Protect Oracle databases SnapCenter Software 4.6 NetApp July 19, 2022 This PDF was generated from https://docs.netapp.com/us-en/snapcenter/protect- sco/concept_what_you_can_do_with_the_snapcenter_plug_in_for_oracle_database.html on July 19, 2022. Always check docs.netapp.com for the latest.

Welcome message from author
This document is posted to help you gain knowledge. Please leave a comment to let me know what you think about it! Share it to your friends and learn new things together.
Transcript
Protect Oracle databases
SnapCenter Software 4.6NetAppJuly 19, 2022
This PDF was generated from https://docs.netapp.com/us-en/snapcenter/protect-sco/concept_what_you_can_do_with_the_snapcenter_plug_in_for_oracle_database.html on July 19,2022. Always check docs.netapp.com for the latest.
Table of Contents
Protect Oracle databases. . . . . . . . . . . . . . . . . . . . . . . . . . . . . . . . . . . . . . . . . . . . . . . . . . . . . . . . . . . . . . . . . . . 1
Overview of SnapCenter Plug-in for Oracle Database. . . . . . . . . . . . . . . . . . . . . . . . . . . . . . . . . . . . . . . . . . . 1
Install SnapCenter Plug-in for Oracle Database . . . . . . . . . . . . . . . . . . . . . . . . . . . . . . . . . . . . . . . . . . . . . . . 8
Install SnapCenter Plug-in for VMware vSphere . . . . . . . . . . . . . . . . . . . . . . . . . . . . . . . . . . . . . . . . . . . . . . 35
Prepare for protecting Oracle databases . . . . . . . . . . . . . . . . . . . . . . . . . . . . . . . . . . . . . . . . . . . . . . . . . . . . 35
Back up Oracle databases . . . . . . . . . . . . . . . . . . . . . . . . . . . . . . . . . . . . . . . . . . . . . . . . . . . . . . . . . . . . . . . 37
Mount and unmount database backups . . . . . . . . . . . . . . . . . . . . . . . . . . . . . . . . . . . . . . . . . . . . . . . . . . . . . 66
Restore and recover Oracle databases . . . . . . . . . . . . . . . . . . . . . . . . . . . . . . . . . . . . . . . . . . . . . . . . . . . . . 68
Clone Oracle database . . . . . . . . . . . . . . . . . . . . . . . . . . . . . . . . . . . . . . . . . . . . . . . . . . . . . . . . . . . . . . . . . 85
Manage application volumes . . . . . . . . . . . . . . . . . . . . . . . . . . . . . . . . . . . . . . . . . . . . . . . . . . . . . . . . . . . . 105

Protect Oracle databases
Overview of SnapCenter Plug-in for Oracle Database
What can you do with the Plug-in for Oracle Database
The SnapCenter Plug-in for Oracle Database is a host-side component of the NetAppSnapCenter Software that enables application-aware data protection management ofOracle databases.
The Plug-in for Oracle Database automates the backup, cataloging and uncataloging with Oracle RecoveryManager (RMAN), verification, mounting, unmounting, restore, recovery, and cloning of Oracle databases inyour SnapCenter environment. The Plug-in for Oracle Database installs SnapCenter Plug-in for UNIX toperform all the data protection operations.
You can use the Plug-in for Oracle Database to manage backups of Oracle databases running SAPapplications. However, SAP BR*Tools integration is not supported.
• Back up datafiles, control files, and archive log files.
Backup is supported only at container database (CDB) level.
• Restore and recovery of databases, CDBs, and pluggable databases (PDBs).
Incomplete recovery of PDBs are not supported.
• Create clones of production databases up to a point-in-time.
Cloning is supported only at CDB level.
• Verify backups immediately.
• Mount and unmount data and log backups for recovery operation.
• Schedule backup and verification operations.
• Monitor all operations.
• View reports for backup, restore, and clone operations.
Features of Plug-in for Oracle Database
The Plug-in for Oracle Database integrates with the Oracle database on the Linux or AIXhost and with NetApp technologies on the storage system.
• Unified graphical user interface
The SnapCenter interface provides standardization and consistency across plug-ins and environments.The SnapCenter interface enables you to complete consistent backup, restore, recovery, and cloneoperations across plug-ins, use centralized reporting, use at-a-glance dashboard views, set up role-basedaccess control (RBAC), and monitor jobs across all plug-ins.
• Automated central administration
1
You can schedule backup and clone operations, configure policy-based backup retention, and performrestore operations. You can also proactively monitor your environment by configuring SnapCenter to sendemail alerts.
• Nondisruptive NetApp Snapshot copy technology
SnapCenter uses NetApp Snapshot copy technology with the Plug-in for Oracle Database and Plug-in forUNIX to back up databases. Snapshot copies consume minimal storage space.
The Plug-in for Oracle Database also offers the following benefits:
• Support for backup, restore, clone, mount, unmount, and verification workflows
• Automatic discovery of Oracle databases configured on the host
• Support for cataloging and uncataloging using Oracle Recovery Manager (RMAN)
• RBAC-supported security and centralized role delegation
You can also set the credentials so that the authorized SnapCenter users have application-levelpermissions.
• Creation of space-efficient and point-in-time copies of production databases for testing or data extractionby using NetApp FlexClone technology
A FlexClone license is required on the storage system where you want to create the clone.
• Support for consistency group (CG) feature of ONTAP as part of creating backups in SAN and ASMenvironments
• Nondisruptive and automated backup verification
• Capability to run multiple backups simultaneously across multiple database hosts
In a single operation, Snapshot copies are consolidated when databases in a single host share the samevolume.
• Support for physical and virtualized infrastructures
• Support for NFS, iSCSI, Fibre Channel (FC), RDM, VMDK over NFS and VMFS, and ASM over NFS, SAN,RDM, and VMDK
• Support for the Selective LUN Map (SLM) feature of ONTAP
Enabled by default, the SLM feature periodically discovers the LUNs that do not have optimized paths andfixes them. You can configure SLM by modifying the parameters in the scu.properties file located at/var/opt/snapcenter/scu/etc.
◦ You can disable this by setting the value of ENABLE_LUNPATH_MONITORING to false.
◦ You can specify the frequency in which the LUN paths will be fixed automatically by assigning the value(in hours) to LUNPATH_MONITORING_INTERVAL. For information about SLM, see the ONTAP 9 SANAdministration Guide.
Storage types supported by Plug-in for Oracle Database
SnapCenter supports a wide range of storage types on both physical and virtualmachines. You must verify the support for your storage type before installing the
2
SnapCenter Plug-ins Package for Linux or SnapCenter Plug-ins Package for AIX.
SnapCenter does not support storage provisioning for Linux and AIX.
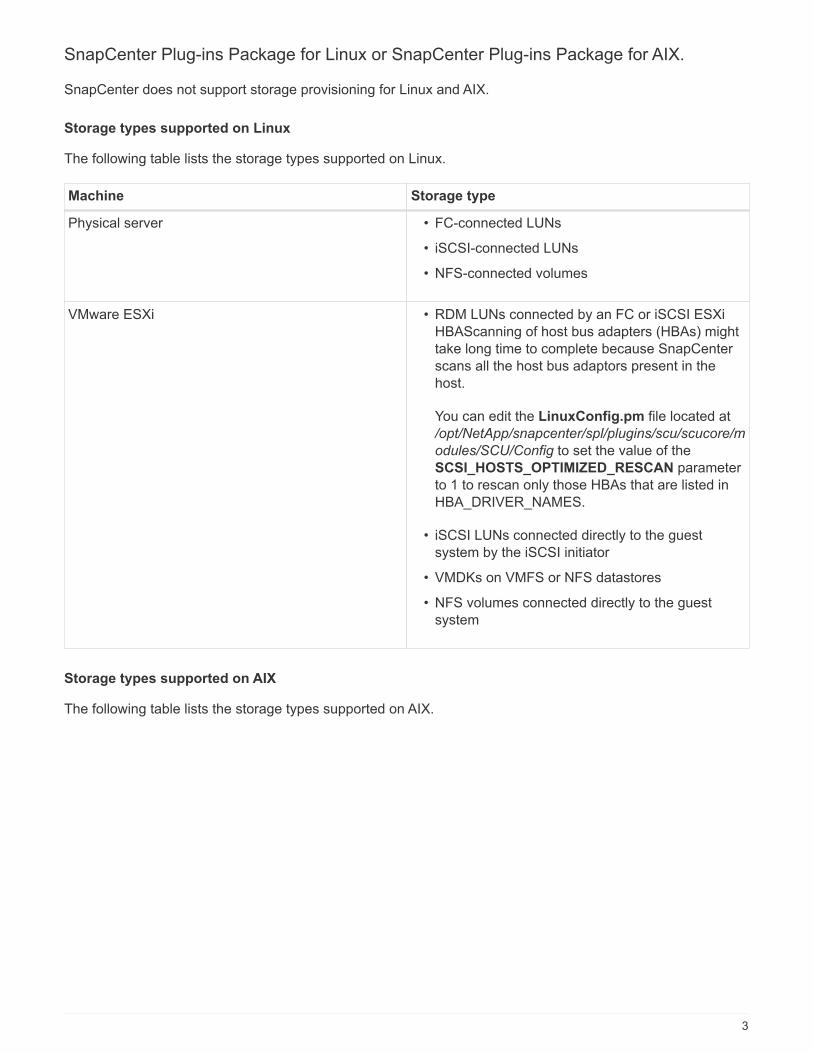
Storage types supported on Linux
The following table lists the storage types supported on Linux.
Machine Storage type
Physical server • FC-connected LUNs
• iSCSI-connected LUNs
• NFS-connected volumes
VMware ESXi • RDM LUNs connected by an FC or iSCSI ESXiHBAScanning of host bus adapters (HBAs) mighttake long time to complete because SnapCenterscans all the host bus adaptors present in thehost.
You can edit the LinuxConfig.pm file located at/opt/NetApp/snapcenter/spl/plugins/scu/scucore/m
odules/SCU/Config to set the value of theSCSI_HOSTS_OPTIMIZED_RESCAN parameterto 1 to rescan only those HBAs that are listed inHBA_DRIVER_NAMES.
• iSCSI LUNs connected directly to the guestsystem by the iSCSI initiator
• VMDKs on VMFS or NFS datastores
• NFS volumes connected directly to the guestsystem
Storage types supported on AIX
The following table lists the storage types supported on AIX.
3
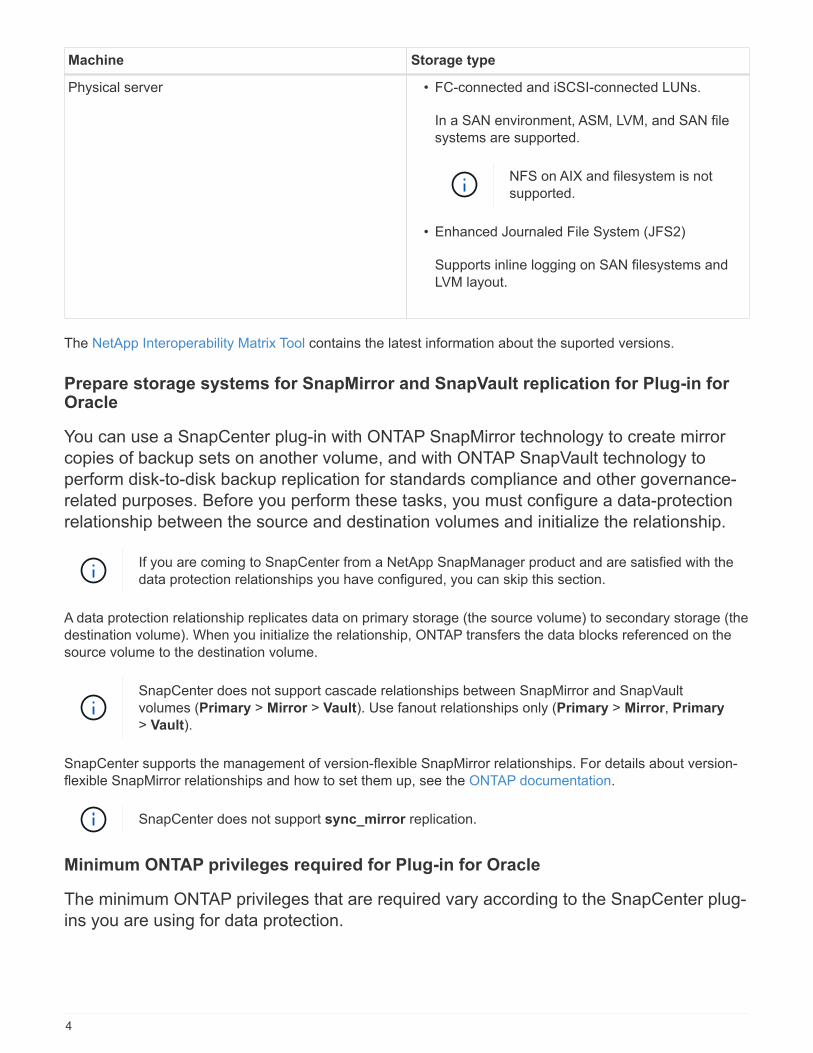
Machine Storage type
Physical server • FC-connected and iSCSI-connected LUNs.
In a SAN environment, ASM, LVM, and SAN filesystems are supported.
NFS on AIX and filesystem is notsupported.
• Enhanced Journaled File System (JFS2)
Supports inline logging on SAN filesystems andLVM layout.
The NetApp Interoperability Matrix Tool contains the latest information about the suported versions.
Prepare storage systems for SnapMirror and SnapVault replication for Plug-in forOracle
You can use a SnapCenter plug-in with ONTAP SnapMirror technology to create mirrorcopies of backup sets on another volume, and with ONTAP SnapVault technology toperform disk-to-disk backup replication for standards compliance and other governance-related purposes. Before you perform these tasks, you must configure a data-protectionrelationship between the source and destination volumes and initialize the relationship.
If you are coming to SnapCenter from a NetApp SnapManager product and are satisfied with thedata protection relationships you have configured, you can skip this section.
A data protection relationship replicates data on primary storage (the source volume) to secondary storage (thedestination volume). When you initialize the relationship, ONTAP transfers the data blocks referenced on thesource volume to the destination volume.
SnapCenter does not support cascade relationships between SnapMirror and SnapVaultvolumes (Primary > Mirror > Vault). Use fanout relationships only (Primary > Mirror, Primary
> Vault).
SnapCenter supports the management of version-flexible SnapMirror relationships. For details about version-flexible SnapMirror relationships and how to set them up, see the ONTAP documentation.
SnapCenter does not support sync_mirror replication.
Minimum ONTAP privileges required for Plug-in for Oracle
The minimum ONTAP privileges that are required vary according to the SnapCenter plug-ins you are using for data protection.
4

All-access commands: Minimum privileges required for ONTAP 8.3.0 and later
• event generate-autosupport-log
• job history show
• job stop
• lun
• lun attribute show
• lun create
• lun delete
• lun geometry
• lun igroup add
• lun igroup create
• lun igroup delete
• lun igroup rename
• lun igroup show
• lun mapping add-reporting-nodes
• lun mapping create
• lun mapping delete
• lun mapping remove-reporting-nodes
• lun mapping show
• lun modify
• lun move-in-volume
• lun offline
• lun online
• lun persistent-reservation clear
• lun resize
• lun serial
• lun show
5
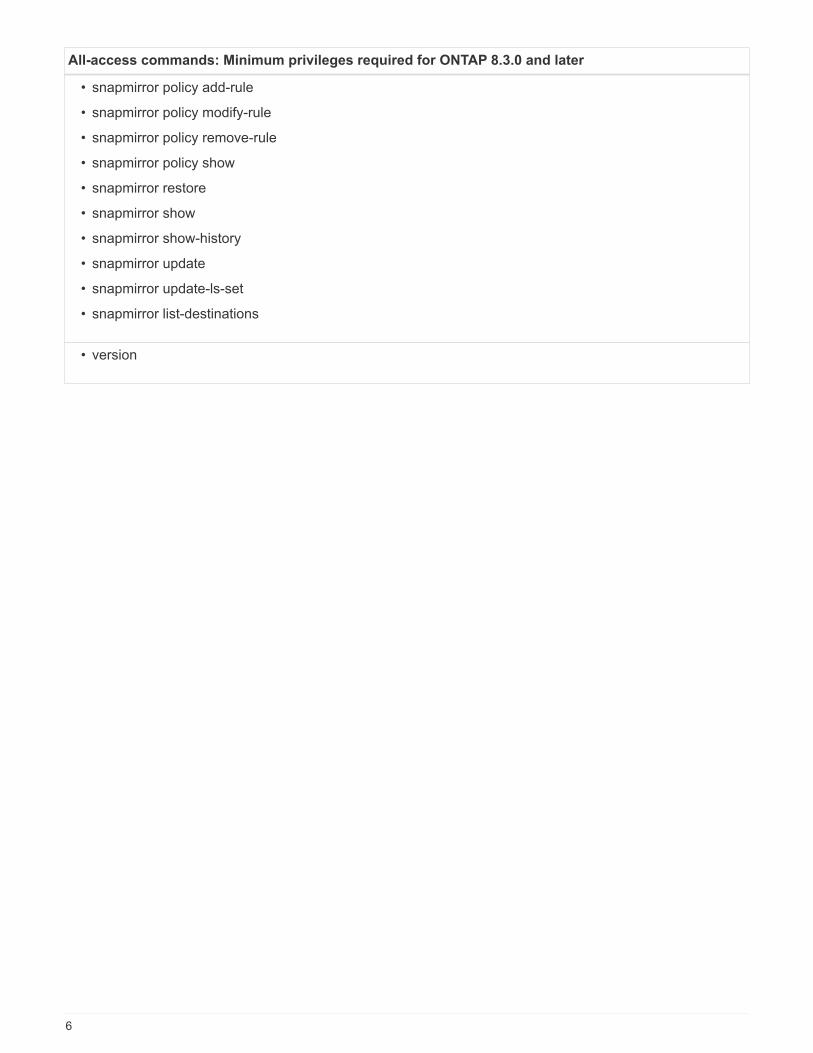
All-access commands: Minimum privileges required for ONTAP 8.3.0 and later
• snapmirror policy add-rule
• snapmirror policy modify-rule
• snapmirror policy remove-rule
• snapmirror policy show
• snapmirror restore
• snapmirror show
• snapmirror show-history
• snapmirror update
• snapmirror update-ls-set
• snapmirror list-destinations
• version
6
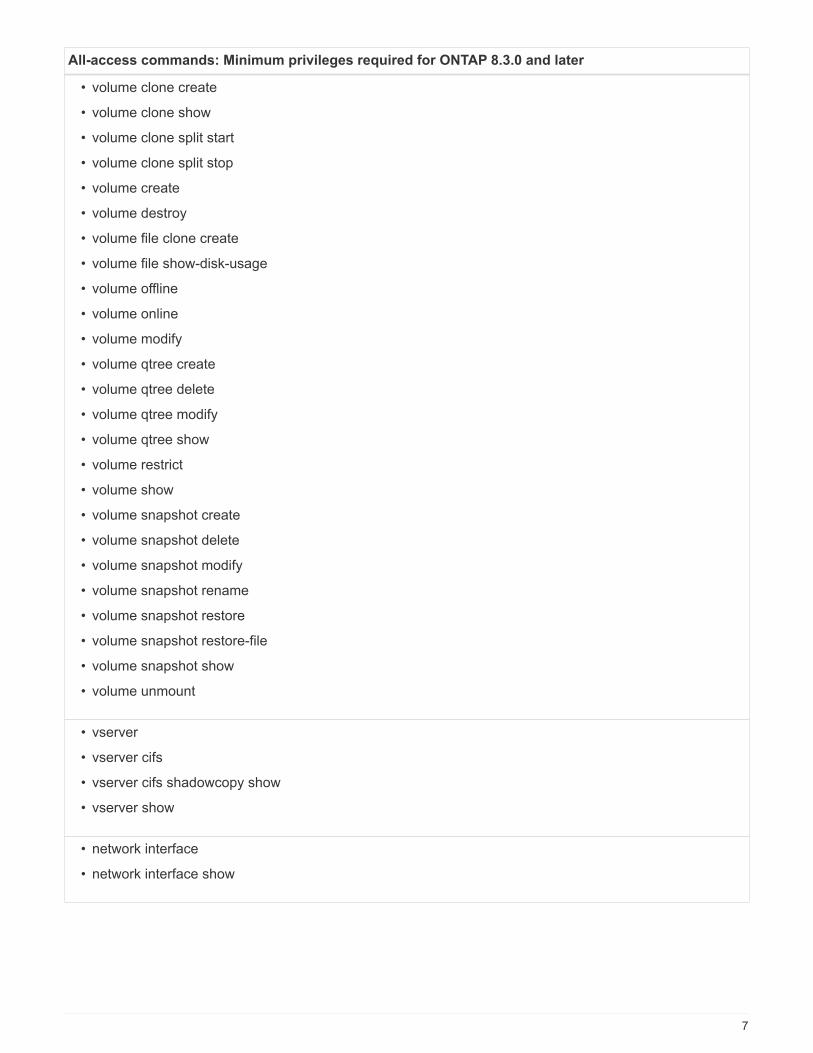
All-access commands: Minimum privileges required for ONTAP 8.3.0 and later
• volume clone create
• volume clone show
• volume clone split start
• volume clone split stop
• volume create
• volume destroy
• volume file clone create
• volume file show-disk-usage
• volume offline
• volume online
• volume modify
• volume qtree create
• volume qtree delete
• volume qtree modify
• volume qtree show
• volume restrict
• volume show
• volume snapshot create
• volume snapshot delete
• volume snapshot modify
• volume snapshot rename
• volume snapshot restore
• volume snapshot restore-file
• volume snapshot show
• volume unmount
• vserver
• vserver cifs
• vserver cifs shadowcopy show
• vserver show
• network interface
• network interface show
7
Install SnapCenter Plug-in for Oracle Database
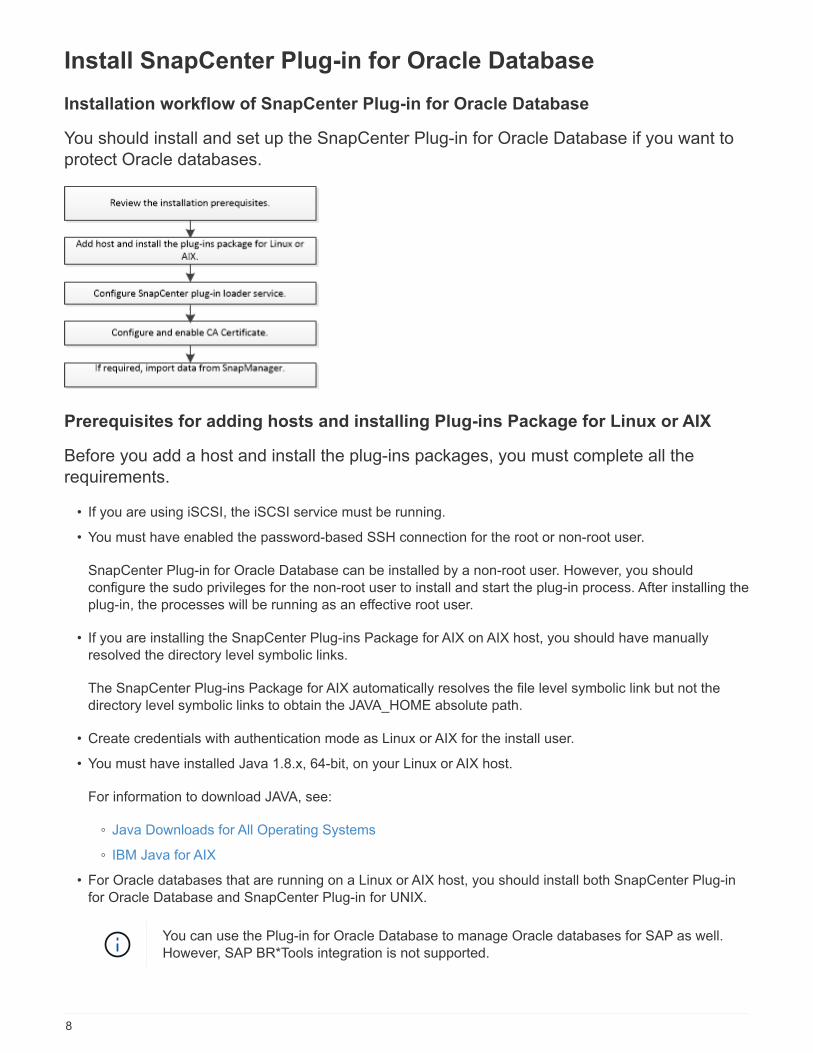
Installation workflow of SnapCenter Plug-in for Oracle Database
You should install and set up the SnapCenter Plug-in for Oracle Database if you want toprotect Oracle databases.
Prerequisites for adding hosts and installing Plug-ins Package for Linux or AIX
Before you add a host and install the plug-ins packages, you must complete all therequirements.
• If you are using iSCSI, the iSCSI service must be running.
• You must have enabled the password-based SSH connection for the root or non-root user.
SnapCenter Plug-in for Oracle Database can be installed by a non-root user. However, you shouldconfigure the sudo privileges for the non-root user to install and start the plug-in process. After installing theplug-in, the processes will be running as an effective root user.
• If you are installing the SnapCenter Plug-ins Package for AIX on AIX host, you should have manuallyresolved the directory level symbolic links.
The SnapCenter Plug-ins Package for AIX automatically resolves the file level symbolic link but not thedirectory level symbolic links to obtain the JAVA_HOME absolute path.
• Create credentials with authentication mode as Linux or AIX for the install user.
• You must have installed Java 1.8.x, 64-bit, on your Linux or AIX host.
For information to download JAVA, see:
◦ Java Downloads for All Operating Systems
◦ IBM Java for AIX
• For Oracle databases that are running on a Linux or AIX host, you should install both SnapCenter Plug-infor Oracle Database and SnapCenter Plug-in for UNIX.
You can use the Plug-in for Oracle Database to manage Oracle databases for SAP as well.However, SAP BR*Tools integration is not supported.
8
• If you are using Oracle database 11.2.0.3 or later, you must install the 13366202 Oracle patch.
UUID mapping in the /etc/fstab file is not supported by SnapCenter.
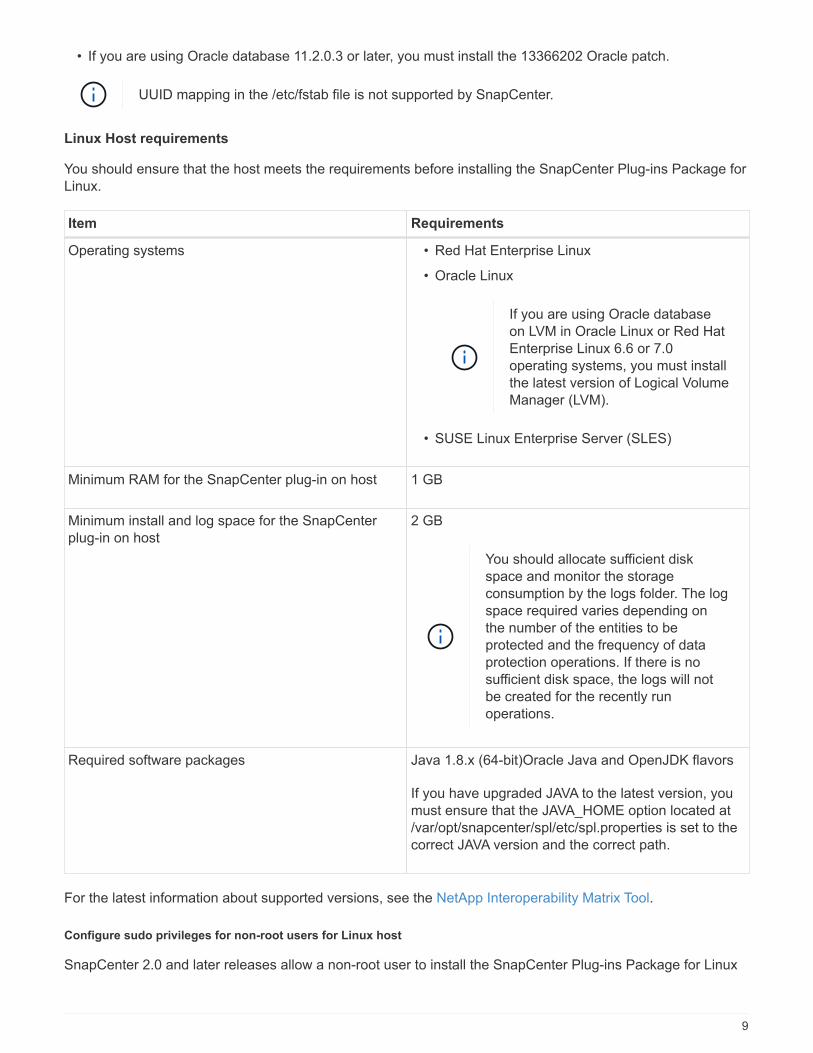
Linux Host requirements
You should ensure that the host meets the requirements before installing the SnapCenter Plug-ins Package forLinux.
Item Requirements
Operating systems • Red Hat Enterprise Linux
• Oracle Linux
If you are using Oracle databaseon LVM in Oracle Linux or Red HatEnterprise Linux 6.6 or 7.0operating systems, you must installthe latest version of Logical VolumeManager (LVM).
• SUSE Linux Enterprise Server (SLES)
Minimum RAM for the SnapCenter plug-in on host 1 GB
Minimum install and log space for the SnapCenterplug-in on host
2 GB
You should allocate sufficient diskspace and monitor the storageconsumption by the logs folder. The logspace required varies depending onthe number of the entities to beprotected and the frequency of dataprotection operations. If there is nosufficient disk space, the logs will notbe created for the recently runoperations.
Required software packages Java 1.8.x (64-bit)Oracle Java and OpenJDK flavors
If you have upgraded JAVA to the latest version, youmust ensure that the JAVA_HOME option located at/var/opt/snapcenter/spl/etc/spl.properties is set to thecorrect JAVA version and the correct path.
For the latest information about supported versions, see the NetApp Interoperability Matrix Tool.
Configure sudo privileges for non-root users for Linux host
SnapCenter 2.0 and later releases allow a non-root user to install the SnapCenter Plug-ins Package for Linux
9
and to start the plug-in process. You should configure sudo privileges for the non-root user to provide access toseveral paths.
What you will need
• Sudo version between 1.8.7 and 1.8.19P2.
• Ensure that the non-root user is part of the Oracle installation group.
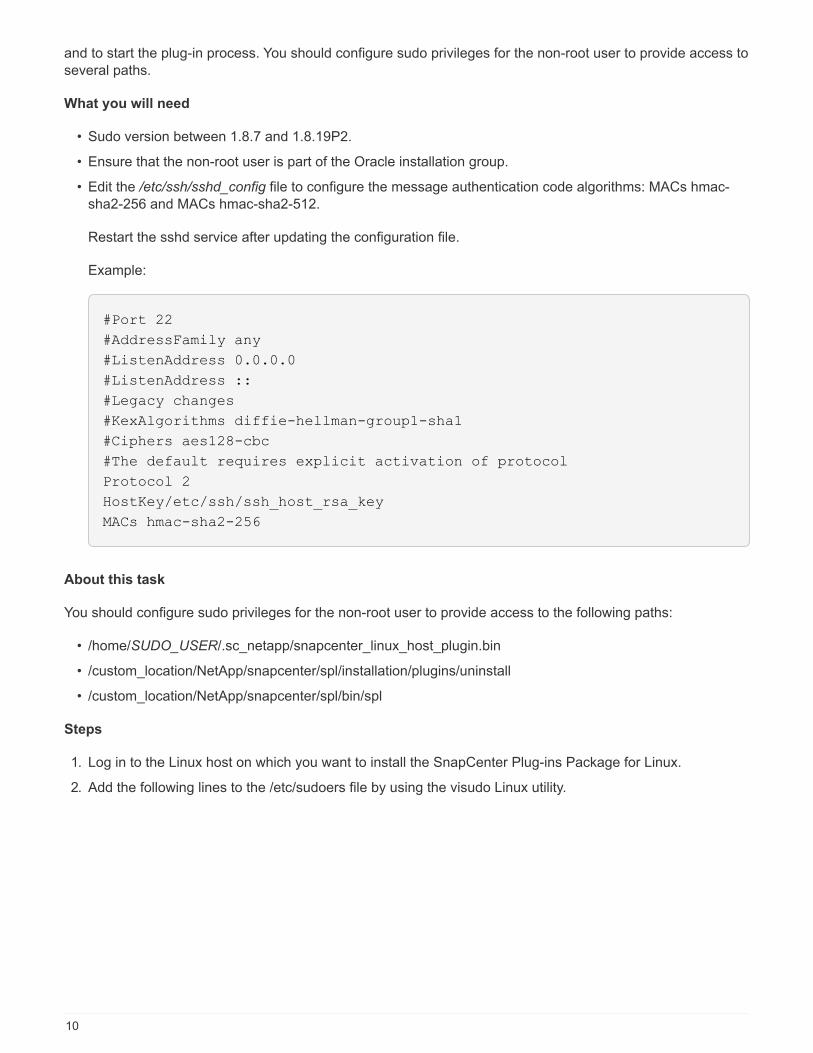
• Edit the /etc/ssh/sshd_config file to configure the message authentication code algorithms: MACs hmac-sha2-256 and MACs hmac-sha2-512.
Restart the sshd service after updating the configuration file.
Example:
#Port 22
#AddressFamily any
#ListenAddress 0.0.0.0
#ListenAddress ::
#Legacy changes
#KexAlgorithms diffie-hellman-group1-sha1
#Ciphers aes128-cbc
#The default requires explicit activation of protocol
Protocol 2
HostKey/etc/ssh/ssh_host_rsa_key
MACs hmac-sha2-256
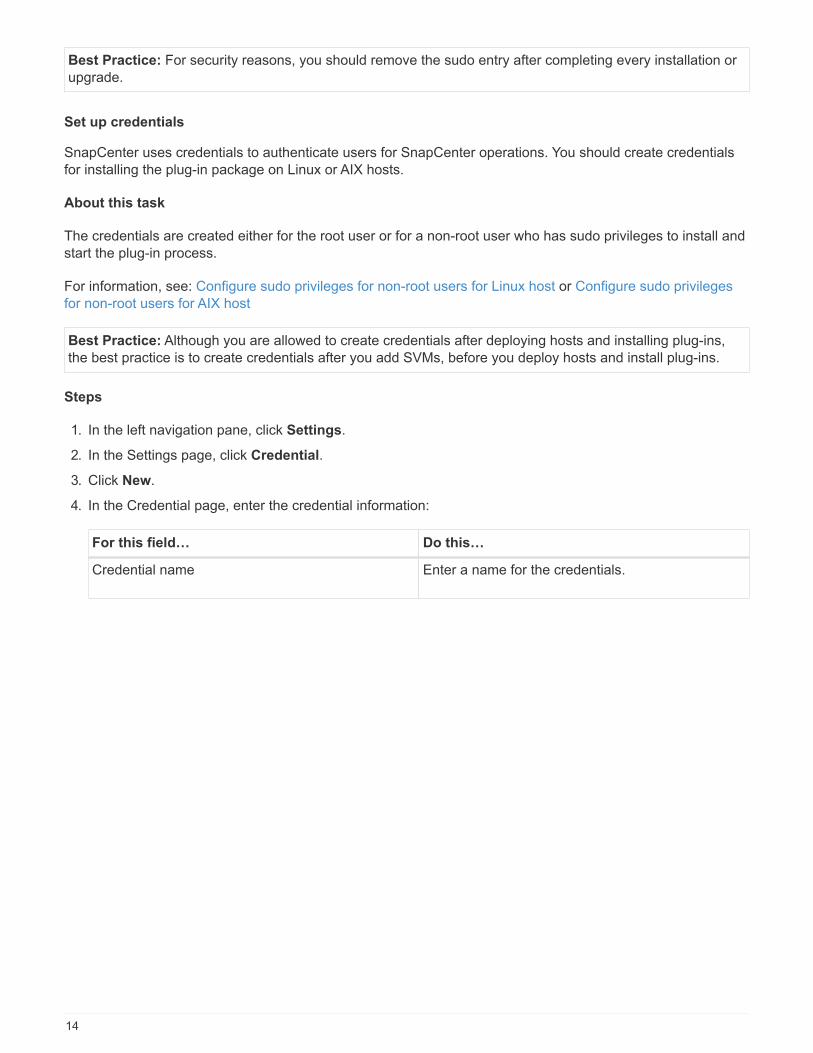
About this task
You should configure sudo privileges for the non-root user to provide access to the following paths:
• /home/SUDO_USER/.sc_netapp/snapcenter_linux_host_plugin.bin
• /custom_location/NetApp/snapcenter/spl/installation/plugins/uninstall
• /custom_location/NetApp/snapcenter/spl/bin/spl
Steps
1. Log in to the Linux host on which you want to install the SnapCenter Plug-ins Package for Linux.
2. Add the following lines to the /etc/sudoers file by using the visudo Linux utility.
10
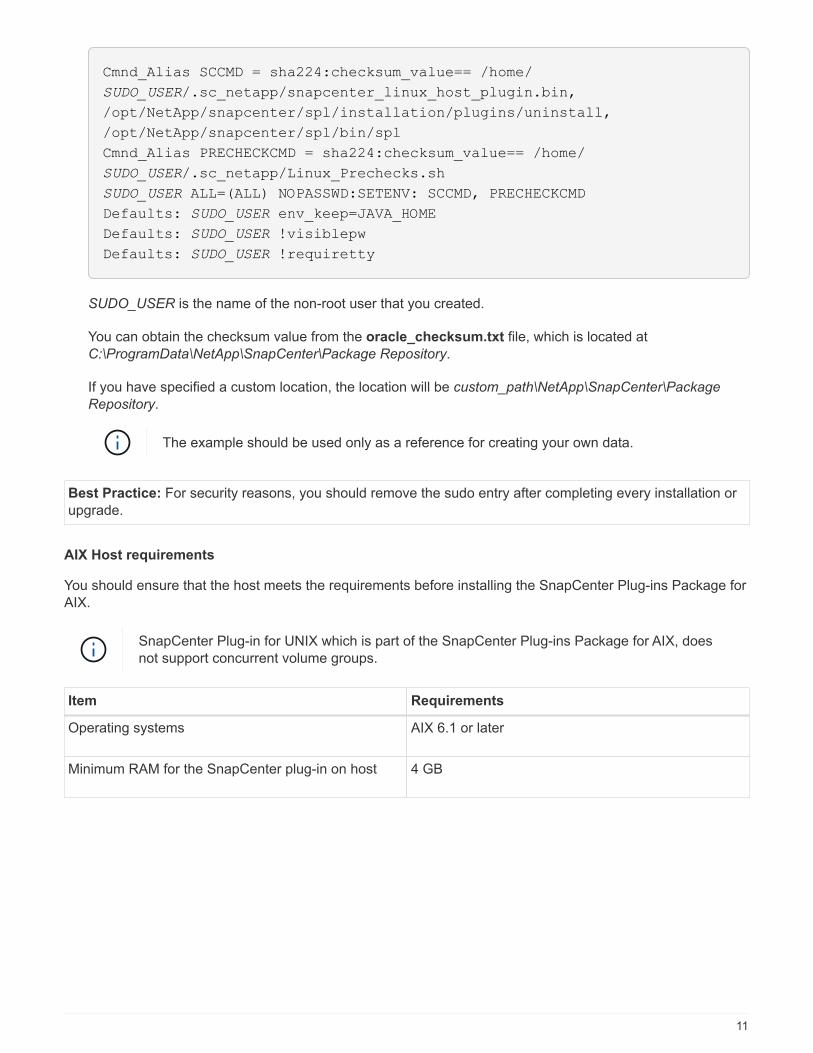
Cmnd_Alias SCCMD = sha224:checksum_value== /home/
SUDO_USER/.sc_netapp/snapcenter_linux_host_plugin.bin,
/opt/NetApp/snapcenter/spl/installation/plugins/uninstall,
/opt/NetApp/snapcenter/spl/bin/spl
Cmnd_Alias PRECHECKCMD = sha224:checksum_value== /home/
SUDO_USER/.sc_netapp/Linux_Prechecks.sh
SUDO_USER ALL=(ALL) NOPASSWD:SETENV: SCCMD, PRECHECKCMD
Defaults: SUDO_USER env_keep=JAVA_HOME
Defaults: SUDO_USER !visiblepw
Defaults: SUDO_USER !requiretty
SUDO_USER is the name of the non-root user that you created.
You can obtain the checksum value from the oracle_checksum.txt file, which is located atC:\ProgramData\NetApp\SnapCenter\Package Repository.
If you have specified a custom location, the location will be custom_path\NetApp\SnapCenter\Package
Repository.
The example should be used only as a reference for creating your own data.
Best Practice: For security reasons, you should remove the sudo entry after completing every installation orupgrade.
AIX Host requirements
You should ensure that the host meets the requirements before installing the SnapCenter Plug-ins Package forAIX.
SnapCenter Plug-in for UNIX which is part of the SnapCenter Plug-ins Package for AIX, doesnot support concurrent volume groups.
Item Requirements
Operating systems AIX 6.1 or later
Minimum RAM for the SnapCenter plug-in on host 4 GB
11
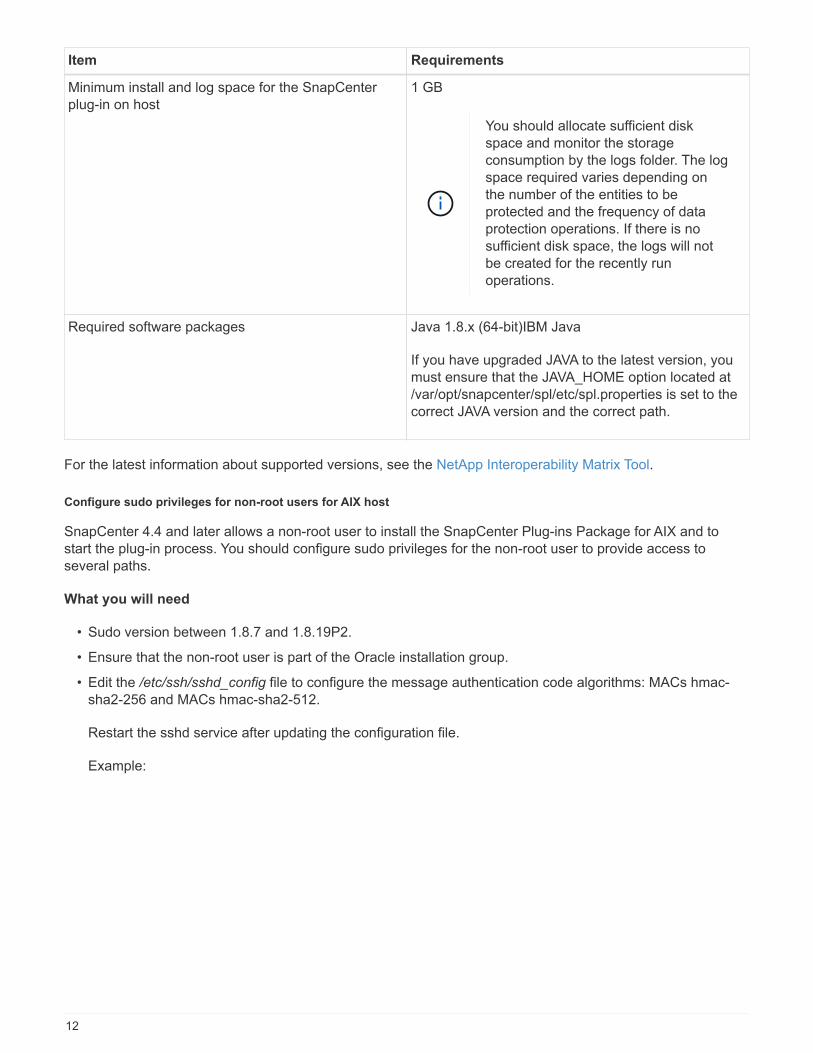
Item Requirements
Minimum install and log space for the SnapCenterplug-in on host
1 GB
You should allocate sufficient diskspace and monitor the storageconsumption by the logs folder. The logspace required varies depending onthe number of the entities to beprotected and the frequency of dataprotection operations. If there is nosufficient disk space, the logs will notbe created for the recently runoperations.
Required software packages Java 1.8.x (64-bit)IBM Java
If you have upgraded JAVA to the latest version, youmust ensure that the JAVA_HOME option located at/var/opt/snapcenter/spl/etc/spl.properties is set to thecorrect JAVA version and the correct path.
For the latest information about supported versions, see the NetApp Interoperability Matrix Tool.
Configure sudo privileges for non-root users for AIX host
SnapCenter 4.4 and later allows a non-root user to install the SnapCenter Plug-ins Package for AIX and tostart the plug-in process. You should configure sudo privileges for the non-root user to provide access toseveral paths.
What you will need
• Sudo version between 1.8.7 and 1.8.19P2.
• Ensure that the non-root user is part of the Oracle installation group.
• Edit the /etc/ssh/sshd_config file to configure the message authentication code algorithms: MACs hmac-sha2-256 and MACs hmac-sha2-512.
Restart the sshd service after updating the configuration file.
Example:
12
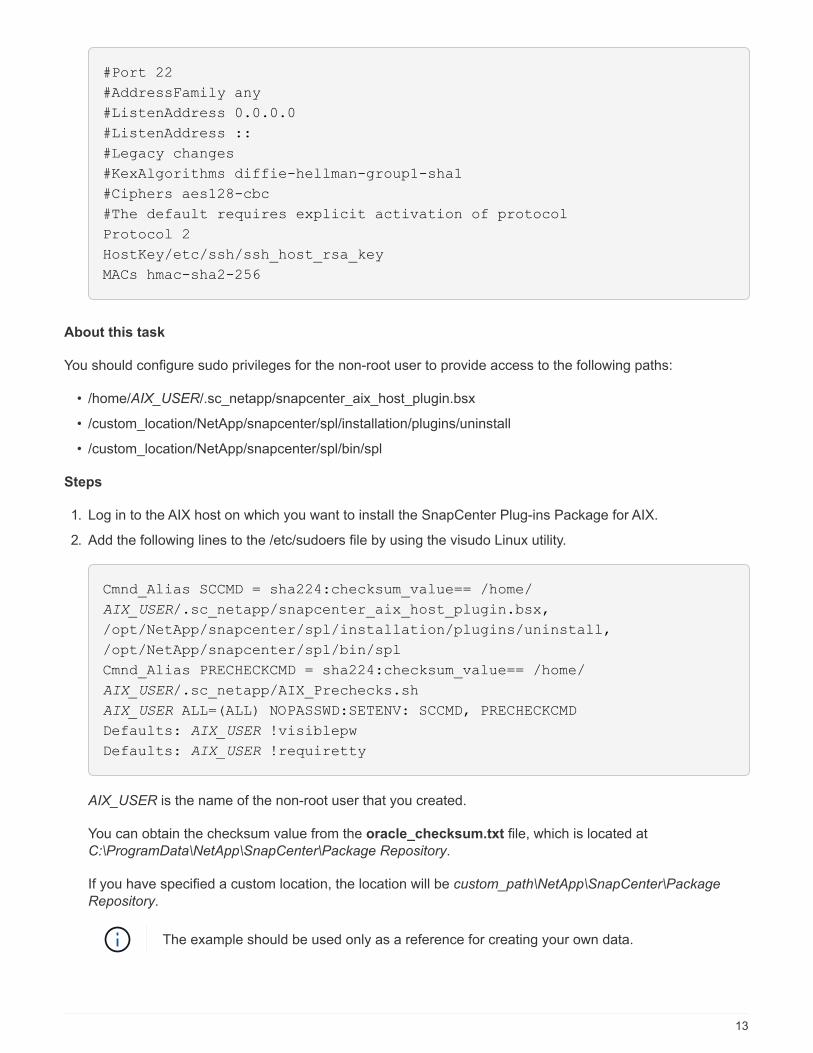
#Port 22
#AddressFamily any
#ListenAddress 0.0.0.0
#ListenAddress ::
#Legacy changes
#KexAlgorithms diffie-hellman-group1-sha1
#Ciphers aes128-cbc
#The default requires explicit activation of protocol
Protocol 2
HostKey/etc/ssh/ssh_host_rsa_key
MACs hmac-sha2-256
About this task
You should configure sudo privileges for the non-root user to provide access to the following paths:
• /home/AIX_USER/.sc_netapp/snapcenter_aix_host_plugin.bsx
• /custom_location/NetApp/snapcenter/spl/installation/plugins/uninstall
• /custom_location/NetApp/snapcenter/spl/bin/spl
Steps
1. Log in to the AIX host on which you want to install the SnapCenter Plug-ins Package for AIX.
2. Add the following lines to the /etc/sudoers file by using the visudo Linux utility.
Cmnd_Alias SCCMD = sha224:checksum_value== /home/
AIX_USER/.sc_netapp/snapcenter_aix_host_plugin.bsx,
/opt/NetApp/snapcenter/spl/installation/plugins/uninstall,
/opt/NetApp/snapcenter/spl/bin/spl
Cmnd_Alias PRECHECKCMD = sha224:checksum_value== /home/
AIX_USER/.sc_netapp/AIX_Prechecks.sh
AIX_USER ALL=(ALL) NOPASSWD:SETENV: SCCMD, PRECHECKCMD
Defaults: AIX_USER !visiblepw
Defaults: AIX_USER !requiretty
AIX_USER is the name of the non-root user that you created.
You can obtain the checksum value from the oracle_checksum.txt file, which is located atC:\ProgramData\NetApp\SnapCenter\Package Repository.
If you have specified a custom location, the location will be custom_path\NetApp\SnapCenter\Package
Repository.
The example should be used only as a reference for creating your own data.
13
Best Practice: For security reasons, you should remove the sudo entry after completing every installation orupgrade.
Set up credentials
SnapCenter uses credentials to authenticate users for SnapCenter operations. You should create credentialsfor installing the plug-in package on Linux or AIX hosts.
About this task
The credentials are created either for the root user or for a non-root user who has sudo privileges to install andstart the plug-in process.
For information, see: Configure sudo privileges for non-root users for Linux host or Configure sudo privilegesfor non-root users for AIX host
Best Practice: Although you are allowed to create credentials after deploying hosts and installing plug-ins,the best practice is to create credentials after you add SVMs, before you deploy hosts and install plug-ins.
Steps
1. In the left navigation pane, click Settings.
2. In the Settings page, click Credential.
3. Click New.
4. In the Credential page, enter the credential information:
For this field… Do this…
Credential name Enter a name for the credentials.
14
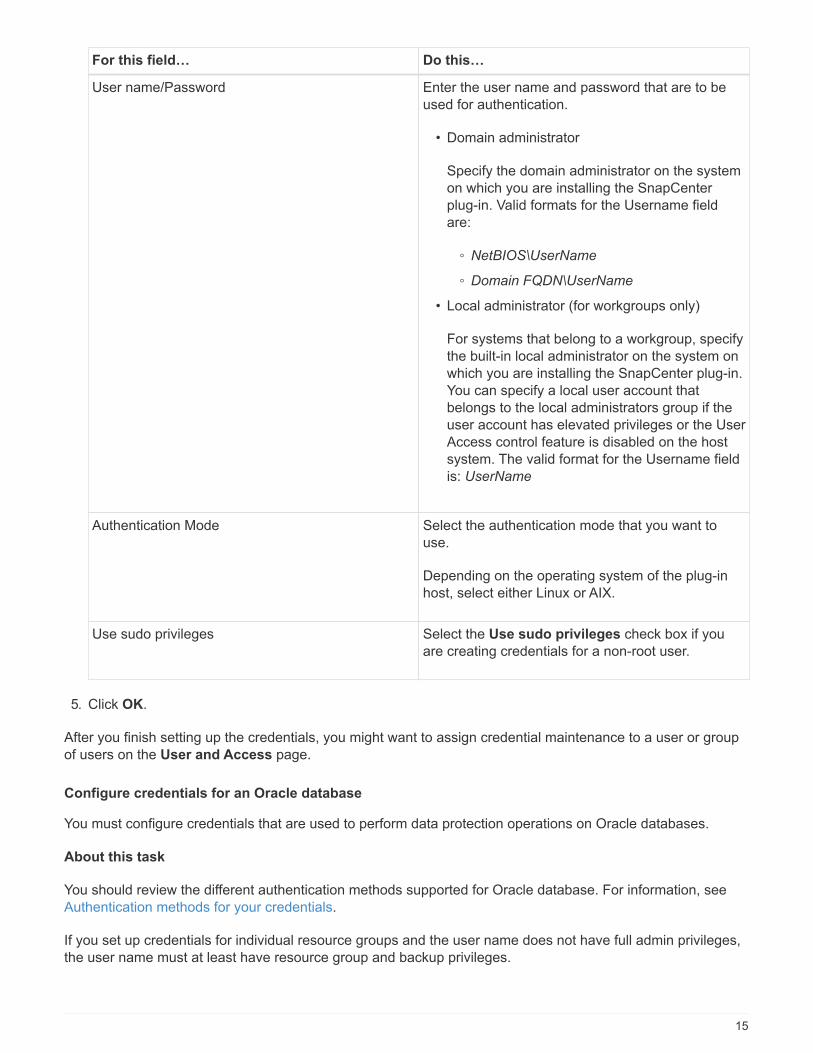
For this field… Do this…
User name/Password Enter the user name and password that are to beused for authentication.
• Domain administrator
Specify the domain administrator on the systemon which you are installing the SnapCenterplug-in. Valid formats for the Username fieldare:
◦ NetBIOS\UserName
◦ Domain FQDN\UserName
• Local administrator (for workgroups only)
For systems that belong to a workgroup, specifythe built-in local administrator on the system onwhich you are installing the SnapCenter plug-in.You can specify a local user account thatbelongs to the local administrators group if theuser account has elevated privileges or the UserAccess control feature is disabled on the hostsystem. The valid format for the Username fieldis: UserName
Authentication Mode Select the authentication mode that you want touse.
Depending on the operating system of the plug-inhost, select either Linux or AIX.
Use sudo privileges Select the Use sudo privileges check box if youare creating credentials for a non-root user.
5. Click OK.
After you finish setting up the credentials, you might want to assign credential maintenance to a user or groupof users on the User and Access page.
Configure credentials for an Oracle database
You must configure credentials that are used to perform data protection operations on Oracle databases.
About this task
You should review the different authentication methods supported for Oracle database. For information, seeAuthentication methods for your credentials.
If you set up credentials for individual resource groups and the user name does not have full admin privileges,the user name must at least have resource group and backup privileges.
15
If you have enabled Oracle database authentication, a red padlock icon is shown in the resources view. Youmust configure database credentials to be able to protect the database or add it to the resource group toperform data protection operations.
If you specify incorrect details while creating a credential, an error message is displayed. Youmust click Cancel, and then retry.
Steps
1. In the left navigation pane, click Resources, and then select the appropriate plug-in from the list.
2. In the Resources page, select Database from the View list.
3. Click , and then select the host name and the database type to filter the resources.
You can then click to close the filter pane.
4. Select the database, and then click Database Settings > Configure Database.
5. In the Configure database settings section, from the Use existing Credential drop-down list, select thecredential that should be used to perform data protection jobs on the Oracle database.
The Oracle user should have sysdba privileges.
You can also create a credential by clicking .
6. In the Configure ASM settings section, from the Use existing Credential drop-down list, select thecredential that should be used to perform data protection jobs on the ASM instance.
The ASM user should have sysasm privilege.
You can also create a credential by clicking .
7. In the Configure RMAN catalog settings section, from the Use existing credential drop-down list, selectthe credential that should be used to perform data protection jobs on the Oracle Recovery Manager(RMAN) catalog database.
You can also create a credential by clicking .
In the TNSName field, enter the Transparent Network Substrate (TNS) file name that will be used by theSnapCenter Server to communicate with the database.
8. In the Preferred RAC Nodes field, specify the Real Application Cluster (RAC) nodes preferred for backup.
The preferred nodes might be one or all cluster nodes where the RAC database instances are present. Thebackup operation is triggered only on these preferred nodes in the order of preference.
In RAC One Node, only one node is listed in the preferred nodes, and this preferred node is the nodewhere the database is currently hosted.
After failover or relocation of RAC One Node database, refreshing of resources in the SnapCenterResources page will remove the host from the Preferred RAC Nodes list where the database was earlierhosted. The RAC node where the database is relocated will be listed in RAC Nodes and will need to bemanually configured as the preferred RAC node.
For more information, see Preferred nodes in RAC setup.
16

9. Click OK.
Add hosts and install Plug-ins Package for Linux or AIX using GUI
You can use the Add Host page to add hosts, and then install the SnapCenter Plug-insPackage for Linux or SnapCenter Plug-ins Package for AIX. The plug-ins areautomatically installed on the remote hosts.
About this task
You can add a host and install plug-in packages either for an individual host or for a cluster. If you are installingthe plug-in on a cluster (Oracle RAC), the plug-in is installed on all of the nodes of the cluster. For Oracle RACOne Node, you should install the plug-in on both active and passive nodes.
You should be assigned to a role that has the plug-in install and uninstall permissions, such as the SnapCenterAdmin role.
You cannot add a SnapCenter Server as a plug-in host to another SnapCenter Server.
Steps
1. In the left navigation pane, click Hosts.
2. Verify that the Managed Hosts tab is selected at the top.
3. Click Add.
4. In the Hosts page, perform the following actions:
For this field… Do this…
Host Type Select Linux or AIX as the host type.
The SnapCenter Server adds the host, and theninstalls the Plug-in for Oracle Database and thePlug-in for UNIX if the plug-ins are not alreadyinstalled on the host.
17
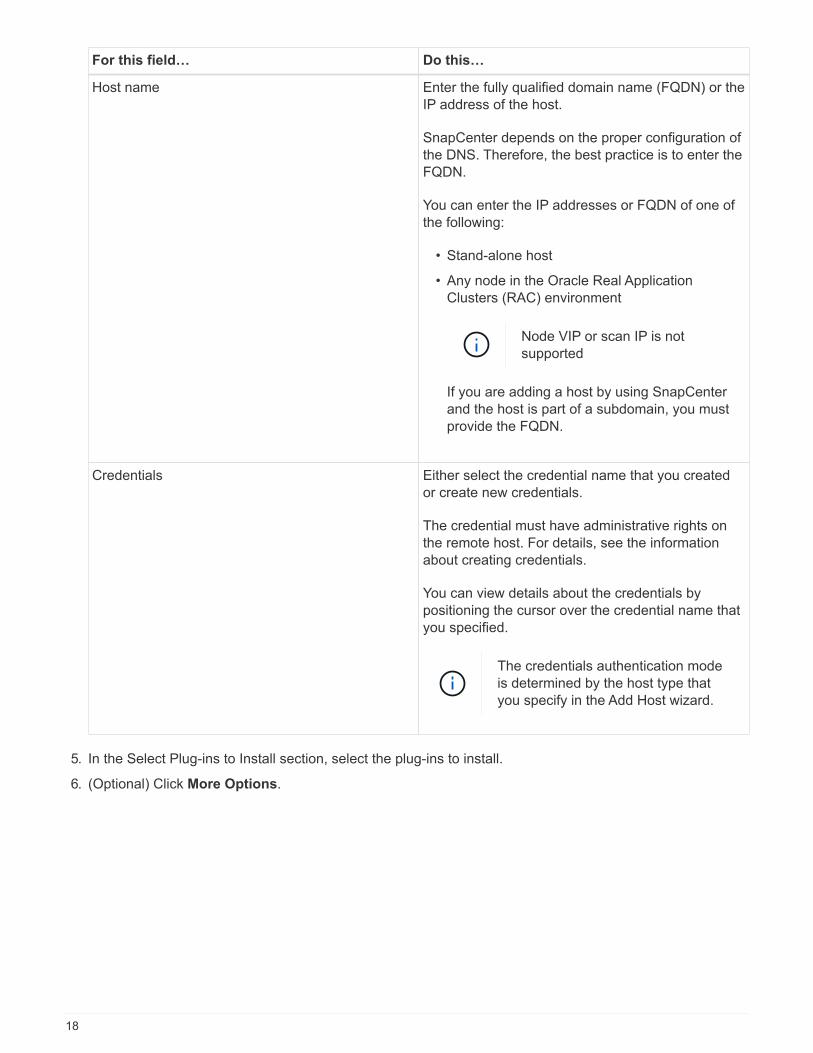
For this field… Do this…
Host name Enter the fully qualified domain name (FQDN) or theIP address of the host.
SnapCenter depends on the proper configuration ofthe DNS. Therefore, the best practice is to enter theFQDN.
You can enter the IP addresses or FQDN of one ofthe following:
• Stand-alone host
• Any node in the Oracle Real ApplicationClusters (RAC) environment
Node VIP or scan IP is notsupported
If you are adding a host by using SnapCenterand the host is part of a subdomain, you mustprovide the FQDN.
Credentials Either select the credential name that you createdor create new credentials.
The credential must have administrative rights onthe remote host. For details, see the informationabout creating credentials.
You can view details about the credentials bypositioning the cursor over the credential name thatyou specified.
The credentials authentication modeis determined by the host type thatyou specify in the Add Host wizard.
5. In the Select Plug-ins to Install section, select the plug-ins to install.
6. (Optional) Click More Options.
18
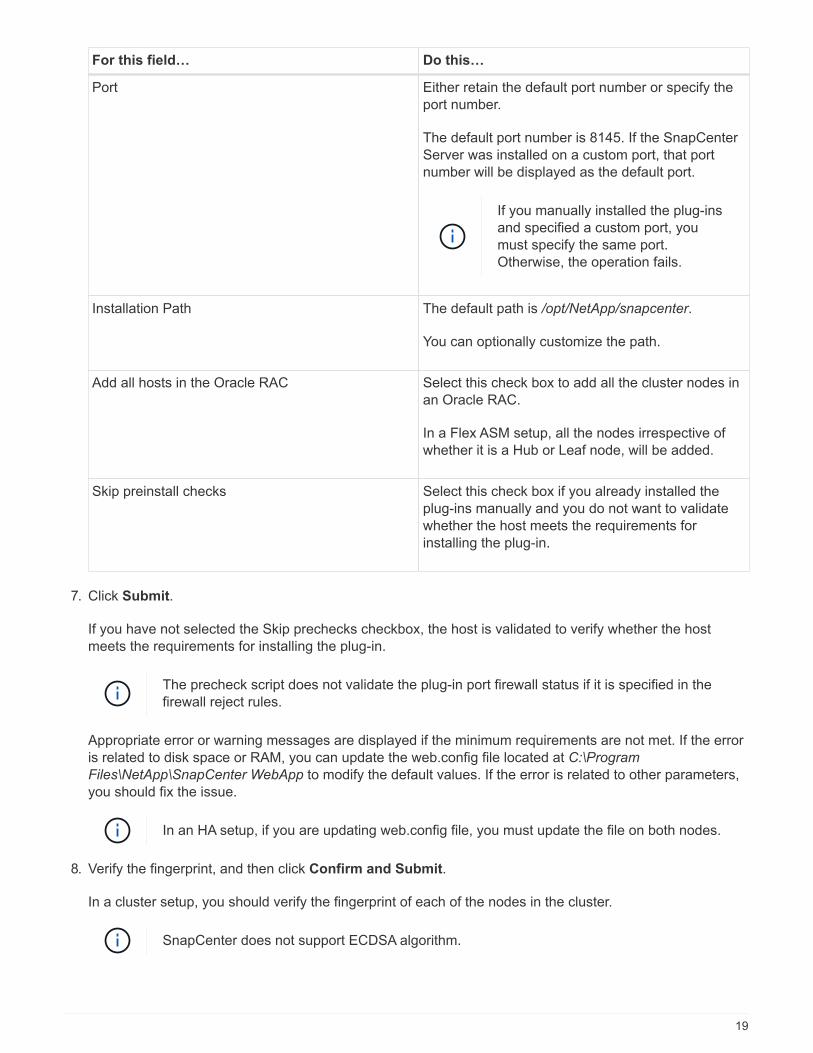
For this field… Do this…
Port Either retain the default port number or specify theport number.
The default port number is 8145. If the SnapCenterServer was installed on a custom port, that portnumber will be displayed as the default port.
If you manually installed the plug-insand specified a custom port, youmust specify the same port.Otherwise, the operation fails.
Installation Path The default path is /opt/NetApp/snapcenter.
You can optionally customize the path.
Add all hosts in the Oracle RAC Select this check box to add all the cluster nodes inan Oracle RAC.
In a Flex ASM setup, all the nodes irrespective ofwhether it is a Hub or Leaf node, will be added.
Skip preinstall checks Select this check box if you already installed theplug-ins manually and you do not want to validatewhether the host meets the requirements forinstalling the plug-in.
7. Click Submit.
If you have not selected the Skip prechecks checkbox, the host is validated to verify whether the hostmeets the requirements for installing the plug-in.
The precheck script does not validate the plug-in port firewall status if it is specified in thefirewall reject rules.
Appropriate error or warning messages are displayed if the minimum requirements are not met. If the erroris related to disk space or RAM, you can update the web.config file located at C:\Program
Files\NetApp\SnapCenter WebApp to modify the default values. If the error is related to other parameters,you should fix the issue.
In an HA setup, if you are updating web.config file, you must update the file on both nodes.
8. Verify the fingerprint, and then click Confirm and Submit.
In a cluster setup, you should verify the fingerprint of each of the nodes in the cluster.
SnapCenter does not support ECDSA algorithm.
19
Fingerprint verification is mandatory even if the same host was added earlier to SnapCenterand the fingerprint was confirmed.
9. Monitor the installation progress.
The installation-specific log files are located at /custom_location/snapcenter/logs.
After you finish
All the databases on the host are automatically discovered and displayed in the Resources page. If nothing isdisplayed, click Refresh Resources.
Monitor installation status
You can monitor the progress of SnapCenter plug-in package installation by using the Jobs page. You mightwant to check the progress of installation to determine when it is complete or if there is an issue.
About this task
The following icons appear on the Jobs page and indicate the state of the operation:
• In progress
• Completed successfully
• Failed
• Completed with warnings or could not start due to warnings
• Queued
Steps
1. In the left navigation pane, click Monitor.
2. In the Monitor page, click Jobs.
3. In the Jobs page, to filter the list so that only plug-in installation operations are listed, do the following:
a. Click Filter.
b. Optional: Specify the start and end date.
c. From the Type drop-down menu, select Plug-in installation.
d. From the Status drop-down menu, select the installation status.
e. Click Apply.
4. Select the installation job and click Details to view the job details.
5. In the Job Details page, click View logs.
Alternate ways to install Plug-ins Package for Linux or AIX
Install on multiple remote hosts using cmdlets
You should use the Install-SmHostPackage PowerShell cmdlet to install the SnapCenter Plug-ins Package forLinux or SnapCenter Plug-ins Package for AIX on multiple hosts.
20
What you will need
You should be logged in to SnapCenter as a domain user with local administrator rights on each host on whichyou want to install the plug-in package.
Steps
1. Launch PowerShell.
2. On the SnapCenter Server host, establish a session using the Open-SmConnection cmdlet, and then enteryour credentials.
3. Install the SnapCenter Plug-ins Package for Linux or SnapCenter Plug-ins Package for AIX using theInstall-SmHostPackage cmdlet and the required parameters.
You can use the -skipprecheck option when you have already installed the plug-ins manually and do notwant to validate whether the host meets the requirements to install the plug-in.
The precheck script does not validate the plug-in port firewall status if it is specified in thefirewall reject rules.
4. Enter your credentials for remote installation.
The information regarding the parameters that can be used with the cmdlet and their descriptions can beobtained by running Get-Help command_name. Alternatively, you can also refer to the SnapCenter SoftwareCmdlet Reference Guide.
Install on cluster host
You should install SnapCenter Plug-ins Package for Linux or SnapCenter Plug-ins Package for AIX on both thenodes of the cluster host.
Each of the nodes of the cluster host has two IPs. One of the IPs will be the public IP of the respective nodesand the second IP will be the cluster IP that is shared between both the nodes.
Steps
1. Install SnapCenter Plug-ins Package for Linux or SnapCenter Plug-ins Package for AIX on both the nodesof the cluster host.
2. Validate that the correct values for SNAPCENTER_SERVER_HOST, SPL_PORT,SNAPCENTER_SERVER_PORT, and SPL_ENABLED_PLUGINS parameters are specified in thespl.properties file located at /var/opt/snapcenter/spl/etc/.
If SPL_ENABLED_PLUGINS is not specified in spl.properties, you can add it and assign the valueSCO,SCU.
3. On the SnapCenter Server host, establish a session using the Open-SmConnection cmdlet, and then enteryour credentials.
4. In each of the nodes, set the preferred IPs of the node using the Set-
PreferredHostIPsInStorageExportPolicy sccli command and the required parameters.
5. In the SnapCenter Server host, add an entry for the cluster IP and corresponding DNS name inC:\Windows\System32\drivers\etc\hosts.
6. Add the node to the SnapCenter Server using the Add-SmHost cmdlet by specifying the cluster IP for thehost name.
21
Discover the Oracle database on node 1 (assuming the cluster IP is hosted on node 1) and create a backup ofthe database. If a failover happens, you can use the backup created on node 1 to restore the database onnode 2. You can also use the backup created on node 1 to create a clone on node 2.
There will be stale volumes, directories, and lock file if the failover happens while any otherSnapCenter operations are running.
Install Plug-ins Package for Linux in silent mode or console mode
You can install the SnapCenter Plug-ins Package for Linux either in console mode or in silent mode by usingthe command-line interface (CLI).
What you will need
• You should review the prerequisites for installing the plug-ins package.
• You should ensure that the DISPLAY environment variable is not set.
If the DISPLAY environment variable is set, you should run unset DISPLAY, and then try to manually installthe plug-in.
About this task
You are required to provide the necessary installation information while installing in console mode, whereas insilent mode installation you do not have to provide any installation information.
Steps
1. Download the SnapCenter Plug-ins Package for Linux from the SnapCenter Server installation location.
The default installation path is C:\ProgramData\NetApp\SnapCenter\PackageRepository. This path isaccessible from the host where the SnapCenter Server is installed.
2. From the command prompt, navigate to the directory where you downloaded the installation file.
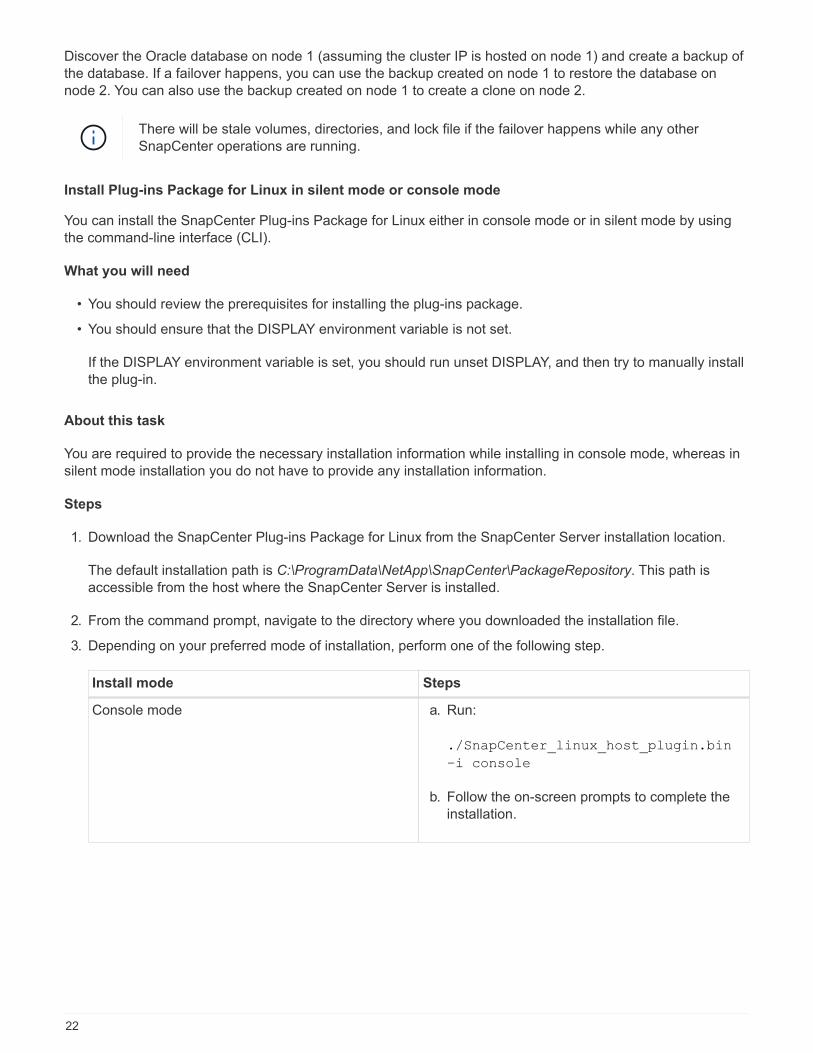
3. Depending on your preferred mode of installation, perform one of the following step.
Install mode Steps
Console mode a. Run:
./SnapCenter_linux_host_plugin.bin
–i console
b. Follow the on-screen prompts to complete theinstallation.
22
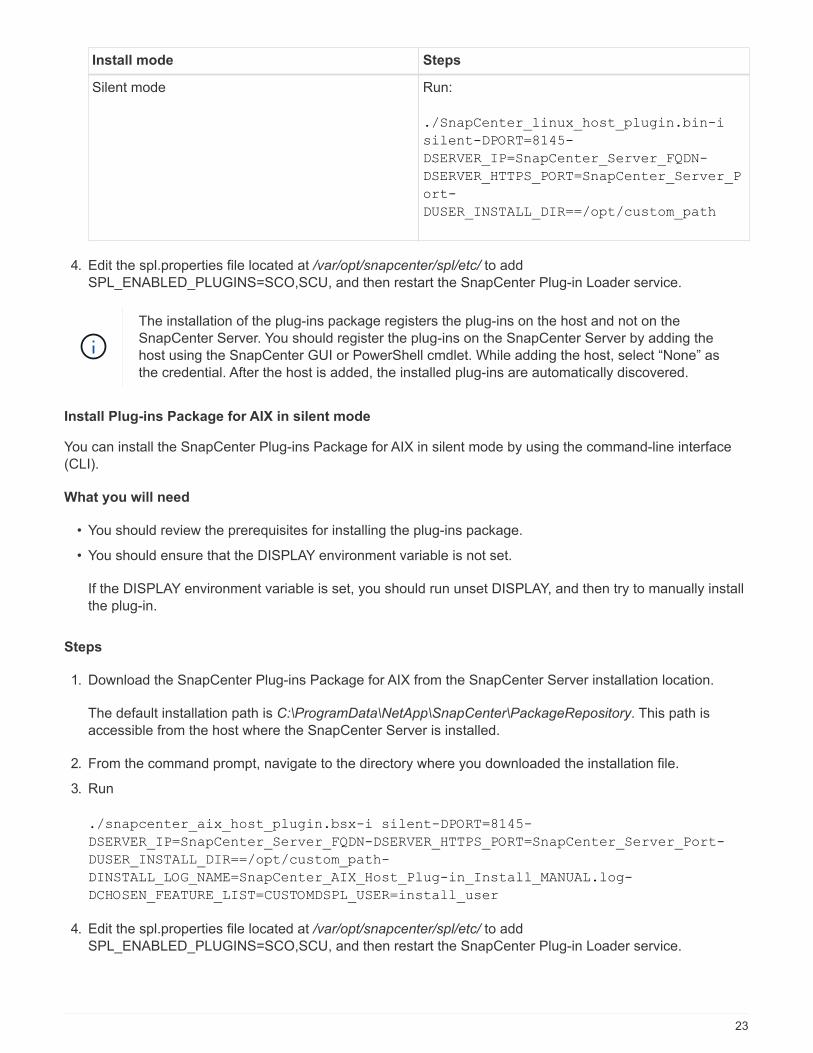
Install mode Steps
Silent mode Run:
./SnapCenter_linux_host_plugin.bin-i
silent-DPORT=8145-
DSERVER_IP=SnapCenter_Server_FQDN-
DSERVER_HTTPS_PORT=SnapCenter_Server_P
ort-
DUSER_INSTALL_DIR==/opt/custom_path
4. Edit the spl.properties file located at /var/opt/snapcenter/spl/etc/ to addSPL_ENABLED_PLUGINS=SCO,SCU, and then restart the SnapCenter Plug-in Loader service.
The installation of the plug-ins package registers the plug-ins on the host and not on theSnapCenter Server. You should register the plug-ins on the SnapCenter Server by adding thehost using the SnapCenter GUI or PowerShell cmdlet. While adding the host, select “None” asthe credential. After the host is added, the installed plug-ins are automatically discovered.
Install Plug-ins Package for AIX in silent mode
You can install the SnapCenter Plug-ins Package for AIX in silent mode by using the command-line interface(CLI).
What you will need
• You should review the prerequisites for installing the plug-ins package.
• You should ensure that the DISPLAY environment variable is not set.
If the DISPLAY environment variable is set, you should run unset DISPLAY, and then try to manually installthe plug-in.
Steps
1. Download the SnapCenter Plug-ins Package for AIX from the SnapCenter Server installation location.
The default installation path is C:\ProgramData\NetApp\SnapCenter\PackageRepository. This path isaccessible from the host where the SnapCenter Server is installed.
2. From the command prompt, navigate to the directory where you downloaded the installation file.
3. Run
./snapcenter_aix_host_plugin.bsx-i silent-DPORT=8145-
DSERVER_IP=SnapCenter_Server_FQDN-DSERVER_HTTPS_PORT=SnapCenter_Server_Port-
DUSER_INSTALL_DIR==/opt/custom_path-
DINSTALL_LOG_NAME=SnapCenter_AIX_Host_Plug-in_Install_MANUAL.log-
DCHOSEN_FEATURE_LIST=CUSTOMDSPL_USER=install_user
4. Edit the spl.properties file located at /var/opt/snapcenter/spl/etc/ to addSPL_ENABLED_PLUGINS=SCO,SCU, and then restart the SnapCenter Plug-in Loader service.
23
The installation of the plug-ins package registers the plug-ins on the host and not on theSnapCenter Server. You should register the plug-ins on the SnapCenter Server by adding thehost using the SnapCenter GUI or PowerShell cmdlet. While adding the host, select “None” asthe credential. After the host is added, the installed plug-ins are automatically discovered.
Configure the SnapCenter Plug-in Loader service
The SnapCenter Plug-in Loader service loads the plug-in package for Linux or AIX tointeract with the SnapCenter Server. The SnapCenter Plug-in Loader service is installedwhen you install the SnapCenter Plug-ins Package for Linux or SnapCenter Plug-insPackage for AIX.
About this task
After installing the SnapCenter Plug-ins Package for Linux or SnapCenter Plug-ins Package for AIX, theSnapCenter Plug-in Loader service starts automatically. If the SnapCenter Plug-in Loader service fails to startautomatically, you should:
• Ensure that the directory where the plug-in is operating is not deleted
• Increase the memory space allotted to the Java Virtual Machine
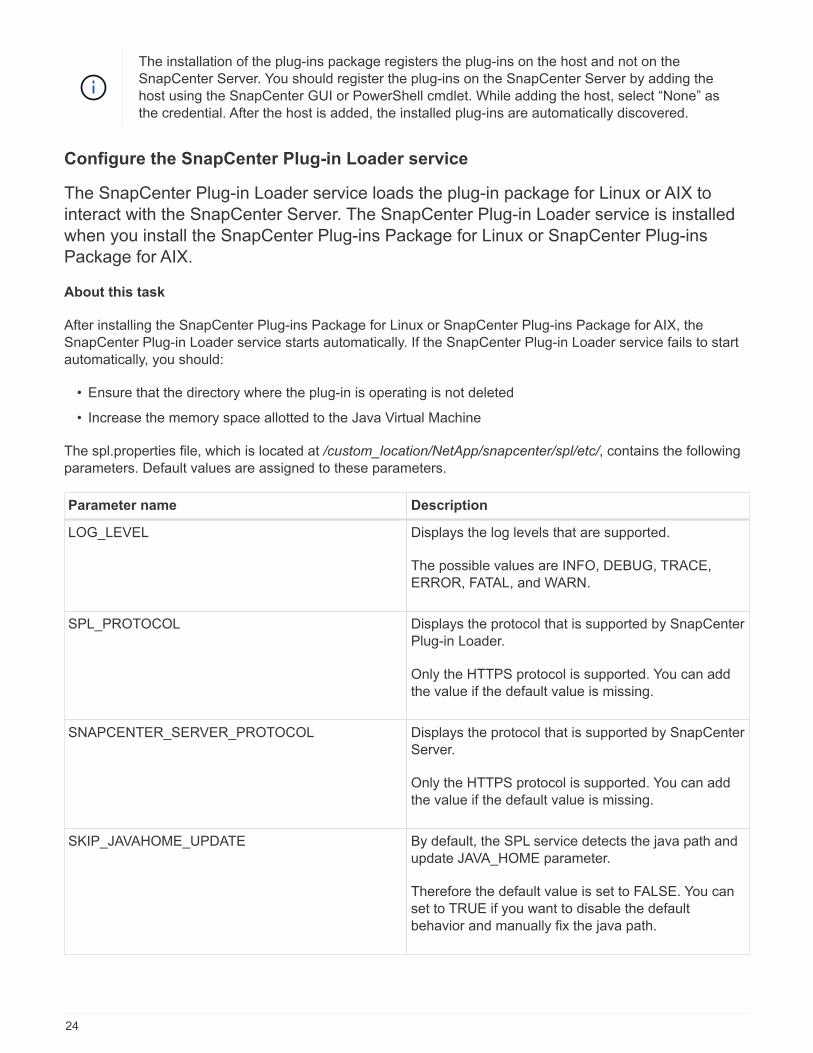
The spl.properties file, which is located at /custom_location/NetApp/snapcenter/spl/etc/, contains the followingparameters. Default values are assigned to these parameters.
Parameter name Description
LOG_LEVEL Displays the log levels that are supported.
The possible values are INFO, DEBUG, TRACE,ERROR, FATAL, and WARN.
SPL_PROTOCOL Displays the protocol that is supported by SnapCenterPlug-in Loader.
Only the HTTPS protocol is supported. You can addthe value if the default value is missing.
SNAPCENTER_SERVER_PROTOCOL Displays the protocol that is supported by SnapCenterServer.
Only the HTTPS protocol is supported. You can addthe value if the default value is missing.
SKIP_JAVAHOME_UPDATE By default, the SPL service detects the java path andupdate JAVA_HOME parameter.
Therefore the default value is set to FALSE. You canset to TRUE if you want to disable the defaultbehavior and manually fix the java path.
24
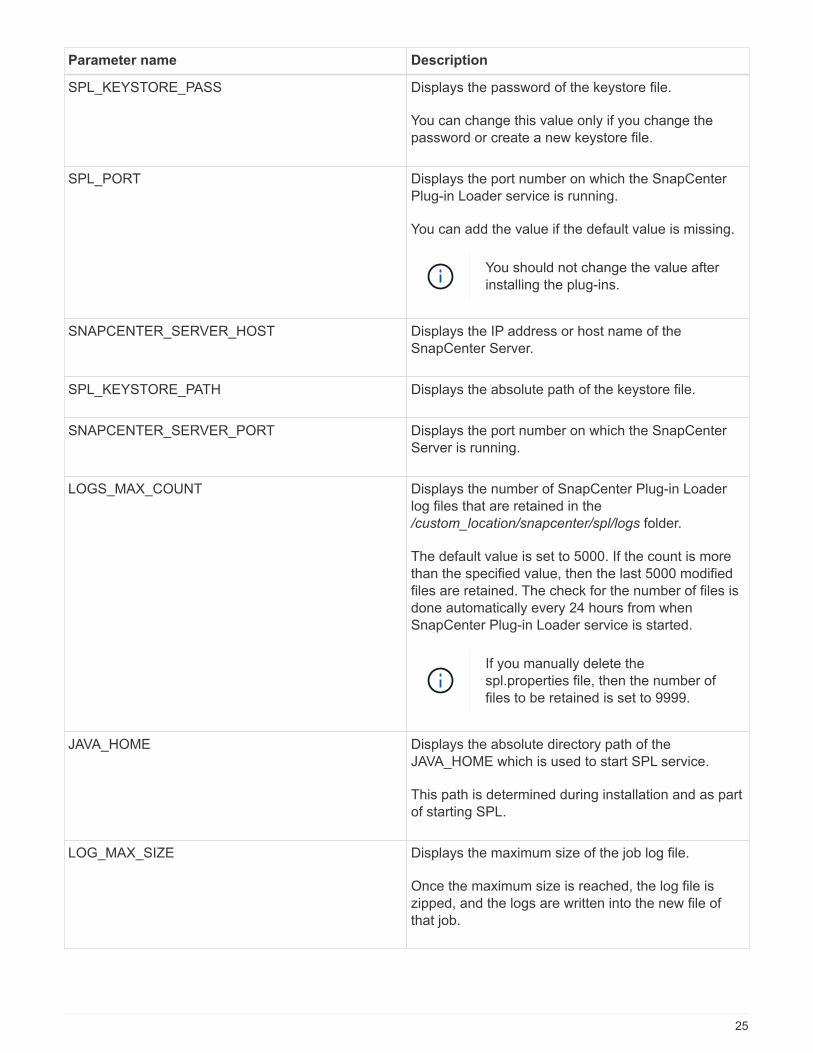
Parameter name Description
SPL_KEYSTORE_PASS Displays the password of the keystore file.
You can change this value only if you change thepassword or create a new keystore file.
SPL_PORT Displays the port number on which the SnapCenterPlug-in Loader service is running.
You can add the value if the default value is missing.
You should not change the value afterinstalling the plug-ins.
SNAPCENTER_SERVER_HOST Displays the IP address or host name of theSnapCenter Server.
SPL_KEYSTORE_PATH Displays the absolute path of the keystore file.
SNAPCENTER_SERVER_PORT Displays the port number on which the SnapCenterServer is running.
LOGS_MAX_COUNT Displays the number of SnapCenter Plug-in Loaderlog files that are retained in the/custom_location/snapcenter/spl/logs folder.
The default value is set to 5000. If the count is morethan the specified value, then the last 5000 modifiedfiles are retained. The check for the number of files isdone automatically every 24 hours from whenSnapCenter Plug-in Loader service is started.
If you manually delete thespl.properties file, then the number offiles to be retained is set to 9999.
JAVA_HOME Displays the absolute directory path of theJAVA_HOME which is used to start SPL service.
This path is determined during installation and as partof starting SPL.
LOG_MAX_SIZE Displays the maximum size of the job log file.
Once the maximum size is reached, the log file iszipped, and the logs are written into the new file ofthat job.
25
Parameter name Description
RETAIN_LOGS_OF_LAST_DAYS Displays the number of days up to which the logs areretained.
ENABLE_CERTIFICATE_VALIDATION Displays true when CA certificate validation isenabled for the host.
You can enable or disable this parameter either byediting the spl.properties file or by using theSnapCenter GUI or cmdlet.
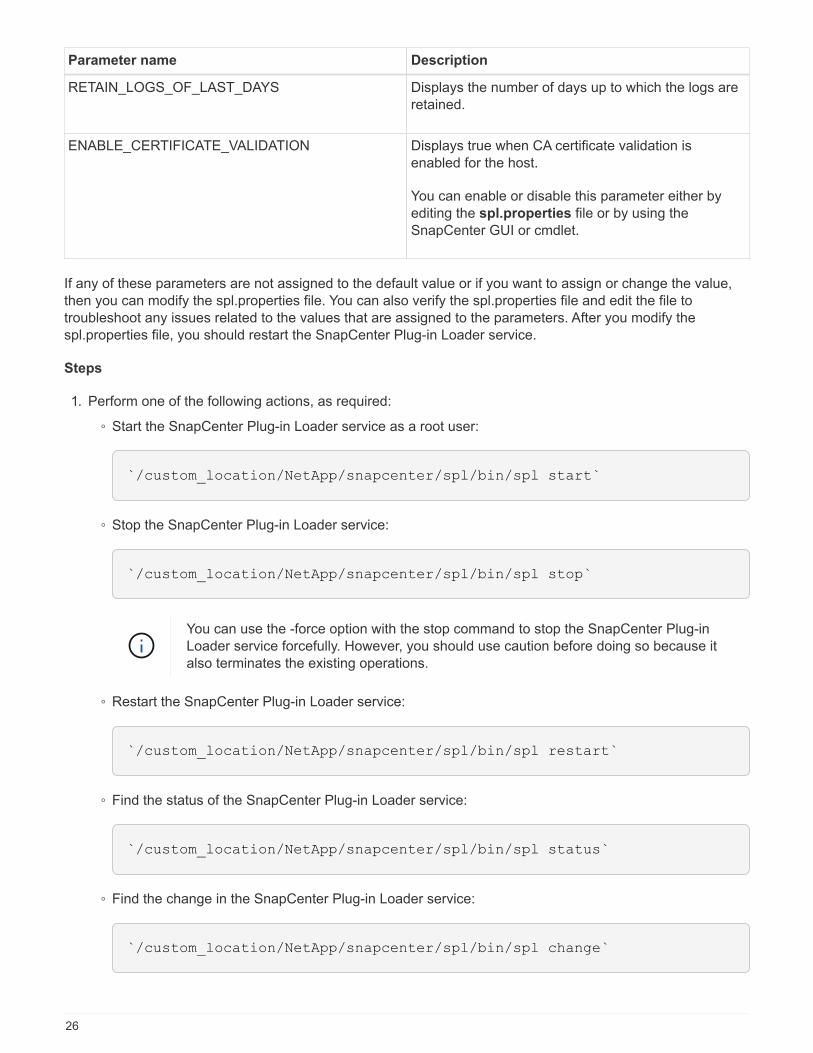
If any of these parameters are not assigned to the default value or if you want to assign or change the value,then you can modify the spl.properties file. You can also verify the spl.properties file and edit the file totroubleshoot any issues related to the values that are assigned to the parameters. After you modify thespl.properties file, you should restart the SnapCenter Plug-in Loader service.
Steps
1. Perform one of the following actions, as required:
◦ Start the SnapCenter Plug-in Loader service as a root user:
`/custom_location/NetApp/snapcenter/spl/bin/spl start`
◦ Stop the SnapCenter Plug-in Loader service:
`/custom_location/NetApp/snapcenter/spl/bin/spl stop`
You can use the -force option with the stop command to stop the SnapCenter Plug-inLoader service forcefully. However, you should use caution before doing so because italso terminates the existing operations.
◦ Restart the SnapCenter Plug-in Loader service:
`/custom_location/NetApp/snapcenter/spl/bin/spl restart`
◦ Find the status of the SnapCenter Plug-in Loader service:
`/custom_location/NetApp/snapcenter/spl/bin/spl status`
◦ Find the change in the SnapCenter Plug-in Loader service:
`/custom_location/NetApp/snapcenter/spl/bin/spl change`
26
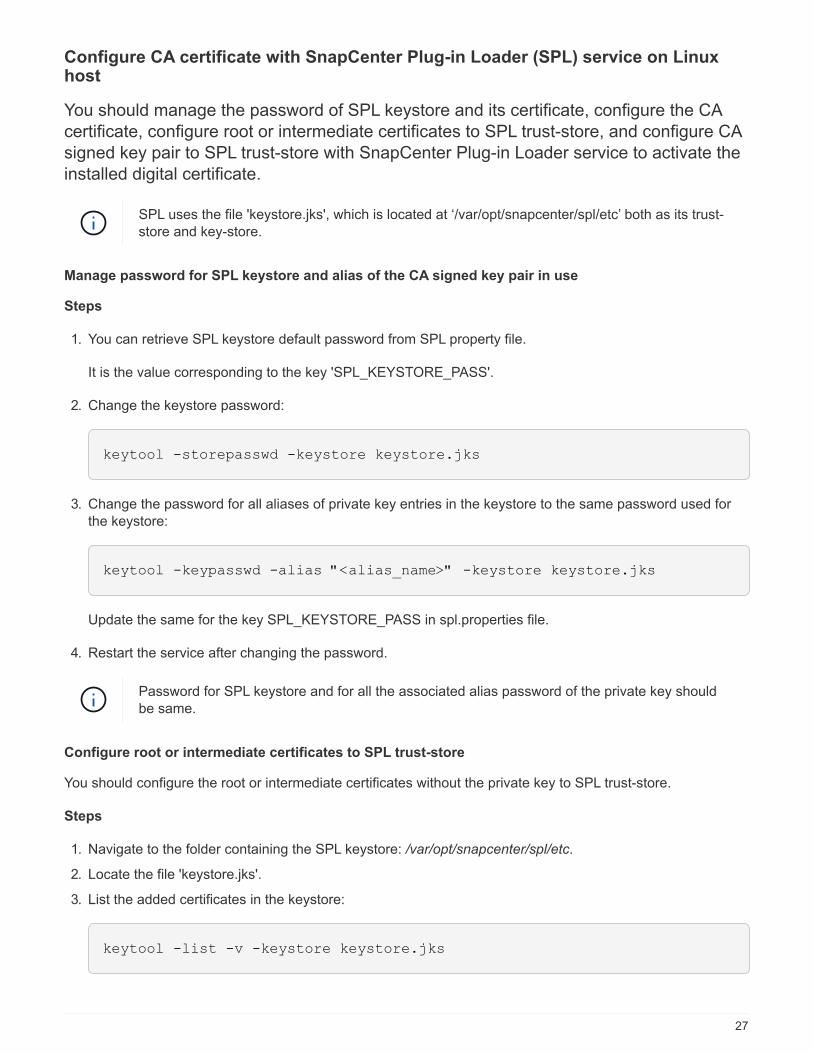
Configure CA certificate with SnapCenter Plug-in Loader (SPL) service on Linuxhost
You should manage the password of SPL keystore and its certificate, configure the CAcertificate, configure root or intermediate certificates to SPL trust-store, and configure CAsigned key pair to SPL trust-store with SnapCenter Plug-in Loader service to activate theinstalled digital certificate.
SPL uses the file 'keystore.jks', which is located at ‘/var/opt/snapcenter/spl/etc’ both as its trust-store and key-store.
Manage password for SPL keystore and alias of the CA signed key pair in use
Steps
1. You can retrieve SPL keystore default password from SPL property file.
It is the value corresponding to the key 'SPL_KEYSTORE_PASS'.
2. Change the keystore password:
keytool -storepasswd -keystore keystore.jks
3. Change the password for all aliases of private key entries in the keystore to the same password used forthe keystore:
keytool -keypasswd -alias "<alias_name>" -keystore keystore.jks
Update the same for the key SPL_KEYSTORE_PASS in spl.properties file.
4. Restart the service after changing the password.
Password for SPL keystore and for all the associated alias password of the private key shouldbe same.
Configure root or intermediate certificates to SPL trust-store
You should configure the root or intermediate certificates without the private key to SPL trust-store.
Steps
1. Navigate to the folder containing the SPL keystore: /var/opt/snapcenter/spl/etc.
2. Locate the file 'keystore.jks'.
3. List the added certificates in the keystore:
keytool -list -v -keystore keystore.jks
27
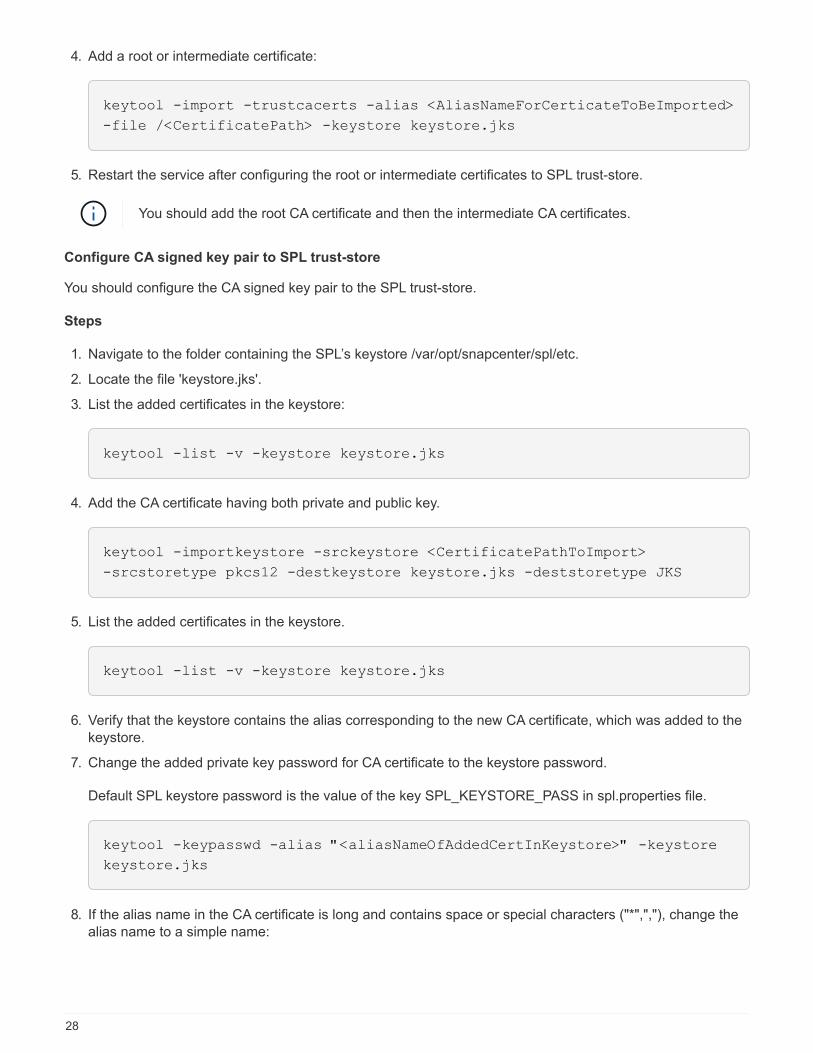
4. Add a root or intermediate certificate:
keytool -import -trustcacerts -alias <AliasNameForCerticateToBeImported>
-file /<CertificatePath> -keystore keystore.jks
5. Restart the service after configuring the root or intermediate certificates to SPL trust-store.
You should add the root CA certificate and then the intermediate CA certificates.
Configure CA signed key pair to SPL trust-store
You should configure the CA signed key pair to the SPL trust-store.
Steps
1. Navigate to the folder containing the SPL’s keystore /var/opt/snapcenter/spl/etc.
2. Locate the file 'keystore.jks'.
3. List the added certificates in the keystore:
keytool -list -v -keystore keystore.jks
4. Add the CA certificate having both private and public key.
keytool -importkeystore -srckeystore <CertificatePathToImport>
-srcstoretype pkcs12 -destkeystore keystore.jks -deststoretype JKS
5. List the added certificates in the keystore.
keytool -list -v -keystore keystore.jks
6. Verify that the keystore contains the alias corresponding to the new CA certificate, which was added to thekeystore.
7. Change the added private key password for CA certificate to the keystore password.
Default SPL keystore password is the value of the key SPL_KEYSTORE_PASS in spl.properties file.
keytool -keypasswd -alias "<aliasNameOfAddedCertInKeystore>" -keystore
keystore.jks
8. If the alias name in the CA certificate is long and contains space or special characters ("*",","), change thealias name to a simple name:
28
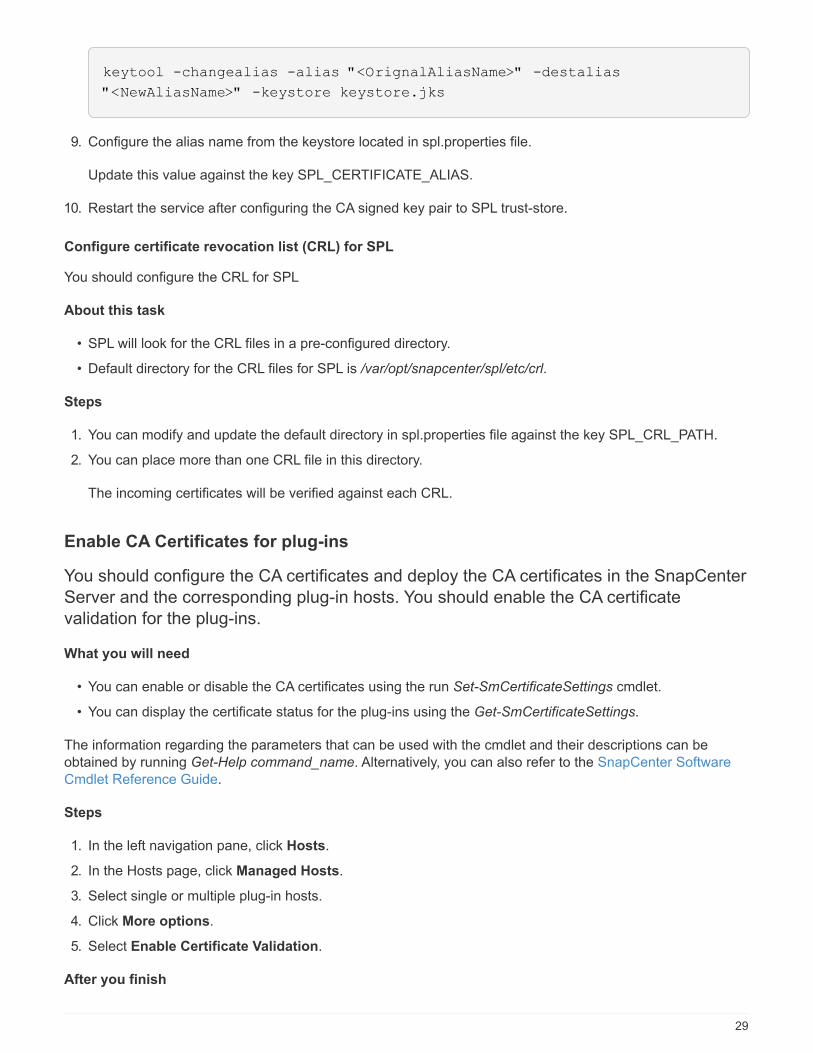
keytool -changealias -alias "<OrignalAliasName>" -destalias
"<NewAliasName>" -keystore keystore.jks
9. Configure the alias name from the keystore located in spl.properties file.
Update this value against the key SPL_CERTIFICATE_ALIAS.
10. Restart the service after configuring the CA signed key pair to SPL trust-store.
Configure certificate revocation list (CRL) for SPL
You should configure the CRL for SPL
About this task
• SPL will look for the CRL files in a pre-configured directory.
• Default directory for the CRL files for SPL is /var/opt/snapcenter/spl/etc/crl.
Steps
1. You can modify and update the default directory in spl.properties file against the key SPL_CRL_PATH.
2. You can place more than one CRL file in this directory.
The incoming certificates will be verified against each CRL.
Enable CA Certificates for plug-ins
You should configure the CA certificates and deploy the CA certificates in the SnapCenterServer and the corresponding plug-in hosts. You should enable the CA certificatevalidation for the plug-ins.
What you will need
• You can enable or disable the CA certificates using the run Set-SmCertificateSettings cmdlet.
• You can display the certificate status for the plug-ins using the Get-SmCertificateSettings.
The information regarding the parameters that can be used with the cmdlet and their descriptions can beobtained by running Get-Help command_name. Alternatively, you can also refer to the SnapCenter SoftwareCmdlet Reference Guide.
Steps
1. In the left navigation pane, click Hosts.
2. In the Hosts page, click Managed Hosts.
3. Select single or multiple plug-in hosts.
4. Click More options.
5. Select Enable Certificate Validation.
After you finish
29
The Managed Hosts tab host displays a padlock and the color of the padlock indicates the status of theconnection between SnapCenter Server and the plug-in host.
• indicates that the CA certificate is neither enabled nor assigned to the plug-in host.
• indicates that the CA certificate is successfully validated.
• indicates that the CA certificate could not be validated.
• indicates that the connection information could not be retrieved.
When the status is yellow or green, the data protection operations completes successfully.
Import data from SnapManager for Oracle and SnapManager for SAP toSnapCenter
Importing data from SnapManager for Oracle and SnapManager for SAP to SnapCenterenables you to continue to use your data from previous versions.
You can import data from SnapManager for Oracle and SnapManager for SAP to SnapCenter by running theimport tool from the command-line interface (Linux host CLI).
The import tool creates policies and resource groups in SnapCenter. The policies and resource groups createdin SnapCenter correspond to the profiles and operations performed using those profiles in SnapManager forOracle and SnapManager for SAP. The SnapCenter import tool interacts with the SnapManager for Oracle andSnapManager for SAP repository databases and the database that you want to import.
• Retrieves all the profiles, schedules, and operations performed using the profiles.
• Creates a SnapCenter backup policy for each unique operation and each schedule attached to a profile.
• Creates a resource group for each target database.
You can run the import tool by executing the sc-migrate script located at /opt/NetApp/snapcenter/spl/bin. Whenyou install the SnapCenter Plug-ins Package for Linux on the database host that you want to import, the sc-migrate script is copied to /opt/NetApp/snapcenter/spl/bin.
Importing data is not supported from SnapCenter graphical user interface (GUI).
SnapCenter does not support Data ONTAP operating in 7-Mode. You can use the 7-Mode Transition Tool tomigrate data and configurations that are stored on a system running Data ONTAP operating in 7-Mode to anONTAP system.
Configurations supported for importing data
Before you import data from SnapManager 3.4.x for Oracle and SnapManager 3.4.x for SAP to SnapCenter,you should be aware of the configurations that are supported with the SnapCenter Plug-in for OracleDatabase.
The configurations that are supported with the SnapCenter Plug-in for Oracle Database are listed in theNetApp Interoperability Matrix Tool.
What gets imported to SnapCenter
You can import profiles, schedules, and operations performed using the profiles.
30
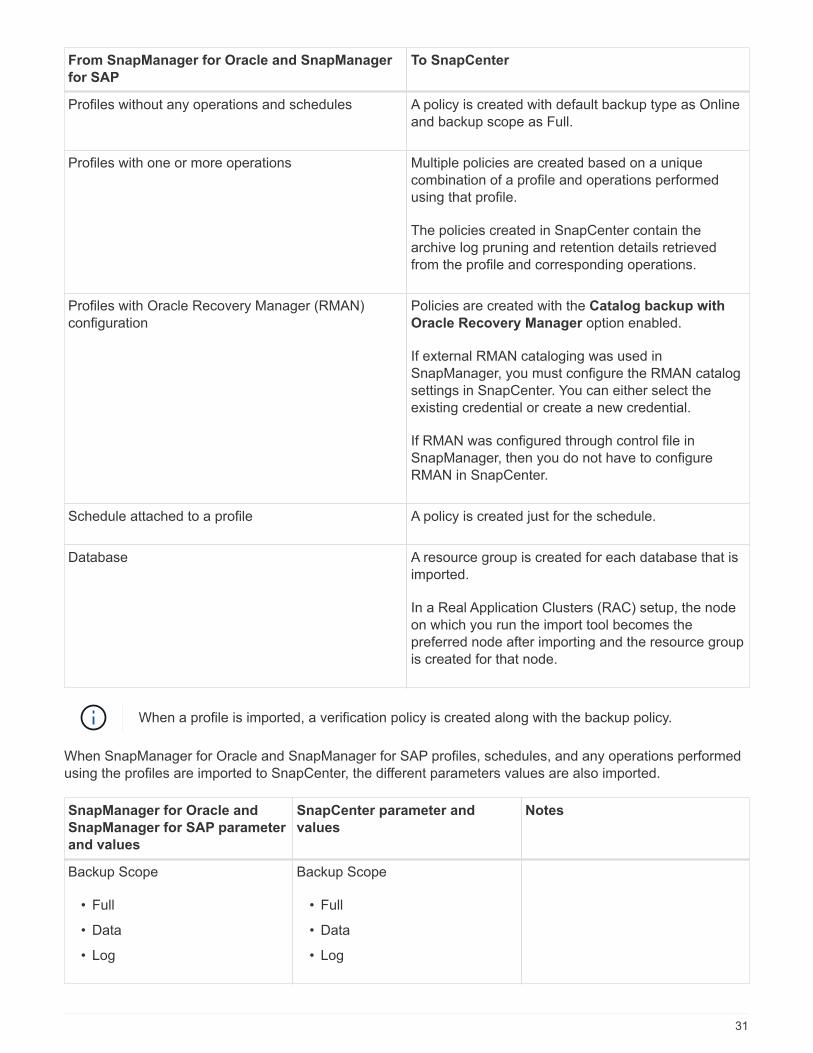
From SnapManager for Oracle and SnapManager
for SAP
To SnapCenter
Profiles without any operations and schedules A policy is created with default backup type as Onlineand backup scope as Full.
Profiles with one or more operations Multiple policies are created based on a uniquecombination of a profile and operations performedusing that profile.
The policies created in SnapCenter contain thearchive log pruning and retention details retrievedfrom the profile and corresponding operations.
Profiles with Oracle Recovery Manager (RMAN)configuration
Policies are created with the Catalog backup with
Oracle Recovery Manager option enabled.
If external RMAN cataloging was used inSnapManager, you must configure the RMAN catalogsettings in SnapCenter. You can either select theexisting credential or create a new credential.
If RMAN was configured through control file inSnapManager, then you do not have to configureRMAN in SnapCenter.
Schedule attached to a profile A policy is created just for the schedule.
Database A resource group is created for each database that isimported.
In a Real Application Clusters (RAC) setup, the nodeon which you run the import tool becomes thepreferred node after importing and the resource groupis created for that node.
When a profile is imported, a verification policy is created along with the backup policy.
When SnapManager for Oracle and SnapManager for SAP profiles, schedules, and any operations performedusing the profiles are imported to SnapCenter, the different parameters values are also imported.
SnapManager for Oracle and
SnapManager for SAP parameter
and values
SnapCenter parameter and
values
Notes
Backup Scope
• Full
• Data
• Log
Backup Scope
• Full
• Data
• Log
31
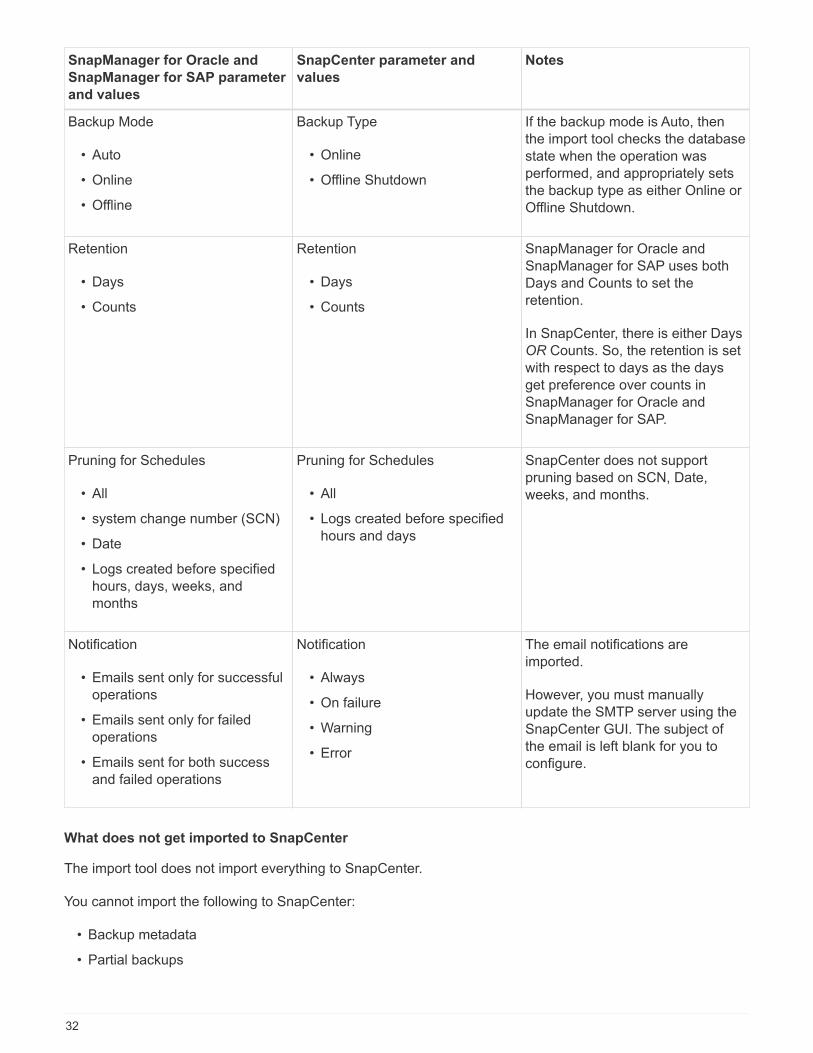
SnapManager for Oracle and
SnapManager for SAP parameter
and values
SnapCenter parameter and
values
Notes
Backup Mode
• Auto
• Online
• Offline
Backup Type
• Online
• Offline Shutdown
If the backup mode is Auto, thenthe import tool checks the databasestate when the operation wasperformed, and appropriately setsthe backup type as either Online orOffline Shutdown.
Retention
• Days
• Counts
Retention
• Days
• Counts
SnapManager for Oracle andSnapManager for SAP uses bothDays and Counts to set theretention.
In SnapCenter, there is either DaysOR Counts. So, the retention is setwith respect to days as the daysget preference over counts inSnapManager for Oracle andSnapManager for SAP.
Pruning for Schedules
• All
• system change number (SCN)
• Date
• Logs created before specifiedhours, days, weeks, andmonths
Pruning for Schedules
• All
• Logs created before specifiedhours and days
SnapCenter does not supportpruning based on SCN, Date,weeks, and months.
Notification
• Emails sent only for successfuloperations
• Emails sent only for failedoperations
• Emails sent for both successand failed operations
Notification
• Always
• On failure
• Warning
• Error
The email notifications areimported.
However, you must manuallyupdate the SMTP server using theSnapCenter GUI. The subject ofthe email is left blank for you toconfigure.
What does not get imported to SnapCenter
The import tool does not import everything to SnapCenter.
You cannot import the following to SnapCenter:
• Backup metadata
• Partial backups
32
• Raw device mapping (RDM) and Virtual Storage Console (VSC) related backups
• Roles or any credentials available in the SnapManager for Oracle and SnapManager for SAP repository
• Data related to verification, restore, and clone operations
• Pruning for operations
• Replication details specified in the SnapManager for Oracle and SnapManager for SAP profile
After importing, you must manually edit the corresponding policy created in SnapCenter to include thereplication details.
• Cataloged backup information
Prepare to import data
Before you import data to SnapCenter, you must perform certain tasks to run the import operation successfully.
Steps
1. Identify the database that you want to import.
2. Using SnapCenter, add the database host and install SnapCenter Plug-ins Package for Linux.
3. Using SnapCenter, set up the connections for the storage virtual machines (SVMs) used by the databaseson the host.
4. In the left navigation pane, click Resources, and then select the appropriate plug-in from the list.
5. In the Resources page, ensure that the database to be imported is discovered and displayed.
When you want to run the import tool, the database must be accessible or else the resource group creationfails.
If the database has credentials configured, you must create a corresponding credential in SnapCenter,assign the credential to the database, and then re-run discovery of the database. If the database is residingon Automatic Storage Management (ASM), you must create credentials for the ASM instance, and assignthe credential to the database.
6. Ensure that the user running the import tool has sufficient privileges to run SnapManager for Oracle orSnapManager for SAP CLI commands (such as the command to suspend schedules) from SnapManagerfor Oracle or SnapManager for SAP host.
7. Run the following commands on the SnapManager for Oracle or SnapManager for SAP host to suspendthe schedules:
a. If you want to suspend the schedules on the SnapManager for Oracle host, run:
▪ smo credential set -repository -dbname repository_database_name -host
host_name -port port_number -login -username
user_name_for_repository_database
▪ smo profile sync -repository -dbname repository_database_name -host
host_name -port port_number -login -username
host_user_name_for_repository_database
▪ smo credential set -profile -name profile_name
You must run the smo credential set command for each profile on the host.
33
b. If you want to suspend the schedules on the SnapManager for SAP host, run:
▪ smsap credential set -repository -dbname repository_database_name -host
host_name -port port_number -login -username
user_name_for_repository_database
▪ smsap profile sync -repository -dbname repository_database_name -host
host_name -port port_number -login -username
host_user_name_for_repository_database
▪ smsap credential set -profile -name profile_name
You must run the smsap credential set command for each profile on the host.
8. Ensure that fully qualified domain name (FQDN) of the database host is displayed when you run hostname-f.
If FQDN is not displayed, you must modify /etc/hosts to specify the FQDN of the host.
Import data
You can import data by running the import tool from the database host.
About this task
The SnapCenter backup policies that are created after importing have different naming formats:
• Policies created for the profiles without any operations and schedules have theSM_PROFILENAME_ONLINE_FULL_DEFAULT_MIGRATED format.
When no operation is performed using a profile, the corresponding policy is created with default backuptype as online and backup scope as full.
• Policies created for the profiles with one or more operations have theSM_PROFILENAME_BACKUPMODE_BACKUPSCOPE_MIGRATED format.
• Policies created for the schedules attached to the profiles have theSM_PROFILENAME_SMOSCHEDULENAME_BACKUPMODE_BACKUPSCOPE_MIGRATED format.
Steps
1. Log in to the database host that you want to import.
2. Run the import tool by executing the sc-migrate script located at /opt/NetApp/snapcenter/spl/bin.
3. Enter the SnapCenter Server user name and password.
After validating the credentials, a connection is established with SnapCenter.
4. Enter the SnapManager for Oracle or SnapManager for SAP repository database details.
The repository database lists the databases that are available on the host.
5. Enter the target database details.
If you want to import all the databases on the host, enter all.
34
6. If you want to generate a system log or send ASUP messages for failed operations, you must enable themeither by running the Add-SmStorageConnection or Set-SmStorageConnection command.
If you want to cancel an import operation, either while running the import tool or afterimporting, you must manually delete the SnapCenter policies, credentials, and resourcegroups that were created as part of import operation.
Results
The SnapCenter backup policies are created for profiles, schedules, and operations performed using theprofiles. Resource groups are also created for each target database.
After importing the data successfully, the schedules associated with the imported database are suspended inSnapManager for Oracle and SnapManager for SAP.
After importing, you must manage the imported database or file system using SnapCenter.
The logs for every execution of the import tool are stored in the /var/opt/snapcenter/spl/logs directory with thename spl_migration_timestamp.log. You can refer to this log to review import errors and troubleshoot them.
Install SnapCenter Plug-in for VMware vSphere
If your database is stored on virtual machines (VMs), or if you want to protect VMs anddatastores, you must deploy the SnapCenter Plug-in for VMware vSphere virtualappliance.
For information to deploy, see Deployment Overview.
Deploy CA certificate
To configure the CA Certificate with SnapCenter Plug-in for VMware vSphere, see Create or import SSLcertificate.
Configure the CRL file
SnapCenter Plug-in for VMware vSphere looks for the CRL files in a pre-configured directory. Default directoryof the CRL files for SnapCenter Plug-in for VMware vSphere is /opt/netapp/config/crl.
You can place more than one CRL file in this directory. The incoming certificates will be verified against eachCRL.
Prepare for protecting Oracle databases
Before performing any data protection operation such as backup, clone, or restoreoperations, you must define your strategy and set up the environment. You can also setup the SnapCenter Server to use SnapMirror and SnapVault technology.
To take advantage of SnapVault and SnapMirror technology, you must configure and initialize a data protectionrelationship between the source and destination volumes on the storage device. You can use NetAppSystemManager or you can use the storage console command line to perform these tasks.
35
Before you use the Plug-in for Oracle Database, the SnapCenter administrator should install and configure theSnapCenter Server and perform the prerequisite tasks.
• Install and configure SnapCenter Server. Learn more
• Configure the SnapCenter environment by adding storage system connections. Learn more
SnapCenter does not support multiple SVMs with the same name on different clusters. EachSVM registered with SnapCenter using either SVM registration or cluster registration mustbe unique.
• Create credentials with authentication mode as Linux or AIX for the install user. Learn more
• Add hosts, install the plug-ins, and discover the resources.
• If you are using SnapCenter Server to protect Oracle databases that reside on VMware RDM LUNs orVMDKs, you must deploy the SnapCenter Plug-in for VMware vSphere and register the plug-in withSnapCenter.
• Install Java on your Linux or AIX host.
See Linux host requirements or AIX host requirements for more information.
• You should set the time out value of the application firewall to 3 hours or more.
• If you have Oracle databases on NFS environments, you must have configured at least one NFS data LIFfor primary or secondary storage to perform mount, clone, verification, and restore operations.
• If you have multiple data paths (LIFs) or a dNFS configuration, you can perform the following using theSnapCenter CLI on the database host:
◦ By default, all the IP addresses of the database host are added to the NFS storage export policy instorage virtual machine (SVM) for the cloned volumes. If you want to have a specific IP address orrestrict to a subset of the IP addresses, run the Set-PreferredHostIPsInStorageExportPolicy CLI.
◦ If you have multiple data paths (LIFs) in SVM, SnapCenter chooses the appropriate data path (LIF) formounting the NFS cloned volume. However, if you want to specify a specific data path (LIF), you mustrun the Set-SvmPreferredDataPath CLI. The command reference guide has more information.
• If you have Oracle databases on SAN environments, ensure that the SAN environment is configured as perthe recommendation mentioned in the following guides:
◦ Recommended Host Settings for Linux Unified Host Utilities
◦ Using Linux Hosts with ONTAP storage
◦ Host Settings Affected by AIX Host Utilities
• If you have Oracle databases on LVM in Oracle Linux or RHEL operating systems, install the latest versionof Logical Volume Management (LVM).
• If you are using SnapManager for Oracle and want to migrate to SnapCenter Plug-in for Oracle Database,you can migrate the profiles to policies and resource groups of SnapCenter by using the sccli command sc-migrate.
• Configure SnapMirror and SnapVault on ONTAP, if you want backup replication
For SnapCenter 4.1.1 users, the SnapCenter Plug-in for VMware vSphere 4.1.1 documentation hasinformation on protecting virtualized databases and file systems. For SnapCenter 4.2.x users, the NetApp DataBroker 1.0 and 1.0.1, documentation has information on protecting virtualized databases and file systemsusing the SnapCenter Plug-in for VMware vSphere that is provided by the Linux-based NetApp Data Brokervirtual appliance (Open Virtual Appliance format). For SnapCenter 4.3.x users, the SnapCenter Plug-in for
36
VMware vSphere 4.3 documentation has information on protecting virtualized databases and file systemsusing the Linux-based SnapCenter Plug-in for VMware vSphere virtual appliance (Open Virtual Applianceformat).
Find more information
• Interoperability Matrix Tool
• SnapCenter Plug-in for VMware vSphere documentation
• Data protection operation fails in a non-multipath environment in RHEL 7 and later
Back up Oracle databases
Backup workflow
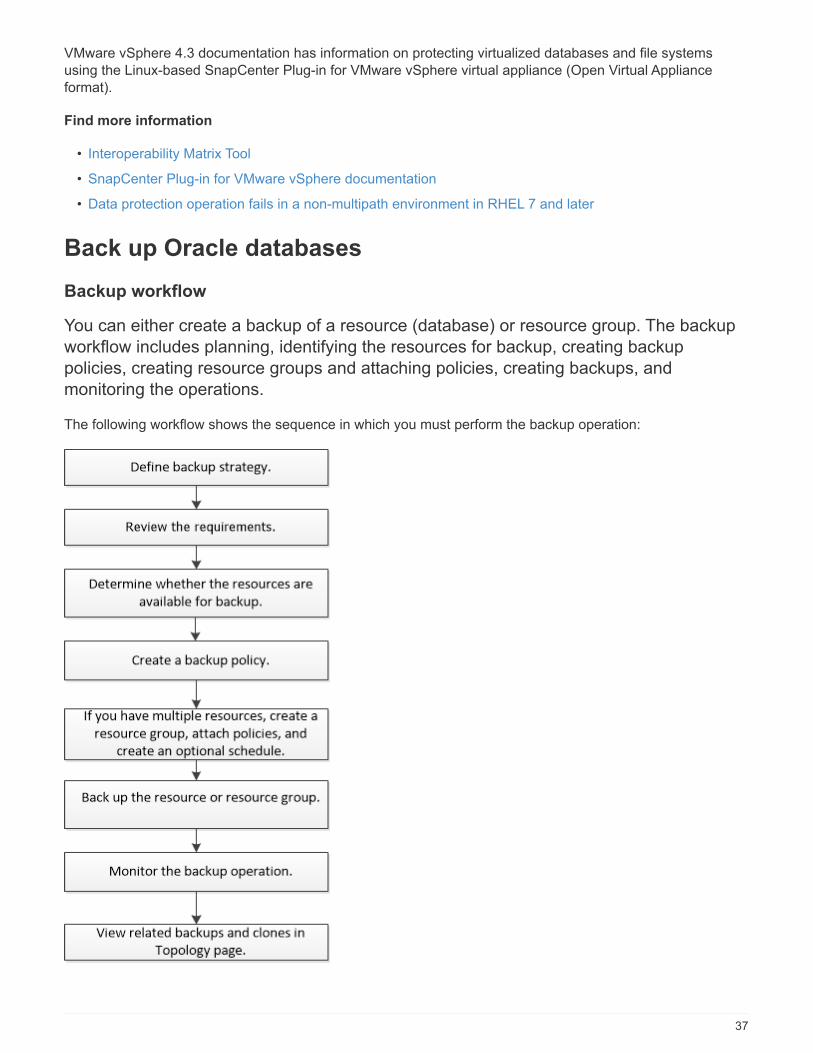
You can either create a backup of a resource (database) or resource group. The backupworkflow includes planning, identifying the resources for backup, creating backuppolicies, creating resource groups and attaching policies, creating backups, andmonitoring the operations.
The following workflow shows the sequence in which you must perform the backup operation:
37
While creating a backup for Oracle databases, an operational lock file (.sm_lock_dbsid) is created on theOracle database host in the $ORACLE_HOME/dbs directory to avoid multiple operations being executed onthe database. After the database has been backed up, the operational lock file is automatically removed.
However, if the previous backup was completed with a warning, the operational lock file might not get deleted,and the next backup operation gets into the wait queue. It might eventually get canceled if the .sm_lock_dbsid
file is not deleted. In such scenario, you must manually delete the operational lock file by perfroming thefollowing steps:
1. From the command prompt, navigate to $ORACLE_HOME/dbs.
2. Delete the operational lock:rm -rf .sm_lock_dbsid.
Define a backup strategy for Oracle databases
Defining a backup strategy before you create your backup jobs ensures that you have thebackups that you require to successfully restore or clone your databases. Your service-level agreement (SLA), recovery time objective (RTO), and recovery point objective(RPO) largely determine your backup strategy.
An SLA defines the level of service that is expected and addresses many service-related issues, including theavailability and performance of the service. RTO is the time by which a business process must be restoredafter a disruption in service. RPO defines the strategy for the age of the files that must be recovered frombackup storage for regular operations to resume after a failure. SLA, RTO, and RPO contribute to the dataprotection strategy.
Supported Oracle database configurations for backups
SnapCenter supports backup of different Oracle database configurations.
• Oracle Standalone
• Oracle Real Application Clusters (RAC)
• Oracle Standalone Legacy
• Oracle Standalone Container Database (CDB)
• Oracle Data Guard standby
You can only create offline-mount backups of Data Guard standby databases. Offline-shutdown backup,archive log only backup, and full backup are not supported.
• Oracle Active Data Guard standby
You can only create online backups of Active Data Guard standby databases. Archive log only backup andfull backup are not supported.
Before creating a backup of Data Guard standby or Active Data Guard standby database,the managed recovery process (MRP) is stopped and once the backup is created, MRP isstarted.
• Automatic Storage Management (ASM)
◦ ASM standalone and ASM RAC on Virtual Machine Disk (VMDK)
38
Among all the restore methods supported for Oracle databases, you can perform onlyconnect-and-copy restore of ASM RAC databases on VMDK.
◦ ASM standalone and ASM RAC on Raw device mapping (RDM) You can perform backup, restore, andclone operations on Oracle databases on ASM, with or without ASMLib.
◦ Oracle ASM Filter Driver (ASMFD)
PDB migration and PDB cloning operations are not supported.
◦ Oracle Flex ASM
For the latest information about supported Oracle versions, see the NetApp Interoperability Matrix Tool.
Types of backup supported for Oracle databases
Backup type specifies the type of backup that you want to create. SnapCenter supports online and offlinebackup types for Oracle databases.
Online backup
A backup that is created when the database is in the online state is called an online backup. Also called a hotbackup, an online backup enables you to create a backup of the database without shutting it down.
As part of online backup, you can create a backup of the following files:
• Datafiles and control files only
• Archive log files only (the database is not brought to backup mode in this scenario)
• Full database that includes datafiles, control files, and archive log files
Offline backup
A backup created when the database is either in a mounted or shutdown state is called an offline backup. Anoffline backup is also called a cold backup. You can include only datafiles and control files in offline backups.You can create either an offline mount or offline shutdown backup.
• When creating an offline mount backup, you must ensure that the database is in a mounted state.
If the database is in any other state, the backup operation fails.
• When creating an offline shutdown backup, the database can be in any state.
The database state is changed to the required state to create a backup. After creating the backup, thedatabase state is reverted to the original state.
How SnapCenter discovers Oracle databases
"Resources" are Oracle databases on the host that are maintained by SnapCenter. You can add thesedatabases to resource groups to perform data protection operations after you discover the databases that areavailable. You should be aware of the process that SnapCenter follows to discover different types and versionsof Oracle databases.
39
For Oracle versions 11g to 12cR1 For Oracle versions 12cR2 to 18c
RAC database: The RAC databases are discoveredonly on the basis of /etc/oratab entries.
You should have the database entries in the/etc/oratab file.
RAC database: The RAC databases are discoveredusing the srvctl config command.
Standalone: The standalone databases arediscovered only on the basis of /etc/oratab entries.
You should have the database entries in the/etc/oratab file.
Standalone: The standalone databases arediscovered based on the entries in the /etc/oratab fileand the output of the srvctl config command.
ASM: The ASM instance entry should be available inthe /etc/oratab file.
ASM: The ASM instance entry need not be in the/etc/oratab file.
RAC One Node: The RAC One Node databases arediscovered only on the basis of /etc/oratab entries.
The databases should be either in nomount, mount,or open state. You should have the database entriesin the /etc/oratab file.
The RAC One Node database status will be markedas renamed or deleted if the database is alreadydiscovered and backups are associated with thedatabase.
You should perform the following steps if the databaseis relocated:
1. Manually add the relocated database entry in the/etc/oratab file on the failed-over RAC node.
2. Manually refresh the resources.
3. Select the RAC One Node database from theresource page, and then click Database
Settings.
4. Configure the database to set the preferredcluster nodes to the RAC node currently hostingthe database.
5. Perform the SnapCenter operations.
If you have relocated a database fromone node to another node and if theoratab entry in the earlier node is notdeleted, you should manually deletethe oratab entry to avoid the samedatabase being displayed twice.
RAC One Node: The RAC One Node databases arediscovered using the srvctl config command only.
The databases should be either in nomount, mount,or open state. The RAC One Node database statuswill be marked as renamed or deleted if the databaseis already discovered and backups are associatedwith the database.
You should perform the following steps if the databaseis relocated:
1. Manually refresh the resources.
2. Select the RAC One Node database from theresource page, and then click Database
Settings.
3. Configure the database to set the preferredcluster nodes to the RAC node currently hostingthe database.
4. Perform the SnapCenter operations.
40
If there are any Oracle 12cR2 and 18c database entries in the /etc/oratab file and the samedatabase is registered with the srvctl config command, SnapCenter will eliminate the duplicatedatabase entries. If there are stale database entries, the database will be discovered but thedatabase will be unreachable and the status will be offline.
Preferred nodes in RAC setup
In Oracle Real Application Clusters (RAC) setup, you can specify the preferred nodes on which the backupoperation will be performed. If you do not specify the preferred node, SnapCenter automatically assigns a nodeas the preferred node and backup is created on that node.
The preferred nodes might be one or all of the cluster nodes where the RAC database instances are present.The backup operation will be triggered only on these preferred nodes in the order of the preference.
Example: The RAC database cdbrac has three instances: cdbrac1 on node1, cdbrac2 on node2, and cdbrac3on node3. The node1 and node2 instances are configured to be the preferred nodes, with node2 as the firstpreference and node1 as the second preference. When you perform a backup operation, the operation is firstattempted on node2 because it is the first preferred node. If node2 is not in the state to back up, which couldbe due to multiple reasons such as the plug-in agent is not running on the host, the database instance on thehost is not in the required state for the specified backup type, or the database instance on node2 in a FlexASMconfiguration is not being served by the local ASM instance; then the operation will be attempted on node1.The node3 will not be used for backup because it is not on the list of preferred nodes.
In a Flex ASM setup, Leaf nodes will not be listed as preferred nodes if the cardinality is less than the numbernodes in the RAC cluster. If there is any change in the Flex ASM cluster node roles, you should manuallydiscover so that the preferred nodes are refreshed.
Required database state
The RAC database instances on the preferred nodes must be in the required state for the backup to finishsuccessfully:
• One of the RAC database instances in the configured preferred nodes must be in the open state to createan online backup.
• One of the RAC database instances in the configured preferred nodes must be in the mount state, and allother instances, including other preferred nodes, must be in the mount state or lower to create an offlinemount backup.
• RAC database instances can be in any state, but you must specify the preferred nodes to create an offlineshutdown backup.
How to catalog backups with Oracle Recovery Manager
The backups of Oracle databases can be cataloged with Oracle Recovery Manager (RMAN) to store thebackup information in the Oracle RMAN repository.
The cataloged backups can be used later for block-level restore or tablespace point-in-time recoveryoperations. When you do not need these cataloged backups, you can remove the catalog information.
The database must be in mounted or higher state for cataloging. You can perform cataloging on data backups,archive log backups, and full backups. If cataloging is enabled for a backup of a resource group that hasmultiple databases, cataloging is performed for each database. For Oracle RAC databases, cataloging will beperformed on the preferred node where the database is at least in mounted state.
41
If you want to catalog backups of a RAC database, ensure that no other job is running for thatdatabase. If another job is running, the cataloging operation fails instead of getting queued.
By default, the target database control file is used for cataloging. If you want to add external catalog database,you can configure it by specifying the credential and Transparent Network Substrate (TNS) name of theexternal catalog using the Database Settings wizard from the SnapCenter graphical user interface (GUI). Youcan also configure the external catalog database from the CLI by running the Configure-SmOracleDatabasecommand with the -OracleRmanCatalogCredentialName and -OracleRmanCatalogTnsName options.
If you enabled the cataloging option while creating an Oracle backup policy from the SnapCenter GUI, thebackups are cataloged using Oracle RMAN as a part of the backup operation. You can also perform deferredcataloging of backups by running the Catalog-SmBackupWithOracleRMAN command. After cataloging thebackups, you can run the Get-SmBackupDetails command to obtain the cataloged backup information such asthe tag for cataloged datafiles, the control file catalog path, and the cataloged archive log locations.
If the ASM disk group name is greater than or equal to 16 characters, from SnapCenter 3.0, the naming formatused for the backup is SC_HASHCODEofDISKGROUP_DBSID_BACKUPID. However, If the disk group nameis less than 16 characters, the naming format used for the backup is DISKGROUPNAME_DBSID_BACKUPID,which is the same format used in SnapCenter 2.0.
The HASHCODEofDISKGROUP is an automatically generated number (2 to 10 digit) unique foreach ASM disk group.
You can perform crosschecks to update outdated RMAN repository information about backups whoserepository records do not match their physical status. For example, if a user removes archived logs from diskwith an operating system command, the control file still indicates that the logs are on disk, when in fact they arenot. The crosscheck operation enables you to update the control file with the information. You can enablecrosscheck by running the Set-SmConfigSettings command and assigning the value TRUE to theENABLE_CROSSCHECK parameter. The default value is set to FALSE.
sccli Set-SmConfigSettings-ConfigSettingsTypePlugin-PluginCodeSCO-ConfigSettings
"KEY=ENABLE_CROSSCHECK, VALUE=TRUE"
You can remove the catalog information by running the Uncatalog-SmBackupWithOracleRMAN command. Youcannot remove the catalog information using the SnapCenter GUI. However, information of a cataloged backupis removed while deleting the backup or while deleting the retention and resource group associated with thatcataloged backup.
When you force a deletion of the SnapCenter host, the information of the cataloged backupsassociated with that host are not removed. You must remove information of all the catalogedbackups for that host before forcing the deletion of the host.
If the cataloging and uncataloging fails because the operation time exceeded the time out value specified forthe ORACLE_PLUGIN_RMAN_CATALOG_TIMEOUT parameter, you should modify the value of theparameter by running the following command:
/opt/Netapp/snapcenter/spl/bin/sccli Set-SmConfigSettings-ConfigSettingsType
Plugin -PluginCode SCO-ConfigSettings
"KEY=ORACLE_PLUGIN_RMAN_CATALOG_TIMEOUT,VALUE=user_defined_value"
After modifying the value of the parameter, restart the SnapCenter Plug-in Loader (SPL) service by running thefollowing command:
42

/opt/NetApp/snapcenter/spl/bin/spl restart
The information regarding the parameters that can be used with the command and their descriptions can beobtained by running Get-Help command_name. Alternatively, you can also refer to the SnapCenter SoftwareCommand Reference Guide.
Backup schedules
Backup frequency (schedule type) is specified in policies; a backup schedule is specified in the resource groupconfiguration. The most critical factor in determining a backup frequency or schedule is the rate of change forthe resource and the importance of the data. You might back up a heavily used resource every hour, while youmight back up a rarely used resource once a day. Other factors include the importance of the resource to yourorganization, your Service Level Agreement (SLA), and your Recover Point Objective (RPO).
An SLA defines the level of service expected and addresses many service-related issues, including theavailability and performance of service. An RPO defines the strategy for the age of the files that must berecovered from backup storage for regular operations to resume after a failure. The SLA and RPO contribute tothe data protection strategy.
Even for a heavily used resource, there is no requirement to run a full backup more than once or twice a day.For example, regular transaction log backups might be sufficient to ensure that you have the backups youneed. The more often you back up your databases, the fewer transaction logs SnapCenter has to use atrestore time, which can result in faster restore operations.
Backup schedules have two parts, as follows:
• Backup frequency
Backup frequency (how often backups are to be performed), called schedule type for some plug-ins, is partof a policy configuration. You can select hourly, daily, weekly, or monthly as the backup frequency for thepolicy. If you do not select any of these frequencies, then the policy created is an on-demand-only policy.You can access policies by clicking Settings > Policies.
• Backup schedules
Backup schedules (exactly when backups are to be performed) are part of a resource group configuration.For example, if you have a resource group that has a policy configured for weekly backups, you mightconfigure the schedule to back up every Thursday at 10:00 PM. You can access resource group schedulesby clicking Resources > Resource Groups.
Backup naming conventions
You can either use the default Snapshot copy naming convention or use a customized naming convention. Thedefault backup naming convention adds a timestamp to Snapshot copy names that helps you identify when thecopies were created.
The Snapshot copy uses the following default naming convention:
resourcegroupname_hostname_timestamp
You should name your backup resource groups logically, as in the following example:
dts1_mach1x88_03-12-2015_23.17.26
43
In this example, the syntax elements have the following meanings:
• dts1 is the resource group name.
• mach1x88 is the host name.
• 03-12-2015_23.17.26 is the date and timestamp.
Alternatively, you can specify the Snapshot copy name format while protecting resources or resource groupsby selecting Use custom name format for Snapshot copy. For example,customtext_resourcegroup_policy_hostname or resourcegroup_hostname. By default, the time stamp suffix isadded to the Snapshot copy name.
Backup retention options
You can choose either the number of days for which to retain backup copies or specify the number of backupcopies you want to retain, up to a ONTAP maximum of 255 copies. For example, your organization mightrequire that you retain 10 days of backup copies or 130 backup copies.
While creating a policy, you can specify the retention options for the backup type and the schedule type.
If you set up SnapMirror replication, the retention policy is mirrored on the destination volume.
SnapCenter deletes the retained backups that have retention labels that match the schedule type. If theschedule type was changed for the resource or resource group, backups with the old schedule type label mightstill remain on the system.
For long-term retention of backup copies, you should use SnapVault backup.
Verify backup copy using the primary or secondary storage volume
You can verify backup copies on the primary storage volume or on either the SnapMirror or SnapVaultsecondary storage volume. Verification using a secondary storage volume reduces load on the primary storagevolume.
When you verify a backup that is either on the primary or secondary storage volume, all the primary and thesecondary Snapshot copies are marked as verified.
SnapRestore license is required to verify backup copies on SnapMirror and SnapVault secondary storagevolume.
Predefined environment variables for backup specific prescript and postscript
SnapCenter allows you to use the predefined environment variables when you executethe prescript and postscript while creating backup policies. This functionality is supportedfor all Oracle configurations except for VMDK.
SnapCenter predefines the values of the parameters that will be directly accessible in the environment wherethe shell scripts are executed. You do not have to manually specify the values of these parameters whenexecuting the scripts.
Supported predefined environment variables for creating backup policy
• SC_JOB_ID specifies the job ID of the operation.
44
Example: 256
• SC_ORACLE_SID specifies the system identifier of the database.
If the operation involves multiple databases, the parameter will contain database names separated by pipe.
This parameter will be populated for application volumes.
Example: NFSB32|NFSB31
• SC_HOST specifies the host name of the database.
For RAC, host name will be the name of the host on which backup is performed.
This parameter will be populated for application volumes.
Example: scsmohost2.gdl.englabe.netapp.com
• SC_OS_USER specifies the operating system owner of the database.
The data will be formatted as <db1>@<osuser1>|<db2>@<osuser2>.
Example: NFSB31@oracle|NFSB32@oracle
• SC_OS_GROUP specifies the operating system group of the database.
The data will be formatted as <db1>@<osgroup1>|<db2>@<osgroup2>.
Example: NFSB31@install|NFSB32@oinstall
• SC_BACKUP_TYPE" specifies the backup type (online full, online data, online log, offline shutdown, offlinemount)
Examples:
◦ For full backup: ONLINEFULL
◦ data only backup: ONLINEDATA
◦ For log only backup: ONLINELOG
• SC_BACKUP_NAME specifies the name of the backup.
This parameter will be populated for application volumes.
Example: DATA@RG2_scspr2417819002_07-20-2021_12.16.48.9267_0|LOG@RG2_scspr2417819002_07-20-2021_12.16.48.9267_1|AV@RG2_scspr2417819002_07-20-2021_12.16.48.9267
• SC_BACKUP_ID specifies the backup ID.
This parameter will be populated for application volumes.
Example: DATA@203|LOG@205|AV@207
• SC_ORACLE_HOME specifies the path of the Oracle home directory.
Example:
45
NFSB32@/ora01/app/oracle/product/18.1.0/db_1|NFSB31@/ora01/app/oracle/product/18.1.0/db_1
• SC_BACKUP_RETENTION specifies the retention period defined in the policy.
Examples:
◦ For full backup: Hourly|DATA@DAYS:3|LOG@COUNT:4
◦ For on-demand data only backup: Ondemand|DATA@COUNT:2
◦ For on-demand log only backup: Ondemand|LOG@COUNT:2
• SC_RESOURCE_GROUP_NAME specifies the name of the resource group.
Example: RG1
• SC_BACKUP_POLICY_NAME specifies the name of the backup policy.
Example: backup_policy
• SC_AV_NAME specifies the names of the application volumes.
Example: AV1|AV2
• SC_PRIMARY_DATA_VOLUME_FULL_PATH specifies the storage mapping of SVM to volume for datafiles directory. It will be the name of the parent volume for luns and qtrees.
The data will be formatted as <db1>@<SVM1:volume1>|<db2>@<SVM2:volume2>.
Examples:
◦ For 2 databases in the same resource group:NFSB32@buck:/vol/scspr2417819002_NFS_CDB_NFSB32_DATA|NFSB31@buck:/vol/scspr2417819002_NFS_CDB_NFSB31_DATA
◦ For single database with data files spread across multiple volumes:buck:/vol/scspr2417819002_NFS_CDB_NFSB31_DATA,herculus:/vol/scspr2417819002_NFS
• SC_PRIMARY_ARCHIVELOGS_VOLUME_FULL_PATH specifies the storage mapping of SVM to volumefor logs file directory. It will be the name of the parent volume for luns and qtrees.
Examples:
◦ For single database instance: buck:/vol/scspr2417819002_NFS_CDB_NFSB31_REDO
◦ For multiple database instances:NFSB31@buck:/vol/scspr2417819002_NFS_CDB_NFSB31_REDO|NFSB32@buck:/vol/scspr2417819002_NFS_CDB_NFSB32_REDO
• SC_PRIMARY_FULL_SNAPSHOT_NAME_FOR_TAG specifies the list of Snapshots containing storagesystem name and volume name.
Examples:
◦ For single database instance:buck:/vol/scspr2417819002_NFS_CDB_NFSB32_DATA/RG2_scspr2417819002_07-21-2021_02.28.26.3973_0,buck:/vol/scspr2417819002_NFS_CDB_NFSB32_REDO/RG2_scspr2417819002_07-21-2021_02.28.26.3973_1
◦ For multiple database instances:
46
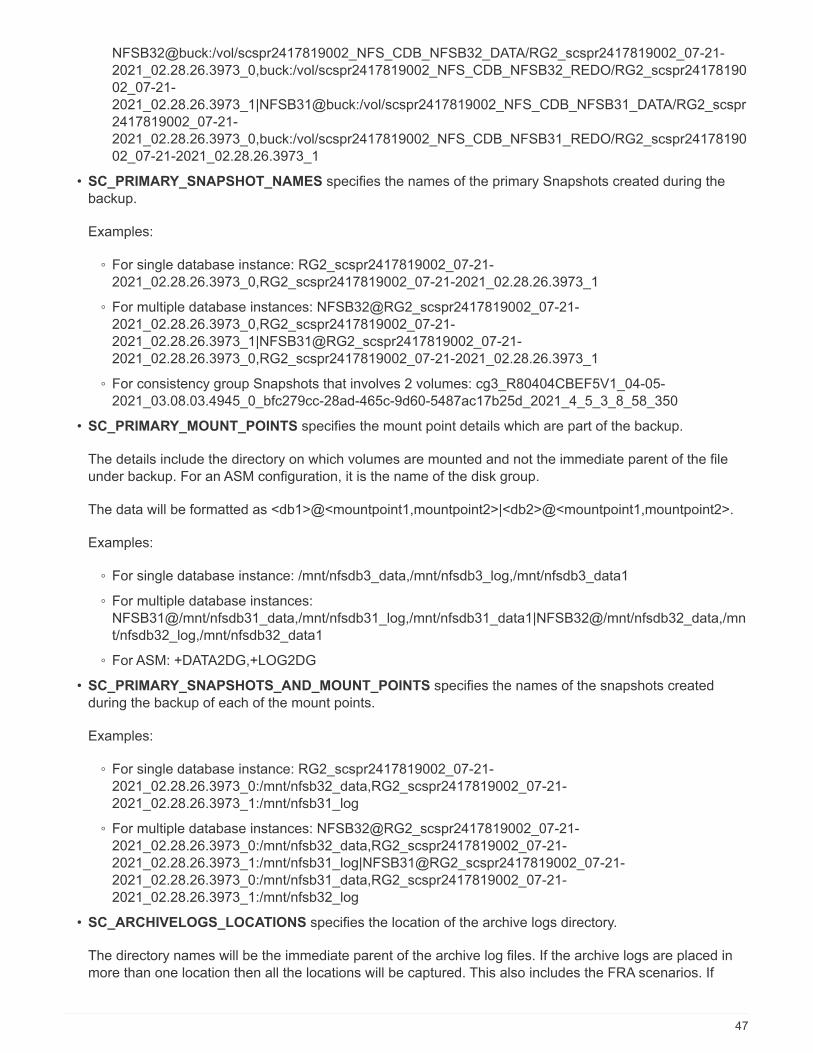
NFSB32@buck:/vol/scspr2417819002_NFS_CDB_NFSB32_DATA/RG2_scspr2417819002_07-21-2021_02.28.26.3973_0,buck:/vol/scspr2417819002_NFS_CDB_NFSB32_REDO/RG2_scspr2417819002_07-21-2021_02.28.26.3973_1|NFSB31@buck:/vol/scspr2417819002_NFS_CDB_NFSB31_DATA/RG2_scspr2417819002_07-21-2021_02.28.26.3973_0,buck:/vol/scspr2417819002_NFS_CDB_NFSB31_REDO/RG2_scspr2417819002_07-21-2021_02.28.26.3973_1
• SC_PRIMARY_SNAPSHOT_NAMES specifies the names of the primary Snapshots created during thebackup.
Examples:
◦ For single database instance: RG2_scspr2417819002_07-21-2021_02.28.26.3973_0,RG2_scspr2417819002_07-21-2021_02.28.26.3973_1
◦ For multiple database instances: NFSB32@RG2_scspr2417819002_07-21-2021_02.28.26.3973_0,RG2_scspr2417819002_07-21-2021_02.28.26.3973_1|NFSB31@RG2_scspr2417819002_07-21-2021_02.28.26.3973_0,RG2_scspr2417819002_07-21-2021_02.28.26.3973_1
◦ For consistency group Snapshots that involves 2 volumes: cg3_R80404CBEF5V1_04-05-2021_03.08.03.4945_0_bfc279cc-28ad-465c-9d60-5487ac17b25d_2021_4_5_3_8_58_350
• SC_PRIMARY_MOUNT_POINTS specifies the mount point details which are part of the backup.
The details include the directory on which volumes are mounted and not the immediate parent of the fileunder backup. For an ASM configuration, it is the name of the disk group.
The data will be formatted as <db1>@<mountpoint1,mountpoint2>|<db2>@<mountpoint1,mountpoint2>.
Examples:
◦ For single database instance: /mnt/nfsdb3_data,/mnt/nfsdb3_log,/mnt/nfsdb3_data1
◦ For multiple database instances:NFSB31@/mnt/nfsdb31_data,/mnt/nfsdb31_log,/mnt/nfsdb31_data1|NFSB32@/mnt/nfsdb32_data,/mnt/nfsdb32_log,/mnt/nfsdb32_data1
◦ For ASM: +DATA2DG,+LOG2DG
• SC_PRIMARY_SNAPSHOTS_AND_MOUNT_POINTS specifies the names of the snapshots createdduring the backup of each of the mount points.
Examples:
◦ For single database instance: RG2_scspr2417819002_07-21-2021_02.28.26.3973_0:/mnt/nfsb32_data,RG2_scspr2417819002_07-21-2021_02.28.26.3973_1:/mnt/nfsb31_log
◦ For multiple database instances: NFSB32@RG2_scspr2417819002_07-21-2021_02.28.26.3973_0:/mnt/nfsb32_data,RG2_scspr2417819002_07-21-2021_02.28.26.3973_1:/mnt/nfsb31_log|NFSB31@RG2_scspr2417819002_07-21-2021_02.28.26.3973_0:/mnt/nfsb31_data,RG2_scspr2417819002_07-21-2021_02.28.26.3973_1:/mnt/nfsb32_log
• SC_ARCHIVELOGS_LOCATIONS specifies the location of the archive logs directory.
The directory names will be the immediate parent of the archive log files. If the archive logs are placed inmore than one location then all the locations will be captured. This also includes the FRA scenarios. If
47
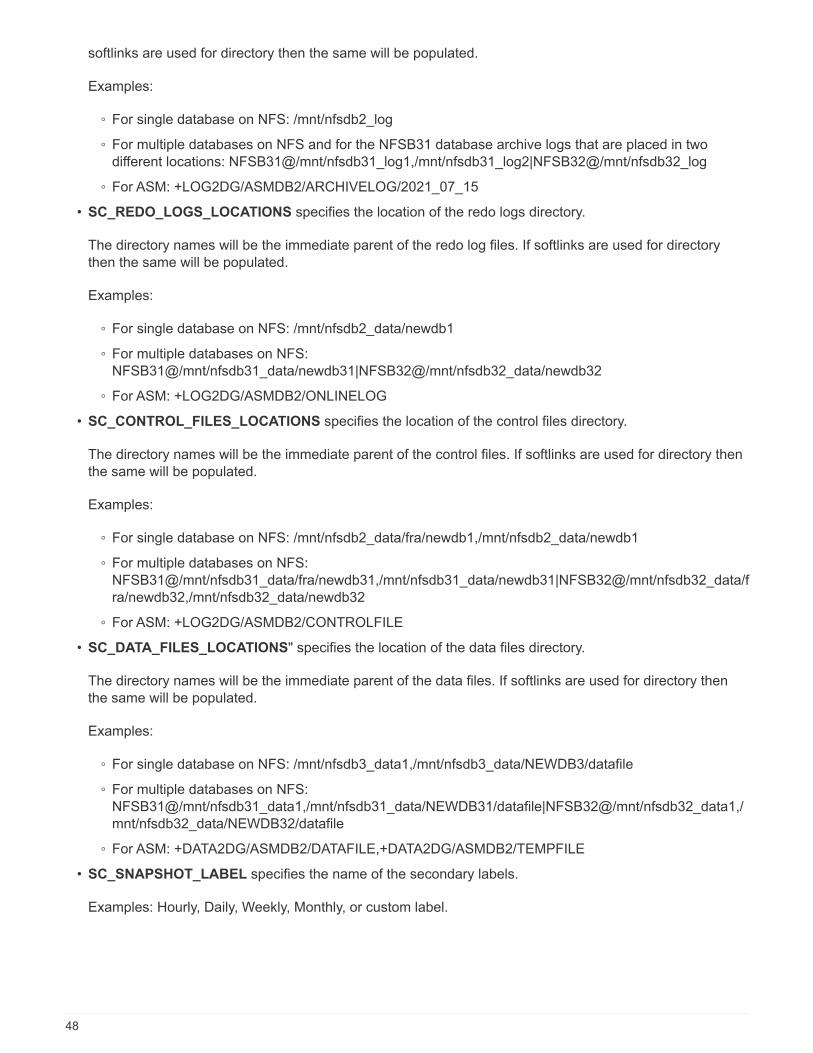
softlinks are used for directory then the same will be populated.
Examples:
◦ For single database on NFS: /mnt/nfsdb2_log
◦ For multiple databases on NFS and for the NFSB31 database archive logs that are placed in twodifferent locations: NFSB31@/mnt/nfsdb31_log1,/mnt/nfsdb31_log2|NFSB32@/mnt/nfsdb32_log
◦ For ASM: +LOG2DG/ASMDB2/ARCHIVELOG/2021_07_15
• SC_REDO_LOGS_LOCATIONS specifies the location of the redo logs directory.
The directory names will be the immediate parent of the redo log files. If softlinks are used for directorythen the same will be populated.
Examples:
◦ For single database on NFS: /mnt/nfsdb2_data/newdb1
◦ For multiple databases on NFS:NFSB31@/mnt/nfsdb31_data/newdb31|NFSB32@/mnt/nfsdb32_data/newdb32
◦ For ASM: +LOG2DG/ASMDB2/ONLINELOG
• SC_CONTROL_FILES_LOCATIONS specifies the location of the control files directory.
The directory names will be the immediate parent of the control files. If softlinks are used for directory thenthe same will be populated.
Examples:
◦ For single database on NFS: /mnt/nfsdb2_data/fra/newdb1,/mnt/nfsdb2_data/newdb1
◦ For multiple databases on NFS:NFSB31@/mnt/nfsdb31_data/fra/newdb31,/mnt/nfsdb31_data/newdb31|NFSB32@/mnt/nfsdb32_data/fra/newdb32,/mnt/nfsdb32_data/newdb32
◦ For ASM: +LOG2DG/ASMDB2/CONTROLFILE
• SC_DATA_FILES_LOCATIONS" specifies the location of the data files directory.
The directory names will be the immediate parent of the data files. If softlinks are used for directory thenthe same will be populated.
Examples:
◦ For single database on NFS: /mnt/nfsdb3_data1,/mnt/nfsdb3_data/NEWDB3/datafile
◦ For multiple databases on NFS:NFSB31@/mnt/nfsdb31_data1,/mnt/nfsdb31_data/NEWDB31/datafile|NFSB32@/mnt/nfsdb32_data1,/mnt/nfsdb32_data/NEWDB32/datafile
◦ For ASM: +DATA2DG/ASMDB2/DATAFILE,+DATA2DG/ASMDB2/TEMPFILE
• SC_SNAPSHOT_LABEL specifies the name of the secondary labels.
Examples: Hourly, Daily, Weekly, Monthly, or custom label.
48
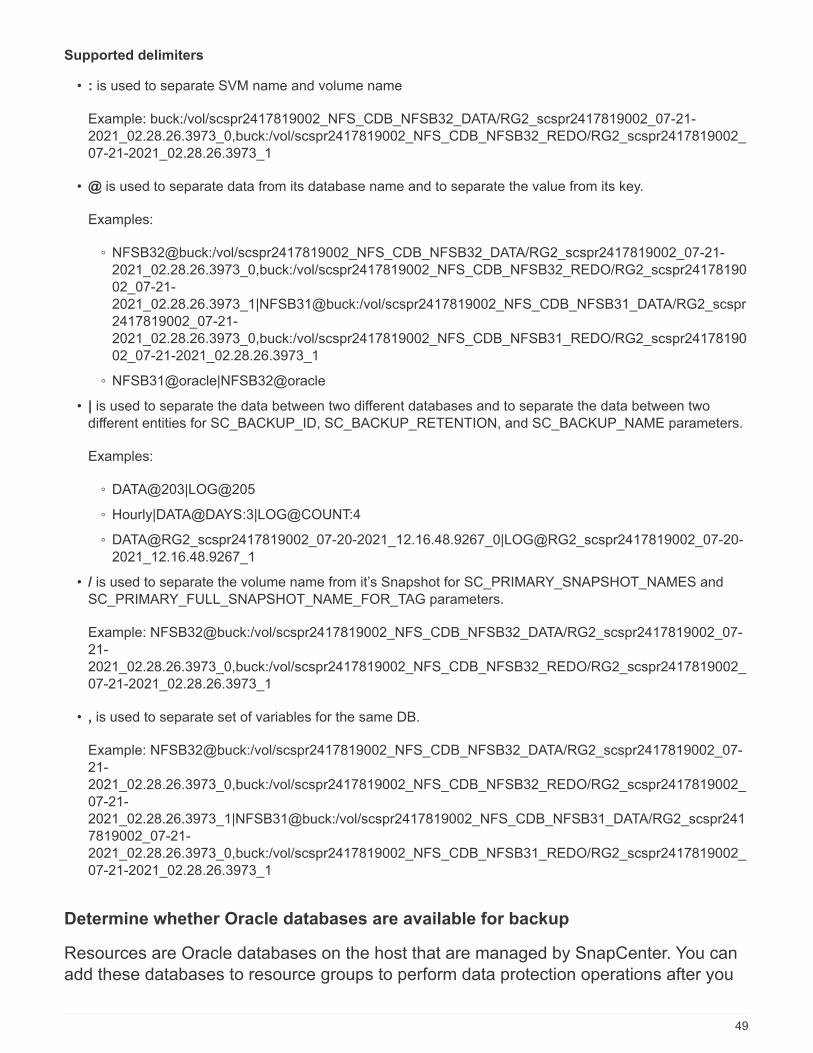
Supported delimiters
• : is used to separate SVM name and volume name
Example: buck:/vol/scspr2417819002_NFS_CDB_NFSB32_DATA/RG2_scspr2417819002_07-21-2021_02.28.26.3973_0,buck:/vol/scspr2417819002_NFS_CDB_NFSB32_REDO/RG2_scspr2417819002_07-21-2021_02.28.26.3973_1
• @ is used to separate data from its database name and to separate the value from its key.
Examples:
◦ NFSB32@buck:/vol/scspr2417819002_NFS_CDB_NFSB32_DATA/RG2_scspr2417819002_07-21-2021_02.28.26.3973_0,buck:/vol/scspr2417819002_NFS_CDB_NFSB32_REDO/RG2_scspr2417819002_07-21-2021_02.28.26.3973_1|NFSB31@buck:/vol/scspr2417819002_NFS_CDB_NFSB31_DATA/RG2_scspr2417819002_07-21-2021_02.28.26.3973_0,buck:/vol/scspr2417819002_NFS_CDB_NFSB31_REDO/RG2_scspr2417819002_07-21-2021_02.28.26.3973_1
◦ NFSB31@oracle|NFSB32@oracle
• | is used to separate the data between two different databases and to separate the data between twodifferent entities for SC_BACKUP_ID, SC_BACKUP_RETENTION, and SC_BACKUP_NAME parameters.
Examples:
◦ DATA@203|LOG@205
◦ Hourly|DATA@DAYS:3|LOG@COUNT:4
◦ DATA@RG2_scspr2417819002_07-20-2021_12.16.48.9267_0|LOG@RG2_scspr2417819002_07-20-2021_12.16.48.9267_1
• / is used to separate the volume name from it’s Snapshot for SC_PRIMARY_SNAPSHOT_NAMES andSC_PRIMARY_FULL_SNAPSHOT_NAME_FOR_TAG parameters.
Example: NFSB32@buck:/vol/scspr2417819002_NFS_CDB_NFSB32_DATA/RG2_scspr2417819002_07-21-2021_02.28.26.3973_0,buck:/vol/scspr2417819002_NFS_CDB_NFSB32_REDO/RG2_scspr2417819002_07-21-2021_02.28.26.3973_1
• , is used to separate set of variables for the same DB.
Example: NFSB32@buck:/vol/scspr2417819002_NFS_CDB_NFSB32_DATA/RG2_scspr2417819002_07-21-2021_02.28.26.3973_0,buck:/vol/scspr2417819002_NFS_CDB_NFSB32_REDO/RG2_scspr2417819002_07-21-2021_02.28.26.3973_1|NFSB31@buck:/vol/scspr2417819002_NFS_CDB_NFSB31_DATA/RG2_scspr2417819002_07-21-2021_02.28.26.3973_0,buck:/vol/scspr2417819002_NFS_CDB_NFSB31_REDO/RG2_scspr2417819002_07-21-2021_02.28.26.3973_1
Determine whether Oracle databases are available for backup
Resources are Oracle databases on the host that are managed by SnapCenter. You canadd these databases to resource groups to perform data protection operations after you
49
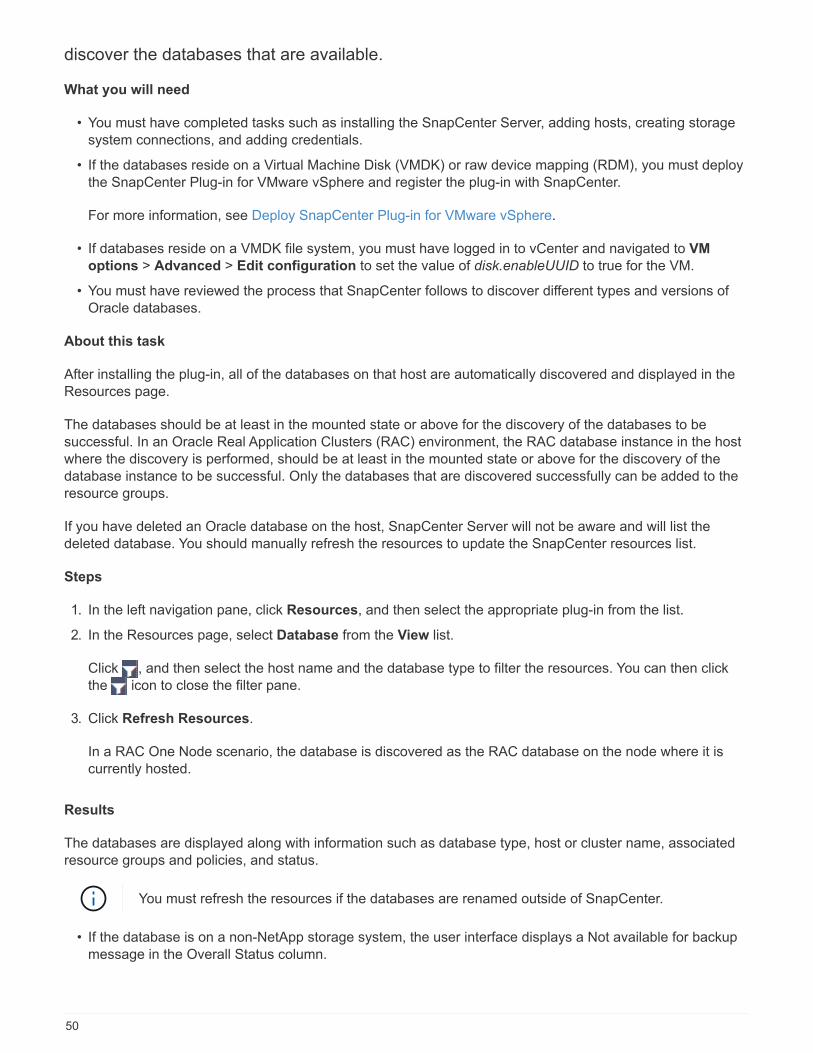
discover the databases that are available.
What you will need
• You must have completed tasks such as installing the SnapCenter Server, adding hosts, creating storagesystem connections, and adding credentials.
• If the databases reside on a Virtual Machine Disk (VMDK) or raw device mapping (RDM), you must deploythe SnapCenter Plug-in for VMware vSphere and register the plug-in with SnapCenter.
For more information, see Deploy SnapCenter Plug-in for VMware vSphere.
• If databases reside on a VMDK file system, you must have logged in to vCenter and navigated to VM
options > Advanced > Edit configuration to set the value of disk.enableUUID to true for the VM.
• You must have reviewed the process that SnapCenter follows to discover different types and versions ofOracle databases.
About this task
After installing the plug-in, all of the databases on that host are automatically discovered and displayed in theResources page.
The databases should be at least in the mounted state or above for the discovery of the databases to besuccessful. In an Oracle Real Application Clusters (RAC) environment, the RAC database instance in the hostwhere the discovery is performed, should be at least in the mounted state or above for the discovery of thedatabase instance to be successful. Only the databases that are discovered successfully can be added to theresource groups.
If you have deleted an Oracle database on the host, SnapCenter Server will not be aware and will list thedeleted database. You should manually refresh the resources to update the SnapCenter resources list.
Steps
1. In the left navigation pane, click Resources, and then select the appropriate plug-in from the list.
2. In the Resources page, select Database from the View list.
Click , and then select the host name and the database type to filter the resources. You can then clickthe icon to close the filter pane.
3. Click Refresh Resources.
In a RAC One Node scenario, the database is discovered as the RAC database on the node where it iscurrently hosted.
Results
The databases are displayed along with information such as database type, host or cluster name, associatedresource groups and policies, and status.
You must refresh the resources if the databases are renamed outside of SnapCenter.
• If the database is on a non-NetApp storage system, the user interface displays a Not available for backupmessage in the Overall Status column.
50
You cannot perform data protection operations on the database that is on a non-NetApp storage system.
• If the database is on a NetApp storage system and not protected, the user interface displays a Notprotected message in the Overall Status column.
• If the database is on a NetApp storage system and protected, the user interface displays an Available forbackup message in the Overall Status column.
If you have enabled an Oracle database authentication, a red padlock icon is shown in theresources view. You must configure database credentials to be able to protect the database oradd it to the resource group to perform data protection operations.
Create backup policies for Oracle databases
Before you use SnapCenter to back up Oracle database resources, you must create abackup policy for the resource or the resource group that you want to back up. A backuppolicy is a set of rules that governs how you manage, schedule, and retain backups. Youcan also specify the replication, script, and backup type settings. Creating a policy savestime when you want to reuse the policy on another resource or resource group.
What you will need
• You must have defined your backup strategy.
• You must have prepared for data protection by completing tasks such as installing SnapCenter, addinghosts, discovering databases, and creating storage system connections.
• If you are replicating Snapshot copies to a mirror or vault secondary storage, the SnapCenter administratormust have assigned the SVMs to you for both the source and destination volumes.
Steps
1. In the left navigation pane, click Settings.
2. In the Settings page, click Policies.
3. Select Oracle Database from the drop-down list.
4. Click New.
5. In the Name page, enter the policy name and description.
6. In the Backup Type page, perform the following steps:
◦ If you want to create an online backup, select Online backup.
You must specify whether you want to back up all the datafiles, control files, and archive log files, onlydatafiles and control files, or only archive log files.
◦ If you want to create an offline backup, select Offline backup, and then select one of the followingoptions:
▪ If you want to create an offline backup when the database is in mounted state, select Mount.
▪ If you want to create an offline shutdown backup by changing the database to shutdown state,select Shutdown.
If you are having pluggable databases (PDBs), and want to save the state of the PDBs beforecreating the backup, you must select Save state of PDBs. This enables you to bring the PDBs to
51
their original state after the backup is created.
◦ Specify the schedule frequency by selecting On demand, Hourly, Daily, Weekly, or Monthly.
You can specify the schedule (start date and end date) for the backup operation whilecreating a resource group. This enables you to create resource groups that share thesame policy and backup frequency, but enables you to assign different backupschedules to each policy.
If you have scheduled for 2:00 a.m., the schedule will not be triggered during daylightsaving time (DST).
◦ If you want to catalog backup using Oracle Recovery Manager (RMAN), select Catalog backup with
Oracle Recovery Manager (RMAN).
You can perform deferred cataloging for one backup at a time either using the GUI or using theSnapCenter CLI command Catalog-SmBackupWithOracleRMAN.
If you want to catalog backups of a RAC database, ensure that no other job is runningfor that database. If another job is running, the cataloging operation fails instead ofgetting queued.
◦ If you want to prune archive logs after backup, select Prune archive logs after backup.
Pruning of archive logs from the archive log destination that is unconfigured in thedatabase, will be skipped.
If you are using Oracle Standard Edition, you can use LOG_ARCHIVE_DEST andLOG_ARCHIVE_DUPLEX_DEST parameters while performing archive log backup.
◦ You can delete archive logs only if you have selected the archive log files as part of your backup.
You must ensure that all the nodes in an RAC environment can access all the archivelog locations for the delete operation to be successful.
If you want to… Then…
Delete all archive logs Select Delete all archive logs.
Delete archive logs that are older Select Delete archive logs older than, and thenspecify the age of the archive logs that are to bedeleted in days and hours.
Delete archive logs from all destinations Select Delete archive logs from all the
destinations.
Delete the archive logs from the log destinationsthat are part of the backup
Select Delete archive logs from the
destinations which are part of backup.
52
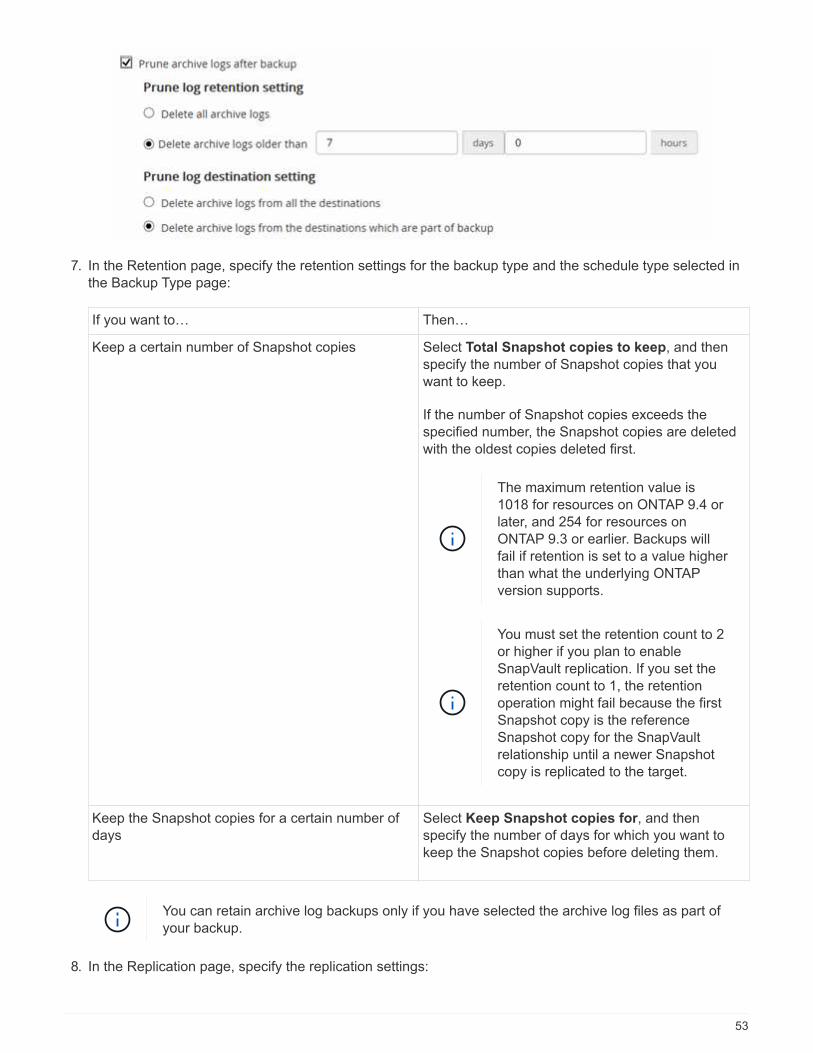
7. In the Retention page, specify the retention settings for the backup type and the schedule type selected inthe Backup Type page:
If you want to… Then…
Keep a certain number of Snapshot copies Select Total Snapshot copies to keep, and thenspecify the number of Snapshot copies that youwant to keep.
If the number of Snapshot copies exceeds thespecified number, the Snapshot copies are deletedwith the oldest copies deleted first.
The maximum retention value is1018 for resources on ONTAP 9.4 orlater, and 254 for resources onONTAP 9.3 or earlier. Backups willfail if retention is set to a value higherthan what the underlying ONTAPversion supports.
You must set the retention count to 2or higher if you plan to enableSnapVault replication. If you set theretention count to 1, the retentionoperation might fail because the firstSnapshot copy is the referenceSnapshot copy for the SnapVaultrelationship until a newer Snapshotcopy is replicated to the target.
Keep the Snapshot copies for a certain number ofdays
Select Keep Snapshot copies for, and thenspecify the number of days for which you want tokeep the Snapshot copies before deleting them.
You can retain archive log backups only if you have selected the archive log files as part ofyour backup.
8. In the Replication page, specify the replication settings:
53
For this field… Do this…
Update SnapMirror after creating a local Snapshotcopy
Select this field to create mirror copies of thebackup sets on another volume (SnapMirrorreplication).
Update SnapVault after creating a local Snapshotcopy
Select this option to perform disk-to-disk backupreplication (SnapVault backups).
Secondary policy label Select a Snapshot label.
Depending on the Snapshot copy label that youselect, ONTAP applies the secondary Snapshotcopy retention policy that matches the label.
If you have selected Update
SnapMirror after creating a local
Snapshot copy, you can optionallyspecify the secondary policy label.However, if you have selectedUpdate SnapVault after creating a
local Snapshot copy, you shouldspecify the secondary policy label.
Error retry count Enter the maximum number of replication attemptsthat can be allowed before the operation stops.
You should configure SnapMirror retention policy in ONTAP for the secondary storage toavoid reaching the maximum limit of Snapshot copies on the secondary storage.
9. In the Script page, enter the path and the arguments of the prescript or postscript that you want to runbefore or after the backup operation, respectively.
You must store the prescripts and postscripts either in /var/opt/snapcenter/spl/scripts or in any folder insidethis path. By default, the /var/opt/snapcenter/spl/scripts path is populated. If you have created any foldersinside this path to store the scripts, you must specify those folders in the path.
You can also specify the script timeout value. The default value is 60 seconds.
SnapCenter allows you to use the predefined environment variables when you execute the prescript andpostscript. Learn more
10. In the Verification page, perform the following steps:
a. Select the backup schedule for which you want to perform the verification operation.
b. In the Verification script commands section, enter the path and the arguments of the prescript orpostscript that you want to run before or after the verification operation, respectively.
You must store the prescripts and postscripts either in /var/opt/snapcenter/spl/scripts or in any folderinside this path. By default, the /var/opt/snapcenter/spl/scripts path is populated. If you have createdany folders inside this path to store the scripts, you must specify those folders in the path.
54
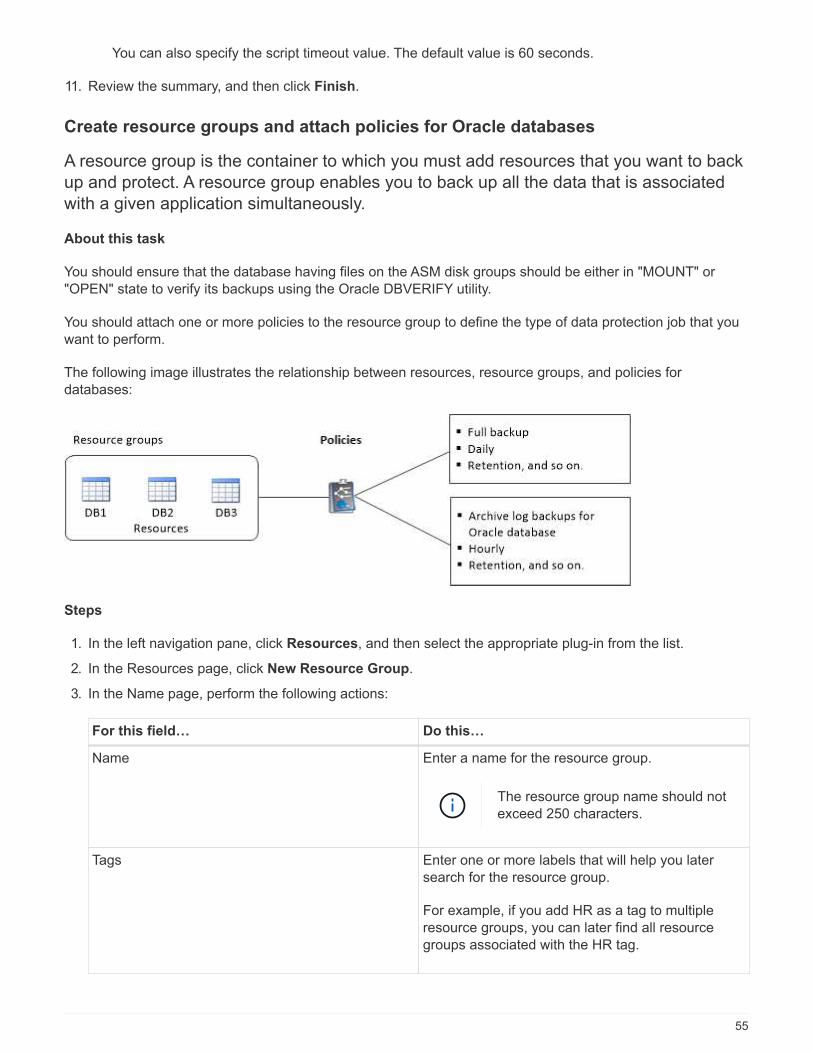
You can also specify the script timeout value. The default value is 60 seconds.
11. Review the summary, and then click Finish.
Create resource groups and attach policies for Oracle databases
A resource group is the container to which you must add resources that you want to backup and protect. A resource group enables you to back up all the data that is associatedwith a given application simultaneously.
About this task
You should ensure that the database having files on the ASM disk groups should be either in "MOUNT" or"OPEN" state to verify its backups using the Oracle DBVERIFY utility.
You should attach one or more policies to the resource group to define the type of data protection job that youwant to perform.
The following image illustrates the relationship between resources, resource groups, and policies fordatabases:
Steps
1. In the left navigation pane, click Resources, and then select the appropriate plug-in from the list.
2. In the Resources page, click New Resource Group.
3. In the Name page, perform the following actions:
For this field… Do this…
Name Enter a name for the resource group.
The resource group name should notexceed 250 characters.
Tags Enter one or more labels that will help you latersearch for the resource group.
For example, if you add HR as a tag to multipleresource groups, you can later find all resourcegroups associated with the HR tag.
55
For this field… Do this…
Use custom name format for Snapshot copy Select this check box, and enter a custom nameformat that you want to use for the Snapshot copyname.
For example, customtext_resourcegroup_policy_hostname or resourcegroup_hostname. By default, a timestamp isappended to the Snapshot copy name.
Exclude archive log destinations from backup Specify the destinations of the archive log files thatyou do not want to back up.
4. In the Resources page, select an Oracle database host name from the Host drop-down list.
The resources are listed in the Available Resources section only if the resource isdiscovered successfully. If you have recently added resources, they will appear on the list ofavailable resources only after you refresh your resource list.
5. Select the resources from the Available Resources section and move them to the Selected Resourcessection.
You can add databases from both Linux and AIX hosts in a single resource group.
6. In the Policies page, perform the following steps:
a. Select one or more policies from the drop-down list.
You can also create a policy by clicking .
In the Configure schedules for selected policies section, the selected policies are listed.
b.Click in the Configure Schedules column for the policy for which you want to configure aschedule.
c. In the Add schedules for policy policy_name window, configure the schedule, and then click OK.
Where, policy_name is the name of the policy that you have selected.
The configured schedules are listed in the Applied Schedules column.
Third party backup schedules are not supported when they overlap with SnapCenter backup schedules.
7. On the Verification page, perform the following steps:
a. Click Load locators to load the SnapMirror or SnapVault volumes to perform verification on secondarystorage.
b.Click in the Configure Schedules column to configure the verification schedule for all theschedule types of the policy.
56
c. In the Add Verification Schedules policy_name dialog box, perform the following actions:
If you want to… Do this…
Run verification after backup Select Run verification after backup.
Schedule a verification Select Run scheduled verification and thenselect the schedule type from the drop-down list.
d. Select Verify on secondary location to verify your backups on secondary storage system.
e. Click OK.
The configured verification schedules are listed in the Applied Schedules column.
8. In the Notification page, from the Email preference drop-down list, select the scenarios in which you wantto send the emails.
You must also specify the sender and receiver email addresses, and the subject of the email. If you want toattach the report of the operation performed on the resource group, select Attach Job Report.
For email notification, you must have specified the SMTP server details using the either theGUI or the PowerShell command Set-SmSmtpServer.
9. Review the summary, and then click Finish.
Requirements for backing up an Oracle database
Before backing up an Oracle database, you should ensure that prerequisites arecompleted.
• You must have created a resource group with a policy attached.
• If you want to back up a resource that has a SnapMirror relationship with a secondary storage, the ONTAProle assigned to the storage user should include the “snapmirror all” privilege. However, if you are using the“vsadmin” role, then the “snapmirror all” privilege is not required.
• You must have assigned the aggregate that is being used by the backup operation to the storage virtualmachine (SVM) used by the database.
• You should have verified that all data volumes and archive log volumes belonging to the database areprotected if secondary protection is enabled for that database.
• You should have verified that the database that has files on the ASM disk groups should be in either“MOUNT” or “OPEN” state to verify its backups using the Oracle DBVERIFY utility.
• You should have verified that the volume mount point length does not exceed 240 characters.
• You should increase value of RESTTimeout to 86400000 seconds in C:\Program Files\NetApp
\SMCore\SMCoreServiceHost.exe.config file in the SnapCenter Server host, if the database being backedup is large (size in TBs).
While modifying the values ensure that there are no running jobs and restart the SnapCenter SMCoreservice after increasing the value.
57
Back up Oracle resources
If a resource is not part of any resource group, you can back up the resource from theResources page.
Steps
1. In the left navigation pane, click Resources, and then select the appropriate plug-in from the list.
2. In the Resources page, select Database from the View list.
3. Click , and then select the host name and the database type to filter the resources.
You can then click to close the filter pane.
4. Select the database that you want to back up.
The Database-Protect page is displayed.
5. In the Resource page, perform the following actions:
For this field… Do this…
Use custom name format for Snapshot copy Select this check box, and then enter a customname format that you want to use for the Snapshotcopy name.
For example, customtext__policy_hostname orresource_hostname. By default, a timestamp isappended to the Snapshot copy name.
Exclude archive log destinations from backup Specify the destinations of the archive log files thatyou do not want to back up.
6. In the Policies page, perform the following steps:
a. Select one or more policies from the drop-down list.
You can also create a policy by clicking .
In the Configure schedules for selected policies section, the selected policies are listed.
b.Click in the Configure Schedules column for the policy for which you want to configure aschedule.
c. In the Add schedules for policy policy_name window, configure the schedule, and then click OK.
policy_name is the name of the policy that you have selected.
The configured schedules are listed in the Applied Schedules column.
7. In the Verification page, perform the following steps:
a. Click Load locators to load the SnapMirror or SnapVault volumes to perform verification on secondary
58
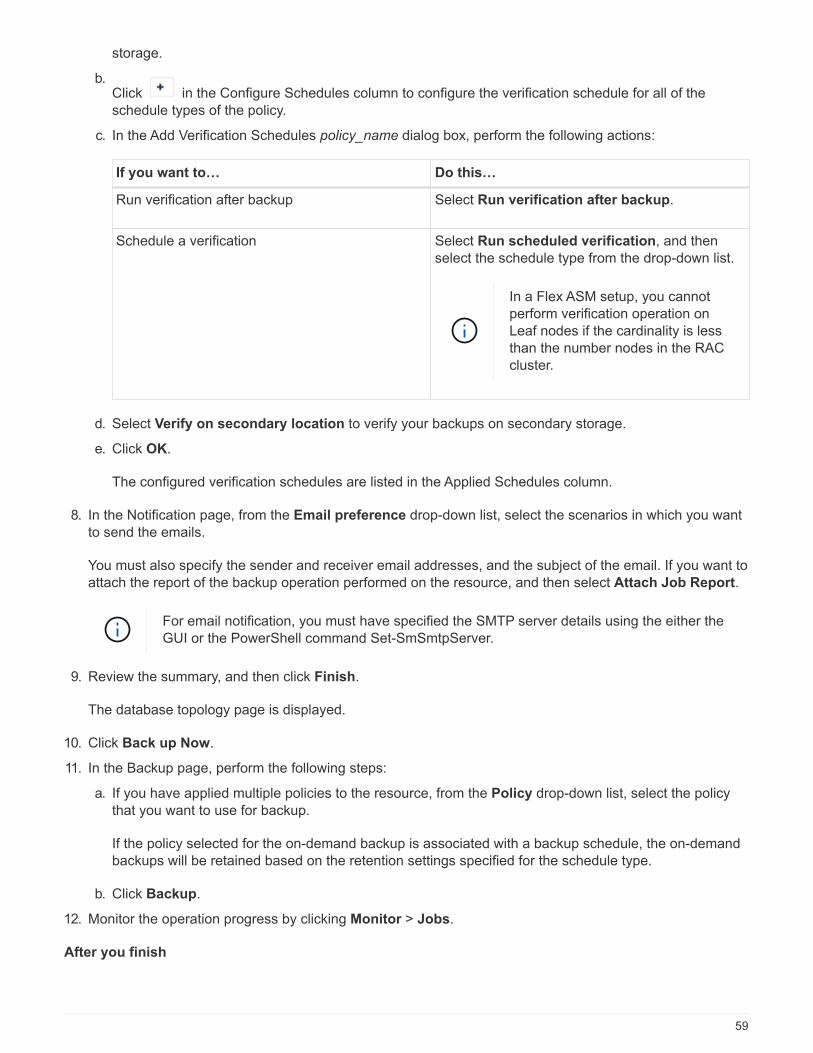
storage.
b.Click in the Configure Schedules column to configure the verification schedule for all of theschedule types of the policy.
c. In the Add Verification Schedules policy_name dialog box, perform the following actions:
If you want to… Do this…
Run verification after backup Select Run verification after backup.
Schedule a verification Select Run scheduled verification, and thenselect the schedule type from the drop-down list.
In a Flex ASM setup, you cannotperform verification operation onLeaf nodes if the cardinality is lessthan the number nodes in the RACcluster.
d. Select Verify on secondary location to verify your backups on secondary storage.
e. Click OK.
The configured verification schedules are listed in the Applied Schedules column.
8. In the Notification page, from the Email preference drop-down list, select the scenarios in which you wantto send the emails.
You must also specify the sender and receiver email addresses, and the subject of the email. If you want toattach the report of the backup operation performed on the resource, and then select Attach Job Report.
For email notification, you must have specified the SMTP server details using the either theGUI or the PowerShell command Set-SmSmtpServer.
9. Review the summary, and then click Finish.
The database topology page is displayed.
10. Click Back up Now.
11. In the Backup page, perform the following steps:
a. If you have applied multiple policies to the resource, from the Policy drop-down list, select the policythat you want to use for backup.
If the policy selected for the on-demand backup is associated with a backup schedule, the on-demandbackups will be retained based on the retention settings specified for the schedule type.
b. Click Backup.
12. Monitor the operation progress by clicking Monitor > Jobs.
After you finish
59
• In AIX setup, you can use the lkdev command to lock and the rendev command to rename the disks onwhich the database that was backed up was residing.
Locking or renaming of devices will not affect the restore operation when you restore using that backup.
• If the backup operation fails because database query execution time exceeded the timeout value, youshould change the value of the ORACLE_SQL_QUERY_TIMEOUT andORACLE_PLUGIN_SQL_QUERY_TIMEOUT parameters by running the Set-SmConfigSettings cmdlet:
After modifying the value of the parameters, restart the SnapCenter Plug-in Loader (SPL) service by
running the following command /opt/NetApp/snapcenter/spl/bin/spl restart
• If the file is not accessible and the mount point is unavailable during the verification process, the operationmight fail with error code DBV-00100 specified file. You should modify the values of theVERIFICATION_DELAY and VERIFICATION_RETRY_COUNT parameters in sco.properties.
After modifying the value of the parameters, restart the SnapCenter Plug-in Loader (SPL) service by
running the following command /opt/NetApp/snapcenter/spl/bin/spl restart
• In MetroCluster configurations, SnapCenter might not be able to detect a protection relationship after afailover.
• If you are backing up application data on VMDKs and the Java heap size for the SnapCenter Plug-in forVMware vSphere is not large enough, the backup might fail.
To increase the Java heap size, locate the script file /opt/netapp/init_scripts/scvservice. In that script, the
do_start method command starts the SnapCenter VMware plug-in service. Update that command to
the following: Java -jar -Xmx8192M -Xms4096M.
Find more information
• Unable to detect SnapMirror or SnapVault relationship after MetroCluster failover
• Oracle RAC One Node database is skipped for performing SnapCenter operations
• Failed to change the state of an Oracle 12c ASM database
• Customizable parameters for backup, restore and clone operations on AIX systems
Back up Oracle database resource groups
A resource group is a collection of resources on a host or cluster. A backup operation onthe resource group is performed on all resources defined in the resource group.
You can back up a resource group on demand from the Resources page. If a resource group has a policyattached and a schedule configured, then backups occur automatically according to the schedule.
Steps
1. In the left navigation pane, click Resources, and then select the appropriate plug-in from the list.
2. In the Resources page, select Resource Group from the View list.
You can search the resource group either by entering the resource group name in the search box, or byclicking , and then selecting the tag. You can then click to close the filter pane.
60
3. In the Resource Groups page, select the resource group that you want to back up, and then click Back up
Now.
If you have a federated resource group with two databases and one of the database hasdatafile on non-NetApp storage, the backup operation is aborted even though the otherdatabase is on NetApp storage.
4. In the Backup page, perform the following steps:
a. If you have associated multiple policies with the resource group, from the Policy drop-down list, selectthe policy that you want to use for backup.
If the policy selected for the on-demand backup is associated with a backup schedule, the on-demandbackups will be retained based on the retention settings specified for the schedule type.
b. Click Backup.
5. Monitor the operation progress by clicking Monitor > Jobs.
After you finish
• In AIX setup, you can use the lkdev command to lock and the rendev command to rename the disks onwhich the database that was backed up was residing.
Locking or renaming of devices will not affect the restore operation when you restore using that backup.
• If the backup operation fails because database query execution time exceeded the timeout value, youshould change the value of the ORACLE_SQL_QUERY_TIMEOUT andORACLE_PLUGIN_SQL_QUERY_TIMEOUT parameters by running the Set-SmConfigSettings cmdlet:
After modifying the value of the parameters, restart the SnapCenter Plug-in Loader (SPL) service by
running the following command /opt/NetApp/snapcenter/spl/bin/spl restart
• If the file is not accessible and the mount point is unavailable during the verification process, the operationmight fail with error code DBV-00100 specified file. You should modify the values of theVERIFICATION_DELAY and VERIFICATION_RETRY_COUNT parameters in sco.properties.
After modifying the value of the parameters, restart the SnapCenter Plug-in Loader (SPL) service by
running the following command /opt/NetApp/snapcenter/spl/bin/spl restart
Back up Oracle databases using UNIX commands
The backup workflow includes planning, identifying the resources for backup, creatingbackup policies, creating resource groups and attaching policies, creating backups, andmonitoring the operations.
What you will need
• You should have added the storage system connections and created the credential using the commandsAdd-SmStorageConnection and Add-SmCredential.
• You should have established the connection session with the SnapCenter Server using the commandOpen-SmConnection.
You can have only one SnapCenter account login session and the token is stored in the user home
61
directory.
The connection session is valid only for 24 hours. However, you can create a token with theTokenNeverExpires option to create a token that never expires and the session will alwaysbe valid.
About this task
You should execute the following commands to establish the connection with the SnapCenter Server, discoverthe Oracle database instances, add policy and resource group, backup and verify the backup.
The information regarding the parameters that can be used with the command and their descriptions can beobtained by running Get-Help command_name. Alternatively, you can also refer to the SnapCenter SoftwareCommand Reference Guide.
Steps
1. Initiate a connection session with the SnapCenter Server for a specified user: Open-SmConnection
2. Perform host resources discovery operation: Get-SmResources
3. Configure Oracle database credentials and preferred nodes for backup operation of a Real ApplicationCluster (RAC) database: Configure-SmOracleDatabase
4. Create a backup policy: Add-SmPolicy
5. Retrieve the information about the secondary (SnapVault or SnapMirror) storage location : Get-
SmSecondaryDetails
This command retrieves the primary to secondary storage mapping details of a specified resource. You canuse the mapping details to configure the secondary verification settings while creating a backup resourcegroup.
6. Add a resource group to SnapCenter: Add-SmResourceGroup
7. Create a backup: New-SmBackup
You can poll the job using the WaitForCompletion option. If this option is specified, then the commandcontinues to poll the server until the completion of the backup job.
8. Retrieve the logs from SnapCenter: Get-SmLogs
Monitor Oracle database backup operations
You can monitor the progress of different backup operations by using theSnapCenterJobs page. You might want to check the progress to determine when it iscomplete or if there is an issue.
About this task
The following icons appear on the Jobs page and indicate the corresponding state of the operations:
• In progress
• Completed successfully
62
• Failed
• Completed with warnings or could not start due to warnings
• Queued
• Canceled
Steps
1. In the left navigation pane, click Monitor.
2. In the Monitor page, click Jobs.
3. In the Jobs page, perform the following steps:
a. Click to filter the list so that only backup operations are listed.
b. Specify the start and end dates.
c. From the Type drop-down list, select Backup.
d. From the Status drop-down, select the backup status.
e. Click Apply to view the operations completed successfully.
4. Select a backup job, and then click Details to view the job details.
Though the backup job status displays , when you click on job details you might see thatsome of the child tasks of the backup operation are still in progress or marked with warningsigns.
5. In the Job Details page, click View logs.
The View logs button displays the detailed logs for the selected operation.
Monitor data protection operations in the Activity pane
The Activity pane displays the five most recent operations performed. The Activity panealso displays when the operation was initiated and the status of the operation.
The Activity pane displays information regarding backup, restore, clone, and scheduled backup operations. Ifyou are using Plug-in for SQL Server or Plug-in for Exchange Server, the Activity pane also displaysinformation about the reseed operation.
Steps
1. In the left navigation pane, click Resources, and then select the appropriate plug-in from the list.
2. Click on the Activity pane to view the five most recent operations.
When you click one of the operations, the operation details are listed in the Job Details page.
Cancel backup operations of Oracle databases
You can cancel backup operations that are either running, queued, or non-responsive.
You must be logged in as the SnapCenter Admin or job owner to cancel backup operations.
63
About this task
When you cancel a backup operation, the SnapCenter Server stops the operation and removes all theSnapshot copies from the storage if the backup created is not registered with SnapCenter Server. If the backupis already registered with SnapCenter Server, it will not roll back the already created Snapshot copy even afterthe cancellation is triggered.
• You can cancel only the log or full backup operation that are queued or running.
• You cannot cancel the operation after the verification has started.
If you cancel the operation before verification, the operation is canceled, and the verification operation willnot be performed.
• You cannot cancel the backup operation after the catalog operations has started.
• You can cancel a backup operation from either the Monitor page or the Activity pane.
• In addition to using the SnapCenter GUI, you can use CLI commands to cancel operations.
• The Cancel Job button is disabled for operations that cannot be canceled.
• If you selected All members of this role can see and operate on other members objects inUsers\Groups page while creating a role, you can cancel the queued backup operations of other memberswhile using that role.
Step
Perform one of the following actions:
From the… Action
Monitor page a. In the left navigation pane, click Monitor > Jobs.
b. Select the operation and click Cancel Job.
Activity pane a. After initiating the backup job, click on theActivity pane to view the five most recentoperations.
b. Select the operation.
c. In the Job Details page, click Cancel Job.
Results
The operation is canceled, and the resource is reverted to the original state.
If the operation you canceled is non-responsive in the canceling or running state, you should run the Cancel-SmJob -JobID <int> -Force to forcefully stop the backup operation.
View Oracle database backups and clones in the Topology page
When you are preparing to back up or clone a resource, you might find it helpful to view agraphical representation of all backups and clones on the primary and secondary storage.
About this task
64
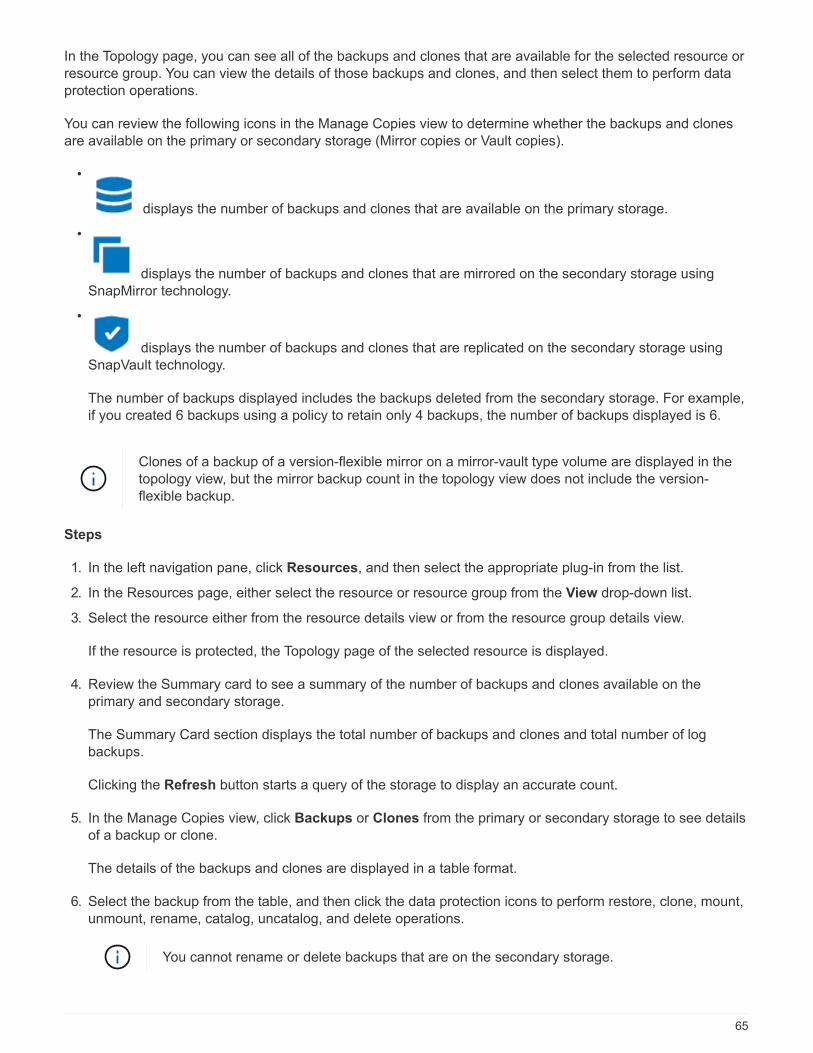
In the Topology page, you can see all of the backups and clones that are available for the selected resource orresource group. You can view the details of those backups and clones, and then select them to perform dataprotection operations.
You can review the following icons in the Manage Copies view to determine whether the backups and clonesare available on the primary or secondary storage (Mirror copies or Vault copies).
•
displays the number of backups and clones that are available on the primary storage.
•
displays the number of backups and clones that are mirrored on the secondary storage usingSnapMirror technology.
•
displays the number of backups and clones that are replicated on the secondary storage usingSnapVault technology.
The number of backups displayed includes the backups deleted from the secondary storage. For example,if you created 6 backups using a policy to retain only 4 backups, the number of backups displayed is 6.
Clones of a backup of a version-flexible mirror on a mirror-vault type volume are displayed in thetopology view, but the mirror backup count in the topology view does not include the version-flexible backup.
Steps
1. In the left navigation pane, click Resources, and then select the appropriate plug-in from the list.
2. In the Resources page, either select the resource or resource group from the View drop-down list.
3. Select the resource either from the resource details view or from the resource group details view.
If the resource is protected, the Topology page of the selected resource is displayed.
4. Review the Summary card to see a summary of the number of backups and clones available on theprimary and secondary storage.
The Summary Card section displays the total number of backups and clones and total number of logbackups.
Clicking the Refresh button starts a query of the storage to display an accurate count.
5. In the Manage Copies view, click Backups or Clones from the primary or secondary storage to see detailsof a backup or clone.
The details of the backups and clones are displayed in a table format.
6. Select the backup from the table, and then click the data protection icons to perform restore, clone, mount,unmount, rename, catalog, uncatalog, and delete operations.
You cannot rename or delete backups that are on the secondary storage.
65

◦ If you have selected a log backup, you can only perform rename, mount, unmount, catalog, uncatalog,and delete operations.
◦ If you have cataloged the backup using Oracle Recovery Manager (RMAN), you cannot rename thosecataloged backups.
7. If you want to delete a clone, select the clone from the table, and then click .
If the value assigned to SnapmirrorStatusUpdateWaitTime is less, the Mirror and Vault backup copies are notlisted on the topology page even if data and log volumes are successfully protected. You should increase thevalue assigned to SnapmirrorStatusUpdateWaitTime using Set-SmConfigSettings PowerShell cmdlet.
The information regarding the parameters that can be used with the command and their descriptions can beobtained by running Get-Help command_name.
Alternatively, you can also refer to the SnapCenter Software Command Reference Guide or SnapCenterSoftware Cmdlet Reference Guide.
Mount and unmount database backups
You can mount a single or multiple data and log only backups if you want to access thefiles in the backup. You can either mount the backup to the same host where the backupwas created or to a remote host having same type of Oracle and host configurations. Ifyou have manually mounted the backups, you should manually unmount the backupsafter completing the operation. At any given instance, a backup of a database can bemounted to any one of the host. While performing an operation, you can mount only asingle backup.
In a Flex ASM setup, you cannot perform mount operation on Leaf nodes if the cardinality is lessthan the number nodes in the RAC cluster.
Mount a database backup
You should manually mount a database backup if you want to access the files in the backup.
What you will need
• If you have an Automatic Storage Management (ASM) database instance in an NFS environment and wantto mount the ASM backups, you should have added the ASM disk path /var/opt/snapcenter/sco/backup*/*/*/*/* to the existing path defined in the asm_diskstring parameter.
• If you have an ASM database instance in an NFS environment and want to mount the ASM log backups aspart of a recovery operation, you should have added the ASM disk path /var/opt/snapcenter/scu/clones/*/*_to the existing path defined in the asm_diskstring parameter.
• In the asm_diskstring parameter, you should configure AFD:* if you are using ASMFD or configure ORCL:*
if you are using ASMLIB.
For information on how to edit the asm_diskstring parameter, see How to add disk paths toasm_diskstring.
• You should configure the ASM credentials and the ASM port if it differs from that of the source databasehost while mounting the backup.
66
• If you want to mount to an alternate host, you must verify that the alternate host meets the followingrequirements:
◦ Same UID and GID as that of the original host
◦ Same Oracle version as that of the original host
◦ Same OS distribution and version as that of the original host
Steps
1. In the left navigation pane, click Resources, and then select the appropriate plug-in from the list.
2. In the Resources page, select either Database or Resource Group from the View list.
3. Select the database either from the database details view or from the resource group details view.
The database topology page is displayed.
4. From the Manage Copies view, select Backups either from the primary or secondary (mirrored orreplicated) storage system.
5.
Select the backup from the table, and then click .
6. In the Mount backups page, select the host on which you want to mount the backup from the Choose the
host to mount the backup drop-down list.
The mount path /var/opt/snapcenter/sco/backup_mount/backup_name/database_name is displayed.
If you are mounting the backup of an ASM database, the mount path +diskgroupname_SID_backupid isdisplayed.
7. Click Mount.
After you finish
• You can run the following command to retrieve the information related to the mounted backup:
./sccli Get-SmBackup -BackupName backup_name -ListMountInfo
• If you have mounted an ASM database, you can run the following command to retrieve the informationrelated to the mounted backup:
./sccli Get-Smbackup -BackupNamediskgroupname_SID_backupid-listmountinfo
• To retrieve the backup ID, run the following command:
./sccli Get-Smbackup-BackupNamebackup_name
The information regarding the parameters that can be used with the command and their descriptions canbe obtained by running Get-Help command_name. Alternatively, you can also refer to the SnapCenterSoftware Command Reference Guide.
Unmount a database backup
You can manually unmount a mounted database backup when you no longer want to access files on thebackup.
67
Steps
1. In the left navigation pane, click Resources, and then select the appropriate plug-in from the list.
2. In the Resources page, select either Database or Resource Group from the View list.
3. Select the database either from the database details view or from the resource group details view.
The database topology page is displayed.
4.Select the backup that is mounted, and then click .
5. Click OK.
Restore and recover Oracle databases
Restore workflow
The restore workflow includes planning, performing the restore operations, andmonitoring the operations.
The following workflow shows the sequence in which you must perform the restore operation:
Define a restore and recovery strategy for Oracle databases
You must define a strategy before you restore and recover your database so that you canperform restore and recover operations successfully.
Types of backups supported for restore and recovery operations
SnapCenter supports restore and recovery of different types of Oracle database backups.
• Online data backup
• Offline shutdown data backup
• Offline mount data backup
If you are restoring an offline shutdown or offline mount data backup, SnapCenter leaves thedatabase in offline state. You should manually recover the database and reset the logs.
• Full backup
• Offline-mount backups of Data Guard standby databases
68
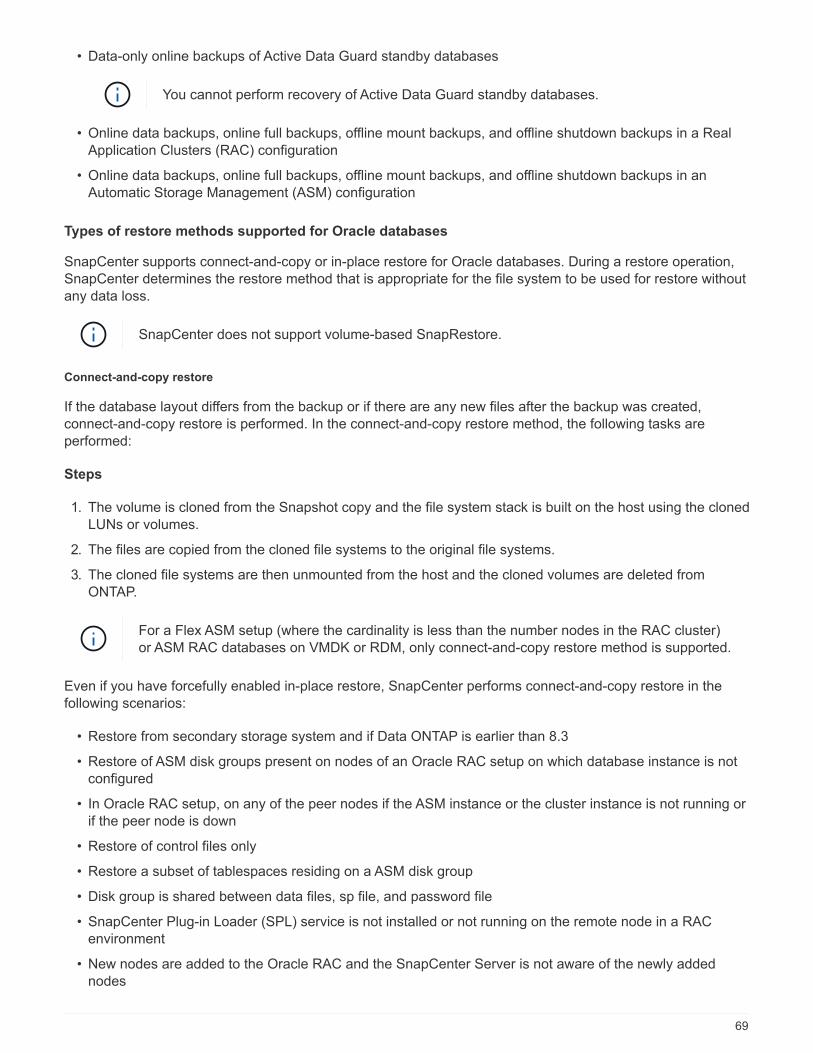
• Data-only online backups of Active Data Guard standby databases
You cannot perform recovery of Active Data Guard standby databases.
• Online data backups, online full backups, offline mount backups, and offline shutdown backups in a RealApplication Clusters (RAC) configuration
• Online data backups, online full backups, offline mount backups, and offline shutdown backups in anAutomatic Storage Management (ASM) configuration
Types of restore methods supported for Oracle databases
SnapCenter supports connect-and-copy or in-place restore for Oracle databases. During a restore operation,SnapCenter determines the restore method that is appropriate for the file system to be used for restore withoutany data loss.
SnapCenter does not support volume-based SnapRestore.
Connect-and-copy restore
If the database layout differs from the backup or if there are any new files after the backup was created,connect-and-copy restore is performed. In the connect-and-copy restore method, the following tasks areperformed:
Steps
1. The volume is cloned from the Snapshot copy and the file system stack is built on the host using the clonedLUNs or volumes.
2. The files are copied from the cloned file systems to the original file systems.
3. The cloned file systems are then unmounted from the host and the cloned volumes are deleted fromONTAP.
For a Flex ASM setup (where the cardinality is less than the number nodes in the RAC cluster)or ASM RAC databases on VMDK or RDM, only connect-and-copy restore method is supported.
Even if you have forcefully enabled in-place restore, SnapCenter performs connect-and-copy restore in thefollowing scenarios:
• Restore from secondary storage system and if Data ONTAP is earlier than 8.3
• Restore of ASM disk groups present on nodes of an Oracle RAC setup on which database instance is notconfigured
• In Oracle RAC setup, on any of the peer nodes if the ASM instance or the cluster instance is not running orif the peer node is down
• Restore of control files only
• Restore a subset of tablespaces residing on a ASM disk group
• Disk group is shared between data files, sp file, and password file
• SnapCenter Plug-in Loader (SPL) service is not installed or not running on the remote node in a RACenvironment
• New nodes are added to the Oracle RAC and the SnapCenter Server is not aware of the newly addednodes
69
In-place restore
If the database layout is similar to the backup and has not undergone any configuration change on the storageand database stack, in-place restore is performed, wherein the restore of file or LUN is performed on ONTAP.SnapCenter supports only Single File SnapRestore (SFSR) as part of the in-place restore method.
Data ONTAP 8.3 or later supports in-place restore from secondary location.
If you want to perform in-place restore on the database, ensure that you have only datafiles on the ASM diskgroup. You must create a backup after any changes are made to the ASM disk group or in the physicalstructure of the database. After performing in-place restore, the disk group will contain the same numberdatafiles as at the time of backup.
The in-place restore will be applied automatically when disk group or mount point matches the followingcriteria:
• No new datafiles are added after backup (foreign file check)
• No addition, deletion, or recreation of ASM disk or LUN after backup (ASM disk group structural changecheck)
• No addition, deletion, or recreation of LUNs to LVM disk group (LVM disk group structural change check)
You can also forcefully enable in-place restore either using GUI, SnapCenter CLI, or PowerShellcmdlet to override the foreign file check and LVM disk group structural change check.
Performing In-place restore on ASM RAC
In SnapCenter, the node on which you perform restore is termed as primary node and all other nodes of theRAC on which ASM disk group resides are called peer nodes. SnapCenter changes the state of ASM diskgroup to dismount on all the nodes where the ASM disk group is in mount state before performing the storagerestore operation. After the storage restore is complete, SnapCenter changes the state of ASM disk group as itwas before the restore operation.
In SAN environments, SnapCenter removes devices from all the peer nodes and performs LUN unmapoperation before storage restore operation. After storage restore operation, SnapCenter performs LUN mapoperation and constructs devices on all the peer nodes. In a SAN environment if the Oracle RAC ASM layout isresiding on LUNs, then while restoring SnapCenter performs LUN unmap, LUN restore, and LUN mapoperations on all the nodes of the RAC cluster where the ASM disk group resides. Before restoring even if allthe initiators of the RAC nodes were not used for the LUNs, after restoring SnapCenter creates a new iGroupwith all the initiators of all the RAC nodes.
• If there is any failure during prerestore activity on peer nodes, SnapCenter automatically rolls back theASM disk group state as it was before performing restore on peer nodes on which prerestore operationwas successful. Rollback is not supported for the primary and the peer node on which the operation failed.Before attempting another restore you must manually fix the issue on the peer node and bring the ASMdisk group on the primary node back to mount state.
• If there is any failure during restore activity, then the restore operation fails and no roll back is performed.Before attempting another restore, you must manually fix the storage restore issue and bring the ASM diskgroup on the primary node back to mount state.
• If there is any failure during postrestore activity on any of the peer nodes, SnapCenter continues with therestore operation on the other peer nodes. You must manually fix the post restore issue on the peer node.
70
Types of restore operations supported for Oracle databases
SnapCenter enables you to perform different types of restore operations for Oracle databases.
Before restoring the database, backups are validated to identify whether any files are missing when comparedto the actual database files.
Full restore
• Restores only the datafiles
• Restores only the control files
• Restores the datafiles and control files
• Restores datafiles, control files, and redo log files in Data Guard standby and Active Data Guard standbydatabases
Partial restore
• Restores only the selected tablespaces
• Restores only the selected pluggable databases (PDBs)
• Restores only the selected tablespaces of a PDB
Types of recovery operations supported for Oracle databases
SnapCenter enables you to perform different types of recovery operations for Oracle databases.
• The database up to the last transaction (all logs)
• The database up to a specific system change number (SCN)
• The database up to a specific date and time
You must specify the date and time for recovery based on the database host’s time zone.
SnapCenter also provides the No recovery option for Oracle databases.
The plug-in for Oracle database does not support recovery if you have restored using a backupthat was created with the database role as standby. You must always perform manual recoveryfor physical standby databases.
Limitations related to restore and recovery of Oracle databases
Before you perform restore and recovery operations, you must be aware of the limitations.
If you are using any version of Oracle from 11.2.0.4 to 12.1.0.1, the restore operation will be in hung statewhen you run the renamedg command. You can apply the Oracle patch 19544733 to fix this issue.
The following restore and recovery operations are not supported:
• Restore and recovery of tablespaces of the root container database (CDB)
• Restore of temporary tablespaces and temporary tablespaces associated with PDBs
• Restore and recovery of tablespaces from multiple PDBs simultaneously
71
• Restore of log backups
• Restore of backups to a different location
• Restore of redo log files in any configuration other than Data Guard standby or Active Data Guard standbydatabases
• Restore of SPFILE and Password file
• When you perform a restore operation on a database that was re-created using the preexisting databasename on the same host, was managed by SnapCenter, and had valid backups, the restore operationoverwrites the newly created database files even though the DBIDs are different.
This can be avoided by performing either of following actions:
◦ Discover the SnapCenter resources after the database is re-created
◦ Create a backup of the re-created database
Limitations related to point-in-time recovery of tablespaces
• Point-in-time recovery (PITR) of SYSTEM, SYSAUX, and UNDO tablespaces is not supported
• PITR of tablespaces cannot be performed along with other types of restore
• If a tablespace is renamed and you want to recover it to a point before it was renamed, you should specifythe earlier name of the tablespace
• If constraints for the tables in one tablespace are contained in another tablespace, you should recover boththe tablespaces
• If a table and its indexes are stored in different tablespaces, then the indexes should be dropped beforeperforming PITR
• PITR cannot be used to recover the current default tablespace
• PITR cannot be used to recover tablespaces containing any of the following objects:
◦ Objects with underlying objects (such as materialized views) or contained objects (such as partitionedtables) unless all the underlying or contained objects are in the recovery set
Additionally, if the partitions of a partitioned table are stored in different tablespaces, then you shouldeither drop the table before performing PITR or move all the partitions to the same tablespace beforeperforming PITR.
◦ Undo or rollback segments
◦ Oracle 8 compatible advanced queues with multiple recipients
◦ Objects owned by the SYS user
Examples of these types of objects are PL/SQL, Java classes, call out programs, views, synonyms,users, privileges, dimensions, directories, and sequences.
Sources and destinations for restoring Oracle databases
You can restore an Oracle database from a backup copy on either primary storage or secondary storage. Youcan only restore databases to the same location on the same database instance. However, in Real ApplicationCluster (RAC) setup, you can restore databases to other nodes.
72
Sources for restore operations
You can restore databases from a backup on primary storage or secondary storage. If you want to restore froma backup on the secondary storage in a multiple mirror configuration, you can select the secondary storagemirror as the source.
Destinations for restore operations
You can only restore databases to the same location on the same database instance.
In a RAC setup, you can restore RAC databases from any nodes in the cluster.
Predefined environment variables for restore specific prescript and postscript
SnapCenter allows you to use the predefined environment variables when you executethe prescript and postscript while restoring a database.
Supported predefined environment variables for restoring a database
• SC_JOB_ID specifies the job ID of the operation.
Example: 257
• SC_ORACLE_SID specifies the system identifier of the database.
If the operation involves multiple databases, this will contain database names separated by pipe.
Example: NFSB31
• SC_HOST specifies the host name of the database.
This parameter will be populated for application volumes.
Example: scsmohost2.gdl.englabe.netapp.com
• SC_OS_USER specifies the operating system owner of the database.
Example: oracle
• SC_OS_GROUP specifies the operating system group of the database.
Example: oinstall
• SC_BACKUP_NAME specifies the name of the backup.
This parameter will be populated for application volumes.
Examples:
◦ If the database is not running in ARCHIVELOG mode: DATA@RG2_scspr2417819002_07-20-2021_12.16.48.9267_0|LOG@RG2_scspr2417819002_07-20-2021_12.16.48.9267_1
◦ If the database is running in ARCHIVELOG mode: DATA@RG2_scspr2417819002_07-20-2021_12.16.48.9267_0|LOG@RG2_scspr2417819002_07-20-2021_12.16.48.9267_1,RG2_scspr2417819002_07-21-2021_12.16.48.9267_1,RG2_scspr2417819002_07-22-2021_12.16.48.9267_1
73
• SC_BACKUP_ID specifies the ID of the backup.
This parameter will be populated for application volumes.
Examples:
◦ If the database is not running in ARCHIVELOG mode: DATA@203|LOG@205
◦ If the database is running in ARCHIVELOG mode: DATA@203|LOG@205,206,207
• SC_RESOURCE_GROUP_NAME specifies the name of the resource group.
Example: RG1
• SC_ORACLE_HOME specifies the path of the Oracle home directory.
Example: /ora01/app/oracle/product/18.1.0/db_1
• SC_RECOVERY_TYPE specifies the files that are recovered and also the recovery scope.
Example:RESTORESCOPE:usingBackupControlfile=false|RECOVERYSCOPE:allLogs=true,noLogs=false,untiltime=false,untilscn=false.
For information about delimiters, see Supported delimiters.
Requirements for restoring an Oracle database
Before restoring an Oracle database, you should ensure that prerequisites arecompleted.
• You should have defined your restore and recovery strategy.
• The SnapCenter administrator should have assigned you the storage virtual machines (SVMs) for both thesource volumes and destination volumes if you are replicating Snapshot copies to a mirror or vault.
• If archive logs are pruned as part of backup, you should have manually mounted the required archive logbackups.
• If you want to restore Oracle databases that are residing on a Virtual Machine Disk (VMDK), you shouldensure that the guest machine has the required number of free slots for allocating the cloned VMDKs.
• You should ensure that all data volumes and archive log volumes belonging to the database are protectedif secondary protection is enabled for that database.
• You should ensure that the RAC One Node database is in "nomount" state to perform control file or fulldatabase restore.
• If you have an ASM database instance in NFS environment, you should add the ASM disk path/var/opt/snapcenter/scu/clones/*/* to the existing path defined in the asm_diskstring parameter tosuccessfully mount the ASM log backups as part of recovery operation.
• In the asm_diskstring parameter, you should configure AFD:* if you are using ASMFD or configure ORCL:*
if you are using ASMLIB.
For information on how to edit the asm_diskstring parameter, see How to add disk paths toasm_diskstring
74
• You should configure the static listener in the listener.ora file available at$ORACLE_HOME/network/admin for non ASM databases and $GRID_HOME/network/admin for ASMdatabases if you have disabled OS authentication and enabled Oracle database authentication for anOracle database, and want to restore the datafiles and control files of that database.
• You should increase value of SCORestoreTimeout parameter by running the Set- SmConfigSettingscommand if the database size is in terabytes (TB).
• You should ensure that all the licenses required for vCenter are installed and up to date.
If the licenses are not installed or up to date, a warning message is displayed. If you ignore the warningand proceed, restore from RDM fails.
Restore and recover Oracle database
In the event of data loss, you can use SnapCenter to restore data from one or morebackups to your active file system and then recover the database.
About this task
Recovery is performed using the archive logs available at the configured archive log location. If the database isrunning in ARCHIVELOG mode, Oracle database saves the filled groups of redo log files to one or more offlinedestinations, known collectively as the archived redo log. SnapCenter identifies and mounts optimal number oflog backups based on the specified SCN, selected date and time, or all logs option. If the archive logs requiredfor recovery are not available at the configured location, you should mount the Snapshot copy containing thelogs and specify the path as external archive logs.
If you migrate ASM database from ASMLIB to ASMFD, then the backups created with ASMLIB cannot be usedto restore the database. You should create backups in the ASMFD configuration and use those backups torestore. Similarly, if ASM database is migrated from ASMFD to ASMLIB, you should create backups in theASMLIB configuration to restore.
When you restore a database, an operational lock file (.sm_lock_dbsid) is created on the Oracle database hostin the $ORACLE_HOME/dbs directory to avoid multiple operations being executed on the database. After thedatabase has been restored, the operational lock file is automatically removed.
Restore of SPFILE and Password file is not supported.
Steps
1. In the left navigation pane, click Resources, and then select the appropriate plug-in from the list.
2. In the Resources page, select either Database or Resource Group from the View list.
3. Select the database from either the database details view or the resource group details view.
The database topology page is displayed.
4. From the Manage Copies view, select Backups from either the primary or the secondary (mirrored orreplicated) storage systems.
5.Select the backup from the table, and then click .
6. In the Restore Scope page, perform the following tasks:
a. If you have selected a backup of a database in a Real Application Clusters (RAC) environment, select
75
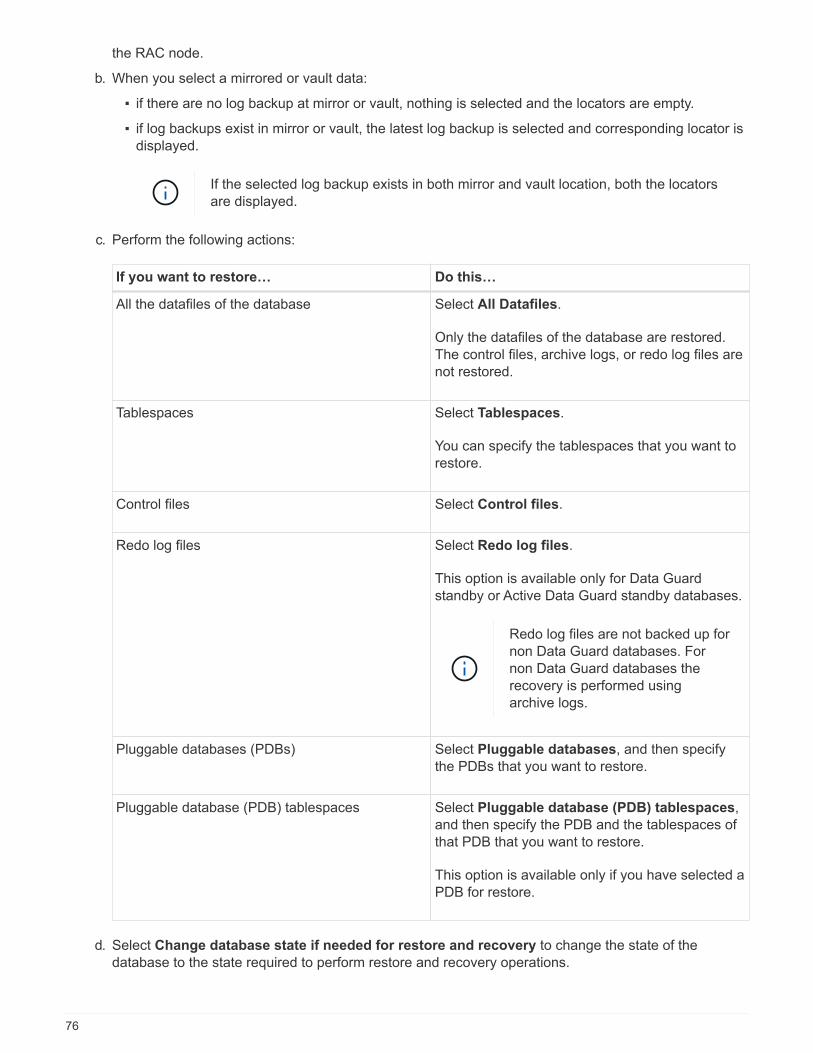
the RAC node.
b. When you select a mirrored or vault data:
▪ if there are no log backup at mirror or vault, nothing is selected and the locators are empty.
▪ if log backups exist in mirror or vault, the latest log backup is selected and corresponding locator isdisplayed.
If the selected log backup exists in both mirror and vault location, both the locatorsare displayed.
c. Perform the following actions:
If you want to restore… Do this…
All the datafiles of the database Select All Datafiles.
Only the datafiles of the database are restored.The control files, archive logs, or redo log files arenot restored.
Tablespaces Select Tablespaces.
You can specify the tablespaces that you want torestore.
Control files Select Control files.
Redo log files Select Redo log files.
This option is available only for Data Guardstandby or Active Data Guard standby databases.
Redo log files are not backed up fornon Data Guard databases. Fornon Data Guard databases therecovery is performed usingarchive logs.
Pluggable databases (PDBs) Select Pluggable databases, and then specifythe PDBs that you want to restore.
Pluggable database (PDB) tablespaces Select Pluggable database (PDB) tablespaces,and then specify the PDB and the tablespaces ofthat PDB that you want to restore.
This option is available only if you have selected aPDB for restore.
d. Select Change database state if needed for restore and recovery to change the state of thedatabase to the state required to perform restore and recovery operations.
76
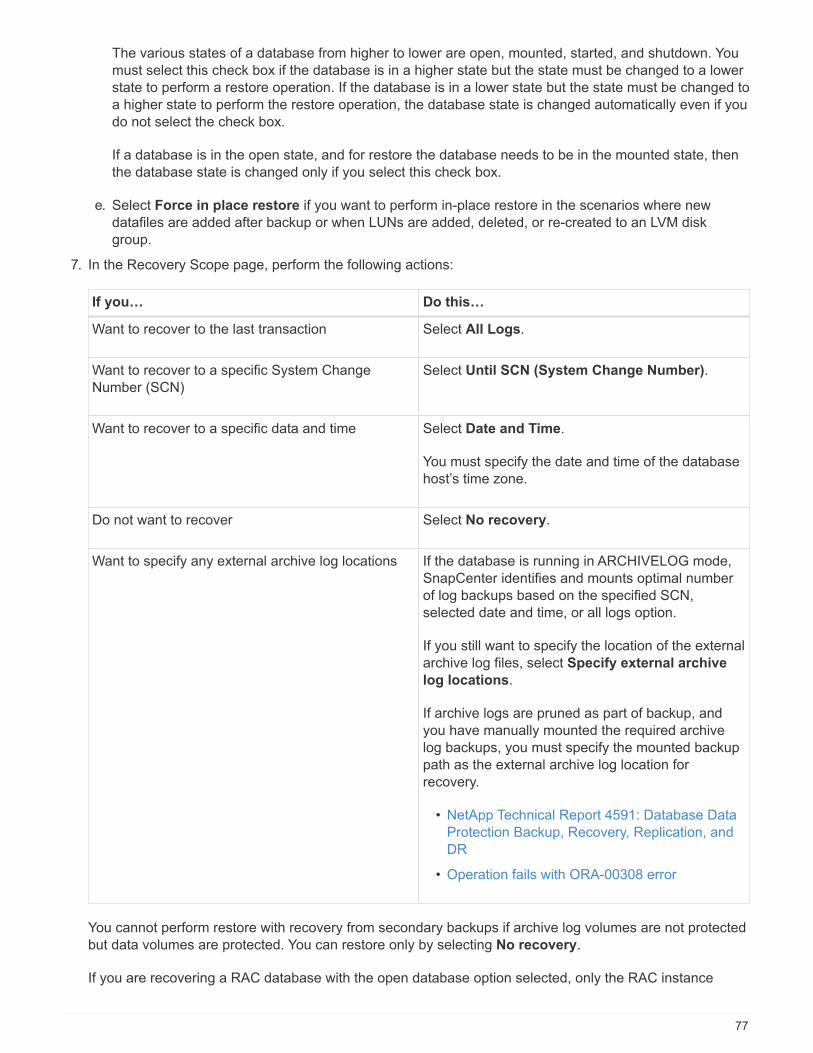
The various states of a database from higher to lower are open, mounted, started, and shutdown. Youmust select this check box if the database is in a higher state but the state must be changed to a lowerstate to perform a restore operation. If the database is in a lower state but the state must be changed toa higher state to perform the restore operation, the database state is changed automatically even if youdo not select the check box.
If a database is in the open state, and for restore the database needs to be in the mounted state, thenthe database state is changed only if you select this check box.
e. Select Force in place restore if you want to perform in-place restore in the scenarios where newdatafiles are added after backup or when LUNs are added, deleted, or re-created to an LVM diskgroup.
7. In the Recovery Scope page, perform the following actions:
If you… Do this…
Want to recover to the last transaction Select All Logs.
Want to recover to a specific System ChangeNumber (SCN)
Select Until SCN (System Change Number).
Want to recover to a specific data and time Select Date and Time.
You must specify the date and time of the databasehost’s time zone.
Do not want to recover Select No recovery.
Want to specify any external archive log locations If the database is running in ARCHIVELOG mode,SnapCenter identifies and mounts optimal numberof log backups based on the specified SCN,selected date and time, or all logs option.
If you still want to specify the location of the externalarchive log files, select Specify external archive
log locations.
If archive logs are pruned as part of backup, andyou have manually mounted the required archivelog backups, you must specify the mounted backuppath as the external archive log location forrecovery.
• NetApp Technical Report 4591: Database DataProtection Backup, Recovery, Replication, andDR
• Operation fails with ORA-00308 error
You cannot perform restore with recovery from secondary backups if archive log volumes are not protectedbut data volumes are protected. You can restore only by selecting No recovery.
If you are recovering a RAC database with the open database option selected, only the RAC instance
77
where the recovery operation was initiated is brought back to the open state.
Recovery is not supported for Data Guard standby and Active Data Guard standbydatabases.
8. In the PreOps page, enter the path and the arguments of the prescript that you want to run before therestore operation.
You must store the prescripts either in the /var/opt/snapcenter/spl/scripts path or in any folder inside thispath. By default, the /var/opt/snapcenter/spl/scripts path is populated. If you have created any foldersinside this path to store the scripts, you must specify those folders in the path.
You can also specify the script timeout value. The default value is 60 seconds.
SnapCenter allows you to use the predefined environment variables when you execute the prescript andpostscript. Learn more
9. In the PostOps page, perform the following steps:
a. Enter the path and the arguments of the postscript that you want to run after the restore operation.
You must store the postscripts either in /var/opt/snapcenter/spl/scripts or in any folder inside this path.By default, the /var/opt/snapcenter/spl/scripts path is populated. If you have created any folders insidethis path to store the scripts, you must specify those folders in the path.
If the restore operation fails, postscripts will not be executed and cleanup activities willbe triggered directly.
b. Select the check box if you want to open the database after recovery.
After restoring a container database (CDB) with or without control files, or after restoring only CDBcontrol files, if you specify to open the database after recovery, then only the CDB is opened and notthe pluggable databases (PDB) in that CDB.
In a RAC setup, only the RAC instance that is used for recovery is opened after recovery.
After restoring a user tablespace with control files, a system tablespace with or withoutcontrol files, or a PDB with or without control files, only the state of the PDB related tothe restore operation is changed to the original state. The state of the other PDBs thatwere not used for restore are not changed to the original state because the state ofthose PDBs were not saved. You must manually change the state of the PDBs that werenot used for restore.
10. In the Notification page, from the Email preference drop-down list, select the scenarios in which you wantto send the email notifications.
You must also specify the sender and receiver email addresses, and the subject of the email. If you want toattach the report of the restore operation performed, you must select Attach Job Report.
For email notification, you must have specified the SMTP server details by using the eitherthe GUI or the PowerShell command Set-SmSmtpServer.
11. Review the summary, and then click Finish.
78
12. Monitor the operation progress by clicking Monitor > Jobs.
For more information
• Oracle RAC One Node database is skipped for performing SnapCenter operations
• Failed to restore from a secondary SnapMirror or SnapVault location
• Failed to restore from a backup of an orphan incarnation
• Customizable parameters for backup, restore and clone operations on AIX systems
Restore and recover tablespaces using point-in-time recovery
You can restore a subset of tablespaces that has been corrupted or dropped withoutimpacting the other tablespaces in the database. SnapCenter uses RMAN to performpoint-in-time recovery (PITR) of the tablespaces.
What you will need
The backups that are required to perform PITR of tablespaces should be cataloged and mounted.
About this task
During PITR operation, RMAN creates an auxiliary instance at the specified auxiliary destination. The auxiliarydestination could be a mount point or ASM disk group. If there is sufficient space in the mounted location, youcan reuse one of the mounted locations instead of a dedicated mount point.
You should specify the date and time or SCN and the tablespace is restored on the source database.
You can select and restore multiple tablespaces residing on ASM, NFS, and SAN environments. For example,if tablespaces TS2 and TS3 reside on NFS and TS4 reside on SAN, you can perform on single PITR operationto restore all the tablespaces.
In a RAC setup, you can perform PITR of tablespaces from any node of the RAC.
Steps
1. In the left navigation pane, click Resources, and then select the appropriate plug-in from the list.
2. In the Resources page, select either Database or Resource Group from the View list.
3. Select the database of type single instance (multitenant) either from the database details view or theresource group details view.
The database topology page is displayed.
4. From the Manage Copies view, select Backups from either the primary or the secondary (mirrored orreplicated) storage systems.
If the backup is not cataloged, you should select the backup and click Catalog.
5.Select the cataloged backup, and then click .
6. In the Restore Scope page, perform the following tasks:
79
a. If you have selected a backup of a database in a Real Application Clusters (RAC) environment, selectthe RAC node.
b. Select Tablespaces, and then specify the tablespaces you want to restore.
You cannot perform PITR on SYSAUX, SYSTEM, and UNDO tablespaces.
c. Select Change database state if needed for restore and recovery to change the state of thedatabase to the state required to perform restore and recovery operations.
7. In the Recovery Scope page, perform one of the following actions:
◦ If you want to recover to a specific System Change Number (SCN), select Until SCN and specify theSCN and auxiliary destination.
◦ If you want to recover to a specific date and time, select Date and Time and specify the date and timeand the auxiliary destination. When you specify the SCN or date and time, SnapCenter lists thebackups that are required to perform PITR but are not cataloged and mounted. You should manuallymount and catalog the log backups required for PITR.
8. In the PreOps page, enter the path and the arguments of the prescript that you want to run before therestore operation.
You should store the prescripts either in the /var/opt/snapcenter/spl/scripts path or in any folder inside thispath. By default, the /var/opt/snapcenter/spl/scripts path is populated. If you have created any foldersinside this path to store the scripts, you must specify those folders in the path.
You can also specify the script timeout value. The default value is 60 seconds.
SnapCenter allows you to use the predefined environment variables when you execute the prescript andpostscript. Learn more
9. In the PostOps page, perform the following steps:
a. Enter the path and the arguments of the postscript that you want to run after the restore operation.
If the restore operation fails, postscripts will not be executed and cleanup activities willbe triggered directly.
b. Select the check box if you want to open the database after recovery.
10. In the Notification page, from the Email preference drop-down list, select the scenarios in which you wantto send the email notifications.
11. Review the summary, and then click Finish.
12. Monitor the operation progress by clicking Monitor > Jobs.
Restore and recover pluggable database using point-in-time recovery
You can restore and recover a pluggable database (PDB) that has been corrupted ordropped without impacting the other PDBs in the container database (CDB). SnapCenteruses RMAN to perform point-in-time recovery (PITR) of the PDB.
What you will need
The backups that are required to perform PITR of a PDB should be cataloged and mounted.
80
In a RAC setup, you should manually close the PDB (changing the state to MOUNTED) on allthe nodes of the RAC setup.
About this task
During PITR operation, RMAN creates an auxiliary instance at the specified auxiliary destination. The auxiliarydestination could be a mount point or ASM disk group. If there is sufficient space in the mounted location, youcan reuse one of the mounted locations instead of a dedicated mount point.
You should specify the date and time or SCN to perform PITR of the PDB. RMAN can recover READ WRITE,READ ONLY, or dropped PDBs including datafiles.
You can restore and recover only:
• one PDB at a time
• one tablespace in a PDB
• multiple tablespaces of the same PDB
In a RAC setup, you can perform PITR of tablespaces from any node of the RAC.
Steps
1. In the left navigation pane, click Resources, and then select the appropriate plug-in from the list.
2. In the Resources page, select either Database or Resource Group from the View list.
3. Select the database of type single instance (multitenant) either from the database details view or theresource group details view.
The database topology page is displayed.
4. From the Manage Copies view, select Backups from either the primary or the secondary (mirrored orreplicated) storage systems.
If the backup is not cataloged, you should select the backup and click Catalog.
5.Select the cataloged backup, and then click .
6. In the Restore Scope page, perform the following tasks:
a. If you have selected a backup of a database in a Real Application Clusters (RAC) environment, selectthe RAC node.
b. Depending on whether you want to restore the PDB or tablespaces in a PDB, perform one of theactions:
If you want to… Steps…
81
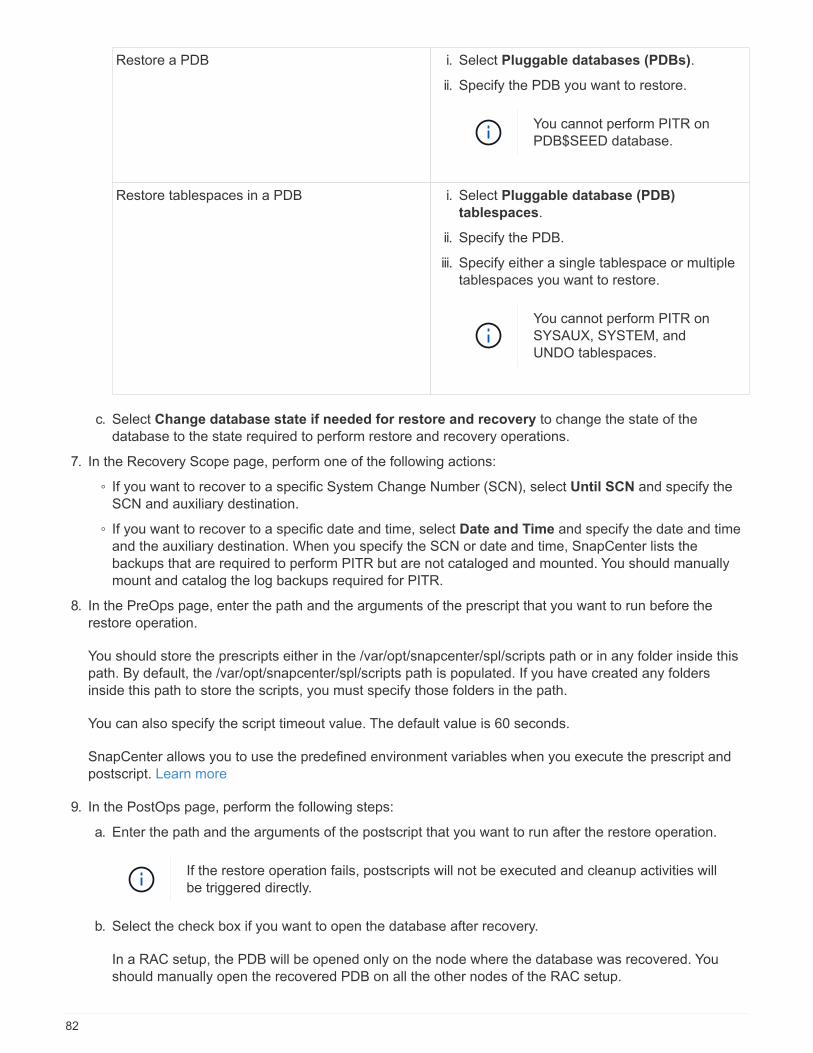
Restore a PDB i. Select Pluggable databases (PDBs).
ii. Specify the PDB you want to restore.
You cannot perform PITR onPDB$SEED database.
Restore tablespaces in a PDB i. Select Pluggable database (PDB)
tablespaces.
ii. Specify the PDB.
iii. Specify either a single tablespace or multipletablespaces you want to restore.
You cannot perform PITR onSYSAUX, SYSTEM, andUNDO tablespaces.
c. Select Change database state if needed for restore and recovery to change the state of thedatabase to the state required to perform restore and recovery operations.
7. In the Recovery Scope page, perform one of the following actions:
◦ If you want to recover to a specific System Change Number (SCN), select Until SCN and specify theSCN and auxiliary destination.
◦ If you want to recover to a specific date and time, select Date and Time and specify the date and timeand the auxiliary destination. When you specify the SCN or date and time, SnapCenter lists thebackups that are required to perform PITR but are not cataloged and mounted. You should manuallymount and catalog the log backups required for PITR.
8. In the PreOps page, enter the path and the arguments of the prescript that you want to run before therestore operation.
You should store the prescripts either in the /var/opt/snapcenter/spl/scripts path or in any folder inside thispath. By default, the /var/opt/snapcenter/spl/scripts path is populated. If you have created any foldersinside this path to store the scripts, you must specify those folders in the path.
You can also specify the script timeout value. The default value is 60 seconds.
SnapCenter allows you to use the predefined environment variables when you execute the prescript andpostscript. Learn more
9. In the PostOps page, perform the following steps:
a. Enter the path and the arguments of the postscript that you want to run after the restore operation.
If the restore operation fails, postscripts will not be executed and cleanup activities willbe triggered directly.
b. Select the check box if you want to open the database after recovery.
In a RAC setup, the PDB will be opened only on the node where the database was recovered. Youshould manually open the recovered PDB on all the other nodes of the RAC setup.
82
10. On the Notification page, from the Email preference drop-down list, select the scenarios in which you wantto send the email notifications.
11. Review the summary, and then click Finish.
12. Monitor the operation progress by clicking Monitor > Jobs.
Restore and recover Oracle databases using UNIX commands
The restore and recovery workflow includes planning, performing the restore andrecovery operations, and monitoring the operations.
About this task
You should execute the following commands to establish the connection with the SnapCenter Server, list thebackups and retrieve its information, and restore the backup.
The information regarding the parameters that can be used with the command and their descriptions can beobtained by running Get-Help command_name. Alternatively, you can also refer to the SnapCenter SoftwareCommand Reference Guide.
Steps
1. Initiate a connection session with the SnapCenter Server for a specified user: Open-SmConnection
2. Retrieve the information about the backups that you want to restore: Get-SmBackup
3. Retrieve the detailed information about the specified backup: Get-SmBackupDetails
This command retrieves the detailed information about the backup of a specified resource with a givenbackup ID. The information includes database name, version, home, start and end SCN, tablespaces,pluggable databases, and its tablespaces.
4. Restore data from the backup: Restore-SmBackup
Monitor Oracle database restore operations
You can monitor the progress of different SnapCenter restore operations by using theJobs page. You might want to check the progress of an operation to determine when it iscomplete or if there is an issue.
About this task
Post-restore states describe the conditions of the resource after a restore operation and any further restoreactions that you can take.
The following icons appear on the Jobs page, and indicate the state of the operation:
• In progress
• Completed successfully
• Failed
• Completed with warnings or could not start due to warnings
83
• Queued
• Canceled
Steps
1. In the left navigation pane, click Monitor.
2. In the Monitor page, click Jobs.
3. In the Jobs page, perform the following steps:
a. Click to filter the list so that only restore operations are listed.
b. Specify the start and end dates.
c. From the Type drop-down list, select Restore.
d. From the Status drop-down list, select the restore status.
e. Click Apply to view the operations that have been completed successfully.
4. Select the restore job, and then click Details to view the job details.
5. In the Job Details page, click View logs.
The View logs button displays the detailed logs for the selected operation.
After the volume based restore operation, the backup metadata is deleted from theSnapCenter repository but the backup catalog entries remain in SAP HANA catalog. Thoughthe restore job status displays , you should click on job details to see the warning sign ofsome of the child tasks. Click on the warning sign and delete the indicated backup catalogentries.
Cancel Oracle database restore operations
You can cancel restore jobs that are queued.
You should be logged in as the SnapCenter Admin or job owner to cancel restore operations.
About this task
• You can cancel a queued restore operation from either the Monitor page or the Activity pane.
• You cannot cancel a running restore operation.
• You can use the SnapCenter GUI, PowerShell cmdlets, or CLI commands to cancel the queued restoreoperations.
• The Cancel Job button is disabled for restore operations that cannot be canceled.
• If you selected All members of this role can see and operate on other members objects inUsers\Groups page while creating a role, you can cancel the queued restore operations of other memberswhile using that role.
Step
Perform one of the following actions:
84
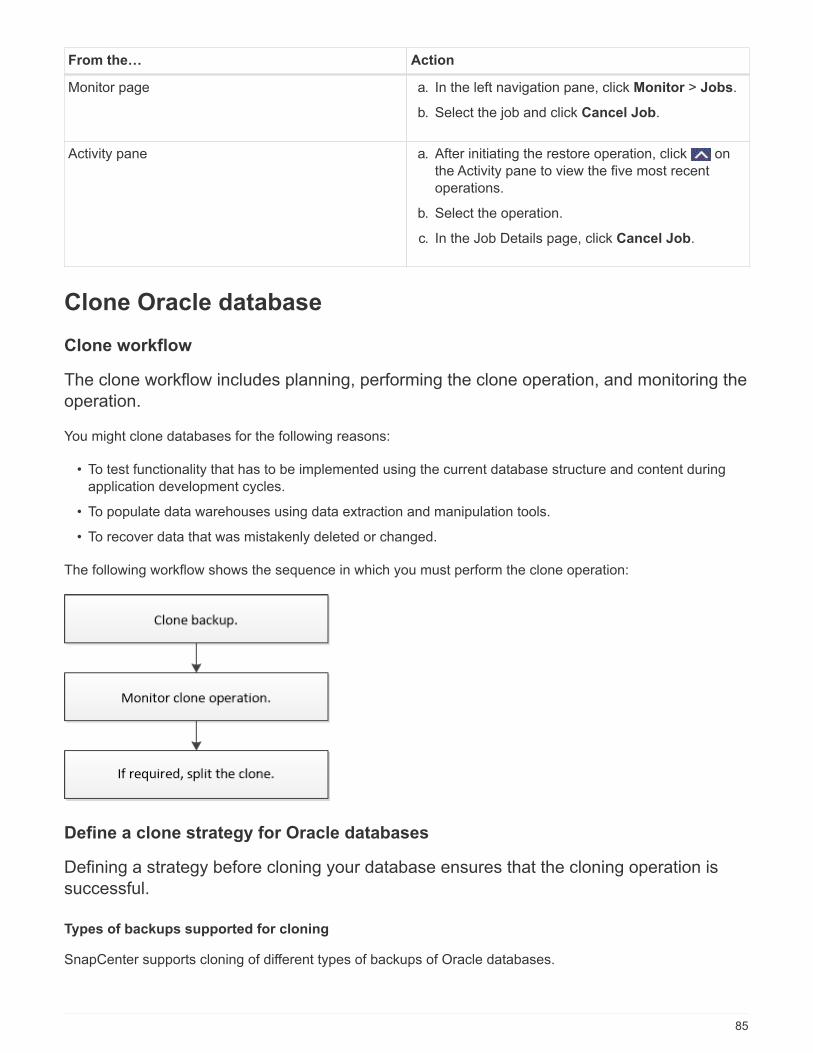
From the… Action
Monitor page a. In the left navigation pane, click Monitor > Jobs.
b. Select the job and click Cancel Job.
Activity pane a. After initiating the restore operation, click onthe Activity pane to view the five most recentoperations.
b. Select the operation.
c. In the Job Details page, click Cancel Job.
Clone Oracle database
Clone workflow
The clone workflow includes planning, performing the clone operation, and monitoring theoperation.
You might clone databases for the following reasons:
• To test functionality that has to be implemented using the current database structure and content duringapplication development cycles.
• To populate data warehouses using data extraction and manipulation tools.
• To recover data that was mistakenly deleted or changed.
The following workflow shows the sequence in which you must perform the clone operation:
Define a clone strategy for Oracle databases
Defining a strategy before cloning your database ensures that the cloning operation issuccessful.
Types of backups supported for cloning
SnapCenter supports cloning of different types of backups of Oracle databases.
85
• Online data backup
• Online full backup
• Offline mount backup
• Offline shutdown backup
• Backups of Data Guard standby databases and Active Data Guard standby databases
• Online data backups, online full backups, offline mount backups, and offline shutdown backups in a RealApplication Clusters (RAC) configuration
• Online data backups, online full backups, offline mount backups, and offline shutdown backups in anAutomatic Storage Management (ASM) configuration
SAN configurations are not supported if user_friendly_names option in the multipathconfiguration file is set to yes.
Cloning of archive log backups is not supported.
Types of cloning supported for Oracle databases
In an Oracle database environment, SnapCenter supports cloning of a database backup. You can clone thebackup from primary and secondary storage systems.
The SnapCenter Server uses NetApp FlexClone technology to clone backups.
You can refresh a clone by running the "Refresh-SmClone" command. This command creates a backup of thedatabase, deletes the existing clone, and creates a clone with the same name.
The clone refresh operation can only be performed using the UNIX commands.
Clone naming conventions for Oracle databases
From SnapCenter 3.0, the naming convention used for clones of file systems is different from the clones ofASM disk groups.
• The naming convention for SAN or NFS file systems is FileSystemNameofsourcedatabase_CLONESID.
• The naming convention for ASM disk groups is SC_HASHCODEofDISKGROUP_CLONESID.
HASHCODEofDISKGROUP is an automatically generated number (2 to 10 digits) that is unique for eachASM disk group.
Limitations of cloning Oracle databases
You should be aware of the limitations of clone operations before you clone the databases.
• If you are using any version of Oracle from 11.2.0.4 to 12.1.0.1, the clone operation will be in hung statewhen you run the renamedg command. You can apply the Oracle patch 19544733 to fix this issue.
• Cloning of databases from a LUN that is directly attached to a host (for instance, by using Microsoft iSCSIInitiator on a Windows host) to a VMDK or an RDM LUN on the same Windows host, or another Windowshost, or vice versa, is not supported.
• The root directory of the volume mount point cannot be a shared directory.
86
• If you move a LUN that contains a clone to a new volume, the clone cannot be deleted.
Predefined environment variables for clone specific prescript and postscript
SnapCenter allows you to use the predefined environment variables when you executethe prescript and postscript while cloning a database.
Supported predefined environment variables for cloning a database
• SC_ORIGINAL_SID specifies the SID of the source database.
This parameter will be populated for application volumes.
Example: NFSB32
• SC_ORIGINAL_HOST specifies the name of the source host.
This parameter will be populated for application volumes.
Example: asmrac1.gdl.englab.netapp.com
• SC_ORACLE_HOME specifies the path of the target database’s Oracle home directory.
Example: /ora01/app/oracle/product/18.1.0/db_1
• SC_BACKUP_NAME" specifies the name of the backup.
This parameter will be populated for application volumes.
Examples:
◦ If the database is not running in ARCHIVELOG mode: DATA@RG2_scspr2417819002_07-20-2021_12.16.48.9267_0|LOG@RG2_scspr2417819002_07-20-2021_12.16.48.9267_1
◦ If the database is running in ARCHIVELOG mode: DATA@RG2_scspr2417819002_07-20-2021_12.16.48.9267_0|LOG:RG2_scspr2417819002_07-20-2021_12.16.48.9267_1,RG2_scspr2417819002_07-21-2021_12.16.48.9267_1,RG2_scspr2417819002_07-22-2021_12.16.48.9267_1
• SC_AV_NAME specifies the names of the application volumes.
Example: AV1|AV2
• SC_ORIGINAL_OS_USER specifies the operating system owner of the source database.
Example: oracle
• SC_ORIGINAL_OS_GROUP specifies the operating system group of the source database.
Example: oinstall
• SC_TARGET_SID" specifies the SID of the cloned database.
For PDB clone workflow, the value of this parameter will not be predefined.
This parameter will be populated for application volumes.
87
Example: clonedb
• SC_TARGET_HOST specifies the name of the host where the database will be cloned.
This parameter will be populated for application volumes.
Example: asmrac1.gdl.englab.netapp.com
• SC_TARGET_OS_USER specifies the operating system owner of the cloned database.
For PDB clone workflow, the value of this parameter will not be predefined.
Example: oracle
• SC_TARGET_OS_GROUP specifies the operating system group of the cloned database.
For PDB clone workflow, the value of this parameter will not be predefined.
Example: oinstall
• SC_TARGET_DB_PORT specifies the database port of the cloned database.
For PDB clone workflow, the value of this parameter will not be predefined.
Example: 1521
For information about delimiters, see Supported delimiters.
Requirements for cloning an Oracle database
Before cloning an Oracle database, you should ensure that prerequisites are completed.
• You should have created a backup of the database using SnapCenter.
You should have successfully created online data and log backups or offline (mount or shutdown) backupsfor the cloning operation to succeed.
• If you want to customize the control file or redo log file paths, you should have preprovisioned the requiredfile system or Automatic Storage Management (ASM) disk group.
By default, redo log and control files of the cloned database are created on the ASM disk group or the filesystem provisioned by SnapCenter for the data files of the clone database.
• If you are using ASM over NFS, you should add /var/opt/snapcenter/scu/clones/*/* to the existing pathdefined in the asm_diskstring parameter.
• In the asm_diskstring parameter, you should configure AFD:* if you are using ASMFD or configure ORCL:*
if you are using ASMLIB.
For information on how to edit the asm_diskstring parameter, see How to add disk paths to asm_diskstring.
• If you are creating the clone on an alternate host, the alternate host should meet the followingrequirements:
◦ SnapCenter Plug-in for Oracle Database should be installed on the alternate host.
88
◦ The clone host should be able to discover LUNs from primary or secondary storage.
▪ If you are cloning from primary storage or secondary (Vault or Mirror) storage to an alternate host,then make sure that an iSCSI session is either established between the secondary storage and thealternate host, or zoned properly for FC.
▪ Linux Host Utilities Installation and Setup Guide
▪ AIX Host Utilities Installation and Setup Guide
▪ If you are cloning from Vault or Mirror storage to the same host, then make sure that an iSCSIsession is either established between the Vault or Mirror storage and the host, or zoned properly forFC.
▪ If you are cloning in a virtualized environment, ensure that an iSCSI session is either establishedbetween the primary or secondary storage and the ESX server hosting the alternate host, or zonedproperly for FC.
◦ If the source database is an ASM database:
▪ The ASM instance should be up and running on the host where the clone will be performed.
▪ The ASM disk group should be provisioned prior to the clone operation if you want to place archivelog files of the cloned database in a dedicated ASM disk group.
▪ The name of the data disk group can be configured, but ensure that the name is not used by anyother ASM disk group on the host where the clone will be performed.
Data files residing on the ASM disk group are provisioned as part of the SnapCenter cloneworkflow.
• The protection type for the data LUN and the log LUN, such as mirror, vault, or mirror-vault, should be thesame to discover secondary locators during cloning to an alternate host using log backups.
• You should set the value of exclude_seed_cdb_view to FALSE in the source database parameter file toretrieve seed PDB related information for cloning a backup of 12c database.
The seed PDB is a system-supplied template that the CDB can use to create PDBs. The seed PDB isnamed PDB$SEED. For information about PDB$SEED, see the Oracle Doc ID 1940806.1.
You should set the value before backing up 12c database.
• SnapCenter supports backup of file systems that are managed by the autofs subsystem. If you are cloningthe database, ensure that data mount points are not under the root of the autofs mount point because theroot user of the plug-in host does not have permission to create directories under the root of the autofsmount point.
If control and redo log files are under data mount point, you should modify the control file path, and thenredo log file path accordingly.
You can manually register the new cloned mount points with the autofs subsystem. The newcloned mount points will not be registered automatically.
• If you have a TDE (auto login) and want to clone the database on the same or alternate host, you shouldcopy wallet (key files) under /etc/ORACLE/WALLET/$ORACLE_SID from the source database to thecloned database.
• You should set the value of use_lvmetad = 0 in /etc/lvm/lvm.conf and stop the lvm2-lvmetad service tosuccessfully perform cloning in storage area network (SAN) environments on Oracle Linux 7 or later or RedHat Enterprise Linux (RHEL) 7 or later.
89
• You should install the 13366202 Oracle patch if you are using Oracle database 11.2.0.3 or later and thedatabase ID for the auxiliary instance is changed using an NID script.
• You should ensure that the aggregates hosting the volumes should be in the assigned aggregates list ofthe storage virtual machine (SVM).
Clone an Oracle database backup
You can use SnapCenter to clone an Oracle database using the backup of the database.
About this task
The cloning operation creates a copy of the database data files, and creates new online redo log files andcontrol files. The database can be optionally recovered to a specified time, based on the specified recoveryoptions.
Cloning fails if you try to clone a backup that was created on a Linux host to an AIX host or vice-versa.
SnapCenter creates a stand-alone database when cloned from an Oracle RAC database backup. SnapCentersupports creating clone from the backup of a Data Guard standby and Active Data Guard standby databases.
During cloning, SnapCenter mounts the optimal number of log backups based on SCN or dat and time forrecovery operations. After recovery, the log backup is unmounted. All such clones are mounted under/var/opt/snapcenter/scu/clones/. If you are using ASM over NFS, you should add/var/opt/snapcenter/scu/clones/*/* to the existing path defined in the asm_diskstring parameter.
While cloning a backup of an ASM database in a SAN environment, udev rules for the cloned host devices arecreated at /etc/udev/rules.d/999-scu-netapp.rules. These udev rules associated with the cloned host devicesare deleted when you delete the clone.
In a Flex ASM setup, you cannot perform clone operation on Leaf nodes if the cardinality is lessthan the number nodes in the RAC cluster.
Steps
1. In the left navigation pane, click Resources, and then select the appropriate plug-in from the list.
2. In the Resources page, select either Database or Resource Group from the View list.
3. Select the database either from the database details view or from the resource group details view.
The database topology page is displayed.
4. From the Manage Copies view, select the backups either from Local copies (primary), Mirror copies(secondary), or Vault copies (secondary).
5.Select the Data backup from the table, and then click .
6. In the Name page, perform one of the following actions:
90
If you want to… Steps…
Clone a database (CDB or non CDB) a. Specify the SID of the clone.
The clone SID is not available by default, andthe maximum length of the SID is 8 characters.
You should ensure that nodatabase with the same SIDexists on the host where theclone will be created.
Clone a pluggable database (PDB) a. Select PDB Clone.
b. Specify the PDB that you want to clone.
c. Specify the name of cloned PDB. For thedetailed steps to clone a PDB, see Clone apluggable database.
When you select a mirrored or vault data:
◦ if there are no log backup at mirror or vault, nothing is selected and the locators are empty.
◦ if log backups exist in mirror or vault, the latest log backup is selected and corresponding locator isdisplayed.
If the selected log backup exists in both mirror and vault location, both the locators aredisplayed.
7. In the Locations page, perform the following actions:
For this field… Do this…
Clone host By default, the source database host is populated.
If you want to create the clone on an alternate host,select the host having the same version of Oracleand OS as that of the source database host.
91
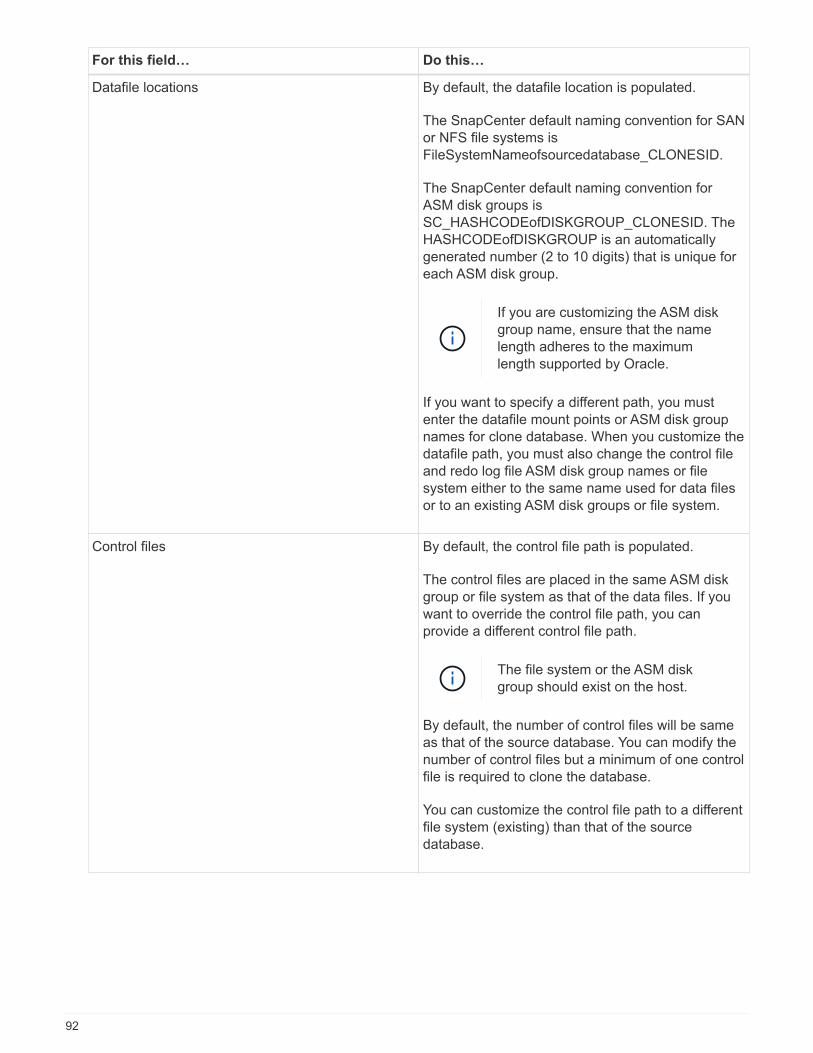
For this field… Do this…
Datafile locations By default, the datafile location is populated.
The SnapCenter default naming convention for SANor NFS file systems isFileSystemNameofsourcedatabase_CLONESID.
The SnapCenter default naming convention forASM disk groups isSC_HASHCODEofDISKGROUP_CLONESID. TheHASHCODEofDISKGROUP is an automaticallygenerated number (2 to 10 digits) that is unique foreach ASM disk group.
If you are customizing the ASM diskgroup name, ensure that the namelength adheres to the maximumlength supported by Oracle.
If you want to specify a different path, you mustenter the datafile mount points or ASM disk groupnames for clone database. When you customize thedatafile path, you must also change the control fileand redo log file ASM disk group names or filesystem either to the same name used for data filesor to an existing ASM disk groups or file system.
Control files By default, the control file path is populated.
The control files are placed in the same ASM diskgroup or file system as that of the data files. If youwant to override the control file path, you canprovide a different control file path.
The file system or the ASM diskgroup should exist on the host.
By default, the number of control files will be sameas that of the source database. You can modify thenumber of control files but a minimum of one controlfile is required to clone the database.
You can customize the control file path to a differentfile system (existing) than that of the sourcedatabase.
92
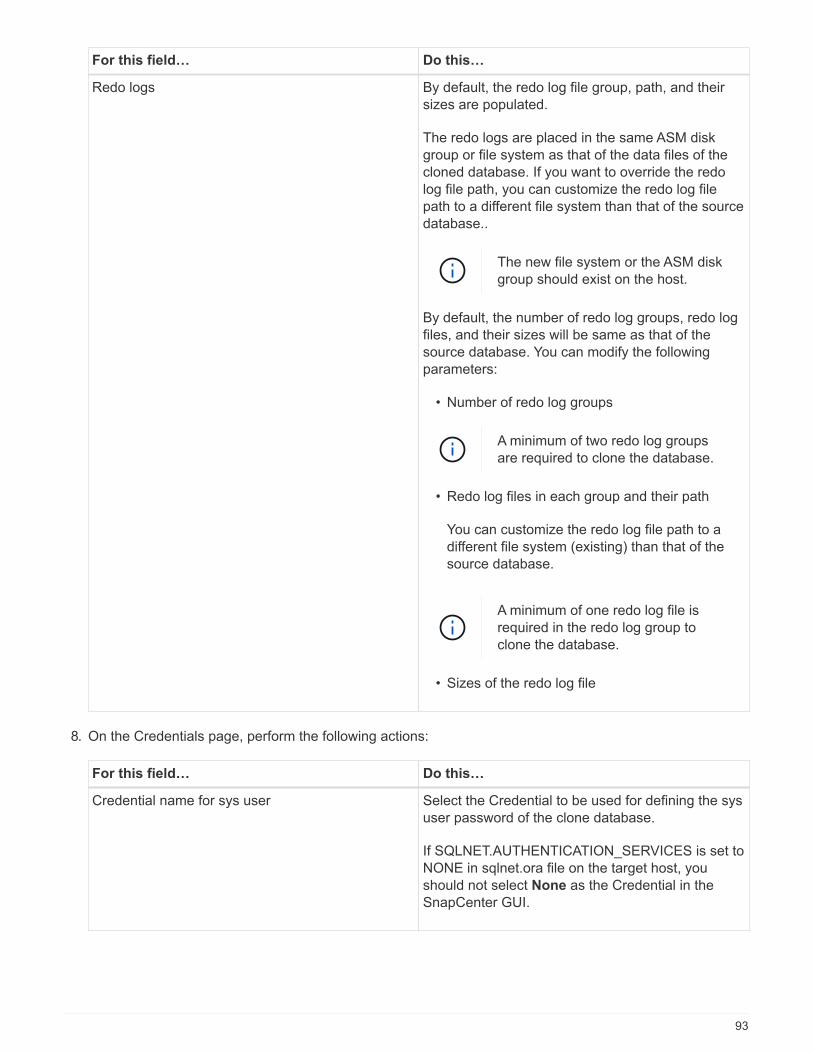
For this field… Do this…
Redo logs By default, the redo log file group, path, and theirsizes are populated.
The redo logs are placed in the same ASM diskgroup or file system as that of the data files of thecloned database. If you want to override the redolog file path, you can customize the redo log filepath to a different file system than that of the sourcedatabase..
The new file system or the ASM diskgroup should exist on the host.
By default, the number of redo log groups, redo logfiles, and their sizes will be same as that of thesource database. You can modify the followingparameters:
• Number of redo log groups
A minimum of two redo log groupsare required to clone the database.
• Redo log files in each group and their path
You can customize the redo log file path to adifferent file system (existing) than that of thesource database.
A minimum of one redo log file isrequired in the redo log group toclone the database.
• Sizes of the redo log file
8. On the Credentials page, perform the following actions:
For this field… Do this…
Credential name for sys user Select the Credential to be used for defining the sysuser password of the clone database.
If SQLNET.AUTHENTICATION_SERVICES is set toNONE in sqlnet.ora file on the target host, youshould not select None as the Credential in theSnapCenter GUI.
93
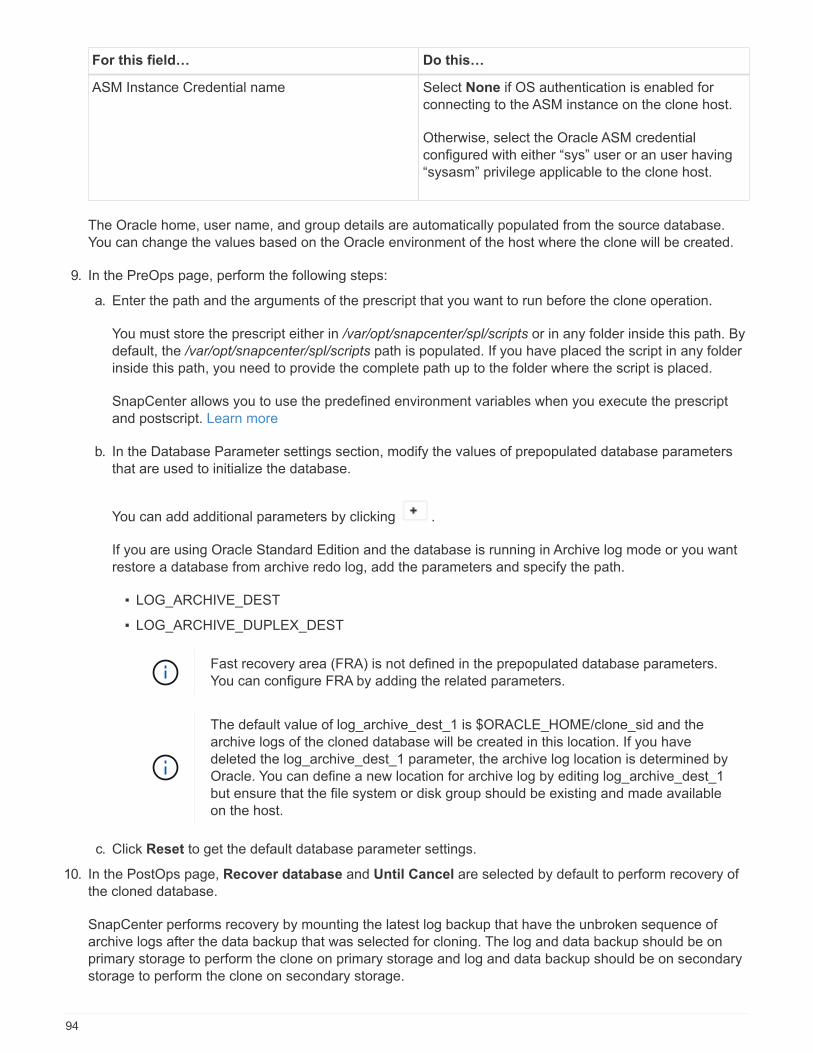
For this field… Do this…
ASM Instance Credential name Select None if OS authentication is enabled forconnecting to the ASM instance on the clone host.
Otherwise, select the Oracle ASM credentialconfigured with either “sys” user or an user having“sysasm” privilege applicable to the clone host.
The Oracle home, user name, and group details are automatically populated from the source database.You can change the values based on the Oracle environment of the host where the clone will be created.
9. In the PreOps page, perform the following steps:
a. Enter the path and the arguments of the prescript that you want to run before the clone operation.
You must store the prescript either in /var/opt/snapcenter/spl/scripts or in any folder inside this path. Bydefault, the /var/opt/snapcenter/spl/scripts path is populated. If you have placed the script in any folderinside this path, you need to provide the complete path up to the folder where the script is placed.
SnapCenter allows you to use the predefined environment variables when you execute the prescriptand postscript. Learn more
b. In the Database Parameter settings section, modify the values of prepopulated database parametersthat are used to initialize the database.
You can add additional parameters by clicking .
If you are using Oracle Standard Edition and the database is running in Archive log mode or you wantrestore a database from archive redo log, add the parameters and specify the path.
▪ LOG_ARCHIVE_DEST
▪ LOG_ARCHIVE_DUPLEX_DEST
Fast recovery area (FRA) is not defined in the prepopulated database parameters.You can configure FRA by adding the related parameters.
The default value of log_archive_dest_1 is $ORACLE_HOME/clone_sid and thearchive logs of the cloned database will be created in this location. If you havedeleted the log_archive_dest_1 parameter, the archive log location is determined byOracle. You can define a new location for archive log by editing log_archive_dest_1but ensure that the file system or disk group should be existing and made availableon the host.
c. Click Reset to get the default database parameter settings.
10. In the PostOps page, Recover database and Until Cancel are selected by default to perform recovery ofthe cloned database.
SnapCenter performs recovery by mounting the latest log backup that have the unbroken sequence ofarchive logs after the data backup that was selected for cloning. The log and data backup should be onprimary storage to perform the clone on primary storage and log and data backup should be on secondarystorage to perform the clone on secondary storage.
94
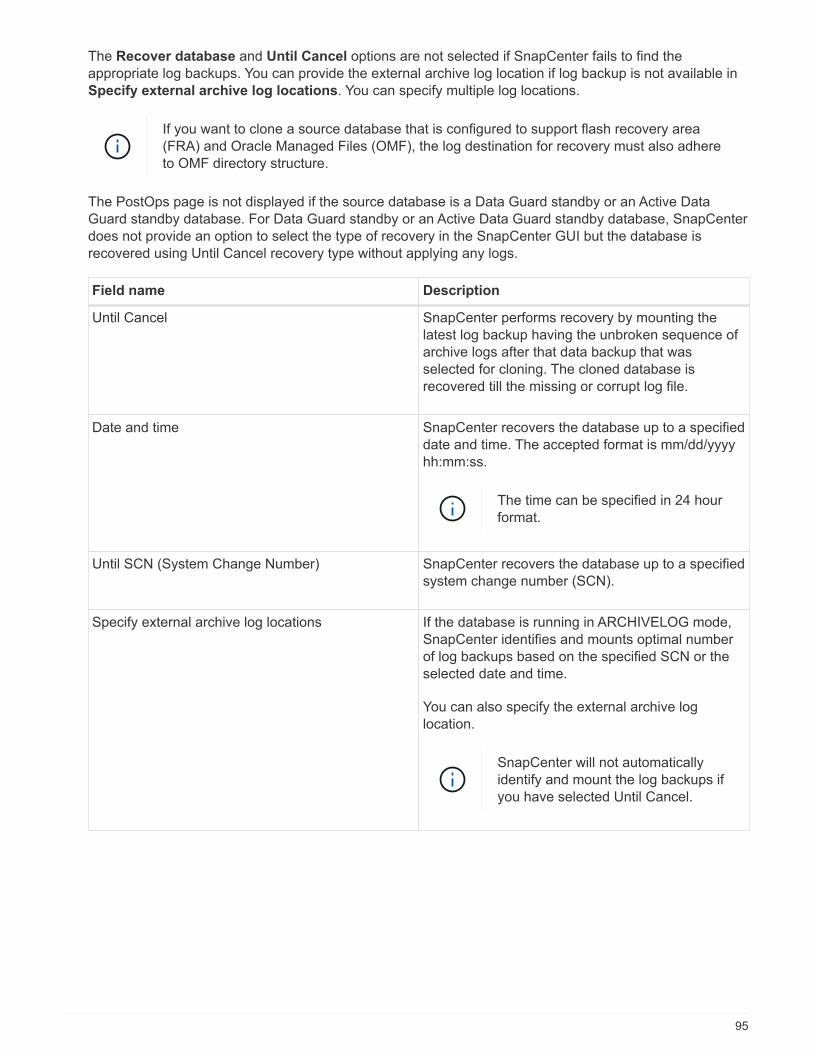
The Recover database and Until Cancel options are not selected if SnapCenter fails to find theappropriate log backups. You can provide the external archive log location if log backup is not available inSpecify external archive log locations. You can specify multiple log locations.
If you want to clone a source database that is configured to support flash recovery area(FRA) and Oracle Managed Files (OMF), the log destination for recovery must also adhereto OMF directory structure.
The PostOps page is not displayed if the source database is a Data Guard standby or an Active DataGuard standby database. For Data Guard standby or an Active Data Guard standby database, SnapCenterdoes not provide an option to select the type of recovery in the SnapCenter GUI but the database isrecovered using Until Cancel recovery type without applying any logs.
Field name Description
Until Cancel SnapCenter performs recovery by mounting thelatest log backup having the unbroken sequence ofarchive logs after that data backup that wasselected for cloning. The cloned database isrecovered till the missing or corrupt log file.
Date and time SnapCenter recovers the database up to a specifieddate and time. The accepted format is mm/dd/yyyyhh:mm:ss.
The time can be specified in 24 hourformat.
Until SCN (System Change Number) SnapCenter recovers the database up to a specifiedsystem change number (SCN).
Specify external archive log locations If the database is running in ARCHIVELOG mode,SnapCenter identifies and mounts optimal numberof log backups based on the specified SCN or theselected date and time.
You can also specify the external archive loglocation.
SnapCenter will not automaticallyidentify and mount the log backups ifyou have selected Until Cancel.
95
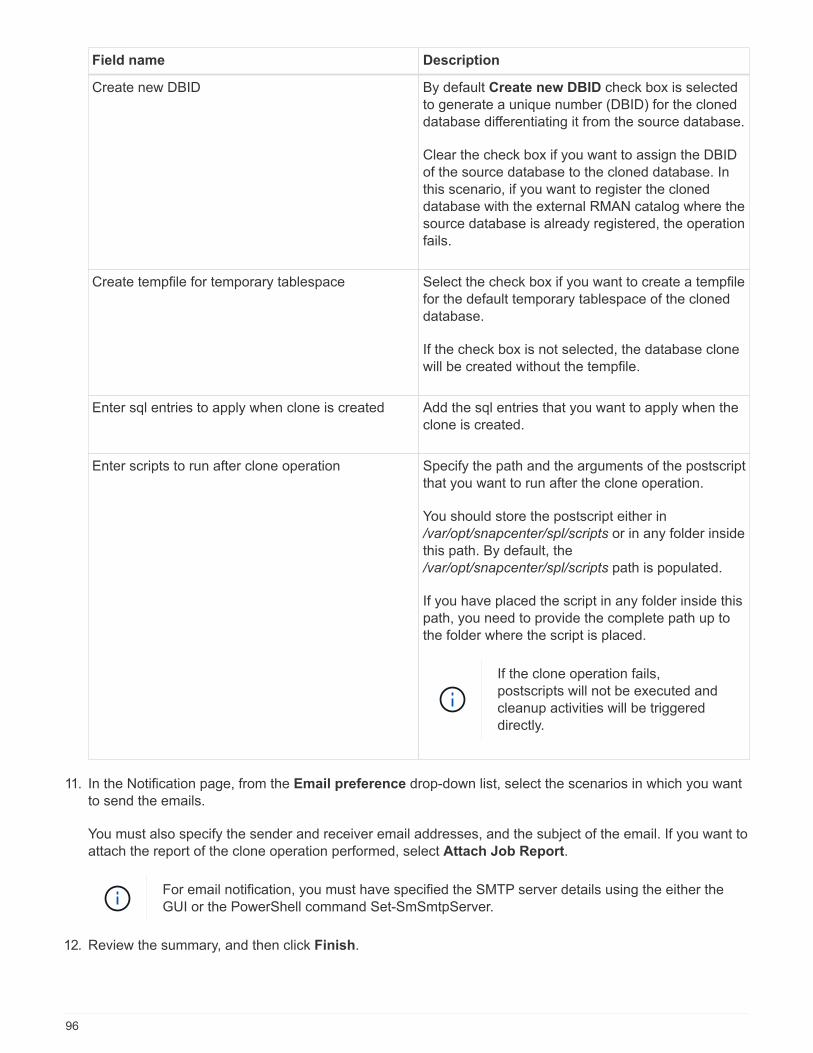
Field name Description
Create new DBID By default Create new DBID check box is selectedto generate a unique number (DBID) for the cloneddatabase differentiating it from the source database.
Clear the check box if you want to assign the DBIDof the source database to the cloned database. Inthis scenario, if you want to register the cloneddatabase with the external RMAN catalog where thesource database is already registered, the operationfails.
Create tempfile for temporary tablespace Select the check box if you want to create a tempfilefor the default temporary tablespace of the cloneddatabase.
If the check box is not selected, the database clonewill be created without the tempfile.
Enter sql entries to apply when clone is created Add the sql entries that you want to apply when theclone is created.
Enter scripts to run after clone operation Specify the path and the arguments of the postscriptthat you want to run after the clone operation.
You should store the postscript either in/var/opt/snapcenter/spl/scripts or in any folder insidethis path. By default, the/var/opt/snapcenter/spl/scripts path is populated.
If you have placed the script in any folder inside thispath, you need to provide the complete path up tothe folder where the script is placed.
If the clone operation fails,postscripts will not be executed andcleanup activities will be triggereddirectly.
11. In the Notification page, from the Email preference drop-down list, select the scenarios in which you wantto send the emails.
You must also specify the sender and receiver email addresses, and the subject of the email. If you want toattach the report of the clone operation performed, select Attach Job Report.
For email notification, you must have specified the SMTP server details using the either theGUI or the PowerShell command Set-SmSmtpServer.
12. Review the summary, and then click Finish.
96
While performing recovery as part of clone create operation, even if recovery fails, the cloneis created with a warning. You can perform manual recovery on this clone to bring the clonedatabase to consistent state.
13. Monitor the operation progress by clicking Monitor > Jobs.
Result
After cloning the database you can refresh the resources page to list the cloned database as one of theresource available for backup. The cloned database can be protected like any other database using thestandard backup workflow or can be included in a resource group (either newly created or existing). Thecloned database can be further cloned (clone of clones).
After cloning, you should never rename the cloned database.
If you have not performed recovery while cloning, the backing up of the cloned database mightfail due to improper recovery and you might have to perform manual recovery. The log backupcan also fail if default location which was populated for archive logs is on a non-NetApp storageor if the storage system is not configured with SnapCenter.
In AIX setup, you can use the lkdev command to lock and the rendev command to rename the disks on whichthe cloned database resided.
Locking or renaming of devices will not affect the clone deletion operation. For AIX LVM layouts built on SANdevices, renaming of devices will not be supported for the cloned SAN devices.
Find more information
• Restore or cloning fails with ORA-00308 error message
• Failed to recover a cloned database
• Customizable parameters for backup, restore and clone operations on AIX systems
Clone a pluggable database
You can clone a pluggable database (PDB) to a different or same target CDB on thesame host or alternate host. You can also recover the cloned PDB to a desired SCN ordate and time.
Steps
1. In the left navigation pane, click Resources, and then select the appropriate plug-in from the list.
2. In the Resources page, select either Database or Resource Group from the View list.
3. Select the database of type single instance (multitenant) either from the database details view or from theresource group details view.
The database topology page is displayed.
4. From the Manage Copies view, select the backups either from Local copies (primary), Mirror copies(secondary), or Vault copies (secondary).
5.Select the backup from the table, and then click .
97
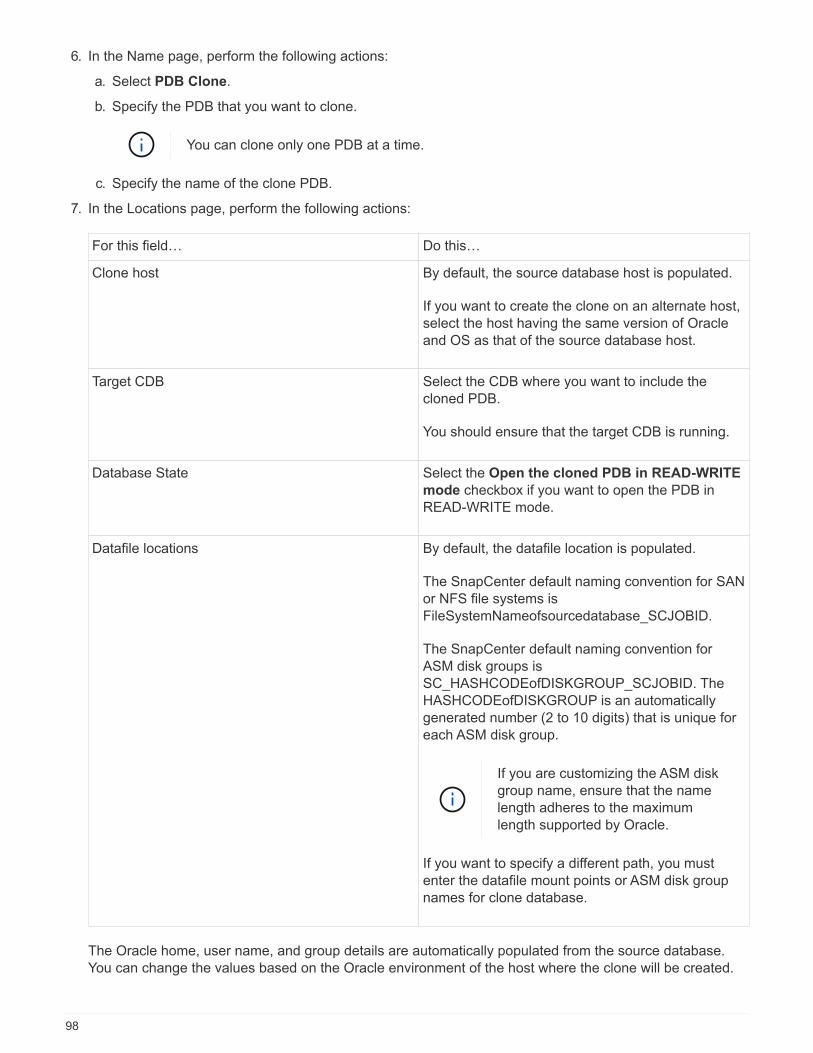
6. In the Name page, perform the following actions:
a. Select PDB Clone.
b. Specify the PDB that you want to clone.
You can clone only one PDB at a time.
c. Specify the name of the clone PDB.
7. In the Locations page, perform the following actions:
For this field… Do this…
Clone host By default, the source database host is populated.
If you want to create the clone on an alternate host,select the host having the same version of Oracleand OS as that of the source database host.
Target CDB Select the CDB where you want to include thecloned PDB.
You should ensure that the target CDB is running.
Database State Select the Open the cloned PDB in READ-WRITE
mode checkbox if you want to open the PDB inREAD-WRITE mode.
Datafile locations By default, the datafile location is populated.
The SnapCenter default naming convention for SANor NFS file systems isFileSystemNameofsourcedatabase_SCJOBID.
The SnapCenter default naming convention forASM disk groups isSC_HASHCODEofDISKGROUP_SCJOBID. TheHASHCODEofDISKGROUP is an automaticallygenerated number (2 to 10 digits) that is unique foreach ASM disk group.
If you are customizing the ASM diskgroup name, ensure that the namelength adheres to the maximumlength supported by Oracle.
If you want to specify a different path, you mustenter the datafile mount points or ASM disk groupnames for clone database.
The Oracle home, user name, and group details are automatically populated from the source database.You can change the values based on the Oracle environment of the host where the clone will be created.
98
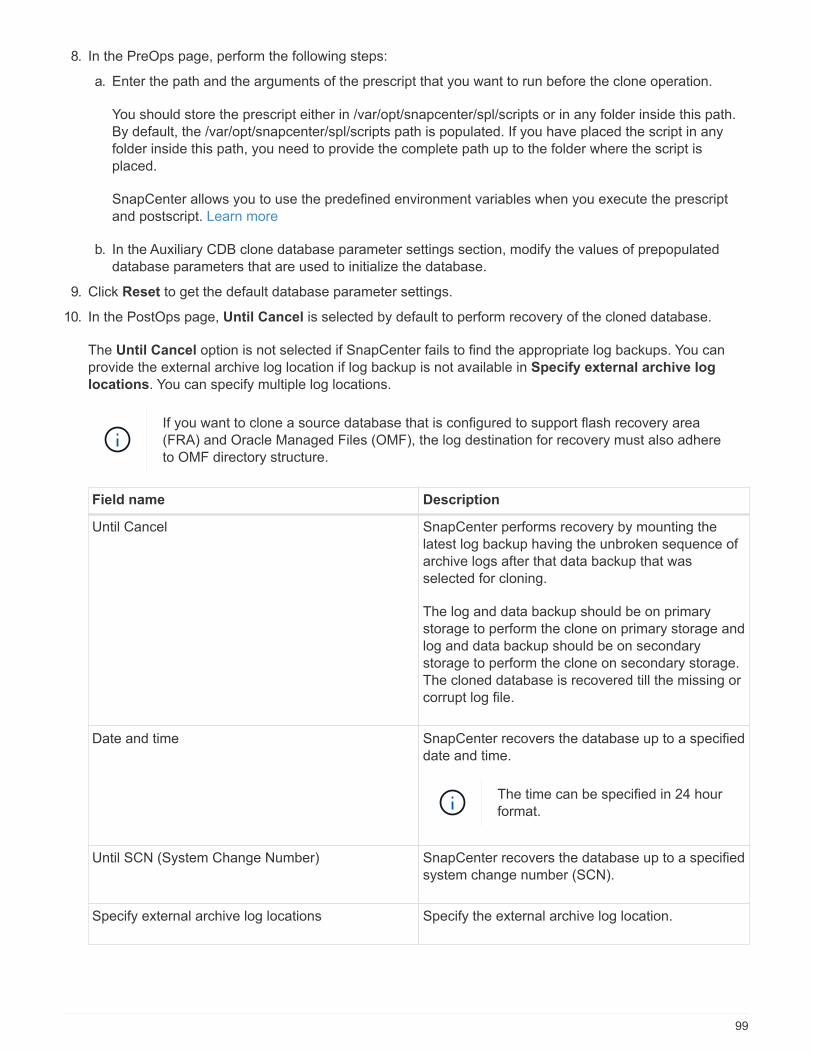
8. In the PreOps page, perform the following steps:
a. Enter the path and the arguments of the prescript that you want to run before the clone operation.
You should store the prescript either in /var/opt/snapcenter/spl/scripts or in any folder inside this path.By default, the /var/opt/snapcenter/spl/scripts path is populated. If you have placed the script in anyfolder inside this path, you need to provide the complete path up to the folder where the script isplaced.
SnapCenter allows you to use the predefined environment variables when you execute the prescriptand postscript. Learn more
b. In the Auxiliary CDB clone database parameter settings section, modify the values of prepopulateddatabase parameters that are used to initialize the database.
9. Click Reset to get the default database parameter settings.
10. In the PostOps page, Until Cancel is selected by default to perform recovery of the cloned database.
The Until Cancel option is not selected if SnapCenter fails to find the appropriate log backups. You canprovide the external archive log location if log backup is not available in Specify external archive log
locations. You can specify multiple log locations.
If you want to clone a source database that is configured to support flash recovery area(FRA) and Oracle Managed Files (OMF), the log destination for recovery must also adhereto OMF directory structure.
Field name Description
Until Cancel SnapCenter performs recovery by mounting thelatest log backup having the unbroken sequence ofarchive logs after that data backup that wasselected for cloning.
The log and data backup should be on primarystorage to perform the clone on primary storage andlog and data backup should be on secondarystorage to perform the clone on secondary storage.The cloned database is recovered till the missing orcorrupt log file.
Date and time SnapCenter recovers the database up to a specifieddate and time.
The time can be specified in 24 hourformat.
Until SCN (System Change Number) SnapCenter recovers the database up to a specifiedsystem change number (SCN).
Specify external archive log locations Specify the external archive log location.
99
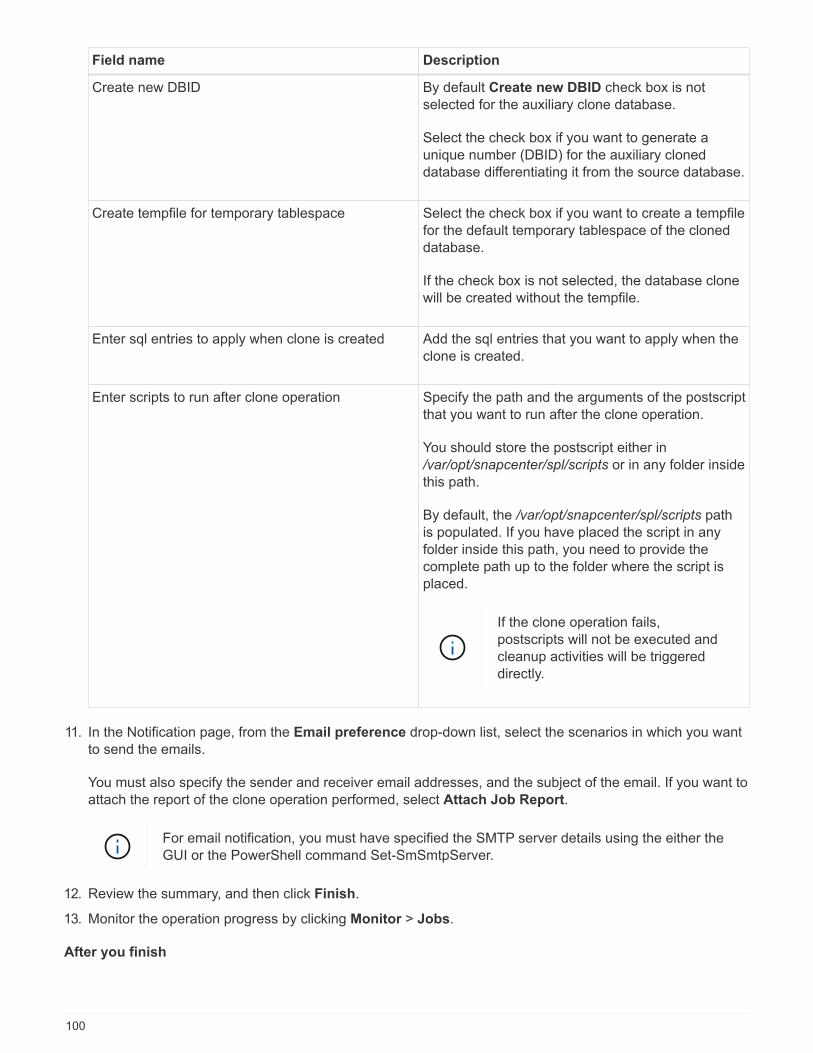
Field name Description
Create new DBID By default Create new DBID check box is notselected for the auxiliary clone database.
Select the check box if you want to generate aunique number (DBID) for the auxiliary cloneddatabase differentiating it from the source database.
Create tempfile for temporary tablespace Select the check box if you want to create a tempfilefor the default temporary tablespace of the cloneddatabase.
If the check box is not selected, the database clonewill be created without the tempfile.
Enter sql entries to apply when clone is created Add the sql entries that you want to apply when theclone is created.
Enter scripts to run after clone operation Specify the path and the arguments of the postscriptthat you want to run after the clone operation.
You should store the postscript either in/var/opt/snapcenter/spl/scripts or in any folder insidethis path.
By default, the /var/opt/snapcenter/spl/scripts pathis populated. If you have placed the script in anyfolder inside this path, you need to provide thecomplete path up to the folder where the script isplaced.
If the clone operation fails,postscripts will not be executed andcleanup activities will be triggereddirectly.
11. In the Notification page, from the Email preference drop-down list, select the scenarios in which you wantto send the emails.
You must also specify the sender and receiver email addresses, and the subject of the email. If you want toattach the report of the clone operation performed, select Attach Job Report.
For email notification, you must have specified the SMTP server details using the either theGUI or the PowerShell command Set-SmSmtpServer.
12. Review the summary, and then click Finish.
13. Monitor the operation progress by clicking Monitor > Jobs.
After you finish
100
If you want to create a backup of the cloned PDB, you should backup the target CDB where the PDB is clonedbecause backing up only the cloned PDB is not possible. You should create a secondary relationship for thetarget CDB if you want to create the backup with secondary relationship.
In a RAC setup the storage for cloned PDB is attached only to the node where the PDB clone was performed.The PDBs on the other nodes of the RAC are in MOUNT state. If you want the cloned PDB to be accessiblefrom the other nodes, you should manually attach the storage to the other nodes.
Find more information
• Restore or cloning fails with ORA-00308 error message
• Customizable parameters for backup, restore and clone operations on AIX systems
Clone Oracle database backups using UNIX commands
The clone workflow includes planning, performing the clone operation, and monitoring theoperation.
About this task
You should execute the following commands to create the Oracle database clone specification file and initiatethe clone operation.
The information regarding the parameters that can be used with the command and their descriptions can beobtained by running Get-Help command_name. Alternatively, you can also refer to the SnapCenter SoftwareCommand Reference Guide.
Steps
1. Create an Oracle database clone specification from a specified backup: New-SmOracleCloneSpecification
If secondary data protection policy is unified mirror-vault, then specify only-IncludeSecondaryDetails. You do not have to specify -SecondaryStorageType.
This command automatically creates an Oracle database clone specification file for the specified sourcedatabase and its backup. You must also provide a clone database SID so that the specification file createdhas the automatically generated values for the clone database which you will be creating.
The clone specification file is created at /var/opt/snapcenter/sco/clone_specs.
2. Initiate a clone operation from a clone resource group or an existing backup: New-SmClone
This command initiates a clone operation. You must also provide an Oracle clone specification file path forthe clone operation. You can also specify the recovery options, host where the clone operation to beperformed, prescripts, postscripts, and other details.
By default, the archive log destination file for the clone database is automatically populated at$ORACLE_HOME/CLONE_SIDs.
Split an Oracle Database Clone
You can use SnapCenter to split a cloned resource from the parent resource. The clone
101
that is split becomes independent of the parent resource.
About this task
• You cannot perform the clone split operation on an intermediate clone.
For example, after you create clone1 from a database backup, you can create a backup of clone1, andthen clone this backup (clone2). After you create clone2, clone1 is an intermediate clone, and you cannotperform the clone split operation on clone1. However, you can perform the clone split operation on clone2.
After splitting clone2, you can perform the clone split operation on clone1 because clone1 is no longer theintermediate clone.
• When you split a clone, the backup copies of the clone are deleted.
• For information about clone split operation limitations, see the ONTAP 9 Logical Storage ManagementGuide.
• Ensure that the volume or aggregate on the storage system is online.
Steps
1. In the left navigation pane, click Resources, and then select the appropriate plug-in from the list.
2. In the Resources page, select Database from the View list.
3. Select the cloned resource, (for example, the database or LUN) and then click .
4. Review the estimated size of the clone that is to be split and the required space available on the aggregate,and then click Start.
5. Monitor the operation progress by clicking Monitor > Jobs.
The clone split operation stops responding if the SMCore service restarts and the databases on which theclone split operation was performed are listed as clones in the Resources page. You should run the Stop-
SmJob cmdlet to stop the clone split operation, and then retry the clone split operation.
If you want a longer poll time or shorter poll time to check whether the clone is split or not, you can changethe value of CloneSplitStatusCheckPollTime parameter in SMCoreServiceHost.exe.config file to set thetime interval for SMCore to poll for the status of the clone split operation. The value is in milliseconds andthe default value is 5 minutes.
For example,
<add key="CloneSplitStatusCheckPollTime" value="300000" />
The clone split start operation fails if backup, restore, or anther clone split is in progress. Youshould restart the clone split operation only after the running operations are complete.
Split clone of a pluggable database
You can use SnapCenter to split a cloned pluggable database (PDB).
About this task
102
If you created a backup of the target CDB where the PDB is cloned, when you split the PDB clone, the clonedPDB is also removed from all the backups of the target CDB containing the cloned PDB.
The PDB clones are not displayed in the inventory or resources view.
Steps
1. In the left navigation pane, click Resources, and then select the appropriate plug-in from the list.
2. Select the source container database (CDB) from the resource or resource group view.
3. From the Manage Copies view, select Clones either from the primary or secondary (mirrored or replicated)storage systems.
4. Select the PDB clone (targetCDB:PDBClone) and then click .
5. Review the estimated size of the clone that is to be split and the required space available on the aggregate,and then click Start.
6. Monitor the operation progress by clicking Monitor > Jobs.
Monitor Oracle database clone operations
You can monitor the progress of SnapCenter clone operations by using the Jobs page.You might want to check the progress of an operation to determine when it is complete orif there is an issue.
About this task
The following icons appear on the Jobs page, and indicate the state of the operation:
• In progress
• Completed successfully
• Failed
• Completed with warnings or could not start due to warnings
• Queued
• Canceled
Steps
1. In the left navigation pane, click Monitor.
2. In the Monitor page, click Jobs.
3. In the Jobs page, perform the following steps:
a. Click to filter the list so that only clone operations are listed.
b. Specify the start and end dates.
c. From the Type drop-down list, select Clone.
d. From the Status drop-down list, select the clone status.
e. Click Apply to view the operations that are completed successfully.
103
4. Select the clone job, and then click Details to view the job details.
5. In the Job Details page, click View logs.
Refresh a clone
You can refresh the clone by running the Refresh-SmClone command. This commandcreates a backup of the database, deletes the existing clone, and creates a clone with thesame name.
You cannot refresh a PDB clone.
What you will need
• Create an online full backup or an offline data backup policy with no scheduled backups enabled.
• Configure the email notification in the policy for backup failures only.
• Define the retention count for the on-demand backups appropriately to ensure that there are no unwantedbackups.
• Ensure that only an online full backup or an offline data backup policy is associated with resource groupwhich is identified for refresh clone operation.
• Create a resource group with only one database.
• If a cron job is created for the clone refresh command, ensure that the SnapCenter schedules and the cronschedules are not overlapping for the database resource group.
For a cron job created for the clone refresh command, ensure that you run Open-SmConnection after every24hrs.
• Ensure that the clone SID is unique for a host.
If multiple refresh clone operations use the same clone specification file or use the clone specification filewith same clone SID, existing clone with the SID on the host will be deleted and then the clone will becreated.
• Ensure that the backup policy is enabled with secondary protection and the clone specification file iscreated with “-IncludeSecondaryDetails” to create the clones using secondary backups.
◦ If the primary clone specification file is specified but the policy has secondary update option selected,the backup will be created, and update will get transferred to secondary. However, the clone will becreated from the primary backup.
◦ If the primary clone specification file is specified and the policy does not have secondary update optionselected, the backup will be created on primary and clone will be created from primary.
Steps
1. Initiate a connection session with the SnapCenter Server for a specified user: Open-SmConnection
2. Create an Oracle database clone specification from a specified backup: New-SmOracleCloneSpecification
If secondary data protection policy is unified mirror-vault, then specify only-IncludeSecondaryDetails. You do not have to specify -SecondaryStorageType.
This command automatically creates an Oracle database clone specification file for the specified source
104
database and its backup. You must also provide a clone database SID so that the specification file createdhas the automatically generated values for the clone database which you will be creating.
The clone specification file is created at /var/opt/snapcenter/sco/clone_specs.
3. Run Refresh-SmClone.
If the operation fails with the "PL-SCO-20032: canExecute operation failed with error: PL-SCO-30031:Redo log file +SC_2959770772_clmdb/clmdb/redolog/redo01_01.log exists" error messages, specify ahigher value for -WaitToTriggerClone.
For detailed information on UNIX commands, see the SnapCenter Software Command Reference Guide.
Delete clone of a pluggable database
You can delete the clone of a pluggable database (PDB) if you no longer require.
If you created a backup of the target CDB where the PDB is cloned, when you delete the PDB clone, thecloned PDB is also removed from the backup of the target CDB.
The PDB clones are not displayed in the inventory or resources view.
Steps
1. In the left navigation pane, click Resources, and then select the appropriate plug-in from the list.
2. Select the source container database (CDB) from the resource or resource group view.
3. From the Manage Copies view, select Clones either from the primary or secondary (mirrored or replicated)storage systems.
4. Select the PDB clone (targetCDB:PDBClone) and then click .
5. Click OK.
Manage application volumes
Add application volumes
SnapCenter supports backing up and cloning of application volumes of Oracle database.You should manually add the application volumes. Auto discovery of application volumesis not supported.
Steps
1. In the left navigation pane, click Resources, and then select the Oracle Database plug-in from the list.
2. Click Add Application Volume.
3. In the Name page, perform the following actions:
◦ In the Name field, enter the name of the application volume.
◦ In the Host Name field, enter the name of the host.
4. In the Storage Footprint page, enter the storage system name, select one or volumes, and specify the
105
associated LUNs or Qtrees.
You can add multiple storage systems.
5. Review the summary, and then click Finish.
6. In the Resources page, select Application Volume from the View list to view all the application volumesthat you have added.
Modify application volume
You can modify all the values that you specified while adding the application volume, if no backups are created.If the backup is created, you can only modify the storage system details.
Steps
1. In the left navigation pane, click Resources, and then select the Oracle Database plug-in from the list.
2. In the Resources page, select Application Volume from the View list.
3.
Click to modify the values.
Delete application volume
When you delete an application volume, if there any backups associated with the application volume, theapplication volume will be put into maintenance mode and no new backups will be created and no earlierbackups will be retained. If there are no backups associated, all the metadata will be deleted.
If required, SnapCenter allows you to undo the delete operation.
Steps
1. In the left navigation pane, click Resources, and then select the Oracle Database plug-in from the list.
2. In the Resources page, select Application Volume from the View list.
3. Click to modify the values.
Backup application volumes
Back up application volume
If the application volume is not part of any resource group, you can back up theapplication volume from the Resources page.
About this task
By default, consistency group (CG) backups are created. If you want to create volume based backups, youshould set the value of EnableOracleNdvVolumeBasedBackup to true in the web.config file.
Steps
1. In the left navigation pane, click Resources, and then select the Oracle Database plug-in from the list.
2. In the Resources page, select Application Volume from the View list.
3. Click , and then select the host name and the database type to filter the resources.
106
You can then click to close the filter pane.
4. Select the application volume that you want to back up.
The Application volume-Protect page is displayed.
5. In the Resource page, perform the following actions:
For this field… Do this…
Use custom name format for Snapshot copy Select this check box, and then enter a customname format that you want to use for the Snapshotcopy name.
For example, customtext__policy_hostname orresource_hostname. By default, a timestamp isappended to the Snapshot copy name.
Exclude archive log destinations from backup Specify the destinations of the archive log files thatyou do not want to back up.
6. In the Policies page, perform the following steps:
a. Select one or more policies from the drop-down list.
You can also create a policy by clicking .
In the Configure schedules for selected policies section, the selected policies are listed.
a.Click in the Configure Schedules column for the policy for which you want to configure aschedule.
b. In the Add schedules for policy policy_name window, configure the schedule, and then click OK.
policy_name is the name of the policy that you have selected.
The configured schedules are listed in the Applied Schedules column.
7. In the Notification page, from the Email preference drop-down list, select the scenarios in which you wantto send the emails.
You must also specify the sender and receiver email addresses, and the subject of the email. If you want toattach the report of the backup operation performed on the resource, and then select Attach Job Report.
For email notification, you must have specified the SMTP server details using the either theGUI or the PowerShell command Set-SmSmtpServer.
8. Review the summary, and then click Finish.
The application volume topology page is displayed.
9. Click Back up Now.
107
10. In the Backup page, perform the following steps:
a. If you have applied multiple policies to the resource, from the Policy drop-down list, select the policythat you want to use for backup.
b. Click Backup.
11. Monitor the operation progress by clicking Monitor > Jobs.
Back up the application volumes resource group
You can back up the resource group containing only application volumes or a mix ofapplication volumes and database. A backup operation on the resource group isperformed on all resources defined in the resource group.
If the resource group has multiple application volumes, all the application volumes should either haveSnapMirror or SnapVault replication policy.
About this task
By default, consistency group (CG) backups are created. If you want to create volume based backups, youshould set the value of EnableOracleNdvVolumeBasedBackup to true in the web.config file.
Steps
1. In the left navigation pane, click Resources, and then select the Oracle Database plug-in from the list.
2. In the Resources page, select Resource Group from the View list.
You can search the resource group either by entering the resource group name in the search box, or byclicking , and then selecting the tag. You can then click to close the filter pane.
3. In the Resource Groups page, select the resource group that you want to back up, and then click Back up
Now.
4. In the Backup page, perform the following steps:
a. If you have associated multiple policies with the resource group, from the Policy drop-down list, selectthe policy that you want to use for backup.
If the policy selected for the on-demand backup is associated with a backup schedule, the on-demandbackups will be retained based on the retention settings specified for the schedule type.
b. Click Backup.
5. Monitor the operation progress by clicking Monitor > Jobs.
Verification operation will be performed only for the databases and not for the applicationvolumes.
Clone application volume backup
You can use SnapCenter to clone the application volume backups.
Steps
108
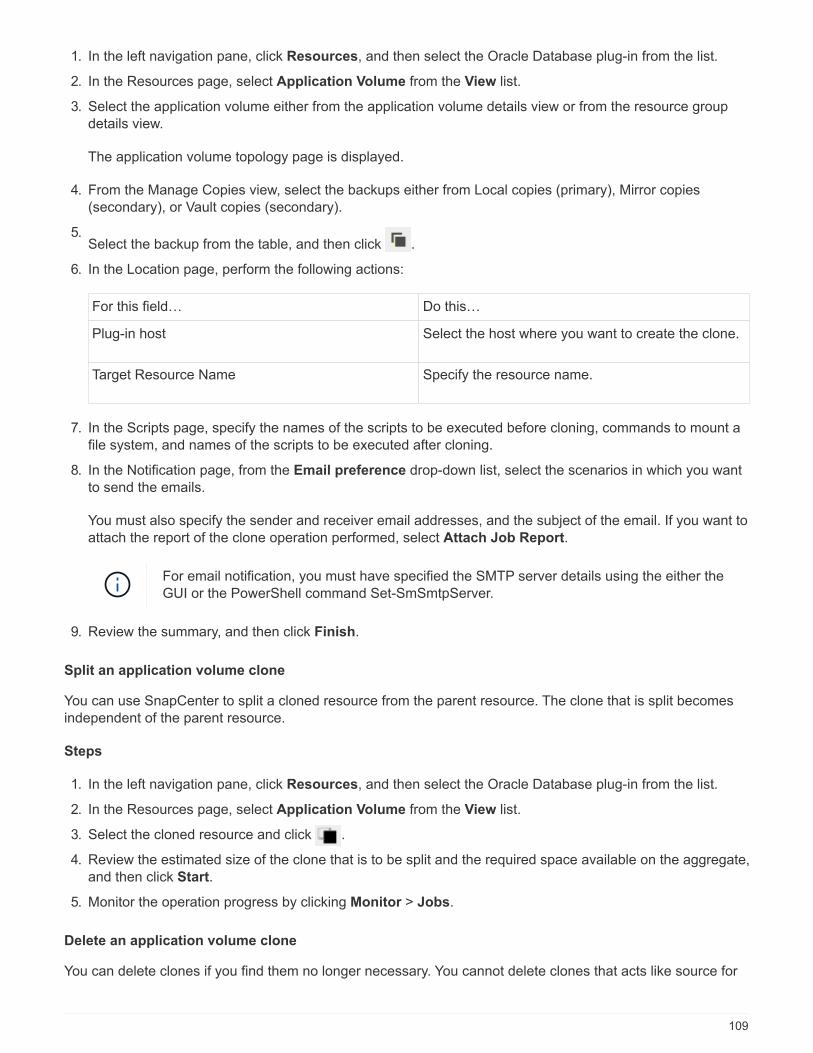
1. In the left navigation pane, click Resources, and then select the Oracle Database plug-in from the list.
2. In the Resources page, select Application Volume from the View list.
3. Select the application volume either from the application volume details view or from the resource groupdetails view.
The application volume topology page is displayed.
4. From the Manage Copies view, select the backups either from Local copies (primary), Mirror copies(secondary), or Vault copies (secondary).
5.Select the backup from the table, and then click .
6. In the Location page, perform the following actions:
For this field… Do this…
Plug-in host Select the host where you want to create the clone.
Target Resource Name Specify the resource name.
7. In the Scripts page, specify the names of the scripts to be executed before cloning, commands to mount afile system, and names of the scripts to be executed after cloning.
8. In the Notification page, from the Email preference drop-down list, select the scenarios in which you wantto send the emails.
You must also specify the sender and receiver email addresses, and the subject of the email. If you want toattach the report of the clone operation performed, select Attach Job Report.
For email notification, you must have specified the SMTP server details using the either theGUI or the PowerShell command Set-SmSmtpServer.
9. Review the summary, and then click Finish.
Split an application volume clone
You can use SnapCenter to split a cloned resource from the parent resource. The clone that is split becomesindependent of the parent resource.
Steps
1. In the left navigation pane, click Resources, and then select the Oracle Database plug-in from the list.
2. In the Resources page, select Application Volume from the View list.
3. Select the cloned resource and click .
4. Review the estimated size of the clone that is to be split and the required space available on the aggregate,and then click Start.
5. Monitor the operation progress by clicking Monitor > Jobs.
Delete an application volume clone
You can delete clones if you find them no longer necessary. You cannot delete clones that acts like source for
109
other clones.
Steps
1. In the left navigation pane, click Resources, and then select the Oracle Database plug-in from the list.
2. In the Resources page, select Application Volume from the View list.
3. Select the resource or resource group from the list.
The resource or the resource group topology page is displayed.
4. From the Manage Copies view, select Clones either from the primary or secondary (mirrored or replicated)storage systems.
5. Select the clone, and then click .
6. In the Delete Clone page, perform the following actions:
a. In the Pre clone delete field, enter the names of the scripts to be executed before deleting the clone.
b. In the Unmount field, enter the commands to unmount the clone before deleting the clone.
7. Click OK.
110

Copyright Information
Copyright © 2022 NetApp, Inc. All rights reserved. Printed in the U.S. No part of this document covered bycopyright may be reproduced in any form or by any means-graphic, electronic, or mechanical, includingphotocopying, recording, taping, or storage in an electronic retrieval system- without prior written permission ofthe copyright owner.
Software derived from copyrighted NetApp material is subject to the following license and disclaimer:
THIS SOFTWARE IS PROVIDED BY NETAPP “AS IS” AND WITHOUT ANY EXPRESS OR IMPLIEDWARRANTIES, INCLUDING, BUT NOT LIMITED TO, THE IMPLIED WARRANTIES OF MERCHANTABILITYAND FITNESS FOR A PARTICULAR PURPOSE, WHICH ARE HEREBY DISCLAIMED. IN NO EVENT SHALLNETAPP BE LIABLE FOR ANY DIRECT, INDIRECT, INCIDENTAL, SPECIAL, EXEMPLARY, ORCONSEQUENTIAL DAMAGES (INCLUDING, BUT NOT LIMITED TO, PROCUREMENT OF SUBSTITUTEGOODS OR SERVICES; LOSS OF USE, DATA, OR PROFITS; OR BUSINESS INTERRUPTION) HOWEVERCAUSED AND ON ANY THEORY OF LIABILITY, WHETHER IN CONTRACT, STRICT LIABILITY, OR TORT(INCLUDING NEGLIGENCE OR OTHERWISE) ARISING IN ANY WAY OUT OF THE USE OF THISSOFTWARE, EVEN IF ADVISED OF THE POSSIBILITY OF SUCH DAMAGE.
NetApp reserves the right to change any products described herein at any time, and without notice. NetAppassumes no responsibility or liability arising from the use of products described herein, except as expresslyagreed to in writing by NetApp. The use or purchase of this product does not convey a license under anypatent rights, trademark rights, or any other intellectual property rights of NetApp.
The product described in this manual may be protected by one or more U.S. patents, foreign patents, orpending applications.
RESTRICTED RIGHTS LEGEND: Use, duplication, or disclosure by the government is subject to restrictionsas set forth in subparagraph (c)(1)(ii) of the Rights in Technical Data and Computer Software clause at DFARS252.277-7103 (October 1988) and FAR 52-227-19 (June 1987).
Trademark Information
NETAPP, the NETAPP logo, and the marks listed at http://www.netapp.com/TM are trademarks of NetApp, Inc.Other company and product names may be trademarks of their respective owners.
111
Related Documents