Project: Coage in the Forest Appliqué Paern may be downloaded for personal use only. No electronic or printed reproduction permied without the prior wrien consent of Meredith Corporation. ©Meredith Corporation 2012. All rights reserved. 1 American Patchwork & Quilting | Quilt Sampler | Quilts and More FABRICS are from the Happy Christmas collection by Deborah Edwards for Northcott (northcott.net). Pattern 29

Welcome message from author
This document is posted to help you gain knowledge. Please leave a comment to let me know what you think about it! Share it to your friends and learn new things together.
Transcript

Project: Cottage in the Forest Appliqué
Pattern may be downloaded for personal use only. No electronic or printed reproduction permitted without the prior written consent of Meredith Corporation. ©Meredith Corporation 2012. All rights reserved. 1
American Patchwork & Quilting | Quilt Sampler | Quilts and More
FABRICS are from the Happy Christmas collection by Deborah Edwards for Northcott (northcott.net).
Pattern 29
Project: Cottage in the Forest Appliqué
Pattern may be downloaded for personal use only. No electronic or printed reproduction permitted without the prior written consent of Meredith Corporation. ©Meredith Corporation 2012. All rights reserved. 2
American Patchwork & Quilting | Quilt Sampler | Quilts and More
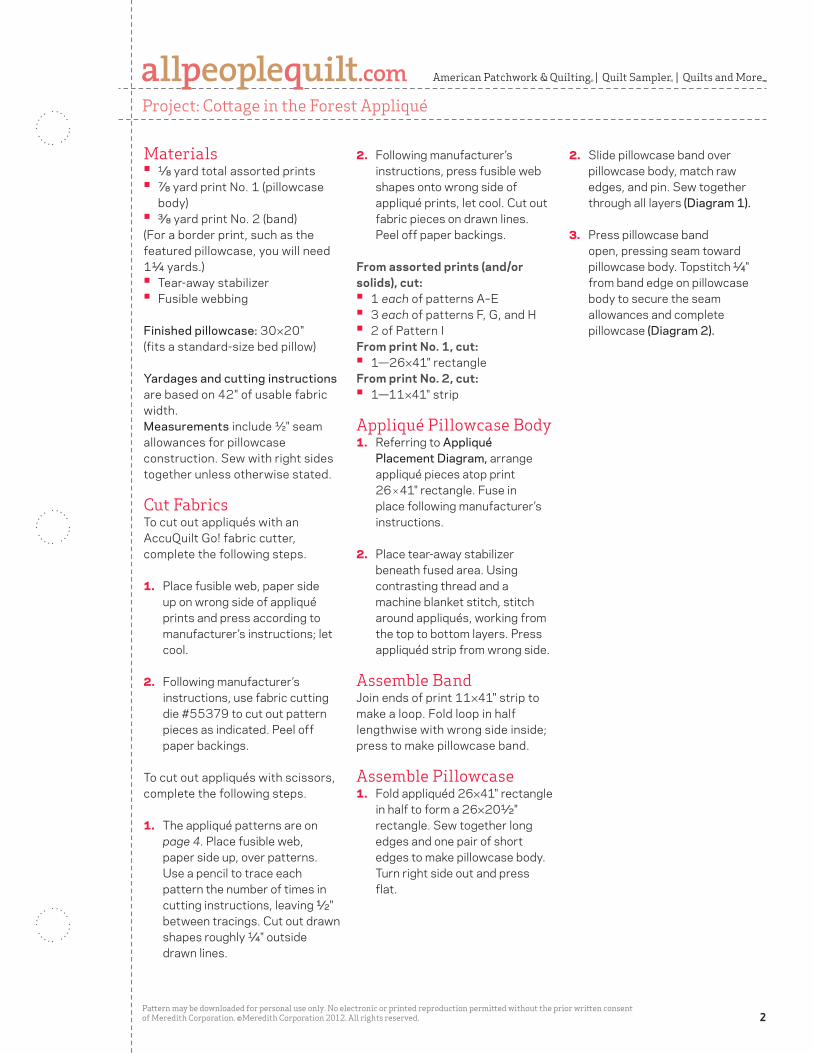
Materials• 1⁄8 yard total assorted prints• 7⁄8 yard print No. 1 (pillowcase
body)• 3⁄8 yard print No. 2 (band)(For a border print, such as the featured pillowcase, you will need 11⁄4 yards.)• Tear-away stabilizer• Fusible webbing
Finished pillowcase: 30×20" (fits a standard-size bed pillow)
Yardages and cutting instructions are based on 42" of usable fabric width.Measurements include ½" seam allowances for pillowcase construction. Sew with right sides together unless otherwise stated.
Cut FabricsTo cut out appliqués with an AccuQuilt Go! fabric cutter, complete the following steps.
1. Place fusible web, paper side up on wrong side of appliqué prints and press according to manufacturer’s instructions; let cool.
2. Following manufacturer’s instructions, use fabric cutting die #55379 to cut out pattern pieces as indicated. Peel off paper backings.
To cut out appliqués with scissors, complete the following steps.
1. The appliqué patterns are on page 4. Place fusible web, paper side up, over patterns. Use a pencil to trace each pattern the number of times in cutting instructions, leaving 1⁄2" between tracings. Cut out drawn shapes roughly 1⁄4" outside drawn lines.
2. Following manufacturer’s instructions, press fusible web shapes onto wrong side of appliqué prints, let cool. Cut out fabric pieces on drawn lines. Peel off paper backings.
Fromassortedprints(and/orsolids),cut:• 1 each of patterns A–E• 3 each of patterns F, G, and H• 2 of Pattern IFromprintNo.1,cut:• 1—26×41" rectangleFromprintNo.2,cut:• 1—11×41" strip
Appliqué Pillowcase Body1. Referring to Appliqué
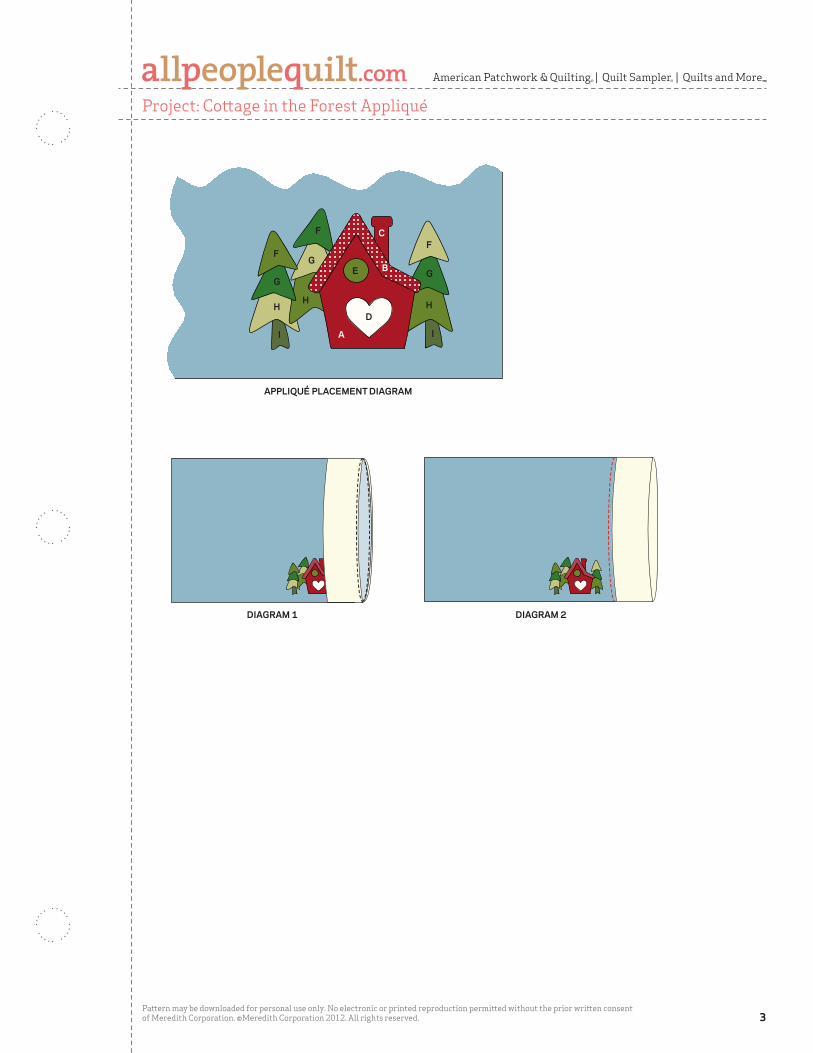
Placement Diagram, arrange appliqué pieces atop print 26×41" rectangle. Fuse in place following manufacturer’s instructions.
2. Place tear-away stabilizer beneath fused area. Using contrasting thread and a machine blanket stitch, stitch around appliqués, working from the top to bottom layers. Press appliquéd strip from wrong side.
Assemble BandJoin ends of print 11×41" strip to make a loop. Fold loop in half lengthwise with wrong side inside; press to make pillowcase band.
Assemble Pillowcase1. Fold appliquéd 26×41" rectangle
in half to form a 26×201⁄2" rectangle. Sew together long edges and one pair of short edges to make pillowcase body. Turn right side out and press flat.
2. Slide pillowcase band over pillowcase body, match raw edges, and pin. Sew together through all layers (Diagram 1).
3. Press pillowcase band open, pressing seam toward pillowcase body. Topstitch 1⁄4" from band edge on pillowcase body to secure the seam allowances and complete pillowcase (Diagram 2).
Project: Cottage in the Forest Appliqué
Pattern may be downloaded for personal use only. No electronic or printed reproduction permitted without the prior written consent of Meredith Corporation. ©Meredith Corporation 2012. All rights reserved. 3
American Patchwork & Quilting | Quilt Sampler | Quilts and More
APPLIQUÉ PLACEMENT DIAGRAM
A
B
C
D
E
F
FF
G
GG
HH H
I I
DIAGRAM 1 DIAGRAM 2

Project: Cottage in the Forest Appliqué
Pattern may be downloaded for personal use only. No electronic or printed reproduction permitted without the prior written consent of Meredith Corporation. ©Meredith Corporation 2012. All rights reserved. 4
American Patchwork & Quilting | Quilt Sampler | Quilts and More
GO! Home design © by Stacy Michell.Licensed exclusively to AccuQuilt.
PILLOWCASE PATTERN 29Pattern A
PILLOWCASE PATTERN 29
Pattern F
PILLOWCASE PATTERN 29
Pattern G
PILLOWCASE PATTERN 29
Pattern H
Pattern C
PatternI
PILLOWCASE PATTERN 29
Pattern B
PILLOWCASE PATTERN 29
Pattern D
Pattern E
GO! Home design © by Stacy Michell.Licensed exclusively to AccuQuilt.
PILLOWCASE PATTERN 29Pattern A
PILLOWCASE PATTERN 29
Pattern F
PILLOWCASE PATTERN 29
Pattern G
PILLOWCASE PATTERN 29
Pattern H
Pattern C
PatternI
PILLOWCASE PATTERN 29
Pattern B
PILLOWCASE PATTERN 29
Pattern D
Pattern E
GO! Home design © by Stacy Michell.Licensed exclusively to AccuQuilt.
PILLOWCASE PATTERN 29Pattern A
PILLOWCASE PATTERN 29
Pattern F
PILLOWCASE PATTERN 29
Pattern G
PILLOWCASE PATTERN 29
Pattern H
Pattern C
PatternI
PILLOWCASE PATTERN 29
Pattern B
PILLOWCASE PATTERN 29
Pattern D
Pattern E
GO! Home design © by Stacy Michell.Licensed exclusively to AccuQuilt.
PILLOWCASE PATTERN 29Pattern A
PILLOWCASE PATTERN 29
Pattern F
PILLOWCASE PATTERN 29
Pattern G
PILLOWCASE PATTERN 29
Pattern H
Pattern C
PatternI
PILLOWCASE PATTERN 29
Pattern B
PILLOWCASE PATTERN 29
Pattern D
Pattern E
GO! Home design © by Stacy Michell.Licensed exclusively to AccuQuilt.
PILLOWCASE PATTERN 29Pattern A
PILLOWCASE PATTERN 29
Pattern F
PILLOWCASE PATTERN 29
Pattern G
PILLOWCASE PATTERN 29
Pattern H
Pattern C
PatternI
PILLOWCASE PATTERN 29
Pattern B
PILLOWCASE PATTERN 29
Pattern D
Pattern E
GO! Home design © by Stacy Michell.Licensed exclusively to AccuQuilt.
PILLOWCASE PATTERN 29Pattern A
PILLOWCASE PATTERN 29
Pattern F
PILLOWCASE PATTERN 29
Pattern G
PILLOWCASE PATTERN 29
Pattern H
Pattern C
PatternI
PILLOWCASE PATTERN 29
Pattern B
PILLOWCASE PATTERN 29
Pattern D
Pattern E
GO! Home design © by Stacy Michell.Licensed exclusively to AccuQuilt.
PILLOWCASE PATTERN 29Pattern A
PILLOWCASE PATTERN 29
Pattern F
PILLOWCASE PATTERN 29
Pattern G
PILLOWCASE PATTERN 29
Pattern H
Pattern C
PatternI
PILLOWCASE PATTERN 29
Pattern B
PILLOWCASE PATTERN 29
Pattern D
Pattern E
GO! Home design © by Stacy Michell.Licensed exclusively to AccuQuilt.
PILLOWCASE PATTERN 29Pattern A
PILLOWCASE PATTERN 29
Pattern F
PILLOWCASE PATTERN 29
Pattern G
PILLOWCASE PATTERN 29
Pattern H
Pattern C
PatternI
PILLOWCASE PATTERN 29
Pattern B
PILLOWCASE PATTERN 29
Pattern D
Pattern E
GO! Home design © by Stacy Michell.Licensed exclusively to AccuQuilt.
PILLOWCASE PATTERN 29Pattern A
PILLOWCASE PATTERN 29
Pattern F
PILLOWCASE PATTERN 29
Pattern G
PILLOWCASE PATTERN 29
Pattern H
Pattern C
PatternI
PILLOWCASE PATTERN 29
Pattern B
PILLOWCASE PATTERN 29
Pattern D
Pattern E
GO! Home design © by Stacy Michell.Licensed exclusively to AccuQuilt.
PILLOWCASE PATTERN 29Pattern A
PILLOWCASE PATTERN 29
Pattern F
PILLOWCASE PATTERN 29
Pattern G
PILLOWCASE PATTERN 29
Pattern H
Pattern C
PatternI
PILLOWCASE PATTERN 29
Pattern B
PILLOWCASE PATTERN 29
Pattern D
Pattern E
When printing a downloadable pdf, set Page Scaling preference to NONE to print patterns at 100%. Do NOT "Shrink to Fit" or "Fit to Printable Area."
Related Documents


