Production process of music magazine contents page with Screengrabs

Welcome message from author
This document is posted to help you gain knowledge. Please leave a comment to let me know what you think about it! Share it to your friends and learn new things together.
Transcript

Production process of music magazine contents page with Screengrabs

Firstly, to create a new Quark Project I have selected ‘File’ then ‘New’ then ‘Project’, as shown below.
When the New project window appeared I changed the Column Guide to 3 so it is the right format for me to create my contents page on.

After clicking OK this is theproject that appeared on my screen. I have then zoomed out so I can see the whole layout by holding ‘ CTRL and – ’ at the same time.
Here is the layout in which I will becreating my contents page on.
Holding ‘CTRL and –’ at the same time.

To create the Title of my contents page I have selected the Rectangle text box tool and then typed into the box.
To type in to the text box I clicked the Content tool then clicked the text box.
To change the Font, Size and Colour of my text, I used the Style item at the top of the page. When clicking this, Font, Size and Colour appeared below. I then used these to edit my text.
The font I used for my title is ‘ Levenim MT’
I changed the size by using the classic bar at the bottom of the screen. I used this as I could choose a specific size.
I kept the colour at Black.

This is my Title once edited. I have next added more text on to my page by using the Rectangle text box tool.
I have changed the main text’s font to Dotum.
Underneath the title of the contents page I had added more text by using the Rectangle text box tool.
Font
Size
1
2
3

By using the Rectangle text box tool I have added more text on to my contents page.
Text size is 14pt
Next I have added text on to my contents page by using the Rectangle text box tool. I have then changed the Font, Size and colour of the text by selecting the Style icon at the top of the page.
1
2
3
I then added the Masthead of my magazine on to the top right hand corner of my contents page. I have done this may saving the Masthead of my music magazine as its own separate image and then using the Rectangle picture box tool and Import Picture to add the image on to my contents page.
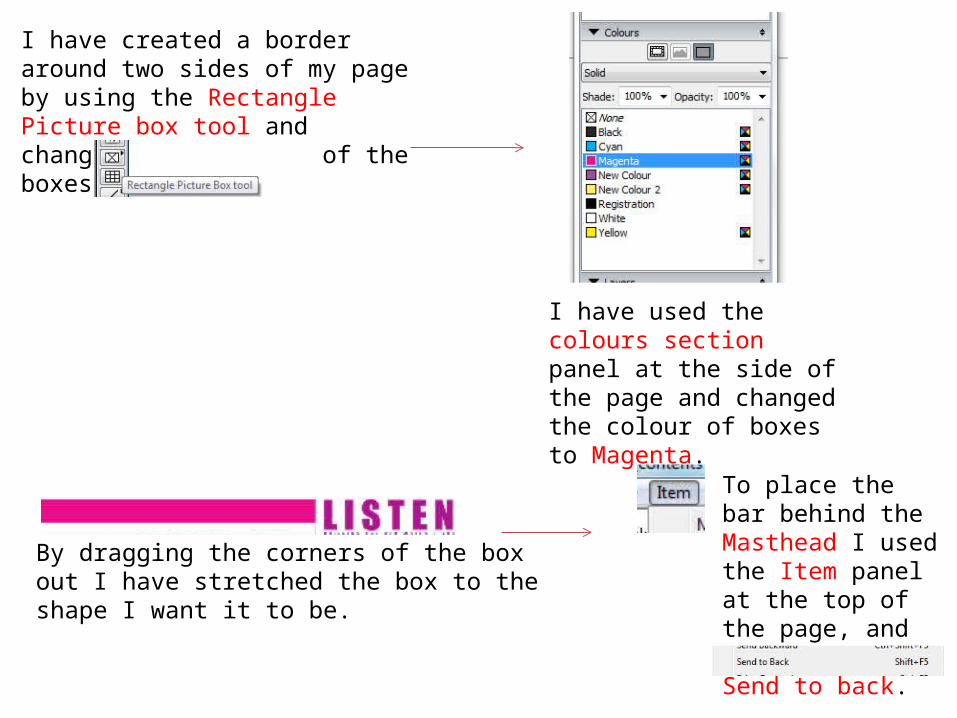
I have created a border around two sides of my page by using the Rectangle Picture box tool and changing the colours of the boxes.
I have used the colours section panel at the side of the page and changed the colour of boxes to Magenta.
By dragging the corners of the box out I have stretched the box to the shape I want it to be.
To place the bar behind the Masthead I used the Item panel at the top of the page, and then clicked Send to back.

I have then done the same to create the second half of the border.
Then I have changed the shade of the colour to 70% so it has made it a light pink colour.
Next I have added 3 new images on to my contents page. I have done this by using the Rectangle Picture Box tool and then selecting File and Import Picture.
Here are the 3 images I have added on to my contents page.

I have created a new box by using the Rectangle Picture Box tool. I have then changed the colour and opacity of it. The colour is Magenta and the opacity is 10% which has changed the colour to a light pink.
I have then chose Send to back, so my text is in front of the box.

Here is my contents page so far.

I have used the Rectangle picture box tool to add 3 small boxes on to my contents page. I have changed the colour of them to yellow and changed the opacity to make them slightly see through.
I have placed the boxes next to the images.
I have then done the same and added white boxes inside of the yellow ones. I have used the Rectangle text box tool to add numbers in to the boxes.

Finally, I have used the rectangle picture box tool to create boxes for my contents page. I have changed the colours of them to Cyan (Blue). I have added text on top of the boxes by using the Rectangle text box tool. I have changed the text to Italic by using the Style bar.

Here is my finished contents page.
Related Documents