Printing the Receiver

Printing the Receiver What this tutorial covers—and doesn’t 1. WebSMARTT: Print a Receiver 2.Count the actual quantities & write them on the form 3.Label.
Jan 03, 2016
Welcome message from author
This document is posted to help you gain knowledge. Please leave a comment to let me know what you think about it! Share it to your friends and learn new things together.
Transcript

Printing the Receiver

What this tutorial covers—and doesn’t
1.WebSMARTT: Print a Receiver 2.Count the actual quantities & write them on the form
3.Label everything with the Item ID number
4.Label food with the expiration date
5.Rotate stock: put away new items behind older ones
6.WebSMARTT: Check / correct the Received Date
7.WebSMARTT: Enter the actual quantities
8.WebSMARTT: Enter any returns
9.WebSMARTT: Click Receive Order
10.File the receiving form until the next inventory
This tutorial covered only the detailed process starred below. See Receiving Step by Step for the other tasks listed below.
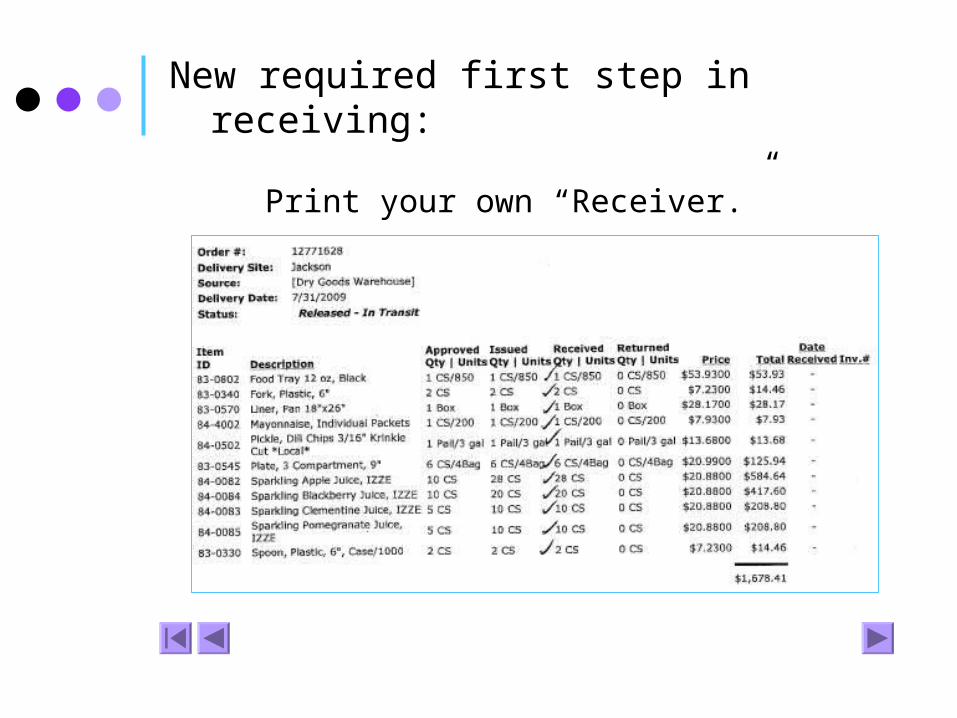
New required first step in receiving:
Print your own “Receiver.”
When? Why? How?
• When?
• Why?
• How?
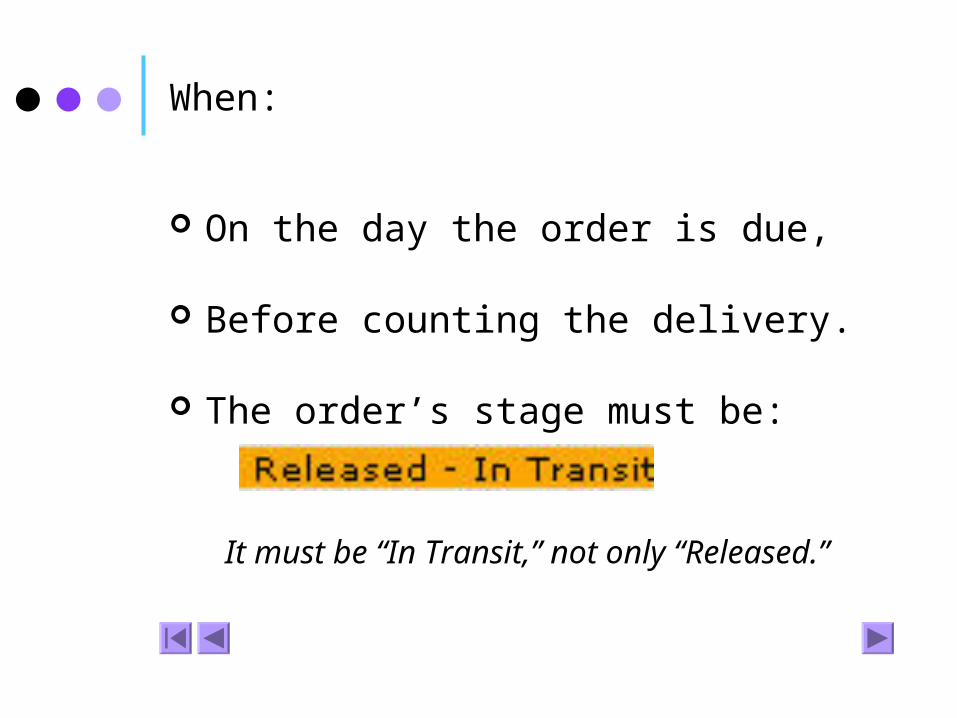
When:
On the day the order is due,
Before counting the delivery.
The order’s stage must be:
It must be “In Transit,” not only “Released.”

Why then?
Why not print it ahead of time?
Because changes are often made during the final packing and loading process, and you need an accurate record.
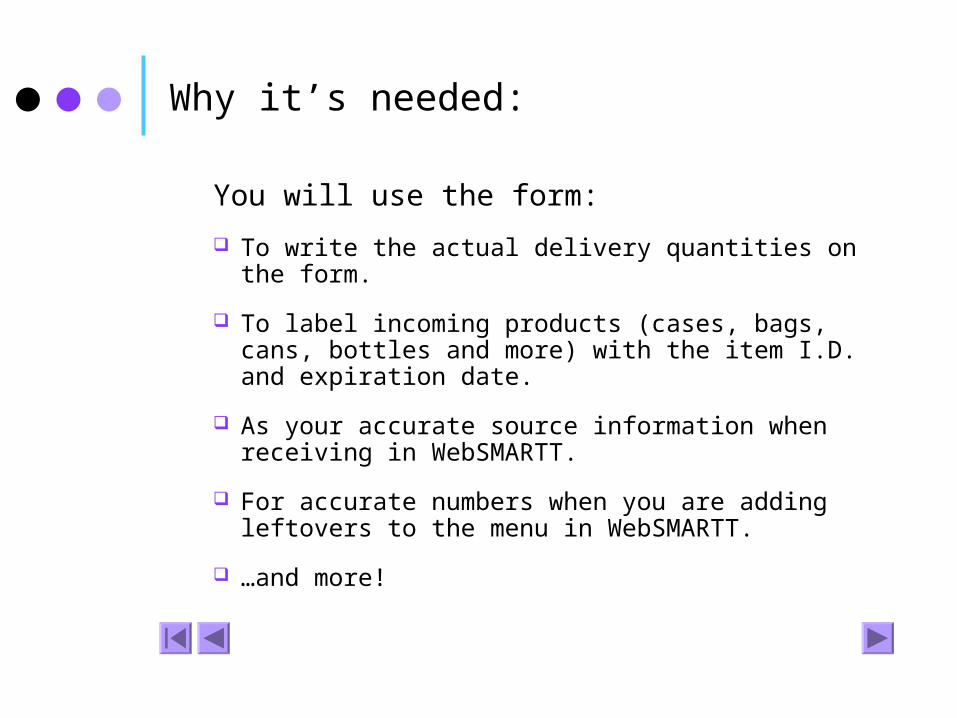
Why it’s needed:
You will use the form:
To write the actual delivery quantities on the form.
To label incoming products (cases, bags, cans, bottles and more) with the item I.D. and expiration date.
As your accurate source information when receiving in WebSMARTT.
For accurate numbers when you are adding leftovers to the menu in WebSMARTT.
…and more!

How
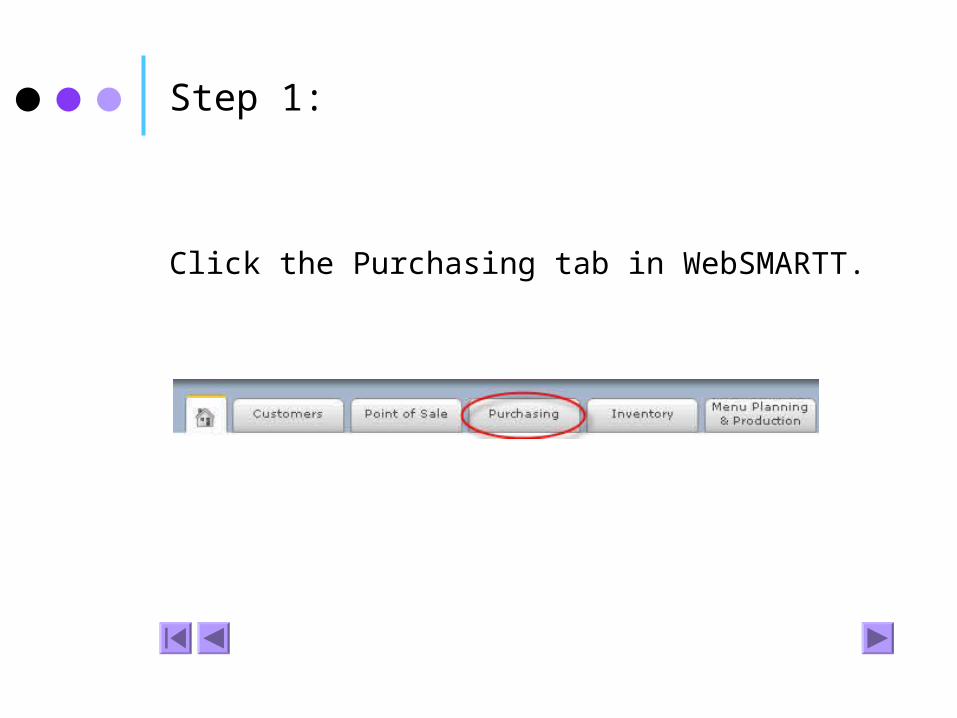
Step 1:
Click the Purchasing tab in WebSMARTT.
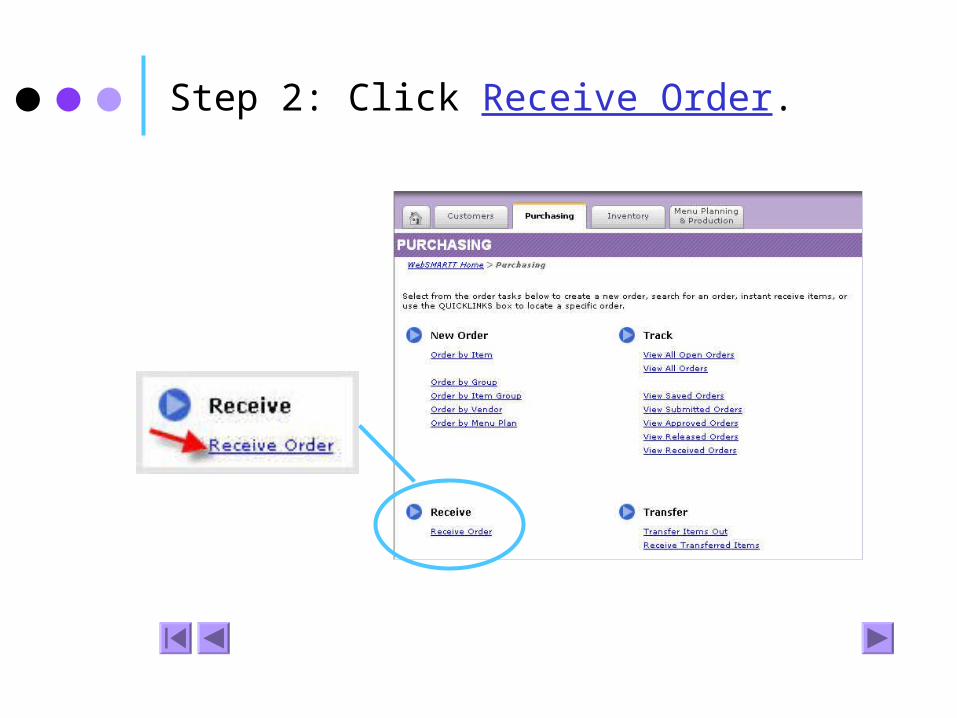
Step 2: Click Receive Order.
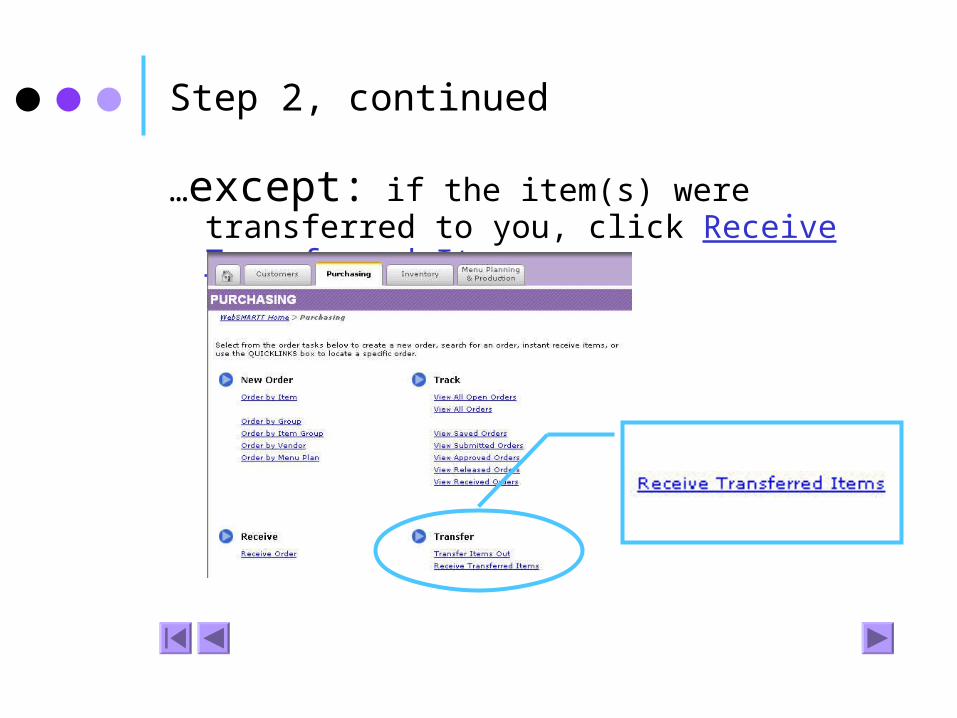
Step 2, continued
…except: if the item(s) were transferred to you, click Receive Transferred Items.

You’ll see all orders ready to be received.
After you click Receive Order (or Receive Transferred Items), the only orders you can see are those that have reached the stage / status of “Released – In Transit,” ready to be received.

3. Find the incoming order, and click Edit.
Tips for finding the correct order:
Find the Delivery Date of the shipment that is arriving.
Look at the Source.

You’ll see the order’s details page:
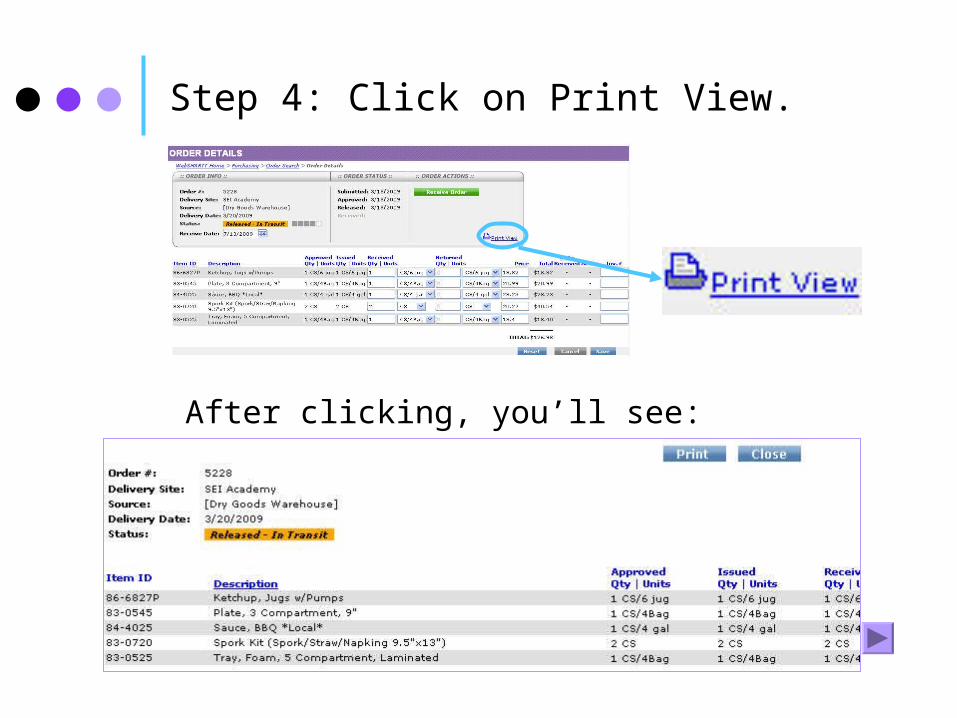
Step 4: Click on Print View.
After clicking, you’ll see:
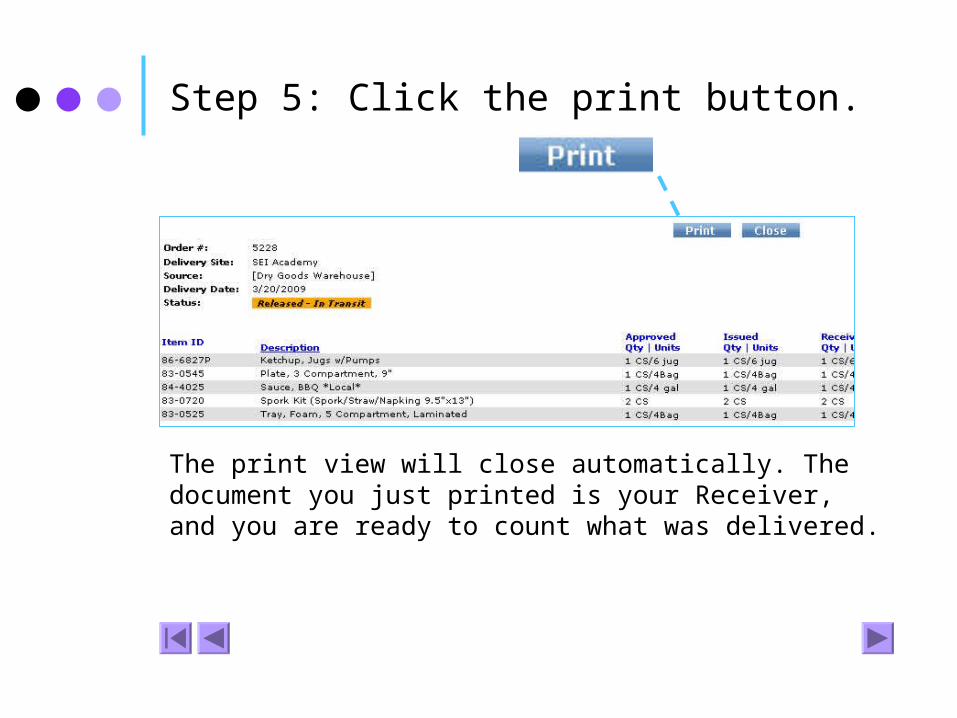
Step 5: Click the print button.
The print view will close automatically. The document you just printed is your Receiver, and you are ready to count what was delivered.
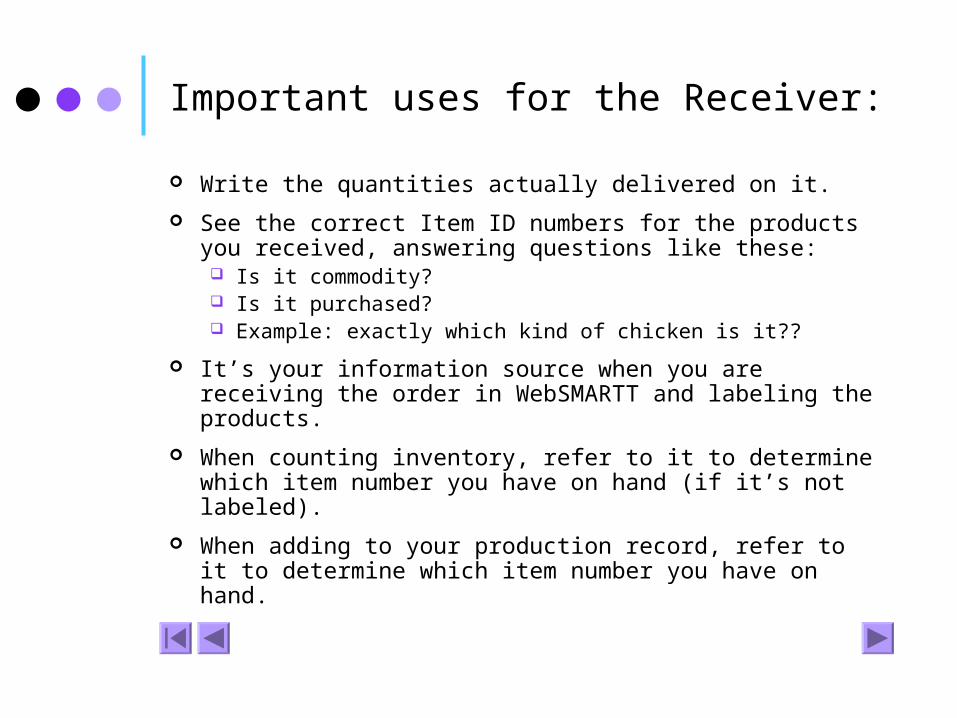
Important uses for the Receiver:
Write the quantities actually delivered on it.
See the correct Item ID numbers for the products you received, answering questions like these: Is it commodity? Is it purchased? Example: exactly which kind of chicken is it??
It’s your information source when you are receiving the order in WebSMARTT and labeling the products.
When counting inventory, refer to it to determine which item number you have on hand (if it’s not labeled).
When adding to your production record, refer to it to determine which item number you have on hand.
Related Documents


