OWNER’S MANUAL Premium Series Whole House Water Filters

Welcome message from author
This document is posted to help you gain knowledge. Please leave a comment to let me know what you think about it! Share it to your friends and learn new things together.
Transcript

OWNER’S MANUAL Premium Series
Whole House Water Filters


Congratulations!
You’ve selected our Premium Series whole house backwashing filters for superior performance and greater efficiency. Your Premium Series filter is designed to provide years of service with proper care and maintenance. Hopefully, this manual will be beneficial and provide information you need to install, start-up and maintain your system.
3
Filter types Media
Taste, odor, chemical reduction Activated carbon & KDF
Neutralizer for pH adjustment Calcite & Corosex
Iron, Sulfur, Manganese (no air draw) Birm, Greensand, Katalox
Sediment Filter net, filter sand, other

PAGE TOPIC
5 Specifications
6 Open cartons and identify components
7 Set up valve and install valve on mineral tank
8 Drain line installation
8 System placement
9 Water test
10-11 Valve programming
12 Time of day
13 Additional programming
14 Manual regen, backwash
15-16 Start-up
17 Error messages
18 Troubleshooting
19 Customer orientation
Table Of Contents
4
Routine maintenance recommended Common with all equipment, routine maintenance is necessary. Maintenance procedures generally include a complete water test to evaluate your system’s performance. Your dealer will also check your valve’s settings to be sure the system is operating at peak efficiency; tanks, for leaks; salt usage; drain line, to be sure they are clear; seals and spacers, for proper regeneration and resin cleaning.
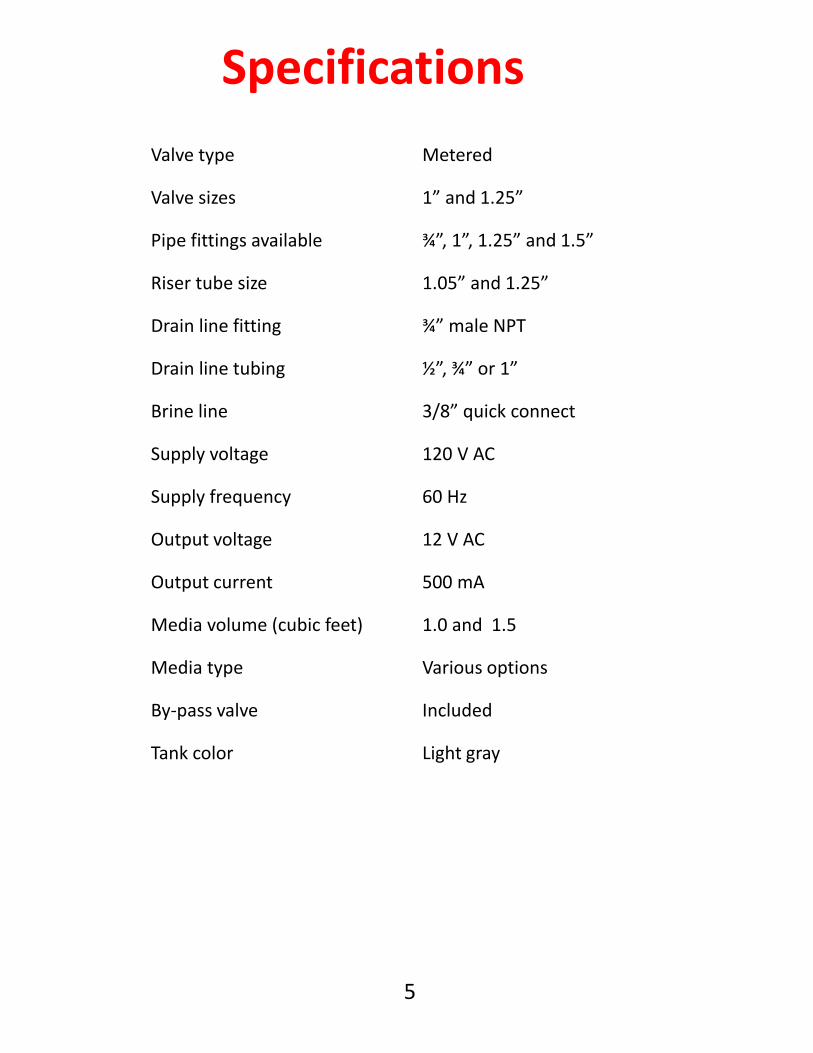
Valve type Metered
Valve sizes 1” and 1.25”
Pipe fittings available ¾”, 1”, 1.25” and 1.5”
Riser tube size 1.05” and 1.25”
Drain line fitting ¾” male NPT
Drain line tubing ½”, ¾” or 1”
Brine line 3/8” quick connect
Supply voltage 120 V AC
Supply frequency 60 Hz
Output voltage 12 V AC
Output current 500 mA
Media volume (cubic feet) 1.0 and 1.5
Media type Various options
By-pass valve Included
Tank color Light gray
Specifications
5

Open Cartons
Mineral tank carton with valve carton
inside.
This carton is inside the mineral tank carton. It includes the valve, by-pass, fittings you ordered, drain line nut, drain line insert, upper basket, installation instructions and warranty.
6

Set-Up Valve & Install Valve On Tank
2. Lubricate ALL black o-rings with Silicone.
3. Install upper basket (insert and twist to lock in place).
5. Install by-pass.
6. Connect pipe fittings to by-pass.
4. Install valve on mineral tank.
Hand tight – All connections.
1. Assemble pipe fittings (Follow directions in
package.)
7

• Locate water line and determine where to place the unit. (Be sure placement is near electrical power and a potential drain.)
• Install system on main water line before the water heater.
Notes: Be sure by-pass is closed.
If a softener is also to be installed, install the softener after the filter.
On two tank systems a hose bib may be useful between the tanks to test the performance of the first tank.
System Installation
8
Drain Line Installation If 5/8” x ½” drain line tubing is used insert the tubing “insert” into the tubing; install nut ; push tubing into the drain line fitting and tighten nut. Otherwise, PEX pipe or rigid ¾” or 1” PVC can be used for the drain.
Insert “insert” in ½” tubing.
Push tubing in fitting and
tighten nut.
Note: Drain line fitting is ¾”male NPT.

Water Test
It is essential to complete a water test, prior to start-up and valve programming.
Check the following parameters:
• Hardness
• pH
• Iron (well water)
• Hydrogen Sulfide (you can smell it!)
• Chlorine
• TDS
We also recommend you check for obvious signs of bacteria on well water installations by checking for slime in back of the toilets.
Note: If bacterial is a concern or known to be present, sanitize the well and provide continuous disinfection if required. Additional testing may be necessary.
9

Valve Programming
Once the valve is powered up, the display will read:
“SALT REMAINING UNKNOWN”
STEPS:
• Push NEXT repeatedly until CAPACITY REMAINING is displayed with a default of 1500 GAL showing. (Number will change later.)
• Press SET to make adjustments.
• Size (select 1” or scroll to 1.25”).
• Press NEXT to select type.
Optional types are: A. Conditioner
B. Iron-Sulfur Zapper
C. Chem-Free filter (two tank)
D. Filter (carbon, sediment, neutralizer)
E. Conditioner – Filter (1-PLUS-1 two tank system)
Select FILTER and press NEXT.
Reminder: To get into the settings always press NEXT until CAPACITY REMAINING is displayed. Then press SET to adjust settings.
10
Note Filter cycles are 1. Backwash (up flow); 2. Rinse (down flow).

Valve Programming (Continued)
At Filter 1 Schedule – SET
5 days for carbon
2 days for Birm
4 days for neutralizer
Press NEXT
Filter 1 Backwash – SET:
15 Mins for carbon or lighter media
20 minutes for neutralizer
25 minutes for Birm or other heavy media
FLT1 Rinse
Set at 6 minutes
Now, the display will read “Next Backwash FLT 1 DAY” and goes back to the default screen.
11

Time of Day
TIME OF DAY
At the “Next Backwash FLT 1 DAY ” default screen:
• Press NEXT until you see TIME OF DAY.
• Press SET and TIME HOUR is displayed at the top with the hour flashing. Arrow to the correct hour and AM or PM and press NEXT. (Clock is a 12 hour clock; go past 12 to change AM / PM.)
• TIME MINUTES is displayed with minutes flashing, Arrow to the correct minutes, then press NEXT.
• REGEN TIME HOUR will be displayed. Arrow to the desired hour, and press NEXT.
• REGEN TIME MINUTES will be displayed. Arrow to the desired minutes, and press NEXT
12

Additional Valve Programming
To set dealer contact info: Press SET & Arrow Up.
Here you can set dealer contact info and phone number. Use arrow buttons to edit; then, press NEXT to go to the next field.
Press SET to exit.
13

Manual Regen
So easy . . . With three regen options:
1. Press and hold the REGEN button (5 seconds), regeneration will be immediate.
2. Press and release the REGEN button, regeneration will be tonight.
3. Press and quickly release REGEN, then press and hold REGEN to initiate an immediate regen, followed by a regen that night.
14

Start Up
• Press and hold the REGEN button until the valve advances to BACKWASH. Open valve’s inlet slowly by 1/3 to fill the mineral tank.
• Allow air to escape (listen until spurting stops).
• Once water flows from drain, open inlet fully.
• Continue backwash until clear water runs to drain.
(May need multiple regen cycles, depending on the media
used.)
• Press REGEN again and the valve will advance to the Rinse position. Allow the water to run out the drain until it runs clear.
• Press the REGEN button again and the valve will advance to Service. (The display will read NEXT BACKWASH FLT 1 DAY.
Once the installation is complete, initiate an immediate regen to start up system in with inlet and outlet valves closed.
By-pass valve in closed position.
Slowly open valve inlet 1/3 to fill tank.
15

Start Up (Continued)
Finally:
• Open the valve’s outlet to supply water to the house.
• Go in the house and open a faucet. See if water runs clear.
• Go back in the house and shut off faucet.
Open outlet slowly to supply water to the house.
16

Error Messages To go back to factory settings follow these directions:
Press NEXT and REGEN together for 3 to 5 seconds (release when motor starts).
Wait until the screen says: SALT REMAINING UNKNOWN.
Now, press NEXT, NEXT, NEXT until you get to CAPACITY REMAINING .
Then, press SET. Then PRESS and HOLD the UP and DOWN arrow buttons to restore programming to factory settings. After this process, the screen will eventually say SALT REMAINING UNKNOWN.
Other messages:
ERROR -MAV TOO LONG
Here, the valve is set up for a second motorized valve, but no motorized valve is installed.
(You are set up in the wrong mode, check your settings.)
Press NEXT and REGEN and HOLD.
IF VALVE APPEARS TO BE LOCKED:
If it appears a valve is locked, press in sequence: ARROW DOWN; NEXT; ARROW UP; SET CLOCK. Then, settings may be viewed and adjusted.
Note: Check if vacation mode is “on”. (If it is “on” turn it “off”.)
17
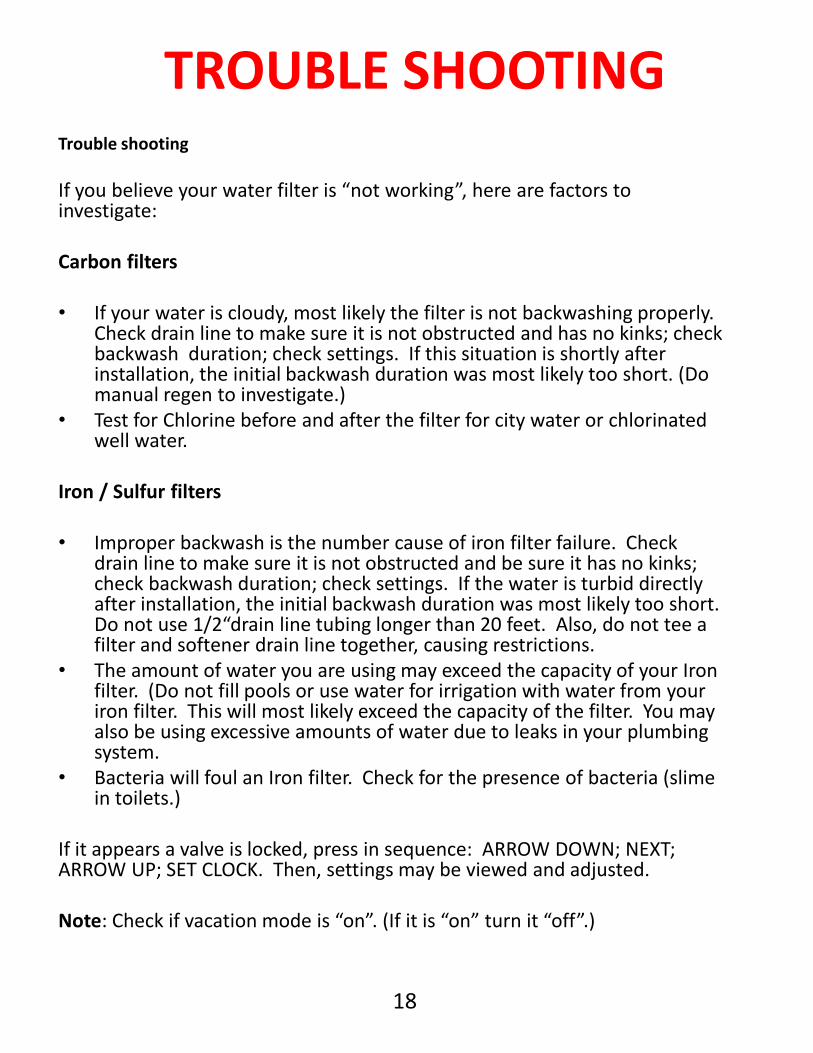
TROUBLE SHOOTING Trouble shooting
If you believe your water filter is “not working”, here are factors to investigate: Carbon filters • If your water is cloudy, most likely the filter is not backwashing properly.
Check drain line to make sure it is not obstructed and has no kinks; check backwash duration; check settings. If this situation is shortly after installation, the initial backwash duration was most likely too short. (Do manual regen to investigate.)
• Test for Chlorine before and after the filter for city water or chlorinated well water.
Iron / Sulfur filters • Improper backwash is the number cause of iron filter failure. Check
drain line to make sure it is not obstructed and be sure it has no kinks; check backwash duration; check settings. If the water is turbid directly after installation, the initial backwash duration was most likely too short. Do not use 1/2“drain line tubing longer than 20 feet. Also, do not tee a filter and softener drain line together, causing restrictions.
• The amount of water you are using may exceed the capacity of your Iron filter. (Do not fill pools or use water for irrigation with water from your iron filter. This will most likely exceed the capacity of the filter. You may also be using excessive amounts of water due to leaks in your plumbing system.
• Bacteria will foul an Iron filter. Check for the presence of bacteria (slime in toilets.)
If it appears a valve is locked, press in sequence: ARROW DOWN; NEXT; ARROW UP; SET CLOCK. Then, settings may be viewed and adjusted. Note: Check if vacation mode is “on”. (If it is “on” turn it “off”.)
18
Customer Orientation
Once the installation and start-up are completed, we suggest you explain the following to your customer:
• How to use the bypass and when this is recommended
• Explain how to set the clock in the event of a prolonged power outage
• Demonstrate the sound of water coming out of the drain so they will not be alarmed when they hear a backwash cycle
• Explain the warranty
• Explain how to fill out the warranty card
(Included with the Owner’s Manual).
• Recommend a maintenance agreement if appropriate.
19

Related Documents