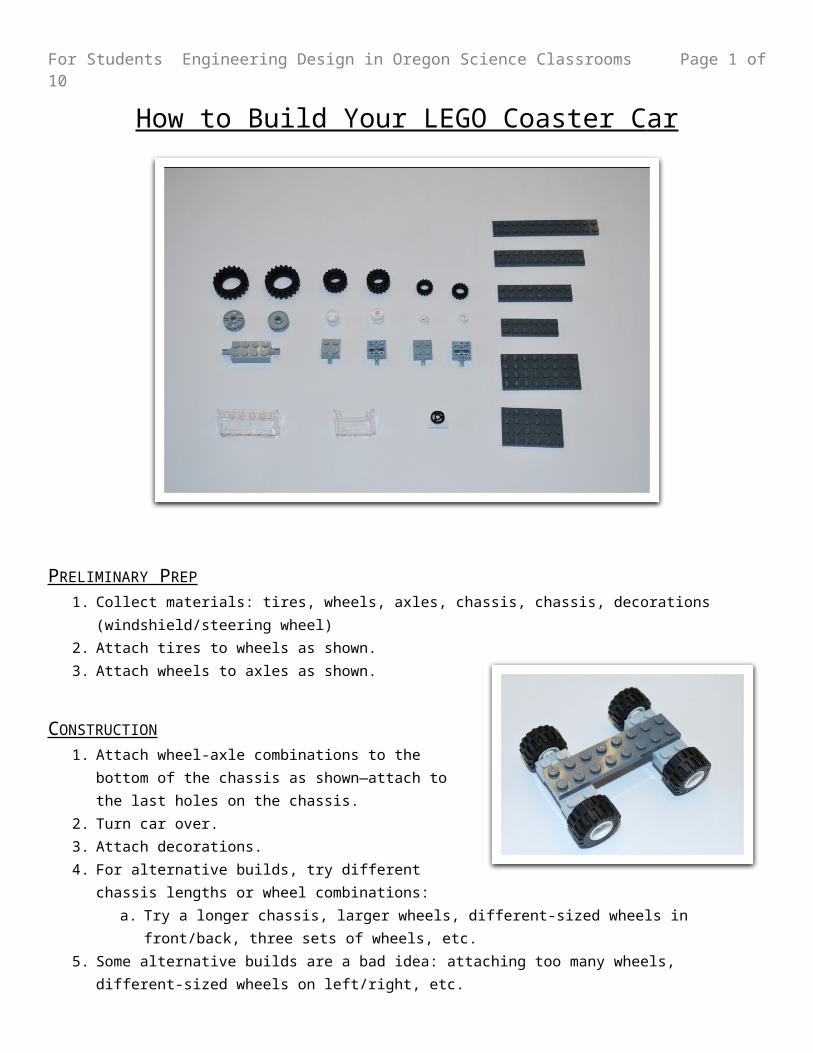
For Students Engineering Design in Oregon Science Classrooms Page 1 of 10 How to Build Your LEGO Coaster C ar PRELIMINARY PREP 1. Collect materials: tires, wheels, axles, chassis, chassis, decorations (windshield/steering wheel) 2. Attach tires to wheels as shown. 3. Attach wheels to axles as shown. CONSTRUCTION 1. Attach wheel-axle combinations to the bottom of the chassis as shown—attach to the last holes on the chassis. 2. Turn car over. 3. Attach decorations. 4. For alternative builds, try different chassis lengths or wheel combinations: a. Try a longer chassis, larger wheels, different-sized wheels in front/back, three sets of wheels, etc. 5. Some alternative builds are a bad idea: attaching too many wheels, different-sized wheels on left/right, etc.

Welcome message from author
This document is posted to help you gain knowledge. Please leave a comment to let me know what you think about it! Share it to your friends and learn new things together.
Transcript
For Students Engineering Design in Oregon Science Classrooms Page 1 of 9
How to Build Your LEGO Coaster C ar
PRELIMINARY PREP 1. Collect materials: tires, wheels, axles, chassis, chassis, decorations (windshield/steering wheel)2. Attach tires to wheels as shown.3. Attach wheels to axles as shown.
CONSTRUCTION 1. Attach wheel-axle combinations to the bottom of the chassis as
shown—attach to the last holes on the chassis.2. Turn car over.3. Attach decorations.4. For alternative builds, try different chassis lengths or wheel
combinations:a. Try a longer chassis, larger wheels, different-sized wheels
in front/back, three sets of wheels, etc.5. Some alternative builds are a bad idea: attaching too many wheels, different-sized wheels on left/right, etc.

For Students Engineering Design in Oregon Science Classrooms Page 2 of 9
PRELIMINARY PREP PHOTOS 1. No photo2. As seen below:
a. Note the orientation of the tire groove and wheel
b. Note the orientation of the tire groove and wheel
c. See below for attached tire-wheel combination
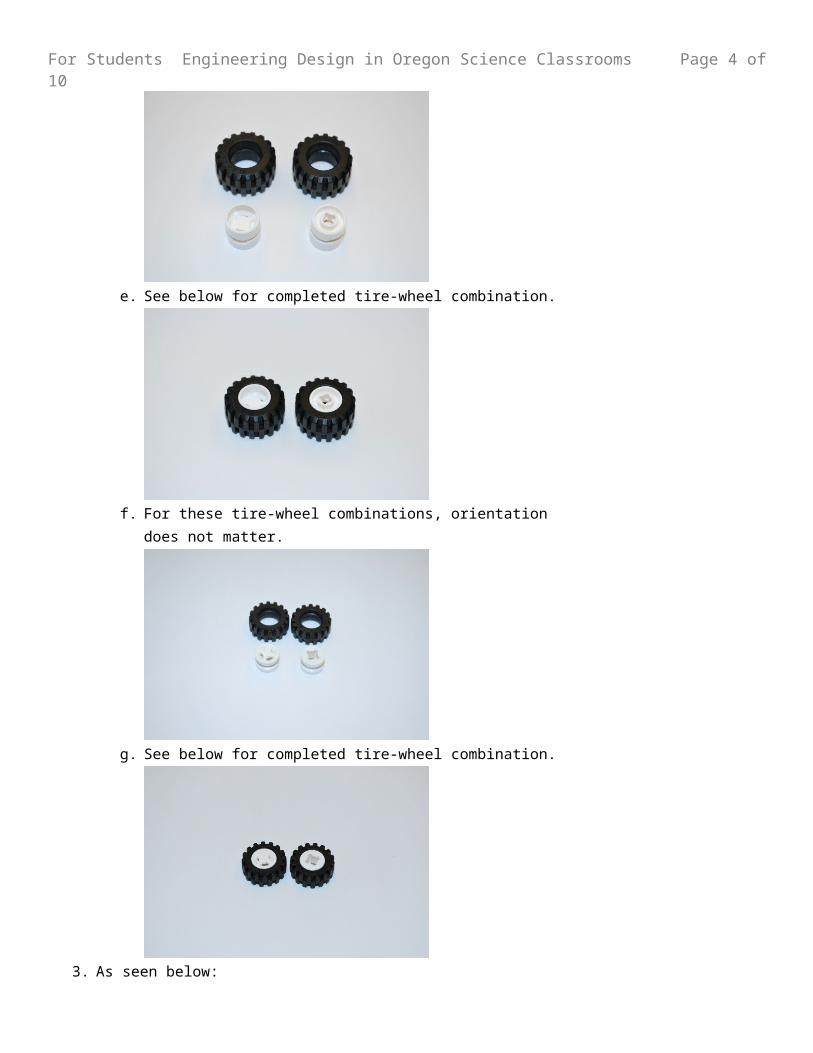
d. For these tire-wheel combinations, orientationdoes not matter.

For Students Engineering Design in Oregon Science Classrooms Page 3 of 9
e. See below for completed tire-wheel combination.
f. For these tire-wheel combinations, orientationdoes not matter.
g. See below for completed tire-wheel combination.
3. As seen below:
For Students Engineering Design in Oregon Science Classrooms Page 4 of 9a. The large wheels take the large axle.
b. Attach as shown.
c. Repeat for second wheel.
d. Repeat for all needed wheel-axle combinations.

For Students Engineering Design in Oregon Science Classrooms Page 5 of 9e. The medium wheels take the regular axle.
f. Attach as shown.
g. Repeat for all needed wheel-axle combinations.
h. The small wheels take the regular axle.

For Students Engineering Design in Oregon Science Classrooms Page 6 of 9i. Attach as shown.
j. Repeat for all needed wheel-axle combinations.
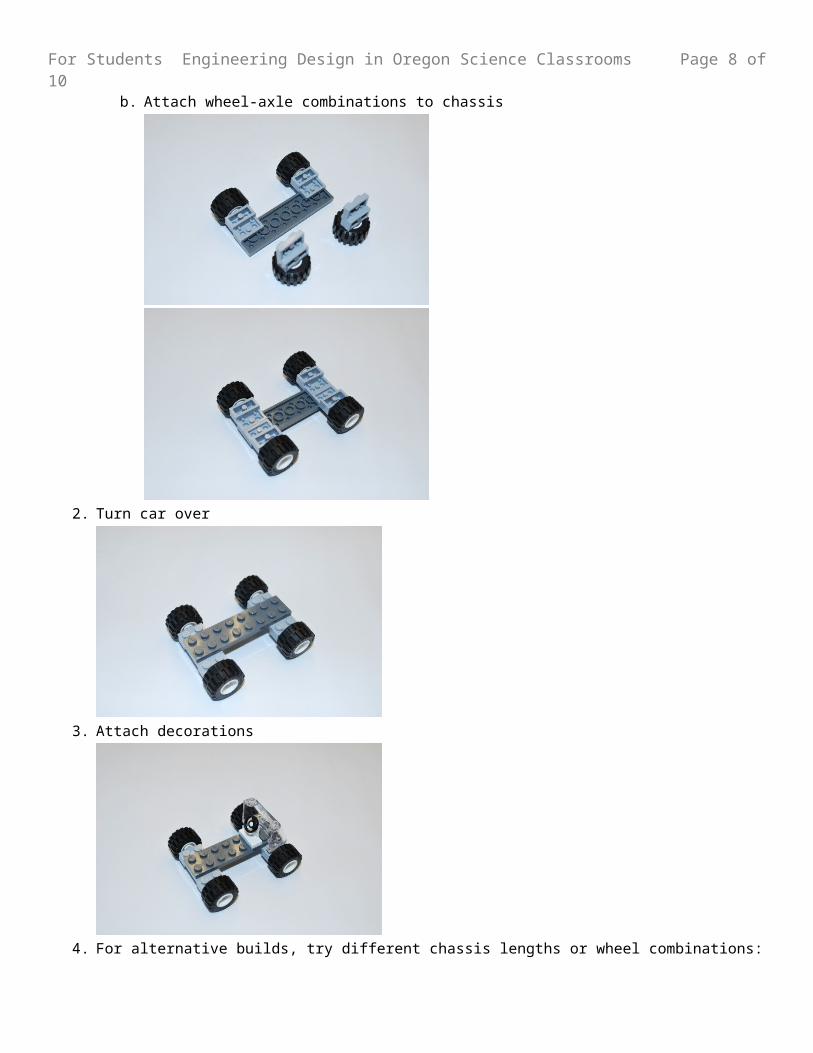
CONSTRUCTION PHOTOS 1. Attach wheel-axle combinations to the bottom of the chassis as shown—attach to the last holes on the chassis.
a. Orient LEGO pieces like so:

For Students Engineering Design in Oregon Science Classrooms Page 7 of 9b. Attach wheel-axle combinations to chassis
2. Turn car over
3. Attach decorations
4. For alternative builds, try different chassis lengths or wheel combinations:
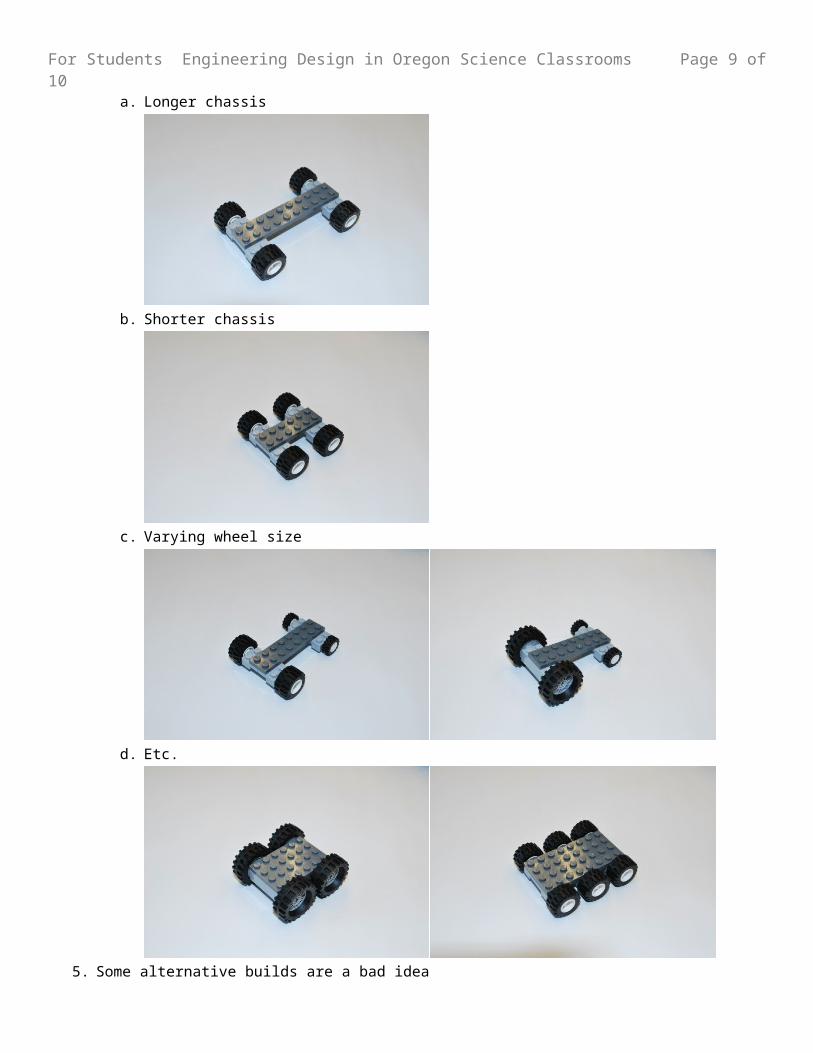
For Students Engineering Design in Oregon Science Classrooms Page 8 of 9a. Longer chassis
b. Shorter chassis
c. Varying wheel size
d. Etc.
5. Some alternative builds are a bad idea
For Students Engineering Design in Oregon Science Classrooms Page 9 of 9a. Awkward wheel placement
b. Lopsided wheels
c. Wheels too close together.
Related Documents