July 19, 2017 P P a a t t c c h h M M a a n n a a g g e e m m e e n n t t User Guide Version R94 English

Welcome message from author
This document is posted to help you gain knowledge. Please leave a comment to let me know what you think about it! Share it to your friends and learn new things together.
Transcript

July 19, 2017
PPaattcchh MMaannaaggeemmeenntt
User Guide
Version R94
English

Copyright Agreement
The purchase and use of all Software and Services is subject to the Agreement as defined in Kaseya’s “Click-Accept” EULATOS as updated from time to time by Kseya at http://www.kaseya.com/legal.aspx. If Customer does not agree with the Agreement, please do not install, use or purchase any Software and Services from Kaseya as continued use of the Software or Services indicates Customer’s
acceptance of the Agreement.”
©2017 Kaseya. All rights reserved. | www.kaseya.com

i
Contents
Patch Management Overview ................................................................................................................ 1
Patch Management Module Minimum Requirements ................................................................... 2
Methods of Updating Patches ........................................................................................................ 2
Configuring Patch Management .................................................................................................... 3
Patch Processing ........................................................................................................................... 4
Superseded Patches ...................................................................................................................... 4
Update Classification ..................................................................................................................... 5
Patch Failure ................................................................................................................................... 5
Scan Machine ......................................................................................................................................... 7
Patch Status ........................................................................................................................................... 9
Initial Update ........................................................................................................................................ 11
Pre/Post Procedure: Patch Management ............................................................................................ 13
Automatic Update ................................................................................................................................ 14
Machine History ................................................................................................................................... 16
Machine Update ................................................................................................................................... 17
Patch Update ........................................................................................................................................ 19
Rollback ............................................................................................................................................... 22
Cancel Updates .................................................................................................................................... 23
Create/Delete: Patch Policy ................................................................................................................. 24
Membership: Patch Policy ................................................................................................................... 25
Approval by Policy ............................................................................................................................... 27
Approval by Patch ............................................................................................................................... 29
KB Override .......................................................................................................................................... 31
Windows Auto Update ......................................................................................................................... 33
Reboot Action ...................................................................................................................................... 35
File Source ........................................................................................................................................... 38
Patch Alert............................................................................................................................................ 40
Office Source ....................................................................................................................................... 43
Command Line ..................................................................................................................................... 45
Patch Location ..................................................................................................................................... 48
Index ..................................................................................................................................................... 51


Patch Management Overview
1
Patch Management Overview Use the Patch Management module to monitor, scan, install, and verify Microsoft patches on
Windows managed machines. Patch management automates the process of keeping all your Windows machines up to date with the latest patches. You decide how and when updates are applied
on a per machine basis. See the following overview topics:
Patch Management System Requirements
Methods of Updating Patches (page 2)
Configuring Patch Management (page 3)
Patch Processing (page 4)
Superseded Patches (page 4)
Update Classification (page 5)
Patch Failure (page 5)
Note: Because Patch Management only manages the patching of Windows machines, machine templates
and Apple and Linux machines do not display on most Patch Management pages.
Functions Description
Scan Machine (page 7) Determine what patches are missing on managed machines.
Patch Status (page 9) Display a summary view of installed, missing and denied patches for each managed machine.
Initial Update (page 11) Perform one-time processing of all approved patches on
managed machines.
Pre/Post Procedure (page
13) Run procedures before and/or after patch Initial Update and Automatic Update.
Automatic Update (page 14)
Update missing approved patches on managed machines automatically on a recurring basis.
Machine History (page 16) Display a detailed view of patch scan results for each managed machine.
Machine Update (page 17) Schedule the installation of missing patches for an individual machine.
Patch Update (page 19) Apply individual patches to multiple machines.
Rollback (page 22) Uninstall patches from managed machines.
Cancel Updates (page 23) Cancel pending patch installations.
Create Delete (page 24) Create and delete machine patch policies.
Membership (page 25) Assign machine IDs as members of one or more patch policies.
Approval by Policy (page 27)
Approve or deny patches by patch policy.
Approval by Patch (page 29)
Approve or deny patches by patch.
KB Override (page 31) Override patch policy default approval status by Microsoft knowledge base article.
Windows Auto Update (page 33)
Remotely set the Windows Automatic Updates settings on selected machines.

Patch Management Overview
2
Reboot Action (page 35) Determine whether or not to reboot the machine automatically after installing new patches.
File Source (page 38) Specify where each machine gets new patch installation files from.
Patch Alert (page 40) Configure alerts for patch-related events, such as when a new patch becomes available for a managed machine.
Office Source (page 43) Specify an alternate source location for MS Office installation files.
Command Line (page 45) Set the command line parameters used to install patches.
Patch Location (page 48) Specify the URL to download a patch from, when the system can not automatically locate it.
Patch Management Module Minimum
Requirements Kaseya Server
The Patch Management R94 module requires VSA R94.
Supported Operating Systems
Patch Managementsupports all OSs supported by Windows Update, which includes:
Microsoft Windows Server 2008, 2008 R2, 2012, 2012 R2, 2016
Microsoft Windows 7, 8, 8.1, 10
Note: See general System Requirements
(http://help.kaseya.com/WebHelp/EN/VSA/9040000/reqs/index.asp#home.htm).
Methods of Updating Patches The VSA provides five methods of applying Microsoft patches to managed Windows machines:
Initial Update is a one-time processing of all approved Microsoft patches applicable to a managed machine based on Patch Policy. Initial Update ignores the Reboot Action (page 35) policy and reboots the managed machine without warning the user as often as necessary until the machine has been brought up to the latest patch level. Initial Update should only be performed during
non-business hours and is typically performed over a weekend on newly added machines.
Automatic Update is the preferred method of updating managed machines on a recurring basis. Obeys both the Patch Policy and the Reboot Action policy.
Patch Update - If you're using Automatic Update, then Patch Update is used on an exception basis to
apply individual patches to multiple machines or for patches that originally failed on certain machines. Overrides the Patch Policy but obeys the Reboot Action policy.
Machine Update - If you're using Automatic Update, then Machine Update is used on an exception basis to apply patches to individual machines. Overrides the Patch Policy but obeys the Reboot Action policy. Machine Update is often used to test a new patch prior to approving it for general release to
all machines.
Patch Deploy - You can also use a user defined procedure to install a Microsoft patch using Agent
Procedures > Patch Deploy. Microsoft releases many hot fixes as patches for very specific issues that are not included in the Microsoft Update Catalog or in the Office Detection Tool, the two patch data sources the Patch Management module uses to manage patch updates. Patch Deploy enables

Patch Management Overview
3
customers to create a patch installation procedure for these hot fixes, via this wizard, that can be used to schedule the installation on any desired machine.
Note: You can install non-Microsoft applications using Agent Procedures > Application Deploy. When a
pre-defined install solution cannot be used, use Agent Procedures > Packager to create a self-extracting
file ready for automated distribution.
Configuring Patch Management
Analyzing Patch Status
You can determine the patch status of managed machines using the following pages:
Determine what patches are missing on managed machines using Scan Machine (page 7).
Display a summary view of installed, missing and denied patches for each managed machine using Patch Status (page 9).
Display a detailed view of patch scan results for each managed machine using Patch History (page 16).
Configuring Patch Management
Patch Management configuration options directly or indirectly affect the four Patch Management
methods of installing patches as follows:
Initial Update
Automatic Update
Patch Update
Machine Update
Create/Delete (page 24)
Create a patch policy.
Membership (page 25)
Assign machine IDs to a patch policy.
Approval by Policy (page 27)
Set patch approval policies.
Approval by Patch (page 29)
Set patch approval policies.
KB Override (page 31)
Overrides patch approval policies.
Pre/Post Procedure (page 13)
Run procedures before or after Initial Update and Automatic Update.
Reboot Action (page 35)
Change the reboot policy for machine IDs.
File Source (page 38) Change the file source location machines use to download patches.
Command Line (page 45)
Change command line parameters for installing selected patches.
Patch Location (page 48)
Change the download URL for patches.
Patch Alert (page 40) Configure alerts for patch-related events.
Office Source (page 43)
Create an alternate source location for Office patches. An agent credential (http://help.kaseya.com/webhelp/EN/VSA/90400
00/index.asp#3492.htm) must be defined to use the Office Source page.

Patch Management Overview
4
Note: Windows Auto Update (page 33) enable or disables Windows Auto Update on managed machines
regardless of whether patches are installed on machine IDs.
Patch Processing When you schedule a patch the following occurs:
1. The agent on the managed machine is told to start the update process at the scheduled time.
2. The patch executable is downloaded to the managed machine from where ever the File Source
(page 38) is set for that machine ID.
3. The patch file is executed on the managed machine using the parameters specified in Command Line (page 45). You should never have to set these switches yourself, but just in case, this
capability is there.
4. After all the patches have been installed the managed machine is rebooted. When reboots occur for a machine ID depends on the Reboot Action (page 35) assigned to that machine ID. Applies to Machine Update (page 17), Patch Update (page 19) and Automatic Update (page 14). Reboots in
response to an Initial Update (page 11) always occur immediately and without warning the user.
5. The managed machine is rescanned automatically. It takes several minutes after the rescan is complete for this data to show up on the VSA. Wait several minutes before checking the patch
state after a reboot.
Note: If you schedule multiple patches for installation on the same machine, all the patches are
installed at the same time. After all the patches have been installed the machine reboots once. This
technique saves time and reboots.
Note: Service packs are always installed separately. If you are installing a service pack with other
patches you will see a reboot after the service pack install and then another single reboot after all
the other patches are installed.
Superseded Patches A superseded patch is a patch that doesn't have to be installed because a later patch is available. A typical example is a service pack, which bundles many other patches that have been released before
the service pack. If you install the service pack, you don't have to install all the earlier patches.
Patch Management only reports patches superseded by a service pack. Superseded patches have a
string appended to the title of the patch that indicates that it is superseded by Service Pack X. This
string is displayed as dark red text with a yellow background to make it stand out.
Example: Superseded By: KB936929 Windows XP Service Pack 3 (KB936929)
The installation process installs superseded updates only if the service pack that supersedes these updates is not selected for installation. If the superseding service pack is selected for installation, the superseded updates are not downloaded or installed. A procedure log entry is added to indicate the
update was skipped because it was superseded.
You can deny all superseded patches using the Override Default Approval Status with Denied for superseded updates in this policy checkbox in Approval by Policy (page 27).
In addition:
Patch titles in the Patch Management report include Superseded By: Service Pack X, when applicable.

Patch Management Overview
5
The patch filter on the patch approval pages now include the ability to filter on superseded/not superseded.
Occasionally, the Superseded By warning displays as Superseded By: Unspecified. This is typically caused by a cross-operating system patch that is superseded by one or more service packs. This is likely to be seen on updates dealing with Media Player.
Update Classification Microsoft updates are organized as follows:
Update Classification Classification Type (Non-Vista / Vista)
Included in WSUSSCN2.CAB*
Security Updates High Priority / Important
Includes critical, important, moderate, low, and non-rated security updates.
Yes
Critical Updates High Priority / Important Yes
Update Rollups High Priority / Important Yes
Service Packs Optional – Software / Recommended Typically not
Updates Optional – Software / Recommended No
Feature Packs Optional – Software / Recommended No
Tools Optional – Software / Recommended No
In those cases where a machine does not have Internet connectivity at the time of a machine patch scan, Kaseya uses Microsoft’s WSUSSCN2.CAB data file. Microsoft publishes this CAB file as needed. It contains a sub-set of the Microsoft Update Catalog. As seen in the table above, scan data for only the high priority updates and occasionally for service packs are included in the CAB file. The Kaseya Server automatically downloads the CAB file on a daily basis to make it available for those
machines needing this type of scan. See Windows Automatic Update.
Note: Kaseya does not support the patch classifications of 'driver' or 'definition update'. Patches released with these classifications do not display in the VSA. See the Kaseya knowledge base
(https://helpdesk.kaseya.com/entries/36010308).
Patch Failure After the patch installation attempt completes—including the reboot if requested—the system re-scans the target machine. If a patch still shows missing after the re-scan, failure is reported. Patches can fail
for several reasons:
Insufficient Disk Space - Patches are downloaded, or copied from a file share, to the local machine's
hard disk. Several patches, especially service packs, may require significant additional local disk space to completely install. Verify the target machine has plenty of disk space available.
Bad Patch File - The phrase Bad Patch File in the Comments column indicates the patch file failed to execute for some reason. If you schedule multiple patches to install as a batch and even one of
them fails, all the patches are marked as Bad Patch File. The system is reporting a procedure failure and can not distinguish which patch in the procedure caused the failure.
Corrupted Patch File - The downloaded patch file is corrupt.

Patch Management Overview
6
Missing Patch Location - The phrase Missing patch location in the Comments column means the URL used to download patches from the Microsoft website is missing. You can manually enter the correct location using the Patch Location (page 48) page.
No Reboot - Several patches require a system reboot before they take effect. If your Reboot Action (page 35) settings did not allow a reboot, the patch may be installed but will not be effective
until after the reboot.
Command Line Failed - If the command line parameters set in the Command Line (page 45) function
are incorrect, the patch executable typically displays a dialog box on the managed machine stating there is a command line problem. This error causes patch installation to halt and the patch
installation procedure to terminate. The patch file remains on the managed machine and Install Failed is displayed. Enter the correct command line parameters for the patch and try again.
Note: Command line parameters for each patch apply globally and can only be changed by a master
role user.
MS Office Command Line Failed - The only command line parameter permitted for use with Microsoft
Office (prior to Office 2007) related patches is /Q. Because MS Office (prior to Office 2007)
patches may require the Office installation CD(s), the use of the /Q command line parameter
might cause the patch install to fail. If an Office related patch fails, remove the /Q command line parameter and try again.
Warning: The only switch permitted for use with Microsoft Office 2000, XP, and 2003 related patches (marked as Office) is /Q. If /Q is not specified, Microsoft Office 2000, XP, and 2003
switches will be reset to /INSTALL-AS-USER. Microsoft Office 2003 patches may also include
the /MSOCACHE switch used to attempt a silent install if the MSOCache exists on the machine and
the /INSTALL-AS-USER switch is set.
Patch Download Blocked - The patch file was never delivered to the machine. The system
downloads the patch directly from the internet to either the Kaseya Server, a file share, or directly to the managed machine, depending on the machine ID's File Source (page 38) settings. The
machine ID's firewall may be blocking these downloads. A patch file delivered to the agent with a size of only 1k or 2k bytes is an indication of this problem.
User not logged in - In some cases a user on the machine being patched must be logged in to
respond to dialogs presented by the install during the patch. The patch procedure automatically detects whether a user is currently logged in and will not continue if a user is not logged in. Reschedule the installation of the patch when a user is available and logged in to the machine.
Credential does not have administrator rights - If an agent credential
(http://help.kaseya.com/webhelp/EN/VSA/9040000/index.asp#3492.htm) is defined for a machine ID, then Patch Management installs all new patches using this agent credential. Therefore, the agent
credential set using the Agent > Manage Agents page should always be a user with administrator rights.
Manual install only - Not a patch failure, but a requirement. Some patches and service packs require
passwords or knowledge of a customized setup that the VSA can not know. The VSA does not automatically install patches having the following warnings:
Manual install only
Patch only available from Windows Update web site
No patch available; must be upgraded to latest version
These updates must be installed manually on each machine.
Troubleshooting Patch Installation Failures
When patch scan processing reports patch installations have failed, a KBxxxxxx.log (if available) and
the WindowsUpdate.log are uploaded to the Kaseya Server. Additionally, for those patches that
required an "Internet based install", a ptchdlin.xml file will be uploaded to the Kaseya Server. These files can be reviewed using Agent Procedures > getFile() for a specific machine and can help you

Scan Machine
7
troubleshoot patch installation failures. Info Center > Reporting > Reports > Logs > Agent Procedure Log contains entries indicating these log files have been uploaded to the Kaseya Server for each
machine.
Scan Machine Patch Management > Manage Machines > Scan Machine
The Scan Machine page schedules scans to search for missing patches on each managed machine. Scanning takes very little resources and can be safely scheduled to run at any time of day. The
scanning operation does not impact users at all.
Note: Kaseya does not support the patch classifications of 'driver' or 'definition update'. Patches released with these classifications do not display in the VSA. See the Kaseya knowledge base
(https://helpdesk.kaseya.com/entries/36010308).
Scanning Frequency
System and network security depends on all your machines having the latest security patches applied. Microsoft typically releases patches on Tuesdays. Security and critical patches are typically released on the second Tuesday of the month (Patch Tuesday), and non-security and non-critical patches are typically released on the third and/or fourth Tuesdays of the month, but these schedules are not guaranteed. To ensure your machines are updated you should scan all managed machines on a daily
basis.
Scanning the Kaseya Server
To scan the Kaseya Server, you must install an agent on the Kaseya Server. Once installed, you can
scan the Kaseya Server just like any other managed machine.
View Definitions
You can filter the display of machine IDs on any agent page using the following options in View
Definitions.
Machines that have no patch scan results (unscanned)
Last execution status for patch scan success / failed
Patch scan schedule / not schedule
Patch scan has / has not executed in the last <N> <periods>
Remind me when machines need a patch scan scheduled
If checked, a warning message displays the number of machine IDs not currently scheduled. The number of machine IDs reported depends on the Machine ID / Group ID filter and machine groups the
user is authorized to see using System > Scope.
Schedule
Click Schedule to display the Scheduler window, which is used throughout the VSA to schedule a task.
Schedule a task once or periodically. Each type of recurrence—Once, Hourly, Daily, Weekly, Monthly, Yearly—displays additional options appropriate for that type of recurrence. Periodic scheduling includes setting start and end dates for the recurrence. Not all options are available for each task
scheduled. Options can include:
Schedule will be based on the timezone of the agent (rather than server) - If checked, time settings set in
the Scheduler dialog reference the local time on the agent machine to determine when to run this task. If blank, time settings reference server time, based on the server time option selected in System > Preferences. Defaults from the System > Default Settings page.

Scan Machine
8
Distribution Window - Reschedules the task to a randomly selected time no later than the number of
periods specified, to spread network traffic and server loading. For example, if the scheduled time for a task is 3:00 AM, and the distribution window is 1 hour, then the task schedule will be changed to run at a random time between 3:00 AM and 4:00 AM.
Skip if offline - If checked and the machine is offline, skip and run the next scheduled period and
time. If blank and the machine is offline, run the task as soon as the machine is online again. Applies only to recurring schedules, a 'Once' schedule always executes the next time the agent is online.
Power up if offline - Windows only. If checked, powers up the machine if offline. Requires
Wake-On-network or vPro and another managed system on the same network.
Exclude the following time range - Applies only to the distribution window. If checked, specifies a time
range to exclude the scheduling of a task within the distribution window. Specifying a time range outside of the distribution window is ignored by the scheduler.
Note: This Schedule button may be hidden for a standard user. This button is enabled using the System >
System Preferences > Enable Scheduling node on the User Roles - Access Rights tab.
Cancel
Click Cancel to cancel execution of this task on selected managed machines. Does not clear scans
that have already started.
Run Now
Click Run Now to run this task on selected machine IDs immediately.
Set Default Scan Source
Sets the scan source of selected machines.
Online - Scan for updates using the Microsoft Update Catalog (page 5) on the internet, then the
cab file second. This is the default scan type.
Offline - Scans for updates using the offline scan source wsusscn2.cab file. This file is copied to the agent's working directory from the Kaseya Server at the time of the scan. The Kaseya Server updates its copy of the cab file, if necessary, twice a day.
A warning icon displays next to any machine that fails to scan online using its default scan source. You can filter machines using the Machines with patch scan source set to online but offline scan ran last
checkbox on the View Definitions page.
Note: Machines with a legacy scan source cannot be changed. When a patch scan runs, the OS/Service pack minimum requirement is checked: Win 2000 SP3 or later. If the minimum requirement is not met, a
legacy scan is run instead of a WUA Patch Scan.
Select All/Unselect All
Click the Select All link to check all rows on the page. Click the Unselect All link to uncheck all rows on the
page.
Check-in status
These icons indicate the agent check-in status of each managed machine. Hovering the cursor over a
check-in icon displays the agent Quick View window.
Online but waiting for first audit to complete
Agent online
Agent online and user currently logged on.
Agent online and user currently logged on, but user not active for 10 minutes
Agent is currently offline
Agent has never checked in

Patch Status
9
Agent is online but remote control has been disabled
The agent has been suspended
An agent icon adorned with a red clock badge is a temporary agent.
Machine.Group ID
The list of Machine.Group IDs displayed is based on the Machine ID / Group ID filter and the machine
groups the user is authorized to see using System > User Security > Scopes.
Last Scan
This timestamp shows when the last scan occurred. When this date changes, new scan data is
available to view.
Skip if Machine Offline
If a checkmark displays and the machine is offline, skip and run the next scheduled period and time. If no checkmark displays, perform this task as soon as the machine connects after the scheduled
time.
This timestamp shows the next scheduled scan. Overdue date/time stamps display as red text with
yellow highlight.
Recurrence
If recurring, displays the interval to wait before running the task again.
Patch Status Patch > Manage Machines > Patch Status
Similar information is provided using Info Center > Reporting > Reports > Patch Management.
The Patch Status page provides a summary view of the patch status for each of your managed
machines. You can quickly identify machines that are missing patches or are indicating errors. The total of all missing patches is the sum of the Missing Approved, Missing Denied, and Missing Manual.
Patch Test
Most patch problems are the result of configuration and/or permission issues. The test function exercises the entire patch deployment process without actually installing anything on the target machine or causing a reboot. If a machine ID's operating system does not support patching, the operating system is displayed. Each count in the paging area is hyperlinked. Clicking a count's
hyperlink displays a list of all patches that make up that count.
The system resets test results every time a machine ID's File Source (page 38) or agent credential (http://help.kaseya.com/webhelp/EN/VSA/9040000/index.asp#3492.htm) changes.
Test cancels any pending patch installs except Initial Updates (page 11).
Machines being processed by Initial Update are not tested. The Initial Update status message and
date/time is displayed instead of the column totals.
View Definitions
You can filter the display of machine IDs on any agent page using the following options in View
Definitions.
Machines with Patch Test Result
Machines missing greater than or equal to N patches
Use Patch Policy

Patch Status
10
Test
Click Test to verify patches can update selected machine IDs. Does not actually install any patches.
Cancel
Click Cancel to stop the test.
Auto Refresh Table
If checked, the paging area is automatically updated every five seconds. This checkbox is automatically selected and activated whenever Test is clicked.
Select All/Unselect All
Click the Select All link to check all rows on the page. Click the Unselect All link to uncheck all rows on the
page.
Check-in status
These icons indicate the agent check-in status of each managed machine. Hovering the cursor over a
check-in icon displays the agent Quick View window.
Online but waiting for first audit to complete
Agent online
Agent online and user currently logged on.
Agent online and user currently logged on, but user not active for 10 minutes
Agent is currently offline
Agent has never checked in
Agent is online but remote control has been disabled
The agent has been suspended
An agent icon adorned with a red clock badge is a temporary agent.
Machine.Group ID
The list of Machine.Group IDs displayed is based on the Machine ID / Group ID filter and the machine
groups the user is authorized to see using System > User Security > Scopes.
Install Patches
The number of patches installed.
Missing Approved
The number of approved patches missing.
Missing Denied
The number of unapproved patches missing.
Missing Manual
The number of approved patches missing that must be installed manually. These patches cannot be processed by Automatic Update (page 14), Initial Update (page 11), Machine Update (page 17), or
Patch Update (page 19).
Pending Patches
The number of patches scheduled to be installed.
User Not Ready
The number of patches not installed because the patch requires:
the user to be logged in, or
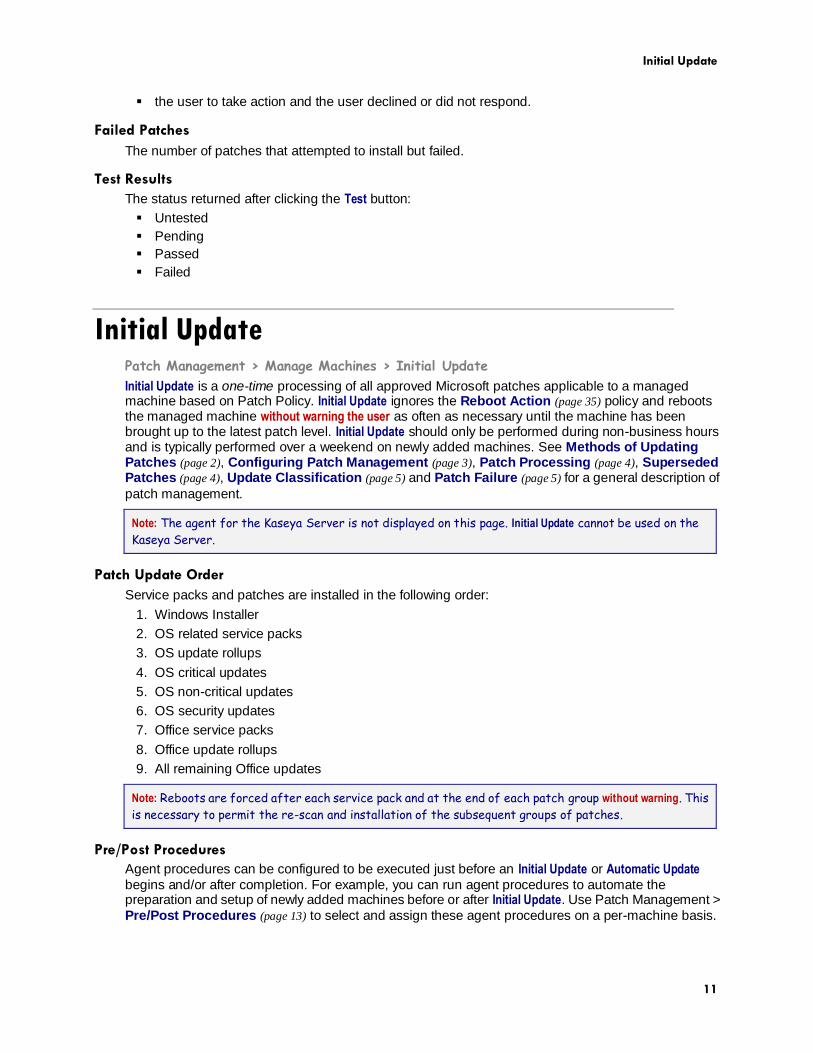
Initial Update
11
the user to take action and the user declined or did not respond.
Failed Patches
The number of patches that attempted to install but failed.
Test Results
The status returned after clicking the Test button:
Untested
Pending
Passed
Failed
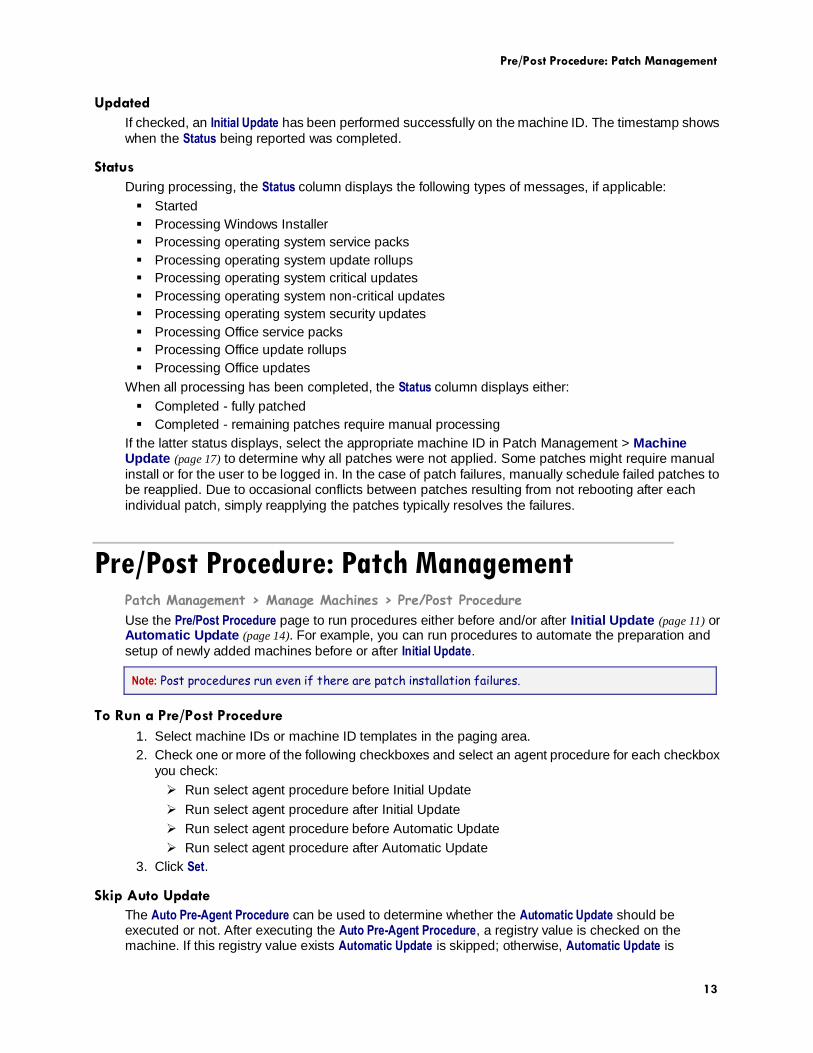
Initial Update Patch Management > Manage Machines > Initial Update
Initial Update is a one-time processing of all approved Microsoft patches applicable to a managed machine based on Patch Policy. Initial Update ignores the Reboot Action (page 35) policy and reboots the managed machine without warning the user as often as necessary until the machine has been brought up to the latest patch level. Initial Update should only be performed during non-business hours and is typically performed over a weekend on newly added machines. See Methods of Updating Patches (page 2), Configuring Patch Management (page 3), Patch Processing (page 4), Superseded Patches (page 4), Update Classification (page 5) and Patch Failure (page 5) for a general description of
patch management.
Note: The agent for the Kaseya Server is not displayed on this page. Initial Update cannot be used on the
Kaseya Server.
Patch Update Order
Service packs and patches are installed in the following order:
1. Windows Installer
2. OS related service packs
3. OS update rollups
4. OS critical updates
5. OS non-critical updates
6. OS security updates
7. Office service packs
8. Office update rollups
9. All remaining Office updates
Note: Reboots are forced after each service pack and at the end of each patch group without warning. This
is necessary to permit the re-scan and installation of the subsequent groups of patches.
Pre/Post Procedures
Agent procedures can be configured to be executed just before an Initial Update or Automatic Update
begins and/or after completion. For example, you can run agent procedures to automate the preparation and setup of newly added machines before or after Initial Update. Use Patch Management >
Pre/Post Procedures (page 13) to select and assign these agent procedures on a per-machine basis.

Initial Update
12
Schedule
Click Schedule to display the Scheduler window, which is used throughout the VSA to schedule a task.
Schedule this task once. Options include:
Distribution Window - Reschedules the task to a randomly selected time no later than the number of
periods specified, to spread network traffic and server loading. For example, if the scheduled time for a task is 3:00 AM, and the distribution window is 1 hour, then the task schedule will be changed to run at a random time between 3:00 AM and 4:00 AM.
Skip if offline - If checked and the machine is offline, skip and run the next scheduled period and
time. If blank and the machine is offline, run the task as soon as the machine is online again. Applies only to recurring schedules, a 'Once' schedule always executes the next time the agent is online.
Power up if offline - Windows only. If checked, powers up the machine if offline. Requires
Wake-On-network or vPro and another managed system on the same network.
Exclude the following time range - Applies only to the distribution window. If checked, specifies a time
range to exclude the scheduling of a task within the distribution window. Specifying a time range outside of the distribution window is ignored by the scheduler.
Note: This Schedule button may be hidden for a standard user. This button is enabled using the System >
System Preferences > Enable Scheduling node on the User Roles - Access Rights tab.
Cancel
Click Cancel to cancel execution of this task on selected managed machines. Does not clear patch
installs that have already started.
Select All/Unselect All
Click the Select All link to check all rows on the page. Click the Unselect All link to uncheck all rows on the
page.
Check-in status
These icons indicate the agent check-in status of each managed machine. Hovering the cursor over a
check-in icon displays the agent Quick View window.
Online but waiting for first audit to complete
Agent online
Agent online and user currently logged on.
Agent online and user currently logged on, but user not active for 10 minutes
Agent is currently offline
Agent has never checked in
Agent is online but remote control has been disabled
The agent has been suspended
An agent icon adorned with a red clock badge is a temporary agent.
Machine.Group ID
The list of Machine.Group IDs displayed is based on the Machine ID / Group ID filter and the machine
groups the user is authorized to see using System > User Security > Scopes.
Note: Displays the following message if applicable: Not a member of a Patch Policy - All missing patches will be installed!
Scheduled
This timestamp shows the scheduled Initial Update.
Pre/Post Procedure: Patch Management
13
Updated
If checked, an Initial Update has been performed successfully on the machine ID. The timestamp shows
when the Status being reported was completed.
Status
During processing, the Status column displays the following types of messages, if applicable:
Started
Processing Windows Installer
Processing operating system service packs
Processing operating system update rollups
Processing operating system critical updates
Processing operating system non-critical updates
Processing operating system security updates
Processing Office service packs
Processing Office update rollups
Processing Office updates
When all processing has been completed, the Status column displays either:
Completed - fully patched
Completed - remaining patches require manual processing
If the latter status displays, select the appropriate machine ID in Patch Management > Machine Update (page 17) to determine why all patches were not applied. Some patches might require manual
install or for the user to be logged in. In the case of patch failures, manually schedule failed patches to be reapplied. Due to occasional conflicts between patches resulting from not rebooting after each
individual patch, simply reapplying the patches typically resolves the failures.
Pre/Post Procedure: Patch Management Patch Management > Manage Machines > Pre/Post Procedure
Use the Pre/Post Procedure page to run procedures either before and/or after Initial Update (page 11) or Automatic Update (page 14). For example, you can run procedures to automate the preparation and
setup of newly added machines before or after Initial Update.
Note: Post procedures run even if there are patch installation failures.
To Run a Pre/Post Procedure
1. Select machine IDs or machine ID templates in the paging area.
2. Check one or more of the following checkboxes and select an agent procedure for each checkbox
you check:
Run select agent procedure before Initial Update
Run select agent procedure after Initial Update
Run select agent procedure before Automatic Update
Run select agent procedure after Automatic Update
3. Click Set.
Skip Auto Update
The Auto Pre-Agent Procedure can be used to determine whether the Automatic Update should be executed or not. After executing the Auto Pre-Agent Procedure, a registry value is checked on the machine. If this registry value exists Automatic Update is skipped; otherwise, Automatic Update is

Automatic Update
14
executed. To invoke this feature, the Auto Pre-Agent Procedure must include a procedure step to set the
registry value below:
HKEY_LOCAL_MACHINE\SOFTWARE\Kaseya\Agent\SkipAutoUpdate
Note: Any data type and any data value may be set. The test is for existence only.
If this registry value exists, a procedure log entry is made to document that Automatic Update was
skipped, and this registry key is deleted.
Select All/Unselect All
Click the Select All link to check all rows on the page. Click the Unselect All link to uncheck all rows on the
page.
Check-in status
These icons indicate the agent check-in status of each managed machine. Hovering the cursor over a
check-in icon displays the agent Quick View window.
Online but waiting for first audit to complete
Agent online
Agent online and user currently logged on.
Agent online and user currently logged on, but user not active for 10 minutes
Agent is currently offline
Agent has never checked in
Agent is online but remote control has been disabled
The agent has been suspended
An agent icon adorned with a red clock badge is a temporary agent.
Edit icon
Click the edit icon next to a machine ID to automatically set header parameters to those matching
the selected machine ID.
Machine.Group ID
The list of Machine.Group IDs displayed is based on the Machine ID / Group ID filter and the machine
groups the user is authorized to see using System > User Security > Scopes.
Init Pre-Agent Procedure / Init Post-Agent Procedure
This column lists the procedures set to run before and/or after an Initial Update.
Auto Pre-Agent Procedure / Auto Post-Agent Procedure
This column lists the procedures set to run before and/or after an Automatic Update.
Automatic Update Patch Management > Manage Machines > Automatic Update
The Automatic Update page is the preferred method of updating managed machines with Microsoft patches on a recurring basis. Automatic Update obeys both the Patch Approval Policy and the Reboot Action (page 35) policy. Use Initial Update (page 11) if you are installing patches for the first time on a managed machine. See Methods of Updating Patches (page 2), Configuring Patch Management (page 3), Patch Processing (page 4), Superseded Patches (page 4), Update Classification (page 5) and
Patch Failure (page 5) for a general description of patch management.

Automatic Update
15
Patches that require manual intervention are not included in Automatic Updates. These are shown in the Missing Manual column of the Patch Status (page 9) page and on the individual Machine Update (page 17) page.
Patch installation only occurs when a new missing patch is found by Scan Machine (page 7).
Automatic Update is suspended for a machine while Initial Update is being processed. Automatic Update automatically resumes when Initial Update completes.
A 'Patch Automatic Update Finished' log entry is added to the Agent Procedure Log when Automatic Update completes on a machine.
Schedule
Click Schedule to display the Scheduler window, which is used throughout the VSA to schedule a task.
Schedule a task once or periodically. Each type of recurrence—Once, Hourly, Daily, Weekly, Monthly, Yearly—displays additional options appropriate for that type of recurrence. Periodic scheduling includes setting start and end dates for the recurrence. Not all options are available for each task
scheduled. Options can include:
Schedule will be based on the timezone of the agent (rather than server) - If checked, time settings set in
the Scheduler dialog reference the local time on the agent machine to determine when to run this task. If blank, time settings reference server time, based on the server time option selected in System > Preferences. Defaults from the System > Default Settings page.
Distribution Window - Reschedules the task to a randomly selected time no later than the number of
periods specified, to spread network traffic and server loading. For example, if the scheduled time for a task is 3:00 AM, and the distribution window is 1 hour, then the task schedule will be changed to run at a random time between 3:00 AM and 4:00 AM.
Skip if offline - If checked and the machine is offline, skip and run the next scheduled period and
time. If blank and the machine is offline, run the task as soon as the machine is online again. Applies only to recurring schedules, a 'Once' schedule always executes the next time the agent is online.
Power up if offline - Windows only. If checked, powers up the machine if offline. Requires
Wake-On-network or vPro and another managed system on the same network.
Exclude the following time range - Applies only to the distribution window. If checked, specifies a time
range to exclude the scheduling of a task within the distribution window. Specifying a time range outside of the distribution window is ignored by the scheduler.
Note: This Schedule button may be hidden for a standard user. This button is enabled using the System > System Preferences > Enable Scheduling node on the User Roles - Access Rights tab.
Cancel
Click Cancel to cancel execution of this task on selected managed machines. Does not clear patch
installs that have already started.
Suspend / Unsuspend
Suspends and unsuspends Automatic Update for selected machines. Applies only to Automatic Update.
Machine Updates (page 17) and Patch Updates (page 19) will continue to be processed.
Select All/Unselect All
Click the Select All link to check all rows on the page. Click the Unselect All link to uncheck all rows on the
page.
Check-in status
These icons indicate the agent check-in status of each managed machine. Hovering the cursor over a
check-in icon displays the agent Quick View window.
Online but waiting for first audit to complete
Agent online

Machine History
16
Agent online and user currently logged on.
Agent online and user currently logged on, but user not active for 10 minutes
Agent is currently offline
Agent has never checked in
Agent is online but remote control has been disabled
The agent has been suspended
An agent icon adorned with a red clock badge is a temporary agent.
Machine.Group ID
The list of Machine.Group IDs displayed is based on the Machine ID / Group ID filter and the machine
groups the user is authorized to see using System > User Security > Scopes.
Note: Displays the following message if applicable: Not a member of a Patch Policy - All missing patches will be installed!
Recurrence
If recurring, displays the interval to wait before running the task again.
Automatic Update Suspended
Displays a lock icon if Automatic Update has been suspended.
Machine History Patch Management > Manage Machines > Machine History
Similar information is provided using Info Center > Reporting > Reports > Patch Management and the Patch
Status tab of the Machine Summary and Live Connect (Classic) pages.
The Machine History page displays the results from the most recent patch scan of managed machines. All installed and missing patches applicable to a managed machine are listed, regardless of whether the
patch is approved or not.
Click a machine ID link to display its patch history.
Click the KB Article link to display a Details page about the patch. The Details page contains a link
to display the knowledge base article.
Patches classified as security updates have a security bulletin ID (MSyy-xxx). Clicking this link displays the security bulletin.
The Product column helps identify the product category associated with a specific patch. If a patch
is used across multiple operating system families (i.e., Windows XP, Windows Server 2003,
Vista, etc.), the product category is Common Windows Component. Examples include Internet Explorer, Windows Media Player, MDAC, MSXML, etc.
Superseded Patches
A patch may be superseded and not need to be installed. See Superseded Patches (page 4) for more
information.
(Patch)
Patches are grouped by update classification first and knowledge base article number second.
(Status)
The following status messages can appear next to a patch:
Installed (date unknown)

Machine Update
17
Installed (<datetime>)
Missing
Denied by Patch Approval
Denied (Pending Patch Approval)
Manual install to VSA database server only - Applies to SQL Server patches on the database server where the Kaseya Server database is hosted
Manual install to KServer only - Applies to Office or any "install-as-user" patches on the Kaseya Server
Patch Location Pending - Applies to patches with an invalid patch location. See Invalid Patch Location Notification in System > Configure.
Missing Patch Location
Ignore
Machine Update Patch Management > Manage Updates > Machine Update
Similar information is provided using Info Center > Reporting > Reports > Patch Management and the Patch
Status tab of the Machine Summary and Live Connect (Classic) pages.
The Machine Update page manually installs Microsoft patches on individual machines. Machine Update overrides the Patch Approval Policy but obeys the Reboot Action (page 35) policy. If you're using Automatic Update, then Machine Update is used on an exception basis. Machine Update is often used to test a new patch prior to approving it for general release to all machines. See Methods of Updating Patches (page 2), Configuring Patch Management (page 3), Patch Processing (page 4), Superseded Patches (page 4), Update Classification (page 5) and Patch Failure (page 5) for a general description of
patch management.
Using Machine Update
1. Click a machine ID to display all patches missing on that machine.
2. The Product column helps identify the product category associated with a specific patch. If a patch
is used across multiple operating system families (i.e., Windows XP, Windows Server 2003,
Vista, etc.), the product category is Common Windows Component. Examples include Internet
Explorer, Windows Media Player, MDAC, MSXML, etc.
Note: If a listed patch displays the phrase User Action required to install update the patch
cannot be installed silently. The patch must be scheduled when a logged on user is available to answer the prompts required to complete the install. If a user does not respond to the prompts
after a fixed time period the install is skipped and the phrase User not ready to install displays
next to the patch.
3. Optionally click the KB Article link to display a Details page about the patch. The Details page
contains a link to display the knowledge base article.
4. Optionally click a Security Bulletin link to review a security bulletin, if available. Patches classified
as security updates have a security bulletin ID (MSyy-xxx).
5. Check the box next to patches you want installed on the selected machine ID.
6. Click the Schedule button to install patches using the install parameters.
7. Click the Cancel button to remove any pending patch installs. Does not clear patch installs that
have already started.
Superseded Patches
A patch may be superseded and not need to be installed. See Superseded Patches (page 4) for more

Machine Update
18
information.
Schedule
Click this button to display the Scheduler window, which is used throughout the VSA to schedule a task.
Schedule this task once. Options include:
Schedule will be based on the timezone of the agent (rather than server) - If checked, time settings set in
the Scheduler dialog reference the local time on the agent machine to determine when to run this task. If blank, time settings reference server time, based on the server time option selected in System > Preferences. Defaults from the System > Default Settings page.
Distribution Window - Reschedules the task to a randomly selected time no later than the number of
periods specified, to spread network traffic and server loading. For example, if the scheduled time for a task is 3:00 AM, and the distribution window is 1 hour, then the task schedule will be changed to run at a random time between 3:00 AM and 4:00 AM.
Skip if offline - If checked and the machine is offline, skip and run the next scheduled period and
time. If blank and the machine is offline, run the task as soon as the machine is online again. Applies only to recurring schedules, a 'Once' schedule always executes the next time the agent is online.
Power up if offline - Windows only. If checked, powers up the machine if offline. Requires
Wake-On-network or vPro and another managed system on the same network.
Exclude the following time range - Applies only to the distribution window. If checked, specifies a time
range to exclude the scheduling of a task within the distribution window. Specifying a time range outside of the distribution window is ignored by the scheduler.
Cancel
Click Cancel to cancel execution of this task on selected managed machines.
Note: Patches that are currently being processed (status of Pending - Processing Now) cannot be canceled.
Hide patches denied by Patch Approval
If checked, hides patches denied patch approval. Patches with the status Pending Approval are considered denied by Machine Update.
Select All/Unselect All
Click the Select All link to check all rows on the page. Click the Unselect All link to uncheck all rows on the
page.
(Patch)
Patches are grouped by update classification first and knowledge base article number second.
(Status)
The following status messages can appear next to a patch:
Pending (Processing Now)
Pending (Scheduled to run at <date>)
Install Failed - See Patch Failure (page 5).
Awaiting Reboot
User not logged in
User not ready to install
Install Failed - Missing Network Credential
Install Failed - Invalid Network Credential or LAN Server Unavailable
Install Failed - Invalid Credential
Missing

Patch Update
19
Denied by Patch Approval
Denied (Pending Patch Approval)
Manual install to database server only - Applies to SQL Server patches on the database server where the Kaseya Server database is hosted
Manual install to KServer only - Applies to Office or any "install-as-user" patches on the Kaseya Server
Patch Location Pending - Applies to patches with an invalid patch location. See Invalid Patch Location Notification in System > Configure.
Missing Patch Location
Ignore
Patch Update Patch Management > Manage Updates > Patch Update
The Patch Update page updates missing Microsoft patches on all machines displayed in the paging area. Patch Update overrides the Patch Approval Policy (page 27) but obeys the Reboot Action (page
35) policy. If you're using Automatic Update, then Patch Update is used on an exception basis to apply
individual patches to multiple machines or to re-apply patches that originally failed on certain machines. See Methods of Updating Patches (page 2), Configuring Patch Management (page 3), Patch Processing (page 4), Superseded Patches (page 4), Update Classification (page 5) and Patch
Failure (page 5) for a general description of patch management.
Patches Displayed
The display of patches on this page are based on:
The Machine ID/Group ID filter.
The patches reported using Scan Machine (page 7). Managed machines should be scanned daily.
The patches of machines using Automatic Update (page 14). If the Hide machines set for Automatic Update box is checked, these patches are not listed here. These patches are automatically applied at the Automatic Update scheduled time for each machine.
If the Hide patches denied by Patch Approval box is checked, patches that are denied or pending
approval are not listed here.
The patches of machines being processed by Initial Update (page 11). These patches are excluded from this page until Initial Update completes.
Duplicate Entries
Microsoft may use a common knowledge base article for one or more patches, causing patches to appear to be listed more than once. Patch Update displays patches sorted by Update Classification or Product first and knowledge base article number second. Check the Product name or click the KB Article
link to distinguish patches associated with a common knowledge base article.
Superseded Patches
A patch may be superseded and not need to be installed. See Superseded Patches (page 4) for more
information.
Using Patch Update
1. Optionally click the KB Article link to display a Details page about the patch. The Details page
contains a link to display the knowledge base article.
2. Patches classified as security updates have a security bulletin ID (MSyy-xxx). Optionally click the Security Bulletin link to review the security bulletin, if available.

Patch Update
20
3. Optionally click the box next to a KB Article to schedule that patch on all managed machines
missing that patch.
4. Optionally click the Machines... button to schedule a patch on individual machines or to set machines to ignore a patch. The Ignore setting applies to the selected patch on the selected
machines. If Ignore is set, the patch is considered Denied. Patches marked as Ignore on the selected machines cannot be installed by any of the installation methods. To be installed, the Ignore setting must be cleared.
Note: A warning icon indicates the patch status for one or more machines should be checked
before installing this patch. Click the Machines button and review the Status column for each machine missing this patch.
5. Click the Schedule button to install the patches using the install parameters.
6. Click the Cancel button to remove any pending patch installs. Does not clear patch installs that
have already started.
Note: If a listed patch displays the phrase User Action required to install update the patch cannot be installed silently. The patch must be scheduled when a logged on user is available to
answer the prompts required to complete the install. If a user does not respond to a prompt after
5 minutes the install is skipped and the phrase User not ready to install displays next to the
patch.
Hide machines set for Automatic Update
If checked, hides patches missing from machine IDs set to Automatic Update (page 14).
Hide patches denied by Approval Policy
If checked, hides patches denied by Patch Approval Policy.
Patch Group By
Display patch groups by Classification or Product.
Schedule
Click this button to display the Scheduler window, which is used throughout the VSA to schedule a task.
Schedule this task once. Options include:
Schedule will be based on the timezone of the agent (rather than server) - If checked, time settings set in
the Scheduler dialog reference the local time on the agent machine to determine when to run this task. If blank, time settings reference server time, based on the server time option selected in System > Preferences. Defaults from the System > Default Settings page.
Distribution Window - Reschedules the task to a randomly selected time no later than the number of
periods specified, to spread network traffic and server loading. For example, if the scheduled time for a task is 3:00 AM, and the distribution window is 1 hour, then the task schedule will be changed to run at a random time between 3:00 AM and 4:00 AM.
Skip if offline - If checked and the machine is offline, skip and run the next scheduled period and
time. If blank and the machine is offline, run the task as soon as the machine is online again. Applies only to recurring schedules, a 'Once' schedule always executes the next time the agent is online.
Power up if offline - Windows only. If checked, powers up the machine if offline. Requires
Wake-On-network or vPro and another managed system on the same network.
Exclude the following time range - Applies only to the distribution window. If checked, specifies a time
range to exclude the scheduling of a task within the distribution window. Specifying a time range outside of the distribution window is ignored by the scheduler.
Patch Update
21
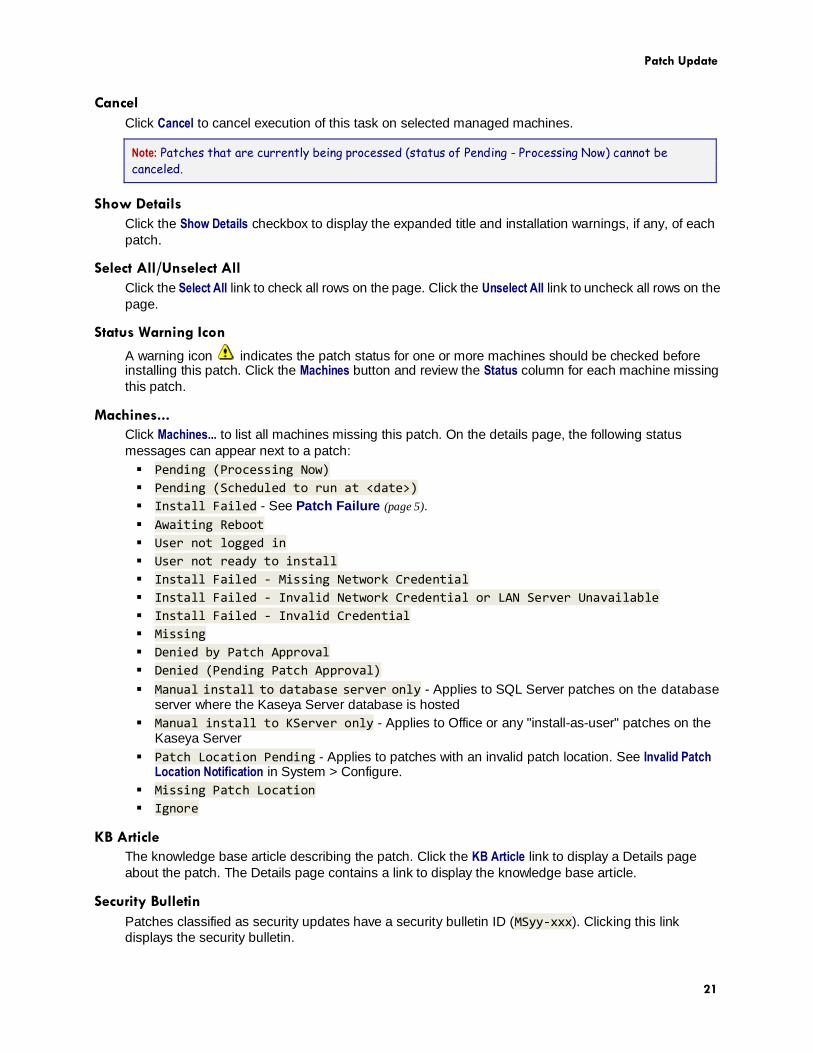
Cancel
Click Cancel to cancel execution of this task on selected managed machines.
Note: Patches that are currently being processed (status of Pending - Processing Now) cannot be canceled.
Show Details
Click the Show Details checkbox to display the expanded title and installation warnings, if any, of each
patch.
Select All/Unselect All
Click the Select All link to check all rows on the page. Click the Unselect All link to uncheck all rows on the
page.
Status Warning Icon
A warning icon indicates the patch status for one or more machines should be checked before installing this patch. Click the Machines button and review the Status column for each machine missing
this patch.
Machines...
Click Machines... to list all machines missing this patch. On the details page, the following status
messages can appear next to a patch:
Pending (Processing Now)
Pending (Scheduled to run at <date>)
Install Failed - See Patch Failure (page 5).
Awaiting Reboot
User not logged in
User not ready to install
Install Failed - Missing Network Credential
Install Failed - Invalid Network Credential or LAN Server Unavailable
Install Failed - Invalid Credential
Missing
Denied by Patch Approval
Denied (Pending Patch Approval)
Manual install to database server only - Applies to SQL Server patches on the database server where the Kaseya Server database is hosted
Manual install to KServer only - Applies to Office or any "install-as-user" patches on the Kaseya Server
Patch Location Pending - Applies to patches with an invalid patch location. See Invalid Patch Location Notification in System > Configure.
Missing Patch Location
Ignore
KB Article
The knowledge base article describing the patch. Click the KB Article link to display a Details page
about the patch. The Details page contains a link to display the knowledge base article.
Security Bulletin
Patches classified as security updates have a security bulletin ID (MSyy-xxx). Clicking this link
displays the security bulletin.

Rollback
22
Missing
The number of machines missing this patch.
Auto
Displays only if the Hide machines set for Automatic Update box is not checked. The number of machines
scheduled to install this patch by Automatic Update.
Ignore
The number of machine set to ignore a patch using the Machines button. The Ignore setting applies to
the selected patch on the selected machines. If Ignore is set, the patch is considered Denied. Patches marked as Ignore on the selected machines cannot be installed by any of the installation methods. To
be installed, the Ignore setting must be cleared.
Product
The Product column helps identify the product category associated with a specific patch. If a patch is
used across multiple operating system families (i.e., Windows XP, Windows Server 2003, Vista, etc.),
the product category is Common Windows Component. Examples include Internet Explorer, Windows
Media Player, MDAC, MSXML, etc.
Update Classification
See Update Classification (page 5) for an explanation of Classification and Type.
Rollback Patch Management > Manage Updates > Rollback
The Rollback page removes patches after they have been installed on a system. Not all patches may be
uninstalled. The system only lists patches supporting the rollback feature.
Warning: Removing Windows software in the wrong order (http://support.microsoft.com/kb/823836/) may cause
the operating system to stop functioning.
To Remove a Patch from a Managed Machine
1. Click the machine ID that you want to remove a patch from.
2. Check the box to the left of the patch you want to uninstall.
3. Click the Rollback button.
Rollback
Click this button to display the Scheduler window, which is used throughout the VSA to schedule a
task. Schedule this task once. Options include:
Distribution Window - Reschedules the task to a randomly selected time no later than the
number of periods specified, to spread network traffic and server loading. For example, if the scheduled time for a task is 3:00 AM, and the distribution window is 1 hour, then the task
schedule will be changed to run at a random time between 3:00 AM and 4:00 AM.
Skip if offline - If checked and the machine is offline, skip and run the next scheduled period
and time. If blank and the machine is offline, run the task as soon as the machine is online again. Applies only to recurring schedules, a 'Once' schedule always executes the next time
the agent is online.
Power up if offline - Windows only. If checked, powers up the machine if offline. Requires
Wake-On-network or vPro and another managed system on the same network.

Cancel Updates
23
Exclude the following time range - Applies only to the distribution window. If checked, specifies a
time range to exclude the scheduling of a task within the distribution window. Specifying a
time range outside of the distribution window is ignored by the scheduler.
Cancel
Click Cancel to clear a scheduled rollback. Does not clear rollbacks that have already started.
Select All/Unselect All
Click the Select All link to check all rows on the page. Click the Unselect All link to uncheck all rows on the
page.
(Patch)
Patches are grouped by update classification first and knowledge base article number second.
KB Article
The knowledge base article describing the patch. Click the KB Article link to display a Details page
about the patch. The Details page contains a link to display the knowledge base article.
Security Bulletin
The security bulletin associated with a patch. Patches classified as security updates have a security
bulletin ID (MSyy-xxx). Click the Security Bulletin link to review the security bulletin, if available.
(Product)
The Product column helps identify the product category associated with a specific patch. If a patch is
used across multiple operating system families (i.e., Windows XP, Windows Server 2003, Vista, etc.),
the product category is Common Windows Component. Examples include Internet Explorer, Windows
Media Player, MDAC, MSXML, etc.
(Install Date)
Includes the date the patch was installed, if available.
Cancel Updates Patch Management > Manage Updates > Cancel Updates
The Cancel Updates page clears all manually scheduled patch installations on selected machine IDs.
Does not clear patch installations that have already started.
The Cancel Updates page can also terminate currently running patch installation processes. A Terminate
button displays next to the machine name when a patch installation is being processed. Termination deletes existing patch installation procedures for the selected machine, and the installation process
ends after the currently running procedure completes.
Note: Remove patches from managed machines using Rollback (page 22).
Note: Use the Initial Updates (page 11) page to cancel a scheduled Initial Update or to cancel an Initial Update
that is currently being processed.
Note: Use the Automatic Update (page 14) page to cancel a scheduled Automatic Update.
Cancel
Click Cancel to clear all scheduled patch installations scheduled by either Machine Update or by Patch Update on selected machine IDs. Does not clear patch installations that have already started.

Create/Delete: Patch Policy
24
View By
View patches sorted by machine or by patch first.
Show patch list
If View By machine is selected and Show patch list is checked, all scheduled patch IDs for each machine ID are listed. If Show patch list is blank, the total number of scheduled patches are listed for each
machine ID.
Show machine list
If View By patch is selected and Show machine list is checked, all scheduled patch IDs for each machine ID are listed. If Show machine list is blank, the total number of scheduled patches are listed for each
machine ID.
Select All/Unselect All
Click the Select All link to check all rows on the page. Click the Unselect All link to uncheck all rows on the
page.
Check-in status
These icons indicate the agent check-in status of each managed machine. Hovering the cursor over a
check-in icon displays the agent Quick View window.
Online but waiting for first audit to complete
Agent online
Agent online and user currently logged on.
Agent online and user currently logged on, but user not active for 10 minutes
Agent is currently offline
Agent has never checked in
Agent is online but remote control has been disabled
The agent has been suspended
An agent icon adorned with a red clock badge is a temporary agent.
Machine.Group ID
The list of Machine.Group IDs displayed is based on the Machine ID / Group ID filter and the machine
groups the user is authorized to see using System > User Security > Scopes.
KB Article
The knowledge base article describing the patch. Click the KB Article link to display a Details page
about the patch. The Details page contains a link to display the knowledge base article.
Create/Delete: Patch Policy Patch Management > Patch Policy > Create/Delete
The Create/Delete page creates or deletes patch policies. Patch policies contain all active patches for the purpose of approving or denying patches. An active patch is defined as a patch that has been reported by a patch scan by at least one machine in the VSA. Any machine can be made a member of
one or more patch policies.
For example, you can create a patch policy named servers and assign all your servers to be members
of this patch policy and another patch policy named workstations and assign all your workstations to be members of this policy. This way, you can configure patch approvals differently for servers and
workstations.

Membership: Patch Policy
25
The patches of machines that are not a member of any patch policy are treated as if they were automatically approved.
When a new patch policy is created the default approval status is pending approval for all patch categories.
The default approval status for each category of patches and for each product can be individually set.
If a machine is a member of multiple patch policies and those policies have conflicting approval statuses, the most restrictive approval status is used.
Initial Update (page 11) and Automatic Update (page 14) require patches be approved before
these patches are installed.
Approval by Policy (page 27) approves or denies patch by policy.
Approval by Patch (page 29) approves or denies patches by patch and sets the approval status
for that patch in all patch policies.
KB Override (page 31) overrides the default approval status by KB Article for all patch policies and
sets the approval status for patches associated with the KB Article in all patch policies.
Patch Update (page 19) and Machine Update (page 17) can install denied patches.
Non-Master role users can only see patch policies they have created or patch policies that have machine IDs the user is authorized to see based on their scope.
Create
Click Create to define a new patch policy, after entering a new machine patch policy name in the edit
field.
Delete
Click Delete to delete selected patch policies.
Enter name for a new patch policy
Enter the name for a new patch policy.
Select All/Unselect All
Click the Select All link to check all rows on the page. Click the Unselect All link to uncheck all rows on the
page.
Edit Icon
Click the edit icon to the left of a patch policy to rename it.
Policy Name
Lists all machine patch policies defined for the entire system.
Member Count
Lists the number of machines that are members of each patch policy.
Show Members
Click Show Members to list the members of a patch policy.
Membership: Patch Policy Patch Management > Patch Policy > Membership
The Membership page assigns machine IDs to one or more patch policies. Patch policies contain all
active patches for the purpose of approving or denying patches. An active patch is defined as a patch

Membership: Patch Policy
26
that has been reported by a patch scan by at least one machine in the VSA. Any machine can be made
a member of one or more patch policies.
For example, you can create a patch policy named servers and assign all your servers to be members
of this patch policy and another patch policy named workstations and assign all your workstations to be members of this policy. This way, you can configure patch approvals differently for servers and
workstations.
The patches of machines that are not a member of any patch policy are treated as if they were automatically approved.
When a new patch policy is created the default approval status is pending approval for all patch categories.
The default approval status for each category of patches and for each product can be individually set.
If a machine is a member of multiple patch policies and those policies have conflicting approval statuses, the most restrictive approval status is used.
Initial Update (page 11) and Automatic Update (page 14) require patches be approved before
these patches are installed.
Approval by Policy (page 27) approves or denies patch by policy.
Approval by Patch (page 29) approves or denies patches by patch and sets the approval status
for that patch in all patch policies.
KB Override (page 31) overrides the default approval status by KB Article for all patch policies and
sets the approval status for patches associated with the KB Article in all patch policies.
Patch Update (page 19) and Machine Update (page 17) can install denied patches.
Non-Master role users can only see patch policies they have created or patch policies that have
machine IDs the user is authorized to see based on their scope.
View Definitions
You can filter the display of machine IDs on any agent page using the following options in View
Definitions.
Show/Hide members of patch policy
Use Patch Policy
Assign machines to a patch policy
Click one or more patch policy names to mark them for adding or removing from selected machine IDs.
Add
Click Add to add selected machine IDs to selected patch policies.
Remove
Click Remove to remove selected machine IDs from selected patch policies.
Always show all Patch Policies to All Users
If checked, always show all patch policies to all users. This allows all non-master role users to deploy patch policies, even if they did not create the patch policies and don't have machines yet that use them. If blank, only master role users can see all patch policies. If blank, non-master role users can only see patch policies assigned to machines within their scope or to unassigned patch policies they created.
This option only displays for master role users.
Machine.Group ID
The list of Machine.Group IDs displayed is based on the Machine ID / Group ID filter and the machine
groups the user is authorized to see using System > User Security > Scopes.

Approval by Policy
27
Policy Membership
Displays a comma separated list of patch policies that each machine ID is a member of.
Approval by Policy Patch Management > Patch Policy > Approval by Policy
The Approval by Policy page approves or denies the installation of Microsoft patches on managed machines by patch policy. Patches pending approval are considered denied until they are approved. This gives you the chance to test and verify a patch in your environment before the patch automatically pushes out. See Methods of Updating Patches (page 2), Configuring Patch Management (page 3), Patch Processing (page 4), Superseded Patches (page 4), Update Classification (page 5) and Patch
Failure (page 5) for a general description of patch management.
Setting Patch Approval Policies
Patch policies contain all active patches for the purpose of approving or denying patches. An active patch is defined as a patch that has been reported by a patch scan by at least one machine in the VSA.
Any machine can be made a member of one or more patch policies.
For example, you can create a patch policy named servers and assign all your servers to be members
of this patch policy and another patch policy named workstations and assign all your workstations to be members of this policy. This way, you can configure patch approvals differently for servers and
workstations.
The patches of machines that are not a member of any patch policy are treated as if they were automatically approved.
When a new patch policy is created the default approval status is pending approval for all patch categories.
The default approval status for each category of patches and for each product can be individually set.
If a machine is a member of multiple patch policies and those policies have conflicting approval statuses, the most restrictive approval status is used.
Initial Update (page 11) and Automatic Update (page 14) require patches be approved before
these patches are installed.
Approval by Policy (page 27) approves or denies patch by policy.
Approval by Patch (page 29) approves or denies patches by patch and sets the approval status
for that patch in all patch policies.
KB Override (page 31) overrides the default approval status by KB Article for all patch policies and
sets the approval status for patches associated with the KB Article in all patch policies.
Patch Update (page 19) and Machine Update (page 17) can install denied patches.
Non-Master role users can only see patch policies they have created or patch policies that have machine IDs the user is authorized to see based on their scope.
Superseded Patches
A patch may be superseded and not need to be installed. See Superseded Patches (page 4) for more
information.
Policy
Select a patch policy by name from the drop-down list.
Note: See Standard Solution Package > Patch / Update Management
(http://help.kaseya.com/webhelp/EN/SSP/9040000/index.asp#11169.htm) > Patch Approval/Denial Policies for more information about standard "ZZ" patch policies.

Approval by Policy
28
Save As...
Click Save As... to save the currently selected patch policy to a new policy with identical settings. All
patch approval/denial statuses are copied as are the default approval statuses for the policy. Machine membership is not copied to the new policy.
Copy Approval Statuses to Policy <Policy> / Copy Now
Select a policy to copy approval statuses to, from the currently selected policy. Then click Copy Now.
This enables you to perform patch testing against a group of test machines using a test policy. Once testing has been completed and the patches have been approved or denied, use the copy feature to
copy only the approved or denied statuses from the test policy to a production policy.
Policy View / Group By
Display patch groups by classification or product.
Patch Approval Policy Status
This table displays the approval status of patches by update classification or product group. Approved, Denied, Pending Approval, and Totals statistics are provided for each update classification or product
group.
Select a Default Approval Status for any category for this patch policy. Newly identified patches for this
patch policy are automatically set to this default value. Choices include:
- Approved
- Denied
- Pending Approval
Note: If the same patch is assigned two different Default Approval Status settings—one by update classification and the other by product group—then the more restrictive of the two defaults has
precedence: Denied over Pending Approval over Approved.
Click any link in this table to display a Patch Approval Policy Details page listing individual patches and
their approval status. The list is filtered by the type of link clicked:
Classification or Product
Approved
Denied
Pending Approval
Totals
In the Patch Approval Policy Details page you can:
Approve or deny approval of patches individually.
Click the KB Article link to display a Details page about the patch. The Details page contains a link
to display the knowledge base article.
Note: Microsoft may use a common knowledge base article for one or more patches, causing patches to appear to be listed more than once. Check the Product name or click the KB Article link to
distinguish patches associated with a common knowledge base article.
Click the Security Bulletin link to review the security bulletin, if available. Patches classified as
security updates have a security bulletin ID (MSyy-xxx).
The Product column helps identify the product category associated with a specific patch. If a patch
is used across multiple operating system families (i.e., Windows XP, Windows Server 2003,
Vista, etc.), the product category is Common Windows Component. Examples include Internet Explorer, Windows Media Player, MDAC, MSXML, etc.
See Update Classification (page 5) for an explanation of Classification and Type.

Approval by Patch
29
Click the Show Details checkbox to display the expanded title, patch status notes and installation
warnings, if any, of each patch.
Click Filter... to restrict the amount of data displayed. You can specify a different advanced filter for each column of data displayed. See Advanced Filtering
(http://help.kaseya.com/webhelp/EN/VSA/9040000/index.asp#254.htm).
Optionally add a note, up to 500 characters, using Patch Status Notes. The note is added when the Approve or Deny buttons are selected. If the text box is empty when the Approval or Deny buttons are
selected, the note is removed for selected patches.
Override Default Approval Status with Denied for "Manual Install Only" updates in this policy
If checked, all existing and future Manual Install Only updates are set to denied for this policy.
Override Default Approval Status with Denied for "Windows Update Web Site" updates in this
policy
If checked, all existing and future Windows Update Web Site updates are set to denied for this policy.
Override Default Approval Status with Denied for superseded updates in this policy
If checked, all existing and future superseded patches are set to denied for this policy.
Note: Checking an override checkbox has a one-time effect on existing patches for that category of
patches. If you approve an existing patch belonging to an override category after checking its override
checkbox, the patch will remain approved regardless of any override setting. Future patches will continue to default to denied.
Set New Patch Product Default Approval Status in this policy
Selects the initial default approval status for new Microsoft products identified during patch scans.
These new products display when the Policy View / Group By drop-down list is set to Product.
Approval by Patch Patch Management > Patch Policy > Approval by Patch
The Approval by Patch page approves or denies the installation of Microsoft patches on managed machines by patch for all patch policies. Changes affect patches installed by all users. This saves you the trouble of approving pending patches separately for each patch policy. See Methods of Updating Patches (page 2), Configuring Patch Management (page 3), Patch Processing (page 4), Superseded Patches (page 4), Update Classification (page 5) and Patch Failure (page 5) for a general description of
patch management.
Setting Patch Approval Policies
Patch policies contain all active patches for the purpose of approving or denying patches. An active patch is defined as a patch that has been reported by a patch scan by at least one machine in the VSA.
Any machine can be made a member of one or more patch policies.
For example, you can create a patch policy named servers and assign all your servers to be members
of this patch policy and another patch policy named workstations and assign all your workstations to be members of this policy. This way, you can configure patch approvals differently for servers and
workstations.
The patches of machines that are not a member of any patch policy are treated as if they were automatically approved.
When a new patch policy is created the default approval status is pending approval for all patch categories.

Approval by Patch
30
The default approval status for each category of patches and for each product can be individually set.
If a machine is a member of multiple patch policies and those policies have conflicting approval statuses, the most restrictive approval status is used.
Initial Update (page 11) and Automatic Update (page 14) require patches be approved before
these patches are installed.
Approval by Policy (page 27) approves or denies patch by policy.
Approval by Patch (page 29) approves or denies patches by patch and sets the approval status
for that patch in all patch policies.
KB Override (page 31) overrides the default approval status by KB Article for all patch policies and
sets the approval status for patches associated with the KB Article in all patch policies.
Patch Update (page 19) and Machine Update (page 17) can install denied patches.
Non-Master role users can only see patch policies they have created or patch policies that have machine IDs the user is authorized to see based on their scope.
Superseded Patches
A patch may be superseded and not need to be installed. See Superseded Patches (page 4) for more
information.
Patch Data Filter Bar
You can filter the data displayed by specifying values in each field of the Patch Filter Data Bar at the top of
the page.
Enter or select values in the KB Article, Classification or Products fields. You can also click the Edit...
button to filter by additional fields and save the filtering selections you make as a view. Supports advanced filtering logic. Saved views can be shared using the Make Public (others can view) checkbox
when editing the view.
Patch Status Notes
Optionally add a note, up to 500 characters, using Patch Status Notes. The note is added when the Approve or Deny buttons are selected. If the text box is empty when the Approval or Deny buttons are
selected, the note is removed for selected patches.
Approve
Click Approve to approve selected patches for all patch policies.
Deny
Click Deny to deny selected patches for all patch policies.
Show Details
Check Show Details to display multiple rows of information for all patches. This includes the title of a
patch, the number of patch policies that have been approved, denied, or are pending approval for a
patch, patch status notes, and installation warnings, if any.
Select All/Unselect All
Click the Select All link to check all rows on the page. Click the Unselect All link to uncheck all rows on the
page.
KB Article
Click the KB Article link to display a Details page about the patch. The Details page contains a link to
display the knowledge base article.

KB Override
31
Note: Microsoft may use a common knowledge base article for one or more patches, causing patches to appear to be listed more than once. Check the Product name or click the KB Article link to distinguish
patches associated with a common knowledge base article.
Security Bulletin
Click the Security Bulletin link to review the security bulletin, if available. Patches classified as security
updates have a security bulletin ID (MSyy-xxx).
Product
The Product column helps identify the product category associated with a specific patch. If a patch is
used across multiple operating system families (i.e., Windows XP, Windows Server 2003, Vista, etc.),
the product category is Common Windows Component. Examples include Internet Explorer, Windows
Media Player, MDAC, MSXML, etc.
Classification / Type
See Update Classification (page 5) for an explanation of Classification and Type.
Approval Status
The approval status for this patch in all policies. Displays Mixed if even 1 policy differs from all other policies. Clicking the Approval Status link displays a page displaying the approval status assigned to this
patch by each policy.
Published
The date the patch was released.
Language
The language the patch applies to.
KB Override Patch Management > Patch Policy > KB Override
The KB Override page sets overrides of the default approval status of patches set using Approval by Policy (page 27) by KB Article for all patch policies. It also sets the approval status for existing patches by KB Article for all patch policies. Changes affect patches in all patch policies installed by all users. KB Override only applies if a Patch Policy is assigned to an endpoint. See Methods of Updating Patches (page
2), Configuring Patch Management (page 3), Patch Processing (page 4), Superseded Patches (page
4), Update Classification (page 5) and Patch Failure (page 5) for a general description of patch
management.
For example, KB890830, "The Microsoft Windows Malicious Software Removal Tool" is released monthly. If you decide to approve all patches associated with this KB Article using KB Override, then not only are existing patches approved but all new patches associated with this KB article are automatically approved each month the new patch is released.
Setting Patch Approval Policies
Patch policies contain all active patches for the purpose of approving or denying patches. An active patch is defined as a patch that has been reported by a patch scan by at least one machine in the VSA.
Any machine can be made a member of one or more patch policies.
For example, you can create a patch policy named servers and assign all your servers to be members
of this patch policy and another patch policy named workstations and assign all your workstations to be members of this policy. This way, you can configure patch approvals differently for servers and
workstations.

KB Override
32
The patches of machines that are not a member of any patch policy are treated as if they were automatically approved.
When a new patch policy is created the default approval status is pending approval for all patch categories.
The default approval status for each category of patches and for each product can be individually set.
If a machine is a member of multiple patch policies and those policies have conflicting approval statuses, the most restrictive approval status is used.
Initial Update (page 11) and Automatic Update (page 14) require patches be approved before
these patches are installed.
Approval by Policy (page 27) approves or denies patch by policy.
Approval by Patch (page 29) approves or denies patches by patch and sets the approval status
for that patch in all patch policies.
KB Override (page 31) overrides the default approval status by KB Article for all patch policies and
sets the approval status for patches associated with the KB Article in all patch policies.
Patch Update (page 19) and Machine Update (page 17) can install denied patches.
Non-Master role users can only see patch policies they have created or patch policies that have machine IDs the user is authorized to see based on their scope.
KB Article
Enter the KB Article number to approve or deny. Do not include the KB prefix.
Note: See Approval by Policy (page 27) or Approval by Patch (page 29) for a listing of all available KB
Articles.
Override Notes
Enter a note to remind VSA users why the override was set.
Approve
Click Approve to approve patches associated with this KB Article. Multiple patches can be associated
with a KB Article.
Deny
Click Deny to deny patches associated with this KB Article. Multiple patches can be associated with a
KB Article.
KB Article
Click the KB Article link to display the KB article.
Override Status
Approved or Denied. Applies to all patches associated with this KB Article.
Admin
The user who approved or denied patches associated with this KB Article.
Changed
The date and time the user approved or denied patched associated with this KB Article.
Notes
Reminds VSA users why the override was set.

Windows Auto Update
33
Windows Auto Update Patch > Configure > Windows Auto Update
Note: A known issue with Windows 10 concerns Patch Management > Windows Automatic Update. Disabling the Windows Automatic Update option in Windows 10 Home edition is not supported as Microsoft does not allow users to disable automatic updates in this version of their operating system. For other editions of Windows 10--Education, Enterprise, and Pro--disabling Windows Automatic Update using the VSA > Patch Management > Windows Auto Update page does not "appear" to be in effect from the machine user's point of view, even though it is. Moreover, the machine user can override the disabled setting by clicking 'Check for updates', which results in the updates being downloaded and installed, instead of being prevented from doing so.
The Windows Auto Update page determines whether Windows Automatic Updates on managed machines is
disabled, left for the user to control, or configured.
Window Automatic Updates
Windows Automatic Updates is a Microsoft tool that automatically delivers updates to a computer. Windows Automatic Updates is supported in the following operating systems: Windows 2003, Windows XP, Windows 2000 SP3 or later, and all operating systems released after these. Patch Management > Windows Auto Update (page 33) can enable or disable this feature on managed machines. While Windows Millennium Edition (Me) has an Automatic Updates capability, it cannot be
managed as the above operating systems can.
Windows Automatic Update Cannot Use Template Accounts
Windows Automatic Updates is one feature that cannot be preconfigured in a machine ID template. This is because Windows Automatic Updates is only supported on Windows 2000 SP3/SP4, Windows XP, Windows Server 2003, and later operating systems. Since a machine ID template cannot specify an operating system, a setting for this feature cannot be stored in the machine ID template. Also, a machine’s current settings must be known before they can be overridden. The current settings are obtained when a Scan Machine (page 7) is performed.
Note: A checkbox does not display for any machine that either has an operating system that does not support
Windows Automatic Updates or for which an initial Scan Machine has not been completed.
View Definitions
You can filter the display of machine IDs on any agent page using the Machines with Patch Automatic
Update configuration option in View Definitions.
Apply
Click Apply to apply parameters to selected machine IDs.
Disable
Select Disable to disable Windows Automatic Updates on selected machine IDs and let Patch Management control patching of the managed machine. Overrides the existing user settings and
disables the controls in Windows Automatic Updates so the user cannot change any of the settings.
Users can still patch their systems manually.
User Control
Let machine users enable or disable Windows Automatic Updates for selected machine IDs.
Configure
Forces the configuration of Windows Automatic Updates on selected machine IDs to the following settings. Overrides the existing user settings and disables the controls in Windows Automatic Updates
so the user cannot change any of the settings. Users can still patch their systems manually.

Windows Auto Update
34
Notify user for download and installation - Notifies the user when new patches are available but does
not download or install them.
Automatically download and notify user for installation - Automatically downloads updates for the user
but lets the user choose when to install them.
Automatically download and schedule installation - Automatically downloads updates and installs the
updates at the scheduled time.
Schedule every day / <day of week> at <time of day>
Applies only if Automatically download and schedule installation is selected. Perform this task every day or
once a week at the specified time of day.
Force auto-reboot if user is logged on
Optionally check the box next to Force auto-reboot if user is logged on. By default, Windows Auto Update
does not force a reboot. Reboot Action (page 35) settings do not apply to Windows Auto Update.
Select All/Unselect All
Click the Select All link to check all rows on the page. Click the Unselect All link to uncheck all rows on the
page.
Check-in status
These icons indicate the agent check-in status of each managed machine. Hovering the cursor over a
check-in icon displays the agent Quick View window.
Online but waiting for first audit to complete
Agent online
Agent online and user currently logged on.
Agent online and user currently logged on, but user not active for 10 minutes
Agent is currently offline
Agent has never checked in
Agent is online but remote control has been disabled
The agent has been suspended
An agent icon adorned with a red clock badge is a temporary agent.
Machine.Group ID
The list of Machine.Group IDs displayed is based on the Machine ID / Group ID filter and the machine
groups the user is authorized to see using System > User Security > Scopes.
Machine Updated
Displays the status of configuring Windows Automatic Updates on selected machine IDs using this
page.
Pending - Windows Automatic Updates is being configured on the selected machine ID.
Timestamp - The date and time Windows Automatic Updates was configured on the selected machine ID.
Windows Automatic Update Configuration
The Windows Automatic Update configuration assigned to each selected machine ID.
Note: If the Windows Automatic Update Configuration column displays Automatic Update not initialized on machine, the user must select the Windows Automatic Updates icon in the system tray to run the
Windows Automatic Updates Setup wizard to setup Windows Automatic Updates. This is sometimes
required on older operating systems.
Reboot Action
35
Reboot Action Patch Management > Configure > Reboot Action
The Reboot Action page defines how reboots are performed after a patch install. Patch installs do not take effect until after a machine is rebooted. The Reboot Action policy applies to Machine Update (page
17), Patch Update (page 19) and Automatic Update (page 14). It does not apply to Initial Update (page
11). See Methods of Updating Patches (page 2), Configuring Patch Management (page 3), Patch Processing (page 4), Superseded Patches (page 4), Update Classification (page 5) and Patch Failure
(page 5) for a general description of patch management.
Warning: It is strongly recommended that the Reboot Action for agents installed on the Kaseya Server and the database server used by the Kaseya Server be set to Do not reboot after update. Automatic
rebooting of the Kaseya Server or database server can have adverse effects on other Kaseya Server
processes!
Patch Process
The patch installation procedure runs at the scheduled time and performs the following steps:
Downloads, or copies from a file share, all the patch files to a local drive, typically the same drive the agent is installed on.
Executes each patch file, one at a time.
Performs a reboot of the machine, as specified by this page.
Note: If you schedule multiple patches for installation on the same machine, all the patches are installed
at the same time. After all the patches have been installed the machine reboots once. This technique
saves time and reboots.
Note: Service packs are always installed separately. If you are installing a service pack with other patches
you will see a reboot after the service pack install and then another single reboot after all the other
patches are installed.
View Definitions
You can filter the display of machine IDs on any agent page using the following options in View
Definitions.
Show machines that have/have not rebooted in the last N periods
Machines with Reboot Pending for patch installations
Apply
Click Apply to apply parameters to selected machine IDs.
Reboot immediately after update.
Reboots the computer immediately after the install completes.
Reboot <day of week> at <time of day> after install.
After the patch install completes, the computer is rebooted at the selected day of week and time of day. Use these settings to install patches during the day when users are logged in, then force a reboot in the middle of the night. Selecting every day reboots the machine at the next specified time of day following
the patch installation.
Warn user that machine will reboot in <N> minutes (without asking permission).
When the patch install completes, the message below pops open warning the user and giving them a specified number of minutes to finish up what they are doing and save their work. If no one is currently

Reboot Action
36
logged in, the system reboots immediately.
Skip reboot if user logged in.
If the user is logged in, the reboot is skipped after the patch install completes. Use this setting to avoid
interrupting your users. This is the default setting.
If user logged in ask to reboot every <N> minutes until the reboot occurs.
This setting displays the message below, asking the user if it is OK to reboot now. If no one is at the computer or they answer no, the same message appears every N minutes repeatedly, until the system
has been rebooted. If no one is currently logged in, the system reboots immediately.
If user logged in ask permission. Reboot if no response in <N> minutes. Reboot if user not
logged in.
This setting displays the message below, asking the user if it is OK to reboot now. If no one is at the computer, it reboots automatically after N minutes without saving any open documents. If no one is
currently logged in, the system reboots immediately.
If user logged in ask permission. Do nothing if no response in <N> minutes. Reboot if user not
logged in.
This setting displays the message below, asking the user if it is OK to reboot now. If no one is at the
computer, the reboot is skipped. If no one is logged in, reboot immediately.
Do not reboot after update
Does not reboot. Typically used if the machine is a server and you need to control the reboot. You can be notified via email when a new patch has been installed by checking Email when reboot required and filling in an email address. You can also format the email message by clicking the Format Email button.
This option only displays for master role users.
The following types of patch reboot emails can formatted:
Patch Reboot
Note: Changing the email alarm format changes the format for all Patch Reboot emails.

Reboot Action
37
The following variables can be included in your formatted email alerts and in procedures.
Within an Email Description
<at> alert time
<db-view.column> Include a view.column from the database. For example, to include the computer name of the machine generating the alert in an email, use <db-vMachine.ComputerName>
<gr> group ID
<id> machine ID
Run select agent procedure before machine is rebooted
If checked, the selected agent procedure is run just before the machine is rebooted.
Run select agent procedure after machine is rebooted
If checked, the selected agent procedure is run just after the machine is rebooted.
Select All/Unselect All
Click the Select All link to check all rows on the page. Click the Unselect All link to uncheck all rows on the
page.
Check-in status
These icons indicate the agent check-in status of each managed machine. Hovering the cursor over a
check-in icon displays the agent Quick View window.
Online but waiting for first audit to complete
Agent online
Agent online and user currently logged on.
Agent online and user currently logged on, but user not active for 10 minutes
Agent is currently offline
Agent has never checked in
Agent is online but remote control has been disabled
The agent has been suspended
An agent icon adorned with a red clock badge is a temporary agent.
Edit icon
Click the edit icon next to a machine ID to automatically set header parameters to those matching
the selected machine ID.
Machine.Group ID
The list of Machine.Group IDs displayed is based on the Machine ID / Group ID filter and the machine
groups the user is authorized to see using System > User Security > Scopes.
Reboot Action
The type of reboot action assigned to each machine ID.

File Source
38
File Source Patch Management > Configure > File Source
The File Source page defines where each machine gets patch executable files from, prior to installation,
and where these patch executables are copied to the local machine. File source locations include:
The internet
The Kaseya Server
A file share
Related information:
Selecting the File share located on option below affects where Backup and Endpoint Security is installed from.
Patch download links with a cab extension are always downloaded directly from the internet regardless of the File Source setting.
You can filter the display of machine IDs on any agent page using the Machines with Patch File Source configuration option in View Definitions.
By default Patch Management uses the Use Fast Transfer option on the System > Default Settings (http://help.kaseya.com/webhelp/EN/VSA/9040000/index.asp#9332.htm) page.
Actions
Apply - Applies the selected patch source option to selected machine IDs.
Clear Cache - Clears all downloaded patches stored on the Kaseya Server.
Options
Copy packages to working directory on local drive with most free space - Patches are downloaded, or copied from a file share, to the managed machine's hard disk. Several patches, especially service packs, may require significant additional local disk space to completely install. Check this box to download patches to the working directory, but use the drive on the managed machine with the most free disk space. Uncheck this box to always use the drive specified in Working Directory for
the machine ID.
Delete package after install (from working directory) - The install package is typically deleted after the
install to free up disk space. Uncheck this box to leave the package behind for debugging purposes. If the install fails and you need to verify the Command Line (page 45) switches, do not delete the package so you have something to test with. The package is stored in the Working Directory on the drive specified in the previous option.
Download from Internet - Each managed machine downloads the patch executable file directly from the internet at the URL specified in Patch Location (page 48).
Pulled from system server - First the Kaseya Server checks to see if it already has a copy of the
patch file. If not, the new patch executable is downloaded automatically and stored on the Kaseya Server, then used for all subsequent distributions to managed machines. When a patch needs to be installed on a managed machine, this patch file is pushed to that machine from the Kaseya Server.
Note: The location for patch files stored on the Kaseya Server is <Kaseya installation directory>\WebPages\ManagedFiles\VSAPatchFiles\
Pulled from file server using UNC path - This method is recommended if you support many machines
on the same LAN. Patch files are downloaded to a local directory on a selected machine ID. The local directory on the machine ID is configured to be shared with other machine IDs on the same LAN. All other machine IDs on the same LAN use a UNC path to the shared folder located on the first machine ID.
1. Identify an agent machine that will act as the file server machine for other machines on the
same LAN.

File Source
39
2. Create a share on the file server machine and specify the credential that will allow other machines on the same LAN to access it. This is done manually, outside of the File Source
page.
3. Set an agent credential (http://help.kaseya.com/webhelp/EN/VSA/9040000/index.asp#3492.htm) for the
file server machine with the shared directory using Agent > Manage Agents. All other machines on the same LAN will use the credential set for the file server machine to access
the shared folder.
4. Enter a UNC path to the share in the Pulled from file server using UNC path field. For example,
\\computername\sharedname\dir\.
In the next three steps you tell the VSA which machine ID is acting as the file server machine and where the shared directory is located using local file format notation.
5. Use the Machine Group Filter drop-down list to select a group ID.
6. Select a machine ID from the File share located on drop-down list.
7. Enter a shared local directory in the in local directory field.
Note: The value in the in local directory field must be in full path format, such as
c:\shareddir\dir.
When a file is downloaded, the Kaseya Server first checks to see if the patch file is already in the file share. If not, the file server machine automatically loads the patch file either directly from the internet or gets it from the Kaseya Server.
8. File Server automatically gets patch files from - Select one of the following options:
the Internet - Use this setting when the file server machine has full internet access.
the system server - Use this setting when the file server machine is blocked from getting
internet access.
9. Download from Internet if machine is unable to connect to the file server - Optionally check this box
to download from the internet. This is especially useful for laptops that are disconnected
from the company network but have internet access.
Pulled from LAN Cache - Uses the Agent > LAN Cache and Agent > Assign LAN Cache pages to
manage file sourcing for patch executable files.
Table Columns
Select All/Unselect All - Click the Select All link to check all rows on the page. Click the Unselect All link
to uncheck all rows on the page.
(Check-in Status) - These icons indicate the agent check-in status of each managed machine.
Hovering the cursor over a check-in icon displays the agent Quick View window.
Online but waiting for first audit to complete
Agent online
Agent online and user currently logged on.
Agent online and user currently logged on, but user not active for 10 minutes
Agent is currently offline
Agent has never checked in
Agent is online but remote control has been disabled
The agent has been suspended
An agent icon adorned with a red clock badge is a temporary agent.
(Edit Icon) - Click the edit icon next to a machine ID to automatically set header parameters to
those matching the selected machine ID.
Machine.Group ID - A unique machine ID / group ID / organization ID name for a machine in the
VSA.
Patch Source - Lists the patch source selected for each machine ID. A Clear Cache button displays in this column if the Pulled from file server using UNC path option is selected for a machine ID. Clicking

Patch Alert
40
this Clear Cache button clears patches from the specified file server UNC path. The Clear Cache
button is not machine specific. All patches stored on that file server for the specified path will be deleted.
Patch Alert Patch Management > Configure > Patch Alert
Monitor > Agent Monitoring > Alerts Select Patch Alert from the Select Alert Function drop-down list.
The Alerts - Patch Alert page alerts for patch management events on managed machines.
A new patch is available for the selected machine ID.
A patch installation failed on the selected machine ID.
The agent credential is invalid or missing for the selected machine ID.
Windows Auto Update changed.
To Create a Patch Alert
1. Check any of these checkboxes to perform their corresponding actions when an alert condition is
encountered:
Create Alarm
Create Ticket
Run Script
Email Recipients
2. Set additional email parameters.
3. Set additional patch alert specific parameters.
4. Check the machine IDs to apply the alert to.
5. Click the Apply button.
To Cancel a Patch Alert
1. Select the machine ID checkbox.
2. Click the Clear button.
The alert information listed next to the machine ID is removed.
Passing Alert Information to Emails and Procedures
The following types of patch alert emails can be sent and formatted:
1 - New Patch Available
2 - Patch Install Failed
3 - Patch Approval Policies Updated
4 - Agent Credential Invalid
5 - Windows Auto Update Configuration Changed
Note: Changing the email alarm format changes the format for all Patch Alert emails.
The following variables can be included in your formatted email alerts and are passed to agent procedures assigned to the alert. A in a numbered column indicates a variable can be used with
the alert type corresponding to that number.

Patch Alert
41
Within an Email Within a
Procedure Description 1 2 3 4 5
<at> #at# alert time
<au> #au# auto update change
<bl> #bl# new bulletin list
<db-view.column> not available Include a view.column from the database. For example, to include the computer name of the machine generating the alert in an email, use <db-vMachine.ComputerName>
<fi> #fi# failed bulletin ID
<gr> #gr# group ID
<ic> #ic# invalid credential type
<id> #id# machine ID
<pl> #pl# new patch list
#subject# subject text of the email message, if an email was sent in response to an alert
#body# body text of the email message, if an email was sent in response to an alert
Create Alarm
If checked and an alert condition is encountered, an alarm is created. Alarms are displayed in Monitor > Dashboard List, Monitor > Alarm Summary and Info Center > Reporting > Reports > Logs > Alarm Log.
Create Ticket
If checked and an alert condition is encountered, a ticket is created.
Run Script
If checked and an alert condition is encountered, an agent procedure is run. You must click the select agent procedure link to choose an agent procedure to run. You can optionally direct the agent procedure to run on a specified range of machine IDs by clicking this machine ID link. These specified machine IDs
do not have to match the machine ID that encountered the alert condition.
Email Recipients
If checked and an alert condition is encountered, an email is sent to the specified email addresses.
The email address of the currently logged on user displays in the Email Recipients field. It defaults
from System > Preferences.
Click Format Email to display the Format Alert Email popup window. This window enables you to
format the display of emails generated by the system when an alert condition is encountered. This option only displays for master role users.
If the Add to current list radio option is selected, when Apply is clicked alert settings are applied and
the specified email addresses are added without removing previously assigned email addresses.
If the Replace list radio option is selected, when Apply is clicked alert settings are applied and the specified email addresses replace the existing email addresses assigned.
If Remove is clicked, all email addresses are removed without modifying any alert parameters.

Patch Alert
42
Email is sent directly from the Kaseya Server to the email address specified in the alert. Set the From Address using System > Outbound Email.
Apply
Click Apply to apply parameters to selected machine IDs. Confirm the information has been applied
correctly in the machine ID list.
Clear
Click Clear to remove all parameter settings from selected machine IDs.
Patch Alert Parameters
The system can trigger an alert for the following alert conditions for a selected machine ID:
New patch is available
Patch install fails
Agent credential is invalid or missing
Note: An agent credential (http://help.kaseya.com/webhelp/EN/VSA/9040000/index.asp#3492.htm) is not required to install patches unless the machine’s File Source (page 38) is configured as Pulled from
file server using UNC path. If an agent credential is assigned, it will be validated as a local
machine credential without regard to the File Source configuration. If this validation fails, the alert
will be raised. If the machine’s File Source is configured as Pulled from file server using UNC
path, a credential is required. If it is missing, the alert will be raised. If it is not missing, it will be
validated as a local machine credential and as a network credential. If either of these validations
fails, the alert will be raised.
Windows Auto Update changed
Select All/Unselect All
Click the Select All link to check all rows on the page. Click the Unselect All link to uncheck all rows on the
page.
Check-in status
These icons indicate the agent check-in status of each managed machine. Hovering the cursor over a
check-in icon displays the agent Quick View window.
Online but waiting for first audit to complete
Agent online
Agent online and user currently logged on.
Agent online and user currently logged on, but user not active for 10 minutes
Agent is currently offline
Agent has never checked in
Agent is online but remote control has been disabled
The agent has been suspended
An agent icon adorned with a red clock badge is a temporary agent.
Edit icon
Click the edit icon next to a machine ID to automatically set header parameters to those matching
the selected machine ID.
Machine.Group ID
The list of Machine.Group IDs displayed is based on the Machine ID / Group ID filter and the machine
groups the user is authorized to see using System > User Security > Scopes.
Office Source
43
Approval Policy Updated
Displays as the first row of data. This is a system alert and not associated with any machines. An alert is generated when a new patch is added to all patch policies. An in the ATSE column indicates you cannot set an alert or a ticket for this row. You can specify an email recipient. You can also run an agent procedure on a specified machine. See Approval by Policy (page 27).
ATSE
The ATSE response code assigned to machine IDs:
A = Create Alarm
T = Create Ticket
S = Run Procedure
E = Email Recipients
Email Address
A comma separated list of email addresses where notifications are sent.
New Patch
If checked, an alarm is triggered when a new patch is available for this machine ID.
Install Failed
If checked, an alarm is triggered when a patch installation has failed for this machine ID.
Invalid Credential
If checked, an alarm is triggered when the credential is invalid for this machine ID.
Win AU Changed
If checked, an alarm is triggered if the group policy for Windows Automatic Update on the managed machine is changed from the setting specified by Patch Management > Windows Auto Update (page
33). A log entry in the machine's Configuration Changes log is made regardless of this alert setting.
Office Source Patch Management > Configure > Office Source
The Office Source page sets alternate source locations for installing Office and Office component
applications. The source location can be changed from the default CD-ROM, which is the typical installation source, to a network share or a directory on a local hard drive. By changing the installation source to a network share or a local directory, those patches that require the Office installation source for installation can get access without prompting the user for the installation media. This alternate source location can be configured to be read-only. It must contain an exact copy of the installation media
contents including all hidden files and/or directories.
An Office source for a managed machine is only available after you have run Scan Machine (page 7) at
least once for the managed machine. Machine IDs are displayed on this page only if they:
Currently match the Machine ID / Group ID filter.
Have Office or Office component applications installed for Office 2000, XP, or 2003.
Note: Office 2007 is not displayed on this page. Office 2007 installs a full set of source installation files on a machine, so an alternate source location is not required.
Multiple Entries
Multiple entries may be displayed for a machine because the machine contains one or more Office

Office Source
44
component applications, such as FrontPage or Project, that were installed separately from their own
installation source and were not part of the Office installation.
Credential Required
Managed machines must have an agent credential
(http://help.kaseya.com/webhelp/EN/VSA/9040000/index.asp#3492.htm) to use the Office Source page. The agent
must have a credential to use the alternate Office source location.
Validation
The specified location is validated to be sure that the location is accessible from the machine and that the installation source in the specified location contains the correct edition and version of Office or the Office component application. Only after the validation succeeds is the machine's registry modified to
use the specified location.
Installing Office Products
Some patches—particularly Office service packs—still display progress dialogs even though the silent
installation switch (/Q) is included using Patch Management > Command Line (page 45). These
progress dialogs do not require any user intervention.
Some patches and service packs display a modal dialog indicating the update has completed, again even though the silent installation switch (/Q) is used. This requires the user to click on the OK button
to dismiss the dialog. Until this happens, the patch installation procedure appears to be hung and will not complete until this dialog is dismissed!
Some Office service packs fail for no apparent reason. Checking the machine's application event log reveals that another Office component service pack failed. This has been observed with Office 2003 service pack 2 requiring the availablility of FrontPage 2003 service pack 2. When the Office source location for the FrontPage 2003 is configured, the Office 2003 service pack 2 finally successfully
installs.
Filter on Office Product
Because each managed machine may be listed multiple times—once for each Office product or Office component application installed—you can filter the Office products/components displayed. This ensures selecting the same product code for multiple machines when setting the installation source
location.
Apply
Click Apply to apply the Office source location specified in Location of Office installation source to selected
machine IDs.
Location of Office installation source
Add the network share as a UNC path (i.e., \\machinename\sharename) or a local directory as a fully
qualified path (i.e., C:\OfficeCD\Office2003Pro) in the installation source text box. When specifying
a UNC path to a share accessed by an agent machine—for example \\machinename\share—ensure the share's permissions allow read/write access using the agent credential
(http://help.kaseya.com/webhelp/EN/VSA/9040000/index.asp#3492.htm) specified for that agent machine in Agent
> Manage Agents.
Reset
Click Reset to restore selected machine IDs back to their original installation source, typically the
CD-ROM.
Select All/Unselect All
Click the Select All link to check all rows on the page. Click the Unselect All link to uncheck all rows on the
page.

Command Line
45
Check-in status
These icons indicate the agent check-in status of each managed machine. Hovering the cursor over a
check-in icon displays the agent Quick View window.
Online but waiting for first audit to complete
Agent online
Agent online and user currently logged on.
Agent online and user currently logged on, but user not active for 10 minutes
Agent is currently offline
Agent has never checked in
Agent is online but remote control has been disabled
The agent has been suspended
An agent icon adorned with a red clock badge is a temporary agent.
Machine.Group ID
The list of Machine.Group IDs displayed is based on the Machine ID / Group ID filter and the machine
groups the user is authorized to see using System > User Security > Scopes.
Status
Displays one of the following:
Missing Credential
Update Procedure Failed
Validation Procedure Failed
Original Source
Pending Validation
Updating Machine
Incorrect Edition
Processing Error
Restoring Original
Office Source Updated
Office Product
Displays the name of the Office product.
Office Source
Displays the current installation source location for this Office product on this machine ID.
Product Code
Displays the Office product code.
Command Line Patch Management > Patch Parameters > Command Line
This page only displays for master role users.
Changes to the switches effect all users.
The Command Line page defines the command line switches used to silently install a specified patch.
Occasionally a patch is released that does not use normal switch settings or the patch database has not been updated with the new switches. If you find a patch does not successfully install with its assigned switch settings, you can change them with this page. Locate patch switches by clicking the

Command Line
46
KB Article link and reading through the knowledge base article.
Suppress Automatic Reboot
Usually you want to load a patch without requiring any user interaction at all. The system supports batch installs of multiple patches at the same time and reboots once at the end of all patch installations.
Therefore, use switch settings to suppress automatic reboot wherever possible.
Switch Settings
Typical patch file switch settings for silent, unattended installs without reboot:
/quiet /norestart - This is the standard setting for most patches in recent years.
/u /q /z - Typical switch settings used to silently install older patches that do not use the Windows Installer technology.
/m /q /z - Typical switch settings to silently install older patches released for Windows NT4.
/q:a /r:n - Internet Explorer and other application switch settings to install in quiet user mode (/q:a) and not automatically reset (/r:n) when the install completes.
Other switch settings found with Microsoft patch installations include:
/? - Display the list of installation switches.
/u - Use Unattended mode.
/m - Unattended mode in older patches.
/f - Force other programs to quit when the computer shuts down.
/n - Do not back up files for removal.
/o - Overwrite OEM files without prompting.
/z - Do not restart when the installation is complete.
/q - Use quiet mode (no user interaction).
/l - List the installed hotfixes.
/x - Extract files without running Setup.
Microsoft Office command line switches
The only switch permitted for use with Microsoft Office 2000 and Office XP related patches is /Q. If /Q is not specified, Microsoft Office 2000 and Microsoft Office XP switches will be automatically reset to
/INSTALL-AS-USER. Microsoft Office 2003 patches may also include the /MSOCACHE switch used to attempt a silent install if the MSOCache exists on the machine. These settings are enforced by the
application.
Note:The /MSOCACHE switch only applies to Office 2003. When the patch database is updated, this switch
is automatically added to all Office 2003 patches where a user has never modified a particular patch's command line switches. It is not automatically added to Office 2003 service packs. When this switch is
used, the system determines if the MSOCache exists on the target machine. If the MSOCache does
exist and this switch is used, the system automatically uses the run silently switch (/Q) thereby relying
on the MSOCache rather than requiring the actual installation media. If the MSOCache does not exist
on the target machine, the existing switch is used. If a patch installation fails that uses the /MSOCACHE
switch, it typically means that the MSOCache could not be used by the patch. In this case, you must clear out all command line switches for this patch and set the /INSTALL-AS-USER switch. Re-running the patch
installation should now succeed. Unfortunately, this requires user intervention and also probably
requires the Office 2003 installation media.
Server-side command line switches
Special server-side command line switches can be combined with patch specific switches:

Command Line
47
/INSTALL-AS-USER - Tells the system to only install this patch as a user. Some rare patches do not install successfully unless someone is logged onto the machine. Add this switch if you find a patch is failing to install if no one is logged in.
Warning: This setting conflicts with the Skip reboot if user logged in setting found in Reboot Action
(page 35). /INSTALL-AS-USER requires that a user be logged in to install.
/DELAY-AFTER=xxx - After the install wait xxx seconds before performing the reboot step. The
reboot step starts after the install package completes. Some rare installers spawn additional programs that must also complete before rebooting. Add this switch to give other processes time to complete after the main installer is done.
Patch Data Filter Bar
You can filter the data displayed by specifying values in each field of the Patch Filter Data Bar at the top of
the page.
Enter or select values in the KB Article, Classification or Products fields. You can also click the Edit...
button to filter by additional fields and save the filtering selections you make as a view. Supports advanced filtering logic. Saved views can be shared using the Make Public (others can view) checkbox
when editing the view.
Filter patches by
Based on the patch category selected, this page displays all patches and service packs for all
machines, both missing and installed, that match the current Machine ID/Group ID filter.
New Switches
Enter the command line switches you want to apply to selected patches.
Apply
Click Apply to apply the specified command line switches to selected patches.
Reset
Click Reset to reset the command lines of selected patches back to their default settings.
Select All/Unselect All
Click the Select All link to check all rows on the page. Click the Unselect All link to uncheck all rows on the
page.
KB Article
The knowledge base article describing the patch. Click the KB Article link to display a Details page
about the patch. The Details page contains a link to display the knowledge base article.
Patch Name
The patch install filename.
Security Bulletin
Click the Security Bulletin link to review the security bulletin, if available. Patches classified as security
updates have a security bulletin ID (MSyy-xxx).
Product
The Product column helps identify the product category associated with a specific patch. If a patch is
used across multiple operating system families (i.e., Windows XP, Windows Server 2003, Vista, etc.),
the product category is Common Windows Component. Examples include Internet Explorer, Windows
Media Player, MDAC, MSXML, etc.

Patch Location
48
Office?
If an Office product, the version displays.
Switches
The command line switches used to install this patch.
Patch Location Patch Management > Patch Parameters > Patch Location
This page only displays for master role users.
Changes effect patches installed by all users.
The Patch Location page defines the URL from which each patch is downloaded. Only patches missing
from machine IDs that currently match the Machine ID / Group ID filter are displayed here. You should
consult this page if, when attempting to install a patch, you are notified of a Path Missing.
The Kaseya Server maintains a list of each patch and the URL it should be downloaded from. In most
cases the download URLs provided for patches are correct. Path Missing errors may occur for the
following reasons:
Each language may require a separate URL to download from.
The URL may change for one or more patches.
The Kaseya Server's record for the URL may be entered incorrectly or be corrupted.
In such cases, users can change the download path associated with a patch. Manually entered URLs are shown in dark red.
To find the URL to a missing path
1. Click the KB Article listed for the missing path.
2. Read through the knowledge base article and locate the download URL for the patch.
Note: There may be several products referenced by the same KB Article. For instance, each Windows operating system is a different product. Also, patches can be different for specific service packs
of the operating system.
3. Click on the download link for your patch. If a different patch is available for each language, you
will be prompted to select a language.
4. Select the appropriate language for the download, if applicable.
5. Click the Download link or button and download the patch file.
6. On your web browser, click the History icon to view your URL history.
7. Locate the file you just downloaded from your history list. Typically, the file will be in the
download.microsoft.com domain.
8. Right- click the filename you just downloaded and select Copy from the menu. This copies the
entire URL into your clipboard.
9. Return to the Patch Location page and:
a. Paste the URL into the New Location edit box.
b. Select the radio button to the left of the KB Article for which you are entering a new patch
location.
c. Click the Apply button.
Patch Data Filter Bar
You can filter the data displayed by specifying values in each field of the Patch Filter Data Bar at the top of

Patch Location
49
the page.
Enter or select values in the KB Article, Classification or Products fields. You can also click the Edit...
button to filter by additional fields and save the filtering selections you make as a view. Supports advanced filtering logic. Saved views can be shared using the Make Public (others can view) checkbox
when editing the view.
New Location
Enter a new URL.
Apply
Click Apply to apply the URL listed in the New Location field to the selected patch.
Remove
Click Remove to delete the download URL associated with a patch ID.
Warning: Removing a path disables patching managed machines using this patch until the correct path is
entered.
KB Article
The knowledge base article describing the patch. Click the KB Article link to display a Details page
about the patch. The Details page contains a link to display the knowledge base article.
Security Bulletin
Click the Security Bulletin link to review the security bulletin, if available. Patches classified as security
updates have a security bulletin ID (MSyy-xxx).
Product
The Product column helps identify the product category associated with a specific patch. If a patch is
used across multiple operating system families (i.e., Windows XP, Windows Server 2003, Vista, etc.),
the product category is Common Windows Component. Examples include Internet Explorer, Windows
Media Player, MDAC, MSXML, etc.
Language
The language associated with the patch location.


Index
51
Index A
Approval by Patch • 29 Approval by Policy • 27 Automatic Update • 14
C
Cancel Updates • 23 Command Line • 45 Configuring Patch Management • 3 Create/Delete
Patch Policy • 24
F
File Source • 38
I
Initial Update • 11
K
KB Override • 31
M
Machine History • 16 Machine Update • 17 Membership
Patch Policy • 25 Methods of Updating Patches • 2
O
Office Source • 43
P
Patch Alert • 40 Patch Failure • 5 Patch Location • 48 Patch Management Module Minimum Requirements •
2 Patch Management Overview • 1 Patch Processing • 4 Patch Status • 9 Patch Update • 19 Pre/Post Procedure
Patch Management • 13
R
Reboot Action • 35 Rollback • 22
S
Scan Machine • 7 Superseded Patches • 4
U
Update Classification • 5
W
Windows Auto Update • 33
Related Documents