5.0 | June 2010 | 3725-77601-001C1 Polycom ® CMA ™ System Operations Guide

Welcome message from author
This document is posted to help you gain knowledge. Please leave a comment to let me know what you think about it! Share it to your friends and learn new things together.
Transcript

5.0 | June 2010 | 3725-77601-001C1
Polycom® CMA™ System Operations Guide

© 2010 Polycom, Inc. All rights reserved.
Polycom, Inc.4750 Willow RoadPleasanton, CA 94588-2708USA
No part of this document may be reproduced or transmitted in any form or by any means, electronic or mechanical, for any purpose, without the express written permission of Polycom, Inc. Under the law, reproducing includes translating into another language or format.
As between the parties, Polycom, Inc., retains title to and ownership of all proprietary rights with respect to the software contained within its products. The software is protected by United States copyright laws and international treaty provision. Therefore, you must treat the software like any other copyrighted material (e.g., a book or sound recording).
Every effort has been made to ensure that the information in this manual is accurate. Polycom, Inc., is not responsible for printing or clerical errors. Information in this document is subject to change without notice.
ii
Trademark Information
Polycom®, the Polycom “Triangles” logo, and the names and marks associated with Polycom’s products are trademarks and/or service marks of Polycom, Inc., and are registered and/or common-law marks in the United States and various other countries.
All other trademarks are the property of their respective owners.
Patent Information
The accompanying product is protected by one or more U.S. and foreign patents and/or pending patent applications held by Polycom, Inc.

Contents
Polycom, Inc. iii
Contents
1 Polycom® CMA™ System Overview . . . . . . . . . . . . . . . . . . . 1Features and Capabilities . . . . . . . . . . . . . . . . . . . . . . . . . . . . . . . . . . . . . . . . . . 1Polycom CMA System Models . . . . . . . . . . . . . . . . . . . . . . . . . . . . . . . . . . . . . 2Minimum System Requirements . . . . . . . . . . . . . . . . . . . . . . . . . . . . . . . . . . . . 3Other Requirements . . . . . . . . . . . . . . . . . . . . . . . . . . . . . . . . . . . . . . . . . . . . . . 3Log Into the Polycom CMA System . . . . . . . . . . . . . . . . . . . . . . . . . . . . . . . . . 3
Scheduling Participants and Endpoints . . . . . . . . . . . . . . . . . . . . . . . . . . 4Bridge Selection and Cascading . . . . . . . . . . . . . . . . . . . . . . . . . . . . . . . . . 4Bridge Scheduling and Reassignment . . . . . . . . . . . . . . . . . . . . . . . . . . . . 5
Working in the Polycom CMA System . . . . . . . . . . . . . . . . . . . . . . . . . . . . . . . 6Polycom CMA System Site Map . . . . . . . . . . . . . . . . . . . . . . . . . . . . . . . . 7Polycom CMA System Views, Roles, and Permissions . . . . . . . . . . . . . 7Field Input Requirements . . . . . . . . . . . . . . . . . . . . . . . . . . . . . . . . . . . . . . 9Filter and Search a List . . . . . . . . . . . . . . . . . . . . . . . . . . . . . . . . . . . . . . . . . 9Managing Bandwidth . . . . . . . . . . . . . . . . . . . . . . . . . . . . . . . . . . . . . . . . 10
Change Password . . . . . . . . . . . . . . . . . . . . . . . . . . . . . . . . . . . . . . . . . . . . . . . 12Log Out of the Polycom CMA System . . . . . . . . . . . . . . . . . . . . . . . . . . . . . . 12
2 Polycom® CMA™ System Configuration . . . . . . . . . . . . . . . 13Add DNS SRV Record for Polycom CMA Services . . . . . . . . . . . . . . . . . . . 13Configure the Connection to the External Database . . . . . . . . . . . . . . . . . . 14Configure the Connection to an External Enterprise Directory . . . . . . . . . 14Configure Redundancy . . . . . . . . . . . . . . . . . . . . . . . . . . . . . . . . . . . . . . . . . . . 15Set Up Video Call Routing . . . . . . . . . . . . . . . . . . . . . . . . . . . . . . . . . . . . . . . . 15Set Up Automatic Provisioning . . . . . . . . . . . . . . . . . . . . . . . . . . . . . . . . . . . . 16Set Up Automatic Softupdate . . . . . . . . . . . . . . . . . . . . . . . . . . . . . . . . . . . . . 16Set Up Conference Templates . . . . . . . . . . . . . . . . . . . . . . . . . . . . . . . . . . . . . 16Set Up Directory Services . . . . . . . . . . . . . . . . . . . . . . . . . . . . . . . . . . . . . . . . . 17Set Up a Certificate for the Polycom CMA System . . . . . . . . . . . . . . . . . . . . 18Distribute Polycom Applications . . . . . . . . . . . . . . . . . . . . . . . . . . . . . . . . . . 18
3 Conference Scheduling Overview . . . . . . . . . . . . . . . . . . . . 21Conference Menu and Views . . . . . . . . . . . . . . . . . . . . . . . . . . . . . . . . . . . . . . 21
Conference Views—Future and Ongoing . . . . . . . . . . . . . . . . . . . . . . . . 23

Polycom CMA System Operations Guide
iv Polycom, Inc.
Conference States . . . . . . . . . . . . . . . . . . . . . . . . . . . . . . . . . . . . . . . . . . . . 24Context-Sensitive Conference Commands . . . . . . . . . . . . . . . . . . . . . . . 25
User Menu and Guest Book . . . . . . . . . . . . . . . . . . . . . . . . . . . . . . . . . . . . . . . 25Context-Sensitive Guest Book Commands . . . . . . . . . . . . . . . . . . . . . . . 26Add a Guest to the System Guest Book . . . . . . . . . . . . . . . . . . . . . . . . . 26Edit a Guest in the System Guest Book . . . . . . . . . . . . . . . . . . . . . . . . . . 29Delete a Guest from the System Guest Book . . . . . . . . . . . . . . . . . . . . . 29
4 Conference Management Operations . . . . . . . . . . . . . . . . . 31Add/Schedule a Conference . . . . . . . . . . . . . . . . . . . . . . . . . . . . . . . . . . . . . . 32Edit a Conference . . . . . . . . . . . . . . . . . . . . . . . . . . . . . . . . . . . . . . . . . . . . . . . . 36Copy a Conference . . . . . . . . . . . . . . . . . . . . . . . . . . . . . . . . . . . . . . . . . . . . . . 37Edit a Participant’s Settings . . . . . . . . . . . . . . . . . . . . . . . . . . . . . . . . . . . . . . . 37Edit a Room’s Settings . . . . . . . . . . . . . . . . . . . . . . . . . . . . . . . . . . . . . . . . . . . 39View Scheduling Information for a Conference . . . . . . . . . . . . . . . . . . . . . . 40Manage an Active Conference . . . . . . . . . . . . . . . . . . . . . . . . . . . . . . . . . . . . . 41Add Additional Participants to an Active Conference . . . . . . . . . . . . . . . . 45Add a Room to an Active Conference . . . . . . . . . . . . . . . . . . . . . . . . . . . . . . 47View the Video of a Participant in an Active Conference . . . . . . . . . . . . . . 47Join an Active Conference (Operator Only) . . . . . . . . . . . . . . . . . . . . . . . . . . 48Add a Participant from a Favorites List to an Active Conference (Operator Only) . . . . . . . . . . . . . . . . . . . . . . . . . . . . . . . . . . . . . . . . . . . . . . . . . 48Add/Save a Participant to a Favorites List (Operator Only) . . . . . . . . . . . 49Manage a Participant’s Endpoint During a Conference . . . . . . . . . . . . . . . 49View a Participant’s Details During a Conference . . . . . . . . . . . . . . . . . . . . 51Terminate an Active Conference . . . . . . . . . . . . . . . . . . . . . . . . . . . . . . . . . . . 53Delete a Conference . . . . . . . . . . . . . . . . . . . . . . . . . . . . . . . . . . . . . . . . . . . . . . 53
5 Advanced Scheduling Operations . . . . . . . . . . . . . . . . . . . 55Edit Conference Settings . . . . . . . . . . . . . . . . . . . . . . . . . . . . . . . . . . . . . . . . . . 55Select a Bridge for a Conference . . . . . . . . . . . . . . . . . . . . . . . . . . . . . . . . . . . 59Create a Cascaded Conference Across Multiple Bridges . . . . . . . . . . . . . . . 60
6 Conference and Participant Details . . . . . . . . . . . . . . . . . . 63Conference Image . . . . . . . . . . . . . . . . . . . . . . . . . . . . . . . . . . . . . . . . . . . . . . . 63Conference Details . . . . . . . . . . . . . . . . . . . . . . . . . . . . . . . . . . . . . . . . . . . . . . . 63Conference Features . . . . . . . . . . . . . . . . . . . . . . . . . . . . . . . . . . . . . . . . . . . . . 65Bridge (MCU) Features . . . . . . . . . . . . . . . . . . . . . . . . . . . . . . . . . . . . . . . . . . . 66Participants List . . . . . . . . . . . . . . . . . . . . . . . . . . . . . . . . . . . . . . . . . . . . . . . . . 67

Contents
Polycom, Inc. v
Participant Details . . . . . . . . . . . . . . . . . . . . . . . . . . . . . . . . . . . . . . . . . . . . . . . 68Participant Settings . . . . . . . . . . . . . . . . . . . . . . . . . . . . . . . . . . . . . . . . . . . . . . 70
7 Endpoint Management Overview . . . . . . . . . . . . . . . . . . . . 73Endpoint Menu, Views, and Lists . . . . . . . . . . . . . . . . . . . . . . . . . . . . . . . . . . 73
Monitor View . . . . . . . . . . . . . . . . . . . . . . . . . . . . . . . . . . . . . . . . . . . . . . . 74Endpoint List in the Monitor View . . . . . . . . . . . . . . . . . . . . . . . . . . 74Commands in the Monitor View . . . . . . . . . . . . . . . . . . . . . . . . . . . 75
Automatic Provisioning View . . . . . . . . . . . . . . . . . . . . . . . . . . . . . . . . . 76Endpoint List in the Automatic Provisioning View . . . . . . . . . . . . 76Commands in the Automatic Provisioning View . . . . . . . . . . . . . 77
Scheduled Provisioning View . . . . . . . . . . . . . . . . . . . . . . . . . . . . . . . . . . 78Endpoint List in the Scheduled Provisioning View . . . . . . . . . . . . 78Commands in the Scheduled Provisioning View . . . . . . . . . . . . . . 79
Automatic Softupdate View . . . . . . . . . . . . . . . . . . . . . . . . . . . . . . . . . . . 79Endpoint List in the Automatic Softupdate View . . . . . . . . . . . . . 79Commands in the Automatic Softupdate View . . . . . . . . . . . . . . . 80
Scheduled Softupdate View . . . . . . . . . . . . . . . . . . . . . . . . . . . . . . . . . . . 81Endpoint List in the Scheduled Softupdate View . . . . . . . . . . . . . 81Scheduled Softupdate View Commands . . . . . . . . . . . . . . . . . . . . . 82
Endpoint Types . . . . . . . . . . . . . . . . . . . . . . . . . . . . . . . . . . . . . . . . . . . . . . . . . 83Endpoint Configuration/Provisioning . . . . . . . . . . . . . . . . . . . . . . . . . . . . . . 85
Automatic Provisioning . . . . . . . . . . . . . . . . . . . . . . . . . . . . . . . . . . . . . . . 85How Automatic Provisioning Works . . . . . . . . . . . . . . . . . . . . . . . . 86Automatic Provisioning Profiles . . . . . . . . . . . . . . . . . . . . . . . . . . . . 86Profile Order and Priority . . . . . . . . . . . . . . . . . . . . . . . . . . . . . . . . . 91
Scheduled Provisioning . . . . . . . . . . . . . . . . . . . . . . . . . . . . . . . . . . . . . . . 91How Scheduled Provisioning Works . . . . . . . . . . . . . . . . . . . . . . . . 91Scheduled Provisioning Profiles . . . . . . . . . . . . . . . . . . . . . . . . . . . . 92
Endpoint Gatekeeper Registration Policies . . . . . . . . . . . . . . . . . . . . . . . . . 112Endpoint Softupdates . . . . . . . . . . . . . . . . . . . . . . . . . . . . . . . . . . . . . . . . . . . 113
Automatic Softupdates . . . . . . . . . . . . . . . . . . . . . . . . . . . . . . . . . . . . . . 113How Automatic Softupdate Works . . . . . . . . . . . . . . . . . . . . . . . . 113Automatic Softupdate Profiles . . . . . . . . . . . . . . . . . . . . . . . . . . . . 113Automatic Softupdate Versions . . . . . . . . . . . . . . . . . . . . . . . . . . . 114
Scheduled Softupdates . . . . . . . . . . . . . . . . . . . . . . . . . . . . . . . . . . . . . . 115Endpoint Passwords . . . . . . . . . . . . . . . . . . . . . . . . . . . . . . . . . . . . . . . . . . . . 116
8 Endpoint Management Operations . . . . . . . . . . . . . . . . . . 117View Device Details . . . . . . . . . . . . . . . . . . . . . . . . . . . . . . . . . . . . . . . . . . . . 117Add an Endpoint or Find an Endpoint on the Network . . . . . . . . . . . . . . 122Edit an Endpoint . . . . . . . . . . . . . . . . . . . . . . . . . . . . . . . . . . . . . . . . . . . . . . . 123

Polycom CMA System Operations Guide
vi Polycom, Inc.
Delete an Endpoint . . . . . . . . . . . . . . . . . . . . . . . . . . . . . . . . . . . . . . . . . . . . . 124View an Endpoint’s Video Feed . . . . . . . . . . . . . . . . . . . . . . . . . . . . . . . . . . 124Clear an Endpoint Help Request . . . . . . . . . . . . . . . . . . . . . . . . . . . . . . . . . . 125Send a Message to an Endpoint . . . . . . . . . . . . . . . . . . . . . . . . . . . . . . . . . . . 126Reboot an Endpoint . . . . . . . . . . . . . . . . . . . . . . . . . . . . . . . . . . . . . . . . . . . . . 126Associate a User with an Endpoint . . . . . . . . . . . . . . . . . . . . . . . . . . . . . . . . 126Search for Endpoints in a Range of IP Addresses . . . . . . . . . . . . . . . . . . . . 127
9 Endpoint Provisioning Operations . . . . . . . . . . . . . . . . . . 129Automatic Provisioning Operations . . . . . . . . . . . . . . . . . . . . . . . . . . . . . . . 130
View the Automatic Provisioning List and Details . . . . . . . . . . . . . . . 130Add an Automatic Provisioning Profile . . . . . . . . . . . . . . . . . . . . . . . . 130Edit an Automatic Provisioning Profile . . . . . . . . . . . . . . . . . . . . . . . . 131Edit the Profile Order for an Automatic Provisioning Profile . . . . . . 131Clone an Automatic Provisioning Profile . . . . . . . . . . . . . . . . . . . . . . . 132Delete an Automatic Provisioning Profile . . . . . . . . . . . . . . . . . . . . . . 132
Scheduled Provisioning Operations . . . . . . . . . . . . . . . . . . . . . . . . . . . . . . . 132View the Scheduled Provisioning List and Details . . . . . . . . . . . . . . . 132Add a Scheduled Provisioning Profile . . . . . . . . . . . . . . . . . . . . . . . . . 133Edit a Scheduled Provisioning Profile . . . . . . . . . . . . . . . . . . . . . . . . . . 133Clone a Scheduled Provisioning Profile . . . . . . . . . . . . . . . . . . . . . . . . 134Delete a Scheduled Provisioning Profile . . . . . . . . . . . . . . . . . . . . . . . . 134Schedule an Endpoint for Provisioning . . . . . . . . . . . . . . . . . . . . . . . . 134Check the Status of a Scheduled Provisioning . . . . . . . . . . . . . . . . . . . 135Clear the Status of Scheduled Provisioning . . . . . . . . . . . . . . . . . . . . . 135Cancel a Scheduled Provisioning . . . . . . . . . . . . . . . . . . . . . . . . . . . . . . 136
10 Endpoint Softupdate Operations . . . . . . . . . . . . . . . . . . . 137Automatic Softupdate Operations . . . . . . . . . . . . . . . . . . . . . . . . . . . . . . . . 137
View Automatic Softupdate Information . . . . . . . . . . . . . . . . . . . . . . . 137View Automatic Softupdate Packages . . . . . . . . . . . . . . . . . . . . . . . . . 138Implement Automatic Softupdates for Endpoints . . . . . . . . . . . . . . . 138
List the Serial Numbers for the Endpoints to be Updated . . . . . 139Download the Required Software Package . . . . . . . . . . . . . . . . . . 140Request Update Activation Keys . . . . . . . . . . . . . . . . . . . . . . . . . . 140Upload the Software Package and Create a Softupdate Package . . . . . . . . . . . . . . . . . . . . . . . . . . . . . . . . . . . . . . . . . . . . . . . . 141Set an Automatic Softupdate Policy . . . . . . . . . . . . . . . . . . . . . . . . 142
Trial a Softupdate Package . . . . . . . . . . . . . . . . . . . . . . . . . . . . . . . . . . . 143Create a Local Trial Group . . . . . . . . . . . . . . . . . . . . . . . . . . . . . . . . 143

Contents
Polycom, Inc. vii
Upload the Software Package and Create a Trial Softupdate Package . . . . . . . . . . . . . . . . . . . . . . . . . . . . . . . . . . . . . . . . . . . . . . . . 143Promote the Trial Softupdate Package to Production . . . . . . . . . 144Delete the Trial Softupdate Package . . . . . . . . . . . . . . . . . . . . . . . . 145
Scheduled Softupdate Operations . . . . . . . . . . . . . . . . . . . . . . . . . . . . . . . . . 145View Scheduled Softupdate Information . . . . . . . . . . . . . . . . . . . . . . . 145View List of Softupdate Packages . . . . . . . . . . . . . . . . . . . . . . . . . . . . . 146Implement Scheduled Softupdates for Endpoints . . . . . . . . . . . . . . . . 146
List the Serial Numbers for the Endpoints to be Updated . . . . . 146Download the Required Software Package . . . . . . . . . . . . . . . . . . 147Request Update Activation Keys . . . . . . . . . . . . . . . . . . . . . . . . . . 148Upload the Software Package and Create a Softupdate Profile . 149Schedule the Softupdate for Endpoints . . . . . . . . . . . . . . . . . . . . . 149
Cancel Software Updates . . . . . . . . . . . . . . . . . . . . . . . . . . . . . . . . . . . . 151
11 Device Details . . . . . . . . . . . . . . . . . . . . . . . . . . . . . . . . . 153Device Summary Information . . . . . . . . . . . . . . . . . . . . . . . . . . . . . . . . . . . . 153Device Status Information . . . . . . . . . . . . . . . . . . . . . . . . . . . . . . . . . . . . . . . 155Call Information . . . . . . . . . . . . . . . . . . . . . . . . . . . . . . . . . . . . . . . . . . . . . . . . 157Device Alerts Information . . . . . . . . . . . . . . . . . . . . . . . . . . . . . . . . . . . . . . . 158Provisioning Details . . . . . . . . . . . . . . . . . . . . . . . . . . . . . . . . . . . . . . . . . . . . 158Softupdate Details . . . . . . . . . . . . . . . . . . . . . . . . . . . . . . . . . . . . . . . . . . . . . . 159
12 Network Device Management Overview . . . . . . . . . . . . . 161Network Device Types . . . . . . . . . . . . . . . . . . . . . . . . . . . . . . . . . . . . . . . . . . 161Network Device Menu, Views, and Lists . . . . . . . . . . . . . . . . . . . . . . . . . . . 162
Monitor View . . . . . . . . . . . . . . . . . . . . . . . . . . . . . . . . . . . . . . . . . . . . . . 163Network Device List in the Monitor View . . . . . . . . . . . . . . . . . . 163Commands in the Monitor View . . . . . . . . . . . . . . . . . . . . . . . . . . 164
VBP View . . . . . . . . . . . . . . . . . . . . . . . . . . . . . . . . . . . . . . . . . . . . . . . . . . 164MCU View . . . . . . . . . . . . . . . . . . . . . . . . . . . . . . . . . . . . . . . . . . . . . . . . . 165DMA View . . . . . . . . . . . . . . . . . . . . . . . . . . . . . . . . . . . . . . . . . . . . . . . . . 165
Device Gatekeeper Registration Policies . . . . . . . . . . . . . . . . . . . . . . . . . . . 166Cascading MCUs . . . . . . . . . . . . . . . . . . . . . . . . . . . . . . . . . . . . . . . . . . . . . . . 167
Configuring Cascading on a Polycom MGC MCU . . . . . . . . . . . . . . . 167Configuring Cascading on a Polycom RMX 2000/4000 MCU . . . . . . 167
Polycom RMX 2000/4000 Systems in Secure Mode . . . . . . . . . . . . . . . . . . 168
13 MCU Bridge Management Operations . . . . . . . . . . . . . . . 169View Device Details . . . . . . . . . . . . . . . . . . . . . . . . . . . . . . . . . . . . . . . . . . . . 169Add an MCU Manually . . . . . . . . . . . . . . . . . . . . . . . . . . . . . . . . . . . . . . . . . 174

Polycom CMA System Operations Guide
viii Polycom, Inc.
Edit an MCU Bridge . . . . . . . . . . . . . . . . . . . . . . . . . . . . . . . . . . . . . . . . . . . . 176Enable Cascading Conferences . . . . . . . . . . . . . . . . . . . . . . . . . . . . . . . . . . . 176Delete an MCU Bridge . . . . . . . . . . . . . . . . . . . . . . . . . . . . . . . . . . . . . . . . . . 177View Bridge Hardware . . . . . . . . . . . . . . . . . . . . . . . . . . . . . . . . . . . . . . . . . . 177View Bridge Services . . . . . . . . . . . . . . . . . . . . . . . . . . . . . . . . . . . . . . . . . . . . 177View Bridge Conferences . . . . . . . . . . . . . . . . . . . . . . . . . . . . . . . . . . . . . . . . 178View Bridge Ports . . . . . . . . . . . . . . . . . . . . . . . . . . . . . . . . . . . . . . . . . . . . . . 178View Bridge Meeting Rooms . . . . . . . . . . . . . . . . . . . . . . . . . . . . . . . . . . . . . 178View Bridge Entry Queues . . . . . . . . . . . . . . . . . . . . . . . . . . . . . . . . . . . . . . . 179View Bridge Gateway Conferences . . . . . . . . . . . . . . . . . . . . . . . . . . . . . . . . 179
14 Management Operations for Other Network Devices . . . . 181Polycom VBP Management Operations . . . . . . . . . . . . . . . . . . . . . . . . . . . . 181
Add a Polycom VBP Device . . . . . . . . . . . . . . . . . . . . . . . . . . . . . . . . . . 182Copy the Polycom CMA System Certificate to a Polycom VBP Device . . . . . . . . . . . . . . . . . . . . . . . . . . . . . . . . . . . . . . . . . . . . . . . . . . . . . 182Edit a Polycom VBP Device . . . . . . . . . . . . . . . . . . . . . . . . . . . . . . . . . . 183Delete a Polycom VBP Device . . . . . . . . . . . . . . . . . . . . . . . . . . . . . . . . 183Identify Endpoints Using the Polycom VBP Device . . . . . . . . . . . . . . 183
Polycom DMA Management Operations . . . . . . . . . . . . . . . . . . . . . . . . . . . 184Add Polycom DMA System Nodes . . . . . . . . . . . . . . . . . . . . . . . . . . . . 184Add a Polycom DMA System . . . . . . . . . . . . . . . . . . . . . . . . . . . . . . . . . 185Edit a Polycom DMA System . . . . . . . . . . . . . . . . . . . . . . . . . . . . . . . . . 186Delete a Polycom DMA System . . . . . . . . . . . . . . . . . . . . . . . . . . . . . . . 186
15 MCU Bridge Device Details . . . . . . . . . . . . . . . . . . . . . . . 187MCU H.320 Services . . . . . . . . . . . . . . . . . . . . . . . . . . . . . . . . . . . . . . . . . . . . 187MCU H.323 Services . . . . . . . . . . . . . . . . . . . . . . . . . . . . . . . . . . . . . . . . . . . . 188MCU Gateway Services . . . . . . . . . . . . . . . . . . . . . . . . . . . . . . . . . . . . . . . . . 189MCU Resources—Polycom MGC Platform . . . . . . . . . . . . . . . . . . . . . . . . . 189MCU Resources—Polycom RMX 2000/4000 Platform . . . . . . . . . . . . . . . 190
16 Users and Groups Overview . . . . . . . . . . . . . . . . . . . . . . 191Groups, Users, and User Roles . . . . . . . . . . . . . . . . . . . . . . . . . . . . . . . . . . . 191
Users . . . . . . . . . . . . . . . . . . . . . . . . . . . . . . . . . . . . . . . . . . . . . . . . . . . . . . 191Local Users . . . . . . . . . . . . . . . . . . . . . . . . . . . . . . . . . . . . . . . . . . . . . 191Enterprise Users . . . . . . . . . . . . . . . . . . . . . . . . . . . . . . . . . . . . . . . . . 192
Groups . . . . . . . . . . . . . . . . . . . . . . . . . . . . . . . . . . . . . . . . . . . . . . . . . . . . 192Local Groups . . . . . . . . . . . . . . . . . . . . . . . . . . . . . . . . . . . . . . . . . . . 193Enterprise Groups . . . . . . . . . . . . . . . . . . . . . . . . . . . . . . . . . . . . . . . 193

Contents
Polycom, Inc. ix
Favorites List . . . . . . . . . . . . . . . . . . . . . . . . . . . . . . . . . . . . . . . . . . . . . . . . . . 194Roles and Permissions . . . . . . . . . . . . . . . . . . . . . . . . . . . . . . . . . . . . . . . . . . 194
Scheduler Role, Permissions, and Functions . . . . . . . . . . . . . . . . . . . . 195Operator Role, Permissions, and Functions . . . . . . . . . . . . . . . . . . . . . 196Administrator Role, Permissions, and Functions . . . . . . . . . . . . . . . . 196
Device Associations and Presence . . . . . . . . . . . . . . . . . . . . . . . . . . . . . . . . . 197User Management . . . . . . . . . . . . . . . . . . . . . . . . . . . . . . . . . . . . . . . . . . . . . . 197
17 User Management Operations . . . . . . . . . . . . . . . . . . . . . 199Manage Users . . . . . . . . . . . . . . . . . . . . . . . . . . . . . . . . . . . . . . . . . . . . . . . . . . 200
Search for a User . . . . . . . . . . . . . . . . . . . . . . . . . . . . . . . . . . . . . . . . . . . . 200Add a Local User . . . . . . . . . . . . . . . . . . . . . . . . . . . . . . . . . . . . . . . . . . . 200Edit a User . . . . . . . . . . . . . . . . . . . . . . . . . . . . . . . . . . . . . . . . . . . . . . . . . 202Delete a User . . . . . . . . . . . . . . . . . . . . . . . . . . . . . . . . . . . . . . . . . . . . . . . 202
Manage Groups . . . . . . . . . . . . . . . . . . . . . . . . . . . . . . . . . . . . . . . . . . . . . . . . 203Add a Local Group . . . . . . . . . . . . . . . . . . . . . . . . . . . . . . . . . . . . . . . . . . 203Import Enterprise Groups . . . . . . . . . . . . . . . . . . . . . . . . . . . . . . . . . . . . 204Edit a Group . . . . . . . . . . . . . . . . . . . . . . . . . . . . . . . . . . . . . . . . . . . . . . . 205Delete a Group . . . . . . . . . . . . . . . . . . . . . . . . . . . . . . . . . . . . . . . . . . . . . 205
Manage User Roles . . . . . . . . . . . . . . . . . . . . . . . . . . . . . . . . . . . . . . . . . . . . . 206Assign Users Roles and Devices . . . . . . . . . . . . . . . . . . . . . . . . . . . . . . . 206View the List of User Roles . . . . . . . . . . . . . . . . . . . . . . . . . . . . . . . . . . . 206Add a User Role . . . . . . . . . . . . . . . . . . . . . . . . . . . . . . . . . . . . . . . . . . . . 207Edit Permissions for a User Role . . . . . . . . . . . . . . . . . . . . . . . . . . . . . . 207Delete a User Role . . . . . . . . . . . . . . . . . . . . . . . . . . . . . . . . . . . . . . . . . . . 208View the Groups and Users Associated with a User Role . . . . . . . . . 208
Manage Favorites . . . . . . . . . . . . . . . . . . . . . . . . . . . . . . . . . . . . . . . . . . . . . . . 209Add a Favorites List . . . . . . . . . . . . . . . . . . . . . . . . . . . . . . . . . . . . . . . . . 209Edit a Favorites List . . . . . . . . . . . . . . . . . . . . . . . . . . . . . . . . . . . . . . . . . 210Delete a Favorites List . . . . . . . . . . . . . . . . . . . . . . . . . . . . . . . . . . . . . . . 210
18 System Reports . . . . . . . . . . . . . . . . . . . . . . . . . . . . . . . . 211Site Statistics Report . . . . . . . . . . . . . . . . . . . . . . . . . . . . . . . . . . . . . . . . . . . . 211Site Link Statistics Report . . . . . . . . . . . . . . . . . . . . . . . . . . . . . . . . . . . . . . . . 213IP Call Detail Records Report . . . . . . . . . . . . . . . . . . . . . . . . . . . . . . . . . . . . 215
Call Detail Record Report Administration . . . . . . . . . . . . . . . . . . . . . . 216Modify the CDR Retention Period . . . . . . . . . . . . . . . . . . . . . . . . . 216Schedule Weekly Archives of the CDR Report . . . . . . . . . . . . . . . 216
Endpoint Usage Report . . . . . . . . . . . . . . . . . . . . . . . . . . . . . . . . . . . . . . . . . . 217Conference Usage Report . . . . . . . . . . . . . . . . . . . . . . . . . . . . . . . . . . . . . . . . 220

Polycom CMA System Operations Guide
x Polycom, Inc.
Conference Type Report . . . . . . . . . . . . . . . . . . . . . . . . . . . . . . . . . . . . . . . . . 221Gatekeeper Message Log . . . . . . . . . . . . . . . . . . . . . . . . . . . . . . . . . . . . . . . . 223
View and Export the Gatekeeper Message Log . . . . . . . . . . . . . . . . . . 223Define Log Settings . . . . . . . . . . . . . . . . . . . . . . . . . . . . . . . . . . . . . . . . . 224Clear Events from the Log . . . . . . . . . . . . . . . . . . . . . . . . . . . . . . . . . . . . 225Pause and Restart Logging . . . . . . . . . . . . . . . . . . . . . . . . . . . . . . . . . . . 225
System Log Files . . . . . . . . . . . . . . . . . . . . . . . . . . . . . . . . . . . . . . . . . . . . . . . 225View and Export System Log Files . . . . . . . . . . . . . . . . . . . . . . . . . . . . 228Change the System Log Level . . . . . . . . . . . . . . . . . . . . . . . . . . . . . . . . . 229
Call Detail Record Report Administration . . . . . . . . . . . . . . . . . . . . . . . . . . 229
19 System Administration Overview . . . . . . . . . . . . . . . . . . . 231Polycom CMA System Dashboard . . . . . . . . . . . . . . . . . . . . . . . . . . . . . . . . 231
Dashboard Command Buttons . . . . . . . . . . . . . . . . . . . . . . . . . . . . . . . . 232Dashboard Panes . . . . . . . . . . . . . . . . . . . . . . . . . . . . . . . . . . . . . . . . . . . 232
System Administration Menu . . . . . . . . . . . . . . . . . . . . . . . . . . . . . . . . . . . . 241
20 Conference Setup Overview . . . . . . . . . . . . . . . . . . . . . . 243Conference Templates . . . . . . . . . . . . . . . . . . . . . . . . . . . . . . . . . . . . . . . . . . . 243Conference Settings . . . . . . . . . . . . . . . . . . . . . . . . . . . . . . . . . . . . . . . . . . . . . 251
21 Conference Setup Operations . . . . . . . . . . . . . . . . . . . . . 253View the Conference Templates List . . . . . . . . . . . . . . . . . . . . . . . . . . . . . . 253Add a Conference Template . . . . . . . . . . . . . . . . . . . . . . . . . . . . . . . . . . . . . 253Edit a Conference Template . . . . . . . . . . . . . . . . . . . . . . . . . . . . . . . . . . . . . . 254Delete a Conference Template . . . . . . . . . . . . . . . . . . . . . . . . . . . . . . . . . . . . 254Set Conference Settings . . . . . . . . . . . . . . . . . . . . . . . . . . . . . . . . . . . . . . . . . . 255Disable Conference Auto-Launch . . . . . . . . . . . . . . . . . . . . . . . . . . . . . . . . . 255Disable Conference Time Warning . . . . . . . . . . . . . . . . . . . . . . . . . . . . . . . . 255Add Customized Text to Email Notifications . . . . . . . . . . . . . . . . . . . . . . . 255Edit Customized Text in Email Notifications . . . . . . . . . . . . . . . . . . . . . . . 256Delete Customized Text in Email Notifications . . . . . . . . . . . . . . . . . . . . . 256
22 Room Overview and Operations . . . . . . . . . . . . . . . . . . . 259Local and Enterprise Meeting Rooms . . . . . . . . . . . . . . . . . . . . . . . . . . . . . . 259View the Rooms List . . . . . . . . . . . . . . . . . . . . . . . . . . . . . . . . . . . . . . . . . . . . 260Add a Local Room . . . . . . . . . . . . . . . . . . . . . . . . . . . . . . . . . . . . . . . . . . . . . . 260Add an Enterprise Room . . . . . . . . . . . . . . . . . . . . . . . . . . . . . . . . . . . . . . . . 262Edit a Room . . . . . . . . . . . . . . . . . . . . . . . . . . . . . . . . . . . . . . . . . . . . . . . . . . . 263

Contents
Polycom, Inc. xi
Delete a Room . . . . . . . . . . . . . . . . . . . . . . . . . . . . . . . . . . . . . . . . . . . . . . . . . 263
23 Directory Setup Operations . . . . . . . . . . . . . . . . . . . . . . . 265View the Global Address Book . . . . . . . . . . . . . . . . . . . . . . . . . . . . . . . . . . . 265Set or Change the GAB Password . . . . . . . . . . . . . . . . . . . . . . . . . . . . . . . . . 266
24 Polycom CMA System Setup Overview . . . . . . . . . . . . . . . 267Server Settings . . . . . . . . . . . . . . . . . . . . . . . . . . . . . . . . . . . . . . . . . . . . . . . . . 267Polycom CMA System Licensing . . . . . . . . . . . . . . . . . . . . . . . . . . . . . . . . . 268Polycom CMA System Security . . . . . . . . . . . . . . . . . . . . . . . . . . . . . . . . . . . 270Polycom CMA System Site Topology and Dial Plan Set Up . . . . . . . . . . . 270
Sites List . . . . . . . . . . . . . . . . . . . . . . . . . . . . . . . . . . . . . . . . . . . . . . . . . . . 272Add/Edit Site Dialog Box . . . . . . . . . . . . . . . . . . . . . . . . . . . . . . . . 272
Site Links . . . . . . . . . . . . . . . . . . . . . . . . . . . . . . . . . . . . . . . . . . . . . . . . . . 276Add/Edit Site Link Dialog Box . . . . . . . . . . . . . . . . . . . . . . . . . . . 276
Site-to-Site Exclusions . . . . . . . . . . . . . . . . . . . . . . . . . . . . . . . . . . . . . . . 277Territories . . . . . . . . . . . . . . . . . . . . . . . . . . . . . . . . . . . . . . . . . . . . . . . . . 277
Add/Edit Territory Dialog Box . . . . . . . . . . . . . . . . . . . . . . . . . . . 278Network Clouds . . . . . . . . . . . . . . . . . . . . . . . . . . . . . . . . . . . . . . . . . . . 279
Add/Edit Network Cloud Dialog Box . . . . . . . . . . . . . . . . . . . . . 279Polycom CMA System Gatekeeper Functionality . . . . . . . . . . . . . . . . . . . 280
Default, Redundant, Alternate, and Neighboring Gatekeepers . . . . 280Default Gatekeeper . . . . . . . . . . . . . . . . . . . . . . . . . . . . . . . . . . . . . . 280Redundant Gatekeeper . . . . . . . . . . . . . . . . . . . . . . . . . . . . . . . . . . . 280Alternate Gatekeeper . . . . . . . . . . . . . . . . . . . . . . . . . . . . . . . . . . . . 280Neighboring Gatekeeper . . . . . . . . . . . . . . . . . . . . . . . . . . . . . . . . . 281
Device Registration . . . . . . . . . . . . . . . . . . . . . . . . . . . . . . . . . . . . . . . . . 281Routing Mode . . . . . . . . . . . . . . . . . . . . . . . . . . . . . . . . . . . . . . . . . . . . . . . . . . 282
Direct Mode . . . . . . . . . . . . . . . . . . . . . . . . . . . . . . . . . . . . . . . . . . . . 282Routed Mode . . . . . . . . . . . . . . . . . . . . . . . . . . . . . . . . . . . . . . . . . . . 283
Polycom CMA System Integration with Microsoft Outlook . . . . . . . . . . . 284Standard Polycom CMA System and Reserved Conferencing . . . . . 284Polycom Conferencing for Microsoft Outlook, Reservationless Conferencing, and Calendaring Management . . . . . . . . . . . . . . . . . . . 284
Polycom CMA System Integration with Microsoft Office Communications Server 2007 . . . . . . . . . . . . . . . . . . . . . . . . . . . . . . . . . . . . 286Endpoint Directory and Directory Settings . . . . . . . . . . . . . . . . . . . . . . . . . 286
25 Server Setting Operations . . . . . . . . . . . . . . . . . . . . . . . . 289Edit the Polycom CMA System Network Settings . . . . . . . . . . . . . . . . . . . 290Edit the Polycom CMA System Time Settings . . . . . . . . . . . . . . . . . . . . . . 291

Polycom CMA System Operations Guide
xii Polycom, Inc.
Integrate with Microsoft Exchange Server for Calendaring Management . . . . . . . . . . . . . . . . . . . . . . . . . . . . . . . . . . . . . . . . . . . . . . . . . . . 292
Associate Sites with Microsoft Exchange Servers . . . . . . . . . . . . . . . . 292Assign Calendaring Settings to Provisioning Profiles . . . . . . . . . . . . 292Provision the Exchange Mailbox for Calendaring Service-enabled Endpoints . . . . . . . . . . . . . . . . . . . . . . . . . . . . . . . . . . . . . . . . . . . . . . . . . . 293
Integrate with Microsoft Office Communications Server . . . . . . . . . . . . . 294Provision Integration with Microsoft Office Communications Server . . . . . . . . . . . . . . . . . . . . . . . . . . . . . . . . . . . . . . . . . . . . . . . . . . . . . 294Provision Domain User Name for Microsoft Office Communications Server Integration . . . . . . . . . . . . . . . . . . . . . . . . . . . . . . . . . . . . . . . . . . . 295
View Current Polycom CMA System Licensing . . . . . . . . . . . . . . . . . . . . . 296Add Polycom CMA System Licenses . . . . . . . . . . . . . . . . . . . . . . . . . . . . . . 297
Request a Software Activation Key Code . . . . . . . . . . . . . . . . . . . . . . . 297Enter the Polycom CMA System Activation Key . . . . . . . . . . . . . . . . 297
Reclaim Polycom CMA Desktop Licenses . . . . . . . . . . . . . . . . . . . . . . . . . . 298Delete Polycom CMA System Licenses . . . . . . . . . . . . . . . . . . . . . . . . . . . . 298Add or Remove a Polycom CMA System Custom Logo . . . . . . . . . . . . . . 298Add or Remove a Polycom CMA Desktop Custom Logo . . . . . . . . . . . . . 299Edit the Polycom CMA System Email Account . . . . . . . . . . . . . . . . . . . . . 300
26 Polycom CMA System SNMP . . . . . . . . . . . . . . . . . . . . . . 301SNMP Overview . . . . . . . . . . . . . . . . . . . . . . . . . . . . . . . . . . . . . . . . . . . . . . . 301Polycom CMA System SNMP Operations . . . . . . . . . . . . . . . . . . . . . . . . . . 303
Enable SNMP Messaging . . . . . . . . . . . . . . . . . . . . . . . . . . . . . . . . . . . . 303Edit the SNMP Settings for a Polycom CMA System . . . . . . . . . . . . . 303Add an SNMP Notification Receiver . . . . . . . . . . . . . . . . . . . . . . . . . . . 305Download Polycom CMA System MIB Package . . . . . . . . . . . . . . . . . 307Change the SNMP Communication Port . . . . . . . . . . . . . . . . . . . . . . . 308
27 Database Operations . . . . . . . . . . . . . . . . . . . . . . . . . . . 309Overview of the Polycom CMA System Database . . . . . . . . . . . . . . . . . . . 309
Internal Databases . . . . . . . . . . . . . . . . . . . . . . . . . . . . . . . . . . . . . . . . . . 310External Databases . . . . . . . . . . . . . . . . . . . . . . . . . . . . . . . . . . . . . . . . . . 310Database Restoration . . . . . . . . . . . . . . . . . . . . . . . . . . . . . . . . . . . . . . . . 311
Database Operations . . . . . . . . . . . . . . . . . . . . . . . . . . . . . . . . . . . . . . . . . . . . 312Integrate a Polycom CMA System to an External Database . . . . . . . 312Revert a Polycom CMA System to its Internal Database . . . . . . . . . . 313Manually Backup a Polycom CMA System . . . . . . . . . . . . . . . . . . . . . 313
Connect to the Polycom CMA System Serial Console . . . . . . . . . 313Backup the Polycom CMA System Internal Databases . . . . . . . . 314

Contents
Polycom, Inc. xiii
Copy the Polycom CMA System Database Backup Files . . . . . . 315Restore the Polycom CMA System Internal Databases . . . . . . . . . . . 316Restore the Polycom CMA System External Database . . . . . . . . . . . . 317Reformat the Existing Database . . . . . . . . . . . . . . . . . . . . . . . . . . . . . . . 317
28 Directory Operations . . . . . . . . . . . . . . . . . . . . . . . . . . . . 319Directory Management Overview . . . . . . . . . . . . . . . . . . . . . . . . . . . . . . . . . 319Directory Management Supported Configurations . . . . . . . . . . . . . . . . . . 320
Multiple Forests . . . . . . . . . . . . . . . . . . . . . . . . . . . . . . . . . . . . . . . . . . . . 320Multiple Domains . . . . . . . . . . . . . . . . . . . . . . . . . . . . . . . . . . . . . . . . . . . 320
Viable options: . . . . . . . . . . . . . . . . . . . . . . . . . . . . . . . . . . . . . . . . . . 320Groups . . . . . . . . . . . . . . . . . . . . . . . . . . . . . . . . . . . . . . . . . . . . . . . . . . . . 320Users . . . . . . . . . . . . . . . . . . . . . . . . . . . . . . . . . . . . . . . . . . . . . . . . . . . . . . 321How Global Catalog Searches Work . . . . . . . . . . . . . . . . . . . . . . . . . . . 322Accounts Required for the Polycom CMA System . . . . . . . . . . . . . . . 323
Polycom CMA System Service Account . . . . . . . . . . . . . . . . . . . . 323Polycom CMA System Computer Account . . . . . . . . . . . . . . . . . . 323
Understanding Base DN . . . . . . . . . . . . . . . . . . . . . . . . . . . . . . . . . . . . . 323Understanding Exclusion Filters . . . . . . . . . . . . . . . . . . . . . . . . . . . . . . 325
Polycom CMA System and Windows Authentication . . . . . . . . . . . . . . . . 326Generating E.164 Aliases . . . . . . . . . . . . . . . . . . . . . . . . . . . . . . . . . . . . . 328
Directory Management Operations . . . . . . . . . . . . . . . . . . . . . . . . . . . . . . . 328Integrate with LDAP Server Option . . . . . . . . . . . . . . . . . . . . . . . . . . . 328
Create the Polycom CMA System Service Account . . . . . . . . . . . 329Create the Polycom CMA System Computer Account . . . . . . . . 330Enable Integration with the LDAP Server . . . . . . . . . . . . . . . . . . . 331
Enable Single Sign On Integrated Windows Authentication . . . . . . . 332Remove or Include Dynamically-Managed Devices in the Global Address Book . . . . . . . . . . . . . . . . . . . . . . . . . . . . . . . . . . . . . . . . . . . . . . 333Remove or Include Guest Book Entries in the Directory . . . . . . . . . . 333
29 Polycom CMA System Redundancy . . . . . . . . . . . . . . . . . 335Polycom CMA 5000 System Redundancy Overview . . . . . . . . . . . . . . . . . 335
How Redundancy Works . . . . . . . . . . . . . . . . . . . . . . . . . . . . . . . . . . . . 335Redundant Configuration System Administration . . . . . . . . . . . . . . . 338
Implement a Redundant Polycom CMA 5000 System . . . . . . . . . . . . . . . . 338Configure the External Database for Redundancy . . . . . . . . . . . . . . . 340Set the Virtual IP Address for the Redundant System . . . . . . . . . . . . 340
License a Redundant Polycom CMA System . . . . . . . . . . . . . . . . . . . . . . . 341Failover to a Redundant Polycom CMA 5000 System Server . . . . . . . . . . 342

Polycom CMA System Operations Guide
xiv Polycom, Inc.
Discontinue Redundancy on a Polycom CMA 5000 System Configuration . . . . . . . . . . . . . . . . . . . . . . . . . . . . . . . . . . . . . . . . . . . . . . . . . . 342
30 Gatekeeper Management . . . . . . . . . . . . . . . . . . . . . . . . 345Gatekeeper Overview . . . . . . . . . . . . . . . . . . . . . . . . . . . . . . . . . . . . . . . . . . . 345Primary Gatekeeper Management Operations . . . . . . . . . . . . . . . . . . . . . . 346
Edit the Primary Gatekeeper Settings . . . . . . . . . . . . . . . . . . . . . . . . . . 347Configure Prefixed Based Registration . . . . . . . . . . . . . . . . . . . . . . . . . 348
Alternate Gatekeeper Management Operations . . . . . . . . . . . . . . . . . . . . . 349Add an Alternate Gatekeeper . . . . . . . . . . . . . . . . . . . . . . . . . . . . . . . . . 349Edit the Alternate Gatekeeper Settings . . . . . . . . . . . . . . . . . . . . . . . . . 350Remove the Alternate Gatekeeper . . . . . . . . . . . . . . . . . . . . . . . . . . . . . 350
Neighboring Gatekeeper Management Operations . . . . . . . . . . . . . . . . . . 350View Neighboring Gatekeepers . . . . . . . . . . . . . . . . . . . . . . . . . . . . . . . 351Add a Neighboring Gatekeeper . . . . . . . . . . . . . . . . . . . . . . . . . . . . . . . 351Edit a Neighboring Gatekeeper . . . . . . . . . . . . . . . . . . . . . . . . . . . . . . . 351Delete a Neighboring Gatekeeper . . . . . . . . . . . . . . . . . . . . . . . . . . . . . 352
31 Management & Security Operations . . . . . . . . . . . . . . . . 353Update the Polycom CMA Server Software . . . . . . . . . . . . . . . . . . . . . . . . 353Edit Certificate Settings to Implement HTTPS . . . . . . . . . . . . . . . . . . . . . . 354
Generate a Certificate Request . . . . . . . . . . . . . . . . . . . . . . . . . . . . . . . . 355Upload a Private Key . . . . . . . . . . . . . . . . . . . . . . . . . . . . . . . . . . . . . . . . 356Upload a Certificate . . . . . . . . . . . . . . . . . . . . . . . . . . . . . . . . . . . . . . . . . 356Edit the HTTPS Security Setting . . . . . . . . . . . . . . . . . . . . . . . . . . . . . . . 357Revert to the Default Key and Certificate . . . . . . . . . . . . . . . . . . . . . . . 357
Configure Client Systems to Accept HTTPS Certificate . . . . . . . . . . . . . . 358Change the Polycom CMA System User Interface Timeout . . . . . . . . . . . 359Give Enterprise Users Default Scheduler Permissions for the Polycom CMA System . . . . . . . . . . . . . . . . . . . . . . . . . . . . . . . . . . . . . . . . . . . . . . . . . . . . . . . . 359Change the Message for Enterprise Users without Permissions . . . . . . . 360Automatic Registration Server Addressing . . . . . . . . . . . . . . . . . . . . . . . . . 360Set Common Passwords for Endpoints . . . . . . . . . . . . . . . . . . . . . . . . . . . . 361
32 Dial Plan Setup Operations . . . . . . . . . . . . . . . . . . . . . . . 363Site Operations . . . . . . . . . . . . . . . . . . . . . . . . . . . . . . . . . . . . . . . . . . . . . . . . . 363
View the Graphical Site Topology . . . . . . . . . . . . . . . . . . . . . . . . . . . . . 364View the Sites List . . . . . . . . . . . . . . . . . . . . . . . . . . . . . . . . . . . . . . . . . . 364Add a Site . . . . . . . . . . . . . . . . . . . . . . . . . . . . . . . . . . . . . . . . . . . . . . . . . . 365View Site Information . . . . . . . . . . . . . . . . . . . . . . . . . . . . . . . . . . . . . . . 370

Contents
Polycom, Inc. xv
Assign Locations to a Site . . . . . . . . . . . . . . . . . . . . . . . . . . . . . . . . . . . . 371Edit Site Settings . . . . . . . . . . . . . . . . . . . . . . . . . . . . . . . . . . . . . . . . . . . . 372Edit Site Provisioning Settings . . . . . . . . . . . . . . . . . . . . . . . . . . . . . . . . 373Delete a Site . . . . . . . . . . . . . . . . . . . . . . . . . . . . . . . . . . . . . . . . . . . . . . . . 373
Site Link Operations . . . . . . . . . . . . . . . . . . . . . . . . . . . . . . . . . . . . . . . . . . . . 374View the Site Links List . . . . . . . . . . . . . . . . . . . . . . . . . . . . . . . . . . . . . . 375Add a Site Link . . . . . . . . . . . . . . . . . . . . . . . . . . . . . . . . . . . . . . . . . . . . . 375Edit a Site Link . . . . . . . . . . . . . . . . . . . . . . . . . . . . . . . . . . . . . . . . . . . . . 375Delete a Site Link . . . . . . . . . . . . . . . . . . . . . . . . . . . . . . . . . . . . . . . . . . . 376
Site-to-Site Exclusions . . . . . . . . . . . . . . . . . . . . . . . . . . . . . . . . . . . . . . . . . . . 376View the Site-to-Site Exclusion List . . . . . . . . . . . . . . . . . . . . . . . . . . . . 376Add a Site-to-Site Exclusion . . . . . . . . . . . . . . . . . . . . . . . . . . . . . . . . . . 377Edit a Site-to-Site Exclusion . . . . . . . . . . . . . . . . . . . . . . . . . . . . . . . . . . 377Delete a Site-to-Site Exclusion . . . . . . . . . . . . . . . . . . . . . . . . . . . . . . . . 377
Territories . . . . . . . . . . . . . . . . . . . . . . . . . . . . . . . . . . . . . . . . . . . . . . . . . . . . . 377View the Territory List . . . . . . . . . . . . . . . . . . . . . . . . . . . . . . . . . . . . . . . 378Add a Territory . . . . . . . . . . . . . . . . . . . . . . . . . . . . . . . . . . . . . . . . . . . . . 378Edit a Territory . . . . . . . . . . . . . . . . . . . . . . . . . . . . . . . . . . . . . . . . . . . . . 378Delete a Territory . . . . . . . . . . . . . . . . . . . . . . . . . . . . . . . . . . . . . . . . . . . 379
Network Clouds . . . . . . . . . . . . . . . . . . . . . . . . . . . . . . . . . . . . . . . . . . . . . . . . 379View the List of Network Clouds . . . . . . . . . . . . . . . . . . . . . . . . . . . . . 379Add a Network Cloud . . . . . . . . . . . . . . . . . . . . . . . . . . . . . . . . . . . . . . . 379Edit a Network Cloud . . . . . . . . . . . . . . . . . . . . . . . . . . . . . . . . . . . . . . . 380Delete a Network Cloud . . . . . . . . . . . . . . . . . . . . . . . . . . . . . . . . . . . . . 380
Dial Plan Service Operations . . . . . . . . . . . . . . . . . . . . . . . . . . . . . . . . . . . . . 381View the Services List . . . . . . . . . . . . . . . . . . . . . . . . . . . . . . . . . . . . . . . 386Add a Service . . . . . . . . . . . . . . . . . . . . . . . . . . . . . . . . . . . . . . . . . . . . . . 386Edit a Service . . . . . . . . . . . . . . . . . . . . . . . . . . . . . . . . . . . . . . . . . . . . . . . 387Delete a Service . . . . . . . . . . . . . . . . . . . . . . . . . . . . . . . . . . . . . . . . . . . . . 387
Dial Rule Operations . . . . . . . . . . . . . . . . . . . . . . . . . . . . . . . . . . . . . . . . . . . . 388Default Dial Rules . . . . . . . . . . . . . . . . . . . . . . . . . . . . . . . . . . . . . . . . . . . 390Parts of a Dial Rule . . . . . . . . . . . . . . . . . . . . . . . . . . . . . . . . . . . . . . . . . . 390
Pattern Types . . . . . . . . . . . . . . . . . . . . . . . . . . . . . . . . . . . . . . . . . . . 390Routing Actions . . . . . . . . . . . . . . . . . . . . . . . . . . . . . . . . . . . . . . . . . 391
Examples of Custom Dial Rules . . . . . . . . . . . . . . . . . . . . . . . . . . . . . . . 391View the Dial Rules List . . . . . . . . . . . . . . . . . . . . . . . . . . . . . . . . . . . . . 392Add a Dial Rule . . . . . . . . . . . . . . . . . . . . . . . . . . . . . . . . . . . . . . . . . . . . 393Enable or Disable Dialing Rules . . . . . . . . . . . . . . . . . . . . . . . . . . . . . . . 393Edit a Dial Rule . . . . . . . . . . . . . . . . . . . . . . . . . . . . . . . . . . . . . . . . . . . . . 394
Least-Cost Routing Operations . . . . . . . . . . . . . . . . . . . . . . . . . . . . . . . . . . . 394

Polycom CMA System Operations Guide
xvi Polycom, Inc.
How Least-Cost Routing Works . . . . . . . . . . . . . . . . . . . . . . . . . . . . . . . 395Example of Least-Cost Routing . . . . . . . . . . . . . . . . . . . . . . . . . . . . . . . 395
LCR Tables for Three Sites . . . . . . . . . . . . . . . . . . . . . . . . . . . . . . . . 395Call Scenario One . . . . . . . . . . . . . . . . . . . . . . . . . . . . . . . . . . . . . . . 397Call Scenario Two . . . . . . . . . . . . . . . . . . . . . . . . . . . . . . . . . . . . . . . 397
Determining Area Codes . . . . . . . . . . . . . . . . . . . . . . . . . . . . . . . . . . . . . 398Determining Country Codes . . . . . . . . . . . . . . . . . . . . . . . . . . . . . . . . . . 398Determining the Weighted Cost . . . . . . . . . . . . . . . . . . . . . . . . . . . . . . . 398View the Least Cost Routing Tables List . . . . . . . . . . . . . . . . . . . . . . . 399Add a Least Cost Routing Table . . . . . . . . . . . . . . . . . . . . . . . . . . . . . . . 399Edit a Least Cost Routing Table . . . . . . . . . . . . . . . . . . . . . . . . . . . . . . . 399Delete a Least Cost Routing Table . . . . . . . . . . . . . . . . . . . . . . . . . . . . . 400
33 Remote Alert Setup Operations . . . . . . . . . . . . . . . . . . . . 401Set Up Remote Alerts . . . . . . . . . . . . . . . . . . . . . . . . . . . . . . . . . . . . . . . . . . . 401
Set Up Polycom CMA System-generated Email Account . . . . . . . . . 402Enable Polycom CMA System Remote Alerts . . . . . . . . . . . . . . . . . . . 402Set Polycom CMA System Remote Alert Level Settings . . . . . . . . . . 403Set Endpoint Alert Level Settings . . . . . . . . . . . . . . . . . . . . . . . . . . . . . 404Add a Remote Alert Profile . . . . . . . . . . . . . . . . . . . . . . . . . . . . . . . . . . . 406Associate a Remote Alert Profile With a User . . . . . . . . . . . . . . . . . . . 407
Edit a Remote Alert Profile . . . . . . . . . . . . . . . . . . . . . . . . . . . . . . . . . . . . . . . 408Disable a Remote Alert Profile . . . . . . . . . . . . . . . . . . . . . . . . . . . . . . . . . . . . 408Delete a Remote Alert Profile . . . . . . . . . . . . . . . . . . . . . . . . . . . . . . . . . . . . . 409Disable Polycom CMA System Remote Alerts . . . . . . . . . . . . . . . . . . . . . . 409
34 System Backup and Recovery Operations . . . . . . . . . . . . . 411Recovery Operations - Reset First Time Setup . . . . . . . . . . . . . . . . . . . . . . 411Restart or Shut Down a Polycom CMA System . . . . . . . . . . . . . . . . . . . . . 412Emergency Shut Down of a Polycom CMA System . . . . . . . . . . . . . . . . . . 413Disaster Recovery - Restore to Factory Default Image . . . . . . . . . . . . . . . . 413
35 System Troubleshooting . . . . . . . . . . . . . . . . . . . . . . . . . . 415Troubleshooting Utilities Dashboard . . . . . . . . . . . . . . . . . . . . . . . . . . . . . . 415Troubleshooting Specific Types of Issues . . . . . . . . . . . . . . . . . . . . . . . . . . 416
Registration Problems and Solutions . . . . . . . . . . . . . . . . . . . . . . . . . . . 416Point-to-Point Calling Problems and Solutions . . . . . . . . . . . . . . . . . . 419MCU and Gateway Dialing Problems and Solutions . . . . . . . . . . . . . 420Conference On Demand Problems and Solutions . . . . . . . . . . . . . . . . 421Gatekeeper Cause Codes . . . . . . . . . . . . . . . . . . . . . . . . . . . . . . . . . . . . . 421

Contents
Polycom, Inc. xvii
A System Security and Port Usage . . . . . . . . . . . . . . . . . . . . 423Port Usage . . . . . . . . . . . . . . . . . . . . . . . . . . . . . . . . . . . . . . . . . . . . . . . . . . . . . 423Open Inbound Ports on the Polycom CMA System . . . . . . . . . . . . . . . . . . 423Outbound Ports Used by the Polycom CMA System . . . . . . . . . . . . . . . . . 424
B Polycom CMA System MIB . . . . . . . . . . . . . . . . . . . . . . . . 427
C System Field Input Requirements . . . . . . . . . . . . . . . . . . . 531
Index . . . . . . . . . . . . . . . . . . . . . . . . . . . . . . . . . . . . . . . 539

Polycom CMA System Operations Guide
xviii Polycom, Inc.

Polycom, Inc. 1
1Polycom® CMA™ System Overview
This chapter provides an overview of the Polycom® Converged Management Application™ (CMA™) system and includes these topics:
• Features and Capabilities
• Minimum System Requirements
• Other Requirements
• Log Into the Polycom CMA System
• Working in the Polycom CMA System
— Polycom CMA System Site Map
— Polycom CMA System Views, Roles, and Permissions
— Field Input Requirements
— Filter and Search a List
— Managing Bandwidth
• Change Password
• Log Out of the Polycom CMA System
Features and CapabilitiesThe Polycom CMA system is an integrated scheduling and device management platform for video conferencing that can include these features:
• The Polycom® Converged Management Application™ (CMA™) Desktop client—an easy-to-use video and audio conferencing application that lets your users see and hear the people they call on their desktop system.
• Automatic device provisioning for dynamically-managed Polycom CMA Desktop clients and Polycom HDX systems
• Scheduled device provisioning for standardly-managed and legacy devices

Polycom CMA System Operations Guide
2 Polycom, Inc.
• Automatic device softupdates for dynamically-managed Polycom CMA Desktop clients and Polycom HDX systems
• Scheduled device softupdates for standardly-managed and legacy devices
• On-demand conferencing using embedded MCUs or external MCUs
• Conference scheduling via the Polycom CMA system Web Scheduler or the optional Polycom Scheduling Plugins for Microsoft® Outlook® or IBM® Lotus® Notes®
• Advanced routing to distribute audio and video calls across multiple media servers (MCUs), creating a single seamless resource pool
• Gatekeeper, alternate, and neighboring gatekeeper functionality
• Access to global user and room directories for on-demand and scheduled calls. Directory services include:
— Presence and contact list functionality for dynamically-managed devices like Polycom CMA Desktop clients and Polycom HDX systems
— Global Address Book functionality for standardly-managed devices
— H.350 and LDAP directory functionality. H.350 defines a directory services architecture for multimedia conferencing for H.323, H.320, SIP and generic protocols.
• Device monitoring and management
• Conference monitoring and management
• An optional high-availability, redundant management server configuration
Polycom CMA System ModelsPolycom offers two Polycom CMA system models.
• The single microprocessor Polycom CMA 4000 system supports up to 400 concurrently registered endpoints and 240 concurrent calls. Integration with a corporate directory and an external database is optional. The Polycom CMA 4000 system is not available in redundant configurations.
• The dual microprocessor Polycom CMA 5000 system can support up to 5000 concurrently registered endpoints and 1500 concurrent calls in direct mode and 3000 concurrent calls in routed mode. The Polycom CMA 5000 system is also available in an optional redundant configuration.

Polycom® CMA™ System Overview
Polycom, Inc. 3
Integration with a corporate directory is optional for Polycom CMA 5000 systems. Integration with an external database (Microsoft SQL Server) is required for redundant Polycom CMA 5000 systems or for Polycom CMA 5000 systems supporting more than 400 concurrently registered endpoints and 240 concurrent calls.
Minimum System RequirementsThe Polycom CMA System Release Notes describe the minimum system requirements for your system. To find the most current Release Notes, go to www.polycom.com/support and navigate to the Polycom CMA system product page (Documentation > Category: Network > Product: Polycom Converged Management Application).
Other RequirementsAny scheduled call that requires an external MCU requires a Polycom MGC™ or Polycom RMX™ conferencing platform. Some features and services, such as Conference on Demand service also requires a Polycom MGC or RMX conferencing platform. Some conferencing features are not supported on the RMX 1000 conferencing platform. For more information, see the Polycom RMX 1000 System Release Notes.
Log Into the Polycom CMA SystemTo log into the Polycom CMA system web interface, you need:
• Microsoft Internet Explorer® 6.0, 7.0 or 8.0, Mozilla FireFox® 3.5 or 3.6, or Apple Safari 3.2 or 4.0
• Adobe® Flash® Player 9.x or 10.0.x
• The IP address or host name of the Polycom CMA system server and your username, password, and domain.
You get three opportunities to enter the correct password. After three failed attempts, the system returns an error message.
To log into a Polycom CMA system
1 Open a browser window and in the Address field enter the Polycom CMA system server IP address or host name.
— If prompted to install the Adobe Flash Player, click OK.

Polycom CMA System Operations Guide
4 Polycom, Inc.
— If you receive an HTTPS Security Alert, click Yes.
To eliminate these HTTPS certificate security alerts in the future, see “Edit Certificate Settings to Implement HTTPS” on page 354.
2 When the Polycom CMA system Log In screen appears, enter your Username and Password.
3 If necessary, select a different Language or Domain.
4 Click Login.
Because the Polycom CMA system is a role-based system, you see only the pages and functions available to your roles.
If you log in as an administrator, you see the Polycom CMA system Dashboard.
Scheduling Participants and EndpointsWhen you schedule conferences, you select the participants you wish to join the conference from your endpoint directory. Depending on your system configuration, your endpoint directory may be the enterprise LDAP directory or the Global Address Book. It may also include Guest Book entries.
For participants that have multiple endpoints registered with the Polycom CMA system, the system selects the participant’s default endpoint. You can change to another endpoint by selecting it from the Call Info list or by editing the participant.
You can schedule participants without endpoints into conferences. You cannot schedule endpoints without owners into conferences.
For the same reason, if you schedule participants with endpoints such as Polycom CMA Desktop, HDX, VVX, or VSX systems into conference as Dial In endpoints, the conference will require external MCU resources.
Bridge Selection and CascadingWhen a conference is scheduled with one of the Polycom CMA system scheduling applications (Web Scheduler or Scheduling Plug-in for Microsoft Outlook or IBM Lotus Notes) and the conference requires external MCU resources (such as a Polycom RMX or MGC system), then by default the Polycom CMA system automatically assigns the conference to a bridge. However, the system allows users with advanced scheduler permissions to select a bridge for their conferences. It also allows them to create multibridge, cascaded conferences.

Polycom® CMA™ System Overview
Polycom, Inc. 5
Bridge Selection
When scheduling a conference, users with advanced scheduler permissions can select a bridge to host their conference by selecting the Single Bridge option. When they select this option, the system presents a list of bridges that have the capabilities and resources required to host their conference.
Because this bridge list depends on the template selection and conference settings, users should make their template selection and conference settings before selecting a bridge. Otherwise, they may select a bridge that cannot meet their conferencing requirements. In this case, the conference will fail to schedule.
Bridge Selection and Cascading Conferences
When scheduling a conference, users with advanced scheduler permissions can select the Multi Bridge option to create cascading conferences.
In some respects, a cascaded conference looks like a single conference, but it is actually two or more conferences on different bridges that are linked together. The link is created by a dial-out from one conference to a second conference via a special cascaded entry queue.
Some reasons you may wish to create cascading conferences include:
• To invite more conference participants than any single bridge can host
• To connect different bridges at different sites into a single conference
• To use the different capabilities of different bridges (for example, different communication protocols, such as, serial connections, ISDN, etc.)
When you create a multibridge, cascaded conference, you must manually select bridges and create the cascaded links between bridges by identifying the originating bridge, the terminating bridge, and the network type (IP or ISDN). The system displays an interconnection diagram that illustrates the cascaded links. Once scheduled, each cascaded link appears as a participant in the conference.
By default, the system automatically assign participants to the “best bridge” for them based on available capacity, location, and least cost routing rules. However, you may also choose to manually assign participants to bridges.
Bridge Scheduling and ReassignmentWhen a conference is scheduled with one of the Polycom CMA system scheduling applications (Web Scheduler or Scheduling Plug-in for Microsoft Outlook or IBM Lotus Notes), by default the system automatically assigns the conference to a bridge unless a user with advanced scheduler permissions intercedes. If that bridge is down at the time the system starts the conference, the Polycom CMA system attempts to dynamically reassign the conference to another bridge with sufficient capabilities and resources.

Polycom CMA System Operations Guide
6 Polycom, Inc.
• If the system can successfully reassign the conference to another bridge, the conference starts on the newly selected bridge, and the system sends an updated conference email to all scheduled participants. This updated email includes a new dial-in number that dial-in participants must use to join the conference.
• If the system cannot successfully reassign the conference to another bridge, the conference fails to start. The system sends an email to notify the conference organizer of the failure.
Some notes about bridge reassignment:
• The bridge reassignment process only occurs when the system detects that a bridge is down. It does not occur if the system determines that a bridge does not have sufficient resources required to host the conference.
• If the Polycom CMA system cannot find another bridge with the features and capacity needed to support a conference, the conference fails to start. The system does not attempt to modify the conference settings in any way. Instead, the system sends an email to notify the conference organizer of the failure.
• The system will chain bridge reassignments. This means that if the next bridge to which the system assigns a conference is down at the time the system tries to start the conference, the system will try to reassign the conference again.
• If the bridge to which the system reassigns a conference has ad hoc conferences on it, the Polycom CMA system is unaware of those conferences. The reassigned conference may fail to start if ad hoc conferences are consuming resources the Polycom CMA system expected to schedule. This is known behavior and is avoided by applying the best practice of not using bridges for both scheduled and ad hoc conferences.
Working in the Polycom CMA SystemThis section includes some general information you should know when working in the Polycom CMA system. It includes these topics:
• Polycom CMA System Site Map
• Polycom CMA System Views, Roles, and Permissions
• Field Input Requirements
• Filter and Search a List
• Managing Bandwidth

Polycom® CMA™ System Overview
Polycom, Inc. 7
Polycom CMA System Site MapThe following figure shows the Polycom CMA system site map illustrating the organization of the system interface.
Polycom CMA System Views, Roles, and PermissionsWhen you log into the Polycom CMA system, the view displayed depends on your user roles and the permissions assigned to your user roles.
This section describes the functionality assigned to the default Polycom CMA system user roles. If your Polycom CMA system has been configured with specialized user roles, what you see may not be reflected here. For more information about Polycom CMA system roles and permissions, see “Users and Groups Overview” on page 191.
Conference Future Ongoing Endpoint Monitor View Automatic Provisioning Scheduled Provisioning Automatic Softupdate Scheduled Softupdate Network Device Monitor View VBPs MCUs DMAs User Users Groups User Roles Guest Book Favorites Reports Site Statistics Site-Link Statistics IP Call Detail Records Endpoint Usage Report Conference Usage Report Conference Type Report Gatekeeper Message Log System Log Files
Admin Dashboard Conference Templates Conference Settings Provisioning Profiles Automatic Provisioning Profiles Scheduled Provisioning Profiles Software Updates Automatic Software Updates Scheduled Software Updates Rooms Global Address Book Server Settings Network System Time Database LDAP Calendaring Management OCS Management Licenses Redundant Configuration Custom Logo Directory Setup Remote Alert Setup E-mail SNMP Settings
Admin (continued) Gatekeeper Settings Primary Gatekeeper Alternate Gatekeeper Neighboring Gatekeepers Management and Security Server Software Upgrade Certificate Settings Security Settings Endpoint Management Settings Dial Plan and Sites Site Topology Sites Site-Links Site-to-Site Exclusions Network Clouds Territories Services Dial Rules LCR Tables Alert Settings CMA Alert Level Settings Endpoint Alert Level Settings Remote Alert Profiles Database Backup Files Troubleshooting Utilities Report Administration

Polycom CMA System Operations Guide
8 Polycom, Inc.
The Polycom CMA system has three default roles: Administrator, Operator, and Scheduler.
• When users who are assigned the default Scheduler role log into the Polycom CMA system, they see the Conference and User menus and the Future conference view is displayed. They can schedule, monitor, and manage their own conferences. They can also delete entries from the system Guest Book. They cannot see conferences that they did not create.
• When users who are assigned the default Operator role log into the Polycom CMA system, they see the Conference, Endpoint, Network Device, User, and Reports menus and the Ongoing conference view is displayed. They can monitor and manage all ongoing Polycom CMA system conferences; monitor all devices; delete entries from the system Guest Book; and view some system reports.
• When users who are assigned the default Administrator role log into the Polycom CMA system, they see the Endpoint, Network Device, User, Reports, and Admin menus and the system Dashboard is displayed. They have access to all Polycom CMA system functionality except that associated with scheduling, monitoring, or managing conferences.
All users see these menu items:
NoteThe role names Administrator, Operator, and Scheduler are stored in the system database and are not localized into other languages. If you wish to localized their names into your language, edit the roles and enter new names for them.
Description
Settings. Click here to display a Settings dialog box with the following information:
• User Name
• Remote Server
• Software Version
• Font Size
In this dialog box, you can also:
• Change the font size used in your display of the Polycom CMA web client interface.
• Change your password, if you are a local system user.
Downloads. Click here to display the Downloads dialog box with the downloadable applications compatible with the Polycom CMA system. Downloadable applications include:
• Polycom CMA Desktop client (including the path to the application)
• Polycom Scheduling Plugin for Microsoft Outlook
• Polycom Scheduling Plugin for IBM Lotus Notes

Polycom® CMA™ System Overview
Polycom, Inc. 9
Field Input RequirementsWhile every effort was made to internationalize the Polycom CMA system, not all system fields accept Unicode entries. If you work in a language other than English, be aware that the Polycom CMA system fields that accept only ASCII characters are shaded a light yellow.
For information about specific field requirements, see “System Field Input Requirements” on page 531.
Filter and Search a ListIn the Polycom CMA system interface, information is often summarized in lists or grids.
Lists that include many items may have filters or searchable fields, which allow you to view a subset of items or search for a specific entry. The available filtering options depend on the type of information in the list. For example in the conference list:
• If you select Custom Date as the filter, a calendar filter field appears
• If you select Ongoing Plus as the filter, an attribute option appears. You can select the attribute Conference Name and enter all or part of the conference name into the associated text field.
In general, most text filter fields are ASCII only and the Polycom CMA system search function is a case-insensitive, substring search. That means when you enter a search string, the Polycom CMA system looks for that string whereever it occurs (beginning, middle, or end) in the word or number.
However, if the Polycom CMA system is integrated with an Active Directory, the Polycom CMA system uses the LDAP search function for searches of the directory. LDAP searches are prefix-searches that include an appended wildcard. In this case, when you enter a search string, the system looks for that search string only at the beginning of the indexed fields.
For example, all of the following searches for a participant will find Barbara Smithe:
Barbara
Log Out. Click here to log out of the Polycom CMA system.
NoteThe Polycom CMA system has an inactivity timer. If you are logged into the system but do not use the interface for a specified period of time (10 minutes by default), the system automatically logs you out. To change this inactivity timer, see “Change the Polycom CMA System User Interface Timeout” on page 359.
Help. Links to the Polycom CMA system online help.
Description

Polycom CMA System Operations Guide
10 Polycom, Inc.
SmitheBarSmi
To optimize LDAP searches, the Polycom CMA system (and its dynamically-managed endpoints) searches only indexed LDAP fields and a limited set of attributes. The attributes include:
ObjectCategorymemberOfDisplayNameGivenNameSnCnSamaccountnamegroupTypedistinguishedNameobjectGuid
These are the requested attributes to be returned by the search:SnGivennameMailOuObjectguidTelephonenumberCnSamaccountnameMemberofDisplaynameObjectclassTitlelocalityNamedepartment
Managing BandwidthThe Polycom CMA system manages the bandwidth between sites and the bandwidth for calls that it schedules within the gatekeeper region it services.
Users with administrator permissions can create bandwidth management policies by setting the following limits. The Polycom CMA system applies the lowest value from the settings described here to limit the bit rate of specific calls or conferences.
• The maximum bit rate for a call at a site. Set it by editing the site, selecting Routing/Bandwidth, and setting the Call Max Bit Rate.
• The total bandwidth between sites. The link type and bandwidth are parameters of the site links between two sites. Set it by editing the site link.

Polycom® CMA™ System Overview
Polycom, Inc. 11
• The maximum speed (bit rate) for calls across a site link. This value is also a parameter of the site links between two sites and is set by editing the site link.
• The specific speed (bit rate) of calls in a conference. This value is a parameter of the conference, as it is inherited from the conference template. You can achieve granularity of bandwidth management by (a) creating a variety of scheduling roles, (b) creating a variety of conference templates with different conference speeds, (c) associating different scheduling roles with different templates, and (d) associating different users and/or groups with the different scheduling roles.
For example, you can assign an executive user or group more bandwidth than your typical user. To do this, create a VIP role and assign it scheduling or advanced scheduling permissions. Then create a VIP conference template that has a higher video speed, say 4096 kpbs. Finally, associate the executive user or group with the VIP role.
There are some things to note in these situations.
— The Polycom CMA system may reduce bandwidth or fail a call if the requested bandwidth is not available.
— The gatekeeper will reduce bandwidth or fail a call if an endpoint requests a speed higher than what is available. If the available speed is less then 56 kbps, the gate keeper will reject the call.
— Schedulers with advanced scheduling permissions can choose to change the speed of calls in conference by changing the value for a specific conference. However, the Polycom CMA system only allows a connection speed when it is within the parameters set for the site link.
— Endpoints in a conference may not be capable of transmitting at the requested speed. In this case, they will transmit at the value they can achieve that is closest to the value set for the conference.
• The maximum speed (bit rate) for receiving calls and the preferred speed for placing calls provisioned on the endpoint. These values are parameters of the endpoint. For endpoints in dynamic management mode, these values are provisioned as part of the automatic provisioning profile. For endpoints operating in standard/traditional management mode, these values are provisioned at the endpoint.
Note in this case that the endpoint can request a speed when placing a call, but again the Polycom CMA system only allows a connection speed when it is within the parameters set for the site topology.

Polycom CMA System Operations Guide
12 Polycom, Inc.
Change PasswordLocal users of the Polycom CMA system must change their passwords every 90 days. Access rules for enterprise users is managed by Microsoft Active Directory.
To change your system password
1 Click Settings in the top-right corner of the page.
2 Click Change Password.
3 Enter your Old Password.
4 Enter a New Password. This password must be at least 8 characters long.
5 Confirm the new password and click OK.
Log Out of the Polycom CMA System
To log out of the Polycom CMA system
Click Log Out in the top-right corner of the page.

Polycom, Inc. 13
2Polycom® CMA™ System Configuration
This chapter describes the configuration tasks that may be required, based on your system design, to complete your implementation of a new Polycom® Converged Management Application™ (CMA™) system once First Time Setup is complete. It includes these topics:
• Add DNS SRV Record for Polycom CMA Services
• Configure the Connection to the External Database
• Configure the Connection to an External Enterprise Directory
• Configure Redundancy
• Set Up Video Call Routing
• Set Up Automatic Provisioning
• Set Up Automatic Softupdate
• Set Up Conference Templates
• Set Up Directory Services
• Set Up a Certificate for the Polycom CMA System
• Distribute Polycom Applications
Add DNS SRV Record for Polycom CMA ServicesYou must configure your DNS, if you wish the DNS to resolve queries for the Polycom CMA system by the host name and/or IP address assigned on the Network page. The DNS should also have entries for your Active Directory server (if different from the DNS) and for the external database server being used by the Polycom CMA system.

Polycom CMA System Operations Guide
14 Polycom, Inc.
To dynamically manageme endpoints, which includes automatic provisioning, automatic softupdate, and presence, you must add the DNS service record (SRV record) for the Polycom CMA system to the domain controller. The lookup key for this service record is _cmaconfig._tcp. So the record will resemble this:
__cmaconfig._tcp.customerdomain.com 86400 IN SRV 0 443 cma5000.customerdomain.com
For more information about DNS, DNS records, and how DNS works, see Microsoft Technet (http://technet.microsoft.com/en-us/library/cc772774(WS.10).aspx).
Configure the Connection to the External DatabaseIf during First Time Setup you did not configure your Polycom CMA system to use an external Microsoft SQL Server database, but need to do so now, see “Directory Operations” on page 319.
Integration with an external Microsoft SQL Server database is required for redundant Polycom CMA 5000 systems or for Polycom CMA 5000 systems supporting more than 400 concurrently registered endpoints and 240 concurrent calls.
Configure the Connection to an External Enterprise DirectoryIf during First Time Setup you did not configure your Polycom CMA system to use an enterprise directory, but need to do so now, see “Database Operations” on page 309.
Connecting to an enterprise directory allows users to enter their network usernames and password to log into Polycom CMA system. It also allows users to access the enterprise directory when selecting conference participants.
NoteIt is not recommended, but you can create the Polycom CMA system databases manually using Microsoft SQL scripts. Contact Polycom Global Services to request the creation scripts.

Polycom® CMA™ System Configuration
Polycom, Inc. 15
Configure RedundancyYou can install the Polycom CMA 5000 system in a fault-tolerant, high-availability, redundant configuration. The Polycom CMA 4000 system is not available in a redundant configuration.
A redundant Polycom CMA system configuration requires the installation of two Polycom CMA system servers on the same network. During First Time Setup, you are instructed to assign these two servers physical IP addresses. During the redundancy process Once the two system servers are installed, see “Polycom CMA System Redundancy” on page 335 to finish implementing redundancy.
Set Up Video Call RoutingThe video call routing setup includes the gatekeeper, site topology, gateway and MCU dial plan services, and bandwidth management.
You can perform the following tasks:
• Handle inbound ISDN calls and route them to correct endpoints.
• Enable outbound IP- based calls.
• Connect through a firewall using an SBC device.
• Allow or deny calls to and from unregistered endpoints (rogue calls).
• When you have a third-party MCU that registers with the gatekeeper using standard H.323 protocol, add gateway and MCU dial plan services manually.
• Define new sites and site links.
• Add IP-to-ISDN call routing using least-cost routing.
• Define neighboring gatekeepers
• Enable routing of H.323 calls to neighboring gatekeepers
• Define a site for each physical location in which a LAN or an ISDN connection exists. If you use VPN connections, you can consolidate distinct physical locations into a single logical site to simplify management tasks.
• For each site, define the subnets in which the video endpoint systems are deployed. It is important that the IP addresses used by the endpoints belong to only one subnet at a site.
• Define least-cost routing tables only when you use the least-cost routing feature.
• Customize default dialing rules.
For more information, see “Dial Plan Setup Operations” on page 363.

Polycom CMA System Operations Guide
16 Polycom, Inc.
Set Up Automatic ProvisioningThe Polycom CMA system automatic provisioning feature allows an administrator to configure one or more endpoints with the standard set of information the registering endpoints need to operate within the network. This eliminates the need to configure each endpoint individually.
Automatic provisioning is enabled at the endpoint, but the Polycom CMA system must have automatic provisioning profiles for both the endpoint and the site at which the endpoint resides.
To ensure out-of-box usability, the Polycom CMA system comes with default automatic provisioning profiles. However, to create your desired user experiences, you should:
• Create customized automatic provisioning profiles for endpoint types.
• Edit provisioning profile for each site.
For more information, see “Add an Automatic Provisioning Profile” on page 130.
Set Up Automatic SoftupdateThe Polycom CMA system automatic softupdate feature allows an administrator to upgrade the software on one or more endpoints with a standard software package. This eliminates the need to upgrade each endpoint individually.
The automatic softupdate feature is enabled at the endpoint. At start up and at designated intervals, endpoints in automatic softupdate mode automatically look for a new softupdate profile and package on the Polycom CMA system.
To implement automatic softupdates, you must create a softupdate package for each endpoint type you wish to support with updates.
For more information, see “Implement Automatic Softupdates for Endpoints” on page 138.
Set Up Conference TemplatesThe Polycom CMA system uses conference templates and global conference settings to manage system and conference behavior.
The Polycom CMA system has a Default Template and default global conference settings. You may want to create additional templates with different settings or change the global conference settings.
For more information, see “Conference Setup Overview” on page 243.
Polycom® CMA™ System Configuration
Polycom, Inc. 17
Set Up Directory ServicesDirectory services provide information about all users, endpoints, and resources on your video communication network.
To set up Polycom CMA directory services, complete the following tasks:
1 Register devices. On the device, you must set the gatekeeper and/or Global Directory Server (GDS) to point to the Polycom CMA system IP address or DNS name. We recommend using the IP address to prevent data inconsistencies.
It may take a device up to 5 minutes to register with the gatekeeper and indicate an online status.
Most endpoint information is automatically populated in the Polycom CMA system through the gatekeeper registration or Global Address Book access. You must review the information for these devices in the Polycom CMA Directory Setup page and fill in missing information.
To select endpoints when scheduling conferences, you must first associate them with a user or conference room by editing the specific user or room settings. For more information, see “Endpoint Management Overview” on page 73.
2 Set up users and associate them with endpoints. Unless your Polycom CMA system is integrated with an enterprise directory, you must enter all user information manually including endpoint association. If your system is integrated with an enterprise directory, general user information (First Name, Last Name, UserID, Password, Email Address) is directly pulled from the directory and cannot be changed. However, you must still associate enterprise users with endpoints. For more information, see “Users and Groups Overview” on page 191.
3 Set up groups, add members, and associate them with provisioning profiles. For more information, see “Users and Groups Overview” on page 191.
4 Set up rooms and associate them with endpoints. Unless your Polycom CMA system is integrated with an enterprise directory that includes conference rooms, you must enter all room information manually including endpoint association. For more information, see “Room Overview and Operations” on page 259.

Polycom CMA System Operations Guide
18 Polycom, Inc.
Set Up a Certificate for the Polycom CMA SystemBy default, the Polycom CMA system uses http for its data interchanges. Edit the Certificate Settings to implement the https protocol, which is a combination of normal http interchange over an encrypted Secure Sockets Layer (SSL) or Transport Layer Security (TLS) connection. For more information, see “Edit Certificate Settings to Implement HTTPS” on page 354.
Distribute Polycom Applications
To deploy the Polycom CMA Desktop client to users, you have at least four distribution options.
Option 1: Distribute the Polycom CMA Desktop client via an email link
You can copy the link for the Polycom CMA Desktop client from the Polycom CMA system Downloads page into an email that you can send to users.
To do this, copy and paste the Polycom CMA Desktop link (for example, http://10.47.9.136/SoftUpdate/vvl/CMADesktop_4_1_1_1010/CMADesktop.exe) from the Downloads page into an email to be sent to users. Include the IP address of the Polycom CMA system and usernames and passwords (as required) in the email to users.
Option 2: Distribute the Polycom CMA Desktop client via the management system
You can provide users access to the Polycom CMA system, from which they can download the client.
To do this, copy and paste the IP address of the Polycom CMA Desktop system into an email to be sent to users. Include usernames and passwords (as required) in the email to users and instruct them to access the Downloads link.
Option 3: Distribute the Polycom CMA Desktop client via a desktop management or group policy object
Distribute the .exe installation file as a desktop management or group policy object to a location on client systems and provide directions to users on how to run the executable.
IMPORTANT• On a Windows XP system, the user installing the Polycom CMA Desktop must
sign in with administrative privileges. On a Windows Vista system, the user installing the Polycom CMA Desktop must sign into the Administrator account.
• The following procedures assumes you have implemented DNS lookup and Windows authentication for single signon.

Polycom® CMA™ System Configuration
Polycom, Inc. 19
To do this, build a desktop management or group policy object that writes the .exe installation file to a directory (for example, C:\temp) on the user’s local system. Include the command for executing the file in an email to be sent to users. For example:
C:\temp\CMA Desktop.exe”/s /v"/qn SBSERVERTYPE=2 SBSERVERADDRESS=nnn.nnn.nnn.nnn
Include the IP address of the Polycom CMA system and usernames and passwords (as required) in the email to users.
Option 4: Distribute the Polycom CMA Desktop client via a .zip file
Zip the .exe installation file and send it in an email to users. Include the IP address of the Polycom CMA system and usernames and passwords (as required) in the email to users. For endpoints on the public network that will be accessing the system through a firewall, include the IP address of the Polycom VBP system rather than the Polycom CMA system.

Polycom CMA System Operations Guide
20 Polycom, Inc.

Polycom, Inc. 21
3Conference Scheduling Overview
This chapter describes the scheduling and conference views, navigation, and commands of the Polycom CMA system. It includes these topics:
• Conference Menu and Views
— Conference Views—Future and Ongoing
— Conference States
— Context-Sensitive Conference Commands
— Context-Sensitive Guest Book Commands
— Add a Guest to the System Guest Book
— Edit a Guest in the System Guest Book
— Delete a Guest from the System Guest Book
Conference Menu and ViewsThe Polycom CMA system Conference menu provides these views of the Conference list:
• Future—Displays the list of future conferences in the main window. Use this view to view and edit future conferences.
• Ongoing—Displays the list of active conferences in the main window. Use this view to manage ongoing conferences.
Users can only manage the conferences that appear in their Conference list. Users with Scheduler Permissions will only see their conferences in the Conference list. Users with Operator Permissions will see all conferences on the system in the Conference list. Users with just Administrator Permissions cannot view conferences.

Polycom CMA System Operations Guide
22 Polycom, Inc.
The Conference views have these sections.
Section Description
Views The views you can access from the page.
Conference Actions The set of available commands. The constant commands in the Conference views are:
• Refresh —Use this command to update the display with current information.
• Add —Use this command to create a new video and/or audio conference.
Conference List The context-sensitive Conference list for the selected view.
Conference Details Displays information about the selected conference. For more information, see “Conference Details” on page 63.
Conference Features
Displays the status of system features for the selected conference. For more information, see “Conference Features” on page 65.
Bridge (MCU) Features
Displays the status of MCU features for the selected conference. For more information, see “Bridge (MCU) Features” on page 66.
Participants Displays the list of participants for the selected conference. For more information, see “Participants List” on page 67.
Participant Details Displays information about the participant selected in the Participants list. For more information, see “Participant Details” on page 68.

Conference Scheduling Overview
Polycom, Inc. 23
Conference Views—Future and OngoingThe Conference list in both the Future and Ongoing view has these fields.
Field Description
Filter Use the filter to display other views of the conference list, which include:
• Future Only - Displays scheduled conferences that have not yet started
• Today Only - Displays scheduled conferences (completed, active, or future) for the current day and active ad hoc conferences
• Custom Date - Displays scheduled conferences (completed, active, or future) for a selected day. Select the day from the calendar.
• Ongoing Plus - Displays active and future scheduled conferences for the day. You can further filter this request by Owner, Conference Name, Endpoint Name, and Bridge.
• Today Plus - Displays scheduled conferences (completed, active, or future) for the current day, current ad hoc conferences, and all future conferences. You can further filter this request by Owner, Conference Name, Endpoint Name, and Bridge.
• Yesterday Plus - Displays completed scheduled conferences for yesterday and earlier. You can further filter this request by Owner and Conference Name.
For information on filters, see “Filter and Search a List”.
Export as Excel file Use this button to download the Conference list as currently displayed to a Microsoft Excel spreadsheet.
Status The state of the conference. For more information, see “Conference States” on page 24.
Type The type of scheduled conference. Possible values include:
• Video Conference —All conference participants have video endpoints.
• Audio Only Conference —All conference participants have audio endpoints. Audio only conferences require an MCU.
• Recurring Conference —The conference is one in a recurring series.
• Multi-Bridge Conference —The scheduler assigned the conference to multiple bridges and created bridge links.
Conference Name The system- or scheduler-assigned name of the conference. By default, the system assigns a conference name and appends the day and date to that name. The scheduler can change the system-assigned name.

Polycom CMA System Operations Guide
24 Polycom, Inc.
Conference StatesConferences may be in the following states.
Start Time The user-assigned start time for the conference. The system appends the time difference between the local time and the standard time.
Bridge If applicable, the user-assigned bridge for the conference. Possible values are:
• N/A—A bridge is not required for the conference.
• <Bridge Name>—The user assigned the conference to a single bridge. In this case, the bridge name is displayed.
• Multi bridge —The user assigned the conference to multiple bridges and created bridge links.
Owner The conference creator.
Field Description
State Description
Future Conference
Scheduled conference that has not yet started. This conference state is possible in all views except the Yesterday Plus view.
Completed Conference
A scheduled conference that occurred in the past. This conference state is possible in all views except the Future and Ongoing Plus view.
Active Conference
A conference that is still active/ongoing. This conference state is possible in all views except the Future and Yesterday Plus view.
Active Alerts Conference
The bridge on which the active/ongoing conference is being hosted has sent an alert. Examples of events that will trigger a bridge alert are:
• A participant is connected in secondary mode (audio only).
• A conference is not yet full (i.e., not all scheduled participants have joined the conference).
Declined Conference
Applies only to conferences scheduled through the Polycom Scheduling Plugin for Microsoft Outlook. This state indicates that most participants did not accept the conference invitation.
Conference End Warning
The conference is ending, i.e., it is in its last five minutes unless someone extends it.

Conference Scheduling Overview
Polycom, Inc. 25
Context-Sensitive Conference CommandsBesides the constant Refresh and Add commands, the Actions section may include these context-sensitive commands depending on the type of conference selected.
User Menu and Guest BookAll users (Schedulers, Operator, and Administrators) have access to the User Menu and Guest Book.
The Polycom CMA system User menu provides access to the system Guest Book. The Guest Book is a system-wide directory that includes guest participants who were added explicitly or saved during scheduling to the Guest Book. They are referred to as static entries because they are not imported through the dynamically updated enterprise directory or included in the system Global Address Book. The Guest Book is limited to 500 entries.
The Guest Book has these fields.
Command Description
Available for future conferences only
Edit Use this command to edit the selected conference. For more information, see “Edit a Conference” on page 36.
Available for future and past conferences
Delete Use this command to delete the selected conference.
Available for future, past, and active conferences
Copy Use this command to copy the selected conference.
Available for active conferences only
Manage Use this command to display the Manage Conference page for the conference selected in the Conference List. Use this command to manage participants and endpoints in the selected active conference. For more information, see “Manage an Active Conference” on page 41.
Terminate Ends the selected conference.
Field Description
Name The guest’s first and last name.
Email The guest’s email address. The system validates the email structure only.

Polycom CMA System Operations Guide
26 Polycom, Inc.
Context-Sensitive Guest Book CommandsThe Actions section of the Guest Book page may include these context-sensitive commands depending on the type of conference selected.
Add a Guest to the System Guest Book
To add a guest to the system Guest Book
1 Go to User > Guest Book and click Add Guest.
2 Configure the Guest Information section of the Add New Guest dialog box.
Location The location of the guest’s endpoint system. This is a free-form entry field that the system does not validate.
Number (Optional) The ISDN phone number for the user. This number is constructed from the Country code + Area/City code + phone number or entered as the modified dial number.
Join Mode Indicates whether the guest will use an audio endpoint or video endpoint to join conferences.
Dial Options Indicates whether the guest will dial into conferences, or that the system should dial out to the guest.
Dial Type Indicates whether the guest has an IP (H.323) or ISDN (H.320) endpoint.
Field Description
Command Description
Add Guest Use this command to add a new guest user.
Edit Guest Use this command to change information for a guest user.
Delete Guest Use this command to delete a guest from the Guest Book. Deleting a guest is a permanent operation.
Field Description
First Name The guest’s first name
Last Name The guest’s last name
Email The guest’s email address. The system validates the email structure only.

Conference Scheduling Overview
Polycom, Inc. 27
3 If the guest has an IP (H.32.3) endpoint, configure:
Location The guest’s location of the guest’s endpoint system. This is a free-form entry field that the system does not validate.
Dial Type Specify the protocol that the guest’s endpoint supports; either IP (H.323) or ISDN (H.320).
Join Mode Specify whether the guest will use an audio endpoint or video endpoint to join conferences.
NoteA guest may have multiple endpoints. To create , create a separate guestbook entry for each endpoint.
Dial Options Specify whether the guest will dial into conferences, or that the system should dial out to the guest.
NoteTo support both options, create a separate guestbook entry for each.
Field Description
Field Description
IP Address The IP address of the guest’s video or audio endpoint.
Extension The specific dial string for the guest. For Annex-O dialing, enter the alias@IP here, for example:
NotePolycom endpoints must register with a gatekeeper before they'll attempt an Annex-O call.
MCU Service Choose from the list of MCU services defined on the MCUs that the Polycom CMA system has registered. Leave this at Any Available Service unless you have specific knowledge of MCU services.
NoteThe Extension field in this dialog box cannot be configured.

Polycom CMA System Operations Guide
28 Polycom, Inc.
4 If the guest has an ISDN (H.320) endpoint and a modified dialing number (with a prefix or postfix):
a Click Use Modified Dial Number.
b Configure these settings:
5 If the guest has an ISDN (H.320) endpoint but no modified dialing number, configure these settings:
6 Click OK.
Field Description
Number The participant’s phone number.
MCU Service Choose from the list of MCU services defined on the MCUs that the Polycom CMA system has registered. Leave this at Any Available Service unless you have specific knowledge of MCU services.
NoteThe Extension field in this dialog box cannot be configured.
Field Description
Country The country to which the system will dial out to the guest.
Area/City Code The area code to which the system will dial out to the guest.
Number The participant’s phone number.
MCU Service Choose from the list of MCU services defined on the MCUs that the Polycom CMA system has registered. Leave this at Any Available Service unless you have specific knowledge of MCU services.
NoteThe Extension field in this dialog box cannot be configured.

Conference Scheduling Overview
Polycom, Inc. 29
Edit a Guest in the System Guest Book
To edit a guest in the system Guest Book
1 Go to User > Guest Book and select the guest of interest.
2 Click Edit Guest.
3 Change the Guest Information section and endpoint information sections of the Add New Guest dialog box, as needed. For more information about these fields, see “Add a Guest to the System Guest Book” on page 26.
4 Click OK.
Delete a Guest from the System Guest Book
To delte a guest from the system Guest Book
1 Go to User > Guest Book and select the guest of interest.
2 Click Delete Guest.
3 Click Yes to confirm the deletion.

Polycom CMA System Operations Guide
30 Polycom, Inc.

Polycom, Inc. 31
4Conference Management Operations
This chapter describes the Polycom® Converged Management Application™ (CMA™) system conference management operations. It includes these topics:
• Add/Schedule a Conference
• Edit a Conference
• Copy a Conference
• Edit a Participant’s Settings
• Edit a Room’s Settings
• View Scheduling Information for a Conference
• Manage an Active Conference
• Add Additional Participants to an Active Conference
• Add a Room to an Active Conference
• View the Video of a Participant in an Active Conference
• Join an Active Conference (Operator Only)
• Add a Participant from a Favorites List to an Active Conference (Operator Only)
• Add/Save a Participant to a Favorites List (Operator Only)
• Manage a Participant’s Endpoint During a Conference
• View a Participant’s Details During a Conference
• Terminate an Active Conference
• Delete a Conference

Polycom CMA System Operations Guide
32 Polycom, Inc.
Add/Schedule a ConferenceOnly users with Scheduler Permissions or Operator Permissions can schedule conferences. Users with just Administrator Permissions cannot work with conferences.
To add or schedule a new conference
1 Go to Conference > Future and click Add .
2 In the conference scheduling page, enter a Conference Name and set a conference Start Date, Start Time, and either an End Time or Duration.
3 To make the conference recurring:
a Click Recurrence and in the Appointment Recurrence dialog box, set:
» Recurrence frequency (Daily, Weekly, or Monthly)
» Recurrence day (Sunday through Saturday)
» Recurrence range (Start date and End After occurrences or End by date)
The maximum number of recurrences is 365.
b Click OK.
4 For a Video conference, you can change the template by clicking Default Template and selecting a different template.
5 For an Audio Only conference:
a Change the Conference Type to Audio Only.
b To change the template, click Default Audio Template and select a different template.
6 To add conference participants from the local directory or enterprise directory:
a Enter all or part of a participant’s Last Name or First Name into one of the name fields and click Add Participants.
The Add Participants dialog box appears with the list of participant names that meet your search criteria.
• Conference templates provide default conference settings. When you select a different template, you are changing the default conference settings for your conference.
• The Default Template and Default Audio Templates are stored in the system database and their names are not localized.

Conference Management Operations
Polycom, Inc. 33
b Select the participant’s name from the list.
The participant’s name appears in the underlying Selected Participants and Rooms list.
c Repeat steps a and b to add all domain participants and then click Close.
7 To add a guest from the Guest Book:
a Click Add From Guest Book.
b In the Add From Guest Book dialog box, select the guest’s name from the list.
The guest’s name appears in the underlying Selected Participants and Rooms list.
c Repeat step b to add all participants from the Guest Book and then click Close.
8 To add new guest participants (participants not available from the local directory, enterprise directory, or Guest Book):
a Click Add Guest.
b In the Add Guest dialog box, enter the following required participant information: First Name, Last Name, Email address, and Location. Note that the system allows duplicates in guest book entries. Also, the Email address field is ASCII only. For more information, see “Field Input Requirements” on page 9.
c Specify how the participant will join the conference.
• Depending on the search domain, the search function may return different results. See “Filter and Search a List” on page 9.
• The search results only include participants associated with endpoints.
Setting Description
In Person The participant will attend the conference by going to a room that is included in the conference or joining another participant who is attending the conference.
Audio Only The participant will attend the conference by telephone. The system will either call out to the participant or the participant will dial in.
Use Video The participant will attend the conference using a video endpoint system. The system will either call out to the participant or the participant will dial in.

Polycom CMA System Operations Guide
34 Polycom, Inc.
d For a guest with an audio endpoint, set Dial Type to IP or ISDN as needed.
e For a guest with a video endpoint system:
» Set the Bit Rate, Dial Options, and Dial Type as required. You can change the connection speed for an endpoint up to the maximum speed specified by the conference template.
» If you select Dial Out and a Dial Type of IP, enter the guest’s phone Number.
» If you select Dial Out and a Dial Type of ISDN and the system must use a specific dialing prefix to call the guest, select Use Modified Dial Number and enter the guest’s complete phone number including prefix, country code, area or city code, and phone number.
» If you select Dial Out and a Dial Type of ISDN and the system does not need to use a specific dialing prefix to call the guest, select the appropriate Country and enter the guest’s Area/City Code and phone Number.
f Select Save to Guest Book to have this guest participant added to the system Guest Book.
g Click OK.
The guest’s name appears in the Selected Participants and Rooms list.
9 Adjust the conference date and time as needed to match participant and endpoint availability.
a Review their availability and adjust the conference date and time as needed.
b To edit a participant’s dial settings, select the participant from the Selected Participants and Rooms list and click Edit. For more information on editing participants settings, see “Edit a Participant’s Settings” on page 37.
10 To add conference rooms to the Selected Participants and Rooms list:
a Click Select Site.
b Select the site of interest from the site list
The conference room list for the selected site appears.
c Select the conference room of interest from the list.
• For participants who are associated with endpoints, the Polycom CMA system schedules their availability according to the endpoint’s availability.
• For participants with multiple endpoints, you must check the availability for each endpoint. Click Call Info to change the participant’s endpoint.

Conference Management Operations
Polycom, Inc. 35
The conference room name appears in the underlying Selected Participants and Rooms list.
d Repeat steps b and c to add all required conference rooms and then click OK.
11 Once you’ve added your participants, you can assign them leadership roles:
a To assign a participant the lecturer role, in the Lecturer field select the participant’s name from the list.
b To assign a participant the video chairperson role, in the Video Chairperson field select the participant’s name from the list.
12 If you have advanced scheduler permissions, now is the time to edit conference settings and make bridge selections. For more information, see “Advanced Scheduling Operations” on page 55.
13 To edit a participant’s dial settings, select the participant from the Selected Participants and Rooms list and click Edit. For more information on editing participants settings, see step 5 on page 38.
14 When finished, click Schedule.
The system verifies that it has a bridge with the capabilities and resources required for your conference. If it does, the conference notification email appears with a message indicating Conference Successfully Scheduled.
15 To exit without sending an email to your participants, click Skip Email.
16 To send an email notification to your participants:
a Copy additional people on the notification and/or add notes about the conference.
Note that the To, CC, and BCC fields are ASCII only. For more information, see “Field Input Requirements” on page 9.
b As needed, add information in the Enter additional notes to include in the email section.
c Click Send.
The system sends the conference notification email. The Future view appears. Your conference appears in the conference list.
The email that the Polycom CMA system sends can be read by email systems that accept plain text emails, iCal attachements, or vCal attachments.
• If the Lecturer or Video Chairperson features are not available, then either you do not have permission to implement these features or the selected template does not support these features.
• To be assigned Lecturer, a participant must have a manageable video endpoint.

Polycom CMA System Operations Guide
36 Polycom, Inc.
Edit a ConferenceOnly future conferences can be edited. Active or past conferences cannot be edited.
Users with Scheduler Permissions can edit their own conferences. Users with Operator Permissions can edit any conference. Users with just Administrator Permissions cannot work with conferences.
To edit a future conference
1 Go to Conference > Future.
2 Select the conference of interest and click Edit .
3 If you select a recurring conference, a dialog box appears asking if you want to edit all conferences in the series or just the selected one. Make the appropriate choice and click Edit.
The conference scheduling page appears.
4 For a Video conference, you can change the template by clicking Default Template and selecting a different template.
5 For an Audio Only conference:
a Change the Conference Type to Audio Only.
b To change the template, click Default Audio Template and select a different template.
6 Make the required changes to the conference date, participants, rooms, or other settings. For information on performing these tasks, see “Add/Schedule a Conference” on page 32.
7 When finished, click Schedule.
The system verifies that it has a bridge with the capabilities and resources required for your conference. If it does, the conference notification email appears with a message indicating Conference Successfully Scheduled.
8 To exit without sending an updated email to your participants, click Skip Email.
9 To send an updated email to your participants:
a Copy additional people on the notification and/or add notes about the conference.
• Conference templates provide default conference settings. When you select a different template, you are changing the default conference settings for your conference.
• The Default Template and Default Audio Templates are stored in the system database and their names are not localized.

Conference Management Operations
Polycom, Inc. 37
Note that the To, CC, and BCC fields are ASCII only. For more information, see “Field Input Requirements” on page 9.
b Click Send.
The system sends the updated conference notification email. The Future view appears. Your conference appears in the conference list.
Copy a ConferenceFuture, ongoing, or past conferences can be copied as a template for a future conference.
Users with Scheduler Permissions can copy their own conferences. Users with Operator Permissions can copy any conference. Users with just Administrator Permissions cannot work with conferences.
To copy a conference
1 Go to the appropriate conference view.
2 Select the conference of interest and click Copy .
3 If you used a template other than the default when you created the conference, reselect the template.
4 Make the required changes to the conference date, participants, rooms, or other settings. For information on performing these tasks, see “Add/Schedule a Conference” on page 32.
5 When finished, click Schedule.
The system verifies that it has a bridge with the capabilities and resources required for your conference. If it does, the conference notification email appears with a message indicating Conference Successfully Scheduled.
6 To exit without sending an updated email to your participants, click Skip Email.
Edit a Participant’s SettingsParticipant’s settings for future scheduled conferences may be edited. You cannot edit a participant’s settings for an active or past conference.
Users with Scheduler Permissions can edit a participant’s settings for their own future conferences. Users with Operator Permissions can edit a participant’s settings for any conference. Users with just Administrator Permissions cannot work with conferences.

Polycom CMA System Operations Guide
38 Polycom, Inc.
To edit a participant’s settings
1 Go to Conference > Future.
2 Select the conference of interest and click Edit .
3 If you select a recurring conference, a dialog box appears asking if you want to edit all conferences in the series or just the selected one. Make the appropriate choice and click Edit.
4 In the conference scheduling page, select the participant of interest from the Selected Participants and Rooms list and click Edit.
5 In the Edit Participant Settings dialog box, edit the participant settings as required.
a Select the participant’s endpoint, if the participant has more than one available.
b Specify how the participant will join the conference.
c For a participant with an audio-only endpoint, set Dial Type to IP or ISDN as required.
d For a participant with a video endpoint:
» Set the Bit Rate, Dial Options, and Dial Type as required. You can change the connection speed for an endpoint up to the maximum speed specified by the conference template.
» If you select Dial Out and a Dial Type of IP, enter the guest’s phone Number.
Setting Description
In Person The participant will attend the conference by physically joining another participant who is attending the conference.
Audio Only The participant will attend the conference by telephone. The system will either call out to the participant or the participant will dial in.
Use Video The participant will attend the conference using a video endpoint system. The system will either call out to the participant or the participant will dial in.
Not all of these settings are applicable to all endpoint types, so some selections may be grayed out. See your endpoint documentation to understand supported settings.

Conference Management Operations
Polycom, Inc. 39
» If you select Dial Out and a Dial Type of ISDN and the system must use a specific dialing prefix to call the guest, select Use Modified Dial Number and enter the guest’s complete phone number including prefix, country code, area or city code, and phone number.
» If you select Dial Out and a Dial Type of ISDN and the system does not need to use a specific dialing prefix to call the guest, select the appropriate Country and enter the guest’s Area/City Code and phone Number.
6 Click OK.
Edit a Room’s SettingsYou can edit a room’s call settings for future scheduled conferences. The changes apply only to the selected conference.
Users with Scheduler Permissions can edit a room’s call settings for their own future conferences. Users with Operator Permissions can edit a room’s call settings for any conference. Users with just Administrator Permissions cannot work with conferences.
To edit a room’s settings
1 Go to Conference > Future.
2 To delete a past conference, select the appropriate filter (such as Yesterday Plus).
3 Select the conference of interest and click Edit .
4 If you select a recurring conference, a dialog box appears asking if you want to edit all conferences in the series or just the selected one. Make the appropriate choice and click Edit.
5 In the conference scheduling page, select the room of interest from the Selected Participants and Rooms list and click Edit.
6 In the Edit Room Settings dialog box, edit the room settings as required.
a Select the room’s endpoint, if the room has more than one available.
b For a room with an audio endpoint, set Dial Type to IP or ISDN as required.
c For a room with a video endpoint:
Not all of these settings are applicable to all endpoint types, so some selections may be grayed out. See your endpoint documentation to understand supported settings.

Polycom CMA System Operations Guide
40 Polycom, Inc.
» Set the Bit Rate, Dial Options, and Dial Type as required. You can change the connection speed for an endpoint up to the maximum speed specified by the conference template.
» If you select Dial Out and a Dial Type of IP, enter the room’s phone Number.
» If you select Dial Out and a Dial Type of ISDN and the system must use a specific dialing prefix to call the room, select Use Modified Dial Number and enter the room’s complete phone number including prefix, country code, area or city code, and phone number.
» If you select Dial Out and a Dial Type of ISDN and the system does not need to use a specific dialing prefix to call the room, select the appropriate Country and enter the room’s Area/City Code and phone Number.
7 Click OK.
View Scheduling Information for a ConferenceUsers with Scheduler Permissions can view scheduling information for their own future conferences. Users with Operator Permissions can view scheduling information for any conference. Users with just Administrator Permissions cannot work with conferences.
To view the scheduling information for a conference
1 To see the scheduling information for a future conference, go to Conference > Future. To see the scheduling information for an active conference, go to Conference > Ongoing.
2 From the list of All Conferences, select the conference of interest and click View.
The View conference page appears displaying the following details about the conference:
Section Description
Start Date The date on which the conference started or will start.
End Date The date on which the conference is scheduled to end.
Duration The scheduled duration of the conference in hours and minutes.
Recurrence The recurrence information for the conference.
Owner The person who scheduled the conference.

Conference Management Operations
Polycom, Inc. 41
Manage an Active ConferenceThe Manage Conference page provides a detailed view of a single active conference and allows you to make some changes to your active conference.
Users with Scheduler Permissions can manage their own active conferences. Users with Operator Permissions can manage any active conference. Users with just Administrator Permissions cannot cannot work with conferences.
To manage an active conference
1 Go to Conference > Ongoing.
2 From the list of All Conferences, select the conference of interest and click Manage .
The conference page appears in a new tab displaying the Participants list. The Participants list displays these settings:
Type The type of conference. Possible values include:
• Audio Only
• Audio Video
Conference Password
The conference password assigned by the system to the conference.
For future conferences, users with Advanced Scheduler permissions can change this conference password. See “Edit Conference Settings” on page 55.
Chairperson Whether or not the conference has a chairperson. This field will include a participant’s name or N/A.
For future conferences, users with Advanced Scheduler permissions can assign a conference chairperson. See “Edit Conference Settings” on page 55.
Participants List
Information for the participant, including
• Name
• Dial Mode
• Participant Type
• Access
• Endpoint
Section Description

Polycom CMA System Operations Guide
42 Polycom, Inc.
Section Description
Status The state of the participant’s connection. Possible states include:
• Idle
• Connecting/Updating
• Connected
• Connected with error
• Not muted
• Admin muted
• Self muted
• Help request
• Audio unavailable
• Video unblocked
• Video blocked
• Video unavailable
Type The type of conference. Possible values include:
• Audio Only
• Audio Video
• Bridge Link
• VIP
Name The participant’s name.
Endpoint The name assigned to the participant’s endpoint when it registered or was added to the system.
Access The endpoint’s network interface type. Possible values include:
• H323
• ISDN
Address The IP address or ISDN number of the participant’s endpoint (if a dial-out).
Bit Rate The sum of the audio and video data transfer rate (in kbps) of the participant’s endpoint.
Dial Mode How the participant joined the call. Possible values include:
• Audio or Video Dial-In
• Audio or Video Dial-Out
Bridge The MCU on which the participants call resides.

Conference Management Operations
Polycom, Inc. 43
Use these conference actions as needed:
Command Use this command to...
Copy . Function not available to users with Scheduler Permissions only.
Schedule a new conference that duplicates the selected conference settings.
View Function not available to users with Scheduler Permissions only.
View information for the selected conference.
Terminate End an active conference.
Extend Duration Extend the duration of an active conference.
Change Layout For applicable endpoints.
Change the default video layout for the conference display.
Choices are illustrated in the Choose Video Mode dialog box.
Add Participant Add one or more participants to the selected conference.
Add Guest Add a guest to the selected conference.
Add Room Add one or more rooms to the selected conference.
Add Favorites Function available to users with Operator Permissions only.
Add participants from one of your Favorites lists to the selected conference.
Join Conference Function available to users with Operator Permissions only.
Join the conference, monitor the conference, and talk with participants as meeded.

Polycom CMA System Operations Guide
44 Polycom, Inc.
3 Use these participant actions as needed:
Command Use this command to...
Mute orUnmute Audio
Function available to users with Operator Permissions only.
Mute or unmute the selected participant’s audio line into the conference. This option appears only when the conference is running on an external MCU. The Audio column in the Participants list shows the current status of this setting.
Block orUnblock Video
Function available to users with Operator Permissions only.
Block or unblock the selected participant’s video line into the conference. This option appears only when the conference is running on an external MCU. The Video column in the Participants list shows the current status of this setting.
Connect orDisconnect
Function available to users with Operator Permissions only.
Disconnect or reconnect the selected participant to the conference. A disconnected participant is still associated with the conference and cannot be scheduled for other conferences.
Remove Remove the selected participant from the Participants list at which time the participant can be scheduled for another conference.
Send Message Send a message to the selected participant’s registered Polycom endpoint. The message appears briefly on the monitor for the selected video endpoint.
Acknowledge Help
Function available to users with Operator Permissions only.
Acknowledge a request for help and send a message to the requesting endpoint.
Manage Device Function available to users with Operator Permissions only.
Open the web-based user interface for the selected participant’s endpoint in a new browser window.
Save as Favorite Function available to users with Operator permissions only and only when the selected participant has an associated endpoint to which the system can dial out.
Save the selected participant to an existing Favorites List.
Connect All New Function available only when the system is displaying the New Conference Participants list.
Initiates the system dial out to new participants.

Conference Management Operations
Polycom, Inc. 45
Add Additional Participants to an Active ConferenceYou can add additional participants to an active conference. These participants can come from your local directory, enterprise directory, or guest book.
Users with Scheduler Permissions can add additional participants to their own active conferences. Users with Operator Permissions can add additional participants to any active conference. Users with just Administrator Permissions cannot cannot work with conferences.
To add additional conference participants to an active conference
1 Go to Conference > Ongoing.
2 From the list of All Conferences, select the conference of interest and click Manage .
3 To add participants from your local directory or enterprise directory:
a Click Add Participant .
b Enter all or part of a participant’s Last Name or First Name into the appropriate field and click Search.
A list appears of participant’s names that meet your search criteria.
c Select the participant’s name from the list.
The participant’s name appears in the underlying New Conference Participants list.
d Repeat steps a and b to add all domain participants and then click Close.
e If necessary, edit the new participants’ settings. See “Edit a Participant’s Settings” on page 37.
4 To add participants from the Guest Book:
a Click Add Guest.
b From the Guest Book dialog box, select the guest’s name from the list.
The guest’s name appears in the underlying New Conference Participants list.
Dial Out is the only Dial Option the system allows for adding participants to an active conferences.
• Depending on the search domain, the search function may return different results. See “Filter and Search a List” on page 9.
• The search results only include users associated with endpoints.

Polycom CMA System Operations Guide
46 Polycom, Inc.
c Repeat step b to add all guest participants and then click Close.
5 To add new guest participants (participants not available from the local directory, enterprise directory, or Guest Book):
a Click Add Participant and then click Add Guest.
b In the Add Guest dialog box, enter the participant’s Name, Email address, and Location. Note that the Email address field is ASCII only.
For more information, see “Field Input Requirements” on page 9.
c Specify how the participant will join the conference.
d For a guest with a video endpoint:
» Set the Bit Rate and Dial Type as required. You can change the connection speed for an endpoint up to the maximum speed specified by the conference template.
» If you select a Dial Type of IP, enter the guest’s phone Number.
» If you select a Dial Type of ISDN and the system must use a specific dialing prefix to call the guest, select Use Modified Dial Number and enter the guest’s complete phone number including prefix, country code, area or city code, and phone number.
» If you select a Dial Type of ISDN and the system does not need to use a specific dialing prefix to call the guest, select the appropriate Country and enter the guest’s Area/City Code and phone Number.
e Select Save to Guest Book to have this guest participant added to the system Guest Book.
f Click OK.
The participant’s name appears in the underlying New Conference Participants list.
6 To initiate the system dial out to new participants, select the participants of interest from the New Conference Participants list and click Connect New Participants.
The system dials out to the participants and adds them to the conference.
Setting Description
In person The participant will attend the conference by physically joining another participant who is attending the conference.
Use Video The participant will attend the conference using a video endpoint system.

Conference Management Operations
Polycom, Inc. 47
Add a Room to an Active ConferenceUsers with Scheduler Permissions can add rooms to their own active conferences. Users with Operator Permissions can add rooms to any active conference. Users with just Administrator Permissions cannot cannot work with conferences.
To add a room to an active conference
1 Go to Conference > Ongoing.
2 From the list of All Conferences, select the conference of interest and click Manage .
3 From the Conference Actions list, click Add Room.
4 From the Add Room dialog box, select the site location of the room.
The list of conference rooms at the site appears.
5 Select the conference room of interest.
The conference room name appears in the underlying New Conference Participants list.
6 Click Close.
7 To initiate the system dial out to the room, select the room from the New Conference Participants list and click Connect New Participants.
The system dials out to the room endpoint system and adds the room to the conference.
View the Video of a Participant in an Active ConferenceUsers with Scheduler Permissions can view participants’ video for their active conferences. Users with Operator Permissions can view participants’ video for any active conference. Users with just Administrator Permissions cannot work with conferences.
To view the video of a participant in an active conference
1 Go to Conference > Ongoing.
2 From the list of All Conferences, select the conference of interest and click Manage .
3 Select a participant from the Participants list.
The selected participant’s video appears in the Conference Image section of the interface.
4 Click Shuffle to shuffle to the next participant’s video.

Polycom CMA System Operations Guide
48 Polycom, Inc.
Join an Active Conference (Operator Only)Users with Operator Permissions can join an active conference to offer conference support. Users with just Administrator Permissions cannot manage conferences.
To join an active conference
1 Go to Conference > Ongoing.
2 From the list of All Conferences, select the conference of interest and click Manage .
3 From the Conference Actions list, click Join Conference.
The Join Conference dialog box appears.
4 If the conference uses bridge cascading, select a bridge for the call into the conference.
5 If you have multiple endpoints, choose the endpoint you wish to use to join the conference.
6 Click Join Conference.
You’re endpoint is added to conference with your video blocked but your audio not muted.
Add a Participant from a Favorites List to an Active Conference (Operator Only)
Users with Operator Permissions can work with favorites lists. Users with just Administrator Permissions cannot work with favorites lists.
To add a participant from a favorites list to an active conference
1 Go to Conference > Ongoing.
2 From the list of All Conferences, select the conference of interest and click Manage .
3 From the Conference Actions list, click Add Favorits.
4 From the Favorites List, expand the list of interest .
The names of the participants in the list is displayed.
5 Select the participant of interest from the list.
The participant’s name appears in the underlying New Conference Participants list.

Conference Management Operations
Polycom, Inc. 49
6 Repeat steps 4 and 5 to add all participants from Favorite’s List and then click Close.
7 To initiate the system dial out to new participants, select the participants of interest from the New Conference Participants list and from the New Participants Action menu, click Connect New Participants.
The system dials out to the participants and adds them to the conference.
Add/Save a Participant to a Favorites List (Operator Only)Users with Operator Permissions can work with favorites lists. Users with just Administrator Permissions cannot work with favorites lists.
To add or save a conference participant to a favorites list
1 Go to Conference > Ongoing.
2 From the list of All Conferences, select the conference of interest and click Manage .
3 From the Participants list, select the participant of interest.
4 From the Participant Actions menu, click Save as Favorite.
The names of the participants in the list is displayed.
5 From the Save as Favorite Participant dialog box, select the Favorite List to which to save the participant and click OK.
Manage a Participant’s Endpoint During a ConferenceUsers with Scheduler Permissions can manage a participant’s endpoint for their own future conferences. Users with Operator Permissions can manage a participant’s endpoint for any conference. Users with just Administrator Permissions cannot edit conferences.
The Manage page also allows you to manage conference participant’s endpoints. Essentially, you become the conference moderator.
To manage a participant’s endpoint
1 Go to Conference > Ongoing.
• These context-sensitive commands only appear when the participant’s endpoint supports the action.
• These commands work for rooms on the participant list as well.

Polycom CMA System Operations Guide
50 Polycom, Inc.
2 Select the conference of interest and click Manage .
The Participants list appears.
3 To view participants geographically, click .
4 Double-click on the participant of interest.
5 Use these participant actions as needed. These actions are also available from the View Participants Details dialog box.
Command Use this command to...
Mute orUnmute Audio
Function available to users with Operator permissions only.
Mute or unmute the selected participant’s audio line into the conference. This option appears only when the conference is running on an external MCU. The Audio column in the Participants list shows the current status of this setting.
Block orUnblock Video
Function available to users with Operator permissions only.
Block or unblock the selected participant’s video line into the conference. This option appears only when the conference is running on an external MCU. The Video column in the Participants list shows the current status of this setting.
Connect orDisconnect
Function available to users with Operator permissions only.
Disconnect or reconnect the selected participant to the conference. A disconnected participant is still associated with the conference and cannot be scheduled for other conferences.
Remove Remove the selected participant from the Participants list at which time the participant can be scheduled for another conference.
Send Message Send a message to the selected participant’s registered Polycom endpoint. The message appears briefly on the monitor for the selected video endpoint.
Acknowledge Help
Function available to users with Operator permissions only.
Acknowledge a request for help and send a message to the requesting endpoint.
Manage Device (Function available to users with Operator permissions only.)
Open the web-based user interface for the selected participant’s endpoint in a new browser window.

Conference Management Operations
Polycom, Inc. 51
View a Participant’s Details During a ConferenceYou can view details for a participant’s endpoint while it is in conference.
To view a participant’s endpoint details
1 Go to Conference > Ongoing.
2 Select the conference of interest and click Manage .
The Participants list appears.
3 To view participants geographically, click .
4 Double-click on the participant of interest.
The View Participant Details dialog box appears with the Call Properties displayed. It includes the Near End and Far End video, the Participant’s name, Status, Errors, Warnings, Endpoint Type, Address, Access, and Bit Rate.
It also includes a list of Participant Actions. For more information about these actions, see “Manage a Participant’s Endpoint During a Conference” on page 49.
5 To view additional participant details, change the selection in the Call Properties drop-down menu.
— If you select Device, you’ll see these participant details:
Setting Description
Endpoint Type Usually the endpoint model, such as Polycom HDX system.
IP Address The IP address for the endpoint.
Site The location of the endpoint as identified by its IP address and the subnet of the site.
Gatekeeper The gatekeeper with which the endpoint is registered.
GDS The Global Directory Service for the endpoint. Usually the Polycom Global Address Book.
Presence Whether or not the endpoint is registered with a Presence service, so that its availability can be reported.
Device Managed Whether or not the endpoint is registered with a Provisioning service, so that it can be configured automatically.

Polycom CMA System Operations Guide
52 Polycom, Inc.
— If you select Call Details, you’ll see these participant details:
— If you select Call Quality of Service, you’ll see these standard service measurements: Total Packet Loss, % Packet Loss, Audio Packet Loss, Video Packet Loss, Audio Jitter, and Video Jitter.
ISDN Line Status The status of the ISDN line. Possible values include:
• Operational
• Non-operations
This field is blank for the following device types: PVX, MGC, RMX, GW/MCU, Other, and Tandberg.
Alias Type If the endpoint has an alias designation, the type of alias. Possible types include E.164, H.323 ID, URL, Transport Address, E-mail, Party Number, and Unknown.
Alias Value Value for the alias type shown.
Setting Description
Setting Description
Video Protocol The video connection protocol, both transmission (Tx) and reception (Rx), the endpoint is using. Possible values include:
• H.261
H.261 is an ITU standard designed for two-way communication over ISDN lines and supports data rates which are multiples of 64Kbit/s. H.261 supports CIF and QCIF resolutions.
• H.263
H.263 is based on H.261 with enhancements that improve video quality over modems. It supports CIF, QCIF, SQCIF, 4CIF and 16CIF resolutions.
• H.264
Video Format The video format, both transmission (Tx) and reception (Rx), the endpoint is using.
Video Rate The video bandwidth negotiated with the far site.
Video Rate Used The actual video bandwidth used in the call to the far site.
Video Frame Rate Specifies the frame rate to use.
Audio Rate The audio bandwidth negotiated with the far site
Audio Protocol The audio connection protocol, both transmission (Tx) and reception (Rx), the endpoint is using.

Conference Management Operations
Polycom, Inc. 53
Terminate an Active Conference
To terminate an active conference
1 Go to Conference > Ongoing.
2 Select the conference of interest and click Terminate .
3 Click Terminate to confirm the termination.
Delete a ConferenceYou can delete future or past conferences. You cannot delete active conferences.
To delete a conference
1 Go to Conference > Future.
2 To delete a past conference, select the appropriate filter (such as Yesterday Plus).
3 Select the conference of interest and click Delete .
4 If you select a recurring conference, a dialog box appears asking you if you want to delete just the conference you selected or all conferences in the series. Make the appropriate choice. Active conferences in the series cannot be deleted.
5 Click Delete to confirm the deletion.
The conference is deleted. For future conferences, the system emails the change to the conference owner and participants and releases the participant and room resources.

Polycom CMA System Operations Guide
54 Polycom, Inc.

Polycom, Inc. 55
5Advanced Scheduling Operations
This chapter describes how users with advanced scheduler permissions have more options when scheduling conferences using the Polycom® Converged Management Application™ (CMA™) system.
When scheduling conferences, users with advanced scheduler permissions can:
• Edit Conference Settings
• Select a Bridge for a Conference
• Create a Cascaded Conference Across Multiple Bridges
Edit Conference SettingsIf you have Scheduler Permissions and an Advanced Scheduling level, you can overwrite certain conference template settings as described here. However, be careful when doing so. If you have an environment with mixed MCU types (e.g., with both Polycom MGC and RMX systems), and the conference you schedule is hosted on a Polycom RMX system, some of the settings you specify here may be overridden by the RMX profile.
You can edit conference settings only for scheduled conferences. You cannot edit conference settings for active conferences.
• A profile is a collection of advanced conference settings that reside on the MCU (Polycom MGC or RMX system). Only an RMX profile can override conference template settings.
• Two conferences scheduled with the same template may have different settings and behavior if they land on different types of MCUs. You can minimize or eliminate such differences by ensuring that all MCUs are similarly configured and that all Polycom CMA system templates are synchronized with RMX profiles.

Polycom CMA System Operations Guide
56 Polycom, Inc.
To edit the conference settings
1 On the conference scheduling page, as you are adding or editing a conference, click Edit Conference Settings.
2 As needed, configure these settings on the Conference Settings dialog box. The settings that you can edit may depend on the template selected.
Setting Description
Conference Password
By default, the system assigns an eight-digit Conference Password and provides this password to participants within the content of the conference notification email.
You can change this password to another four- through eight-digit number.
Enable Chairperson
You can select a video chairperson to control the conference from his or her video endpoint system. The video chairperson must have a video endpoint system and Chairperson conferences require an MCU.
Notes• If the conference template has the Conference
Requires Chairperson parameter enabled, then Enable Chairperson is automatically selected and cannot be changed.
• If a conference is scheduled on a Polycom RMX 2000/4000 system and the RMX profile has Conference Requires Chairperson selected but the template does not, and the conference is scheduled without a chairperson, then all users will remain in the waiting room and will not be able to join the conference.
• Polycom RMX 1000 systems do not support the Chairperson feature.
Chairperson Password
If Enable Chairperson is selected, the system assigns an eight-digit Chairperson Password and provides this password to the video chairperson in a separate email.
If Enable Chairperson is selected, the chairperson must enter this eight-digit password at his or her video endpoint to assume control of the conference.
You can change this password to another four- through eight-digit number.

Advanced Scheduling Operations
Polycom, Inc. 57
Dial Options You have three options:
• To create a conference for which the same dial-in information and a PIN code are assigned to all conference participants, use the Dial-In setting. This setting allows participants to dial in from an audio or video endpoint and connect to the same conference on the MCU.
• To dial out to all participants in the conference, use the Dial-Out setting.
• To allow participants both options, select Dial-In+Dial-Out.
NoteWhen you change a conference from Dial-In to Dial In+Dial Out, the selected resources remain set to Dial-In. You must change them manually.
Always Use MCU This setting forces the conference to an MCU and prevents video endpoints from connecting to each other directly. This setting is automatically selected and cannot be changed when Audio Only is the conference type or when Enable Chairperson is selected.
Video Mode Determines the initial layout on a video endpoint's monitor for a multipoint conference that requires an MCU. The options are:
• Switching. Indicates that the display changes each time the speaker changes, and everyone sees the current speaker.
• Continuous Presence. Displays several panels on the monitor, each showing a different participant, and allows you to see all conference participants at once. You can select a specific layout, with a certain number of windows open.
• Automatic Layout is a continuous presence layout, in which the number of participants determines the number of panels.
Bit Rate Specifies the maximum connection speed for endpoints in the conference. Individual endpoints that specify a lower connection speed connect at that lower speed. Endpoints that specify a higher connection speed connect at the speed identified in the conference template.
If you select a higher speed than an endpoint can support, the speed for that endpoint is reduced; however, the conference uses the default connection speed for endpoints that can match it. If you place the calls through an endpoint with an embedded MCU, the behavior depends on the capabilities of that endpoint.
Setting Description

Polycom CMA System Operations Guide
58 Polycom, Inc.
Bit Rate (continued)
When the dial speed is higher than the number of channels defined in the H.320 service for the endpoint, you receive a warning. To continue, lower the dial speed to less than or equal to the ISDN capability of the endpoint.
Higher speed is important for high-quality video in a conference. Because higher speeds use greater bandwidth, scheduling a high-bandwidth conference may limit the number of conferences that you can reserve at one time.
NoteThe bit rate can be set at the network level, the endpoint level, and the conference level. If there is a discrepancy between these bit rate settings, the system implements the lowest bit rate setting. The only exception, is that the bit rate in the RMX profile takes precedence over the bit rate in the conference settings.
People + Content Controls the ability for one endpoint to send two types of data—a data stream and a video stream—over the same bandwidth to display people and content. The receiving endpoint handles the two video streams differently and may display them on separate screens or through video switching mode.
Endpoints that do not support the selected method connect with either video through IP or audio only through ISDN.
Select from these available settings:
• None. Select this option when dual data streams are not required.
• People +Content. This enables the industry standard H.239 dual streams for endpoints that support H.239 or the Polycom proprietary People+Content dual streams for older Polycom endpoints without H.239 capabilities. The MCU requires that conferences with People + Content use a minimum speed of 192 K.
• People and Content VO. This Polycom proprietary technology works with PictureTel endpoints. Select this option for older endpoints.
• Visual Concert PC. Select this option for use with Polycom ViewStation MP/512/SP/323 endpoints.
• Visual Concert FX. Select this option for use with Polycom ViewStation FX/EX and VS4000 endpoints.
• Duo Video. This setting supports IP and ISDN and is available with Tandberg endpoints, in which one part of the conference is set as the video conference and the other as the presentation conference.
Setting Description

Advanced Scheduling Operations
Polycom, Inc. 59
3 Continue adding or editing the conference, as described in “Conference Management Operations” on page 31.
Select a Bridge for a ConferenceBy default when you add a conference, the Polycom CMA system will automatically select a bridge for the conference. However, if you have advanced scheduler permissions, you can select a specific bridge for your conferences.
To select a single bridge for a conference
1 When you’re adding or editing a conference, after you’ve made all of your other conference configuration choices, click Bridge Selection and select Single Bridge.
A bridge selection drop down list appears based on the template selection and conference settings.
2 From the MCU list, select a specific MCU to host the conference.
3 Continue adding or editing the conference, as described in “Conference Management Operations” on page 31.
T.120 Mode For MGC-hosted conferences only, selects the protocols and specifications for multipoint data communication.
In the T.120 menu, select the speed for the T.120 connection. See your IT department to determine the best combinations for your conferences. To disable the T.120 mode, select None.
If you select T.120, these options may be available, according to the participant’s endpoint and software:
• Application Sharing. Allows two or more participants to work on the same document or application, even when only one participant has the application. In application sharing, one participant launches the application, and it runs simultaneously on all other computers.
• File Transfer. Enables participants to send files to each other.
• Chat or Whiteboard. Allows participants to communicate with each other by writing.
In all of these modes, participants can view and hear each other.
Setting Description

Polycom CMA System Operations Guide
60 Polycom, Inc.
Create a Cascaded Conference Across Multiple Bridges
To create a cascaded conference across multiple bridges
1 When you’re adding or editing a conference, after you’ve made all of your other conference configuration choices, click Bridge Selection and select Multi Bridge.
The Schedule button changes to a Manual Cascade button and the Recurrence button is grayed out.
2 Click Manual Cascade.
The People To Bridges dialog box appears displaying the selected conference participants and their bridge assignments. Bridge assignments default to Auto. These system assignments are based on bridge capacity and/or least cost routing principles.
In the Selected Bridge Availability section, the system shows a count of the available ports on the available bridges for the specified time period. If the port count is within 5% of the maximum ports available, it is displayed in red.
3 To change a bridge assignment for a selected participant, click Auto and select a bridge from the pull-down menu.
4 When you’ve completed all bridge assignments, click Next.
The Bridge To Bridge Links dialog box displays a graphical view of the selected bridges.
5 To add a hub bridge (a bridge used to connect one bridge to another), from the Available Bridges window, select a bridge and click Add Bridge.
6 Specify bridge-to-bridge connections by selecting the bridges of interest and clicking Add Link.
The link is graphically represented by an arrow. The bridge at the base of the arrow dials to the bridge at the point of the arrow.
A Polycom CMA system can only show port counts for conferences scheduled via the system. Ad hoc conferences are not included in the port count.
If an MCU does not show up in the Bridge To Bridge Links dialog box, then the MCU software does not support cascading.

Advanced Scheduling Operations
Polycom, Inc. 61
7 In the Add Link dialog box, select the Link Type.
8 When finished, click Schedule.
The system verifies that it has a bridge with the capabilities and resources required for your conference. If it does, the Conference Email Notification page appears with a message indicating Conference Successfully Scheduled.
9 To exit without sending an email to your participants, click Skip Email.
10 To send an email notification to your participants, in the Conference Email Notification page:
a Copy additional people on the notification and/or add notes about the conference.
b Click Send.
Note that the To, CC, and BCC fields are ASCII only. For more information, see “Field Input Requirements” on page 9.
The system sends the conference notification email. The Conference List - Schedule View appears. Your conference appears in the Conference List.
A Polycom RMX system cannot dial a Polycom MGC, so do not link from an RMX to an MGC.
• You can add links from a Polycom MGC MCU to a Polycom RMX MCU
• There is no support for ISDN cascaded links on RMX MCUs.
The lag time required to update cascaded links may cause more than one participant to hear the prompt about being the first person to join the conference.
• Recurring cascaded conferences are not allowed.
• You cannot change the conference layout of a cascaded conference.

Polycom CMA System Operations Guide
62 Polycom, Inc.

Polycom, Inc. 63
6Conference and Participant Details
This chapter lists the conference and participant detail fields for reference. It includes these sections:
• Conference Details
• Conference Features
• Bridge (MCU) Features
• Participants List
• Participant Details
• Participant Settings
Conference ImageThe Conference Image section displays the selected participant’s video. Shuffle to shuffle to the next participant’s video
Conference DetailsThe Conference Details section has these fields.
Section Description
Owner The name of the person who created the conference. Schedulers only see the conferences they own.
Not applicable for ad hoc conferences.
Start Date/Time For a scheduled conference, the start date and time of the conference and the time difference between the local time and the standard time.
For an unscheduled conference, the date and time the conference started.

Polycom CMA System Operations Guide
64 Polycom, Inc.
Duration For a scheduled conference, how long the conference is scheduled to last.
For a completed conference, how long the conference actually lasted.
End Date/Time The date and time the conference ended
Type The type of conference. Possible values include:
• Audio
• Audio-Video
Status The state of the conference. Possible values include:
• Active
• Declined
• Finished
• Future
Recurring Whether or not the conference was scheduled as a recurring conference
Connection Connection information about the conference. Possible values include:
• Multipoint
• Point To Point
• Gateway
Bit Rate The rate (in kbps) at which to transfer the conference audio or video data
Schedule ID System-assigned ID used for troubleshooting
Conf Monitoring ID
System-assigned ID used for troubleshooting
Video Layout The video layout for the conference: Continuous Presence or video Switching.
Video Format For a conference hosted on an MCU, the video format of the conference data stream. Possible values include:
• Auto
• CIF
• QCIF
• 4CIF
• 16CIF
• VGA
• SVGA
• XGA
• NTSC
Video Protocol For a conference hosted on an MCU, the video protocol of the conference data stream. Possible values include:
• Auto
• H.261
• H.263
• H.264
Section Description

Conference and Participant Details
Polycom, Inc. 65
Conference FeaturesThe Conference Features section has these fields.
Audio Algorithm For a conference hosted on an MCU, the audio compression ratio of the conference data stream. Possible values are:
• AUTO
• G.711
• G.722
• Siren 7 (16 kbps)
Section Description
Section Description
Conference Password
The conference password, which is assigned either by the system or the scheduler.
Chairperson Required
Indicates whether or not the conference requires a chairperson.
NoteThe RMX 1000 system does not support the Chairperson feature.
Chairperson Password
The password the chairperson must enter to take control of the conference. Not applicable when no chairperson is designated.
Chairperson The name of the chairperson. Not applicable when no chairperson is designated.
Lecture Mode The type of Lecture Mode, if any, that was selected when the conference was created. Possible values are None and Presentation.
NoteThe RMX 1000 system does not support Lecture Mode.
Lecturer The name of the lecturer. Not applicable when Lecture Mode is None.
Lecture View Switching
Indicates whether or not automatic switching between participants is enabled.
Dual Stream Mode Possible values are:
• None
• People+Content
• Duo Video
• Visual Concert PC
• Visual Concert FX
• Unknown

Polycom CMA System Operations Guide
66 Polycom, Inc.
Bridge (MCU) FeaturesThe Bridge (MCU) Features section, which applies only for conferences that use an MCU, has these fields.
T120 Rate Possible values are:
• None
• HMLP - Var
• HMLP - 384
• HMLP - 320
• HMLP - 256
• HMLP - 192
• HMLP - 128
• HMLP - 6.4
• HMLP - 62.4
• HMLP - 14.4
• MLP - Var
• MLP - 64.4
• MLP - 62.4
• MLP - 46.4
• MLP - 40
• MLP - 38.4
• MLP - 32
• MLP - 30.4
• MLP - 24
• MLP - 22.4
• MLP - 16
• MLP - 14.4
• MLP - 6.4
• MLP - 4
End Time Alert Whether or not the system alerts participants to the end of the conference by playing an end tone
Entry Tone Whether or not an entry tone is played to all connected participants when a participant joins the conference
Exit Tone Whether or not an exit tone is played to all connected participants when a participant disconnects from the conference
Section Description
Section Description
MCU Name The MCU device name hosting the conference. Not applicable when the conference is not being hosted on an MCU.
Numeric ID The unique conference identifier assigned by the MCU
Entry Queue Access
Whether or not the conference has an entry queue enabled
NoteThe Polycom CMA system enables entry queues on a per MGC basis and all conferences on an entry queue enabled MGC will be scheduled with entry queue access.

Conference and Participant Details
Polycom, Inc. 67
Participants ListThe Participants section has these fields.
Meet Me per Conf Whether or not the a conference is a Meet Me conference, for which a dial-in number is assigned, so that undefined participants can connect to the conference
Conference on Port (MGC only) Indicates whether or not the MGC is set to Conference on Port, which conserves bandwidth and ports. In this case, all participants are on a single video port and use the same connection speed and video format.
Message Service Type
Displays the type of messages participants joining the conference hear. Possible values are:
• None
• Welcome (No wait)
• Attended (Wait)
• IVR
Message Service Name
Name on the MCU of the Message Service. So, for example, a service name IVR70 which provides the IVR service
Section Description
Section Description
Name The participant’s name
Call Info How the participant joined the call. Possible values include:
• Video Dial-Out
• Audio Dial-In@<Address>
• Video Dial-In@<Address>
• In Person
• Room Only

Polycom CMA System Operations Guide
68 Polycom, Inc.
Participant DetailsThe Participant Details section has these fields.
Section Description
Call Info How the participant joined the call. Possible values include:
• Video Dial-Out
• Audio Dial-In@<Address>
• Video Dial-In@<Address>
• In Person
• Room Only
Video Protocol For a conference hosted on an MCU, the video protocol of the conference data stream. Possible values include:
• Auto
• H.261
• H.263
• H.264
Video Format For a conference hosted on an MCU, the video format of the conference data stream. Possible values include:
• Auto
• CIF
• QCIF
• 4CIF
• 16CIF
• VGA
• SVGA
• XGA
• NTSC
Audio Algorithm For a conference hosted on an MCU, the audio compression ratio of the conference data stream. Possible values are:
• Siren 7 (16 kbps)
• Siren 14 (24 kbps)
• Siren 14 (32 kbps)
• Siren 14 (48 kbps)
• AUTO
• G.711
• G.722
Local Date/Time The date and time the conference started in local time.
Call ID System-assigned ID used for troubleshooting.
Callee Name The names of the participants called
Callee Endpoint The names of the endpoints for the called participants
Callee Site The names of the sites for the called participants

Conference and Participant Details
Polycom, Inc. 69
Callee Endpoint Status
The state of the participant’s connection. Possible states include:
• Connected
• Disconnected
• Help request
• Updating
• New dial-in participant
• New dial-out participant
Caller Name The name of the participant who placed the call
Caller Endpoint The name of the endpoint from which the participant placed the call
Caller Site The name of the site from which the participant placed the call
Caller Endpoint Status
The state of the participant’s connection. Possible states include:
• Connected
• Disconnected
• Help request
• Updating
• New dial-in participant
• New dial-out participant
Content None
T120 Rate Possible values include:
• None
• HMLP - Var
• HMLP - 384
• HMLP - 320
• HMLP - 256
• HMLP - 192
• HMLP - 128
• HMLP - 6.4
• HMLP - 62.4
• HMLP - 14.4
• MLP - Var
• MLP - 64.4
• MLP - 62.4
• MLP - 46.4
• MLP - 40
• MLP - 38.4
• MLP - 32
• MLP - 30.4
• MLP - 24
• MLP - 22.4
• MLP - 16
• MLP - 14.4
• MLP - 6.4
• MLP - 4
Section Description

Polycom CMA System Operations Guide
70 Polycom, Inc.
Participant SettingsThe Participant Settings dialog box has these fields.
If you select a Dial Option of Dial-Out for a participant without a managed endpoint, the Participant Settings dialog box has these additional fields.
Section Description
Name The participant’s name.
Devices The participant’s managed endpoint(s) if available.
Email The participant’s email address (ASCII only) for participants or guests without managed endpoints.
Type The type of participant. Possible values include:
• Domain User
• Local User
• Domain Resource (a room)
• Local Resource (a room)
• Guest
How will this participant join the conference?
How the participant will join the conference. Possible values include:
• In Person (requires no dial settings)
• Room Only
• Audio Only (Dial in)
• Use Video
Bit Rate The audio or video data transfer rate (in kbps) of the participant’s endpoint.
Dial Options Available only if the participant is joining via a video endpoint system. Possible values include:
• Dial-In
• Dial-Out
Dial Type The protocol the audio or video endpoint system uses.
Section Description
Country (H.320 dial type only) The country to which the system will dial out to the participant
Area/City Code (H.320 dial type only) The area code to which the system will dial out to the participant

Conference and Participant Details
Polycom, Inc. 71
Number (H.323 and H.320 dial types) The participant’s phone number
Use Modified Dial Number
(H.320 dial type only) Click this check box to add a specific prefix to the participant’s phone number. The Number field becomes active
Number (H.320 dial type only) The complete modified dial number as required to include PBX exit codes, dialing prefixes, or other installation-specific dial string requirements.
Section Description

Polycom CMA System Operations Guide
72 Polycom, Inc.

Polycom, Inc. 73
7Endpoint Management Overview
This chapter provides an overview of the Polycom® Converged Management Application™ (CMA™) system’s endpoint management functions. It includes these topics:
• Endpoint Menu, Views, and Lists
• Endpoint Types
• Endpoint Configuration/Provisioning
• Endpoint Gatekeeper Registration Policies
• Endpoint Softupdates
• Endpoint Passwords
Endpoint Menu, Views, and ListsThe Polycom CMA system Endpoint menu provides these views of the Endpoint list:
• Monitor View—Displays the list of all registered endpoints. Use this view to manage endpoints. See “Monitor View” on page 74.
• Automatic Provisioning—Displays the list of dynamically managed endpoints eligible for automatic provisioning. See “Automatic Provisioning View” on page 76.
• Scheduled Provisioning—Displays the list of traditionally managed endpoints eligible for scheduled provisioning. See “Scheduled Provisioning View” on page 78.
• Automatic Softupdate—Displays the list of dynamically managed endpoints eligible for automatic software updates. See “Automatic Softupdate View” on page 79.
• Scheduled Softupdate—Displays the list of traditionally managed endpoints eligible for scheduled software updates. See “Scheduled Softupdate View” on page 81.

Polycom CMA System Operations Guide
74 Polycom, Inc.
All of the Endpoint views have the following information:
Monitor ViewUse the Endpoint Monitor View to monitor and manage endpoints.
Endpoint List in the Monitor View By default the Endpoint list in the Monitor View displays a list of all endpoints managed by the Polycom CMA system, including endpoints that registered automatically with the Polycom CMA system and endpoints that were added manually for management and monitoring purposes.
The Endpoint list in this view has these fields.
Section Description
Views The views you can access from the page.
Actions The set of available commands. The constant command in the Endpoint views is Refresh , which updates the display with current information.
Endpoint List The context-sensitive Endpoint list for the selected view.
Device Details Information about the endpoint selected in the endpoint list including:
• “Device Summary Information” on page 153
• “Device Status Information” on page 155
• “Call Information” on page 157
• “Device Alerts Information” on page 158
• “Provisioning Details” on page 158
• “Softupdate Details” on page 159
Field Description
Filter Use the filter choices to display other views of the Endpoint list, which include:
• Type- Filters the list by type. For more information, see “Endpoint Configuration/Provisioning” on page 85.
• Alerts- Filters the list by alert type: Help, Error, or Warning.
• Connection Status- Filters the list by connection status: In a Call, Online, or Offline.
• Name - Filters the list by system name entered.
• IP Address - Filters the list by IP address entered.
• ISDN Video Number - Filters the list by ISDN video number entered.

Endpoint Management Overview
Polycom, Inc. 75
Commands in the Monitor ViewBesides providing access to the endpoint views, the Actions section of the Monitor View may also include these context-sensitive commands depending on the selected endpoint type.
Filter (continued) • Alias - Filters the list by the alias entered.
• Site - Filters the list by site location entered.
• VIP - Filters the list for VIP endpoints.
Status The state of the endpoint. Possible values include:
• Online
• Offline
• In a call
• Unknown
• Gatekeeper registered
• Gatekeeper unregistered
• Gatekeeper rejected
Mode The management mode for the endpoint. Possible values include:
• Dynamic management mode
• Standard management mode (no icon)
For a description of these modes, see “Endpoint Configuration/Provisioning” on page 85.
Name The assigned name of the endpoint.
Model The type of endpoint. For valid endpoint types, see “Endpoint Types” on page 83.
IP Address The IP address assigned to the endpoint.
Alias The alias assigned to the endpoint.
Site The site to which the endpoint belongs.
Owner The user associated with the endpoint.
Field Description
Command Use this command to...
Available for all endpoint types
Add Manually add an endpoint to the Polycom CMA system or find a endpoint on the network.
ViewDetails
Display all of the Device Details for the selected endpoint.

Polycom CMA System Operations Guide
76 Polycom, Inc.
For information about these endpoint commands, see “Endpoint Management Operations” on page 117.
Automatic Provisioning ViewUse the Automatic Provisioning View to see the list of endpoints that are registered to the system for automatic provisioning.
Endpoint List in the Automatic Provisioning View By default the endpoint list in the Automatic Provisioning View displays the list of Polycom HDX system endpoints registered to the Polycom CMA system for automatic provisioning.
Edit Change connection settings for the selected endpoint. Note that if this is a managed endpoint, the endpoint may overwrite settings entered manually.
Delete Delete the selected endpoints.
Search Devices Search the list of endpoints by IP range.
Associate User Manually associate a user with the selected endpoint.
Available for only selected endpoint types
Manage Open the selected endpoint’s management interface in a separate browser window. This command is not available for the following endpoint types: iPower, PVX, and Other.
Send Message Send a text message (ASCII onlya, 100 characters maximum) to the selected endpoint’s video monitor. This command is not available for the following endpoint types: Tandberg, iPower, and Other.
Clear Help Clear help for the selected endpoint on the Polycom CMA system.
Reboot Device Reboot the selected endpoint. This command is only available for HDX-Series, V-Series and VSX-Series endpoints with a Connection Status of Online.
Manage Owner Edit information for the user (owner) of the selected device. This command is applicable only when a user is associated with the endpoint.
a. For more information on field limitations, see “Field Input Requirements” on page 9.
Command Use this command to...

Endpoint Management Overview
Polycom, Inc. 77
The endpoint list in the Automatic Provisioning View has the following information.
Commands in the Automatic Provisioning View Because automatic provisioning is managed by the endpoint, there are no context-sensitive commands available in the Automatic Provisioning View.
Field Description
Filter The filter choice for endpoint types that can be automatically provisioned. Possible values include:
• All—Displays all dynamically managed systems together
• HDX Series—Displays just the Polycom HDX systems deployed in dynamic management mode.
• CMA Desktop—Displays just the Polycom CMA Desktop systems.
• VVX—Displays just the Polycom VVX systems.
Status The status of the endpoint’s last provisioning process. Possible values include:
• Success
• Failed
• Clear
Name The assigned name of the endpoint.
NoteThe system assigns Polycom CMA Desktop systems a user name of LastName_Firstname_CMADesktop.
Type The type of endpoint. Automatic provisioning is only available for these endpoint types:
• HDX Series--Polycom HDX system endpoints deployed in dynamic management mode.
• CMA Desktop—Polycom CMA Desktop clients.
• VVX—Polycom VVX systems.
IP Address The IP address assigned to the endpoint.
Last The date and time of the endpoint’s last provisioning.
NotePolycom CMA Desktop systems are provisioned at the start of each session.

Polycom CMA System Operations Guide
78 Polycom, Inc.
Scheduled Provisioning ViewUse the Scheduled Provisioning View to:
• View the list of endpoints that are eligible for scheduled provisioning
• Schedule one or more endpoints for provisioning
• Cancel a scheduled provisioning
Endpoint List in the Scheduled Provisioning ViewBy default the endpoint list in the Scheduled Provisioning View displays the list of Polycom HDX system endpoints registered to the Polycom CMA system that are eligible for scheduled provisioning.
The Endpoint list in this view has the following information.
Field Description
Filter The filter choice for endpoint types that can be scheduled for provisioning. Possible values include:
• Viewstation FX & EX
• HDX Series—Displays the Polycom HDX systems operating in standard/traditional management mode.
• V and VSX Series
• Viewstation
• Tandberg
• QDX Series
Status The status of the endpoint’s last provisioning process. Possible values include:
• Success
• Pending
• Failed
• Clear
Name The system name of the endpoint.
Type The type of endpoint. Scheduled provisioning is only available for the endpoints types listed previously as Filter selections.
IP Address The IP address assigned to the endpoint.
Last The date and time of the endpoint’s last provisioning, unless its status has been cleared.
Pending When the endpoint is scheduled for provisioning, this field shows the provisioning profile to be used for the scheduled provisioning process.

Endpoint Management Overview
Polycom, Inc. 79
Commands in the Scheduled Provisioning ViewBesides providing access to the endpoint views, the Commands section of the Scheduled Provisioning View also includes these commands:
You can perform these operations on multiple endpoints at the same time. To select multiple endpoints, hold the control key while you select the endpoints.
For information about these endpoint commands, see “Endpoint Provisioning Operations” on page 129.
Automatic Softupdate ViewUse the Automatic Softupdate View, available from the Endpoint menu, to view the list of endpoints that have registered to the system for automatic softupdates.
Endpoint List in the Automatic Softupdate ViewBy default the Endpoint list in the Automatic Softupdate View displays all endpoints eligible for automatic softupdate. It has the following information.
Scheduled When the endpoint is scheduled for provisioning, this field shows the date and time for the next scheduled provisioning process.
Field Description
Command Use this command to...
Provision Schedule provisioning for the selected endpoint(s).
Cancel Provision Cancel a previously scheduled provisioning operation.
Clear Status Change the status column for a endpoint to the Clear state.

Polycom CMA System Operations Guide
80 Polycom, Inc.
Commands in the Automatic Softupdate View Because automatic (pull) softupdate is managed by the endpoint, there are no commands available in the Automatic Softupdate View.
Field Description
Filter Filter choices for this view include:
• Type—Filters the list by endpoint type.
• Name—Searches the list by the endpoint’s system name.
• IP Address—Searches the endpoint list by IP address.
• ISDN Video Number—Searches the endpoint list by ISDN video number.
• Alias—Searches the endpoint list by alias.
• Site—Searches the endpoint list by site location.
Status The status of the endpoint’s last softupdate. Possible values include:
• Success
• Failed
• Clear
Name The system name of the endpoint.
Type The type of endpoint. Automatic softupdate is only available for these endpoint types:
• All—Displays all dynamically managed systems together.
• HDX Series—Displays just the Polycom HDX systems deployed in dynamic management mode.
• CMA Desktop—Displays just the Polycom CMA Desktop systems.
• VVX—Displays just the Polycom VVX systems.
IP Address The IP address assigned to the endpoint.
Current Version The version of software installed during the last successful softupdate procedure.

Endpoint Management Overview
Polycom, Inc. 81
Scheduled Softupdate ViewUse the Scheduled Softupdate View, available from the Endpoint menu, to:
• View the list of endpoints that are eligible for a scheduled softupdate
• Schedule one or more endpoints for a softupdate
• Cancel a softupdate.
Endpoint List in the Scheduled Softupdate ViewBy default the Endpoint list in the Scheduled Softupdate View displays all endpoints eligible for scheduled softupdate.
The Endpoint list in the Scheduled Softupdate View has the following information.
Field Description
Filter Filter choices for this view include:
• Type—Filters the list by endpoint type.
• Name—Searches the list by the endpoint’s system name.
• IP Address—Searches the list by endpoint’s IP address.
• ISDN Video Number—Searches the list by endpoint’s ISDN video number.
• Alias—Searches the list by endpoint’s alias.
• Site—Searches the list by site location.
Status The status of the endpoint’s last scheduled softupdate. Possible values include:
• Success
• Failed
• Clear
Name The system name of the endpoint
Type The type of endpoint. Scheduled softupdate is only available for these endpoint types:
• Viewstation FX & EX
• HDX Series—Displays the Polycom HDX systems operating in standard/traditional management mode.
• V and VSX Series
• Viewstation
• Tandberg
• QDX Series
IP Address The IP address assigned to the endpoint.

Polycom CMA System Operations Guide
82 Polycom, Inc.
Scheduled Softupdate View CommandsBesides providing access to the endpoint views, the Command section for the Scheduled Softupdate View will also include these commands:
For information about these endpoint commands, see “Endpoint Softupdate Operations” on page 137.
Current Version The version of software installed during the last successful softupdate procedure.
Scheduled When the endpoint is scheduled for softupdate, this field shows the date and time for the scheduled softupdate process.
Field Description
Command Use this command to...
Software Update
Schedule softupdate for the selected endpoints.
Cancel Update Cancel a scheduled or in progress softupdate operation.
Clear Status Change the status column for an endpoint to the Clear state.

Endpoint Management Overview
Polycom, Inc. 83
Endpoint TypesThe following table describes the Polycom CMA system support for endpoints based on endpoint type and category of support.
Polycom Endpoint Type Versions Gat
eke
epe
r R
egis
trat
ion
Glo
ba
l Ad
dre
ss B
oo
k A
cces
s
Dyn
amic
Man
age
men
ta
a. Dynamic Management and Standard Management are mutally exclusive functionality.
Sta
nd
ard
Man
agem
enta
Sch
edu
ling
(D
ial I
n o
nly
)b
b. Scheduling (Dial In Only) and Scheduling (Dial In and Dial Out) are presented as mutually exclusive functionality. Some endpoints, such as Polycom VVX systems do not have interfaces that can be ask to perform dialing. Some endpoints, such as Polycom CMA Desktop clients and VVX systems require external MCU resources for dial-in conferences.
Sch
edu
ling
(D
ial i
n a
nd
Dia
l ou
t)b
Mo
nit
ori
ng
(S
tan
dar
d C
MA
mo
nit
ori
ng
)c
c. Standard CMA monitoring does not involve using SNMP. It includes endpoint monitoring (online/offline status) and alerts.
Co
mm
and
an
d C
on
tro
ld
d. Command and Control means the Polycom CMA system can send a command like Send Message and Reboot, and the endpoint can receive and act on the command.
Rep
ort
s f
or
IP C
alls
e
e. Reports for IP Calls are generated as part of standard gatekeeper functionality. Reports for ISDN Calls are additional system functionality. Devices that aren't registered with the gatekeeper or ISDN calls send an alert to the the device management function to record CDR information. Some legacy endpoints do not sent this alert so the CDRs are not written.
Rep
ort
s f
or
ISD
N C
alls
e
Su
pp
ort
ed B
ehin
d a
Fir
ewal
lf
f. Supported behind a Polycom VBP device with Access Proxy enabled.
CMA Desktop 1.0 or greater Y N Y N N Y Y N Y N Y
HDX Series (dynamic management mode)
2.5 or greater Y N Y N N Y Y Y Y Y Y
HDX Series (standard management mode)
All Y Y N Y N Y Y Y Y Y N
VVX Series 3.3.0 or greater Y N Y N Y N Y N Y N Y
ViewStation Series All Y Y N Y N Y Y Y Y Y N
ViewStation FX and EX Series
All Y Y N Y N Y Y Y Y Y N
V and VSX Series All Y Y N Y N Y Y Y Y Y N
QDX Series 4.0 or greater Y Y N Y N Y Y Y Y Y N
QDX Series Less than 4.0 Y Y N N N N N N Y N N
PVX All Y Y N N Y N Y N Y N N

Polycom CMA System Operations Guide
84 Polycom, Inc.
A Polycom CMA system may also list an endpoint type of Other. The Polycom CMA system cannot control endpoints with a type of Other and cannot direct these endpoints to initiate point-to-point calls. A scheduled point-to-point call between two endpoint systems with an endpoint type of Other requires the use of an MCU.
Endpoint Type Versions Gat
eke
epe
r R
egis
trat
ion
Glo
ba
l Ad
dre
ss B
oo
k A
cces
s
Dy
nam
ic M
anag
em
enta
(Au
tom
atic
Pro
visi
on
ing
an
d S
oft
up
da
te)
a. Dynamic Management and Standard Management are mutally exclusive functionality.
Sta
nd
ard
Man
agem
enta
(Sch
edu
led
Pro
visi
on
ing
an
d S
oft
up
da
te)
Sch
edu
ling
(D
ial I
n o
nly
)c
c. Scheduling (Dial In Only) and Scheduling (Dial In and Dial Out) are presented as mutually exclusive functionality.
Sch
edu
ling
(D
ial i
n a
nd
Dia
l o
ut)
b
Mo
nit
ori
ng
(S
tan
dar
d C
MA
mo
nit
ori
ng
)d
d. Standard CMA monitoring does not involve using SNMP. It includes endpoint monitoring (online/offline status) and alerts.
Co
mm
and
an
d C
on
tro
le
e. Command and Control means the Polycom CMA system can send a command like Send Message and Reboot, and the endpoint can receive and act on the command.
Re
po
rts
for
IP C
alls
f
f. Reports for IP Calls are generated as part of standard gatekeeper functionality. Reports for ISDN Calls are additional system functionality.
Re
po
rts
for
ISD
N C
alls
e
Su
pp
ort
ed
Beh
ind
a F
ire
wal
lgg. Supported behind a Polycom VBP device with Access Proxy enabled.
Tandberg Y N N N Y N N N Y N N
Tandberg 990, 880, or 770 MXP
Y N N Yb
b. Scheduled provisioning of key fields (not all fields) on Tandberg MXP Series endpoints, version NTSC including the 990, 880 and 770.
Y N N N Y N N
Other third-party endpoints:
• Lifesize
• Sony PCS
• Aertha Maia Starr
• VCON (Galaxy and Vigo)
• VTEL
Y N N N Y N N N Y N

Endpoint Management Overview
Polycom, Inc. 85
Endpoint Configuration/ProvisioningPolycom endpoint systems can be configured in three ways:
• In the room by using the system’s remote control to navigate the screens and enter information.
• From a remote location by using the system’s web interface to navigate the screens and enter information.
• From a remote location by using a management system’s web interface to provision configuration settings to the endpoint system.
The Polycom CMA system can provision several types of endpoints. Endpoint provisioning, which requries provisioning profiles, allows an administrator to remotely configure multiple endpoints of the same type with a standard set of settings. This eliminates the need to configure each endpoint individually either through the hand-held remote or the endpoint’s web interface.
The Polycom CMA system supports two exclusive types of endpoint provisioning: automatic and scheduled. Automatic and scheduled endpoint provisioning are exclusive management scenarios. Endpoints enabled for automatic provisioning should not be scheduled for provisioning through the Polycom CMA system.
For more information, see:
• Automatic Provisioning
• Scheduled Provisioning
Automatic ProvisioningThe Polycom CMA system is a gatekeeper; it manages video and audio endpoints. However, the system also manages users, because endpoints are only useful when they provide access to users.
Automatic provisioning, which controls the automatic configuration of endpoints and the management of video resources, is also tied to users and groups. That’s because some users and groups may require significantly more video resources than others.
Currently, automatic provisioning is available for:
• Polycom VVX systems deployed in dynamic management mode
• Polycom HDX systems deployed in dynamic management mode
• Polycom CMA Desktop clients
NotePolycom recommends that all endpoints in a region (i.e., a gatekeeper zone) be managed by a single management system.

Polycom CMA System Operations Guide
86 Polycom, Inc.
How Automatic Provisioning WorksIn dynamic management mode, when an endpoint starts up and at designated intervals thereafter, it automatically polls for new provisioning information from the Polycom CMA system. The provisioning information is sent in XML format over a secure HTTPS connection.
Endpoints do not poll for provisioning information if they are in a call. They restart polling after the call ends.
When you add an automatic provisioning profile, the Polycom CMA system immediately rolls it out. If it rolls it out first thing in the morning, people who need to attend a “start the day” conference will have to first wait for their endpoint to be provisioned. Better to implement profiles in the middle of the work day and then let the provisioning occur at the designated polling interval.
Automatic Provisioning ProfilesAutomatic provisioning is enabled at the endpoint, but the Polycom CMA system must have automatic provisioning profiles for both the endpoint and the site at which the endpoint resides. So to ensure out-of-box usability, the Polycom CMA system comes with Default Provisioning Profiles for both. However, you can edit these default profiles to meet your needs or add additional provisioning profiles to assign different video resources to different groups of users.
NotePolycom CMA Desktop provisioning occurs on a session by session basis.
Notes• If an automatic provisioning profile provisions a setting that the endpoint is not
capable of fulfilling, the endpoint will ignore those settings.
• The name of the Default Provisioning Profile is stored in the system database and is not localized into other languages. If you wish to localized it into your language, edit the profile and give it a new profile name.

Endpoint Management Overview
Polycom, Inc. 87
The following table show the fields you can define when adding a new automatic provisioning profile. You may find more implementation details about these fields in the endpoint system documentation.
Field For the endpoint systems being provisioned... HD
X S
erie
s
CM
A D
esk
top
System Settings
Language Specifies the language for the video endpoint system’s user interface. Possible values include: English, German, Spanish, French, and Chinese (Simplified Chinese only).
Allow Access to User Setup
Specifies whether the User Settings screen is accessible to users via the System screen. Select this option if you want to allow endpoint system users to change limited environmental settings.
Y Y
Allow Directory Changes
Specifies whether endpoint system users can save changes they make to the directory on contacts/favorites list.
Y Y
Call Detail Report Specifies whether to collect call data for the Call Detail Report and Recent Calls list. When selected, information about calls can be viewed through the endpoint system’s web interface and downloaded as a .csv file.
NoteIf this setting is disabled, applications such as the Polycom CMA system or the Polycom Global Management System™ will not be able to retrieve Call Detail Report (CDR) records.
Y Y
Maximum Time in Call (minutes)
Specifies the maximum number of minutes allowed for a call. Enter 0 to remove any limit.
Y Y
Recent Calls Specifies whether to display the Recent Calls button on the home screen. The Recent Calls screen lists the site number or name, the date and time, and whether the call was incoming or outgoing.
NoteIf the Call Detail Report option is not selected, the Recent Calls option is not available.
Y Y

Polycom CMA System Operations Guide
88 Polycom, Inc.
Screen Saver Wait Time
Specifies how long the system remains awake during periods of inactivity. The default is 3 minutes. If the system requires users to log in, the screen saver timeout also logs out the current user.
Setting this option to Off prevents the system from going to sleep. To prevent image burn-in, specify 3 minutes or less.
Y Y
Directory Search Mode Specifies how endpoint directory searches are initiated by the endpoint user. Possible values are:
• Automatic—The search is executed after the user stops entering characters.
• Manual—The search is executed only when the user explicitly clicks the Search button.
Y
Home Screen Settings
Display Contact List as Home Screen
Specifies whether or not to display the contact list as the entry screen.
?
Display H.323 Extension
Lets users placing a gateway call enter the H.323 extension separately from the gateway ID.
If you do not select this setting, endpoint system users make gateway calls by entering the call information in this format:
gateway ID + ## + extension
Y Y
Enable Availability Control
When enabled, lets users set their availability in the endpoint system’s local user interface.
Y Y
H.323 Settings
Maximum Speed for Receiving Calls (kbps)
Allows you to restrict the bandwidth used when receiving calls.
If the far site attempts to call the endpoint system at a higher speed than selected here, the call is re-negotiated at the speed specified in this field.
Y Y
Preferred Speed for Placing Calls (kbps)
Determines the speeds that will be used for calls from this endpoint system when:
• The Call Quality selection is either unavailable or set to Auto on the Place a Call screen
• The call is placed from the directory
If the far-site endpoint system does not support the selected speed, the endpoint system automatically negotiates a lower speed.
Y Y
Field For the endpoint systems being provisioned... HD
X S
erie
s
CM
A D
esk
top

Endpoint Management Overview
Polycom, Inc. 89
Call Settings
Preferred Dialing Method
Specifies the preferred method for dialing various call types.
• If set to Auto, calls use the configured dialing order.
• If set to Manual, the endpoint systems will prompt the user to select the call type from a list when placing a call.
Audio Settings
Mute Auto Answer Calls
Specifies whether or not to automatically mute incoming calls.
Y Y
CMA Desktop Settings
Allow IM/Chat When enabled, specifies that the Polycom CMA Desktop client can initiate instant messaging.
N Y
Calendaring Settings
Enable Calendaring When enabled, specifies that the Polycom CMA system will provision the endpoint for Polycom Conferencing for Outlook. This includes provisioning the Microsoft Exchange server and calendaring settings for the endpoint system.
Y N
Alert Tone When enabled, specifies that an endpoint system provisioned for Polycom Conferencing for Outlook will play a sound along with the meeting reminder. In this case, the endpoint will only play a sound when the system is not in a call.
Y N
Display Private Meeting When enabled, specifies that an endpoint system provisioned for Polycom Conferencing for Outlook will display details about meetings marked private.
Y N
Meeting Reminder Time
Specifies the number of minutes before the meeting an endpoint system provisioned for Polycom Conferencing for Outlook will display a reminder.
Y N
Field For the endpoint systems being provisioned... HD
X S
erie
s
CM
A D
esk
top

Polycom CMA System Operations Guide
90 Polycom, Inc.
UC Settings
Select method to find Office Communications Server
Specifies how the Polycom CMA system will locate the Office Communications Server that it will provision to endpoints. Possible values are:
• Disable OCS—The Polycom CMA system will not provision an Office Communication Server.
• DNS SRV Record—The Polycom CMA system will issue a DNS query to locate the Office Communication Server and provision that information to endpoints.
• Server Name—The Polycom CMA system will use the specified Server Address. Enter the Office Communication Server address or DNS name.
Y N
Transport Protocol Specifies the transport protocol for communications with the Office Communications Server. Possible values are:
Auto—The communication protocol will be auto-negotiated.
TCP—This protocol has error-recovery services, message delivery is assured, and messages are delivered in the order they were sent.
UDP—This protocol does not provide error-recovery services, message delivery is not assured, and messages are not necessarily delivered in the order they were sent.
TLS—This protocol transfers communications over an encrypted Secure Sockets Layer (SSL) or Transport Layer Security (TLS) connection.
Y N
Group Name Specifies the group name for which the endpoint system should be provisioned.
Y N
VVX Settings
Configuration Server URL
Specifies the IP address for the system that will provide provisioning service. All addresses can be followed by an optional directory and optional filename.
N N
Loggin Server URL Specifies the directory to use for log files, if required. A URL can also be specified. This field is blank by default..
N N
Configuration Data Enter XML data for a custom configuration. Allows the Polycom CMA system administrator's to provision settings that the Polycom CMA system does not normally provide.
N N
Field For the endpoint systems being provisioned... HD
X S
erie
s
CM
A D
esk
top

Endpoint Management Overview
Polycom, Inc. 91
Profile Order and PriorityAutomatic provisioning profiles are associated with groups, but what about those users who belong to more than one group—what determines their experience? When you add new profiles, you assign a Profile Order. The Profile Order determines which provisioning profile takes priority.
Consider the following example:
• Jason Smith is part of the Support group and also part of the Executive group.
• The Support group is assigned an automatic provisioning profile named Low-Bandwidth, which allows a maximum speed for receiving calls of 128kbps.
• The Executive group is assigned an automatic provisioning profile called High-Bandwidth, which allows a maximum speed for receiving calls of 1920kbps
• The Low-Bandwidth profile is assigned a profile order of 1, while the High-Bandwith profile is assigned a profile order of 2.
In this example, Jason’s endpoint is provisioned with the Low-Bandwidth provisioning profile, because it has the higher priority.
So when you add provisioning profiles, you may want to assign provisioning profiles with more robust privileges a higher priority than those providing less privileges.
Scheduled ProvisioningScheduled provisioning is enabled at the Polycom CMA system. To schedule a endpoint for provisioning, the Polycom CMA system must already have a scheduled provisioning profile created for the endpoint.
How Scheduled Provisioning WorksIn this standard/traditional management mode, administrators with System Setup permissions can schedule provisioning for one endpoint or a group of endpoints; and they can schedule provisioning to occur immediately or for a date and time in the future. The provisioning data is sent in XML format over a secure HTTPS connection.
Scheduled provisioning is available for these endpoint types:
• ViewStation endpoints
• ViewStation FX & EX endpoints
• V and VSX Series endpoints
• Tandberg endpoints

Polycom CMA System Operations Guide
92 Polycom, Inc.
• HDX Series--Polycom HDX systems deployed in standard/traditional management mode
Scheduled Provisioning ProfilesThe Polycom CMA system does not include a default profile for scheduled provisioning. You must create a profile before you can schedule a endpoint for provisioning. Create a different profile for each endpoint type (Polycom HDX system or Polycom CMA Desktop) and group of users.
Some examples of when to use scheduled provisioning profiles follow.
• To apply a standard set of options to each new endpoint
By creating templates of standard settings for different types of endpoints, or for the needs of different users, you can have the Polycom CMA system apply all the settings at once. After the endpoint is connected and registered with the Polycom CMA system, you can use a provisioning profile that defines a range of other options.
• To update the password for all endpoints of a particular type
For security purposes, you can create a provisioning profile to update the password for endpoints on a regular basis and reuse the same profile quarterly. You might have several profiles, one for each type of endpoint you want to update.
• To change the IP address of the Polycom CMA system gatekeeper when the Polycom CMA system is moved
Scheduled Provisioning
The following table show the fields you can provision when adding a new scheduled provisioning profile for the supported Polycom endpoints.
.
Field For the endpoint systems being provisioned... HD
X S
erie
s
V\V
SX
Ser
ies
FX
/EX
Vie
wS
tati
on
QD
X S
erie
s
General Settings > System Settings > System Settings 1 ORGeneral Setup Applies to: Y Y Y Y Y
Maximum Time in Call (minutes)
Specifies the maximum number of minutes allowed for a call. Enter 0 to remove any limit.
Y Y Y Y Y
Allow Mixed IP and ISDN calls
Specifies whether users can make multipoint calls that include both IP and H.320 sites.
Y Y — — —
Allow Dialing Allow users to place calls. You can still place calls from the web interface.
— — Y Y

Endpoint Management Overview
Polycom, Inc. 93
Allow Directory Changes
Specifies whether users can save changes to the directory or contacts/favorites list.
Y Y Y Y Y
Confirm Directory Additions
Specifies whether users are prompted to confirm deletions of directory entries.
Y Y — — Y
Confirm Directory Deletions
Specifies whether users are prompted to confirm new directory entries when saving the information for the last site called.
Y Y — — Y
Allow Access to User Setup
Specifies whether the User Settings screen is accessible to users via the System screen.
Select this option if you want to allow users to change limited environmental settings.
Y Y Y Y Y
General Settings > System Settings > System Settings 2 ORGeneral Setup Applies to:
Y Y Y Y
Far Site Name Display Time
Specifies how long the far site name to appear on the screen when the call is first connected.
Y Y — — Y
Display Time in Call Displays time that the current call has been connected Y Y — — Y
Keypad Audio Confirmation
Allows the user to hear a voice confirmation of the numbers selected with the remote control.
Y Y Y Y Y
Call Detail Report Collects call data. Y Y — — Y
Recent Calls Provides navigational tool for call history. Y Y — — Y
Display IP and ISDN Information
• Both – Displays both number types on the system’s Home screen.
• IP only – Display the system IP number on the Home screen.
• ISDN only – Displays the system ISDN number on the Home screen.
• None – The system will not display contact numbers on the Home screen.
— — Y Y
Show Speed Dial Allow the user to disable the Speed Dial page and go directly to the Address Book.
— — Y Y
Color Scheme Enables the customization of the look of the system with five different color schemes.
Y — —
Screen Saver Wait Time
The time the system will delay before going into standby mode after nonuse
Y Y Y Y
Field For the endpoint systems being provisioned... HD
X S
erie
s
V\V
SX
Ser
ies
FX
/EX
Vie
wS
tati
on
QD
X S
erie
s

Polycom CMA System Operations Guide
94 Polycom, Inc.
General Settings > Home Screen Settings > Home Screen Settings 1Applies to:
Y Y — Y
Dialing Display Dialing entry field - Includes the dialing entry field on the Home screen.
Display Marquee - Allows the addition of text to the dialing entry field of the Home screen.
Y Y — — Y
Enter Marquee Text Enter the Marquee text that will appear in the “Dialing entry field” when Display Marquee is selected.
Y Y — — Y
Call Quality Allow users to select the speed/bandwidth of the call. Y Y Y
Display H.323 Extension
Displays the IP dialing extension on the main call screen Y Y Y
Directory Includes the Directory button on the Home screen. Y Y Y
System Includes the System button on the Home screen. Y Y Y
Multipoint Includes the Multipoint navigational item on the Home screen.
Y Y
General Settings > Home Screen Settings > Home Screen Settings 2 Appliesto:
Y Y — Y
IP or ISDN Information • Both – Displays both number types on the system’s Home screen.
• IP only – Display the system IP number on the Home screen.
• ISDN only – Displays the system ISDN number on the Home screen.
• None – The system will not display contact numbers on the Home screen.
Y Y
Local Date and Time Displays the local time on the Home screen. Y Y Y
Enable Availability Control
Displays availability icons on the Home screen. Y Y Y
Sites Displays icons created for frequently called sites on the Home screen.
Y Y Y
Last Number Dialed Displays the last number dialed on the Home screen. Y Y Y
Field For the endpoint systems being provisioned... HD
X S
erie
s
V\V
SX
Ser
ies
FX
/EX
Vie
wS
tati
on
QD
X S
erie
s

Endpoint Management Overview
Polycom, Inc. 95
General Settings > Security ORSecurity Applies to: Y Y Y Y Y
Remote Access Password
Specifies the password for administrator access when logging in to the system remotely.
When the remote access password is set, users must enter it to manage the system from a computer. The remote access password must not contain spaces.
Y Y Y Y Y
Meeting Password Specifies the password users must supply to join multipoint calls on this system if the call uses the internal multipoint option, rather than a bridge.
The meeting password must not contain spaces.
Do not set a meeting password if multipoint calls will include audio-only endpoints. Audio-only endpoints cannot participate in password-protected calls.
Y Y Y Y
Software Update Password
Specifies the password users must enter to update the software on their endpoint system.
Y Y
Enable FTP Access Specifies that the endpoint system can be accessed via an FTP session.
Note: The system restarts if you change the remote access settings. This setting does not deactivate the associated port, only the application. Use Web Access Port to disable the port.
Y Y Y
Enable Web Access Specifies that the endpoint system can be accessed via it’s web interface.
Note: The system restarts if you change the remote access settings. This setting does not deactivate the associated port, only the application. Use Web Access Port to disable the port.
Y Y Y Y Y
Enable Telnet Access Specifies that the endpoint system can be accessed via a telnet session.
Note: The system restarts if you change the remote access settings. This setting does not deactivate the associated port, only the application. Use Web Access Port to disable the port.
Y Y Y Y Y
Field For the endpoint systems being provisioned... HD
X S
erie
s
V\V
SX
Ser
ies
FX
/EX
Vie
wS
tati
on
QD
X S
erie
s

Polycom CMA System Operations Guide
96 Polycom, Inc.
Enable Encryption Specifies how to encrypt calls with other sites that support AES encryption.
• Off—AES Encryption is disabled.
• When Available—AES Encryption is used with any endpoint that supports it, even if the other endpoints in the call don’t support it.
• Required for Video Calls Only—AES Encryption is used for all video endpoints in the call. Analog phone and voice over ISDN connections are allowed. Video endpoints must support AES Encryption to participate in the call.
• Required for All Calls—AES Encryption is used for all video endpoints in the call. Analog phone and voice over ISDN connections are not allowed. All endpoints must support AES Encryption to participate in the call.
Y Y Y
Enable SNMP Access Specifies that the endpoint system can be accessed via an SNMP monitoring system.
Note: The system restarts if you change the remote access settings. This setting does not deactivate the associated port, only the application. Use Web Access Port to disable the port.
Y Y
General Settings > Location > Date and Time 1 Applies to: Y Y — Y
Date Format Specifies the preferred format preference for the date and time display and lets you enter your local date and time.
Y Y Y
Time Format Y Y Y
Month Y Y Y
Day Y Y Y
Year Y Y Y
Hour Y Y Y
Minute Y Y Y
AM/PM Y Y Y
General Settings > Location > Date and Time 2 ORGlobal Management > GMS Setup Applies to: Y Y Y
Auto Adjust for Daylight Saving Time
Specifies the daylight savings time setting. When this setting is enabled, the system clock automatically changes for daylight saving time.
Y Y Y Y
Time Difference from GMT
Specifies the time difference between GMT (Greenwich Mean Time) and the endpoint system’s location.
Y Y Y Y
Field For the endpoint systems being provisioned... HD
X S
erie
s
V\V
SX
Ser
ies
FX
/EX
Vie
wS
tati
on
QD
X S
erie
s

Endpoint Management Overview
Polycom, Inc. 97
Time Server Specifies connection to a time server for automatic system time settings.
Y Y Y
Time Server Address Specifies the address of the time server to use when Time Server is set to Manual.
Y Y Y
Video Network > IP Network > H.323 Settings Applies to: Y Y — Y
Enable IP H.323 Allows the system to make IP calls Y Y — Y
Enable H.239 Specifies standards-based People+Content data collaboration. Enable this option if you know that H.239 is supported by the far sites you will call. If callers experience issues when sharing content with other Polycom systems, disable this setting.
Y Y — Y
Enable Transcoding Specifies whether the system allows each far-site system to connect at the best possible call rate and audio/video algorithm. If transcoding is disabled, the Polycom HDX system down-speeds all connections to the same call rate.
Y Y —
ISDN Gateway Allows users to place IP-to-ISDN calls through a gateway. Y Y — Y
IP Gateway Allows users to place ISDN-to-IP or IP-to-IP calls through a gateway.
Y — —
Video Network > IP Network > Gatekeeper ORLAN/H.323 > H.323 > Gateway/Gatekeeper Applies
to:Y Y Y Y Y
Use Gatekeeper Specifies whether to use a gatekeeper. Gateways and gatekeepers are required for calls between IP and ISDN.
• Off — Calls do not use a gatekeeper.
• Auto — System attempts to automatically find an available gatekeeper.
• Specify — Calls use the specified gatekeeper. Enter the gatekeeper’s IP address or name (for example, gatekeeper.companyname.usa.com, or 10.11.12.13).
Y Y Y Y Y
Gatekeeper IP Address If you chose to use an automatically selected gatekeeper, this area displays the gatekeeper’s IP address.
If you chose to specify a gatekeeper, enter the IP address.
Y Y Y Y Y
Outbound Call Route Choices:
• Gateway
• ISDN
— — Y Y
Field For the endpoint systems being provisioned... HD
X S
erie
s
V\V
SX
Ser
ies
FX
/EX
Vie
wS
tati
on
QD
X S
erie
s

Polycom CMA System Operations Guide
98 Polycom, Inc.
Use Gatekeeper for Multipoint Calls
Specify whether multipoint calls use the system’s internal multipoint capability or the Conference on Demand feature.
Y Y Y
Video Network > IP Network > Gateway Number ORLAN/H.323 > H.323 > Gateway Number Applies
to:Y Y Y Y
Country Code Specifies the country code for the system’s location Y Y —
Area Code Specifies the area or city code for the system’s location Y Y —
Gateway Number Specifies the gateway’s number Y Y —
Gateway Number Type Specifies the number type users enter to call this system:
• Direct Inward Dial — Users enter an internal extension to call this system directly.
NoteIf you choose this setting, you must also register the number with the gatekeeper as an E.164 alias.
• Number + Extension — Users enter the gateway number and the system’s extension to call this system.
Y Y Y Y
Number of digits in DID Number
Specifies the number of digits in the DID number.
The national or regional dialing plan for your location determines the standard number of digits. For instance, the US standard is 7 digits.
Y Y Y Y
Number of digits in Extension
Specifies the number of digits in the extension used when Direct Inward Dial is selected.
Your organization’s dial plan determines this number.
Y Y Y Y
Video Network > IP Network > Gateway Setup ORLAN/H.323 > H.323 > Gateway Setup Applies
to:Y Y Y Y
Speed Enter a prefix or suffix for each bandwidth you want to allow for gateway calls.
Associating prefixes and suffixes with particular bandwidths on your gateway can optimize the use of bandwidth by your organization. Be sure the gateway is configured to use the same prefixes and suffixes you define for the system.
Y Y Y Y
Prefix Y Y Y Y
Suffix Y Y Y Y
Field For the endpoint systems being provisioned... HD
X S
erie
s
V\V
SX
Ser
ies
FX
/EX
Vie
wS
tati
on
QD
X S
erie
s

Endpoint Management Overview
Polycom, Inc. 99
Video Network > IP Network > Quality of Service Settings ORLAN/H.323 > H.323 > Quality of Service & Firewall Settings Applies
to:Y Y Y Y
Y
Type of Service Field Specifies the service type and the priority of IP packets sent to the system for video, audio, and far-end camera control:
• IP Precedence — Represents the priority of IP packets sent to the system. The value can be between 0 and 5.
• DiffServ — Represents a priority level between 0 and 63. If this setting is selected, enter the value in the Type of Service Value field.
This Type of Service value does not apply to the Polycom CMA Desktop system. It’s Type of Service value is set by the client’s operating system.
Y Y Y Y Y
Type of Service Value Specifies the IP Precedence or Diffserv value for Video, Audio, and Control.
Y Y Y Y Y
Video Type of Service Value
Specifies the IP Precedence or Diffserv value for video packets.
Y Y Y Y
Audio Type of Service Value
Specifies the IP Precedence or Diffserv value for audio packets.
Y Y Y Y
FECC Type of Service Value
Specifies the IP Precedence or Diffserv value for Far End Camera Control packets.
Y Y Y Y
Enable Dynamic Bandwidth
Specifies whether to let the system automatically find the optimum line speed for a call
Y Y Y
Enable PVEC Allows the system to use PVEC (Polycom Video ErrorConcealment) if packet loss occurs.
Y Y Y Y
Field For the endpoint systems being provisioned... HD
X S
erie
s
V\V
SX
Ser
ies
FX
/EX
Vie
wS
tati
on
QD
X S
erie
s

Polycom CMA System Operations Guide
100 Polycom, Inc.
Video Network > IP Network > Firewall Settings ORLAN/H.323 > H.323 > Firewall Settings Applies to: Y Y Y Y
Use Fixed Ports Specifies whether to define the TCP and UDP ports.
• If the firewall is H.323 compatible or the endpoint systems are not behind a firewall, disable this setting.
• If the firewall is not H.323 compatible, enable this setting. The endpoint systems will assign a range of ports starting with the TCP and UDP ports you specify. The endpoint system defaults to a range beginning with port 3230 for both TCP and UDP.
NoteYou must open the corresponding ports in the firewall. You must also open the firewall’s TCP port 1720 to allow H.323 traffic.
Y Y Y Y Y
Start TCP Port Allows you to specify the beginning value for the range of TCP ports used by the endpoint systems. The endpoint systems will automatically assign a range of ports starting with the port you specifiy.
NoteYou must also open the firewall’s TCP port 1720 to allow H.323 traffic.
Y Y Y Y Y
Start UDP Port Allows you to specify the beginning value for the range of TCP ports used by the endpoint systems. The endpoint systems will automatically assign a range of ports starting with the port you specifiy.
Y Y Y Y Y
System is Behind a NAT
Specifies whether the endpoint systems are behind a NAT firewall.
— — Y Y
NAT Configuration Specifies whether the endpoint systems should determine the NAT Public WAN Address automatically.
• If the endpoint systems are behind a NAT that allows HTTP traffic, select Auto.
• If the endpoint systems are behind a NAT that does not allow HTTP traffic, select Manual. Then specify a NAT Public (WAN) Address.
• If the endpoint systems are not behind a NAT or are connected to the IP network through a virtual private network (VPN), select Off.
Y Y Y
Field For the endpoint systems being provisioned... HD
X S
erie
s
V\V
SX
Ser
ies
FX
/EX
Vie
wS
tati
on
QD
X S
erie
s

Endpoint Management Overview
Polycom, Inc. 101
NAT Public (WAN) Address
When NAT Configuration is set to Manual, specifies the address that callers from outside the LAN should use to call the endpoint systems.
Y Y Y
NAT is H.323 Compatible
Specifies that the endpoint systems are behind a NAT that is capable of translating H.323 traffic.
Y Y Y Y
Auto Discover NAT Address
Specifies whether to allow the system to automatically discover the NAT firewall address through the domain name server.
— — Y Y
Address Displayed in Global Directory
Specifies whether or not to include the endpoint system’s information in the global directory
Y Y — Y
Video Network > ISDN BRI Protocol Applies to: Y Y —
Enable ISDN H.320 Allows this system to make H.320 (ISDN) calls. Y Y —
Number of ISDN Channels to Dial in Parallel
Specifies how many channels to dial at one time. You can specify up to eight channels. If you experience network problems, decrease the number.
Set this value to 1 for serial dialing. Serial dialing is not recommended unless you have trouble connecting calls using parallel dialing.
Y Y —
ISDN Switch Protocols Specifies the protocol used by your network’s switch. Y Y —
Outside Line Dialing Prefix
Specifies the ISDN dialing prefix used to call outside the network.
Y Y —
Video Network > Preferred Speeds Applies to: Y Y — Y
Preferred Speed for Placing Calls (Kbps)
Determines the speeds that will be used for IP, ISDN, or International ISDN calls from this endpoint system when:
• The Call Quality selection is either unavailable or set to Auto on the Place a Call screen
• The call is placed from the directory
If the far-site endpoint system does not support the selected speed, the endpoint system automatically negotiates a lower speed.
Y Y — Y
IP Calls Y Y — Y
ISDN Video Call (H.320)
Y Y —
International ISDN calls Y Y —
Maximum Speed for Receiving Calls (Kbps)
Allows you to restrict the bandwidth used when receiving IP or ISDN calls.
If the far site attempts to call the system at a higher speed than selected here, the call is re-negotiated at the speed specified in this field.
Y Y — Y
IP Calls Y Y — Y
ISDN Video Call (H.320)
Y Y —
Field For the endpoint systems being provisioned... HD
X S
erie
s
V\V
SX
Ser
ies
FX
/EX
Vie
wS
tati
on
QD
X S
erie
s

Polycom CMA System Operations Guide
102 Polycom, Inc.
Monitors Applies to: Y Y — Y
Monitor 1 Options Applies to: Y Y — Y
Monitor 1 Specifies the monitor’s aspect ratio.
• 4:3 — Select if you are using a regular TV monitor.
Y Y — Y
Video Format Specifies the monitor’s format:
• DVI — Select if the monitor is connected to the DVI connector using a DVI or HDMI cable.
• VGA — Select if the monitor is connected to the DVI connector using a VGA cable.
• Component YPbPr — Select if the monitor is connected to the DVI connector using component cables. Polycom HDX 8000 series and Polycom HDX 7000 series systems do not support 720p Component format for 50 Hz monitors.
• S-Video (Polycom HDX 9000 series only) — Select if the monitor is connected to the BNC connectors using an S-Video cable.
• Composite (Polycom HDX 9000 series only) — Select if the monitor is connected to the BNC connectors using a composite video cable.
Y Y —
Display Icons in Call Specifies whether to display all on-screen graphics, including icons and help text, during calls.
Y Y — Y
Snapshot Timeout Lets you choose whether to have slides and snapshots time out after a period of four minutes.
— Y —
Dual Monitor Emulation Specifies whether the system can show multiple views on a single display.
Y Y —
Output Upon Screen Saver Activation
Specifies whether black video or no signal is sent to the monitor when the system goes to sleep and the screen saver activates.
• Select Black if you want to display black video. This is the recommended setting to prevent burn-in for TV monitors.
• Select No Signal if you want the display to react as if it is not connected when the system goes to sleep. This is the recommended setting for VGA monitors and projectors.
Y — Y
Field For the endpoint systems being provisioned... HD
X S
erie
s
V\V
SX
Ser
ies
FX
/EX
Vie
wS
tati
on
QD
X S
erie
s

Endpoint Management Overview
Polycom, Inc. 103
Monitor 2 Options Applies to: Y — — Y
Monitor 2 Specifies the second monitor’s aspect ratio:
• Off — Select if you do not have a second monitor.
• 4:3 — Select if you are using a regular TV monitor as the second monitor.
Y — — Y
Video Format Specifies the monitor’s format:
• DVI — Select if the monitor is connected to the DVI connector using a DVI or HDMI cable.
• VGA — Select if the monitor is connected to the DVI connector using a VGA cable.
• Component YPbPr — Select if the monitor is connected to the DVI connector using component cables. Polycom HDX 8000 series and Polycom HDX 7000 series systems do not support 720p Component format for 50 Hz monitors.
• S-Video (Polycom HDX 9000 series only) — Select if the monitor is connected to the BNC connectors using an S-Video cable.
• Composite (Polycom HDX 9000 series only) — Select if the monitor is connected to the BNC connectors using a composite video cable.
Y — — Y
Output Upon Screen Saver Activation
Specifies whether black video or no signal is sent to the monitor when the system goes to sleep and the screen saver activates.
• Select Black if you want to display black video. This is the recommended setting to prevent burn-in for TV monitors.
• Select No Signal if you want the display to react as if it is not connected when the system goes to sleep. This is the recommended setting for VGA monitors and projectors.
Y — — Y
Field For the endpoint systems being provisioned... HD
X S
erie
s
V\V
SX
Ser
ies
FX
/EX
Vie
wS
tati
on
QD
X S
erie
s

Polycom CMA System Operations Guide
104 Polycom, Inc.
Monitor 3 Options Applies to: Y — —
Monitor 3 Specifies the aspect ratio for recording.
• Off — Select if you do not have a VCR or DVD player connected to record video conferences.
• 4:3 — Select to record for playback on a standard monitor.
• 16:9—Select to record for playback on a wide-screen monitor, if your recording device has this capability.
See the endpoint product documentation for more information about these selections.
Y — —
Video Format Specifies the VCR or DVD player’s format:
• S-Video — Select if the VCR or DVD player is connected to a Polycom HDX system using an S-Video cable.
• Composite — Select if the VCR or DVD player is connected to a Polycom HDX system using a composite video cable and S-Video to RCA adapter.
Y — —
Output Upon Screen Saver Activation
Specifies whether black video or no signal is sent to the VCR or DVD player when the system goes to sleep and the screen saver activates.
• Select Black if you want to send black video.
• Select No Signal if you want the VCR or DVD player to react as if it is not connected when the system goes to sleep.
Y — —
VCR/DVD Record Source
Specifies the video source to be recorded to videotape or DVD.
• If Far is enabled, the recorded video will switch to the current far site speaker.
• If both Near and Far are enabled, the recorded video will switch between near and far sites depending on the current speaker.
• If Content is enabled, any content sent during the call is recorded.
Y — —
Near Y — —
Far Y — —
Content Y — —
Cameras > Camera Settings Applies to: Y Y Y
Camera 1 Name Specifies a name for camera 1. Y Y Y
Camera 1 Icon Specifies an icon for camera 1. Y Y Y
Camera 2 Name Specifies a name for camera 2. Y Y Y
Camera 2 Icon Specifies an icon for camera 2. Y Y Y
Field For the endpoint systems being provisioned... HD
X S
erie
s
V\V
SX
Ser
ies
FX
/EX
Vie
wS
tati
on
QD
X S
erie
s

Endpoint Management Overview
Polycom, Inc. 105
Camera 3 Name Specifies a name for camera 3. Y Y Y
Camera 3 Icon Specifies an icon for camera 3. Y Y Y
Cameras > Video Quality Applies to: Y Y Y
Camera 1 Specifies Motion or Sharpness for the video input. The default is Sharpness.
• Motion — This setting is for showing people or other video with motion.
• Sharpness — The picture will be sharp and clear, but moderate to heavy motion at low call rates can cause some frames to be dropped. Sharpness is available in point-to-point H.263 and H.264 calls only. It is recommended for HD calls between 1 Mbps and 2 Mbps.
Y Y Y
Camera 2 Y Y Y
Camera 3 Y Y Y
Video/Camera > Cameras 1 ORCameras > Cameras 1 Applies to:
— — Y
Snapshot Camera Y Y
Far Control of Near Camera
Specifies whether the far site can pan, tilt, or zoom the near-site camera. When this option is selected, a user at the far site can control the framing and angle of the camera for the best view of the near site.
Y Y Y Y Y
Backlight Compensation
Specifies whether the camera should automatically adjust for a bright background. Backlight compensation is best used in situations where the subject appears darker than the background.
Y Y Y Y Y
Primary Camera Specifies which camera is the main camera. Y Y Y Y
Camera Direction Specifies the direction the camera moves when using the arrow buttons on the remote control.
Y Y Y Y Y
Video/Camera > Monitor Setup Applies to: — — Y Y
Snapshot Timeout Lets you choose whether to have slides and snapshots time out after a period of four minutes.
— — Y Y
Audio Settings > Audio Settings 1 ORPhone/Audio Applies to: Y Y Y Y
Sound Effects Volume Sets the volume level of the ring tone and user alert
tones.
Y Y Y Y Y
Incoming Video Call Specifies the ring tone used for incoming calls. Y Y Y
User Alert Tones Specifies the tone used for user alerts. Y Y Y
Field For the endpoint systems being provisioned... HD
X S
erie
s
V\V
SX
Ser
ies
FX
/EX
Vie
wS
tati
on
QD
X S
erie
s

Polycom CMA System Operations Guide
106 Polycom, Inc.
Mute Auto Answer Calls
Specifies whether to mute incoming calls.
Incoming calls are muted by default until you press the
mute on the microphone or on the remote control.
Y Y Y Y Y
Line Input (Red) Specifies the type of equipment that is connected to audio input 1.
Y Y
Line Input Level (Red) Sets the volume level for audio input 1. Y Y
Line Input (White) Specifies the type of equipment that is connected to audio input 2.
Y Y
Line Input Level (White) Sets the volume level for audio input 2. Y Y
Line Outputs Specifies how the audio output behaves. The default selection, Monitor - Far Site Audio, supplies audio to the Monitor 1 audio outputs only when the system is receiving audio from the far site.
If you have connected a VCR to record the conference, select Monitor - Far and Near Audio to supply audio from both the far site and the system’s microphones.
Y Y
Line Output Level Sets the volume level for audio output Y Y
Audio Settings > Audio Settings 2 Applies to: Y Y — Y
Master Audio Volume Sets the volume level for audio from the far site. Y Y Y
Midrange Speakers Specifies whether to use the system’s built-in midrange speaker. You may prefer to turn off the midrange speaker if you connect the audio output to Monitor 1 or if you connect an external speaker system.
— Y
Bass Sets the volume level for the low frequencies without changing the master audio volume.
Y Y
Treble Sets the volume level for the high frequencies without changing the master audio volume.
Y Y
LAN Properties > LAN Properties 1 Applies to: Y Y — Y
Connect to My LAN Enables connection to the local area network Y Y
IP Address Specifies how the system obtains an IP address.
• Obtain IP Address Automatically — Select if the system gets an IP address from the DHCP server on the LAN.
• Enter IP Address Manually — Select if the IP address will not be assigned automatically.
Y Y Y
Field For the endpoint systems being provisioned... HD
X S
erie
s
V\V
SX
Ser
ies
FX
/EX
Vie
wS
tati
on
QD
X S
erie
s

Endpoint Management Overview
Polycom, Inc. 107
Use the Following IP Address
If you selected Enter IP Address Manually, enter the IP address here.
Y Y Y
LAN Properties > LAN Properties 2 Applies to: Y Y —
DNS Servers Displays the DNS servers currently assigned to the system.
If the system does not automatically obtain a DNS server address, enter up to four DNS servers here.
Changing this setting causes the system to restart.
Y Y Y
Default Gateway Displays the gateway currently assigned to the system.
If the system does not automatically obtain a gateway IP address, enter one here.
Changing this setting causes the system to restart.
Y Y Y
Subnet Mask Displays the subnet mask currently assigned to the system.
If the system does not automatically obtain a subnet mask, enter one here.
Changing this setting causes the system to restart.
Y Y Y
WINS Server Displays the server running the Windows Internet Name Service
— Y
WINS Resolution Enables connection to the WINS Server for URL resolution
— Y
LAN Speed Specify the LAN speed to use. Note that the setting you choose must be supported by the switch.
Choose Auto to have the network switch negotiate the speed automatically. In this case, the switch must also be set to Auto. Choosing Auto automatically sets Duplex Mode to Auto.
If you choose 10 Mbps, 100 Mbps, or 1000 Mbps you must set Duplex Mode to Half or Full.
Changing this setting causes the system to restart.
NoteMismatches with the network switch settings may lead to unexpected behaviors.
Y Y Y
Field For the endpoint systems being provisioned... HD
X S
erie
s
V\V
SX
Ser
ies
FX
/EX
Vie
wS
tati
on
QD
X S
erie
s

Polycom CMA System Operations Guide
108 Polycom, Inc.
Duplex Mode Specify the duplex mode to use. Note that the Duplex mode you choose must be supported by the switch.
Choose Auto to have the network switch negotiate the Duplex mode automatically. In this case, the switch must also be set to Auto. Choosing Auto automatically sets LAN Speed to Auto.
Changing this setting causes the system to restart.
Y Y Y
Global Services > Directory Servers ORLAN/H.323 > Global Directory (GDS) > Server Applies to: Y Y Y Y
Global Directory (GDS) Specifies the IP address or DNS address of the Global Directory Server.
Y Y Y Y Y
Password Lets you enter the global directory password, if there is one.
Y Y Y Y Y
Display Name in Global Directory
Specifies whether to display the system’s name in the global directories of other registered systems.
Y Y — Y
Display Global Addresses
Displays other registered systems in the global directory. Y Y Y Y Y
Register Registers this system with the Global Directory Server. Y Y Y Y Y
Save Global Directory to System
Copies the global directory to this local system. When this setting is disabled, the system can display no more than 1,000 global directory entries. When this setting is enabled, the system can display up to 4,000 global directory entries.
Y Y — Y
LAN/H.323 > Global Directory (GDS) > Preferences Applies to: — — Y Y
Show Addresses in Address Book
— — Y Y
Preferred Speed for Placing Calls (Kbps)
Determines the speeds that will be used for IP, ISDN, or International ISDN calls from this endpoint system when:
• The Call Quality selection is either unavailable or set to Auto on the Place a Call screen
• The call is placed from the directory
If the far-site endpoint system does not support the selected speed, the endpoint system automatically negotiates a lower speed.
— — Y Y
ISDN Video Call (H.320)
— — Y Y
International ISDN calls — — Y Y
IP Calls — — Y Y
Field For the endpoint systems being provisioned... HD
X S
erie
s
V\V
SX
Ser
ies
FX
/EX
Vie
wS
tati
on
QD
X S
erie
s

Endpoint Management Overview
Polycom, Inc. 109
LAN/H.323 > Global Directory (GDS) > Preferred Alias Applies to: — — Y Y
Preferred Alias Possible values include:
• Gateway Number
• ISDN Number
• Called Party Line Identifier
• Extension
— — Y Y
Global Services > Dialing Rules 1 ORLAN/H.323 > Global Directory (GDS) > Dialing Rules 1 Applies to: Y Y Y Y
Number of digits in Extension
Specifies the number of digits in the extension. Your organization’s dial plan determines this number.
— — Y Y
International Dialing Prefix
Specifies the dialing prefix needed for international calls Y Y Y Y
Public Network Access Specifies if calls can be made to the public network — — Y Y
Public Network Dialing Prefix
Specifies the dialing prefix used to call out to endpoints on the public network when the endpoint is not in the same area code as the system
— — Y Y
Public Network (same area code) Prefix
Specifies the dialing prefix used to call out to endpoints on the public network when the endpoint is in the same area code as the system
— — Y Y
Private Network Access Specifies if calls can be made to the private network — — Y Y
Private Network Dialing Prefix
Specifies the dialing prefix used to call outside the network
— — Y Y
Always Dial Area Code Specify whether the phone number must always include an area code
Y Y —
Dial 1+ for all USA Calls
Specify whether to preface calls within the United States with 1
Y Y —
Global Services > Dialing Rules 2 ORLAN/H.323 > Global Directory (GDS) > Dialing Rules 2 Applies to:
— — Y Y
If Area Code Equals/ Dial Prefix Pairs
Create additional dialing rules and routing based on area code
— — Y Y
Global Services > Account Validation ORGlobal Management > GMS Setup Applies to:
Require Account Number to Dial
Specify whether to require an account number for placing calls and whether that number should be validated by the system.
Y Y Y
Field For the endpoint systems being provisioned... HD
X S
erie
s
V\V
SX
Ser
ies
FX
/EX
Vie
wS
tati
on
QD
X S
erie
s

Polycom CMA System Operations Guide
110 Polycom, Inc.
Validate Account Number
Specify whether to require an account number for placing calls and whether that number should be validated by the system.
Y Y Y
Global Services > My Information ORGlobal Management > Contact Information Applies to: Y Y Y Y
Contact Person Specifies the name of the person responsible for this system
Y Y Y Y
Contact Number Specifies the phone number of the person responsible for this system
Y Y Y Y
Contact Email Specifies the email address of the person responsible for this system
Y Y Y Y
Contact Fax Specifies the Fax number of the person responsible for this system
Y Y Y Y
Tech Support Specifies the contact information for Technical Support for this system
Y Y Y
City Specifies the location of the person responsible for this system
Y Y Y Y
State/Province Y Y Y Y
Country Y Y Y Y
Field For the endpoint systems being provisioned... HD
X S
erie
s
V\V
SX
Ser
ies
FX
/EX
Vie
wS
tati
on
QD
X S
erie
s

Endpoint Management Overview
Polycom, Inc. 111
The following table show the fields you can provision when adding a new scheduled provisioning profile for the supported Tandberg endpoints. Refer to your Tandberg product documentation for more information about these fields.
Some notes about scheduled provisioning profiles and the scheduled provisioning of endpoints:
• Each page in the scheduled Provisioning Fields dialog box has a Provision This Page option. When this option is selected, the system provisions all of the values on that page. When this option is not selected, the system does not provision any of the values on that page. At least one page must be provisioned, or the system returns an error stating, “No data to save in profile. Either press Cancel or add pages.”
Field
General Settings
Timezone
Auto Adjust for Daylight Saving Time
Security Settings
Password
Call Settings
Access Code
Auto Answer
Microphone
Volume
Network Settings
Gatekeeper Discovery Mode
Gatekeeper IP Address
SNMP Settings
Host IP Address 1
Host IP Address 2
Host IP Address 3
SNMP System Contact
SNMP Community Name
SNMP System Location

Polycom CMA System Operations Guide
112 Polycom, Inc.
• Until the Polycom CMA system successfully provisions an endpoint scheduled for provisioning, provisioning remains in the Pending state and the system attempts to provision the endpoint until it succeeds or until the provisioning is cancelled.
• If an endpoint scheduled for provisioning is In a Call, the system waits until the call ends before provisioning the endpoint. The system checks the endpoint at 15 minute intervals.
• If an endpoint scheduled for provisioning is Offline, the system attempts to connect to it at 60 minute intervals until the endpoint is Online.
• Provisioning may reboot the endpoint
• You can schedule provisioning for an unlimited number of endpoints, but the system may limit the number of active provisioning processes
Endpoint Gatekeeper Registration PoliciesIf the Polycom CMA system gatekeeper registration policy allows endpoints to register automatically (that is, a primary gatekeeper setting of Allow Registration of All Endpoints, Allow Registration of Endpoints in Defined Sites, or Allow Registration of Endpoints with Defined E.164 Prefixes), those registered endpoints are automatically added to the endpoint list.
If the Polycom CMA gatekeeper registration policy does not allow endpoints to register automatically (i.e., a gatekeeper setting of Allow Registration of Predefined Endpoints Only), you must manually add all endpoints to the Polycom CMA system.
No matter what the gatekeeper registration policy, any endpoint that is automatically provisioned, any endpoint that is registered with the Global Address Book, and any endpoint that is added manually to the Polycom CMA system can automatically register with the gatekeeper.
For more information, see “Device Registration” on page 281.
NoteYou can also manually add endpoints to the Polycom CMA system for monitoring purposes only.

Endpoint Management Overview
Polycom, Inc. 113
Endpoint Softupdates The Polycom CMA system softupdate feature, which requires a softupdate profile for the endpoint type and model, allows an administrator to upgrade the software on one or more endpoints with a standard software package. This eliminates the need to upgrade each endpoint individually.
The Polycom CMA system supports two exclusive softupdate processes: automatic and scheduled. Automatic and scheduled softupdate are exclusive endpoint management scenarios. Endpoints enabled for automatic softupdate should not be scheduled for softupdates through the system.
For more information, see:
• Automatic Softupdates
• Scheduled Softupdates
Automatic SoftupdatesAutomatic softupdate, which controls the endpoint’s software version level, is tied to the endpoint type. Currently, the automatic softupdate feature is only available for these endpoint types.
• Polycom HDX system endpoints deployed in dynamic management mode
• Polycom CMA Desktop systems
How Automatic Softupdate WorksIn dynamic management mode, when a endpoint starts up and at designated intervals thereafter, it automatically polls the Polycom CMA system for a newer softupdate package. If a softupdate is necessary, the package is sent in XML format over a secure HTTPS connection.
Endpoints do not poll for softupdate packages if they are in a call. They restart polling after the call ends.
Automatic Softupdate ProfilesAutomatic softupdate is enabled at the endpoint, but the Polycom CMA system must have an automatic softupdate profile for the endpoint type to fulfill the process. A default automatic softupdate profile—with the description CMA Desktop - shipped version—is available for the Polycom
NotePolycom recommends that all endpoints in a region (i.e., a gatekeeper zone) be managed by a single management system.

Polycom CMA System Operations Guide
114 Polycom, Inc.
CMA Desktop client. Default automatic softupdate profiles are not available for other endpoint systems. To create an automatic softupdate profile, you upload the software package and create a profile for the update.
Automatic Softupdate VersionsAfter creating an automatic softupdate profile, you can use the Version to use and Allow this version or newer selections to manage the roll out of softupdate packages. These selections also allow you to manage the release of multiple software packages for the same endpoint type.
Here’s how it works:
All endpoints have a current version of software. To automatically overwrite that current software with a different software version on all dynamically managed endpoint systems:
1 You first create a new automatic softupdate profile that includes the new softupdate package.
2 Then to activate the roll out, you change the Version to use selection from the current value (None by default) to the new version number and Update the page.
The next time a dynamically managed endpoint polls the Polycom CMA system, it will detect that it has a different software version than the Version to use selection, so it will automatically download and install the identified softupdate package. Use this method to force users to use a specific software version.
If you also enable the Allow this version or newer selection, anytime you package a newer version of software into an automatic software profile that package will be automatically installed on all dynamically managed endpoint systems.
Some important things to note about software versions
• Newer software is identified by the version number. If the Allow this version or newer selection is enabled, when a dynamically managed endpoint polls the Polycom CMA system, the system will compare the current software version number with the packaged software version numbers. The Polycom CMA system will send the software package with the highest version number to the endpoint.
NoteUntil the Version to use selection is enabled, the automatic softupdate is not activated.

Endpoint Management Overview
Polycom, Inc. 115
• You can also use the Version to use selection to roll endpoints back to older software versions. If you change the Version to use selection to an older software version and clear the Allow this version or newer selection, the Polycom CMA system will send the specifically identified software package to the endpoint even if it is an older version.
Scheduled SoftupdatesThe scheduled softupdate feature is enabled at the Polycom CMA system. An administrator with System Setup permissions can schedule softupdates for one endpoint or a group of endpoints to occur immediately or for a date and time in the future.
Scheduled softupdates are available for these endpoint types.
• ViewStation
• ViewStation FX & EX
• V and VSX Series
• Tandberg MXP series
• HDX Series--Polycom HDX systems operating in standard management mode
Some notes about scheduled softupdates:
• Until the Polycom CMA system successfully updates an endpoint scheduled for updating, the update remains in the Pending or In Progress state and the Polycom CMA system attempts to update the endpoint until it succeeds or until the update is cancelled.
• If an endpoint scheduled for update is In a Call, the Polycom CMA system waits until the call ends before updating the endpoint. The system checks the endpoint at 15 minute intervals.
• If an endpoint scheduled for update is Offline, the Polycom CMA system attempts to connect to the endpoint every hour until the endpoint is Online.
• A software update may reboot the endpoint.
NoteCurrently to roll back a Polycom CMA Desktop client to an older version, you must first remove the existing Polycom CMA Desktop client via the Windows Add or Remove Software selection. Then you can install the older software package.

Polycom CMA System Operations Guide
116 Polycom, Inc.
Endpoint PasswordsA Polycom CMA system can manage Polycom endpoints only when the password in the device record matches the password in the endpoint. Matching passwords are required to:
• Schedule provisioning of an endpoint through a Polycom CMA system
• Use the Scheduled Softupdate feature
• Monitor the endpoint from the Endpoint > Monitor View
You can update the password for certain endpoint systems through scheduled provisioning only after you have entered the matching password in the Polycom CMA system. In this case, you must instruct end-users not to change the password.
For third-party endpoints, passwords may be required to access the endpoint management software.
For information about restrictions in changing passwords for a specific endpoint, see the documentation for the endpoint.
NoteSome companies select an administrative password that is used for all endpoints and regularly updated through provisioning.

Polycom, Inc. 117
8Endpoint Management Operations
This chapter describes how to perform the Polycom® Converged Management Application™ (CMA™) system endpoint management tasks. It includes these topics:
• View Device Details
• Add an Endpoint or Find an Endpoint on the Network
• Edit an Endpoint
• Delete an Endpoint
• View an Endpoint’s Video Feed
• Clear an Endpoint Help Request
• Send a Message to an Endpoint
View Device Details
To view detailed information about a managed endpoint
1 Go to Endpoint > Monitor View.
2 As needed, use the Filter to customize the endpoint list.
3 Select the endpoint of interest and click View Details.
The Device Details dialog box for the selected endpoint appears.

Polycom CMA System Operations Guide
118 Polycom, Inc.
Field Description
Identification
System Name The name of the endpoint.
• Endpoint names must be unique.
• The name must be in ASCII onlya and may have an unlimited number of characters. Spaces, dashes, and underscores are valid.
• When retrieved from a video endpoint system, the name is taken from the H.323 ID if the endpoint registered with the gatekeeper and it is a third-party system. In other cases, it is the system name, which might be different than the H.323 ID.
Device Type The type of endpoint. For valid types, see “Endpoint Types” on page 83.
IP Address The assigned IP address of the endpoint
Site The network site for the endpoint. By default, endpoints are added to the Primary Site.
Product ID
Description A free-form text field (Extended ASCII onlya) in which information about the endpoint can be added
Serial Number The serial number (ASCII onlya) of the endpoint.The endpoint provides the serial number if it registered successfully or is managed.
Software Version The version of the software installed on the endpoint (ASCII onlya). The endpoint provides the version number if it registered successfully or is managed.
HTTP URL The management URL for the endpoint, if available (ASCII onlya). This URL allows the Polycom CMA system to start the endpoint ‘s management system using the Manage function.
All Polycom endpoints allow device management through a browser. For these endpoints, this field is completed when the endpoint registers with the Polycom CMA system.
For third-party endpoints that do not register using an IP address, you must enter the URL.
HTTP Port The HTTP port number for the endpoint. The endpoint provides the port number if it registered successfully and is managed.

Endpoint Management Operations
Polycom, Inc. 119
Addresses
Aliases The aliases that allow you to connect to the endpoint. The Polycom CMA system converts the aliases to the IP address associated with the endpoint.
• Alias Type. Possible types include E.164, H.323 ID, URL, Transport Address, E-mail, Party Number, and Unknown.
• Alias Value. Value for the alias type shown.
• The value for the H.323 ID is the endpoint name if the endpoint registered with the gatekeeper and it is a third-party system. In other cases, the endpoint name is the system name, which might be different from the H323 ID.
• The value of the E.164 alias is the extension dialed to reach this endpoint.
Notes• To add aliases for the endpoint, edit the endpoint.
• The following Alias Values are ASCII onlya: H323 ID, URL, Transport Address, and Unknown.
ISDN Video Number
For ISDN endpoints only, the country code + city/area code + phone number for the endpoint.
When you add an endpoint without native ISDN, the ISDN gateway, country code, and area code are not captured. The Polycom CMA system only supports native ISDN.
LAN Host Name The host name of the endpoint on the LAN. This can be different from the system name of the endpoint. It is an ASCII onlya name.
Capabilities
Supported Protocols
The communications protocols that the endpoint can support. Possible values include:
• IP (H.323) - A standard that defines the protocols used for multimedia communications on packet-based networks, such as IP.
• ISDN (H.320) - A standard that defines the protocols used for multimedia communications on switched networks, such as ISDN.
For endpoints with the type Unknown, select H.323.
The endpoint automatically provides the protocols if it registered successfully or is managed.
Required MCU Service
Choose from the list of MCU services defined on the MCUs that the Polycom CMA system has registered.
Field Description

Polycom CMA System Operations Guide
120 Polycom, Inc.
Capabilities Enabled
Capabilities to enable on this endpoint. Options are:
• MCU - The endpoint can act as a control unit for multipoint conferences
• Gateway - The endpoint can act as a gateway for call management
The MCU provides the capability if it registered successfully or is managed.
Available to Schedule
Select this option to make the endpoint available when users are scheduling conferences
Monitoring Level The monitoring level for the endpoint. Possible values include:
• Standard. This endpoint is monitored.
• VIP. This endpoint is monitored closely. The VIP identifier and filters are available to operators to monitor and manage conferences.
Admin ID The ID for the endpoint administrator
Call Info > Sites
Connection Status State of the endpoint. Possible values include: In a Call, Online, or Offline
Call type The connection protocol for the call in which the endpoint is participating. Possible values include: H.323, H.320, and SIP
Far Site Info Site—
Name—The H.323ID of the far site endpoint to which the selected endpoint is connected. When multiple endpoints are connected through the endpoint's embedded MCU, this field displays a concatenation of each endpoint's H.323ID separated by ' | ', e.g. 'ISDN-CO1-7-1 | Vsfx-9-1'.
Number—The address of the far site endpoint to which the selected endpoint is connected. The address value for the calling endpoint appears to be the dialed address. The address value for the called endpoint appears to be the IP Address.
Encryption—The type of encryption the far site uses.
Field Description

Endpoint Management Operations
Polycom, Inc. 121
Call Info > Call Details
Video Protocol The video connection protocol, both transmission (Tx) and reception (Rx), the endpoint is using. Possible values include:
• H.261
H.261 is an ITU standard designed for two-way communication over ISDN lines and supports data rates which are multiples of 64Kbit/s. H.261 supports CIF and QCIF resolutions.
• H.263
H.263 is based on H.261 with enhancements that improve video quality over modems. It supports CIF, QCIF, SQCIF, 4CIF and 16CIF resolutions.
• H.264
Video Format The video format, both transmission (Tx) and reception (Rx), the endpoint is using
Video Rate The video bandwidth negotiated with the far site
Video Rate Used The actual video bandwidth used in the call to the far site
Video Frame Rate Specifies the frame rate to use
Video FEC Errors The number of Forward Error Correction (FEC) errors that have been corrected in the current call.
Cause Code The cause code showing how the call ended
Audio Protocol The audio connection protocol, both transmission (Tx) and reception (Rx), the endpoint is using. Possible values include:
• G.711
• G.722
• G.728
Audio Rate The audio bandwidth negotiated with the far site
System Alerts
Errors Device error message text, e.g., GK Registration error
Warnings Device warning message text, e.g., Low Battery
a. For more information on field limitations, see “Field Input Requirements” on page 6.
Field Description

Polycom CMA System Operations Guide
122 Polycom, Inc.
Add an Endpoint or Find an Endpoint on the NetworkThis section describes how to manually add endpoints and how to find endpoints on the same network as the Polycom CMA system.
For most endpoints, you enter basic information. The Polycom CMA system then locates the endpoint and retrieves its device details.
To add an endpoint to a Polycom CMA system or find an endpoint on the network
1 Go to Endpoint > Monitor View and click Add .
2 In the Add New Device dialog box, select the Device Type of interest. For valid types, see “Endpoint Types” on page 83. For third-party endpoints, select a Device Type of Other.
3 Enter the IP Address of the endpoint.
4 If necessary, enter the Admin ID and Password for the endpoint. Some endpoints may not require this information. Other endpoints may require only a password.
5 Click Find Device.
— If the Polycom CMA system can find the endpoint on the network, the Add New Device dialog box is populated with information retrieved from the endpoint. Review any information retrieved from the endpoint.
— If the Polycom CMA system cannot find the endpoint on the network, a Device Not Found dialog box appears.
6 Click OK.
NoteIf you enter an invalid Admin ID or Password for an endpoint that requires that information, the Polycom CMA system may still find the endpoint. It depends upon the endpoint type.
• V-Series, VSX-Series, and Viewstation endpoints allow the Polycom CMA system to detect the endpoint type and complete the registration. The endpoint appears in the Endpoint list with an alert indicating Incorrect Password.
• Polycom HDX systems and ViewStation FX systems won’t allow the Polycom CMA system to detect the endpoint type and complete the registration. You can manually add the endpoint, but the Polycom CMA system cannot communicate with it until you’ve entered a valid Admin ID or Password for the endpoint. In this case, the Polycom CMA system records an error message in a device error log.

Endpoint Management Operations
Polycom, Inc. 123
7 Complete the Identification, Addresses, and Capabilities sections of the Add New Device dialog box. (For more information, see “View Device Details” on page 117.) At a minimum, assign the endpoint a System Name.
Pay particular attention to the Capabilities options, because the settings on it determine how the endpoint is used throughout the Polycom CMA system. For example, you can select it as a VIP endpoint and determine whether it will be Available to Schedule through the scheduling interface.
Note that many fields in this dialog box are ASCII only. For more information, see “Field Input Requirements” on page 9.
8 Click Add.
The endpoint appears in the Endpoint list. By default, the system:
— Adds the endpoint to the applicable site
— Sets the HTTP Port to 80
— Adds an Alias for the endpoint
— Makes the endpoint Available to Schedule
— Sets the Monitoring Level to Standard
Once you’ve added an endpoint, you can associate it with a user. See “Assign Users Roles and Devices” on page 206.
Edit an EndpointThe Polycom CMA system automatically detects IP address changes and updates its database with the new information for Polycom and third-party endpoints that are registered with the Polycom CMA system.
To edit an endpoint in the Polycom CMA system
1 Go to Endpoint > Monitor View
2 As needed, use the Filter to customize the endpoint list.
3 Select the endpoint of interest and click Edit .
4 As required, edit the Identification, Addresses, and Capabilities sections of the Edit Device dialog box. (For more information, see “View Device Details” on page 117.)
NoteFor third-party endpoints, the HTTP URL, serial number, and DNS name are not captured during endpoint registration.

Polycom CMA System Operations Guide
124 Polycom, Inc.
Note that many fields in this dialog box are ASCII only. For more information, see “Field Input Requirements” on page 9.
5 Click Update.
Delete an Endpoint
To delete an endpoint from the Polycom CMA system
1 Go to Endpoint > Monitor View
2 As needed, use the Filter to customize the endpoint list.
3 Select the endpoint of interest and click Delete.
4 Click Yes to confirm the deletion.
The Endpoint list is updated.
View an Endpoint’s Video Feed
NoteEditing information for endpoint management by the Polycom CMA system does not change the information in the endpoint. To make changes in the endpoint information, use Provisioning or change it at the endpoint interface. Note that for managed endpoints, the endpoint may overwrite settings entered manually.
NoteIf your gatekeeper registration policy allows endpoints to register automatically with the Polycom CMA system (i.e., a gatekeeper setting of Allow Registration of All Endpoints or Allow Registration of Endpoints in Defined Sites or Allow Registration of Predefined Prefixes Only) a endpoint that you delete may re-appear in the Endpoint list.
NoteThis procedure is available on the following endpoint types:
• Polycom HDX system
• Tandberg
• V-Series and VSX-Series
• ViewStation

Endpoint Management Operations
Polycom, Inc. 125
To view the video feed for an endpoint (near site or far site)
1 Go to Endpoint > Monitor View
2 As needed, use the Filter to customize the Endpoint list.
3 Select the endpoint of interest and click View Details.
The Device Details dialog box appears. For information about these fields, see “View Device Details” on page 117.
4 Click Call Info to expand the Call Info options and select Video Feed.
The Endpoint Video section shows the video feed from the near and far site.
Clear an Endpoint Help Request
To clear an endpoint help request from the Polycom CMA system
1 Go to Endpoint > Monitor View
2 As needed, use the Filter to customize the Endpoint list.
3 Select the endpoint of interest and click Clear Help.
The Confirm Endpoint Help Clear dialog box appears.
4 To send a message to the endpoint as well as clear the help request, check Also send message to endpoint.
5 Click Clear.
6 If you selected the Also send message to endpoint checkbox, enter the text message to send the endpoint in the Send Message to Endpoint dialog box and click Send. (Note that the text-message field is ASCII only. For more information, see “Field Input Requirements” on page 9.)
The Endpoint list is updated and alerts for the endpoint are cleared.
NoteIf the reason for the original alert still exists on the endpoint, the alert will likely reappear in the Endpoint list.

Polycom CMA System Operations Guide
126 Polycom, Inc.
Send a Message to an EndpointIn some situations, such as in response to a help request, you can send a message to some types of endpoints.
To send a message to an endpoint from the Polycom CMA system
1 Go to Endpoint > Monitor View
2 As needed, use the Filter to customize the Endpoint list.
3 Select the endpoint of interest.
If the endpoint can receive text messages, a Send Message option appears in the Command menu.
4 Click Send Message.
5 In the Send Message to Endpoint dialog box, enter a text message and click Send. (Note that the text-message field is ASCII only. For more information, see “Field Input Requirements” on page 9.)
The message is sent to the endpoint.
Reboot an EndpointIn some situations, for example when a remote device is unresponsive, you may need to reboot an endpoint remotely through the Polycom CMA system.
To reboot an endpoint from the Polycom CMA system
1 Go to Endpoint > Monitor View
2 As needed, use the Filter to customize the Endpoint list.
3 Select the endpoint of interest.
4 Click Reboot Device.
5 To confirm the request, click Reboot.
Associate a User with an Endpoint
To associate an endpoint with a user within the Polycom CMA system
1 Go to Endpoint > Monitor View
2 As needed, use the Filter to customize the Endpoint list.

Endpoint Management Operations
Polycom, Inc. 127
3 Select the endpoint of interest.
4 Click Associate User.
5 In the Last Name field of the Associate User dialog box, enter all or part of the user’s last name and click Search.
The system displays the list of users who meet your search criteria.
6 Select the user of interest and click Close.
Search for Endpoints in a Range of IP Addresses
To search for a set of endpoints within a range of IP addresses
1 Go to Endpoint > Monitor View. and click Search Devices.
2 In the Search Devices dialog box, enter the starting IP address and ending IP address for the search range and click Search.
The system begins searching for endpoints. A progress bar displays the status of the search and a results message displays the number of endpoints searched and the number of endpoints found within the IP range.

Polycom CMA System Operations Guide
128 Polycom, Inc.

Polycom, Inc. 129
9Endpoint Provisioning Operations
This chapter discusses Polycom® Converged Management Application™ (CMA™) system automatic and scheduled endpoint provisioning operations.
For automatic endpoint provisioning, it includes these topics:
• View the Automatic Provisioning List and Details
• Add an Automatic Provisioning Profile
• Edit an Automatic Provisioning Profile
• Edit the Profile Order for an Automatic Provisioning Profile
• Clone an Automatic Provisioning Profile
• Delete an Automatic Provisioning Profile
For scheduled endpoint provisioning, it includes these topics:
• View the Scheduled Provisioning List and Details
• Add a Scheduled Provisioning Profile
• Edit a Scheduled Provisioning Profile
• Clone a Scheduled Provisioning Profile
• Delete a Scheduled Provisioning Profile
• Schedule an Endpoint for Provisioning
• Check the Status of a Scheduled Provisioning
• Clear the Status of Scheduled Provisioning
• Cancel a Scheduled Provisioning

Polycom CMA System Operations Guide
130 Polycom, Inc.
Automatic Provisioning Operations
View the Automatic Provisioning List and Details
To view the automatic provisioning list and details about an automatic provisioning operation
1 Go to Endpoint > Automatic Provisioning.
2 As needed, use the Filter to customize the Endpoint list.
3 Select the endpoint of interest.
4 Expand the Provisioning Details tab in the Device Details section.
Add an Automatic Provisioning ProfileThis section describes how to add automatic provisioning profiles.
When you add an automatic provisioning profile, the Polycom CMA system immediately rolls it out. If it rolls it out first thing in the morning, people who need to attend a “start the day” conference will have to first wait for their endpoint to be provisioned. Better to implement profiles in the middle of the work day and then let the provisioning occur at the designated polling interval.
To add an automatic provisioning profile
1 Go to Admin > Provisioning Profiles > Automatic Provisioning Profiles.
2 In the Automatic Provisioning Profiles page, click Add .
3 In the Add Profile dialog box, enter a name for the profile and click Next.
4 Complete the System Settings, Home Screen Settings, H.323 Settings, Call Settings, Audio Settings, and (if applicable) CMA Desktop Settings sections of the Provisioning Fields dialog box.
For information about these fields, see “Automatic Provisioning” on page 85. The sections may differ depending on the endpoint type selected.
5 Click OK.
The provisioning profile appears at the bottom Automatic Provisioning Profiles list.
TIPAdd provisioning profiles in the middle of the work day, not first thing in the morning.

Endpoint Provisioning Operations
Polycom, Inc. 131
6 To change the priority order of the automatic provisioning profiles:
a Click in the Profile Order text box preceding the provisioning profile of interest and enter the priority for the profile.
b Click Update Profile Order.
The system assigns the provisioning profile the selected priority and shuffles and reassigns priorities to the other provisioning profiles.
Edit an Automatic Provisioning Profile
To edit an automatic provisioning profile
1 Go to Admin > Provisioning Profiles > Automatic Provisioning Profiles.
2 In the Automatic Provisioning Profiles page, select the profile of interest and click Edit .
3 Edit the System Settings, Home Screen Settings, H.323 Settings, Call Settings, Audio Settings, and (if applicable) CMA Desktop Settings sections of the Provisioning Fields dialog box.
For information about these fields, see “Automatic Provisioning” on page 85. The sections may differ depending on the endpoint type selected.
4 Click OK.
The provisioning profile is updated.
Edit the Profile Order for an Automatic Provisioning Profile
To edit the profile order for an automatic provisioning profile
1 Go to Admin > Provisioning Profiles > Automatic Provisioning Profiles.
2 In the Automatic Provisioning Profiles page, select the profile of interest, click in the Profile Order text box preceding the provisioning profile of interest, and enter the priority for the profile.
3 Click Update Profile Order.
The system assigns the provisioning profile the selected priority and shuffles and reassigns priorities to the other provisioning profiles.

Polycom CMA System Operations Guide
132 Polycom, Inc.
Clone an Automatic Provisioning Profile
To clone an automatic provisioning profile
1 Go to Admin > Provisioning Profiles > Automatic Provisioning Profiles.
2 In the Automatic Provisioning Profiles page, select the profile of interest and click Clone .
3 In the Clone Profile dialog box, enter a name for the new profile and click Save.
The provisioning profile appears last in the Automatic Provisioning Profiles list.
4 As needed, edit the profile. See “Edit an Automatic Provisioning Profile” on page 131.
Delete an Automatic Provisioning Profile
To delete an automatic provisioning profile
1 Go to Admin > Provisioning Profiles > Automatic Provisioning Profiles.
2 In the Automatic Provisioning Profiles page, select the profile of interest and click Delete .
3 Click Yes to confirm the deletion.
The profile is deleted from the Polycom CMA system.
Scheduled Provisioning Operations
View the Scheduled Provisioning List and Details
To view the automatic provisioning list and details about a scheduled provisioning operation
1 Go to Endpoint > Scheduled Provisioning.
2 As needed, use the Filter to customize the Endpoint list.
3 Select the endpoint of interest.
4 Expand the Provisioning Details tab in the Device Details section.

Endpoint Provisioning Operations
Polycom, Inc. 133
Add a Scheduled Provisioning Profile
To add a scheduled provisioning profile
1 Go to Admin > Provisioning Profiles > Scheduled Provisioning Profiles.
2 In the Scheduled Provisioning Profiles page, click Add .
3 In the Add Profile dialog box, select the Endpoint Type for the provisioning profile, enter a name for the profile, and click Next.
4 As needed, select Provision This Page and complete the General Settings, Video Network, Monitors, Cameras, Audio Settings, LAN Properties, and Global Services sections of the Provisioning Fields dialog box.
For information about these fields, see “Scheduled Provisioning” on page 91. The sections may differ depending on the endpoint type selected.
5 Click OK.
The provisioning profile appears in the updated Scheduled Provisioning Profiles list.
Edit a Scheduled Provisioning Profile
To edit a scheduled provisioning profile
1 Go to Admin > Provisioning Profiles > Scheduled Provisioning Profiles.
2 In the Scheduled Provisioning Profiles list, select the profile of interest and click Edit Profile.
3 As needed, select Provision This Page and complete the General Settings, Video Network, Monitors, Cameras, Audio Settings, LAN Properties, and Global Services sections of the Provisioning Fields dialog box.
For information about these fields, see “Scheduled Provisioning” on page 91. The sections may differ depending on the endpoint type selected.
4 Click OK.
The provisioning profile is updated.

Polycom CMA System Operations Guide
134 Polycom, Inc.
Clone a Scheduled Provisioning Profile
To clone a scheduled provisioning profile
1 Go to Admin > Provisioning Profiles > Scheduled Provisioning Profiles.
2 In the Scheduled Provisioning Profiles page, select the profile of interest and click Clone Profile.
3 In the Clone Profile dialog box, enter a name for the new profile and click Save.
The provisioning profile appears first in the updated Scheduled Provisioning Profiles list.
4 Edit the sections of the Provisioning Fields dialog box. The sections and fields differ depending on the endpoint type selected. For more information on these fields, see the product documentation for the selected endpoint.
5 Review each page of the scheduled provisioning profile and determine if you want the parameters on the page provisioned. If you do want the parameters on the page provisioned, select Provision This Page.
6 Click OK.
The provisioning profile is updated.
Delete a Scheduled Provisioning Profile
To delete a scheduled provisioning profile
1 Go to Admin > Provisioning Profiles > Scheduled Provisioning Profiles.
2 In the Scheduled Provisioning Profiles page, select the profile of interest and click Delete Profile.
3 Click Yes to confirm the deletion.
The profile is deleted from the Polycom CMA system.
Schedule an Endpoint for Provisioning
To schedule an endpoint for provisioning
1 Go to Endpoint > Scheduled Provisioning.
2 As needed, use the Filter to customize the endpoint list.

Endpoint Provisioning Operations
Polycom, Inc. 135
3 Select the endpoints of interest.
4 Click Provision.
5 In the Schedule Endpoint Provisioning dialog box, select the appropriate provisioning profile.
6 In the Schedule field, select Now or Later.
7 If you select Later, enter a Date and Time for the provisioning.
8 Select either Use Server Date/Time or Use Endpoint Date/Time as these may differ.
9 Click Schedule.
The Scheduled Provisioning View reappears.
10 Click Refresh and check the Pending column for the provisioning status.
For each endpoint you selected, the name of the profile appears in the Pending column, and the date and time you entered appears in the Scheduled column.
Check the Status of a Scheduled Provisioning
To check the status of a scheduled provisioning
1 Go to Endpoint > Scheduled Provisioning.
2 As needed, use the Filter to customize the endpoint list.
3 Select the endpoint of interest.
4 Expand the Provisioning Details tab in the Device Details section.
For information about the fields in this section, see “View the Scheduled Provisioning List and Details” on page 132.
Clear the Status of Scheduled Provisioning
To clear the status of a scheduled provisioning
1 Go to Endpoint > Scheduled Provisioning.
2 As needed, use the Filter to customize the endpoint list.
3 Select the endpoints of interest.
4 Click Clear Status.
The endpoint provisioning status returns to Clear.

Polycom CMA System Operations Guide
136 Polycom, Inc.
Cancel a Scheduled ProvisioningYou can only cancel provisioning of a Pending process. You cannot cancel the provisioning of an endpoint while it is In Progress.
To cancel a pending scheduled provisioning
1 Go to Endpoint > Scheduled Provisioning.
2 As needed, use the Filter to customize the endpoint list.
3 Select the endpoints of interest.
4 Click Cancel Provision.
The provisioning operation is cancelled and the provisioning status returns to Clear.

Polycom, Inc. 137
10Endpoint Softupdate Operations
This chapter describes how to use Polycom® Converged Management Application™ (CMA™) system to update the software on Polycom endpoints when a new software package is available.
For automatic softupdate, it includes these topics:
• View Automatic Softupdate Information
• View Automatic Softupdate Packages
• Implement Automatic Softupdates for Endpoints
For scheduled softupdate, it includes these topics:
• View Scheduled Softupdate Information
• View List of Softupdate Packages
• Implement Scheduled Softupdates for Endpoints
Automatic Softupdate Operations
View Automatic Softupdate Information
To view information for endpoints that are eligible for automatic softupdates
1 Go to Endpoint > Automatic Softupdate.
The Automatic Softupdate page appears.
2 As needed, use the Filter to customize the endpoint list. Filter choices include Type, Name, IP Address, ISDN Video Number, Alias, and Site.
3 Select the endpoint of interest.
4 In the Device Details section, expand the Softupdate Details tab. For more information, see “Softupdate Details” on page 159.

Polycom CMA System Operations Guide
138 Polycom, Inc.
View Automatic Softupdate Packages
To view the list of automatic softupdate packages
1 Go to Admin > Software Updates > Automatic Software Updates.
The Automatic Software Updates page appears and the Polycom HDX Series automatic softupdate packages are displayed. The Automatic Software Updates page includes this information.
2 To view the Polycom CMA Desktop automatic softupdate packages, click the CMA Desktop tab.
Implement Automatic Softupdates for EndpointsTo implement automatic softupdates, complete the following tasks:
1 “List the Serial Numbers for the Endpoints to be Updated” on page 139.
2 “Download the Required Software Package” on page 140.
3 “Request Update Activation Keys” on page 140.
4 “Upload the Software Package and Create a Softupdate Package” on page 141. For more information on softupdate packages, see “View Automatic Softupdate Information” on page 137.
5 “Set an Automatic Softupdate Policy” on page 142.
Field Description
Version to use Displays the default automatic softupdate profile to be used for the endpoint type and model
Allow this version or newer When checked, indicates that when a newer automatic softupdate package for the endpoint type and model is added, that package should be used as the default package
Endpoint Type The type of endpoint system. For valid endpoint system types, see “Endpoint Configuration/Provisioning” on page 85.
Version The version of the software package associated with the automatic softupdate package
Description The meaningful name given to the automatic softupdate package when it was created
Uploaded The date and time when the automatic softupdate package was created
Trial Group The trial group assigned to the software update package, if applicable.

Endpoint Softupdate Operations
Polycom, Inc. 139
List the Serial Numbers for the Endpoints to be Updated
To list the serial numbers for the endpoints to be updated
1 Go to Admin > Software Updates > Automatic Software Updates.
2 Click Get Serial Numbers .
The Endpoint Serial Number List appears listing the endpoints eligible for automatic softupdate. Endpoints without serial numbers and endpoints that are not actively managed by the system are excluded.
3 As needed, use the Filter to customize the endpoint list.
4 Select the specific endpoints to be updated. To select all endpoints in the list, click the checkbox in the column header.
5 Click Get Serial Numbers.
The serial number(s) appear in the text box on the page.
6 When updating a single endpoint:
a Record the serial number:____________________________________
b Click Close.
The Automatic Software Updates list reappears.
c Go to “Download the Required Software Package” on page 140.
7 When updating multiple endpoints:
a Copy and paste the serial numbers from the list to a .txt file that you can submit to the Polycom Product Activation site. Put one serial number per line as shown in the following example.
b Return to the Endpoint Serial Number List and click Close.
The Automatic Software Updates list reappears.
c Repeat steps 2 through 7 for the each endpoint or set of endpoints to be updated. You may include all of the serial numbers for all of the different endpoint types in the same .txt file.
d Save the .txt file.
e Go to “Download the Required Software Package” on page 140.
82071007E1DACD82070407E010CD820418048078B282040903E00FB0

Polycom CMA System Operations Guide
140 Polycom, Inc.
Download the Required Software Package
To download the software package required to update the devices
1 On your local system, create a directory to which to save the software package (if one does not already exist).
2 For Polycom endpoints:
a Open a web browser and go to www.polycom.com/support.
b In the Downloads section, select the Product and Category for the required software package.
c Select the software package and save it to the directory created in step 1.
d Repeat steps b through c for each device type to be updated. Note that the software package may contain the software for different models of the same device type.
3 For third-party endpoints, follow the company’s recommended procedure for downloading a software package. Save it to the directory created in step 1.
Request Update Activation Keys
To request upgrade activation keys
1 For Polycom products
a Go to http://www.polycom.com/activation.
b Log in or Register for An Account.
c Select Product Activation.
d In the Software Upgrade KeyCode section, click Retrieve Software KeyCode.
e When upgrading a single device:
» Enter the serial number of the device to be updated into the Serial Number field of the Single Upgrade Key Code section.
NoteIn general, you need an activation key when updating to a major release (for example, 3.x to 4.x) or minor release (for example, 3.1 to 3.2). You do not need an activation key when updating a point release (for example, 3.1.1 to 3.1.2). However, you should read the product release notes for specific information about whether or not you’ll need an activation key.

Endpoint Softupdate Operations
Polycom, Inc. 141
» Enter the version number to which you are upgrading and click Retrieve.
» The key code is returned on the screen.
» Record the key code and create a .txt file with the Serial Number - Key Code combination to be updated.
» Close the Product Activation screens.
f When updating multiple devices from a prepared .txt file (step 7 on page 139):
» In the Multiple Upgrade KeyCode section, click Add Attachment.
» Browse to the location of the .txt file you created in step 7 on page 139 and click Upload.
» A file containing the Serial Number - Key Code combinations will be emailed to the specified email account.
» When you receive the .txt file, save it to your local system.
» Close the Product Activation screens.
2 For third-party endpoints, follow the company’s recommended procedure for requesting an upgrade activation key.
Upload the Software Package and Create a Softupdate PackageAfter you receive notification about a new software package for a Polycom endpoint, upload the softupdate to the Polycom CMA system and create a softupdate profile to use for the update.
To upload the software package and create an automatic softupdate profile
1 Go to Admin > Software Updates > Automatic Software Updates.
2 Select the tab for the endpoint type of interest.
3 Click Upload Software Update.
4 In the Upload Software Update dialog box, verify the endpoint type and model.
5 If an activation key code is required to activate the softupdate, click the Update Requires Key checkbox and in the Software Update Key File field browse to the .txt key file received in “Request Update Activation Keys” on page 140.

Polycom CMA System Operations Guide
142 Polycom, Inc.
6 Enter a meaningful description that will help other users to understand the purpose of the softupdate. (Note that the field is ASCII only. For more information, see “Field Input Requirements” on page 9.)
7 Click OK.
An automatic softupdate profile for the endpoint type and model type appears in the Automatic Software Updates list.
If you receive a message that indicates “This version is the first for its endpoint type, so it will be assumed to be the policy for this endpoint type,” the softupdate profile also appears in the Version to use field.
Set an Automatic Softupdate Policy
To set an automatic softupdate policy for an endpoint type
1 Go to Admin > Software Updates > Automatic Software Updates.
2 Select the tab for the endpoint type of interest.
3 Choose one of these policies:
— To specify a minimum version of automatic softupdate package, make that version the Version to use and select Allow this version or newer.
— To require a specific version of automatic softupdate package, make that version the Version to use and clear Allow this version or newer.
— To turn automatic softupdate off for an endpoint type, change the Version to use value to (none).
4 Click Update.
NoteThe key is generated from the endpoint serial number and version number, and Polycom sends it as a text (.txt) file to the customer when new software is available. Customers can review their key history at http://www.polycom.com/support.

Endpoint Softupdate Operations
Polycom, Inc. 143
Trial a Softupdate Package
To trial a softupdate package:
1 Get the things you need to create the package. Complete these tasks:
a “List the Serial Numbers for the Endpoints to be Updated” on page 139.
b “Download the Required Software Package” on page 140.
c “Request Update Activation Keys” on page 140.
2 Set up testing. Complete these tasks:
a “Create a Local Trial Group” on page 143.
b “Upload the Software Package and Create a Trial Softupdate Package” on page 143. For more information on softupdate packages, see “View Automatic Softupdate Information” on page 137.
3 Once your testing of the trial software package is complete, do one of these tasks:
— “Promote the Trial Softupdate Package to Production” on page 144
— “Delete the Trial Softupdate Package” on page 145.
Create a Local Trial GroupTo trial a software update with a specific group of local and/or enterprise users, create a local group that includes these users, as described in “Add a Local Group” on page 203. The people in this group will receive the trial softupdate package when their endpoint goes through its normal, automated softupdate process.
Upload the Software Package and Create a Trial Softupdate Package
To upload the software package and create a trial automatic softupdate package
1 Go to Admin > Software Updates > Automatic Software Updates.
2 Select the tab for the endpoint type of interest.
Notes• You can use an existing enterprise group as a trial group, but you will not be
allowed to change the enterprise group in any way.
• If the trial software group is a parent group with children, all of its children will inherit trial permissions.

Polycom CMA System Operations Guide
144 Polycom, Inc.
3 Click Upload Software Update.
4 In the Upload Software Update dialog box, verify the endpoint type and model.
5 If an activation key code is required to activate the softupdate, click the Update Requires Key checkbox and in the Software Update Key File field browse to the .txt key file received in “Request Update Activation Keys” on page 140.
6 Enter a meaningful description that will help other users to understand the purpose of the softupdate. (Note that the field is ASCII only. For more information, see “Field Input Requirements” on page 9.)
7 To trial the software with the group created previously, select Trial Software and from the Select Trial Group menu, select the trial group created in “Create a Local Trial Group” on page 143.
8 Click OK.
A trial automatic softupdate package for the endpoint type and model type appears in the Automatic Software Update list. You can tell it is a trial package, because the Trial Group column includes your entry.
The next time members of the trial group log into the system, their systems will be upgraded with the trial software package.
Promote the Trial Softupdate Package to ProductionIf you determine that the trial softupdate package is acceptable for production, you can then promote it to production.
To promote a trial softupdate package to production
1 Go to Admin > Software Updates > Automatic Software Updates.
2 Select the tab for product to update.
3 Select the softupdate package of interest and click Promote to Production.
4 Click Yes to confirm the promotion.
The package becomes a production automatic softupdate package.
NoteThe key is generated from the endpoint serial number and version number, and Polycom sends it as a text (.txt) file to the customer when new software is available. Customers can review their key history at http://www.polycom.com/support.

Endpoint Softupdate Operations
Polycom, Inc. 145
Delete the Trial Softupdate PackageIf you determine that the trial softupdate package is unacceptable for production, you can delete it.
To delete a trial softupdate package
1 Go to Admin > Software Updates > Automatic Software Updates.
2 Select the tab for product to update.
3 Select the softupdate package of interest and click Delete Software Update.
4 Click Yes to confirm the deletion.
The package is removed from the Automatic Software Updates list.
5 To return your trial group to the last production version of software, clear the Allow this version or newer option and click Update.
6 When all endpoints are back to the last production version of software, reset your automatic softupdate policy. See “Set an Automatic Softupdate Policy” on page 142.
Scheduled Softupdate Operations
View Scheduled Softupdate Information
To view information about softupdates that are schedule or for endpoints that are eligible for scheduled softupdates
1 Go to Endpoint > Scheduled Softupdate.
2 As needed, use the Filter to customize the endpoint list. Filter choices include Type, Name, IP Address, ISDN Video Number, Alias, and Site.
3 Select the endpoint of interest.
4 In the Device Details section, expand the Softupdate Details tab. For more information, see “Softupdate Details” on page 159.

Polycom CMA System Operations Guide
146 Polycom, Inc.
View List of Softupdate Packages
To view the list of scheduled softupdate packages
Go to Admin > Software Updates > Scheduled Software Updates.
The Scheduled Software Updates page appears and includes this information.
Implement Scheduled Softupdates for EndpointsTo implement a scheduled softupdate, you must perform this series of tasks.
1 “List the Serial Numbers for the Endpoints to be Updated” on page 146.
2 “Download the Required Software Package” on page 147.
3 “Request Update Activation Keys” on page 140.
4 “Upload the Software Package and Create a Softupdate Package” on page 141. For more information on softupdate profiles, see “View Automatic Softupdate Information” on page 137.
5 “Schedule the Softupdate for Endpoints” on page 149.
List the Serial Numbers for the Endpoints to be Updated
To list the serial numbers for the endpoints to be updated
1 Go to Admin > Software Updates > Scheduled Software Updates.
2 Select the appropriate Endpoint Type and Endpoint Model combination for the endpoint to update.
Field Description
Endpoint Type The type of endpoints for which the Polycom CMA system can perform a scheduled softupdate. For valid types, see “Endpoint Types” on page 83.
Endpoint Model The model of endpoints for which the Polycom CMA system can perform a scheduled softupdate.
Description The meaningful name given to the softupdate package when it was created
Uploaded The date and time when the softupdate package was added to the Polycom CMA system.

Endpoint Softupdate Operations
Polycom, Inc. 147
3 Click Get Serial Numbers .
The Endpoint Serial Number List appears listing the endpoints of the selected type and model that are eligible for scheduled softupdates.
4 As needed, use the Filter to customize the endpoint list.
5 Select the specific endpoints to be updated. To select all endpoints in the list, click the checkbox in the column header.
6 Click Get Serial Numbers.
The serial number(s) appear in the text box on the page.
7 When updating a single endpoint:
a Record the serial number:_____________________________________
b Click Close.
The Scheduled Software Updates list reappears.
8 When updating multiple endpoints:
a Copy and paste the serial numbers from the endpoint serial number list to a .txt file that you can submit to the Polycom Product Activation site. Put one serial number per line as shown in the following example.
b Return to the endpoint serial number list and click Close.
The Scheduled Software Updates list reappears.
c Repeat steps 2 through 8 for the each endpoint or set of endpoints to be updated. You may include all of the serial numbers for all of the different endpoint types in the same .txt file.
d Save the .txt file.
Download the Required Software Package
To download the software package required to update the devices
1 On your local system, create a directory to which to save the software package (if one does not already exist).
2 For Polycom endpoints:
a Open a web browser and go to www.polycom.com/support.
b In the Downloads section, select the Product and Category for the required software package.
82071007E1DACD82070407E010CD820418048078B282040903E00FB0

Polycom CMA System Operations Guide
148 Polycom, Inc.
c Select the software package and save it to the directory created in step 1.
d Repeat steps b through c for each device type to be updated. Note that the software package may contain the software for different models of the same device type.
3 For third-party endpoints, follow the company’s recommended procedure for downloading a software package. Save it to the directory created in step 1.
Request Update Activation Keys
To request upgrade activation keys
1 For Polycom products
a Go to http://www.polycom.com/activation.
b Log in or Register for An Account.
c Select Product Activation.
d In the Software Upgrade KeyCode section, click Retrieve Software KeyCode.
e When upgrading a single device:
» Enter the serial number of the device to be updated into the Serial Number field of the Single Upgrade Key Code section.
» Enter the version number to which you are upgrading and click Retrieve.
» The key code is returned on the screen.
» Record the key code and create a .txt file with the Serial Number - Key Code combination to be updated.
» Close the Product Activation screens.
f When updating multiple devices from a prepared .txt file (step 7 on page 139):
» In the Multiple Upgrade KeyCode section, click Add Attachment.
» Browse to the location of the .txt file you created in step 7 on page 139 and click Upload.
» A file containing the Serial Number - Key Code combinations will be emailed to the specified email account.
» When you receive the .txt file, save it to your local system.
» Close the Product Activation screens.

Endpoint Softupdate Operations
Polycom, Inc. 149
2 For third-party endpoints, follow the company’s recommended procedure for requesting an upgrade activation key.
Upload the Software Package and Create a Softupdate Profile
To upload the software package and create an automatic softupdate profile
1 Go to Admin > Software Updates > Scheduled Software Updates.
2 On the Software Update Profiles list, click the checkbox to select the appropriate Endpoint Type and Endpoint Model combination for the endpoints to be updated. To select all endpoints in the list, click the checkbox in the column header.
3 In the Upload Software Update dialog box, verify the endpoint type and model.
4 If an activation key code is required to activate the softupdate, click Update Requires Key and in the Software Update Key File field browse to the .txt key file (received in “Request Update Activation Keys” on page 140).
5 Enter a meaningful description that will help other users to understand the purpose of the softupdate. (Note that the field is ASCII only. For more information, see “Field Input Requirements” on page 9.)
6 Click OK.
A scheduled softupdate profile for the endpoint type and model type is created.
7 In a redundant configuration, repeat steps 1 through 6 on the redundant server.
Schedule the Softupdate for Endpoints
To schedule one or more endpoints for softupdate
1 Go to Endpoint > Scheduled Softupdate.
2 As needed, use the Filter to customize the endpoint list.
3 Select the endpoints of interest and click Software Update.
NoteThe key is generated from the endpoint serial number and version number, and Polycom sends it as a text (.txt) file to the customer when new software is available. Customers can review their key history at http://www.polycom.com/support.

Polycom CMA System Operations Guide
150 Polycom, Inc.
4 In the Schedule Software Update dialog box, specify when the update should occur.
a In the Schedule field, select Now or Later.
b If you select Later, enter a Date and Time for the update.
c Select either Use Server Date/Time or Use Endpoint Date/Time as these may differ.
5 Select from these options.
6 Click Schedule.
For each endpoint selected, the status changes to Pending and the date and time for the softupdate appears in the Scheduled column.
Fields Description
Remove address book entries
Select this checkbox to have all local address book entries removed after the update.
Remove system files Select this checkbox to have all endpoint settings removed after the update. You must then reconfigure the endpoint.
Allow endpoint to be a DHCP server
Select this checkbox to allow the endpoint to be a DHCP server.
Applies to V-Series, VSX-Series, and ViewStation endpoints only. For more information, see the endpoint’s user guide.
Passive mode Select this checkbox to perform a softupdate in passive FTP mode.
Applies to V-Series, VSX-Series, and ViewStation endpoints only. For more information, see the endpoint’s user guide.
NoteYou may apply a single softupdate request to multiple endpoint models. If the request includes one or more scheduling options that are not valid for a selected endpoint model, the system applies only the options that are valid.

Endpoint Softupdate Operations
Polycom, Inc. 151
Cancel Software UpdatesYou can cancel scheduled softupdates for an endpoint. You cannot explicitly cancel automatic softupdates for an endpoint. You must do that at the endpoint.
To cancel scheduled software updates
1 Go to Endpoint > Scheduled Softupdate.
2 As needed, use the Filter to customize the endpoint list.
3 Select the endpoint or endpoints of interest and click Cancel Update.
A confirmation dialog box appears. The dialog box may indicate that one or more of the selected endpoints had a softupdate in progress.
4 Click Ok to cancel in progress and future softupdates for the selected endpoints and clear their status.
You can cancel softupdate operations that are in progress, but you may wish to check the endpoint afterward to verify it was left in a operational state.

Polycom CMA System Operations Guide
152 Polycom, Inc.

Polycom, Inc. 153
11Device Details
This chapter lists the fields found in the Device Detail section of the Polycom® Converged Management Application™ (CMA™) system interface. It includes these topics:
• Device Summary Information
• Device Status Information
• Call Information
• Device Alerts Information
• Provisioning Details
• Softupdate Details
Device Summary InformationThe Device Summary information in the Device Details section includes the following fields.
Field Description
Name The name of the device
Type The type of device. For valid device types, see “Endpoint Configuration/Provisioning” on page 85.
ID
Owner (Endpoints only) The user associated with the device
IP Address The assigned IP address of the device
ISDN Video Number
For ISDN devices only, the country code + city/area code + phone number for the device.
When you add an endpoint without native ISDN, the ISDN gateway, country code, and area code are not captured. The CMA system only supports native ISDN.

Polycom CMA System Operations Guide
154 Polycom, Inc.
Site The network site for the device. By default, devices are added to the Primary Site.
Software Version The version of the software installed on the device (ASCII onlya). The device provides the version number if it registered successfully or is managed.
Serial Number The serial number (ASCII onlya) of the device.The device provides the serial number if it registered successfully or is managed.
Available to Schedule
Select this option to make the device available when users are scheduling conferences
NoteThe Available to schedule field is disabled for MGC and RMX devices.
Monitoring Level (Endpoints only—grayed out for MCU devices.) The monitoring level for the device. Possible values include:
• Standard. This device is monitored.
• VIP. This device is monitored closely. The VIP identifier and filters are available to operators to monitor and manage conferences.
Supported Protocols
The communications protocols that the device can support. Possible values include:
• IP (H.323) - A standard that defines the protocols used for multimedia communications on packet-based networks, such as IP.
• ISDN (H.320) - A standard that defines the protocols used for multimedia communications on switched networks, such as ISDN.
For devices with the type Unknown, select H.323.
The device automatically provides the protocols if it registered successfully or is managed.
Notes • If an endpoint is configured as a gateway (ISDN), only
the H.323 checkbox is selected. If the endpoint supports true ISDN, the H.323 and ISDN checkboxes are selected.
• RMX 2000/4000 devices support only the H.323 protocol.
Field Description

Device Details
Polycom, Inc. 155
Device Status InformationThe Device Status information in the Device Details section includes the following fields.
Capabilities Enabled
Capabilities to enable on this device. Options are:
• MCU - The device can act as a control unit for multipoint conferences
• Gateway - The device can act as a gateway for call management
The MCU provides the capability if it registered successfully or is managed.
NoteCurrently, RMX devices cannot be Gateway devices.
Alias (type) The alias to connect to the device. The Polycom CMA system converts the aliases to the IP address associated with the device.
• Alias Type. Possible types include E.164, H.323 ID, URL, Transport Address, E-mail, Party Number, and Unknown.
• Alias Value. Value for the alias type shown.
a. For more information on field limitations, see “Field Input Requirements” on page 9.
Field Description
Field Description
Gatekeeper Registration
The status of the device’s registration with the gatekeeper service. Possible values include:
• Registered
• Unregistered
Directory Registration
The status of the device’s registration with the Global Directory Service. Possible values include:
• Registered
• Unregistered
Presence Registration
The status of the device’s registration with the presence service. Possible values include:
• Registered
• Unregistered
Exchange Registration
The status of the device’s registration with the Microsoft Exchange service.

Polycom CMA System Operations Guide
156 Polycom, Inc.
SIP Registration The status of the device’s registration with the SIP service.
Device Managed Indicates whether or not the Polycom CMA system is managing the device.
Last GK Registration
The date and time of the device’s last gatekeeper registration in a default format of mm-dd-yyyy hh:mm:ss AM | PM with adjustment to the client-machine GMT offset
Device Local Time The local time as set within the device in a default format of hh:mm:ss AM | PM. This field is blank for the following device types: MGC, RMX, GW/MCU, Other, and Tandberg.
ISDN Line Status Type
The status of the ISDN line. Possible values include:
• Operational
• Non-operations
This field is blank for the following device types: PVX, MGC, RMX, GW/MCU, Other, and Tandberg.
ISDN Assignment Type
How the ISDN type was assigned to the device. Possible values include:
• Administrator, when the ISDN type was assigned manually by an administrator
• Endpoint, when the ISDN type was natively assigned in the endpoint
• Auto-Assigned, when the ISDN type was automatically assigned by the CMA system based on the site configuration
• From Network, when the ISDN type was derived from the gateway and extension
• Undefined, when the CMA system cannot identify the source for the ISDN type assignment
This field is blank for the following device types: PVX, MGC, RMX, GW/MCU, Other, and Tandberg.
Device ISDN Type The ISDN network interface type installed in the device. Possible values include:
• ISDN_QUAD_BRI
• ISDN_PRI_T1
• ISDN_BRI
• ISDN_UNKNOWN
This field is blank for the following device types: PVX, MGC, RMX, GW/MCU, Other, and Tandberg.
Field Description

Device Details
Polycom, Inc. 157
Call InformationThe Call Info in the Device Details section includes the following fields.
Field Description
Call Type The connection protocol for the call in which the device is participating. Possible values include: H.323, H.320, and SIP
Video Protocol The video connection protocol, both transmission (Tx) and reception (Rx), the device is using. Possible values include:
• H.261
H.261 is an ITU standard designed for two-way communication over ISDN lines and supports data rates which are multiples of 64Kbit/s. H.261 supports CIF and QCIF resolutions.
• H.263
H.263 is based on H.261 with enhancements that improve video quality over modems. It supports CIF, QCIF, SQCIF, 4CIF and 16CIF resolutions.
• H.264
Video Format The video format, both transmission (Tx) and reception (Rx), the device is using.
Audio Protocol The audio connection protocol, both transmission (Tx) and reception (Rx), the device is using. Possible values include:
• G.711
• G.722
• G.728
Far Site Name The H.323ID of the far site device to which the selected endpoint is connected. When multiple endpoints are connected through the device's embedded MCU, this field displays a concatenation of each endpoint's H.323ID separated by ' | ', e.g. 'ISDN-CO1-7-1 | Vsfx-9-1'.
Far Site Number The address of the far site device to which the selected endpoint is connected. The address value for the calling device appears to be the dialed address. The address value for the called device appears to be the IP Address.
Cause Code Standard H.323 cause code that reflects normal call termination or the nature of an internal failure, e.g., '16' or '211'.
Encryption The status of encryption for the call. Possible values include: Off, Disabled, AES, and DH-1024

Polycom CMA System Operations Guide
158 Polycom, Inc.
Device Alerts InformationThe Device Alerts information in the Device Details section includes the following fields.
Provisioning DetailsThe Provisioning Details information in the Device Details section includes the following fields.
Field Description
Errors Device error message text, e.g., GK Registration error
Warnings Device warning message text, e.g., Low Battery
Field Description
Last Profile Applied The name of the last provisioning profile that was or was not successfully applied to the device. The Provisioning Status will be either Success or Failed.
Provisioning Status The device’s current provisioning status. Possible values include:
• Clear. No provisioning has been done.
• Pending. Provisioning is scheduled for this device.
• In Progress. The device is currently being provisioned.
• Success. Provisioning has been completed successfully on this device.
• Failed. Provisioning was not completed on this device.
Some endpoint systems expect all configuration fields to be provisioned. If any of the fields are not provisioned, the status will indicate failed. However, the endpoint will often function successfully.
Pending Profile The name of the provisioning profile that is scheduled to be applied to the device. In this case, the Provisioning Status will be either Pending or In Progress.
This field is blank if the device is not scheduled for provisioning.
Scheduled The date and time, in the default format of yyyy-mm-dd hh:mm, when the device is schedule to be provisioned.
This field is blank if the device is not scheduled for provisioning.

Device Details
Polycom, Inc. 159
Softupdate DetailsThe Softupdate Details information in the Device Details section includes the following fields.
Last Attempt Date/Time
The date and time, in the default format of yyyy-mm-dd hh:mm:ss, of the last provisioning message exchanged with the device.
Failure Reason A text description of the reason the provisioning failed. Causes for failure include:
• The provisioning profile does not exist
• The provisioning profile does not include provisioning information
• The CMA system no longer manages the device
• A password for the device is set in the video endpoint system, and you must enter it in the CMA system
• The device is busy
• A network error occurred
• An incomplete transfer of provisioning information occurred
• Provisioning has timed out
• An internal error occurred on the device, and you must reboot it
• An unknown error occurred. Reboot the device.
Log Message A read-only text box that contains messages related to the device provisioning status
Field Description
Field Description
Softupdate Status The device’s software update status. Possible values include:
• Clear. A software update has not been done.
• Pending. A software update has been scheduled and is pending. The device may be offline or in a call.
• In Progress. The software update is in progress.
• Success. A software update has completed successfully.
• Failed. A software update could not be performed.
Scheduled The date and time, in the default format of yyyy-mm-dd hh:mm, when the device software is schedule to be updated.
This field is blank if the device is not scheduled for provisioning.

Polycom CMA System Operations Guide
160 Polycom, Inc.
Last Attempt Date/Time
The date and time, in the default format of yyyy-mm-dd hh:mm:ss, of the last software update message exchanged with the device.
Failure Reason A text description of the reason the software update failed. Causes for failure may include:
• The software update file location does not exist.
• A password for the device is set in the video endpoint system, and you must enter it in CMA.
• A network error has occurred.
• The update has timed out.
• An internal error occurred on the device, and you must reboot it.
• A profile has not been configured.
• An endpoint is offline.
• An incorrect activation key is in the key file.
• An unknown error has occurred. Reboot the device
Log Message A read-only text box that contains the log message text recorded during the execution of the software update.
Note that there are no log messages displayed for dynamically-managed endpoints.
Field Description

Polycom, Inc. 161
12Network Device Management Overview
This chapter provides an overview of the Polycom® Converged Management Application™ (CMA™) system’s network device management functions. It includes these topics:
• Network Device Types
• Network Device Menu, Views, and Lists
• Device Gatekeeper Registration Policies
• Cascading MCUs
Network Device TypesA Polycom CMA system supports these network device types:
• Polycom MGC conferencing bridges
• Polycom RMX conferencing bridges
• Polycom Distributed Management Application™ (DMA™) systems
• Polycom Video Border Proxy (VBP) systems
In the Network Device > Monitor View, a Polycom CMA system displays MCUs as two separate Device Types, the MCU type and a GW/MCU device.
Notes• If you have one or more MCUs, you must add a device record for each unit, even
when you use the open gatekeeper policy for registration. This process creates a device record for the controller unit.
• Some features such as Lecture Mode, Presentation Mode, Conference on Demand and Chairperson are not available on Polycom RMX 1000 MCUs.

Polycom CMA System Operations Guide
162 Polycom, Inc.
If automatic registration is allowed, individual H.323 cards and/or IP blades in Polycom MCUs are assigned the device type of GW/MCU during registration. This device type represents the cards’ network interface. If automatic registration is not allowed, you must add a GW/MCU device record for each H.323 card and IP blade.
Network Device Menu, Views, and ListsThe Polycom CMA system Network Device menu provides these views of the network device list:
• Monitor View—Displays the list of all manageable and registered network devices. Use this view to manage network devices.
• VBPs (Video Border Proxy systems)—Displays the list of Polycom VBP systems registered to the Polycom CMA system. Use this view to add, edit, or delete VBP systems.
• MCUs (Microprocessing Control Units)—Displays the list of Polycom MCUs (Polycom RMX or Polycom MGC conferencing platforms) registered to the Polycom CMA system. Use this view to add, edit, or delete MCUs.
• DMAs (Distributed Management Application™ systems)—Displays the list of Polycom DMA™ systems) registered to the Polycom CMA system. Use this view to add, edit, or delete DMA systems.
All of the Network Device views have the following information:
Section Description
Views The views you can access from the page
Actions The set of available commands. The constant command in the Network Device views is Refresh , which updates the display with current information.
Network Device List The context-sensitive Network Device list for the selected view
Device Details Information about the network device selected in the network device list including:
• “Device Summary Information” on page 153
• “Device Status Information” on page 155
• “Call Information” on page 157
• “Device Alerts Information” on page 158
• “Provisioning Details” on page 158
• “Softupdate Details” on page 159

Network Device Management Overview
Polycom, Inc. 163
Monitor ViewUse the Network Device > Monitor View to monitor the network devices.
Network Device List in the Monitor View By default the Network Device list in the Monitor View displays a list of network devices the Polycom CMA system monitors, including those devices that registered automatically with the Polycom CMA system and those devices that were added manually for management and monitoring purposes.
The Network Device list in the Monitor View includes MCUs and Polycom DMA nodes. It does not include Polycom VBP devices.
The Network Device list has these fields.
Field Description
Filter Use the filter choices to display other views of the Network Device list, which include:
• Type- Filters the list by device type. For more information, see “Network Device Types” on page 161.
• Alerts- Filters the list by alert type: Help, Error, or Warning
• Connection Status- Filters the list by connection status: In a Call, Online, or Offline
• Name - Filters the list by system name entered
• IP Address - Filters the list by IP address entered
• Alias - Filters the list by the alias entered
• Site - Filters the list by site location entered
Status The state of the network device. Possible values include:
• Online
• Offline
• In a call
• Unknown
• Device alert
• Gatekeeper registration error
Name The system name of the network device
Type The type of network device. For valid device types, see “Network Device Types” on page 161.
IP Address The IP address assigned to the network device
Site The site to which the network device belongs
Alias The alias assigned to the network device

Polycom CMA System Operations Guide
164 Polycom, Inc.
Commands in the Monitor ViewBesides providing access to the network device views, the Actions section of the Monitor View may also include these context-sensitive commands depending on the selected device type.
VBP ViewUse the VBP View to manage Polycom Video Border Proxy™ (VBP™) firewall devices on the network.
Polycom VBP devices, when installed at the edge of the operations center, secures critical voice, video, and data infrastructure components including VoIP softswitches, video gatekeepers, gateways, media servers, and endpoints.
The VBP list has the following information.
Command Use this command to...
Available for all device types
Add Manually add a network device to the Polycom CMA system or find a network device on the network
View Details
Display all of the Device Details for the selected network device
Edit Change connection settings for the selected network device. Note that if this is a managed device, the device may overwrite settings entered manually.
Delete Delete the selected network devices
Available for only selected network device types
Manage Open the selected network device’s management interface in a separate browser window. This command is not available for the following device types: MGC, GW/MCU, and Other.
Field Description
Name A unique name to identify the Polycom VBP device
Model The model of Polycom VBP device
Provider-side IP The private network IP address for the Polycom VBP device
Subscriber-side IP The public network IP address for the Polycom VBP device

Network Device Management Overview
Polycom, Inc. 165
MCU ViewUse the MCU View to manage Polycom MCU conferencing platforms on the network.
The MCU list has the same fields as the Network Device > Monitor view. For more information, see “Monitor View” on page 163.
DMA ViewUse the DMA View to manage Polycom® Distributed Media Application™ (DMA™) systems on the network.
The Polycom DMA system is a multipoint conferencing solution that uses advanced routing policies to distribute audio and video calls among multiple MCUs, creating a single resource pool. The Polycom DMA system acts much like a virtual MCU, greatly simplifying video conferencing resource management and improving efficiency.
Logically, the Polycom DMA system is a cooperative two-node cluster. Both nodes register with the gatekeeper and can accept and process calls. In the Polycom Visual Communications experience, the Polycom CMA system is the gatekeeper. It recognizes that the H.323 gatekeeper registration requests from the DMA nodes are part of a two-node cluster. When both nodes are registered and the systems completely configured, the Polycom CMA system routes calls destined for the Polycom DMA system to the first node that it finds available. If the first node isn’t available, it automatically routes the call to the second node.
You may wish to implement both scheduled multipoint conferencing (enabled by a Polycom CMA system) and ad hoc multipoint conferencing (enabled by a Polycom DMA system) using your Polycom RMX 2000/4000 bridges. If so, you should identify two pools of RMX bridges. To do this, add all of the bridges to the Polycom CMA system, because it will act as the gatekeeper for all of the bridges. However, for those bridges that you wish to reserve for ad hoc conferencing, disable the Available to Schedule option (enabled by default) on the Polycom CMA system.
You can also manually add DMA nodes to a Polycom CMA system.
Once the two nodes are registered to a Polycom CMA system, finish the integration of the Polycom DMA system by completing the following tasks:
• Add the logical Polycom DMA system, as described in “Add a Polycom DMA System” on page 185.
Note Although it can distribute conferences among a pool of MCUs, the Polycom DMA system doesn’t currently support cascading of MCUs. Each conference is limited to the capacity of the MCU on which it resides.

Polycom CMA System Operations Guide
166 Polycom, Inc.
• Change the Available to Schedule setting for the RMX media servers that the Polycom DMA system incorporates. See “Edit an MCU Bridge” on page 176.
In this initial release, a Polycom CMA system does not provide provisioning, softupdate, monitoring, alerts or control for a Polycom DMA system.
The DMA list has the following information.
Device Gatekeeper Registration PoliciesIf the Polycom CMA system gatekeeper registration policy allows devices to register automatically (that is, a primary gatekeeper setting of Allow Registration of All Endpoints, Allow Registration of Endpoints in Defined Sites, or Allow Registration of Endpoints with Defined E.164 Prefixes), those registered devices are automatically added to the either the endpoint list or the network device list.
If the Polycom CMA gatekeeper registration policy does not allow devices to register automatically (i.e., a gatekeeper setting of Allow Registration of Predefined Endpoints Only), you must manually add all devices to the Polycom CMA system.
No matter what the gatekeeper registration policy, any device that is automatically provisioned, any device that is registered with the Global Address Book, and any device that is added manually to the Polycom CMA system can automatically register with the gatekeeper.
For more information, see “Device Registration” on page 281.
Field Description
Name A unique name for the Polycom DMA system
Virtual IP Address The virtual IP address for the Polycom DMA system
H.323 Alias The alias used to identify both nodes in the Polycom DMA system
Description A useful description for the Polycom DMA system
NoteYou can also manually add devices to the Polycom CMA system for monitoring purposes only.

Network Device Management Overview
Polycom, Inc. 167
Cascading MCUs
To enable multi-bridge conferences, you must complete the following steps:
1 Configure entry queues on the participating MCUs. Only bridges with entry queues are display in the list of available bridges to schedule on the people-to-bridge or bridge-to-bridge scheduling page.
2 Configure MCU Cascading for each bridge on the Polycom CMA system by editing each MCU and referencing the appropriate entry queue ID and ISDN numbers.
Some notes about cascading MCUs:
• A Polycom RMX 1000 MCU cannot be used for cascading.
• All devices (MCUs and endpoints) in a cascaded conference must be registered to the same Polycom CMA system gatekeeper.
• All systems (the Polycom CMA system, MCUs, and endpoints) must be time synchronized.
Configuring Cascading on a Polycom MGC MCUWhen using a Polycom MGC MCU for cascading, version 8.0.2 or greater is required. Polycom recommends creating a cascade entry queue on every Polycom MGC MCU on the network.
To create a cascade entry queue on a Polycom MGC system, create an Entry Queue Service that has the Cascade check box enabled. If the cascade link is to be IP only, check the IP Only checkbox under Target Conferences. If the cascade link is to support ISDN, leave this box unchecked and configure the dial-in numbers. Also, enable the Use Entry Queue selection.
See the Polycom MGC Manager User Guide for additional information on configuring entry queues on a Polycom MGC system.
Configuring Cascading on a Polycom RMX 2000/4000 MCUWhen using a Polycom RMX 2000/4000 MCU for cascading, Polycom recommends version 3.0 or greater. Earlier versions may cause a tunneling effect.
To configure cascading using a Polycom RMX 2000/4000 MCU, you must create two cascading entry queues—one for which the Master option on the Cascade menu is selected and one for which the Slave option on the Cascade menu is selected. Also, enable the Use Entry Queue selection.
The primary purpose for the Master and Slave designation is to determine which Polycom RMX 2000/4000 MCU is responsible for managing People+Content for the conference.

Polycom CMA System Operations Guide
168 Polycom, Inc.
However, since ISDN cascade links on Polycom RMX MCUs are not supported, do not select Enable ISDN/PSTN Access. The Polycom CMA system only supports cascaded IP links on Polycom RMX 2000/4000 MCUs. It does not support cascaded ISDN links on Polycom RMX 2000/4000 MCUs.
Also, Polycom RMX systems enforce a 1x1 layout for the cascaded link between bridges, so only one participant on each bridge is displayed at any time. To change this on a Polycom RMX system, go to Setup > System Configuration and on the MCMS_PARAMETERS_USER page add a new flag called FORCE_1X1_LAYOUT_ON_CASCADED_LINK_CONNECTION with a Value of NO.
Polycom RMX 2000/4000 Systems in Secure ModeThe Polycom CMA system automatically detects when a Polycom RMX 2000/4000 system is operating in secure (HTTPS) mode. By default, in non-secure (HTTP) mode, the Polycom RMX 2000/4000 system uses port 80 for its communications and in secure (HTTPS) mode, the Polycom RMX 2000/4000 system uses port 443 for its communications.
You can determine via the Polycom CMA system interface whether or not a Polycom RMX 2000/4000 system is operating in secure mode by viewing the HTTP port number for the MCU (see “View Device Details” on page 169).
If an administrator changes the secure mode setting on a Polycom RMX 2000/4000 system, the Polycom CMA system will lose connection to the RMX, but will automatically regain it using the correct protocol.. The Polycom CMA system may take up to a minute to restore the connection.

Polycom, Inc. 169
13MCU Bridge Management Operations
This chapter describes how to perform the Polycom® Converged Management Application™ (CMA™) system MCU bridge management tasks. It includes these topics:
• View Device Details
• Add an MCU Manually
• Edit an MCU Bridge
• Delete an MCU Bridge
• View Bridge Hardware
• View Bridge Services
• View Bridge Conferences
• View Bridge Ports
• View Bridge Meeting Rooms
• View Bridge Entry Queues
• View Bridge Gateway Conferences
View Device Details
To view detailed information about a managed MCU bridge
1 Go to Network Device > MCUs.
2 As needed, use the Filter to customize the MCU list.
3 Select the MCU of interest and click View Details .
The Device Details dialog box for the selected MCU appears.

Polycom CMA System Operations Guide
170 Polycom, Inc.
Field Description
Identification
System Name The name of the MCU.
• MCU names must be unique.
• The name must be in ASCII onlya and may have an unlimited number of characters. Spaces, dashes, and underscores are valid.
• When retrieved from the MCU, the name is taken from the H.323 ID if the MCU registered with the gatekeeper and it is a third-party system. In other cases, it is the system name, which might be different than the H.323 ID.
Device Type The type of MCU. For valid types, see “Network Device Types” on page 161.
IP Address The assigned IP address of the MCU
Site The network site for the MCU. By default, MCUs are added to the Primary Site.
Product ID
Description A free-form text field (Extended ASCII onlya) in which information about the MCU can be added
Serial Number The serial number (ASCII onlya) of the MCU.The MCU provides the serial number if it registered successfully or is managed.
Software Version The version of the software installed on the MCU (ASCII onlya). The MCU provides the version number if it registered successfully or is managed.
HTTP URL (RMX MCUs only) The management URL for the endpoint, if available (ASCII onlya). This URL allows the Polycom CMA system to start the endpoint ‘s management system using the Manage function.
All Polycom endpoints allow device management through a browser. For these endpoints, this field is completed when the endpoint registers with the Polycom CMA system.
For third-party endpoints that do not register using an IP address, you must enter the URL.
HTTP Port (RMX MCUs only) The HTTP port number for the MCU communitcations. The MCU provides the port number if it registered successfully and is managed.
By default, in non-secure (HTTP) mode, the RMX uses port 80 and in secure (HTTPS) mode, the RMX uses port 443.

MCU Bridge Management Operations
Polycom, Inc. 171
Addresses
DNS Name The DNS name for the MCU
Aliases The aliases that allow you to connect to the MCU. The Polycom CMA system converts the aliases to the IP address associated with the MCU.
• Alias Type. Possible types include E.164, H.323 ID, URL, Transport Address, E-mail, Party Number, and Unknown.
• Alias Value. Value for the alias type shown.
• The value for the H.323 ID is the MCU name if the MCU registered with the gatekeeper and it is a third-party system. In other cases, the MCU name is the system name, which might be different from the H323 ID.
Notes• To add aliases for the MCU, edit the MCU.
• The following Alias Values are ASCII onlya: H323 ID, URL, Transport Address, and Unknown.
ISDN Video Number
The country code + city/area code + phone number for the MCU.
Capabilities
Supported Protocols
The communications protocols that the MCU can support. Possible values include:
• IP (H.323) - A standard that defines the protocols used for multimedia communications on packet-based networks, such as IP.
• ISDN (H.320) - A standard that defines the protocols used for multimedia communications on switched networks, such as ISDN.
The MCU automatically provides the protocols if it registered successfully or is managed.
Capabilities Enabled
Capabilities to enable on this MCU. Options are:
• MCU - The device can act as a control unit for multipoint conferences
• Gateway - (MGC MCUs only) The device can act as a gateway for call management
The MCU provides the capability if it registered successfully or is managed.
Available to Schedule
Select this option to make the MCU available to users who are scheduling conferences
Monitoring Level Not applicable to MCU devices.
Field Description

Polycom CMA System Operations Guide
172 Polycom, Inc.
MCU (Network) Services
Service Type The available network services may include:
• H.323 Service—Indicates a connection to an IP network using the H.323 protocol.
• H.320 Service—Indicates a connection to an ISDN phone line using the H.320 protocol.
• Gateway Service—(MGC MCUs only) Indicates a connection to both IP and ISDN to enable conversion from one protocol to the other.
• Direct Service—Indicates a direct connection between an MCU and a video endpoint system, using a serial cable.
Service Name A descriptive name for the network service.
Priority The priority set for the network service as compared to other services when it was created.
MCU Resources
Max Total Conferences
Maximum number of total conferences allowed at once on this MCU.
Max CP Conferences
Maximum number of continuous presence (CP) conferences allowed, based on the number of licenses available.
Max Video Ports (RMX MCUs only)
Max Total Participants
Maximum number of total MCU participants allowed at once on this MCU.
Max Transcoding Ports
(MGC MCUs only) Maximum number of transcoding ports on which both ISDN and IP participants can be connected.
Use Entry Queue Indicates whether the MGC device supports an IVR.
Entry Queue Number ID
The IP number that conference participants dial to access the IVR prompt to join a conference.
Max Bandwidth Capacity (Kbps)
The maximum bandwidth supported by the Polycom RMX 2000/4000.
Field Description

MCU Bridge Management Operations
Polycom, Inc. 173
Alerts (RMX MCUs only)
Category Lists the type of error. The following categories may be listed:
• File – indicates a problem in one of the files stored on the MCU’s hard disk.
• Card – indicates problems with a card.
• Exception – indicates software errors.
• General – indicates a general error.
• Assert – indicates internal software errors that are reported by the software program.
• Startup – indicates errors that occurred during system startup.
• Unit – indicates problems with a unit.
• MPL - indicates an error related to a Shelf Management component (MPL component) other than an MPM, RTM or switch board.
Level Indicates the severity of the problem, or the type of event. There are three fault level indicators:
• Major Error
• System Message
• Startup Event
Code Indicates the problem, as identified by the error category
Card Alerts (MGC MCUs only)
Slot Displays an icon according to the HW component type and the slot number. The icon displays the hardware status as follows:
• An exclamation point (!) indicates errors in the HW component.
• Card icon with the reset button () indicates that the HW component is currently resetting.
• Card icon with diagnostic tools () indicates that the HW component is in diagnostic mode.
Type The type of hardware card
a. For more information on field limitations, see “Field Input Requirements” on page 9.
Field Description

Polycom CMA System Operations Guide
174 Polycom, Inc.
Add an MCU ManuallyThis section describes how to add an MCU to a Polycom CMA system.
When you add an MCU device, MCU network services are added automatically at the time the IP card registers with the Polycom CMA system.
When you add a gateway device, use the Services page to specify the network services available for the device.
When you enter network service information manually, remember that the Polycom CMA system does not create the service at the device. The service must have already been defined at the device. Enter information in the Polycom CMA system that matches the information in the device.
If you do not define network services, you may not use an MCU or gateway in a conference. For example, if you do not define the H.323 service on the MCU, when the Polycom CMA system tries to schedule a video conference that requires this service, it will look for another MCU with this service. If another MCU with this service is not available, the conference will not be scheduled.
NoteBack-end communication with the RMX control units and IP service blades must be enabled.
Notes• Polycom RMX 2000/4000 devices may only have H.323 service.
• Once an MCU registers with the Polycom CMA system, if you change an MCU service on the MCU, the update does not automatically get sent to the Polycom CMA system. To update the system, you must delete and read the MCU to the system.
• These network services are not the same as the Dial Plan Services such as Simplified Dialing and Conference on Demand. Network services describe the physical connection that the device supports. Dial plan services provide access to specific features used for routing calls by dialing a prefix.

MCU Bridge Management Operations
Polycom, Inc. 175
To add an MCU bridge to a Polycom CMA system or find an MCU on the network
1 Go to Network Device > MCUs and click Add .
2 In the Add New Device dialog box, select the Device Type of interest. For valid types, see “Network Device Types” on page 161.
3 Enter the IP Address of the MCU.
4 Enter the Admin ID and Password for the MCU.
5 Click Find Device.
— If the Polycom CMA system can find the MCU on the network, the Add New Device dialog box is populated with information retrieved from the MCU. Review any information retrieved from the MCU.
— If the Polycom CMA system cannot find the MCU on the network, a Device Not Found dialog box appears.
6 Click OK.
7 Complete the Identification, Addresses, Capabilities, MCU Services, MCU Resources, and MCU Cascading sections of the Add New Device dialog box. (For more information, see “View Device Details” on page 169.) At a minimum, assign the MCU a System Name.
Pay particular attention to the Capabilities options, because the settings on it determine how the MCU is used throughout the Polycom CMA system.
Note that many fields in this dialog box are ASCII only. For more information, see “Field Input Requirements” on page 9.
8 Click Add.
The MCU appears in the Network Device list. By default, the system:
— Adds the MCU to the applicable site
— Sets the HTTP Port to 80
— Adds an Alias for the endpoint
— Makes the endpoint Available to Schedule
— Sets the Monitoring Level to Standard
Notes• In the Device List, a Polycom CMA system displays a single MCU as two
separate Device Types (an RMX or MGC device and a GW/MCU device). The GW/MCU designation represents the network interface.
• For third-party endpoints, the HTTP URL, serial number, and DNS name are not captured during endpoint registration.

Polycom CMA System Operations Guide
176 Polycom, Inc.
Edit an MCU Bridge
To edit an MCU from the Polycom CMA system
1 Go to Network Device > MCUs.
2 As needed, use the Filter to customize the MCU list.
3 Select the MCU of interest and click Edit .
4 Complete the Identification, Addresses, Capabilities, MCU Services, MCU Resources, and MCU Cascading sections of the Edit Device dialog box. (For more information, see “View Device Details” on page 169.) At a minimum, assign the MCU a System Name.
5 Click Update.
Enable Cascading Conferences
To enable cascading conferences
1 On the MCUs, configure entry queues as required and record the entry queue number(s). For more information, see “Cascading MCUs” on page 167 or the product documentation for the MCU.
2 Go to Network Device > MCUs.
3 As needed, use the Filter to customize the MCU list.
4 Select the MCU of interest and click Edit .
5 Go to the MCU Resources section of the Edit Device dialog box and select Use Entry Queue.
6 Go to the MCU Cascading section of the Edit Device dialog box.
7 For a Polycom RMX 2000/4000 MCU:
a Enter the Master Entry Queue Number ID and Slave Entry Queue Number ID.
b (Optional) Enter the Master Entry Queue ISDN Number and Slave Entry Queue ISDN Number.
8 For a Polycom MGC MCU:
a Enter the Cascade Entry Queue Number ID.
b (Optional) Enter the Cascade Entry Queue ISDN Number.
9 Click Update.

MCU Bridge Management Operations
Polycom, Inc. 177
Delete an MCU Bridge
To delete an MCU from the Polycom CMA system
1 Go to Network Device > MCUs.
2 As needed, use the Filter to customize the MCU list.
3 Select the MCU of interest and click Delete.
4 Click Yes to confirm the deletion.
The MCU list is updated.
View Bridge Hardware
To view the hardware configuration of a bridge
1 Go to Network Device > MCUs.
2 As needed, use the Filter to customize the MCU list.
3 In the MCU list, select the bridge of interest and click View Hardware.
A Hardware pane appears below the bridge list. It lists the hardware for the selected bridge and displays the Slot number, Card Type, Status, Temperature, and Voltage for each piece of hardware.
View Bridge Services
To view the network services available on the bridge
1 Go to Network Device > MCUs.
2 As needed, use the Filter to customize the MCU list.
3 In the MCU list, select the bridge of interest and click View Services.
A Services pane appears below the bridge list. It lists the network services for the selected bridge and identifies the Service Type, Service Name, and the default setting for the network service.

Polycom CMA System Operations Guide
178 Polycom, Inc.
View Bridge Conferences
To view information about the conferences resident on the bridge
1 Go to Network Device > MCUs.
2 As needed, use the Filter to customize the MCU list.
3 In the MCU list, select the bridge of interest and click View Conferences.
A Conferences pane appears below the bridge list. It lists the conferences for the selected bridge and identifies the conference Status, Type, Name, Start Time, Bridge, and Owner.
View Bridge Ports
To view information about the bridge ports
1 Go to Network Device > MCUs.
2 As needed, use the Filter to customize the MCU list.
3 In the MCU list, select the bridge of interest and click View Ports.
A Ports pane appears below the bridge list. It lists the ports for the selected bridge and identifies the Audio Ports Available, Video Ports Available, Audio Ports in Use, and Video Ports in Use.
View Bridge Meeting Rooms
To view information about meeting rooms on a bridge
1 Go to Network Device > MCUs.
2 As needed, use the Filter to customize the MCU list.
3 In the MCU list, select the bridge of interest and click View Meeting Rooms.
A Meeting Rooms pane appears below the bridge list. It lists the meeting rooms for the selected bridge and identifies the meeting room by Name, ID, Duration, Conference, Chairperson, Profile.

MCU Bridge Management Operations
Polycom, Inc. 179
View Bridge Entry Queues
To view information about entry queues on a bridge
1 Go to Network Device > MCUs.
2 As needed, use the Filter to customize the MCU list.
3 In the MCU list, select the bridge of interest and click View Entry Queues.
An Entry Queues pane appears below the bridge list. It lists the entry queues for the selected bridge and identifies the entry queue by Name, ID, Profile, and Dial-In Number.
View Bridge Gateway Conferences
To view information about gateway conferences on a bridge
1 Go to Network Device > MCUs.
2 As needed, use the Filter to customize the MCU list.
3 In the MCU list, select the bridge of interest and click View Gateway Conferences.
If the feature is available on the bridge, a Gateway Conferences pane appears below the bridge list. It lists the gateway conferences for the selected bridge.

Polycom CMA System Operations Guide
180 Polycom, Inc.

Polycom, Inc. 181
14Management Operations for Other Network Devices
This chapter describes how to perform the Polycom® Converged Management Application™ (CMA™) system network device management tasks. It includes these sections:
• Polycom VBP Management Operations
• Polycom DMA Management Operations
Polycom VBP Management OperationsThe Polycom Video Border Proxy (VBP) device management operations include these topics:
• Add a Polycom VBP Device
• Edit a Polycom VBP Device
• Delete a Polycom VBP Device
• Identify Endpoints Using the Polycom VBP Device
• Identify Endpoints Using the Polycom VBP Device

Polycom CMA System Operations Guide
182 Polycom, Inc.
Add a Polycom VBP Device
To add a Polycom VBP device to a Polycom CMA system
1 Go to Network Device > VBPs and click Add .
2 Configure these settings in the Add VBP dialog box.
3 Click OK.
A system dialog box appears indicating that you must restart Apache for the settings to take affect. You also have the opportunity to add another Polycom VBP device.
4 Click Restart Apache.
The Polycom VBP device is added to the Polycom CMA system. However, more configuration may be necessary for the device to operate in your network. For example, you will probably need to “Copy the Polycom CMA System Certificate to a Polycom VBP Device” as described in the next topic.
Copy the Polycom CMA System Certificate to a Polycom VBP Device
To copy the Polycom CMA system certificate to a Polycom VBP device
1 Go to Network Device > VBPs
2 Select the Polycom VBP device of interest and click Copy Certificate to VBP.
In the Copy Certificate to VBP dialog box, the system automatically populates the Filename field with the filename of the Polycom CMA system certificate and the Username field with root.
IMPORTANTWhen you add a new Polycom VBP device, the Polycom CMA system will restart the user interface web service. This will interrupt others using the Polycom CMA system user interface.
Column Description
Name A unique name to identify the Polycom VBP device
Provider-side IP The Private Network IP address for the Polycom VBP device
Subscriber-side IP The Public Network IP address for the Polycom VBP device

Management Operations for Other Network Devices
Polycom, Inc. 183
3 Enter the SSH or console Password for the root user and click OK.
The Polycom VBP device appears in the Network Device list.
Edit a Polycom VBP Device
To edit a Polycom VBP device
1 Go to Network Device > VBPs
2 Select the Polycom VBP device of interest and click Edit .
3 Configure these settings as needed in the Edit VBP dialog box.
4 Click OK.
Delete a Polycom VBP Device
To delete a Polycom VBP device from a Polycom CMA system
1 Go to Network Device > VBPs.
2 Select the Polycom VBP device of interest and click Delete .
3 Click Yes to confirm the deletion.
Identify Endpoints Using the Polycom VBP Device
To identify which endpoints are using the Polycom VBP firewall
1 Go to Endpoint > Monitor View.
2 Click Select Filter and select IP Address.
NoteThis procedure identifies only Polycom HDX and CMA Desktop systems that are:
• Registered to the Polycom CMA system
• Using the Polycom VBP firewall
• Operating in dynamic-management mode.
One Polycom HDX or legacy endpoint system operating in standard management mode, registered to the Polycom CMA system, and using the Polycom VBP firewall may also be displayed in the Endpoint list. This entry may represent multiple endpoints, since all Polycom HDX or legacy endpoint system operating in standard management mode register with the same information.

Polycom CMA System Operations Guide
184 Polycom, Inc.
3 Enter the provider-side IP address of the Polycom VBP device and press Enter.
The Endpoint list displays the dynamically-managed endpoints that are registered to the Polycom CMA system and using the Polycom VBP firewall. All of the endpoints display the same IP address, which is the Provider-side IP address of the Polycom VBP device. However, the endpoints will have different aliases and owners.
Polycom DMA Management OperationsThe Polycom DMA device management operations includes these topics:
• Add Polycom DMA System Nodes
• Edit a Polycom DMA System
• Delete a Polycom DMA System
Add Polycom DMA System Nodes
To add Polycom DMA system nodes to a Polycom CMA system
1 Go to Network Device > Monitor View and click Add .
2 In the Add New Device dialog box, select the DMA node.
3 Enter the IP Address of the DMA node to add.
4 Enter the Admin ID and Password for the DMA node.
5 Click Find Device.
— If the Polycom CMA system can find the DMA node on the network, the Add New Device dialog box is populated with information retrieved from the node. Review any information retrieved from the node.
— If the Polycom CMA system cannot find the DMA node on the network, a Device Not Found dialog box appears.
6 Click OK.
7 Complete the Identification, Addresses, and Capabilities sections of the Add New Device dialog box. At a minimum, assign the DMA node a System Name and an Alias.
Note that many fields in this dialog box are ASCII only. For more information, see “Field Input Requirements” on page 9.
8 Click Add.
The DMA node appears in the Network Device list.

Management Operations for Other Network Devices
Polycom, Inc. 185
9 Repeat steps 1 through 8 for the second DMA node. Once both nodes are added to the Polycom CMA system, you can continue on “Add a Polycom DMA System” on page 185.
Add a Polycom DMA System
To add a Polycom DMA system to a Polycom CMA system
1 Go to Network Device >Monitor View and verify that both DMA nodes for the cluster are added to the Polycom CMA system.
To add a Polycom DMA system to the Polycom CMA system, both nodes of a Polycom DMA cluster must be registered with the system. If the nodes are not registered with the Polycom CMA system, you can add them manually and then add the system. See “Add Polycom DMA System Nodes” on page 184.
2 Once both nodes are listed, go to Network Device > DMAs and click Add .
3 Configure these settings in the Add DMA dialog box.
4 Click Add.
The Polycom DMA system is added to the Polycom CMA system. However, more configuration may be necessary for the DMA system to operate in your network. See the product documentation for the DMA system.
Column Description
Name A unique name for the Polycom DMA system
Description A useful description for the Polycom DMA system
Virtual IP Address The virtual IP address for the Polycom DMA system
Admin ID The administrator ID for the Polycom DMA system
Admin/Confirm Password
The administrator password for the Polycom DMA system
H.323 Alias The alias used to identify both nodes in the Polycom DMA system

Polycom CMA System Operations Guide
186 Polycom, Inc.
Edit a Polycom DMA System
To edit a Polycom DMA system
1 Go to Network Device > DMAs.
2 Select the Polycom DMA system of interest and click Edit .
3 Configure these settings as needed in the Edit DMA dialog box.
4 Click OK.
Delete a Polycom DMA System
To delete a Polycom DMA system from a Polycom CMA system
1 Go to Network Device > DMAs.
2 Select the Polycom DMA system of interest and click Delete .
3 Click Yes to confirm the deletion.
Column Description
Name A unique name for the Polycom DMA system
Description A useful description for the Polycom DMA system
Virtual IP Address The virtual IP address for the Polycom DMA system
Admin ID The administrator ID for the Polycom DMA system
Admin/Confirm Password
The administrator password for the Polycom DMA system
H.323 Alias The alias used to identify both nodes in the Polycom DMA system

Polycom, Inc. 187
15MCU Bridge Device Details
This chapter lists the fields found in the MCU Device Detail section of the Polycom® Converged Management Application™ (CMA™) system interface. It includes these sections:
• MCU H.320 Services
• MCU H.323 Services
• MCU Gateway Services
• MCU Resources—Polycom MGC Platform
• MCU Resources—Polycom RMX 2000/4000 Platform
MCU H.320 Services
Field Description
MCU H.32O Service
Service Name Name of the H.320 ISDN service
Channels Number of 64K channels dedicated to the MCU
Number Range Dial-in number range of service. These ISDN numbers are available on an MCU for all endpoints to use. Also called direct inward dialing (DID).
LCR Table The least-cost routing table for calls made through this gateway
Local Prefix The prefix required to place a call to a local number outside the enterprise. For example, if you dial 9 to reach an outside line, the Local Prefix is 9.
Non-Local Prefix The prefix required to dial long distance. For example, in certain states in the United States, you must dial 1 before you can dial a non-local number.

Polycom CMA System Operations Guide
188 Polycom, Inc.
MCU H.323 Services
International Prefix The prefix required to dial an international number. For example, in many countries, the international prefix is 00.
Local Area Code A list of local area codes, separated by commas
Priority The priority order for this service
Field Description
Service Name The name of the H.323 service (ASCII onlya) defined in the MCU.
a. For more information, see “Field Input Requirements” on page 9.
Dialing Prefix Prefix to select this service.
The prefix for the MGC is located in the H.323 Service Properties dialog box of the MGC Manager.
Service IP Address IP address associated with this network service and with this H.323 card in the MCU.
Alias Alias for the service defined in the MCU.
NotePolycom recommends using E.164 as the alias for this service.
The number that is dialed if the endpoints are registered with the same gatekeeper. If the endpoints are not registered with the same gatekeeper, they use their assigned IP address to connect.
Port Number of IP connections available.
Priority The priority order for this service.
Field Description

MCU Bridge Device Details
Polycom, Inc. 189
MCU Gateway Services
MCU Resources—Polycom MGC Platform
Field Description
Service Name The name of the H.323 service defined in the MCU.
Dialing Prefix Prefix to select this service.
The prefix for the MGC is located in the H.323 Service Properties dialog box of the MGC Manager.
H320 Service Name Select a defined H320 service
Channels Number of 64K channels dedicated to the MCU.
Priority The priority order for this service.
Field Description
Max Total Conferences Maximum number of total conferences allowed at once on this MCU.
Max CP Conferences Maximum number of continuous presence (CP) conferences allowed, based on the number of licenses available.
Max Total Participants Maximum number of total MCU participants allowed at once on this MCU.
Max Transcoding Ports Maximum number of transcoding ports on which both ISDN and IP participants can be connected.
Total IP Parties (Embedded MCU devices)
Maximum number of IP calls that can be made from this endpoint.
Total ISDN Parties (Embedded MCU devices)
Maximum number of ISDN calls that can be made from this endpoint.
Total Transcoded Parties (Embedded MCU devices)
Maximum number of transcoded calls (IP and ISDN calls combined) that can be made from this endpoint.
Use Entry Queue Indicates whether the MGC device supports an IVR.
Entry Queue Number ID The IP number that conference participants dial to access the IVR prompt to join a conference.
Entry Queue ISDN Number The ISDN-allocated phone number of the IVR. ISDN devices only.

Polycom CMA System Operations Guide
190 Polycom, Inc.
MCU Resources—Polycom RMX 2000/4000 Platform
Field Description
Max Total Conferences Maximum number of total conferences allowed at once on this MCU.
Max CP Conferences Maximum number of continuous presence (CP) conferences allowed, based on the number of licenses available.
Max Video Ports Maximum number of video ports on which participants can be connected.
Max Licensed Video Ports Maximum number of total video participants allowed at once on this MCU.
Use Entry Queue Indicates whether the RMX 2000/4000 device supports an IVR.
Entry Queue Number ID The IP number that conference participants dial to access the IVR prompt to join a conference.
Audio & Video Settings: The following parameters must be set manually to synchronize the with the RMX 2000/4000 device. See the RMX 2000/4000 documentation for more information about these settings.
RMX API Version Choose Pre-2.0 if you have an RMX 1.x system. Choose 2.0 or greater if you have an RMX 2.x system.
Max Voice Ports Only available when RMX API Version is 2.x or greater. Set this to the maximum number of audio ports configured on the RMX device.
Refer to the RMX 2000/4000 Administrator’s Guide for more information about this field.
NoteUp to 10 blocks of RMX video ports can be converted to 50 audio-only ports, up to a maximum of 200 audio-only ports.
Max CP Resolution Only available when RMX API Version is 2.x or greater. Set this to the highest available video format. Choices are: None, CIF, SD15, and SD30.
Refer to the RMX 2000/4000 Administrator’s Guide for more information about this field.

Polycom, Inc. 191
16Users and Groups Overview
This chapter provides an overview of the Polycom® Converged Management Application™ (CMA™) system users and groups management structure. It includes these topics:
• Groups, Users, and User Roles
• Roles and Permissions
• Device Associations and Presence
• User Management
Groups, Users, and User RolesThe Polycom CMA system allows an administrator with System Setup permissions to manage users, groups, user roles, and permissions. Most often a Polycom CMA system is integrated with an enterprise directory from which users are imported. However, the Polycom CMA system also allows an administrator with System Setup permissions to add local users (i.e., users added manually to the system) and associate them with devices and roles.
Users
Local UsersWhen you manually add local users, the Polycom CMA system manages all user information and associations.
At a minimum, when you manually add users, you must enter a user’s First Name or Last Name, User ID, and Password. When you enter the minimum information, the Polycom CMA system automatically assigns local users the basic Scheduler role. They can then schedule conferences, be scheduled into conferences, and call into conferences. However, the system cannot call out to them until they are associated with devices.

Polycom CMA System Operations Guide
192 Polycom, Inc.
You should associate local users with one or more roles and associate them with one or more devices. Alternatively, you can associate local users with roles by associating them with local groups.
Enterprise UsersWhen the Polycom CMA system is integrated with an enterprise directory, the Polycom CMA system manages only three pieces of an enterprise users’ information: the devices, roles, and alert profiles assigned to them. The remaining information is pulled from the enterprise directory.
When the Polycom CMA system is integrated with an enterprise directory, users imported into the system through the enterprise directory are by default added to the system without a role. This default set up allows users to log into the Polycom CMA system with their enterprise user IDs and passwords. They can then be scheduled into conferences and call into conferences. However, the system cannot call out to them until they are associated with devices.
To be fully functional, you must associate enterprise users with one or more roles to control their access to system functions and associate them with one or more devices. Alternatively, you can associate enterprise users with roles by associating them with local or enterprise groups.
If you want the Polycom CMA system to, by default, automatically assign enterprise users the basic Scheduler role, you must change the appropriate system Security Settings. See “Give Enterprise Users Default Scheduler Permissions for the Polycom CMA System” on page 359.
GroupsGroups provide a more efficient and consistent use of the Polycom CMA system, because they allow you to assign roles and provisioning profiles to sets of users rather than to individual users.
Notes• Currently, the Polycom CMA system supports only a Microsoft Active Directory
implementation of an LDAP directory.
• You cannot have more than 18 users with the same first and last name in the Polycom CMA system, and their user IDs must be unique across all users and rooms and across all domains.
• The Polycom CMA system displays a user’s City, Title, and Department to help distinguish between users with the same name.

Users and Groups Overview
Polycom, Inc. 193
Local GroupsThe Polycom CMA system allows you to add local groups (i.e., groups added manually to the system) and associate them with provisioning profiles and roles.
For local groups, the Polycom CMA system manages all group information and associations.
Enterprise GroupsWhen the Polycom CMA system is integrated with an enterprise directory, groups defined to the enterprise directory are not automatically added to the Polycom CMA system, but you can import them into the system.
When the Polycom CMA system is integrated with an enterprise directory, the system manages only three pieces of group information: the provisioning profile assigned to the group, the roles assigned to the group, and whether or not the group is Directory Viewable (i.e., displayed in endpoint directories). The remaining group information is pulled from the enterprise directory.
To take full advantage of the Polycom CMA system, the enterprise Microsoft Active Directory must:
• Have Global Catalog turned ON. The Global Catalog enables searching for Active Directory objects in any domain without the need for subordinate referrals, and users can find objects of interest quickly without having to know what domain holds the object.
• Use universal groups. The Global Catalog stores the member attributes of universal groups only. It does not store local or global group attributes.
• Have a login account that has read access to all domains in the Active Directory that the Polycom CMA system can use. We recommend an account with a administrative username and a non-expiring password.
• Have the Active Directory Domain Name Service correctly configured. For more information about Active Directory design and deployment, see the Microsoft best practices guides at http://technet.microsoft.com.
For system and endpoint directory performance purposes, two best practices in regards to enterprise groups are:
• Do not import more than 500 enterprise groups into a Polycom CMA system
• Do not mark more than 200 enterprise groups as Directory Viewable

Polycom CMA System Operations Guide
194 Polycom, Inc.
Favorites ListThe Polycom CMA system allows operators with Monitoring permissions to create one or more Favorites list, which they can use to quickly select participants to participate in conferences.
Roles and PermissionsThe Polycom CMA system is a role and permissions based system.
• Users are assigned one or more user roles either directly or through their group associations
• User roles are assigned a set of permissions
• Users see only the pages and functions available for their roles and associated permissions. Permissions are cumulative, so users see all of the pages and functions assigned to all of their roles and associated permissions.
An administrator has several options when implementing user roles.
1 Implement only the system default user roles of Administrator, Operator, and Scheduler and keep the standard permissions assigned to these roles.
2 Implement only the system default user roles of Administrator, Operator, and Scheduler but change the permissions assigned to the Operator, and Scheduler roles.
Notes• Users inherit roles from their parent groups—local or enterprise. They cannot
inherit roles from groups more distantly removed—for example, from their grandparent groups.
• The role names Administrator, Operator, and Scheduler are stored in the system database and are not localized into other languages. If you wish to localized their names into your language, edit the roles and enter new names for them.
NoteTo ensure Polycom CMA system access and stability, the default roles cannot be deleted and the Administrator role cannot be edited.

Users and Groups Overview
Polycom, Inc. 195
3 Implement either option 1 or 2, but also create additional unique, workflow-driven user roles and determine which permissions to assign to those user roles.
As a best practice, we recommend you create an Advanced Scheduler role and associate it with just advanced scheduling permissions.
Some important notes about user roles and permissions:
• Users (local and enterprise) may be assigned more than one role. In this case, the permissions associated with those roles are cumulative; a user has all of the permissions assigned to all of his roles.
• Users (local and enterprise) may be assigned roles as an individual and as part of a group. Again, the permissions associated with those roles are cumulative; a user has all of the permissions assigned to all of his roles no matter how that role is assigned.
• Users assigned a role with any one of the Administrator Permissions are generally referred to as administrators. Users assigned a role with any one of the Operator Permissions and none of the Administrator Permissions are referred to as Operators. Users assigned a user role with Scheduler Permissions and none of the Administrator or Operator Permissions are referred to as Schedulers.
Scheduler Role, Permissions, and FunctionsA scheduler who is assigned the default Scheduler role with the default permissions has access to the following functions:
ConferenceFutureOngoing
UserGuest Book

Polycom CMA System Operations Guide
196 Polycom, Inc.
Operator Role, Permissions, and FunctionsAn operator who is assigned the default operator role with the default permissions has access to the following functions:
Administrator Role, Permissions, and FunctionsAn administrator who is assigned the default administrator role with the default permissions has access to the following functions:
Conference Future Ongoing
User Guest Book Favorites
Reports IP Call Detail Records Endpoint Usage Report Conference Usage Report Gatekeeper Message Log
Endpoint Monitor View Automatic Provisioning Scheduled Provisioning Automatic Softupdate Scheduled Softupdate
Network Device Monitor View VBPs MCUs DMAs
User Users Groups User Roles Guest Book
Reports Site Statistics Site-Link Statistics IP Call Detail Records Endpoint Usage Report Conference Usage Report Conference Type Report Gatekeeper Message Log System Log Files
Admin Dashboard Conference Templates Conference Settings Provisioning Profiles Automatic Provisioning Profiles Scheduled Provisioning Profiles Software Updates Automatic Software Updates Scheduled Software Updates Rooms Global Address Book Server Settings Network System Time Database LDAP Calendaring Management Microsoft OCS Integration Licenses Redundant Configuration Custom Logo Directory Setup Remote Alert Setup E-mail SNMP Settings
Admin (continued) Gatekeeper Settings Primary Gatekeeper Alternate Gatekeeper Neighboring Gatekeepers Management and Security Server Software Upgrade Certificate Settings Security Settings Endpoint Management Settings Dial Plan and Sites Site Topology Sites Site-Links Site-to-Site Exclustions Network Clouds Territories Services Dial Rules LCR Tables Alert Settings CMA Alert Level Settings Endpoint Alert Level Settings Remote Alert Profiles Database Backup Files Troubleshooting Utilities Report Administration

Users and Groups Overview
Polycom, Inc. 197
Device Associations and PresenceThe Polycom CMA system assumes that users will be associated with devices. You can associate a user with more than one device, but one device is designated as the primary device.
When scheduling a user in a conference, the Polycom CMA system will, by default, schedule the user’s primary device. The scheduler can choose to change the request to schedule one of the user’s other devices.
The Polycom CMA system is also a presence service, which is the part of the system that maintains online status information for the users of dynamically managed devices. The presence service allows users to access information about the online status of other users. This is important, because when you make a video call or start a chat, that action only takes you to a device. It doesn’t ensure that you will reach the person you want to reach. The presence service provides information about the user’s availability, which improves your chances of getting the person.
User ManagementThe Polycom CMA system manages the following user, group, and room management entities:
Name Description
Users list Displays local and enterprise user accounts. Local users are added to the system manually. Enterprise users appear in the Users list when you associate the Polycom CMA system with an enterprise directory.
Groups list Displays local and enterprise groups. Local groups are added to the system manually. Enterprise groups appear in the Groups list when you associate the Polycom CMA system with an enterprise directory and then import the enterprise groups.
Rooms list Displays local and enterprise rooms. Local rooms are added to the system manually. Enterprise rooms appear in the Rooms list when you associate the Polycom CMA system with an enterprise directory and then search for the room in the enterprise directory.
Global Address Book
Automatically populated by devices that register with the gatekeeper function of the Polycom CMA system. You can edit a device in this list and associate the device with a user.

Polycom CMA System Operations Guide
198 Polycom, Inc.
Some additional settings may affect whether or not entries appear in an endpoint’s directory:
• When Directory Viewable is enabled for a local or enterprise group (the default setting), the group appears in the endpoint system’s directory.
• When Allow Directory Changes is enabled at the endpoint, Polycom HDX systems users can save changes to their local directory or Contacts list.
The following illustration shows the relationship between the Polycom CMA system user management entities and those of the dynamically managed endpoints.
Guest Book Static user entries, which can be added to the Guest Book in two ways: From the User menu or when Polycom CMA system schedulers select the Save to Guest Book option when adding a guest participant to a conference.
Presence service contacts
For dynamically-managed endpoint systems only. Presence service contacts are XMPP buddy entries saved as contacts by both buddies and stored with the presence service. Entries saved as contacts by both buddies and stored with the presence service share presence status.
Name Description

Polycom, Inc. 199
17User Management Operations
This chapter includes information on managing users and groups within the Polycom® Converged Management Application™ (CMA™) system. It includes these topics:
• Search for a User
• Add a Local User
• Edit a User
• Delete a User
• Add a Local Group
• Import Enterprise Groups
• Edit a Group
• Delete a Group
• Manage User Roles
• View the List of User Roles
• Add a User Role
• Edit Permissions for a User Role
• Delete a User Role
• View the Groups and Users Associated with a User Role
• Add a Favorites List
• Edit a Favorites List
• Delete a Favorites List

Polycom CMA System Operations Guide
200 Polycom, Inc.
Manage UsersIn the Polycom CMA system, only administrators with Directory Setup permissions can view, add, edit or delete system users.
Search for a User
To search for a user
1 Go to User > Users and in the Search Users field, enter the name of the user of interest.
2 To search for a local user, press Enter.
3 To search both local and enterprise users, first clear the Local Users Only checkbox and then press Enter.
The first 500 users in the database that match your search criteria are displayed in the Users list.
4 If the list is too large to scan, further refine your search string.
Add a Local User
To add a local user
1 Go to User > Users, and click Add.
2 Configure the General Info section of the Add New User dialog box.
NoteSearches for a user are case-insensitive, prefix searches of the Username, First Name, and Last Name fields.
NoteIf you are not in an enterprise domain, you will not have the option of searching for enterprise users.

User Management Operations
Polycom, Inc. 201
3 In the Associated Devices section, select and move the required device(s) to Selected Devices list. Move the unwanted device(s) to the Available Devices list. Press Shift-click or Ctrl-click to select multiple items in the list.
4 In the Associated Roles section, select and move the required role(s) to Selected Roles list. Move the unwanted role(s) to the Available Roles list. Press Shift-click or Ctrl-click to select multiple items in the list.
5 Click OK.
Column Description
First Name The user’s first name
Last Name The user’s last name
User ID The user’s unique login name. This user ID must be unique across all rooms and users and across all domains.
Password The user’s assigned password. This password must be a minimum of eight characters in length.
Email Address The user’s email address. (The Email address is an ASCII-only field.a)
NoteThe Polycom CMA system identifies plugin users and their associated devices by email address, so this is required information for the plugin to work.
a. For more information, see “Field Input Requirements” on page 9.
Title The user’s professional title
Department The user’s department within the enterprise
City The city in which the user’s office is located
Phone Number The contact phone number for the user
NoteIf the user has multiple devices, list the devices in order of priority, with the primary device first.

Polycom CMA System Operations Guide
202 Polycom, Inc.
Edit a UserFor users added manually to the Polycom CMA system, you can edit all user information except the user ID.
For users added through the enterprise directory, you can edit their roles (unless the role is inherited from a group) and associate them to devices, but you cannot change user names, user IDs, or passwords.
To edit a user
1 Go to User > Users and in the Search Users field, enter the name for the user of interest.
2 To search for a local user, press Enter.
3 To search both local and enterprise users, first clear the Local Users Only checkbox and then press Enter.
4 If the list is too large to scan, further refine your search string.
5 Select the user of interest and click Edit.
6 As required, edit the General Info, Associated Devices, and Associated Roles sections of the Edit User dialog box.
7 Click OK.
Delete a UserYou can only delete local users from the Polycom CMA system. You cannot delete users added through integration with an enterprise directory.
To delete a user
1 Go to User > Users and in the Search Users field, enter the name for the user of interest.
NoteSearches for a user are case-insensitive, prefix searches of the Username, First Name, and Last Name fields.
NoteIf you are not in an enterprise domain, you will not have the option of searching for enterprise users.

User Management Operations
Polycom, Inc. 203
2 To search for a local user, press Enter.
3 To search both local and enterprise users, first clear the Local Users Only checkbox and then press Enter.
4 If the list is too large to scan, further refine your search string.
5 Select the user of interest and click Delete.
6 Click Yes to confirm the deletion.
The user is deleted from the Polycom CMA system.
Manage Groups
Add a Local Group
To add a local group
1 Go to User > Groups.
2 In the Groups page, click Add Local Group.
3 Complete the General Info section of the Add Local Group dialog box.
NoteSearches for a user are case-insensitive, prefix searches of the Username, First Name, and Last Name fields.
NoteIf you are not in an enterprise domain, you will not have the option of searching for enterprise users.
Column Description
General Info
Group Name A meaningful and unique group name assigned when creating the group. This
Description A more complete description of the group’s purpose
Directory Viewable Whether or not the group is displayed in the endpoint directory
Provisioning Profile The automatic provisioning profile assigned when creating the group

Polycom CMA System Operations Guide
204 Polycom, Inc.
4 In the Search Available Members field of the Group Members dialog box, search for the users and groups to add to this local group.
5 In the Search Results section, select and move the users and groups of interest to the Group Members list. To select all users and groups listed, click the checkbox in the column header.
6 Click OK.
The group appears in the Groups list. It is identified as a LOCAL group.
Import Enterprise Groups
To import one or more enterprise groups
1 Go to User > Groups.
2 In the Groups page, click Import Enterprise Group.
3 In the Search Available Groups field of the Import Enterprise Group dialog box, type all or part of the group name (with wildcards) and press ENTER.
4 In the Search Results list, select the enterprise groups to add. To select all enterprise groups, click the checkbox in the column header.
Associated Roles
Available Roles The list of roles defined to the CMA system
Selected Roles The list of roles that you assign users when adding them to the system. Users have all of the permissions associated with all of the roles assigned to them (i.e., permissions are cumulative).
Group Members (Local Users Only)
Search Available Members
Search field for finding users
Search Results The users and groups identified to the system that you can add to the local group. This list can include both local and enterprise users and groups.
Group Members The users and groups selected as part of the group
Column Description
NoteSearches for a group are case-insensitive, exact-match searches of the Group Name field. Use wildcard characters to perform substring searches.

User Management Operations
Polycom, Inc. 205
5 Click the right arrow to add the enterprise groups to the Groups to Import list.
6 Click OK.
The enterprise group appears in the Groups list. Now you can edit the group and associate it with an automatic provisioning profile, user roles, and specify whether or not the group directory is viewable. You can also search for enterprise users.
Edit a Group
To edit a local or enterprise group
1 Go to User > Groups.
2 In the Groups page, select the group of interest and click Edit.
3 As required, edit the General Info, Associated Roles, and Group Members sections of the Edit Local Groups dialog box.
4 Click OK.
Delete a Group
To delete a local or enterprise group
1 Go to User > Groups.
2 In the Groups page, select the group of interest and click Delete Group.
3 Click Yes to confirm the deletion.
The group is deleted from the Polycom CMA system.
Notes• The Group Members section is only available for Local groups.
• If you remove a user from a group or a role from a group, the user no longer has the roles associated with the group.
NoteAn enterprise group is only deleted from the Polycom CMA system, not the enterprise directory, so it can be reimported.

Polycom CMA System Operations Guide
206 Polycom, Inc.
Manage User Roles
Assign Users Roles and DevicesYou can assign roles to both local and enterprise users and associate them with devices.
To assign a role and endpoint to a user
1 Go to User > Users.
2 To search for a user:
a In the Search field of the Users page, type a search string.
b To search both local and enterprise users, clear the Local Users Only checkbox and press Enter.
The first 500 users in the database that match your search criteria are displayed in the Users list.
c If the list is too large to scan, further refine your search string.
3 Select the user of interest and click Edit.
4 In the Devices section of the Edit User dialog box, select the device you want to associate with the user and move it to the Selected Devices column. If a user has multiple devices, the first device listed is the user’s default device.
5 Click Finish.
View the List of User Roles
To view the list of User Roles
Go to User > User Roles.
The User Roles list appears. It can be filtered by Name and Description.
NoteSearches for a user on the Polycom CMA system Users page are case-insensitive, prefix searches of the Username, First Name, and Last Name fields.
Column Description
Name The unique name of the user role
Description An optional description of the role

User Management Operations
Polycom, Inc. 207
Add a User RoleWhen you add a user role, you also specify permissions for the role.
To add a new user role
1 Go to User > User Roles.
2 On the User Roles page, click Add.
3 Complete the Name and Description fields of the Add Role dialog box and assign permissions to the new role.
The following table describes the fields of the Add Role dialog box.
4 Click Save.
The new user role appears in the Polycom CMA system.
Edit Permissions for a User RoleYou can change permissions for the default Operator and Scheduler roles, as well as for other user roles that were created manually. You cannot change permissions for the default Administrator role.
Field Description
Name The unique name (ASCII onlya) of the user role
a. For more information, see “Field Input Requirements” on page 9.
Description (Optional) A useful description (ASCII onlya) of the user role
Administrator Permissions
Identifies which Polycom CMA system administrator pages and functions are available to the user role.
Operator Permissions
Identifies which Polycom CMA system operator pages and functions are available to the user role.
Scheduler Permissions
Identifies which Polycom CMA system scheduling pages and functions are available to the user role.
Scheduling Level. This setting determines the level of scheduling available through this role. Possible values are:
• Basic. Users can schedule conferences using the conference templates defined for them. They cannot access or edit the advanced Conference Settings.
• Advanced. Users can schedule conferences using the conference templates defined for them. They can also access and edit the advanced Conference Settings.
Polycom CMA System Operations Guide
208 Polycom, Inc.
To edit the permissions for a user role
1 Go to User > User Roles.
2 As needed, use the Filter to customize the User Roles list.
3 In the User Roles list, select the role of interest and click Edit.
4 Edit the Description field of the Edit Role dialog box and edit permissions for the role.
5 Click Save.
Delete a User RoleYou can delete a user role from the Polycom CMA system, provided no users are currently assigned to it.
To delete a user role
1 Go to User > User Roles.
2 As needed, use the Filter to customize the User Roles list.
3 In the User Roles list, select the role of interest and click Delete.
4 Click Yes to confirm the deletion.
The user role is deleted from the Polycom CMA system.
View the Groups and Users Associated with a User Role
To view which groups and users are associated with a specific user role
1 Go to User > User Roles.
2 As needed, use the Filter to customize the User Roles list.
3 In the User Roles list, select the role of interest and click View Associated Groups and Users.
The View Associated Groups and Users dialog box appears.

User Management Operations
Polycom, Inc. 209
Manage FavoritesThe Polycom CMA system allows operators with Monitoring permissions to create one or more Favorites list, which they can use to quickly select participants to participate in conferences.
The operations associated with managing favorites include:
• Add a Favorites List
• Edit a Favorites List
• Delete a Favorites List
In the Polycom CMA system, only operators with Monitoring permissions can view, add, edit, delete, or use Favorites lists and these Favorites lists cannot be shared with other operators.
Add a Favorites List
To add a Favorites list
1 Go to User > Favorites.
2 On the Favorites page, click Add.
3 Complete the Favorites List Name and Description fields of the Add Favorites List dialog box.
4 In the Search Available Members field enter all or part of the person’s last name or first name and click Search.
The system searches the Users list (local and domain) for users who are associated with devices and who meet your search criteria. The results appear in the Search Results column.
5 Select the user(s) of interest from the list and move them to the Favorite List Members column.
NoteThe Favorites List Name must be unique within the system.
Notes• Depending on the search domain, the search function may return different
results. See Filter and Search a List.
• The search results only include users associated with devices.

Polycom CMA System Operations Guide
210 Polycom, Inc.
6 Repeat step 4 and 5 until you’ve added the users of interest to your Favorites list and then click OK.
The new list appears in the Favorites page.
Edit a Favorites List
To edit a Favorites list
1 Go to User > Favorites.
2 On the Favorites page, select the Favorites list of interest and click Edit.
3 In the Edit Favorites List dialog box, edit the Favorites List Name and Description fields as needed.
4 Remove or add users to the Favorite List Members column as needed and then click OK.
Delete a Favorites List
To delete a Favorites list
1 Go to User > Favorites.
2 On the Favorites page, select the Favorites list of interest and click Delete.
3 Click Yes to confirm the deletion.
The list is deleted from the Polycom CMA system.

Polycom, Inc. 211
18System Reports
This chapter describes the reports available through the Polycom® Converged Management Application™ (CMA™) system and how to view and export them. Use these reports to identify return on investment, troubleshoot problems, provide information about network traffic, and ensure accurate billing for Polycom video calls.
This chapter includes these topics:
• Site Statistics Report
• Site Link Statistics Report
• IP Call Detail Records Report
• Endpoint Usage Report
• Conference Type Report
• Gatekeeper Message Log
• System Log Files
Site Statistics ReportUse the Site Statistics report to check call rate and call quality statistics for the sites. You can view the data in a grid or graphically.
To view Site Statistics
1 Go to Reports > Site Statistics.
The Site Statistics appear with the statistics displayed in a grid. The grid shows a snapshot of the current statistics. The data is updated automatically every 15 seconds
Column Description
Site Name Specifies the site to which the statistics apply.

Polycom CMA System Operations Guide
212 Polycom, Inc.
2 To view the Site Statistics graphically and over a selected period of time:
a Click View Chart.
b In the Site Name list, select the site(s) to chart.
c In the Y-Axis list, select the statistic(s) to chart.
d In the Data Limit field, enter the time frame in minutes for which to chart the data. The default is 60 minutes.
The charts are dynamically updated for your selections.
Num of Calls Specifies the number of currently active calls for the site.
Bandwidth Used Specifies the cummulative bandwidth used by the currently active calls.
Avg Bit Rate Specifies the average bit rate for the currently active calls i.e., the total bit rate for all currently active calls divided by the number of active calls.
% Packet Loss Specifies the average percentage of packet loss for the currently active calls i.e., the total percentage of packet loss for all currently active calls divided by the number of active calls.
Avg Jitter Specifies the average jitter for the currently active calls i.e., the total jitter for all currently active calls divided by the number of active calls.
Avg Delay Specifies the average delay for the currently active calls i.e., the total delay for all currently active calls divided by the number of active calls.
Column Description
Site Name Specifies the site to which the statistics apply.
Num of Calls Specifies the number of calls for the site over the selected time frame.
Bandwidth Used Specifies the cummulative bandwidth used by all of the calls over the selected time frame.
Avg Bit Rate Specifies the average bit rate for all of the calls over the selected time frame, i.e., the total bit rate for all of the calls over the selected time frame divided by the number of calls.
% Packet Loss Specifies the average percentage of packet loss for all of the calls over the selected time frame, i.e., the total percentage of packet loss over the selected time frame, divided by the number of calls.
Column Description

System Reports
Polycom, Inc. 213
Site Link Statistics ReportUse the Site Link Statistics report to check call rate and call quality statistics for all site links. You can view the data in a grid or graphically.
To view Site Link Statistics
1 Go to Reports > Site Link Statistics.
The SiteLink Statistics appear with the statistics displayed in a grid. The grid shows a snapshot of the current statistics. The data is updated automatically every 15 seconds
Avg Jitter Specifies the average jitter for all of the calls over the selected time frame, i.e., the total jitter for all of the calls over the selected time frame divided by the number of calls.
Avg Delay Specifies the average delay for all of the calls over the selected time frame, i.e., the total delay for all of the calls over the selected time frame divided by the number of calls.
Column Description
Column Description
Site Name Specifies the two linked sites for which the statistics apply.
Num of Calls Specifies the number of currently active calls for the site link.
% Bandwidth Used Specifies the percentage of bandwidth used by the currently active calls, i.e., the bandwidth used by the currently active calls divided by the total available bandwidth for the link expressed as a percentage.
Avg Bit Rate Specifies the average bit rate for the currently active calls, i.e., the total bit rate for all currently active calls divided by the number of active calls.
% Packet Loss Specifies the average percentage of packet loss for the currently active calls i.e., the total percentage of packet loss for all currently active calls divided by the number of active calls.
Avg Jitter Specifies the average jitter for the currently active calls i.e., the total jitter for all currently active calls divided by the number of active calls.

Polycom CMA System Operations Guide
214 Polycom, Inc.
2 To view the Site Link Statistics graphically:
a Click View Chart.
b In the Site Name list, select the site(s) to chart.
c In the Y-Axis list, select the statistic(s) to chart.
d In the Data Limit field, enter the time frame in minutes for which to chart the data. The default is 60 minutes.
The charts are dynamically updated for your selections. The site-links are displayed in the same order as the site-link grid.
Avg Delay Specifies the average delay for the currently active calls i.e., the total delay for all currently active calls divided by the number of active calls.
Column Description
Site Name Specifies the two linked sites for which the statistics apply.
Num of Calls Specifies the number of calls for the site link over the selected time frame.
Bandwidth Used Specifies the percentage of bandwidth used by the currently active calls, i.e., the bandwidth used by the currently active calls divided by the total available bandwidth for the link expressed as a percentage.
Avg Bit Rate Specifies the average bit rate for all of the calls over the selected time frame, i.e., the total bit rate for all of the calls over the selected time frame divided by the number of calls.
% Packet Loss Specifies the average percentage of packet loss for all of the calls over the selected time frame, i.e., the total percentage of packet loss over the selected time frame, divided by the number of calls.
Avg Jitter Specifies the average jitter for all of the calls over the selected time frame, i.e., the total jitter for all of the calls over the selected time frame divided by the number of calls.
Avg Delay Specifies the average delay for all of the calls over the selected time frame, i.e., the total delay for all of the calls over the selected time frame divided by the number of calls.
Column Description

System Reports
Polycom, Inc. 215
IP Call Detail Records ReportThe Call Detail Record (CDR) report includes CDRs for Polycom and non-Polycom endpoints. Use data from the IP Call Detail Record (CDR) report to troubleshoot problems, provide information about network traffic, and ensure accurate billing for video calls.
To work with the IP Call Detail Records report data, extract the report from the Logger.dbo.calls database. See your Microsoft SQL Server documentation for information about extracting data.
To view the IP Call Detail Records report
1 Go to Reports > IP Call Detail Records.
The IP Call Detail Records report appears. It lists the CDRs for the 5,000 most recent IP calls made to or from system-managed devices. It includes the following information.
Notes• Endpoints that access the Polycom CMA system through a Polycom VBP
device do not have CDRs.
• Only calls that go through the gatekeeper are included in this report.
• A Call Detail Record is recorded for each IP call into a conference.
• CDR reports may not include data for calls made in the last 24 hours, depending upon when the data in the localcdr.csv file was last updated.
Column Description
Call ID Specifies the ID automatically generated for the call.
Conf ID Specifies the GUID (global unique identifier) for the conference to which the call was made.
Date/Time Specifies the date and time the call started, provided in local time for the server.
Source Specifies the name, IP, or alias of the device that originated the call.
Source Address Specifies the IP address of the device that originated the call.
Destination Specifies the name, IP address, or alias of the device that received the call. For point-to-point calls this is another endpoint. For multipoint calls using an MCU, this is the MCU.
Destination Address
Specifies the IP address of the device that received the call.

Polycom CMA System Operations Guide
216 Polycom, Inc.
2 Use the Filter to customize the report by Date, IP Address, Endpoint Type, Call Type and Duration.
Call Detail Record Report AdministrationBy default, the Polycom CMA system stores the conference and endpoint call detail records (CDRs) for 30 days. You can modify the CDR retention period and you can schedule a weekly archive of the CDRs. These procedures are described in the following sections.
Modify the CDR Retention PeriodBy default, the conference and endpoint CDRs are purged after 30 days.
To change how long CDR information is retained
1 Go to Admin > Report Administration.
2 In the Report Administration page, enter the number of Days to keep Conference and Endpoint CDRs.
3 Click Save Settings.
Schedule Weekly Archives of the CDR Report
To schedule weekly archives of CDR information
1 Go to Admin > Report Administration.
2 In the Report Administration page, select Enable Weekly FTP Archiving of CDR Records.
3 Configure these settings:
Call Type Specifies the type of call: scheduled or unscheduled.
Bandwidth (Kbps) Specifies the bit rate that was used for the call.
Duration (min) Specifies how long the call lasted in minutes, up to a maximum of 999.
Q.850 Code Specifies the standard cause code for call termination.
Column Description

System Reports
Polycom, Inc. 217
4 To verify that the FTP settings are functional, click Test Archive Settings.
5 When the settings are correct, click Save Settings.
Endpoint Usage ReportThe Endpoint Usage Report is based on the CDRs extracted from Polycom endpoints only and includes entries for all ISDN and IP calls. Use data from the Endpoint Usage Report to troubleshoot problems, provide information about network traffic, and ensure accurate billing for Polycom video calls.
To view the Endpoint Usage Report
1 Go to Reports > Endpoint Usage Report.
The Endpoint Usage Report page appears displaying information for all of the endpoints for which CDRs are available. The Polycom CMA system reports CDRs for the Polycom HDX Series, V and VSX Series, VVX, and CMA Desktop endpoints only.
The CDRs are displayed in alphabetical order for the default Start Date and End Date. By default, the CDRs for the last week are reported.
Field Description
First day of weekly archive
Specifies the day on which the system will transfer archives. By default, this is Sunday. As needed, you can select a different day for the transfers.
Use Secure FTP (SSL/TLS)
Specifies whether or not the archives will be transferred over an encrypted Secure Sockets Layer (SSL) or Transport Layer Security (TLS) connection. By default, the system does not secure the transfers.
Host name or IP Address of FTP server
Specifies the server to which the archives will be transferred. By default, the system transfers the archives to a location on its local server. You can change this to an external server.
FTP Port Specifies the port through which the archives will be transferred. By default, this is system port 21.
FTP User Name/FTP Password/Confirm FTP Password
Specifies a user name and password combination for accessing the FTP server. This must be a valid user account on the FTP server.
FTP Directory Specifies the directory on the server to which the archives will be transferred.

Polycom CMA System Operations Guide
218 Polycom, Inc.
2 To restrict the report to a different time period, change the Start Date and End Date. The report is dynamically updated.
3 Use the Filter to customize the report by endpoint Type, Name, IP Address, ISDN Video Number, Alias, Site, or VIP status.
4 Select one or more endpoints to include in the report and click Generate Report. Use the CTRL key, to select multiple endpoints.
The Generate Report page displays the Summary usage report for the selected endpoints. It includes the following information for the calls.
5 To select a different group of endpoints, click Change Selection, select the endpoints, and click Generate Report again.
6 Click Call Times to see a chart that identifies the number of calls versus the start time for the calls.
7 Click Inbound to see a chart that identifies the devices from which the inbound calls to the selected endpoints originated.
8 Click Outbound to see a chart that identifies the devices to which the selected endpoints called.
9 Click Summary CDR Report to see a grid that displays information for each of the selected endpoints that participated in calls.
Field Description
Number of calls Specifies the number of calls the selected endpoints joined for the selected date range. Click Details to get more information about these calls.
Total call time Specifies the total amount of time the selected endpoints spent in conference during the selected date range.
Average time per call
Specifies the average amount of time the selected endpoints spent in conference during the selected date range, i.e., the total call time divided by the number of calls.
Average rate per call
Specifies the average bit rate for the selected calls.
Field Description
Endpoint Name Identifies the endpoint by name.
Total Time in Call Specifies the total amount of time the endpoint spent in conference during the selected time period.
Average Time in Call
Specifies the average amount of time the endpoint spent per call during the selected time period, i.e., the Total Time in Call divided by the Total Calls.

System Reports
Polycom, Inc. 219
If any of the selected endpoints did not participate in calls during the selected time period, it is not included in the Summary CDR Report.
10 To export the information in the Summary CDR Report, click Export as Excel File and either Open or Save the file as needed. Note that only the first 1000 lines of the report are exported to the Excel file.
11 Click Detail CDR Report to see a grid that displays information for each of the selected endpoints that participated in calls.
The Generate Report page displays System Information and CDR information for the first endpoint in the list.
For the selected endpoint, the System Information section includes the following data.
12 To export the information in the Detail CDR Report, click Download Report and either Open or Save the CDR report in Microsoft Excel format for the selected endpoint or in CSV format For All Selected Endpoints. Note that only the first 1000 lines of the report are exported to the Excel file.
Average Speed of All Calls
Specifies the average bit rate for all of the calls in which the endpoint participated during the selected time period, i.e., total bit rate divided by the Total Calls.
Calls Out Specifies the number of calls in which the endpoint participated during the selected time period that originated from the endpoint.
Calls In Specifies the number of calls in which the endpoint participated during the selected time period that did not originate from the endpoint.
Total Calls Specifies the total number of calls in which the endpoint participated for the selected time period.
Field Description
Field Description
System Name Specifies the name of the selected endpoint.
Model Specifies the model number of the selected endpoint.
IP Address Specifies the IP address of the selected endpoint.
ISDN or V.35 Number Specifies the ISDN number or V.35 ???
Serial Number Specifies the serial number of the selected endpoint.

Polycom CMA System Operations Guide
220 Polycom, Inc.
Conference Usage ReportThe Conference Usage Report is based on the CDRs extracted from the endpoint and includes all scheduled calls: both ISDN and IP. CDRs for ad hoc calls are not included in this report.
To view the Conference Usage Report
1 Go to Reports > Conference Usage Report.
The Conference Usage Report page appears displaying the Summary Report for the default Start Date and End Date, which is generally 30 days as specified on the Report Administration page. The CDRs are displayed in descending order by Date and Scheduled Start time.
2 To restrict the report to a specific time period, change the Start Date and End Date. The report is dynamically updated.
The Conference Usage Report includes the following basic conference information:
— Conference name
— Date
— Scheduled start and stop date and time
— Scheduled duration
— Actual start and stop date and time
— Actual duration
— Total scheduled participants

System Reports
Polycom, Inc. 221
Conference Type ReportUse the Conference Type Report option to review monthly summary information about past Polycom CMA system conferences.
To create a Conference Type Report
1 Go to Reports > Conference Type Report.
An empty Conference Type Report grid appears.
2 As needed, change the From: and To: dates to select the date range for the report, and click View.
The Conference Type Report for the selected date range appears. It includes the following information.
Column Description
Date Information is displayed on a month-by-month basis and an average for the selected months.
Scheduled Confs The number of conferences scheduled via one of the Polycom CMA system scheduling interfaces (that is, the Polycom CMA system application, the Polycom Scheduling Plugin for Microsoft Outlook, or the Polycom Scheduling Plugin for IBM Lotus Notes).
Ad hoc Confs The number of conferences that used one or more devices for which the Polycom CMA system was the gatekeeper, but that weren’t scheduled via one of the Polycom CMA system scheduling interfaces.
MP Confs The number of multipoint conferences scheduled using one of the Polycom CMA system scheduling interfaces.
P2P Confs The number of point-to-point conferences scheduled using one of the Polycom CMA system scheduling interfaces.
Gateway Confs The number of scheduled conferences that used a gateway to reach one or more devices.
Embedded MP Confs
The number of scheduled multipoint conferences that used the MCU embedded in a V-Series, VSX-Series, or Polycom HDX-Series device rather than an external MCU such as an MGC or RMX 2000/4000.
P2P Confs on MCU
The number of scheduled point-to-point conferences that used an external MCU such as an MGC or RMX 2000/4000 even through point-to-point conferences do not usually require MCU resources.

Polycom CMA System Operations Guide
222 Polycom, Inc.
3 To create one of the conference type report charts, click the appropriate chart name below the grid. Chart choices include:
The selected chart dynamically appears below the grid.
4 To export the report:
a Click Export.
b In the File Download dialog box, click Save.
c In the Save As dialog box, browse to the location to which to save the report and click Save.
Short Confs The number of scheduled conferences that were scheduled to last 30 minutes or more, but which actually lasted less than 30 minutes.
Scheduled Minutes The sum of the scheduled minutes for all Polycom CMA system scheduled conferences.
Executed Minutes The sum of the actual minutes for all Polycom CMA system scheduled conferences.
Total Parts The sum of the participants that joined Polycom CMA system scheduled conferences.
Avg Parts in MP Confs
The average number of participants that joined scheduled Polycom CMA system multipoint conferences.
Column Description
Column Description
Scheduled vs. Ad hoc
A chart that compares the number of scheduled conferences to the number of ad hoc conferences for each month
Scheduled Types A chart that compares the number of point-to-point, multipoint, gateway, and embedded multipoint conferences for each month
Scheduled vs. Executed Mins
A chart that compares the number of scheduled minutes to the number executed minutes for each month
Avg Parts in MP Confs
A chart that displays the average number of participants in multipoint conferences for each month
Point-to-Point Confs on MCUs
A chart that displays the number of point-to-point conferences hosted on an external MCU for each month

System Reports
Polycom, Inc. 223
Gatekeeper Message LogUse the Gatekeeper Message Log page to:
• View messages that endpoints send to the gatekeeper
• Define which messages are logged
• Pause and restart message logging
• Clear the log
• Export the log to another file
Logging starts when you define the Log Settings. Logging stops only when you clear all of the Log Settings. Logging can include these types of messages:
• Warnings/Errors. Messages displayed for all warnings or errors that occur on registered Polycom endpoints
• Rogues. Messages displayed for all calls from unregistered endpoints
• Events. Messages display about these events:
— Registration
— Call detail
— Neighboring gatekeeper
While you can pause logging, the Polycom CMA system always logs device errors and warnings.
You can also:
• Clear events from the log, which removes data from the database
• Export the log to a a comma-separated value (CSV) file. You can export only the data that displays on-screen, and exporting the log may take a long time depending on the number of entries in the log.
View and Export the Gatekeeper Message Log
To see more details about a log message
1 Go to Reports > Gatekeeper Message Log.
2 Use the Filter on the Gatekeeper Message Log list to customize the list.

Polycom CMA System Operations Guide
224 Polycom, Inc.
3 Select the message of interest.
The Gatekeeper Message Log report appears. It has these fields:
4 To export a message:
a Select the log of interest and click Export Log.
b In the Export Log dialog box, click Yes.
A GKexport file appears in your default text editor.
c Save the file.
Define Log Settings
To define which messages should be logged
1 Go to Reports > Gatekeeper Message Log.
2 When the Gatekeeper Message Log page appears, click Log Settings.
3 In the Gatekeeper Log Settings dialog box, select the events to log and click OK.
The Polycom CMA system begins logging the types of messages you selected.
Column Description
Type These types of messages display:
• Information, which indicates normal communications between the Polycom CMA system and the endpoint.
• Warning, which indicates an unscheduled call and the inability to assign E.164 and ISDN numbers to an endpoint.
• Error, which indicates the registration of an endpoint or a call failed, or a lack of resources for this gateway or MCU exists.
Date/Time Date and time of the event.
Category Specifies whether an event is a registration, call, or neighboring gatekeeper request.
Description Displays the message sent to or received from the endpoint, identified by the IP address.

System Reports
Polycom, Inc. 225
Clear Events from the Log
To clear all events from the log
1 Go to Reports > Gatekeeper Message Log.
2 When the Gatekeeper Message Log page appears, click Clear Events.
3 Click Yes to confirm the action.
The Gatekeeper Message Log is cleared.
Pause and Restart Logging
To pause logging
1 Go to Reports > Gatekeeper Message Log.
2 When the Gatekeeper Message Log page appears, click Pause Log.
3 In the Stop Logging dialog box, click Yes.
The Start Log button is available and the system stops logging device messages to the Gatekeeper Message Log.
4 Click Start Log to restart logging.
System Log FilesMany of the Polycom CMA system components can write a System Log File when they experience an error or issue. Whether or not they do write a system log file depends upon the system log level.
The following table lists some of the logs the Polycom CMA system saves.
Log Name Description
Log Files Related to Basic System Functionality
SE200MasterService.txt Log file that shows when individual services are started and stopped, and displays a memory usage summary for some of those services (mqm, sitetopo, plcmgk, gab) every 30 minutes
SE200SerialConsoleLog.txt Log file that shows when the serial console was started and which COM port was used (e.g. COM1). It also shows any errors that occur while processing menu commands from the serial console.

Polycom CMA System Operations Guide
226 Polycom, Inc.
ESINSTALL-<timestamp>.txt Log file that shows the output of the Polycom CMA system install script. shows what steps were done when installing the Polycom CMA system software
ESUPGRADE-<timestamp>.txt Log file that shows the output of the Polycom CMA system upgrade script (not applicable unless an upgrade was performed)
Log File Related to Dial Plan Functionality
DialRule_Log.txt General log file used by the dial rule process. This process generates dial out strings to endpoints, controls the dialing rules set up in the user interface.
SiteTopo_Log.txt When in debug mode, this log file contains messages about site topology entry and usage.
Log File Related to External Database Functionality
ServiceMonitor_Log.txt Log file for the redundancy service that shows when a redundant Polycom CMA system goes into active or standby mode
Log Files Related to Scheduling Functionality
AdapterLog_SCH.txt .NET remoting log file that shows low-level communication errors between internal system components--in this case, the scheduling component
Log Files Related to Global Address Book Functionality
AdapterLog_GAB.txt .NET remoting log file that shows low-level communication errors from the GAB communications with the integration layer
ComponentLog_GAB.txt .NET remoting log file that shows low-level communication errors from the GAB communications with devices
EXXX_LOGx.txt Log files for web services, device manager, and conference monitoring. This file includes information about successful and failed system logins and all logouts, as well as system errors, major system events, and general system information.
Log Name Description

System Reports
Polycom, Inc. 227
Log Files Related to Device Management Functionality
AdapterLog_GMS.txt .NET remoting log file that shows low-level communication errors between internal system components--in this case, the management component
<DeviceType>Device.txt Log file that captures device specific message
<DeviceType>DeviceCollection.txt Log file that captures device specific message
<DeviceType>PasswdErrs.log Log file that captures device specific messages related to potential password mismatches
DeviceManager.txt Log file for the device management process
DeviceManagerService.txt Log file for the device management process
SoftUpdate Log file that shows when a device is updated with a new software package via a scheduled softupdate
Log Files Related to Gatekeeper Functionality
AdapterLog_PN.txt .NET remoting log file that shows low-level communication errors between internal system components--in this case, the gatekeeper component
PN_Log.txt General gatekeeper log file
MQM_Log.txt General media quality monitor log file that will show any errors when writing CDRs or media quality data to the database
Log Files Related to Call Management Functionality
Messages.txt Conference launching log used exclusively by CodecMngr process. This log contains information about the conference start up process, i.e., information that the system sends to devices at the start of a conference.
CS_<conf_name>.html
CS_<conf_name>.txt
Conference scheduling log used by the conference scheduling process. This log contains debug information on how a conference is created. A log file is created for each scheduled conference, with the log file name format: CS-<conf_name>.txt, where <conf_name> is the name of the scheduled conference. This is always on, and there is no logging level.
Log Name Description

Polycom CMA System Operations Guide
228 Polycom, Inc.
View and Export System Log Files
To view System Log Files
1 Go to Reports > System Logs.
The System Log Files list appears listing the logs for the given time period.
2 To view a log file:
a Select the log file of interest.
b Click Open.
3 To export a .zip of all log files:
a Click Get All.
Log Files Related to Web Services Functionality
apache_access.log.<xxxx> Apache web server access log that shows when and what URL was requested
apache_error.log Log file that captures error messages from the Apache web server
mod_jk.log Log file that shows which web requests were forwarded from Apache web server to the Tomcat servlet engine.
Log Files Related to Presence Functionality
Jserver.log.<n> Log file that shows errors related to the internal LDAP, SNMP, DM, Site Topology and dynamically-managed endpoint login and provisioning functionality. This circular log has a six month limit. The timestamp is the local server time.
boot.log JBoss startup log. JBoss is the container service for the Jserver service
debug.log Openfire debug log that shows errors related to connection to internal LDAP server.
error.log Openfire error log
info.log Openfire information log
warn.log Openfire warning log
openfire.log Openfire service log—currently unused
Log Name Description

System Reports
Polycom, Inc. 229
b To open the .zip file, in the Open File dialog box, click Open with, and browse to the program you use to open.zip files.
c To save the .zip file to your local computer, in the Open File dialog box, click Save.
4 Click OK.
Change the System Log Level
To edit the current system log level
1 Go to Reports > System Logs.
The System Log Files list appears listing the logs for the given time period. The Current Log Level indicates which log files are being saved.
2 Change the log level, by selecting a new value in the Current Log Level menu. Choices include:
— Debug
— Info
— Warn
— Error
— Major
— Fatal
— Off
3 In a redundant configuration, repeat steps 1 and 2 on the redundant server.
Call Detail Record Report AdministrationThe Polycom CMA system allows you to specify conference and endpoint Call Detail Record (CDR) retention and archive settings.
To specify conference and endpoint CDR report settings
1 Go to Admin > Report Administration.
2 As needed, change the number of days that the Polycom CMA system should save the conference and endpoint CDRs. By default, the system keeps 30 days worth of CDRs.

Polycom CMA System Operations Guide
230 Polycom, Inc.
3 To have the Polycom CMA system transfer an archive of the conference and endpoint CDRs to a specific FTP site on a weekly basis:
a Select Enable Weekly FTP archiving of CDR records (CSV Format).
b Select the day of the on which to perform the archive and as needed, select Secure FTP to secure the file transfer process.
c Enter the Host Name or IP Address of the FTP Server and the FTP port for the FTP server.
d Enter the FTP User Name and FTP Password the system should use to transfer the file.
e Enter the directory on the FTP server to which the system should transfer the file.
f To test the setup, click Test Archive Settings.
The Polycom CMA system will verify that it can reach the FTP server with the credentials.
4 When the settings are correct, click Save Settings.

Polycom, Inc. 231
19System Administration Overview
This chapter describes the Polycom® Converged Management Application™ (CMA™) system Dashboard, menu, and commands. It includes these topics:
• Polycom CMA System Dashboard
• Dashboard Command Buttons
• Dashboard Panes
• System Administration Menu
Polycom CMA System DashboardWhen you log into the Polycom CMA system with Administrator role and permissions, the system first displays the system Dashboard. Use the system Dashboard to view information about system health and activity levels.
The system Dashboard displays data in an array of charts, forms, data grids, and other graphical displays. It is supremely customizable. You can modify your system Dashboard layout by moving (select the pane title, hold, drag and drop), minimizing, maximizing, closing, and restoring panes. Also note that your changes to the system Dashboard are persistent not just for a session but between logouts and logins.
NoteWe recommend that you use a minimum monitor display of 1280 x 1024 pixels to view the system Dashboard.

Polycom CMA System Operations Guide
232 Polycom, Inc.
Dashboard Command ButtonsIn general, the system Dashboard displays information only. However, the following command buttons are available from the Dashboard view.
Dashboard PanesBy default the system Dashboard displays the following informational panes:
• Users Logged In
• CMA Configuration
• CMA Info
• Services
• Gatekeepers
• CMA Licenses
But you can add or remove panes to customize the system Dashboard . Additional panes that you can add include:
• Pre-call Status
• Today’s Adhoc Conferences
• Today’s Scheduled Conferences
• Endpoints (multiple, configurable panes)
• Systems
• Conference Status
• Failed AD Login Attempts
• Redundancy Status
• MCU Status (multiple, configurable panes)
Button Use this command button to....
Add Panes Add additional display panes to the system Dashboard. See “Dashboard Panes” on page 232.
Refresh Update the page with current information. To change the frequency of automatic screen refreshes from the default of 5 seconds, click the down arrow and select another option: 15, 30 45, or 60 seconds.
The Refresh command button flashes when the system refreshes the Dashboard or when you click Refresh.
Restart Shuts down and restarts the Polycom CMA system. See “Restart or Shut Down a Polycom CMA System” on page 412.
Shutdown Shuts down the Polycom CMA system. See “Restart or Shut Down a Polycom CMA System” on page 412.

System Administration Overview
Polycom, Inc. 233
These panes are described in more detail in the following sections.
Users Logged In
The Users Logged In pane displays the type and number of users that are currently logged into the system. A sparkline presents the number of logins over time (30 minutes total; updated every 5 minutes so there are 6 data points on the sparkline) for each user type.
The system identifies three user types by their permissions: Administrators, Operators, and Schedulers.
Note that these three user types are not necessarily the same as user roles. For example, while you may create other user roles with associated permissions (for example Advanced Scheduler), users with other roles always appear in the Users Logged In pane as one of the three specified types. So any users logged into the system as Advanced Scheduler appear in the Users Logged In pane as a Scheduler.
For more information, see “Roles and Permissions” on page 194.
CMA Configuration
The CMA Configuration pane displays information about the configuration of the Polycom CMA system, including:
Field Description
Software Version
Displays the current version of Polycom CMA system software running on the system.
CMAD Shipped Version
Displays the version of Polycom CMA Desktop that shipped with the version of Polycom CMA system software running on the system. Users can download this version of the Polycom CMA Desktop software from the Downloads page.
LDAP Displays the LDAP configuration. Possible values include:
• Auto—If the system is configured to auto-discover the LDAP server.
• IP address of the LDAP server—If an LDAP server is specified on the system configuration page.
• None—If the system is not integrated with an LDAP server.
Database Displays the database source (Internal or External) and the IP address or DNS name of the database server.
Time Source Displays the time server source (Internal or External) and the IP address of the time server.
Redundancy Displays whether or not the system is configured for redundancy. The Redundancy field may also show two configuration errors: Need Virtual IP or Secondary Is Down.
Remote Alerts Displays whether or not the system is configured to send remote alert notifications.

Polycom CMA System Operations Guide
234 Polycom, Inc.
CMA Info
The CMA Info pane displays general information about the Polycom CMA system, including:
Services
The Services pane displays information about the Polycom CMA system services, including:
• How many services are running
• How many services are stopped
• A list of the services and a graphical indicator for each service indicating its state: Running or Stopped . If a service is stopped, select the service and a dialog box appears that describes the error, possible reasons for the error, and suggestions to correct the error. Click the start service icon to restart the service.
The following table lists the services, their purpose, and whether or not they are essential to the health of the system.
SSO DC If the system is integrated with a domain controller for single sign on authentication, displays the domain name for that domain controller. If the system is not integrated with a single sign on domain controller, this field displays Disabled.
Field Description
Field Description
CPU Utilization
Displays two views of the Polycom CMA system control processor unit (CPU) usage:
• A sparkline that presents the CPU usage over time (10 minutes total; updated every 1 minute so there are 10 data points on the sparkline)
• A percentage indicator that shows the current usage
Paging File Displays two views of the Polycom CMA system paging file usage:
• A sparkline that presents the paging file usage over time (10 minutes total; updated every 1 minute so there are 10 data points on the sparkline)
• A percentage indicator that shows the current usage
Last Hard Start/Reboot
Displays the date and time of the last complete system start.
Provisioning in Progress
Displays the number of scheduled endpoint provisioning processes that are currently underway.
Softupdates in Progress
Displays the number of scheduled endpoint softupdate processes that are currently underway.

System Administration Overview
Polycom, Inc. 235
When users log into a Polycom CMA system, the system first checks to make sure all essential services are running before allowing users to access the system. The following situations may occur.
• If all essential services are running, users are allowed to access the system.
• If one or more essential services is down, and the Apache service has been running for less than seven minutes, users receive an error message saying, “The Polycom CMA system is not ready. Please try again in a few minutes.”
Service Manages the system’s... Comment
Apache2 Web processes Essential
MSSQLSERVER Database processes Essential
OpenDS Site topology database Required for site topology functionality
openfire Presence/XMPP processes Required for presence
Polycom Cascader Cascaded conferencing processes
Required for cascading conferences
Polycom Conference Scheduling Service
Conference scheduling processes
Essential
Polycom Device Manager Device management processes
Essential
Polycom DialRuleService Dial rule management processes
Essential
Polycom Gatekeeper Gatekeeper processes Essential
Polycom JServer Java processes including LDAP, SNMP, device management, Site Topology, and dynamically-managed device logins and provisioning.
Essential
Polycom Master Service Basic operation processes Essential
Polycom Serial COM Serial port management processes
Essential
Polycom Service Monitor Redundancy monitoring processes
Required for redundancy
Polycom Global Address Book
Global Address Book management processes
Essential

Polycom CMA System Operations Guide
236 Polycom, Inc.
• If one or more essential services is down, but the Apache service has been running for at least seven minutes, users are allowed to access to the system. In this case, specific system functions may be unavailable to users.
Gatekeepers
The Gatekeepers pane displays information about the Polycom CMA system as a gatekeeper, including:
CMA Licenses
The CMA Licenses pane displays information about how the Polycom CMA system is licensed, including:
• The Total Number of Licenses available on the system
• The Licenses in Use, which displays two views of the Polycom CMA system active calls:
— A sparkline that presents the license usage over time (60 minutes total; updated every 5 minutes so there are 12 data points on the sparkline).
— A percentage indicator that shows the current usage.
Field Description
Gatekeeper Statue
Displays the status of the Polycom CMA system gatekeeper. Possible values are Up or Down.
Call Model Describes how the Polycom CMA system routes selected H.225 call signalling messages. Possible values include: Routed or Direct. For more information, see “Routing Mode” on page 282.
Neighbors Displays the number of neighboring gatekeepers identified for the Polycom CMA system.
Aternate Configure
Displays whether or not the Polycom CMA system has an alternate gatekeeper identified.
Registered Devices
Displays the number of devices currently registered to the Polycom CMA system gatekeeper.
Active Calls Displays two views of the Polycom CMA system active calls:
• A number field that shows the current number of active calls
• A graph that presents the percentage of active calls over time

System Administration Overview
Polycom, Inc. 237
Pre-call Status
The Pre-call Status pane displays information about the next conference or conferences that are scheduled to launch including:
Today’s Adhoc Conferences
The Today’s Adhoc Conferences pane displays information about the ad hoc conferences started by video endpoints registered to the Polycom CMA system. For the current day (starting at 0:00 and ending at 24:00), it displays:
• The number of ad hoc conferences that were Completed for the current day
• The number of ad hoc conferences that are Active at the current time
• A bar chart that displays the number of ad hoc conferences (vertical axis) plotted against time of day (horizontal axis)
Today’s Scheduled Conferences
The Today’s Scheduled Conferences pane displays information about the scheduled conferences managed by the Polycom CMA system. For the current day (starting at 0:00 and ending at 24:00), it displays:
• The number of scheduled conferences that were Completed that day
• The number of scheduled conferences that are Active at the current time
• The number of scheduled conferences that are yet to occur (Future)
• A bar chart that displays time on the linear axis plotted against the number of scheduled conferences on the horizontal axis
Field Description
Time to Conference
Displays the system-defined pre-call status reporting time of 10 minutes. In other words, the Pre-call Status pane always reports on conferences that are scheduled to start in the next 10 minutes.
Scheduled to Launch
Displays the number of conferences scheduled to start in the next 10 minutes.
Ready to Launch
Displays the subset of conferences that are scheduled to start in the next 10 minutes and that have passed the resource tests that the system executes before launching a conference.
Ready to Launch with Device in Call
Displays the subset of conferences that are scheduled to start in the next 10 minutes and that have passed the resource tests but that still have one or more devices in another call.
NOT Ready to Launch
Displays the subset of conferences that are scheduled to start in the next 10 minutes but that have not yet passed the resource tests.
Also displays the conferences that are not ready to launch.

Polycom CMA System Operations Guide
238 Polycom, Inc.
Endpoints
The system allows you to add multiple Endpoints panes so you can create your own scheme for grouping and monitoring endpoints. When you add an Endpoints pane, you can give the pane a meaningful name and select which endpoints to monitor. You can save the pane, create others as needed. You can also reconfigure an Endpoints pane using the configuration tool
Endpoints panes display the following information:
• The number of endpoints being monitored
• The number of monitored endpoints that are In a Call
• The number of monitored endpoints that are Online
• The number of monitored endpoints that are Offline
In addition, the Endpoints pane identifies any monitored endpoints that are experiencing alert conditions. If you click on an endpoint in the list, the system displays the ...
Finally, click View Endpoint to see the Status, Name, Alias, IP Address, Owner, and Site for the monitored endpoints. This status information is sent by the endpoints to the Polycom CMA system. For more information on these fields, see...
Systems
The Systems pane displays summary information about the devices registered with the Polycom CMA system, including:
Field Description
Endpoints The number of endpoints registered with the Polycom CMA system
VVXs The number of VVX systems registered with the Polycom CMA system
MCUs The number of MCUs registered with the Polycom CMA system
Gatekeepers The number of neighbored gatekeepers identified to the Polycom CMA system plus the Polycom CMA system itself.
Gateways The number of individual H.323 cards and/or IP blades in Polycom MCUs are assigned the device type of GW/MCU during registration. For more information, see “Network Device Types” on page 161.
Rooms The number of Rooms defined with the Polycom CMA system
VBPs The number of VBPs defined with the Polycom CMA system
DMAs The number of DMAs defined with the Polycom CMA system
Temperature Status
Temperature status information provided by the Polycom-branded Dell server agent throught its MIB

System Administration Overview
Polycom, Inc. 239
If any of the devices registered with the Polycom CMA system experience a fault, the Systems pane also displays an alert icon . Click the alert icon to see the Endpoint or Network Device view and get more information about the alert.
Conference Status
The Conference Status pane displays the list of active conferences. (see screen shot) plus 2 of 6 participants online.
Click on conference title to go to conference monitor view for that conference
Failed AD Login Attempts
The Failed AD Login Attempts pane displays:
• The total number of Failed Logins for Active Directory users in the last 24 hour period.
• The domain\username for the Active Directory users whose login attempts failed and how many times they failed. Click the domain\username to view the date and time for the failed attempts.
Redundancy Status
The Redundancy Status pane displays information about the Polycom CMA system redundancy configuration, including:
• Whether or not the system is configured for redundancy. Possible values for Status are Configured or Not Configured.
• The Virtual IP Address for the redundant system
• The IP address of the Active Server
• The IP address of the Backup Server
Cooling Fan Status
Fan status information provided by the Polycom-branded Dell server agent throught its MIB
Power Supply Status
Power supply status information provided by the Polycom-branded Dell server agent throught its MIB
Memory Card Status
Memory card status information provided by the Polycom-branded Dell server agent throught its MIB
Battery Status Battery status information provided by the Polycom-branded Dell server agent throught its MIB
Process Status Process status information provided by the Polycom-branded Dell server agent throught its MIB
Field Description

Polycom CMA System Operations Guide
240 Polycom, Inc.
MCU Status
The system allows you to add multiple MCU Status panes so you can create a pane for all or individual MCUs registered with the Polycom CMA system. When you add an MCU Status pane, you can give the pane a meaningful name and either select an MCU to monitor or select All MCUs. You can save the pane, create others as needed. You can also reconfigure an MCU Status pane using the configuration tool.
The MCU Status pane for All MCUs displays the following information:
The MCU Status pane for All MCUs also lists all of the registered MCUs and displays the Errors and Warnings for the MCUs.
The MCU Status pane for an individual MCU displays the following information:
Field Description
Errors Displays the cummulative number of alarms for all of the registered MCUs.
Warnings Displays the cummulative number of warnings for all of the registered MCUs.
Active Conferences
Displays the total number of active conferences being hosted by all of the registered MCUs.
Field Description
Errors Displays the number of alarms on the MCU.
Warnings Displays the number of conferences that are active on the MCU at the current time.
Active Conferences
Displays the number of active conferences currently being hosted by the MCU.
Number of Audio Ports
Displays the number of dedicated audio ports configured on the MCU.
Audio Ports Utilization
Displays two views of the MCU audio port usage:
• A sparkline that presents the audio port usage over time
• A percentage indicator that shows the current usage
Number of Video Ports
Displays the number of video ports configured on the MCU.
Video Ports Utilization
Displays two views of the MCU video port usage:
• A sparkline that presents the video port usage over time
• A percentage indicator that shows the current usage
Expected Port Utilization
A timeline that shows how many ports are scheduled for conferences within the next 45 minutes.

System Administration Overview
Polycom, Inc. 241
This status information is sent by the MCU to the Polycom CMA system.
In addition, the MCU Status pane identifies when the monitored MCU is experiencing alert conditions.
System Administration MenuThe system Admin menu gives users with administrative permissions access to the day-to-day management tasks they need to monitor, maintain, and troubleshoot the Polycom CMA system. Besides the Dashboard, it lists these selections:
Selection Use this selection to...
Conference Templates
Manage (add, edit, and delete) conference templates. See “Conference Templates” on page 243.
Conference Settings Enable or disable Conference Auto-launch and Conference Time Warning. See “Conference Settings” on page 251.
Provisioning Profiles Manage (add, edit, and delete) automatic or scheduled provisioning profiles
Software Updates Manage (add, edit, and delete) automatic or scheduled software update packages
Rooms Manage (add, edit, and delete) rooms in the Polycom CMA system directory
Global Address Book
Manage (add, edit, and delete) users in the Polycom CMA system Global Address Book
Server Settings Configure the basic Polycom CMA system, which includes the network, system time, database, directory, licensing, redundancy, branding, GAB, remote alert, and email set up

Polycom CMA System Operations Guide
242 Polycom, Inc.
Gatekeeper Settings By default the Polycom CMA system is made the default gatekeeper during the First Time Setup process. Use the Gatekeeper Settings option to modify the this setting or to add an alternate gatekeeper or neighboring gatekeepers.
Gatekeeper Settings affect how devices register and calls are made in your video communications network. These settings allow you to:
• Identify the gatekeeper with an identifier and description.
• Specify registration-related settings, including the default gatekeeper, which endpoints register, the registration refresh period, and the offline timeout.
• Set the maximum number of neighboring gatekeeper hop counts.
• Specify how to handle calls to and from unregistered endpoints.
Management and Security
Upgrade the Polycom CMA system and configure the certificate, security, and endpoint management set up
Dial Plan and Sites Edit the default Polycom CMA system Dial Plan and Site settings (which includes the definition of sites, site links, dial rules, services, and least-cost routing tables) to support your network topology and video call routing.
Alert Settings Configure the Polycom CMA system to send email alerts for specified system or endpoint events
Database Backup FIles
View or backup the Polycom CMA system internal database backup file
Selection Use this selection to...

Polycom, Inc. 243
20Conference Setup Overview
This chapter includes information about conference templates, options, and settings within the Polycom® Converged Management Application™ (CMA™) system. Two types of configuration settings relate to scheduled conferences:
• Conference Templates define most of the settings that become the defaults for a conference.
• Conference Settings are global system-wide settings that apply to all scheduled conferences.
Conference TemplatesConference templates allow you to create various combinations of settings to apply to scheduled conferences.
• For scheduled conferences that land on MGC devices, the conference template explicitly identifies the settings the MGC should use to control the conference.
• For scheduled conferences that land on RMX devices, the conference template explicitly identifies the RMX profile which identifies the settings the RMX should use to control the conference.
Administrators with Conference Setup permissions can add or edit Conference Templates. They can also identify (by user role) which users have access to which Conference Templates and which users have Advanced scheduling permissions. Then users select from the different templates available to them to switch between different combinations of conference settings.

Polycom CMA System Operations Guide
244 Polycom, Inc.
Table 20-1 Conference Template Parameters
Field Description
General Info
Name Enter a unique and meaningful name for the template, which can be up to 32 characters long.
Description Enter a meaningful description (ASCII onlya) of the conference settings template.
Audio-Only Template
Select this option to designate the template as an audio-only template. Selecting this option disables the Video Settings and some of the Conference Settings.
Template Avail For Select the roles to which users must be assigned for them to see this template when scheduling conferences.
Video Settings
Video Dial Options These settings apply only to video conferences. The video dial options are:
• Dial-In Only (all participants dial into the conference)
• Dial-Out Only (all participants are called by the system)
• Dial-In + Dial-Out (The person setting up the conference can specify which participants must dial into the conference and which participants are called by the system.)
Video Mode Sets the video layout for the conference. The default is Video Switching Mode. To change to a Continuous Presence layout or mode, click the switching icon and select a layout option.
The video mode determines the initial layout on an endpoint’s display during a multipoint conference. This option requires an MCU.
NoteMake sure you have defined video endpoint systems and boards so that they are available for selection in continuous presence layouts.

Conference Setup Overview
Polycom, Inc. 245
Video Algorithm Sets the compression algorithm that the MCU uses to process video. Possible values include:
• Auto
• H.261. An ITU standard designed for two-way communication over ISDN lines and supports data rates which are multiples of 64Kbit/s. H.261 supports CIF and QCIF resolutions.
• H.263. Based on H.261 with enhancements that improve video quality over modems. It supports CIF, QCIF, SQCIF, 4CIF and 16CIF resolutions.
• H.264
The default is Auto.
Notes • Selecting a video algorithm doesn't guarantee that it will
be chosen for a conference since the MCU device may negotiate a different algorithm with the endpoints, depending on the endpoint’s capabilities.
• Not user-configurable for RMX devices
People and Content Enable this setting when you have equipment that supports the display of people and content. Sets the format type of the content. Possible values include:
• None
• People+Content (H.239)
• People and Content V0. To show both the presenter and the content on a single display using HDX-Series products.
• Polycom Visual Concert PC. To show live PC content using standard ViewStation® systems
• Polycom Visual Concert FX. To integrate a laptop with graphics into a video call using ViewStation® products
• DuoVideo
None is the default.
Notes • The MGC requires that conferences with People and
Content use a minimum speed of 192 K.
• Not supported on RMX devices. H.239 multimedia is set in the RMX profile for RMX devices.
Table 20-1 Conference Template Parameters
Field Description

Polycom CMA System Operations Guide
246 Polycom, Inc.
Lecture Mode Possible values include:
• None. All participants see the conference in the video mode defined elsewhere.
• Presentation. In this mode, when a participant’s speech exceeds a predefined time (30 seconds), the system identifies the participant as the lecturer. The video mode for the other participant’s automatically changes to full screen, displaying the lecturer, while the lecturer’s endpoint displays participants in the video mode defined previously. When another participant starts talking, Presentation Mode is cancelled and the conference returns to its predefined video layout.
Notes• Set in the RMX profile for RMX devices
• RMX 1000 systems do not support Lecture Mode, Presentation Mode, or Lecture View Switching.
Speed Sets the speed for the conference, which applies to both point-to-point and multipoint calls. Possible values are between 128 to 1920 Kbps and Bridged Audio. The default is 384 Kbps.
Note For conferences that may land on an RMX device, the speed designated here is used to reserve bandwidth and must match the line rate defined in the RMX profile that is identified in the Profile Name field.
Lecture View Switching
Select this option to enable automatic switching of participants on the Lecturer’s screen when Lecture Mode is set to Presentation Mode and the number of participants exceeds the number of windows identified by the video mode defined elsewhere.
NoteRMX 1000 systems do not support Lecture Mode, Presentation Mode, or Lecture View Switching.
High Definition Select this option for an ultra-high quality video resolution enabling compliant endpoints to connect to conferences at resolutions of 1280x720 (720p) and at bit rates up to 4Mb.
Table 20-1 Conference Template Parameters
Field Description

Conference Setup Overview
Polycom, Inc. 247
Video Quality Optimizes the video quality based on the amount of movement contained in the conference video. Possible values include:
• Motion. Provides a higher frame rate without increased resolution
• Sharpness. Provides a higher video resolution and requires more system resources
MCU Settings
Supported MCUs Specify the supported MCU types. Possible values include:
• MGC
• RMX
RMX Profile Name Identifies the RMX profile for the conference, if the conference ends up on an RMX device.
Enter the RMX profile routing name, which is generally (but not always) the same as the profile name as specified in the RMX platform.
NoteConferences fail if they land on an RMX device and a valid RMX profile is not specified.
Always Use MCU When selected, an MCU is used for the scheduled conference, regardless of the number of participants. When not selected, an MCU is used only when necessary.
Conf Settings
Meet Me Per Conference
When selected, only one dial-in number is assigned to the conference. When cleared, each dial-in participant is assigned a different dial-in number.
NoteNot supported on RMX devices.
Conference on Port When selected, this option conserves bandwidth and ports by putting all participants on a single port. When Conference on Port is enabled, the Video Mode must be set to one of the Continuous Presence layouts.
NoteNot supported on RMX devices.
Table 20-1 Conference Template Parameters
Field Description

Polycom CMA System Operations Guide
248 Polycom, Inc.
Conference Requires Chairperson
Select this option to require that a video chairperson control the conference from his or her video endpoint system.
When this option is implemented, the system will assign an eight-digit password that the conference chairperson must enter to control the conference. The conference scheduler can change this system-assigned password to any four- through eight-digit number.
In this case:
• The video chairperson must have a video endpoint system
• The conference requires an MCU.
• All conference participants remain in the waiting room and cannot join the conference until the conference chairperson enters the conference.
H.243 chair control allows an endpoint to control the conference using the H.243 chair control feature. The chairperson can disconnect participants, force the use of a continuous presence video layout, and terminate the conference.
H.243 cascade control allows the MGC-50 or MGC-100 to support a cascading configuration of conferences with the capabilities of H.243.
Note• Set in the RMX profile for RMX 2000/4000 devices
• The RMX 1000 system does not support the Chairperson feature.
Entry Tone Sets an entry tone sound when a participant enters a conference.
NoteNot user-configurable for RMX devices
Exit Tone Sets an exit tone sound when a participant leaves a conference.
NoteNot user-configurable for RMX devices
Table 20-1 Conference Template Parameters
Field Description

Conference Setup Overview
Polycom, Inc. 249
End Time Alert Tone Sets an alert tone to play into MCU-hosted conferences indicating that the conference is scheduled to end soon.
Set the End Time Alert (minutes) field to configure when the tone should be played into the conference.
Notes• This feature is not related to the system-based
Conference Time Warning feature.
• Not user-configurable for RMX devices
Talk Hold Time (sec) Indicates the minimum period that a participant has to speak to become the main speaker. During this period, no other participant may become the main speaker. The range is from 1.5 seconds to 10 seconds, in increments of 0.01 seconds.
NoteNot user-configurable for RMX devices
End Time Alert (minutes)
Specifies the number of minutes before the conference end that the End Time Alert Tone should sound.
NoteNot user-configurable for RMX devices
T120 Rate Determines whether T.120 is enabled, and if so, the default transfer rate. Enable this setting when you have equipment that supports T.120 display of data. Options are: 6.4, 14.4, 16, 22.4, 24, 30.4, 32, 38.4, 40, 46.4, 54.4, and 62.4.
Notes• Because this setting uses resources on the MCU
device, it is recommended that you select None.
• Not supported on RMX devices.
Audio Algorithm Sets the compression algorithm that the MGC uses to process audio.
The default is Auto.
Notes • Selecting a certain video/audio algorithm doesn't
guarantee that it will be chosen for a conference since an MGC device may negotiate a different algorithm with the endpoints, depending on the endpoint’s capabilities.
• Not user-configurable for RMX devices
Table 20-1 Conference Template Parameters
Field Description

Polycom CMA System Operations Guide
250 Polycom, Inc.
Polycom CMA system has a Default Template. Administrators with Conference Setup permissions can edit the Default Template and create additional templates with different settings.
When scheduling a conference, the Default Template, which is available to all users, is selected by default. Schedulers can select a different conference template from the list of templates an administrator has made available to them. Users with advanced scheduling permissions can edit the template settings for a specific scheduled conference. These changes apply only to the specified conference.
Use these best practices when working with conference templates.
• For the Default Template, select settings that are the lowest common values for all device types. This ensures that all conferences scheduled with the Default Template can successfully launch on whatever devices the system has available at the time.
• The template names Default Template and Default Audio Templates are stored in the system database and their names are not localized into other languages. If you wish to localized their names into your language, edit the templates and enter new names for them.
• When creating new templates, give them meaningful purposes and names so that your users can easily identify the differences between template choices. For example, identify templates according to maximum bit rate, specific features implemented by the template (for example, Lecture Mode or Chairperson Control), and/or supported MCU type (MGC or RMX).
• In a mixed-MCU environment, consider the advantages and disadvantages of creating one or more conference templates for each MCU type. This ensures that the system can select a specific type of MCU and can implement the chosen conference settings.
• Remember that the RMX profile may override settings specified when scheduling a conference through the Polycom CMA system. To ensure consistent and expected behavior, make sure to synchronize and lock down RMX profiles and Polycom CMA system conference templates.
Audio Mix Depth (sites)
Sets the number of participants with the loudest voices who can speak at once during a conference. If additional participants speak, their comments are not heard.
NoteNot user-configurable for RMX devices
a. For more information, see “Field Input Requirements” on page 9.
Table 20-1 Conference Template Parameters
Field Description

Conference Setup Overview
Polycom, Inc. 251
Conference SettingsConference settings apply to all conferences scheduled using the Polycom CMA system. These settings include:
NotePolycom CMA systems do not support scheduling of third-party MCUs. Template settings apply only to the MGC or RMX devices.
Field Description
Conference Auto Launch
When Disable is selected, scheduled conferences do not start. This is useful if you wish to stop future scheduled conferences from starting before you perform a restart or shutdown.
Conference Time Warning
Specifies whether or not the Polycom CMA system sends a message to video endpoints in a conference to warn the endpoint users that their conference is scheduled to end soon. The system sends the message 15 minutes and 5 minutes before the conference is scheduled to end.
To support this feature, the video endpoint system must be capable of receiving a system Send Message command.
By default, Conference Time Warning is enabled.
NoteThis feature is not related to the MCU-based End Time Alert Tone feature.
Automatically Include Conference Owner (Scheduler) in New Conferences
Select this option when you wish the system to always include the person scheduling the conference as a conference participant. Do not select this option if your organization has assistants or operators schedule conferences for others.

Polycom CMA System Operations Guide
252 Polycom, Inc.

Polycom, Inc. 253
21Conference Setup Operations
This chapter includes information about conference options and tasks within the Polycom® Converged Management Application™ (CMA™) system. It includes these topics:
• View the Conference Templates List
• Add a Conference Template
• Edit a Conference Template
• Delete a Conference Template
• Set Conference Settings
• Disable Conference Auto-Launch
• Disable Conference Time Warning
View the Conference Templates List
To view the Conference Template list
Go to Admin > Conference Templates.
The Conference Templates list appears.
Add a Conference Template
To add a conference template
1 Go to Admin > Conference Templates.
2 On the Conference Templates list, click Add .
3 Complete the General Info, Video Settings, MCU Settings, and Conf Settings sections of the Add Conference Template dialog box.

Polycom CMA System Operations Guide
254 Polycom, Inc.
4 Click OK.
The new template appears in the Conference Template list.
Edit a Conference Template
To edit a conference template
1 Go to Admin > Conference Templates.
2 On the Conference Templates list, select the template of interest and click Edit .
3 Edit the General Info, Video Settings, MCU Settings, and Conf Settings sections of the Edit Conference Template dialog box as required.
4 Click OK.
Delete a Conference Template
To delete a conference template
1 In the Conference Setup menu, choose Conference Templates.
2 On the Conference Templates list, select the template of interest and click Delete .
3 Click Yes to confirm the deletion.
NoteThe Polycom CMA system does not validate the Conference Template settings. When you create a new conference template, you must make certain that the settings match the capabilities of the MCUs (MGC or RMX device) or endpoints.
NoteIf you change the conference template Speed setting and there are scheduled conferences using that template, all endpoints in the scheduled conferences are reset to whichever is less: the new template Speed or the maximum speed that the endpoint supports.

Conference Setup Operations
Polycom, Inc. 255
Set Conference Settings
To specify conference settings
1 Go to Admin > Conference Settings.
2 On the Conference Settings page, make the required selections. “Conference Settings” on page 251.
3 Click Update.
Disable Conference Auto-Launch
To disable conference auto-launch
1 Go to Admin > Conference Settings.
2 In the Conference Auto-Launch section of the Conference Settings page, check the Disabled checkbox.
3 Click Update.
Disable Conference Time Warning
To disable the conference time warning
1 Go to Admin > Conference Settings.
2 In the Conference Time Warning section of the Conference Settings page, clear the Enabled checkbox.
3 Click Update.
Add Customized Text to Email Notifications
To add customized text to all conferencing email notifications
1 Go to Admin > Email Customization.

Polycom CMA System Operations Guide
256 Polycom, Inc.
2 In the Beginning Text section of the Email Customization page, type in the introductory text you want to appear at the start of all conferecing email notifications.
This text field is limited to 650 characters. The text you type here will appear in plain text just as you typed it.
3 In the End Text section of the Email Customization page, type in the closing text you want to appear at the end of all conferecing email notifications.
This text field is limited to 650 characters. The text you type here will appear in plain text just as you typed it.
4 Click Update.
Edit Customized Text in Email Notifications
To edit the customized text in all conferencing email notifications
1 Go to Admin > Server Settings > Email.
2 To change the introductory text, replace the text in the first text box (Text at the Beginning of the Reminder Email) with the new text you want to appear at the start of all conferecing email notifications.
This text field is limited to 650 characters. The text you type here will appear in plain text just as you typed it.
3 To change the closing text, replace the text in the second text box (Text at the End of the Reminder Email) the new text you want to appear at the end of all conferecing email notifications.
This text field is limited to 650 characters. The text you type here will appear in plain text just as you typed it.
4 Click Update.
Delete Customized Text in Email Notifications
To delete the customized text in all conferencing email notifications
1 Go to Admin > Email Customization.
2 To delete the introductory text, select the text in the Beginning Text section of the Email Customization page and delete it.
3 To delete the closing text, select the text in the End Text section of the Email Customization page and delte it.

Conference Setup Operations
Polycom, Inc. 257
4 Click Update.

Polycom CMA System Operations Guide
258 Polycom, Inc.

Polycom, Inc. 259
22Room Overview and Operations
This chapter describes how to set up rooms in the Polycom® Converged Management Application™ (CMA™) system. It includes these topics:
• View the Rooms List
• Add a Local Room
• Add an Enterprise Room
• Edit a Room
• Delete a Room
Local and Enterprise Meeting RoomsThe Polycom CMA system allows an administrator with System Setup permissions to manage local and enterprise meeting rooms and the devices associated with those meeting rooms.
Most often a Polycom CMA system is integrated with an enterprise directory to which rooms have been added. However, the Polycom CMA system also allows an administrator with System Setup permissions to add local rooms (i.e., users added manually to the system) and associate them with devices.

Polycom CMA System Operations Guide
260 Polycom, Inc.
View the Rooms List
To view the Rooms list
Go to Admin > Rooms.
The Rooms list appears. It can be filtered by Site.
Add a Local RoomWhen you add a local room (a room not found in the enterprise directory) to a Polycom CMA system, you specify settings for it and associate one or more devices with it.
To add a local room
1 Go to Admin > Rooms.
2 On the Rooms page, click Add .
The Add New Room dialog box appears.
3 If you are logged into a domain other than the Local domain, click Manually Define.
4 Complete the General Info and Associated Devices sections of the Add New Room dialog box. The following table shows the room information in the Polycom CMA system records.
Column Description
Room Name The unique and required name of the room
Description The optional description of the room
Associated Endpoints
The primary endpoint associated with this room. A set of ellipses (...) indicates the room has more than one associated device.
Field Description
General Info
Room Name The name of the room, which appears in the address book for associated devices
Description (Optional) A useful description (ASCII onlya) of the room.

Room Overview and Operations
Polycom, Inc. 261
5 Click OK.
The room is added to the Polycom CMA system. Note that the system does not distinguish between enterprise rooms and local rooms once they’ve been added to the system.
Site The site in which the room is located.
NoteRooms and the endpoint associated with them must be assigned to the same site.
Email (Optional) The email address of the room administrator.
User ID A user account for the room. This user ID must be unique within the system across all rooms and users and across all domains.
If you do not usually create meaningful user IDs for your rooms, create a placeholder ID that will not conflict with any other room and user IDs.
NotePolycom CMA system dynamic device management requires that rooms be assigned user IDs and passwords, so users can schedule rooms in the same way they schedule users and so that the Polycom CMA system can manage room endpoints (scheduling, monitoring, provisioning, and software updates) in the same way that it manages users’ endpoints.
Password/Confirm Password
The password that corresponds to the room’s User ID. This password must be a minimum of eight characters in length.
Associated Endpoints
Available Endpoints
The list of unassigned endpoints that are managed by the Polycom CMA system.
Selected Endpoints
The list of endpoints assigned to the room. The device at the top of the list is the primary device. You can change the order of device priority by selecting a device and clicking Move Up or Move Down.
a. For more information, see “Field Input Requirements” on page 9.
Field Description

Polycom CMA System Operations Guide
262 Polycom, Inc.
Add an Enterprise RoomIf your Polycom CMA system is integrated with an enterprise directory, you can add a room from the enterprise directory to the Polycom CMA system.
To add an enterprise room
1 Go to Admin > Rooms.
2 On the Rooms list, click Add Room .
The Add New Room dialog box appears. If you’re logged into an enterprise domain, the Find Room in LDAP page with a search field is displayed.
3 To find a room in the enterprise directory:
a In the Search Value field, type in the first few characters of the room name.
The system does a prefix search of the appropriate fields. For information on searching see “Filter and Search a List” on page 9.
b Click Search.
A list of the enterprise users and rooms that meet the search criteria appears. If the search found more than 500 matching entries, only the first 500 are displayed.
c Select the room of interest and click Define Details.
4 Complete the General Info and Associated Devices sections of the Add New Room dialog box. For information on these fields, see “Add a Local Room” on page 260.
5 Click OK.
The room is added to the Polycom CMA system. Note that the system does not distinguish between enterprise rooms and local rooms once they’ve been added to the system.
NoteUser IDs must be unique across all users and rooms and across all domains.

Room Overview and Operations
Polycom, Inc. 263
Edit a Room
To edit a room
1 Go to Admin > Rooms.
2 In the Rooms list, select the room of interest and click Edit .
3 Edit the General Info or Associated Devices sections of the Add New Room dialog box. For information on these fields, see “Add a Local Room” on page 260.
4 Click OK.
Delete a Room
To delete a room
1 Go to Admin > Rooms .
2 In the Rooms list, select the room of interest and click Delete.
3 In the Delete Room dialog box, click Yes.
The room is deleted from the Polycom CMA system.
NoteUser IDs must be unique across all users and rooms and across all domains.

Polycom CMA System Operations Guide
264 Polycom, Inc.

Polycom, Inc. 265
23Directory Setup Operations
This chapter describes how to manage the Global Address Book in the Polycom® Converged Management Application™ (CMA™) system. It includes these topics:
• View the Global Address Book
• Set or Change the GAB Password
View the Global Address BookThe Polycom Global Address Book is an endpoint directory that allows users with video endpoints to look up and call other users with video endpoints in their video communications network.
From a video endpoint system, users can locate other user’s devices by name in the Global Address Book and initiate a call without knowledge of the other user’s equipment.
For more information on the Global Address Book, see “Endpoint Directory and Directory Settings” on page 286.
To view the Global Address Book
1 Go to Admin > Global Address Book.
2 As needed, use the Filter to customize the Global Address Book. It can be filtered by Endpoint Name or IP Address.
The user information found in the Global Address Book includes:
Column Description
User/Resource The associated user or resource ID.
Endpoint Name The name of the registered endpoint.
Type The type of endpoint.

Polycom CMA System Operations Guide
266 Polycom, Inc.
Set or Change the GAB PasswordYou can require that endpoints be provisioned with a password in order to access the Global Address Book on the Polycom CMA system. To do so, set a Global Address Book password as described here. Use the same procedure to change the Global Address Book password.
To provision this password to endpoints, see “Add a Scheduled Provisioning Profile” on page 133.
To set or change the password for the Global Address Book
1 Go to Admin > Global Address Book.
2 In the Global Address Book, click Set GAB Password .
3 In the Set Client Password dialog box, enter the Old Password and the New Password. (Note that the password fields are ASCII only; for more information, see “Field Input Requirements” on page 9.)
4 Confirm the new password and click Save.
Once you set this password, endpoints that are not provisioned with this password cannot access the Global Address Book on the Polycom CMA system.
IP Address The IP address of the endpoint.
Phone Number The phone number of the endpoint.
Alias The alias associated with the endpoint.
Column Description

Polycom, Inc. 267
24Polycom CMA System Setup Overview
This chapter provides an overview of the Polycom® Converged Management Application™ (CMA™) System Setup menu. It includes these topics:
• Server Settings
• Polycom CMA System Licensing
• Polycom CMA System Security
• Polycom CMA System Site Topology and Dial Plan Set Up
• Polycom CMA System Gatekeeper Functionality
• Routing Mode
• Polycom CMA System Integration with Microsoft Outlook
• Polycom CMA System Integration with Microsoft Office Communications Server 2007
• Endpoint Directory and Directory Settings
Server SettingsMost of the selections in the Server Settings menu are entered during the Polycom CMA system First Time Setup process and do not change frequently. Use the Server Settings menu, when you do need to change them.
The Server Settings menu allows users with Administrator permissions to implement the Polycom CMA system configuration best suited for their corporate environment as identified in the solution design, site survey, and/or network design.

Polycom CMA System Operations Guide
268 Polycom, Inc.
The Server Settings menu includes these items:
Polycom CMA System LicensingThe seat capacity for a Polycom CMA 5000 system scales from 500 to 5,000 devices. The entry-level Polycom CMA 5000 system has a baseline capacity of 500 client access licenses. Additional licensing is offered in 100, 500, and 1000 license pack sizes.
The seat capacity for a Polycom CMA 4000 system scales from 200 to 400 devices. The entry-level Polycom CMA 4000 system has a baseline capacity of 200 client access licenses. Additional device licensing is offered in 100 license pack size.
Selection Description
Network The basic network setting for the Polycom CMA system on your network.
Gatekeeper Settings By default the Polycom CMA system is made the primary gatekeeper during the First Time Setup process. Use the Gatekeeper Settings option to modify the primary gatekeeper behavior or to add an alternate gatekeeper or neighboring gatekeepers.
Gatekeeper Settings affect how devices register and calls are made in your video communications network. These settings allow you to:
• Identify the gatekeeper with an identifier and description.
• Specify registration-related settings, including the default gatekeeper, which endpoints register, the registration refresh period, and the offline timeout.
• Set the maximum number of neighboring gatekeeper hop counts.
• Specify how to handle calls to and from unregistered endpoints.
Management and Security Settings
Management Settings allow you to upgrade the Polycom CMA system software and enable auto discovery of endpoints.
Security Settings allow you to implement HTTPS for the Polycom CMA system.
Dial Plan Settings Edit the default Polycom CMA system Dial Plan and Site settings (which includes the definition of sites, site links, dial rules, services, and least-cost routing tables) to support your network topology and video call routing.

Polycom CMA System Setup Overview
Polycom, Inc. 269
Your system comes with a Default Trial key that is valid for 60 days after activating your system. With your system order, you will receive one License Certificate. You must activate the License Certificate to receive an activation key, which you then enter in the Polycom CMA system. When you enter this activation key into the system, it overwrites the Default Trial key.
When applied to the system, an expansion license pack augments the device license count. For example, applying a 1000-device expansion license pack to a baseline Polycom CMA 5000 system will yield a total license count of 1500 concurrent licenses.
Where applicable, the number of concurrent calls supported by a Polycom CMA system is derived from the number of device licenses at a 3/10 ratio (calls/devices). For example, a system licensed for 5000 devices supports up to 1500 concurrent calls in routed mode and 3000 calls in direct mode.
Device licenses are consumed based on a 1:1 basis for any managed device (endpoints, MCU, GK, GW— including personal endpoints, IP blades, and more) that can be added to the system by any means, including the user interface, registration for management services, or registration for Global Address Book services.
The Polycom CMA system has the following licensing packages:
• Base system license
• Base system license with Microsoft Outlook
• Base system license with IBM Lotus Notes
• Base system license with Microsoft Outlook and IBM Lotus Notes
• Redundant system licenses (primary and redundant licenses)
• Redundant system licenses with Microsoft Outlook
• Redundant system licenses with IBM Lotus Notes
• Redundant system licenses with Microsoft Outlook and IBM Lotus Notes
Licensing for the Polycom CMA Desktop client is included with the Polycom CMA system. When a Polycom CMA Desktop client is provisioned by the Polycom CMA system, it automatically consumes a license. That license is then reserved for that Polycom CMA Desktop client. However, you can configure the Polycom CMA system to automatically released a Polycom CMA Desktop client license after a set number of days of inactivity.
Licenses consumed by registered devices are never automatically released. To release a license from a registered device, an administrator must manually delete the device from the system.
NoteDevice licenses are consumed by managed devices, not by users. You may add any number of local or enterprise users to the Polycom CMA system.

Polycom CMA System Operations Guide
270 Polycom, Inc.
Polycom CMA System SecurityBy default, the Polycom CMA system uses http for its data interchanges. However, you can edit the Certificate Settings to implement the https protocol, which is a combination of normal http interchange over an encrypted Secure Sockets Layer (SSL) or Transport Layer Security (TLS) connection.
If you implement HTTPS, you have the following choices. You can:
• Use the Polycom CMA system default key and self-signed certificate. In this case, you will want to configure the client systems to accept (trust) the self-signed certificate.
• Use your own existing private key and certificate, if your company is self-authorizing.
• Use a private key and certificate requested by the Polycom CMA system. In this case, you can complete a Certific
Polycom CMA System Site Topology and Dial Plan Set UpSite topology information describes your network and its interfaces to other networks, including the following elements:
• Site — Generally, a geographic location such as an office or plant. A site contains one or more network subnets, so a device’s IP address identifies the site to which it belongs.
• Network clouds — A Multiprotocol Label Switching (MPLS) network cloud defined in the site topology. An MPLS network is a private network that links multiple locations and uses label switching to tag packets with origin, destination, and quality of service (QOS) information.
Note that MPLS clouds are not associated with an IP address ranges, so they can be used to group multiple subnets. They could also represent a service provider.
While links to MPLS clouds have bandwidth and bit rate limitations, the cloud is infinite. In this way, clouds reflect the way in which businesses control bandwidth and bit rate.
• Internet/VPN — A entity that represents your network’s connection to the public Internet.
• Site link — A network connection between two sites or between a site and an MPLS network cloud.
• Site-to-site exclusion — A site-to-site connection that the site topology doesn’t permit an audio or video call to use.
• Territory — A grouping of one or more sites for which a Polycom CMA system is responsible.

Polycom CMA System Setup Overview
Polycom, Inc. 271
The site topology you create within the Polycom CMA system should reflect your network design. Consider the following information and best practices when creating your site topology:
• If possible, connect all sites to an MPLS cloud. MPLS clouds are like corporate networks, used to connect multiple subnets in multiple sites, but all servicing a company.
• Avoid cross loops or multiple paths to a site; otherwise a call may have different paths to a single destination. The more cross, circular, and multi paths you have, the higher the number of calculations for a conference.
• Link sites that aren’t connected to an MPLS cloud directly to another site that is connected to an MPLS cloud. Do not create orphan sites.
• Calls are routed through a bridge, so bandwidth and bit rate limits for the site and subnet apply to all calls made using that bridge.
• Reserve the Internet/VPN “site” for IP addresses that fall outside your private or corporate network (for example remote workers), because all calls routed to the Internet/VPN site will be routed through the site on your private or corporate network that has Internet access.
The Polycom CMA system site topology function uses a dynamic, embedded mapping tool that graphically displays the sites, clouds (network and Internet), and site links (site-to-site or site-to-cloud) in your network.
Within this global and graphical view of the video conferencing network, you can:
• Create and link up to 500 sites
• Zoom and pan to view specific network components
• View system and device alarms

Polycom CMA System Operations Guide
272 Polycom, Inc.
• View the video network capacity for sites and site links as indicated by the color and shape of its icons.
• Filter the view by site name, territory name, IP address, network devices, and alerts
Sites ListThe Sites page contains a list of the sites defined to the Polycom CMA system. A site is a geographic location such as an office or plant. A site contains one or more network subnets, so a device’s IP address identifies the site to which it belongs.
Use the commands in the Actions list to add a site, edit or delete existing sites, and see information about a site, including the number of devices of each type it contains.
The following table describes the fields in the list.
Add/Edit Site Dialog Box Use the Add Site dialog box to define a new site in the Polycom CMA system’s site topology and specify which subnets are associated with it. Use the Edit Site dialog box to redefine information for an existing site.
Column Description
Name Name of the site.
Description Description of the site.
Country Code The country code for the country in which the site is located.
Area Code The city or area code for the site. Do not include a leading zero. For example, the city code for Paris is 01; however, enter 1 in this field.
Max Bandwidth (Mbps) The total bandwidth limit for audio and video calls.
Max Bit Rate (Kbps) The per-call bandwidth limit for audio and video calls.
Territory The territory to which the site belongs, which determines the Polycom CMA system responsible for it.

Polycom CMA System Setup Overview
Polycom, Inc. 273
The following table describes the fields in the Add Site and Edit Site dialog boxes.
Field Description
General Info
Site Name The physical location of the site. The name can be up to 32 characters long, and may include spaces, dashes, and underscores.
Description Description (ASCII onlya) of the site.
Override ITU Dialing Rules
Check this box to override the standard dialing rules established by the International Telecommunications Union.
PBX Access Code The access code required to enter the site’s PBX system.
Country Code The country code for the country in which the site is located.
Area Code The city or area code for the site. Do not include a leading zero. For example, the city code for Paris is 01; however, enter 1 in this field.
# of Digits in Subscriber Number
The number of digits in a phone number. For example, in the United States, subscriber numbers may have seven digits or ten digits depending upon the region.
Default LCR Table The default least-cost routing table (LCR) for this site. This LCR table is used for all calls originating from devices associated with this site. The default is None.

Polycom CMA System Operations Guide
274 Polycom, Inc.
Assignment Method The ISDN number assignment method for the site. Possible values include:
• No Auto Assignment. Select this option when ISDN numbers are not assigned to IP devices.
• DID (Direct Inward Dial). Select this option when you assign a range of phone numbers received from the telephone company service.
• Gateway Extension Dialing. Select this option when you have a single gateway phone number and a range of extensions (E.164 aliases) that are internal to the company. In this case, calls go through a gateway. Endpoints are differentiated by the extension at the end of the dial string.
When a site is assigned an automatic assignment method, devices without an ISDN number are assigned one when they register. These numbers allow inbound calls to reach specific video endpoints. After an ISDN number is assigned to an endpoint, it is reserved for use as long as that endpoint remains registered with the Polycom CMA system.
NoteIf you do not assign ISDN numbers automatically, you cannot call IP-only endpoints through an ISDN line.
Territory Assigns the site to a territory, and thus to a Polycom CMA system.
Location Specify the geographic location of the site either by longitude+latitude or country+city.
ISDN Number Assignment—DID (Direct Inward Dial)
# Digits in Call Line Identifier
Enter the number of digits in the Call Line Identifier (CLID), which is the dialed number. The maximum is 17.
• For example, in the United States, the number of digits in the CLID is often 7 for outside local calls, 4 for internal calls, or 11 for callers in a different area code.
• This number indicates what part of the full dial string is sent to the gatekeeper for address resolution.
# Digits in Short Phone Number
Enter the number of digits in the short form of the dialing number.
• For example, in the United States, internal extensions are usually four or five digits.
• This number indicates what part of the dial string is sent to the gatekeeper for address resolution in gateway + extension dialing.
Field Description

Polycom CMA System Setup Overview
Polycom, Inc. 275
ISDN Number Range - Start
The starting ISDN number to assign automatically to IP devices
ISDN Number Range - End
The ending ISDN number to assign automatically to IP devices
ISDN Number Assignment—Gateway Extension Dialing
Gateway Phone Number
Phone number of the site gateway
E164 Start • The starting number in a range of available extensions to assign automatically to IP devices
• When a device without native ISDN registers, a number within the start and end range is assigned, so that the device can be called through an ISDN line
E164 End The ending number in the range of available extensions to assign automatically to IP devices
Site Routing/Bandwidth
Internet calls are not allowed
Disables call routing through the Internet
Allowed via H.323 aware firewall
Enables call routing through the Internet, using an H.323-aware firewall
Notes• For an outbound call to the Internet, you must enter
the firewall gateway service (e.g. a Polycom VBP appliance) code before the IP address in the dial string.
• If you select Allowed via H.323 aware firewall you must create a site link between this site and the Internet/VPN site.
Allowed via H.323 aware SBC or ALG
Enables call routing via the Internet, using an H.323-aware SBC (Session Border Control) or ALG (Application Level Gateway) server
NoteFor an outbound call to the Internet, you must enter the firewall gateway service (e.g. a Polycom VBP appliance) code before the IP address in the dial string.
Call Signaling IPv4 Address
IP address of the SBC or ALG server. Supports only IPv4.
Port Port address of SBC or ALG server
Total Bandwidth The total bandwidth of the pipe at the site.
Field Description

Polycom CMA System Operations Guide
276 Polycom, Inc.
Site Links The Site Links page lists the links defined in the site topology. A link can connect two sites, or it can connect a site to an MPLS network cloud (see “Network Clouds” on page 102).
Use the commands in the Actions list to add, edit, or delete a site link. The following table describes the fields in the site list.
Add/Edit Site Link Dialog Box Use the Add Site Link dialog box to define a new site link in the Polycom CMA system’s site topology. Use the Edit Site Link dialog box to redefine an existing site link. A site link can connect two sites, or it can connect a site to an MPLS network cloud.
Call Max Bit Rate (kbps) The maximum bandwidth that can be used for each intrasite call at the site. The default and maximum value is 2000000 (2 GB).
Subnets
Subnet IP Address/Mask
Specifies the subnets within the site. For each subnet, includes:
• IP Address range
• Subnet mask
• Maximum bandwidth for the subnet
• Maximum bit rate per call for the subnet
a. For more information, see “Field Input Requirements” on page 9.
Field Description
Column Description
Name Name of the link.
Description Description of the link.
From Site The originating site of the link.
To Site The destination site (or MPLS cloud) of the link.
Max Bandwidth (Mbps) The total bandwidth limit for this link.
Max Bit Rate (Kbps) The per-call bandwidth limit for this link.

Polycom CMA System Setup Overview
Polycom, Inc. 277
The following table describes the fields in the Add Site Link and Edit Site Link dialog boxes.
Site-to-Site Exclusions The Site-to-Site Exclusions page contains a list of the direct site-to-site connections that the system won’t permit a call or session to use.
Use the commands in the Actions list to add and delete site-to-site exclusions.
The following table describes the fields in the list.
Territories The Territories page contains a list of the territories defined in the site topology. On the right, it displays information about the selected territory.
A territory is a set of one or more sites for which a Polycom CMA system is responsible. By default, there is one territory named Default CMA Territory, and its primary node (the CMA system responsible for it) is set to this system.
Use the commands in the Actions list to add, edit, or delete a territory.
Field Description
Name A meaningful name for the site (up to 128 characters).
Description A brief description of the site (up to 200 characters).
From site The originating site of the link. The drop-down list includes all defined sites and the Internet. Can’t be changed for a site-to-cloud link.
To site The destination site of the link. The drop-down list includes all defined sites and an Internet/VPN option. Can’t be changed for a site-to-cloud link.
Total bandwidth (Mbps) Specifies the total bandwidth limit for this link.
Max bit rate (Kbps) Specifies the per-call bandwidth limit for this link.
Column Description
From/To Site Name of one of the two sites connected by the excluded link.
To/From Site Name of the other site.

Polycom CMA System Operations Guide
278 Polycom, Inc.
The following table describes the fields in the list and the sections on the right.
Add/Edit Territory Dialog Box Use the Add Territory dialog box to define a new territory in the Polycom CMA system’s site topology. Use the Edit Territory dialog box to define a new territory in the Polycom CMA system’s site topology.
The following table describes the fields in the Add Territory and Edit Territory dialog boxes.
Column/Section Description
Name Name of the territory.
Description Description of the territory.
Primary Node The primary node of the Polycom CMA system responsible for this territory.
Backup Node The second node, if any, of the Polycom CMA system responsible for this territory.
Territory Summary Repeats the name and description of the selected territory.
Associated Sites List the sites included in the selected territory.
Field Description
Territory Info
Name A meaningful name for the territory (up to 128 characters).
Description A brief description of the territory (up to 200 characters).
Primary Node The primary node of the Polycom CMA system responsible for this territory.
Backup Node The second node, if any, of the Polycom CMA system responsible for this territory.
Associated Sites
Search Sites Enter search string or leave blank to find all sites.
Search Result Lists sites found and shows the territory, if any, to which each currently belongs.
Select a site and click the right arrow to move it to the Selected Sites list.
Selected Sites Lists sites selected and shows the territory, if any, to which each currently belongs.

Polycom CMA System Setup Overview
Polycom, Inc. 279
Network Clouds The Network Clouds page contains a list of the MPLS (Multiprotocol Label Switching) network clouds defined in the site topology.
Use the commands in the Actions list to add, edit, or delete an MPLS cloud.
The following table describes the fields in the list.
Add/Edit Network Cloud Dialog Box Use the Add Network Cloud dialog box to define a new MPLS network cloud in the Polycom CMA system’s site topology. Use the Edit Network Cloud dialog box to redefine an existing MPLS network cloud.
The following table describes the fields in the Add Network Cloud and Edit Network Cloud dialog boxes.
Column/Section Description
Name Name of the cloud.
Description Description of the cloud.
Field Description
Cloud Info
Name A meaningful name for the cloud (up to 128 characters).
Description A brief description of the cloud (up to 200 characters).
Linked Sites
Search Sites Enter search string or leave blank to find all sites.
Search Result Lists sites found and shows the territory, if any, to which each belongs.
Select a site and click the right arrow to open the Add Site Link dialog box .
Selected Sites Lists sites linked to the cloud and shows the territory, if any, to which each belongs.

Polycom CMA System Operations Guide
280 Polycom, Inc.
Polycom CMA System Gatekeeper FunctionalityDuring the First Time Setup process, the Polycom CMA system is designated as the default gatekeeper and the default gatekeeper settings are implemented.
The Polycom CMA system is the default gatekeeper responsible for:
• Default, alternate and neighboring gatekeeper management
• Device registration
• Address resolution
• Bandwidth control and management
• Call control signaling
• Call management, authorization, access, and accounting
• Firewall traversal
Default, Redundant, Alternate, and Neighboring Gatekeepers
Default GatekeeperWe recommend setting up the Polycom CMA system as the default gatekeeper, so that all endpoints and other devices on the network capable of automatic registration will register with it. This allows the Polycom CMA system gatekeeper to serve as the centralized manager of the H.323 network and more effectively aid in bandwidth management, firewall traversal, and device authentication and authorization.
Redundant GatekeeperWhen the Polycom CMA system is deployed in a redundant configuration, the redundant Polycom CMA system operates as a redundant gatekeeper in parallel with the primary Polycom CMA system sharing endpoint registration information. If the primary Polycom CMA system becomes unavailable, the redundant Polycom CMA system replaces it until it returns.
Alternate GatekeeperWithin the Polycom CMA system, you can designate an alternate gatekeeper. In this case, when an endpoint or other device registers with the Polycom CMA system gatekeeper, the system sends back the alternate gatekeeper
Note MCUs that register with a GRQ instead of a RRQ like the Polycom RMX, will only register with the Polycom CMA system when it is enabled as the default gatekeeper for the zone.

Polycom CMA System Setup Overview
Polycom, Inc. 281
information to the endpoint. Then, if communication with the Polycom CMA system fails, the endpoint will attempt to register with the alternate gatekeeper.
In a redundant configuration, the alternate gatekeeper is the third gatekeeper in line after the primary and redundant Polycom CMA system gatekeepers.
Neighboring GatekeeperNeighboring gatekeepers are gatekeepers that manage other H.323 regions within an enterprise. When a call originates within one gatekeeper region but that region’s gatekeeper is unable to resolve the dialed address, it is forwarded to the neighboring gatekeepers for resolution.
Within the Polycom CMA system, you can also set up a dial rule that will route calls with designated prefixes to designated neighboring gatekeepers.
Device RegistrationThe Polycom CMA system manages device registration and offers several choices from an open registration policy to more restrictive registration policies.
No matter what the gatekeeper registration policy, any endpoint that is automatically provisioned, any endpoint that is registered with the Global Address Book, and any endpoint that is added manually to the Polycom CMA system can automatically register with the gatekeeper.
The Polycom CMA system gatekeeper registration policies include:
Allow Registration of All Endpoints
This open Allow Registration of All Endpoints registration policy allows any device that can find the Polycom CMA system gatekeeper to register with it. This is the default policy.
In this case, devices can register to the Polycom CMA system automatically:
• When the device broadcasts a message to find a gatekeeper with which to register.
In this case, specifying a default gatekeeper is important, because devices that register automatically may find multiple gatekeepers. Devices register with the system designated as the default gatekeeper, unless that gatekeeper is down. Then devices register with the system designated as the alternate gatekeeper.
When registering, devices send a variety of settings to the gatekeeper including their IP address, one or more H.323 IDs, and one or more E.164 aliases. These settings appear in the Polycom CMA system as Device Details.

Polycom CMA System Operations Guide
282 Polycom, Inc.
• When devices in dynamic management mode are automatically provisioned by the Polycom CMA system
And devices can be registered to the Polycom CMA system manually:
• At the device by specifying the IP address of the Polycom CMA system as the gatekeeper
• At the device by specifying the IP address of the Polycom CMA system as the Global Directory Service. Once the device in the Polycom CMA system Global Address Book it is registered to the system.
• At the Polycom CMA system by adding the device to the one of the device lists (Endpoint, MCU, VBP, or DMA lists)
Once an endpoint is registered, users of other registered endpoints can call the endpoint by using either the H.323 ID, a URI, an E.164 alias, or one of the services.
Allow Registration of Predefined Endpoints Only
The restrictive Allow Registration of Predefined Endpoints Only registration policy allows devices to automatically register once they are added to the Polycom CMA system either when they are automatically provisioned, automatically registered to the Global Address Book, or added to the system manually.
Allow Registration of Endpoints in Defined Sites
The moderately open Allow Registration of Endpoints in Defined Sites registration policy allows endpoints to automatically register if they are within one of the Dial Plan sites defined to the Polycom CMA system, when they are automatically provisioned, when they are automatically registered to the Global Address Book, or when they are added to the system manually
Allow Registration of Predefined Prefixes Only
With this controlled registration policy, devices within a range of defined E.164 prefixes may automatically register with the Polycom CMA system.
Routing ModeThe Polycom CMA system has two routing modes.
Direct ModeIn this simplest gatekeeper mode, the Polycom CMA system gatekeeper resolves IP addresses to their E.164 addresses and Aliases (similar to the function of a domain name server) and grants endpoints permission to place

Polycom CMA System Setup Overview
Polycom, Inc. 283
calls. Once the gatekeeper performs these two functions, it plays no further role in the call. Call signaling and media streams are sent directly between the endpoints in the call.
In Direct mode, the number of concurrent calls supported by a Polycom CMA system is derived from the number of device licenses at a 3/5 ratio (calls/devices). So, for example, a system in Direct mode licensed for 5000 devices supports up to 3000 calls.
Use Direct mode when implementing a hierarchical architecture. A hierarchical architecture is one with multiple gatekeepers, where one gatekeeper—the Polycom CMA system in Direct mode—acts as the directory gatekeeper at the top of the hierarchy. On the directory gatekeeper, you must configure all of the other member gatekeepers as neighbors and on the member gatekeepers you must configure the directory gatekeeper as a neighbor. However, the member gatekeepers do not have to be neighbored with each other.
When in Direct mode, some advanced Polycom CMA system features do not work. These features include Simplified Dialing, Conference on Demand, Alternate Routing, Least Cost Routing, MCU board hunting, and firewall traversal for a Polycom VBP system in "Enterprise" or "E" mode. (Firewall traversal for a Polycom VBP system in "Service Provider or "S" mode does work.)
The advantage of Direct mode is that conferences stay connected even if the gatekeeper fails.
The disadvantage of Direct mode (along with the loss of advanced functionality) is that during a failure and restart the gatekeeper loses track of active calls that it was not involved in setting up. In this case, after a failure and restart, the gatekeeper’s bandwidth calculations will be incorrect until those calls end. Also, since the Conference Monitoring function uses gatekeeper data, the monitoring information for those calls may be incorrect or incomplete.
Routed ModeIn this advanced mode, the Polycom CMA system gatekeeper, besides performing the functions of a Direct mode gatekeeper, also acts as a proxy for the call signaling H.225 messages that set up the call. In this mode, only the media streams are sent directly between the endpoints in the call.
In Routed mode, the number of concurrent calls supported by a Polycom CMA system is derived from the number of device licenses at a 3/10 ratio (calls/devices). So, for example, a system in Routed mode licensed for 5000 devices supports up to 1500 calls.
The advantage of Routed mode is that it enables advanced features such as Simplified Dialing, Conference on Demand, Alternate Routing, Least Cost Routing, MCU board hunting and firewall traversal for a Polycom VBP system in "Enterprise" or "E" mode. Routed mode is also supported for the Polycom VBP system in "Service Provider" or "S" mode.

Polycom CMA System Operations Guide
284 Polycom, Inc.
The disadvantage of routed mode is that a gatekeeper failure and restart terminates all running conferences that include a registered device. Calls are not reestablished after a system failure and restart. Conferences show a status of Active, but participants show a status of Disconnected.
In either mode, CDR information for calls is accurate if the Polycom CMA system does not fail and the endpoints send a DRQ (Disconnect Request) at the end of the call.
Polycom CMA System Integration with Microsoft OutlookPolycom now supports two conferencing methods when integrating Polycom conferencing with Microsoft Outlook: Reserved and Reservationless.
Standard Polycom CMA System and Reserved ConferencingReserved conferencing is standard with the Polycom CMA system. All conferences scheduled either through the Polycom CMA system web scheduler or one of the Scheduling Plugins are reserved conferences, which means the Polycom CMA system reserves video bridge, network resources, and video endpoints at the scheduled time. In this case, the calendars for the endpoints are stored and maintained by the Polycom CMA system.
When the conference is scheduled using the Scheduling Plugin for Microsoft Outlook and the participants use Microsoft Outlook as their email and calendaring tool, the scheduled conferences are also posted as meetings on the participants’ Outlook calendars. However, the endpoints themselves do not have Outlook calendars.
Polycom Conferencing for Microsoft Outlook, Reservationless Conferencing, and Calendaring Management
The Polycom CMA system can also be used to provision Polycom Conferencing for Microsoft Outlook, which is reservationless conferencing. When you use this method:
• Video bridge, network resources, and video endpoints are not reserved at the scheduled time
NoteIf you wish to implement both reserved conferencing (enabled by a Polycom CMA system) and reservationless or ad hoc conferencing (enabled by a Polycom DMA system) , you should create two pools of RMX bridges as described in “DMA View” on page 165. However if you do, Polycom does not recommend using both the Polycom Scheduling Plug-in for Microsoft Outlook (Reserved Conferencing) and the Polycom Conferencing Add-in for Microsoft Outlook (Reservationless Conferencing) on the same client system.
Polycom CMA System Setup Overview
Polycom, Inc. 285
• A Polycom RMX or DMA system is required to locate available bridge resources when the meeting begins
• Calendars for the endpoints are stored and maintained by Microsoft Exchange and the endpoints have their own Outlook calendar.
Polycom Conferencing for Outlook, which requires the Polycom Conferencing Add-in, allows:
• Conference organizers to:
— Use Microsoft Outlook and its usual meeting request workflow to schedule video- and audio-enabled meetings.
— Include recording and streaming into the conference, when required.
• Meeting participants to:
— Track their video- and audio-enabled meetings on the same calendar that they track their other meetings.
— Click a link in an email meeting request to join conferences on their associated video or audio endpoint system.
• Endpoints to have their own unique credentials and mailbox separate from the endpoint user, so that endpoints can display their own calendars. This is especially important for room endpoints.
The Polycom CMA system supports the Polycom Conferencing for Outlook solution. It allows you to provision endpoints with the credentials, mailbox address, Exchange server IP address, and calendaring service settings they need to use Polycom Conferencing for Outlook.
To provision endpoints with the information required to support Polycom Conferencing for Outlook, you must complete the following tasks (after your sites are set up):
1 “Associate Sites with Microsoft Exchange Servers” on page 292.
2 “Assign Calendaring Settings to Provisioning Profiles” on page 292.
3 “Provision the Exchange Mailbox for Calendaring Service-enabled Endpoints” on page 293.

Polycom CMA System Operations Guide
286 Polycom, Inc.
Polycom CMA System Integration with Microsoft Office Communications Server 2007
The Polycom CMA system supports the integration of selected Polycom endpoints with Microsoft Office Communications Server 2007. Integration with Office Communications Server allows Polycom HDX system users to see Office Communicator users who have been added to the Polycom HDX system Favorites list and place audio and video calls to them. Conversely, Office Communicator users can also see Polycom HDX system users in their Microsoft Office Communicator Contacts List and place audio and video calls to them.
For Polycom HDX systems that are integrated with Office Communications Server, the Office Communications Server replaces the Polycom CMA system as the presence and directory service provider. However, the Polycom CMA system continues to act as the gatekeeper and manager for these endpoint systems.
The Polycom CMA system supports the integration with Office Communications Server by provisioning endpoints with the credentials, Exchange server IP address, and communications service settings they need.
To provision endpoints with the information required to integrate with Office Communications Server, you must complete the following tasks:
1 “Provision Integration with Microsoft Office Communications Server” on page 294.
2 “Provision Domain User Name for Microsoft Office Communications Server Integration” on page 295.
Endpoint Directory and Directory SettingsWhen an endpoint registers with the Polycom CMA system, its information is automatically entered into the Global Address Book. When information changes at the endpoint, the Global Address Book is automatically updated as well. If an endpoint is configured to Allow Directory Changes, additions and deletions to the Global Address Book are pushed to the endpoint.
Endpoints that get their global directory from the Polycom CMA system will either get the Global Address Book or the enterprise LDAP directory. Two Directory Setup options allow you to affect which devices and users appear in the endpoint directory.
Typically, standard endpoints (those that are not dynamically managed) register for the Polycom GDS and are listed in the Polycom CMA system Global Address Book. The Global Address Book allows standard endpoint users to call other standard endpoint users by selecting them by name. In this case, the Global Address Book is limited to 2000 entries, which is the limit that standard endpoint systems can manage.

Polycom CMA System Setup Overview
Polycom, Inc. 287
The Include dynamically-managed devices in the Global Address Book option changes the Global Address Book so that it includes all standard endpoints and all dynamically-managed endpoints such as CMA Desktop and Polycom VVX 1500 endpoints in the Global Address Book. In this case, the Global Address Book limit is increased to 5000 entries.
By default the Include dynamically-managed devices in the Global Address Book option is selected. This brings all of your devices and users together into one endpoint directory. However, you may not want to take advantage of this feature if you have legacy endpoint systems such as VSX, ViewStation, and FX endpoints. These endpoint systemscannot handle the increased size of the Global Address Book. For information on clearing this option, see “Remove or Include Dynamically-Managed Devices in the Global Address Book” on page 333.
The second Directory Setup option affects both the Global Address Book and the enterprise LDAP directory. The Polycom CMA system Guest Book includes static user entries. By selecting the Show Guest Book entries in the Directory, these static entries are included in the endpoint directory, regardless of whether the endpoint directory is the Global Address Book or the enterprise LDAP directory. The Show Guest Book entries in the Directory option is also selected by default.
Notes• The Polycom CMA system Global Address Book lists endpoints. Endpoints may
or may not have users or rooms associated with them. On an endpoint, the Global Address Book does not list users unless they have endpoints associated with them.
• If your company has more than 100 endpoints, don’t limit the Global Address Book on the endpoint side or the endpoint user won’t have access to all Global Address Book entries.
• The Polycom CMA system Global Address Book does not support unicode data.

Polycom CMA System Operations Guide
288 Polycom, Inc.

Polycom, Inc. 289
25Server Setting Operations
This chapter describes how to update the Polycom® Converged Management Application™ (CMA™) system configuration settings, many of which were entered during First Time Setup. It includes these topics:
• Edit the Polycom CMA System Network Settings
• Edit the Polycom CMA System Time Settings
• Integrate with Microsoft Office Communications Server
• Integrate with Microsoft Office Communications Server
• View Current Polycom CMA System Licensing
• Add Polycom CMA System Licenses
• Reclaim Polycom CMA Desktop Licenses
• Delete Polycom CMA System Licenses
• Add or Remove a Polycom CMA System Custom Logo
• Add or Remove a Polycom CMA Desktop Custom Logo
• Edit the Polycom CMA System Email Account

Polycom CMA System Operations Guide
290 Polycom, Inc.
Edit the Polycom CMA System Network SettingsEdit the system Network settings to change the basic network information for the Polycom CMA system. Network settings include these fields:
To edit the Polycom CMA system network settings
1 Go to Admin > Server Settings > Network.
2 Configure these settings on the Network page, as necessary.
3 Click Update.
If you change the IP address, the system prompts you to restart the Polycom CMA system. We also recommend that you restart the system if you change the subnet mask.
4 As required, restart the system.
Field Description
System Name The NetBIOS name (ASCII onlya) of the Polycom CMA system server. Must be between 6 and 16 characters long; dashes and underscores are valid characters.
a. For more information on field limitations, see “Field Input Requirements” on page 9.
IP Address The static IP address for the Polycom CMA system server
Subnet Mask The network subnet mask for the Polycom CMA system IP address
Default Gateway The static IP address of the Polycom CMA system gateway
DNS Server The IP address of the domain name server for the network
DNS Domain The fully qualified domain for network in which the domain name server and Polycom CMA system server reside
NoteChanging the IP address via the Windows Network Settings is not a supported operation. To change the Polycom CMA system IP address, you must use this procedure.

Server Setting Operations
Polycom, Inc. 291
Edit the Polycom CMA System Time SettingsEdit the System Time server settings to change the Polycom CMA server time or to synchronize the server with an external NTP server. The system time settings include these fields:
To edit the Polycom CMA system time settings
1 Go to Admin > Server Settings > System Time.
2 Configure these settings on the System Time page, as necessary.
3 Click Update.
Field Description
System Time Zone The time zone in which the Polycom CMA server resides
Auto adjust for Daylight Saving?
Select this checkbox to adjust the clock automatically for daylight savings time.
Use Current Time Select this checkbox to input the current date and time.
Current Date The system date for the Polycom CMA system
Current Time The system time for the Polycom CMA system
Use External NTP Server Time Synchronization
Select this checkbox to synchronize the Polycom CMA system date and time with an external NTP server.
IP address or DNS resolved name
The IP address or fully qualified domain name (ASCII onlya) of the NTP server
a. For more information on field limitations, see “Field Input Requirements” on page 9.
Minutes between synchronization attempts
Input how often the Polycom CMA system should synchronize with the NTP server
The default is 60 minutes.
NoteMake sure the current system time is correct before synchronizing with an NTP server. If you set the system to use an external NTP server when the current date and time are incorrect, the system time may be wrong for the amount of time specified in the Minutes between synchronization attempts.

Polycom CMA System Operations Guide
292 Polycom, Inc.
Integrate with Microsoft Exchange Server for Calendaring Management
The Polycom CMA system supports the Polycom Conferencing for Outlook solution. It allows you to provision endpoints with the credentials, mailbox address, Exchange server IP address, and calendaring service settings they need to use Polycom Conferencing for Outlook.
This section describes the tasks that enable provisioning endpoints for Polycom Conferencing for Outlook.
Associate Sites with Microsoft Exchange ServersBy default, the Polycom CMA system is set up to automatically discover the Exchange server for the domain in which a site is located. However, if you wish to associate sites with a Exchange server using its IP address or DNS name, follow this procedure.
To associate sites with Microsoft Exchange servers by IP address or DNS name
1 Go to Admin > Server Settings > Calendaring Management.
2 In the Manage Calendaring dialog box, click Calendared Sites.
The Specify Calendaring Exchange Servers page appears listing the sites defined on the Polycom CMA system.
3 Select the checkbox for each of the sites you need to associate with a single Exchange server and then click Specify Exchange Server.
4 In the Add Exchange Server dialog box, enter the Exchange Server Address or DNS and click Save.
The sites appear in the calendared sites list below.
5 Repeat steps 3 and 4 for each Exchange server for which you need to associate sites.
Assign Calendaring Settings to Provisioning ProfilesCalendaring settings are included as part of provisioning profiles.
To assign calendaring settings to provisioning profiles
1 Go to Admin > Server Settings > Calendaring Management.
2 In the Manage Calendaring dialog box, click Group Information.
The Group Information page appears listing the provisioning profiles defined on the Polycom CMA system.

Server Setting Operations
Polycom, Inc. 293
3 Select the checkbox for each of the provisioning profiles to which you need to assign the same calendaring settings and then click Specify Options.
4 In the Manage Calendaring dialog box, select these options.
5 Click Save.
The profiles appear in the calendared profiles list below.
6 Repeat steps 3 through 5 for each set of profiles to which you need to assign calendaring settings.
Provision the Exchange Mailbox for Calendaring Service-enabled EndpointsTo use Polycom Conferencing for Outlook (PCO), a Polycom endpoint system must have a mailbox on the assigned Exchange server, and the Exchange server must authenticate the endpoint before it can access its mailbox.
To use the Polycom CMA system to automatically provision a Polycom endpoint system, the endpoint system must use the same credentials (username and password) to access both the Exchange server and the Polycom CMA system. Only then can the Polycom CMA system automatically provision a calendaring service-enabled endpoint system.
To provision the Exchange Mailbox for calendaring service-enabled endpoints
1 Go to Admin > Server Settings > Calendaring Management.
2 In the Manage Calendaring dialog box, click Mailbox.
Fields Description
Meeting Reminder Time
Specifies the number of minutes before the meeting an endpoint system provisioned for Polycom Conferencing for Outlook will display a reminder.
Enable Alert Tone When enabled, specifies that an endpoint system provisioned for Polycom Conferencing for Outlook will play a sound along with the meeting reminder. In this case, the endpoint will only play a sound when the system is not in a call.
Display Private Meetings
When enabled, specifies that an endpoint system provisioned for Polycom Conferencing for Outlook will display details about meetings marked private.

Polycom CMA System Operations Guide
294 Polycom, Inc.
3 In the Polycom Conferencing for Outlook page, enable Provision Mailbox and click OK.
For Exchange credentials, each endpoint system will be provisioned with the same credentials it used to access the Polycom CMA system.
For its mailbox, each endpoint system will be provisioned with the mailbox configured for it in Active Directory. This mailbox must be pre-configured for the endpoint system on the Exchange server.
Integrate with Microsoft Office Communications ServerThe Polycom CMA system supports the integration with Office Communications Server by provisioning endpoints with the credentials, Exchange server IP address, and communications service settings they need.
This section describes the tasks that enable provisioning endpoints for integration with Office Communications Server.
Provision Integration with Microsoft Office Communications ServerBy default, integration with Microsoft Office Communications Server is disabled. This procedure describes how to change an existing automatic provisioning profile so that it provisions integration with Office Communications Server.
To provision integration with Microsoft Office Communications Server
1 Go to Admin > Provisioning Profiles > Automatic Provisioning Profiles.
2 In the Automatic Provisioning Profiles page, select the profile of interest and click Edit .
3 In the Provisioning Fields dialog box, click OCS Settings and select these options.
Notes• You cannot provision integration with an Office Communications Server via
scheduled provisioning.
• If you change an automatic provisioning profile to enable integration with Office Communications Server, but the endpoint being provisioned is not capable of such an integration, the endpoint will ignore those settings.

Server Setting Operations
Polycom, Inc. 295
4 Click OK.
The provisioning profile is updated.
5 Repeat steps 3 and 4 for each automatic provisioning profile for which you need to change.
Provision Domain User Name for Microsoft Office Communications Server Integration
To integrate with Office Communications Server, Polycom endpoint system must have a user account on the Microsoft Office Communications infrastructure. To have the Polycom CMA system automatically provision a Polycom endpoint system for Office Communications Server integration, the endpoint system must use the same credentials (username and password) to
Fields Description
Select method to find Office Communications Server
Specifies how the Polycom CMA system will locate the Office Communications Server that it will provision to endpoints. Possible values are:
• Disable OCS—The Polycom CMA system will not provision an Office Communication Server.
• DNS SRV Record—The Polycom CMA system will issue a DNS query to locate the Office Communication Server and provision that information to endpoints.
• Server Name—The Polycom CMA system will use the specified Server Address. Enter the Office Communication Server address or DNS name.
Transport Protocol Specifies the transport protocol for communications with the Office Communications Server. Possible values are:
Auto—The communication protocol will be auto-negotiated.
TCP—This protocol has error-recovery services, message delivery is assured, and messages are delivered in the order they were sent.
UDP—This protocol does not provide error-recovery services, message delivery is not assured, and messages are not necessarily delivered in the order they were sent.
TLS—This protoco transfers communications over an encrypted Secure Sockets Layer (SSL) or Transport Layer Security (TLS) connection.
Group Name

Polycom CMA System Operations Guide
296 Polycom, Inc.
access both the Office Communications Server and the Polycom CMA system. Only then can the Polycom CMA system automatically provision a calendaring service-enabled endpoint system.
To provision the domain username for Office Communications Server integration
1 Go to Admin > Server Settings > OCS Management.
2 In the Credentials section of the Manage OCS dialog box, enable Provision Domain Username and click OK. .
For Office Communications Server, each endpoint system will be provisioned with the same credentials it used to access the Polycom CMA system.
For its domain username, each endpoint system will be provisioned with the domain username initially provided to it. This username must be pre-configured for the endpoint system on the Microsoft Office Communications Server.
View Current Polycom CMA System Licensing
To view current Polycom CMA system licensing
Go to Admin > Server Settings > Licenses.
The Active License section of the Licenses page displays the following information.
Field Description
Activation Key The current activation key for the product.
Expiration date The expiration date of the current license key.
Components The components for which the Polycom CMA system is licensed.
Seats The number of seats for which the Polycom CMA system is licensed.

Server Setting Operations
Polycom, Inc. 297
Add Polycom CMA System LicensesAdding licenses to your Polycom CMA system is a two step process:
• Request a Software Activation Key Code.
• Enter the Polycom CMA System Activation Key
These processes are described in the following sections.
Request a Software Activation Key Code
To request a software activation key code
1 In a separate browser page or tab, log into the Polycom CMA system server as an administrator.
2 Go to Admin > Server Settings > Licenses and record the Polycom CMA server serial number:
____________________.
3 Go to http://www.polycom.com/activation.
4 Log in or Register for an Account.
5 Select Product Activation.
6 In the Single License Number section of the Activate Your Product page, enter the software license number listed on your License Certificate (shipped with the product) and the serial number you recorded in step 2.
7 Click Generate.
8 When the activation key appears, record it:
__________-__________-_________-___________
9 Repeat this procedure for each additional license key required.
Enter the Polycom CMA System Activation Key
To enter the Polycom CMA system activation key
1 Go to Admin > Server Settings > Licenses.
2 Enter the new activation key into the Add New License > Activation Key field and click Add. (Note that the field is ASCII only. For more information, see “Field Input Requirements” on page 9.)

Polycom CMA System Operations Guide
298 Polycom, Inc.
Reclaim Polycom CMA Desktop Licenses
To set the threshold for reclaiming inactive Polycom CMA Desktop licenses
1 Go to Admin > Server Settings > Licenses.
2 Change the Threshold value in the Reclaim Inactive CMA Desktop Licenses section of the Licenses page. To reclaim licenses more quickly, lower the threshold. Set the threshold to zero, to stop reclaiming licenses.
3 Click Update.
Delete Polycom CMA System Licenses
To delete Polycom CMA Desktop licenses
1 Go to Admin > Server Settings > Licenses.
2 In the Active License section of the Licenses page, select the component of interest and click Delete.
3 Click Delete to confirm the deletion.
Add or Remove a Polycom CMA System Custom LogoYou can add your company’s logo to the Polycom CMA system user interface. To avoid distortion, we recommend adding a logo in GIF, JPG, or PNG format with a size of 300 x 44 pixels.
To add a custom logo to the Polycom CMA system user interface
1 Go to Admin > Server Settings > Custom Logos.
2 In the Current Server Logo section of the Custom Logos page, click Upload...
3 In the Select file dialog box, browse to the logo image and select the file.
4 Click Open.
5 In a redundant configuration, repeat steps 1 through 4 on the redundant server.

Server Setting Operations
Polycom, Inc. 299
To remove a custom logo from the Polycom CMA system user interface
1 Go to Admin > Server Settings > Custom Logos.
2 In the Current Server Logo section of the Custom Logos page, click Remove.
Add or Remove a Polycom CMA Desktop Custom Logo You can add your company logo to the Polycom CMA Desktop user interface. This logo will be displayed on the application user interface before the user logs in. The following illustration shows the default Polycom CMA Desktop user interface and a customized Polycom CMA Desktop user interface.
To avoid distortion, use a logo in GIF or JPG format with a size of approximately 260x215 pixels.
Because the Polycom CMA Desktop logo is stored in the Polycom CMA system database, in redundant configurations you do not need to upload the logo to both servers.
To add a custom logo to the Polycom CMA Desktop user interface
1 Go to Admin > Server Settings > Custom Logos.
2 In the Current CMA Desktop Logo section of the Custom Logos page, click Upload...
3 In the Select file dialog box, browse to the logo image and select the file.
Default Polycom CMA Desktop Branded Polycom CMA Desktop

Polycom CMA System Operations Guide
300 Polycom, Inc.
4 Click Open.
Once a user logs in, is provisioned, and then logs out, the logo will be displayed on the Polycom CMA Desktop user interface.
To remove a custom logo from the Polycom CMA Desktop user interface
1 Go to Admin > Server Settings > Custom Logos.
2 In the Current CMA Desktop Logo section of the Custom Logos page, click Restore Default.
Once a user logs in, is provisioned, and then logs out, the default logo will be displayed on the Polycom CMA Desktop user interface.
Edit the Polycom CMA System Email Account
To edit the Polycom CMA system email account
1 Go to Admin > Server Settings > E-mail.
2 On the Email page, edit the email account (ASCII only) from which the Polycom CMA system will send conference notification emails or edit the IP address of the mail server from which the Polycom CMA system will send conference notification emails.
3 Click Update.
Notes• Many email servers will block or discard emails without a qualified From:
address. To avoid this issue, make sure each person with Scheduler permissions has a valid email address.
• Many email servers will block or discard emails from un-trusted domains, in which case you may need to change the default Polycom CMA system email address to one in a trusted domain.

Polycom, Inc. 301
26Polycom CMA System SNMP
This chapter provides a discussion of the Polycom® Converged Management Application™ (CMA™) SNMP support. It includes these topics:
• SNMP Overview
• Polycom CMA System SNMP Operations
— Enable SNMP Messaging
— Edit the SNMP Settings for a Polycom CMA System
— Add an SNMP Notification Receiver
— Download Polycom CMA System MIB Package
— Change the SNMP Communication Port
SNMP OverviewSimple Network Management Protocol (SNMP) is a TCP/IP-based communication protocol that allows network management systems to manage resources across a network.
SNMP communication takes place between the management system and SNMP agents, which are the hardware and software that the management system monitors. An agent collects and stores local system information and makes this information available to the management system via SNMP.
The Polycom CMA system software includes an SNMP agent. It translates local system information into the format defined by the MIB.
The Polycom CMA system resides on a Polycom-branded Dell server. The Dell server software also includes an SNMP agent and MIB. However, the Polycom CMA system acts as a proxy agent to forward the Dell server MIB alarms and alerts, so the management system does not need to be configured to receive information directly from the Dell server MIB.

Polycom CMA System Operations Guide
302 Polycom, Inc.
Polycom recommends using a MIB browser to explore the Polycom CMA system MIB. However, a printed copy of the MIB is available in “Polycom CMA System SNMP” on page 301. The Polycom CMA system MIB is self-documenting including information about the purpose of specific traps and inform notifications.
It is important to note that you should understand how your SNMP management system is configured to properly configure the Polycom CMA system SNMP transport protocol requirements, SNMP version requirements, SNMP authentication requirements, and SNMP privacy requirements on the Polycom CMA system.
The Polycom CMA system supports three SNMP levels:
• Disabled—The Polycom CMA system SNMP processes are turned off.
• SNMPv2c—The Polycom CMA system implements a sub-version of SNMPv2. The key advantage of SNMPv2c is the Inform command. Unlike Traps, Informs are messages sent to the management system that must be positively acknowledged with a response message. If the management system does not reply to an Inform, the Polycom CMA system resends the Inform. SNMPv2c also has improved error handling and improved SET commands.
One drawback of SNMPv2c is that it is subject to packet sniffing of the clear text community string from the network traffic, because it does not encrypt communications between the management system and SNMP agents.
• SNMPv3—The Polycom CMA system implements the newest version of SNMP. Its primary feature is enhanced security. The contextEngineID in SNMPv3 uniquely identifies each SNMP entity. The contextEngineID is used to generate the key for authenticated messages.
The Polycom CMA system implements SNMPv3 communication with authentication and privacy (the authPriv security level as defined in the USM MIB).
— Authentication is used to ensure that traps are read by only the intended recipient. As messages are created, they are given a special key that is based on the contextEngineID of the entity. The key is shared with the intended recipient and used to receive the message.
— Privacy encrypts the SNMP message to ensure that it cannot be read by unauthorized users.

Polycom CMA System SNMP
Polycom, Inc. 303
Polycom CMA System SNMP OperationsThe Polycom CMA system SNMP operations described in this section include:
• Enable SNMP Messaging
• Edit the SNMP Settings for a Polycom CMA System
• Add an SNMP Notification Receiver
• Download Polycom CMA System MIB Package
Enable SNMP MessagingTo enable SNMP messaging you must perform the two tasks:
• Edit the SNMP Settings for a Polycom CMA System
• Add an SNMP Notification Receiver
Edit the SNMP Settings for a Polycom CMA System
To edit the SNMP settings for a Polycom CMA system
1 Go to Admin > SNMP Settings.
2 To enable SNMP, select an SNMP Version. For information on the SNMP versions, see “SNMP Overview” on page 301.
3 Configure these settings for the connection between the Polycom CMA system and the SNMP agents on the SNMP Setting page.
Setting Description
Transport Specifies the transport protocol for SNMP communications. SNMP can be implemented over two transport protocol:
TCP—This protocol has error-recovery services, message delivery is assured, and messages are delivered in the order they were sent. Some SNMP managers only support SNMP over TCP.
UDP—This protocol does not provide error-recovery services, message delivery is not assured, and messages are not necessarily delivered in the order they were sent.
Because UDP doesn't have error recovery services, it requires fewer network resources. It is well suited for repetitive, low-priority functions like alarm monitoring.

Polycom CMA System Operations Guide
304 Polycom, Inc.
Port Specifies the port that the Polycom CMA system uses for general SNMP messages. By default, the Polycom CMA system uses port 161.
Community For SNMPv2c, specifies the context for the information, which is the SNMP group to which the devices and management stations running SNMP belong.
The Polycom CMA system has only one valid context—by default, public—which is identified by this Community name. The Polycom CMA system will not respond to requests from management systems that do not belong to its community.
V3 Context Name For SNMPv3, specifies the context for the information. The Polycom CMA system has only one valid context, which is identified by contextName (in our case—an empty string) and contextEngineID.
V3 Local Engine Id For SNMPv3, displays the Polycom CMA system contextEngineID for SNMPv3.
Security User For SNMPv3, specifies the security name required to access a monitored MIB object.
Auth Type For SNMPv3, specifies the authentication protocol. These protocols are used to create unique fixed-sized message digests of a variable length message.
The Polycom CMA system implements communication with authentication and privacy (the authPriv security level as defined in the USM MIB).
Possible values for authentication protocol are:
• MD5—Creates a digest of 128 bits (16 bytes).
• SHA—Creates a digest of 160 bits (20 bytes).
Both methods include the authentication key with the SNMPv3 packet and then generate a digest of the entire SNMPv3 packet.
Auth Password For SNMPv3, specifies the authentication password that is appended to the authentication key before it is computed into the MD5 or SHA message digest.
Setting Description

Polycom CMA System SNMP
Polycom, Inc. 305
4 Click Save SNMP Settings.
Add an SNMP Notification ReceiverYou can configure the Polycom CMA system to send SNMP messages to different notification receivers (e.g., a network management system).
To add an SNMP notification receiver to a Polycom CMA system
1 Go to Admin > SNMP Settings.
2 In the Notification RCVR Actions section , click Add.
3 Configure these settings in the New Notification Receiver dialog box.
Encryption Type For SNMPv3, specifies the privacy protocol for the connection between the Polycom CMA system and the SNMP agent.
The Polycom CMA system implements communication with authentication and privacy (the authPriv security level as defined in the USM MIB ).
Possible values for privacy protocol are:
• DES—Uses a 56 bit key with a 56 bit salt to encrypt the SNMPv3 packet.
• AES—Uses a 128 bit key with a 128 bit salt to encrypt the SNMPv3 packet.
Encryption Password For SNMPv3, specifies the password to be associated with the privacy protocol.
Setting Description
Setting Description
IP Address Specifies the IP address of the host receiver.
Transport Specifies the transport protocol for SNMP communications to the host receiver. Possible values are:
• TCP
• UDP
Select the transport protocol for which the host receiver is configured.
Port Specifies the port that the Polycom CMA system will use to send notifications. By default, the Polycom CMA system uses port 162.

Polycom CMA System Operations Guide
306 Polycom, Inc.
Trap/Inform Specifies the type of information that should be sent to the host receiver. Possible values are:
• Inform—An unsolicited message sent to a notification receiver that expects/requires a confirmation message. Introduced with SNMP version 2c, this option is not supported by systems that only support SNMP version 1.
• Trap—An unsolicited message sent to a notification receiver that does not expect/require a confirmation message.
SNMP Version For SNMPv3, specifies the context for the information.
The Polycom CMA system is a proxy-forwarding application. It passes SNMP requests to its various SNMP-reporting processes based on the context information in the SNMP message. For SNMPv3, this context is identified by contextName and contextEngineID.
V3 Local Engine Id For SNMPv3, displays the Polycom CMA system contextEngineID for SNMPv3.
Security User For SNMPv3, specifies the security name required to access a monitored MIB object.
Auth Type For SNMPv3, specifies the authentication protocol.
The Polycom CMA system implements communication with authentication and privacy (the authPriv security level as defined in the USM MIB).
Possible values for authentication protocol are:
• MD5
• SHA
These protocols are used to create unique fixed-sized message digests of a variable length message. MD5 creates a digest of 128 bits (16 bytes) and SHA creates a digest of 160 bits (20 bytes).
Auth Password For SNMPv3, specifies the authentication password that is appended to the authentication key before it is computed into the MD5 or SHA message digest.
Setting Description

Polycom CMA System SNMP
Polycom, Inc. 307
Download Polycom CMA System MIB Package
To download the MIB package for a Polycom CMA system
1 Go to Admin > SNMP Settings.
2 Click Download CMA MIBs.
3 In the CMA MIBs dialog box, select the MIB of interest.
Encryption Type For SNMPv3, specifies the privacy protocol for the connection between the Polycom CMA system and the notification receiver.
The Polycom CMA system implements communication with authentication and privacy (the authPriv security level as defined in the USM MIB ).
Possible values for privacy protocol are:
• DES
• AES
Encryption Password For SNMPv3, specifies the password to be associated with the privacy protocol.
Setting Description
Name Description
Brcm-adapterInfo-MIB The interface table (ifTable) shows addresses, physical addresses, names, descriptions etc. of the network interfaces
DCS3FRU-MIB Contains all the field replaceable unit names, serial numbers, and revisions for the Polycom-branded Dell server. For more information, see the Dell SNMP documentation.
DELL-ASF-MIB Trap definitions for the Polycom-branded Dell server. For more information, see the Dell SNMP documentation.
INET-ADDRESS-MIB A definition file for standard conventions included for reference.
ITU-ALARM-TC-MIB A definition file for standard conventions included for reference.
MIB-Dell-10892 The primary MIB for the Polycom-branded Dell server. It provides 36 traps from the server motherboard, including system type, voltages, and temperature readings. For more information, see the Dell SNMP documentation.

Polycom CMA System Operations Guide
308 Polycom, Inc.
Polycom recommends using a MIB browser to explore the Polycom CMA system MIB. However, a printed copy of the MIB is available in “Polycom CMA System SNMP” on page 301. The Polycom CMA system MIB is self-documenting including information about the purpose of specific traps and inform notifications.
Change the SNMP Communication PortBy default, the Polycom CMA system uses port 161 as its standard open port for SNMP communications. However, you can change this to another open port.
To change the SNMP communication port
1 Go to Admin > SNMP Settings.
2 In the Port field of the SNMP Settings page, type a new communication port number and click Update SNMP Settings.
MIB-Dell-10900 Trap definitions for the system including up/down, CPU, Memory, Network, and Disk monitoring. For more information, see the Dell SNMP documentation.
MIB-Dell-CM Provides information about devices running on the Polycom-branded Dell server. For more information, see the Dell SNMP documentation.
POLYCOM-CMA-MIB Polycom CMA-specific MIB definition
RFC1213-MIB RFC1213MIB definitions included for reference. The Polycom CMA system supports all but "egp".
SNMPv2-CONF A definition file for standard conventions included for reference.
SNMPv2-SMI A definition file for standard conventions included for reference.
SNMPv2-TC A definition file for standard conventions included for reference.
StorageManagement-MIB Monitoring and information about the hard disks and RAID configuration on the server.
Name Description

Polycom, Inc. 309
27Database Operations
This chapter describes the Polycom® Converged Management Application™ (CMA™) database integration and operations. It includes these topics:
• Overview of the Polycom CMA System Database
— Internal Databases
— External Databases
— Database Restoration
• Database Operations
— Integrate a Polycom CMA System to an External Database
— Revert a Polycom CMA System to its Internal Database
— Manually Backup a Polycom CMA System
— Restore the Polycom CMA System Internal Databases
— Restore the Polycom CMA System External Database
Overview of the Polycom CMA System DatabasePolycom CMA system information is stored in these databases:
Database Description
ReadiManager.bak The general Polycom CMA system database that includes all data for scheduling, devices, dial rules, device registration, and site topology
Logger.bak The Polycom CMA system database for call detail records and gatekeeper diagnostic logs
XMPP.bak The Polycom CMA system database for presence information

Polycom CMA System Operations Guide
310 Polycom, Inc.
Internal DatabasesThe Polycom CMA system automatically optimizes its internal database on an ongoing basis. It backs up its internal databases daily. The backup files are stored on the system’s hard disk. The Polycom CMA system maintains the last four internal backups. To keep backups for a longer time period, copy them regularly to a different location. For more information, see “Copy the Polycom CMA System Database Backup Files” on page 315.
External DatabasesYou can integrate the Polycom CMA system to an external Microsoft SQL Server. Some information about integrating with an external database:
• Polycom CMA systems with 400 or more registered endpoints and redundant systems require an external database.
• If you set up an external database, follow your own corporate policies (or Microsoft best practices) to back it up and maintain it. The Polycom CMA system does not back up its external databases.
• Anytime you switch from the internal Polycom CMA system database to an external Microsoft SQL Server database, some system configuration settings, for example the LDAP settings, must be reconfigured.
• Take steps to minimize database connection failures. For example:
— Ensure you have good network connectivity between the Polycom CMA system and the Microsoft SQL Server. You may even consider co-locating the Polycom CMA system with your Microsoft SQL Server.
— Increase the keep alive checks on the Microsoft SQL Server to once an hour.
• If your system does lose connection to the database, you must reboot the system to restore login capability; the Polycom CMA system does not automatically reconnect to the database. For more information, see “Restart or Shut Down a Polycom CMA System” on page 412.
• It is recommended that anytime you reboot the external database server, you also restart the Polycom CMA system in the same maintenance window.
• You can create the Polycom CMA system databases manually using Microsoft SQL scripts. Contact Polycom Global Services to request the scripts.
mastermodelmsdb
The Polycom CMA system Microsoft SQL Server 2008 Express databases
Database Description

Database Operations
Polycom, Inc. 311
• Anytime you switch from database sources (internal to external or external to internal), the default administrator’s password is moved to the database as part of the switch.
Database RestorationTo restore an internal Polycom CMA system database, follow the procedures in this section. To restore from an external Microsoft SQL Server databases, use Microsoft SQL Server Management Studio. Refer to your Microsoft SQL Server Management Studio documentation for more information.
You can migrate databases as follow.
When you restore internal or external databases:
• Do not allow users to connect to the server during the restoration process
• Restore all of the system databases at the same time
• Restore all of the system databases from backups that were taken at the same time
• Restart the Polycom CMA system server when the restoration process is finished
From... To...
Internal Internal
Internal External
External External

Polycom CMA System Operations Guide
312 Polycom, Inc.
Database OperationsBefore performing the database operations described here, Microsoft SQL Server should already be installed. (For information about the supported Microsoft SQL Server applications and service pack levels, see the Polycom CMA System Release Notes for the version you’re installing.)
The Microsoft SQL Server Setup wizard and documentation provides guidance for setting up Microsoft SQL Server. As you use the wizard, make these choices:
— For Components to Install, at a minimum choose the SQL Server Database Services.
— For Instance Name, select Default Instance and configure the database instance port (typically 1433).
— For Service Account, select the Use the built-in System account option.
— For Authentication Mode, select Mixed Mode and provide a password that meets your enterprise policy for password length and complexity.
— For Collation Settings, select SQL collations. The Polycom CMA system is only certified with the Microsoft SQL Server set to US-English Collation (SQL_Latin1_General_CP1_CI_AS).
— Error and Usage Report Settings are optional.
Integrate a Polycom CMA System to an External Database
To integrate Polycom CMA with an external database
1 Using the Microsoft SQL Server Configuration Manager, change the SQL Server keep alive checks (typically, SQL Server 2005 Network Configuration > Protocols for MSSQLSERVER > TCP/IP > KeepAlive) to 3,600,000 milliseconds.
2 From the Polycom CMA system web interface, go to Admin > Server Settings > Database.
3 On the Database page, select Use an external SQL Server database.
4 Enter the Database Server IP address or DNS Name.
5 Enter the Database Server Port and click Update.
The system will guide you through formatting or upgrading the external database, as necessary.
6 Click Finish.

Database Operations
Polycom, Inc. 313
Revert a Polycom CMA System to its Internal Database
To revert a Polycom CMA system from an external database to its internal database
1 From the Polycom CMA system web interface, go to Admin > Server Settings > Database.
2 On the Database page, clear Use an external SQL Server database and click Update.
3 Click Update.
Manually Backup a Polycom CMA SystemYou can perform manual backups of the Polycom CMA system using its serial console (internal databases) or Microsoft Enterprise Manager (external databases). As a best practice, only do backups during a maintenance window when there are no active conferences.
To perform a manual backup:
1 Connect to the Polycom CMA System Serial Console.
2 Backup the Polycom CMA System Internal Databases.
3 Copy the Polycom CMA System Database Backup Files.
Connect to the Polycom CMA System Serial Console
To connect to the Polycom CMA system serial console
1 Connect a computer to the Polycom CMA system server through the RS-232 serial port.
2 Power on the computer.
3 Access the serial console and start a Hyperterm session.
4 In the Connection Description dialog box, type Polycom CMA in the Name field and click OK.
5 In the Connect To dialog box, select COM1 in the Connect using drop-down list and click OK.
NoteTo go back to the external database, follow the procedure to “Integrate a Polycom CMA System to an External Database” on page 312.

Polycom CMA System Operations Guide
314 Polycom, Inc.
6 In the Properties dialog box, enter these values for port settings.
— Bits per second: 19200
— Data bits: 8
— Parity: None
— Stop bits: 1
— Flow control: None
The Polycom CMA Administrative Console appears.
Backup the Polycom CMA System Internal DatabasesAs a best practice, only do backups during a maintenance window when there are no active conferences.
To back up a database from the Polycom CMA server serial port
1 Connect to the Polycom CMA system serial console, as described in “Connect to the Polycom CMA System Serial Console” on page 313.
2 From the Polycom CMA Administrative Console root menu, select (4) Database Operations.
3 From the Database Operations menu, select (1) Backup Local Databases.
If you have a previous backup that you created earlier, a warning appears stating: “The following backup database files will be deleted. To keep these files, enter ‘N’ to exit and then use the Copy Database operation to copy them to an external location. Do You Wish to Continue?”
— To save a previous backup, select N and then select (4) Copy Database files TO ... to copy these files to an external location. See “Copy the Polycom CMA System Database Backup Files” on page 315.
— To delete the previous backup database files, select Y.
4 When prompted, enter the administrator user name and password.
The system backs up the database. When the backup is complete, a success message for the completed backup displays on the console.

Database Operations
Polycom, Inc. 315
Copy the Polycom CMA System Database Backup FilesIn addition to backing up and restoring database files, you can copy the database backup files to and from the Polycom CMA system to an external location.
You have two options for copying the Polycom CMA system backup files: the Polycom CMA system web interface and the Polycom CMA system serial console. Copying the database backup files using the web interface saves them to a local system. Copy them using the serial port puts them on a USB drive. You can also use the Polycom CMA system serial port to copy the database backup file onto the Polycom CMA system.
To copy the Polycom CMA system database backup files using the web interface
1 From the Polycom CMA system web interface, go to Admin > Database Backup Files.
The Database Backup Files list appears showing all of the backup files stored on the Polycom CMA system. Files with a timestamp included in the name are system-generated backup files. Files without a timestamp are user forced backups.
2 In the Database Backup Files list, select the backup files of interest and click Save.
3 In the Save As dialog box, browse to a location and click Save.
To copy the database backup files from the Polycom CMA system onto a USB flash drive
1 Connect to the Polycom CMA system serial console, as described in “Connect to the Polycom CMA System Serial Console” on page 313.
2 From the Polycom CMA Administrative Console root menu, select (4) Database Operations.
3 From the Database Operations menu, select 4. Copy Database files TO....
4 Select the source and destination locations to copy database files.
5 Enter the full path of the folder to which the database files will be copied. For example, if the folder is on the root, type backslash (\).
The system copies the files. When the backup is complete, the Database Operations menu reappears.
6 Exit the serial console.
NoteMake sure you create a folder for the database backup files before you copy the files or the operation will fail.

Polycom CMA System Operations Guide
316 Polycom, Inc.
To copy the database backup files to the Polycom CMA system from a USB flash drive
1 Connect to the Polycom CMA system serial console, as described in “Connect to the Polycom CMA System Serial Console” on page 313.
2 From the Polycom CMA Administrative Console root menu, select (4) Database Operations.
3 From the Database Operations menu, select 3. Copy Database files FROM....
4 Select the source location on the USB flash drive from which you want to copy database files.
5 Enter the full path and file name of the database backup files (.bak) or just the file names if they are on the root.
The system copies the files. When the backup is complete, the Database Operations menu reappears.
6 Exit the serial console.
Restore the Polycom CMA System Internal Databases
To restore the Polycom CMA system internal databases
1 Connect to the Polycom CMA system serial console, as described in “Connect to the Polycom CMA System Serial Console” on page 313.
2 From the Polycom CMA Administrative Console root menu, select (4) Database Operations.
3 From the Database Operations menu, select 2. Restore Local Databases.
4 When prompted, enter the database name.
5 Enter the administrator username and password.
A list of database backup files appear with corresponding backup dates.
6 Select the number of the database backup file to restore.
The system restores the database. When the restoration is complete, a success message for the completed backup displays on the console and the Database Operations menu reappears.
7 Repeat step 6 to restore the next database backup file.
8 After you have restored all of the databases, exit the serial console and restart the Polycom CMA system server.

Database Operations
Polycom, Inc. 317
Restore the Polycom CMA System External DatabaseYou can restore an external Microsoft SQL Server database using Microsoft SQL Server Management Studio or Microsoft SQL Query Analyzer.
To restore external databases
1 Restore all of the Polycom CMA system database backup files as described in “Restore the Polycom CMA System Internal Databases” on page 316.
2 Run the following command using Microsoft SQL Server Management Studio or Microsoft SQL Query Analyzer.
EXEC ReadiManager.dbo.pr_FixOrphanUsers
Reformat the Existing DatabaseThe Polycom CMA system has an option that allows you to completely reformat (clean out) the system’s existing database.
To reformat the existing databases
1 From the Polycom CMA system web interface, go to Admin > Server Settings > Database.
2 On the Database page, select Reformat existing database...
3 In the Reformat Existing Database/Database Maintenance dialog box, specify the Database Server IP Address and Database Server Port Number for the database to be reformatted.
4 Specify an administrative Login ID and Password for the database server and click Reformat/Install Database.
5 Click Yes to confirm the reformat operation.
The system displays a Reformat/Install Progress bar to indicate that the system is reformatting the database.
NoteThe database name is part of each backup file name. Make sure you restore the correct backup file for each database.
IMPORTANTUse this option only if your database is corrupted beyond repair or perhaps if you need to wipe out a test system to prepare it for production data.

Polycom CMA System Operations Guide
318 Polycom, Inc.

Polycom, Inc. 319
28Directory Operations
This chapter describes the Polycom® Converged Management Application™ (CMA™) enterprise directory integration and operations. It includes these topics:
• Directory Management Overview
• Directory Management Supported Configurations
• Polycom CMA System and Windows Authentication
• Directory Management Operations
— Integrate with LDAP Server Option
— Enable Single Sign On Integrated Windows Authentication
— Remove or Include Dynamically-Managed Devices in the Global Address Book
Directory Management OverviewIn a large organization, integrating your Polycom® Converged Management Application™ (CMA™) system with Microsoft Active Directory greatly simplifies the task of managing conference system security. Directory management provides the following features.
• Single sign-on capability. Users get the benefits of pass-through authentication, allowing them to leverage their Active Directory user name and password to login to the Polycom CMA Desktop system. This happens without the user having to enter their credentials, creating seamless integration for logins.
• Single management environment. After the initial setup of the Polycom CMA system, adding groups into Polycom CMA system is no more complex than adding a group to a file share or database. Continue to manage your group memberships through Active Directory, then grant those groups rights within the Polycom CMA system.

Polycom CMA System Operations Guide
320 Polycom, Inc.
• Allows you to continue leveraging the existing role-based security model that you have in place, though the Polycom CMA system only uses Universal groups.
Directory Management Supported ConfigurationsThere are many possible configurations available within Microsoft Active Directory, some of which are not fully supported by the Polycom CMA system. This section describes the implications of different Microsoft Active Directory configurations for integrating with the Polycom CMA system.
Multiple ForestsMicrosoft Active Directory may be set up in either a single-forest or multi-forest configuration. However, the Polycom CMA system requires that user accounts reside in a single forest or forests must have full mutual trust and visibility.
Multiple DomainsMicrosoft Active Directory forests may contain one or more domains. In either configuration, the directory must have a Global Catalog service. The Polycom CMA system can integrate to either single or multiple domains, so long as they reside in the same forest structure.
Microsoft Active Directory domains are organized into trees, each tree being a group of domains which share a consistent DNS namespace (ex: polycom.com and na.polycom.com would be in the same tree, while polycom.com and CMADevelopment.net would be separate trees, if they were in the same forest). The Polycom CMA system will integrate to all domains in a multi-tree forest.
Viable options:1 Integrate to all domains of a multi-domain forest configuration.
2 Restrict to a single domain tree in a multi-domain forest through the use of LDAP Search baseDN criteria.
GroupsMicrosoft Active Directory provides three group scopes: Universal, Global, and Domain Local. Both Global groups and Universal Groups are held on all Global Catalog servers in the forest. The Polycom CMA system supports only the Universal groups.

Directory Operations
Polycom, Inc. 321
Microsoft Active Directory provides two group types: Security and Distribution. The Polycom CMA system supports either of these group types.
In addition to leveraging Active Directory Universal groups, the Polycom CMA system also has Local groups, which you can use to grant a standard set of rights to multiple users or groups. These Polycom CMA system Local groups can have as members, Polycom CMA system Local users, Active Directory users or Active Directory Universal groups. In this fashion, you can nest a variety of users and groups into a Polycom CMA system Local group and assign those users rights through their Polycom CMA system Local group membership, simplifying management of rights on the Polycom CMA system.
Users The Polycom CMA system supports both local and enterprise user accounts. Local user accounts exist entirely on the Polycom CMA system. They can be created and managed whether or not the system is integrated to an enterprise directory. Enterprise user accounts exist in your enterprise Active Directory. The Polycom CMA system cannot create or manage Active Directory accounts, except to modify their privileges on the Polycom CMA system itself.
If simultaneously using local and enterprise accounts, it is important to avoid duplication of account data. For example, if your Active Directory has a user named John Doe with a username of jdoe, a local account for this user must possess a unique name, such as localjdoe or johndoetest. If duplicate user accounts exist in the same domain or across domains, the user associated with these accounts will not be able to log into a dynamically managed endpoint.
The Polycom CMA system accesses the enterprise directory in a read-only mode. It does not create, modify, or delete Active Directory users or groups in any way.
Once you integrate with an enterprise directory, it's best to minimize your dependency on local users. A single local administrative user account must exist, and it should be used only when there is a problem connecting to the enterprise directory.
This configuration provides flexibility and varying security levels as follows:
• Restricted access: For security reasons, local user accounts do not have access to any data in Active Directory, though they can see the Active Directory users and groups as defined in the Polycom CMA system's security.
NoteAn Active Directory forest with a functional level of Windows 2000 Mixed mode only supports Universal Distribution groups. Windows 2000 Native mode, Windows 2003 Mixed, and Windows 2003 forest functional levels support Universal Security and Distribution groups.

Polycom CMA System Operations Guide
322 Polycom, Inc.
• Administration: Active Directory users and their Active Directory group memberships are managed through your Active Directory. Polycom CMA system local users are managed through the Polycom CMA system's web interface.
• Security: Local accounts have their own passwords, which are stored on the Polycom CMA system. Active Directory user accounts maintain the same users' Active Directory credentials and password complexity policies, which are validated by the domain controllers.
How Global Catalog Searches WorkWhen you integrate the Polycom CMA system with Active Directory, you can configure it to integrate in one of two ways:
• It can access a specific global catalog server by host name or IP address (not recommended, due to a lack of redundancy).
If you select this option, the domain name that you specify for the Polycom CMA system must match the DNS name suffix of the Global Catalog server (example: dc1.polycom.com configured as the Global Catalog, then you must enter polycom.com as the domain name of the Polycom CMA system server).
• It can auto-discover the server by querying the DNS for the closest Global Catalog server (strongly recommended).
If you select this option, you can specify any domain in the Active Directory forest in the Domain Name criteria for the Polycom CMA system server. The DNS server must contain Active Directory-specific entries.
It is recommended that you enter the forest root DNS domain name.
When configured to auto-discover the server, every time the Polycom CMA system needs to bind to a Global Catalog server for LDAP queries, the Polycom CMA system performs the following.
• Uses Microsoft's LDAP Ping mechanism to determine the site in which the system is located.
• Uses a DNS SRV record query to find a Global Catalog server within the same site.
• Connects to the Global Catalog on the domain controller and queries for the object in question and any relevant information (such as GUID, userID, name, phone number).
You can secure the connection between the Polycom CMA system and the Active Directory server's Global Catalog using LDAP-S (via outbound TCP/UDP port 3269) or Start TLS (via outbound 3268 TCP/UDP). To implement the secure connection, the appropriate ports must be open on any network equipment between the Global Catalog and the Polycom CMA system.

Directory Operations
Polycom, Inc. 323
Accounts Required for the Polycom CMA System
Polycom CMA System Service Account Before integrating the Polycom CMA system with an Active Directory forest, you must create a service account for it in Active Directory. This service account is a read-only user account that the Polycom CMA system uses to perform LDAP queries against your Active Directory Global Catalog.
Polycom CMA System Computer AccountThe Polycom CMA system requires a computer account to enable secure channel communications with the Active Directory forest that is being leveraged for authentication. This account must be pre-created and the password set by an administrator from a Domain Controller (see the section Create the Polycom CMA System Computer Account).
Understanding Base DN When the Polycom CMA system is integrated with an enterprise directory, the system uses the baseDN to determine domains and manage directory searches.
The Base DN field is where you specify the distinguished name (DN) of a subset of the Active Directory hierarchy (a domain, subset of domains, or organizational unit) to which you want to restrict the Polycom CMA system search. It acts like a filter.
By default, the Base DN field is empty. The first time you tell the system to connect to the enterprise directory server, leave the Base DN field empty. Once you have established a working connection with your Active Directory, then you enter a Base DN.
The following table illustrates some basic examples of Base DN filter expressions.
NoteWhen setting up a redundant Polycom CMA system, the redundant servers use the same computer account to create their secure channel connection. The machine account name does not have to match the host name of your Polycom CMA system server.

Polycom CMA System Operations Guide
324 Polycom, Inc.
Expressions in the Base DN and exclusion filter fields must be formatted according to RFC-4514, section 2.4.
Some special characters are allowed in the BaseDN field. They include:
The special characters that are not allowed in the Base DN field without the special escape character (backslash, \) are:
Search baseDN expression Description
(ou=CMAGroups,dc=example,dc=com) Include only groups and users which reside within the CMAGroups OU in the example.com domain.
(dc=example,dc=com) Include only groups and users which reside within the example.com domain or domain tree.
Character Characater Name
“ % ” Percent
“ ” Space
“ " ” Double quote
“ ? ” Question mark
“ { ” Open brace
“ } ” Close brace
“ ^ ” Caret
“ ~ ” Tilde
“ [ ” Open bracket
“ ] ” Close bracket
“ ‘ ” Single quote
“ & ” Ampersand
“ | ” Pipe or bar
Character Character Name
“ \ ” Backslash
“ = ” Equal
“ , ” Comma
“ # ” Pound

Directory Operations
Polycom, Inc. 325
Therefore, to use these character as part of a name, they must be preceded in the Base DN field by a backslash. For example, the baseDN of an ou named "tom,ann,bob" in the "myteam.example.com" domain must be entered as:
ou=tom\,ann\,bob\ dc=my team,dc=example,dc=com
Or the baseDN of an ou named "#+,=<>\ " in the "mydomain.example.com" domainmust be entered as
ou=\#\+\,\=\<\>\\\ ,dc=mydomain,dc=example,dc=com
Note that this applies only to attribute values, not the ou= or dc= structure.
Understanding Exclusion FiltersUsing LDAP exclusion filters, you can exclude objects in your directory based on a wide variety of criteria within your Active Directory environment. Any LDAP filters that you create must follow the LDAP standard and reference the LDAP display name of the attributes against which you are filtering.
The following table illustrates some basic examples of exclusion filter expressions.
Creating exclusion filters can impact the performance of your LDAP queries. As a best practice, use indexed attributes and do not use medial searches when implementing exclusion filters. For more information, see Creating More Efficient Microsoft Active Directory-Enabled Applications.
“ + ” Plus
“ ; ” Semicolon
“ < ” Less than
“ > ” Greater than
Character Character Name
Search baseDN expression Description
Memberof=cn=Restricted Group,OU=users,dc=example,dc=com Excludes all users who are members of "Restricted Group" within the Users OU in the example.com domain.
!(Memberof=cn=Video Users,OU=Users,dc=example,dc=com) Includes only groups and users within the Video Users group in the Users OU in the example.com domain.

Polycom CMA System Operations Guide
326 Polycom, Inc.
The following table illustrates some more advanced examples of exclusion filter expressions.
Polycom CMA System and Windows Authentication To allow Microsoft Active Directory users with dynamically-managed endpoints to securely log into their endpoint without typing in their network credentials, the Polycom CMA system must be integrated with an Active Directory server and trusted by Active Directory.
When the Polycom CMA system starts up, it performs the following actions.
• Uses Microsoft's LDAP ping mechanism to determine the site in which the system is located.
• Uses a DNS SRV record query to find a domain controller within the same site.
When an Active Directory user attempts to log into the Polycom CMA system, it authenticates the user by connecting to the domain controller that it is connected to and passes the user's credentials using NTLMv2. The credentials are seamlessly passed to the Polycom CMA system utilizing a secure channel connection from the user's workstation, using the credentials with which they logged into the workstation.
Search baseDN expression Description
!(| (memberof=CN=Sales,DC=europe,DC=example,DC=com) (memberof=CN=IT,DC=europe,DC=example,DC=com))
Includes only users that are members of the ‘Sales’ or ‘IT’ Groups in the domain europe.example.com.
Notes: • The expression should be in continuous
line with no carriage returns or extra spaces (not possible in this document’s format).
• By excluding an entity, we implicitly mean to include all other entities. Conversely, by including an entity, we are implicitly excluding all other entities. Hence, this exclusion filter will suffice for a case where, for example, the administrator wants to include Sales and IT but exclude Human Resources, Engineering, etc, within the specified domain.
&(objectCategory=person)(objectClass=user)(userAccountControl:1.2.840.113556.1.4.803:=2)
Excludes all users who are disabled. Note this is using a different but valid notation.

Directory Operations
Polycom, Inc. 327
Some important notes about the Polycom CMA system Active Directory integration:
• The Polycom CMA system is not joined to the domain. Other computers on the network cannot browse its file system and it cannot be managed remotely by existing IT mechanisms such as SMS.
• The Polycom CMA system does not modify the Active Directory in any way.
• The Polycom CMA system can auto-discover the closest logical domain controller and Active Directory servers, but to do this the network DNS server must have a DNS SRV record for these servers. Once the domain controller’s hostname and IP address have a record on the DNS, the Polycom CMA system can auto-discover the IP address of the domain controller. If your Active Directory does not publish the domain controller’s hostname and IP address to the network DNS, you must edit the file to include it.
• The Polycom CMA system requires that you enable Digitally sign communications on the Active Directory server.
NoteBecause the Polycom CMA system uses NTLMv2, the password is not stored within and the Polycom CMA system never receives the user's password.

Polycom CMA System Operations Guide
328 Polycom, Inc.
Generating E.164 AliasesWhen a user first logs into the Polycom CMA system successfully using the Polycom CMA Desktop client or a properly configured HDX endpoint, the Polycom CMA system creates an E.164 alias for that client to use. This is based upon the user's phone number or a random, unique number, if no phone
number is listed for the user in Active Directory. Users can connect directly to the user's Polycom device by dialing this number or by searching for them by name in the Polycom CMA system directory.
Directory Management OperationsThis section describes the directory management operations. It includes these topics:
• Integrate with LDAP Server Option
• Enable Single Sign On Integrated Windows Authentication
• Remove or Include Dynamically-Managed Devices in the Global Address Book
Integrate with LDAP Server OptionEnabling the Integrate with LDAP Server option allows Polycom CMA system users who are included in the Active Directory to log into the Polycom CMA system interface using their network credentials.
Enabling the Integrate with LDAP Server option also allows endpoint users to select conference participants and rooms from the enterprise directory. Because endpoint connections to LDAP use the endpoint user’s credentials, the Active Directory access control lists identify which endpoint users and rooms each user can see.
In addition, administrative users can:
• View some enterprise user and group information
• Import enterprise groups into the Polycom CMA system
• Assign roles to users in different enterprise groups
• Identify enterprise resources, such as rooms, so that they can be treated as resources in the Polycom CMA system
NoteThe Polycom CMA system supports only the Microsoft Active Directory implementation of LDAP.

Directory Operations
Polycom, Inc. 329
For more information about Active Directory and LDAP, see MS Strategy for Lightweight Directory Access Protocol (LDAP).
The process of integrating with an LDAP server, involves these steps:
• Create the Polycom CMA System Service Account
• Create the Polycom CMA System Service Account
• Enable Integration with the LDAP Server
Create the Polycom CMA System Service Account
To create the Polycom CMA System service account
1 On the Activer Directory server, open the Active Directory Users and Computers module (Start > Programs > Administrative Tools > Active Directory Users and Computers) .
2 Click the node for your domain and then right-click the OU folder in which you want to add a user account and select New > User.
3 At a minimum, in the First name, Full name, and User logon name fields, type cmaservice or an appropriate name for your environment and click Next.
4 In the Password and Confirm Password fields, type a password for the service account to use during initial integration. This is the password you must enter on the Polycom CMA System LDAP Server page.
5 Select the Password never expires option, unselect the User cannot change password option, click Next and then Finish.
NoteTo allow endpoint users to use NTLM Single Sign On technology to connect to the Polycom CMA system and access services such as automatic provisioning, automatic softupdate, and presence, see “Enable Single Sign On Integrated Windows Authentication” on page 332.
Notes• You can reset the password for this account manually, but to do so you must
change it in Active Directory first and then update the Polycom CMA system LDAP Server page.
• The service account requires the rights to read all properties on all users and groups that will be used in the Polycom CMA system. Without these permissions, it may not function properly.

Polycom CMA System Operations Guide
330 Polycom, Inc.
Create the Polycom CMA System Computer Account
To create the Polycom CMA System computer account
1 On the Microsoft Active Directory system, open the Active Directory Users and Computers module (Start > Programs > Administrative Tools > Active Directory Users and Computers.
2 Select the node for your domain, right-click the OU folder in which to add the computer account and then select New > Computer.
3 In the Computer name field, type PolycomCMA or an appropriate name for your environment and then click Next and Finish (or simply click OK depending on your version of Active Directory).
4 Ensure that the Active Directory Users and Computers console will show all available computer options necessary for the remaining steps by enabling View > Advanced Features.
5 Right-click the computer account, select Properties, and then select the Security tab.
6 In the Group or user names section of the Security tab, select the SELF object.
7 In the Permissions for SELF section, select Change password, and then click OK.
8 Login to the domain controller where the computer account was created and set the password using the following command:
net user <computername>$ <password>
For example: net user polycomcma$ p@ssw0rd
Notes• Performing the net user command on any machine other than a domain
controller will not assign the computer account password for the Polycom CMA system machine account.
• At initial integration, the Polycom CMA System will change its Computer Account password to a random 120 character string including special characters. This password will also be changed, to a new randomly generated password, every time the CMA System is rebooted, or every week if no reboots are performed. Because this is a Computer account, resetting the password to a known value requires use of net user commands on an Active Directory Domain Controller.

Directory Operations
Polycom, Inc. 331
Enable Integration with the LDAP Server
To integrate the Polycom CMA system to an LDAP server
1 Go to Admin > Server Settings > LDAP.
a On the LDAP page, select Integrate with LDAP server.
b To have the system auto-discover the LDAP server by querying DNS, enable Auto-discover in the Integrate with LDAP server section; otherwise, enter the LDAP Server IP Address or DNS Name.
c As needed, configure these settings on the LDAP page.
Setting Description
Domain\LDAP User ID Domain and LDAP User ID for an account that the Polycom CMA system can use to access the LDAP server and retrieve group, user, and room information. This is the account created in the step Create the Polycom CMA System Service Account.
This LDAP User ID must have read permissions so it can search the entire forest on the LDAP server.
This LDAP User ID is automatically associated with the Polycom CMA system administrator role - by default it is the ONLY LDAP User ID with this role.
LDAP User Password The password for the LDAP user account
Security Level The level of security on the connection between the Polycom CMA system and the Active Directory server. Possible values include:
• Plain—No security on the connection
• LDAPS—The connection is secured over outbound port 3269 using LDAP-S in a manner similar to https.
If the “Domain Controller: LDAP Server signing requirements” setting on the Active Directory server is set to “Require Signing”, then you must use LDAPS to secure the connection.
• StartTLS—The connection is secured over outbound port 3268 (the same port as Plain), but it then negotiates security once the socket is opened. Some LDAP servers reject any unsecured transactions, so the first command is the StartTLS negotiation command.
Ignore Disabled LDAP users
Check this field to have the Polycom CMA system ignore disabled enterprise users in its queries.

Polycom CMA System Operations Guide
332 Polycom, Inc.
2 If you also wish to implement single sign-on, see “Enable Single Sign On Integrated Windows Authentication” on page 332. Otherwise, click Update.
Enable Single Sign On Integrated Windows Authentication The Polycom CMA system Use Single Sign on (Integrated Windows Authentication) option, allows endpoint users who are included in the Active Directory to securely log into their dynamically-managed endpoint without typing in credentials.
To use single sign-on Windows authentication
1 Go to Admin > Server Settings > LDAP and on the LDAP page, select Use Single Sign on (Integrated Windows Authentication).
2 The Polycom CMA system can auto-discover the closest logical domain controller and Active Directory servers, but to do this the network DNS server must have a DNS SRV record for these servers
3 If your network DNS server has a DNS SRV record for the domain controller, in the Domain controller name section enable Auto-discover; otherwise, enter the fully qualified hostname of the domain controller (for example, dc1.mydomain.com).
4 Enter the Username (domain\<computer name>) and Password and click Update.
LDAP Exclusion Filter If necessary and you understand LDAP filter syntax, specify other types of user accounts to exclude. Don’t edit these expressions unless you understand LDAP filter syntax.
For more information, see “Understanding Exclusion Filters” on page 325.
LDAP Search BaseDN If necessary and you understand LDAP filter syntax, specify the top level of the LDAP directory tree (referred to as the base DN) to search. Don’t edit these expressions unless you understand LDAP filter syntax.
For more information, see “Understanding Base DN” on page 323.
Setting Description
NoteTo allow Polycom CMA system users who enter their network usernames and passwords to log into the Polycom CMA system and select conference participants from your company’s active directory, see “Integrate with LDAP Server Option” on page 328.

Directory Operations
Polycom, Inc. 333
Remove or Include Dynamically-Managed Devices in the Global Address BookBy default the Polycom CMA system includes dynamically-managed devices in the Global Address Book. However, you may not want to take advantage of this feature if you have legacy devices such as VSX, ViewStation, and FX endpoints. These devices may not be able to handle the increased size of the Global Address Book.
For more information on directory options, see “Endpoint Directory and Directory Settings” on page 286.
To remove enterprise users from the Polycom CMA system Global Address Book
1 Go to Admin > Server Settings > Directory Setup.
2 In the Directory page, clear Include dynamically-managed devices in the Global Address Book.
3 Click Update.
To include enterprise users in the Polycom CMA system Global Address Book
1 Go to Admin > Server Settings > Directory Setup.
2 In the Directory page, select Include dynamically-managed devices in the Global Address Book.
3 Click Update.
Remove or Include Guest Book Entries in the DirectoryBy default the Polycom CMA system includes Guest Book entries in the endpoint directory, regardless of whether the endpoint directory is the Global Address Book or the enterprise LDAP directory. For more information on directory options, see “Endpoint Directory and Directory Settings” on page 286.
To remove Guest Book entries from the endpoint directory
1 Go to Admin > Server Settings > Directory Setup.
2 In the Directory page, clear Show Guest Book entries in the Directory.
3 Click Update.
To include Guest Book entries in the endpoint directory
1 Go to Admin > Server Settings > Directory Setup.
2 In the Directory page, select Show Guest Book entries in the Directory.
3 Click Update.

Polycom CMA System Operations Guide
334 Polycom, Inc.

Polycom, Inc. 335
29Polycom CMA System Redundancy
This chapter describes how to configure a redundant Polycom® Converged Management Application™ (CMA™) system. It includes these topics:
• Polycom CMA 5000 System Redundancy Overview
• Implement a Redundant Polycom CMA 5000 System
— Configure the External Database for Redundancy
— Set the Virtual IP Address for the Redundant System
• License a Redundant Polycom CMA System
• Failover to a Redundant Polycom CMA 5000 System Server
• Discontinue Redundancy on a Polycom CMA 5000 System Configuration
Polycom CMA 5000 System Redundancy OverviewA redundant Polycom CMA system configuration offers higher reliability and greater call success by ensuring that a Polycom CMA system server is always available.
A redundant Polycom CMA system configuration requires two Polycom CMA system servers and three IP addresses in the same subnet on the same network—one physical IP address for each of the servers and one virtual IP address dedicated to endpoint registration.
How Redundancy WorksTerminology is very important in understanding how redundancy works.
In a redundant configuration, one server is licensed as the primary server and the other server is licensed as the redundant server. The primary server is always the primary server and the redundant server is always the redundant server.

Polycom CMA System Operations Guide
336 Polycom, Inc.
In a redundant configuration, there is only one active server. The active server is the server managing the system. It is the server running all of the Polycom CMA system services (see “Services” on page 234). In a normal operational state, the active server is the primary server. In a fail over state, the active server is the redundant server.
In a redundant configuration, there is only one standby server. The standby server is the server that is not managing the system. It is the server running only the Polycom Service Monitor. In a normal operational state, the redundant server is the standby server. In a fail over state, the active server is standby server. (If at anytime you receive a Cannot find server error when you try to log into a server, check to see if it is the standby server.)
The Polycom Service Monitor monitors redundancy. In a normal operational state, the redundant/standby server sends a SEND_REQUEST_STATUS message via TCP every three seconds on port 700 to the primary/active server and expects the server to answer with a SERVICE_RUNNING message. (These messages do not include any qualitative data about the health of other services; they only verify that the active server is available on the network.)
If the redundant servce sends three consecutive SEND_REQUEST_STATUS requests that go unanswered, its Service Monitor initiates a fail over and the redundant server becomes the active server.
The most common reasons for system fail overs are power failures and network disconnections. Note that failures in services do not initiate a failover, only a server failure.
If both the primary and pedundant servers start simultaneously (for example if both are in the same location and recover from a power failure at the same time), both servers will initially attempt to become the active server. However, the redundant server—the server licensed as the redundant server—retreats to standby status once the system reaches its fully functional state.
An administrator can force a fail over via the Switch Server Roles function in the Polycom CMA system user interface. Failover does not require a system restart.
The primary and redundant servers share the external Polycom CMA system database, so what is recorded by one Polycom CMA system is read by the other Polycom CMA system. An external Microsoft SQL Server database is required. The Polycom CMA system database information—call records, endpoint registration information, and network topology configurations—remains consistent and available during a fail over because both servers point to the same database.
Also, the fail over to the redundant server seems to occur seamlessly because the endpoints are registered with the virtual IP address, which remains constant.
During a fail over:
• Active conferences are dropped from the system. Conference participants can call back in using the same conference information.

Polycom CMA System Redundancy
Polycom, Inc. 337
• Users logged into the Polycom CMA system user interface are disconnected during a fail over and returned to main Polycom CMA system web page. Users can log back in once the fail over is completed.
• Users in the middle of an operation may get an error message, because the system is not available to respond to a request.
• The redundant server becomes the active server. Its services start in an order designed to prevent the new active server from being flooded with requests from endpoints during startup. The order is:
— Database Service
— Apache Service
— Jserver
— Device Manager
— Site Topology Service
— Dial Rules Service
— Global Address Book Service
— Polycom Cascade Service
— Polycom Scheduler Service
— GateKeeper Service
— Openfire Service
A system fail over usually takes approximately 5 minutes, but some system settings affect how rapidly a redundant system returns to full functionality. The gatekeeper Registration Refresh period affects how quickly endpoints re-register with the redundant server after a failover. And if Deny calls to/from unregistered endpoints is checked, the gatekeeper rejects calls from endpoints that have not re-registered with the redundant server after a failover. Therefore, in a redundant system configuration, use a short refresh period (30 seconds) unless you have many endpoints or a large amount of network traffic.
Once a fail over to a redundant server occurs, the redundant server manages all system operations until an administrator switches back to the original primary server via the Switch Server Roles function in the Polycom CMA system user interface.
Notes• The Polycom CMA system does not automatically switch to the primary server
when the primary server becomes available. An administrator must Switch Server Roles.
• A fail over or system restart initiates an encryption routine that changes the private key for a redundant system. Therefore, after a fail over or system restart, schedulers who use one of the scheduling plug-ins will be prompted to re-enter their login settings to access the system.

Polycom CMA System Operations Guide
338 Polycom, Inc.
Redundant Configuration System AdministrationBecause the two servers share the external Polycom CMA system database, most of their configuration information is shared. However, certain information is not stored in the database, so an administrator must manually synchronize this information. This includes:
• Basic network settings such as IP, default gateway, and DNS settings
• External database information
• Time and external NTP server settings
• The current system log level
• Custom Polycom CMA system logo--upload the same logo to both servers
• Softupdate profiles for scheduled softupdates--upload the same software package to both servers
Whenever you change information in one of these sections on one server you should also change it on the other server.
Licensing and upgrading a redundant system is slightly more complex. The primary and redundant server required different licenses.
Implement a Redundant Polycom CMA 5000 SystemYou can set up a Polycom CMA 5000 system in a fault-tolerant, high-availability, redundant configuration. The Polycom CMA 4000 system is not available in a redundant configuration.
This section has two procedures. One describes how to convert an existing non-redundant Polycom CMA 5000 system to a redundant configuration. The other describes how to configure redundancy on a newly installed system.
To add a redundant Polycom CMA system server to an existing system
1 Install the redundant Polycom CMA 5000 system as described in the Polycom CMA Getting Started Guide. During installation, point the redundant Polycom CMA 5000 system server to its internal database.
2 Request the required software activation key code for the redundant server as described in “Request a Software Activation Key Code” on page 297.
3 Log into both the primary and redundant Polycom CMA 5000 system servers.
4 Point the primary server to an external Microsoft SQL Server database and re-enter the license.

Polycom CMA System Redundancy
Polycom, Inc. 339
5 On the primary server:
a Go to Admin > Server Settings > Redundant Configuration.
b Enter the Virtual IP for the redundant system and click Submit.
6 On the redundant server:
a Go to Admin > Server Settings > Database.
b On the Database page, select the Use an external SQL Server database check box.
c Enter the database information from the primary server i.e., the database server’s IP address, and SQL server port number in the Database page.
d Click Update.
The Polycom CMA 5000 system connects to the database server and the redundant server restarts and comes online.
7 On the primary server, fail over to the redundant server. See “Failover to a Redundant Polycom CMA 5000 System Server” on page 342.
8 Once the failover is complete, on the redundant server:
a Log into the Polycom CMA 5000 system using the virtual IP address, and go to Admin > Server Settings > Licenses.
b Enter the activation key code for the redundant server into the Add New License > Activation Key field and click Add. (Note that the field is ASCII only. For more information, see “Field Input Requirements” on page 9.)
c Go to Admin > Dashboard and click Restart to restart the system.
This system fails over to the primary server.
To configure redundancy on a newly installed Polycom CMA system.
A redundant Polycom CMA system configuration requires the installation of two Polycom CMA system servers on the same network. During First Time Setup, you are instructed to assign these two servers physical IP addresses and leave them pointed at their internal databases. This section describes how to complete the configuration of these newly installed redundant servers. It includes these topics:
1 Configure the External Database for Redundancy
2 Set the Virtual IP Address for the Redundant System
NoteThis procedure describes implementing a new redundant Polycom CMA system. For information on converting an existing system to a redundant system, see “Add or Remove a Polycom CMA System Custom Logo” on page 298.

Polycom CMA System Operations Guide
340 Polycom, Inc.
Configure the External Database for Redundancy
To configure the two redundant servers to use the same external database
1 Log into both the primary and redundant Polycom CMA 5000 system servers.
2 On the primary server, go to Admin > Dashboard and click Shutdown to shut down the primary server.
3 When the primary server has shutdown completely, on the redundant server:
a Go to Admin > Server Settings > Database.
b On the Database page, select the Use an external SQL Server database check box.
c Enter the Database Server IP address or DNS Name.
d Enter the Database Server Port and click Update.
The system will guide you through formatting or upgrading the external database. The redundant server boots.
e After the redundant server restarts completely, log into it again and select Admin > Dashboard.
f Click Shutdown to shut down the redundant server.
4 When the redundant server has shutdown completely, on the primary server:
a Turn ON the primary server.
b Log into the server and go to Admin > Server Settings > Database.
c On the Database page, select the Use an external SQL Server database check box.
d Enter the Database Server IP address or DNS Name.
e Enter the Database Server Port and click Update.
The system will guide you through formatting or upgrading the external database. The primary server restarts and comes online as the active server.
Set the Virtual IP Address for the Redundant System
To set the virtual IP address for the redundant system
1 When the primary server has restarted completely, log into the primary Polycom CMA 5000 system server.

Polycom CMA System Redundancy
Polycom, Inc. 341
2 Go to Admin > Server Settings > Redundant Configuration.
If the two Polycom CMA system servers are installed and configured correctly on the network, both servers are displayed in the table on the Redundant Configuration page.
3 Enter the Virtual IP for the redundant system and click Submit. For information about this virtual IP address, see “Add or Remove a Polycom CMA System Custom Logo” on page 298.
The primary server restarts and comes online as the active server.
4 When the primary server has restarted completely, turn ON the redundant server and wait for it to boot completely.
License a Redundant Polycom CMA SystemTo license a non-redundant Polycom CMA system, see “Add Polycom CMA System Licenses” on page 297. This section describes how to license a redundant system.
To license a redundant Polycom CMA 5000 system
1 Request a separate software activation key code for the primary and redundant server as described in “Request a Software Activation Key Code” on page 297.
2 On the primary Polycom CMA 5000 system server:
a Go to Admin > Server Settings > Database and verify the database information. (If you fail to point the server to the correct database, you must re-enter the license when you change databases.)
b Go to Admin > Server Settings > Licenses.
c Enter the activation key code for the primary server into the Add New License > Activation Key field and click Add.
The license number appears in the list and the number of active licenses is updated.
d Go to Admin > Server Settings > Redundant Configuration. and click Switch Server Role.
The system fails over to the redundant server.
NoteSet the virtual IP for the redundant server on the primary server only.

Polycom CMA System Operations Guide
342 Polycom, Inc.
3 On the redundant server:
a Log into the Polycom CMA system using the virtual IP address, and go to Admin > Server Settings > Licenses.
b Enter the software activation key code for the redundant server into the Add New License > Activation Key field and click Add.
c Go to Admin > Dashboard and click Restart to restart the system.
The system fails over to the primary server.
Failover to a Redundant Polycom CMA 5000 System ServerIn a redundant configuration, the Polycom CMA 5000 system automatically fails over from the primary server to the redundant server. However, you can also manually initiate a failover.
To manually initiate a failover
1 On either server, go to Admin > Server Settings > Redundant Configuration.
2 On the Redundant Configuration page, click Switch Server Role.
The system initiates a failover to the other server.
Discontinue Redundancy on a Polycom CMA 5000 System Configuration
In some circumstances, you may need to discontinue redundancy. Use this procedure to do so, but only when the system is in a valid redundant state.
To discontinue a redundant Polycom CMA 5000 system configuration:
1 Log into the Polycom CMA 5000 system using the virtual IP address.
2 Failover to the redundant server. See page 342.
3 On the redundant server:
a Go to Admin > Server Settings > Database.
b On the Database page, deselect the Use an external SQL Server database check box.
c Click Update.
The redundant server restarts.

Polycom CMA System Redundancy
Polycom, Inc. 343
4 On the primary server:
a Go to Admin > Server Settings > Redundant Configuration.
b On the Redundant Configuration page, click Reset Redundant Configuration.
The primary system restarts.

Polycom CMA System Operations Guide
344 Polycom, Inc.

Polycom, Inc. 345
30Gatekeeper Management
This chapter describes how to work with gatekeepers within the Polycom® Converged Management Application™ (CMA™) system. It includes these topics:
• Gatekeeper Overview
• Primary Gatekeeper Management Operations
• Alternate Gatekeeper Management Operations
• Neighboring Gatekeeper Management Operations
Gatekeeper OverviewThe Polycom CMA system gatekeeper provides address translation and network access control services for endpoints, gateways, and MCUs. It also provides other services such as bandwidth management and dial plans services. These additional features allow you to configure and manage your gatekeeping operations and provide flexibility and scalability.
During First Time Setup—the Polycom CMA system’s initial configuration— the system is assigned a default region and site (called My Region: Primary Site). A region is just the set of network devices that share a common Polycom CMA system gatekeeper, so a gatekeeper has only a single region or zone. However, a region or zone can have multiple sites.
This initial set up allows you to immediately start using the Polycom CMA system for video conferencing. However, you can also configure the system may change the name of the default site and assign the sites you have created. You may create additional neighboring gatekeeper regions, if needed. When you create a new gatekeeper region, you define gatekeeper settings only. A gatekeeper region functions as a neighboring gatekeeper. You cannot add sites to a newly created gatekeeper region.

Polycom CMA System Operations Guide
346 Polycom, Inc.
When a call originates from the Polycom CMA system and the system is unable to resolve the dialed address, the call can be forwarded to another gatekeeper for resolution. To enable call forwarding, create a neighboring region and a dialing rule that routes calls using a particular prefix to the neighboring gatekeeper.
If you have a Polycom PathNavigator installed, it can act as a neighboring gatekeeper region to the Polycom CMA system.
Primary Gatekeeper Management OperationsBy default the Polycom CMA system is made the primary gatekeeper during the First Time Setup process. Operations for managing the primary gatekeeper include:
• Edit the Primary Gatekeeper Settings
• Configure Prefixed Based Registration
NoteTo prevent a site from participating in a dial plan, do not assign it to a region.
Field Description
Name The name (ASCII onlya) of the region.
a. For more information, see “Field Input Requirements” on page 9.
Description A description (ASCII onlya) of the region.
Gatekeeper IP Address The IP address for this region. For the default region, automatically set to the IP address of the Polycom CMA system server.
Port The port for this region. Defaults to the port for the Polycom CMA system server.
Gatekeeper Identifier The unique ID (ASCII onlya) for the gatekeeper associated with this region. Automatically filled in for the default region.
PN: is inserted in front of the gatekeeper identifier. Example: PN: Silicon Valley Campus
The character limit is 254; all keyboard characters are supported.”

Gatekeeper Management
Polycom, Inc. 347
Edit the Primary Gatekeeper Settings
To edit the primary Polycom CMA system gatekeeper settings
1 Go to Admin > Gatekeeper Settings > Primary Gatekeeper.
2 On the Primary Gatekeeper page, make the required changes.
The Primary Gatekeeper Settings include these fields:
Field Description
Gatekeeper Identifier
The gatekeeper identifier (ASCII-only) on the network, which is used by the endpoints and Polycom CMA system for communication.
The maximum number of characters is 254. All ASCII characters are valid.
Gatekeeper Description
The description (ASCII only) of this gatekeeper on the network
Default Gatekeeper When enabled, indicates that this Polycom CMA system is the default gatekeeper on the network.
Allow Registration of Defines for the gatekeeper of which endpoints to allow to register. For more information, see “Device Registration” on page 281.
Registration Refresh (seconds)
The number of days that the Polycom CMA gatekeeper maintains the endpoint registration information, in case the endpoint has not yet received any.
The default is 30 days.
Enter 999 to prevent endpoint registrations from expiring automatically.
Registration Refresh (seconds)
The interval at which the Polycom CMA system sends “keep-alive” messages to registered endpoints to determine whether they are online. The default is 300 seconds.
If the endpoint responds with a registration request message, the endpoint is online. If not, the endpoint is offline.
When the endpoint is registered to another gatekeeper, the Polycom CMA system still shows the endpoint’s status.
To view the endpoint’s state (Online or Offline), go to Endpoint> Monitor View.
NoteEndpoints are Offline when they have been turned off or have been removed from the network. Endpoints return to an Online state when they have been turned on or have reregistered with Polycom CMA system.

Polycom CMA System Operations Guide
348 Polycom, Inc.
3 Click Update.
Configure Prefixed Based Registration A user with administrator permissions can configure the Polycom CMA system so that only endpoints with specified E.164 prefixes are allowed to register to the H.323 gatekeeper.
Note that when you apply this policy to an system with existing endpoints, all existing endpoints that fail to meet the new policy will fail to re-register with the gatekeeper. This will be flagged in the Endpoint > Monitor View as a gatekeeper registration error.
Maximum Neighbor Gatekeeper Hop Counts
Limits the number of connections to make when an endpoint seeks dialing resolution. The default is 3.
Log calls to/from unregistered endpoints
Logs calls to and from rogue endpoints. To view call logs, select System Management > Reports > Gatekeeper Message Log.
Deny calls to/from unregistered endpoints
Prevents calls to and from rogue endpoints.
Enable Real-Time Statistics
Select this option to allow the gatekeeper to collect statistics from the endpoints.
IRR frequency Specifies the interval (in seconds) at which endpoints that can report QoS (Quality of Service) measures will report them to the Polycom CMA system.
By default, IRR is set to 0, which is equivalent to disabling the Real-time Statistics option. The valid IRR frequency range is 20 to 65535.
Call Model Describes how the Polycom CMA system routes selected H.225 call signalling messages (i.e., SETUP, CALL PROCEEDING, ALERTING, CONNECT, and NOTIFY message).
Possible values include: Routed or Direct. For more information, see “Routing Mode” on page 282.
In any case, Q.931 messages (ARQ, ACF, ARJ, BRQ, BCF, and BRJ) are always sent through the Polycom CMA system gatekeeper.
Field Description

Gatekeeper Management
Polycom, Inc. 349
To allow only the registration of endpoints with defined E.164 prefixes
1 Go to Admin > Gatekeeper Settings > Primary Gatekeeper.
On the Primary Gatekeeper page, change the Allow Registration of setting to Predefined Prefixes Only.
The Valid E.164 Prefixes entry box appears.
2 Enter a range of prefixes in the From and To fields and click Add.
The prefix range appears in the Allowed Prefix Ranges table.
3 Continue adding prefixes ranges as necessary. To delete a range, select the range and click the Delete button for it.
When you’ve specified all the prefix ranges, click Update.
Alternate Gatekeeper Management OperationsAlternate Gatekeeper Management Operations include:
• Add an Alternate Gatekeeper
• Edit the Alternate Gatekeeper Settings
• Remove the Alternate Gatekeeper
Add an Alternate Gatekeeper
To add an alternate gatekeeper
1 Go to Admin > Gatekeeper Settings > Alternate Gatekeeper.
2 On the Alternate Gatekeeper page, enter the required gatekeeper information.
The Alternate Gatekeeper Settings include these fields:
Field Description
Need to Register Check this box to require that a endpoint register with the alternate gatekeeper before sending other registration admission status requests.The default setting is unchecked.
Alternate Gatekeeper ID
The alternate gatekeeper’s network identifier (ASCII onlya)

Polycom CMA System Operations Guide
350 Polycom, Inc.
3 Click Update.
Edit the Alternate Gatekeeper Settings
To edit the alternate gatekeeper settings
1 Go to Admin > Gatekeeper Settings > Alternate Gatekeeper.
2 On the Alternate Gatekeeper page, make the required changes. For more information, see Alternate Gatekeeper Settings
3 Click Update.
Remove the Alternate Gatekeeper
To remove the alternate gatekeeper settings
1 Go to Admin > Gatekeeper Settings > Alternate Gatekeeper.
2 On the Alternate Gatekeeper page, clear the Need to Register checkbox.
3 Click Update.
Neighboring Gatekeeper Management OperationsNeighboring Gatekeeper Management Operations include:
• View Neighboring Gatekeepers
• Add a Neighboring Gatekeeper
• Edit a Neighboring Gatekeeper
• Delete a Neighboring Gatekeeper
IP Address The IP address of the alternate gatekeeper
Port The port number (usually 1719) that the alternate gatekeeper uses to communicate with endpoints
Priority Indicates the alternate gatekeeper’s priority for endpoint registration. A lower number has higher priority (the range is 0 to 127), so endpoints would first register with an alternate gatekeeper with a priority of 0. The default setting is 0.
a. For more information, see “Field Input Requirements” on page 9.
Field Description

Gatekeeper Management
Polycom, Inc. 351
View Neighboring Gatekeepers
To view the neighboring gatekeepers
Go to Admin > Gatekeeper Settings > Neighboring Gatekeepers.
The Neighboring Gatekeepers list appears.
Add a Neighboring Gatekeeper
To add a neighboring gatekeeper
1 Go to Admin > Gatekeeper Settings > Neighboring Gatekeeper.
2 On the Neighboring Gatekeeper page, click Add Neighbor.
3 In the Add Neighbor dialog box, enter the required gatekeeper information and click Save.
The neighboring gatekeeper is added to the system.
Edit a Neighboring Gatekeeper
To edit the settings for a neighboring gatekeeper
1 Go to Admin > Gatekeeper Settings > Neighboring Gatekeeper.
2 On the Neighboring Gatekeeper page, select the neighboring gatekeeper of interest and click Edit Neighbor.
3 In the Edit Neighbor dialog box, make the required changes and click Update.
4 You’ll need to reboot the Polycom CMA system to make the change effective.
Column Description
Name The name of the region
Description The description of the region

Polycom CMA System Operations Guide
352 Polycom, Inc.
Delete a Neighboring Gatekeeper
To delete a neighboring gatekeeper
1 Go to Admin > Gatekeeper Settings > Neighboring Gatekeeper.
2 On the Neighboring Gatekeeper page, select the neighboring gatekeeper of interest and click Delete.
3 Click Delete to confirm the deletion.

Polycom, Inc. 353
31Management & Security Operations
This chapter describes the Polycom® Converged Management Application™ (CMA™) system management and security tasks. It includes these topics:
• Update the Polycom CMA Server Software
• Edit Certificate Settings to Implement HTTPS
• Change the Polycom CMA System User Interface Timeout
• Give Enterprise Users Default Scheduler Permissions for the Polycom CMA System
• Automatic Registration Server Addressing
• Automatic Registration Server Addressing
• Set Common Passwords for Endpoints
Update the Polycom CMA Server SoftwareTo update a Polycom CMA system with a new software patch, complete the following tasks:
1 Download the software upgrade file.
2 Obtain an upgrade key code.
3 Save a back up of the Polycom CMA system databases.
4 Perform the software upgrade.
5 Verify the upgrade.
For more information on performing each of these tasks, see the Polycom CMA System Upgrade Guide.

Polycom CMA System Operations Guide
354 Polycom, Inc.
Edit Certificate Settings to Implement HTTPS By default, the Polycom CMA system uses http for its data interchanges. Edit the Certificate Settings to implement the https protocol, which is a combination of normal http interchange over an encrypted Secure Sockets Layer (SSL) or Transport Layer Security (TLS) connection.
If you are implementing HTTPS you have the following decisions to make:
Note that depending on their browser security settings, your users may receive different levels of security warnings for certificate issues. These may include an expired certificate, a certificate whose name does not match where it came from, an invalid certificate authority. Polycom recommends that you replace the self-signed certificate that ships with the Polycom CMA system with a certificate generated onsite that is designed to meet your security standard. At the least it should be specific to the system name and come from an internal or external certficate authority or by a re-generated self-signed certificate that matches the system name.
To prepare the Polycom CMA system web server to accept HTTPS connections, you must also create a public key certificate for it. The following table describes the information needed to request a certificate. All fields are required.
Decision... If yes, then perform these tasks...
Use the Polycom CMA system default key and self-signed certificate?
• “Edit Certificate Settings to Implement HTTPS” on page 354
Use your own existing private key and certificate, if your company is self-authorizing?
• “Upload a Private Key” on page 356
• “Upload a Certificate” on page 356
• “Edit Certificate Settings to Implement HTTPS” on page 354
Use a private key and certificate requested by the Polycom CMA system?
• “Generate a Certificate Request” on page 355
• “Upload a Certificate” on page 356
• “Edit Certificate Settings to Implement HTTPS” on page 354
Field Description
Country Name Two-letter (ASCII onlya) ISO 3166 country code
State or Province Name Full name (ASCII onlya)
Locality Name City (ASCII onlya)
Organization Name Company Who (ASCII onlya)

Management & Security Operations
Polycom, Inc. 355
Because the key and certificate are stored in the Polycom CMA system database, in redundant configurations you implement HTTPS on the primary server only.
Generate a Certificate Request
To generate a certificate request on a Polycom CMA system
1 Go to Admin > Management and Security Settings > Certificate Settings.
2 Click Generate Certificate Request.
The system displays a warning that “This action will overwrite any previously generated or uploaded private key. “
3 To continue, click Yes.
4 Complete the Certificate Request Data dialog box.
5 Save the Certificate Request Data to a file and submit the file to the Certificate Authority of your choice.
Organization Unit Name Section (ASCII onlya)
Common Name Server’s host name (ASCII onlya)
Email Address (ASCII onlya)
a. For more information on field limitations, see “Field Input Requirements” on page 9.
Field Description
Notes • The Polycom CMA system always stores the default key and certificate. However, it stores only the last private key generated or uploaded to the system and the last certificate uploaded to the system.
• The uploaded certificate is for HTTPS connectivity only. The other Polycom CMA system TLS interfaces (for the enterprise directory and presence) are supported via self-signed certificates.
• You may receive certificate warnings if the Polycom CMA Desktop client is using HTTPS while the Polycom CMA system is using HTTP.

Polycom CMA System Operations Guide
356 Polycom, Inc.
Upload a Private KeyThis procedure describes how to upload a private key to a Polycom CMA system. This private key must be an unencrypted RSA key in PEM format, without a password.
To upload a private key to a Polycom CMA system
1 Go to Admin > Management and Security Settings > Certificate Settings.
2 Click Upload Private Key.
The system displays a warning that “This action will overwrite any previously generated or uploaded private key. “
3 To continue, click Yes.
4 Browse to the private key file location and select the file.
5 Click Open.
An Upload Successful dialog box appears.
Upload a CertificateThis procedure describes how to upload a certificate to a Polycom CMA system. This certificate must be in PEM format.
To upload a certificate from a Certificate Authority
1 If necessary, save the certificate file to a PC on the network.
2 Go to Admin > Management and Security Settings > Certificate Settings.
3 Click Upload Certificate.
4 Browse to the certificate file location and select the file.
5 Click Open.
The certificate is checked against the private key in the database to verify that they match. If they do, an Upload Successful dialog box appears. The certificate file is registered. If https is already activated, the web server will restart so that it can load the certificate authority.

Management & Security Operations
Polycom, Inc. 357
Edit the HTTPS Security Setting
To edit the https security setting on a Polycom CMA system
1 Go to Admin > Management and Security Settings > Certificate Settings.
2 On the Security Settings page, check Use HTTPS.
3 Click Update.
The system displays a warning that this action will restart the web server and all client sessions will be lost
4 Click Yes to confirm the update.
The Polycom CMA system web server restarts.
Revert to the Default Key and CertificateIf you’ve implemented a certificate from a Certificate Authority, you can revert to the default certificate.
To revert to the default key and certificate
1 Go to Admin > Management and Security Settings > Certificate Settings.
2 Click Revert to Default Certificate.
3 Click OK.
The system displays a warning that this action will restart the web server and all client sessions will be lost
4 Click Yes to confirm the change.
The Polycom CMA system web server restarts.

Polycom CMA System Operations Guide
358 Polycom, Inc.
Configure Client Systems to Accept HTTPS CertificateWhen you implement HTTPS on the Polycom CMA system, client systems that access the system interface receive the following HTTPS certificate security alert until they are configured to accept the Polycom CMA system HTTPS certificate.
To configure client systems to accept the HTTPS certificate without errors
1 Add the Polycom CMA system IP address or DNS name to the DNS hosts file.
2 Instruct client users to install the Polycom CMA system HTTPS certificate as follows:
a Open a browser window and in the Address field enter the Polycom CMA system server IP address or DNS name.
b In the HTTPS Security Alert page, click View Certificate.
c In the General tab of the Certificate dialog box, click Install Certificate.
d When the Certificate Import Wizard appears, click Next
e Click Next again, to accept the default setting of Automatically select the certificate store based on the type of certificate.
The wizard indicates that “You have successfully completed the Certificate Import wizard.”
f Click Finish.
A Security Warning indicates that “You are about to install a certificate from a certification authority claiming to represent: CMA Self-Signed Certificate” and asking you “Do you want to install this certificate?”

Management & Security Operations
Polycom, Inc. 359
g Click Yes.
The wizard indicates that “You have successfully completed the Certificate Import wizard.”
h Click Finish.
A Security Warning indicates that “You are about to install a certificate from a certification authority claiming to represent: CMA” and asking you “Do you want to install this certificate?”
i Click Yes.
The Polycom CMA system log in page appears. The next time you access the Polycom CMA system, the Security Alert indicates “The security certificate is from a trusted certifying authority.”
Change the Polycom CMA System User Interface TimeoutBy default the Polycom CMA system user interface times out after a 10 minutes of inactivity. Use this procedure to change the timeout value for the user interface inactivity timer or to turn it off.
To change the Polycom CMA system user interface timeout
1 Go to Admin > Management and Security Settings > Security Settings.
2 In the CMA User Interface Timeout section of the Security Settings page:
a To disable the CMA User Interface Timeout, by change the drop-down menu to OFF.
b To change the CMA User Interface Timeout value,
3 Click Update.
Give Enterprise Users Default Scheduler Permissions for the Polycom CMA System
By default when local users are added to the Polycom CMA system, they are assigned the Scheduler role with Scheduler permissions. By default, when you integrate a Polycom CMA system to an Active Directory, enterprise users are not assigned a role or permissions. In this case, you must either assign each enterprise user a role, or you can use this procedure to give enterprise users Scheduler permissions by default.

Polycom CMA System Operations Guide
360 Polycom, Inc.
To give enterprise users default Scheduler permissions for a Polycom CMA system
1 Go to Admin > Management and Security Settings > Security Settings.
2 Change the CMA Access via default profile allowed value to ON.
3 Click Update.
Change the Message for Enterprise Users without Permissions
To change the message enterprise users without permissions see when they try to log into a Polycom CMA system
1 Go to Admin > Management and Security Settings > Security Settings.
2 Edit the Message to be displayed to unauthorized users.
For example, enter a message such as “Your username and password are valid, but you have no permissions on this system. Contact your IT department for more information.”
3 Click Update.
Automatic Registration Server AddressingYou can configure the Polycom CMA system to send registration server addressing information for the gatekeeper and/or global directory server (GDS) when the endpoint is registered to the Polycom CMA system.
This automatic registration service only works for endpoints that register with the gatekeeper or GDS (or are manually added to the Polycom CMA system) after the Automatic Registration Service setting is enabled.
So if the Automatic Registration Service setting is enabled and an endpoint registers with the gatekeeper, the gatekeeper addressing information is sent to the endpoint. If the Automatic Registration Service setting is enabled and an endpoint registers with the GDS, the GDS addressing information is sent to the endpoint. If the Automatic Registration Service setting is enabled and an endpoint is added manually to the Polycom CMA system, both the gatekeeper and GDS addressing information is sent to the endpoint.
If automatic discovery and configuration is not successful, you can manually add endpoints.

Management & Security Operations
Polycom, Inc. 361
To enable automatic discovery of endpoints
1 Go to Admin > Management and Security Settings > Endpoint Management Settings.
2 In the Automatic Endpoint Discovery section of the Endpoint Management Settings page, select Discover Endpoints and click Update.
After you have changed this setting, all endpoints you add are automatically provisioned.
Set Common Passwords for EndpointsThe Common Password feature allows you to manage endpoints that have the same global administrative password. However, it cannot reset the administrative password on endpoints.
If you use the Common Password feature, access to password-protected data within endpoints is granted if the specified common password matches the endpoints’ Administrator Password.
To set common passwords for endpoints
1 Go to Admin > Management and Security Settings > Endpoint Management Settings.
2 In the Common Password section of the Endpoint Management Settings page, select Use a Common Password.
3 Enter the common password in the Password and Verify Password fields and click Update.
Notes• Automatic discovery works only for endpoints that register with the gatekeeper
or Global Directory Server after the Automatic Discovery setting is enabled; it does not automatically discover existing endpoints.
• The Polycom CMA system only supports automatic discovery for V-Series, VSX-Series, and Polycom HDX-Series devices operating in traditional mode.
NoteLeave these three settings blank if your Polycom endpoints require individual passwords or do not have passwords. To configure a global administrative password for all Polycom endpoints, use scheduled provisioning.

Polycom CMA System Operations Guide
362 Polycom, Inc.

Polycom, Inc. 363
32Dial Plan Setup Operations
This chapter describes how to edit the default Polycom CMA system Dial Plan settings to support your company’s site topology. It includes these topics:
• Site Operations
• Site Link Operations
• Site-to-Site Exclusions
• Territories
• Network Clouds
• Dial Plan Service Operations
• Dial Rule Operations
• Least-Cost Routing Operations
Site OperationsSite operations include:
• View the Graphical Site Topology
• View the Sites List
• Add a Site
• View Site Information
• Assign Locations to a Site
• Edit Site Settings
• Edit Site Provisioning Settings
• Delete a Site

Polycom CMA System Operations Guide
364 Polycom, Inc.
View the Graphical Site Topology
To view the graphical site topology
1 Go to Admin > Dial Plan and Sites > Site Topology.
The Site Topology page appears. It graphically displays the sites and site links defined to the Polycom CMA system.
— Hover over a map element to view information about it.
— Use the slider bar to zoom in or out on the map.
— Select or deselect elements (Site Links, Bandwidth, or Site Names) to changewhat is displayed on the map.
— Use the Select Sites drop-down list to filter (by site name, territory name, IP address, network devices, and alerts) which sites are displayed on the map.
View the Sites List
To view the Sites list
Go to Admin > Dial Plan and Sites > Sites.
The Sites list appears. It includes this information:
Column Description
Name Name of the site.
Description Description of the site.
Country Code The country code for the country in which the site is located.
Area Code The city or area code for the site. Do not include a leading zero. For example, the city code for Paris is 01; however, enter 1 in this field.
Max Bandwidth (Mbps) The total bandwidth limit for audio and video calls.
Max Bit Rate (Kbps) The per-call bandwidth limit for audio and video calls.
Territory The territory to which the site belongs, which determines the Polycom CMA system responsible for it.

Dial Plan Setup Operations
Polycom, Inc. 365
Add a Site
To add a site
1 Go to Admin > Dial Plan and Sites > Sites or Admin > Dial Plan and Sites > Site Topology.
2 In the Sites list or Site Topology page, click Add Site.
3 In the Add Site dialog box, enter a Site Name and Description for the site.
4 Complete the General Info, Routing, Subnet, and if applicable ISDN Number Assignment, sections of the Add Site dialog box. The minimum information required is Site Name, Description, Location, and Subnets.
For information about all of the site fields, see “Add/Edit Site Dialog Box” on page 272.
5 Click OK.
The new site is added to the system and the Edit Site Provisioning dialog box appears. These are the site-based parameters that the Polycom CMA system automatically provisions to endpoint systems operating in dynamic management mode.
6 As needed, edit the default site provisioning details and click Apply.
NoteNot all of the site provisioning parameters apply to all endpoint systems being provisioned. If an endpoint system does not have a corresponding parameter, it ignores the parameter.
Field For the endpoint systems at the site being provisioned...
Date and Time Settings
Country Specifies the country code for their location.
Date Format Specifies the date display format.
Auto Adjust for Daylight Saving Time
Specifies whether or not to adjust the endpoint’s system clock for daylight savings time.
Time Format Specifies the time display format.

Polycom CMA System Operations Guide
366 Polycom, Inc.
Time Server Specifies whether to connect to a time server for automatic system time settings.
Select Auto to require that the video endpoint system synchronize with an external time server that is identified by a network domain controller. Because it is identified by a network domain controller, you do not need to enter the IP address of the time server.
Select Manual to require that the video endpoint system synchronize with an external time server that may not be identified by a network domain controller. In this case, you must also enter the IP address of the time server in the Time Server Address field.
If Time Server is set to Off, or if the Time Server is set to Manual or Auto but the endpoint system cannot connect to the time server, the date and time must be manually reset at the endpoint.
Time Server Address Specifies the address of the time server when Time Server is set to Manual.
Timezone Specifies the time difference between GMT (Greenwich Mean Time) and the endpoint system’s location.
Firewall Settings
Use Fixed Ports Specifies whether to define the TCP and UDP ports.
• If the firewall is H.323 compatible or the endpoint systems are not behind a firewall, disable this setting.
• If the firewall is not H.323 compatible, enable this setting. The endpoint systems will assign a range of ports starting with the TCP and UDP ports you specify. The endpoint system defaults to a range beginning with port 3230 for both TCP and UDP.
NoteYou must open the corresponding ports in the firewall. You must also open the firewall’s TCP port 1720 to allow H.323 traffic.
Start TCP Port Lets you specify the beginning value for the range of TCP ports used by the endpoint systems. The endpoint systems will automatically assign a range of ports starting with the port you specify.
NoteYou must also open the firewall’s TCP port 1720 to allow H.323 traffic.
Start UDP Port Lets you specify the beginning value for the range of TCP ports used by the endpoint systems. The endpoint systems will automatically assign a range of ports starting with the port you specify.
Enable H.460 Firewall Traversal
Allows the endpoint system to use H.460-based firewall traversal. For more information, see the Administrator’s Guide for Polycom HDX Systems.
NAT Configuration Specifies whether the endpoint systems should determine the NAT Public WAN Address automatically.
• If the endpoint systems are behind a NAT that allows HTTP traffic, select Auto.
• If the endpoint systems are behind a NAT that does not allow HTTP traffic, select Manual. Then specify a NAT Public (WAN) Address.
• If the endpoint systems are not behind a NAT or are connected to the IP network through a virtual private network (VPN), select Off.
Field For the endpoint systems at the site being provisioned...

Dial Plan Setup Operations
Polycom, Inc. 367
NAT Public (WAN) Address
When NAT Configuration is set to Manual, specifies the address that callers from outside the LAN should use to call the endpoint systems.
NAT is H.323 Compatible
Specifies that the endpoint systems are behind a NAT that is capable of translating H.323 traffic.
Address Displayed in Global Directory
Specifies whether to include the endpoint system’s information in the global directory
• Select Private to exclude the endpoint from the global directory
• Select Public to include the endpoint in the global directory
H323 Settings
Enable IP H.323 Specifies whether to enable IP H.323 calls.
Use Gatekeeper When IP H.323 is enabled, specifies whether the endpoint systems will use the Polycom CMA system as its gatekeeper or another gatekeeper. Gateways and gatekeepers are required for calls between IP and ISDN.
• This Server — The endpoint systems will use the Polycom CMA system as their gatekeeper.
• Specify — The endpoint systems will use another system as their gatekeeper.
Gatekeeper IP Address
When Use Gatekeeper is set to Specify, enter the gatekeeper IP address in this field.
Use Gatekeeper for Multipoint Calls
Specify whether multipoint calls use the endpoint system’s internal multipoint capability or the Polycom MCU’s Conference on Demand feature. This feature is available only if the system is registered with a PathNavigator or Polycom CMA system gatekeeper.
Provisioning Settings
Provisioning Polling Interval (minutes)
Specifies the frequency at which the endpoint systems poll the Polycom CMA system for new provisioning information.
By default, this interval is 60 minutes. For performance reasons, the minimum positive value for this interval is 5 minutes. There is no maximum value enforced. When the value of this interval is set to 0, the endpoint systems do not poll the Polycom CMA system for new provisioning information.
Softupdate Polling Interval (minutes)
Specifies the frequency at which the endpoint systems poll the Polycom CMA system for a new softupdate package.
By default, this interval is 60 minutes. For performance reasons, the minimum positive value for this interval is 5 minutes. There is no maximum value enforced. When the value of this interval is set to 0, the endpoint systems do not poll the Polycom CMA system for a new softupdate package.
Quality of Service Settings
Video Type of Service Value
Specifies the IP Precedence or Diffserv value for video packets.
Audio Type of Service Value
Specifies the IP Precedence or Diffserv value for audio packets.
FECC Type of Service Value
Specifies the IP Precedence or Diffserv value for Far End Camera Control packets.
Field For the endpoint systems at the site being provisioned...

Polycom CMA System Operations Guide
368 Polycom, Inc.
Type of Service Field Specifies the service type and the priority of IP packets sent to the system for video, audio, and far-end camera control:
• IP Precedence — Represents the priority of IP packets sent to the system. The value can be between 0 and 5.
• DiffServ — Represents a priority level between 0 and 63. If this setting is selected, enter the value in the Type of Service Value field.
Maximum Transmission Unit Size (bytes)
Specifies the Maximum Transmission Unit (MTU) size used in IP calls. If the video becomes blocky or network errors occur, packets may be too large; decrease the MTU. If the network is burdened with unnecessary overhead, packets may be too small; increase the MTU.
Enable PVEC Allows the endpoint system to use PVEC (Polycom Video Error Concealment) if packet loss occurs. PVEC delivers smooth, clear video over IP networks by concealing the deteriorating effects of packet loss
Enable RSVP Allows the endpoint system to use Resource Reservation Setup Protocol (RSVP) to request that routers reserve bandwidth along an IP connection path. Both the near site and far site must support RSVP in order for reservation requests to be made to routers on the connection path.
Enable Dynamic Bandwidth
Specifies whether to let the endpoint system automatically find the optimum line speed for a call.
Maximum Transmit Bandwidth (Kbps)
Specifies the maximum transmission line speed.
Maximum Receive Bandwidth (Kbps)
Specifies the maximum reception line speed.
Security Settings
Use Room Password for Remote Access
Specifies whether the local endpoint system password and remote access password are the same.
Room Password Enter or change the local endpoint system password here.
When the local password is set, you must enter it to configure the system Admin Settings using the remote control. The local password must not contain spaces.
Administrator ID Enter the administrative account that should be used to access the endpoint system remotely.
Remote Access Password
For endpoint systems, enter or change the remote access password here.
When the remote access password is set, you must enter it to upgrade the software or manage the endpoint systems from a computer. The remote access password cannot include spaces.
Meeting Password Specifies the password users must supply to join multipoint calls on this endpoint system if the call uses the internal multipoint option, rather than a bridge.
This field can also be used to store a password required by another endpoint system that this system calls. If a password is stored in this field, you do not need to enter it at the time of the call; the endpoint system supplies it to the system that requires it. The meeting password cannot include spaces.
Field For the endpoint systems at the site being provisioned...

Dial Plan Setup Operations
Polycom, Inc. 369
Enable Secure Mode Specifies whether to operate in secure mode (also known as security mode), which uses TLS, HTTPS, AES, digital signatures, and other security protocols, algorithms, and mechanisms. These protocols encrypt management communication over IP, preventing access by unauthorized users.
When devices at a site are provisioned to operate in secure mode, the Polycom CMA system can only perform the dynamic management operations of automatic provisioning, automatic softupdate, and directory and presence services for the devices. The Polycom CMA system cannot perform monitoring or control operations for the devices.
For more information, see the Administrator’s Guide for Polycom HDX Systems.
Enable Encryption Specifies how to encrypt calls with other sites that support AES encryption.
• Off—No encryption is used.
• When Available—AES Encryption is used with any endpoint that supports it, even if the other endpoints in the call don’t support it.
• Required for Video Calls Only—AES Encryption is used for all video endpoints in the call. Analog phone and voice over ISDN connections are allowed. Video endpoints must support AES Encryption to participate in the call.
• Required for All Calls—AES Encryption is used for all video endpoints in the call. Analog phone and voice over ISDN connections are not allowed. All endpoints must. support AES Encryption to participate in the call.
Enable Web Access Specifies whether to allow remote access to the endpoint system by the web.
NoteThe endpoint systems will restart if the remote access settings are changed. This setting does not deactivate the associated port, only the application. Use the Web Access Port setting to disable the port.
Enable Telnet Access Specifies whether to allow remote access to the system by Telnet.
NoteThe endpoint systems will restart if the remote access settings are changed. This setting does not deactivate the associated port, only the application. Use the Web Access Port setting to disable the port.
Enable SNMP Access Specifies whether to allow remote access to the system by SNMP.
NoteThe endpoint systems will restart if the remote access settings are changed. This setting does not deactivate the associated port, only the application. Use the Web Access Port setting to disable the port.
Web Access Port Specifies the port to use when accessing the endpoint system’s web interface.
If you change this from the default (port 80), specify a port number of 1025 or higher, and make sure the port is not already in use. You will need to include the port number with the IP address when you use the Polycom HDX web interface to access the system. This makes unauthorized access more difficult.
NoteThe system restarts if you change the web access port.
Field For the endpoint systems at the site being provisioned...

Polycom CMA System Operations Guide
370 Polycom, Inc.
View Site Information
To view information about an existing site
1 Go to Admin > Dial Plan and Sites > Sites or Admin > Dial Plan and Sites > Site Topology.
2 In the Sites list or Site Topology page, select the site of interest and click Site Information.
The Site Information dialog box displays the following site information.
Allow Video Display On Web
Specifies whether to allow viewing of the room where the endpoint system is located, or video of calls in which the endpoint system participates, using the endpoint system’s web interface.
NoteThis feature activates both near site and far site video displays in Web Director.
NTLM Version Specifies the NTLM version the endpoint system should use to authenticate.
General Settings
Heartbeat Posting Interval (minutes)
Specifies the frequency at which the endpoint systems poll the Polycom CMA system for a heartbeat.
In Call Stats Posting Interval (minutes)
Specifies the frequency at which the endpoint systems poll the Polycom CMA system for in call statistics.
Calendaring Settings
Automatically Discover Exchange Server
Specifies that the Polycom CMA system should discover the Microsoft Exchange server for the site by searching DNS records.
Specify Exchange Server
Specifies that the Polycom CMA system should use the Microsoft Exchange server specified in the Exchange Server Address field.
Exchange Server Address
Specifies the IP address or DNS name of the Microsoft Exchange server for the site.
LDAP Settings
Group Display Name Specifies whether the Polycom CMA system should identify groups by their common name (cn) or their DisplayName. These names are extracted from the Active Directory.
User Display Name Specifies whether the Polycom CMA system should identify users by their common name (cn) or their DisplayName. These names are extracted from the Active Directory.
Field For the endpoint systems at the site being provisioned...
Column Description
Name Name of the site.

Dial Plan Setup Operations
Polycom, Inc. 371
Assign Locations to a SiteLocation has not always been a required field for sites. If your existing sites do not include location information, use the Assign Locations command to update your sites.
To assign a location to an existing site
1 Go to Admin > Dial Plan and Sites > Sites or Admin > Dial Plan and Sites > Site Topology.
2 Click Assign Locations.
3 In the Assign Locations to Sites dialog box, select the site of interest and click Specify Location.
4 To specify a location by city name:
a From the Enter Location By drop-down list, select Search for City.
b If you know it, select the Country name for the location.
c Enter the name of the City and click Search.
The system returns the list of cities that match your entry.
d Select the appropriate city using the Country, Division, and Subdivision fields to identify it and click Select.
Description Description of the site.
Location The specified location of the site identified either by longitude + latitude or by country + city.
Bandwidth (Mbps) The specified total bandwidth limit for audio and video calls.
Bandwidth Used Identifies the percentage of the maximum bandwidth currently occupied with audio and video calls.
Device Types Identifies the type (Bridges, DMAs, VBPs, and Endpoints) and number of devices assigned to the site.
Alarms Identifies the device alarms present within the site. Alarm information includes Status, Device Name, Device Type, and Description. Click Details to view more device details.
Subnets Identifies the subnets within the site. Subnets information includes Bandwidth Used, Subnet (name), and (maximum) Bandwidth.
Column Description

Polycom CMA System Operations Guide
372 Polycom, Inc.
5 To specify a location by latitude and longitude in decimal degrees format:
a From the Enter Location By drop-down list, select Latitude/Longitude (Decimal format).
b Enter the Latitude and Longitude coordinates in decimal degrees (for example, Baltimore has a latitude of 39.3° and a longitude of 76.6°).
c Enter a Location Name. The system uses this location name for reference only; it does not validated the location name against the latitude and longitude coordinates that you enter.
d Select the Country name for the location and click Select.
The system uses the coordinates you input to place the site in the proper location on its site topology map.
6 To specify a location by latitude and longitude in DaysMinutesSeconds format:
a From the Enter Location By drop-down list, select Latitude/Longitude (DDD:MM:SS format).
b Enter the Latitude and Longitude coordinates in the required format and select
c Enter a Location Name. The system uses this location name for reference only; it does not validated the location name against the latitude and longitude coordinates that you enter.
d Select the Country name for the location and click Select.
The system uses the coordinates you input to place the site in the proper location on its site topology map.
Edit Site Settings
To edit settings for a site
1 Go to Admin > Dial Plan and Sites > Sites or Admin > Dial Plan and Sites > Site Topology.
2 In the Sites list or Site Topology page, select the site of interest and click Edit Site.
3 Edit the General Info, Site Routing, Site Subnet, and if applicable ISDN Number Assignment, sections of the Edit Site dialog box. For information about these sections, see “Add/Edit Site Dialog Box” on page 272.
NoteChanging network topology may affect the accuracy of reports based on this information. To retain historical data for the current network topology, generate reports before making changes.

Dial Plan Setup Operations
Polycom, Inc. 373
4 Click OK.
The Sites list reappears.
Edit Site Provisioning Settings
To edit the site provisioning settings for a site
1 Go to Admin > Dial Plan and Sites > Sites or Admin > Dial Plan and Sites > Site Topology.
2 In the Sites list or Site Topology page, select the site of interest and click Edit Site Provisioning Details.
3 As needed, edit the site provisioning details and click Apply. For information about these sections, see “Add/Edit Site Dialog Box” on page 272.
4 Click OK.
The Sites list reappears.
Delete a Site
To delete a site
1 Go to Admin > Dial Plan and Sites > Sites or Admin > Dial Plan and Sites > Site Topology.
2 In the Sites list or Site Topology page, select the site of interest and click Delete .
3 Click Yes to confirm the deletion.
NoteDevices that belonged to a deleted site are automatically reassigned to support Internet and VPN calls.

Polycom CMA System Operations Guide
374 Polycom, Inc.
Site Link OperationsWhen you add a site link, you enter the starting and ending sites of the link and the maximum bandwidth and bit rates available for calls (audio and video) that use the link. Links are bidirectional. After you have created a link from Site A to Site B, you automatically have a bi-directional link from Site B to Site A, although the link appears as unidirectional.
Site-link operations include:
• View the Site Links List
• Add a Site Link
• Edit a Site Link
• Delete a Site Link
NoteThe bit rate can be set at the network level, the device level, and the conference level. If there is a discrepancy between these bit rate settings, the system implements the lowest bit rate setting. The only exception, is that the bit rate in the RMX profile takes precedence over the bit rate in the conference settings.
Field Description
Name Name (ASCII onlya) of the inter-site link
a. For more information, see “Field Input Requirements” on page 9.
Description Description (ASCII onlya) of the inter-site link
From Site Identifies the first site to be linked. The drop-down list includes all defined sites and the Internet.
To Site Identifies the other site to be linked. The drop-down list includes all defined sites and an Internet/VPN option.
Link Type Specifies a direct link between two physical sites for which a path of links is defined
Total Bandwidth (kbps) The maximum available bandwidth for audio and video calls, which you set at the gateway or router. Only applies to direct links.
Call Max Bit Rate (kbps) The maximum bit rate allowed for an audio and video call. Only applies to direct links.

Dial Plan Setup Operations
Polycom, Inc. 375
View the Site Links List
To view the Site Links list
Go to Admin > Dial Plan and Sites > Site-Links.
The Site-Links list appears.
Add a Site LinkBefore you can create a site link, you must add two or more sites to the system.
To add a site link
1 Go to Admin > Dial Plan and Sites > Site-Links.
2 In the Site-Links page, click Add.
3 In the Add Site-Link dialog box, enter a Name and Description for the link and select the starting (From Site) and ending (To Site) sites.
4 Enter the Bandwidth and Max Bit Rate and click Save.
The new link appears on the Site Links page.
Edit a Site LinkYou may need to edit site links when network changes are made.
If you make a bandwidth change, the current load is not affected; however, the bandwidth available for future conferences may be affected.
Column Description
Name Name of the link
Description Description of the link
From Site First site reached in the call route
To Site Final site reached through this call link
Link Type Indicates a direct link from one site to another, which may use a path through several different sites and the Internet
Max Bandwidth The maximum available bandwidth for audio and video calls, which you set at the gateway or router. Only applies to direct links.
Max Bit Rate (kbps)
The maximum bit rate allowed for an audio and video call. Only applies to direct links.

Polycom CMA System Operations Guide
376 Polycom, Inc.
To edit a site link
1 Go to Admin > Dial Plan and Sites > Site-Links.
2 In the Site-Links list, select the link of interest and click Edit.
3 In the Edit Site-Link dialog box, edit the Name, Description, Bandwidth or Max Bit Rate.
4 Click Save.
Delete a Site LinkYou can remove site links from the Polycom CMA system.
To delete a site link
1 Go to Admin > Dial Plan and Sites > Site-Links.
2 In the Site-Links list, select the site link of interest and click Delete.
3 Click Yes to confirm the deletion.
Site-to-Site ExclusionsCreate site-to-site exclusions to explicitly deny connection between two sites for audio or video calls.
Site-link operations include:
• View the Site-to-Site Exclusion List
• Add a Site-to-Site Exclusion
• Edit a Site-to-Site Exclusion
• Delete a Site-to-Site Exclusion
View the Site-to-Site Exclusion List
To view the Site-to-Site exclusion list
Go to Admin > Dial Plan and Sites > Site-to-Site Exclusion.
The Site-to-Site Exclusions list appears.
NoteAvoid removing a link on which a scheduled conference depends.

Dial Plan Setup Operations
Polycom, Inc. 377
Add a Site-to-Site ExclusionBefore you can create a site link exclusion, you must add two or more sites to the system.
Exclusions are by definition bilateral. No call traffic is allowed to flow across the site-link in either direction.
To add a site-to-site exclusion
1 Go to Admin > Dial Plan and Sites > Site-to-Site Exclusions.
2 In the Site-to-Site Exclusions page, click Add.
3 In the Add Site-to-Site Exclusions wizard:
a Select the first site of the From/To site pair (by clicking the appropriate button). If needed, use the Search Site field to find the site.
b Select the second site of the From/To site pair (by enabling the appropriate checkbox) and click Continue.
c Review the site-to-site exclusion and if it is correct, click Save Exclusion.
Edit a Site-to-Site ExclusionYou cannot edit a site-to-site exclusion; you can only delete it and then re-add it.
Delete a Site-to-Site Exclusion
To delete a site-to-site exclusion
1 Go to Dial Plan and Sites > Site-to-Site Exclusions. .
2 In the Site-to-Site Exclusions page, select the exclusion of interest and click Delete.
3 Click Yes to confirm the deletion.
TerritoriesA territory is a set of one or more sites for which a Polycom CMA system is responsible. By default, there is one territory named Default CMA Territory, and its primary node (the CMA system responsible for it) is set to this system. For more information, see “Territories” on page 277.

Polycom CMA System Operations Guide
378 Polycom, Inc.
Territory operations include:
• View the Territory List
• Add a Territory
• Edit a Territory
• Delete a Territory
View the Territory List
To view the Territories list
Go to Admin > Dial Plan and Sites > Territories.
The Territories list appears.
Add a Territory
To add a territory
1 Go to Admin > Dial Plan and Sites > Territories.
2 In the Territories page, click Add.
3 Complete the Territory Info and Associated Sites sections of the Add Territories dialog box. For information about these fields, see “Add/Edit Territory Dialog Box” on page 278.
4 Click OK.
Edit a Territory
To edit a territory
1 Go to Admin > Dial Plan and Sites > Territories.
2 In the Territories page, select the territory of interest and click Edit.
3 Change the Territory Info and Associated Sites information of the Add Territories dialog box as needed. For information about these fields, see “Add/Edit Territory Dialog Box” on page 278.
4 Click OK.

Dial Plan Setup Operations
Polycom, Inc. 379
Delete a Territory
To delete a territory
1 Go to Admin > Dial Plan and Sites > Territories.
2 In the Territories page, select the territory of interest and click Delete.
3 Click Yes to confirm the deletion.
Network CloudsTo simplify the network topology, define network clouds to represents a hub with many sites connected to each other such as a private network or VPN.
Network cloud operations include:
• View the List of Network Clouds
• Add a Network Cloud
• Edit a Network Cloud
• Delete a Network Cloud
View the List of Network Clouds
To view the Territories list
Go to Admin > Dial Plan and Sites > Territories.
The Territories list appears.
Add a Network Cloud
To add a network cloud
1 Go to Admin > Dial Plan and Sites > Network Clouds.
2 In the Network Clouds page, click Add.
3 In the Cloud Info section of the Add Network Cloud dialog box, enter a unique and meaningful Name and Description for the cloud.
4 To create a link between a site and the network cloud:
a Click Linked Sites.

Polycom CMA System Operations Guide
380 Polycom, Inc.
b In the Search Sites field, enter all or part of the site name or location and click Find.
The list of sites containing the search phrase appear in the Search Results column.
c Select one or more sites to link with the network cloud and then click the right arrow to move them to the Selected Sites column.
5 Click OK.
Edit a Network Cloud
To edit a network clou
1 Go to Admin > Dial Plan and Sites > Network Clouds.
2 In the Network Clouds page, select the network cloud of interest and click Edit.
3 Edit the Cloud Info or to create a link between a site and the network cloud:
a Click Linked Sites.
b In the Search Sites field, enter all or part of the site name or location and click Find.
The list of sites containing the search phrase appear in the Search Results column.
c Select one or more sites to link with the network cloud and then click the right arrow to move them to the Selected Sites column.
4 Click OK.
Delete a Network Cloud
To delete a network clou
1 Go to Admin > Dial Plan and Sites > Network Clouds.
2 In the Network Clouds page, select the network cloud of interest and click Delete.
3 Click Yes to confirm the deletion.

Dial Plan Setup Operations
Polycom, Inc. 381
Dial Plan Service OperationsDial plan services are special features that video endpoint system users can invoke by dialing the prefix assigned in the Polycom CMA system to that service.
The Polycom CMA system has two default dial plan services: Conference on Demand and Simplified Dialing, which are described in the sections that follow. These services can be edited and disabled, but not deleted.
You can also add other gateway or If a service does not appear automatically when a device registers with the Polycom CMA system, you can define the service manually so that it is available for video endpoint system users. In addition, you can add services for certain third-party MCU services.
Conference on Demand
With Conference on Demand, video endpoint system users can start an unscheduled multipoint conference from their endpoint rather than requesting this service from an administrator.
The initiating endpoint uses the capabilities made available through the MCU. When Conference on Demand is enabled on the endpoint, the Polycom CMA system sends the call directly to the MCU.
The following table provides details on how the Conference on Demand service is configured.
NoteConference on Demand is only available on Polycom RMX 2000/4000 and Polycom MGC MCUs. It is not available on Polycom RMX 1000 MCUs.
Field Description
General Info
Service Type Conference on Demand (read only)
Enable Indicates whether or not the service is enabled
Available for New Groups Indicates whether or not the service is available for new user groups
Description Description (ASCII onlya) of the service. By default for this service, Conference on Demand
Service Prefix The prefix (ASCII onlya) for the service. By default for this service: con

Polycom CMA System Operations Guide
382 Polycom, Inc.
Simplified Dialing
Simplified dialing is a service that allows video endpoint system users to access gateway services by dialing 9, and then the phone number or other dialing string. Simplified dialing is enabled by default.
To use simplified dialing, the following settings are also required:
• Sites must specify the country code, city and area code, and number of digits in the subscriber line.
• The gateway must be registered with the Polycom CMA system and display in the List of Devices page.
• Gateway services must be defined.
Conference on Demand—MCU Properties
Login ID User login (ASCII onlya) for the MCU hosting the conference. This user account must be authorized to create new conferences.
Password Password (ASCII onlya) for the user login. Each time you modify the password for the MCU, you must also modify it in this page.
H.323 Network Service The corresponding service created on the MCU to implement this Polycom CMA system service. Set on the MCU (ASCII onlya).
Default Conference Properties
MGC: Video Session Indicates what users see. Set to Continuous Presence for this service.
Notes• MGC only. For RMX 2000/4000 MCUs, the profile
determines this setting.
• Select Transcoding to support IP and ISDN calls.
MGC: Bit rate (Kbps) Default bit rate for calls.
Notes• MGC only. The RMX 2000/4000 MCU bit rate is
dictated by the RMX profile.
• The video endpoint system that starts the Conference on Demand call may use a higher or lower bit rate than is specified in this page.
RMX: Profile Name The name of the RMX profile that has the conference settings for the conference.
a. For more information, see “Field Input Requirements” on page 9.
Field Description

Dial Plan Setup Operations
Polycom, Inc. 383
• The LCR table must be defined.
Gateway Service
These services are provided by a gateway to endpoints. For example, gateways usually have distinct services for each speed they support (128 Kbps, 384 Kbps, 512 Kbps, and so on) and a service for audio-only calls.
Gateway services tell the Polycom CMA system how to route the call during conversion between IP and ISDN.
You must define a gateway service for each bit rate available. These services should appear automatically in the list when the gateway registers with the Polycom CMA system. If gateway services do not appear, you can enter them manually. If the List of Services page does not include gateway services, alternate routing and least-cost routing are disabled. For details, see the following table.
Field Description
Service Type Name of the service (read only)
Enable Indicates whether this service is enabled
Available for New Groups The service is available for new user groups
Description Description of the service
Service Prefix The prefix for this service: 9.
NoteGateway and MCU services must be defined in both the Polycom CMA system and the MCU platform. They must be defined exactly the same in both locations. If you enter this information manually, be sure to type it exactly as it is entered in the MGC or RMX 2000/4000 system.
You can simplify entry of services by making sure that the MCUs and gateways on your video conferencing network are set to register with the gatekeeper in the Polycom CMA system. This setting assures the information appears automatically in the List of Services page.
Field Description
Service Type Type of service
Enable Indicates whether this service is enabled
Available for New Groups The service is available to new user groups
Description Description of the service

Polycom CMA System Operations Guide
384 Polycom, Inc.
Service Prefix The prefix for this service.
Must be a registered E.164 alias for the corresponding gateway in the Devices page for Directory Setup.
For use in simplified dialing
Device Capability Specifies the type of connection the device can handle. Select all that apply. Options are:
• H.320. Supports video and voice using the ITU H.320 standard.
• Voice. Supports voice over the PSTN network.
• Other. Supports a protocol other than H.320 or voice, such as H.321 or video over ATM.
Bit Rate (Kbps) The maximum rate at which the calls can connect.
NoteIf you select Unknown, this service cannot support simplified dialing.
Insert between prefix and first number
Specifies the character to insert in the dial string between the prefix and the first number.
For example, if you specify * as the character, the sequence the user enters would be:
77*2125551212
Insert between phone number
Specifies the character to insert in the dial string between phone numbers.
For example, if you specify # as the character to separate numbers, the sequence the user enters would be:
77*5551212#5651213
Append after full dial string
Specifies the character to append after the full dial string.
To process the call, certain gateways require a symbol be appended after the final dialing number.
For example, if you specify ** as the characters to append after the final dialing number, the sequence the user enters would be:
77*5551212#5651213#2223232**
Warning: The Polycom CMA system does not recognize dial strings that require termination after the ISDN number and have an extension after the terminated ISDN.
For example, the CMA system does not recognize the following dial string:
165024710000**3452
Field Description

Dial Plan Setup Operations
Polycom, Inc. 385
MCU Service
These services allow devices to use specific MCU features and settings when making a call. For example, an MCU can define a service for a multipoint video call with continuous presence at 384 Kbps and another service for video switching at 256 Kbps.
MCU services and their associated prefixes are defined at the MCU. For MGC or RMX 2000/4000 devices, the MCU services should appear automatically in the List of Services page when the MCU registers with the Polycom CMA system. Because third-party MCUs may not automatically register, you must enter them manually in the Polycom CMA system.
Use MCU services to dial the IP gateway segment that translates between IP and ISDN, in conference calls with two or more participants, or continuous presence.
Services operations include:
• View the Services List
• Add a Service
• Edit a Service
• Delete a Service
Field Name Description
Service Type Type of service.
Enable Indicates whether this service is enabled or not.
Available for New Groups The service is available for new user groups.
Description Description of the service. To identify it easily in the List of Services page, include the prefix and the MCU feature (for example, 384 K video switching).
Service Prefix The prefix for this service, which must be a E.164 alias that is registered for the MCU on the Device page.

Polycom CMA System Operations Guide
386 Polycom, Inc.
View the Services ListThis page shows the services that have been defined in your dial plan. These services are available when you place unscheduled calls.
To view the Services list
Go to Admin > Dial Plan > Services.
The Services list appears.
Add a ServiceIf a gateway or MCU service does not appear automatically when the device registers with the Polycom CMA system, you can define the service manually so that it is available for use in unscheduled calls. In addition, you can add services for certain third-party MCU services.
To add a service
1 Go to Admin > Dial Plan > Services.
2 In the Services list, click Add Service.
3 Complete the General Info, and if applicable Simplified Dialing or Conference on Demand, sections of the Add Service dialog box.
NoteE.164 aliases appear in this list as follows:
• For MGC and RMX 2000/4000 devices, they appear as gateway services.
• For a device’s H.323 services, they (including the alias prefix) appear as MCU services. Gateway service prefixes are the E.164 aliases of the MCU’s gateway session profiles.
Column Description
Prefix Prefix of the service.
Type The type of service. Available types include System, Gateway, and MCU.
Description Description of the service.
Tip: When completed automatically, the description reflects the value entered in the MGC or RMX manager.
Enabled By default, services are enabled. To disable them, clear the Enabled check box.

Dial Plan Setup Operations
Polycom, Inc. 387
4 Click OK.
The new service is added to the system.
Edit a ServiceYou can make changes to a service.
To edit a service
1 Go to Admin > Dial Plan > Services.
2 In the Services list, select the service of interest and click Edit Service.
3 As required, edit the General Info, and if applicable Simplified Dialing or Conference on Demand, sections of the Edit Service dialog box.
4 Click OK.
Delete a ServiceYou can delete a gateway or MCU service from the Polycom CMA system. You cannot delete the Conference on Demand or Simplified Dialing service.
To delete a service
1 Go to Admin > Dial Plan > Services.
2 In the Services list, select the service of interest and click Delete Service.
3 Click Yes to confirm the deletion.
NoteBe sure that the information you enter in the Polycom CMA system matches the information entered in the MCU.

Polycom CMA System Operations Guide
388 Polycom, Inc.
Dial Rule OperationsDial rules describe how the Polycom CMA system gatekeeper should resolve addresses in an incoming dial string to route a call. This dial string may include an IP address, a string of numbers that begin with a prefix associated with a service, a string that begins with a country code and city code, or a string that matches a particular alias for a device.
Dial strings may match multiple dial rules. However, you can assign a priority to each dial rule. When the Polycom CMA system gatekeeper receives a call request and associated dial string, it reviews the dial rules in order of priority. The first matched (highest priority) dial rule is executed.
Field Description
General Info
Name Name (ASCII onlya) of the dial rule.
Description Description (ASCII onlya) of the dial rule, which can be up to 256 characters long.
Priority Priority number of the dial rule, which determines which rule the Polycom CMA system uses first.
More than one dial rule may have the same priority. In that case, rules with the same priority are applied in random order.
Enabled Select the check box to enable the rule.
Pattern Type Specifies the type of pattern to be matched. Available patterns include:
• Local Directory Services
• DNS Name
• IP Address
• Prefix
• Prefix Range
Applicable Site Site to which this pattern applies. You can select a specific site or all sites.
This field is not available when the Pattern Type is Local Directory Services.
Routing Action > Dial String Manipulation
IP Address Pattern Data Specifies the criteria (ASCII onlya) to use to match the pattern type and additional changes to make when routing the call.
This field is available when the Pattern Type is DNS Name, IP Address, or Prefix.
This field is not available when the Pattern Type is Local Directory Services or Prefix Range.

Dial Plan Setup Operations
Polycom, Inc. 389
Start Value The starting number to use as a prefix, which displays only for rules with the Prefix Range pattern type.
End Value The ending number to use as a prefix, which displays only for rules with the Prefix Range pattern type
# Characters to remove Number of digits to remove (from the start or from the end) of the dialed string
This field is available when the Pattern Type is Local Directory Services, Prefix, and Prefix Range.
This field is not available when the Pattern Type is DNS Name or IP Address.
Prefix to add Prefix to add to the dialed string
This field is available when the Pattern Type is Local Directory Services, Prefix, and Prefix Range.
This field is not available when the Pattern Type is DNS Name or IP Address.
Routing Action > Action to perform
Action Specifies what action to take for calls that match the pattern type and criteria.
Action to perform when the pattern is matched. Depending on the Pattern Type, options may include:
• Route
• Block
• Route within region
• Route out of region
• Route to a gateway with LCR applied
• Route to a gateway service
• Route to a list of gateway services
• Route to a trusted neighbor
Trusted Neighbors
Available Region When the action is Route to a trusted neighbor, select the region to which you want to route.
Gateway Services
Selected Gateway Services (prioritized)
When the action is Route to a gateway service, this field lists the selected gateway services.
You can define multiple gateway services for a rule. The first in the list is the default gateway service. Others are used in priority order when the primary gateway service is not available.
a. For more information, see “Field Input Requirements” on page 9.
Field Description

Polycom CMA System Operations Guide
390 Polycom, Inc.
Default Dial RulesThe Polycom CMA system has three default dial rules. With these defaults, the system can route most calls except those requiring an external DNS lookup.
• Internal IP - This dial rule allows the system to identify the incoming dial string as an IP addresses and routes the call out of the region. By default, this dial rule applies to all sites.
• Alias - This dial rule allows the system to identify the incoming dial string as belonging to the local directory and routes the call to the local device or service, as required.
• DNS Name - This dial rule allows the system to identify the incoming dial string as a DNS name and block the call.
Parts of a Dial RuleA dial rule consists of a pattern type paired with a routing action. When the dialed string uses a pattern that matches the pattern type, the associated rule is applied.
Pattern TypesA pattern type tells the Polycom CMA system how to find a match for the dial string. The following table shows the available pattern types.
NoteDo not delete the default dial rules or the CMA system will not be able to route calls correctly. You can disable a dial rule by editing it and clearing the Enabled check box for the rule.
Pattern Type Description
Local Directory Services
Search the List of Devices and List of Services. Includes aliases, which are searched before the service prefix.
DNS Name Look up a DNS Name
IP Address Look for an IP addresses in the IPV4 format
Prefix Look for a prefix specified in the dial rule
Prefix Range Look for a prefix within the range of prefixes specified in the dial rule

Dial Plan Setup Operations
Polycom, Inc. 391
Routing ActionsA routing action informs the Polycom CMA system what to do based on the dial rule’s associated pattern type. The following table shows the available routing actions.
Examples of Custom Dial RulesYou use custom dial rules to perform these tasks:
• Block calls. For example, you can block all calls to 900 numbers, which usually charge a per-minute fee. Create a dial rule with these settings:
— Pattern type: Prefix
— Prefix to match: 900
— Routing action: Block
Routing Action
Pattern Type Description
Route All Allow the call to pass
Block All Block the call
Route within region
IP Address Route to any IP address inside the region
Route out of region
IP Address Route to any IP address outside the region
NoteThe originating site’s Internet access rules still apply.
Route to a gateway with LCR
Prefix and Prefix Range
Remove the prefix specified in the dial rule and route the remaining dial string to a gateway service, which has the specified LCR table
Route to a gateway service
Prefix and Prefix Range
Remove the prefix specified in the dial rule and route the remaining dial string to the specified gateway service
Route to a list of gateway services
Prefix and Prefix Range
Modify the dial string specified in the dial rule and route the remaining dial string to the specified gateway service.
Route to a trusted neighbor
Prefix and Prefix Range
Modify the dial string as specified in the dial rule and ask the specified neighboring gatekeeper to route the modified dial string. If the neighboring gatekeeper agrees, route the call.
NoteThe neighboring gatekeeper must be configured as a region in the CMA system.

Polycom CMA System Operations Guide
392 Polycom, Inc.
• Route to a neighboring gatekeeper. If you have entered information about neighboring gatekeepers in the List of Regions page, you can create a rule to route calls to another gatekeeper. Create a dial rule with these settings:
— Pattern type: Prefix Range
— Prefixes to match: Specify the range.
— Routing action: Select Route to a trusted neighbor and the region for the neighboring gatekeeper to which you want to route calls.
• IP-specific routing. You can specify which calls may connect, according to the IP address. For example, you could allow calls from San Jose to Atlanta, but not from San Jose to Pleasanton.
Dial Rule operations include:
• View the Dial Rules List
• Add a Dial Rule
• Enable or Disable Dialing Rules
• Edit a Dial Rule
View the Dial Rules List
To view the Dial Rules list
Go to Admin > Dial Plan > Dial Rules.
The Dial Rules list appears.
Column Description
Name The name of the dial rule
Pattern Type The pattern type in use for this rule. Options are:
• Local Directory Services
• DNS Name
• IP Address
• Prefix
• Prefix Range
For more information, see “Parts of a Dial Rule” on page 390.
Pattern Data Additional criteria that must be met to apply this rule

Dial Plan Setup Operations
Polycom, Inc. 393
Add a Dial Rule
To add a dial rule
1 Go to Admin > Dial Plan > Dial Rules.
2 In the Dial Rules list, click Add Dialing Rule.
3 Complete the General Info, Routing Action, Trusted Neighbors, and Gateway Services sections of the Add Dialing Rule dialog box.
4 Click OK.
The new dial rule is added to the system.
Enable or Disable Dialing RulesYou can enable or disable dial rules.
Routing Action The routing action used by this rule. Options are:
• Route
• Block
• Route within region
• Route out of region
• Route to a GW with LCR applied
• Route to a GW service
• Route to a list of GW services
• Route to a trusted neighbor
NoteNot all actions are available for all pattern types.
Site The sites for which this rule is used. May be all sites or a specific site
Priority The priority assigned this rule
Enabled Indicates whether or not the dial rule is enabled
Column Description
NoteUse caution when changing the default dial rules, which enable basic operations in the CMA system.

Polycom CMA System Operations Guide
394 Polycom, Inc.
To enable or disable a dialing rule
1 Go to Admin > Dial Plan > Dial Rules.
2 In the Dial Rules list, select the dial rule of interest and click Edit Dialing Rule.
3 On the Dial Rules - General Information page, check or clear the Enabled check box.
4 Click OK.
Edit a Dial Rule
To edit a dial rule
1 Go to Admin > Dial Plan > Dial Rules.
2 In the Dial Rules list, select the dial rule of interest and click Edit Dial Rule.
3 In the Edit Dial Rule dialog box, make the required changes.
4 When you are finished, click OK.
Least-Cost Routing OperationsLeast-cost routing (LCR) allows the Polycom CMA system to route ISDN or POTS calls made on paths that incur the lowest expense. You can route calls from one site through a gateway in another site by referencing LCR tables.
Least-cost routing is useful when sites already have a high-bandwidth connection between them.
Least-cost routing works with the Polycom CMA system’s other routing features.
Setting up least-cost routing requires you to:
• Determine the LCR information to enter in the Polycom CMA system.
• Create LCR tables.
• In the device record for MCUs:
— Define an H.320 service and select the LCR table to use.
— Define a gateway service and select the H.320 service associated with the LCR table.
NoteMake sure the LCR tables you define match the network setup.

Dial Plan Setup Operations
Polycom, Inc. 395
You cannot use least-cost routing when:
• The route cannot be identified.
• The required resources are unavailable.
• Bandwidth limitations exist on the WAN.
How Least-Cost Routing WorksEach LCR table defines dial strings, which include the country code, area code, prefix, and a weighted cost for commonly made calls. You usually create one LCR table per site.
The following table is an example of an LCR table.
The Polycom CMA system compares the dial string for a call to the dial strings in LCR tables. The dial string can match at the country code, area code, or prefix level. The CMA system reads the “# of digits to strip” field to determine how many digits to remove.
Before determining the final call routing, the Polycom CMA system considers cost (through LCR tables), bandwidth resources (through site topology and device group policies), and gateway availability.
Example of Least-Cost RoutingCompany ABC has three sites: Site A in San Jose, CA, Site B in Monterey, CA, and Site C in Washington, D.C. All sites have gateways.
LCR Tables for Three SitesThe LCR tables included area codes that are used frequently in each site and considered that calls are made frequently from Site C to Southern California.
Country Code Area Code Prefix Weighted Cost
1 408 565 0
1 408 0
1 650 0
1 415 5
NoteFor areas of the United States that do not require you dial an access code before the area code, exclude this number when you define the number of digits to strip.

Polycom CMA System Operations Guide
396 Polycom, Inc.
The following table lists area codes for the San Francisco Bay Area and Southern California. The prefix 755 for the 408 area code applies for all numbers in Site A.
The following table lists area codes for Washington, D.C., Eastern Maryland, and Northeastern Virginia.
Area Code Prefix Weighted Cost
408 755 0
408 0
650 0
510 0
925 0
415 5
831 5
213 10
310 10
714 10
20
Area Code Prefix Weighted Cost
202 238 0
202 0
240 0
301 0
741 0
703 0
410 5
443 5
540 5
804 10
20

Dial Plan Setup Operations
Polycom, Inc. 397
The following table lists area codes for San Jose, Monterrey, and Southern California.
Call Scenario OneSite C can call San Jose using ISDN through one of two routes:
• Through the Site C gateway to the local phone system, making a long distance connection, at a higher cost per minute.
• From Site C through the direct inter-site link to Site A and out its gateway, at a lower cost per minute.
Call Scenario TwoCalls are frequently made from Site C to Los Angeles. The area codes for some parts of Southern California are included in the LCR tables for Sites A and B, because it is less expensive to make an intrastate long distance call within California than an interstate long distance call from Washington, D.C. to Los Angeles.
By including Southern California area codes in LCR tables for San Jose and Monterey, if the bandwidth for the San Jose gateway is saturated, the call from Site C can be routed through the Monterey gateway. The priority is to call from Site A or Site B, because the LCR tables share a relative cost to dial the area codes for Los Angeles.
Area Code Prefix Weighted Cost
831 477 0
831 0
408 5
213 10
310 10
714 10
20
NoteIf you dial an area code that is not in an LCR table, the call goes through the gateway from which the call originates.

Polycom CMA System Operations Guide
398 Polycom, Inc.
Determining Area CodesIt is recommended you enter area codes for:
• The area in which the site is located.
• The area surrounding the site.
• Frequently called numbers.
You should also include special rate plans for intrastate calling.
Determining Country CodesIf you make international calls and you determine that calls to a certain country are less expensive from a particular gateway, enter the dial string for this country in the LCR table for the selected gateway.
Determining the Weighted CostWhen you enter call strings in an LCR table, associate a weighted cost with each one. You can base the cost on a monetary value or ratio that compares costs between several locations. The weighted cost determines which call string is most cost-effective to use.
You can calculate costs for the following types of calls:
• Local
• Local toll
• Intrastate
• Interstate
• International long distance
Field Description
Name Name (ASCII onlya) for the LCR table.
a. For more information, see “Field Input Requirements” on page 9.
Description (Optional) (ASCII onlya)
Country Country code for the location to which this call is made.
City Code City or area code for the location to which this call is made.
Prefix The prefix is the first three numbers in a 7-digit dial string.
# Digits to Strip The number of digits to strip before dialing.
Cost Weighted cost for each call to the selected area or city code.

Dial Plan Setup Operations
Polycom, Inc. 399
LCR operations include:
• View the Least Cost Routing Tables List
• Add a Least Cost Routing Table
• Edit a Least Cost Routing Table
• Delete a Least Cost Routing Table
View the Least Cost Routing Tables List
To display the list of least cost routing tables
Go to Admin > Dial Plan > LCR Tables.
The LCR Tables list appears.
Add a Least Cost Routing Table
To add a LCR table
1 Go to Admin > Dial Plan > LCR Tables.
2 In the LCR Tables list, click Add LCR.
3 In the Add LCR Tables dialog box, enter the Name, Description, and New Route information required to create a new table.
4 Click Add.
5 Repeat step 3 and 4 for add additional routes to the table.
6 Click OK.
Edit a Least Cost Routing Table
To edit an LCR table
1 Go to Admin > Dial Plan > LCR Tables.
2 In the LCR Tables list, select the table of interest and click Edit LCR.
Column Description
Name Name of the LCR table.
Description Description of the LCR table.

Polycom CMA System Operations Guide
400 Polycom, Inc.
3 In the Edit LCR dialog box, edit the Name, Description, and New Route information as required.
4 Click Save.
The changes you made apply to all MCUs associated with a gateway service that uses this LCR table.
Delete a Least Cost Routing Table
To delete an LCR table
1 Go to Admin > Dial Plan > LCR Tables.
2 In the LCR Tables list, select the table of interest and click Delete LCR.
3 Click Delete to confirm the deletion.

Polycom, Inc. 401
33Remote Alert Setup Operations
This chapter describes how to configure the Polycom® Converged Management Application™ (CMA™) system to send alerts to users via email for specific types of system and endpoint events. It includes these topics:
• Set Up Remote Alerts
• Edit a Remote Alert Profile
• Disable a Remote Alert Profile
• Delete a Remote Alert Profile
• Disable Polycom CMA System Remote Alerts
Set Up Remote Alerts The Polycom CMA system remote alerts functionality is very flexible. It allows you to:
• Assign different severity levels to different classifications of CMA system and Endpoint alerts.
• Create different alert profiles so that different types of alerts can be sent to different people. So if you have administrators who specialize by device type (for example bridges, endpoints, or servers), you can create profiles that notify each type of administrator of failures related to those specific types of devices.
To set up remote alerts, you must complete the following tasks:
1 Set Up Polycom CMA System-generated Email Account.
2 Enable Polycom CMA System Remote Alerts.
3 Set Polycom CMA System Remote Alert Level Settings.
4 Set Endpoint Alert Level Settings.
5 Add a Remote Alert Profile.
6 Associate a Remote Alert Profile With a User.

Polycom CMA System Operations Guide
402 Polycom, Inc.
Set Up Polycom CMA System-generated Email Account
To set the Polycom CMA system-generated email account
1 Go to Admin > Server Settings > Email.
2 On the Email page, enter the email account (ASCII only) from which the Polycom CMA system will send conference notification emails and system alerts.
By default, the Polycom CMA system emails are sent from the [email protected] email account.
3 Specify the IP address of the mail server from which the Polycom CMA system will send conference notification emails.
4 Click Update.
Enable Polycom CMA System Remote Alerts
To enable Polycom CMA system remote alerts
1 Go to Admin > Server Settings > Remote Alert Setup.
2 On the Remote Alert Setup page, select Enable Remote Alerts.
3 Set a Remote Alert quiescent time, which is the amount of time (in minutes) the system should wait after alerts have been detected but not cleared before starting the alert notification process, and if applicable, the remote alert notification process.
4 Click Update.
Notes• Many email servers will block or discard emails without a qualified From:
address. To avoid this issue, make sure each person with Scheduler permissions has a valid email address.
• Many email servers will block or discard emails from untrusted domains, in which case you may need to change the default Polycom CMA system email address to one in a trusted domain.

Remote Alert Setup Operations
Polycom, Inc. 403
Set Polycom CMA System Remote Alert Level SettingsThe Polycom CMA system monitors and reports events regarding its performance, connections, and services. It categorizes alerts into three alert levels: Info, Minor, or Major.
By default the Alert Severity Level is set to Info for all of the CMA Alert Types it reports. You have these options:
• You can leave all of the Alert Severity Levels set to Info and create a single remote alert profile that allows you to notify all users assigned that profile about system events of all types.
• You can change some of the Alert Severity Levels to either Minor or Major and create multiple remote alert profiles that notify different users of system events of different types and severity levels.
To set the Polycom CMA system remote alert level settings
1 Go to Admin > Alert Settings > CMA Alert Level Settings.
2 On the CMA Alert Level Settings page, change the Alert Severity Level for the following CMA Alert Type system events, as required.
Alert Type Alert indicates...
Bridge Down A Polycom MCU (RMX or MGC) has failed.
Database Connection Down
The connection to the database has been lost.
LDAP Connection Down
The connection to the LDAP server has been lost.
LDAP System Account Password Failure
The connection to the LDAP server could not be established because the account password was incorrect.
CMA Failover Occurred
(In redundant Polycom CMA system configurations only.)
The system has failed over from one system server to the other.
License Capacity Threshold Exceeded
The number of available seats defined by the installed license is within 5% of the total license capacity.
Bridge Time Discrepancy
A difference between the clock on the Polycom MCU (RMX or MGC) and the Polycom CMA system clock.
CMA Monitor Service Stopped
(In redundant Polycom CMA system configurations only.) The Polycom CMA system redundancy monitoring service is not running.

Polycom CMA System Operations Guide
404 Polycom, Inc.
3 Click Update.
Set Endpoint Alert Level SettingsMonitored endpoints send events to the Polycom CMA system. The Polycom CMA system categorizes and reports endpoint alerts into three alert levels: Info, Minor, or Major.
By default the Alert Severity Level is set to Info for all of the Endpoint Alert Types it reports. You have these options:
• You can leave all of the Alert Severity Levels set to Info and create a remote alert profile for each endpoint type being monitored that allows you to notify all users assigned that profile about all endpoint events applicable to that endpoint type.
• You can change some of the Alert Severity Levels to either Minor or Major and create multiple remote alert profiles that notify different users of endpoint events of different types and severity levels.
To set the endpoint alert level settings
1 Go to Admin > Alert Settings > Endpoint Alert Level Settings.
2 On the Endpoint Alert Level Settings page, change the Alert Severity Level for the different types of endpoint events as required.
Redundant Server Down
(In redundant Polycom CMA system configurations only.) The connection or synchronization between the primary and secondary server has been lost.
Redundancy Conflict
(In redundant Polycom CMA system configurations only.) Both the primary and secondary system servers believe they are the active server.
Site Bandwidth Threshold Exceeded
The site bandwidth threshold, which is set at 90% of capacity, has been exceeded.
Subnet Bandwidth Threshold Exceeded
The subnet bandwidth threshold, which is set at 90% of capacity, has been exceeded.
Site Link Bandwidth Threshold Exceeded
The site link bandwidth threshold, which is set at 90% of capacity, has been exceeded.
Alert Type Alert indicates...

Remote Alert Setup Operations
Polycom, Inc. 405
3 Click Update.
Alert Type Alert indicates...
Remote Control Battery Low
The battery in the endpoint’s remote needs to be replaced.
Credentials Required
The endpoint system requires that the user enter a valid username and password.
Credentials Failed
An attempt to log into the endpoint system failed.
HTTP Forbidden The endpoint must be used in https: mode only.
Device Not Responding
The endpoint is not responding to the Polycom CMA system.
Heartbeat Timeout
The endpoint did not send a hearbeat to the Polycom CMA system within the required timeout period.
Gatekeeper Status Unknown
The Polycom CMA system gatekeeper cannot determine the connection status of the endpoint.
Gatekeeper Rejected
The Polycom CMA system gatekeeper rejected the endpoint’s attempt to register.
Gatekeeper Unregistered
The endpoint is not registered to the gatekeeper.
Directory Status Unknown
The Polycom CMA system gatekeeper cannot determine the directory status of the endpoint.
Directory Not Registered
The endpoint is not registered to the directory service.
Presence Status Unknown
The Polycom CMA system gatekeeper cannot determine the presence status of the endpoint.
Presence Unregistered
The endpoint is not registered to the presence service.
User Assistance Request
The endpoint user sent a request for help.
Management URL Not Set
The Polycom CMA system is not one of the management URLs set on the endpoint, possibly because the management URL list is full.
NoteBecause endpoint systems do not have an interface to manually delete management URLs, if the management list is full you must disconnect the endpoint’s network cable for two minutes. This should clear up all the mgmt server URLs.

Polycom CMA System Operations Guide
406 Polycom, Inc.
Add a Remote Alert ProfileYou can add a remote alert profile to identify which device alerts from which devices should be sent as part of a remote alert profile. Note that using a combination of setting alerts by device type and by specific types, provide additional granularity in managing device alerts.
To add a remote alert profile
1 Go to Admin > Alert Settings > Remote Alert Profiles.
2 On the Remote Alert Profiles page, click Add.
3 In the Add Remote Alert Profile dialog box, enter a Name and Description for the profile.
4 To activate the profile, select Enable Profile.
5 Configure one of the following:
— To have all Polycom CMA system alerts sent as part of this profile, select Info, Minor, and Major.
— To have a subset of Polycom CMA system alerts sent as part of this profile, select any combination of Info, Minor, or Major. These selections work in conjunction with the Polycom CMA system alert level settings you choose previously.
— To have no Polycom CMA system alerts sent as part of this profile, leave Info, Minor, and Major cleared.
6 To use the device type to identify which devices and device alerts should be sent as part of this profile, click Alert by Device Type and configure one of the following. For endpoint systems, these selections work in conjunction with the endpoint alert level settings you choose previously.
a To have all device alerts for all device types sent as part of this profile:
In the Device Type Alert Level Mapping page, select Info, Minor, and Major for all of the device types.
b To have a subset of device alerts for all device types sent as part of this profile:
In the Device Type Alert Level Mapping page, select any combination of Info, Minor, or Major for each device type.
c To have all device alerts for a subset of device types sent as part of this profile:
In the Device Type Alert Level Mapping page, select Info, Minor, or Major for each device type to be included in the profile. Alerts for those device types that do not have an alert level selected will not be included.
7 To use the device name to identify which devices and device alerts should be sent as part of this profile, click Alert by Device.

Remote Alert Setup Operations
Polycom, Inc. 407
a As needed, use the Filter to customize the device list.
b In the Available Devices list, select the devices to add to the profile. Use CTRL to select multiple devices.
c Click the down arrow to add the devices to the Monitored Devices list and configure one of the following:
d To have all device alerts for all selected devices sent as part of this profile:
For the devices in the Monitored Devices list, select Info, Minor, and Major for each device.
e To have a subset of device alerts for all selected devices sent as part of this profile.
For the devices in the Monitored Devices list, select any combination of Info, Minor, or Major for each device.
f To have all device alerts for a subset of device types sent as part of this profile:
For the devices in the Monitored Devices list, select Info, Minor, and Major for each device to be included in the profile. Alerts for those devices in the Monitored Devices list that do not have an alert level selected will not be included.
8 Click OK.
Associate a Remote Alert Profile With a User
To associate a remote alert profile with a user
1 Go to User > Users.
2 To search for a user:
a In the Search field of the Users page, search for the user of interest.
Notes• If you set device alerts for specific devices, these settings override settings
made on the Alert by Device Type page. The settings are not cumulative.
• You cannot set the system up to send device alerts for specific desktop video endpoints. Polycom CMA Desktop and Polycom PVX endpoints are not displayed in the Available Device list.
NoteSearches for a user on the Polycom CMA system Users page are case-insensitive, prefix searches of the Username, First Name, and Last Name fields.

Polycom CMA System Operations Guide
408 Polycom, Inc.
b To search both local and enterprise users, clear the Local Users Only checkbox and press Enter.
The first 500 users in the database that match your search criteria are displayed in the Users list.
c If the list is too large to scan, further refine your search string.
3 Select the user of interest and click Edit User.
4 In the Edit User dialog box, click Associated Alert Profile.
5 Select the Remote Alert Profile to associate with the user.
6 Click OK.
Edit a Remote Alert Profile
To edit a Remote Alert Profile
1 Go to Admin > Alert Settings > Remote Alert Profiles.
2 On the Remote Alert Profiles page, select the profile of interest and click Edit Remote Alert Profile.
3 As required, edit the General Info, Alert by Device Type, and Alert by Device sections of the Edit Remote Alert Profile dialog box.
4 Click OK.
Disable a Remote Alert Profile
To disable a Remote Alert Profile
1 Go to Admin > Alert Settings > Remote Alert Profiles.
2 On the Remote Alert Profiles page, select the profile of interest and click Edit Remote Alert Profile.
3 Clear Enable Profile.
4 Click Update.

Remote Alert Setup Operations
Polycom, Inc. 409
Delete a Remote Alert Profile
To delete a Remote Alert Profile
1 Go to Admin > Alert Settings > Remote Alert Profiles.
2 On the Remote Alert Profiles page, select the profile of interest and click Delete Remote Alert Profile.
3 Click Yes to confirm the deletion.
The profile is deleted from the Polycom CMA system.
Disable Polycom CMA System Remote Alerts
To disable all (system and device) Polycom CMA System remote alerts
1 Go to Admin > System Settings > Remote Alert Setup.
2 On the Remote Alert Setup page, clear Enable Remote Alerts.
3 Click Update.

Polycom CMA System Operations Guide
410 Polycom, Inc.

Polycom, Inc. 411
34System Backup and Recovery Operations
This chapter provides an overview of the Polycom® Converged Management Application™ (CMA™) backup and recovery procedures. It includes these topics:
• Recovery Operations - Reset First Time Setup
• Restart or Shut Down a Polycom CMA System
• Emergency Shut Down of a Polycom CMA System
• Disaster Recovery - Restore to Factory Default Image
Recovery Operations - Reset First Time SetupTo recover after a major system failure, you must Reset First Time Setup. This:
• Resets the system to point to its internal database
• Resets the local admin password to the factory default
• Re-enables the First Time Setup pages
• Allows you to reconfigure the Polycom CMA system network, database, and LDAP settings
To reset First Time Setup
1 Connect a computer to the Polycom CMA system server through the RS-232 serial port.
NoteBefore you reset a system using this First Time Setup option, make sure you know the standard, factory-set Polycom CMA system administrator username and password. You’ll need it to log into the Polycom CMA system after reseting it.

Polycom CMA System Operations Guide
412 Polycom, Inc.
2 Power on the computer and server and access the serial console and start a Hyperterm session.
3 In the Properties dialog box, enter these values for port settings.
— Bits per second: 19200
— Data bits: 8
— Parity: None
— Stop bits: 1
— Flow control: None
4 On the Root menu, select 1. Reset First Time Setup.
The system resets itself to its first time setup state. When the reset is complete, a success message displays on the console.
5 Exit the serial console.
6 Open a browser window and in the Address field enter the Polycom CMA system server IP address or host name.
7 When the Polycom CMA system Log In screen appears, enter the factory-set Username and Password.
8 Review the First Time Setup pages and make required changes to any settings.
The system is restored and is ready for use.
Restart or Shut Down a Polycom CMA SystemYou have several options for an orderly shutdown or restart of a Polycom CMA system in non-emergency situations.
The options for an orderly shutdown or restart of the system include:
• Use the Shutdown option on the user interface when you must disconnect the Polycom CMA system server for some reason; for example, to move it. All Polycom CMA system functionality is stopped during a Shutdown.
• If the system user interface is not available and you must shut down the system, press once (but do not hold) the power switch on the rear panel of the Polycom CMA system server. This is equivalent to selecting the Shutdown option described previously.
• Use the Restart option on the user interface when you must cycle the Polycom CMA system for some reason; for example, if the system locks up or loses connection with the database.
If you have access to the Polycom CMA system user interface, you can also stop future scheduled conferences from starting automatically and wait for active conferences to end before performing an orderly shut down or restart of the system.

System Backup and Recovery Operations
Polycom, Inc. 413
During a restart, the system will drop all IP conferences. In general, ISDN conferences will not drop. Also, devices registered to the gatekeeper will drop. IP devices not registered with the gatekeeper can continue in conference.
To restart or shut down a Polycom CMA system
1 (Optional) To stop future scheduled conferences from starting before you perform the restart or shutdown:
a Go to Admin > Conference Settings.
b Check the Conference Auto-Launch Disabled checkbox and click Update.
c Go to Admin > Dashboard.
d Monitor the Today’s Conferences section to determine when all active conferences are completed.
2 Click Restart or Shutdown , as required.
In a redundant Polycom CMA system configuration, the system displays a warning indicating that it is initiating a failover.
If you select Restart, it may take the Polycom CMA system up to 10 minutes to shutdown and then restart all server processes.
Emergency Shut Down of a Polycom CMA SystemYou have two options to perform an emergency shut down of a Polycom CMA system. Use these options only when you must immediately cut power to the server.
• Press and hold the power switch on the rear panel of the Polycom CMA system server.
• Pull the system power cord.
After an emergency shutdown (i.e. when you press and hold the power switch, or you pull the system cord, or you lose power to the system), a system battery may continue to cache information until the battery runs out. In this case, the system enters an error state. To recover, you must connect a keyboard and monitor to the Polycom CMA system and boot the system to clear the error message. Then the system can begin recovery.
Disaster Recovery - Restore to Factory Default ImageIn a disaster recovery situation, your Polycom Global Services (PGS) support representative may instruct you to restore your Polycom CMA system to its factory default image.

Polycom CMA System Operations Guide
414 Polycom, Inc.
To perform this disaster recovery procedure, you will need the Restore to Factory Default DVD that shipped with the Polycom CMA system server. This DVD has the base image of the Polycom CMA system server software.
WARNING• This is a last resort, so never do this without being instructed to do so by PGS
support.
• This procedure will wipe out your system database and all other system data.
• The Restore to Factory Default DVD is specific to the Polycom CMA system server type: either 4000 or 5000.

Polycom, Inc. 415
35System Troubleshooting
This chapter has Polycom® Converged Management Application™ (CMA™) system troubleshooting information. It includes the following topics:
• Troubleshooting Utilities Dashboard
• Troubleshooting Specific Types of Issues
— Registration Problems and Solutions
— Point-to-Point Calling Problems and Solutions
— MCU and Gateway Dialing Problems and Solutions
— Conference On Demand Problems and Solutions
Troubleshooting Utilities DashboardThe Polycom CMA system has a Troubleshooting Utilities dashboard that brings together on one page access to all of the information you might need to diagnose system issues. It includes access to various diagnostic files and informational panes.
The diagnostic files include:
• Traces—Use this option to generate and download a network sniffer trace that can help you examine the traffic to and from the Polycom CMA system.
• Windows Event Logs—Use this option to generate and download a WindowsEventLogs.zip file that includes the Application, Security, and System logs. These logs store events logged by applications, events related to logon and resource use, and events logged by Windows system components respectively. For more information about these event logs, see Microsoft Technet.
• CMA System Logs—Use this option to generate and download a GetAllLogs.zip file that includes all of the Polycom CMA system log files. For more information about these system logs, see “System Log Files” on page 225.

Polycom CMA System Operations Guide
416 Polycom, Inc.
The information panes include:
• Systems—Displays summary information about the devices registered with the Polycom CMA system. For more information, see page 238.
• CMA Configuration—Displays information about the configuration of the Polycom CMA system. For more information, see page 233.
• CMA Info—Displays general information about the Polycom CMA system. For more information, see page 234.
• CMA Licenses—Displays information about how the Polycom CMA system is licensed. For more information, see page 236.
• Gatekeepers—Displays information about the Polycom CMA system as a gatekeeper. For more information, see page 236.
• Users Logged In—Displays the type and number of users that are currently logged into the system. For more information, see page 233.
• Services—Displays information about the Polycom CMA system services. For more information, see page 234.
Troubleshooting Specific Types of IssuesThis section provides information on troubleshooting specific types of issues on the Polycom CMA system. It includes these topics:
• Registration Problems and Solutions
• Point-to-Point Calling Problems and Solutions
• MCU and Gateway Dialing Problems and Solutions
• Conference On Demand Problems and Solutions
Registration Problems and Solutions
Problem Description Solutions
Unable to place calls to an MCU conference room from a registered Polycom HDX system
The Polycom CMA system rejects the ARQ stating that the "endpoint is not registered" to the gatekeeper even though the system indicates it is registered.
• The MCU is not registered to the gatekeeper

System Troubleshooting
Polycom, Inc. 417
When the gatekeeper registration is set to auto- discovery, endpoints do not register.
When auto-discovery is used, a GRQ message is broadcast and sent over multicast. However, the Polycom CMA system must be able to receive one of these messages, and does not respond to this message if it is not the default gatekeeper.
• Verify that the Default Gatekeeper check box is selected in the Admin > Gatekeeper Settings > Primary Gatekeeper page.
• Verify that a UDP broadcast from the endpoint’s network can reach the Polycom CMA system, or that multicast is enabled on all routers between the endpoint and the Polycom CMA system.
An endpoint cannot register with the Polycom CMA system.
The endpoint is configured to use the Polycom CMA system as its gatekeeper, but is being rejected during registration.
In the gatekeeper diagnostic log, an error has occurred during the RRQ/RCF process that caused the registration to fail.
• Review the gatekeeper diagnostic logs for the RRQ attempt by the endpoint and determine the RRJ reason.
• Verify that the endpoint alias is not a duplicate of other endpoint aliases.
• Verify that the endpoint does not have NAT enabled.
• Verify that enough licenses remain.
An endpoint cannot register with the Polycom CMA system.
An endpoint cannot register with CMA, but the gatekeeper diagnostics do not indicate a problem.
The gatekeeper sent the RCF message, but the endpoint did not receive it.
• Verify that the IP address that the gatekeeper sent to the endpoint is correct.
The MCU cannot register with the Polycom CMA system.
Some MCU vendors register with a GRQ message instead of an RRQ message.
Some MCU vendors do not retry registration after a first attempt has failed.
• Verify that the Default Gatekeeper check box is selected in the Admin > Gatekeeper Settings > Primary Gatekeeper page.
• Reset the MCU or MGC card to force registration to occur.
An endpoint shows that it is not registered to the gatekeeper in the Gatekeeper Registration field in the Device Status.
The Polycom CMA system receives the RRQ message, but not the LWRRQ message from the endpoint.
The endpoint did not send a LWRRQ message within the offline timeout period specified in the Admin > Gatekeeper Settings > Primary Gatekeeper page.
• Reboot the endpoint.
Problem Description Solutions

Polycom CMA System Operations Guide
418 Polycom, Inc.
The RadVision OnLAN MCU continually changes state: from online to offline and offline to online.
The Radvision OnLAN MCU ignores the RCF Time to Live (TTL) field, which is filled in with the value that the administrator specified in the offline timeout field in the Admin > Gatekeeper Settings > Primary Gatekeeper page.
• Reconfigure the Radvision OnLAN MCU to send the registration requests in the same time period specified in CMA.
• Add the MCU manually.
• Reboot the MCU to force registration to occur.
Some endpoints are not assigned ISDN numbers.
A registered H.323-only system was not assigned an ISDN number. The system could belong to a network that does not have ISDN number ranges assigned to it.
No ISDN numbers are available to assign.
• Verify that the endpoint belongs to the site that has assigned ISDN number ranges. To do so, go to Admin > Dial Plan and Sites > Sites and make sure the site has the correct ISDN range specified in the ISDN Number Assignment pane.
• Verify that ISDN numbers are available to assign.
• Verify that the RCF message “Can’t find ISDN free pool” from the gatekeeper returns to the endpoint.
Endpoints that were previously registered and auto-assigned ISDN numbers are being rejected when attempting to register.
Inconsistent configuration in ISDN number assignment has occurred.
• Verify that the previous ISDN range was changed.
When the Polycom CMA system is restarted, some registrants that were previously online are now offline.
Some endpoints do not reregister when the Polycom CMA system goes down.
Some MCUs do not reregister automatically after two retries.
• Reboot the MCU.
Problem Description Solutions

System Troubleshooting
Polycom, Inc. 419
Point-to-Point Calling Problems and Solutions
Problem Description Solutions
ViewStation and ViaVideo have an incorrect RAS IP address.
These endpoints are configured with a NAT address and may not receive the RCF message from the gatekeeper.
The endpoints need to be reconfigured to disable NAT.
A call with an alias as the dial string from a registered endpoint cannot be placed to another registered endpoint. The two endpoints are in different sites.
• The site link between the sites in which the endpoints reside is not correctly defined or is missing.
• No bandwidth is available to the site link.
• The calling bit rate is higher than the bit rate defined in the site link.
• ISDN alternate routing is not available.
• Dialing rules may not be enabled or may be set to block instead of route.
• Go to Admin > Dial Plan and Sites > Site Links and make sure that a site link exists between the two networks.
• Make sure that the IP addresses of both endpoints are included in their respective sites.
• If site topology is defined for both endpoints, verify that there is enough bandwidth in the site links between the two sites.
• Verify that the dialing bit rate is lower or equal to that of the maximum bit rate defined for the site links.
• If the endpoint is ISDN capable, verify that the ISDN parameter is correct.
Dialing by IP address fails. A registered endpoint cannot call an unregistered endpoint by IP address within the same site.
A dialing rule is not enabled or is set to block instead of route.
• Check the Reports > Gatekeeper Message Log for error messages.
• Verify that the registered endpoint is registered.
• Verify that the Deny calls to/from unregistered endpoints check box is cleared. Go to Admin > Gatekeeper Settings > Primary Gatekeeper to change this setting.
• Verify that the IP address dialing rule is enabled and set to route.

Polycom CMA System Operations Guide
420 Polycom, Inc.
MCU and Gateway Dialing Problems and Solutions
Problem Description Solutions
Call fails when using an MCU service.
Dialing an MCU service results in a network error.
The call using the MCU service is rejected because of one of the following:
• The MCU is not registered.
• The MCU is offline.
• The MCU prefix is not registered as an E.164 alias.
• The MCU resource issue was sent through resource allocation indication or resource allocation.
• The dialing rule is not enabled.
• The priority of the dialing rule may be too high.
• Services are not enabled.
• Check the Reports > Gatekeeper Message Log for error messages indicating why the call failed.
• Verify that the MCU is registered.
• Verify that the MCU is online. If the device is offline, reboot it.
• Verify that the MCU service is available. Go to the Admin > Dial Plan and Sites > Services page. Verify that the MCU service prefix is enabled and listed.
Simplified dialing does not work.
When you dial 9, you receive a network error.
The call using the simplified dialing service is rejected because of one of the following:
• The simplified dialing prefix service in the system configuration is disabled.
• No gateway services are available.
• There is insufficient BRI/PRI bandwidth.
• The call uses a higher bit rate than the device policy group allows.
• Check the Reports > Gatekeeper Message Log for error messages.
• Verify that the gateway and simplified dialing service prefix is enabled. Go to Admin > Dial Plan and Sites > Services.
• Verify that the gateway is registered.

System Troubleshooting
Polycom, Inc. 421
Conference On Demand Problems and Solutions
Gatekeeper Cause Codes
Problem Description Solutions
Dialing a Conference On Demand fails.
Inviting other endpoints into a conference using the CON service fails.
The endpoint dials a CON service, and the call is rejected because of one of the following:
• The MCU is not registered or is offline.
• The Polycom CMA system cannot log into the MGC.
• The MGC has no resource available for the call.
• The MGC’s IP address is not entered in the Polycom CMA system.
• Check the diagnostics log for an ARJ reason from this endpoint.
• Verify that the MCU is registered with the Polycom CMA system and is online.
• Verify that the MCU registered with the Polycom CMA system has the MCU’s IP address filled out in the Devices list.
• Verify that the MCU login ID and password for the CON service are correct.
• Verify that the H.323 network service that the MCU is using is set as the default service.
• Verify that the MCU has enough available resources to start this conference.
• Verify that the CON service is enabled. Go to Admin > Dial Plan and Sites > Services.
Cause Code Description
150 The gatekeeper is out of resources
151 The gatekeeper has insufficient resources
152 The gatekeeper registration version is invalid
153 The call signal address is invalid
154 The registering device’s address is invalid
155 The registering device’s terminal type is invalid
156 The registering device’s permissions are invalid
157 The conference ID is invalid
158 The registering device’s ID is invalid
159 The caller’s device is not registered
160 The called party’s device is not registered

Polycom CMA System Operations Guide
422 Polycom, Inc.
161 The registering device’s permissions have expired
162 The registering device has a duplicate alias
163 The call transport is not supported
164 The called device has a call in progress
165 The call has been routed to the gatekeeper
166 Cannot request a drop for others
167 The registering device is not registered with the gatekeeper
168 Unknown reason
169 Permission failure
170 Discovery permissions have expired
171 The device is not registered
172 No bandwidth available
173 Location not found
174 Security access denied
175 Quality of service not supported
176 Resources are exhausted
177 Invalid alias
178 Cannot unregister others
179 Quality of service control is not supported
180 Incomplete address
181 Registration permissions have expired
182 Call routed to SCN
183 Inconsistent alias
203 Call rejected at destination
208 Incorrect address
221 The far end is busy
222 The far end is not responding
Cause Code Description

Polycom, Inc. 423
ASystem Security and Port Usage
This section provides an overview of the port usage and security required by the Polycom® Converged Management Application™ (CMA™) system system and includes a comprehensive list of services and clients on the system that are required for normal operation. It includes these topics:
• Open Inbound Ports on the Polycom CMA System
• Outbound Ports Used by the Polycom CMA System
Port UsageThe Polycom CMA system in this release is designed to sit behind your corporate firewall. The following sections describe inbound and outbound ports on the Polycom CMA system.
Open Inbound Ports on the Polycom CMA SystemThe following table lists the open inbound ports on the Polycom CMA system and provides a description of their use.
Port Description
TCP 80 HTTP web server, through which the web application displays and where Polycom endpoints post status messages
TCP/UDP 161 SNMP listener
TCP 389 Directory services (LDAP)
TCP 443 HTTPS web server listener
TCP 700 (Polycom proprietary service) Service monitor for redundant Polycom CMA servers
TCP/UDP 1718 H.323 gatekeeper listener--gatekeeper discovery

Polycom CMA System Operations Guide
424 Polycom, Inc.
Outbound Ports Used by the Polycom CMA SystemThe following table lists all outbound ports that the Polycom CMA system uses to communicate with other systems, including endpoints, bridges, database servers, and other network equipment.
As a standard H.323 gatekeeper, the Polycom CMA system uses ports 1024-65535 for dynamic TCP and UDP traffic.
TCP/UDP 1719 H.323 gatekeeper listener--gatekeeper statistics
TCP/UDP 1720 H.323 gatekeeper listener--host call
TCP 3601 (Polycom proprietary service)Global Address Book listener with which endpoints register
TCP 3389 Remote desktop
TCP 5222 Presence service (XMPP)
TCP 4449 (Polycom proprietary service)OpenDS (Data store for site topology) admin port
TCP 8989 (Polycom proprietary service)OpenDS (Data store for site topology) replication port
NoteThird-party port-scanning software may incorrectly identify the Polycom proprietary services as IANA-registered services, since identification is made by port number only and not by the actual protocol being transmitted:
Port Description
Port Description
TCP 20Used to FTP data to endpoints
TCP 21
TCP/UDP 24 Used to access the telnet interfaces on endpoints
TCP/UDP 25 Used to send email messages to SMTP servers
TCP/UDP 53 Used to access domain name servers (DNS)
TCP 80 Used to access the web application on endpoints and MGCs, version 7.x and higher
TCP 135TCP 137TCP 139
Active Directory (AD) Single Signon (NetBios/NTLM)

System Security and Port Usage
Polycom, Inc. 425
TCP/UDP 389 Used to access LDAP services
TCP 443 Secure access to endpoint devices (SSL) including Polycom CMA Desktop
TCP 445 AD Single Signon
TCP/UDP 636 Used to access LDAP over TLS/SSL (LDAPS)
TCP 1205 Used to access MGCs for management and monitoring
TCP/UDP 1719 Used by the gatekeeper for H.323 datagrams
TCP/UDP 1720 Used by the gatekeeper for H.323 RAS messages
TCP/UDP 3268 Used to access the Microsoft Active Directory Global Catalog using StartTLS.
TCP/UDP 3269 Used to access the Microsoft Active Directory Global Catalog using LDAP-S.
TCP/UDP 3603 Used for HTTP communication with the Polycom PVX client
TCP 5001
TCP 1205
Used to access MGCs for management and monitoring
Port Description

Polycom CMA System Operations Guide
426 Polycom, Inc.

Polycom, Inc. 427
BPolycom CMA System MIB
The Polycom CMA system enterprise MIB relates information about the system. The information is divided into these categories:
• Configuration—The static state of each component, for example component type, software version, current owner, values of all configured parameters.
• Status—The dynamic state of each component, for example the number of connections, number of conferences, number of ports (used and available), temperature, fan speed, CPU utilization, memory utilization, network link status, number of dropped packets, jitter measurements, number of successful calls, number of CPU resets.
• Alerts—To notify that an exception condition has occurred, for example a power supply failure, link/down up on a major interface, memory usage exceeding a predefined percentage, connections in an MCU exceeding a threshold, a logical fault or ungraceful transition.
• Conformance—The historical trend for selected groups of data, for example conference load over time for an MCU, bandwidth consumed over time for a network device.
POLYCOM-CMA-MIB DEFINITIONS ::= BEGIN
IMPORTS-- TRAP-TYPE FROM RFC-1215 DateAndTime, TruthValue, TEXTUAL-CONVENTION FROM SNMPv2-TC MODULE-IDENTITY, OBJECT-TYPE, NOTIFICATION-TYPE, enterprises, Counter32, Integer32 FROM SNMPv2-SMI ItuPerceivedSeverity FROM ITU-ALARM-TC-MIB InetAddressType, InetAddress, InetPortNumber FROM INET-ADDRESS-MIB OBJECT-GROUP, NOTIFICATION-GROUP FROM SNMPv2-CONF;
polycom MODULE-IDENTITY LAST-UPDATED "200908130000Z" ORGANIZATION "Polycom Inc." CONTACT-INFO "Thomas Filarecki" DESCRIPTION "This is the Converged Media Application (CMA) MIB." REVISION "200908130000Z" DESCRIPTION "Updated descriptions" REVISION "200906020000Z"

Polycom CMA System Operations Guide
428 Polycom, Inc.
DESCRIPTION "Initial draft" ::= { enterprises 13885 }
--------------------------------------------------------------------------------- Object Identifiers------------------------------------------------------------------------------- cma OBJECT IDENTIFIER ::= { polycom 14 }cmaConfigObjects OBJECT IDENTIFIER ::= { cma 100 }cmaStatusObjects OBJECT IDENTIFIER ::= { cma 200 }cmaAlertObjects OBJECT IDENTIFIER ::= { cma 300 }
cmaAlertObjectsGeneral OBJECT IDENTIFIER ::= { cmaAlertObjects 10 }cmaAlertObjectsAlerts OBJECT IDENTIFIER ::= { cmaAlertObjects 20 }
------------------------------------------------------------------------------------- CMA configuration data-----------------------------------------------------------------------------------
cmaConfigGeneral OBJECT IDENTIFIER ::= { cmaConfigObjects 10 }cmaConfigContact OBJECT IDENTIFIER ::= { cmaConfigObjects 20 }cmaConfigNetwork OBJECT IDENTIFIER ::= { cmaConfigObjects 30 }cmaConfigLog OBJECT IDENTIFIER ::= { cmaConfigObjects 40 }cmaConfigDatabase OBJECT IDENTIFIER ::= { cmaConfigObjects 50 }cmaConfigLDAP OBJECT IDENTIFIER ::= { cmaConfigObjects 60 }cmaConfigTime OBJECT IDENTIFIER ::= { cmaConfigObjects 70 }cmaConfigRedundancy OBJECT IDENTIFIER ::= { cmaConfigObjects 80 }cmaConfigRemoteAlert OBJECT IDENTIFIER ::= { cmaConfigObjects 90 }cmaConfigGab OBJECT IDENTIFIER ::= { cmaConfigObjects 100 }cmaConfigEmail OBJECT IDENTIFIER ::= { cmaConfigObjects 110 }
cmaConfigGatekeeper OBJECT IDENTIFIER ::= { cmaConfigObjects 120 }cmaConfigGatekeeperPrimary OBJECT IDENTIFIER ::= { cmaConfigGatekeeper 1 }cmaConfigGatekeeperAlternate OBJECT IDENTIFIER ::= { cmaConfigGatekeeper 2 }cmaConfigGatekeeperNeighbor OBJECT IDENTIFIER ::= { cmaConfigGatekeeper 3 }
cmaConfigUI OBJECT IDENTIFIER ::= { cmaConfigObjects 130 }cmaConfigEndpoint OBJECT IDENTIFIER ::= { cmaConfigObjects 140 }
cmaConfigDialPlan OBJECT IDENTIFIER ::= { cmaConfigObjects 150 }cmaConfigDialPlanRules OBJECT IDENTIFIER ::= { cmaConfigDialPlan 1 }cmaConfigDialPlanLCR OBJECT IDENTIFIER ::= { cmaConfigDialPlan 2 }cmaConfigDialPlanServices OBJECT IDENTIFIER ::= { cmaConfigDialPlan 3 }
cmaConfigSite OBJECT IDENTIFIER ::= { cmaConfigObjects 160 }cmaConfigSiteTopology OBJECT IDENTIFIER ::= { cmaConfigSite 1 }cmaConfigSiteProvisioning OBJECT IDENTIFIER ::= { cmaConfigSite 2 }
cmaConfigConference OBJECT IDENTIFIER ::= { cmaConfigObjects 170 }cmaConfigConferenceGeneral OBJECT IDENTIFIER ::= { cmaConfigConference 1 }cmaConfigConferenceTemplates OBJECT IDENTIFIER ::= { cmaConfigConference 2 }
cmaConfigRooms OBJECT IDENTIFIER ::= { cmaConfigObjects 180 }
cmaConfigUser OBJECT IDENTIFIER ::= { cmaConfigObjects 190 }cmaConfigUserRoles OBJECT IDENTIFIER ::= { cmaConfigUser 1 }cmaConfigUserGroups OBJECT IDENTIFIER ::= { cmaConfigUser 2 }cmaConfigUserUsers OBJECT IDENTIFIER ::= { cmaConfigUser 3 }
cmaConfigSnmp OBJECT IDENTIFIER ::= { cmaConfigObjects 200 }

Polycom CMA System MIB
Polycom, Inc. 429
cmaConfigLicenses OBJECT IDENTIFIER ::= { cmaConfigObjects 210 }cmaEmailCustomization OBJECT IDENTIFIER ::= { cmaConfigObjects 220 }
------------------------------------------------------------------------------------- CMA Status data-----------------------------------------------------------------------------------
cmaStatusUsers OBJECT IDENTIFIER ::= { cmaStatusObjects 10 } -- connected userscmaStatusLicenses OBJECT IDENTIFIER ::= { cmaStatusObjects 30 } cmaStatusServices OBJECT IDENTIFIER ::= { cmaStatusObjects 40 } cmaStatusEndpointManagement OBJECT IDENTIFIER ::= { cmaStatusObjects 50 }
cmaStatusDevice OBJECT IDENTIFIER ::= { cmaStatusObjects 60 } cmaStatusDeviceMCU OBJECT IDENTIFIER ::= { cmaStatusDevice 1 } cmaStatusDeviceEndpoint OBJECT IDENTIFIER ::= { cmaStatusDevice 2 } cmaStatusDeviceVBP OBJECT IDENTIFIER ::= { cmaStatusDevice 3 } cmaStatusDeviceDMA OBJECT IDENTIFIER ::= { cmaStatusDevice 4 }
cmaStatusConferenceSummary OBJECT IDENTIFIER ::= { cmaStatusObjects 70 } cmaStatusConferencesOngoing OBJECT IDENTIFIER ::= { cmaStatusObjects 80 } cmaStatusAlerts OBJECT IDENTIFIER ::= { cmaStatusObjects 90 } cmaStatusRedundancy OBJECT IDENTIFIER ::= { cmaStatusObjects 100 } cmaStatusSites OBJECT IDENTIFIER ::= { cmaStatusObjects 110 } cmaStatusSiteLinks OBJECT IDENTIFIER ::= { cmaStatusObjects 120 }
------------------------------------------------------------------------------------- SMIv2 Conformance groups-----------------------------------------------------------------------------------
cmaConformance OBJECT IDENTIFIER ::= { cma 1000 }cmaConfigConformance OBJECT IDENTIFIER ::= { cmaConformance 10 }cmaStatusConformance OBJECT IDENTIFIER ::= { cmaConformance 20 }cmaNotificationConformance OBJECT IDENTIFIER ::= { cmaConformance 30 }
--------------------------------------------------------------------------------- Textual Conventions-------------------------------------------------------------------------------
--NetworkAddress ::= SEQUENCE--{-- addressType InetAddressType,-- address InetAddress--}
CmaDefaultTableIndexRange ::= TEXTUAL-CONVENTION DISPLAY-HINT "d" STATUS current DESCRIPTION "Default table index range." SYNTAX Integer32 (1..2147483647)
CmaTimeZone ::= TEXTUAL-CONVENTION DISPLAY-HINT "1a1d:1d" STATUS current DESCRIPTION "A time zone specification. field octets contents range ----- ------ -------- ----- 1 1 direction from UTC '+' / '-' 2 2 hours from UTC 0..13 3 3 minutes from UTC 0..59

Polycom CMA System Operations Guide
430 Polycom, Inc.
Note: - Daylight saving time in New Zealand is +13." SYNTAX OCTET STRING (SIZE(3))
CmaConfigSystemLogLevel ::= TEXTUAL-CONVENTION STATUS current DESCRIPTION "CMA System log level values." SYNTAX INTEGER { debug(0), info(1), warn(2), error(3), fatal(4), off(5) }
CmaConfigLdapSecurityLevel ::= TEXTUAL-CONVENTION STATUS current DESCRIPTION "CMA LDAP security level values." SYNTAX INTEGER { plain(1), startTLS(2), ldaps(3) }
CmaConfigDatabaseType ::= TEXTUAL-CONVENTION STATUS current DESCRIPTION "CMA database type values." SYNTAX INTEGER { internal(1), external(2) }
CmaConfigSystemTimeSourceType ::= TEXTUAL-CONVENTION STATUS current DESCRIPTION "CMA time source values." SYNTAX INTEGER { internal(1), external(2) }
CmaConfigRemoteAlertLevel ::= TEXTUAL-CONVENTION STATUS current DESCRIPTION "CMA remote alert level values." SYNTAX INTEGER { none(0), info(1), minor(2), major(4) }
CmaConfigGatekeeperMessageType ::= TEXTUAL-CONVENTION STATUS current DESCRIPTION "CMA gatekeeper message type values." SYNTAX INTEGER { rrq(0), -- Registration Request grq(1), -- Gatekeeper Request irrIrq(2), -- Information Reponse/Information Request lwrrq(3), -- Light-weight Registration Request urq(4), -- Unregistration Request lrq(5), -- Location Request

Polycom CMA System MIB
Polycom, Inc. 431
arq(6), -- Admission Request drq(7), -- Disengage Request brq(8), -- Bandwidth Request setup(9), -- Setup message releaseComplete(10), nsm(11), -- Non-standard message other(12) -- other call state changed }
CmaPrimaryGatekeeperEndpointRegistrationType ::= TEXTUAL-CONVENTION STATUS current DESCRIPTION "CMA gatekeeper endpoint registration type values." SYNTAX INTEGER { all(1), predefinedOnly(2), inDefineSites(3), predefinedPrefixesOnly(4) }
CmaGatekeeperCallModel ::= TEXTUAL-CONVENTION STATUS current DESCRIPTION "CMA gatekeeper call model values." SYNTAX INTEGER { directMode(1), routedMode(2) }
CmaLicenseComponent ::= TEXTUAL-CONVENTION STATUS current DESCRIPTION "CMA license component values." SYNTAX INTEGER { none(0), primary(1), -- primary (non-redundant) license redundant(2), -- redundant license base(3), -- primary + redundant outlookScheduling(4), -- outlook scheduling redundantAndOutlook(6), -- redundant + outlook scheduling baseAndOutlook(7), -- base + outlook scheduling lotusScheduling(8), -- lotus scheduling redundantAndLotus(10), -- redundant + lotus notes scheduling baseAndLotus(11), -- base + lotus notes scheduling redundantAndOutlookAndLotus(14), -- redundant + outlook + lotus notes scheduling baseAndOutlookAndLotus(15) -- base + outlook + lotus notes scheduling }
CmaServiceStatus ::= TEXTUAL-CONVENTION STATUS current DESCRIPTION "CMA service status values." SYNTAX INTEGER { stopped(1), startPending(2), stopPending(3), running(4), continuePending(5), pausePending(6), paused(7)

Polycom CMA System Operations Guide
432 Polycom, Inc.
}
CmaMcuType ::= TEXTUAL-CONVENTION STATUS current DESCRIPTION "CMA MCU type values." SYNTAX INTEGER { other(0), rmx(1), mgc(2) }
CmaDeviceStatus ::= TEXTUAL-CONVENTION STATUS current DESCRIPTION "CMA device status values." SYNTAX INTEGER { online(1), offline(2) }
CmaEndpointType ::= TEXTUAL-CONVENTION STATUS current DESCRIPTION "CMA endpoint type values." SYNTAX INTEGER { other(0), vseries(1), viewstationFx(2), viewstation(3), viavideo(4), ipower(5), vtx1000(6), tandberg(7), hdx(8), cmad(9), qdx(10), vvx(11) }
CmaDeviceRegistrationStatus ::= TEXTUAL-CONVENTION STATUS current DESCRIPTION "CMA device registration status values." SYNTAX INTEGER { unknown(0), registered(1), notRegistered(2), registering(3), rejected(4), notApplicable(5) }
CmaDeviceManagementStatus ::= TEXTUAL-CONVENTION STATUS current DESCRIPTION "CMA endpoint management status values." SYNTAX INTEGER { unknown(0), ok(1),

Polycom CMA System MIB
Polycom, Inc. 433
notApplicable(2), notResponding(3), heartbeatTimeout(4), signedOut(5), credentialsRequired(6), credentialsFailed(7), behindFirewall(8) }
CmaVbpModel ::= TEXTUAL-CONVENTION STATUS current DESCRIPTION "CMA VBP model values." SYNTAX INTEGER { unknown(0), stSeries(1) }
CmaConferenceType ::= TEXTUAL-CONVENTION STATUS current DESCRIPTION "CMA conference type values." SYNTAX INTEGER { audioOnly(1), video(2) }
CmaConferenceStatus ::= TEXTUAL-CONVENTION STATUS current DESCRIPTION "CMA conference status values." SYNTAX INTEGER { unknown(0), active(1), activeAlerts(2), future(3), -- for completeness futureAlerts(4), finished(5), -- for completeness deleted(6), -- for completeness declined(7) }
CmaSystemAlertType ::= TEXTUAL-CONVENTION STATUS current DESCRIPTION "CMA system alert values." SYNTAX INTEGER { unknown(0), mcuDown(1), databaseConnectionDown(2), ldapConnectionDown(3), cmaFailOver(4), licenseCloseToMax(5), mcuTimeDiscrepancy(6), monitorServiceStopped(7), redundantServerOffline(8), redundancyConflict(9), ldapSysAccountPasswordFailure(10), ldapConnectionFailure(11) }

Polycom CMA System Operations Guide
434 Polycom, Inc.
CmaEndpointAlertType ::= TEXTUAL-CONVENTION STATUS current DESCRIPTION "CMA endpoint alert values." SYNTAX INTEGER { remoteControlBatteryLow(0), credentialsRequired(1), credentialsFailed(2), httpForbidden(3), notResponding(4), heartbeatTimeout(5), gatekeeperStatusUnknown(6), gatekeeperRejected(7), gatekeeperUnregistered(8), directoryStatusUnknown(9), directoryNotRegistered(10), presenceStatusUnknown(11), presenceUnregistered(13), helpRequest(14) }
CmaRedundantServerRole ::= TEXTUAL-CONVENTION STATUS current DESCRIPTION "CMA redundant server role values." SYNTAX INTEGER { primary(1), alternate(2) }
CmaRedundantMonitorStatus ::= TEXTUAL-CONVENTION STATUS current DESCRIPTION "CMA redundant monitor status values." SYNTAX INTEGER { started(1), stopped(2) }
CmaRedundantServerStatus ::= TEXTUAL-CONVENTION STATUS current DESCRIPTION "CMA redundant server status values." SYNTAX INTEGER { online(1), offline(2) }
CmaDialPlanRulePatternType ::= TEXTUAL-CONVENTION STATUS current DESCRIPTION "CMA dial plan rule pattern values." SYNTAX INTEGER { localDirectoryService(0), dnsName(1), ipAddress(2), prefix(3), prefixRange(4),

Polycom CMA System MIB
Polycom, Inc. 435
unknown(5) }
CmaDialPlanRuleRoutingActionType ::= TEXTUAL-CONVENTION STATUS current DESCRIPTION "CMA dial plan rule routing action values." SYNTAX INTEGER { block(0), route(1), routeLcr(2), -- route LCR applied routeToGw(3), -- route to the specified gateway service routeToGwList(4), -- route to the specified gateway services routeToIpAddress(5), -- route to specific IP address routeInRegion(6), -- route to any IP address in the region routeOutOfRegion(7), -- route to any IP address outside the region routeToSite(8), -- route to a specific site routeToNeighbor(9), -- route to specified neighbor gatekeeper. routeContinue(10) -- Not available }
CmaDialPlanRoutingDialStringPosition ::= TEXTUAL-CONVENTION STATUS current DESCRIPTION "CMA dial plan routing dial string position values." SYNTAX INTEGER { none(1), beginning(2), ending(3) }
DailPlanServiceType ::= TEXTUAL-CONVENTION STATUS current DESCRIPTION "CMA dial plan service types." SYNTAX INTEGER { gw(1), mcu(2), simplifiedDialing(3), conferenceOnDemand(4) }
SimplifiedDialingEndpointBitRates ::= TEXTUAL-CONVENTION STATUS current DESCRIPTION "CMA dial plan service simplified dialing bit rates." SYNTAX INTEGER { notConfigured(0), br1B(1), -- 1B br2B(2), -- 2B br3B(3), -- 3B br4B(4), -- 4B br5B(5), -- 5B br6B(6), -- 6B br64(7), -- 64 kbps br128(8), -- 128 kbps br192(9), -- 192 kbps br256(10), -- 256 kbps br320(11), -- 320 kbps br384(12), -- 384 kbps

Polycom CMA System Operations Guide
436 Polycom, Inc.
br448(13), -- 448 kbps br512(14), -- 512 kbps br576(15), -- 576 kbps br640(16), -- 640 kbps br704(17), -- 704 kbps br768(18), -- 768 kbps br1152(19), -- 1152 kbps br1472(20), -- 1472 kbps br1536(21), -- 1536 kbps br1920(22) -- 1920 kbps }
MgcVideoSessionType ::= TEXTUAL-CONVENTION STATUS current DESCRIPTION "MGC video session type." SYNTAX INTEGER { continuousPresence(1), switching(2), transcoding(3) }
ConfOnDemandMgcBitRateType ::= TEXTUAL-CONVENTION STATUS current DESCRIPTION "MGC bit rate." SYNTAX INTEGER { notConfigured(0), br128(1), -- 128 kbps br256(2), -- 256 kbps br384(3), -- 384 kbps br448(4), -- 448 kbps br512(5), -- 512 kbps br576(6), -- 576 kbps br640(7), -- 640 kbps br704(8), -- 704 kbps br768(9), -- 768 kbps br1152(10), -- 1152 kbps br1472(11), -- 1472 kbps br1536(12), -- 1536 kbps br1920(13) -- 1920 kbps }
SiteTopoIsdnNumberAssignmentMethodType ::= TEXTUAL-CONVENTION STATUS current DESCRIPTION "Site topology ISDN number assignment method." SYNTAX INTEGER { none(1), did(2), -- Direct Inward Dial gwExtensionDialing(3) -- Gateway + extension }
SiteTopoInternetRoutingType ::= TEXTUAL-CONVENTION STATUS current DESCRIPTION "Site topology internet calling types." SYNTAX INTEGER { notAllowed(1), -- call routing through internet not allowed viaH323AwareFirewall(2), -- allowed via a H.323 aware firewall

Polycom CMA System MIB
Polycom, Inc. 437
viaH323SbcOrAlg(3) -- allowed via a H.323 aware SBC -- (Session Border Control) or ALG -- (Application level gateway) }
SiteProvisioningDateFormatType ::= TEXTUAL-CONVENTION STATUS current DESCRIPTION "Site topology provisioning date format." SYNTAX INTEGER { montDayYear(1), -- MM-dd-yyy dayMonthYear(2), -- dd-MM-yyy yearMonthDay(3) -- yyyy-MM-dd }
SiteProvisioningTimeFormatType ::= TEXTUAL-CONVENTION STATUS current DESCRIPTION "Site topology provisioning time format." SYNTAX INTEGER { twelveHour(1), twentyFourHour(2) }
SiteNatConfigurationType ::= TEXTUAL-CONVENTION STATUS current DESCRIPTION "Site topology provisioning NAT configuration type." SYNTAX INTEGER { off(1), auto(2), manual(3) }
SiteUseGkForMultipointCallsType ::= TEXTUAL-CONVENTION STATUS current DESCRIPTION "Site topology provisioning use gatekeeper for multipoint calls setting." SYNTAX INTEGER { dynamic(1), always(2), never(3) }
SiteQosTypeOfServiceType ::= TEXTUAL-CONVENTION STATUS current DESCRIPTION "Site topology provisioning QOS type." SYNTAX INTEGER { ipPrecedence(1), diffServ(2) }
SiteQosMtuSizeType ::= TEXTUAL-CONVENTION STATUS current DESCRIPTION "Site topology provisioning IP call maximum transmission unit values (bytes)" SYNTAX INTEGER { ipCallMtu660(1), -- 660 ipCallMtu780(2), -- 780

Polycom CMA System Operations Guide
438 Polycom, Inc.
ipCallMtu900(3), -- 900 ipCallMtu1020(4), -- 1020 ipCallMtu1140(5), -- 1140 ipCallMtu1260(6), -- 1260 ipCallMtu1500(7) -- 1500 }
SiteQosBandwidthType ::= TEXTUAL-CONVENTION STATUS current DESCRIPTION "Site topology provisioning IP call maximum line speed values (Kbps)." SYNTAX INTEGER { linespeed64(1), linespeed128(2), linespeed256(3), linespeed384(4), linespeed512(5), linespeed768(6), linespeed1024(7), linespeed1472(8), linespeed1920(9), linespeed3840(10), linespeed4096(11), linespeed6144(12), linespeed8192(13), linespeed10240(14) }
SiteSecurityEnableEncryptionType ::= TEXTUAL-CONVENTION STATUS current DESCRIPTION "Site topology provisioning IP call encryption options." SYNTAX INTEGER { off(1), -- No encryption used whenAvailable(2), -- encryption used with any enpoint that supports it. requiredForVideo(3), -- used for all video endpoints in the call, audio & ISDN -- connection are allowed requiredForAll(4) -- used for all video endpoints in the call, audio & ISDN -- connections are not allowed }
ConferenceTemplateVideoDialType ::= TEXTUAL-CONVENTION STATUS current DESCRIPTION "Conference template video dial options." SYNTAX INTEGER { dialinOnly(1), -- dial-in only dialoutOnly(2), -- dial-out only dialinDialout(3) -- dial-in and dial-out }
ConferenceTemplateVideoMode ::= TEXTUAL-CONVENTION STATUS current DESCRIPTION "Conference template video layout modes." SYNTAX INTEGER { videoSwitching(1), oneByOne(2), oneByTwo(3), twoByOne(4),

Polycom CMA System MIB
Polycom, Inc. 439
oneByTwoVeritcal(5), oneByTwoHorizontal(6), oneByTwoHorizontalUpper(7), oneAndTwoHorizontal(8), oneAndTwoVertical(9), twoByTwo(10), oneAndThreeHorizontalUpper(11), oneAndThreeHorizontal(12), oneAndThreeVertical(13), oneAndFourHorizontalUpper(14), oneAndFourHorizontal(15), oneAndFourVertical(16), oneAndFive(17), oneAndSeven(18), threeByThree(19), oneAndEightLower(20), oneAndEightUpper(21), oneAndEightCentral(22), fourByFour(23), twoAndEight(24), oneAndTwelve(25) }
ConferenceTemplateVideoAlgorithm ::= TEXTUAL-CONVENTION STATUS current DESCRIPTION "Conference template video compression algorithm types." SYNTAX INTEGER { auto(1), h261(2), h263(3), h264(4) }
ConferenceTemplateContentType ::= TEXTUAL-CONVENTION STATUS current DESCRIPTION "Conference template people and content format types." SYNTAX INTEGER { none(1), peopleAndContent(2), peopleAndContentV0(3), polycomVisualConcertPc(4), polycomVisualConcertFx(5), duoVideo(6) }
ConferenceTemplateConferenceSpeed ::= TEXTUAL-CONVENTION STATUS current DESCRIPTION "Conference template conference speeds (Kbps)." SYNTAX INTEGER { confSpeed128(1), confSpeed256(2), confSpeed320(3), confSpeed384(4), confSpeed512(5), confSpeed768(6), confSpeed1152(7), confSpeed1472(8),

Polycom CMA System Operations Guide
440 Polycom, Inc.
confSpeed1536(9), confSpeed1920(10), confSpeed4096(11), confSpeed6144(12), confSpeed8192(13), confSpeed10240(14), confSpeedBridgedAudio(15) }
ConferenceTemplateVideoQualityType ::= TEXTUAL-CONVENTION STATUS current DESCRIPTION "Conference video quality type." SYNTAX INTEGER { motion(1), sharpness(2) }
ConferenceTemplateT120Rates ::= TEXTUAL-CONVENTION STATUS current DESCRIPTION "Conference T.120 transfer rate." SYNTAX INTEGER { none(1), -- T.120 is not enabled mlp6dot4(2), -- MLP 6.4K mlp14dot4(3), -- MLP 14.4K mlp16(4), -- MLP 16K mlp22dot4(5), -- MLP 22.4K mlp24(6), -- MLP 24K mlp30dot4(7), -- MLP 30.4K mlp32(8), -- MLP 32K mlp38dot4(9), -- MLP 38.4 mlp40(10), -- MLP 40K mlp46dot4(11), -- MLP 46.4K hmlp14dot4(12), -- HMLP 14.4K hmlp62dot4(13) -- HMLP 62.4K }
ConferenceTemplateAudioAlgorithms ::= TEXTUAL-CONVENTION STATUS current DESCRIPTION "Conference audio compression algorithm used on the MGC MCU." SYNTAX INTEGER { auto(1), siren7b16(2), siren14b24(3), siren14b32(4), siren14b48(5), g722b56(6), g711b56(7) }ConferenceTemplateLectureModeType ::= TEXTUAL-CONVENTION STATUS current DESCRIPTION "Conference template lecture mode values." SYNTAX INTEGER { none(0), lecture(1), -- Lecture Mode presentation(2) -- Presentation Mode }

Polycom CMA System MIB
Polycom, Inc. 441
UserRoleSchedulingLevel ::= TEXTUAL-CONVENTION STATUS current DESCRIPTION "User role scheduling levels." SYNTAX INTEGER { basic(1), advanced(2) }
UserGroupType ::= TEXTUAL-CONVENTION STATUS current DESCRIPTION "User group type." SYNTAX INTEGER { local(1), enterprise(2) }
RedundancyStatusType ::= TEXTUAL-CONVENTION STATUS current DESCRIPTION "CMA redundancy status." SYNTAX INTEGER { notConfigured(1), configured(2), -- configured and okay errorNeedsVirtualIp(3), -- needs virtual IP errorSecondaryDown(4) -- secondary CMA server is down }SnmpVersionType ::= TEXTUAL-CONVENTION STATUS current DESCRIPTION "CMA SNMP version." SYNTAX INTEGER { disabled(1), v2c(2), v3Usm(3) -- V3 User Based Security Model }
SnmpTransportType ::= TEXTUAL-CONVENTION STATUS current DESCRIPTION "CMA SNMP transport type." SYNTAX INTEGER { tcp(1), udp(2) }
SnmpAuthenticationType ::= TEXTUAL-CONVENTION STATUS current DESCRIPTION "CMA SNMP authentication type." SYNTAX INTEGER { sha(1), md5(2) } SnmpEncryptionType ::= TEXTUAL-CONVENTION STATUS current DESCRIPTION "CMA SNMP encryption type." SYNTAX INTEGER

Polycom CMA System Operations Guide
442 Polycom, Inc.
{ des(1), aes128bit(2) }
SnmpNotificationType ::= TEXTUAL-CONVENTION STATUS current DESCRIPTION "CMA SNMP notification type." SYNTAX INTEGER { trap(1), inform(2) }
UseGatekeeperType ::= TEXTUAL-CONVENTION STATUS current DESCRIPTION "" SYNTAX INTEGER { local(0), -- use local gatekeeper on this CMA server specify(1) -- specify a (remote) gatekeeper to use }
--------------------------------------------------------------------------------- Configuration Group-------------------------------------------------------------------------------
-- START general configuration
cmaConfigGeneralGroup OBJECT-GROUP OBJECTS { cmaConfigSoftwareVersion, cmaConfigCMADSoftwareVersion, cmaConfigRemoteDesktopEnabled } STATUS current DESCRIPTION "CMA general configuration group." ::= { cmaConfigConformance 1 }
cmaConfigSoftwareVersion OBJECT-TYPE SYNTAX OCTET STRING (SIZE(1..255)) MAX-ACCESS read-only STATUS current DESCRIPTION "CMA software version." ::= { cmaConfigGeneral 1 }
cmaConfigCMADSoftwareVersion OBJECT-TYPE SYNTAX OCTET STRING (SIZE(1..255)) MAX-ACCESS read-only STATUS current DESCRIPTION "Software version of the downloadable CMADesktop client." ::= { cmaConfigGeneral 2 }
cmaConfigRemoteDesktopEnabled OBJECT-TYPE SYNTAX TruthValue MAX-ACCESS read-only STATUS current DESCRIPTION "Windows Remote Desktop enabled flag" ::= { cmaConfigGeneral 3 }

Polycom CMA System MIB
Polycom, Inc. 443
-- END general configuration
-- START Admin contact configuration
cmaConfigContactGroup OBJECT-GROUP OBJECTS { cmaConfigAdminContactName, cmaConfigAdminContactEmailAddress, cmaConfigAdminContactTitle, cmaConfigAdminContactDepartment, cmaConfigAdminContactCity, cmaConfigAdminContactPhoneNumber } STATUS current DESCRIPTION "CMA administrator contact configuration group." ::= { cmaConfigConformance 2 }
cmaConfigAdminContactName OBJECT-TYPE SYNTAX OCTET STRING (SIZE(1..255)) MAX-ACCESS read-only STATUS current DESCRIPTION "CMA administrator contact name." ::= { cmaConfigContact 1 }
cmaConfigAdminContactEmailAddress OBJECT-TYPE SYNTAX OCTET STRING (SIZE(1..255)) MAX-ACCESS read-only STATUS current DESCRIPTION "CMA administrator email address." ::= { cmaConfigContact 2 }
cmaConfigAdminContactTitle OBJECT-TYPE SYNTAX OCTET STRING (SIZE(1..255)) MAX-ACCESS read-only STATUS current DESCRIPTION "CMA administrator title." ::= { cmaConfigContact 3 }
cmaConfigAdminContactDepartment OBJECT-TYPE SYNTAX OCTET STRING (SIZE(1..255)) MAX-ACCESS read-only STATUS current DESCRIPTION "CMA administrator department." ::= { cmaConfigContact 4 }
cmaConfigAdminContactCity OBJECT-TYPE SYNTAX OCTET STRING (SIZE(1..255)) MAX-ACCESS read-only STATUS current DESCRIPTION "CMA administrator city." ::= { cmaConfigContact 5 }
cmaConfigAdminContactPhoneNumber OBJECT-TYPE SYNTAX OCTET STRING (SIZE(1..255)) MAX-ACCESS read-only STATUS current DESCRIPTION "CMA administrator phone number." ::= { cmaConfigContact 6 }

Polycom CMA System Operations Guide
444 Polycom, Inc.
-- END Admin contact configuration
-- START Log configuration
cmaConfigLogGroup OBJECT-GROUP OBJECTS { cmaConfigSystemLogLevel, cmaConfigGatekeeperLogMessageType, cmaConfigGatekeeperLogMessageEnabled } STATUS current DESCRIPTION "CMA log configuration group." ::= { cmaConfigConformance 3 }
CmaConfigGatekeeperLogSettingEntry ::= SEQUENCE{ cmaConfigGatekeeperLogMessageType CmaConfigGatekeeperMessageType, cmaConfigGatekeeperLogMessageEnabled TruthValue }
cmaConfigSystemLogLevel OBJECT-TYPE SYNTAX CmaConfigSystemLogLevel MAX-ACCESS read-only STATUS current DESCRIPTION "CMA system log level setting." ::= { cmaConfigLog 1 }
cmaConfigGatekeeperLogSettingTable OBJECT-TYPE SYNTAX SEQUENCE OF CmaConfigGatekeeperLogSettingEntry MAX-ACCESS not-accessible STATUS current DESCRIPTION "CMA gatekeeper log setting table. Contains log setting information for each gatekeeper message type." ::= { cmaConfigLog 2 }
cmaConfigGatekeeperLogSettingEntry OBJECT-TYPE SYNTAX CmaConfigGatekeeperLogSettingEntry MAX-ACCESS not-accessible STATUS current DESCRIPTION "CMA gatekeeper log setting entry." INDEX { cmaConfigGatekeeperLogMessageType } ::= { cmaConfigGatekeeperLogSettingTable 1}
cmaConfigGatekeeperLogMessageType OBJECT-TYPE SYNTAX CmaConfigGatekeeperMessageType MAX-ACCESS read-only STATUS current DESCRIPTION "Message type of the gatekeeper log setting entry." ::= { cmaConfigGatekeeperLogSettingEntry 2 }
cmaConfigGatekeeperLogMessageEnabled OBJECT-TYPE SYNTAX TruthValue MAX-ACCESS read-only STATUS current DESCRIPTION "Flag indicating whether this message type is logged." ::= { cmaConfigGatekeeperLogSettingEntry 3 }
-- END Log contact configuration

Polycom CMA System MIB
Polycom, Inc. 445
-- START LDAP configuration
cmaConfigLdapGroup OBJECT-GROUP OBJECTS { cmaConfigLdapEnabled, cmaConfigLdapServerInetAddressType, cmaConfigLdapServerInetAddress, cmaConfigLdapSecurityLevel, cmaConfigLdapIgnoreDisabledADUsers, cmaConfigLdapExclusionFilter, cmaConfigLdapSearchBaseDN, cmaConfigLdapWindowsAuthenticationIntegration, cmaConfigLdapWindowsAuthenticationDomainControllerName } STATUS current DESCRIPTION "CMA LDAP configuration conformance group." ::= { cmaConfigConformance 4 }
cmaConfigLdapEnabled OBJECT-TYPE SYNTAX TruthValue MAX-ACCESS read-only STATUS current DESCRIPTION "LDAP integration enabled flag." ::= { cmaConfigLDAP 1 }
cmaConfigLdapServerInetAddressType OBJECT-TYPE SYNTAX InetAddressType MAX-ACCESS read-only STATUS current DESCRIPTION "IP address type of the LDAP server." ::= { cmaConfigLDAP 2 }
cmaConfigLdapServerInetAddress OBJECT-TYPE SYNTAX InetAddress MAX-ACCESS read-only STATUS current DESCRIPTION "IP address or DNS name of the LDAP server." ::= { cmaConfigLDAP 3 }
cmaConfigLdapSecurityLevel OBJECT-TYPE SYNTAX CmaConfigLdapSecurityLevel MAX-ACCESS read-only STATUS current DESCRIPTION "LDAP security level." ::= { cmaConfigLDAP 4 }
cmaConfigLdapIgnoreDisabledADUsers OBJECT-TYPE SYNTAX TruthValue MAX-ACCESS read-only STATUS current DESCRIPTION "Flag indicating whether to ignore disabled active directory users." ::= { cmaConfigLDAP 5 }
cmaConfigLdapExclusionFilter OBJECT-TYPE SYNTAX OCTET STRING (SIZE(0..255)) MAX-ACCESS read-only STATUS current

Polycom CMA System Operations Guide
446 Polycom, Inc.
DESCRIPTION "LDAP exclusion filter." ::= { cmaConfigLDAP 6 }
cmaConfigLdapSearchBaseDN OBJECT-TYPE SYNTAX OCTET STRING (SIZE(0..255)) MAX-ACCESS read-only STATUS current DESCRIPTION "LDAP search base distinquished name." ::= { cmaConfigLDAP 7 }
cmaConfigLdapWindowsAuthenticationIntegration OBJECT-TYPE SYNTAX TruthValue MAX-ACCESS read-only STATUS current DESCRIPTION "Windows Authentication integration flag." ::= { cmaConfigLDAP 8 }
cmaConfigLdapWindowsAuthenticationDomainControllerName OBJECT-TYPE SYNTAX OCTET STRING (SIZE(0..255)) MAX-ACCESS read-only STATUS current DESCRIPTION "Windows domain controller name." ::= { cmaConfigLDAP 9 }
-- END LDAP contact configuration
-- START database configurationcmaConfigDatabaseGroup OBJECT-GROUP OBJECTS { cmaConfigDatabaseType, cmaConfigExternalDatabaseInetAddressType, cmaConfigExternalDatabaseInetAddress, cmaConfigExternalDatabasePort, cmaConfigExternalDatabaseInstanceName } STATUS current DESCRIPTION "CMA database configuration conformance group." ::= { cmaConfigConformance 5 }
cmaConfigDatabaseType OBJECT-TYPE SYNTAX CmaConfigDatabaseType MAX-ACCESS read-only STATUS current DESCRIPTION "CMA database type (internal or external)." ::= { cmaConfigDatabase 1 }
cmaConfigExternalDatabaseInetAddressType OBJECT-TYPE SYNTAX InetAddressType MAX-ACCESS read-only STATUS current DESCRIPTION "IP address type of external database (only valid if external database is being used)." ::= { cmaConfigDatabase 2 }
cmaConfigExternalDatabaseInetAddress OBJECT-TYPE SYNTAX InetAddress MAX-ACCESS read-only STATUS current

Polycom CMA System MIB
Polycom, Inc. 447
DESCRIPTION "IP address of external database (only valid if external database is being used)." ::= { cmaConfigDatabase 3 }
cmaConfigExternalDatabasePort OBJECT-TYPE SYNTAX InetPortNumber MAX-ACCESS read-only STATUS current DESCRIPTION "IP port of external database (only valid if external database is being used)." ::= { cmaConfigDatabase 4 }
cmaConfigExternalDatabaseInstanceName OBJECT-TYPE SYNTAX OCTET STRING (SIZE(0..255)) MAX-ACCESS read-only STATUS current DESCRIPTION "External database instance name (only valid if external database is being used)." ::= { cmaConfigDatabase 5 }
-- END database configuration
-- START system time configurationcmaConfigSystemTimeGroup OBJECT-GROUP OBJECTS { cmaConfigSystemTimeZone, cmaConfigSystemTimeDaylightSavingAutoAdjust, cmaConfigSystemTimeSourceType, cmaConfigSystemTimeExternalSourceSyncPeriod, timeSourceIndex, timeSourceInetAddressType, timeSourceInetAddress } STATUS current DESCRIPTION "CMA System time configuration conformance group." ::= { cmaConfigConformance 6 }
cmaConfigSystemTimeZone OBJECT-TYPE SYNTAX CmaTimeZone MAX-ACCESS read-only STATUS current DESCRIPTION "Time zone in which the CMA server resides." ::= { cmaConfigTime 1 }
cmaConfigSystemTimeDaylightSavingAutoAdjust OBJECT-TYPE SYNTAX TruthValue MAX-ACCESS read-only STATUS current DESCRIPTION "Daylight saving auto adjust flag." ::= { cmaConfigTime 2 }
cmaConfigSystemTimeSourceType OBJECT-TYPE SYNTAX CmaConfigSystemTimeSourceType MAX-ACCESS read-only STATUS current DESCRIPTION "Time source type." ::= { cmaConfigTime 3 }
cmaConfigSystemTimeExternalSourceSyncPeriod OBJECT-TYPE

Polycom CMA System Operations Guide
448 Polycom, Inc.
SYNTAX Integer32 MAX-ACCESS read-only STATUS current DESCRIPTION "Number of minutes between synchronization attempts with external time source (only valid if external time source is used)." ::= { cmaConfigTime 4 }
CmaConfigSystemTimeExternalSourceTableEntry ::= SEQUENCE{ timeSourceIndex CmaDefaultTableIndexRange, timeSourceInetAddressType InetAddressType, timeSourceInetAddress InetAddress}
cmaConfigSystemTimeExternalSourceTable OBJECT-TYPE SYNTAX SEQUENCE OF CmaConfigSystemTimeExternalSourceTableEntry MAX-ACCESS not-accessible STATUS current DESCRIPTION "External time source table. Contains time server addresses." ::= { cmaConfigTime 5 }
cmaConfigSystemTimeExternalSourceEntry OBJECT-TYPE SYNTAX CmaConfigSystemTimeExternalSourceTableEntry MAX-ACCESS not-accessible STATUS current DESCRIPTION "External time source table entry." INDEX { timeSourceIndex } ::= { cmaConfigSystemTimeExternalSourceTable 1}
timeSourceIndex OBJECT-TYPE SYNTAX CmaDefaultTableIndexRange MAX-ACCESS read-only STATUS current DESCRIPTION "Unique system-assigned ID for this entry." ::= { cmaConfigSystemTimeExternalSourceEntry 1 }
timeSourceInetAddressType OBJECT-TYPE SYNTAX InetAddressType MAX-ACCESS read-only STATUS current DESCRIPTION "IP address type of the external time source." ::= { cmaConfigSystemTimeExternalSourceEntry 2 }
timeSourceInetAddress OBJECT-TYPE SYNTAX InetAddress MAX-ACCESS read-only STATUS current DESCRIPTION "IP address or DNS name of the external time source." ::= { cmaConfigSystemTimeExternalSourceEntry 3 }
-- END system time configuration
-- START Redundancy settingscmaConfigRedundancyGroup OBJECT-GROUP OBJECTS { cmaConfigRedundancyEnabled, cmaConfigRedundancyVirtualInetAddressType, cmaConfigRedundancyVirtualInetAddress }

Polycom CMA System MIB
Polycom, Inc. 449
STATUS current DESCRIPTION "CMA redundancy configuration conformance group." ::= { cmaConfigConformance 7 }
cmaConfigRedundancyEnabled OBJECT-TYPE SYNTAX TruthValue MAX-ACCESS read-only STATUS current DESCRIPTION "Redundancy enabled flag." ::= { cmaConfigRedundancy 1 }
cmaConfigRedundancyVirtualInetAddressType OBJECT-TYPE SYNTAX InetAddressType MAX-ACCESS read-only STATUS current DESCRIPTION "IP address type of the virtual IP (valid only if redundancy is enabled)." ::= { cmaConfigRedundancy 2 }
cmaConfigRedundancyVirtualInetAddress OBJECT-TYPE SYNTAX InetAddress MAX-ACCESS read-only STATUS current DESCRIPTION "IP address of the virtual IP (valid only if redundancy is enabled)." ::= { cmaConfigRedundancy 3 }
-- END Redundancy settings
-- START Remote Alert SettingscmaConfigRemoteAlertGroup OBJECT-GROUP OBJECTS { cmaConfigRemoteAlertsEnabled, cmaConfigRemoteStartupQuiescentTime, cmaConfigSystemAlertType, cmaConfigSystemAlertLevel, cmaConfigEndpointAlertType, cmaConfigEndpointAlertLevel } STATUS current DESCRIPTION "CMA remote alert configuration conformance group." ::= { cmaConfigConformance 8 }
cmaConfigRemoteAlertsEnabled OBJECT-TYPE SYNTAX TruthValue MAX-ACCESS read-only STATUS current DESCRIPTION "Remote alerts enabled flag." ::= { cmaConfigRemoteAlert 1 }
cmaConfigRemoteStartupQuiescentTime OBJECT-TYPE SYNTAX Integer32 MAX-ACCESS read-only STATUS current DESCRIPTION "Number of minutes after a startup of CMA before remote alerts are sent (only valid if remote alerts are enabled). This period of time allows the CMA server to finish startup activities. Only alerts that are still outstanding at the end of the period are sent."

Polycom CMA System Operations Guide
450 Polycom, Inc.
::= { cmaConfigRemoteAlert 2 }
CmaConfigSystemAlertSettingEntry ::= SEQUENCE{ cmaConfigSystemAlertType CmaSystemAlertType, cmaConfigSystemAlertLevel CmaConfigRemoteAlertLevel}
cmaConfigSystemAlertSettingTable OBJECT-TYPE SYNTAX SEQUENCE OF CmaConfigSystemAlertSettingEntry MAX-ACCESS not-accessible STATUS current DESCRIPTION "System alert level settings table. Contains system alert types and their alert levels." ::= { cmaConfigRemoteAlert 3 }
cmaConfigSystemAlertSettingEntry OBJECT-TYPE SYNTAX CmaConfigSystemAlertSettingEntry MAX-ACCESS not-accessible STATUS current DESCRIPTION "System alert level settings table entry." INDEX { cmaConfigSystemAlertType } ::= { cmaConfigSystemAlertSettingTable 1}
cmaConfigSystemAlertType OBJECT-TYPE SYNTAX CmaSystemAlertType MAX-ACCESS read-only STATUS current DESCRIPTION "System alert type." ::= { cmaConfigSystemAlertSettingEntry 1 }
cmaConfigSystemAlertLevel OBJECT-TYPE SYNTAX CmaConfigRemoteAlertLevel MAX-ACCESS read-only STATUS current DESCRIPTION "Alert level of the system alert type." ::= { cmaConfigSystemAlertSettingEntry 2 }
CmaConfigEndpointAlertSettingEntry ::= SEQUENCE{ cmaConfigEndpointAlertType CmaEndpointAlertType, cmaConfigEndpointAlertLevel CmaConfigRemoteAlertLevel}
cmaConfigEndpointAlertSettingTable OBJECT-TYPE SYNTAX SEQUENCE OF CmaConfigEndpointAlertSettingEntry MAX-ACCESS not-accessible STATUS current DESCRIPTION "Endpoint alert level settings table. Contains endpoint alert types and their alert levels." ::= { cmaConfigRemoteAlert 4 }
cmaConfigEndpointAlertSettingEntry OBJECT-TYPE SYNTAX CmaConfigEndpointAlertSettingEntry MAX-ACCESS not-accessible STATUS current DESCRIPTION "Endpoint alert level settings table entry." INDEX { cmaConfigEndpointAlertType } ::= { cmaConfigEndpointAlertSettingTable 1}

Polycom CMA System MIB
Polycom, Inc. 451
cmaConfigEndpointAlertType OBJECT-TYPE SYNTAX CmaEndpointAlertType MAX-ACCESS read-only STATUS current DESCRIPTION "Endpoint alert type." ::= { cmaConfigEndpointAlertSettingEntry 1 }
cmaConfigEndpointAlertLevel OBJECT-TYPE SYNTAX CmaConfigRemoteAlertLevel MAX-ACCESS read-only STATUS current DESCRIPTION "Alert level of the endpoint alert type." ::= { cmaConfigEndpointAlertSettingEntry 2 }
-- END Remote Alert Settings
-- START Global Address Book settings
cmaConfigGabGroup OBJECT-GROUP OBJECTS { cmaConfigGabIncludeADUsers } STATUS current DESCRIPTION "CMA GAB configuration conformance group." ::= { cmaConfigConformance 9 }
cmaConfigGabIncludeADUsers OBJECT-TYPE SYNTAX TruthValue MAX-ACCESS read-only STATUS current DESCRIPTION "Flag indicating whether to include active directory users in the Global Address Book." ::= { cmaConfigGab 1 }
-- END Global Address Book settings
-- START Network settingscmaConfigNetworkGroup OBJECT-GROUP OBJECTS { cmaConfigNetworkSystemName, cmaConfigNetworkInetAddressType, cmaConfigNetworkInetAddress, cmaConfigNetworkSubnetMask, cmaConfigNetworkDefaultGatewayInetAddressType, cmaConfigNetworkDefaultGatewayInetAddress, cmaConfigNetworkDnsServerInetAddressType, cmaConfigNetworkDnsServerInetAddress, cmaConfigNetworkDnsServerDomain } STATUS current DESCRIPTION "CMA Network configuration conformance group." ::= { cmaConfigConformance 10 }
cmaConfigNetworkSystemName OBJECT-TYPE SYNTAX OCTET STRING (SIZE(1..255)) MAX-ACCESS read-only STATUS current

Polycom CMA System Operations Guide
452 Polycom, Inc.
DESCRIPTION "CMA server's system name." ::= { cmaConfigNetwork 1 }
cmaConfigNetworkInetAddressType OBJECT-TYPE SYNTAX InetAddressType MAX-ACCESS read-only STATUS current DESCRIPTION "CMA server's IP address type." ::= { cmaConfigNetwork 2 }
cmaConfigNetworkInetAddress OBJECT-TYPE SYNTAX InetAddress MAX-ACCESS read-only STATUS current DESCRIPTION "CMA server's IP address." ::= { cmaConfigNetwork 3 }
cmaConfigNetworkSubnetMask OBJECT-TYPE SYNTAX InetAddress MAX-ACCESS read-only STATUS current DESCRIPTION "CMA server's subnet mask." ::= { cmaConfigNetwork 4 }
cmaConfigNetworkDefaultGatewayInetAddressType OBJECT-TYPE SYNTAX InetAddressType MAX-ACCESS read-only STATUS current DESCRIPTION "Default gateway IP address type." ::= { cmaConfigNetwork 5 }
cmaConfigNetworkDefaultGatewayInetAddress OBJECT-TYPE SYNTAX InetAddress MAX-ACCESS read-only STATUS current DESCRIPTION "Default gateway IP address." ::= { cmaConfigNetwork 6 }
cmaConfigNetworkDnsServerInetAddressType OBJECT-TYPE SYNTAX InetAddressType MAX-ACCESS read-only STATUS current DESCRIPTION "DNS server IP address type." ::= { cmaConfigNetwork 7 }
cmaConfigNetworkDnsServerInetAddress OBJECT-TYPE SYNTAX InetAddress MAX-ACCESS read-only STATUS current DESCRIPTION "DNS server IP address." ::= { cmaConfigNetwork 8 }
cmaConfigNetworkDnsServerDomain OBJECT-TYPE SYNTAX OCTET STRING (SIZE(0..255)) MAX-ACCESS read-only STATUS current DESCRIPTION "DNS server domain name." ::= { cmaConfigNetwork 9 }
-- END Network settings

Polycom CMA System MIB
Polycom, Inc. 453
-- START email settingscmaConfigEmailGroup OBJECT-GROUP OBJECTS { cmaConfigEmailFromAddress, cmaConfigEmailSmtpServerInetAddressType, cmaConfigEmailSmtpServerInetAddress, cmaConfigEmailSmtpServerPort } STATUS current DESCRIPTION "CMA email configuration conformance group." ::= { cmaConfigConformance 11 }
cmaConfigEmailFromAddress OBJECT-TYPE SYNTAX OCTET STRING (SIZE(0..255)) MAX-ACCESS read-only STATUS current DESCRIPTION "CMA server's email 'From' address." ::= { cmaConfigEmail 1 }
cmaConfigEmailSmtpServerInetAddressType OBJECT-TYPE SYNTAX InetAddressType MAX-ACCESS read-only STATUS current DESCRIPTION "IP address type of the SMTP server." ::= { cmaConfigEmail 2 }
cmaConfigEmailSmtpServerInetAddress OBJECT-TYPE SYNTAX InetAddress MAX-ACCESS read-only STATUS current DESCRIPTION "IP address of the SMTP server." ::= { cmaConfigEmail 3 }
cmaConfigEmailSmtpServerPort OBJECT-TYPE SYNTAX InetPortNumber MAX-ACCESS read-only STATUS current DESCRIPTION "Port number of the SMTP server." ::= { cmaConfigEmail 4 }-- END email settings
-- START Primary gatekeeper settingscmaConfigGatekeeperGroup OBJECT-GROUP OBJECTS { cmaConfigPrimaryGatekeeperId, cmaConfigPrimaryGatekeeperDescription, cmaConfigPrimaryGatekeeperIsDefault, cmaConfigPrimaryGatekeeperEndpointRegistrationType, cmaConfigPrimaryGatekeeperRegistrationTimeout, cmaConfigPrimaryGatekeeperEndpointRegistrationRefreshPeriod, cmaConfigPrimaryGatekeeperMaxNeighborHopCount, cmaConfigPrimaryGatekeeperRogueEndpointCallLogging, cmaConfigPrimaryGatekeeperDenyRogueEndpointCalling, cmaConfigPrimaryGatekeeperEnableStatistics, cmaConfigPrimaryGatekeeperIrrFrequency, cmaConfigPrimaryGatekeeperCallModel,

Polycom CMA System Operations Guide
454 Polycom, Inc.
cmaConfigAlternateGatekeeperRegistrationRequired, cmaConfigAlternateGatekeeperId, cmaConfigAlternateGatekeeperInetAddressType, cmaConfigAlternateGatekeeperInetAddress, cmaConfigAlternateGatekeeperPort, cmaConfigAlternateGatekeeperPriority, cmaConfigNeighborGatekeeperCount, cmaNeighborGatekeeperIndex, cmaNeighborGatekeeperName, cmaNeighborGatekeeperId, cmaNeighborGatekeeperDescription, cmaNeighborGatekeeperInetAddressType, cmaNeighborGatekeeperInetAddress, cmaNeighborGatekeeperPort } STATUS current DESCRIPTION "CMA gatekeeper configuration conformance group." ::= { cmaConfigConformance 12 }
cmaConfigPrimaryGatekeeperId OBJECT-TYPE SYNTAX OCTET STRING (SIZE(1..255)) MAX-ACCESS read-only STATUS current DESCRIPTION "Primary gatekeeper identifier." ::= { cmaConfigGatekeeperPrimary 1 }
cmaConfigPrimaryGatekeeperDescription OBJECT-TYPE SYNTAX OCTET STRING (SIZE(1..255)) MAX-ACCESS read-only STATUS current DESCRIPTION "Primary gatekeeper description." ::= { cmaConfigGatekeeperPrimary 2 }
cmaConfigPrimaryGatekeeperIsDefault OBJECT-TYPE SYNTAX TruthValue MAX-ACCESS read-only STATUS current DESCRIPTION "Flag indicating whether the primary gatekeeper is the default gatekeeper on the network." ::= { cmaConfigGatekeeperPrimary 3 }
cmaConfigPrimaryGatekeeperEndpointRegistrationType OBJECT-TYPE SYNTAX CmaPrimaryGatekeeperEndpointRegistrationType MAX-ACCESS read-only STATUS current DESCRIPTION "Type of endpoints allowed to register with the primary gatekeeper." ::= { cmaConfigGatekeeperPrimary 4 }
cmaConfigPrimaryGatekeeperRegistrationTimeout OBJECT-TYPE SYNTAX Integer32 MAX-ACCESS read-only STATUS current DESCRIPTION "Number of days the primary gatekeeper maintains endpoint registration information. A value of 999 indicates that the information is maintained indefinitely." ::= { cmaConfigGatekeeperPrimary 5 }
cmaConfigPrimaryGatekeeperEndpointRegistrationRefreshPeriod OBJECT-TYPE SYNTAX Integer32 MAX-ACCESS read-only

Polycom CMA System MIB
Polycom, Inc. 455
STATUS current DESCRIPTION "Interval in seconds at which the gatekeeper sends keep-alive messages to registered endpints." ::= { cmaConfigGatekeeperPrimary 6 }
cmaConfigPrimaryGatekeeperMaxNeighborHopCount OBJECT-TYPE SYNTAX Integer32 (1..10) MAX-ACCESS read-only STATUS current DESCRIPTION "Maximum number of connections to make when an endpoint seeks dialing resolution." ::= { cmaConfigGatekeeperPrimary 7 }
cmaConfigPrimaryGatekeeperRogueEndpointCallLogging OBJECT-TYPE SYNTAX TruthValue MAX-ACCESS read-only STATUS current DESCRIPTION "Flag indicating whether calls to and from rogue endpoints are logged." ::= { cmaConfigGatekeeperPrimary 8 }
cmaConfigPrimaryGatekeeperDenyRogueEndpointCalling OBJECT-TYPE SYNTAX TruthValue MAX-ACCESS read-only STATUS current DESCRIPTION "Flag indicating whether calls to and from rogue endpoints are denied." ::= { cmaConfigGatekeeperPrimary 9 }
cmaConfigPrimaryGatekeeperEnableStatistics OBJECT-TYPE SYNTAX TruthValue MAX-ACCESS read-only STATUS current DESCRIPTION "Flag indicating whether real-time statics are enabled." ::= { cmaConfigGatekeeperPrimary 10 }
cmaConfigPrimaryGatekeeperIrrFrequency OBJECT-TYPE SYNTAX TruthValue MAX-ACCESS read-only STATUS current DESCRIPTION "Frequency of the gatekeeper's response to the calling or receiving endpoint (valid only if statistics are enabled)." ::= { cmaConfigGatekeeperPrimary 11 }
cmaConfigPrimaryGatekeeperCallModel OBJECT-TYPE SYNTAX CmaGatekeeperCallModel MAX-ACCESS read-only STATUS current DESCRIPTION "Call model of the gatekeeper." ::= { cmaConfigGatekeeperPrimary 12 }
-- END Primary gatekeeper settings
-- START Alternate gatekeeper settings
cmaConfigAlternateGatekeeperRegistrationRequired OBJECT-TYPE SYNTAX TruthValue MAX-ACCESS read-only STATUS current DESCRIPTION "Flag indicating whether devices are required to register with the alternate gatekeeper before sending other registration admission status requests."

Polycom CMA System Operations Guide
456 Polycom, Inc.
::= { cmaConfigGatekeeperAlternate 1 }
cmaConfigAlternateGatekeeperId OBJECT-TYPE SYNTAX OCTET STRING (SIZE(1..255)) MAX-ACCESS read-only STATUS current DESCRIPTION "Identifier of the alternate gatekeeper." ::= { cmaConfigGatekeeperAlternate 2 }
cmaConfigAlternateGatekeeperInetAddressType OBJECT-TYPE SYNTAX InetAddressType MAX-ACCESS read-only STATUS current DESCRIPTION "IP address type of the alternate gatekeeper." ::= { cmaConfigGatekeeperAlternate 3 }
cmaConfigAlternateGatekeeperInetAddress OBJECT-TYPE SYNTAX InetAddress MAX-ACCESS read-only STATUS current DESCRIPTION "IP address of the alternate gatekeeper." ::= { cmaConfigGatekeeperAlternate 4 }
cmaConfigAlternateGatekeeperPort OBJECT-TYPE SYNTAX InetPortNumber MAX-ACCESS read-only STATUS current DESCRIPTION "Port used by the alternate gatekeeper for endpoint communication." ::= { cmaConfigGatekeeperAlternate 5 }
cmaConfigAlternateGatekeeperPriority OBJECT-TYPE SYNTAX Integer32 (0..127) MAX-ACCESS read-only STATUS current DESCRIPTION "Alternate gatekeeper's priority for endpoint registration. A lower number has higher priority (the range is 0 to 127), so endpoints first register with a priority 0 alternate gatekeeper." ::= { cmaConfigGatekeeperAlternate 6 }
-- END Alternate gatekeeper settings
-- START Neighbor gatekeeper settings
cmaConfigNeighborGatekeeperCount OBJECT-TYPE SYNTAX Integer32 MAX-ACCESS read-only STATUS current DESCRIPTION "Number of configured neighbor gatekeepers." ::= { cmaConfigGatekeeperNeighbor 1 }
CmaConfigNeighborGatekeeperTableEntry ::= SEQUENCE{ cmaNeighborGatekeeperIndex CmaDefaultTableIndexRange, cmaNeighborGatekeeperName OCTET STRING, cmaNeighborGatekeeperId OCTET STRING, cmaNeighborGatekeeperDescription OCTET STRING, cmaNeighborGatekeeperInetAddressType InetAddressType, cmaNeighborGatekeeperInetAddress InetAddress, cmaNeighborGatekeeperPort InetPortNumber}

Polycom CMA System MIB
Polycom, Inc. 457
cmaConfigNeighborGatekeeperTable OBJECT-TYPE SYNTAX SEQUENCE OF CmaConfigNeighborGatekeeperTableEntry MAX-ACCESS not-accessible STATUS current DESCRIPTION "Neighbor gatekeeper table. Lists the neighbor gatekeepers defined in the system." ::= { cmaConfigGatekeeperNeighbor 2 }
cmaConfigNeighborGatekeeperTableEntry OBJECT-TYPE SYNTAX CmaConfigNeighborGatekeeperTableEntry MAX-ACCESS not-accessible STATUS current DESCRIPTION "Neighbor gatekeeper table entry." INDEX { cmaNeighborGatekeeperIndex } ::= { cmaConfigNeighborGatekeeperTable 1 }
cmaNeighborGatekeeperIndex OBJECT-TYPE SYNTAX CmaDefaultTableIndexRange MAX-ACCESS read-only STATUS current DESCRIPTION "Unique system-assigned ID for this entry." ::= { cmaConfigNeighborGatekeeperTableEntry 1 }
cmaNeighborGatekeeperName OBJECT-TYPE SYNTAX OCTET STRING (SIZE(1..255)) MAX-ACCESS read-only STATUS current DESCRIPTION "Name of the neighbor gatekeeper." ::= { cmaConfigNeighborGatekeeperTableEntry 2 }
cmaNeighborGatekeeperId OBJECT-TYPE SYNTAX OCTET STRING (SIZE(1..255)) MAX-ACCESS read-only STATUS current DESCRIPTION "Identifier of the neighbor gatekeeper." ::= { cmaConfigNeighborGatekeeperTableEntry 3 }
cmaNeighborGatekeeperDescription OBJECT-TYPE SYNTAX OCTET STRING (SIZE(1..255)) MAX-ACCESS read-only STATUS current DESCRIPTION "Description of the neighbor gatekeeper." ::= { cmaConfigNeighborGatekeeperTableEntry 4 }
cmaNeighborGatekeeperInetAddressType OBJECT-TYPE SYNTAX InetAddressType MAX-ACCESS read-only STATUS current DESCRIPTION "IP address type of the neighbor gatekeeper." ::= { cmaConfigNeighborGatekeeperTableEntry 5 }
cmaNeighborGatekeeperInetAddress OBJECT-TYPE SYNTAX InetAddress MAX-ACCESS read-only STATUS current DESCRIPTION "IP address of the neighbor gatekeeper." ::= { cmaConfigNeighborGatekeeperTableEntry 6 }
cmaNeighborGatekeeperPort OBJECT-TYPE

Polycom CMA System Operations Guide
458 Polycom, Inc.
SYNTAX InetPortNumber MAX-ACCESS read-only STATUS current DESCRIPTION "Port used by the neighbor gatekeeper for endpoint communication." ::= { cmaConfigNeighborGatekeeperTableEntry 7 }
-- END Neighbor gatekeeper settings
-- START UI SettingscmaConfigUIGroup OBJECT-GROUP OBJECTS { cmaConfigUIUseHttps, cmaConfigUITimeout, cmaConfigUIDefaultProfileAccessAllowed, cmaConfigUINoRolesUserMessage } STATUS current DESCRIPTION "CMA UI configuration conformance group." ::= { cmaConfigConformance 13 }
cmaConfigUIUseHttps OBJECT-TYPE SYNTAX TruthValue MAX-ACCESS read-only STATUS current DESCRIPTION "Flag indicating whether HTTPS is enabled for the CMA UI." ::= { cmaConfigUI 1 }
cmaConfigUITimeout OBJECT-TYPE SYNTAX Integer32 MAX-ACCESS read-only STATUS current DESCRIPTION "UI timeout in minutes. UI sessions are automatically logged out if inactive for this period of time. The timeout is disabled if this value is 0." ::= { cmaConfigUI 2 }
cmaConfigUIDefaultProfileAccessAllowed OBJECT-TYPE SYNTAX TruthValue MAX-ACCESS read-only STATUS current DESCRIPTION "Flag indicating whether users without explicit roles are allowed to log into the CMA UI and are assigned the default profile." ::= { cmaConfigUI 3 }
cmaConfigUINoRolesUserMessage OBJECT-TYPE SYNTAX TruthValue MAX-ACCESS read-only STATUS current DESCRIPTION "Message displayed to users who log into the CMA UI, but do not have explicitly assigned roles (valid only if cmaConfigDefaultProfileAccessAllowed is true)." ::= { cmaConfigUI 4 }
-- END UI Settings
-- START endpoint management settingscmaConfigEndpointGroup OBJECT-GROUP OBJECTS {

Polycom CMA System MIB
Polycom, Inc. 459
cmaConfigEndpointAutoDiscovery, cmaConfigEndpointUseCommonPassword } STATUS current DESCRIPTION "CMA Endpoint management configuration conformance group." ::= { cmaConfigConformance 14 }
cmaConfigEndpointAutoDiscovery OBJECT-TYPE SYNTAX TruthValue MAX-ACCESS read-only STATUS current DESCRIPTION "Flag indicating whether automatic endpoint discovery is enabled." ::= { cmaConfigEndpoint 1 }
cmaConfigEndpointUseCommonPassword OBJECT-TYPE SYNTAX TruthValue MAX-ACCESS read-only STATUS current DESCRIPTION "Flag indicating whether a common administrator password is used for all endpoints." ::= { cmaConfigEndpoint 2 }
-- END endpoint management settings
-- START Dial Plans - dial rulescmaConfigDialPlanGroup OBJECT-GROUP OBJECTS { cmaConfigDialPlanRuleCount, dialPlanRuleIndex, dialPlanRuleName, dialPlanRuleDescription, dialPlanRulePriority, dialPlanRuleEnabled, dialPlanRulePatternType, dialPlanRuleSite, dialPlanRuleRoutingAction, dialPlanRuleDialStringPattern, dialPlanRuleDialStringPrefixStart, dialPlanRuleDialStringPrefixEnd, dialPlanRuleDialStringCharsToRemove, dialPlanRuleDialStringCharsToRemovePosition, dialPlanRuleDialStringPrefixToAdd, dialPlanRuleTrustedNeighbors, dialPlanRuleGatwayServiceList, lcrTableCount, lcrTableIndex, lcrTableName, lcrTableDescription, lcrRouteIndex, lcrRouteLcrTableName, lcrRouteCountryCode, lcrRouteAreaCode, lcrRoutePrefix, lcrRouteDigitsToStrip, lcrRouteCost, dialPlanServiceCount, dialPlanServiceIndex, dialPlanServiceType, dialPlanServiceEnabled,

Polycom CMA System Operations Guide
460 Polycom, Inc.
dialPlanServiceAvailForNewGroups, dialPlanServiceDescription, dialPlanServicePrefix, dialPlanServiceSimplifiedDialingH320, dialPlanServiceSimplifiedDialingVoice, dialPlanServiceSimplifiedDialingOther, dialPlanServiceSimplifiedDialingBitRate, dialPlanServiceSimplifiedDialingCharInsert1, dialPlanServiceSimplifiedDialingCharInsert2, dialPlanServiceSimplifiedDialingCharAppend, dialPlanServiceConfOnDemandMcuH323Service, dialPlanServiceConfOnDemandMgcVideoSession, dialPlanServiceConfOnDemandMgcBitRate, dialPlanServiceConfOnDemandRmxProfileName, siteProvisioningSiteName, siteCountry, siteDateFormat, siteAutoAdjustDst, siteTimeFormat , siteTimeServerInetAddressType, siteTimeServerInetAddress, siteTimeZone, siteFirewallUseFixedPorts, siteFirewallTcpStartPort, siteFirewallUdpStartPort, siteFirewallH460Traversal, siteFirewallNatConfiguration, siteFirewallNatWanAddressType, siteFirewallNatWanAddress, siteFirewallNatH323Compatible, siteFirewallShowEpInGab, siteH323EnableIpCalls, siteH323UseGatekeeperType, siteH323GatekeeperIPAddressType, siteH323GatekeeperIPAddress, siteH3232UseGkForMultipointCalls, siteProvisioningPollingInterval, siteSoftupdatePollingInterval, siteQosVideoTosValue, siteQosAudioTosValue, siteQosFeccTosValue, siteQosTosType, siteQosMaxMtusize, siteQosEnablePvec, siteQosEnableRsvp, siteQosDynamicBandwidth, siteQosMaxTransmitBandwidth, siteQosMaxReceiveBandwidth, siteSecurityUsePwdForRemoteAccess, siteSecurityEnableSecureMode, siteSecurityEnableEncryption, siteSecurityEnableWebAccess, siteSecurityEnableTelnetAccess, siteSecurityEnableSnmpAccess, siteSecurityWebAccessPort, siteSecurityAllowWebVideoDisplay, siteCmadHeartbeatPollingInterval, siteCmadInCallStatsPollingInterval } STATUS current

Polycom CMA System MIB
Polycom, Inc. 461
DESCRIPTION "CMA Dial plan configuration conformance group." ::= { cmaConfigConformance 15 }
cmaConfigDialPlanRuleCount OBJECT-TYPE SYNTAX Integer32 MAX-ACCESS read-only STATUS current DESCRIPTION "Number of configured dial plan rules." ::= { cmaConfigDialPlanRules 1 }
CmaConfigDialPlanRuleTableEntry ::= SEQUENCE{ dialPlanRuleIndex CmaDefaultTableIndexRange, dialPlanRuleName OCTET STRING, dialPlanRuleDescription OCTET STRING, dialPlanRulePriority Integer32, dialPlanRuleEnabled TruthValue, dialPlanRulePatternType CmaDialPlanRulePatternType, dialPlanRuleSite OCTET STRING, dialPlanRuleRoutingAction CmaDialPlanRuleRoutingActionType, dialPlanRuleDialStringPattern OCTET STRING, dialPlanRuleDialStringPrefixStart OCTET STRING, dialPlanRuleDialStringPrefixEnd OCTET STRING, dialPlanRuleDialStringCharsToRemove Integer32, dialPlanRuleDialStringCharsToRemovePosition CmaDialPlanRoutingDialStringPosition, dialPlanRuleDialStringPrefixToAdd OCTET STRING, dialPlanRuleTrustedNeighbors OCTET STRING, dialPlanRuleGatwayServiceList OCTET STRING}
cmaConfigDialPlanRuleTable OBJECT-TYPE SYNTAX SEQUENCE OF CmaConfigDialPlanRuleTableEntry MAX-ACCESS not-accessible STATUS current DESCRIPTION "Dial plan rule table. Lists the dial plan rules defined in the system, specifying their actions, settings, and parameters." ::= { cmaConfigDialPlanRules 5 }
cmaConfigDialPlanRuleTableEntry OBJECT-TYPE SYNTAX CmaConfigDialPlanRuleTableEntry MAX-ACCESS not-accessible STATUS current DESCRIPTION "Dial plan rule table entry." INDEX { dialPlanRuleIndex } ::= { cmaConfigDialPlanRuleTable 1 }
dialPlanRuleIndex OBJECT-TYPE SYNTAX CmaDefaultTableIndexRange MAX-ACCESS read-only STATUS current DESCRIPTION "Unique system-assigned ID for this entry." ::= { cmaConfigDialPlanRuleTableEntry 1 }
dialPlanRuleName OBJECT-TYPE SYNTAX OCTET STRING(SIZE(1..255)) MAX-ACCESS read-only STATUS current DESCRIPTION "Name of the dial plan rule." ::= { cmaConfigDialPlanRuleTableEntry 2 }

Polycom CMA System Operations Guide
462 Polycom, Inc.
dialPlanRuleDescription OBJECT-TYPE SYNTAX OCTET STRING(SIZE(1..255)) MAX-ACCESS read-only STATUS current DESCRIPTION "Description of the dial plan rule." ::= { cmaConfigDialPlanRuleTableEntry 3 }
dialPlanRulePriority OBJECT-TYPE SYNTAX Integer32 MAX-ACCESS read-only STATUS current DESCRIPTION "Priority ranking of the dial plan rule." ::= { cmaConfigDialPlanRuleTableEntry 4 }
dialPlanRuleEnabled OBJECT-TYPE SYNTAX TruthValue MAX-ACCESS read-only STATUS current DESCRIPTION "Flag indicating whether the dial plan rule is enabled." ::= { cmaConfigDialPlanRuleTableEntry 5 }
dialPlanRulePatternType OBJECT-TYPE SYNTAX CmaDialPlanRulePatternType MAX-ACCESS read-only STATUS current DESCRIPTION "Type of pattern to be matched in the dial plan rule." ::= { cmaConfigDialPlanRuleTableEntry 6 }
dialPlanRuleSite OBJECT-TYPE SYNTAX OCTET STRING(SIZE(1..255)) MAX-ACCESS read-only STATUS current DESCRIPTION "Site to which the dial plan rule applies. This may be 'All' or a specific site name." ::= { cmaConfigDialPlanRuleTableEntry 7 }
dialPlanRuleRoutingAction OBJECT-TYPE SYNTAX CmaDialPlanRuleRoutingActionType MAX-ACCESS read-only STATUS current DESCRIPTION "Action to take for calls that match the pattern type and criteria." ::= { cmaConfigDialPlanRuleTableEntry 8 }
dialPlanRuleDialStringPattern OBJECT-TYPE SYNTAX OCTET STRING (SIZE(0..255)) MAX-ACCESS read-only STATUS current DESCRIPTION "Criteria to use to match the pattern type for the dial plan rule." ::= { cmaConfigDialPlanRuleTableEntry 9 }
dialPlanRuleDialStringPrefixStart OBJECT-TYPE SYNTAX OCTET STRING (SIZE(0..30)) MAX-ACCESS read-only STATUS current DESCRIPTION "Starting prefix criteria to use to match the pattern type." ::= { cmaConfigDialPlanRuleTableEntry 10 }
dialPlanRuleDialStringPrefixEnd OBJECT-TYPE SYNTAX OCTET STRING (SIZE(0..30)) MAX-ACCESS read-only

Polycom CMA System MIB
Polycom, Inc. 463
STATUS current DESCRIPTION "Ending prefix criteria to use to match the pattern type." ::= { cmaConfigDialPlanRuleTableEntry 11 }
dialPlanRuleDialStringCharsToRemove OBJECT-TYPE SYNTAX Integer32 MAX-ACCESS read-only STATUS current DESCRIPTION "Number of digits to remove from matching dial strings." ::= { cmaConfigDialPlanRuleTableEntry 12 }
dialPlanRuleDialStringCharsToRemovePosition OBJECT-TYPE SYNTAX CmaDialPlanRoutingDialStringPosition MAX-ACCESS read-only STATUS current DESCRIPTION "Position from which to remove digits in matching dial strings. The number of digits to remove is defined in the dialPlanRuleDialStringCharsToRemove object." ::= { cmaConfigDialPlanRuleTableEntry 13 }
dialPlanRuleDialStringPrefixToAdd OBJECT-TYPE SYNTAX OCTET STRING (SIZE(0..30)) MAX-ACCESS read-only STATUS current DESCRIPTION "Prefix to add to matching dial strings." ::= { cmaConfigDialPlanRuleTableEntry 14 }
dialPlanRuleTrustedNeighbors OBJECT-TYPE SYNTAX OCTET STRING MAX-ACCESS read-only STATUS current DESCRIPTION "List of trusted neighbor gatekeeper names, separated by new-line characters." ::= { cmaConfigDialPlanRuleTableEntry 15 }
dialPlanRuleGatwayServiceList OBJECT-TYPE SYNTAX OCTET STRING MAX-ACCESS read-only STATUS current DESCRIPTION "List of gateway service names, separated by new-line characters." ::= { cmaConfigDialPlanRuleTableEntry 16 }
-- END Dial Plans
-- START LCR
lcrTableCount OBJECT-TYPE SYNTAX Integer32 MAX-ACCESS read-only STATUS current DESCRIPTION "Number of configured Least Cost Routing tables." ::= { cmaConfigDialPlanLCR 1 }
LcrTablesTableEntry ::= SEQUENCE{ lcrTableIndex CmaDefaultTableIndexRange, lcrTableName OCTET STRING, lcrTableDescription OCTET STRING}

Polycom CMA System Operations Guide
464 Polycom, Inc.
lcrTablesTable OBJECT-TYPE SYNTAX SEQUENCE OF LcrTablesTableEntry MAX-ACCESS not-accessible STATUS current DESCRIPTION "Least Cost Routing Tables table. Lists the LCR tables defined in the system. Each entry in this table is associated with one or more entries in the lcrTableRouteTable." ::= { cmaConfigDialPlanLCR 2 }
lcrTablesTableEntry OBJECT-TYPE SYNTAX LcrTablesTableEntry MAX-ACCESS not-accessible STATUS current DESCRIPTION "LCR tables table entry." INDEX { lcrTableIndex } ::= { lcrTablesTable 1 }
lcrTableIndex OBJECT-TYPE SYNTAX CmaDefaultTableIndexRange MAX-ACCESS read-only STATUS current DESCRIPTION "Unique system-assigned ID for this entry." ::= { lcrTablesTableEntry 1 }
lcrTableName OBJECT-TYPE SYNTAX OCTET STRING (SIZE(1..255)) MAX-ACCESS read-only STATUS current DESCRIPTION "Name of the LCR table." ::= { lcrTablesTableEntry 2 }
lcrTableDescription OBJECT-TYPE SYNTAX OCTET STRING (SIZE(0..255)) MAX-ACCESS read-only STATUS current DESCRIPTION "Description of the LCR table." ::= { lcrTablesTableEntry 3 }
LcrTableRouteEntry ::= SEQUENCE{ lcrRouteIndex CmaDefaultTableIndexRange, lcrRouteLcrTableName OCTET STRING, lcrRouteCountryCode OCTET STRING, lcrRouteAreaCode OCTET STRING, lcrRoutePrefix OCTET STRING, lcrRouteDigitsToStrip Integer32, lcrRouteCost Integer32}
lcrTableRouteTable OBJECT-TYPE SYNTAX SEQUENCE OF LcrTableRouteEntry MAX-ACCESS not-accessible STATUS current DESCRIPTION "Least Cost Routing Tables route table. Each LCR table entry in the lcrTablesTable has one or more route entries in this table, each specifying the parameters of a route." ::= { cmaConfigDialPlanLCR 3 }

Polycom CMA System MIB
Polycom, Inc. 465
lcrTableRouteEntry OBJECT-TYPE SYNTAX LcrTableRouteEntry MAX-ACCESS not-accessible STATUS current DESCRIPTION "LCR table route table entry." INDEX { lcrTableIndex, lcrRouteIndex } ::= { lcrTableRouteTable 1 }
lcrRouteIndex OBJECT-TYPE SYNTAX CmaDefaultTableIndexRange MAX-ACCESS read-only STATUS current DESCRIPTION "Unique system-assigned ID for this entry." ::= { lcrTableRouteEntry 1 }
lcrRouteLcrTableName OBJECT-TYPE SYNTAX OCTET STRING (SIZE(1..255)) MAX-ACCESS read-only STATUS current DESCRIPTION "Name of the LCR table to which the route entry belongs." ::= { lcrTableRouteEntry 2 }
lcrRouteCountryCode OBJECT-TYPE SYNTAX OCTET STRING (SIZE(0..10)) MAX-ACCESS read-only STATUS current DESCRIPTION "Country code of the route." ::= { lcrTableRouteEntry 3 }
lcrRouteAreaCode OBJECT-TYPE SYNTAX OCTET STRING (SIZE(0..10)) MAX-ACCESS read-only STATUS current DESCRIPTION "Area code of the route." ::= { lcrTableRouteEntry 4 }
lcrRoutePrefix OBJECT-TYPE SYNTAX OCTET STRING (SIZE(0..3)) MAX-ACCESS read-only STATUS current DESCRIPTION "Prefix (first three numbers in a 7-digit dial string) of the route." ::= { lcrTableRouteEntry 5 }
lcrRouteDigitsToStrip OBJECT-TYPE SYNTAX Integer32 MAX-ACCESS read-only STATUS current DESCRIPTION "Number of digits to strip from the dial string before dialing." ::= { lcrTableRouteEntry 6 }
lcrRouteCost OBJECT-TYPE SYNTAX Integer32 MAX-ACCESS read-only STATUS current DESCRIPTION "Weighted cost of each call number for the route." ::= { lcrTableRouteEntry 7 }
-- END LCR

Polycom CMA System Operations Guide
466 Polycom, Inc.
-- Start Gateway/MCU services
dialPlanServiceCount OBJECT-TYPE SYNTAX Integer32 MAX-ACCESS read-only STATUS current DESCRIPTION "Number of configured CMA dial plan services." ::= { cmaConfigDialPlanServices 1 }
DialPlanServiceTableEntry ::= SEQUENCE{ dialPlanServiceIndex CmaDefaultTableIndexRange, dialPlanServiceType DailPlanServiceType, dialPlanServiceEnabled TruthValue, dialPlanServiceAvailForNewGroups TruthValue, dialPlanServiceDescription OCTET STRING, dialPlanServicePrefix OCTET STRING, dialPlanServiceSimplifiedDialingH320 TruthValue, dialPlanServiceSimplifiedDialingVoice TruthValue, dialPlanServiceSimplifiedDialingOther TruthValue, dialPlanServiceSimplifiedDialingBitRate SimplifiedDialingEndpointBitRates, dialPlanServiceSimplifiedDialingCharInsert1 OCTET STRING, dialPlanServiceSimplifiedDialingCharInsert2 OCTET STRING, dialPlanServiceSimplifiedDialingCharAppend OCTET STRING, dialPlanServiceConfOnDemandMcuH323Service OCTET STRING, dialPlanServiceConfOnDemandMgcVideoSession MgcVideoSessionType, dialPlanServiceConfOnDemandMgcBitRate ConfOnDemandMgcBitRateType, dialPlanServiceConfOnDemandRmxProfileName OCTET STRING }
dialPlanServiceTable OBJECT-TYPE SYNTAX SEQUENCE OF DialPlanServiceTableEntry MAX-ACCESS not-accessible STATUS current DESCRIPTION "Dial plan service table. Contains the dial plan services defined in the system and their parameters." ::= { cmaConfigDialPlanServices 2 }
dialPlanServiceTableEntry OBJECT-TYPE SYNTAX DialPlanServiceTableEntry MAX-ACCESS not-accessible STATUS current DESCRIPTION "Dial plan service table entry." INDEX { dialPlanServiceIndex } ::= { dialPlanServiceTable 1 }
dialPlanServiceIndex OBJECT-TYPE SYNTAX CmaDefaultTableIndexRange MAX-ACCESS read-only STATUS current DESCRIPTION "Unique system-assigned ID for this entry." ::= { dialPlanServiceTableEntry 1 }
dialPlanServiceType OBJECT-TYPE SYNTAX DailPlanServiceType MAX-ACCESS read-only STATUS current DESCRIPTION "Type of dial plan service." ::= { dialPlanServiceTableEntry 2 }

Polycom CMA System MIB
Polycom, Inc. 467
dialPlanServiceEnabled OBJECT-TYPE SYNTAX TruthValue MAX-ACCESS read-only STATUS current DESCRIPTION "Flag indicating whether the dial plan service is enabled." ::= { dialPlanServiceTableEntry 3 }
dialPlanServiceAvailForNewGroups OBJECT-TYPE SYNTAX TruthValue MAX-ACCESS read-only STATUS current DESCRIPTION "Flag indicating whether the dial plan service is available for new user groups." ::= { dialPlanServiceTableEntry 4 }
dialPlanServiceDescription OBJECT-TYPE SYNTAX OCTET STRING (SIZE(0..255)) MAX-ACCESS read-only STATUS current DESCRIPTION "Description of the dial plan service." ::= { dialPlanServiceTableEntry 5 }
dialPlanServicePrefix OBJECT-TYPE SYNTAX OCTET STRING (SIZE(1..32)) MAX-ACCESS read-only STATUS current DESCRIPTION "Prefix of the dial plan service." ::= { dialPlanServiceTableEntry 6 }
dialPlanServiceSimplifiedDialingH320 OBJECT-TYPE SYNTAX TruthValue MAX-ACCESS read-only STATUS current DESCRIPTION "Flag indicating whether H.320 connections are supported for simplified dialing in the dial plan service." ::= { dialPlanServiceTableEntry 7 }
dialPlanServiceSimplifiedDialingVoice OBJECT-TYPE SYNTAX TruthValue MAX-ACCESS read-only STATUS current DESCRIPTION "Flag indicating whether voice over PSTN connections are supported for simplified dialing in the dial plan service." ::= { dialPlanServiceTableEntry 8 }
dialPlanServiceSimplifiedDialingOther OBJECT-TYPE SYNTAX TruthValue MAX-ACCESS read-only STATUS current DESCRIPTION "Flag indicating whether protocols other than H.320 and voice over PSTN are supported for simplified dialing in the dial plan service." ::= { dialPlanServiceTableEntry 9 }
dialPlanServiceSimplifiedDialingBitRate OBJECT-TYPE SYNTAX SimplifiedDialingEndpointBitRates MAX-ACCESS read-only STATUS current DESCRIPTION "Maximum call rate at which calls can connect

Polycom CMA System Operations Guide
468 Polycom, Inc.
for simplified dialing in the dial plan service." ::= { dialPlanServiceTableEntry 10 }
dialPlanServiceSimplifiedDialingCharInsert1 OBJECT-TYPE SYNTAX OCTET STRING (SIZE(0..1)) MAX-ACCESS read-only STATUS current DESCRIPTION "Character to insert in the dial string between the prefix and first number for simplified dialing in the dial plan service." ::= { dialPlanServiceTableEntry 11 }
dialPlanServiceSimplifiedDialingCharInsert2 OBJECT-TYPE SYNTAX OCTET STRING (SIZE(0..1)) MAX-ACCESS read-only STATUS current DESCRIPTION "Character to insert in the dial string between phone numbers for simplified dialing in the dial plan service." ::= { dialPlanServiceTableEntry 12 }
dialPlanServiceSimplifiedDialingCharAppend OBJECT-TYPE SYNTAX OCTET STRING (SIZE(0..1)) MAX-ACCESS read-only STATUS current DESCRIPTION "Character to append after the full dial string for simplified dialing in the dial plan service." ::= { dialPlanServiceTableEntry 13 }
dialPlanServiceConfOnDemandMcuH323Service OBJECT-TYPE SYNTAX OCTET STRING (SIZE(0..64)) MAX-ACCESS read-only STATUS current DESCRIPTION "H.323 service defined on the MCU to implement conference on demand in the dial plan service." ::= { dialPlanServiceTableEntry 14 }
dialPlanServiceConfOnDemandMgcVideoSession OBJECT-TYPE SYNTAX MgcVideoSessionType MAX-ACCESS read-only STATUS current DESCRIPTION "Video session type for MGC MCUs for conference on demand in the dial plan service." ::= { dialPlanServiceTableEntry 15 }
dialPlanServiceConfOnDemandMgcBitRate OBJECT-TYPE SYNTAX ConfOnDemandMgcBitRateType MAX-ACCESS read-only STATUS current DESCRIPTION "Maximum call bit rate for conference on demand in the dial plan service." ::= { dialPlanServiceTableEntry 16 }
dialPlanServiceConfOnDemandRmxProfileName OBJECT-TYPE SYNTAX OCTET STRING MAX-ACCESS read-only STATUS current DESCRIPTION "RMX conference profile for conference on demand in the dial plan service." ::= { dialPlanServiceTableEntry 17 }
-- End Gateway/MCU service

Polycom CMA System MIB
Polycom, Inc. 469
-- START Site Topology
cmaConfigSiteTopologyGroup OBJECT-GROUP OBJECTS { siteTopoSiteCount, siteIndex, siteName, siteDescription, siteOverrideItuDialingRules, sitePbxAccessCode, siteCountryCode, siteAreaCode, siteNumSubscriberDigits, siteDefaultLcrTable, siteIsdnNumberAssignmentMethod, siteInternetRoutingType, siteCallSignallingInetAddressType, siteCallSignallingInetAddress, siteCallSignallingPort, siteTotalBandwidthRestriction, siteMaxBitRateRestriction, siteSubnetCount, siteSubnetList, siteIsdnGatewayPhoneNumber, siteIsdnE164Start, siteIsdnE164End, siteIsdnCliDigits, siteIsdnShortPhoneDigits, siteIsdnNumberRangeList, siteTopoDirectLinkCount, directLinkIndex, directLinkName, directLinkDescription, directLinkSiteA, directLinkSiteB, directLinkTotalBandwidthRestriction, directLinkMaxCallBitRateRestriction } STATUS current DESCRIPTION "CMA Site topology configuration conformance group." ::= { cmaConfigConformance 16 }
siteTopoSiteCount OBJECT-TYPE SYNTAX Integer32 MAX-ACCESS read-only STATUS current DESCRIPTION "Number of configured sites." ::= { cmaConfigSiteTopology 1 }
SiteTopoSiteTableEntry ::= SEQUENCE{ siteIndex CmaDefaultTableIndexRange, siteName OCTET STRING, siteDescription OCTET STRING, siteOverrideItuDialingRules TruthValue, sitePbxAccessCode OCTET STRING, siteCountryCode OCTET STRING, siteAreaCode OCTET STRING,

Polycom CMA System Operations Guide
470 Polycom, Inc.
siteNumSubscriberDigits Integer32, siteDefaultLcrTable OCTET STRING, siteIsdnNumberAssignmentMethod SiteTopoIsdnNumberAssignmentMethodType, siteInternetRoutingType SiteTopoInternetRoutingType, siteCallSignallingInetAddressType InetAddressType, siteCallSignallingInetAddress InetAddress, siteCallSignallingPort InetPortNumber, siteTotalBandwidthRestriction Integer32, siteMaxBitRateRestriction Integer32, siteSubnetCount Integer32, siteSubnetList OCTET STRING, siteIsdnGatewayPhoneNumber OCTET STRING, siteIsdnE164Start OCTET STRING, siteIsdnE164End OCTET STRING, siteIsdnCliDigits Integer32, siteIsdnShortPhoneDigits Integer32, siteIsdnNumberRangeList OCTET STRING }
siteTopoSiteTable OBJECT-TYPE SYNTAX SEQUENCE OF SiteTopoSiteTableEntry MAX-ACCESS not-accessible STATUS current DESCRIPTION "Site topology site table. Lists the sites defined in the system and their parameters." ::= { cmaConfigSiteTopology 2 }
siteTopoSiteTableEntry OBJECT-TYPE SYNTAX SiteTopoSiteTableEntry MAX-ACCESS not-accessible STATUS current DESCRIPTION "Site table entry." INDEX { siteIndex } ::= { siteTopoSiteTable 1 }
siteIndex OBJECT-TYPE SYNTAX CmaDefaultTableIndexRange MAX-ACCESS read-only STATUS current DESCRIPTION "Unique system-assigned ID for this entry." ::= { siteTopoSiteTableEntry 1 }
siteName OBJECT-TYPE SYNTAX OCTET STRING (SIZE(1..255)) MAX-ACCESS read-only STATUS current DESCRIPTION "Name of the site." ::= { siteTopoSiteTableEntry 2 }
siteDescription OBJECT-TYPE SYNTAX OCTET STRING (SIZE(1..255)) MAX-ACCESS read-only STATUS current DESCRIPTION "Description of the site." ::= { siteTopoSiteTableEntry 3 }
siteOverrideItuDialingRules OBJECT-TYPE SYNTAX TruthValue MAX-ACCESS read-only STATUS current

Polycom CMA System MIB
Polycom, Inc. 471
DESCRIPTION "Flag indicating whether to override ITU dialing rules for the site." ::= { siteTopoSiteTableEntry 4 }
sitePbxAccessCode OBJECT-TYPE SYNTAX OCTET STRING (SIZE(0..10)) MAX-ACCESS read-only STATUS current DESCRIPTION "Access code required to enter the site's PBX system." ::= { siteTopoSiteTableEntry 5 }
siteCountryCode OBJECT-TYPE SYNTAX OCTET STRING (SIZE(0..10)) MAX-ACCESS read-only STATUS current DESCRIPTION "Country code for the site." ::= { siteTopoSiteTableEntry 6 }
siteAreaCode OBJECT-TYPE SYNTAX OCTET STRING (SIZE(0..10)) MAX-ACCESS read-only STATUS current DESCRIPTION "Area code for the site." ::= { siteTopoSiteTableEntry 7 }
siteNumSubscriberDigits OBJECT-TYPE SYNTAX Integer32 MAX-ACCESS read-only STATUS current DESCRIPTION "Number of digits in a phone number for the site." ::= { siteTopoSiteTableEntry 8 }
siteDefaultLcrTable OBJECT-TYPE SYNTAX OCTET STRING (SIZE(0..255)) MAX-ACCESS read-only STATUS current DESCRIPTION "Name of the default LCR table for the site, or 'none' if there is no default." ::= { siteTopoSiteTableEntry 9 }
siteIsdnNumberAssignmentMethod OBJECT-TYPE SYNTAX SiteTopoIsdnNumberAssignmentMethodType MAX-ACCESS read-only STATUS current DESCRIPTION "ISDN number assignment method for the site." ::= { siteTopoSiteTableEntry 10 }
siteInternetRoutingType OBJECT-TYPE SYNTAX SiteTopoInternetRoutingType MAX-ACCESS read-only STATUS current DESCRIPTION "Internet calling type for the site." ::= { siteTopoSiteTableEntry 11 }
siteCallSignallingInetAddressType OBJECT-TYPE SYNTAX InetAddressType MAX-ACCESS read-only STATUS current DESCRIPTION "IP address type for the site." ::= { siteTopoSiteTableEntry 12 }

Polycom CMA System Operations Guide
472 Polycom, Inc.
siteCallSignallingInetAddress OBJECT-TYPE SYNTAX InetAddress MAX-ACCESS read-only STATUS current DESCRIPTION "IP address for the site." ::= { siteTopoSiteTableEntry 13 }
siteCallSignallingPort OBJECT-TYPE SYNTAX InetPortNumber MAX-ACCESS read-only STATUS current DESCRIPTION "IP port for the site." ::= { siteTopoSiteTableEntry 14 }
siteTotalBandwidthRestriction OBJECT-TYPE SYNTAX Integer32 MAX-ACCESS read-only STATUS current DESCRIPTION "Bandwidth restriction for the site, or -1 if there is no bandwidth restriction." ::= { siteTopoSiteTableEntry 15 }
siteMaxBitRateRestriction OBJECT-TYPE SYNTAX Integer32 MAX-ACCESS read-only STATUS current DESCRIPTION "Maximum call bit rate for the site, or -1 if there is no bit rate restriction." ::= { siteTopoSiteTableEntry 16 }
siteSubnetCount OBJECT-TYPE SYNTAX Integer32 MAX-ACCESS read-only STATUS current DESCRIPTION "Number of subnets defined for the site." ::= { siteTopoSiteTableEntry 17 }
siteSubnetList OBJECT-TYPE SYNTAX OCTET STRING MAX-ACCESS read-only STATUS current DESCRIPTION "Comma-separated list of subnets defined for the site (each entry has the format aaa.bbb.ccc.ddd/netmask)." ::= { siteTopoSiteTableEntry 18 }
siteIsdnGatewayPhoneNumber OBJECT-TYPE SYNTAX OCTET STRING MAX-ACCESS read-only STATUS current DESCRIPTION "ISDN gateway phone number for the site." ::= { siteTopoSiteTableEntry 19 }
siteIsdnE164Start OBJECT-TYPE SYNTAX OCTET STRING MAX-ACCESS read-only STATUS current DESCRIPTION "Start of the range of E.164 numbers available for automatic assignment to IP devices for the site." ::= { siteTopoSiteTableEntry 20 }

Polycom CMA System MIB
Polycom, Inc. 473
siteIsdnE164End OBJECT-TYPE SYNTAX OCTET STRING MAX-ACCESS read-only STATUS current DESCRIPTION "End of the range of E.164 numbers available for automatic assignment to IP devices for the site." ::= { siteTopoSiteTableEntry 21 }
siteIsdnCliDigits OBJECT-TYPE SYNTAX Integer32(0..17) MAX-ACCESS read-only STATUS current DESCRIPTION "Number of digits in the Call Line Identifier, which is the dialed number for the site." ::= { siteTopoSiteTableEntry 22 }
siteIsdnShortPhoneDigits OBJECT-TYPE SYNTAX Integer32 MAX-ACCESS read-only STATUS current DESCRIPTION "Number of digits in the short form of the dialing number for the site. This number indicates what part of the dial string is sent to the gatekeeper for address resolution in gateway + extension dialing." ::= { siteTopoSiteTableEntry 23 }
siteIsdnNumberRangeList OBJECT-TYPE SYNTAX OCTET STRING MAX-ACCESS read-only STATUS current DESCRIPTION "Comma-separated list of ISDN number ranges, specifying the ISDN numbers available for automatic assignment to IP devices for the site (each range has the format startNumber-endNumber)." ::= { siteTopoSiteTableEntry 24 }
siteTopoDirectLinkCount OBJECT-TYPE SYNTAX Integer32 MAX-ACCESS read-only STATUS current DESCRIPTION "Number of direct links configured in CMA system." ::= { cmaConfigSiteTopology 3 }
SiteTopoDirectLinkTableEntry ::= SEQUENCE{ directLinkIndex CmaDefaultTableIndexRange, directLinkName OCTET STRING, directLinkDescription OCTET STRING, directLinkSiteA OCTET STRING, directLinkSiteB OCTET STRING, directLinkTotalBandwidthRestriction Integer32, directLinkMaxCallBitRateRestriction Integer32}
siteTopoDirectLinkTable OBJECT-TYPE SYNTAX SEQUENCE OF SiteTopoDirectLinkTableEntry MAX-ACCESS not-accessible STATUS current

Polycom CMA System Operations Guide
474 Polycom, Inc.
DESCRIPTION "Site topology direct link table. Lists the direct links defined in the system and their parameters." ::= { cmaConfigSiteTopology 4 }
siteTopoDirectLinkTableEntry OBJECT-TYPE SYNTAX SiteTopoDirectLinkTableEntry MAX-ACCESS not-accessible STATUS current DESCRIPTION "Direct link table entry." INDEX { directLinkIndex } ::= { siteTopoDirectLinkTable 1 }
directLinkIndex OBJECT-TYPE SYNTAX CmaDefaultTableIndexRange MAX-ACCESS read-only STATUS current DESCRIPTION "Unique system-assigned ID for this entry." ::= { siteTopoDirectLinkTableEntry 1 }
directLinkName OBJECT-TYPE SYNTAX OCTET STRING (SIZE(1..255)) MAX-ACCESS read-only STATUS current DESCRIPTION "Name of the direct link." ::= { siteTopoDirectLinkTableEntry 2 }
directLinkDescription OBJECT-TYPE SYNTAX OCTET STRING (SIZE(1..255)) MAX-ACCESS read-only STATUS current DESCRIPTION "Description of the direct link." ::= { siteTopoDirectLinkTableEntry 3 }
directLinkSiteA OBJECT-TYPE SYNTAX OCTET STRING (SIZE(1..255)) MAX-ACCESS read-only STATUS current DESCRIPTION "Name of the site of origin for the direct link." ::= { siteTopoDirectLinkTableEntry 4 }
directLinkSiteB OBJECT-TYPE SYNTAX OCTET STRING (SIZE(1..255)) MAX-ACCESS read-only STATUS current DESCRIPTION "Name of the destination site for the direct link." ::= { siteTopoDirectLinkTableEntry 5 }
directLinkTotalBandwidthRestriction OBJECT-TYPE SYNTAX Integer32 MAX-ACCESS read-only STATUS current DESCRIPTION "Total bandwidth restriction for the direct link, or -1 if there is no bandwidth restriction." ::= { siteTopoDirectLinkTableEntry 6 }
directLinkMaxCallBitRateRestriction OBJECT-TYPE SYNTAX Integer32 MAX-ACCESS read-only STATUS current DESCRIPTION "Maximum call bit rate for the direct link, or -1

Polycom CMA System MIB
Polycom, Inc. 475
if there is no bit rate restriction." ::= { siteTopoDirectLinkTableEntry 7 }
SiteTopologySiteProvisioningDetailsTableEntry ::= SEQUENCE{ siteProvisioningSiteName OCTET STRING, siteCountry OCTET STRING, siteDateFormat SiteProvisioningDateFormatType, siteAutoAdjustDst TruthValue, siteTimeFormat SiteProvisioningTimeFormatType, siteTimeServerInetAddressType InetAddressType, siteTimeServerInetAddress InetAddress, siteTimeZone CmaTimeZone, siteFirewallUseFixedPorts TruthValue, siteFirewallTcpStartPort InetPortNumber, siteFirewallUdpStartPort InetPortNumber, siteFirewallH460Traversal TruthValue, siteFirewallNatConfiguration SiteNatConfigurationType, siteFirewallNatWanAddressType InetAddressType, siteFirewallNatWanAddress InetAddress, siteFirewallNatH323Compatible TruthValue, siteFirewallShowEpInGab TruthValue, siteH323EnableIpCalls TruthValue, siteH323UseGatekeeperType UseGatekeeperType, siteH323GatekeeperIPAddressType InetAddressType, siteH323GatekeeperIPAddress InetAddress, siteH3232UseGkForMultipointCalls SiteUseGkForMultipointCallsType, siteProvisioningPollingInterval Integer32, siteSoftupdatePollingInterval Integer32, siteQosVideoTosValue Integer32, siteQosAudioTosValue Integer32, siteQosFeccTosValue Integer32, siteQosTosType SiteQosTypeOfServiceType, siteQosMaxMtusize SiteQosMtuSizeType, siteQosEnablePvec TruthValue, siteQosEnableRsvp TruthValue, siteQosDynamicBandwidth TruthValue, siteQosMaxTransmitBandwidth SiteQosBandwidthType, siteQosMaxReceiveBandwidth SiteQosBandwidthType, siteSecurityUsePwdForRemoteAccess TruthValue, siteSecurityEnableSecureMode TruthValue, siteSecurityEnableEncryption SiteSecurityEnableEncryptionType, siteSecurityEnableWebAccess TruthValue, siteSecurityEnableTelnetAccess TruthValue, siteSecurityEnableSnmpAccess TruthValue, siteSecurityWebAccessPort InetPortNumber, siteSecurityAllowWebVideoDisplay TruthValue, siteCmadHeartbeatPollingInterval Integer32, siteCmadInCallStatsPollingInterval Integer32}
sitetopologySiteProvisioningTable OBJECT-TYPE SYNTAX SEQUENCE OF SiteTopologySiteProvisioningDetailsTableEntry MAX-ACCESS not-accessible STATUS current DESCRIPTION "Site topology site provisioning details table. Contains the provisioning details for each site." ::= { cmaConfigSiteProvisioning 1 }

Polycom CMA System Operations Guide
476 Polycom, Inc.
siteTopologySiteProvisioningDetailsTableEntry OBJECT-TYPE SYNTAX SiteTopologySiteProvisioningDetailsTableEntry MAX-ACCESS not-accessible STATUS current DESCRIPTION "Site provisioning details entry." INDEX { siteIndex } ::= { sitetopologySiteProvisioningTable 1 }
siteProvisioningSiteName OBJECT-TYPE SYNTAX OCTET STRING (SIZE(1..255)) MAX-ACCESS read-only STATUS current DESCRIPTION "Name of the site." ::= { siteTopologySiteProvisioningDetailsTableEntry 1 }
siteCountry OBJECT-TYPE SYNTAX OCTET STRING MAX-ACCESS read-only STATUS current DESCRIPTION "Country of the site." ::= { siteTopologySiteProvisioningDetailsTableEntry 2 }
siteDateFormat OBJECT-TYPE SYNTAX SiteProvisioningDateFormatType MAX-ACCESS read-only STATUS current DESCRIPTION "Date format for the site." ::= { siteTopologySiteProvisioningDetailsTableEntry 3 }
siteAutoAdjustDst OBJECT-TYPE SYNTAX TruthValue MAX-ACCESS read-only STATUS current DESCRIPTION "Flag indicating whether to adjust the site's endpoint system clocks for daylight saving time." ::= { siteTopologySiteProvisioningDetailsTableEntry 4 }
siteTimeFormat OBJECT-TYPE SYNTAX SiteProvisioningTimeFormatType MAX-ACCESS read-only STATUS current DESCRIPTION "Time format for the site." ::= { siteTopologySiteProvisioningDetailsTableEntry 5 }
siteTimeServerInetAddressType OBJECT-TYPE SYNTAX InetAddressType MAX-ACCESS read-only STATUS current DESCRIPTION "IP address type of the time server for the site." ::= { siteTopologySiteProvisioningDetailsTableEntry 6 }
siteTimeServerInetAddress OBJECT-TYPE SYNTAX InetAddress MAX-ACCESS read-only STATUS current DESCRIPTION "IP address of the time server for the site." ::= { siteTopologySiteProvisioningDetailsTableEntry 7 }
siteTimeZone OBJECT-TYPE SYNTAX CmaTimeZone

Polycom CMA System MIB
Polycom, Inc. 477
MAX-ACCESS read-only STATUS current DESCRIPTION "Time zone for the site." ::= { siteTopologySiteProvisioningDetailsTableEntry 8 }
siteFirewallUseFixedPorts OBJECT-TYPE SYNTAX TruthValue MAX-ACCESS read-only STATUS current DESCRIPTION "Flag indicating whether the TCP and UDP ports to use are defined for the site." ::= { siteTopologySiteProvisioningDetailsTableEntry 9 }
siteFirewallTcpStartPort OBJECT-TYPE SYNTAX InetPortNumber MAX-ACCESS read-only STATUS current DESCRIPTION "Starting TCP port number used by the site's endpoint systems." ::= { siteTopologySiteProvisioningDetailsTableEntry 10 }
siteFirewallUdpStartPort OBJECT-TYPE SYNTAX InetPortNumber MAX-ACCESS read-only STATUS current DESCRIPTION "Starting UDP port number used by the site's endpoint systems." ::= { siteTopologySiteProvisioningDetailsTableEntry 11 }
siteFirewallH460Traversal OBJECT-TYPE SYNTAX TruthValue MAX-ACCESS read-only STATUS current DESCRIPTION "Flag indicating whether the site's endpoint systems are allowed to use H.460-based firewall traversal." ::= { siteTopologySiteProvisioningDetailsTableEntry 12 }
siteFirewallNatConfiguration OBJECT-TYPE SYNTAX SiteNatConfigurationType MAX-ACCESS read-only STATUS current DESCRIPTION "Flag indicating whether the site's endpoint systems should determine the NAT public (WAN) address automatically." ::= { siteTopologySiteProvisioningDetailsTableEntry 13 }
siteFirewallNatWanAddressType OBJECT-TYPE SYNTAX InetAddressType MAX-ACCESS read-only STATUS current DESCRIPTION "Address type of the NAT public (WAN) IP address for the site. Only valid if the siteFirewallNatConfiguration attribute is set to manual." ::= { siteTopologySiteProvisioningDetailsTableEntry 14 }
siteFirewallNatWanAddress OBJECT-TYPE SYNTAX InetAddress MAX-ACCESS read-only STATUS current DESCRIPTION "NAT public (WAN) IP address for the site. Only valid if the siteFirewallNatConfiguration attribute is set to manual." ::= { siteTopologySiteProvisioningDetailsTableEntry 15 }
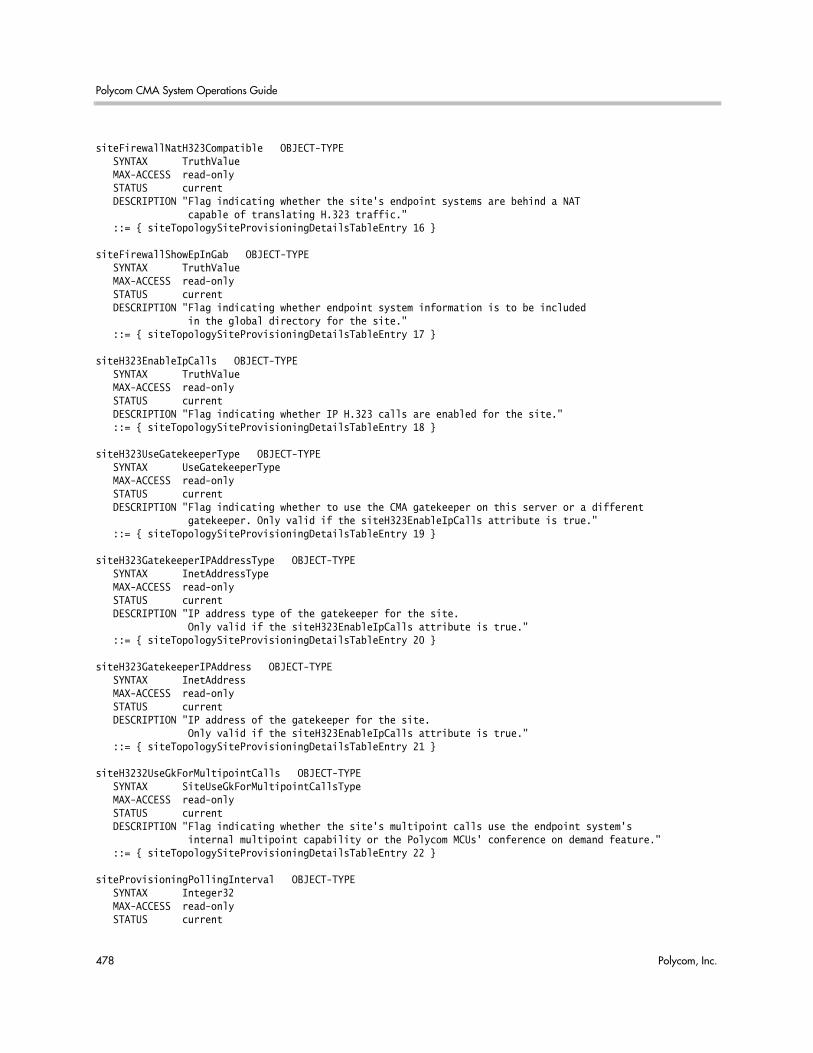
Polycom CMA System Operations Guide
478 Polycom, Inc.
siteFirewallNatH323Compatible OBJECT-TYPE SYNTAX TruthValue MAX-ACCESS read-only STATUS current DESCRIPTION "Flag indicating whether the site's endpoint systems are behind a NAT capable of translating H.323 traffic." ::= { siteTopologySiteProvisioningDetailsTableEntry 16 }
siteFirewallShowEpInGab OBJECT-TYPE SYNTAX TruthValue MAX-ACCESS read-only STATUS current DESCRIPTION "Flag indicating whether endpoint system information is to be included in the global directory for the site." ::= { siteTopologySiteProvisioningDetailsTableEntry 17 }
siteH323EnableIpCalls OBJECT-TYPE SYNTAX TruthValue MAX-ACCESS read-only STATUS current DESCRIPTION "Flag indicating whether IP H.323 calls are enabled for the site." ::= { siteTopologySiteProvisioningDetailsTableEntry 18 }
siteH323UseGatekeeperType OBJECT-TYPE SYNTAX UseGatekeeperType MAX-ACCESS read-only STATUS current DESCRIPTION "Flag indicating whether to use the CMA gatekeeper on this server or a different gatekeeper. Only valid if the siteH323EnableIpCalls attribute is true." ::= { siteTopologySiteProvisioningDetailsTableEntry 19 }
siteH323GatekeeperIPAddressType OBJECT-TYPE SYNTAX InetAddressType MAX-ACCESS read-only STATUS current DESCRIPTION "IP address type of the gatekeeper for the site. Only valid if the siteH323EnableIpCalls attribute is true." ::= { siteTopologySiteProvisioningDetailsTableEntry 20 }
siteH323GatekeeperIPAddress OBJECT-TYPE SYNTAX InetAddress MAX-ACCESS read-only STATUS current DESCRIPTION "IP address of the gatekeeper for the site. Only valid if the siteH323EnableIpCalls attribute is true." ::= { siteTopologySiteProvisioningDetailsTableEntry 21 }
siteH3232UseGkForMultipointCalls OBJECT-TYPE SYNTAX SiteUseGkForMultipointCallsType MAX-ACCESS read-only STATUS current DESCRIPTION "Flag indicating whether the site's multipoint calls use the endpoint system's internal multipoint capability or the Polycom MCUs' conference on demand feature." ::= { siteTopologySiteProvisioningDetailsTableEntry 22 }
siteProvisioningPollingInterval OBJECT-TYPE SYNTAX Integer32 MAX-ACCESS read-only STATUS current

Polycom CMA System MIB
Polycom, Inc. 479
DESCRIPTION "Frequency at which the site's endpoint systems poll the CMA for new provisioning information." ::= { siteTopologySiteProvisioningDetailsTableEntry 23 }
siteSoftupdatePollingInterval OBJECT-TYPE SYNTAX Integer32 MAX-ACCESS read-only STATUS current DESCRIPTION "Frequency at which the site's endpoint systems poll the CMA for a new softupdate package." ::= { siteTopologySiteProvisioningDetailsTableEntry 24 }
siteQosVideoTosValue OBJECT-TYPE SYNTAX Integer32 MAX-ACCESS read-only STATUS current DESCRIPTION "IP precedence or Diffserv value for the site's video packets." ::= { siteTopologySiteProvisioningDetailsTableEntry 25 }
siteQosAudioTosValue OBJECT-TYPE SYNTAX Integer32 MAX-ACCESS read-only STATUS current DESCRIPTION "IP precedence or Diffserv value for the site's audio packets." ::= { siteTopologySiteProvisioningDetailsTableEntry 26 }
siteQosFeccTosValue OBJECT-TYPE SYNTAX Integer32 MAX-ACCESS read-only STATUS current DESCRIPTION "IP precedence or Diffserv value for the site's Far End Camera Control packets." ::= { siteTopologySiteProvisioningDetailsTableEntry 27 }
siteQosTosType OBJECT-TYPE SYNTAX SiteQosTypeOfServiceType MAX-ACCESS read-only STATUS current DESCRIPTION "Type of service (IP precedence or Diffserv) for the site's audio, video, and FECC TOS values." ::= { siteTopologySiteProvisioningDetailsTableEntry 28 }
siteQosMaxMtusize OBJECT-TYPE SYNTAX SiteQosMtuSizeType MAX-ACCESS read-only STATUS current DESCRIPTION "Maximum transmission unit (MTU) size used in IP calls for the site." ::= { siteTopologySiteProvisioningDetailsTableEntry 29 }
siteQosEnablePvec OBJECT-TYPE SYNTAX TruthValue MAX-ACCESS read-only STATUS current DESCRIPTION "Flag indicating whether the site's endpoint systems can use Polycom Video Error Concealment (PVEC) if packet loss occurs." ::= { siteTopologySiteProvisioningDetailsTableEntry 30 }
siteQosEnableRsvp OBJECT-TYPE SYNTAX TruthValue

Polycom CMA System Operations Guide
480 Polycom, Inc.
MAX-ACCESS read-only STATUS current DESCRIPTION "Flag indicating whether the site's endpoint systems can use Resource Reservation Setup Protocol (RSVP) to request that routers reserve bandwidth along an IP connection path." ::= { siteTopologySiteProvisioningDetailsTableEntry 31 }
siteQosDynamicBandwidth OBJECT-TYPE SYNTAX TruthValue MAX-ACCESS read-only STATUS current DESCRIPTION "Flag indicating whether the site's endpoint systems automatically find the optimum line speed for a call." ::= { siteTopologySiteProvisioningDetailsTableEntry 32 }
siteQosMaxTransmitBandwidth OBJECT-TYPE SYNTAX SiteQosBandwidthType MAX-ACCESS read-only STATUS current DESCRIPTION "Maximum transmission line speed for the site." ::= { siteTopologySiteProvisioningDetailsTableEntry 33 }
siteQosMaxReceiveBandwidth OBJECT-TYPE SYNTAX SiteQosBandwidthType MAX-ACCESS read-only STATUS current DESCRIPTION "Maximum reception line speed for the site." ::= { siteTopologySiteProvisioningDetailsTableEntry 34 }
siteSecurityUsePwdForRemoteAccess OBJECT-TYPE SYNTAX TruthValue MAX-ACCESS read-only STATUS current DESCRIPTION "Flag indicating whether the local endpoint system password and remote access password are the same for the site." ::= { siteTopologySiteProvisioningDetailsTableEntry 35 }
siteSecurityEnableSecureMode OBJECT-TYPE SYNTAX TruthValue MAX-ACCESS read-only STATUS current DESCRIPTION "Flag indicating whether to operate in secure mode with the site's devices." ::= { siteTopologySiteProvisioningDetailsTableEntry 36 }
siteSecurityEnableEncryption OBJECT-TYPE SYNTAX SiteSecurityEnableEncryptionType MAX-ACCESS read-only STATUS current DESCRIPTION "Encryption usage setting for the site." ::= { siteTopologySiteProvisioningDetailsTableEntry 37 }
siteSecurityEnableWebAccess OBJECT-TYPE SYNTAX TruthValue MAX-ACCESS read-only STATUS current DESCRIPTION "Flag indicating whether to allow web access to the site's endpoint systems." ::= { siteTopologySiteProvisioningDetailsTableEntry 38 }

Polycom CMA System MIB
Polycom, Inc. 481
siteSecurityEnableTelnetAccess OBJECT-TYPE SYNTAX TruthValue MAX-ACCESS read-only STATUS current DESCRIPTION "Flag indicating whether to allow telnet access to the site's endpoint systems." ::= { siteTopologySiteProvisioningDetailsTableEntry 39 }
siteSecurityEnableSnmpAccess OBJECT-TYPE SYNTAX TruthValue MAX-ACCESS read-only STATUS current DESCRIPTION "Flag indicating whether to allow SNMP access to the site's endpoint systems." ::= { siteTopologySiteProvisioningDetailsTableEntry 40 }
siteSecurityWebAccessPort OBJECT-TYPE SYNTAX InetPortNumber MAX-ACCESS read-only STATUS current DESCRIPTION "Port number to use when accessing an endpoint system's web interface." ::= { siteTopologySiteProvisioningDetailsTableEntry 41 }
siteSecurityAllowWebVideoDisplay OBJECT-TYPE SYNTAX TruthValue MAX-ACCESS read-only STATUS current DESCRIPTION "Flag indicating whether to allow viewing of the endpoint video using the endpoint system's web interface." ::= { siteTopologySiteProvisioningDetailsTableEntry 42 }
siteCmadHeartbeatPollingInterval OBJECT-TYPE SYNTAX Integer32 MAX-ACCESS read-only STATUS current DESCRIPTION "Frequency at which the site's endpoint systems poll the CMA system for a heartbeat." ::= { siteTopologySiteProvisioningDetailsTableEntry 43 }
siteCmadInCallStatsPollingInterval OBJECT-TYPE SYNTAX Integer32 MAX-ACCESS read-only STATUS current DESCRIPTION "Frequency at which the site's endpoint systems poll the CMA system for in-call statistics." ::= { siteTopologySiteProvisioningDetailsTableEntry 44 }
-- END Site topology
-- START conference settings configurationcmaConferenceSettingGroup OBJECT-GROUP OBJECTS { cmaConferenceConfigAutoLaunch, cmaConferenceConfigTimeWarning, cmaConferenceConfigIncludeScheduler } STATUS current DESCRIPTION "CMA conference settings conformance group."

Polycom CMA System Operations Guide
482 Polycom, Inc.
::= { cmaConfigConformance 17 }
cmaConferenceConfigAutoLaunch OBJECT-TYPE SYNTAX TruthValue MAX-ACCESS read-only STATUS current DESCRIPTION "Flag indicating whether scheduled conferences are automatically launched at their designated start time." ::= { cmaConfigConferenceGeneral 1 }
cmaConferenceConfigTimeWarning OBJECT-TYPE SYNTAX TruthValue MAX-ACCESS read-only STATUS current DESCRIPTION "Flag indicating whether a message is sent to video endpoint systems to let users know that the conference is ending soon." ::= { cmaConfigConferenceGeneral 2 }
cmaConferenceConfigIncludeScheduler OBJECT-TYPE SYNTAX TruthValue MAX-ACCESS read-only STATUS current DESCRIPTION "Flag indicating whether the conference scheduler is automatically added to a new conference." ::= { cmaConfigConferenceGeneral 3 }
-- END conference settings configuration
-- START Conference template configurationcmaConferenceTemplateGroup OBJECT-GROUP OBJECTS { confTemplateIndex, cmaConferenceTemplateCount, confTemplateName, confTemplateDescription, confTemplateAudioOnly, confTemplateRoles, confTemplateVideoDialType, confTemplateVideoMode, confTemplateVideoAlgorithm, confTemplateContent, confTemplateLectureMode, confTemplateSpeed, confTemplateLectureViewSwitching, confTemplateHighDefinition, confTemplateVideoQuality, confTemplateMgcSupported, confTemplateRmxSupported, confTemplateRmxProfileName, confTemplateUseMcu, confTemplateMetMePerConference, confTemplateConferenceOnPort, confTemplateChairpersonRequired, confTemplateEntryTone, confTemplateExitTone, confTemplateEndTimeAlertTone, confTemplateTalkHoldTime, confTemplateEndTimeAlert, confTemplateT120Rate,

Polycom CMA System MIB
Polycom, Inc. 483
confTemplateAudioAlgorithm, confTemplateAudioMixDepth } STATUS current DESCRIPTION "CMA conference template conformance group." ::= { cmaConfigConformance 18 }
cmaConferenceTemplateCount OBJECT-TYPE SYNTAX Integer32 MAX-ACCESS read-only STATUS current DESCRIPTION "Total number of configured conference templates." ::= { cmaConfigConferenceTemplates 1 }
CmaConferenceTemplateTableEntry ::= SEQUENCE{ confTemplateIndex CmaDefaultTableIndexRange, confTemplateName OCTET STRING, confTemplateDescription OCTET STRING, confTemplateAudioOnly TruthValue, confTemplateRoles OCTET STRING, confTemplateVideoDialType ConferenceTemplateVideoDialType, confTemplateVideoMode ConferenceTemplateVideoMode, confTemplateVideoAlgorithm ConferenceTemplateVideoAlgorithm, confTemplateContent ConferenceTemplateContentType, confTemplateLectureMode ConferenceTemplateLectureModeType, confTemplateSpeed ConferenceTemplateConferenceSpeed, confTemplateLectureViewSwitching TruthValue, confTemplateHighDefinition TruthValue, confTemplateVideoQuality ConferenceTemplateVideoQualityType, confTemplateMgcSupported TruthValue, confTemplateRmxSupported TruthValue, confTemplateRmxProfileName OCTET STRING, confTemplateUseMcu TruthValue, confTemplateMetMePerConference TruthValue, confTemplateConferenceOnPort TruthValue, confTemplateChairpersonRequired TruthValue, confTemplateEntryTone TruthValue, confTemplateExitTone TruthValue, confTemplateEndTimeAlertTone TruthValue, confTemplateTalkHoldTime Integer32, confTemplateEndTimeAlert Integer32, confTemplateT120Rate ConferenceTemplateT120Rates, confTemplateAudioAlgorithm ConferenceTemplateAudioAlgorithms, confTemplateAudioMixDepth Integer32}
cmaConferenceTemplateTable OBJECT-TYPE SYNTAX SEQUENCE OF CmaConferenceTemplateTableEntry MAX-ACCESS not-accessible STATUS current DESCRIPTION "Conference template table. Contains the names and parameters of all the templates." ::= { cmaConfigConferenceTemplates 2 }
cmaConferenceTemplateTableEntry OBJECT-TYPE SYNTAX CmaConferenceTemplateTableEntry MAX-ACCESS not-accessible STATUS current DESCRIPTION "Conference template table entry."

Polycom CMA System Operations Guide
484 Polycom, Inc.
INDEX { confTemplateIndex } ::= { cmaConferenceTemplateTable 1 }
confTemplateIndex OBJECT-TYPE SYNTAX CmaDefaultTableIndexRange MAX-ACCESS read-only STATUS current DESCRIPTION "Unique system-assigned ID for this entry." ::= { cmaConferenceTemplateTableEntry 1 }
confTemplateName OBJECT-TYPE SYNTAX OCTET STRING (SIZE(1..255)) MAX-ACCESS read-only STATUS current DESCRIPTION "Name of the conference template." ::= { cmaConferenceTemplateTableEntry 2 }
confTemplateDescription OBJECT-TYPE SYNTAX OCTET STRING (SIZE(0..255)) MAX-ACCESS read-only STATUS current DESCRIPTION "Description of the conference template." ::= { cmaConferenceTemplateTableEntry 3 }
confTemplateAudioOnly OBJECT-TYPE SYNTAX TruthValue MAX-ACCESS read-only STATUS current DESCRIPTION "Flag indicating whether the template is for audio-only conferences." ::= { cmaConferenceTemplateTableEntry 4 }
confTemplateRoles OBJECT-TYPE SYNTAX OCTET STRING MAX-ACCESS read-only STATUS current DESCRIPTION "Comma-delimited list of user roles for which the template is available." ::= { cmaConferenceTemplateTableEntry 5 }
confTemplateVideoDialType OBJECT-TYPE SYNTAX ConferenceTemplateVideoDialType MAX-ACCESS read-only STATUS current DESCRIPTION "Dial type for the template (dial-in, dial-out, or both)." ::= { cmaConferenceTemplateTableEntry 6 }
confTemplateVideoMode OBJECT-TYPE SYNTAX ConferenceTemplateVideoMode MAX-ACCESS read-only STATUS current DESCRIPTION "Video layout mode for the template." ::= { cmaConferenceTemplateTableEntry 7 }
confTemplateVideoAlgorithm OBJECT-TYPE SYNTAX ConferenceTemplateVideoAlgorithm MAX-ACCESS read-only STATUS current DESCRIPTION "Video compression algorithm for the template." ::= { cmaConferenceTemplateTableEntry 8 }

Polycom CMA System MIB
Polycom, Inc. 485
confTemplateContent OBJECT-TYPE SYNTAX ConferenceTemplateContentType MAX-ACCESS read-only STATUS current DESCRIPTION "People and content format type for the template." ::= { cmaConferenceTemplateTableEntry 9 }
confTemplateLectureMode OBJECT-TYPE SYNTAX ConferenceTemplateLectureModeType MAX-ACCESS read-only STATUS current DESCRIPTION "Flag indicating whether the template has lecture mode enabled." ::= { cmaConferenceTemplateTableEntry 10 }
confTemplateSpeed OBJECT-TYPE SYNTAX ConferenceTemplateConferenceSpeed MAX-ACCESS read-only STATUS current DESCRIPTION "Conference speed for the template." ::= { cmaConferenceTemplateTableEntry 11 }
confTemplateLectureViewSwitching OBJECT-TYPE SYNTAX TruthValue MAX-ACCESS read-only STATUS current DESCRIPTION "Flag indicating whether the template has lecture view switching enabled." ::= { cmaConferenceTemplateTableEntry 12 }
confTemplateHighDefinition OBJECT-TYPE SYNTAX TruthValue MAX-ACCESS read-only STATUS current DESCRIPTION "Flag indicating whether the template has high definition video resolution enabled for endpoints that support it." ::= { cmaConferenceTemplateTableEntry 13 }
confTemplateVideoQuality OBJECT-TYPE SYNTAX ConferenceTemplateVideoQualityType MAX-ACCESS read-only STATUS current DESCRIPTION "Video quality optimization setting for the template." ::= { cmaConferenceTemplateTableEntry 14 }
confTemplateMgcSupported OBJECT-TYPE SYNTAX TruthValue MAX-ACCESS read-only STATUS current DESCRIPTION "Flag indicating whether the template supports MGC MCUs." ::= { cmaConferenceTemplateTableEntry 15 }
confTemplateRmxSupported OBJECT-TYPE SYNTAX TruthValue MAX-ACCESS read-only STATUS current DESCRIPTION "Flag indicating whether the template supports RMX MCUs." ::= { cmaConferenceTemplateTableEntry 16 }
confTemplateRmxProfileName OBJECT-TYPE SYNTAX OCTET STRING (SIZE(0..255)) MAX-ACCESS read-only

Polycom CMA System Operations Guide
486 Polycom, Inc.
STATUS current DESCRIPTION "Name of the RMX profile with which the template is associated." ::= { cmaConferenceTemplateTableEntry 17 }
confTemplateUseMcu OBJECT-TYPE SYNTAX TruthValue MAX-ACCESS read-only STATUS current DESCRIPTION "Flag indicating whether the template always uses an MCU for scheduled conferences regardless of the number of participants." ::= { cmaConferenceTemplateTableEntry 18 }
confTemplateMetMePerConference OBJECT-TYPE SYNTAX TruthValue MAX-ACCESS read-only STATUS current DESCRIPTION "Flag indicating whether the template uses a single dial-in number per conference (true) or assigns each participant a different dial-in number (false). Only valid for MGC MCUs." ::= { cmaConferenceTemplateTableEntry 19 }
confTemplateConferenceOnPort OBJECT-TYPE SYNTAX TruthValue MAX-ACCESS read-only STATUS current DESCRIPTION "Flag indicating whether the template uses a single port for all participants. Only valid for MGC MCUs." ::= { cmaConferenceTemplateTableEntry 20 }
confTemplateChairpersonRequired OBJECT-TYPE SYNTAX TruthValue MAX-ACCESS read-only STATUS current DESCRIPTION "Flag indicating whether someone must enter the chairperson password in order to start a conference. Chairpersons can control a conference from their video endpoint." ::= { cmaConferenceTemplateTableEntry 21 }
confTemplateEntryTone OBJECT-TYPE SYNTAX TruthValue MAX-ACCESS read-only STATUS current DESCRIPTION "Flag indicating whether an entry tone is played when a participant enters a conference." ::= { cmaConferenceTemplateTableEntry 22 }
confTemplateExitTone OBJECT-TYPE SYNTAX TruthValue MAX-ACCESS read-only STATUS current DESCRIPTION "Flag indicating whether an exit tone is played when a participant leaves a conference." ::= { cmaConferenceTemplateTableEntry 23 }
confTemplateEndTimeAlertTone OBJECT-TYPE SYNTAX TruthValue MAX-ACCESS read-only STATUS current DESCRIPTION "Flag indicating whether an end time alert tone is played near the end of the scheduled conference time."

Polycom CMA System MIB
Polycom, Inc. 487
::= { cmaConferenceTemplateTableEntry 24 }
confTemplateTalkHoldTime OBJECT-TYPE SYNTAX Integer32 MAX-ACCESS read-only STATUS current DESCRIPTION "Minimum period of time in seconds that a participant has to speak to become the main speaker." ::= { cmaConferenceTemplateTableEntry 25 }
confTemplateEndTimeAlert OBJECT-TYPE SYNTAX Integer32 (1..30) MAX-ACCESS read-only STATUS current DESCRIPTION "Number of minutes before the scheduled conference end that the end time alert tone is played." ::= { cmaConferenceTemplateTableEntry 26 }
confTemplateT120Rate OBJECT-TYPE SYNTAX ConferenceTemplateT120Rates MAX-ACCESS read-only STATUS current DESCRIPTION "T.120 transfer rate for the template's conferences, or 'none' to disable T.120. Only valid for MGC MCUs." ::= { cmaConferenceTemplateTableEntry 27 }
confTemplateAudioAlgorithm OBJECT-TYPE SYNTAX ConferenceTemplateAudioAlgorithms MAX-ACCESS read-only STATUS current DESCRIPTION "Audio compression algorithm used on the MGC to process audio for the template's conferences." ::= { cmaConferenceTemplateTableEntry 28 }
confTemplateAudioMixDepth OBJECT-TYPE SYNTAX Integer32 (1..5) MAX-ACCESS read-only STATUS current DESCRIPTION "Number of participants who can speak at once. Those with the loudest voices are heard. Additional participants are not heard." ::= { cmaConferenceTemplateTableEntry 29 }
-- END Conference template configuration
-- START Room configuration
cmaConfigRoomGroup OBJECT-GROUP OBJECTS { cmaConfigRoomCount, roomIndex, roomName, roomDescription, roomSite, roomEmailAddress, roomUserId } STATUS current DESCRIPTION "CMA room configuration conformance group." ::= { cmaConfigConformance 19 }

Polycom CMA System Operations Guide
488 Polycom, Inc.
cmaConfigRoomCount OBJECT-TYPE SYNTAX Integer32 MAX-ACCESS read-only STATUS current DESCRIPTION "Total number of configured rooms." ::= { cmaConfigRooms 1 }
CmaConfigRoomTableEntry ::= SEQUENCE{ roomIndex CmaDefaultTableIndexRange, roomName OCTET STRING, roomDescription OCTET STRING, roomSite OCTET STRING, roomEmailAddress OCTET STRING, roomUserId OCTET STRING}
cmaConfigRoomTable OBJECT-TYPE SYNTAX SEQUENCE OF CmaConfigRoomTableEntry MAX-ACCESS not-accessible STATUS current DESCRIPTION "CMA room table. Contains information about the rooms defined in the system." ::= { cmaConfigRooms 2 }
cmaConfigRoomTableEntry OBJECT-TYPE SYNTAX CmaConfigRoomTableEntry MAX-ACCESS not-accessible STATUS current DESCRIPTION "Room configuration table entry." INDEX { roomIndex } ::= { cmaConfigRoomTable 1 }
roomIndex OBJECT-TYPE SYNTAX CmaDefaultTableIndexRange MAX-ACCESS read-only STATUS current DESCRIPTION "Unique system-assigned ID for this entry." ::= { cmaConfigRoomTableEntry 1 }
roomName OBJECT-TYPE SYNTAX OCTET STRING (SIZE(0..255)) MAX-ACCESS read-only STATUS current DESCRIPTION "Name of the room." ::= { cmaConfigRoomTableEntry 2 } roomDescription OBJECT-TYPE SYNTAX OCTET STRING (SIZE(0..255)) MAX-ACCESS read-only STATUS current DESCRIPTION "Description of the room." ::= { cmaConfigRoomTableEntry 3 }
roomSite OBJECT-TYPE SYNTAX OCTET STRING (SIZE(0..255)) MAX-ACCESS read-only STATUS current DESCRIPTION "Name of the site in which the room is located."

Polycom CMA System MIB
Polycom, Inc. 489
::= { cmaConfigRoomTableEntry 4 }
roomEmailAddress OBJECT-TYPE SYNTAX OCTET STRING (SIZE(0..255)) MAX-ACCESS read-only STATUS current DESCRIPTION "Email address for the room." ::= { cmaConfigRoomTableEntry 5 }
roomUserId OBJECT-TYPE SYNTAX OCTET STRING (SIZE(0..255)) MAX-ACCESS read-only STATUS current DESCRIPTION "ID of the user associated with the room." ::= { cmaConfigRoomTableEntry 6 } -- END Room configuration
-- START user role configuration
cmaConfigUserRoleGroup OBJECT-GROUP OBJECTS { cmaConfigUserRoleCount, userRoleIndex, userRoleName, userRoleDescription, userRoleAdminDirectorySetup, userRoleAdminDialPlanSetup, userRoleAdminConferencingSetup, userRoleAdminSystemSetup, userRoleOperatorMonitoring, userRoleOperatorScheduling, userRoleOperatorReports, userRoleOperatorTroubleShooting, userRoleSchedulerScheduleConferences, userRoleSchedulerSchedulingLevel } STATUS current DESCRIPTION "CMA user role configuration conformance group." ::= { cmaConfigConformance 20 }
cmaConfigUserRoleCount OBJECT-TYPE SYNTAX OCTET STRING MAX-ACCESS read-only STATUS current DESCRIPTION "Number of configured user roles." ::= { cmaConfigUserRoles 1 }
CmaConfigUserRoleTableEntry ::= SEQUENCE{ userRoleIndex CmaDefaultTableIndexRange, userRoleName OCTET STRING, userRoleDescription OCTET STRING, userRoleAdminDirectorySetup TruthValue, userRoleAdminDialPlanSetup TruthValue, userRoleAdminConferencingSetup TruthValue, userRoleAdminSystemSetup TruthValue, userRoleOperatorMonitoring TruthValue, userRoleOperatorScheduling TruthValue,

Polycom CMA System Operations Guide
490 Polycom, Inc.
userRoleOperatorReports TruthValue, userRoleOperatorTroubleShooting TruthValue, userRoleSchedulerScheduleConferences TruthValue, userRoleSchedulerSchedulingLevel UserRoleSchedulingLevel}
cmaConfigUserRoleTable OBJECT-TYPE SYNTAX SEQUENCE OF CmaConfigUserRoleTableEntry MAX-ACCESS not-accessible STATUS current DESCRIPTION "User role table. Lists the user roles defined in the system and their permissions." ::= { cmaConfigUserRoles 2 }
cmaConfigUserRoleTableEntry OBJECT-TYPE SYNTAX CmaConfigUserRoleTableEntry MAX-ACCESS not-accessible STATUS current DESCRIPTION "User role table entry." INDEX { roomIndex } ::= { cmaConfigUserRoleTable 1 }
userRoleIndex OBJECT-TYPE SYNTAX CmaDefaultTableIndexRange MAX-ACCESS read-only STATUS current DESCRIPTION "Unique system-assigned ID for this entry." ::= { cmaConfigUserRoleTableEntry 1 }
userRoleName OBJECT-TYPE SYNTAX OCTET STRING (SIZE(1..255)) MAX-ACCESS read-only STATUS current DESCRIPTION "Name of the user role." ::= { cmaConfigUserRoleTableEntry 2 }
userRoleDescription OBJECT-TYPE SYNTAX OCTET STRING (SIZE(0..255)) MAX-ACCESS read-only STATUS current DESCRIPTION "Description of the user role." ::= { cmaConfigUserRoleTableEntry 3 }
userRoleAdminDirectorySetup OBJECT-TYPE SYNTAX TruthValue MAX-ACCESS read-only STATUS current DESCRIPTION "Flag indicating whether the user role has the administrator directory setup permission." ::= { cmaConfigUserRoleTableEntry 4 }
userRoleAdminDialPlanSetup OBJECT-TYPE SYNTAX TruthValue MAX-ACCESS read-only STATUS current DESCRIPTION "Flag indicating whether the user role has the administrator dial plan setup permission." ::= { cmaConfigUserRoleTableEntry 5 }
userRoleAdminConferencingSetup OBJECT-TYPE

Polycom CMA System MIB
Polycom, Inc. 491
SYNTAX TruthValue MAX-ACCESS read-only STATUS current DESCRIPTION "Flag indicating whether the user role has administrator conferencing setup permission." ::= { cmaConfigUserRoleTableEntry 6 }
userRoleAdminSystemSetup OBJECT-TYPE SYNTAX TruthValue MAX-ACCESS read-only STATUS current DESCRIPTION "Flag indicating whether the user role has administrator sysem setup permission." ::= { cmaConfigUserRoleTableEntry 7 }
userRoleOperatorMonitoring OBJECT-TYPE SYNTAX TruthValue MAX-ACCESS read-only STATUS current DESCRIPTION "Flag indicating whether the user role has operator monitoring permission." ::= { cmaConfigUserRoleTableEntry 8 }
userRoleOperatorScheduling OBJECT-TYPE SYNTAX TruthValue MAX-ACCESS read-only STATUS current DESCRIPTION "Flag indicating whether the user role has operator scheduling permission." ::= { cmaConfigUserRoleTableEntry 9 }
userRoleOperatorReports OBJECT-TYPE SYNTAX TruthValue MAX-ACCESS read-only STATUS current DESCRIPTION "Flag indicating whether the user role has operator reports permission." ::= { cmaConfigUserRoleTableEntry 10 }
userRoleOperatorTroubleShooting OBJECT-TYPE SYNTAX TruthValue MAX-ACCESS read-only STATUS current DESCRIPTION "Flag indicating whether the user role has operator troubleshooting permission." ::= { cmaConfigUserRoleTableEntry 11 }
userRoleSchedulerScheduleConferences OBJECT-TYPE SYNTAX TruthValue MAX-ACCESS read-only STATUS current DESCRIPTION "Flag indicating whether the user role has scheduler schedule conferences permission." ::= { cmaConfigUserRoleTableEntry 12 }
userRoleSchedulerSchedulingLevel OBJECT-TYPE SYNTAX UserRoleSchedulingLevel MAX-ACCESS read-only STATUS current DESCRIPTION "Scheduling level for the user role. Only valid if

Polycom CMA System Operations Guide
492 Polycom, Inc.
the role has schedule conferences permission." ::= { cmaConfigUserRoleTableEntry 13 }
-- END user role configuration
-- START user group configurationcmaConfigUserGroupGroup OBJECT-GROUP OBJECTS { cmaConfigUserGroupCount, userGroupIndex, userGroupName, userGroupDescription, userGroupType, userGroupDirectoryViewable, userGroupProvisioningProfile, userGroupRoles } STATUS current DESCRIPTION "CMA user group configuration conformance group." ::= { cmaConfigConformance 21 }
cmaConfigUserGroupCount OBJECT-TYPE SYNTAX Integer32 MAX-ACCESS read-only STATUS current DESCRIPTION "Number of configured user groups." ::= { cmaConfigUserGroups 1 }
CmaConfigUserGroupTableEntry ::= SEQUENCE{ userGroupIndex CmaDefaultTableIndexRange, userGroupName OCTET STRING, userGroupDescription OCTET STRING, userGroupType UserGroupType, userGroupDirectoryViewable TruthValue, userGroupProvisioningProfile OCTET STRING, userGroupRoles OCTET STRING}
cmaConfigUserGroupTable OBJECT-TYPE SYNTAX SEQUENCE OF CmaConfigUserGroupTableEntry MAX-ACCESS not-accessible STATUS current DESCRIPTION "User group table. Lists the user groups defined in the system and their parameters." ::= { cmaConfigUserGroups 2 }
cmaConfigUserGroupTableEntry OBJECT-TYPE SYNTAX CmaConfigUserGroupTableEntry MAX-ACCESS not-accessible STATUS current DESCRIPTION "User group table entry." INDEX { userGroupIndex } ::= { cmaConfigUserGroupTable 1 }
userGroupIndex OBJECT-TYPE SYNTAX CmaDefaultTableIndexRange MAX-ACCESS read-only STATUS current

Polycom CMA System MIB
Polycom, Inc. 493
DESCRIPTION "Unique system-assigned ID for this entry." ::= { cmaConfigUserGroupTableEntry 1 }
userGroupName OBJECT-TYPE SYNTAX OCTET STRING (SIZE(1..255)) MAX-ACCESS read-only STATUS current DESCRIPTION "Name of the user group." ::= { cmaConfigUserGroupTableEntry 2 }
userGroupDescription OBJECT-TYPE SYNTAX OCTET STRING (SIZE(0..255)) MAX-ACCESS read-only STATUS current DESCRIPTION "Description of the user group." ::= { cmaConfigUserGroupTableEntry 3 }
userGroupType OBJECT-TYPE SYNTAX UserGroupType MAX-ACCESS read-only STATUS current DESCRIPTION "Type (local or enterprise) of the user group." ::= { cmaConfigUserGroupTableEntry 4 }
userGroupDirectoryViewable OBJECT-TYPE SYNTAX TruthValue MAX-ACCESS read-only STATUS current DESCRIPTION "Flag indicating whether the user group is displayed in the endpoint directory." ::= { cmaConfigUserGroupTableEntry 5 }
userGroupProvisioningProfile OBJECT-TYPE SYNTAX OCTET STRING (SIZE(1..255)) MAX-ACCESS read-only STATUS current DESCRIPTION "Automatic provisioning profile assigned to the user group, or 'none' if no profile is assigned." DEFVAL {"none"} ::= { cmaConfigUserGroupTableEntry 6 }
userGroupRoles OBJECT-TYPE SYNTAX OCTET STRING MAX-ACCESS read-only STATUS current DESCRIPTION "Comma-delimited list of the user roles associated with the group." ::= { cmaConfigUserGroupTableEntry 7 }
-- END user group configuration
-- START user configurationcmaConfigLocalUserGroup OBJECT-GROUP OBJECTS { cmaConfigLocalUserCount, userIndex, userId, userFirstName, userLastName, userEmailAddress,

Polycom CMA System Operations Guide
494 Polycom, Inc.
userTitle, userDepartment, userCity, userPhoneNumber, userRoles, userAlertProfile } STATUS current DESCRIPTION "CMA local user configuration conformance group." ::= { cmaConfigConformance 22 }
cmaConfigLocalUserCount OBJECT-TYPE SYNTAX Integer32 MAX-ACCESS read-only STATUS current DESCRIPTION "Number of local users." ::= { cmaConfigUserUsers 1 }
CmaConfigLocalUserTableEntry ::= SEQUENCE{ userIndex CmaDefaultTableIndexRange, userId OCTET STRING, userFirstName OCTET STRING, userLastName OCTET STRING, userEmailAddress OCTET STRING, userTitle OCTET STRING, userDepartment OCTET STRING, userCity OCTET STRING, userPhoneNumber OCTET STRING, userRoles OCTET STRING, userAlertProfile OCTET STRING }
cmaConfigLocalUserTable OBJECT-TYPE SYNTAX SEQUENCE OF CmaConfigLocalUserTableEntry MAX-ACCESS not-accessible STATUS current DESCRIPTION "Local user table. Lists the local users defined in the system and their parameters." ::= { cmaConfigUserUsers 2 }
cmaConfigLocalUserTableEntry OBJECT-TYPE SYNTAX CmaConfigLocalUserTableEntry MAX-ACCESS not-accessible STATUS current DESCRIPTION "Local user table entry." INDEX { userIndex } ::= { cmaConfigLocalUserTable 1 }
userIndex OBJECT-TYPE SYNTAX CmaDefaultTableIndexRange MAX-ACCESS read-only STATUS current DESCRIPTION "Unique system-assigned ID for this entry." ::= { cmaConfigLocalUserTableEntry 1 }
userId OBJECT-TYPE SYNTAX OCTET STRING (SIZE(1..255)) MAX-ACCESS read-only STATUS current

Polycom CMA System MIB
Polycom, Inc. 495
DESCRIPTION "ID of the local user." ::= { cmaConfigLocalUserTableEntry 2 }
userFirstName OBJECT-TYPE SYNTAX OCTET STRING (SIZE(1..255)) MAX-ACCESS read-only STATUS current DESCRIPTION "First name of the local user." ::= { cmaConfigLocalUserTableEntry 3 }
userLastName OBJECT-TYPE SYNTAX OCTET STRING (SIZE(1..255)) MAX-ACCESS read-only STATUS current DESCRIPTION "Last name of the local user." ::= { cmaConfigLocalUserTableEntry 4 }
userEmailAddress OBJECT-TYPE SYNTAX OCTET STRING (SIZE(0..255)) MAX-ACCESS read-only STATUS current DESCRIPTION "Email address of the local user." ::= { cmaConfigLocalUserTableEntry 5 }
userTitle OBJECT-TYPE SYNTAX OCTET STRING (SIZE(0..255)) MAX-ACCESS read-only STATUS current DESCRIPTION "Title of the local user." ::= { cmaConfigLocalUserTableEntry 6 }
userDepartment OBJECT-TYPE SYNTAX OCTET STRING (SIZE(0..255)) MAX-ACCESS read-only STATUS current DESCRIPTION "Department of the local user." ::= { cmaConfigLocalUserTableEntry 7 }
userCity OBJECT-TYPE SYNTAX OCTET STRING (SIZE(0..255)) MAX-ACCESS read-only STATUS current DESCRIPTION "City of the local user." ::= { cmaConfigLocalUserTableEntry 8 }
userPhoneNumber OBJECT-TYPE SYNTAX OCTET STRING (SIZE(0..255)) MAX-ACCESS read-only STATUS current DESCRIPTION "Phone number of the local user." ::= { cmaConfigLocalUserTableEntry 9 }
userRoles OBJECT-TYPE SYNTAX OCTET STRING (SIZE(0..255)) MAX-ACCESS read-only STATUS current DESCRIPTION "Comma-delimited list of the local user's user roles." ::= { cmaConfigLocalUserTableEntry 10 }
userAlertProfile OBJECT-TYPE

Polycom CMA System Operations Guide
496 Polycom, Inc.
SYNTAX OCTET STRING (SIZE(0..255)) MAX-ACCESS read-only STATUS current DESCRIPTION "Name of the local user's remote alert profile (empty if no profile is assigned)." ::= { cmaConfigLocalUserTableEntry 11 }
-- END user configuration
-- START SNMP configurationcmaConfigSnmpGroup OBJECT-GROUP OBJECTS { snmpVersion, snmpTransport, snmpPort, snmpCommunity, snmpV3ContextName, snmpV3SecurityUser, snmpAuthenticationType, snmpEncryptionType, snmpV3LocalEngineId, recipientIndex, recipientIPAddressType, recipientIPAddress, recipientPort, recipientTransportType, recipientNotificationType, recipientSnmpVersion, recipientSecurityUser, recipientAuthenticationType, recipientEncryptionType } STATUS current DESCRIPTION "CMA SNMP configuration conformance group." ::= { cmaConfigConformance 23 }
snmpVersion OBJECT-TYPE SYNTAX SnmpVersionType MAX-ACCESS read-only STATUS current DESCRIPTION "SNMP version." ::= { cmaConfigSnmp 1 }
snmpTransport OBJECT-TYPE SYNTAX SnmpTransportType MAX-ACCESS read-only STATUS current DESCRIPTION "Type of transport used for SNMP." ::= { cmaConfigSnmp 2 }
snmpPort OBJECT-TYPE SYNTAX InetPortNumber MAX-ACCESS read-only STATUS current DESCRIPTION "Port used for SNMP." ::= { cmaConfigSnmp 3 }
snmpCommunity OBJECT-TYPE SYNTAX OCTET STRING (SIZE(0..255))

Polycom CMA System MIB
Polycom, Inc. 497
MAX-ACCESS read-only STATUS current DESCRIPTION "SNMP v2 community name." ::= { cmaConfigSnmp 4 }
snmpV3ContextName OBJECT-TYPE SYNTAX OCTET STRING (SIZE(0..255)) MAX-ACCESS read-only STATUS current DESCRIPTION "SNMP v3 context name." ::= { cmaConfigSnmp 5 }
snmpV3SecurityUser OBJECT-TYPE SYNTAX OCTET STRING (SIZE(0..255)) MAX-ACCESS read-only STATUS current DESCRIPTION "SNMP v3 security user name." ::= { cmaConfigSnmp 6 }
snmpAuthenticationType OBJECT-TYPE SYNTAX SnmpAuthenticationType MAX-ACCESS read-only STATUS current DESCRIPTION "SNMP v3 authentication type." ::= { cmaConfigSnmp 7 }
snmpEncryptionType OBJECT-TYPE SYNTAX SnmpEncryptionType MAX-ACCESS read-only STATUS current DESCRIPTION "SNMP v3 encryption type." ::= { cmaConfigSnmp 8 }
snmpV3LocalEngineId OBJECT-TYPE SYNTAX OCTET STRING (SIZE(0..255)) MAX-ACCESS read-only STATUS current DESCRIPTION "SNMP v3 local engine ID." ::= { cmaConfigSnmp 9 }
SnmpNoticationRecipientTableEntry ::= SEQUENCE{ recipientIndex CmaDefaultTableIndexRange, recipientIPAddressType InetAddressType, recipientIPAddress InetAddress, recipientPort InetPortNumber, recipientTransportType SnmpTransportType, recipientNotificationType SnmpNotificationType, recipientSnmpVersion SnmpVersionType, recipientSecurityUser OCTET STRING, recipientAuthenticationType SnmpAuthenticationType, recipientEncryptionType SnmpEncryptionType}
snmpNotificationRecipientTable OBJECT-TYPE SYNTAX SEQUENCE OF SnmpNoticationRecipientTableEntry MAX-ACCESS not-accessible STATUS current DESCRIPTION "SNMP notification recipients table. Each entry contains the parameters for an agent that receives notifications from the CMA server."

Polycom CMA System Operations Guide
498 Polycom, Inc.
::= { cmaConfigSnmp 10 }
snmpNoticationRecipientTableEntry OBJECT-TYPE SYNTAX SnmpNoticationRecipientTableEntry MAX-ACCESS not-accessible STATUS current DESCRIPTION "SNMP notification recipient table entry." INDEX { recipientIndex } ::= { snmpNotificationRecipientTable 1 }
recipientIndex OBJECT-TYPE SYNTAX CmaDefaultTableIndexRange MAX-ACCESS read-only STATUS current DESCRIPTION "Unique system-assigned ID for this entry." ::= { snmpNoticationRecipientTableEntry 1 }
recipientIPAddressType OBJECT-TYPE SYNTAX InetAddressType MAX-ACCESS read-only STATUS current DESCRIPTION "IP address type of the SNMP recipient." ::= { snmpNoticationRecipientTableEntry 2 }
recipientIPAddress OBJECT-TYPE SYNTAX InetAddress MAX-ACCESS read-only STATUS current DESCRIPTION "IP address of the SNMP recipient." ::= { snmpNoticationRecipientTableEntry 3 }
recipientPort OBJECT-TYPE SYNTAX InetPortNumber MAX-ACCESS read-only STATUS current DESCRIPTION "IP port number of the SNMP recipient." ::= { snmpNoticationRecipientTableEntry 4 }
recipientTransportType OBJECT-TYPE SYNTAX SnmpTransportType MAX-ACCESS read-only STATUS current DESCRIPTION "Transport type for the SNMP recipient." ::= { snmpNoticationRecipientTableEntry 5 }
recipientNotificationType OBJECT-TYPE SYNTAX SnmpNotificationType MAX-ACCESS read-only STATUS current DESCRIPTION "Notification type (trap or inform) for the SNMP recipient." ::= { snmpNoticationRecipientTableEntry 6 }
recipientSnmpVersion OBJECT-TYPE SYNTAX SnmpVersionType MAX-ACCESS read-only STATUS current DESCRIPTION "SNMP version of notifications for the SNMP recipient." ::= { snmpNoticationRecipientTableEntry 7 }
recipientSecurityUser OBJECT-TYPE

Polycom CMA System MIB
Polycom, Inc. 499
SYNTAX OCTET STRING (SIZE(0..255)) MAX-ACCESS read-only STATUS current DESCRIPTION "SNMP V3 security user name for the SNMP recipient." ::= { snmpNoticationRecipientTableEntry 8 }
recipientAuthenticationType OBJECT-TYPE SYNTAX SnmpAuthenticationType MAX-ACCESS read-only STATUS current DESCRIPTION "SNMP V3 authentication type for the SNMP recipient." ::= { snmpNoticationRecipientTableEntry 9 }
recipientEncryptionType OBJECT-TYPE SYNTAX SnmpEncryptionType MAX-ACCESS read-only STATUS current DESCRIPTION "SNMP V3 encryption type for the SNMP recipient." ::= { snmpNoticationRecipientTableEntry 10 }
-- END SNMP configuration
-- START CMA Server license configuration cmaConfigLicenseGroup OBJECT-GROUP OBJECTS { cmaLicenseSystemSerialNumber, cmaLicenseIsDemo, cmaLicenseExpirationDate, cmaLicenseComponents, cmaLicenseSeats, cmaCmadLicenseReclaimationThreshold } STATUS current DESCRIPTION "CMA license configuration conformance group." ::= { cmaConfigConformance 24 }
cmaLicenseSystemSerialNumber OBJECT-TYPE SYNTAX OCTET STRING (SIZE(0..255)) MAX-ACCESS read-only STATUS current DESCRIPTION "CMA license serial number." ::= { cmaConfigLicenses 1 }
cmaLicenseIsDemo OBJECT-TYPE SYNTAX TruthValue MAX-ACCESS read-only STATUS current DESCRIPTION "Flag indicating whether the installed license is a demo/trial license." ::= { cmaConfigLicenses 2 } cmaLicenseExpirationDate OBJECT-TYPE SYNTAX DateAndTime MAX-ACCESS read-only STATUS current DESCRIPTION "CMA license expiration date. Time portion is not relevant. Valid only for demo licenses." ::= { cmaConfigLicenses 3 }
cmaLicenseComponents OBJECT-TYPE

Polycom CMA System Operations Guide
500 Polycom, Inc.
SYNTAX CmaLicenseComponent MAX-ACCESS read-only STATUS current DESCRIPTION "Components licensed for the CMA server." ::= { cmaConfigLicenses 4 }
cmaLicenseSeats OBJECT-TYPE SYNTAX Integer32 MAX-ACCESS read-only STATUS current DESCRIPTION "Number of CMAD seats in the license." ::= { cmaConfigLicenses 5 }
cmaCmadLicenseReclaimationThreshold OBJECT-TYPE SYNTAX Integer32 (0..90) MAX-ACCESS read-only STATUS current DESCRIPTION "Number of days of inactivity by a CMAD before its license is returned to the available pool. Set to 0 to not reclaim CMAD licenses." ::= { cmaConfigLicenses 6 }
-- END CMA Server license configuration
-- START CMA Email CustomizationcmaEmailCustomizationGroup OBJECT-GROUP OBJECTS { cmaEmailCustomizationStart, cmaEmailCustomizationEnd } STATUS current DESCRIPTION "CMA Email Customization conformance group." ::= { cmaConfigConformance 25 }
cmaEmailCustomizationStart OBJECT-TYPE SYNTAX OCTET STRING (SIZE(0..650)) MAX-ACCESS read-only STATUS current DESCRIPTION "CMA Email Customization - Beginning of the scheduling reminder email " ::= { cmaEmailCustomization 1 }
cmaEmailCustomizationEnd OBJECT-TYPE SYNTAX OCTET STRING (SIZE(0..650)) MAX-ACCESS read-only STATUS current DESCRIPTION "CMA Email Customization - End of the scheduling reminder email " ::= { cmaEmailCustomization 2 } -- END CMA Email Customization
--------------------------------------------------------------------------------- Status Group-------------------------------------------------------------------------------
-- START Connected User status cmaStatusUsersGroup OBJECT-GROUP OBJECTS { connectedUserCount,

Polycom CMA System MIB
Polycom, Inc. 501
connectedAdminUserCount, connectedOperatorUserCount, connectedSchedulerUserCount, connectedUserIndex, connectedUserName, connectedUserRole, connectedUserLoginTime } STATUS current DESCRIPTION "CMA connected user status conformance group." ::= { cmaStatusConformance 1 }
connectedUserCount OBJECT-TYPE SYNTAX Integer32 MAX-ACCESS read-only STATUS current DESCRIPTION "Total number of connected CMA users." ::= { cmaStatusUsers 1 }
connectedAdminUserCount OBJECT-TYPE SYNTAX Integer32 MAX-ACCESS read-only STATUS current DESCRIPTION "Number of connected Administrator users." ::= { cmaStatusUsers 2 }
connectedOperatorUserCount OBJECT-TYPE SYNTAX Integer32 MAX-ACCESS read-only STATUS current DESCRIPTION "Number of connected Operator users." ::= { cmaStatusUsers 3 }
connectedSchedulerUserCount OBJECT-TYPE SYNTAX Integer32 MAX-ACCESS read-only STATUS current DESCRIPTION "Number of connected Scheduler users." ::= { cmaStatusUsers 4 }
-- Connected User table ConnectedUserTableRange ::= Integer32 (1..255)ConnectedUserTableEntry ::= SEQUENCE{ connectedUserIndex ConnectedUserTableRange, connectedUserName OCTET STRING, connectedUserRole OCTET STRING, connectedUserLoginTime DateAndTime}
connectedUserTable OBJECT-TYPE SYNTAX SEQUENCE OF ConnectedUserTableEntry MAX-ACCESS not-accessible STATUS current DESCRIPTION "Connected user table. Contains the names, roles, and login times of the connected users." ::= { cmaStatusUsers 5 }
connectedUserTableEntry OBJECT-TYPE SYNTAX ConnectedUserTableEntry

Polycom CMA System Operations Guide
502 Polycom, Inc.
MAX-ACCESS not-accessible STATUS current DESCRIPTION "Connected user table entry." INDEX { connectedUserIndex } ::= { connectedUserTable 1 }
connectedUserIndex OBJECT-TYPE SYNTAX ConnectedUserTableRange MAX-ACCESS read-only STATUS current DESCRIPTION "Unique system-assigned ID for this entry." ::= { connectedUserTableEntry 1 }
connectedUserName OBJECT-TYPE SYNTAX OCTET STRING (SIZE(0..255)) MAX-ACCESS read-only STATUS current DESCRIPTION "Name of the connected user." ::= { connectedUserTableEntry 2 }
connectedUserRole OBJECT-TYPE SYNTAX OCTET STRING (SIZE(0..255)) MAX-ACCESS read-only STATUS current DESCRIPTION "Role of the connected user." ::= { connectedUserTableEntry 3 } connectedUserLoginTime OBJECT-TYPE SYNTAX DateAndTime MAX-ACCESS read-only STATUS current DESCRIPTION "Login time of the connected user." ::= { connectedUserTableEntry 4 }
-- END Connected User status
-- START CMA Server license statuscmaStatusLicenseGroup OBJECT-GROUP OBJECTS { cmaLicenseSeatCount, cmaLicenseSeatsInUse } STATUS current DESCRIPTION "CMA license status conformance group." ::= { cmaStatusConformance 3 }
cmaLicenseSeatCount OBJECT-TYPE SYNTAX Integer32 MAX-ACCESS read-only STATUS current DESCRIPTION "Total number of CMAD seats in the license." ::= { cmaStatusLicenses 1 }
cmaLicenseSeatsInUse OBJECT-TYPE SYNTAX Integer32 MAX-ACCESS read-only STATUS current DESCRIPTION "Number of licensed seats in use." ::= { cmaStatusLicenses 2 }

Polycom CMA System MIB
Polycom, Inc. 503
-- END CMA Server license status
-- START CMA Services statuscmaStatusCmaServicesGroup OBJECT-GROUP OBJECTS { cmaServiceIndex, cmaServiceName, cmaServiceStatus } STATUS current DESCRIPTION "CMA service status conformance group." ::= { cmaStatusConformance 4 }
CmaServiceRange ::= Integer32(1..50)CmaServiceTableEntry ::= SEQUENCE{ cmaServiceIndex CmaServiceRange, cmaServiceName OCTET STRING, cmaServiceStatus CmaServiceStatus}
cmaServiceTable OBJECT-TYPE SYNTAX SEQUENCE OF CmaServiceTableEntry MAX-ACCESS not-accessible STATUS current DESCRIPTION "CMA service table. Contains the name and status of all CMA-related software services." ::= { cmaStatusServices 1 }
cmaServiceTableEntry OBJECT-TYPE SYNTAX CmaServiceTableEntry MAX-ACCESS not-accessible STATUS current DESCRIPTION "CMA service table entry." INDEX { cmaServiceIndex } ::= { cmaServiceTable 1 }
cmaServiceIndex OBJECT-TYPE SYNTAX CmaServiceRange MAX-ACCESS read-only STATUS current DESCRIPTION "Unique system-assigned ID for this entry." ::= { cmaServiceTableEntry 1 }
cmaServiceName OBJECT-TYPE SYNTAX OCTET STRING (SIZE(1..255)) MAX-ACCESS read-only STATUS current DESCRIPTION "Name of the service." ::= { cmaServiceTableEntry 2 }
cmaServiceStatus OBJECT-TYPE SYNTAX CmaServiceStatus MAX-ACCESS read-only STATUS current DESCRIPTION "Status of the service." ::= { cmaServiceTableEntry 3 }

Polycom CMA System Operations Guide
504 Polycom, Inc.
-- END CMA Services status
-- START scheduled endpoint management statuscmaStatusEndpointManagementGroup OBJECT-GROUP OBJECTS {-- cmaEpManagementPendingSoftUpdates, cmaEpManagementInProgressSoftUpdates,-- cmaEpManagementSucessfulSoftUpdates,-- cmaEpManagementFailedSoftUpdates,-- cmaEpManagementPendingProvisioning, cmaEpManagementInProgressProvisioning-- cmaEpManagementSucessfulProvisioning,-- cmaEpManagementFailedProvisioning } STATUS current DESCRIPTION "CMA endpoint management status conformance group." ::= { cmaStatusConformance 6 }
cmaEpManagementInProgressSoftUpdates OBJECT-TYPE SYNTAX Integer32 MAX-ACCESS read-only STATUS current DESCRIPTION "Number of in-progress endpoint soft updates." ::= { cmaStatusEndpointManagement 1 }
cmaEpManagementInProgressProvisioning OBJECT-TYPE SYNTAX Integer32 MAX-ACCESS read-only STATUS current DESCRIPTION "Number of in-progress endpoint provisioning jobs." ::= { cmaStatusEndpointManagement 2 }
--cmaEpManagementPendingSoftUpdates OBJECT-TYPE-- SYNTAX Integer32-- MAX-ACCESS read-only-- STATUS current-- DESCRIPTION "Number of pending endpoint soft updates."-- ::= { cmaStatusEndpointManagement 1 }
--cmaEpManagementSucessfulSoftUpdates OBJECT-TYPE-- SYNTAX Integer32-- MAX-ACCESS read-only-- STATUS current-- DESCRIPTION "Number of sucessful soft updates."-- ::= { cmaStatusEndpointManagement 4 }
--cmaEpManagementFailedSoftUpdates OBJECT-TYPE-- SYNTAX Integer32-- MAX-ACCESS read-only-- STATUS current-- DESCRIPTION "Number of failed soft updates."-- ::= { cmaStatusEndpointManagement 5 }
--cmaEpManagementPendingProvisioning OBJECT-TYPE-- SYNTAX Integer32-- MAX-ACCESS read-only-- STATUS current

Polycom CMA System MIB
Polycom, Inc. 505
-- DESCRIPTION "Number of pending endpoint provisioning jobs."-- ::= { cmaStatusEndpointManagement 6 }
--cmaEpManagementSucessfulProvisioning OBJECT-TYPE-- SYNTAX Integer32-- MAX-ACCESS read-only-- STATUS current-- DESCRIPTION "Number of sucessful provisioning jobs."-- ::= { cmaStatusEndpointManagement 8 }
--cmaEpManagementFailedProvisioning OBJECT-TYPE-- SYNTAX Integer32-- MAX-ACCESS read-only-- STATUS current-- DESCRIPTION "Number of failed provisioning jobs."-- ::= { cmaStatusEndpointManagement 9 }
-- END scheduled endpoint management status
-- START MCU statuscmaStatusDeviceGroup OBJECT-GROUP OBJECTS { cmaMcuCount, cmaMcuCountWithWarnings, cmaMcuCountWithErrors, cmaMcuIndex, cmaMcuName, cmaMcuType, cmaMcuInetAddressType, cmaMcuInetAddress, cmaMcuStatus, cmaMcuConferenceCount, cmaMcuAudioPortsUsed, cmaMcuVideoPortsUsed, cmaEndpointCount, cmaEndpointCountWithAlerts, cmaEndpointCountWithHelpRequests, cmaEndpointCountOnline, cmaEndpointCountOffline, cmaEndpointCountInCall, cmaEndpointIndex, cmaEndpointType, cmaEndpointInetAddressType, cmaEndpointInetAddress, cmaEndpointStatus, cmaEndpointInCall, cmaEndpointGatekeeperRegStatus,-- cmaEndpointGatekeeperRegCauseCode, cmaEndpointGabRegStatus,-- cmaEndpointGabRegCauseCode, cmaEndpointPresenceRegStatus,-- cmaEndpointPresenceRegCauseCode, cmaEndpointSipRegStatus,-- cmaEndpointSipRegCauseCodea cmaEndpointManagementStatus, cmaEndpointErrorCount, cmaEndpointErrors, cmaEndpointWarningCount, cmaEndpointWarnings,

Polycom CMA System Operations Guide
506 Polycom, Inc.
cmaEndpointHelpRequest, cmaVbpCount, cmaVbpIndex, cmaVbpModel, cmaVbpName, cmaVbpLanInetAddressType, cmaVbpLanInetAddress, cmaVbpWanInetAddressType, cmaVbpWanInetAddress, cmaDmaCount, cmaDmaIndex, cmaDmaName, cmaDmaDescription, cmaDmaVirtualInetAddressType, cmaDmaVirtualInetAddress, cmaDmaH323Alias, cmaDmaStatus, cmaEndpointExchangeStatus } STATUS current DESCRIPTION "CMA device status conformance group." ::= { cmaStatusConformance 7 }
cmaMcuCount OBJECT-TYPE SYNTAX Integer32 MAX-ACCESS read-only STATUS current DESCRIPTION "Total number of MCUs known to the CMA server." ::= { cmaStatusDeviceMCU 1 }
cmaMcuCountWithWarnings OBJECT-TYPE SYNTAX Integer32 MAX-ACCESS read-only STATUS current DESCRIPTION "Number of MCUs with warnings." ::= { cmaStatusDeviceMCU 2 }
cmaMcuCountWithErrors OBJECT-TYPE SYNTAX Integer32 MAX-ACCESS read-only STATUS current DESCRIPTION "Number of MCUs with errors." ::= { cmaStatusDeviceMCU 3 }
CmaMcuStatusTableEntry ::= SEQUENCE{ cmaMcuIndex CmaDefaultTableIndexRange, cmaMcuName OCTET STRING, cmaMcuType CmaMcuType, cmaMcuInetAddressType InetAddressType, cmaMcuInetAddress InetAddress, cmaMcuStatus CmaDeviceStatus, cmaMcuConferenceCount Integer32, -- Number of active conferences cmaMcuAudioPortsUsed Integer32, -- % of audio ports in use cmaMcuVideoPortsUsed Integer32 -- % of video ports in use}
cmaMcuStatusTable OBJECT-TYPE SYNTAX SEQUENCE OF CmaMcuStatusTableEntry

Polycom CMA System MIB
Polycom, Inc. 507
MAX-ACCESS not-accessible STATUS current DESCRIPTION "MCU status table. Contains identification, status, and usage information for MCUs." ::= { cmaStatusDeviceMCU 4 }
cmaMcuStatusTableEntry OBJECT-TYPE SYNTAX CmaMcuStatusTableEntry MAX-ACCESS not-accessible STATUS current DESCRIPTION "MCU status table entry." INDEX { cmaMcuIndex } ::= { cmaMcuStatusTable 1 }
cmaMcuIndex OBJECT-TYPE SYNTAX CmaDefaultTableIndexRange MAX-ACCESS read-only STATUS current DESCRIPTION "Unique system-assigned ID for this entry." ::= { cmaMcuStatusTableEntry 1 }
cmaMcuName OBJECT-TYPE SYNTAX OCTET STRING (SIZE(1..255)) MAX-ACCESS read-only STATUS current DESCRIPTION "Name of the MCU." ::= { cmaMcuStatusTableEntry 2 }
cmaMcuType OBJECT-TYPE SYNTAX CmaMcuType MAX-ACCESS read-only STATUS current DESCRIPTION "MCU type." ::= { cmaMcuStatusTableEntry 3 }
cmaMcuInetAddressType OBJECT-TYPE SYNTAX InetAddressType MAX-ACCESS read-only STATUS current DESCRIPTION " IP address type of the MCU." ::= { cmaMcuStatusTableEntry 4 }
cmaMcuInetAddress OBJECT-TYPE SYNTAX InetAddress MAX-ACCESS read-only STATUS current DESCRIPTION "IP address of the MCU." ::= { cmaMcuStatusTableEntry 5 }
cmaMcuStatus OBJECT-TYPE SYNTAX CmaDeviceStatus MAX-ACCESS read-only STATUS current DESCRIPTION "Status of the MCU." ::= { cmaMcuStatusTableEntry 6 }
cmaMcuConferenceCount OBJECT-TYPE SYNTAX Integer32 MAX-ACCESS read-only STATUS current

Polycom CMA System Operations Guide
508 Polycom, Inc.
DESCRIPTION "Number of active conferences on the MCU." ::= { cmaMcuStatusTableEntry 7 }
cmaMcuAudioPortsUsed OBJECT-TYPE SYNTAX Integer32 MAX-ACCESS read-only STATUS current DESCRIPTION "Percentage of audio ports in use on the MCU." ::= { cmaMcuStatusTableEntry 8 }
cmaMcuVideoPortsUsed OBJECT-TYPE SYNTAX Integer32 MAX-ACCESS read-only STATUS current DESCRIPTION "Percentage of video ports in use on the MCU." ::= { cmaMcuStatusTableEntry 9 }-- END MCU status
-- START endpoint status
cmaEndpointCount OBJECT-TYPE SYNTAX Integer32 MAX-ACCESS read-only STATUS current DESCRIPTION "Total number of endpoints known to the CMA server." ::= { cmaStatusDeviceEndpoint 1 }
cmaEndpointCountWithAlerts OBJECT-TYPE SYNTAX Integer32 MAX-ACCESS read-only STATUS current DESCRIPTION "Number of endpoints with alert conditions." ::= { cmaStatusDeviceEndpoint 2 }
cmaEndpointCountWithHelpRequests OBJECT-TYPE SYNTAX Integer32 MAX-ACCESS read-only STATUS current DESCRIPTION "Number of endpoints with help requests." ::= { cmaStatusDeviceEndpoint 3 }
cmaEndpointCountOnline OBJECT-TYPE SYNTAX Integer32 MAX-ACCESS read-only STATUS current DESCRIPTION "Number of endpoints that are on line." ::= { cmaStatusDeviceEndpoint 4 }
cmaEndpointCountOffline OBJECT-TYPE SYNTAX Integer32 MAX-ACCESS read-only STATUS current DESCRIPTION "Number of endpoints that are off line." ::= { cmaStatusDeviceEndpoint 5 }
cmaEndpointCountInCall OBJECT-TYPE SYNTAX Integer32 MAX-ACCESS read-only STATUS current DESCRIPTION "Number of endpoints that are in a call."

Polycom CMA System MIB
Polycom, Inc. 509
::= { cmaStatusDeviceEndpoint 6 }
CmaEndpointStatusTableEntry ::= SEQUENCE{ cmaEndpointIndex CmaDefaultTableIndexRange, cmaEndpointType CmaEndpointType, cmaEndpointInetAddressType InetAddressType, cmaEndpointInetAddress InetAddress, cmaEndpointStatus CmaDeviceStatus, -- online or offline cmaEndpointInCall TruthValue, cmaEndpointGatekeeperRegStatus CmaDeviceRegistrationStatus,-- cmaEndpointGatekeeperRegCauseCode Integer32, cmaEndpointGabRegStatus CmaDeviceRegistrationStatus,-- cmaEndpointGabRegCauseCode Integer32, cmaEndpointPresenceRegStatus CmaDeviceRegistrationStatus,-- cmaEndpointPresenceRegCauseCode Integer32, cmaEndpointSipRegStatus CmaDeviceRegistrationStatus,-- cmaEndpointSipRegCauseCode Integer32, cmaEndpointManagementStatus CmaDeviceManagementStatus, cmaEndpointErrorCount Integer32, cmaEndpointErrors OCTET STRING, cmaEndpointWarningCount Integer32, cmaEndpointWarnings OCTET STRING, cmaEndpointHelpRequest TruthValue, cmaEndpointExchangeStatus CmaDeviceRegistrationStatus}
cmaEndpointStatusTable OBJECT-TYPE SYNTAX SEQUENCE OF CmaEndpointStatusTableEntry MAX-ACCESS not-accessible STATUS current DESCRIPTION "Endpoint status table. Contains identification and status information for endpoints." ::= { cmaStatusDeviceEndpoint 7 }
cmaEndpointStatusTableEntry OBJECT-TYPE SYNTAX CmaEndpointStatusTableEntry MAX-ACCESS not-accessible STATUS current DESCRIPTION "Endpoint status table entry." INDEX { cmaEndpointIndex } ::= { cmaEndpointStatusTable 1}
cmaEndpointIndex OBJECT-TYPE SYNTAX CmaDefaultTableIndexRange MAX-ACCESS read-only STATUS current DESCRIPTION "Unique system-assigned ID for this entry." ::= { cmaEndpointStatusTableEntry 1 }
cmaEndpointType OBJECT-TYPE SYNTAX CmaEndpointType MAX-ACCESS read-only STATUS current DESCRIPTION "Type of endpoint." ::= { cmaEndpointStatusTableEntry 2 }
cmaEndpointInetAddressType OBJECT-TYPE SYNTAX InetAddressType MAX-ACCESS read-only

Polycom CMA System Operations Guide
510 Polycom, Inc.
STATUS current DESCRIPTION "IP address type of the endpoint." ::= { cmaEndpointStatusTableEntry 3 }
cmaEndpointInetAddress OBJECT-TYPE SYNTAX InetAddress MAX-ACCESS read-only STATUS current DESCRIPTION "IP address of the endpoint." ::= { cmaEndpointStatusTableEntry 4 }
cmaEndpointStatus OBJECT-TYPE SYNTAX CmaDeviceStatus MAX-ACCESS read-only STATUS current DESCRIPTION "Status of the endpoint." ::= { cmaEndpointStatusTableEntry 5 }
cmaEndpointInCall OBJECT-TYPE SYNTAX TruthValue MAX-ACCESS read-only STATUS current DESCRIPTION "Flag indicating whether the endpoint is in a call." ::= { cmaEndpointStatusTableEntry 6 }
cmaEndpointGatekeeperRegStatus OBJECT-TYPE SYNTAX CmaDeviceRegistrationStatus MAX-ACCESS read-only STATUS current DESCRIPTION "Gatekeeper registration status of the endpoint." ::= { cmaEndpointStatusTableEntry 7 }
--cmaEndpointGatekeeperRegCauseCode OBJECT-TYPE-- SYNTAX Integer32-- MAX-ACCESS read-only-- STATUS current-- DESCRIPTION "Gatekeeper registration status reason."-- ::= { cmaEndpointStatusTableEntry 8 }
cmaEndpointGabRegStatus OBJECT-TYPE SYNTAX CmaDeviceRegistrationStatus MAX-ACCESS read-only STATUS current DESCRIPTION "GAB registration status of the endpoint." ::= { cmaEndpointStatusTableEntry 9 }
--cmaEndpointGabRegCauseCode OBJECT-TYPE-- SYNTAX Integer32-- MAX-ACCESS read-only-- STATUS current-- DESCRIPTION "GAB registration status reason."-- ::= { cmaEndpointStatusTableEntry 10 }
cmaEndpointPresenceRegStatus OBJECT-TYPE SYNTAX CmaDeviceRegistrationStatus MAX-ACCESS read-only STATUS current DESCRIPTION "Presence registration status of the endpoint." ::= { cmaEndpointStatusTableEntry 11 }

Polycom CMA System MIB
Polycom, Inc. 511
--cmaEndpointPresenceRegCauseCode OBJECT-TYPE-- SYNTAX Integer32-- MAX-ACCESS read-only-- STATUS current-- DESCRIPTION "Presence registration status reason."-- ::= { cmaEndpointStatusTableEntry 12 }
cmaEndpointSipRegStatus OBJECT-TYPE SYNTAX CmaDeviceRegistrationStatus MAX-ACCESS read-only STATUS current DESCRIPTION "SIP registration status of the endpoint." ::= { cmaEndpointStatusTableEntry 13 }
--cmaEndpointSipRegCauseCode OBJECT-TYPE-- SYNTAX Integer32-- MAX-ACCESS read-only-- STATUS current-- DESCRIPTION "SIP registration status reason."-- ::= { cmaEndpointStatusTableEntry 14 }
cmaEndpointManagementStatus OBJECT-TYPE SYNTAX CmaDeviceManagementStatus MAX-ACCESS read-only STATUS current DESCRIPTION "Management status of the endpoint." ::= { cmaEndpointStatusTableEntry 15 }
cmaEndpointErrorCount OBJECT-TYPE SYNTAX Integer32 MAX-ACCESS read-only STATUS current DESCRIPTION "Number of errors on the endpoint." ::= { cmaEndpointStatusTableEntry 16 }
cmaEndpointErrors OBJECT-TYPE SYNTAX OCTET STRING MAX-ACCESS read-only STATUS current DESCRIPTION "List of the errors on the endpoint, separated by new-line characters." ::= { cmaEndpointStatusTableEntry 17 }
cmaEndpointWarningCount OBJECT-TYPE SYNTAX Integer32 MAX-ACCESS read-only STATUS current DESCRIPTION "Number of warnings on the endpoint." ::= { cmaEndpointStatusTableEntry 18 }
cmaEndpointWarnings OBJECT-TYPE SYNTAX OCTET STRING MAX-ACCESS read-only STATUS current DESCRIPTION "List of the warnings on the endpoint, separated by new-line characters." ::= { cmaEndpointStatusTableEntry 19 }
cmaEndpointHelpRequest OBJECT-TYPE SYNTAX TruthValue

Polycom CMA System Operations Guide
512 Polycom, Inc.
MAX-ACCESS read-only STATUS current DESCRIPTION "Flag indicating whether there is a help request on the endpoint." ::= { cmaEndpointStatusTableEntry 20 }
cmaEndpointExchangeStatus OBJECT-TYPE SYNTAX CmaDeviceRegistrationStatus MAX-ACCESS read-only STATUS current DESCRIPTION "Exchange server status of user associated with the endpoint." ::= { cmaEndpointStatusTableEntry 21 }
-- END endpoint status
-- START VBP statuscmaVbpCount OBJECT-TYPE SYNTAX Integer32 MAX-ACCESS read-only STATUS current DESCRIPTION "Number of VBPs known to the CMA server." ::= { cmaStatusDeviceVBP 1 }
CmaVbpStatusTableEntry ::= SEQUENCE{ cmaVbpIndex CmaDefaultTableIndexRange, cmaVbpModel CmaVbpModel, cmaVbpName OCTET STRING, cmaVbpLanInetAddressType InetAddressType, cmaVbpLanInetAddress InetAddress, cmaVbpWanInetAddressType InetAddressType, cmaVbpWanInetAddress InetAddress}
cmaVbpStatusTable OBJECT-TYPE SYNTAX SEQUENCE OF CmaVbpStatusTableEntry MAX-ACCESS not-accessible STATUS current DESCRIPTION "VBP status table. Contains information about Polycom Video Border Proxy devices." ::= { cmaStatusDeviceVBP 2 }
cmaVbpStatusTableEntry OBJECT-TYPE SYNTAX CmaVbpStatusTableEntry MAX-ACCESS not-accessible STATUS current DESCRIPTION "VBP status table entry." INDEX { cmaVbpIndex } ::= { cmaVbpStatusTable 1}
cmaVbpIndex OBJECT-TYPE SYNTAX CmaDefaultTableIndexRange MAX-ACCESS read-only STATUS current DESCRIPTION "Unique system-assigned ID for this entry." ::= { cmaVbpStatusTableEntry 1 }
cmaVbpModel OBJECT-TYPE SYNTAX CmaVbpModel MAX-ACCESS read-only STATUS current

Polycom CMA System MIB
Polycom, Inc. 513
DESCRIPTION "Model of the VBP device." ::= { cmaVbpStatusTableEntry 2 }
cmaVbpName OBJECT-TYPE SYNTAX OCTET STRING (SIZE(1..255)) MAX-ACCESS read-only STATUS current DESCRIPTION "Name of the VBP device." ::= { cmaVbpStatusTableEntry 3 }
cmaVbpLanInetAddressType OBJECT-TYPE SYNTAX InetAddressType MAX-ACCESS read-only STATUS current DESCRIPTION "LAN IP address type of the VBP device." ::= { cmaVbpStatusTableEntry 4 }
cmaVbpLanInetAddress OBJECT-TYPE SYNTAX InetAddress MAX-ACCESS read-only STATUS current DESCRIPTION "LAN IP address of the VBP device." ::= { cmaVbpStatusTableEntry 5 }
cmaVbpWanInetAddressType OBJECT-TYPE SYNTAX InetAddressType MAX-ACCESS read-only STATUS current DESCRIPTION "WAN IP address type of the VBP device." ::= { cmaVbpStatusTableEntry 6 }
cmaVbpWanInetAddress OBJECT-TYPE SYNTAX InetAddress MAX-ACCESS read-only STATUS current DESCRIPTION "WAN IP address of the VBP device." ::= { cmaVbpStatusTableEntry 7 }
-- END VBP status
-- START DMA statuscmaDmaCount OBJECT-TYPE SYNTAX Integer32 MAX-ACCESS read-only STATUS current DESCRIPTION "Number of DMA systems known to the CMA server." ::= { cmaStatusDeviceDMA 1 }
CmaDmaStatusTableEntry ::= SEQUENCE{ cmaDmaIndex CmaDefaultTableIndexRange, cmaDmaName OCTET STRING, cmaDmaDescription OCTET STRING, cmaDmaVirtualInetAddressType InetAddressType, cmaDmaVirtualInetAddress InetAddress, cmaDmaH323Alias OCTET STRING, cmaDmaStatus CmaDeviceStatus}
cmaDmaStatusTable OBJECT-TYPE

Polycom CMA System Operations Guide
514 Polycom, Inc.
SYNTAX SEQUENCE OF CmaDmaStatusTableEntry MAX-ACCESS not-accessible STATUS current DESCRIPTION "DMA status table. Contains information about DMA systems." ::= { cmaStatusDeviceDMA 2 }
cmaDmaStatusTableEntry OBJECT-TYPE SYNTAX CmaDmaStatusTableEntry MAX-ACCESS not-accessible STATUS current DESCRIPTION "DMA status table entry." INDEX { cmaDmaIndex } ::= { cmaDmaStatusTable 1}
cmaDmaIndex OBJECT-TYPE SYNTAX CmaDefaultTableIndexRange MAX-ACCESS read-only STATUS current DESCRIPTION "Unique system-assigned ID for this entry." ::= { cmaDmaStatusTableEntry 1 }
cmaDmaName OBJECT-TYPE SYNTAX OCTET STRING (SIZE(1..255)) MAX-ACCESS read-only STATUS current DESCRIPTION "Name of the DMA system." ::= { cmaDmaStatusTableEntry 2 }
cmaDmaDescription OBJECT-TYPE SYNTAX OCTET STRING (SIZE(1..255)) MAX-ACCESS read-only STATUS current DESCRIPTION "Description of the DMA system." ::= { cmaDmaStatusTableEntry 3 }
cmaDmaVirtualInetAddressType OBJECT-TYPE SYNTAX InetAddressType MAX-ACCESS read-only STATUS current DESCRIPTION "Virtual IP address type of the DMA system." ::= { cmaDmaStatusTableEntry 4 }
cmaDmaVirtualInetAddress OBJECT-TYPE SYNTAX InetAddress MAX-ACCESS read-only STATUS current DESCRIPTION "Virtual IP address of the DMA system." ::= { cmaDmaStatusTableEntry 5 }
cmaDmaH323Alias OBJECT-TYPE SYNTAX OCTET STRING (SIZE(0..255)) MAX-ACCESS read-only STATUS current DESCRIPTION "H.323 alias of the DMA system." ::= { cmaDmaStatusTableEntry 6 }
cmaDmaStatus OBJECT-TYPE SYNTAX CmaDeviceStatus MAX-ACCESS read-only

Polycom CMA System MIB
Polycom, Inc. 515
STATUS current DESCRIPTION "Status of the DMA system." ::= { cmaDmaStatusTableEntry 7 }
-- END DMA status
-- START Conference summarycmaStatusConferenceGroup OBJECT-GROUP OBJECTS { cmaConfSummaryCompletedScheduledCount, cmaConfSummaryActiveScheduledCount, cmaConfSummaryFutureScheduledCount, cmaConfSummaryCompletedAdhocCount, cmaConfSummaryActiveAdhocCount, cmaActiveConferenceCount, cmaConferenceIndex, cmaConferenceName, cmaConferenceScheduleId, cmaConferenceType, cmaConferenceIsScheduled, cmaConferenceIsRecurring, cmaConferenceStartTime, cmaConferenceOwner, cmaConferenceStatus, cmaConferenceTotalParticipants, cmaConferenceConnectedParticipants, cmaConferenceIsCascaded, cmaConferenceMcu, cmaConferenceAvgParticipantAudioQOE, cmaConferenceAvgParticipantVideoQOE, cmaConferenceAvgParticipantContentQOE, cmaConferenceMinParticipantAudioQOE, cmaConferenceMinParticipantVideoQOE, cmaConferenceMinParticipantContentQOE } STATUS current DESCRIPTION "CMA conference status conformance group." ::= { cmaStatusConformance 8 }
cmaConfSummaryCompletedScheduledCount OBJECT-TYPE SYNTAX Integer32 MAX-ACCESS read-only STATUS current DESCRIPTION "Number of completed scheduled conferences since midnight." ::= { cmaStatusConferenceSummary 1 }
cmaConfSummaryActiveScheduledCount OBJECT-TYPE SYNTAX Integer32 MAX-ACCESS read-only STATUS current DESCRIPTION "Number of active scheduled conferences." ::= { cmaStatusConferenceSummary 2 }
cmaConfSummaryFutureScheduledCount OBJECT-TYPE SYNTAX Integer32 MAX-ACCESS read-only STATUS current DESCRIPTION "Number of future scheduled conferences for today (i.e., until midnight of the current day)."

Polycom CMA System Operations Guide
516 Polycom, Inc.
::= { cmaStatusConferenceSummary 3 }
cmaConfSummaryCompletedAdhocCount OBJECT-TYPE SYNTAX Integer32 MAX-ACCESS read-only STATUS current DESCRIPTION "Number of completed ad hoc conferences since midnight." ::= { cmaStatusConferenceSummary 4 }
cmaConfSummaryActiveAdhocCount OBJECT-TYPE SYNTAX Integer32 MAX-ACCESS read-only STATUS current DESCRIPTION "Number of active ad hoc conferences." ::= { cmaStatusConferenceSummary 5 }
-- END Conference summary
-- START Conference status
cmaActiveConferenceCount OBJECT-TYPE SYNTAX Integer32 MAX-ACCESS read-only STATUS current DESCRIPTION "Total number of active conferences (both scheduled and ad hoc)" ::= { cmaStatusConferencesOngoing 1 }
CmaActiveConferenceTableEntry ::= SEQUENCE{ cmaConferenceIndex CmaDefaultTableIndexRange, cmaConferenceName OCTET STRING, cmaConferenceScheduleId Integer32, cmaConferenceType CmaConferenceType, cmaConferenceIsScheduled TruthValue, cmaConferenceIsRecurring TruthValue, cmaConferenceStartTime DateAndTime, cmaConferenceOwner OCTET STRING, cmaConferenceStatus CmaConferenceStatus, cmaConferenceTotalParticipants Integer32, cmaConferenceConnectedParticipants Integer32, cmaConferenceIsCascaded TruthValue, cmaConferenceMcu OCTET STRING, cmaConferenceAvgParticipantAudioQOE Integer32, cmaConferenceAvgParticipantVideoQOE Integer32, cmaConferenceAvgParticipantContentQOE Integer32, cmaConferenceMinParticipantAudioQOE Integer32, cmaConferenceMinParticipantVideoQOE Integer32, cmaConferenceMinParticipantContentQOE Integer32}
cmaActiveConferenceTable OBJECT-TYPE SYNTAX SEQUENCE OF CmaActiveConferenceTableEntry MAX-ACCESS not-accessible STATUS current DESCRIPTION "Active conference table. Contains the available information for all active conferences." ::= { cmaStatusConferencesOngoing 2 }
cmaActiveConferenceTableEntry OBJECT-TYPE SYNTAX CmaActiveConferenceTableEntry

Polycom CMA System MIB
Polycom, Inc. 517
MAX-ACCESS not-accessible STATUS current DESCRIPTION "Active conference table entry." INDEX { cmaConferenceIndex } ::= { cmaActiveConferenceTable 1 }
cmaConferenceIndex OBJECT-TYPE SYNTAX CmaDefaultTableIndexRange MAX-ACCESS read-only STATUS current DESCRIPTION "Unique system-assigned ID for this entry." ::= { cmaActiveConferenceTableEntry 1 }
cmaConferenceName OBJECT-TYPE SYNTAX OCTET STRING (SIZE(1..255)) MAX-ACCESS read-only STATUS current DESCRIPTION "Name of the conference." ::= { cmaActiveConferenceTableEntry 2 }
cmaConferenceScheduleId OBJECT-TYPE SYNTAX Integer32 MAX-ACCESS read-only STATUS current DESCRIPTION "Scheduling ID of the conference." ::= { cmaActiveConferenceTableEntry 3 }
cmaConferenceType OBJECT-TYPE SYNTAX CmaConferenceType MAX-ACCESS read-only STATUS current DESCRIPTION "Type (audio-only or video) of the conference." ::= { cmaActiveConferenceTableEntry 4 }
cmaConferenceIsScheduled OBJECT-TYPE SYNTAX TruthValue MAX-ACCESS read-only STATUS current DESCRIPTION "Flag indicating whether the conference is scheduled (true) or ad hoc (false)." ::= { cmaActiveConferenceTableEntry 5 }
cmaConferenceIsRecurring OBJECT-TYPE SYNTAX TruthValue MAX-ACCESS read-only STATUS current DESCRIPTION "Flag indicating whether the conference is a recurring conference." ::= { cmaActiveConferenceTableEntry 6 }
cmaConferenceStartTime OBJECT-TYPE SYNTAX DateAndTime MAX-ACCESS read-only STATUS current DESCRIPTION "Start date/time of the conference." ::= { cmaActiveConferenceTableEntry 7 }
cmaConferenceOwner OBJECT-TYPE SYNTAX OCTET STRING (SIZE(0..255)) MAX-ACCESS read-only STATUS current

Polycom CMA System Operations Guide
518 Polycom, Inc.
DESCRIPTION "Owner of the conference." ::= { cmaActiveConferenceTableEntry 8 }
cmaConferenceStatus OBJECT-TYPE SYNTAX CmaConferenceStatus MAX-ACCESS read-only STATUS current DESCRIPTION "Status of the conference." ::= { cmaActiveConferenceTableEntry 9 }
cmaConferenceTotalParticipants OBJECT-TYPE SYNTAX Integer32 MAX-ACCESS read-only STATUS current DESCRIPTION "Total number of participants for the conference (both connected and disconnected)." ::= { cmaActiveConferenceTableEntry 10 }
cmaConferenceConnectedParticipants OBJECT-TYPE SYNTAX Integer32 MAX-ACCESS read-only STATUS current DESCRIPTION "Number of connected participants for the conference." ::= { cmaActiveConferenceTableEntry 11 }
cmaConferenceIsCascaded OBJECT-TYPE SYNTAX TruthValue MAX-ACCESS read-only STATUS current DESCRIPTION "Flag indicating whether the conference is cascaded." ::= { cmaActiveConferenceTableEntry 12 }
cmaConferenceMcu OBJECT-TYPE SYNTAX OCTET STRING (SIZE(0..255)) MAX-ACCESS read-only STATUS current DESCRIPTION "Name of the MCU hosting the conference. Empty if no MCU is involved. For cascaded conferences, this is a comma-delimited list of MCUs." ::= { cmaActiveConferenceTableEntry 13 }
cmaConferenceAvgParticipantAudioQOE OBJECT-TYPE SYNTAX Integer32 -- meaning is yet to be defined MAX-ACCESS read-only STATUS current DESCRIPTION "Average audio QOE (Quality Of Experience) for all connected participants in the conference." ::= { cmaActiveConferenceTableEntry 14 }
cmaConferenceAvgParticipantVideoQOE OBJECT-TYPE SYNTAX Integer32 -- meaning is yet to be defined MAX-ACCESS read-only STATUS current DESCRIPTION "Average video QOE (Quality Of Experience) for all connected participants in the conference." ::= { cmaActiveConferenceTableEntry 15 }
cmaConferenceAvgParticipantContentQOE OBJECT-TYPE SYNTAX Integer32 -- meaning is yet to be defined MAX-ACCESS read-only STATUS current

Polycom CMA System MIB
Polycom, Inc. 519
DESCRIPTION "Average content QOE (Quality Of Experience) for all connected participants in the conference." ::= { cmaActiveConferenceTableEntry 16 }
cmaConferenceMinParticipantAudioQOE OBJECT-TYPE SYNTAX Integer32 -- meaning is yet to be defined MAX-ACCESS read-only STATUS current DESCRIPTION "Minimum audio QOE (Quality Of Experience) across all connected participants in the conference." ::= { cmaActiveConferenceTableEntry 17 }
cmaConferenceMinParticipantVideoQOE OBJECT-TYPE SYNTAX Integer32 -- meaning is yet to be defined MAX-ACCESS read-only STATUS current DESCRIPTION "Minimum video QOE (Quality Of Experience) across all connected participants in the conference." ::= { cmaActiveConferenceTableEntry 18 }
cmaConferenceMinParticipantContentQOE OBJECT-TYPE SYNTAX Integer32 -- meaning is yet to be defined MAX-ACCESS read-only STATUS current DESCRIPTION "Minimum content QOE (Quality Of Experience) across all connected participants in the conference." ::= { cmaActiveConferenceTableEntry 19 }
-- END Conference status
-- START system alertscmaStatusSystemAlertGroup OBJECT-GROUP OBJECTS { cmaSystemAlertCount, cmaSystemAlertIndex, cmaSystemAlertSequenceNumber, cmaSystemAlertType, cmaSystemAlertDescription, cmaSystemAlertGenerationTime, cmaSystemAlertNotes } STATUS current DESCRIPTION "CMA system alerts status conformance group." ::= { cmaStatusConformance 9 }
cmaSystemAlertCount OBJECT-TYPE SYNTAX Integer32 MAX-ACCESS read-only STATUS current DESCRIPTION "Number of active system alerts." ::= { cmaStatusAlerts 1 }
CmaSystemAlertTableEntry ::= SEQUENCE{ cmaSystemAlertIndex CmaDefaultTableIndexRange, cmaSystemAlertSequenceNumber Counter32, cmaSystemAlertType CmaSystemAlertType, cmaSystemAlertDescription OCTET STRING, cmaSystemAlertGenerationTime DateAndTime,

Polycom CMA System Operations Guide
520 Polycom, Inc.
cmaSystemAlertNotes OCTET STRING}
cmaSystemAlertTable OBJECT-TYPE SYNTAX SEQUENCE OF CmaSystemAlertTableEntry MAX-ACCESS not-accessible STATUS current DESCRIPTION "System alert table. Contains information for all active alerts." ::= { cmaStatusAlerts 2 }
cmaSystemAlertTableEntry OBJECT-TYPE SYNTAX CmaSystemAlertTableEntry MAX-ACCESS not-accessible STATUS current DESCRIPTION "System alert table entry." INDEX { cmaSystemAlertIndex } ::= { cmaSystemAlertTable 1 }
cmaSystemAlertIndex OBJECT-TYPE SYNTAX CmaDefaultTableIndexRange MAX-ACCESS read-only STATUS current DESCRIPTION "Unique system-assigned ID for this entry." ::= { cmaSystemAlertTableEntry 1 }
cmaSystemAlertSequenceNumber OBJECT-TYPE SYNTAX Counter32 MAX-ACCESS read-only STATUS current DESCRIPTION "Sequence number of the system alert." ::= { cmaSystemAlertTableEntry 2 }
cmaSystemAlertType OBJECT-TYPE SYNTAX CmaSystemAlertType MAX-ACCESS read-only STATUS current DESCRIPTION "Alert type of the system alert." ::= { cmaSystemAlertTableEntry 3 }
cmaSystemAlertDescription OBJECT-TYPE SYNTAX OCTET STRING MAX-ACCESS read-only STATUS current DESCRIPTION "Description of the system alert." ::= { cmaSystemAlertTableEntry 4 }
cmaSystemAlertGenerationTime OBJECT-TYPE SYNTAX DateAndTime MAX-ACCESS read-only STATUS current DESCRIPTION "Date and time when the system alert was generated." ::= { cmaSystemAlertTableEntry 5 }
cmaSystemAlertNotes OBJECT-TYPE SYNTAX OCTET STRING MAX-ACCESS read-only STATUS current DESCRIPTION "Notes for the system alert." ::= { cmaSystemAlertTableEntry 6 }

Polycom CMA System MIB
Polycom, Inc. 521
-- END system alerts
-- START Redundancy statuscmaStatusRedundancyGroup OBJECT-GROUP OBJECTS { cmaRedundancyStatus, cmaRedundancyVirtualInetAddressType, cmaRedundancyVirtualInetAddress, cmaRedundantServerIndex, cmaRedundantServerInetAddressType, cmaRedundantServerInetAddress, cmaRedundantServerRole, cmaRedundantServerMonitorStatus, cmaRedundantServerMachineStatus } STATUS current DESCRIPTION "CMA redundancy status conformance group." ::= { cmaStatusConformance 10 }
cmaRedundancyStatus OBJECT-TYPE SYNTAX RedundancyStatusType MAX-ACCESS read-only STATUS current DESCRIPTION "CMA server redundancy status (no redundancy, redundancy OK, or redundancy with error)." ::= { cmaStatusRedundancy 1 }
cmaRedundancyVirtualInetAddressType OBJECT-TYPE SYNTAX InetAddressType MAX-ACCESS read-only STATUS current DESCRIPTION "Virtual IP address type of the CMA system (valid only if redundancy is enabled)." ::= { cmaStatusRedundancy 2 }
cmaRedundancyVirtualInetAddress OBJECT-TYPE SYNTAX InetAddress MAX-ACCESS read-only STATUS current DESCRIPTION "Virtual IP address of the CMA system (valid only if redundancy is enabled)." ::= { cmaStatusRedundancy 3 }
CmaRedundancyTableEntry ::= SEQUENCE{ cmaRedundantServerIndex CmaDefaultTableIndexRange, cmaRedundantServerInetAddressType InetAddressType, cmaRedundantServerInetAddress InetAddress, cmaRedundantServerRole CmaRedundantServerRole, cmaRedundantServerMonitorStatus CmaRedundantMonitorStatus, cmaRedundantServerMachineStatus CmaRedundantServerStatus}
cmaRedundancyTable OBJECT-TYPE SYNTAX SEQUENCE OF CmaRedundancyTableEntry MAX-ACCESS not-accessible STATUS current DESCRIPTION "CMA server redundancy table. In a redundant system, it

Polycom CMA System Operations Guide
522 Polycom, Inc.
includes an entry for each of the two servers." ::= { cmaStatusRedundancy 4 }
cmaRedundancyTableEntry OBJECT-TYPE SYNTAX CmaRedundancyTableEntry MAX-ACCESS not-accessible STATUS current DESCRIPTION "CMA server redundancy table entry." INDEX { cmaRedundantServerIndex } ::= { cmaRedundancyTable 1 }
cmaRedundantServerIndex OBJECT-TYPE SYNTAX CmaDefaultTableIndexRange MAX-ACCESS read-only STATUS current DESCRIPTION "Unique system-assigned ID for this entry." ::= { cmaRedundancyTableEntry 1 }
cmaRedundantServerInetAddressType OBJECT-TYPE SYNTAX InetAddressType MAX-ACCESS read-only STATUS current DESCRIPTION "IP address type of the server." ::= { cmaRedundancyTableEntry 2 }
cmaRedundantServerInetAddress OBJECT-TYPE SYNTAX InetAddress MAX-ACCESS read-only STATUS current DESCRIPTION "IP address of the server." ::= { cmaRedundancyTableEntry 3 }
cmaRedundantServerRole OBJECT-TYPE SYNTAX CmaRedundantServerRole MAX-ACCESS read-only STATUS current DESCRIPTION "Role of the server." ::= { cmaRedundancyTableEntry 4 }
cmaRedundantServerMonitorStatus OBJECT-TYPE SYNTAX CmaRedundantMonitorStatus MAX-ACCESS read-only STATUS current DESCRIPTION "Monitor status of the server." ::= { cmaRedundancyTableEntry 5 }
cmaRedundantServerMachineStatus OBJECT-TYPE SYNTAX CmaRedundantServerStatus MAX-ACCESS read-only STATUS current DESCRIPTION "Machine status of the server." ::= { cmaRedundancyTableEntry 6 }
-- END Redundancy status
-- START Site statistics
cmaStatusSitesGroup OBJECT-GROUP OBJECTS {

Polycom CMA System MIB
Polycom, Inc. 523
cmaSiteCount, cmaSiteIndex, cmaSiteName, cmaSiteCallCount, cmaSiteBandwidthUsed, cmaSiteAvgCallBitRate, cmaSitePacketLoss, cmaSiteAverageJitter, cmaSiteAverageDelay, cmaSiteLinkCount, cmaSiteLinkIndex, cmaSiteLinkName, cmaSiteLinkFromSite, cmaSiteLinkToSite, cmaSiteLinkCallCount, cmaSiteLinkBandwidthUsed, cmaSiteLinkAverageCallBitRate, cmaSiteLinkPacketLoss, cmaSiteLinkAverageJitter, cmaSiteLinkAverageDelay } STATUS current DESCRIPTION "CMA sites status conformance group." ::= { cmaStatusConformance 11 }
cmaSiteCount OBJECT-TYPE SYNTAX Integer32 MAX-ACCESS read-only STATUS current DESCRIPTION "Number of sites provisioned in the CMA server." ::= { cmaStatusSites 1 }
CmaSiteTableEntry ::= SEQUENCE{ cmaSiteIndex CmaDefaultTableIndexRange, cmaSiteName OCTET STRING, cmaSiteCallCount Integer32, cmaSiteBandwidthUsed Integer32, cmaSiteAvgCallBitRate Integer32, cmaSitePacketLoss Integer32, cmaSiteAverageJitter Integer32, cmaSiteAverageDelay Integer32}
cmaSiteTable OBJECT-TYPE SYNTAX SEQUENCE OF CmaSiteTableEntry MAX-ACCESS not-accessible STATUS current DESCRIPTION "CMA site table. Contains usage and network quality information for the sites." ::= { cmaStatusSites 2 }
cmaSiteTableEntry OBJECT-TYPE SYNTAX CmaSiteTableEntry MAX-ACCESS not-accessible STATUS current DESCRIPTION "CMA site table entry." INDEX { cmaSiteIndex } ::= { cmaSiteTable 1 }

Polycom CMA System Operations Guide
524 Polycom, Inc.
cmaSiteIndex OBJECT-TYPE SYNTAX CmaDefaultTableIndexRange MAX-ACCESS read-only STATUS current DESCRIPTION "Unique system-assigned ID for this entry." ::= { cmaSiteTableEntry 1 }
cmaSiteName OBJECT-TYPE SYNTAX OCTET STRING (SIZE(1..255)) MAX-ACCESS read-only STATUS current DESCRIPTION "Name of the site." ::= { cmaSiteTableEntry 2 }
cmaSiteCallCount OBJECT-TYPE SYNTAX Integer32 MAX-ACCESS read-only STATUS current DESCRIPTION "Number of active calls in the site." ::= { cmaSiteTableEntry 3 }
cmaSiteBandwidthUsed OBJECT-TYPE SYNTAX Integer32 (0..100) MAX-ACCESS read-only STATUS current DESCRIPTION "Percentage of bandwidth used in the site." ::= { cmaSiteTableEntry 4 }
cmaSiteAvgCallBitRate OBJECT-TYPE SYNTAX Integer32 MAX-ACCESS read-only STATUS current DESCRIPTION "Average call bit rate in the site." ::= { cmaSiteTableEntry 5 }
cmaSitePacketLoss OBJECT-TYPE SYNTAX Integer32 (0..100) MAX-ACCESS read-only STATUS current DESCRIPTION "Percentage of packet loss in the site." ::= { cmaSiteTableEntry 6 }
cmaSiteAverageJitter OBJECT-TYPE SYNTAX Integer32 MAX-ACCESS read-only STATUS current DESCRIPTION "Average jitter in the site." ::= { cmaSiteTableEntry 7 }
cmaSiteAverageDelay OBJECT-TYPE SYNTAX Integer32 MAX-ACCESS read-only STATUS current DESCRIPTION "Average delay in the site." ::= { cmaSiteTableEntry 8 }
-- END Site statistics
-- START Site link statistics

Polycom CMA System MIB
Polycom, Inc. 525
cmaSiteLinkCount OBJECT-TYPE SYNTAX Integer32 MAX-ACCESS read-only STATUS current DESCRIPTION "Number of site links provisioned in the CMA server." ::= { cmaStatusSiteLinks 1 }
CmaSiteLinkTableEntry ::= SEQUENCE{ cmaSiteLinkIndex CmaDefaultTableIndexRange, cmaSiteLinkName OCTET STRING, cmaSiteLinkFromSite OCTET STRING, cmaSiteLinkToSite OCTET STRING, cmaSiteLinkCallCount Integer32, cmaSiteLinkBandwidthUsed Integer32, cmaSiteLinkAverageCallBitRate Integer32, cmaSiteLinkPacketLoss Integer32, cmaSiteLinkAverageJitter Integer32, cmaSiteLinkAverageDelay Integer32}
cmaSiteLinkTable OBJECT-TYPE SYNTAX SEQUENCE OF CmaSiteLinkTableEntry MAX-ACCESS not-accessible STATUS current DESCRIPTION "CMA site link table. Contains usage and network quality information for the site links." ::= { cmaStatusSiteLinks 2 }
cmaSiteLinkTableEntry OBJECT-TYPE SYNTAX CmaSiteLinkTableEntry MAX-ACCESS not-accessible STATUS current DESCRIPTION "CMA site link table entry." INDEX { cmaSiteLinkIndex } ::= { cmaSiteLinkTable 1 }
cmaSiteLinkIndex OBJECT-TYPE SYNTAX CmaDefaultTableIndexRange MAX-ACCESS read-only STATUS current DESCRIPTION "Unique system-assigned ID for this entry." ::= { cmaSiteLinkTableEntry 1 }
cmaSiteLinkName OBJECT-TYPE SYNTAX OCTET STRING (SIZE(1..255)) MAX-ACCESS read-only STATUS current DESCRIPTION "Name of the site link." ::= { cmaSiteLinkTableEntry 2 }
cmaSiteLinkFromSite OBJECT-TYPE SYNTAX OCTET STRING (SIZE(1..255)) MAX-ACCESS read-only STATUS current DESCRIPTION "Name of the site of origin for the link." ::= { cmaSiteLinkTableEntry 3 }
cmaSiteLinkToSite OBJECT-TYPE SYNTAX OCTET STRING (SIZE(1..255))

Polycom CMA System Operations Guide
526 Polycom, Inc.
MAX-ACCESS read-only STATUS current DESCRIPTION "Name of the destination site for the link." ::= { cmaSiteLinkTableEntry 4 }
cmaSiteLinkCallCount OBJECT-TYPE SYNTAX Integer32 MAX-ACCESS read-only STATUS current DESCRIPTION "Number of active calls in the link." ::= { cmaSiteLinkTableEntry 5 }
cmaSiteLinkBandwidthUsed OBJECT-TYPE SYNTAX Integer32 (0..100) MAX-ACCESS read-only STATUS current DESCRIPTION "Percentage of bandwidth used in the link." ::= { cmaSiteLinkTableEntry 6 }
cmaSiteLinkAverageCallBitRate OBJECT-TYPE SYNTAX Integer32 MAX-ACCESS read-only STATUS current DESCRIPTION "Average call bit rate in the link." ::= { cmaSiteLinkTableEntry 7 }
cmaSiteLinkPacketLoss OBJECT-TYPE SYNTAX Integer32 (0..100) MAX-ACCESS read-only STATUS current DESCRIPTION "Percentage of packet loss in the link." ::= { cmaSiteLinkTableEntry 8 }
cmaSiteLinkAverageJitter OBJECT-TYPE SYNTAX Integer32 MAX-ACCESS read-only STATUS current DESCRIPTION "Average jitter in the link." ::= { cmaSiteLinkTableEntry 9}
cmaSiteLinkAverageDelay OBJECT-TYPE SYNTAX Integer32 MAX-ACCESS read-only STATUS current DESCRIPTION "Average delay in the link." ::= { cmaSiteLinkTableEntry 10 }
-- END Site link statistics
--------------------------------------------------------------------------------- Alert Group-------------------------------------------------------------------------------alertGroup OBJECT-GROUP OBJECTS { alertSequenceNumber, alertSeverity, alertTimeStamp, alertFailedServerInetAddressType,

Polycom CMA System MIB
Polycom, Inc. 527
alertFailedServerInetAddress, alertActiveServerInetAddressType, alertActiveServerInetAddress, alertRedundantServerInetAddressType, alertRedundantServerInetAddress, alertCmaServerInetAddressType, alertCmaServerInetAddress, alertMcuName, alertCmaDbName, alertLdapInetAddressType, alertLdapInetAddress } STATUS current DESCRIPTION "A collection of alert-related objects." ::= { cmaNotificationConformance 1 }
alertSequenceNumber OBJECT-TYPE SYNTAX Counter32 MAX-ACCESS accessible-for-notify STATUS current DESCRIPTION "Sequential ID number of the alert. Each alert ID on a specific CMA server is unique."::= { cmaAlertObjectsGeneral 1 }
alertSeverity OBJECT-TYPE SYNTAX ItuPerceivedSeverity MAX-ACCESS accessible-for-notify STATUS current DESCRIPTION "Severity of the alert."::= { cmaAlertObjectsGeneral 2 }
alertTimeStamp OBJECT-TYPE SYNTAX DateAndTime MAX-ACCESS accessible-for-notify STATUS current DESCRIPTION "Timestamp of the alert."::= { cmaAlertObjectsGeneral 3 }
alertFailedServerInetAddressType OBJECT-TYPE SYNTAX InetAddressType MAX-ACCESS accessible-for-notify STATUS current DESCRIPTION "IP address type of the failed CMA server."::= { cmaAlertObjectsGeneral 4 }
alertFailedServerInetAddress OBJECT-TYPE SYNTAX InetAddress MAX-ACCESS accessible-for-notify STATUS current DESCRIPTION "IP address of the failed CMA server."::= { cmaAlertObjectsGeneral 5 }
alertActiveServerInetAddressType OBJECT-TYPE SYNTAX InetAddressType MAX-ACCESS accessible-for-notify STATUS current DESCRIPTION "IP address type of the active CMA server."::= { cmaAlertObjectsGeneral 6 }
alertActiveServerInetAddress OBJECT-TYPE

Polycom CMA System Operations Guide
528 Polycom, Inc.
SYNTAX InetAddress MAX-ACCESS accessible-for-notify STATUS current DESCRIPTION "IP address of the active CMA server."::= { cmaAlertObjectsGeneral 7 }
alertRedundantServerInetAddressType OBJECT-TYPE SYNTAX InetAddressType MAX-ACCESS accessible-for-notify STATUS current DESCRIPTION "IP address type of the redundant CMA server."::= { cmaAlertObjectsGeneral 8 }
alertRedundantServerInetAddress OBJECT-TYPE SYNTAX InetAddress MAX-ACCESS accessible-for-notify STATUS current DESCRIPTION "IP address of the redundant CMA server."::= { cmaAlertObjectsGeneral 9 }
alertCmaServerInetAddressType OBJECT-TYPE SYNTAX InetAddressType MAX-ACCESS accessible-for-notify STATUS current DESCRIPTION "IP address type of the CMA server."::= { cmaAlertObjectsGeneral 10 }
alertCmaServerInetAddress OBJECT-TYPE SYNTAX InetAddress MAX-ACCESS accessible-for-notify STATUS current DESCRIPTION "IP address of the CMA server."::= { cmaAlertObjectsGeneral 11 }
alertMcuName OBJECT-TYPE SYNTAX OCTET STRING(SIZE (0..255)) MAX-ACCESS read-only STATUS current DESCRIPTION "Name assigned to an MCU within the CMA" ::= { cmaAlertObjectsGeneral 12 }
alertCmaDbName OBJECT-TYPE SYNTAX OCTET STRING(SIZE (0..255)) MAX-ACCESS read-only STATUS current DESCRIPTION "CMA Database name."::= { cmaAlertObjectsGeneral 15 }
alertLdapInetAddressType OBJECT-TYPE SYNTAX InetAddressType MAX-ACCESS read-only STATUS current DESCRIPTION "IP address type of the MCU's management interface."::= { cmaAlertObjectsGeneral 16 }
alertLdapInetAddress OBJECT-TYPE SYNTAX InetAddress MAX-ACCESS read-only STATUS current DESCRIPTION "IP address of the MCU's management interface."

Polycom CMA System MIB
Polycom, Inc. 529
::= { cmaAlertObjectsGeneral 17 }
--------------------------------------------------------------------------------- Alerts-------------------------------------------------------------------------------cmaAlertNotificationGroup NOTIFICATION-GROUP NOTIFICATIONS { mcuDownAlert, dbConnectionDownAlert, ldapConnectionDownAlert, cmaFailoverAlert, licenseCapacityAlert, mcuTimeDiscrepancyAlert, cmaMonitorServiceStoppedAlert, redundantServerDownAlert, redundantServerConflictAlert, ldapSystemAccountPasswordFailed, ldapConnectionFailed } STATUS current DESCRIPTION "Notifications that the CMA SNMP agent is required to implement." ::= { cmaNotificationConformance 2 }
mcuDownAlert NOTIFICATION-TYPE OBJECTS { alertSequenceNumber, alertSeverity, alertTimeStamp, alertMcuName } STATUS current DESCRIPTION "Alert generated when the CMA server detects a loss of communication with an MCU." ::= { cmaAlertObjectsAlerts 1 }
dbConnectionDownAlert NOTIFICATION-TYPE OBJECTS { alertSequenceNumber, alertSeverity, alertTimeStamp, alertCmaDbName } STATUS current DESCRIPTION "Alert generated when the CMA server detects a connection loss with the CMA database." ::= { cmaAlertObjectsAlerts 2 }
ldapConnectionDownAlert NOTIFICATION-TYPE OBJECTS { alertSequenceNumber, alertSeverity, alertTimeStamp } STATUS current DESCRIPTION "Alert generated when the CMA server detects a connection loss with the LDAP server." ::= { cmaAlertObjectsAlerts 3 }
cmaFailoverAlert NOTIFICATION-TYPE OBJECTS { alertSequenceNumber, alertSeverity, alertTimeStamp, alertFailedServerInetAddressType, alertFailedServerInetAddress, alertActiveServerInetAddressType, alertActiveServerInetAddress } STATUS current DESCRIPTION "Alert generated when the CMA server fails over to the redundant server." ::= { cmaAlertObjectsAlerts 4 }
licenseCapacityAlert NOTIFICATION-TYPE OBJECTS { alertSequenceNumber, alertSeverity, alertTimeStamp } STATUS current DESCRIPTION "Alert generated when the percentage of used licenses reaches 5% of the maximum." ::= { cmaAlertObjectsAlerts 5 }

Polycom CMA System Operations Guide
530 Polycom, Inc.
mcuTimeDiscrepancyAlert NOTIFICATION-TYPE OBJECTS { alertSequenceNumber, alertSeverity, alertTimeStamp, alertMcuName } STATUS current DESCRIPTION "Alert generated when the CMA server detects a discrepancy between the CMA system time and the time reported on an MCU." ::= { cmaAlertObjectsAlerts 6 }
cmaMonitorServiceStoppedAlert NOTIFICATION-TYPE OBJECTS { alertSequenceNumber, alertSeverity, alertTimeStamp, alertCmaServerInetAddressType, alertCmaServerInetAddress } STATUS current DESCRIPTION "Alert generated when the CMA redundancy monitoring service stops on a CMA server. Contains the IP address of the server on which the monitoring service has stopped." ::= { cmaAlertObjectsAlerts 7 }
redundantServerDownAlert NOTIFICATION-TYPE OBJECTS { alertSequenceNumber, alertSeverity, alertTimeStamp, alertFailedServerInetAddressType, alertFailedServerInetAddress } STATUS current DESCRIPTION "Alert generated when the CMA server detects a connection loss with the redundant CMA server." ::= { cmaAlertObjectsAlerts 8 }
redundantServerConflictAlert NOTIFICATION-TYPE OBJECTS { alertSequenceNumber, alertSeverity, alertTimeStamp, alertActiveServerInetAddressType, alertActiveServerInetAddress, alertRedundantServerInetAddressType, alertRedundantServerInetAddress } STATUS current DESCRIPTION "Alert generated if the active and redundant CMA servers are both running in active mode." ::= { cmaAlertObjectsAlerts 9 }
ldapSystemAccountPasswordFailed NOTIFICATION-TYPE OBJECTS { alertSequenceNumber, alertSeverity, alertTimeStamp } STATUS current DESCRIPTION "Alert generated if the CMA server cannot connect to the LDAP server using the configured LDAP system account." ::= { cmaAlertObjectsAlerts 10 }
ldapConnectionFailed NOTIFICATION-TYPE OBJECTS { alertSequenceNumber, alertSeverity, alertTimeStamp } STATUS current DESCRIPTION "Alert generated if the connection to the previously connected LDAP server fails." ::= { cmaAlertObjectsAlerts 11 }
END

Polycom, Inc. 531
CSystem Field Input Requirements
The text input fields in each Polycom® Converged Management Application™ (CMA™) system page accept basic ASCII, extended-ASCII (eASCII), or Unicode input as indicated in the following table.
Field Data Format Page
Filter Value: Owner Unicode Conference view > Secondary Filter
Filter Value: Conference Name Unicode Conference view > Secondary Filter
Conference Name Unicode Add/Edit Conference
Last Name Unicode Add/Edit Conference > Add Participants
First Name Unicode Add/Edit Conference > Add Participants
Name Unicode Add/Edit Conference > Add Guest
Email ASCII(1) Add/Edit Conference > Add Guest
Number N/A Add/Edit Conference > Add Guest > Dial-Out + IP | ISDN
Note
Entry of text-based IP alias values is prohibited.
To ASCII Add/Edit Conference > Email Notification
CC ASCII Add/Edit Conference > Email Notification
BCC ASCII Add/Edit Conference > Email Notification
Additional Notes Unicode Add/Edit Conference > Email Notification
Filter Value: Name ASCII Endpoint > Monitor View
Network Device > Monitor View
Filter Value: Alias ASCII Endpoint > Monitor View
Network Device > Monitor View
Filter Value: Site Unicode Endpoint > Monitor View
Network Device > Monitor View
Admin ID ASCII Add/Edit Device > Find Device on Network

Polycom CMA System Operations Guide
532 Polycom, Inc.
Password ASCII(15) Add/Edit Device > Find Device on Network
System Name ASCII(2) Add/Edit Device > Identification
Description eASCII Add/Edit Device > Identification
Serial Number ASCII Add/Edit Device > Identification
Software Version ASCII Add/Edit Device > Identification
HTTP URL ASCII Add/Edit Device > Identification
HTTP Port Numeric Add/Edit Device > Identification
DNS Name ASCII Add/Edit Device > Addresses
Alias Value (E164) 0 through 9, *, and #
Add/Edit Device > Addresses
Alias Value (H323 ID) ASCII Add/Edit Device > Addresses
Alias Value (URL) ASCII Add/Edit Device > Addresses
Alias Value (Transport Address) ASCII Add/Edit Device > Addresses
Alias Value (Party Number) Numeric Add/Edit Device > Addresses
Alias Value (Unknown) ASCII Add/Edit Device > Addresses
Service Name ASCII Add/Edit Device > MCU Services > Add > Gateway | H320 | H323
Dialing Prefix Numeric Add/Edit Device > MCU Services > Add > Gateway | H323
Channels Numeric Add/Edit Device > MCU Services > Add > H320
Number Range 0 through 9 and ‘-’ (dash)
Add/Edit Device > MCU Services > Add > H320
Service IP Address 0 through 9 and ‘.’ (period)
Add/Edit Device > MCU Services > Add > H323
Alias E164 Add/Edit Device > MCU Services > Add > H323
Message Text ASCII Endpoint > Monitor View > Send Message | Clear Help
Filter Value: Name ASCII Endpoint > Softupdate View > Filter
Filter Value: Alias ASCII Endpoint > Softupdate View > Filter
Filter Value: Site Unicode(9) Endpoint > Softupdate View > Filter
Name Unicode(5) Add/Edit Conference Template
Description ASCII Add/Edit Conference Template
RMX Profile Name Add/Edit Conference Template
Field Data Format Page

System Field Input Requirements
Polycom, Inc. 533
Talk Hold Time Numeric x.x to y.y
Add/Edit Conference Template
From Address ASCII Conference Settings
SMTP Server Conference Settings
Filter Value: First Name Unicode Users > Attribute Filter
Filter Value: Last Name Unicode Users > Attribute Filter
Filter Value: User ID Unicode Users > Attribute Filter
First Name Unicode(6) Add/Edit User
Last Name Unicode Add/Edit User
User ID Unicode Add/Edit User; AND
Login Page
Password/Confirm Password Unicode(7) Add/Edit User; AND
Login Page
Email Address Unicode(8) Add/Edit User
Search Value Unicode Add Room > Search LDAP by First Name | Last Name | User ID
Description ASCII Add/Edit Room > General Info
Email Unicode(8) Add/Edit Room > General Info (display of LDAP email address or entry of a Local email address)
Filter Value: Device Name ASCII Global Address Book > Attribute Filter
Name ASCII(10) Add GAB User
E-164 Alias 0 through 9, *, and #
Add GAB User > IP Video
IP Address IP Address format
Add GAB User > IP Video
City Code Numeric Add GAB User > ISDN Video
Number A Numeric Add GAB User > ISDN Video
Number B Numeric Add GAB User > ISDN Video
Extension Numeric Add GAB User > ISDN Video
Old Password ASCII(11) Set GAB Password
New Password / Confirm ASCII Set GAB Password
Filter Value: Name ASCII(2) Provision Device Profiles
Filter Value: Created By Unicode(12) Provision Device Profiles
Field Data Format Page

Polycom CMA System Operations Guide
534 Polycom, Inc.
Admin Password ASCII Add/Edit Provision Profile > General Settings > Security
Meeting Password ASCII Add/Edit Provision Profile > General Settings > Security
Country Code E164 Add/Edit Provision Profile >Video Network > IP Network > Gateway Number
Area Code E164 Add/Edit Provision Profile >Video Network > IP Network > Gateway Number
Gateway Number E164 Add/Edit Provision Profile >Video Network > IP Network > Gateway Number
Outside Line Dialing Prefix E164 Add/Edit Provision Profile >Video Network > IP Network > ISDN BRI Protocol
Camera 1 Name ASCII Add/Edit Provision Profile > Cameras
Camera 2 Name ASCII Add/Edit Provision Profile > Cameras
Camera 3 Name ASCII Add/Edit Provision Profile > Cameras
Host Name ASCII Add/Edit Provision Profile > LAN Properties > LAN Properties 1
Password ASCII Add/Edit Provision Profile > Global Services > Directory Servers
Number of digits in Extension Numeric Add/Edit Provision Profile > Global Services > Dialing Rules 1
International Dialing Prefix E164 Add/Edit Provision Profile > Global Services > Dialing Rules 1
Public Network Dialing Prefix E164 Add/Edit Provision Profile > Global Services > Dialing Rules 1
Public Network (same area code) Prefix
E164 Add/Edit Provision Profile > Global Services > Dialing Rules 1
Private Network Dialing Prefix E164 Add/Edit Provision Profile > Global Services > Dialing Rules 1
If Area Code Equals E164 Add/Edit Provision Profile > Global Services > Dialing Rules 2
Dial Prefix E164 Add/Edit Provision Profile > Global Services > Dialing Rules 2
Contact Person ASCII Add/Edit Provision Profile > Global Services > My Information
Contact Number E164 Add/Edit Provision Profile > Global Services > My Information
Contact Email ASCII Add/Edit Provision Profile > Global Services > My Information
Field Data Format Page

System Field Input Requirements
Polycom, Inc. 535
Contact Fax E164 Add/Edit Provision Profile > Global Services > My Information
Tech Support ASCII Add/Edit Provision Profile > Global Services > My Information
City ASCII Add/Edit Provision Profile > Global Services > My Information
State/Province ASCII Add/Edit Provision Profile > Global Services > My Information
Country ASCII Add/Edit Provision Profile > Global Services > My Information
Software Update Key File ASCII Software Update Profile > Upload Software Update
Description ASCII Software Update Profile > Upload Software Update
Filter Value: Name ASCII(2) Software Update Profiles > Get Serial Numbers
Filter Value: Site Unicode Software Update Profiles > Get Serial Numbers
Get Serial Numbers text box ASCII Software Update Profiles > Get Serial Numbers
Filter Value: Name ASCII User Roles
Filter Value: Description ASCII User Roles
Name ASCII User Roles > Add/Edit Role
Description ASCII User Roles > Add/Edit Role
Filter Value: Group Name Unicode(13) User Roles for LDAP Groups
Filter String ASCII Reports > Gatekeeper Message Log
Filter Value: IP Address IP Address Reports > IP Call Detail Records
Filter Value: System Name ASCII(2) Reports > ISDN Call Detail Records
System Name ASCII(14) Server Settings > Network
IP Address IP Address Server Settings > Network
Subnet Mask Subnet Mask Server Settings > Network
Default Gateway IP Address Server Settings > Network
DNS Server IP Address Server Settings > Network
IP Address or DNS Name ASCII Server Settings > System Time > External NTP Server Time Synchronization
DB Server IP Address IP Address Server Settings > Database
DB Server Port Numeric Server Settings > Database
Field Data Format Page

Polycom CMA System Operations Guide
536 Polycom, Inc.
LDAP Server IP Address or DNS Name
ASCII Server Settings > LDAP
LDAP User ID Unicode Server Settings > LDAP
LDAP User Password Unicode(7) Server Settings > LDAP
Activation Key ASCII Server Settings > Licenses
Virtual IP IP Address Server Settings > Redundant Configuration
Server IP IP Address Server Settings > Redundant Configuration
Gatekeeper Identifier ASCII Gatekeeper Settings > Primary Gatekeeper
Gatekeeper Description ASCII Gatekeeper Settings > Primary Gatekeeper
Alternate Gatekeeper ID ASCII Gatekeeper Settings > Alternate Gatekeeper
IP Address IP Address Gatekeeper Settings > Alternate Gatekeeper
Port Numeric Gatekeeper Settings > Alternate Gatekeeper
Priority Numeric Gatekeeper Settings > Alternate Gatekeeper
Country Name (2 letter code) ASCII Security Settings > Generate Certificate Request
State or Province Name ASCII Security Settings > Generate Certificate Request
Locality Name ASCII Security Settings > Generate Certificate Request
Organization Name ASCII Security Settings > Generate Certificate Request
Organizational Unit Name ASCII Security Settings > Generate Certificate Request
Common Name ASCII(14) Security Settings > Generate Certificate Request
Email Address ASCII Security Settings > Generate Certificate Request
Password / Verify Password ASCII(15) Security Settings > Endpoint Management Settings
Site Name Unicode(9) Dial Plan > Sites > Add/Edit Site
Description ASCII Dial Plan > Sites > Add/Edit Site
PBX Access Code E164 Dial Plan > Sites > Add/Edit Site
Name ASCII Dial Plan > Site-Links > Add/Edit Site-Link
Description ASCII Dial Plan > Site-Links > Add/Edit Site-Link
Name ASCII Dial Plan > Gatekeeper Regions > Add/Edit Region
Description ASCII Dial Plan > Gatekeeper Regions > Add/Edit Region
Gatekeeper IP Address IP Address Dial Plan > Gatekeeper Regions > Add/Edit Region
Gatekeeper Identifier ASCII Dial Plan > Gatekeeper Regions > Add/Edit Region
Description ASCII Dial Plan > Services > Add/Edit Service > General Info
Field Data Format Page

System Field Input Requirements
Polycom, Inc. 537
Service Prefix ASCII Dial Plan > Services > Add/Edit Service > General Info
Insert between Prefix & First number
E164 Dial Plan > Services > Add/Edit Service > Simplified Dialing
Insert between Phone number E164 Dial Plan > Services > Add/Edit Service > Simplified Dialing
Append after full Dial string E164 Dial Plan > Services > Add/Edit Service > Simplified Dialing
Login ID ASCII Dial Plan > Services > Add/Edit Service > Conference On Demand
Password ASCII Dial Plan > Services > Add/Edit Service > Conference On Demand
H.323 Network Service ASCII Dial Plan > Services > Add/Edit Service > Conference On Demand
RMX Profile Name Unicode Dial Plan > Services > Add/Edit Service > Conference On Demand
Name ASCII Dial Plan > Dial Rules > Add/Edit Rule > General Information
Description ASCII Dial Plan > Dial Rules > Add/Edit Rule > General Information
IP Address Pattern Data ASCII Dial Plan > Dial Rules > Add/Edit Rule > Routing Action
Name ASCII Dial Plan > LCR Tables > Add/Edit LCR
Description ASCII Dial Plan > LCR Tables > Add/Edit LCR
Alert Note ASCII System Alerts > Edit
Field Data Format Page

Polycom CMA System Operations Guide
538 Polycom, Inc.

Polycom, Inc. 539
Index
MCU and gateway dialing problems 420
AAcknowledge Help command 44, 50activation key, requesting 297activation keys, requesting 140, 148active conference. See conferenceAdd Device command 75, 164adding
an alternate gatekeeper 349conference templates 253conferences 32custom logos to the user interface 298, 299dial rules 393least-cost-routing tables 399provioning profiles 130, 133rooms 260services 386site links 375sites 365system licenses 297user roles 207users to the system 200
adding manuallyendpoints 122MCUs 174
admin/monitor view commandsClear Help 76Delete Device 76, 164Edit Device 76, 164Manage Device 76Manage User 76Reboot Device 76Send Message 76View Device Details 75
administering a redundant system 338Adobe Flash Player 3advanced conference settings
editing 55alternate gatekeeper
adding 349editing settings for 350
area codes, determining 398assigning
a lecturer 35a video chairperson 35user roles and devices 206
audio-only conference 32, 36automatic provisioning profiles
uploading for software updates 141, 149automatic software updates
uploading the image 141, 149available commands, list of 22, 74
Bbacking up
system databases 309, 314backup files
copying 315bandwidth. See bit ratebit rate
setting for guest participants 34, 38, 40, 46setting for internal participants 57
bridge (MCU)features field names 66features, list of 22forcing use of 57
Ccall detail records
IP call detail records, viewing and exporting 215
call routingsetting up 15
Cancel Provision command 79Cancel Update command 82canceling
conferences 53provisioning 136software updates 151

Polycom CMA System Operations Guide
540 Polycom, Inc.
capabilities, system, list of 1chairperson
assigning 35enabling 56password for 56
changingadvanced conference settings 55alternate gatekeeper settings 350conference information 36conference templates 254devices 123dial rules 394least-cost-routing tables 399participant dial options 37participant endpoint settings 37permissions for a user role 207primary gatekeeper settings 347provisioning profiles 131, 133room dial options 39room endpoint settings 39rooms 263security settings for https 354services 387site links 375site settings 372, 373system network settings 290system time settings 291user information 202
checking the status of device provisioning 135Clear Help command 76Clear Status command 79, 82clearing
device help requests 125gatekeeper message log events 225status of device provisioning 135
cloning provisioning profiles 132, 134closing the CMA system 12command categories
admin/monitor view commands 75, 164softupdate view commands 82
commandsAcknowledge Help 44, 50Add Device 75, 164Cancel Provision 79Cancel Update 82Clear Help 76Clear Status 79, 82conference 25Connect/Disconnect participant 44, 50Delete Conference 25Delete Device 76, 164Edit Conference 25Edit Device 76, 164
list of 22, 74Manage Conference 25Manage Device 76Manage User 76Provision 79Reboot Device 76Remove Participant 44, 50Send Message 44, 50, 76Software Update 82Terminate Conference 25View Device Details 75
commands, dashboardRefresh 232Restart 232Shutdown 232
conference commands 25conference details
conference details field names 63displaying 22
conference features field names 65conference on demand
troubleshooting 421conference on demand service 381conference rooms
adding 34setting dial options for 39setting endpoints for 39
conference settingsediting 55
conference settings. See settingsconference templates
adding 253deleting 254editing 254overview of 243setting up 16viewing list of 253
conferencesassigning password for 56deleting 53features, list of 22list of conferences 22managing 41overview of conference settings 251scheduling 32sending email notification for 35, 37, 61setting to audio only 32, 36setting to recurring 32
configuringa redundant system 335an external database 14an LDAP connection 14

Index
Polycom, Inc. 541
redundancy 15configuring devices 85Connect/Disconnect Participant command 44,
50connecting to the serial console 313connection speed
setting for guest participants 34, 38, 40, 46setting for internal participants 57
console, connecting to 313continuous presence mode 57copying
database backup files 315provisioning profiles 132, 134
country codes, determining 398creating
conferences 32dial rules 393least-cost-routing tables 399
customcustom dialing rules, examples of 391custom logo, adding to the user interface 298,
299Custom Date filter 23customizing the user interface 298, 299
Ddashboard 231dashboard commands
Refresh 232Restart 232Shutdown 232
data plus video stream 58database, external
backing up 309integrating with the system 312restoring 317
database, external, configuring 14database, internal
reverting to 313databases
backing up 314copying backup files 315restoring, overview of 311
databases, internalbacking up 309restoring 316
defaultsfor dial rules 390
defininggatekeeper message log settings 224
Delete Conference command 25Delete Device command 76, 164deleting
conference templates 254conferences 53devices 124gatekeeper message log events 225least-cost-routing tables 400provisioning profiles 132, 134rooms 263services 387site links 376sites 373user roles 208users 202
deleting a conference 25details of conference, displaying 22determining
area codes 398country codes 398weighted cost 398
device commandsAdd Device 75, 164
device detailsalias 119, 155, 171audio protocol 157available to schedule 120, 154, 171call type 157capabilities enabled 120, 155, 171cause code 157description 118, 170device local time 156Directory registration 155encryption 157endpoint ISDN type 156errors 158far site name 157far site number 157gatekeeper registration 155HTTP port 118, 170HTTP URL 118, 170IP address 75, 118, 153, 170ISDN assignment type 156ISDN line status type 156ISDN video number 119, 153, 171last GK registration 156monitoring level 120, 154, 171name 118, 170owner 153serial number 118, 154, 170site 118, 154, 170software version 118, 154, 170supported protocols 119, 154, 171

Polycom CMA System Operations Guide
542 Polycom, Inc.
type 118, 170video format 157video protocol 157warnings 158
device details, viewing 117device list field names 74device lists
list of provioning details 132list of serial numbers for 139, 146
device summaryname 75, 153type 153
devicesassigning to users 206canceling provisioning for 136checking provisioning status for 135clearing a help request for 125clearing provisioning status for 135configuring 85deleting 124device details field names 153editing information about 123provisioning 134provisioning details field names 158scheduling software updates for 149setting passwords for 116softupdate details field names 159video feed for 124See also endpoints
devices, managing for participants 49dial options
editing 37setting 57setting for guest participants 34, 38, 40
dial plan servicesconference on demand service 381gateway service 383MCU service 385overview of 381simplified dialing service 382
dial plan settingsoverview of 268
dial rulesadding 393default 390editing 394enabling/disabling 393examples of custom rules 391overview of 388pattern types 390routing actions 391rule components 390viewing list of 392
dial typesetting for guest participants 34, 38, 39
dial-in option 57dial-out option 57Directory Overview screen 6directory services
setting up 17disabling/enabling dial rules 393disconnecting/connecting a participant 44, 50displaying
conference templates list 253device details 117gatekeeper message log 223global address book 265IP call detail records 215rooms list 260system log files 228user roles list 206
downloading software updates 140, 147
EEdit Conference command 25Edit Device command 76, 164editing
advanced conference settings 55alternate gatekeeper settings 350conference information 36conference templates 254devices 123dial rules 394least-cost-routing tables 399participant dial options 37participant endpoint settings 37permissions for a user role 207primary gatekeeper settings 347provioning profiles 131, 133room dial options 39room endpoint settings 39rooms 263security settings for https 354services 387site links 375site settings 372, 373system network settings 290system time settings 291user information 202
email notifications 35, 37, 61enabling a chairperson 56enabling/disabling dial rules 393endpoints
adding manually 122editing settings for 37

Index
Polycom, Inc. 543
sending messages to 44, 50setting common passwords for 361setting passwords for 116
entering the system license number 297exporting
gatekeeper message log 223IP call detail records 215system log files 228
external databaseintegrating with the system 312
external database, configuring 14external databases. See databases and database,
external
Ffailover, initiating in a redundant system 342features
bridge (MCU) 22list of conference 22
features, system, list of 1feed, viewing for a video device 124field names
bridge (MCU) features 66conference details 63conference features 65device details 153device list 74participant details 68participant settings 70participants 67provisioning details 158softupdate details 159
fieldsinput requirements for 9
filteringoverview of 9
filtersCustom Date 23Future Only 23Ongoing Plus 23Today Only 23Today Plus 23Yesterday Plus 23
first-time setup, resetting during a recovery setup 411
forcing MCU usage 57future conference view 21Future Only filter 23
Ggatekeeper message log
clearing events from 225defining messages to be logged 224overview of 223pausing and restarting 225viewing and exporting 223
gatekeeper settingsediting for alternate gatekeeper 350editing for primary gatekeeper 347overview of 268
gatekeepersadding alternate 349gatekeeper regions, overview of 345overview of 280viewing gatekeeper regions list 351
gateway dialing, troubleshooting 420gateway service 383global address book
viewing 265guest participants
adding 33setting bit rate for 34, 38, 40, 46setting dial options for 34, 38, 40setting dial type for 34, 38, 39
Hhelp request, clearing for a device 125help, acknowledging 44, 50https, implementing 354
Iimplementing
a redundant system 338https 354
initiating failover in a redundant system 342input requirements for fields
requirementsfor field inputs
ASCII-only fields 9integrating
an external database 312internal database, reverting to 313internal databases. See databases and databases,
internalIP call detail records
viewing and exporting 215
Kkey for software activation, requesting 297keys for software activation, requesting 140, 148

Polycom CMA System Operations Guide
544 Polycom, Inc.
LLCR. See least-cost routing (LCR)LDAP 206LDAP connection, configuring 14least-cost routing (LCR)
determining area codes for 398determining country codes for 398determining weighted cost for 398
least-cost-routing (LCR) tablesadding 399deleting 400editing 399examples of 395overview of 394viewing list of 399
lecturer, assigning 35licenses, system
adding 297entering number for 297
licensing the system 341link statistics for a site
overview of 213links for a site
adding 375deleting 376editing 375viewing list of 375
listsfiltering, overview of 9of bridge (MCU) features 22of commands 22, 74of conference features 22of conference templates 253of conferences 22of device serial numbers 139, 146of devices 74of dial rules 392of gatekeeper regions 351of least-cost-routing tables 399of participant details 22of participants 22of provisioning details 132of rooms 260of services 386of site links 375of sites 364of system features and capabilities 1of user roles 206of users 200
logging into the CMA system 3logging out of the CMA system 12logo, adding to the user interface 298, 299
logsgatekeeper message log 223system log files 225, 228
MManage Conference command 25Manage Device command 76Manage User command 76management settings, overview of 268managing
active conferences 41participant devices 49
manual additionsendpoints 122MCUs 174
MCUfeatures field names 66forcing use of 57list of features 22
MCU device detailschannels 187international prefix 188LCR table 187local area codes 188local prefix 187non-local prefix 187number range 187priority 188service name 187
MCU dialing, troubleshooting 420MCU service 385MCUs
adding manually 174menus
System Management 241messages, sending 44, 50mode, T.120 59modes, video
continuous presence mode 57setting 57switching mode 57
modifyingadvanced conference settings 55alternate gatekeeper settings 350conference information 36conference templates 254devices 123dial rules 394least-cost-routing tables 399participant dial options 37participant endpoint settings 37

Index
Polycom, Inc. 545
permissions for a user role 207primary gatekeeper settings 347provisioning profiles 131, 133room dial options 39room endpoint settings 39rooms 263security settings for https 354services 387site links 375site settings 372, 373system network settings 290system time settings 291user information 202
Monitor Conferences screen 6
Nnetwork settings, editing 290number for system license, entering 297
OOngoing Plus filter 23open ports
list of 423
Pparticipant field names
participant details field names 68participant settings field names 70
participantsadding guest 33connecting/disconnecting 44, 50list of 22list of, details 22managing devices for 49removing 44, 50setting endpoints for 37
participants field names 67passwords
for chairperson 56for conference 56setting for endpoints 361
pattern types for a dial plan 390pausing and restarting
gatekeeper message log 225People + Content 58point-to-point calls
troubleshooting 419ports used by the Polycom CMA system
list of 424primary gatekeepers
editing settings for 347
Provision command 79provision view commands
Cancel Provision 79Clear Status 79Provision 79
provisioningcanceling 136provisioning details field names 158starting 134
provisioning detailsfailure reason 159last attempt date/time 159last profile applied 158log message 159pending profile 158provisioning status 158scheduled 158
provisioning profilesadding 130, 133cloning 132, 134deleting 132, 134editing 131, 133viewing list of 132
RReboot Device command 76records
IP call detail records 215recovery operations
overview of 411recurring conferences 32redundancy, configuring 15redundant system
administering 338configuring 335implementing 338initiating failover in 342
Refresh command 232regions, gatekeeper
viewing 351registration
troubleshooting problems with 416Remove Participant command 44, 50removing
conference templates 254conferences 53devices 124gatekeeper message log events 225least-cost-routing tables 400provioning profiles 132, 134rooms 263services 387

Polycom CMA System Operations Guide
546 Polycom, Inc.
site links 376sites 373user roles 208users 202
removing a conference 25request for help, clearing for a device 125requesting
software activation key 297requesting update activation keys 140, 148requirements, system 3requirements, system, list of 3resetting first-time setup during a recovery
operation 411Restart command 232restarting
the gatekeeper message log 225the system 412
restoringdatabases, overview of 311external database 317internal databases 316
reverting to an internal database 313roles, user
adding 207deleting 208editing permissions for 207overview of 191, 206viewing list of 206
roomsadding 34, 260deleting 263editing 263setting dial options for 39setting endpoints for 39viewing list of 260
routingrouting actions for a dial plan 391
Sschedule conference view 21scheduling a conference 32scheduling software updates 149searching
users 200security settings
editing for https 354overview of 268
Send Message command 44, 50, 76serial console, connecting to 313serial numbers for devices to be updated 139,
146servers
initiating failover in a redundant system 342updating software for 353
servicesadding 386deleting 387editing 387viewing list of 386
services, dial planconference on demand service 381gateway service 383MCU service 385overview of 381simplified dialing service 382
settingcommon passwords for endpoints 361
setting upconference templates 16directory services 17video call routing 15
settingsadvanced conference settings 55chairperson password 56conference password 56conference settings 251connection speed 57dial options 57dial plan settings 268enable chairperson 56forced MCU usage 57gatekeeper settings 268management settings 268network settings 290People + Content 58security settings 268security settings for https 354system time settings 291T.120 mode 59video mode 57
Shutdown command 232shutting down the system 412simplified dialing service 382site link statistics
overview of 213site links
adding 375deleting 376editing 375overview of 374viewing list of 375
site settings, editing 372, 373

Index
Polycom, Inc. 547
site statisticsoverview of 211
site topologyoverview of 270
sitesadding 365deleting 373view graphical topology 364viewing list of 364
softupdateoverview of 113softupdate details field names 159
softupdate detailsfailure reason 160last attempt date/time 160log message 160scheduled 159softupdate status 159
softupdate view commandsCancel Update 82Clear Status 82Software Update 82
softwarerequesting activation key for 297updating for the server 353
Software Update command 82software updates
canceling 151downloading 140, 147overview of 113scheduling 149See also softupdate
SQL server database. See database, externalstarting
the gatekeeper message log 225the system 412
starting the CMA system 3statistics
site link statistics, overview of 213site statistics, overview of 211
status of device provisioningchecking 135clearing 135
stoppingprovisioning 136software updates 151
switching mode 57system dashboard 231system features and capabilities, list of 1system integration with external database 312system licenses
adding 297entering number for 297
system log filesoverview of 225viewing and exporting 228
system login 3system management menu 241system network settings, editing 290system requirements 3system requirements, list of 3system setup menu
overview of 267system time settings, editing 291system views 7system, licensing 341
TT.120 mode 59templates, conference
adding 253deleting 254editing 254overview of 243setting up 16viewing list of 253
Terminate Conference command 25time settings, editing 291Today Only filter 23Today Plus filter 23topology
of sites 364overview of 270
troubleshooting 420conference on demand problems 421point-to-point call problems 419registration problems 416
Uupdates, software
canceling 151downloading 140, 147overview of 113requesting activation keys for 140, 148scheduling 149See also softupdate
updating server software 353uploading the software image 141, 149user
search for a 200user interface, adding a custom logo to 298, 299

Polycom CMA System Operations Guide
548 Polycom, Inc.
user rolesadding 207deleting 208editing permissions for 207overview of 191
usersadding to the system 200assigning roles and devices to 206deleting 202editing information about 202overview of 191roles for 206searching list of 200
Vvideo call routing
setting up 15video chairperson, assigning 35video endpoints. See devices and endpointsvideo feed, viewing for a device 124video modes
continuous presence mode 57setting 57switching mode 57
video plus data stream 58view
graphical site topology 364View Device Details command 75viewing
conference templates list 253device details 117device serial numbers list 139, 146dial rules list 392gatekeeper message log 223gatekeeper regions list 351global address book 265IP call detail records 215least-cost-routing tables list 399provisioning list and details 132rooms list 260services list 386site links list 375sites list 364status of device provisioning 135system log files 228user roles list 206video feed for a device 124
viewsfuture conference view 21schedule conference view 21
Wwarnings 158weighted cost, determining 398workspaces in the CMA system 6
YYesterday Plus filter 23
Related Documents