An in-depth exploration of the revolutionary technologies and tonal pleasures of the POD XT . Electrophonic Limited Edition. Also available at www.line6.com. Revision A. Pilot’s Handbook POD ULTIMATE TONE FOR GUITAR XT

Welcome message from author
This document is posted to help you gain knowledge. Please leave a comment to let me know what you think about it! Share it to your friends and learn new things together.
Transcript

An in-depth exploration of the revolutionary technologies and tonal pleasures of the POD
XT
.
Electrophonic Limited Edition. Also available at www.line6.com. Revision A.
Pilot’s Handbook
PODULTIMATE TONE FOR GUITAR
XT

NAVIGATION REFERENCE
SELECT
• When EDIT, SAVE or TUNER is lit, “SELECT”selects pages
• Otherwise, “SELECT” chooses ChannelMemories
COMP STOMP MOD DELAY CAB /A.I.R.(GATE)
• For Comp, Stomp, Mod, and Delay, the effect is onwhen lit.
• CAB/A.I.R. is lit when you are using a cab simulation.
• Double press an effect button to go straight to itsEDIT page.
SAVE 1. Save Sound to Channel Memory2. Custom Save Amp Model3. Custom Save Effects Setup4. Single Factory Channel recall5. Factory Recall6. MIDI Dump
EDIT 1. Amp Settings2. A.I.R. Settings3. Compressor and Gate Settings4. Stomp Select and Settings5. Modulation Select and Settings6. Modulation Settings (page 2)7. Delay Select and Settings8. Delay Settings (page 2)9. Reverb Select and Settings10. Wah and Volume Settings11. FX Tweak and Tempo Settings
All amp, cab and effect product names are trademarks of their respective owners, which are in no way associated or affiliated with Line 6. These product names and descriptions are provided for thesole purpose of identifying the specific products that were studied during Line 6’s sound model development.
EDIT PAGES SAVE PAGES
TUNER 1. Tuner2. What are you connecting to?3. Display contrast4. MIDI5. PODXT Software Version
TUNER PAGES
# CAB MODEL MODEL BASED ON0 ......NO CAB...........................N/A1 ......1X6 SUPER O ..................SUPRO S66162 ......1X8 TWEED.....................‘60 TWEED FENDER CHAMP3 ......1X10 GIBTONE ................GIBSON EXPLORER4 ......1X10 G-BRAND ................GRETSCH5 ......1X12 LINE 6 ...................LINE 6 ORIGINAL6 ......1X12 TWEED...................‘53 FENDER DELUXE REVERB7 ......1X12 BLACKFACE .............‘65 FENDER DELUXE REVERB
CABINET MODELS# AMP MODEL MODEL BASED ON16 ....4X10 TWEED...................'58 FENDER BASSMAN17 ....4X12 LINE 6 ...................LINE 6 ORIGINAL18 ....4X12 GREEN 20’s ............MARSHALL W/ GREENBACK 20'S19 ....4X12 GREEN 25’s ............MARSHALL W/ GREENBACK 25'S20 ....4X12 BRIT T75................MARSHALL W/ GR-T75'S21 ....4X12 BRIT V30’S ............MARSHALL W/ VINTAGE 30'S22 ....4X12 RECTO ...................MESA W/ CUSTOM CELESTIONS
# AMP MODEL MODEL BASED ON8 ......1X12 CLASS A .................VOX AC-15 W/ GRAYBELLS9 ......2X2 MINI T .....................FENDER MINI TWIN10 ....2X12 LINE 6 ...................LINE 6 ORIGINAL11 ....2X12 BLACKFACE .............'65 FENDER BLACKFACE TWIN12 ....2X12 MATCH...................'96 MATCHLESS CHIEFTAIN13 ....2X12 JAZZ ......................ROLAND JC-12014 ....2X12 CLASS A .................VOX AC-30 TB15 ....4X10 LINE 6 ...................LINE 6 ORIGINAL
AMP MODELS# AMP MODEL MODEL BASED ON0 ......BYPASS ..........................(Bypasses the Amp Model)1 ......TUBE PREAMP..................TUBE INSTRUMENT PREAMP2 ......LINE 6 CLEAN...................LINE 6 21st CENTURY CLEAN3 ......LINE 6 JTS-45..................LINE 6 ORIGINAL4 ......LINE 6 CLASS A................LINE 6 ORIGINAL5 ......LINE 6 MOOD ..................LINE 6 ORIGINAL6 ......SPINAL PUPPET ................LINE 6 ORIGINAL7 ......LINE 6 CHEM X ................LINE 6 CHEMICAL X8 ......LINE 6 INSANE.................WAY TOO MANY HOURS OF SHREDDING9 ......LINE 6 ACO 2...................LINE 6 PIEZO ACOUSTIC 210 ....ZEN MASTER....................BUDDA TWINMASTER 2x12 Combo11 ....SMALL TWEED .................‘53 FENDER DELUXE12 ....TWEED B-MAN .................‘58 FENDER BASSMAN13 ....TINY TWEED ....................‘60 TWEED FENDER CHAMP14 ....BLACKFACE LUX................‘64 FENDER DELUXE REVERB15 ....DOUBLE VERB..................‘65 FENDER BLACKFACE TWIN16 ....TWO-T0NE.......................GRETSCH 6156
# AMP MODEL MODEL BASED ON17 ....HIWAY 100 .....................HIWATT CUSTOM 10018 ....PLEXI 45.........................‘65 MARSHALL JTM-4519 ....PLEXI LEAD......................‘68 MARSHALL ‘PLEXI’ SUPER LEAD20 ....PLEXI JUMP LEAD .............JUMPERED MARSHALL SUPER LEAD21 ....PLEXI VARIAC ...................VARIAC’D MARSHALL SUPER LEAD22 ....BRIT J-800 ......................MARSHALL JCM 80023 ....BRIT JM PRE ....................MARSHALL JMP-1 PREAMP24 ....MATCH CHIEF...................‘96 MATCHLESS CHIEFTAIN25 ....MATCH D-30....................MATCHLESS DC-3026 ....RECTO DUAL ....................2001 MESA BOOGIE DUAL RECTIFIER27 ....CALI CRUNCH...................‘85 MESA BOOGIE MARK IIC+28 ....JAZZ CLEAN .....................‘87 ROLAND JC-12029 ....SOLO 100.......................SOLDANO SLO-100 HEAD30 ....SUPER O .........................SUPRO S661631 ....CLASS A-15 .....................‘60 VOX AC-1532 ....CLASS A-30 TB.................‘67 VOX AC-30 TOP BOOST
1
2
6 7
17
MIDDLE0 10
TREBLE0 10
BASS0 10
DRIVE0 10
PRESENCE0 10
CHAN VOL0 10
REVERB0 10
PODULTIMATE TONE FOR GUITAR
XT
OUTPUT
EFFECTSAMP MODELS
0 10
PHONES
MIDI IN
MIDI OUTUSBPEDAL
RIGHT OUTPUT
LEFT OUTPUT
INPU
T
TUNER
TAP
SAVE
EDIT
COMP STOMP MOD DELAY CAB /A.I.R.(GATE)
EFFECTTWEAKSELECT
4
9
1010 10
10
11
12
15 13
1416
1822
21 23
24
20
85
3
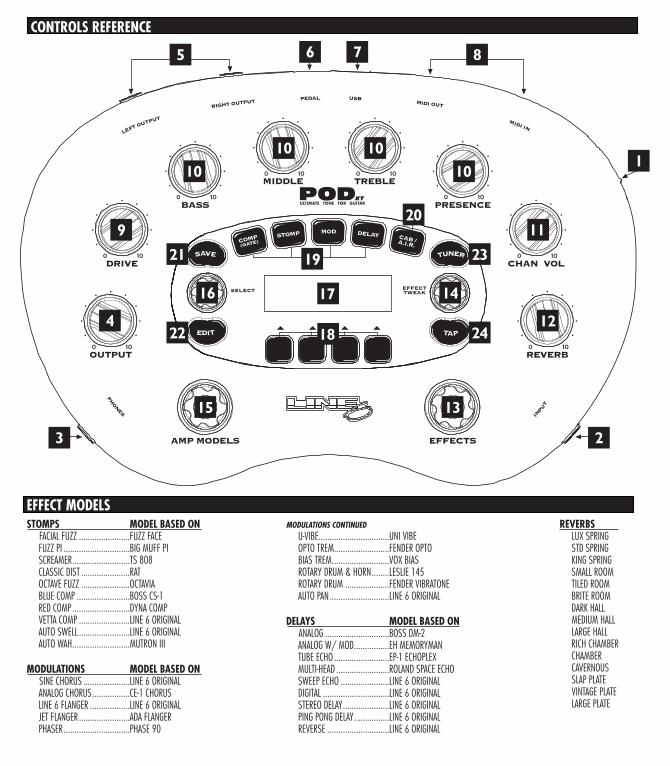
CONTROLS REFERENCE
STOMPS MODEL BASED ONFACIAL FUZZ .......................FUZZ FACEFUZZ PI ..............................BIG MUFF PISCREAMER..........................TS 808CLASSIC DIST ......................RATOCTAVE FUZZ ......................OCTAVIABLUE COMP ........................BOSS CS-1RED COMP..........................DYNA COMPVETTA COMP .......................LINE 6 ORIGINALAUTO SWELL .......................LINE 6 ORIGINALAUTO WAH..........................MUTRON III
MODULATIONS MODEL BASED ONSINE CHORUS .....................LINE 6 ORIGINALANALOG CHORUS.................CE-1 CHORUSLINE 6 FLANGER ..................LINE 6 ORIGINALJET FLANGER .......................ADA FLANGERPHASER..............................PHASE 90
EFFECT MODELSMODULATIONS CONTINUED
U-VIBE................................UNI VIBEOPTO TREM.........................FENDER OPTOBIAS TREM..........................VOX BIASROTARY DRUM & HORN........LESLIE 145ROTARY DRUM ....................FENDER VIBRATONEAUTO PAN...........................LINE 6 ORIGINAL
DELAYS MODEL BASED ONANALOG .............................BOSS DM-2ANALOG W/ MOD................EH MEMORYMANTUBE ECHO .........................EP-1 ECHOPLEXMULTI-HEAD ........................ROLAND SPACE ECHOSWEEP ECHO ......................LINE 6 ORIGINALDIGITAL ..............................LINE 6 ORIGINALSTEREO DELAY.....................LINE 6 ORIGINALPING PONG DELAY................LINE 6 ORIGINALREVERSE ............................LINE 6 ORIGINAL
REVERBSLUX SPRINGSTD SPRINGKING SPRINGSMALL ROOMTILED ROOMBRITE ROOMDARK HALLMEDIUM HALLLARGE HALLRICH CHAMBERCHAMBERCAVERNOUSSLAP PLATEVINTAGE PLATELARGE PLATE
19

4
1
FX LOOP STOMP BOX 1 STOMP BOX 2 STOMP BOX 3WAH PEDAL 1 PEDAL 2VOLUME
DELAYMODULATIONTREMOLOREVERB TAP TEMPOAMP 2AMP 1
HOLD FOR TUNER
CUSTOM FOOT CONTROLLER
FACTORY/USER
CHANNEL A CHANNEL B CHANNEL C CHANNEL D FAVORITE CHANNELBANK DOWN BANK UP
STOMP MODULATION REVERB
FX LOOP
HOLD FOR TUNER
TAPCHANNEL BCHANNEL A CHANNEL DCHANNEL C
VO
LUM
EW
AHFBV SHORTBOARD
DELAY
11
1
10
4
5 6 7 8
93
2
3
4 56 7
8
9
10
2
FBV SERIES REFERENCE
AMP/CAB + A.I.R. II
REVERBCOMP
GATE
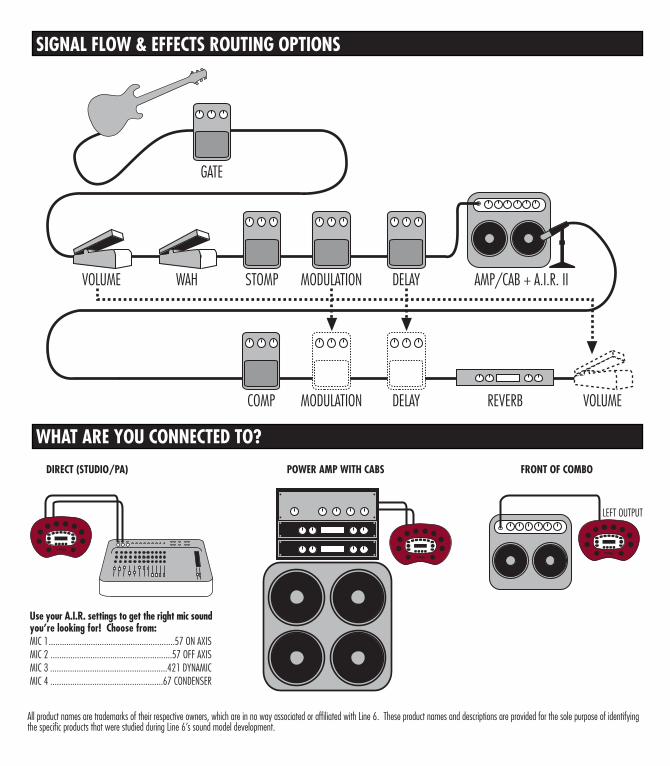
SIGNAL FLOW & EFFECTS ROUTING OPTIONS
VOLUME
WHAT ARE YOU CONNECTED TO?
Use your A.I.R. settings to get the right mic soundyou’re looking for! Choose from:MIC 1.........................................................57 ON AXISMIC 2 .......................................................57 OFF AXISMIC 3 .....................................................421 DYNAMICMIC 4 ...................................................67 CONDENSER
POWER AMP WITH CABS FRONT OF COMBODIRECT (STUDIO/PA)
All product names are trademarks of their respective owners, which are in no way associated or affiliated with Line 6. These product names and descriptions are provided for the sole purpose of identifyingthe specific products that were studied during Line 6’s sound model development.
VOLUMEMODULATION DELAY
WAH STOMP DELAYMODULATION
LEFT OUTPUT
SERIAL NO:
Y
OU
SHOULD
READ
THESE
I
MPORTANT
S
AFETY
I
NSTRUCTIONS
K
EEP
THESE
INSTRUCTIONS
IN
A
SAFE
PLACE
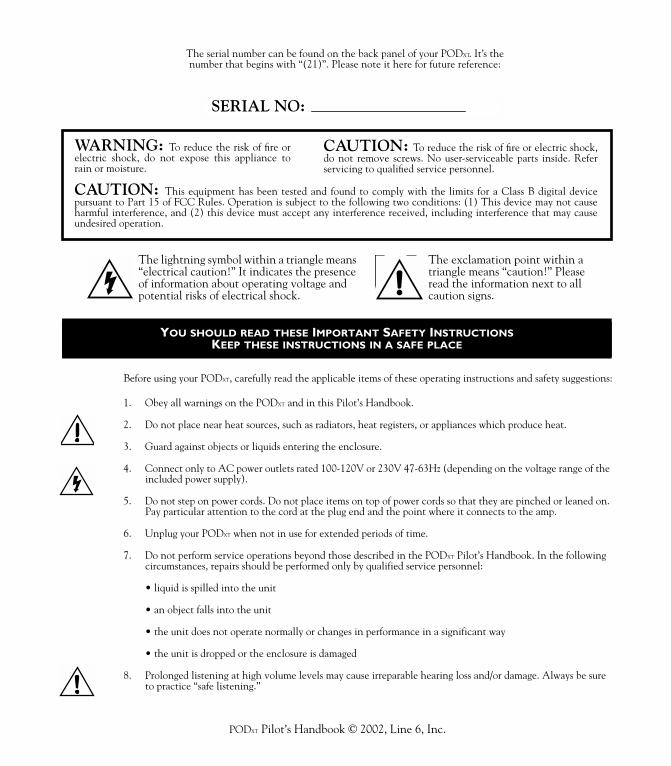
The serial number can be found on the back panel of your POD
XT
. It’s the number that begins with “(21)”. Please note it here for future reference:
CAUTION:
To reduce the risk of fire or electric shock,do not remove screws. No user-serviceable parts inside. Referservicing to qualified service personnel.
The lightning symbol within a triangle means “electrical caution!” It indicates the presence of information about operating voltage and potential risks of electrical shock.
The exclamation point within a triangle means “caution!” Please read the information next to all caution signs.
POD
XT
Pilot’s Handbook © 2002, Line 6, Inc.
Before using your POD
XT
, carefully read the applicable items of these operating instructions and safety suggestions:
1. Obey all warnings on the POD
XT
and in this Pilot’s Handbook.
2. Do not place near heat sources, such as radiators, heat registers, or appliances which produce heat.
3. Guard against objects or liquids entering the enclosure.
4. Connect only to AC power outlets rated 100-120V or 230V 47-63Hz (depending on the voltage range of the included power supply).
5. Do not step on power cords. Do not place items on top of power cords so that they are pinched or leaned on. Pay particular attention to the cord at the plug end and the point where it connects to the amp.
6. Unplug your POD
XT
when not in use for extended periods of time.
7. Do not perform service operations beyond those described in the POD
XT
Pilot’s Handbook. In the following circumstances, repairs should be performed only by qualified service personnel:
• liquid is spilled into the unit
• an object falls into the unit
• the unit does not operate normally or changes in performance in a significant way
• the unit is dropped or the enclosure is damaged
8. Prolonged listening at high volume levels may cause irreparable hearing loss and/or damage. Always be sure to practice “safe listening.”
WARNING:
To reduce the risk of fire orelectric shock, do not expose this appliance torain or moisture.
CAUTION:
This equipment has been tested and found to comply with the limits for a Class B digital devicepursuant to Part 15 of FCC Rules. Operation is subject to the following two conditions: (1) This device may not causeharmful interference, and (2) this device must accept any interference received, including interference that may causeundesired operation.
Please Note:
Line 6, Vetta, Amp Farm, POD, and POD
XT
aretrademarks of Line 6, Inc. All other product names,trademarks, and artists’ names are the property oftheir respective owners, which are in no wayassociated or affiliated with Line 6. Product names,images, and artists’ names are used solely toidentify the products whose tones and sounds werestudied during Line 6’s sound model developmentfor this product. The use of these products,trademarks, images, and artists’ names does notimply any cooperation or endorsement.
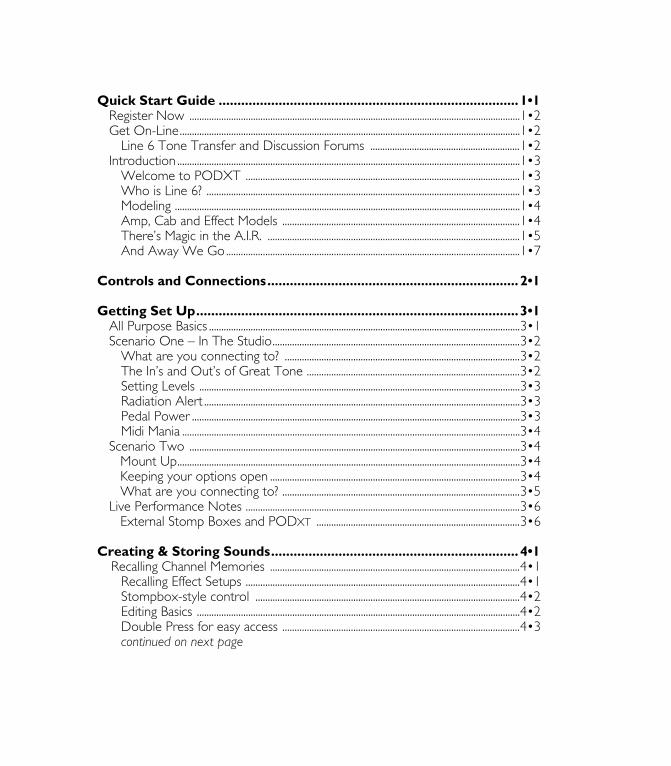
Quick Start Guide ................................................................................1•1
Register Now .......................................................................................................................................1•2Get On-Line...........................................................................................................................................1•2
Line 6 Tone Transfer and Discussion Forums .............................................................1•2Introduction ............................................................................................................................................1•3
Welcome to PODXT ................................................................................................................1•3Who is Line 6? ................................................................................................................................1•3Modeling .............................................................................................................................................1•4Amp, Cab and Effect Models .................................................................................................1•4There’s Magic in the A.I.R. .......................................................................................................1•5And Away We Go........................................................................................................................1•7
Controls and Connections...................................................................2•1
Getting Set Up......................................................................................3•1
All Purpose Basics ...............................................................................................................................3•1Scenario One – In The Studio.....................................................................................................3•2
What are you connecting to? ................................................................................................3•2The In’s and Out’s of Great Tone .......................................................................................3•2Setting Levels ...................................................................................................................................3•3Radiation Alert .................................................................................................................................3•3Pedal Power ......................................................................................................................................3•3Midi Mania ..........................................................................................................................................3•4
Scenario Two .......................................................................................................................................3•4Mount Up............................................................................................................................................3•4Keeping your options open ......................................................................................................3•4What are you connecting to? .................................................................................................3•5
Live Performance Notes ................................................................................................................3•6External Stomp Boxes and POD
XT
...................................................................................3•6
Creating & Storing Sounds..................................................................4•1
Recalling Channel Memories ......................................................................................................4•1Recalling Effect Setups ................................................................................................................4•1Stompbox-style control ............................................................................................................4•2Editing Basics ....................................................................................................................................4•2Double Press for easy access .................................................................................................4•3
continued on next page

Creating & Storing Sounds
continued
Inside the Edit Menu ........................................................................................................................4•3Amp Knob settings ........................................................................................................................4•3Cabinet and Mic settings (There’s magic in the A.I.R.!) ............................................4•4Effects Editing....................................................................................................................................4•4
Setting your Tone to Tempo ......................................................................................................4•7Reverb ......................................................................................................................................................4•7Wah and Volume................................................................................................................................4•8FX Tweak Knob Assign / Tempo Assign ...............................................................................4•8Saving Yourself ......................................................................................................................................4•9
Saving Channel Memory ............................................................................................................4•9Custom Save Amp Model.........................................................................................................4•10Custom Save Effect Setup.........................................................................................................4•11Single Channel Recall ...................................................................................................................4•12Complete Factory Recall............................................................................................................4•12MIDI Dumps......................................................................................................................................4•13
Modeled Amps & Cabs.........................................................................5•1
Which Amps and Cabs Are Modeled? .................................................................................5•1Cabinet Models ...................................................................................................................................5•28
Stompboxes & Effects ..........................................................................6•1
About the Stompboxes...................................................................................................................6•1Basic Effect Editing..........................................................................................................................6•1Deep Dive Editing..........................................................................................................................6•2Stomp Effects: Distortions and Overdrives.....................................................................6•2Stomp Effects: Compressors....................................................................................................6•2Comp/Gate Effects ........................................................................................................................6•3Modulation Effects .........................................................................................................................6•3Tap Tempo........................................................................................................................................6•4
Reverb ......................................................................................................................................................6•5Springs...................................................................................................................................................6•5Rooms...................................................................................................................................................6•6Halls........................................................................................................................................................6•6Plates......................................................................................................................................................6•7
The Stomp Effects .............................................................................................................................6•8The Modulation Effects ..................................................................................................................6•17The Delay Effects ...............................................................................................................................6•24

Deep Editing & MIDI Control..............................................................7•1
MIDI Basics ............................................................................................................................................7•1What’s MIDI?.....................................................................................................................................7•1In/Out....................................................................................................................................................7•1MIDI Channel....................................................................................................................................7•2
MIDI Messages .....................................................................................................................................7•3Backing Up POD
XT
Programs to Other Devices ...........................................................7•4Other Things You Can Do with MIDI ..................................................................................7•6
Changing POD
XT
Channels with MIDI Program Changes.....................................7•6Tweaking POD
XT
Tones with MIDI Controllers.........................................................7•6Full MIDI Automation of POD
XT
.........................................................................................7•6MIDI Setup Trouble-shooting .....................................................................................................7•7
Putting Your Feet to Work ................................................................8•1
Meet the FBV Shortboard ............................................................................................................8•1Hooking up the Shortboard.....................................................................................................8•1
Pushing Your Buttons........................................................................................................................8•1Saving and Naming with the FBV Shortboard....................................................................8•3Using an EX-1........................................................................................................................................8•3
Appendices ............................................................................................9•1
Amp Models .........................................................................................................................................9•1MIDI Program Changes ...................................................................................................................9•2POD
XT
MIDI Controls ....................................................................................................................9•3FBV Shortboard MIDI Controls ..................................................................................................9•7Line 6 Contact ......................................................................................................................................9•8Warranty Info ........................................................................................................................................9•9
QUICK START GUIDE • Register now!
1 • 2 Register now!
Included in this manual is a handy, postage-paid card for you to send back to us to register your purchase. It’s very important that you fill that registration card out right now and drop it in the mail or jump on the Internet and register at the Line 6 Support Center — www.line6.com. Registering insures that you’re dialed in for warranty service (warranty info is at the end of this manual) and insures we can contact you if new software versions or other cool enhancements are offered — cutting edge technology and such.
Get On-line and get good stuff
Here at Line 6, our mission is to let you be more creative by bringing you powerful new technologies. As part of that mission, we focus great effort on making the Internet a valuable resource for every one of our customers.
The Line 6 web site (www.line6.com) is one of the most effective ways for us to deliver you what you need. Through the Internet, we can give you instant access to all kinds of great, free stuff that makes you and your PODXT ever more powerful. Like easy access to our product support experts, handy tips & tricks, USB drivers and other free software, electronic versions of this book and other documentation, the latest news of what’s happening with Line 6 and the products we make for you, and...
Line 6 ToneTransfer and Discussion Forums: Visit the web site, and you’ll find a powerful way to connect to other PODXT users. Swap sounds, trade advice, generally hang out and get POD-a-licious, all from the privacy of your own comfy computer chair! Jammies optional.
Not on the Internet yet? This may be the time to make the big jump, and thereby ensure that you will get all the great resources we can offer for you and your PODXT.
QUICK START GUIDE • Introduction
1 • 3Introduction
Welcome To PODxt...Thank you for inviting PODXT into your life. Whether you use your PODXT as a direct recording miracle, a powerhouse preamp, a practice partner, or as a creative digital signal processing tool (and heck, why should it be just one of these?) — we think you’ll agree that PODXT is about the most amazing thing to happen to the electric guitar since, well, since the guitar amplifier itself! PODXT delivers the incredible tones of the acclaimed Line 6 Point-to-Point modeling technology (as featured in our Vetta series amps) and fuses it with the incredibly portable and easy to use POD, which has been the guitar recording world standard for years. So you’ve got the tonal heritage of the past century of guitar amplifier and stomp box design, plus no-compromise recording and direct sound excellence — all ready to roll when you are.
Who is Line 6?As you may know, Line 6 first came on the scene several years back with a new kind of guitar amplifier — the first to put digital software modeling technology to work in a combo amp for guitarists. We also knew then that guitarists need great amp tone when recording, but generally don’t have the room to crank up that classic stack, or the money to hire a team of ace engineers get it to tape. So we squished our patented modeling technology down into a small, kidney-bean-shaped wonder called POD, and forever changed the world of guitar recording.
Once we’d gotten this whole modeling amp and POD thing started, it was time to see what we could do if we really cranked up the horsepower and took our modeling to the next level. I mean, once you’ve climbed to the top of the mountain, it’s on to the next mountain, right? So, eyes glowing like power tubes, we stocked up on the Pepsi, gathered our genius engineers into a secret lab, fired up our extensive collection of amplifiers and stomp boxes... and spirited their treasured tones into a newly-supercharged modeling technology we dubbed Point-to-Point modeling. It first hit the streets in the award-winning Vetta amp, whose superb tone and unparalleled selection of dream amps, cabinets and effects make it a pretty good contender for the world heavyweight amp title. After that, we poured the same magic elixir into the classic POD and—ta-dah!—PODXT was born.
How does PODXT help you create a guitar tone that is out of this world, and then get that tone wherever you need it? Easy! It’s…

QUICK START GUIDE • Introduction
1 • 4 ModelingModeling: just what is it, and why is it so important?
To answer that question, we’ll start with tubes (better know as “valves” to our friends in England and elsewhere). Tubes, we can all agree, are the heart and soul of pretty much every legendary guitar amp, and are key to the warm, harmonic-rich tone quality of those amps. Solid state devices (transistors) are simply unable to duplicate tube warmth and performance. And “hybrids” — a tube in a circuit along with a bunch of transistors — are really a vain attempt at warming up a transistor-based tone. They fall short in any comparison to a 100% tube circuit. So that’s it — tubes or nothin’, right? Well, not any more....
You see, Line 6’s team of crack engineer-guitarists has spent years understanding pretty much everything there is to know about tube-powered gear, including exactly how different types of tubes respond under various conditions typical of guitar amplifier design. How tubes process an input signal, how the signal is colored and shaped, at what point it begins to distort, the quality and characteristic of the distortion, what happens when the signal gets to other parts of the system — complicated stuff, but all analyzable as electronic data. A guitar pickup output, after all, is an electronic signal, and tubes and all the rest are really just a complex form of signal processing.
Having sussed it all out, the Line 6 engineers translated all this arcane knowledge into software that simulates the signal processing of guitar amps’ tubes and other electronics, entirely within the digital domain. Cool, huh? The Line 6 crew also directed their caffeine-enhanced modeling attention to a study of guitar speaker cabinets and the important part they play in communicating great guitar tone. And the great variety of stomp box and rack effects that guitarists use to juice things up. They translated it all into yet more powerful software, and it’s this revolutionary DSP (digital signal processing) software-based modeling technology gives Line 6 the power to create super silicon-based life forms like PODXT.
Amp, Cab and Effect ModelsThe tone and technology know-how of Line 6 thus comes to you as Amp, Cab and Effect Models based on a collection of gear recognized by guitarists the world over as true “tone classics.” These models were tweaked through careful, scientific A/B comparisons to the gear that inspired them, with an ear open for the effects of different volume levels and settings of the originals’ tone and gain controls. The gain

QUICK START GUIDE • Introduction
1 • 5and equalization characteristics of the modeled gear were carefully measured so that changes to knobs on the models would mirror the effects of these changes on the originals as closely as possible. We’re talkin’ major attention to detail here. Tone control center frequencies, slopes, and cut/boost range were painstakingly analyzed, in addition to a whole host of factors unique to each piece of gear. Not only that, but since many classic amps and effects have highly interactive circuits, we paid careful attention to the way that the setting of one knob changes the way that another knob may behave. All in an effort to make our Models as much like the amps, cabs and effects in our collection as possible. The resulting Amp, Cab and Effect Models are the foundation of PODXT.
Now, then — here are a couple of things we want to be completely crystal clear on:
1. The Line 6 modeling process is a patented, 100% digital software-based technology exclusive to Line 6.
2. Line 6 Modeling is not sampling, nor is it solid state; no special guitar, pickup, or cabling is needed.
There’s Magic in the A.I.R.PODXT delivers its modeling tones through another innovation: Line 6's A.I.R. direct recording output. The A.I.R. (acoustically integrated recording) technology is the result of intensive research and careful study of the tonal characteristics produced by the interaction of amplifiers, cabinets, speakers, microphones and the recording room during the recording process.
The direct output of many preamps, amplifiers and direct box-style amp replacements available today offer some limited form of cabinet simulation or speaker emulation. Those that happen to be more than simple high end roll-offs have little or no control options. Generic cabinet simulations cannot reproduce the markedly different tones resulting from the choice of speakers, wood, and other details of a great real-life speaker cabinet. Other equipment also fails to reproduce the significant tonal contribution of microphone selection and placement, and do nothing to reproduce the subtle ambience of the recording space.
The result is the familiar dissatisfaction with direct recording products — even those that deliver a reasonably usable basic tone fail to reproduce the “life” of the

QUICK START GUIDE • Introduction
1 • 6 guitar sound, and destroy the proper feel in the process. It is as if your guitar strings became heavier and less responsive, like they just went up a couple of gauges when you plugged into your direct box. And your sound lost its life.
PODXT's combination of Amp Models and A.I.R. technology provides superior direct tones by recreating all the elements contributing to a great recorded guitar sound, and giving you that tone with the same feel as playing through a real amp and speaker cabinet:
• The effect of the guitar amplifier circuit is emulated by the Amp Model you choose. Each model was developed from extensive study of a classic amplifier treasured as a tone classic.
• In a guitar amp, once the guitar signal passes through the electronics, it is output to one or more speakers in a speaker cabinet. The specific design of the speakers, how many there are, and how they are arranged contributes significantly to your guitar tone, as does the construction and resulting tone of the wood box itself. A Marshall head driving a single 12-inch speaker in an open-back cabinet, for instance, will sound dramatically different from the same head driving a 4x12 closed-back cabinet. Line 6 has carefully constructed virtual software speaker cabinets that emulate the contribution made by real speaker cabinets to get great guitar sound.
• Once the sound makes it out of the speaker cabinet, the next important link in the recording system is the microphone that receives that sound. Guitar recordists select different microphones, and arrange them in different placements, to get particular sounds. A microphone pointing directly into the cone of a speaker will hear something different than one positioned off-axis. Line 6 carefully analyzed the coloring that various microphones add to the guitar sound, as well as the effects of different mic placement techniques, and gave you control of these details in your PODXT.
• The guitar amp, cabinet, and microphone don't just sit in empty space. The room that they are in contributes importantly to the guitar sound you will record. Reverb can be used to capture the basic character of the space, simulating the effect of the sound reflecting off the room's walls, floors and ceiling. But there are other subtle details that have more to do with the “spread” of the sound as it passes through the air between the speaker and microphone. This final component is the key to the sense that the listener is in one position in the room, and the guitar sound is in
QUICK START GUIDE • And Away We Go....
1 • 7another position, and that the two are separated by a mass of air that sound spreads through to reach the listener.
All of these important sound-shaping components are accounted for in your PODXT. Turn the Amp Model knob to call up the amplifier emulation you want. PODXT automatically matches that amplifier with an appropriate cabinet and microphone setup, and gives you the sound of that setup coming through the air of a recording space. Turn the reverb knob to taste, and start recording incredible mic’d up sound. Press a button and twiddle a knob or two, and you can switch cabinets, change out mics and their placement, and adjust the “spread” of the sound in your virtual room as well.
The A.I.R. direct recording output is exclusive to Line 6. In combination with the Line 6 Amp, Cab and Effect Models, it is the key to PODXT's phenomenally satisfying direct recording sound.
And Away We Go....
So, now that you know what’s in store, it’s time to experience PODXT for yourself. Grab your favorite axe, plug in, and flip back to the handy Quick Start Guide on the first page of this chapter if you haven’t already been through that. Then fold out the back cover and follow me, my friend, for the PODXT Grand Tour....

Controls & Connections
2• 1
CONTROLS & CONNECTIONS
Now would be a good time to turn to the nifty back cover of this manual and notice that it folds out. Ooh, pretty pictures! The idea is to have this essential pictorial reference always opened out while you’re thumbing through the manual. It’s also got all the essential details for quickly getting around on your PODXT. The boxed numbers that pop up throughout this manual correspond to the numbers on the foldout’s illustrations. The back side of the cover’s got handy pictures for the FBV and FBV Shortboard foot controllers, plus signal flow and connection guides.
Power Switch - Right edge of PODXT. Flip this to bring your PODXT to life. Be sure to use only the included PX-2 power pack.
Input - Bottom right side of PODXT. Plug your guitar in here. (You techies will want to know this is a mono, un-balanced connection).
Phones - Bottom left side of PODXT. Plug in your headphones here for silent concertos. The volume is set by the OUTPUT knob. The headphone amplifier is designed to provide a hot signal for all types of headphones. As a result, you can get major league volume from this connector. Be sure to set the output level carefully so you don’t blow your head off when slipping on your phones.
Output - Far left knob on the PODXT. Controls the overall output level of PODXT whether you’re going direct or plugged into an amp. Also sets the headphone level. This setting is not saved when you store settings into one of the PODXT’s memory locations. Changing the OUTPUT level does not change your tone. So you can get the tone you want at any volume level.
PODXT will give the best signal-to-noise performance when you have the OUTPUT control at max. With the OUTPUT control turned down low, you may get extra hiss that obviously ain’t what you want. In order to allow you to set the OUTPUT as high as possible with recording, mixing, and other studio gear, be sure you are plugging PODXT’s outputs into line level, not microphone or guitar level inputs. Line level inputs should allow you to turn PODXT’s OUTPUT up all the way (or close to it) and
1
2
3
4

Controls & Connections
2• 2
thereby get the best sound possible. If your gear has inputs that function as mic/line level inputs, try to set the trim for those inputs to the minimum level, and PODXT’s OUTPUT to maximum, when setting levels.
Left & Right Output - Top left of PODXT. These are balanced 1/4-inch TRS (tip/ring/sleeve) connectors, and are ready to rock with pro +4dBu balanced equipment. They will also work happily with unbalanced -10dBV equipment and standard guitar cables. If you are running PODXT mono, use the LEFT output.
Foot Pedal Connector - Top of PODXT. Looks like a telephone connector on steroids. Connect the optional Line 6 FBV or FBV Shortboard foot controllers here. PODXT does not work with the Line 6 Floor Board and FB4.
USB Connector - Top of PODXT. Your new PODXT comes fully-equipped to connect to even the most modern computers. This USB jack will let you record your PODXT into most popular recording applications. All you need to do is install the appropriate driver software (available at www.line6.com) and connect to your computer with the included USB cable. Have a look at Chapter 7, Deep Editing and MIDI Control, to setup your computer to work with your PODXT.
MIDI In & Out - Top right of PODXT. Connect PODXT to your MIDI equipment to select Channel Memories (via Program Change messages), or automate PODXT settings (via controllers and/or Sysex). You can also back up PODXT’s memory to your computer by using free software from www.line6.com. The PODXT MIDI OUT connects to another device’s MIDI IN; its MIDI IN goes to another device’s MIDI OUT. Please also see Chapter 7, Deep Editing and MIDI Control, to setup your MIDI gear with PODXT and find out what MIDI can do for PODXT and you.
Drive - Knob to the left of the button panel. This knob controls how hard you’re driving the input of the chosen Amp Model. Like the input volume control on a non-master volume guitar amp, higher settings give you more “dirt.”
Tone Controls - Following the arc of knobs up and to the right. BASS, MIDDLE, TREBLE, PRESENCE. Just like a guitar amp, only when you change Amp Models, the response and interactivity of the controls changes, too — so they act like the tone controls of the original amp that inspired the Amp Model you’ve selected.
5
6
7
8
9
10

Controls & Connections
2• 3
Chan Vol - Knob to the right of the button panel. This knob controls the relative volume level of the “channel” you are playing through — thus, CHANNEL VOLUME. Use this to balance levels between the sounds you store in two different PODXT Channel Memories (say between your rhythm and lead tones). In general, you want to set the CHAN VOL as high as possible to insure you’re getting the best signal-to-noise ratio performance — but back off on this control if you’re seeing CLIP in PODXT’s display.
TIP: Save your ‘clean’ channels first (with the CHAN VOL maxed), and then Save lower CHAN VOL settings for your ‘dirtier’ crunch and lead tones.
Reverb - Far right knob on the PODXT. How much reverb do you want today? Spin this knob to set the Reverb level. Several flavors of reverb live inside PODXT, including springs, rooms, chambers, halls and plate reverbs.
Effects - Bottom right of PODXT. This knob selects from PODXT’s Effect Setups — which set up an effect or combination of effects for you (all the details on effects are in Chapter 6, Stompboxes & Effects). Think of each Effect Setup as a virtual pedal board or outboard gear rack that you can match with any Amp Model. When you turn the EFFECTS knob, PODXT shows the name of the Effect Setup that is loaded and you’ll hear the effects change instantly. The effect buttons light to show which effects are on. There are 64 of these effect “rigs” pre-programmed and ready for your use.
Effect Tweak - Knob to the right of the display. This knob varies the effect you’ve chosen. Turn it up and the effect will generally go deeper, louder, faster, longer or just plain more. You’ll know what you’re tweakin’ because a window will pop up on PODXT’s display to show you. The speed of the effects is usually set by the TAP button. For the inside scoop, including how you can customize the EFFECT TWEAK knob see Chapter 4, Creating & Storing Sounds. If the effect that EFFECT TWEAK is “targeting” is off, then, big surprise, EFFECT TWEAK won’t change anything. While the EDIT or TUNER button is lit, the EFFECT TWEAK knob selects pages instead.
Amp Models - Bottom left of PODXT. When you spin this knob, it’s essentially like changing what electronic “circuitry” is running inside PODXT to make your amp sound. (See the groovy details in Chapter 5, Modeled Amps and Cabs.) You’ll see the Amp Model names change in PODXT’s display. When you choose an Amp Model, a Cabinet Model is also loaded automatically. For instance, when you
11
12
13
14
15

Controls & Connections
2• 4
choose the Brit Hi Gain model (based on the classic Marshall JCM 800 head), a Cabinet Model based on a Marshall 4x12 will be loaded with it. You can also choose a different cabinet by pressing the CAB/A.I.R. button (below).
In fact, Amp Models automatically load with all the amp-related settings pre-set for a ready to go tone. Drive, Bass, Mid, Treble, Presence, Cab/A.I.R., etc. will all be determined by the Amp Model you choose — giving you a ready-to-rock sound with the turn of just this one knob. Once you get familiar with PODXT, you can change these amp-associated defaults to customize the settings of each of the Amp Models to fit your tastes. Note that when you’re in Manual Mode, Drive, Bass, Mid, Treble, Presence, Channel Volume and Reverb are set by the physical knob positions instead of being automatically set with the amp selection. Complete details are in Chapter 5.
Select - Knob to the left of the display. The PODXT has 64 Channel Memories that store a huge variety of complete amp-and-effect selections pre-programmed by the tone mavens at Line 6. They are arranged in 16 banks of four channels each. (The four are called A, B, C, and D.) You can think of each bank as a sort of virtual four-channel guitar amp — and you’ll find that the same layout is used on the optional Line 6 foot controllers for PODXT (the FBV and FBV Shortboard) which are discussed later in Chapter 8.
You load PODXT channels by turning the SELECT knob. You can press one of the four “soft buttons” under the display to load one of the other channels of the current bank. When recalling a channel, you may have left the physical BASS knob at minimum, whereas the just-recalled channel has this control set to max. To change BASS (or anything else), just grab the knob you want and tweak. To leave the Channel Memory world and enter Manual operation, press any of the buttons under PODXT’S display twice. The display will read Manual Mode to let you know you’ve got WYSIWYG (what-you-see-is-what-you-get) operation, and all the physical knob positions are being used to determine your sound. More on all this later.
When the EDIT, SAVE or TUNER button is lit, the SELECT knob selects from the available display pages. When you press EDIT, it selects pages of effect and channel parameters; when you press TUNER, it takes you through all of the Tuner and system-wide settings; when SAVE is lit, you’ll find amp and effect customization features as well as MIDI file operations. The vertical “scroll bar” on the left side of each display page shows you where you are in that group of pages.
16

Controls & Connections
2• 5
Display - It’s right... well you know where it is. PODXT’s extra-informative LCD (liquid crystal display) is your window into every parameter and setting available. Here’s how to get around:
1. When you’re the SAVE, EDIT or TUNER button is lit, a scrollbar on the left side of PODXT’s display helps you keep your place in the various pages. Press one of these buttons to see the scrollbar now. For those that really need to get all the nerdy details, each dot in that bar represents a page. As you turn the SELECT knob, you move through the pages and so does the little square. When you’re on the first page, the little square is at the top. When you get to the last page, the square’s at the bottom. Square goes up, square goes down. Square goes up, square goes down. Fun for the whole family!
2. Each page typically has words that appear in the bottom of the display. These represent things you can adjust. Press the button below the thing you want to adjust, then turn the Effect Tweak knob to do your adjusting.
That’s pretty much it.
Soft Buttons - The 4 buttons directly under the display. These four buttons operate differently depending on what you’re doing. Generally, these buttons allow you to instantly load one of 4 channels in a bank, or get you in and out of the Manual mode of operation when you double-press (see SELECT above). If the EDIT, SAVE, or TUNER button is lit, you can press a Soft Button to select the item above it so it can be adjusted with the EFFECT TWEAK knob.
Effect On/Off Buttons - 4 of the buttons above the display. These four buttons allow you to quickly turn any of the four effects on or off (the effects are on when the buttons are lit).
• The COMP (Gate) button turns on/off the loaded Compressor effect• The STOMP button turns on/off the loaded Stomp-Box effect• The MOD button turns on/off the loaded Modulation effect• The DELAY button turns on/off the loaded Delay effect.
17
18
19

Controls & Connections
2• 6
Double-press one of these buttons to adjust the loaded effect or load a different one. For example, just press the COMP button two-times quickly and you’re instantly taken to the Compressor and Gate EDIT page. Double-pressing the STOMP button will quickly take you to the first Stomp Box EDIT page.
To turn off the built-in Noise Gate, double press the COMP button, then turn the Threshold parameter all the way down.
CAB/A.I.R. - The button to the right above the display. Pressing the CAB/A.I.R. button once lets you select the Cab Model to pair with your amplifier, select the microphone used on the cabinet and even set the amount of “room” that the mic captures. Unlike the EFFECT ON/OFF buttons, this button is not an on/off type control. A single press of this button simply lets you change cabs and mics quickly.
When the Cabinets are turned off, this button’s light will be off as well.
Save - When you want to store your own tweaked-up sounds in your PODXT this button is the key. Exactly how it works is detailed in Chapter 4, Creating & Storing Sounds. But you’re probably impatient, so here are the basics:
When you are using one of the pre-programmed sounds, the PODXT will display the bank number, channel letter and channel name at the top of the display. If you turn one of the knobs or change a parameter in the EDIT mode pages, you’ll notice an asterisk appears to the left of the bank number. This is a reminder to you that you have tweaked the memorized channel, and that you should save it if you want your PODXT to remember the tweak.
To save the changes you’ve made to a Channel Memory, press the SAVE button. The button will start to flash. Just press SAVE again if you want to overwrite the currently loaded Channel, using the same name. Or, if you’d like to change the name first, use the middle two Soft Buttons to select a character, then press the right soft button and turn the EFFECT TWEAK knob to change it. Press the soft button under DEST, turn the EFFECT TWEAK knob, and you will see that you are switching through memory locations A, B, C, and D in each of the sixteen numbered banks. Pick one to store your sound in, and press that SAVE button a second time. The button’s light will stop flashing, and the sound is stored at the location you chose, replacing the sound that was stored there before. Doesn’t get much simpler than that.
20
21

Controls & Connections
2• 7
After the sound is stored, you can bring it back any old time by simply turning the SELECT knob to call up the location where you stored it. (See Chapter 8 to learn how to do all this with your feet on the optional foot controllers).
If you aren’t using one of the PODXT Channel Memories — you’re in Manual mode, and you’re just getting the sound of where the knobs are set — you can store that state into a memory location the same way. Press SAVE, then DEST, then use EFFECT TWEAK to choose a place to save to, and press SAVE again.
If you decide you don’t want to store the sound after you’ve started saving, press any other button to cancel the save. (The save will also be canceled if you don’t touch anything for 15 seconds after having pressed SAVE.) And don’t worry, if you accidentally save over a sound you liked, the SAVE button’s additional pages let you recall the factory preset version of a Channel Memory any time. See Chapter 4 for more details on this feature.
The SAVE button also lets you customize any of the Amp Models and Effect Setups to your own taste, so your favorite version of the amp or effect comes up instantly when you turn AMP MODELS or EFFECTS. See Chapter 4 for the details on that.
Edit - A deep-dive into tone central is available at the press of the EDIT button. While EDIT is lit, the EFFECT TWEAK knob selects pages of everything that makes up a Channel Memory. From here, you set all the effect parameters, select cabinets and microphones, and assign a parameter to the EFFECT TWEAK knob. To learn more about deep editing, please see Chapter 4.
Tuner - Press that puppy and — shazam! Instant digital chromatic tuner. All Amp Model and effects processing are bypassed so you can hear those questionably-tuned strings clearly, should you choose to do so.
Play a note on your guitar and PODXT will show you what it is on that handy display; all notes are displayed as flats, so you’ll see A instead of G . Play that string you’re trying to tune again, spin its tuning key so it goes sharp and flat, and the little ball will move to the right if it’s sharp and back down to the left when the note’s flat. The little ball will sit right in the middle when you’ve got it just right. Give PODXT’s TUNER button a push and the tuner disappears just as swiftly as it came, taking you right back to normal operation.
22
23

Controls & Connections
2• 8
Tuner Bypass/Volume - Normally, the audio will be muted while you’re tuning, but if you prefer to hear yourself tune, press the button labeled Mute, and turning EFFECT TWEAK to select Bypass. Alternatively, if you have an FBV or FBV Shortboard connected, the volume pedal will control the tuner volume, too.
Tuner Reference - Want a different reference than A=440Hz? When you’re in the tuner mode, press the button labeled 440 Hz and turn the EFFECT TWEAK knob on PODXT while watching the display. This control lets you set the reference frequency anywhere from 430-450 Hz. This setting is stored so you don’t have to reset it every time you turn on PODXT if you decide you want to be different (or if that piano in your rehearsal room has decided to be different).
Tap - PODXT allows you to control the time and speed of your effects by simply tapping on this button. To use the TAP control, just tap the button at the tempo you want and the effects will change to match that tempo. There’s also a Tempo parameter near the end of the EDIT pages, so you’ll see exactly what Tempo you’ve Tapped. This is especially useful if you are trying to nudge your TAP setting to just the right value. See Chapter 4 to learn how to set up the effects to follow the tempo that you’ve tapped.
24
GETTING SET UP • All Purpose Basics
3 • 1
GETTING SET UP
The numbers in black boxes below and throughout the chapter refer to the back cover foldout’s illustrations
This chapter details how to get the best tone from your new PODXT, no matter what you’re plugging into. You see, this puppy is just as happy to live on stage with you, plugged into your ol’ standby amp, as it is connected to the most elite of world-class recording systems. (And who wouldn’t be?) So, if you’re gonna be POD’ing in a recording studio, you’ll want to check out Scenario One - In the Studio. If you’re using PODXT for live gigs, flip forward a few pages and read up on Scenario Two - PODxt Plays Live. But first, it’s the...
All Purpose Basics
1. Plug the power supply into the wall, and connect it to the Power Connector on the right edge of your PODXT.
2. Connect the output of your guitar to the INPUT .
3. Plug the output of your PODxt into whatever you’re going to be playing it into. The OUTPUT connectors are balanced 1/4-inch TRS (tip/ring/sleeve) connectors, ready to rock with pro +4dBu balanced equipment. They will also work quite happily with unbalanced -10dBV equipment and standard guitar cables. When you are running PODXT mono, use the LEFT output.
1
2
5
GETTING SET UP • Scenario One — In The Studio
3 • 2
Scenario One — In The Studio
PODXT makes friends easily. It’s right at home next to a bajillion input, million dollar console, and will just as happily do its thing with your portable cassette recorder and everything in between. Here’s how to get going:
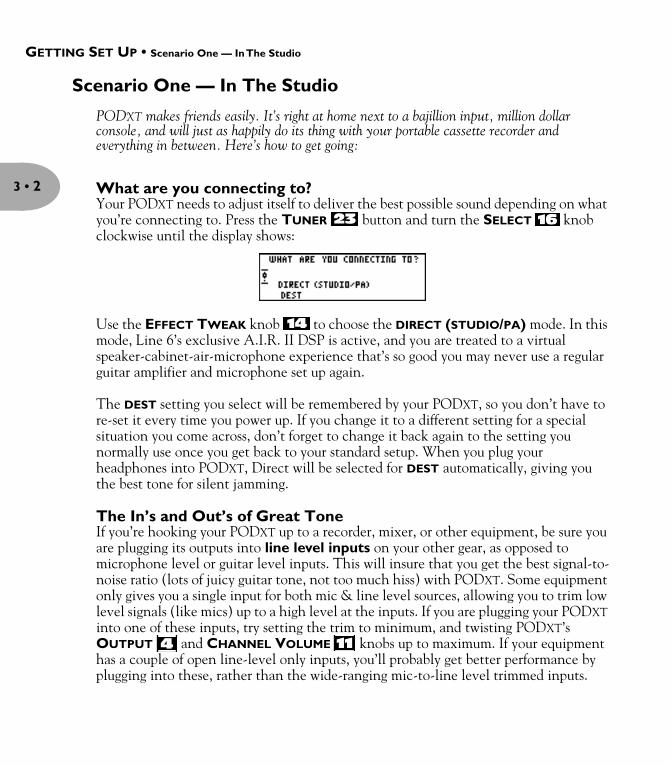
What are you connecting to?Your PODXT needs to adjust itself to deliver the best possible sound depending on what you’re connecting to. Press the TUNER button and turn the SELECT knob clockwise until the display shows:
Use the EFFECT TWEAK knob to choose the DIRECT (STUDIO/PA) mode. In this mode, Line 6’s exclusive A.I.R. II DSP is active, and you are treated to a virtual speaker-cabinet-air-microphone experience that’s so good you may never use a regular guitar amplifier and microphone set up again.
The DEST setting you select will be remembered by your PODXT, so you don’t have to re-set it every time you power up. If you change it to a different setting for a special situation you come across, don’t forget to change it back again to the setting you normally use once you get back to your standard setup. When you plug your headphones into PODXT, Direct will be selected for DEST automatically, giving you the best tone for silent jamming.
The In’s and Out’s of Great ToneIf you’re hooking your PODXT up to a recorder, mixer, or other equipment, be sure you are plugging its outputs into line level inputs on your other gear, as opposed to microphone level or guitar level inputs. This will insure that you get the best signal-to-noise ratio (lots of juicy guitar tone, not too much hiss) with PODXT. Some equipment only gives you a single input for both mic & line level sources, allowing you to trim low level signals (like mics) up to a high level at the inputs. If you are plugging your PODXT into one of these inputs, try setting the trim to minimum, and twisting PODXT’s OUTPUT and CHANNEL VOLUME knobs up to maximum. If your equipment has a couple of open line-level only inputs, you’ll probably get better performance by plugging into these, rather than the wide-ranging mic-to-line level trimmed inputs.
23 16
14
4 11

GETTING SET UP • Scenario One — In The Studio
3 • 3
Setting LevelsSet your PODXT OUTPUT level so that you’re getting plenty of signal feeding into your gear, but not so loud that it’s overdriving your system and distorting. Try turning the AMP MODEL knob to Line 6 Clean, set the DRIVE control to the 12 o’clock position, and CHANNEL VOLUME to Max. Now play with the PODXT OUTPUT knob and any input volume control on your system so you can get the maximum sound level out of your PODXT without going so far that you overdrive the input and cause unwanted distortion. If you’ve got some headphones handy, you can plug them into the PODXT headphone output to make sure that it sounds the same as what you hear through your system. Before you strap the phones on your ears, be careful that the headphones aren’t too loud, since their level is set by the Output, too.
TIP: Save your ‘clean’ channels first (with the Chan Vol maxed), and then Save lower Chan Vol settings for your ‘dirtier’ crunch and lead tones.
Radiation AlertYou’re also likely to find, especially if you are using a guitar with single coil pickups, that it is quite easy to pick up some serious noise from any computer CRT (which stands for cathode ray tube) display you might have in your studio. CRT displays are, after all, just special purpose ray guns that shoot photons at you all day long. Your guitar pickups receive and amplify the electro-magnetic fields that your display radiates, and you hear this in your audio signal as buzz and hum. Moving farther from the CRT, and turning your guitar so it does not directly face the computer’s display, will minimize this problem. But if you find yourself in a tight studio setup, needing to lay down some quick tracks, and being pestered by CRT-induced buzz, you may find it helpful to do as we have sometimes done: set up your track to record and start your pre-roll; reach up and flick your computer monitor’s power switch off; record your guitar part; stop your recording, flick the monitor back on, and check out the buzz-free playback. Flatscreen LCD monitors generally don’t cause hum and buzz.
Pedal PowerPODXT has a couple of foot control options that make getting great guitar tracks even easier: the LINE 6 FBV and FBV Shortboard. While we’ll go into all the details in a later chapter, it’s good to know that both allow you to select PODXT channels, tap in your effect speeds/times/tempos, and kick in the tuner, plus both give you Wah and
4
15 911

GETTING SET UP • Scenario Two — PODxt Plays Live
3 • 4
Volume pedal control. Whichever of these two Line 6 foot controllers you choose, it will plug into the PODXT Pedal jack. Remember that the older Line 6 Floor Board and FB4 pedals will not work with your PODXT.
MIDI ManiaAnd for yet more control (and who can ever get enough?), those of you with MIDI-capable studios will find that your PODXT lets you control everything via MIDI. Using MIDI, you can select any PODXT Channel and automate any PODXT parameter. You are truly lord of your domain. Pretty neat, huh? Be sure to read the Deep Editing & MIDI Control chapter if you plan to venture into this realm.
Scenario Two — PODXT Plays Live
If you’re going to be using your PODXT in a live situation—whether it’s direct to the sound system, with a power amp and cabs, or as the “front end” for a guitar amplifier, here’s what you need to know to get set up:
Mount UpIf you perform live, you’ll probably want to have the PODXT in a handy spot on stage. One of the easiest ways to get it there is with the optional PODXT mic stand/amp top adaptor you can get from Line 6 — it’s described on the Line 6 web site (where it can also be purchased). We know this is another shameless plug to get you to buy more gear, but what the heck — this really is a handy little item to get the PODXT’s righteous red aluminum chassis wherever you need it for mid-show tweaking. And that custom PODXT carry case is simply smashing.... But let’s get back to educational stuff:
Keeping your options openWhen you’re playing live with PODXT, you’ve got a choice of setups. You can plug straight out of the PODXT’s outputs into the house system for awesome tone without the hassle of mics and cabinets and all that other stage setup. You can also choose to run PODXT into a power amp and speaker cabinets, using it as the ultimate preamp. Or, you can plug your PODXT in between your guitar and a guitar amplifier so PODXT acts as a tone shaping front end for the amp. Whichever setup you choose, you’re gonna have to tell your PODXT about it first. Read along and we’ll get’cha dialed in like a pro.
6

GETTING SET UP • Scenario Two — PODxt Plays Live
3 • 5
What are you connecting to?You can supply your PODXT with one of three answers to this question, and thereby insure that your little red pal gives you the best possible tones in any application. To start the dialogue, press the TUNER button and then turn the Select knob until the display looks like this:
Use the EFFECT TWEAK knob to choose the destination that’s most appropriate for your setup:
Direct (Studio/PA) — If you’re plugging PODXT straight into a P.A., or are using in-ear monitoring systems, pick this setting for amazing tone, night after night. In this mode, Line 6 exclusive A.I.R. processing is active, serving up a virtual speaker-cabinet-air-microphone experience that’s so good you may never use a regular guitar amplifier and microphone setup on stage again. You are now as powerful as the entire P.A. System — and you’re guaranteed to be in the mix!
Power Amp with Cabs — With this option selected, your PODXT expects to be plugged into a power amplifier driving one or more closed-back cabinet(s), and it tailors the sound at its 1/4-inch outputs to work well with this type of rig. Specifically, the Mic and Room components of A.I.R. are turned off, and the Cabinet Models are magically re-voiced to sound their best coming through your new rig-of-doom!
In Front of a Combo — Choose this when plugging PODXT into the front of a combo amp. With this option, your PODXT expects to be plugged into the front of a combo amp with an open back speaker cab. Once again, the Mic and Room components of A.I.R. are turned off, and the Cabinet Models are revoiced to sound their best coming through an open-back combo.
The DEST setting you select will be remembered by your PODXT, so you don’t have to re-set it every time you power up. If you change it to a different setting for a special situation you come across, don’t forget to change it back again to the setting you normally use, once you get back to your standard setup.
24 16
14

GETTING SET UP • Live Performance Notes
3 • 6
Live Performance Notes
When you’re playing PODXT into the front of a combo amplifier, it’s a good idea to start off with your combo amp in neutral. What is “neutral,” you ask? Well, if you only have one volume control on your amp, set it low enough to get a “clean” tone; that ensures PODXT’s sounds come through as purely as possible. If you have a master volume in addition to a volume control on the input, set them both so that the first volume doesn’t overdrive the master volume (so you’re getting a clean tone). This will vary from amp to amp, but usually the input volume is going to be less than the master volume to get a clean, non-distorted sound. If you have passive tone controls, try setting your mid control at max, and your treble and bass controls at zero (this is actually “flat” equalization-wise on most amps). Active tone controls may vary, but just be sure you’re not overdriving the amp so the PODXT tone comes through without extra coloration. Once you get going, you can tweak the amplifier settings to suit your tastes. Try to set the PODXT’s OUTPUT so you’re not overdriving the input of the amp.
If you have a guitar amp with an effect return or a jack that lets you connect directly to the input to the power amp, you can plug PODXT’s output right into that connection and that will generally bypass the tone controls of the amp and avoid their coloring of PODXT’s tones. When you’re plugging into the effect return or amp directly this way, you want to choose POWER AMP W/CABS on the What Are You Connecting To? page.
External Stomp Boxes and PODXTIf you’ve been playing guitar for a while, you probably have some favorite pedals that you dig. And even though PODXT has now graced your life with some pretty hip stomp box and rack effects models, you probably still want to have the option of keeping those old pedals in your arsenal. No problem! Just remember that if you’re going to use PODXT with those other effects boxes in front, they’re going to act differently based on the Amp Model you’ve selected on your PODXT. It’s just like you’d expect — different combinations will produce a veritable feast of tone!
Creating & Storing Sounds • Recalling Channel Memories
4 • 1
CREATING & STORING SOUNDSThis chapter gives you the inside scoop on editing your new PODXT. Here, we’ll take you through everything from loading and changing sounds to full customization of PODXT’s Amp and Effect Models. Even you power users will want to read on and learn the tips and tricks to the quickest way around for instant tonal satisfaction.
Recalling Channel Memories
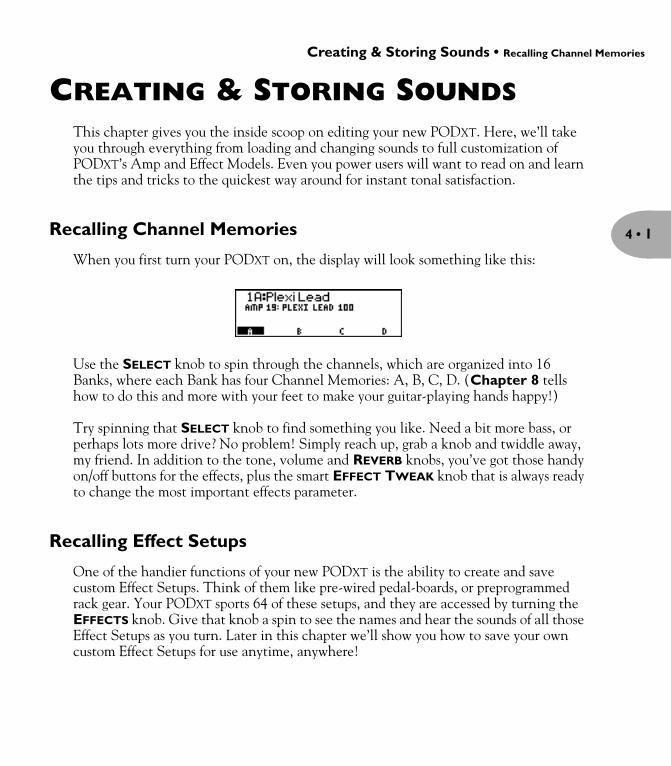
When you first turn your PODXT on, the display will look something like this:
Use the SELECT knob to spin through the channels, which are organized into 16 Banks, where each Bank has four Channel Memories: A, B, C, D. (Chapter 8 tells how to do this and more with your feet to make your guitar-playing hands happy!)
Try spinning that SELECT knob to find something you like. Need a bit more bass, or perhaps lots more drive? No problem! Simply reach up, grab a knob and twiddle away, my friend. In addition to the tone, volume and REVERB knobs, you’ve got those handy on/off buttons for the effects, plus the smart EFFECT TWEAK knob that is always ready to change the most important effects parameter.
Recalling Effect Setups
One of the handier functions of your new PODXT is the ability to create and save custom Effect Setups. Think of them like pre-wired pedal-boards, or preprogrammed rack gear. Your PODXT sports 64 of these setups, and they are accessed by turning the EFFECTS knob. Give that knob a spin to see the names and hear the sounds of all those Effect Setups as you turn. Later in this chapter we’ll show you how to save your own custom Effect Setups for use anytime, anywhere!

Creating & Storing Sounds • Stompbox-style Control
4 • 2
Stompbox-style Control
The PODXT lets you turn four PODXT effects on or off just as you would any other stompbox in your arsenal. The buttons above the PODXT display are the key:
Comp (Gate) — This button turns our model of the studio-standard LA-2A compressor on or off. Double press for the EDIT page that’s got the settings for the compressor settings along with the full-time NOISE GATE, which can be tweaked and turned on or off from the EDIT page.
Stomp — This is where the distortion boxes and some stomp box compressors live. Like all the other effect buttons, press to turn on or off, double-press to EDIT.
Mod — PODXT comes with several flavors of modulation effects. Use this button to turn the loaded one on or off, double-press to EDIT.
Delay — The delay models are found here. Press on, press off, double press to EDIT.
Editing Basics
In this section we’ll take a trip into tweak. A Deep Dive into the way your PODXT works, and how to make it best work for you. PODXT’s knobs, buttons and display give you direct access to absolutely every detail. No need to connect to a computer for detailed editing as is required for the original POD.
To begin your editing adventure, all you have to do is press the EDIT button to light it up. Now turn the SELECT knob. Well lookey here, everything you’d ever want to tweak on your PODXT is right there in front of you. To change something shown on the display, simply press the SOFT BUTTON directly below it and spin EFFECT TWEAK. Everything you tweak here, by the way, is remembered when you press SAVE and choose a Channel Memory to save to.

Creating & Storing Sounds • Inside the Edit Menu
4 • 3
Double Press for easy accessWant to change the Mod effect, or pick a different Delay model? No worries! Press twice quickly on the COMP, STOMP, MOD or DELAY button any time to go straight to the first page of parameters for the associated effect. Another double-press will pop you right back out of EDIT, so you can surf for more tone. (The CAB/A.I.R. button just takes a single press to select its page, or leave EDIT.)
Inside the Edit Menu
When the EDIT button is lit, you’ll see that there is a graphic representation of the EDIT “menu” on the left side of the PODxt’s display. Turn the select knob, and notice that the box in the graphic slides up and down the menu, with each dot in the graphic representing one of the available EDIT pages. This “scrollbar” is there to help you keep your place in the great circle of life, er, EDIT pages.
Amp knob settingsWith the EDIT button lit, spin the SELECT knob counterclockwise to select the first page from the EDIT menu. This page shows the knob settings for the current channel. It looks like this:
At the top of the display you’ll also see the Amp Model name. Now, spin the AMP MODELS knob. See how the tone controls change? This shows you the settings that the helpful elves at Line 6 have programmed for each Amp Model. Read on to find out how to customize them for your taste.
Look carefully now... do you see the little ‘dots’ by the knobs? These tell you where the knobs were last saved. Reach up and spin the Drive knob. Notice that the knob moves on the display. Cool, huh? And notice that the little dots are still where they were. This allows you to compare your edit with the saved settings for this Channel Memory. Now, that’s handy!

Creating & Storing Sounds • Inside the Edit Menu
4 • 4
Cabinet and Mic settings (There’s magic in the A.I.R.!)From the Amp Knob display, turn Select one click to the right (you can also get here directly by pressing the CAB/A.I.R. button). You’re now looking at something like this:
These are the advanced A.I.R. settings where you can mix and match any cabinet model with any amp, as well as dial in the perfect microphone setup.
Press the button under the displayed word CAB, then use the EFFECT TWEAK knob to spin through the available Cabinet models.
You can change the microphone selection or spread of the room the same way. Press the button under the displayed word MIC, then use EFFECT TWEAK to spin through the Mic options, or press the button under ROOM and tweak the room.
These settings allow you to completely customize the sound of the virtual recording environment we call A.I.R. — all without leaving the privacy of your own mind! Remember, you can get to this page at anytime from anywhere with a single press of the CAB/A.I.R. button.
Effects EditingYou edit all of PODXT’s Effects the same way. Simply double-press any effect on/off button to jump directly to the first page for that effect, press a button beneath the display to select a parameter, and twiddle the EFFECT TWEAK knob to tweak what’s selected. To get to any other page, whether for Reverb or whatever, turn the SELECT knob while the EDIT button is lit. And your handy “scrollbar” on the left of the display lets you know where you are. See? We knew you were a power user, deep down inside.
In general, most effects only have two pages worth of parameters to keep it simple, and the most common parameters are on the first page. So if you can’t find what you’re looking for on the first page, turn SELECT one click clockwise and you’ll probably see what you need there.

Creating & Storing Sounds • Inside the Edit Menu
4 • 5
Here’s an example. Double-press the STOMP button. The Stompboxes only have one EDIT page that looks something like this:
As with all of the effects, the first button from the left below the display allows you to choose the effect model. You can also see that the Vetta Comp has ‘knobs’ for Sensitivity, and Level. Pressing the button under SENS, selects it for tweaking via the EFFECT TWEAK knob.
Other effects, such as DELAY and MOD, have 2 pages of parameters:
Delay Edit Page 1
Delay Edit Page 2
CONFIG, on page 2, is available for PODXT’s volume pedal, Delay, and Mod. It lets you position each one either:
PRE – in front of the amp, where you’d place a stompbox, or
POST – after the amp, where you’d put a rack type effect.
A picture is worth a thousand words. Turn the page for a few good ones that illustrate this pre/post stuff.

Creating & Storing Sounds • Inside the Edit Menu
4 • 6
Here’s a typical routing with a MOD effect PRE and a DELAY running POST:
Here’s another routing with both MOD and DELAY effects in the PRE position:
This is what the full signal flow looks like inside your PODXT, including the pre and post options for Mod, Delay and the Volume pedal:
AMP/CAB – A.I.R. II DELAYMODULATION
AMP/CABMODULATION DELAY
AMP/CAB + A.I.R. II
REVERBCOMP
GATE
VOLUME
VOLUMEMODULATION DELAY
WAH STOMP DELAYMODULATION

Creating & Storing Sounds • Inside the Edit Menu
4 • 7
Setting your Tone to TempoYou’re probably wondering when we were going to let you in on the secret to giving your effects some groove. Well the secret is Note Values. Note values take the current tempo and apply a common set of calculations to derive delay times or modulation speeds that are perfectly in time with your music. Let’s put it this way: Ever wanted to have a 16th note Tremolo feeding into a dotted-eighth note Delay? Now you can.
Whenever you want to set a Mod Speed or Delay Time to be groov-a-licious:
1. Select the Delay TIME or Mod SPEED by pressing the button below it.
2. Spin EFFECT TWEAK to the left until you start seeing little notes in the place where milliseconds or Hertz used to be.
3. Tap twice on the TAP button to set your tempo and your Delay and/or Mod to match the tempo you tapped.
When you set a Delay to use Notes, the TIME control will look like this:
ReverbOur next stop on our little trip through the EDIT wonderland is the Reverb page. After all, what self-respecting twangmaster wouldn’t want some reverb now and then? Here you’ll find the ability to change the reverb model (PODXT’s got plenty of them), as well as the associated parameters necessary to get that really groovy ’verb going on. The only thing you won’t find is reverb Mix — that’s because the mix is controlled by the dedicated REVERB knob.

Creating & Storing Sounds • Inside the Edit Menu
4 • 8
Wah and VolumeFrom the Reverb edit page, spin the SELECT knob one click to the right and you’ll find the WAH and VOLUME parameters. The display now looks something like this:
Let’s check out the wah first. Over the last few years, many POD users have requested the ability to save the on/off state of the wah with a Channel Memory. That way when you recall that channel, the wah comes on automatically. Rejoice! Rejoice! Your wish has been granted by the all-merciful tone gods. And you didn’t even have to sacrifice your 60’s Telecaster in a firey devotional ceremony! (Whew.) In fact, you can even save the position you want the wah to be set at when it comes on — by pressing the button below POSI and twiddling that EFFECT TWEAK knob.
Moving on to the right side of the Wah/Volume page.... Here you can determine the behavior of an expression pedal (like the Line 6 EX-1) connected to the optional FBV Shortboard. When PEDAL is set to VOLUME, the EX-1 will control PODXT’s Volume and the Shortboard’s built-in pedal will be your dedicated to Wah. When PEDAL is set to TWEAK, pedaling the expression pedal from heel to toe will move the FX TWEAK assigned parameter from its minimum value to its maximum value. Like the delay and mod effects, you can also choose the position of the volume pedal: PRE (before the amp model), or POST.
FX Tweak Knob Assign / Tempo AssignImagine this: you’re in the middle of the most inspired gig of your life and you wish to tweak the one effect parameter that would send you over the top and into sonic nirvana...
Shazam! Your wish has been granted. Follow me to the next EDIT page that controls the EFFECT TWEAK knob assignment. It looks like this:

Creating & Storing Sounds • Saving Yourself
4 • 9
From this page, you can decide what the EFFECT TWEAK knob will be adjusting in this Channel Memory. Just press the button under the display that’s labeled TWEAK, and use the EFFECT TWEAK knob to choose the perfect parameter.
The right side of this display shows you the tempo for this Channel Memory. This tempo is used to calculate the time/speed of any delay and modulation effects that you set to follow tempo. You set the tempo by tapping the TAP button a couple of times, or you can select the button that’s labeled tempo and spin the EFFECT TWEAK knob until you get exactly the tempo that will make your heart beat with passion and joy!
Saving Yourself
PODXT lets you save as many as 64 tones that you create as described earlier in this chapter. And even though we ship it to you chuck full of some of our favorites, go ahead and save over whatever you want. We recommend spending some time with each of the factory sounds so you’ll know which you want to keep, and which you’ll want to save over. And don’t worry, because we’ll soon show you how to recall that favorite factory sound you just saved over and simply have to get back. You can also visit www.line6.com to check out the ToneTransfer database, surf around, pull some down, and even add your own masterpieces to the lot.
Saving a Channel MemoryOne of the simplest things to do with PODXT is call up a Channel Memory, make a few tweaks, and save that Channel without changing its name. To simply save a Channel you’ve tweaked, press SAVE, then SAVE again. That’s it.
Of course, you might want to stick your tweaked sound somewhere else, or at least change the name so you know which one it is. PODXT let’s you do that just as easily.
To save your edit to a new location - Make your edits, then press SAVE. This calls up a screen that looks something like this:

Creating & Storing Sounds • Saving Yourself
4 • 10
Now, press the button under the display that reads DEST (short for destination) and then use the EFFECT TWEAK knob to pick a different Channel Memory. Pressing SAVE again will confirm your decision, and save your sound to that Channel Memory, replacing what was there before.
Give your tone a name - Make your edits, then press SAVE. Again, you’ll see a display like the one above. Now, use the CURSOR < and > buttons to move the cursor under the letters you want to change. Press the button under CHAR (short for character) and then use EFFECT TWEAK to change the selected character. When you’re done, press SAVE again to complete the job. See, that wasn’t so bad.
Custom Save Amp ModelUsing this powerful feature, you can pack your PODXT with all the special amp- tweaking genius that only you possess. This brilliance will then be available instantly at the turn of the AMP MODEL knob, loading your customized version of the Amp Model, including your chosen Cab Model, Mic selection and your personal tweak of the ‘room’. This way, when you turn the AMP MODEL knob to load the Plexi-45 model, you’ll get your personal Plexi-45, with all the controls set for your very own version. Here’s how it works:
Choose an Amp Model, change the cab, tweak the room, use a different mic, and even completely change the reverb model and all of its parameters. Press the SAVE button, then use the SELECT knob and scroll to the display that looks like this:
You have entered the land of Custom Save. Now, if you want your current settings to be recalled with this Amp Model, simply press SAVE again.

Creating & Storing Sounds • Saving Yourself
4 • 11
PODXT saves the following controls with an Amp Model, and loads them when you turn the AMP MODELS knob:
Custom Save Effect SetupAs we mentioned earlier, you’ve got easy access to as many as 64 pre-wired pedal-boards and racks in your PODXT just by spinning the EFFECTS knob. We’ve made many of these for you, but if you always use that tweaked-up fuzz box feeding into your favorite settings of an analog delay pedal, then phase it all up after the amp, and you use that over and over with different Amp Models, just make it your own custom Effect Setup. Then, you can mix it with any of your customized Amp Models any time you want.
It’s easy, just:
Press Save and use the Select knob to scroll down to the page that looks like this:
Where to put it — Press the button under the display that’s labeled DEST (destination) and then use the EFFECT TWEAK knob to select a location to store it. You may decide to save these settings in the current location, or you can choose any of the 64 total spots.
What to name it — If you want to give your new Effect Setup a name, now’s the time to do it! Use the CURSOR < and > buttons to move the cursor under the letters
Controls you can customize
Amp ModelCabinet ModelDrive, Bass, Middle, Treble and Presence controlsChannel VolumeVolume Pedal pre/post and Minimum setting

Creating & Storing Sounds • Saving Yourself
4 • 12
you want to change. Press the button under CHAR (short for character) and then use EFFECT TWEAK to change the selected character.
Commitment — Pressing SAVE again will now take a snapshot of your current COMP, GATE, STOMP, MOD, DELAY and REVERB settings, and keep them forever and ever.
Single Channel RecallImagine this: you’re in the middle of massive inspiration, moving at the speed of light, and before you know it... you just saved an edit over one of your favorite factory presets. Perish the thought! Fortunately, we’ve got you covered. To recall that favorite preset:
Press SAVE, and then use the SELECT knob to get to the page that looks like this:
You can now press SAVE to recall the factory version of the chosen Channel Memory, or turn the EFFECT TWEAK knob to choose another Channel Memory you’d like to retrieve. Press SAVE again, and you’ve safely recovered that lost gem!
Complete Factory RecallIf for any reason, or just for the sheer mad joy of it, you decide you need to reset your PODXT’s entire memory to its factory-programmed state, then blindly do this: Press SAVE once, then use the SELECT knob to scroll to the page that looks like this:
Now ask yourself, “Do I really want to do this?” Now, ask it again. How about now? If this is truly your heart’s desire, then press SAVE again and you’ll have accomplished your goal. That’ll wipe your PODXT’s memory and reset it just like it was when it left the Line 6 factory.

Creating & Storing Sounds • Saving Yourself
4 • 13
Warning: This will erase ALL the channels, as well as the custom amp and effect settings you might have created. Everything. So be sure and ask yourself again, “Do I really want to do this?” If the answer is yes, go on ahead with your bad self.
MIDI DumpsIf you want to transfer one or more tones directly from one PODXT to another PODXT, or between PODXT and a MIDI data recorder, workstation, computer or sequencer, read on. You’ll need a standard MIDI cable to do the deed. Connect the MIDI Out of your PODXT to the MIDI In of the receiving device.
You can transfer the:• All Channels• The Current Channel• The Effect Setups• The Amp Setups (including your customizations)
Transferring All Channel Memories - This feature will let you send all of your PODXT Channel Memories out via MIDI for a complete back-up of the 64 Channel Memories:
Press SAVE once, and use the SELECT knob to scroll down to this page:
Press the button under SELECT. Turn the EFFECT TWEAK knob to the left (counterclockwise) until the display reads:
Now, if you press SAVE again, the entire set of 64 Channel Memories of your PODXT will be dumped out of its MIDI jack. If another PODXT is connected, its brain will be taken over by this data, making it a virtual clone of your own PODXT channels! Who knew cloning was so easy?

Creating & Storing Sounds • Saving Yourself
4 • 14
Transferring Only Some Channels - To transfer only one or more individual Channel Memories, Effects Setups or Amp Models from one PODXT to another, do this:
Press SAVE once, and use the SELECT knob to scroll down to the page that looks like this:
Press the button under SELECT and turn the EFFECT TWEAK knob to tell PODXT what to transfer:
Any Channel Memory:
All Channel Memories:
All Amp Models:
All Effects Setups:

Creating & Storing Sounds • Saving Yourself
4 • 15
Now, if you press SAVE again, the MIDI dump you’ve selected will be transmitted out the MIDI jack, into the brain of a receiving PODXT, or into your computer or other MIDI device for backup.

Modeled Amps & Cabs • Which Amps and Cabs Are Modeled?
5 • 1
MODELED AMPS & CABS
Which Amps and Cabs Are Modeled?
General Notes About the ModelsAs you may have guessed, we’re tone fanatics here at Line 6. Once we’ve set our sights on creating a software emulation of a particular kind of amp, we will (and have) scour the globe in search of just the right specimen—that one, very particular amplifier that has the magic. We are also intensely mindful of the fact that, although amp model names may stay the same over the years, the circuit designs sometimes change radically. Amps from ’57, ’62, ’65, ’67, ’75, and 2001 may all bear the same model name, yet sometimes have totally different sound and response, and quite often a different look as well. And as we all know, even two amps with the same circuit design, from the same era, can sound radically different, just on the basis of variance in component tolerances, among other things. Plus, there’s the fact that every amp has its own special way of settling in over the years. And, just like people, some of them only get better with age. That’s exactly why we went to so much trouble to find the very best examples we could of every amp that we wanted to model for PODXT. And it’s why, when describing the software amp models that are emulations of other amplifiers, we’ve included photos here of the actual, individual amps that we lovingly selected, studied and measured—so that you’ll know exactly which amp we’re talking about.
So, now that you know what’s in store, let’s take a tour of the amp models that live inside your PODXT, and the original equipment that helped to make them possible.
There are 32 Amp Models living within your PODXT, plus 22 Cabinet Model selections. When you turn the AMP MODELS knob, you select an Amp/Cab combination. You can then mix’n’ match different cabs with the amp by pressing the CAB/A.I.R. button and choosing any Cab model you like with the EFFECT TWEAK knob. Chapter 4 tells you how you can customize PODXT to call up your favorite Amp/Cab combinations.

Modeled Amps & Cabs • Which Amps and Cabs Are Modeled?
5 • 2
Line 6’s Originals
We’ll start the introductions with the original Amp Models that Line 6 created to give you even more tonal options than you could get from vintage gear alone:
Line 6 CleanTo create this Amp Model, we essentially grafted the preamp and tone stack of a JC-120 (Roland’s popular “Jazz Chorus” solid state combo) onto the poweramp and transformer of a classic Marshall JTM-45 tube head, thereby giving you the crisp and clear front end typical of a solid state amp, but with a rich, satisfying tube amp-style bite as you turn it up.
Line 6 JTS-45Since the design of early Marshalls was based on the Fender Tweed Bassman circuitry, we wondered what it would be like if we took the preamp and tone stack of our JTM 45 and ran it into the poweramp and transformer of our ‘58 Tweed Bassman. What we got was way happening, as JTS-45 will attest. Great grind and nice punch. A tone the whole family can enjoy.
Line 6 Class AOne of the most satisfying tonal experiences as a guitarist is to play through an amp that’s driven to the point where the poweramp is just starting to distort, but before it achieves full clipping. For many players, this is the coveted ‘sweet spot’ they look for on an amp. Because we’re not limited to physical reality when we’re creating amps in the digital world, our goal for this one was to make an amp model that was nothing but sweet spot. One of the great side effects is the ease of coaxing feedback out of this one.
Line 6 MoodAnd here we give you a fantasia tone, based on our memories of grunge guitar tones we have known and loved.

Modeled Amps & Cabs • Which Amps and Cabs Are Modeled?
5 • 3
Line 6 Spinal PuppetYou know how, when you’re playing head-bangin’ music, you look out into the audience and see all those heads bobbing up and down? Those are Spinal Puppets. Need we say more?
Line 6 Chemical X Just like those secret ingredients that detergent companies used to crow about (Now! Contains Ingredient X-27!), the Line 6 sound design guys wouldn’t tell us anything about what the inspiration for this one was or who it might have belonged to (no matter what type of bribery we attempted). Suffice to say that it’s a very punchy hi-gain sound that also cleans up quite nicely when you roll your volume back.
Line 6 InsaneOur goal here was to provide you with as much input gain distortion as possible short of complete meltdown. You get ridiculous, rich tube drive to shame the distortion of pretty much any amp on the planet (sort of like a Dual Rectifier on 10 being used as a preamp for a Soldano), while still retaining tonal definition and character. As a result, you get way lots of bottom end and cabinet character with tons of wide-ranging tone shaping. Crank up the Drive control and take no prisoners!
Line 6 Piezacoustic 2This one is designed to work with the piezo output of solidbody electrics that have one of those newfangled bridges with the ‘acoustic’ pickup built in. Since you don’t have to worry about the body shaking itself to pieces with feedback on that type of guitar, we’ve cooked up this model with more low-mids and low frequencies.

Modeled Amps & Cabs • Zen Master
5 • 4
Zen Master
This model is based on a Budda Twinmaster 2x12 combo. The Budda has a great, warm, Class A/B, sound. The Budda philosophy is all about power tube distortion. Simplicity is the key. With relatively low front end gain, highly interactive tone controls, and tube rectifier “sag,” it’s great at getting a classic cranked sound for small gigs and recording (it’s all of 18 watts). Since the original Twinmaster has no mid control, we’ve added a little bonus to our model in the form of some post-Amp Model mid contouring available via PODXT’s MIDDLE control. As is true for all such “bonus” tone controls on PODXT’s models, you should set this control to 12 o’clock to get groovy with the unadorned Budda-style vibe.
We used the Twinmaster’s Input 2, which is lower gain, when creating this model.
All product names are trademarks of their respective owners, which are in no way associated or affiliated with Line 6. These product names, descriptions and images
are provided for the sole purpose of identifying the specific products that were studied during Line 6’s sound model development.

Modeled Amps & Cabs • Small Tweed
5 • 5
Small Tweed
Modeled after a 1953 “wide panel” Fender Tweed Deluxe, this Amp Model will snarl with the best of them. The original amp had only a single tone control, essentially a treble roll off. We set up the TREBLE knob to give you this treble roll off when using this Amp Model. Which left us with the BASS and MIDDLE knobs just sitting there, so we set up the BASS and MIDDLE as post-Amp Model controls, which essentially lets you EQ up your tone as you would do on a mixing console after recording your amp. Set the BASS and MIDDLE knobs at halfway to put them in ‘neutral’, turn the PRESENCE to 0, and try the TREBLE knob somewhere above halfway for a classic Tweed sound.
All product names are trademarks of their respective owners, which are in no way associated or affiliated with Line 6. These product names, descriptions and images
are provided for the sole purpose of identifying the specific products that were studied during Line 6’s sound model development.

Modeled Amps & Cabs • Tweed B-Man
5 • 6
Tweed B-Man
The classic ’58 Fender Bassman 4x10 combo was the amp that started it all—instant rock and roll tone. Originally a bass guitar amp, the Bassman became a Blues staple for 6-string guitarists. It has the fat bottom end you’d expect from a bass amp, but also has the Fender twang on the top. Incidentally, when Jim Marshall built his first amps with Ken Bran they were heavily influenced by the early Bassman. One of the interesting things about the Bassman is just how interactive the MIDDLE and TREBLE controls are. The MIDDLE control isn’t a bandpass, as in most tone control setups. Instead, it’s almost like a second treble control. The two are additive, so if you’re running PODXT’s MIDDLE knob higher than halfway up with this model, you’ll find that the TREBLE control might give you more bright than you really want. On the other hand, when you turn the MIDDLE knob down, you’ll probably want to boost the TREBLE. The Bassman, like many of the amps modeled for PODXT, didn’t have a master volume. So to get the kind of tone that the Bassman can deliver at higher gain settings, you had to crank it up loud enough to do some serious damage to anyone who might be standing close by. With PODXT, you can get that kind of tone at a bedroom or studio level — or even through your headphones! Try a Drive setting of about 4 or 5—it’s guaranteed to dredge up the best R&B licks you know.
All product names are trademarks of their respective owners, which are in no way associated or affiliated with Line 6. These product names, descriptions and images
are provided for the sole purpose of identifying the specific products that were studied during Line 6’s sound model development.

Modeled Amps & Cabs • Tiny Tweed
5 • 7
Tiny Tweed
Modeled after a 1961 Tweed Champ, this model has a great sound when the Drive is cranked (not bad clean, either). These amps were originally designed to be sold to beginners, but rock and rollers quickly discovered that you could get a great distorted sound at fairly low volume levels. Many of the classic guitar solos of the 50’s were recorded through a Champ. The Champ had no tone control, only volume. With your PODXT, it’s easy to get a classic Champ tone. Just leave the BASS, MIDDLE and TREBLE controls parked at 12 o’clock, which means they are “flat,” making no contribution to the tone. Set PRESENCE to 0, and it will also be letting the unadorned classic Champ tone through. When you’re ready to explore further sonic territory, spin those and work your magic.
All product names are trademarks of their respective owners, which are in no way associated or affiliated with Line 6. These product names, descriptions and images
are provided for the sole purpose of identifying the specific products that were studied during Line 6’s sound model development.

Modeled Amps & Cabs • Blackface Lux
5 • 8
Blackface Lux
The Holy Grail for many blues, country, and “roots” players has been a blackface Fender Deluxe Reverb. After listening to quite a few candidates back when we were seeking the ultimate Deluxe Reverb to model during our development of Flextone and POD, we stumbled upon an extremely cool ’64 Deluxe. We still haven’t found one better.
Most players love a Deluxe when it’s turned up to about 7 for a nice gritty sound that cleans up when you back off your guitar’s volume knob just a little. Notice how the tone control response changes as this Amp Model’s Drive is changed: clean settings are crisp and present, while more driven settings will mellow the high end. This is typical of what you get from a Deluxe and is nicely captured here. The Deluxe itself has only BASS and TREBLE controls, leaving us, once again, with the prospect of a couple knobs with nothing to say for themselves. But fear not; in this case, we’ve set up PODXT’s MIDDLE knob so you can add some post-Amp Model Midrange contouring for a little more flexibility, while PRESENCE adds, well, Presence. Once again, set the MIDDLE knob to its “neutral” 12 o’clock position and the PRESENCE knob to 0 for the classic Deluxe sound. Tweaked up right, this tone will cut through and sing. We jacked into Input 1 of the Vibrato Channel to get this model cooked up for PODXT.
All product names are trademarks of their respective owners, which are in no way associated or affiliated with Line 6. These product names, descriptions and images
are provided for the sole purpose of identifying the specific products that were studied during Line 6’s sound model development.
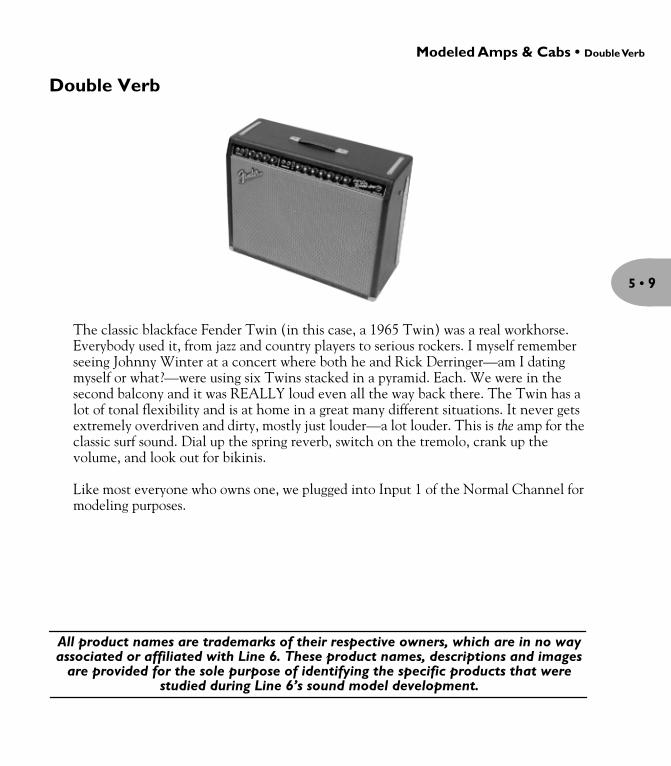
Modeled Amps & Cabs • Double Verb
5 • 9
Double Verb
The classic blackface Fender Twin (in this case, a 1965 Twin) was a real workhorse. Everybody used it, from jazz and country players to serious rockers. I myself remember seeing Johnny Winter at a concert where both he and Rick Derringer—am I dating myself or what?—were using six Twins stacked in a pyramid. Each. We were in the second balcony and it was REALLY loud even all the way back there. The Twin has a lot of tonal flexibility and is at home in a great many different situations. It never gets extremely overdriven and dirty, mostly just louder—a lot louder. This is the amp for the classic surf sound. Dial up the spring reverb, switch on the tremolo, crank up the volume, and look out for bikinis.
Like most everyone who owns one, we plugged into Input 1 of the Normal Channel for modeling purposes.
All product names are trademarks of their respective owners, which are in no way associated or affiliated with Line 6. These product names, descriptions and images
are provided for the sole purpose of identifying the specific products that were studied during Line 6’s sound model development.

Modeled Amps & Cabs • Two-Tone
5 • 10
Two-Tone
Another amp made by Valco/Supro, this is the Gretsch 6156. One of its curiosities is that the output transformer is actually mounted on its single 10-inch speaker, rather than on the amp chassis. It also has a lovely wraparound grill cloth, for a real futuristic look (or what passed for it in the ’50s).
All product names are trademarks of their respective owners, which are in no way associated or affiliated with Line 6. These product names, descriptions and images
are provided for the sole purpose of identifying the specific products that were studied during Line 6’s sound model development.

Modeled Amps & Cabs • Hiway 100
5 • 11
Hiway 100
Based on a Hiwatt DR-103, this model gives a great, punchy sound that will cut through almost anything and retains great definition even when cranked. That’s exactly what designer Dave Reeves was looking for when he left the Sound City division of Dallas Arbiter in 1966 to form HyLight Electronics. Though his first designs were more reminiscent of the Vox and Selmer amps of the day, it wasn’t long before Reeves had started producing the amps that ’60s Brit-Rock fans have become familiar with. Renowned for their ‘tank-like’ construction (due in part to Reeves’ hiring of ‘mil-spec’ wiring specialist Harry Joyce), it was no small wonder this amp was the choice of Pete Townshend for so many years. It wasn’t just Townshend using Hiwatt, either. Many of the then-current crop of British rockers like Pink Floyd, The Moody Blues, Manfred Mann, and Jethro Tull were also Hiwatt endorsees. Crank this one up and you can see for miles.
All product names are trademarks of their respective owners, which are in no way associated or affiliated with Line 6. These product names, descriptions and images
are provided for the sole purpose of identifying the specific products that were studied during Line 6’s sound model development.

Modeled Amps & Cabs • Plexi 45
5 • 12
Plexi 45
This Amp Model is based on a ’65 ‘block logo’ (predates the “scrolled” Marshall logo) JTM-45 head, complete with a gold Plexiglas front panel. When the royal agents we had dispatched to the U.K. found this particular amp, we instantly fell in love. The amp even has the original KT-66s in it, still in great shape! It’s one of the finest examples of a JTM-45 we’ve ever heard, and it’s a constant battle at Line 6 to see who gets to take it home for the weekend.
Those interested in the genealogy of tone will be interested to note that the JTM-45 marked the beginning of Marshall’s transition from a mellower Fender-like tone to the distinctive, bright “crunchy” sound of the later Marshalls.
All product names are trademarks of their respective owners, which are in no way associated or affiliated with Line 6. These product names, descriptions and images
are provided for the sole purpose of identifying the specific products that were studied during Line 6’s sound model development.

Modeled Amps & Cabs • Plexi Lead 100
5 • 13
Plexi Lead 100
Modeled after the infamous ‘68 Marshall ‘Plexi’ Super Lead—coveted by tone connoisseurs the world over. We literally scoured the world for this particular amp, finally finding a great example of a Super Lead languishing (we like to think fate preserved it for us) in Holland. By the time this amp was built (ca. 1968), Marshall had completely changed the circuitry away from the Fender 6L6 power tube heritage and moved to an EL34 tube. Another major tone difference was due to the necessary output & power supply transformer changes. All this mucking about added up to create a tone forever linked with Rock Guitar. Amps of this era didn’t have any sort of master volume control, so to get the sound you’d have to crank your Super Lead to max—just the thing to help you really make friends with the neighbors. Hendrix used Marshalls of this era; a decade later Van Halen’s first two records owed their “brown sound” to a 100-watt Plexi (Our Super Lead, in fact, has the ‘lay down’ transformer that was unique to ’68 models, the same as Hendrix and Van Halen’s Marshalls.). To get a crunch sound out of a Plexi, you would likely crank the input volume and tone controls (to 10!). You’ll find that, in keeping with our “make-it-sound-a-whole-lot-like-the-original” concept, PODXT’s model is set up to do pretty darned near the same thing.
All product names are trademarks of their respective owners, which are in no way associated or affiliated with Line 6. These product names, descriptions and images
are provided for the sole purpose of identifying the specific products that were studied during Line 6’s sound model development.
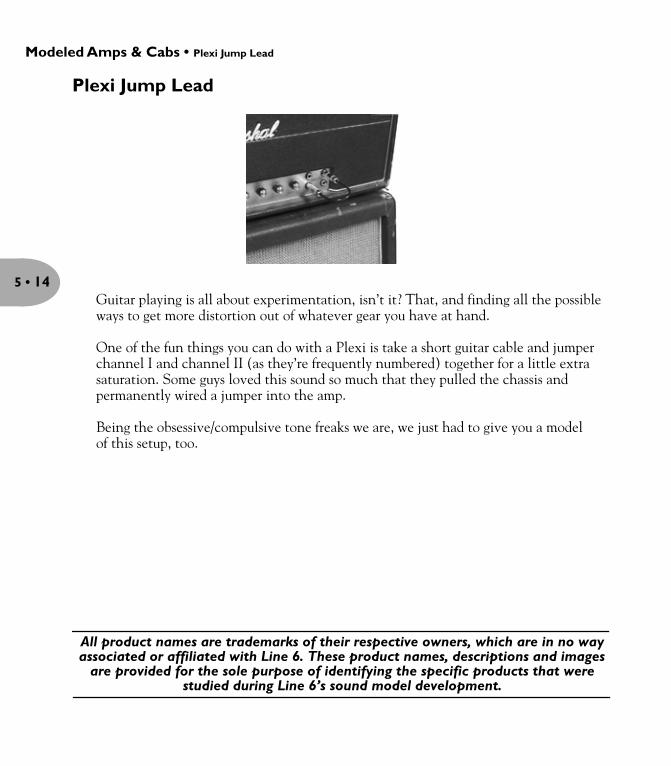
Modeled Amps & Cabs • Plexi Jump Lead
5 • 14
Plexi Jump Lead
Guitar playing is all about experimentation, isn’t it? That, and finding all the possible ways to get more distortion out of whatever gear you have at hand.
One of the fun things you can do with a Plexi is take a short guitar cable and jumper channel I and channel II (as they’re frequently numbered) together for a little extra saturation. Some guys loved this sound so much that they pulled the chassis and permanently wired a jumper into the amp.
Being the obsessive/compulsive tone freaks we are, we just had to give you a model of this setup, too.
All product names are trademarks of their respective owners, which are in no way associated or affiliated with Line 6. These product names, descriptions and images
are provided for the sole purpose of identifying the specific products that were studied during Line 6’s sound model development.
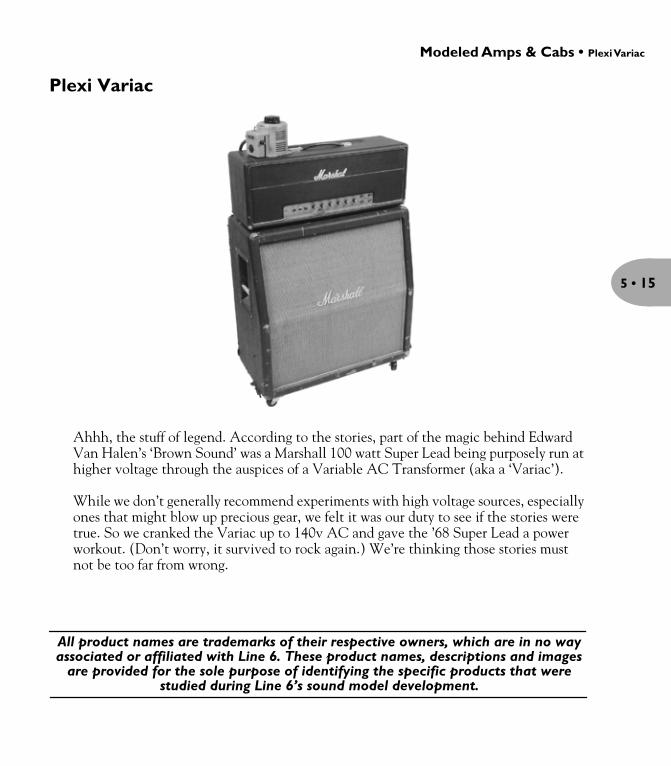
Modeled Amps & Cabs • Plexi Variac
5 • 15
Plexi Variac
Ahhh, the stuff of legend. According to the stories, part of the magic behind Edward Van Halen’s ‘Brown Sound’ was a Marshall 100 watt Super Lead being purposely run at higher voltage through the auspices of a Variable AC Transformer (aka a ‘Variac’).
While we don’t generally recommend experiments with high voltage sources, especially ones that might blow up precious gear, we felt it was our duty to see if the stories were true. So we cranked the Variac up to 140v AC and gave the ’68 Super Lead a power workout. (Don’t worry, it survived to rock again.) We’re thinking those stories must not be too far from wrong.
All product names are trademarks of their respective owners, which are in no way associated or affiliated with Line 6. These product names, descriptions and images
are provided for the sole purpose of identifying the specific products that were studied during Line 6’s sound model development.
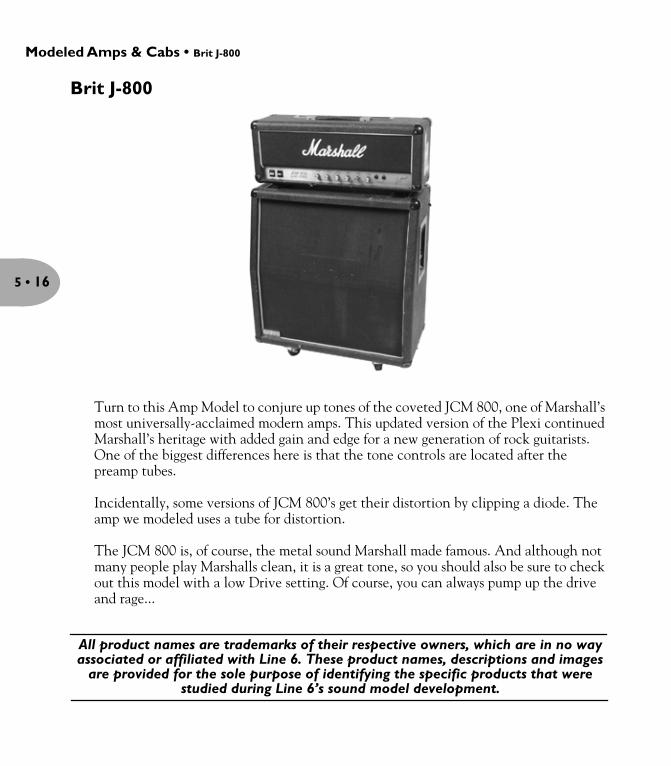
Modeled Amps & Cabs • Brit J-800
5 • 16
Brit J-800
Turn to this Amp Model to conjure up tones of the coveted JCM 800, one of Marshall’s most universally-acclaimed modern amps. This updated version of the Plexi continued Marshall’s heritage with added gain and edge for a new generation of rock guitarists. One of the biggest differences here is that the tone controls are located after the preamp tubes.
Incidentally, some versions of JCM 800’s get their distortion by clipping a diode. The amp we modeled uses a tube for distortion.
The JCM 800 is, of course, the metal sound Marshall made famous. And although not many people play Marshalls clean, it is a great tone, so you should also be sure to check out this model with a low Drive setting. Of course, you can always pump up the drive and rage...
All product names are trademarks of their respective owners, which are in no way associated or affiliated with Line 6. These product names, descriptions and images
are provided for the sole purpose of identifying the specific products that were studied during Line 6’s sound model development.
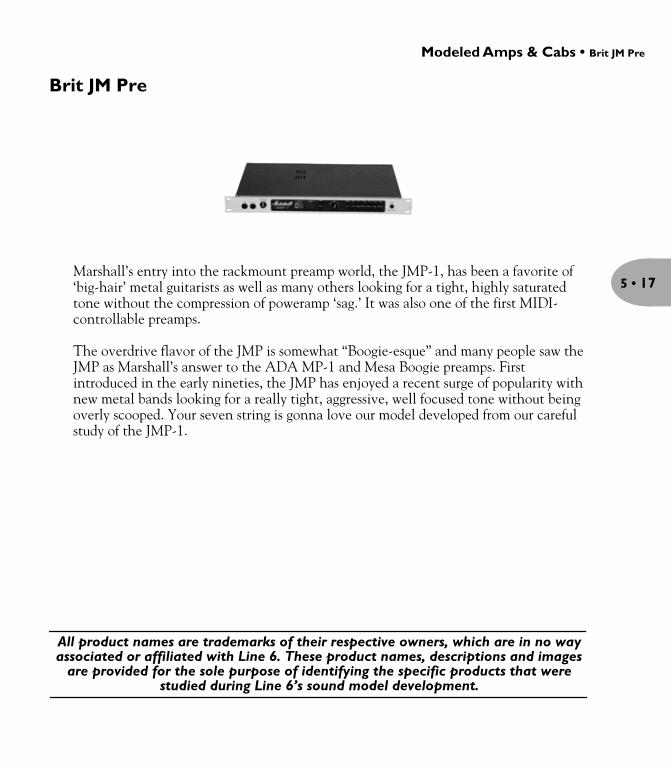
Modeled Amps & Cabs • Brit JM Pre
5 • 17
Brit JM Pre
Marshall’s entry into the rackmount preamp world, the JMP-1, has been a favorite of ‘big-hair’ metal guitarists as well as many others looking for a tight, highly saturated tone without the compression of poweramp ‘sag.’ It was also one of the first MIDI-controllable preamps.
The overdrive flavor of the JMP is somewhat “Boogie-esque” and many people saw the JMP as Marshall’s answer to the ADA MP-1 and Mesa Boogie preamps. First introduced in the early nineties, the JMP has enjoyed a recent surge of popularity with new metal bands looking for a really tight, aggressive, well focused tone without being overly scooped. Your seven string is gonna love our model developed from our careful study of the JMP-1.
All product names are trademarks of their respective owners, which are in no way associated or affiliated with Line 6. These product names, descriptions and images
are provided for the sole purpose of identifying the specific products that were studied during Line 6’s sound model development.

Modeled Amps & Cabs • Match Chief
5 • 18
Match Chief
We crafted this model from our studies of the Matchless Chieftain. The Matchless has an EL34-powered “modern class A” design — hence this model’s name — and a unique tone (largely due to the complicated EQ scheme).
The Chieftain was designed by Mark Sampson at Matchless to blend a Fender/Marshall type front end with a classic ‘spongy’ and very reactive Class A power section.
With higher gain than the DC-30 (which is next in our hit parade), the Chieftain is a great roots-music amp. It also features the incredibly sexy feature of a light up front logo name plate, which may not affect tone, but it sure does look cool.
When, sad to say, Matchless went out of business, both the Chieftain and the DC-30 became highly collectable pieces of gear, with used ones often fetching up to a thousand dollars more than their original price. We’re happy to do our part to keep the Matchless legacy alive with the Matchless models in your PODXT.
All product names are trademarks of their respective owners, which are in no way associated or affiliated with Line 6. These product names, descriptions and images
are provided for the sole purpose of identifying the specific products that were studied during Line 6’s sound model development.

Modeled Amps & Cabs • Match D-30
5 • 19
Match D-30
This model is based on a Matchless DC-30.
The DC-30 was the amp that really put Matchless on the map. Mark Sampson, the amp’s designer, who was generous enough to tell us the story of this amp’s creation, set out to create a road-worthy Class A amp that could cover a wide range of tones.
Built like a tank (and weighing nearly as much), the DC-30 paid tribute to early Vox amps. So if you like a Vox AC-30 (or PODXT’s model based on one), you’ll also want to check out PODXT’s model of the DC-30.
All product names are trademarks of their respective owners, which are in no way associated or affiliated with Line 6. These product names, descriptions and images
are provided for the sole purpose of identifying the specific products that were studied during Line 6’s sound model development.
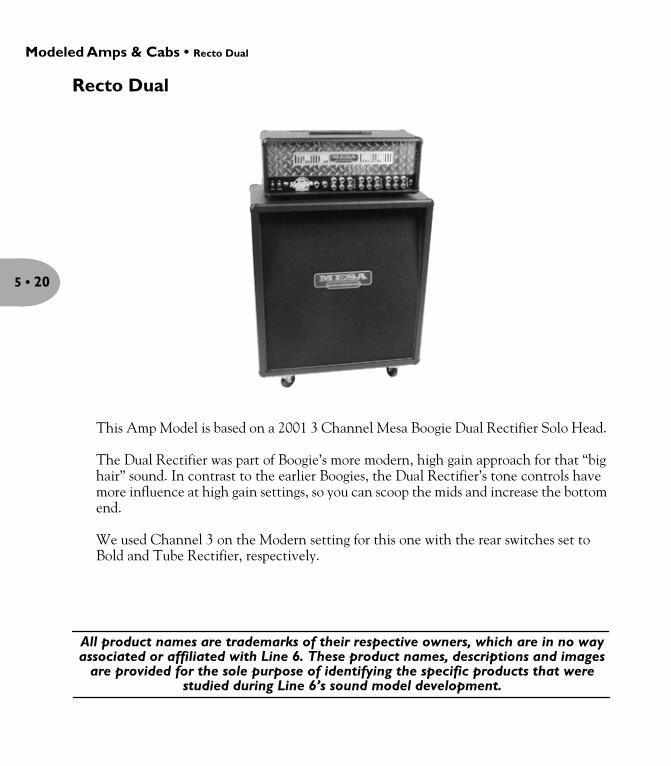
Modeled Amps & Cabs • Recto Dual
5 • 20
Recto Dual
This Amp Model is based on a 2001 3 Channel Mesa Boogie Dual Rectifier Solo Head.
The Dual Rectifier was part of Boogie’s more modern, high gain approach for that “big hair” sound. In contrast to the earlier Boogies, the Dual Rectifier’s tone controls have more influence at high gain settings, so you can scoop the mids and increase the bottom end.
We used Channel 3 on the Modern setting for this one with the rear switches set to Bold and Tube Rectifier, respectively.
All product names are trademarks of their respective owners, which are in no way associated or affiliated with Line 6. These product names, descriptions and images
are provided for the sole purpose of identifying the specific products that were studied during Line 6’s sound model development.

Modeled Amps & Cabs • Cali Crunch
5 • 21
Cali Crunch
We modeled this from our studies of a Mesa Boogie Mark IIc+.
Mesa Engineering started out with Randall Smith souping up old Fender Princeton amps for SF Bay area musicians. Over the years, the amps evolved, adding effects loops, switchable channels, and Randall’s Simul-Class design, in which one pair of output tubes is run Class AB and the second pair run Class A. Boogies were really the first modern guitar amplifiers and were quickly adopted by many players looking for more ‘oomph’ in a smaller package.We used the Drive channel to do our modeling.
All product names are trademarks of their respective owners, which are in no way associated or affiliated with Line 6. These product names, descriptions and images
are provided for the sole purpose of identifying the specific products that were studied during Line 6’s sound model development.
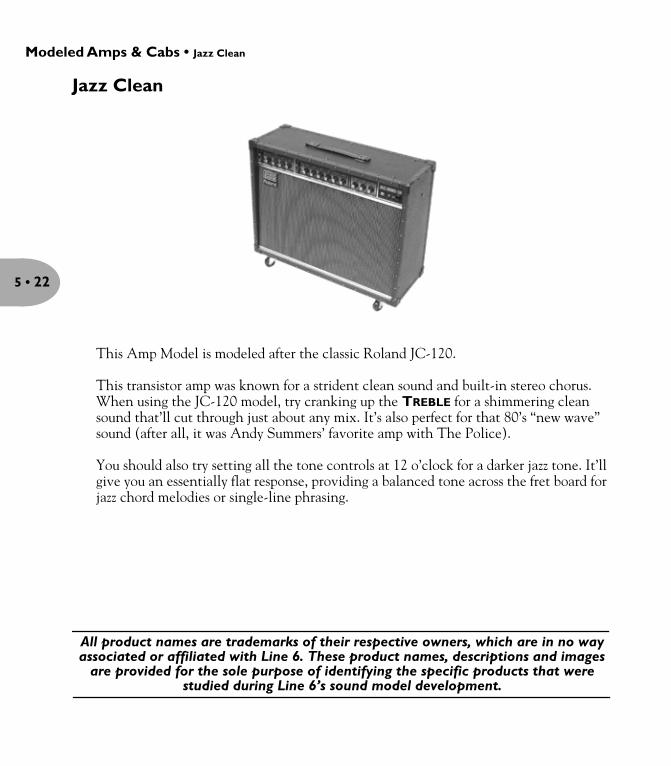
Modeled Amps & Cabs • Jazz Clean
5 • 22
Jazz Clean
This Amp Model is modeled after the classic Roland JC-120.
This transistor amp was known for a strident clean sound and built-in stereo chorus. When using the JC-120 model, try cranking up the TREBLE for a shimmering clean sound that’ll cut through just about any mix. It’s also perfect for that 80’s “new wave” sound (after all, it was Andy Summers’ favorite amp with The Police).
You should also try setting all the tone controls at 12 o’clock for a darker jazz tone. It’ll give you an essentially flat response, providing a balanced tone across the fret board for jazz chord melodies or single-line phrasing.
All product names are trademarks of their respective owners, which are in no way associated or affiliated with Line 6. These product names, descriptions and images
are provided for the sole purpose of identifying the specific products that were studied during Line 6’s sound model development.

Modeled Amps & Cabs • Solo 100
5 • 23
Solo 100
This model is based on a Soldano SLO-100 head.
Mike Soldano first came to fame as the guy who could do all the really cool mods to your Marshall. It wasn’t long before he started building his own ‘hot-rod’ amps—sporting chromed transformers and chassis, no less. Mike’s amps are also famous for their bullet-proof construction and military spec wiring and components.
While primarily known for its high gain personality, the SLO-100 has a great clean tone as well. Eric Clapton put Soldano on the map when he played “Saturday Night Live” with his Soldano SLO-100.
All product names are trademarks of their respective owners, which are in no way associated or affiliated with Line 6. These product names, descriptions and images
are provided for the sole purpose of identifying the specific products that were studied during Line 6’s sound model development.

Modeled Amps & Cabs • Super O
5 • 24
Super O
Yet more of the stuff of legend. Jimmy Page has admitted to using his ’58 Tele and a Supro amp to record most of the first two Led Zeppelin albums. The only problem is, he’s never really copped to which Supro model he used, since his simply saying the word ‘Supro’ caused a run on pawnshops and music stores everywhere, making it virtually impossible to find another one of whichever model it was that he used.
We went so far as to impose on our friendship with people we know who were actually present during the recording of “Led Zeppelin II” to see if they remembered anything about that particular amp. They didn’t recall the specific model number, only that it was “a grey and silver tiny little bastard.” Other sources have claimed that it was the 1x12-inch version. So, until Pagey speaks, the mystery remains, but, whatever the truth of those Zep sessions may be, we’re confident that this Supro S6616 model can be a fine entrance ticket to the Houses of the Holy.
By the way, that’s a 6x9-inch speaker in this amp, just like in your car stereo. Go figure.
All product names are trademarks of their respective owners, which are in no way associated or affiliated with Line 6. These product names, descriptions and images
are provided for the sole purpose of identifying the specific products that were studied during Line 6’s sound model development.

Modeled Amps & Cabs • Class A-15
5 • 25
Class A-15
Here’s another Vox-inspired Amp Model. This model is based on Channel 1 of a wonderful 1960 AC 15. The sound is similar to the Vox AC 30 that was studied for Vetta, but this is a smaller amp (one, instead of two, 12-inch speakers) with a warmer, more “woody” sound.
Once again, the original amp had only a single tone control—a treble cut. We faithfully modeled that and then slipped in some post-Amp Model Bass and Mid contouring. Set the BASS and MIDDLE in neutral (12 o’clock, or halfway up), PRESENCE to 0, and play with the TREBLE control to get yourself some of those classic British invasion sounds.
To model this, we plugged into Input 2, which is slightly darker than Input 1, and gives you more of that classic warm sound that the AC 15 is famous for.
All product names are trademarks of their respective owners, which are in no way associated or affiliated with Line 6. These product names, descriptions and images
are provided for the sole purpose of identifying the specific products that were studied during Line 6’s sound model development.

Modeled Amps & Cabs • Class A-30 TB
5 • 26
Class A-30 TB
Music was changing in the early ’60s and guitarists were asking for more brilliance & twang. So the Jennings Company, makers of Vox amps, decided to add Treble and Bass controls (and an extra 12AX7 gain stage, incidentally) in addition to the Treble Cut knob it already had (which in actuality was a sliding bandpass filter that always seemed like it was working backwards); this additional circuit became known as Top Boost.
The AC 30 with Top Boost was the amp made famous by many British invasion bands. Much of the unique character of the Vox sound can be attributed to the fact that Class A amps overdrive in a very different way than Class AB. Brian May of Queen, Mike Campbell of Tom Petty’s Heartbreakers, and The Edge of U2 have all used classic AC 30s to make their music. Although usually played fairly clean, a cranked AC 30 has a great saturated lead tone, a la Brian May on the early Queen albums.
On this Amp Model, PODXT’s MIDDLE control acts like the original Cut knob on the AC 30.
For this model, we used the Hi gain input of the Brilliant channel. We also turned the tone controls around, since original Top Boost amps had the bass and treble turned all the way down when the knob was all the way up. Go figure.
All product names are trademarks of their respective owners, which are in no way associated or affiliated with Line 6. These product names, descriptions and images
are provided for the sole purpose of identifying the specific products that were studied during Line 6’s sound model development.
Modeled Amps & Cabs • Class A-30 TB
5 • 27
Tube PreampNot even close to being a guitar amp, but once we got started, we just couldn’t stop ourselves. The thinking went like this: ‘Once people get this PODXT, they’re gonna wish they could use it for everything — warming up keyboards, crunching up drums, fuzzing up vocals. We’ve gotta give’em something to do that!’ So we did. The Tube Preamp Model lets you warm up any sound source the way producers and engineers often do in the studio with vintage tube gear. For more “edge” on vocals, try running your vocal tracks through PODXT. Or punch up (or munch up) a synth bass track by sending it through PODXT and cranking up the Drive and EQ controls to suit your taste. Although this is not actually a guitar amp model, you can even get some great guitar tones out of it. Also try using it as a direct box for bass. When you do this stuff, you want to use the Drive control like a mix knob on a reverb to control how much processing you want to hear. You generally don’t want to mix the pre-PODXT sound with the post-PODXT sound because of the comb filtering that results. Instead, jack the sound source right into PODXT and then only monitor it through PODXT. With the tone controls at 12 o’clock, the EQ is “flat.”

Modeled Amps & Cabs • Class A-30 TB
5 • 28
Cabinet ModelsThe following Cabinet Models are available on PODXT, and are accessed by pressing the CAB/A.I.R. button, then turning the EFFECT TWEAK knob:
Cabinet Model Based On...1x6 Super O 6x9 Supro S66161x8 Tweed 1961 Fender Tweed Champ1x10 Gibtone 1x10 Gibson1x10 G-Brand Gretsch 61561x12 Line 6 Line 6 1x121x12 Tweed 1953 Fender Tweed Deluxe1x12 Blackface 1964 Fender Blackface Deluxe1x12 Class A 1960 Vox AC-152x2 Mini T 2x2” Fender Mini Twin2x12 Line 6 Line 6 2x122x12 Blackface 1965 Fender Blackface Twin2x12 Match 1995 Matchless Chieftain2x12 Jazz Roland JC-1202x12 Class A 1967 Vox AC-304x10 Line 6 Line 6 4x104x10 Tweed 1959 Fender Bassman4x12 Line 6 Line 6 4x124x12 Green 20’s 1967 Marshall Basketweave with Greenbacks4x12 Green 25’s 1968 Marshall Basketweave with Greenbacks4x12 Celest T-75 1978 Marshall with stock 70s4x12 Celest V-30 1996 Marshall with Vintage 30s4x12 Recto 4x12 Mesa BoogieNo Cab You will probably want to use this Cabinet model with the Tube
Preamp model for non-guitar sources. It is selected by default when you pull up the Tube Preamp Amp Model.
All product names are trademarks of their respective owners, which are in no way associated or affiliated with Line 6. These product names, descriptions and images
are provided for the sole purpose of identifying the specific products that were studied during Line 6’s sound model development.

Stompboxes & Effects • About the Stompboxes
6 • 1
STOMPBOXES & EFFECTS
About the Stompboxes
What guitarist doesn’t like Stomp boxes? PODXT’s got a bunch of great stomp box models adapted from Line 6’s DM4 Distortion Modeler, MM4 Modulation Modeler, and DL4 Delay Modeler pedals, and some brand spankin’ new models that come straight from our flagship combo, Vetta. We’ve also given you a few of the ol’ standby’s like Ping Pong and Stereo Delay. Who says you can get too much of a good thing?
In this chapter, we’re not only going to take a look at just which stomp box effects are modeled. We’ll also be talking about how you go about tweaking them. So hold onto your hats and glasses, and please keep your hands and feet inside the car at all times.
Basic Effect EditingPODXT features a collection of sought-after stomp boxes and effects that you can assemble with any Amp Model into small ‘rigs’ with complete channel switching, stomp box-style on/off and Tap Tempo. Add an FBV or FBV Shortboard foot controller and you’ve got it all, hands-free. And there’s nothing hidden on this PODXT. Any parameter can be adjusted without the need for a computer. Effects can be turned on or off at any time just by pressing one of the effect on/off buttons above the display.
There are 4 effect on/off buttons:
Comp (Gate) - This is the button to turn our model of the LA-2A compressor on or off. Double pressing this button allows you to edit the compressor settings. It also gives you access to the full-time NOISE GATE.
Stomp - This is where PODXT’s distortion boxes and stomp box compressors live. Like all the other effect buttons, press to turn on or off, double-press to EDIT.
Mod - PODXT comes with several flavors of modulation effects. Use this button to turn them on or off, double-press to EDIT.
Delay - The delay models are here. Press on, press off, double press to EDIT.

Stompboxes & Effects • About the Stompboxes
6 • 2
Deep Dive EditingAll of PODXT’s Stomp boxes and Effects share a similar way of editing and the real details are covered in Chapter 4, Creating & Storing Sounds. We’ll go over the two basic ways to do it here. To edit any effect’s parameters you can:
A. Press the EDIT button, then use the SELECT knob to scroll through the pages and find the parameters you’re looking for, or
B. Double-press an effect on/off button (press it twice quickly) to go straight to the first page for that effect.
Stomp Effects: Distortions and OverdrivesBack before fuzzes, distortions, and overdrives existed, guitar players used to do stuff like slice their speakers with a razor blade to get that raunchy, distorted, lovely sound (check out Link Wray’s ‘Rumble’ for an example). While it sounded great, it did make it impractical to turn around and play a nice smooth ballad on the same amp.
Enter the ‘fuzz’ box. Legend has it that the first such devices were designed to duplicate the sound of a faulty mixer input strip. Whether this story is true or not, soon everybody was getting some ‘Satisfaction’ through the modern miracle of floor-based distortion.
Stomp Effects: CompressorsA compressor takes quiet sounds and loud sounds coming into it, and makes them have a more similar volume, so the loudest sounds aren’t so loud versus the quiet sounds, and the quiet sounds are closer to the level of the loudest sounds. The result is that a compressor can be set to keep boosting the level of your guitar signal as a note dies away, giving your guitar a longer note decay. In other words, plop a stomp box compressor down in front of an amp and you’ve got an instant sustain enhancer! As a side benefit, the compressor evens out your attacks and enables you to make up some gain (so you can hit the front end of your amp a bit hotter, but without extra before-the-amp distortion that a distortion box would create when boosting input level to your amp). We’ve provided you with a number of stompbox compression options in PODXT, so you can squash your signal ’til the cows come home.

Stompboxes & Effects • About the Stompboxes
6 • 3
Comp/Gate EffectsThe Compressor effect available from the COMP (GATE) button is just the thing when you want to smooth out your levels the way that you would typically do in a recording studio. The THRES (Threshold) knob determines how aggressive you want the Compressor to be in smoothing things out. Lower numbers make the Compressor more active in taming your levels, so -32dBis a more aggressive setting that -16dB, say. The GAIN knob lets you add back level to compensate for the overall level reduction that the Compressor may cause.
The Gate effect is used to eliminate hiss when you’re not playing. The THRES knob again determines how aggressive, or quickly, the Gate will be, and (as with the Compressor’s THRES) lower numbers will give you a more aggressive gating effect. Turn the THRES all the way down to minimum to disable the Gate. The DECAY knob lets you adjust the Gate so that it kicks in quickly or slowly. A higher DECAY setting can prevent the Gate from cutting off the tail end of your notes, but will tend to let more hiss through before the Gate kicks in.
Modulation EffectsModulation effects are things that swoosh, pulse and warble—from phase shifters to flangers to choruses. Why are they called modulation effects? Well, if we consult a dictionary, we discover that ‘modulate,’ in the electronic world means to “alter the amplitude or frequency of (a wave) by (using) a wave of a lower frequency to carry a signal” (definition courtesy of The Oxford Encyclopedic English Dictionary, Third Edition, thank you very much). That modulating wave is what causes all that swooshing, pulsing, and warbling.
For Modulation effects, there are controls for SPEED and DEPTH. SPEED controls how fast (or slow) the modulating waveform sweeps. DEPTH controls the overall amplitude of the modulating wave, which usually determines just how intense the effect will be. There’s always a MIX control, and sometimes there are also other controls. Refer to the individual effects listed in the following pages of this chapter for details.

Stompboxes & Effects • About the Stompboxes
6 • 4
Tap TempoMany of PODXT’s Delay and Mod effects feature the ability to set your SPEED or DELAY TIME to match your musical tempo. Tapping on PODXT’s TAP button or your FBV’s TAP switch on each beat of a song will set your tempo. Actually, you only need to Tap twice, but what the hey.
To tell a particular effect to “listen” to the Tap Tempo, all you have to do is spin the EFFECT TWEAK knob way down below the lowest SPEED or Delay TIME. For delays, you’ll go down past 20 milliseconds and you’ll see a whole note in the display. Keep turning until you see a quarter note. Now tap twice and you’ll hear the delay time is in perfect sync with what you tapped. Give the Delay TIME another twiddle to select a half note, and the delay is now twice as slow as it was before, since half notes are twice as long as quarter notes. Nifty, huh?
Setting a Mod speed for Tap Tempo works just like Delay TIME. Select a Mod effect’s SPEED parameter, then turn the EFFECT TWEAK knob all the way down until you see notes showing for the SPEED. Tap away on your PODxt’s TAP button and hear the results!
Here’s the delay page with a note selected for TIME:
If you know exactly what the tempo is and don’t feel like tapping today, press the EDIT button if it isn’t lit already, and spin SELECT to go all the way to the end of the EDIT pages. Well look at that! There’s a TEMPO parameter for you to adjust. This is the tempo, in Beats Per Minute, of the current channel, and you can save it so that all the effects in this channel that you’ve told to use a note value will follow this tempo.

Stompboxes & Effects • Reverb
6 • 5
Reverb
When we set out to create PODXT, we devoted our fanatical modeling technology and energy for innovation to developing no-compromise reverb effects. PODXT’s collection of reverb models emulate physical environments (rooms and halls), plate reverbs (which traditionally feature a big steel plate with some sort of speaker driving it, and usually multiple pickups to pick up the vibrations of the plate), spring reverbs (the kind guitar players know best), and even a couple of unique new models that you’ll have to hear to appreciate.
SpringsAhh, the ‘sproing’ of a good spring reverb tank. Ya say you wanna play surf music, neighbor? Well sir, you’ve come to the head of the stream! The only thing missing is the ugly crash when the bass player stumbles over your amp.
Lux SpringThe blackface Fender Deluxe amp had a two spring reverb tank, which we’ve modeled here.
Standard SpringOne of the many things that people have loved about the blackface Fender Twin Reverb over the years has been its rich, dense reverb sound. The three-spring tank offered a more complex sound than Fender’s earlier spring reverbs. Go find yourself a bevy of bikini-clad beauties, wax up your board, and dig in.
King SpringA Line 6 original, inspired by the Sealy Posturepedic. If three springs are cool, how about a whole mattress full of Slinkies? Richer, denser, wigglier. A good night sleep guaranteed, or we’ll give you your money back.
All product names are trademarks of their respective owners, which are in no way associated or affiliated with Line 6. These product names, descriptions and images
are provided for the sole purpose of identifying the specific products that were studied during Line 6’s sound model development.
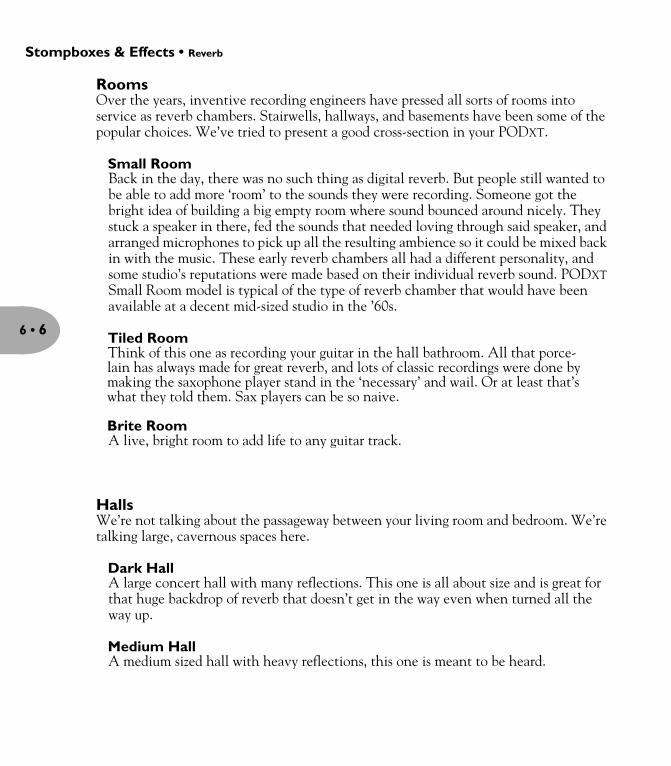
Stompboxes & Effects • Reverb
6 • 6
RoomsOver the years, inventive recording engineers have pressed all sorts of rooms into service as reverb chambers. Stairwells, hallways, and basements have been some of the popular choices. We’ve tried to present a good cross-section in your PODXT.
Small RoomBack in the day, there was no such thing as digital reverb. But people still wanted to be able to add more ‘room’ to the sounds they were recording. Someone got the bright idea of building a big empty room where sound bounced around nicely. They stuck a speaker in there, fed the sounds that needed loving through said speaker, and arranged microphones to pick up all the resulting ambience so it could be mixed back in with the music. These early reverb chambers all had a different personality, and some studio’s reputations were made based on their individual reverb sound. PODXT Small Room model is typical of the type of reverb chamber that would have been available at a decent mid-sized studio in the ’60s.
Tiled RoomThink of this one as recording your guitar in the hall bathroom. All that porce-lain has always made for great reverb, and lots of classic recordings were done by making the saxophone player stand in the ‘necessary’ and wail. Or at least that’s what they told them. Sax players can be so naive.
Brite RoomA live, bright room to add life to any guitar track.
HallsWe’re not talking about the passageway between your living room and bedroom. We’re talking large, cavernous spaces here.
Dark HallA large concert hall with many reflections. This one is all about size and is great for that huge backdrop of reverb that doesn’t get in the way even when turned all the way up.
Medium HallA medium sized hall with heavy reflections, this one is meant to be heard.

Stompboxes & Effects • Reverb
6 • 7
Large HallA very large concert hall. It doesn’t get much bigger than this.
Rich ChamberA rich chamber great for making that crunch tone even fatter.
ChamberTypical of a studio chamber, this reverb goes well with just about anything.
CavernousOkay, so it does get bigger than Large Hall. Fire this ’verb up and get set for a long night of dandelion dreams.
PlatesPlate reverbs were the first type of ‘mechanical’ reverb. The basic design includes a big steel plate or sheet of gold foil with some sort of speaker driving it, and usually multiple pickups to capture the vibrations of the plate.
Slap PlateThis reverb dishes up the vibe of early rock and roll recordings, like Sam Phillips’ great work at Sun Studios. Thank you very much.
Vintage PlateA classic plate reverb that you won’t forget.
Large PlateWell with Large Hall and Cavernous lying around, we just had to dish up a big ol’ Plate of goodness. This one makes a great bed of reverb for playing over and washes up real good with soap and water.

Stompboxes & Effects • The Stomp Effects — Facial Fuzz
6 • 8
The Stomp Effects — Facial Fuzz
Sometime in late 1966, an infamous circular stompbox hit the London music scene. Designed and built by Arbiter Music, the Fuzz Face would soon begin its famous association with guitar legend Jimi Hendrix.
Like all stompboxes from the early era, the Fuzz Face would see many design changes, as well as re-issues. Our model is based on the germanium diode-powered treasure pictured here: an original, very early “gray with black screening” Arbiter Fuzz Face. Call the PODXT Facial Fuzz model up, and treat yourself to our faithful re-creation of the original’s fuzz and glory. Crank up the drive, and you’ll be seeing Purple Haze right before your eyes.
All product names are trademarks of their respective owners, which are in no way associated or affiliated with Line 6. These product names, descriptions and images
are provided for the sole purpose of identifying the specific products that were studied during Line 6’s sound model development.

Stompboxes & Effects • Fuzz Pi
6 • 9
Fuzz Pi
Not to be outdone by the Brits, the colonies came up with their own twist on the fuzz rage. Mike Mathews and his band of merry men at Electro-Harmonix had been cooking up all sorts of nifty effects when their attention turned to the distortion/fuzz pedal. Their most popular offering was the Electro-Harmonix Big Muff Pi, known more for its sweet sustain than for its buzz.
Electro-Harmonix was famous for their use of surplus parts, and the results of this practice were ever-changing circuit designs and parts specs. As you can see in the picture of our collection of Big Muffs, these pedals had several looks determined by the parts that Mike and the gang found at hand. Our sweetheart of the bunch is the one in the middle, known as the “triangle knob pattern” model. We know you’ll agree, there’s nothing like a slice of Pi.
All product names are trademarks of their respective owners, which are in no way associated or affiliated with Line 6. These product names, descriptions and images
are provided for the sole purpose of identifying the specific products that were studied during Line 6’s sound model development.

Stompboxes & Effects • Screamer
6 • 10
Screamer
From Stevie Ray Vaughan to Michael Landau, the simple Ibanez Tube Screamer is the overdrive heard ’round the world. This medium-gain pedal was introduced in the early ’80s, and in many blues circles, you’re not allowed to solo without one.
Over the years, Ibanez issued several variations of the venerable Tube Screamer, but none have reached the fabled status of the TS-808. Of course, we obsessed over which of our vintage 808s to model, and in the end we think you’ll agree that our model of this green jewel makes a precious addition to PODXT.
All product names are trademarks of their respective owners, which are in no way associated or affiliated with Line 6. These product names, descriptions and images
are provided for the sole purpose of identifying the specific products that were studied during Line 6’s sound model development.

Stompboxes & Effects • Classic Distortion
6 • 11
Classic Distortion
Born and bred in the late ’70s, the ProCo Rat was the beginning of a new generation of distortion boxes. With a sound that was angrier and more aggressive than a fuzz, the Rat put teeth into a new breed of metal that was beginning to crawl to the surface of the music scene.
Through its life span, the Rat has seen several changes, and the unanimous choices for tone are the originals pictured here. Inside, these two Rats use the same board, and their circuits are identical. (For those that need to know, we modeled the smaller one.)
The TONE knob on PODXT’s Rat model functions like the original Rat’s “filter” control, which gives you brighter tone at lower settings, and darker tone at higher settings. Once bitten, you’ll know why we call this one tone with teeth!
All product names are trademarks of their respective owners, which are in no way associated or affiliated with Line 6. These product names, descriptions and images
are provided for the sole purpose of identifying the specific products that were studied during Line 6’s sound model development.
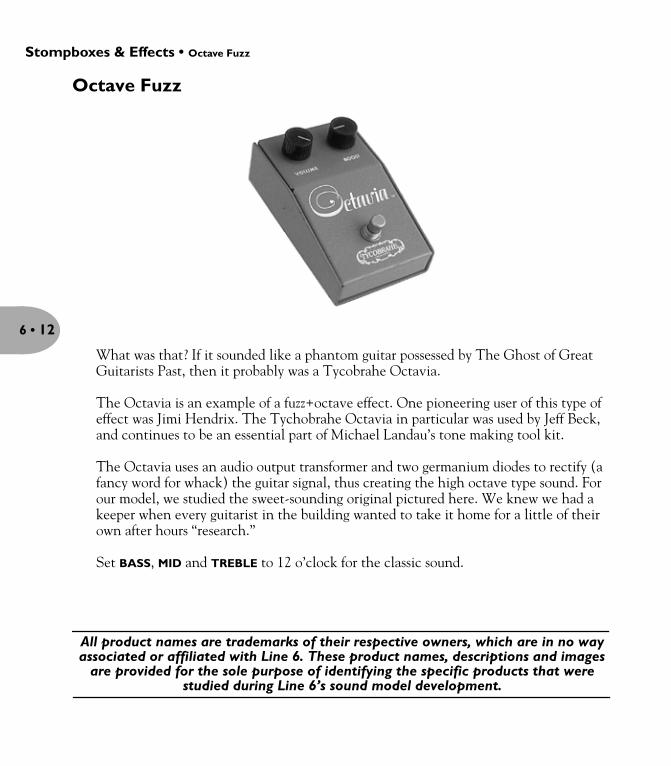
Stompboxes & Effects • Octave Fuzz
6 • 12
Octave Fuzz
What was that? If it sounded like a phantom guitar possessed by The Ghost of Great Guitarists Past, then it probably was a Tycobrahe Octavia.
The Octavia is an example of a fuzz+octave effect. One pioneering user of this type of effect was Jimi Hendrix. The Tychobrahe Octavia in particular was used by Jeff Beck, and continues to be an essential part of Michael Landau’s tone making tool kit.
The Octavia uses an audio output transformer and two germanium diodes to rectify (a fancy word for whack) the guitar signal, thus creating the high octave type sound. For our model, we studied the sweet-sounding original pictured here. We knew we had a keeper when every guitarist in the building wanted to take it home for a little of their own after hours “research.”
Set BASS, MID and TREBLE to 12 o’clock for the classic sound.
All product names are trademarks of their respective owners, which are in no way associated or affiliated with Line 6. These product names, descriptions and images
are provided for the sole purpose of identifying the specific products that were studied during Line 6’s sound model development.

Stompboxes & Effects • Blue Comp
6 • 13
Blue Comp
Roland/Boss jumped on the compressor stompbox bandwagon with the CS-1 Compression Sustainer. It has a fixed ratio, so the PODXT model based on it has the SUSTAIN control varying the threshold of the compressor circuitry. LEVEL does what you’d expect.
All product names are trademarks of their respective owners, which are in no way associated or affiliated with Line 6. These product names, descriptions and images
are provided for the sole purpose of identifying the specific products that were studied during Line 6’s sound model development.

Stompboxes & Effects • Red Comp
6 • 14
Red Comp
Probably the most widely used stompbox compressor, and pretty much the standard against which others are judged, the MXR Dynacomp has a fixed compression ratio with variable threshold and gain, which is what you get in the Vetta model.
The SUSTAIN knob varies your compression threshold, and LEVEL varies your (wait for it) level.
All product names are trademarks of their respective owners, which are in no way associated or affiliated with Line 6. These product names, descriptions and images
are provided for the sole purpose of identifying the specific products that were studied during Line 6’s sound model development.

Stompboxes & Effects • Auto Wah
6 • 15
Auto Wah
What self-respecting filter-junkie would be without a Mu-Tron III envelope follower? Part auto-wah, part triggered filter, it’s all about wacky, and your Filter Modeler’s model based on the Mu-Tron III gives it to you both coming and going. Go ahead – unbutton that shirt, put on the flares, and get down with your bad self!.
The SENS knob varies the filter’s response to your playing, and Q adjusts your filter’s width.
All product names are trademarks of their respective owners, which are in no way associated or affiliated with Line 6. These product names, descriptions and images
are provided for the sole purpose of identifying the specific products that were studied during Line 6’s sound model development.

Stompboxes & Effects • Auto Wah
6 • 16
Vetta CompA Line 6 original, Vetta Comp has a fixed ratio (2.35:1, in case you’re asking) with the threshold (that would be your SENS knob) adjustable from -9dB to -56dB and up to 12dB of gain available at the LEVEL knob. In other words, turn the Sens knob ’til you like the way your signal’s compressed, then set the volume with Level.
Auto SwellTake a compressor that has a fixed ratio and threshold with the gain set for unity and add an adjustable attack triggered volume swell in front of it, and you’ve got Auto Swell. You can dial in the ramp time here to give you the kind of ‘bowed’ attacks that might otherwise require you to have your pinky rolling the volume knob on your guitar with every pick attack. Longer ramp times in combination with delay and reverb can keep you occupied for a pleasant hour or two, seeing what kind of chords you can come up with to blend into each other. You’ve got RAMP time to set over how long the swell takes to happen, plus DEPTH to determine how much the volume of your attacks is reduced.

Stompboxes & Effects • The Modulation Effects
6 • 17
The Modulation Effects
Sine ChorusYour basic digital chorus (as opposed to the analog type vibe of the CE-1 chorus model), with a sine wave as the modulator. Smooth going down, with BASS and TREBLE controls for bassing and trebling.
FlangerAnother Line 6 creation, the “Expo” in this flanger stands for exponential, which is a fancy way of saying that the sweep of the flanging spends extra time in the ‘swooshy’ part of the Flanger. The FEEDBACK and PRE-DELAY knobs on Page 2 can help you keep it in check or make it as strange as you want. We think you know which way we’re leaning on that one.
Opto TremThis one is based on the optical tremolo circuit that was used in the blackface Fender amps, like the ’64 Deluxe and ’65 Twin Reverb. Basically a light bulb and a photo-resistor, when the light got brighter, the tremolo got louder. It’s a very smooth, even tremolo, and the obvious choice for use with the amp models that are based on Fender originals.
Bias TremOne of our long time favorite pieces of ‘Rube Goldberg’ engineering, the old Vox tremolo (and a similar circuit in some blonde and brown Fender amps) got its pulse by literally varying the bias of the power amp tubes. While this tended to reduce the life span of the output tubes in these amps, it gave a beautifully liquid, uneven, and rather ‘lumpy’ sound that bears a distinct resemblance to a Uni-Vibe or other phase shifter (mainly because treating the tube bias in such a cavalier manner actually caused some phase shift to occur).
Auto PanAlso known as a panner, this effect makes your sound go back and forth between the left and right channels. Sure to keep you up late at night.
All product names are trademarks of their respective owners, which are in no way associated or affiliated with Line 6. These product names, descriptions and images
are provided for the sole purpose of identifying the specific products that were studied during Line 6’s sound model development.
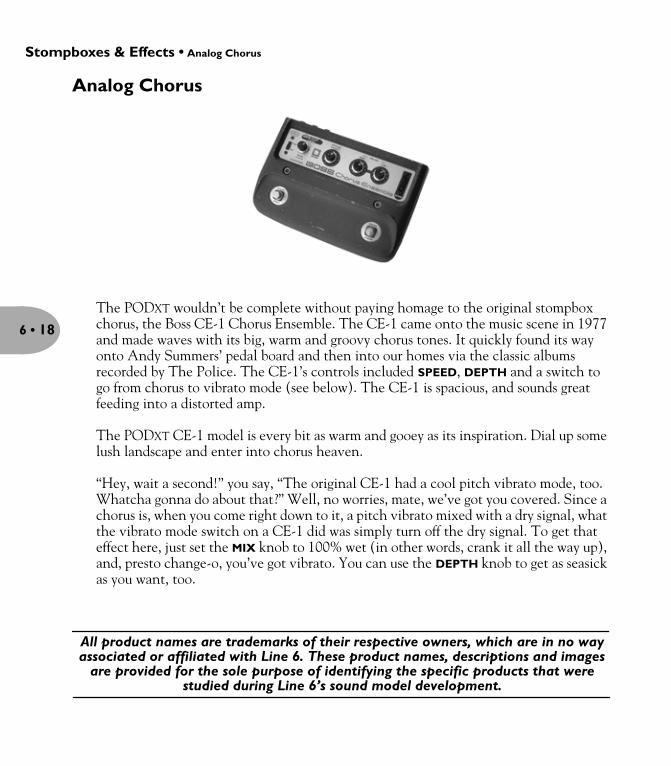
Stompboxes & Effects • Analog Chorus
6 • 18
Analog Chorus
The PODXT wouldn’t be complete without paying homage to the original stompbox chorus, the Boss CE-1 Chorus Ensemble. The CE-1 came onto the music scene in 1977 and made waves with its big, warm and groovy chorus tones. It quickly found its way onto Andy Summers’ pedal board and then into our homes via the classic albums recorded by The Police. The CE-1’s controls included SPEED, DEPTH and a switch to go from chorus to vibrato mode (see below). The CE-1 is spacious, and sounds great feeding into a distorted amp.
The PODXT CE-1 model is every bit as warm and gooey as its inspiration. Dial up some lush landscape and enter into chorus heaven.
“Hey, wait a second!” you say, “The original CE-1 had a cool pitch vibrato mode, too. Whatcha gonna do about that?” Well, no worries, mate, we’ve got you covered. Since a chorus is, when you come right down to it, a pitch vibrato mixed with a dry signal, what the vibrato mode switch on a CE-1 did was simply turn off the dry signal. To get that effect here, just set the MIX knob to 100% wet (in other words, crank it all the way up), and, presto change-o, you’ve got vibrato. You can use the DEPTH knob to get as seasick as you want, too.
All product names are trademarks of their respective owners, which are in no way associated or affiliated with Line 6. These product names, descriptions and images
are provided for the sole purpose of identifying the specific products that were studied during Line 6’s sound model development.

Stompboxes & Effects • Jet Flanger
6 • 19
Jet Flanger
This is our model of the A/DA “studio quiet” Flanger. Introduced in 1977, this stompbox has a sweep range of 35-to-1 and a built-in compressor that work together with the tone circuitry to give the A/DA its signature jet-like sweep. It can be very dramatic with its unique wave shape and ability to create almost ring modulator-like effects at extreme settings.
When the model of the A/DA Flanger is selected for editing on PODXT, the knob below DEPTH controls the sweep range. FDBK adjusts feedback (in other words, how much of the effected signal is fed back to the input of the effect), and the MANUAL knob controls the length of the very short delay that’s applied to the sweep to make the flanging effect happen.
Plug in, spin up the depth and feedback, and get ready for take-off!
All product names are trademarks of their respective owners, which are in no way associated or affiliated with Line 6. These product names, descriptions and images
are provided for the sole purpose of identifying the specific products that were studied during Line 6’s sound model development.

Stompboxes & Effects • Phaser
6 • 20
Phaser
The unassuming metal box pictured above is the phaser that changed the world—the MXR Phase 90. The Phase 90 is relatively subtle compared to other phasers, and when you use it, it becomes part of the overall guitar tone rather than trying to grab the spotlight all to itself. Its lush, organic, and groovy swirl can be heard all over the first two Van Halen albums, as well as Jimmy Page’s work on Physical Graffiti.
The Phase 90 is a four stage phaser; its single knob controls only speed. Our model stays true to the original, with only the addition of a MIX knob. Sometimes, its best not to mess with perfection.
All product names are trademarks of their respective owners, which are in no way associated or affiliated with Line 6. These product names, descriptions and images
are provided for the sole purpose of identifying the specific products that were studied during Line 6’s sound model development.

Stompboxes & Effects • U-Vibe
6 • 21
U-Vibe
The now-legendary Uni-Vibe was put on the map in 1969 by Jimi Hendrix. Essentially a four-stage phase shifter, the Uni-Vibe is best known for its watery texture and sultry tones. One listen to “Machine Gun” and you’ll know what we mean.
As with the CE-1 model’s stealth vibrato mode, you can recreate the effect of the original Uni-Vibe’s vibrato switch by turning the MIX control to 100% wet. (That’s what the switch did on the original.)
BASS and TREBLE controls also make an appearance on this model. Set them to 12 o’clock for the classic Uni-Vibe sound, or use them to adjust tone to taste.
All product names are trademarks of their respective owners, which are in no way associated or affiliated with Line 6. These product names, descriptions and images
are provided for the sole purpose of identifying the specific products that were studied during Line 6’s sound model development.

Stompboxes & Effects • Rotary Drum+Horn
6 • 22
Rotary Drum+Horn
Fine furniture and cool tones—the Leslie 145 gave you both at once. This tube-driven behemoth (you definitely don’t want to try picking one up on your own) features a belt-drive rotating high frequency horn along with a downwards facing 15-inch speaker that had a segmented drum spinning over it to disperse the sound. It was originally designed to be used with electric organs like the Hammond B3, but once guitarists (and even vocalists!) heard it, they just had to get in on the rotate-o-rama. Our model gives you all that whirligig glory, without giving you a herniated disc.
The SPEED knob for our model based on the Leslie acts like the Fast/Slow switch that came on the unit’s preamp. This effect also gives you TONE and MIX settings. For the truly authentic kind of spin that a Leslie delivers, you’ll want to set the MIX knob to max, since a Leslie had no ‘dry’ path.
All product names are trademarks of their respective owners, which are in no way associated or affiliated with Line 6. These product names, descriptions and images
are provided for the sole purpose of identifying the specific products that were studied during Line 6’s sound model development.

Stompboxes & Effects • Rotary Drum
6 • 23
Rotary Drum
When they noticed that guitar players had started using Leslies, Fender decided to come out with its own, guitar specific whirling dervish of a tone machine. Dubbed the Vibratone, it used a styrofoam baffle spinning in front of a 12-inch speaker, kicking all the sound out the sides of the box. One of the best known examples of a Vibratone tone is Stevie Ray Vaughan’s classic ‘Cold Shot’.
The editing controls for the Vibratone are the same as for the Leslie 145. Take it for a spin!
All product names are trademarks of their respective owners, which are in no way associated or affiliated with Line 6. These product names, descriptions and images
are provided for the sole purpose of identifying the specific products that were studied during Line 6’s sound model development.

Stompboxes & Effects • The Delay Effects — Analog Echo
6 • 24
The Delay Effects — Analog Echo
Analog echo units like the DM-2 were designed as improvements over the tape echoes that came before them, using “bucket brigade” electronics to give guitarists echo units that were more reliable than the tape-based delays, with the added advantage of a low power circuit that can be run on batteries.
Analog delays are treasured for the warm, distorted tones they produce, and PODXT’s model based on the Boss DM-2 gets you the same sort of thing in a new digital realm of existence.
All product names are trademarks of their respective owners, which are in no way associated or affiliated with Line 6. These product names, descriptions and images
are provided for the sole purpose of identifying the specific products that were studied during Line 6’s sound model development.

Stompboxes & Effects • Analog w/Mod
6 • 25
Analog w/Mod
Here’s a model based on the Electro-Harmonix Deluxe Memory Man which is a pedal that uses the “bucket brigade” electronics of other analog echoes, and adds a chorus circuit to boot. This adjustable chorus is applied to the echoes only, leaving the direct sound unaffected.
The Memory Man, with its warm, distorted tone and swimming echoes, became an important tool for many guitarists, and was an essential part of the guitar sounds for the first U2 album.
Part of the Deluxe in Deluxe Memory Man was the increased delay time of 500 milliseconds. Your PODXT’s Analog w/Mod emulates that classic Memory Man tone with the added advantage of 2 seconds of delay time.
On page 2, you’ll find the MOD SPEED and DEPTH control to set up the chorus on the delays.
All product names are trademarks of their respective owners, which are in no way associated or affiliated with Line 6. These product names, descriptions and images
are provided for the sole purpose of identifying the specific products that were studied during Line 6’s sound model development.

Stompboxes & Effects • Tube Echo
6 • 26
Tube Echo
The classic 1963 Maestro EP-1 was the first of a series of “Echoplex” designs distributed by the company, and made by Harris-Teller in Chicago. As touted in a Maestro advertisement, the Echoplex’s “...special effects range all the way from a controlled high speed reverberation to a full, throbbing echo”!
The main feature of the Echoplex design is a special cartridge of looped 1/4-inch audio tape that wraps past separate record and playback heads. The position of the playback head can be moved to adjust the delay time from 60 to 650 milliseconds. PODXT’s EP-1 model emulates the classic Echoplex tone with the extra advantage of up to 2 seconds of delay time.
On page 2, you’ll find FLUT (wow and flutter) and DRIVE controls so that you can not only dial up some tube warmth like the original, but add that unique sound of a slipping, dirty capstan as well.
All product names are trademarks of their respective owners, which are in no way associated or affiliated with Line 6. These product names, descriptions and images
are provided for the sole purpose of identifying the specific products that were studied during Line 6’s sound model development.
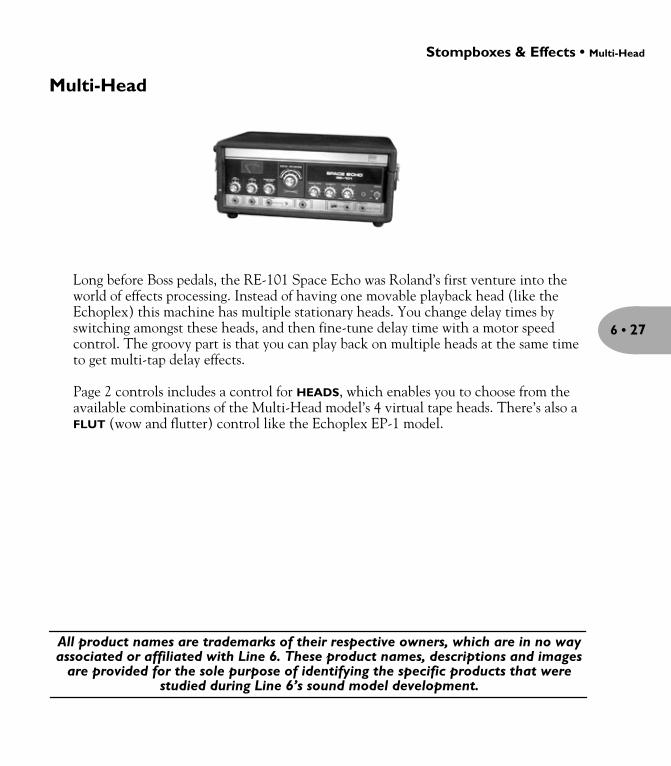
Stompboxes & Effects • Multi-Head
6 • 27
Multi-Head
Long before Boss pedals, the RE-101 Space Echo was Roland’s first venture into the world of effects processing. Instead of having one movable playback head (like the Echoplex) this machine has multiple stationary heads. You change delay times by switching amongst these heads, and then fine-tune delay time with a motor speed control. The groovy part is that you can play back on multiple heads at the same time to get multi-tap delay effects.
Page 2 controls includes a control for HEADS, which enables you to choose from the available combinations of the Multi-Head model’s 4 virtual tape heads. There’s also a FLUT (wow and flutter) control like the Echoplex EP-1 model.
All product names are trademarks of their respective owners, which are in no way associated or affiliated with Line 6. These product names, descriptions and images
are provided for the sole purpose of identifying the specific products that were studied during Line 6’s sound model development.

Stompboxes & Effects • Multi-Head
6 • 28
Sweep EchoLike the Phaze Eko, this model is a Line 6 original. It first appeared on our DL4 Delay Modeler and has turned out to be a special favorite amongst the many DL4 users that we’ve spoken to.
The Page 2 knobs adjust the speed and depth of the sweeping filter part of the effect. sweep SPEED sets how fast the filter sweeps, and sweep DEPTH sets the range of frequencies that the filter affects, allowing you to create and explore your own shifting landscape of tonal possibilities. There’s both subtle texture and serious weirdness to be found in this one. Try assigning one of the FBV pedals to control the Mix, and use a relatively short delay for some fun.
Digital DelayThis model is a straight up digital delay with BASS and TREBLE tone controls (located on Page 2, of course). Nothing fancy here, just basic echo-cho-cho-cho. After all, it’s good to cleanse the palate every once in a while.
Stereo DelayEver asked yourself, “How did The Edge (U2) get that groovy sound on Where the Streets Have No Name”? Stereo delays, my friend. It’s the secret to many a U2 song, as well as the “Big L.A. Solo” sound of the late ’80s. Set one side as a fast echo with many repeats, and the other as a slow delay with just a few repeats. Voila, you’re famous!
Stompboxes & Effects • Ping Pong Delay
6 • 29
Ping Pong Delay
The Ping Pong Delay is the one delay that can be run as a Post Delay Effect, but not as a stompbox (since this kind of delay requires a stereo output to do its stuff). It has two separate channels of delay, with the output of each channel flowing into the other, going back and forth like a game of ping pong.
The TIME knob on Page 1 sets the time for the left side delay line.
The OFFSET knob on Page 2 sets the time for the right side delay line, as a percentage of the left delay’s TIME. And SPREAD sets the stereo spread of the delays from mono to hard panned left and right.
Sound too tricky? Just use the TIME knob (or Tap Tempo Button, if you want to set that up) to set the longer delay time you hear, and then turn OFFSET to adjust the shorter delay time. If you set Offset straight up at 12 o’clock, your left and right delays are evenly spaced. Then, once you’ve got your delay times set, use the SPREAD knob to adjust where the delay repeats appear in the stereo field.
All product names are trademarks of their respective owners, which are in no way associated or affiliated with Line 6. This particular image is provided for the sole
purpose of identifying the specific products that were studied during Line 6’s sound model development, and doesn’t imply that we have any fun doing this stuff.

Stompboxes & Effects • Ping Pong Delay
6 • 30
Reverse Delay!seltaeB eht dna xirdneH imiJ ekil tsuJ — Take a step back in time with your cool new reverse delay. Whatever you play in comes back out at you backwards, delayed by the time you set (up to 2 seconds). To use this little wonder most effectively, try playing a legato lick, ignoring the reverse playback as well as you can. Longer licks can translate into very cool reverse phrases. We’ve seen Tom Petty guitarist Mike Campbell taking advantage of the Reverse Delay in the Line 6 DM4 Delay Modeler stompbox to play a backwards guitar solo live—on a worldwide TV broadcast, no less.
When using Reverse, try setting the MIX knob to full (100% wetness) so all you hear is the reversed sound—instant backwards guitar solo fun. We also added, as on our Memory Man model, a chorus that lives just on the delayed signal.
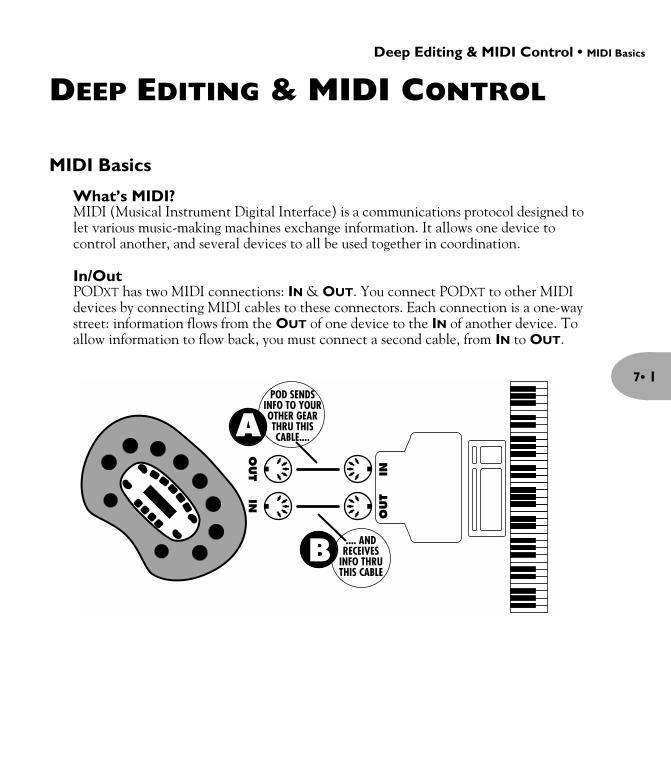
Deep Editing & MIDI Control • MIDI Basics
7• 1
DEEP EDITING & MIDI CONTROL
MIDI Basics
What’s MIDI?MIDI (Musical Instrument Digital Interface) is a communications protocol designed to let various music-making machines exchange information. It allows one device to control another, and several devices to all be used together in coordination.
In/OutPODXT has two MIDI connections: IN & OUT. You connect PODXT to other MIDI devices by connecting MIDI cables to these connectors. Each connection is a one-way street: information flows from the OUT of one device to the IN of another device. To allow information to flow back, you must connect a second cable, from IN to OUT.
POD SENDSINFO TO YOUROTHER GEARTHRU THISCABLE....
.... ANDRECEIVES
INFO THRUTHIS CABLE

Deep Editing & MIDI Control • MIDI Basics
7• 2
MIDI ChannelMIDI allows 16 different channels of information to be transmitted and received through one MIDI cable. The MIDI channel is independent of, and has nothing to do with, PODXT’s preset channels for storing individual sound programs.
You tune PODXT in to listen to a particular MIDI channel (like choosing a channel on a TV or a station on a radio), and make sure the device that you want PODXT to listen to is transmitting on that same MIDI Channel. To set PODXT’s MIDI channel, press the TUNER button (which will light up). Use the Select knob to find the MIDI page that looks like this:
Channel — Press the button under CHANL and start spinning the EFFECT TWEAK knob to change the MIDI Channel. You can choose channels 1 thru 16, or OMNI (this means PODXT will ‘listen’ on all MIDI channels).
Program Change — The PODXT allows you to process incoming MIDI Program Change messages (PGM ON), ignore these messages (PGM OFF), or pass the received program change regardless of the MIDI Output setting (PGM ECHO).
Output — PODXT’s MIDI Out generally sends out the MIDI messages generated by your PODXT when this parameter is set to OUT. You also have the option of changing it to act as a MIDI Thru. When you choose THRU for the OUTPUT, PODXT will not generate any outgoing MIDI messages. Instead, it will take whatever comes in at its MIDI In and send it straight “thru” to the MIDI Out so you can get this same info to some other MIDI device. Note that in Thru mode, the MIDI Out simply passes on what’s received at its MIDI In; it does not combine PODXT MIDI messages with this incoming MIDI data.

Deep Editing & MIDI Control • MIDI Basics
7• 3
MIDI MessagesMIDI allows for several different kinds of messages, each with a different purpose:
MIDI Program Changes - Program change messages tell a device to switch from one sound or setup to another. With PODXT, program changes change from one Channel Memory to another. So, for instance, when PODXT receives program change number 1, it will select Bank 1, Channel A. When it gets program change number 2, it will select Bank 1, Channel B. And so on, as the chart in Appendix B shows.
MIDI Controllers - MIDI controller messages allow you to control a device’s parameters in real time. So, for instance, you can use a MIDI controller to vary the setting the of the PODXT DRIVE control, or the REVERB level. Each of PODXT’s parameters are mapped to a MIDI controller, so you can take full control of your PODXT. The chart in Appendix C lists each PODXT parameter, the controller assigned to it, and how that controller affects PODXT. Note that the wah and volume pedals of the FBV and FBV Shortboard also transmit MIDI controller messages via MIDI when used with your PODXT.
MIDI Sysex Commands - Sysex stands for “System Exclusive.” Sysex commands are special commands that only a particular device understands — they are ‘exclusive’ to that device — as opposed to the more generic kind of program, controller, and other messages that almost all MIDI devices understand. PODXT uses Sysex to transmit its Channel Memories to another device, or to receive new Channels from another device. This exchange of data is typically called a “dump.”

Deep Editing & MIDI Control • Backing Up PODxt Programs to Other
7• 4
Backing Up PODXT Programs to Other Devices
It’s recommended that you backup the sounds programmed into your PODXT so that you can restore them in case of some future disaster. If you want to transfer sounds from PODXT to some other MIDI device for backup (like say a MIDI file player or a hardware sequencer or keyboard workstation), things work pretty much the same way as they do for PODXT-to-PODXT transfers. You’ll need a standard MIDI cable to get everybody talking.
Connect the MIDI OUT of your PODXT to the MIDI IN of the receiving MIDI device. Press TUNER so that it’s lit, turn SELECT to reach the MIDI page, then be sure the PODXT’s MIDI channel is set to the same channel that your MIDI device expecting to receive on. Or alternatively, change your other MIDI device to match the PODXT MIDI channel — whichever ya wanna do is just fine, so long as they both end up talking on the same MIDI channel.
Transferring All Channels - This feature will let you send all of your PODXT presets to out via MIDI for a complete back-up of all your Channels:
Press SAVE once, and use the SELECT knob to scroll down to the page that looks like this:
Now press the button under SELECT. Turn the EFFECT TWEAK knob to the left (counterclockwise) until the display reads:
Now press SAVE again to make the transfer.

Deep Editing & MIDI Control • Backing Up PODxt Programs to Other
7• 5
Transferring Some Data - If you’d like to send a particular Channel memory out via MIDI, or just Effect Setups or Amp Models do this:
Press SAVE once, and use the SELECT knob to scroll down to the page that looks like this:
Now press the button under SELECT. Turn the EFFECT TWEAK knob to select a Channel Memory, Amp Models, or Effect Setups that you’d like to transfer.
Any Channel Memory
All Amp Models (including your customized ones)
All Effect Setups (including your customized ones)
Now press SAVE again to make the transfer.

Deep Editing & MIDI Control • Other Things You Can Do with MIDI
7• 6
Other Things You Can Do with MIDI
Changing PODXT Channels with MIDI Program ChangesThe most basic thing to do with PODXT via MIDI is change channels. You may have a foot controller or other device that sends MIDI program change messages. Hook its MIDI OUT to PODXT’s MIDI IN, set the MIDI Channels of both devices to be the same, and refer to the chart in Appendix B to see what program number on the foot controller will select which PODXT Channel. Note that both MANUAL MODE and the TUNER can be selected with MIDI Program Change messages. You can also send MIDI Program change messages to PODXT from a MIDI sequencer to allow you to change PODXT sounds automatically in sync with your sequences.
Tweaking PODXT Tones with MIDI ControllersIf you have a hardware MIDI “fader box,” assignable MIDI controllers on a keyboard, or a stand-alone or computer software-based MIDI sequencer, you can take control of any PODXT parameter via MIDI. The chart in Appendix C lists which PODXT parameter is controlled by which MIDI Controller. Remember to make sure that the MIDI Channels have been set properly when first setting up your PODXT with the gear that will control it. To minimize “zipper” noise when controlling parameter changes via MIDI, try making gradual, rather than sudden changes to PODXT settings.
Full MIDI Automation of PODXTWhen you use PODXT with a MIDI sequencer, you can automate any PODXT parameter using MIDI Controller messages. This allows PODXT to give you the same kind of capabilities as Line 6’s acclaimed Amp Farm software plug-in software for Pro Tools TDM systems, without the Pro Tools system!
The PODXT front panel knobs all send out appropriate MIDI controllers (as do the wah and volume pedals of the optional Floor Board foot controller) that you can record into a MIDI track as you play through your PODXT along with a MIDI sequence.
Hook your PODXT’s MIDI OUT to a MIDI IN on your sequencing setup. Hook the sequencer MIDI OUT to PODXT’s MIDI IN, and make sure PODXT and your sequencer are set to the same MIDI Channel. Also, be sure you set the MIDI OUTPUT setting in TUNER mode to OUT.

Deep Editing & MIDI Control • MIDI Setup Trouble-shooting
7• 7
To allow MIDI-controlled automation, you need to set up a MIDI track in your sequencer to record the data flowing from PODXT’s MIDI Out. Set up a MIDI track to receive PODXT’s MIDI output, record-enable it, and start the sequencer recording. Slowly turn PODXT’s DRIVE knob all the way up and then all the way down as your sequencer records, and then stop your sequencer. Now, look at the data that’s been recorded into the PODXT MIDI track on your sequencer. You’ll see that you’ve recorded MIDI controller #13 messages. This is the controller that’s assigned to PODXT’s Drive parameter. Play back the recorded MIDI track as you play through PODXT (or play back recorded direct guitar audio through PODXT), and you’ll hear the Drive changes that you recorded into your MIDI track. To minimize “zipper” noise when controlling parameter changes via MIDI, try making gradual, rather than sudden changes to PODXT settings.
MIDI Setup Trouble-shooting
Here are some troubleshooting hints for computer MIDI setups, courtesy of Line 6’s own product support gurus:
1. SoundBlaster type cards have more than one MIDI driver. The system will usually default to the driver for the built-in synth on the card, rather than the external MIDI port. This means that you must select the correct driver before the software can see the PODXT.
2. MIDI cables must run from out to in and vice versa (don’t connect PODXT’s MIDI In to your computer’s MIDI In; connect PODXT’s MIDI In to your computer’s MIDI Out). Think of it in terms of the direction that information is flowing; out of the PODXT in to the computer. Out of the computer in to the PODXT.
3. MIDI channels must be set to be the same. The quickest way to ensure communication is to simply set the PODXT MIDI Channel to OMNI for all channels.

Putting Your Feet to Work • Meet the FBV Shortboard
8• 1
PUTTING YOUR FEET TO WORK
The FBV Series Foot ControllersPODXT is compatible with the optional Line 6 FBV and FBV Shortboard foot controllers. The FBV is designed to provide all the foot control functions needed for Line 6’s Vetta series amps, and therefore includes a number of controls that aren’t needed for PODXT. The PODXT, on the other hand, is focused on PODXT features. So, we’ll concentrate here on describing the use of your PODXT with an FBV Shortboard, and if you’ve got a standard FBV, you’ll find that it works pretty much the same way.
Meet the FBV Shortboard
The FBV Shortboard foot controller gives you a greatly expanded range of control over your PODXT, especially in live performances. The Shortboard provides foot switches for virtually every function of PODXT, a pedal that can be used for Wah or Volume and a separate input for the Line 6 EX-1 expression pedal.
Hooking up the ShortboardThe Shortboard comes complete with the necessary hookup cable, so all you have to do is plug it into the jack on the back of your PODXT that’s labeled PEDAL (in case you ever need to replace it, it’s a standard CAT-5 Ethernet cable that’s available just about everywhere these days). Since the Shortboard is powered over the cable, there’s no need for a ‘wall-wart’ or other external power supply. One cable, and you’re done!
Pushing Your Buttons
Bank Up - Bank Down: Use these two switches to choose any of the 16 Banks of PODXT Channel Memories. Press A, B, C, or D to actually load the Channel Memory. You can also hold either one to quickly scroll through the banks.
Channel A, B, C & D: Load one of the four Channel Memories in the current Bank.
FX Loop: Cover the label with the included COMP sticker that came with your Shortboard and it now magically controls the PODXT’s COMP On/Off.
1
2
3

Putting Your Feet to Work • Pushing Your Buttons
8• 2
Stomp: Use this switch to turn your STOMP effect on and off. The light above the switch will be lit when this effect is on.
Reverb: Switches PODXT’s reverb on and off.
Modulation: Use this switch to turn your MOD effect on and off. The light above the switch will be lit when this effect is on.
Delay: Use this switch to turn your DELAY on and off. The light above the switch will be lit when this effect is on.
Tap Tempo: Tap twice on the TAP TEMPO switch to set the Tempo on PODXT. The light above the TAP TEMPO switch flashes to show you the current tempo in BPM (beats per minute). Hold the TAP TEMPO switch down for two seconds to activate the TUNER. The Shortboard display shows the note you’re playing and lets you know whether you’re sharp or flat.
Wah and Volume Lights: One of these lights will come on when the Shortboard’s built-in pedal is ready to control WAH or VOLUME. If an expression pedal is connected and set to control VOLUME, the VOLUME light will not come on.
Wah / Volume Pedal: Press this pedal fully forward to click the toe-switch, switching the pedal to control WAH or VOLUME. If an expression pedal is connected to the Shortboard’s rear panel 1/4-inch jack and is set to control VOLUME, the Shortboard pedal controls WAH only, with the toe switch toggling the WAH on/off. If the expression pedal is set to provide remote control over the EFFECT TWEAK parameter, the WAH / VOLUME pedal will continue to switch between WAH and VOLUME. See Chapter 4, Creating & Storing Sounds for more details.
External Pedal Jack: You can connect an expression pedal (such as the Line 6 EX-1) to the Shortboard’s rear panel 1/4-inch jack. The connected pedal can be set to control VOLUME or EFFECT TWEAK. See Chapter 4, Creating & Storing Sounds for more details on setting up the expression pedal.
Note: Any FBV switches not being used by your PODXT will send MIDI messages via PODXT’s MIDI Output and can be used to control other devices. See Appendix C for details.
4
5
6
7
8
9
10
11

Putting Your Feet to Work • Saving and Naming with the FBV Shortboard
8• 3
Saving and Naming with the FBV Shortboard
To prepare for saving, it’s a good idea to browse through the various factory-stored preset sounds to decide which you can do without. Make a note of their Bank number and Channel letter so you can save your own sounds there instead.
1. Save - Step on the FX LOOP (COMP) switch until NAME EDIT is displayed.
2. Name - The Shortboard’s STOMP and MODULATION switches (labeled Cursor in small text) select one of the characters of the channel name so you can change it. The DELAY and REVERB switches (labeled Character in small text) choose from the available letters, numbers and symbols. Once you’ve got a name you’re happy with, go ahead to step 3.
3. Pick a Bank - The BANK UP and BANK DOWN switches pick a Bank you’d like to save to.
4. Finish - Press the A, B, C or D switch to store to that Channel Memory in the chosen Bank. The display will show “SAVING”.
Congratulations, you’re all done!
Note: FBV owners, saving works the same way for you except that the REVERB and PITCH/TREMOLO switches are used for cursor control, and the MOD and DELAY switches change the character.
Using an EX-1
The FBV Shortboard allows you to connect an expression pedal, such as the Line 6 EX-1, to provide volume pedal control or act as remote control over the parameter assigned to the EFFECT TWEAK knob. This lets you remotely control the Rotary Drum Speed, for example, while allowing the on-board pedal to control WAH or VOLUME and it’s even stored with a Channel Memory so you can change it on the fly. To set up this pedal:

Putting Your Feet to Work • Using an EX-1
8• 4
1. Press the EDIT button and turn SELECT until you see the Wah and Volume parameters:
2. Press the button under PEDAL and select either VOLUME, to control the volume, or TWEAK, to control the EFFECT TWEAK parameter.
3. Be sure to save if you want to keep your changes.
When the PEDAL is set to EFFECT TWEAK, moving a connected EX-1 from heel to toe will move the FX TWEAK assigned parameter from its minimum value to its maximum value. When PEDAL is set to VOLUME, the FBV Shortboard’s Volume light will go out, the EX-1 will control the PODXT’s volume and the on-board pedal will be your dedicated wah pedal. Like the delay and mod effects, you can also choose the position of the volume pedal: PRE (before the amp model), or POST.

Appendix A: Amp Models •
9• 1
APPENDIX A: AMP MODELS
All product names are trademarks of their respective owners, which are in no way associated or affiliated with Line 6. These product names are provided for the sole purpose of identifying the specific products that were studied during
Line 6’s sound model development.
Amp Model Based On Cab Model Mic
Tube Preamp Tube Instrument Preamp No Cab U-67Line 6 Clean Line 6 21st Century Clean 2x12 Line 6 SM-57 On AxisLine 6 JTS-45 Line 6 JTS-45 4x12 Celest V30 SM-57 On AxisLine 6 Class A Line 6 Class A 1x12 Tweed MD-421Line 6 Mood Line 6 Mood 4x12 Green 20’s SM-57 On AxisSpinal Puppet Line 6 Spinal Puppet 4x12 Celest T75 MD-421Line 6 Chem X Line 6 Chemical X 4x12 Celest T75 MD-421Line 6 Insane Way too many hours of shredding 4x12 Celest T75 MD-421Line 6 ACO 2 Line 6 Piezacoustic 2 No Cab U-67Zen Master Budda Twinmaster 2x12 Combo 2x12 Line 6 SM-57 On AxisSmall Tweed ’53 Fender Deluxe 1x12 Tweed MD-421Tweed B-Man ’58 Fender Bassman 4x10 Tweed SM-57 On AxisTiny Tweed ’60 Tweed Fender Champ 1x8 Tweed U-67Blackface Lux ’64 Fender Deluxe 1x12 Blackface SM-57 On AxisDouble Verb ’65 Blackface Fender Twin 2x12 Blackface SM-57 Off AxisTwo-Tone Gretsch 6156 1x10 G-Brand SM-57 On AxisHiway 100 Hiwatt DR-103 4x12 Green 25’s SM-57 Off AxisPlexi 45 ’65 Marshall JTM-45 4x12 Green 20’s SM-57 Off AxisPlexi Lead 100 ’68 Marshall ‘Plexi’ Super Lead 4x12 Green 20’s SM-57 On AxisPlexi Jump Lead ’68 Marshall Super Lead Jumped 4x12 Green 25’s MD-421Plexi Variac ’68 Marshall Super Lead Variac’d 4x12 Green 25’s U-67Brit J-800 ’90 Marshall JCM-800 4x12 Celest T-75 MD-421Brit JM Pre Marshall JMP-1 4x12 Celest T-75 MD-421Match Chief ’96 Matchless Chieftain 2x12 Match SM-57 On AxisMatch D-30 Matchless DC-30 2x12 Match SM-57 On AxisRecto Dual ’01 Mesa Boogie Dual Rectifier 4x12 Recto SM-57 Off AxisCali Crunch ’85 Mesa Boogie Mark IIc+ 1x12 Line 6 SM-57 On AxisJazz Clean ’87 Roland JC-120 2x12 Jazz U-67Solo 100 Soldano SLO-100 Head 4x12 Celest T-75 SM-57 On AxisSuper O Supro S6616 1x6 Super O SM-57 On AxisClass A-15 ’60 Vox AC 15 1x12 Class A SM-57 Off AxisClass A-30 TB ’63 Vox AC 30 with Top Boost 2x12 Class A SM-57 On Axis

Appendix B: MIDI Program Changes •
9• 2
APPENDIX B: MIDI PROGRAM CHANGES
PODXT channels can be selected via MIDI program changes. Some devices numberprograms starting at zero. Some start at one. We start at zero (Manual Mode) and then workour way along through the stored channels as shown in this table:
POD Channel
MIDI Program Changes
POD Channel
MIDI Program Changes
PODxt Channel
MIDI Program Changes
PODxt Channel
MIDI Program Changes
Manual 0 5A 17 9B 34 13C 511A 1 5B 18 9C 35 13D 521B 2 5C 19 9D 36 14A 531C 3 5D 20 10A 37 14B 541D 4 6A 21 10B 38 14C 552A 5 6B 22 10C 39 14D 562B 6 6C 23 10D 40 15A 572C 7 6D 24 11A 41 15B 582D 8 7A 25 11B 42 15C 593A 9 7B 26 11C 43 15D 603B 10 7C 27 11D 44 16A 613C 11 7D 28 12A 45 16B 623D 12 8A 29 12B 46 16C 634A 13 8B 30 12C 47 16D 644B 14 8C 31 12D 48 Tuner 654C 15 8D 32 13A 494D 16 9A 33 13B 50
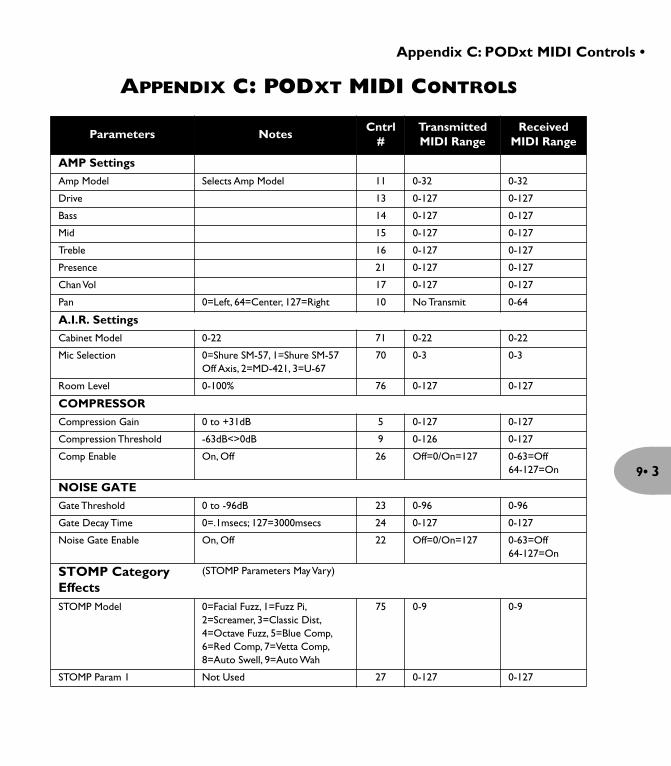
Appendix C: PODxt MIDI Controls •
9• 3
APPENDIX C: PODXT MIDI CONTROLS
Parameters NotesCntrl
#Transmitted MIDI Range
Received MIDI Range
AMP Settings
Amp Model Selects Amp Model 11 0-32 0-32
Drive 13 0-127 0-127
Bass 14 0-127 0-127
Mid 15 0-127 0-127
Treble 16 0-127 0-127
Presence 21 0-127 0-127
Chan Vol 17 0-127 0-127
Pan 0=Left, 64=Center, 127=Right 10 No Transmit 0-64
A.I.R. Settings
Cabinet Model 0-22 71 0-22 0-22
Mic Selection 0=Shure SM-57, 1=Shure SM-57 Off Axis, 2=MD-421, 3=U-67
70 0-3 0-3
Room Level 0-100% 76 0-127 0-127
COMPRESSOR
Compression Gain 0 to +31dB 5 0-127 0-127
Compression Threshold -63dB<>0dB 9 0-126 0-127
Comp Enable On, Off 26 Off=0/On=127 0-63=Off64-127=On
NOISE GATE
Gate Threshold 0 to -96dB 23 0-96 0-96
Gate Decay Time 0=.1msecs; 127=3000msecs 24 0-127 0-127
Noise Gate Enable On, Off 22 Off=0/On=127 0-63=Off64-127=On
STOMP Category Effects
(STOMP Parameters May Vary)
STOMP Model 0=Facial Fuzz, 1=Fuzz Pi, 2=Screamer, 3=Classic Dist, 4=Octave Fuzz, 5=Blue Comp, 6=Red Comp, 7=Vetta Comp, 8=Auto Swell, 9=Auto Wah
75 0-9 0-9
STOMP Param 1 Not Used 27 0-127 0-127

Appendix C: PODxt MIDI Controls •
9• 4
STOMP Param 1 Note value Not Used 78 See Note 1 See Note 1
STOMP Param 2 Model dependant 79 0-127 0-127
STOMP Param 3 Model dependant 80 0-127 0-127
STOMP Param 4 Model dependant 81 0-127 0-127
STOMP Param 5 Not Used 82 0-127 0-127
STOMP Volume/Mix 0<>100% 83 0-127 0-127
Stomp Enable On, Off 25 Off=0/On=127 0-63=Off64-127=On
MOD Category Effects
(MOD Parameters May Vary)
Modulation Model 0=Sine Chorus, 1=Analog Cho-rus, 2=Line 6 Flanger, 3=Jet Flanger, 4=Phaser, 5=U-Vibe, 6=Opto Trem, 7=Bias Trem, 8=Rotary Drum+Horn, 9=Rotary Drum, 10=Auto Pan
58 0-10 0-10
Mod Param 1 Model dependant 29 0-127 0-127
Mod Param 1 Double Preci-sion
Model dependant 61 0-127 0-127
Mod Param 1 Note value Model dependant 51 See Note 1 See Note 1
Mod Param 2 Model dependant 52 0-127 0-127
Mod Param 3 Model dependant 53 0-127 0-127
Mod Param 4 Model dependant 54 0-127 0-127
Mod Param 5 Model dependant 55 0-127 0-127
Mod Volume/Mix 0<>100% 56 0-127 0-127
Mod Pre/Post Pre, Post 57 Pre=0/Post=127 0-63=Pre64-127=Post
Mod Enable On, Off 50 Off=0/On=127 0-63=Off64-127=On
DELAY Category Effects
(Delay Parameters May Vary)
Delay Model 0=Analog, 1=Analog w/Mod, 2=Tube Echo, 3=Multi-Head, 4=Sweep Echo, 5=Digital Delay, 6=Stereo Delay, 7=Ping Pong, 8=Reverse Delay
88 0-8 0-8
Parameters NotesCntrl
#Transmitted MIDI Range
Received MIDI Range

Appendix C: PODxt MIDI Controls •
9• 5
Delay Param 1 30 0-127 0-127
Delay Param 1 DBL Precision 62 0-127 0-127
Delay Param 1 Note value 31 See Note 1 See Note 1
Delay Param 2 Model dependant 33 0-127 0-127
Delay Param 3 Model dependant 35 0-127 0-127
Delay Param 4 Model dependant 85 0-127 0-127
Delay Param 5 Model dependant 86 0-127 0-127
Delay Volume/Mix 0<>100% 34 0-127 0-127
Delay Pre/Post Pre, Post 87 Pre=0/Post=127 0-63=Pre64-127=Post
Delay Enable On, Off 28 Off=0/On=127 0-63=Off64-127=On
REVERB Category EffectsReverb Type 0=Lux Spring, 1=Std Spring, 2=King
Spring, 3=Small Room, 4=Tiled Room, 5=Brite Room, 6=Dark Hall, 7=Medium Hall, 8=Large Hall, 9=Rich Chamber, 10=Chamber, 11=Cavern-ous, 12=Slap Plate, 13=Vintage Plate, 14=Large Plate
37 0-15 0-15
Reverb Decay 0.1<>9.0sec 38 0-127 0-127
Reverb Pre-Delay 0<>100ms 40 0-127 0-127
Reverb Tone 0<>100% 39 0-127 0-127
Reverb Mix 0<>50% 18 0-127 0-127
Reverb Pre/Post Pre, Post 41 No Transmit 0-63=Pre64-127=Post
Reverb Enable On, Off 36 Off=0/On=127 0-63=Off64-127=On
WAH WAHWah Position 0<>127 4 0-127 0-127
Wah Enable On, Off 43 Off=0/On=127 0-63=Off64-127=On
Volume PedalVol Pedal Value Not Stored 7 0-127 0-127
Minimum Position 46 0-127 0-127
Parameters NotesCntrl
#Transmitted MIDI Range
Received MIDI Range

Appendix C: PODxt MIDI Controls •
9• 6
Note 1: Note Value Controller Values
1 = Whole Note2 = Dotted Half Note3 = Half Note4 = Half Note Triplet5 = Dotted Quarter Note6 = Quarter Note7 = Quarter Note Triplet8 = Dotted Eighth Note9 = Eighth Note
10 = Eighth Note Triplet11 = Dotted Sixteenth Note12 = Sixteenth Note13 = Sixteenth Note Triplet
Volume Pre/Post Pre, Post 47 Pre=0/Post=127 0-63=Pre64-127=Post
Wah Enable On, Off 43 Off=0/On=127 0-63=Off64-127=On
TEMPO SettingsTempo MSB 30.0-240.0 BPM 89 0-127 0-127
Tempo LSB 90 0-127 0-127
Tap Tap 64 Tap Button or FBV sends 127
64-127=a Tap
Tweak Tweak Controller 1 0-127 0-127
EFFECTS SetupsEffect Setup EFFECTS knob 19 0-63 0-63
Tweak Param Select 108 0-13 0-13
Parameters NotesCntrl
#Transmitted MIDI Range
Received MIDI Range

Appendix C: PODxt MIDI Controls •
9• 7
APPENDIX D: FBV SERIES MIDI CONTROLS
Parameters Notes Controller #Transmitted MIDI Range
Comp On, Off(FX Loop on FBV)
26 Off=0/On=127
Stomp On, Off(Stomp Box 1 on FBV)
25 Off=0/On=127
Modulation On, Off 50 Off=0/On=127
Delay On, Off 28 Off=0/On=127
Reverb On, Off 36 Off=0/On=127
Tap Tap (momentary) 64 Off=0/On=127
Wah/Volume Pedal Wah or Volume set by PODXT
(Individual Pedals on FBV)4 = Wah
7 = Volume0-127
Expression Pedal (optional) Tweak or Volume set by PODXT 1 = Tweak7 = Volume
0-127
Pedal 1 Real-time Controller(not available on Shortboard)
1 0-127
Pedal 2 Real-time Controller(not available on Shortboard)
2 0-127
Stomp Box 2 On, Off(not available on Shortboard)
109 Off=0/On=127
Stomp Box 3 On, Off(not available on Shortboard)
110 Off=0/On=127
Amp 1 On, Off(not available on Shortboard)
111 Off=0/On=127
Amp 2 On, Off(not available on Shortboard)
112 Off=0/On=127
Pitch/Tremolo On, Off(not available on Shortboard)
113 Off=0/On=127
Appendix C: PODxt MIDI Controls • Appendix E: Line 6 Contact
9• 8
APPENDIX E: LINE 6 CONTACT
Customer ServiceBefore contacting the Line 6 Customer Service team, please take the time to look through this publication to see if it can answer your questions. Additional helpful information is on the Support page of the Line 6 web site (www.line6.com), including the searchable FAQTRAQ system which is often the fastest and easiest way to go answers.
If you need to talk to an actual human on the Line 6 Customer Service team by phone, it will generally help to take some notes for yourself before you call, to insure that you remember everything you want to ask about. In the USA or Canada, you can contact Line 6 at (818) 575-3600, 8AM to 5PM Monday through Friday (Pacific Time). Outside the USA and Canada, please contact your distributor directly to arrange service. The list of Line 6 distributors is available on the Internet at www.line6.com.
To obtain factory service:If a member of the Line 6 Customer Service Team determines that your Vetta needs to be sent to Line 6 for service, you will be given a return authorization (RA) number. Products returned without an RA number will be returned to you at your sole expense. Pack the product in its original shipping carton and attach a description of the problem along with your name and a phone number where Line 6 can contact you if necessary. Ship the product insured and freight prepaid to Line 6 Customer Service, 6033 De Soto Avenue, Woodland Hills, CA 91367.

Appendix C: PODxt MIDI Controls • Appendix E: Line 6 Contact
9• 9
APPENDIX F: WARRANTY INFO
LINE 6 LIMITED WARRANTY INFORMATIONSending in your registration card allows us to register key information so that we may handle problems faster and inform you of advance information, upgrades,and other news. Thanks in advance for filling out your registration card and sending it to us. And good luck in your music!
Line 6, Inc., warrants this product when purchased at an Authorized Line 6 Dealer in the United States of America or Canada, to be free of defects in materialsand workmanship for a period of one year from the date of original purchase only upon completion and return of the Line 6 Warranty Registration form within30 days from date of purchase. Please contact your distributor for information on warranty and service outside the USA and Canada.During the warranty period Line 6 shall, at its option, either repair or replace any product that proves to be defective upon inspection by Line 6. Line 6 reserves the right to update any unit returned for repair, and reserves the right to change or improve the design of the product at any time without notice.This warranty is extended to the original retail purchaser. This warranty can be transferred to anyone who may subsequently purchase this product within theapplicable warranty period by providing Line 6 with all Warranty Registration information for the new owner and proof of transfer within 30 days of thepurchase. Final determination of warranty coverage lies solely with Line 6.This is your sole warranty. Line 6 does not authorize any third party, including any dealer or sales representative, to assume any liability on behalf of Line 6 or tomake any warranty for Line 6. Line 6 may, at its option, require proof of the original date of purchase in the form of a dated copy of the original authorized dealer’s invoice or sales receipt.Service and repairs of Line 6 products are to be performed only at the factory (see below) unless otherwise authorized in advance by the Line 6 ServiceDepartment. Unauthorized service, repair or modification will void this warranty.
DISCLAIMER AND LIMITATION OF WARRANTYTHE FORGOING WARRANTY IS THE ONLY WARRANTY GIVEN BY LINE 6 AND IS IN LIEU OF ALL OTHER WARRANTIES. ALL IMPLIEDWARRANTIES, INCLUDING WARRANTIES OF MERCHANTABILITY AND FITNESS FOR ANY PARTICULAR PURPOSE, ARE HEREBYEXCLUDED. UPON EXPIRATION OF THE APPLICABLE EXPRESSED WARRANTY PERIOD, LINE 6 SHALL HAVE NO FURTHER WARRANTYOBLIGATION OF ANY KIND, EXPRESSED OR IMPLIED. LINE 6 SHALL IN NO EVENT BE OBLIGATED FOR ANY INCIDENTAL ORCONSEQUENTIAL DAMAGES THAT MAY RESULT FROM ANY DEFECT OR WARRANTY CLAIM, EXPRESSED OR IMPLIED. Some states do notallow the exclusion or limitation of incidental or consequential damages or limitation on how long implied warranties last, so some of the above limitation orexclusion may not apply to you. This warranty gives you specific legal rights, and you may also have other rights which vary from state to state. This warrantyonly applies to products sold and used in the United States of America and Canada. Line 6 shall not be liable for damages or loss resulting from negligent orintentional acts of shipper or his contract affiliates. You should contact the shipper for proper claims procedures in the event of damage or loss resulting fromshipment.
Related Documents