Drawing Ray Diagrams Plain Mirror Style SNC2D

Plain Mirror Style SNC2D. Angles – What’s It All Mean?
Dec 17, 2015
Welcome message from author
This document is posted to help you gain knowledge. Please leave a comment to let me know what you think about it! Share it to your friends and learn new things together.
Transcript

Drawing Ray DiagramsPlain Mirror Style
SNC2D
Angles – What’s It All Mean?
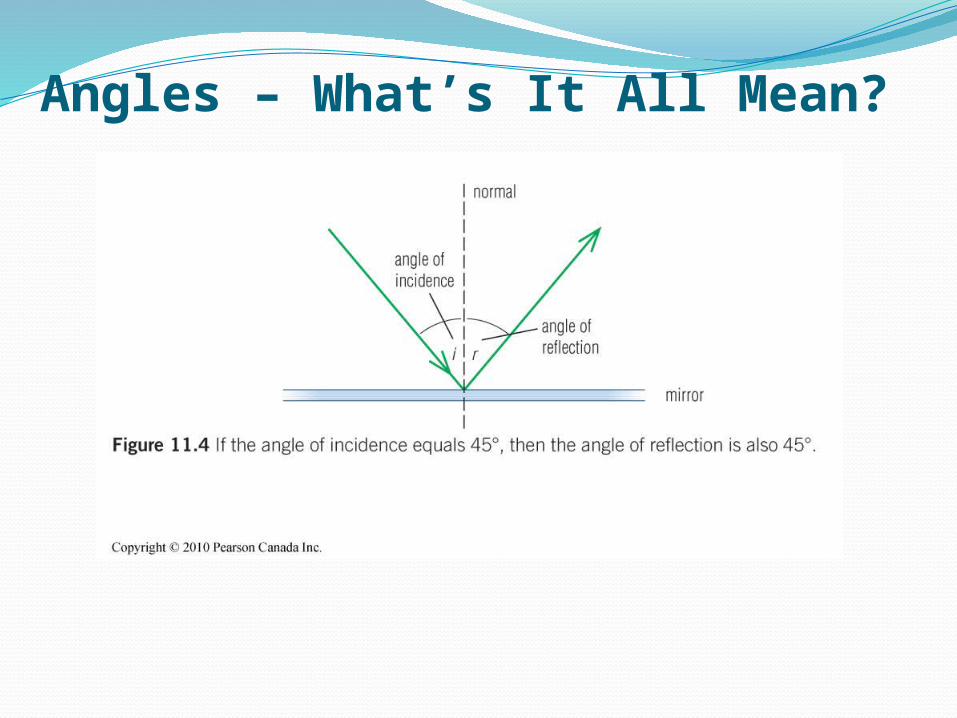
Steps to Draw Ray DiagramPlane Mirror
1. Draw a vertical line in the middle of your page and label this line PLANE MIRROR.
2. Label the left side of the mirror REAL and the right side of the mirror VIRTUAL
3. Draw an arrow facing upward on the REAL IMAGE side of the mirror
4. Draw a horizontal incident ray from the top of your image to the mirror – this line will be perpendicular to the mirror (form a 90 degree angle). The reflected ray will also be at a 90 degree angle. Extend this ray into the virtual side using a dashed line.

5. Draw another incident ray coming from the top of your object, but have it hit the mirror at an angle.
6. Draw a dashed normal line (perpendicular to the mirror) at the point of intersection of the incident ray and the mirror
7. Measure the angle of incidence
8. Draw your reflected ray at the same angle as your angle of incidence
9. Extend your reflected ray into the virtual side of your mirror using dashed lines. The intersection of the dashed lines will become the top of your image.

11. Connect the top and the bottom of your new image.
12. Measure the distance from your object to the mirror. The distance from the object to the mirror must be equal to the distance from your image to the mirror.
Let’s try another example, this time
starting with an object that is angled.
10. Repeat these same steps to create the bottom of your image

Curved Mirrors - CONCAVE1. Draw object at desired
length away from the mirror
2. Draw a ray parallel to your axis until it hits your mirror.
3. Reflect this ray through your focal point
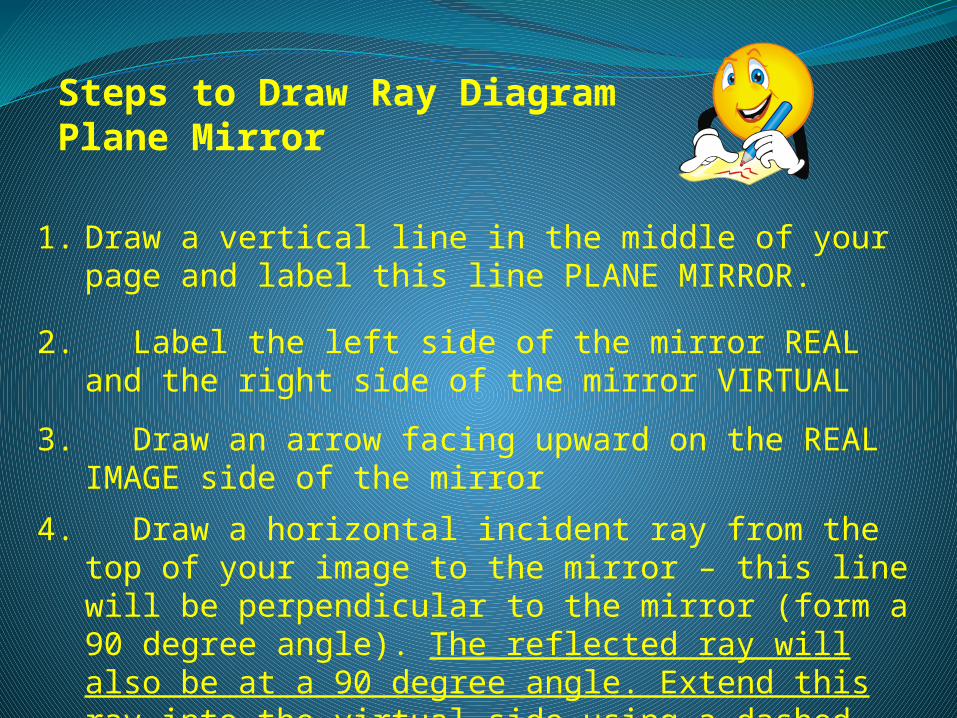
4. Draw a new light ray that goes through the focal point FIRST before it hits the
mirror
5. Reflect this ray parallel to your axis.
6. At the point of intersection of your reflected rays is the top of your new object
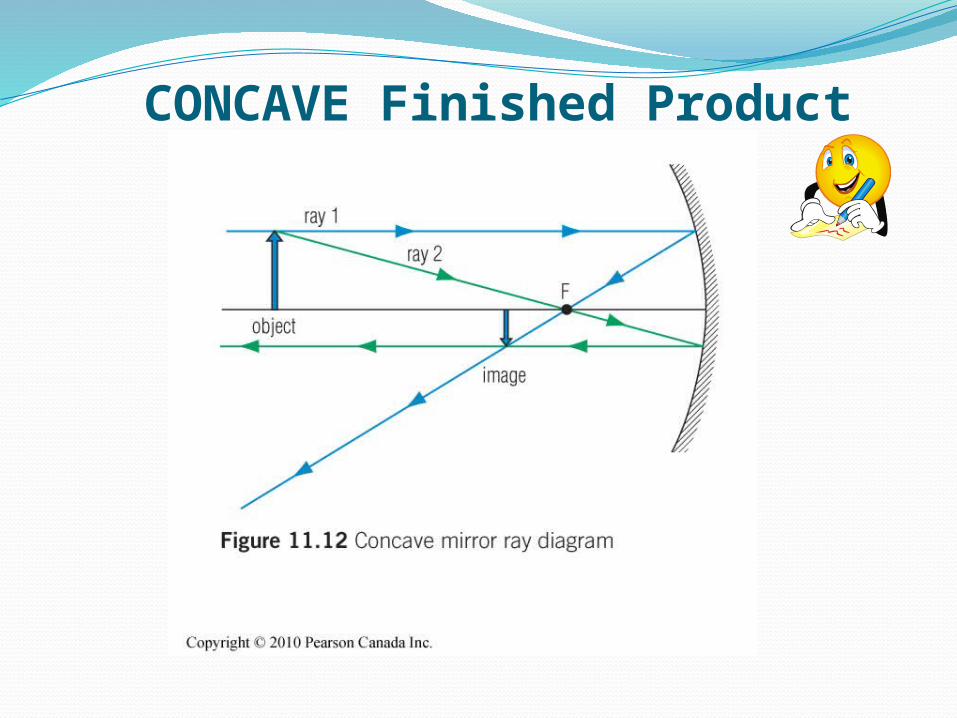
CONCAVE Finished Product


Curved Mirrors - CONVEX1. Draw object in front of
your convex mirror
2. Draw a ray parallel to your axis until it hits your mirror.
3. The reflected ray needs to be extended into the virtual side of your mirror, through the focal point.

4. Draw a new light ray that would go through the focal point if it could. Stop the ray when it hits in the mirror.5. Reflect this ray parallel to your axis
6. At the point of intersection of your reflected rays is the top of your new object
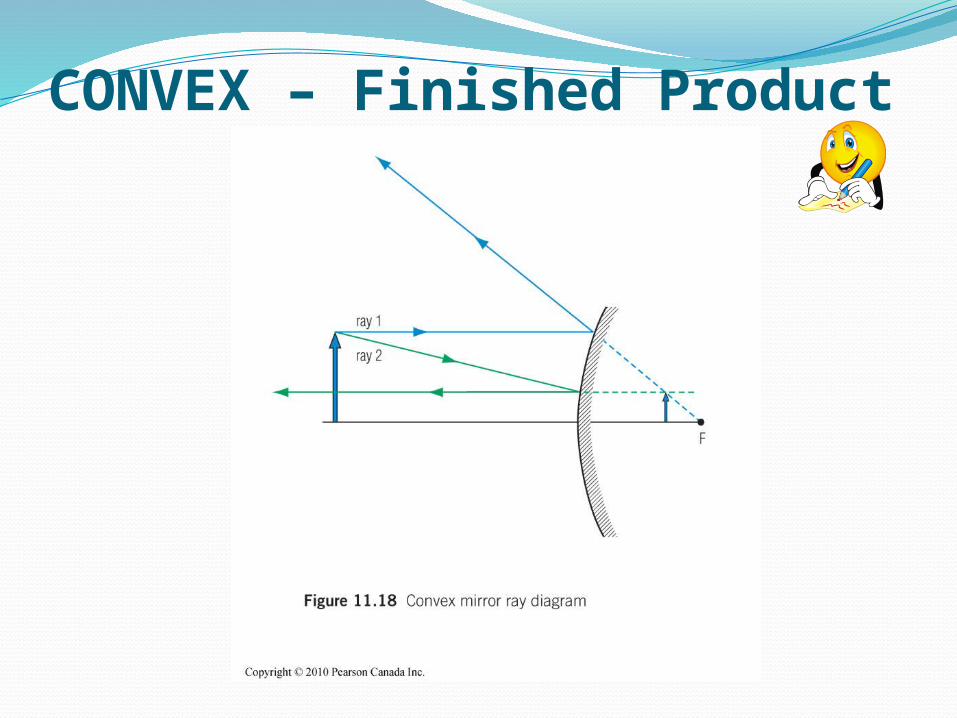
CONVEX – Finished Product
SEATWORK FOR TODAYComplete a Plain Mirror Ray Diagram for
any slanted objectComplete a Concave Ray Diagram for an
object of your choice. Complete a Convex ray diagram for an object
of your choice.
Related Documents