PICkit 3 Manual: For this project we are using PICkit 3 to program the PICs. Figure: PICkit 2 MCU Programmer/Debugger • Connect PICkit 3 to the PC using the supplied USB cable. • Pin 1 Marker designates the location of Pin 1. • Programming connector (6-pin) connects to the target device. • Status LEDs- 1. Power(green)- power is supplied to the PICkit 3. 2. Active(Blue)- PICkit 3 has connection to the PC USB port and the communication link is active. 3. Status- Busy(yellow)- usually programming Error(red)- error encountered.

Welcome message from author
This document is posted to help you gain knowledge. Please leave a comment to let me know what you think about it! Share it to your friends and learn new things together.
Transcript

PICkit 3 Manual: For this project we are using PICkit 3 to program the PICs.
Figure: PICkit 2 MCU Programmer/Debugger
• Connect PICkit 3 to the PC using the supplied USB cable. • Pin 1 Marker designates the location of Pin 1. • Programming connector (6-pin) connects to the target device. • Status LEDs-
1. Power(green)- power is supplied to the PICkit 3. 2. Active(Blue)- PICkit 3 has connection to the PC USB port and the
communication link is active. 3. Status- Busy(yellow)- usually programming
Error(red)- error encountered.
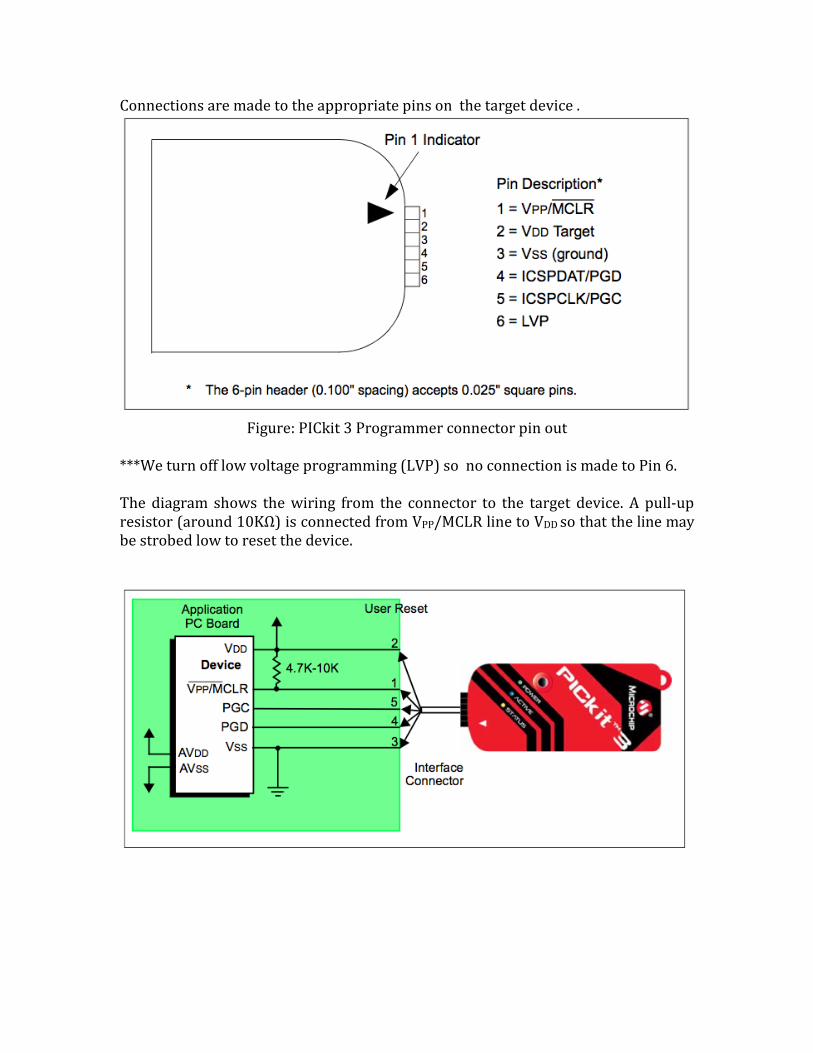
Connections are made to the appropriate pins on the target device .
Figure: PICkit 3 Programmer connector pin out
***We turn off low voltage programming (LVP) so no connection is made to Pin 6. The diagram shows the wiring from the connector to the target device. A pull-up resistor (around 10KΩ) is connected from VPP/MCLR line to VDD so that the line may be strobed low to reset the device.

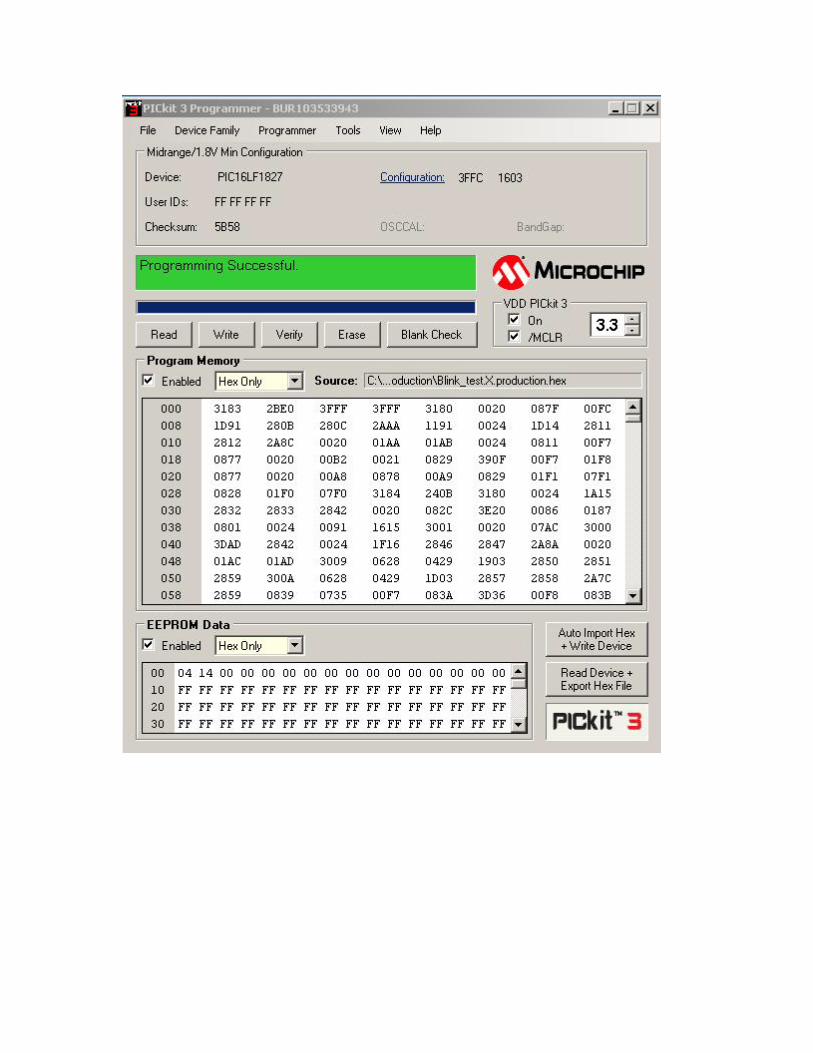
Loading Hex file into the PIC using PICkit 3 Open PICkit3.exe. PICkit 3 can be downloaded from : Step 1: Selecting the device. Click on Device Family and select Midrange 1.8 V min.

Step 2: Click on File and select Import Hex.
Step 3: Browse to the folder containing the hex file.


Step 4: Check the box on, and MCLR on the right hand side. Set the VDD to be 3.3V.(Only needed when the PIC is powered from the PICkit 3. If using external power source, there is no need to do this step)
Step 5: Click on Write. On successful completion , the following screen should be displayed.
Related Documents