Physical Literacy at School: Unit 1 10-week unit for ages 5 - 8 years Active for Life in partnership with ACC sports’ “Champions for Life” program bring you this collection of physical literacy lesson plans for leaders and educators who want to enrich their programs. Each of these 10 lessons takes about 30 minutes to complete with a group of children. At the end of each program, kids will have enjoyed a series of fun activities, and they will have taken one more step in developing physical literacy. What is physical literacy? Physical literacy is when kids have developed the skills and confidence to participate in many different physical activities and sports. Fundamental movement skills such as throwing, catching, running and jumping are the beginning of physical literacy. Physical literacy is important because it gives kids the confidence to stay active for life. It’s not about being a “superstar athlete”—everyone can learn fundamental movement skills, and everyone can become physically literate! How to use these lesson plans 1. Decide what time of day that you will run your sessions. 2. Review each lesson plan in advance to ensure that you have the needed equipment. 3. Establish a routine for the kids (e.g. coming together and listening to your instructions at the start of each session). 4. Make sure that the children understand your expectations (e.g. stop and start on your signal, put away equipment, etc.). Tips for running a fun session 1. Manage each session so that all of the kids feel included. For example, avoid setups where highly skilled kids dominate. 2. If necessary, select partners and teams to make sure that all of the partners or teams are balanced for ability. 3. Maximize every child’s participation by minimizing line-ups and avoiding games with large circles. Whenever possible, stick to small group activities or fun competitions that use small teams of 2-4 kids each. Have fun! For more lesson plans and information on physical literacy, visit: ActiveForLife.com and ChampionsForLife.ca

Welcome message from author
This document is posted to help you gain knowledge. Please leave a comment to let me know what you think about it! Share it to your friends and learn new things together.
Transcript

Physical Literacy at School: Unit 110-week unit for ages 5 - 8 years
Active for Life in partnership with ACC sports’ “Champions for Life” program bring you
this collection of physical literacy lesson plans for leaders and educators who want to
enrich their programs.
Each of these 10 lessons takes about 30 minutes to complete with a group of children.
At the end of each program, kids will have enjoyed a series of fun activities, and they
will have taken one more step in developing physical literacy.
What is physical literacy? Physical literacy is when kids have developed the skills and confidence to participate
in many different physical activities and sports. Fundamental movement skills such as
throwing, catching, running and jumping are the beginning of physical literacy.
Physical literacy is important because it gives kids the confidence to stay active for life.
It’s not about being a “superstar athlete”—everyone can learn fundamental movement
skills, and everyone can become physically literate!
How to use these lesson plans
1. Decide what time of day that you will run your sessions.
2. Review each lesson plan in advance to ensure that you have the needed equipment.
3. Establish a routine for the kids (e.g. coming together and listening to your
instructions at the start of each session).
4. Make sure that the children understand your expectations (e.g. stop and start on your signal,
put away equipment, etc.).
Tips for running a fun session
1. Manage each session so that all of the kids feel included. For example, avoid setups where
highly skilled kids dominate.
2. If necessary, select partners and teams to make sure that all of the partners or teams are
balanced for ability.
3. Maximize every child’s participation by minimizing line-ups and avoiding games with large
circles. Whenever possible, stick to small group activities or fun competitions that use small
teams of 2-4 kids each.
Have fun! For more lesson plans and information on physical literacy, visit: ActiveForLife.com
and ChampionsForLife.ca
Physical Literacy at School: Unit 1 | 10-week unit for ages 5-8 years – page 2 of 29
© ActiveForLife.com
EQUIPMENT: Soft balls, music, pictures or images of balance
Introduction (2 minutes)
Establish your routine right from the first lesson.
Call the children into a circle or into designated lines and greet them.
Explain any special safety rules and remind children to stop, look, and listen whenever
you signal.
Explain in 20-30 seconds what you will be doing today.
Today we will learn, practice, and play to balance on one leg and hold different stances
properly.
Can one of you show me how you can stand on one leg for 10 seconds? (Choose a
different child each lesson)
What sports or activities use the skill of standing on one leg? (Yoga, gymnastics,
dancing, figure skating, hockey, soccer)
Warm-up: Hot dog tag (5 minutes)
• Choose 3-4 children to be “it”.
• When the music begins I want you to run around the activity space trying not to get “tagged”.
• Children who are tagged become “hot dogs” by lying down with arms at their
• sides.
• Tagged children can be free again if two other children make a “bun” by lying
• down on either side of them.
• All three children can then get up and continue playing.
• Leader can suggest different locomotor ways to move around activity space (run, hop, gallop, skip).
• Switch who is “it” after 1 or 2 minutes.
• To keep the game moving, “hot dogs” can roll to other “hot dogs” to get free.
Lesson 1: Single-leg balance5 - 8 year olds
Physical Literacy at School: Unit 1 | 10-week unit for ages 5-8 years – page 3 of 29
© ActiveForLife.com
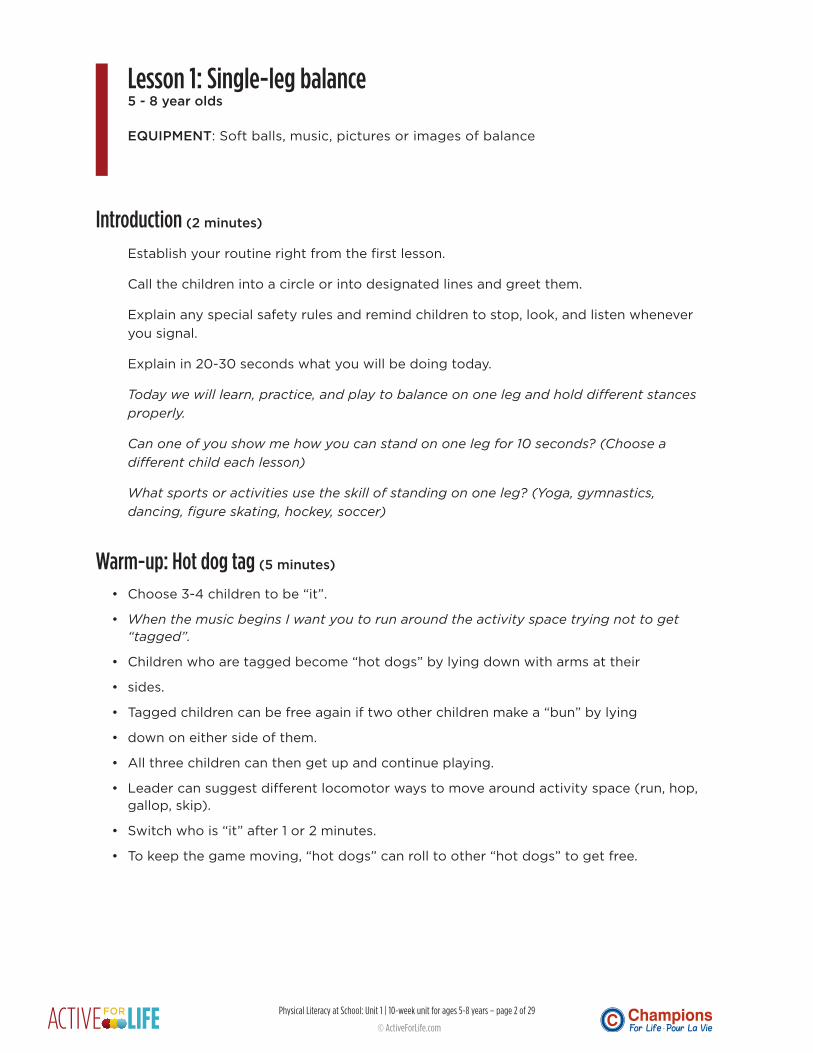
Demonstration: Single-leg balancing (3 - 5 minutes)
• Demonstrate the following single-leg balances for 5-10 seconds each.
• You can show that it is not always easy to hold stances when learning.
• Teach that it does not have to be perfect, but you can try your best:
» Kimbo Stance: Keep one foot flat on the ground. Lift other foot and cross it over your other leg so that your toe is pointing down and touching the ground.
» Single-leg balance stance: Stand on one foot.
» Stork stance: Balance on one foot, place other foot lightly touching support leg, stretch arms out to side.
» Airplane taking-off stance: Staggered-stance, front leg bent, back leg straight with toes touching the ground, arms straight out to sides at shoulder height, lean forward, upper body and back leg in straight line.
» Airplane flying stance: Stand on one foot with arms out to sides at shoulder height, lean forward, front leg bent, back leg straight in the air, upper body and back leg in straight line.
» Kite stance: Stand tall on one foot, arms straight out to sides, lean over like a tilted kite flying upwards and to the side.
Practice: Single-leg balance (5 minutes)
• Leader tapes drawings or diagrams of the stances from the demonstration around the walls of the activity space.
• Leader divides children into six groups.
• Each group starts at one station and practices that balance.
• Leader encourages children to practice both legs and hold their stances for 10 seconds.
• Rotate to next station every 60 seconds.
CUES• Look forward
• Good posture (knee up, arms out)
• Body still
• Hold pose for 10 seconds
• Balancing on one foot is easier when we look at a fixed object.
TIPS FOR INSTRUCTION• Play music while children are practicing
and stop the music between stations.
• Recognize children for their efforts.
• Encourage children to explore and demonstrate their own balance poses that they can hold for 10 seconds.
• Encourage children to hold challenging balance as long as possible.
• Encourage children to balance using alternate legs.

Physical Literacy at School: Unit 1 | 10-week unit for ages 5-8 years – page 4 of 29
© ActiveForLife.com
Game: Balance ball pass (10 minutes)
• Leader divides children into groups of 4 or 5.
• Groups spread out around activity space and each group makes a circle.
• Each group has a soft ball.
• Leader explains that they will call out a balance pose and then begin the music.
• When the music is playing, I want you to hold the balance I call out and try to pass the ball around the circle.
• Count how many times you can pass without anyone dropping the ball or losing your balance.
• Repeat activity calling out different balances that were practiced.
• Circles can be made smaller or larger to create more or less challenge.
Lesson progressions: It is a good idea to repeat the lesson one or two more times so that the children can
have time to get better at skills and build their confidence. If you see some children
quickly mastering the balances, encourage them to try the following:
• Ask children to close their eyes to increase the challenge. Tell them to open their eyes if they start to lose balance (so they avoid falling and getting hurt).
• Pair students up and have them challenge each other by balancing bean bags on differ-ent parts of the body while holding their stances.
• Encourage the children to develop good single-leg balance on the right and left legs.
Wrap-up (2 minutes)
Call the children back into a circle or designated lines and review what they learned.
What are the five things that we do to balance well on one leg?
What did you do to hold your balance on one leg longer?

Physical Literacy at School: Unit 1 | 10-week unit for ages 5-8 years – page 5 of 29
© ActiveForLife.com
EQUIPMENT: Cones, music.
Introduction (1 - 2 minutes)
Can somebody show me how to march, another person show me how to jog, and
another how to sprint?
What sports or activities use the skills of marching, jogging, or sprinting? (Track and
field, baseball, basketball, football, rugby, rhythmic gymnastics, soccer, etc.)
Warm-up: Animal locomotion (5 minutes)
• Explain to children that animals all move in different ways and must move their arms and legs different ways to keep their balance (dynamic balance).
• Show the children how they can move like the following animals over different distances in order to not get too tired, and encourage them to have fun as they follow along:
» Giraffe walk on the balls of the feet with legs and arms straight. Notice how the arms and legs move opposite to each other.
» Crab walk forward, backward, and sideways. Notice how the opposite hands and feet move together.
» Crocodile crawl with stomach close to or touching ground. Notice how the opposite arms and legs move at the same time
» Dog walk on all fours. Notice how opposite hands and knees move together.
» Bear mini-march on hands and feet with knees slightly off the ground, small steps with feet and hands. Notice how the opposite hands and feet move together.
» Elephant walk on hands and feet with high in the air. Notice how the opposite hands and feet move together.
» Bunny hops off the ball of the feet. Notice how both hands move together with both feet.
» Kangaroo bounding off the ball of the feet, tucking the knees up to the chest. Notice how much more the arms swing and move together with both feet.
» Galloping horse on two feet where back foot chases the front foot. Notice how the back hand moves at the same time as the front leg.
» Galloping horse on all fours where back foot chases opposite front hand alternately. Notice how the sound is similar to a horse galloping one the pattern is done well. .
Lesson 2: Running5 - 8 year olds
Physical Literacy at School: Unit 1 | 10-week unit for ages 5-8 years – page 6 of 29
© ActiveForLife.com
CUES: HIGH-KNEE MARCHING• Keep your head still
• Hands move hip-to-Lip
• Knees and toes up
• Arms and legs move opposite
CUES: JOGGING• Straight Posture
• Hands pump forward-backward
• Land middle of foot
• Arms and legs move opposite
TIPS FOR INSTRUCTION• Children have different levels of fitness.
Performance is not important. The goal is to show them how to run at different speeds and have fun.
• There are many elements that make up mature running. It is beyond the scope of this basic lesson to address all of them. Simply watch each child and provide individual feedback based on the practice instructions.
Basic running (2 minutes)
• Tell children that there are things they can do to be better runners.
• Quickly demonstrate the difference between jogging (running slow to medium speed) and sprinting (running fast to fastest).
• Explain that jogging is good for going longer distances and sprinting is good for short distances.
• Arms should be bent at the elbows and do not cross the centre of the body.
• When jogging, arms “pump” gently forward and backward.
• In jogging, you land with the middle of your foot and then spring off your toes.
• When sprinting, hands “swing” from “hip to lip”, knees come up higher, and you land on the balls of your feet.
Practice: Marching and running (5 - 8 minutes)
• Ask the children to march on the spot with you for 30-60 seconds.
• Practice marching at different speeds to get used to moving the arms opposite to the legs, lifting the knees, and swinging the arms more when going faster.
• From time to time, ask the children to stop and balance on one foot as they march slowly on the spot.
• If they stand on the right foot, the right hand should point forward, and vice versa.
• Repeat a few times so children can grasp the concept of moving the opposite arms and legs.
• Ask the children to run on the spot for 30-60 seconds at a time.
• Ask the children run in the same direction around the activity space.
• Ask the children to sprint when they run along one of the short sides of the space and jog the rest of the way (children pass on the outside and can march if they get too tired).
• Keep your heads still—not loose and “flopping” from side to side.

Physical Literacy at School: Unit 1 | 10-week unit for ages 5-8 years – page 7 of 29
© ActiveForLife.com
CUES: SPRINTING• Straight Posture
• Hands move hip-to-Lip
• Land on balls of feet
• Arms and legs move opposite
TIPS FOR INSTRUCTION• Encourage children to walk, jog, and
sprint and remind them of the cues.
• Children can crawl or walk like an animal in the warm-up when tagged.
Game: Fire “safety” tag (10 minutes)
• Generally, 2 children are “fires” and another is a “firefighter”.
• When the fires tag a child, the child must stop, drop, roll, and then crawl.
• If the firefighter tags a crawling child, the child is free to get up and run again.
Lesson progressions
• This lesson can be used several times in order to help develop proper coordination and dynamic balance when marching, jogging, and running.
• In the practice, the children can march and jog forward, backward, and sideways while maintaining good coordination between their arms and legs.
• Playing fun and motivating music with different tempos during certain parts of the lesson can provide energy and establish the pace when children are marching, jogging, and sprinting.
• Each time you repeat this lesson, surprise the children with a new tag game or other ac-tivity at the end (can be a yoga stretch or relaxation time).
Wrap-up (2 minutes)
Call the children back into a circle or designated lines and review what they learned.
What are four things we need to do when we jog?
What are four things (tricks) we need to do when we sprint?

Physical Literacy at School: Unit 1 | 10-week unit for ages 5-8 years – page 8 of 29
© ActiveForLife.com
EQUIPMENT: Hula hoops, music, ropes, cones, crates, mats.
Introduction (2 minutes)
Start with the same routine (greeting, semi-circle or lines
Today we will learn, practice, and play to gallop properly.
Can somebody show me how to gallop?
What sports or activities use the skill of galloping? (Fencing, tennis, track and field,
baseball, gymnastics)
Warm-up: Balance tag (5 minutes)
• Leader places hula hoops around activity space (one per child).
• When the music starts, jog around the activity space without touching the hula hoops.
• When the music stops, hop into a hula hoop and balance the way I tell you to.
• Suggested balances:
» Kimbo stance
» Single-leg balance stance
» Stork stance Airplane taking-off stance
» Airplane flying stance
» Kite stance
• Leader encourages and gives children an opportunity to invent their own balances.
Demonstration: Galloping (3 - 5 minutes)
• Leader asks children to sit in a semi-circle.
• Today we are going to learn how to gallop, just like a racehorse!
• Leader demonstrates how to gallop:
» In galloping, you step forward with one foot that is always your “lead” foot.
» The toes of your back foot chase the heel of your lead foot.
» Both feet leave the ground, and you land on your back foot, followed by your lead foot.
» When galloping, point both feet forward.
» Arms swing forward at the same time the back foot moves forward.
» Head up and look forward.
Lesson 3: Galloping5 - 8 year olds

Physical Literacy at School: Unit 1 | 10-week unit for ages 5-8 years – page 9 of 29
© ActiveForLife.com
Practice: Galloping (5 minutes)
• Children spread out along one side of the activity space.
• Leader asks children to gallop in a line to the opposite side of the activity space.
• Leader gallops alongside any children who have difficulty (model the movement).
• Leader encourages children to swing their arms in rhythm with their lower body.
• With a partner, children spread out around activity space and practice the “step-toes-to-heel” pattern.
• Leader can invite children to gallop and work together to make shapes as they gallop (circle, figure eight, triangle, following a line on the floor etc.).
• Leader should encourage children to try galloping with opposite foot leading.
CUES• Head up with good posture
• Toes pointed forward
• Step-toes-to-heel
• Swing arms in rhythm with lower body
TIPS FOR INSTRUCTION• Many children learn this skill quickly,
so it is a good time to reinforce good listening and cooperation while helping those with more difficulty.
• Encourage children to gallop with either foot leading.
Game: Galloping horses relay (10 minutes)
• Divide children into 4 or 5 groups with even numbers.
• Designate a start line at one end of activity space.
• For each group, leader places a cone at the other end of the activity space to mark their turn-around point.
• Groups line up behind the start line.
• Each group has one skipping rope which will be used as the “reins” to lead the horse.
• The first person in line is the horse, and they place the reins around their waist.
• The second person in line holds the reins as if they are guiding the horse.
• In pairs (horse and guide), children gallop around the turn around point and back to the start.
• When they reach the start line, they pass the reins to the next pair in their group.
• The first group to have every pair complete the course wins.
Physical Literacy at School: Unit 1 | 10-week unit for ages 5-8 years – page 10 of 29
© ActiveForLife.com
Lesson progressions
• Create a relay race obstacle course for children to gallop through. Provide opportunities for children to gallop over low obstacles (e.g. foam noodles, ropes, and low hurdles) and in and out of other objects (e.g. cones, crates, and mats).
• Have children play game with non-dominant foot leading.
• Have children change lead foot while they are galloping by saying “switch”. Show them how the switch involves changing their lead foot abruptly (i.e. step forward with the back foot and continue galloping).
• Have children gallop to the beat of different songs to develop rhythm, and ask all of them to change direction at every four or eight beats.
• Children can perform different patterns and even “switch” when changing direction.
• Ask children to gallop backward and try all the variations above.
Wrap-up (2 minutes)
Call the children into a circle and review what they learned.
What are four things we need to do when we gallop?
Why is it important to swing your arms when you are galloping?
Physical Literacy at School: Unit 1 | 10-week unit for ages 5-8 years – page 11 of 29
© ActiveForLife.com
EQUIPMENT: Skipping ropes, tape, chalk, cones, gymnastics mats, yoga mats, boxes or safe benches to jump onto, and/or hula hoops.e.
Introduction (2 minutes)
Can somebody show me how to jump?
What sports or activities use the skill of jumping? (Basketball, gymnastics, volleyball,
track and field, etc.)
Warm-up: Exploring the jump (5 minutes)
• Each child uses an existing line on the floor. If you are outside, they can lay out a skipping rope in a line on the ground, or draw a chalk line on the pavement.
• Ask children to try different ways to jump over their line and land on the other side with-out falling.
• Jumping is when you spring with both legs (jump) from two feet and land on two feet.
• Encourage and give time for children to try different jumps:
» Jump forward
» Jump sideways
» Jump backward
» Jump diagonal forward and backward
» Jumping and twisting (90, 180, 270, and 360 degrees both ways)
• Using two lines that make a plus sign (+), children can practice jumping over the lines in different ways.
Demonstration: Horizontal jump (2 - 3 minutes)
• Demonstrate the parts of a good jump that help us to jump further.
• Get ready: Bend knees and lean forward, swing arms back.
• Take off: Swing arms up and forward as you spring with your legs, reaching as high and far as possible.
• Fly forward: Extend body before bringing knees up.
• Land: Absorb your landing softly by bending ankles, knees, and hips on impact.
• On landing, arms should reach straight forward for balance.
Lesson 4: Horizontal jumping5 - 8 year olds
Physical Literacy at School: Unit 1 | 10-week unit for ages 5-8 years – page 12 of 29
© ActiveForLife.com
CUES• Get ready: Arms back, crouch forward
• Take off: Spring and swing
• Fly: Extend body
• Land: Land quietly, arms forward
TIPS FOR INSTRUCTION• Provide feedback to the children using
the cues.
• Encourage the children to extend their bodies on takeoff.
• Jumping requires a lot of strength and fitness. Children should not be tired when learning to jump. Give them breaks to rest as they practice.
• Have students close their eyes and lis-ten to others jumping and landing softly, making as little sound as possible.
Practice: Jumping for distance (8 - 10 minutes)
• Quickly demonstrate with one child how to work in pairs during this exercise.
• Pair-up children, and ask them to line-up along a long line in the activity space (use tape or chalk if there are no lines available).
• The first child stands behind the line, jumps forward, and lands without moving so that the other child can measure how far they jumped.
• The second child marks where the back heal landed with a ruler, tape, or chalk line.
• The first child jumps two more times to try to jump further each time.
• The second child gets a turn afterwards.
• After a few minutes, the leader pairs up children with different partners.
• Now you will take turns jumping from your line three or more times in a row and measure how far you get.
• Leader repeats the cues for jumping.
Game: Island jumping (10 minutes)
• Having practiced, tell the children they are ready to try to island jump.
• Scatter gymnastics mats, yoga mats, and/or hula hoops throughout the activity space as “islands”.
• Place the islands close enough so children can jump from one to another.
• The object of the game is the jump to all the islands without falling in the water (gym floor).
• After children complete the circuit, increase the distance between the mats slightly.

Physical Literacy at School: Unit 1 | 10-week unit for ages 5-8 years – page 13 of 29
© ActiveForLife.com
Lesson progressions• Provide opportunities for children to jump on and off of obstacles (e.g. mats stacked up,
strong wood boxes, benches, etc.) and over obstacles (e.g. low hurdles, wooden blocks, cones, etc.).
• As they jump from island to island, ask children to jump and twist in the air before land-ing. (Try twisting both ways.)
• Ask children if they can Jump and make letter shapes with their bodies in the air before landing (e.g. A, Y, X, O).
• Each jumping variation is difficult and children will do better when they know how to get ready, take off, fly, and land well.
Wrap-up (2 minutes)
Call the children into a circle and review what they learned.
What are four things we need to do to jump well?
Why are arms important in jumping and landing?

Physical Literacy at School: Unit 1 | 10-week unit for ages 5-8 years – page 14 of 29
© ActiveForLife.com
EQUIPMENT: Hoops.
Introduction (1 - 2 minutes)
Can somebody show me how to do a bunny hop?
Can somebody show me how to hop on one foot?
What sports or activities use the skill of hopping? (Track and field, dancing, figure
skating, gymnastics)
Warm-up: Locomotor skills on display (5 minutes)
• Explain to children that you want to see how they can move around the activity space in different ways.
• On the signal, I want you to move around using any form of locomotion (e.g. walk, run, hop, jump, gallop, skip, shuffle, crawl, roll, etc.).
• Suggest just a few skills for the younger children and encourage them to keep moving.
• On the signal, children must freeze in an interesting way. Leader can have children pick their own “freeze” pose or pick balances they have learned.
• When restarting after each freeze, children must use a different form of locomotion.
Demonstration: Hopping (2 - 3 minutes)
• Explain hopping: Jump off one foot and land on the same foot.
• Explain that a bunny hop is a tiny jump off of two feet and landing on two feet.
• Demonstrate bunny hopping and hopping a few times over a short distance.
• The part of the foot that you use for take-off and landing when you hop and bunny hop is the ball of the foot.
• The ball of the foot is the part that touches the ground when you are standing on your tippy-toes.
• Spring with each hop by bending your leg when you land and springing back up.
• Your leg in the air does a “hitch-kick” by swinging back to front with each hop.
• Use your arms for balance when hopping (see tips).
Lesson 5: Hopping on one foot5 - 8 year olds

Physical Literacy at School: Unit 1 | 10-week unit for ages 5-8 years – page 15 of 29
© ActiveForLife.com
CUES• Head up with good posture
• Spring on one leg
• Hitch-kick
• Swing arms opposite to leg
TIPS FOR INSTRUCTION• Encourage children to hop with both
their right and left legs.
• Hopping requires a lot of strength and fitness. Children should not be tired when learning to hop. Give the children rest breaks while practicing.
Practice: Red light, green light (5 - 8 minutes)
• Ask children to spread out along one end of the activity space.
• Explain the game “Red light, green light”.
• When I call out “green light”, hop towards the other end of the activity space.
• When I call out “red light”, stop and stand on one foot.
• When I call out “yellow light”, march slowly towards the other end of the activity space, lifting knees high and swinging arms opposite to legs.
• Play a few rounds and give different children the opportunity to call the commands.
Game: Hoop hop (8 - 10 minutes)
• Spread a few hoops around the activity space.
• Explain to the children that you will call out a movement (walk, run, gallop, skip).
• Children must move around the activity space using that movement pattern, and they must avoid touching the hoops.
• When I call out “hoop hop” you must hop in and out of as many hoops as you can until I blow the whistle to stop.
• I want you to practice with both legs, so change legs once you hop out of a hoop.
• Repeat several times, changing the movement pattern each time.
• Once you have played a few rounds, take away half of the hoops.
• Leader can challenge the children to hop in and out of a certain number of hoops: I want you to try to hop in and out of 5 hoops before I blow the whistle.
Lesson progressions
• Children can hop on one foot in multiple directions (forward, backward, sideways, diagonally, in a circle, etc.).
• Provide opportunities for children to hop on and off of obstacles (e.g. mats stacked up, benches etc.) and over obstacles (e.g. low hurdles, wooden blocks etc.).
Wrap-up (2 minutes)
What is the difference between bunny hopping and hopping?
What are four things we need to do when we hop?

Physical Literacy at School: Unit 1 | 10-week unit for ages 5-8 years – page 16 of 29
© ActiveForLife.com
EQUIPMENT: Pinnies, hula hoops, music.
Introduction (2 minutes)
Can somebody show me how to skip?
What sports or activities use the skill of skipping? (Playing in the school yard, track
and field, martial arts, gymnastics, dancing)
Warm-up: Colour tag (5 minutes)
• Leader divides children into 4 equal groups.
• Each group is wearing a different colour pinnie.
• Leader calls a colour that is “it” and a locomotor movement (walk, run, gallop, skip).
• The team that is “it” tries to tag members of the other teams.
• When a child is tagged they must freeze in a “star” position.
• To rejoin the game, another team member must “high-five” the star and then crawl under the star’s legs.
• Leader changes which colour is “it” every 30-60 seconds.
Demonstration: Skipping (3 - 5 minutes)
• Leader asks children to sit in a semi-circle.
• Leader explains skipping by breaking it down into two parts: “the step and the hop”.
• Leader demonstrates a “soldier march” by stepping with high knees (up to waist), arms swinging opposite to legs.
• Leader then demonstrates the “hop” by swinging one knee up, hopping off the other foot, and landing on same foot.
• Leader then demonstrates skipping, by stepping forward, hopping on the same foot, then repeating with other foot (step-hop, step-hop, step-hop).
Lesson 6: Skipping5 - 8 year olds

Physical Literacy at School: Unit 1 | 10-week unit for ages 5-8 years – page 17 of 29
© ActiveForLife.com
CUES• Head up with good posture
• Step-hop, step-hop rhythm
• Swing knee up and hop
• Swing arms opposite to legs
TIPS FOR INSTRUCTION• Skipping can be difficult to learn.
• Praise children for their efforts.
• Provide enough practice time for success.
Practice: Skip (5 minutes)
• Children spread out along one side of the activity area and face the other side.
• All children move across the space with the instructions:
» Leader calls out the word “step” and children take a step like a marching soldier.
» Leader calls out the word “hop” and children hop and land on the same foot, one step at a time.
» Leader calls out step” and then “hop” and the children follow the instructions.
» The leader should gradually increase the tempo.
• With a partner, children spread out around activity space and practice the “step-hop” pattern (e.g. play follow-the-leader by skipping).
• Encourage the children to say “step-hop, step-hop” as they move.
• When the leader sees that most children understand basic movement, leader can encourage them to swing their arms opposite their legs.
• Leader can invite children to skip making shapes (circle, figure eight, triangle, following a line on the floor, etc.).
Game: Skipping chain tag (10 minutes)
• Leader chooses 2 children to be the first chain and to be “it”.
• The pair of “it” children join hands and try to tag other children with their free hands.
• All children are skipping around the activity space.
• When the pair tags a child, they become a chain of three.
• When the three children tag a fourth child, they split into two chains of two.
• Both chains continue to chase and tag.
• The game is over when all children are part of a chain.
• Leader makes sure all children continue to skip at all times.

Physical Literacy at School: Unit 1 | 10-week unit for ages 5-8 years – page 18 of 29
© ActiveForLife.com
Lesson progressions
• Have the children practice skipping forwards and backwards.
• Encourage the children to continue to skip different patterns while switching from for-ward to backward or sideways skipping.
• As children are tagged they join the “chain”. This time the chain stays together and con-tinues to get longer.
• Only the two children on the ends of the chain can tag.
• Game continues until only 1 child is left.
Wrap-up (2 minutes)
What are four things we need to do when we skip?
Why is it important to swing our arms when we skip?

Physical Literacy at School: Unit 1 | 10-week unit for ages 5-8 years – page 19 of 29
© ActiveForLife.com
EQUIPMENT: Soft balls of different sizes (foam, rubber, inflated).
Introduction (2 minutes)
Can somebody show me how to catch?
What sports or activities use the skill of catching a ball or object? (Baseball, softball,
basketball, dodgeball, football, rugby, rhythmic gymnastics, soccer, volleyball).
Warm-up: Individual toss and catch (5 minutes)
• Each child takes a ball and finds a space next to a wall.
• Each child practices catching by tossing their ball against the wall above them.
• Ask children to explore different ways to catch the ball:
» Catch your ball with two hands.
» Let your ball bounce once before catching it.
» Toss your ball at different heights or aim for a target on the wall.
» Catch your ball with one hand and then the other.
Demonstration: Catching (2 minutes)
• Demonstrate the elements of catching.
• Keep your eyes on the ball until it arrives in your hands.
• Get your body behind the ball (i.e. in front of its flight path).
• If you see the ball passing to one side, move your whole body to the side. Don’t just reach your arms out to the side.
• If the ball is arriving above your belly button, make sure your palms face forward, your fin-gers point up, and your two thumbs should be touching.
• If the ball is arriving below your belly button, make sure your palms face forward, your fin-gers point down, and your two pinky fingers are touching.
• As you receive the ball with your hands, you should bend your arms and bring the ball in towards your body.
Practice: Partner toss and catch (10 minutes)
• Repeat the warm-up activity with children grouped in pairs.
• Children simply toss the ball to each other.
Lesson 7: Catching5 - 8 year olds

Physical Literacy at School: Unit 1 | 10-week unit for ages 5-8 years – page 20 of 29
© ActiveForLife.com
CUES• Eyes on the ball
• Get “behind the ball”
• Hands bowl shape (pinkies close to-gether)
• Bring to body
TIPS FOR INSTRUCTION• At this age, the ball will touch the
ground many times.
• Praise children if they use even one key element of catching (see Cues).
• Challenge each pair: How many times can you catch your ball without dropping it?
• Can you better your score?
Game: Trick catch (10 minutes)
• Children organized in pairs, and every child has a ball.
• Partner 1 tosses the ball up in the air and does a trick before catching (e.g. clapping hands).
• Partner 2 tries to do Partner 1’s trick.
• Next, Partner 2 does a trick that Partner 1 has to imitate.
• Leader signals for children to find a new partner and start again.
• Extra fun: Leader can do a trick and ask all children to imitate it, or leader can pick a child to do a trick for the entire group to imitate.
Lesson progressions • Object manipulation skills can be even more difficult to learn if children have trouble bal-
ancing and doing basic locomotion skills. Give ample opportunities for children to use the balls and explore the skills as much as possible.
• Younger children often have difficulty staying focused on the activities, so be patient and keep the children engaged.
• Have the children move (e.g. walk, skip, hop) around the activity space as they are “trick catching”. For younger children, simply walking and catching will be difficult.
• Encourage children to try catching while in different positions (e.g. very low to floor, while balancing on one leg, while balancing in a pose previously learned, etc.).
Wrap-up (2 minutes)
What are four things we need to do when we catch below our belly buttons?
What are four things we need to do when we catch above our belly buttons?
Physical Literacy at School: Unit 1 | 10-week unit for ages 5-8 years – page 21 of 29
© ActiveForLife.com
EQUIPMENT: Plastic bowling pins or short pool noodles for targets, tennis balls, soft foam balls, bean bags, hula hoops and music.
Introduction (2 minutes)
Can somebody show me how to roll a ball?
What sports or activities use the skill of rolling a ball? (Bowling, lawn bowling, soccer
baseball, soccer, rhythmic gymnastics, curling)
Warm-up: Hoop catch (5 minutes)
• Leader spreads hula hoops around activity space (one per child).
• Using as many different types of objects as possible (various size balls, bean bags, foam blocks, balloons, badminton bird, etc.), leader places one object in each hoop.
• Each child stands in a hoop to start.
• When the music starts, children toss and catch the object by themselves.
• When the music stops, children place their object in their hoop and run to a different hoop.
• Repeat activity.
• Allow a maximum of 10 seconds for transition time between hoops.
• Encourage children to run, gallop, jump, hop, or skip to a different hoop each time.
Demonstration: Underhand roll (2 minutes)
• Demonstrate an underhand roll to the group using a tennis ball.
• Backswing with your rolling hand.
• Step forward with opposite foot to rolling hand.
• Bend knees and do a lunge as you release the ball (lean forward).
• Follow-through with your rolling arm after releasing the ball (hand should be pointing at target after release).
Lesson 8: Rolling a ball5 - 8 year olds

Physical Literacy at School: Unit 1 | 10-week unit for ages 5-8 years – page 22 of 29
© ActiveForLife.com
CUES• Back swing with throwing arm
• Lunge with opposite leg
• Swing throwing arm
• Point at target
TIPS FOR INSTRUCTION• Praise children for working well together
and rolling the balls accurately.
• Change partners from time to time and have them start close and move further apart to practice.
TIPS FOR INSTRUCTION• With younger children, simplify the rules
by setting-up equal targets on end lines and players are not allowed to protect their target.
Game: Take down (10 - 15 minutes)
• Divide the group into two teams.
• Teams stand on opposite sides of a centre line.
• Players cannot cross the centre line of the gym.
• Leader designates a target line in each team’s zone.
• Each player stands up a pool noodle or bowling pin on their team’s end line as a target.
• To start, target lines should be close enough for children on the other team to be able to knock down the targets easily.
• Players should spread out along their end line, and they should stand in front of their target to protect it.
• To start the game, each child starts with a tennis ball in their hands.
• Players must try to protect their target while retrieving tennis balls and rolling the balls to the other end to knock down opponent targets.
• The first team to knock down all the targets on their opponent’s side wins.
• No sitting down to protect your target.
• Players must be on their feet at all times.
• If you knock down your target by accident, it stays down.
• Only one person can protect a target at a time.
Practice: Underhand roll (10 minutes)
• Practice the underarm roll in pairs using tennis balls.
• Designate two lines (e.g. floor markings) where partners stand across from each other, so all pairs are rolling in parallel.
• Partners start 3 metres apart, then increase distance after each partner receives 5 rolls.
• Provide feedback as you go around the activity space.

Physical Literacy at School: Unit 1 | 10-week unit for ages 5-8 years – page 23 of 29
© ActiveForLife.com
Lesson progressions• This lesson can be repeated one or two more times.
• Children will do better as they bend their knees more and follow through smoothly.
• Make sure children are having success at short distances and developing their accuracy before you increase the distance.
• Children can play bridge bowling where children go in groups of 3-4. One of the children makes a bridge with their hand and feet or simply stands with their legs apart while the other children take turns and try to roll a ball through the bridge and hit a cone placed on the other side.
• Have children roll a ball along a long line and see how long the ball can stay on that line.
Wrap-up (2 minutes)
What are four things we need to do when we do an underhand roll?
When else do you lunge in a normal day?
Physical Literacy at School: Unit 1 | 10-week unit for ages 5-8 years – page 24 of 29
© ActiveForLife.com
EQUIPMENT: Bean bags, hoops, tape, buckets or small boxes.
Introduction (2 minutes)
Can somebody show me how to throw a ball underhand?
What sports or activities use the skill of throwing a ball underhand? (Softball, baseball,
rugby, volleyball, badminton, tennis, rhythmic gymnastics, dodgeball)
Warm-up: Island hopping (5 minutes)
• Place hoops around the activity space (one hoop per child).
• Explain that the hoops are islands.
• Children must move around the “water” between and around the islands.
• When you shout “shark attack”, the children must jump onto an island to be safe.
• Call a different locomotor movement each time:
» walk
» run
» jump
» hop
» gallop
» skip
• Once a few rounds have been played, take away half of the hoops.
• Children are now allowed to “share” their island with one other friend.
• Continue to take away hoops until only one hoop is left.
• Children try to fit at least one foot into the remaining hoop.
Lesson 9: Underhand throwing5 - 8 year olds
TIPS FOR INSTRUCTION• For safety, remind children not to step
on the hoops.

Physical Literacy at School: Unit 1 | 10-week unit for ages 5-8 years – page 25 of 29
© ActiveForLife.com
CUES• Back swing with throwing arm
• Step with opposite foot
• Swing throwing arm
• Follow through
TIPS FOR INSTRUCTION• Begin by placing cones fairly close to
children.
• Allow children to throw this short distance for a few turns.
• Increase the difficulty by increasing the distance.
Game: Bucket toss golf (10 - 15 minutes)
• Set up several “golf holes” by placing buckets or small boxes around the activity space.
• Place tape on the floor to mark “golf tees” where children throw for each hole.
• Organize groups into pairs.
• Each child in pair has a different colour bean bag.
• Each pair of “golfers” starts at a different golf hole.
• Children take turns throwing their bean bag at the golf hole from the tee.
• Children must continue to throw from the tee until they get their bean bag in the hole.
• Children count the number of attempts they make from the tee as “strokes” until they land in the hole, or until the leader says to move to the next hole.
• Tell children to move to the next hole every 1-2 minutes.
• Game is over when each pair has had a turn at each hole.
• Partner with the fewest strokes wins.
Demonstration: Underhand throw (2 minutes)
• Demonstrate an underhand throw with a bean bag into a hoop.
• Look at your target.
• Step forward with the foot opposite to your throwing arm.
• Swing your throwing arm and follow through as you release your bean bag.
• After you release your bean bag, your hand should be pointing at your target.
Practice: Throw to target (5 - 8 minutes)
• Organize children into groups of 2 or 3.
• Groups spread out along one end of activity space so that all children are throwing in the same direction.
• Every child has a bean bag.
• Set up a hoop in front of every group.
• Children take turns underhand throwing into their hoop or to a cone to see who can throw closest to the target.
• Give the command to collect bean bags once all children have had a chance to throw.

Physical Literacy at School: Unit 1 | 10-week unit for ages 5-8 years – page 26 of 29
© ActiveForLife.com
Lesson progressions
• Once the children have understood how to do a proper underhand throw, have them throw balls and bean bags to each other and catch the objects.
• Children can practice running together while underhand throwing and catching without dropping the object (passing a ball or bean bag to each other).
Wrap-up (2 minutes)
What are four things we need to do when we throw underhand?
Can you think of different times when you use an underhand throw?
TIPS FOR INSTRUCTION• During setup, vary the distances for
different holes.
• If time allows, play a second round where the children throw with their non-dominant hand.

Physical Literacy at School: Unit 1 | 10-week unit for ages 5-8 years – page 27 of 29
© ActiveForLife.com
EQUIPMENT: S oft balls, noodles or bowling pins, skipping ropes
Introduction (1 - 2 minutes)
For the past few weeks we have been having a lot of fun learning how to balance, move
in different ways, and throw and catch a ball.
Because you have done such a great job, today we will be having more fun with some
of the activities that we enjoyed the most.
Lesson 10: Best of “Fun Day”5 - 8 year olds
TIPS FOR INSTRUCTION• The purpose of this lesson plan is to
provide an opportunity for the children to revisit some of the games that they most enjoyed throughout the previous 9 weeks, while at the same time continuing to practice fundamental movement skills.
• The games that follow are examples of what Lesson 10 might look like.
• Leaders can either follow this lesson plan or create their own, based on their own observations and feedback from the children.
• Balance, locomotion, and object manipulation should all be practiced in this lesson.
Game 1: Balance ball pass (10 minutes)
• Divide children into groups of 4 or 5.
• Groups spread out around activity space and each group makes a circle.
• Each group has a soft ball.
• Explain that children will call out a balance pose and then begin the music.
• When the music is playing, I want you to hold the balance I call out and try to pass the ball around the circle.
• Count how many times you can pass without anyone dropping the ball or losing your balance.
• Repeat activity calling out different balances that were practiced.
• Circles can be made smaller or larger to create more or less challenge.
Physical Literacy at School: Unit 1 | 10-week unit for ages 5-8 years – page 28 of 29
© ActiveForLife.com
CUES• Look forward (at object in front)
• Good posture (stand tall, knee up, arms out)
• Body still
• Hold pose for 10 seconds
CUES• Back swing with throwing arm
• Lunge with opposite leg
• Swing throwing arm
• Point at target
Game 2: Take down (10 - 15 minutes)
• Divide the group into two teams.
• Teams stand on opposite sides of a centre line.
• Players cannot cross the centre line of the gym.
• Leader designates a target line in each team’s zone.
• Each player stands up a pool noodle or bowling pin on their team’s end line as a target.
• To start, target lines should be close enough for children on the other team to be able to knock down the targets easily.
• Players should spread out along their end line, and they should stand in front of their target to protect it.
• To start the game, each child starts with a tennis ball in their hands.
• Players must try to protect their target while retrieving tennis balls and rolling the balls to the other end to knock down opponent targets.
• The first team to knock down all the targets on their opponent’s side wins.
• No sitting down to protect your target.
• Players must be on their feet at all times.
• If you knock down your target by accident, it stays down.
• Only one person can protect a target at a time.
• You are not allowed to help a teammate protect their target.
TIPS FOR INSTRUCTION• With younger children, simplify the
rules by setting-up equal targets on end lines and players are not allowed to protect their target.

Physical Literacy at School: Unit 1 | 10-week unit for ages 5-8 years – page 29 of 29
© ActiveForLife.com
CUES• Head up with good posture
• Toes pointed forward
• Step-toes-to-heel
• Swing arms in rhythm with lower body
Game 3: Galloping horses relay (10 minutes)
• Leader divides children into 4 or 5 groups with even numbers.
• Leader designates a start line at one end of activity space.
• For each group, leader places a cone at the other end of the activity space to mark their turn-around point.
• Groups line up behind the start line.
• Each group has one skipping rope which will be used as the “reins” to lead the horse.
• The first person in line is the horse, and they place the reins around their waist.
• The second person in line holds the reins as if they are guiding the horse.
• In pairs (horse and guide), children gallop around the turn around point and back to the start.
• When they reach the start line, they pass the reins to the next pair in their group.
• The first group to have every pair complete the course wins.
Wrap-up (2 minutes)
Call the children back into a circle.
Discuss what the children liked best and what they learned throughout the lessons.
Say thank you for participating in the program.
Related Documents