Original Post and thread here - http://forum.xda-developers.com/showthread.php?t=1199098 Here is the method xda member edgan discovered for root access. Yes, it requires the HD Station. There is currently no way around that. You have to download and extract pulse.tar in webtop. There is no other way that it will work. You can use adb or Android Terminal Emulator instead of ssh, but you are on your own. With those, expect problems with your PATH. Images and additional notes provided by twospirits Please donate to the original OP with the button, if you are willing. While he does not promise anything new in the future. It would just be a thank you for this hack he provided. Here is a very nice YouTube tutorial: Youtube tutorial NOTE: All images in this step b y step when clicked open up i n another window in full size. Requirements: Item needed Notes HD Station The dock is necessary because the WebTop application that is launched via dock only, provides an exploit that is used to obtain SU permissions Webtop is needed because the Linux user that runs Webtop has access to write to /var/tmp, which is on the /osh partition and all that we use Webtop for is to get the files extracted to that partition with the proper permissions. The exploit needs to reside on the /osh partition to work properly. Sprint Photon HDMI cable The one that came with the Photon or a compatible one. Monitor or TV with open HDMI port. Wi-Fi connection on the phone You do need to have your phone on your local Wi-Fi on the same local Lan segment as your PC to SSH in to your phone from your pc. Computer with network access to the phone Steps: Preparing your phone 1. Install Superuser from the Market 2. Install SSHDroid from the Market 3. Open SSHDroid, and configure (as shown below if necessary) Open app Select Options Make sure port is 2222 SSHDroid is ready

Welcome message from author
This document is posted to help you gain knowledge. Please leave a comment to let me know what you think about it! Share it to your friends and learn new things together.
Transcript
8/3/2019 Photon Root Instructions-Xda
http://slidepdf.com/reader/full/photon-root-instructions-xda 1/7
Original Post and thread here -http://forum.xda-developers.com/showthread.php?t=1199098
Here is the method xda member edgan discovered for root access. Yes, it requires the HD Station. There
is currently no way around that. You have to download and extract pulse.tar in webtop. There is no other
way that it will work. You can use adb or Android Terminal Emulator instead of ssh, but you are on your
own. With those, expect problems with your PATH.Images and additional notes provided by twospirits
Please donate to the original OP with the button, if you are willing. While he
does not promise anything new in the future. It would just be a thank you for this hack he
provided. Here is a very nice YouTube tutorial: Youtube tutorial
NOTE: All images in this step by step when clicked open up in another window in full size.
Requirements:
Item needed Notes
HD Station The dock is necessary because the WebTop application that is
launched via dock only, provides an exploit that is used to obtainSU permissionsWebtop is needed because the Linux user that runs Webtop hasaccess to write to /var/tmp, which is on the /osh partition and all
that we use Webtop for is to get the files extracted to that
partition with the proper permissions. The exploit needs to resideon the /osh partition to work properly.
Sprint Photon
HDMI cable The one that came with the Photon or a compatible one.
Monitor or TV with open HDMI port.
Wi-Fi connection on the phone You do need to have your phone on your local Wi-Fi on the same
local Lan segment as your PC to SSH in to your phone from your
pc.Computer with network access tothe phone
Steps:
Preparing your phone
1. Install Superuser from the Market
2. Install SSHDroid from the Market
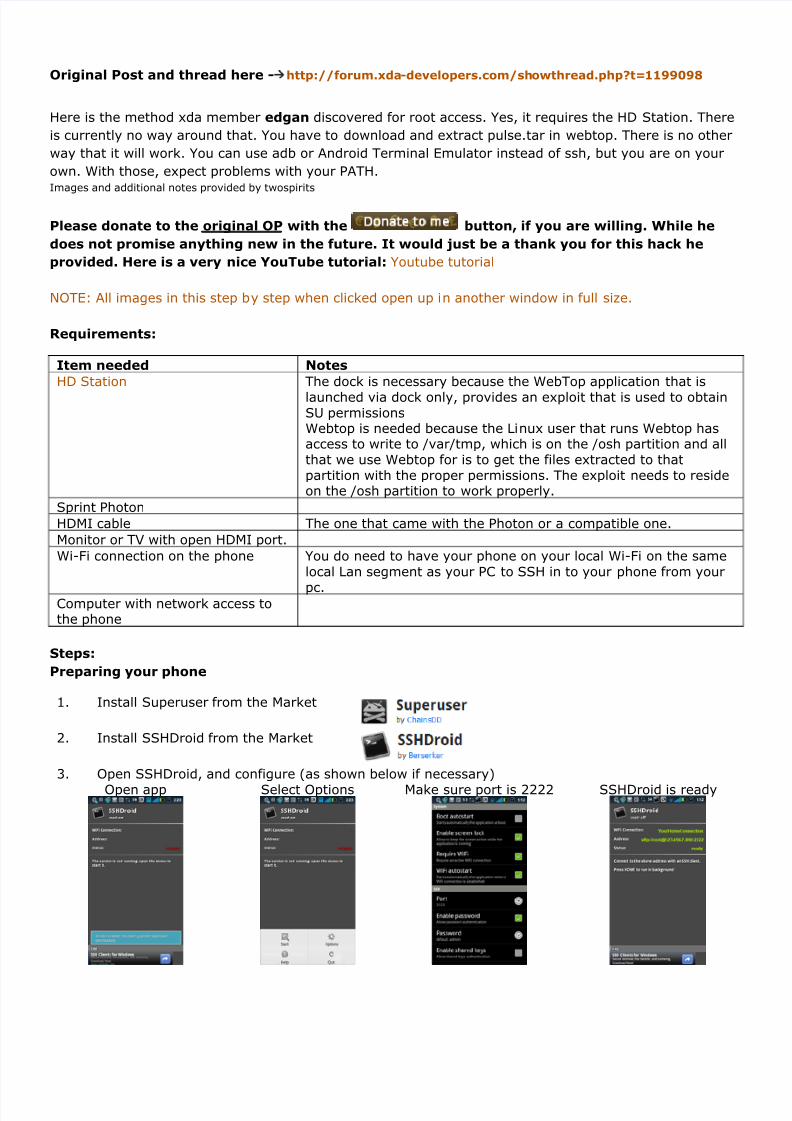
3. Open SSHDroid, and configure (as shown below if necessary)
Open app Select Options Make sure port is 2222 SSHDroid is ready
8/3/2019 Photon Root Instructions-Xda
http://slidepdf.com/reader/full/photon-root-instructions-xda 2/7
4. Install ConnectBot from the Market
5. Install or Run a SSH ClientFor Windows, on your PC:(in this case we use PuTTY)
http://bit.ly/SSH_WinPC or( http://the.earth.li/~sgtatham/putty/.../x86/putty.exe )
For Linux, in terminal window: ssh -p 2222 root@ip-address-mentioned-in-SSHDroid
For Mac, in terminal window: ssh -p 2222 root@ipaddress-mentioned-in-SSHDroid
Docking and downloading procedures
Steps 6 thru 13 needs the docking station. You connect your Photon to the docking station, perform thestepsand then do the remaining steps elsewhere. At home, if you already have the dock (instructions to
the left) or at the Sprint store, (instructions to the right).
6. Connect Photon to HD Station(HD Station should already be connected to your TV/Monitor and your TV input to HDMI)
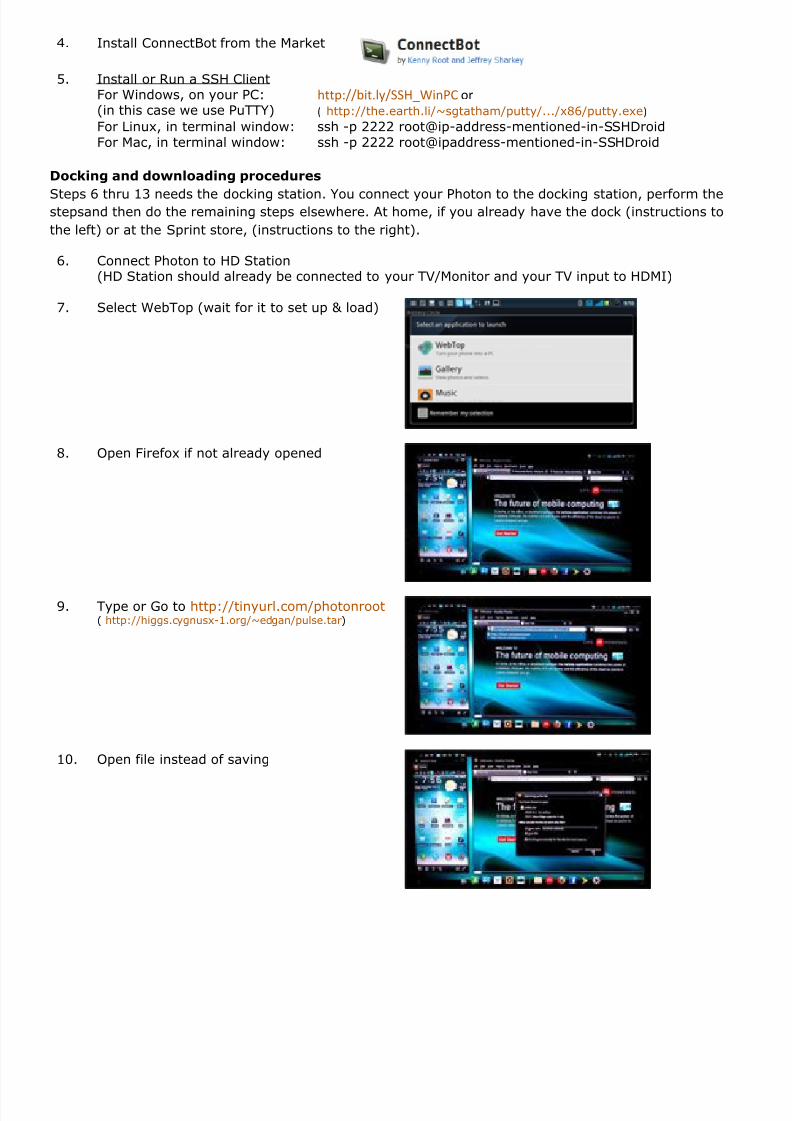
7. Select WebTop (wait for it to set up & load)
8. Open Firefox if not already opened
9. Type or Go to http://tinyurl.com/photonroot ( http://higgs.cygnusx-1.org/~edgan/pulse.tar)
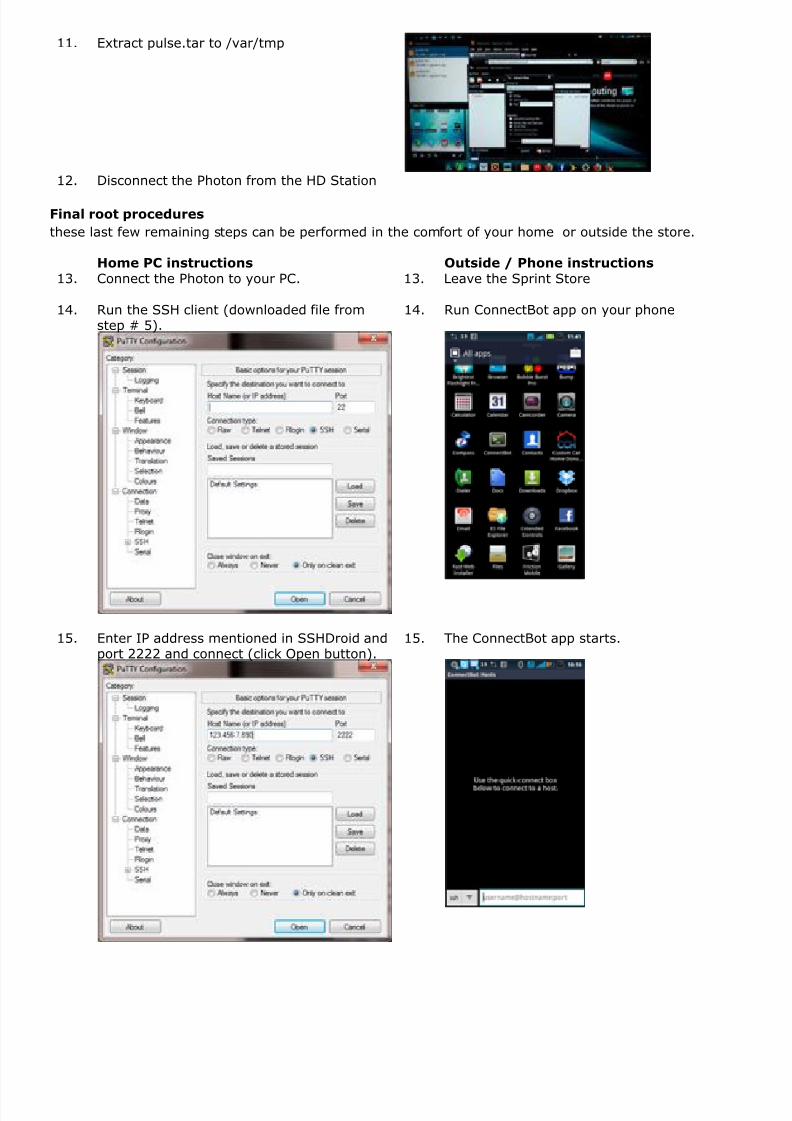
10. Open file instead of saving
8/3/2019 Photon Root Instructions-Xda
http://slidepdf.com/reader/full/photon-root-instructions-xda 3/7
11. Extract pulse.tar to /var/tmp
12. Disconnect the Photon from the HD Station
Final root procedures
these last few remaining steps can be performed in the comfort of your home or outside the store.
Home PC instructions Outside / Phone instructions
13. Connect the Photon to your PC. 13. Leave the Sprint Store
14. Run the SSH client (downloaded file fromstep # 5).
14. Run ConnectBot app on your phone
15. Enter IP address mentioned in SSHDroid andport 2222 and connect (click Open button).
15. The ConnectBot app starts.
8/3/2019 Photon Root Instructions-Xda
http://slidepdf.com/reader/full/photon-root-instructions-xda 4/7
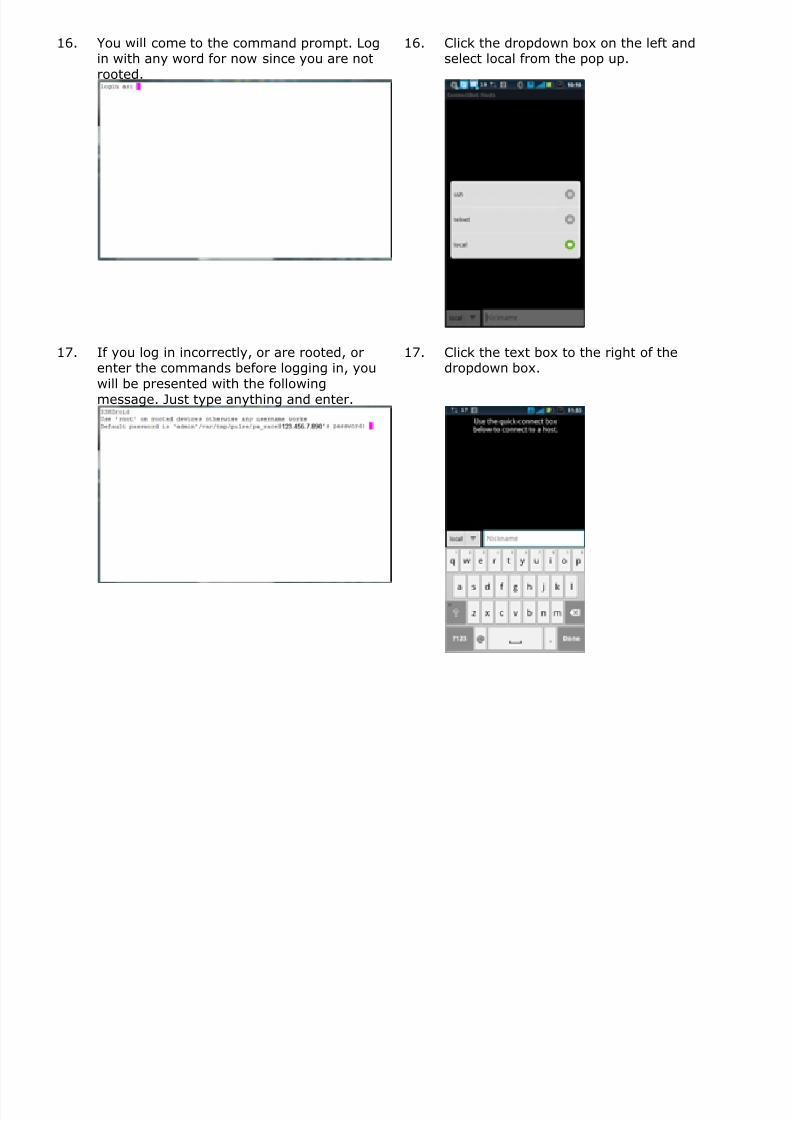
16. You will come to the command prompt. Login with any word for now since you are not
rooted.
16. Click the dropdown box on the left andselect local from the pop up.
17. If you log in incorrectly, or are rooted, orenter the commands before logging in, you
will be presented with the following
message. Just type anything and enter.
17. Click the text box to the right of thedropdown box.
8/3/2019 Photon Root Instructions-Xda
http://slidepdf.com/reader/full/photon-root-instructions-xda 5/7
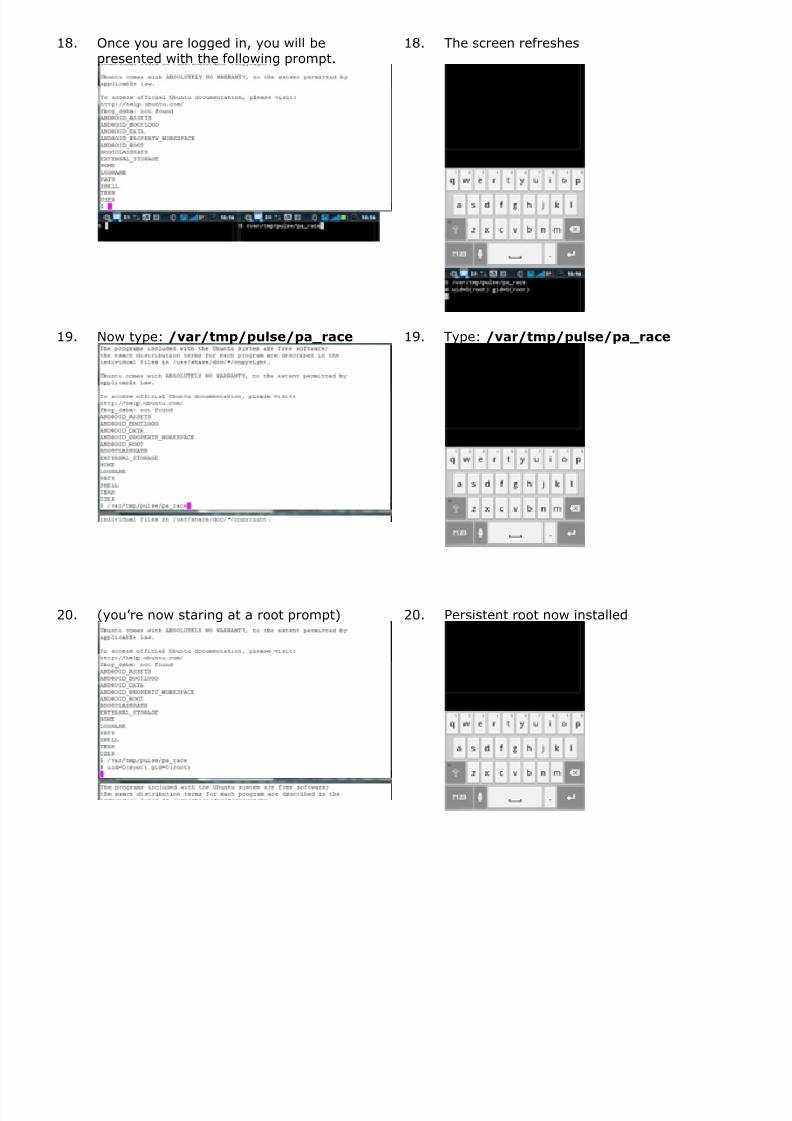
18. Once you are logged in, you will bepresented with the following prompt.
18. The screen refreshes
19. Now type: /var/tmp/pulse/pa_race 19. Type: /var/tmp/pulse/pa_race
20. (you’re now staring at a root prompt) 20. Persistent root now installed
8/3/2019 Photon Root Instructions-Xda
http://slidepdf.com/reader/full/photon-root-instructions-xda 6/7
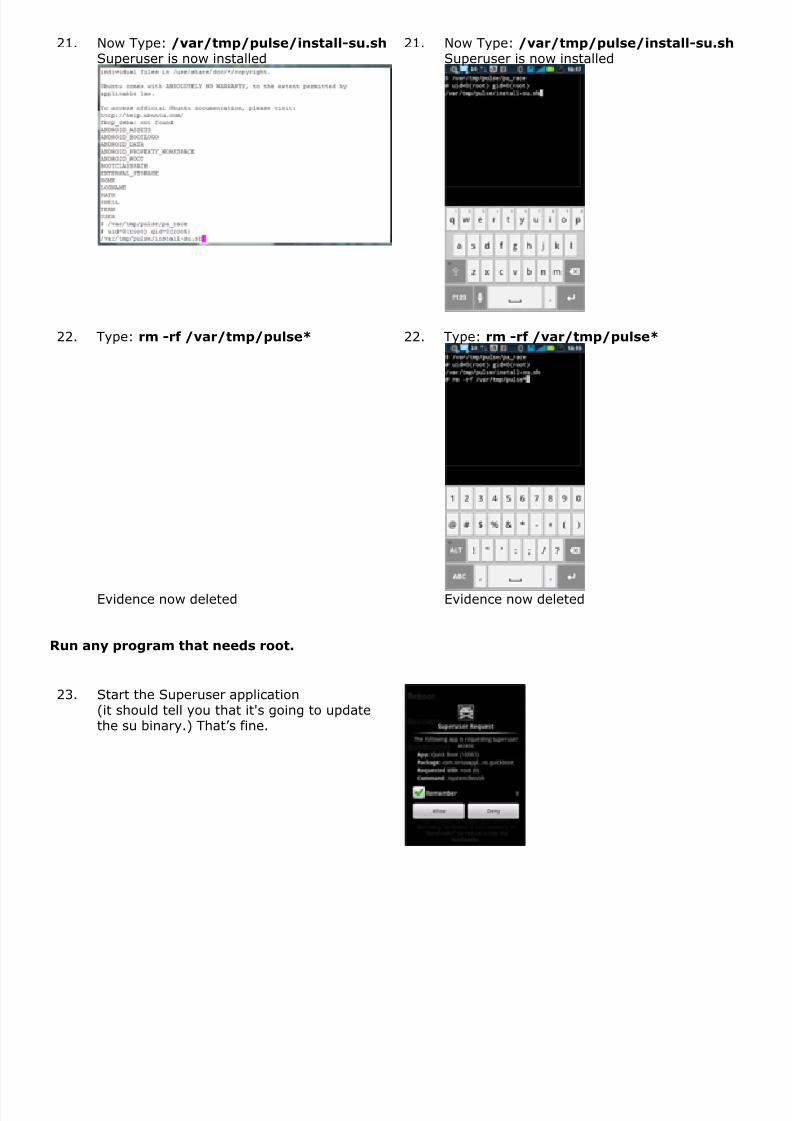
21. Now Type: /var/tmp/pulse/install-su.shSuperuser is now installed
21. Now Type: /var/tmp/pulse/install-su.shSuperuser is now installed
22. Type: rm -rf /var/tmp/pulse* 22. Type: rm -rf /var/tmp/pulse*
Evidence now deleted Evidence now deleted
Run any program that needs root.
23. Start the Superuser application(it should tell you that it's going to updatethe su binary.) That’s fine.
8/3/2019 Photon Root Instructions-Xda
http://slidepdf.com/reader/full/photon-root-instructions-xda 7/7
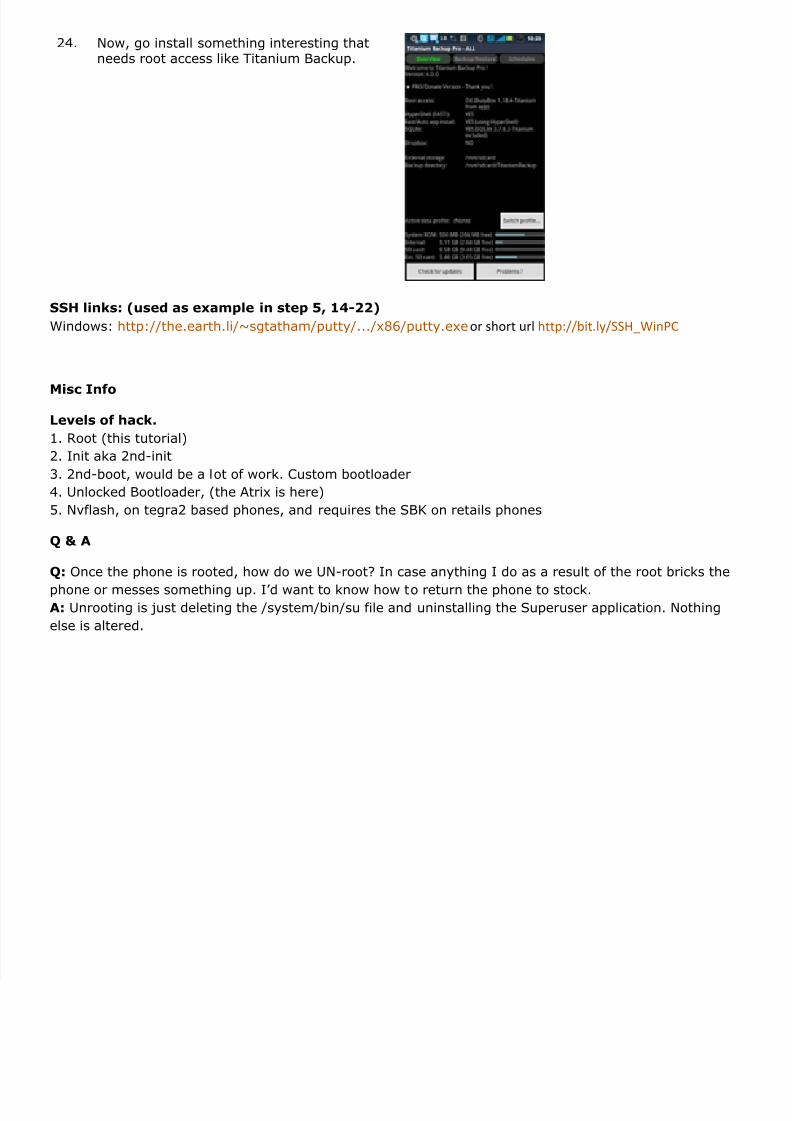
24. Now, go install something interesting thatneeds root access like Titanium Backup.
SSH links: (used as example in step 5, 14-22)
Windows: http://the.earth.li/~sgtatham/putty/.../x86/putty.exe or short url http://bit.ly/SSH_WinPC
Misc Info
Levels of hack.
1. Root (this tutorial)
2. Init aka 2nd-init
3. 2nd-boot, would be a lot of work. Custom bootloader
4. Unlocked Bootloader, (the Atrix is here)
5. Nvflash, on tegra2 based phones, and requires the SBK on retails phones
Q & A
Q: Once the phone is rooted, how do we UN-root? In case anything I do as a result of the root bricks the
phone or messes something up. I’d want to know how to return the phone to stock. A: Unrooting is just deleting the /system/bin/su file and uninstalling the Superuser application. Nothing
else is altered.
Related Documents

![[GUIDE] [PORT] [ROM] All About Mediatek ROM Porting - Xda-Developers](https://static.cupdf.com/doc/110x72/55cf9426550346f57b9ff263/guide-port-rom-all-about-mediatek-rom-porting-xda-developers.jpg)


