PHOTOGRAPHY DAY Escola Betúlia

Photography workshop
Jul 16, 2015
Welcome message from author
This document is posted to help you gain knowledge. Please leave a comment to let me know what you think about it! Share it to your friends and learn new things together.
Transcript
PHOTOGRAPHY DAYEscola Betúlia
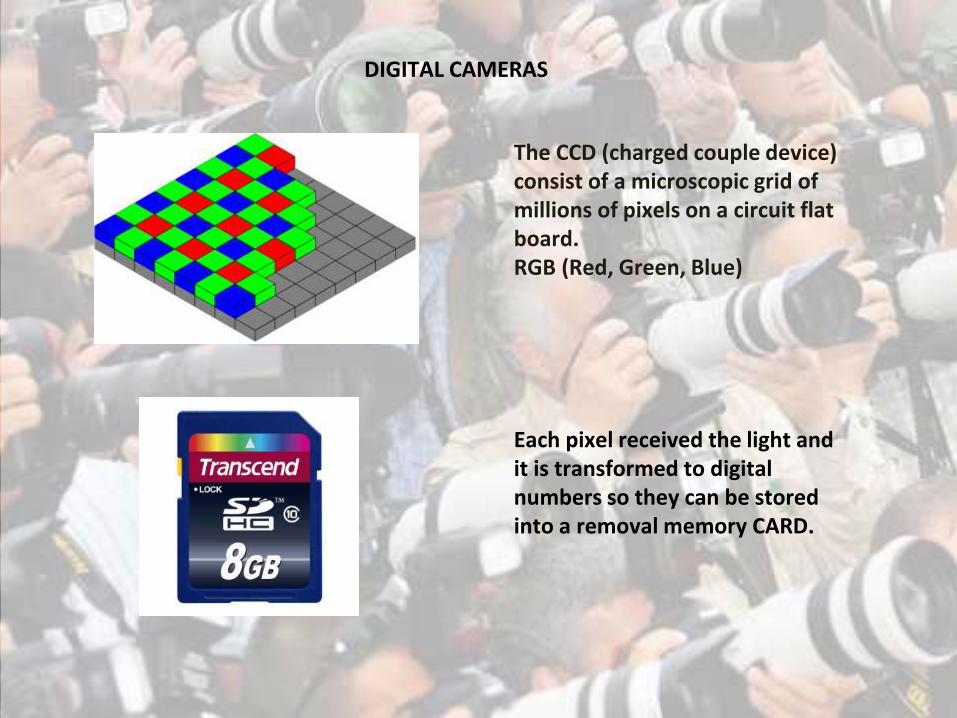
DIGITAL CAMERAS
The CCD (charged couple device) consist of a microscopic grid of millions of pixels on a circuit flat board.RGB (Red, Green, Blue)
Each pixel received the light and it is transformed to digital numbers so they can be stored into a removal memory CARD.

ISO (International Standardization Organization): Film speed o light sensitiveShutter speed: Exposure time o Time value Tv, is the length of time a camera’s shutter is open when taking a photograph. Aperture: Aperture value Av, the size of the hole where the light travelsWhite Balance (Color Balance): global adjustment of the intensities of the colors (typically: the red, green and blue - primary colors)
CAMARA SETTINGS
ISO
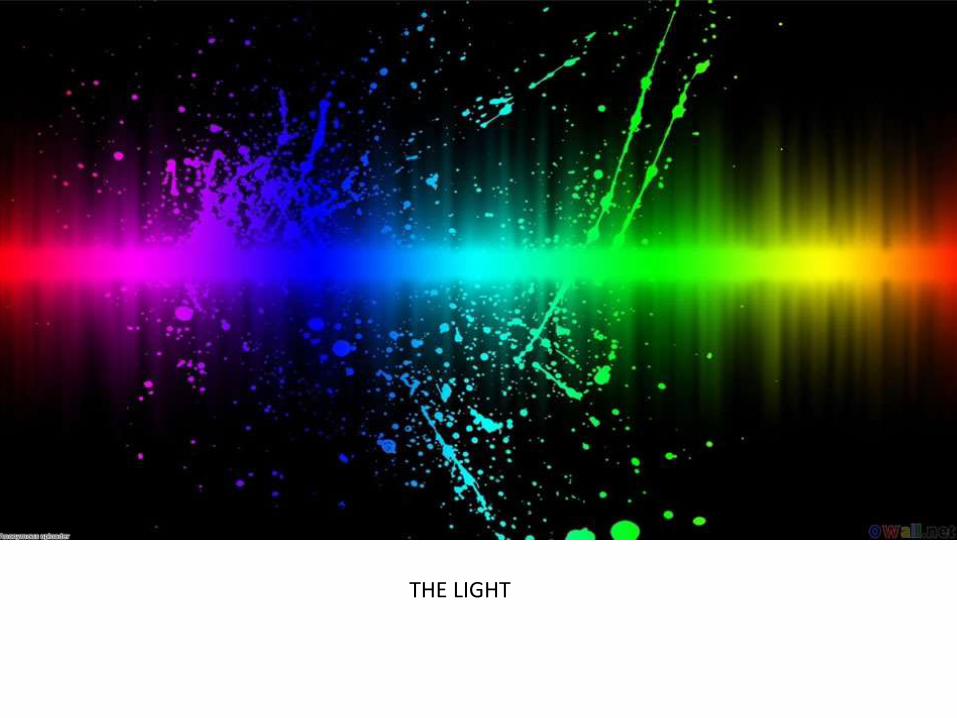
THE LIGHT

Check up the camara settings WHITE BALANCE to find out where you can change the Light settings
White Balance

Do you think the white balance of this image is correct?
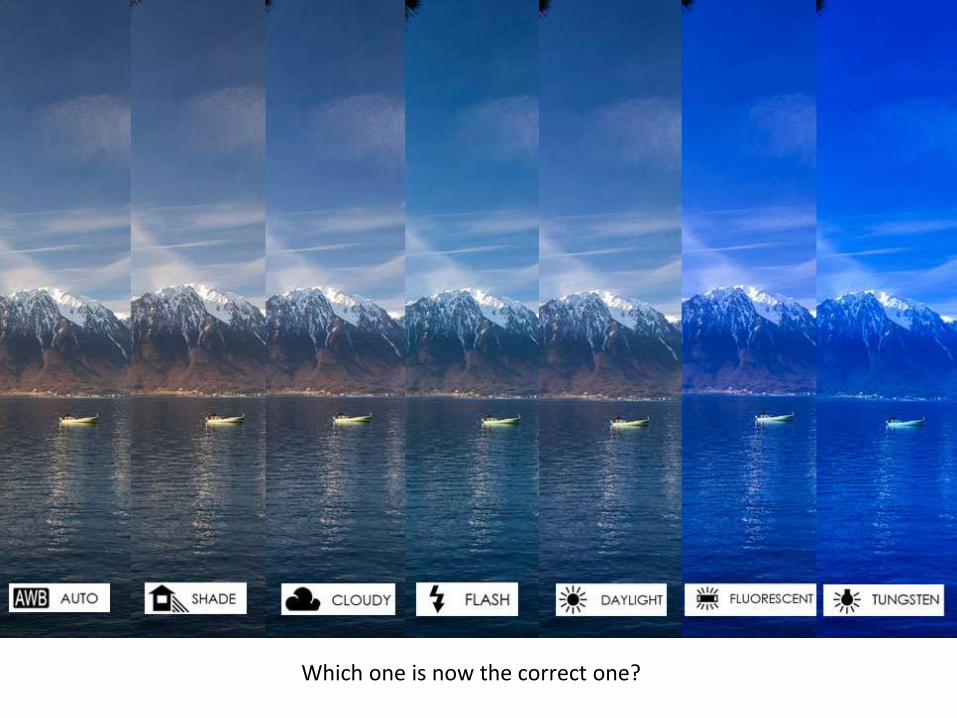
Which one is now the correct one?
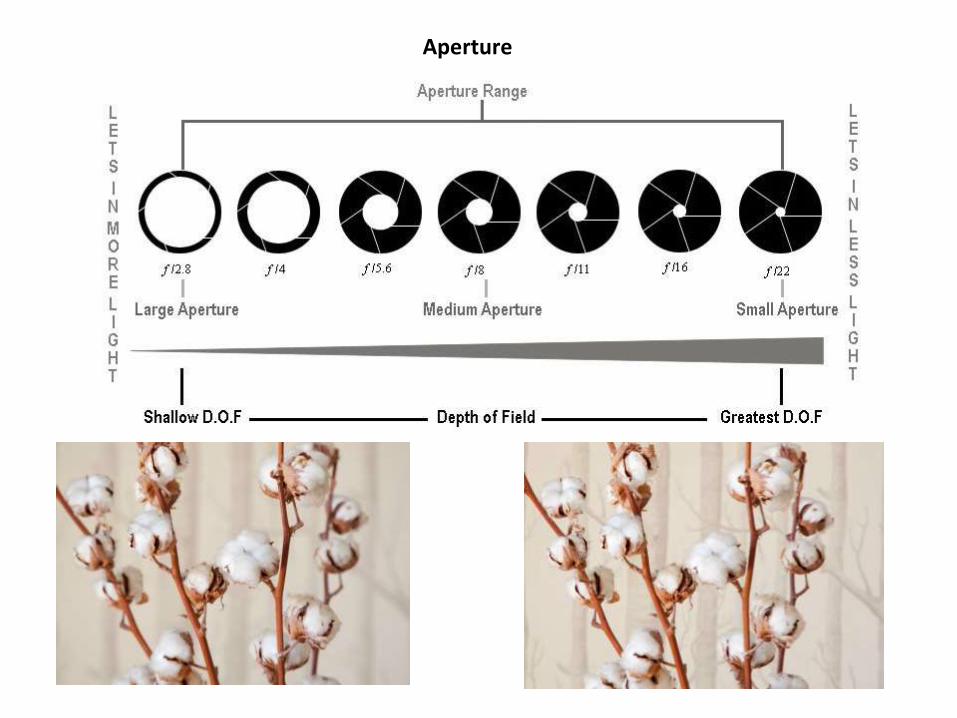
Aperture
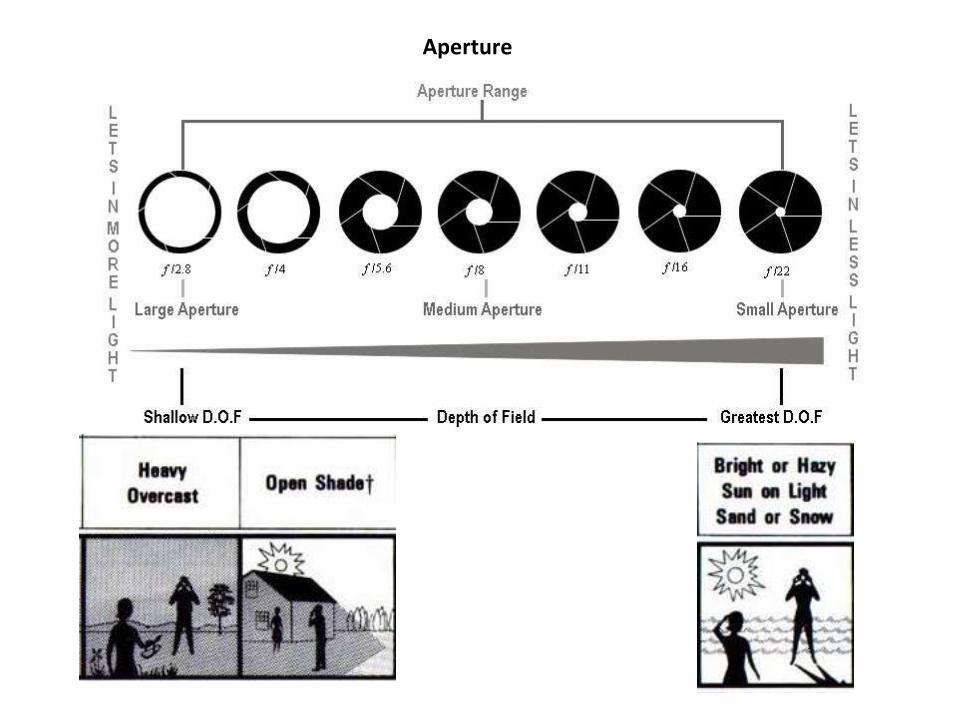
Aperture

Aperture: 2.8Shallow Depth of Field
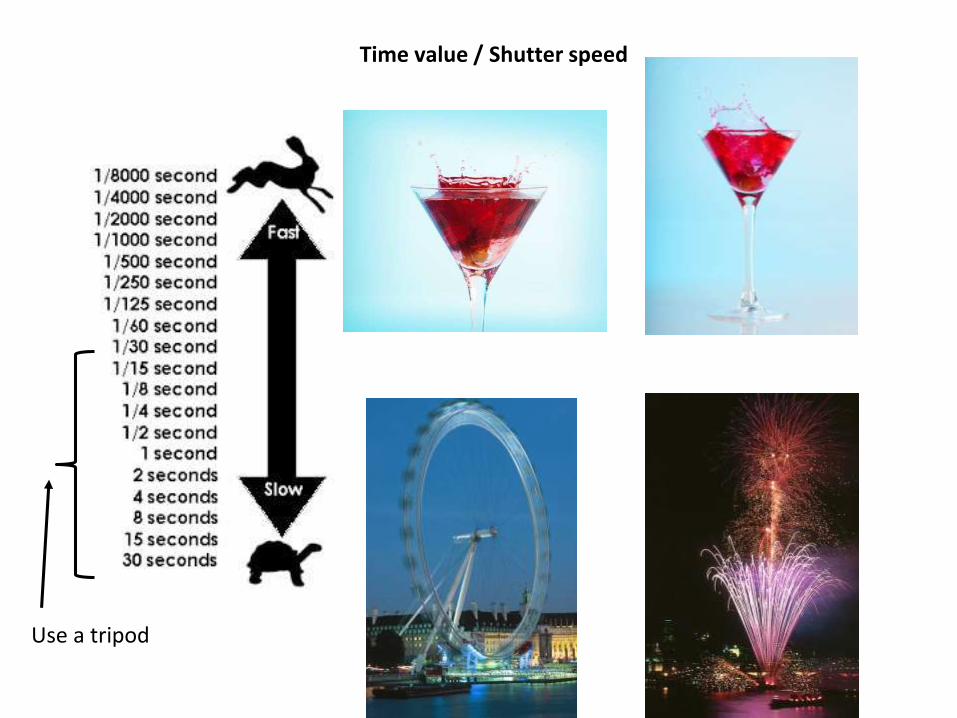
Time value / Shutter speed
Use a tripod

Time value / Shutter speed
More motion blur image
Less motion blur image

ISO 100 ISO 6400Less noise More noise


If an image is correctly exposed at 1/250, f/4 and ISO 100Then it is also correctly exposed at 1/500, f/2.8 and ISO 100And also at 1/500, f/2 and ISO 100
Shutter speed (measured in
seconds)
1 1/2 1/4 1/8 1/15 1/30 1/60 1/125 1/250 1/500 1/1000 1/2000
Aperture (measured in f/x) 1 1.4 2 2.8 4 5.6 8 11 16 22
ISO 3200 1600 800 400 200 100 50
For a fix ISO = 100
Remember these settings are connected, so if one element goes up a stop, another has to go down to get a correct exposure.

If the image is correctly exposed at 1/250, f/4 and ISO 100Then is also correctly exposed at 1/500, f/5.6 and ISO 400And also at 1/1000, f/1.4 and ISO 50
Shutter speed (measured in
seconds)
1 1/2 1/4 1/8 1/15 1/30 1/60 1/125 1/250 1/500 1/1000 1/2000
Aperture (measured in f/x) 1 1.4 2 2.8 4 5.6 8 11 16 22
ISO 3200 1600 800 400 200 100 50
In case we change 2 elements
To get the exposure right, you must place the line in

Aperture: 11Time value: 1/125ISO: 200
Aperture: 22 (-1 stop)Time value: 1/125ISO: 200
Aperture: 8 (1 stop)Time value: 1/125ISO: 200
Aperture: 11Time value: 1/60 (1 stop)ISO: 200
Aperture: 11Time value: 1/250 (-1 stop)ISO: 200
Option 1: Option 2:
Option 1: Option 2:
Exposure +1:
Exposure -1:
Aperture: 11Time value: 1/125ISO: 400 (1 stop)
Option 3:
Aperture: 11Time value: 125ISO: 100 (-1 stop)
Option 3:

10 COMPOSITION PHOTOGRAPHY RULES
It is said there are no rules in photography, but it is good to know some basic compositions to get started!
1. RULE OF THIRDS
You should position the most important elements in your scene along these lines, or at the points where they intersect. Doing so will add balance and interest to your photo. Some cameras even offer an option to superimpose a rule of thirds grid over the LCD screen, making it even easier to use.
10 COMPOSITION PHOTOGRAPHY RULES
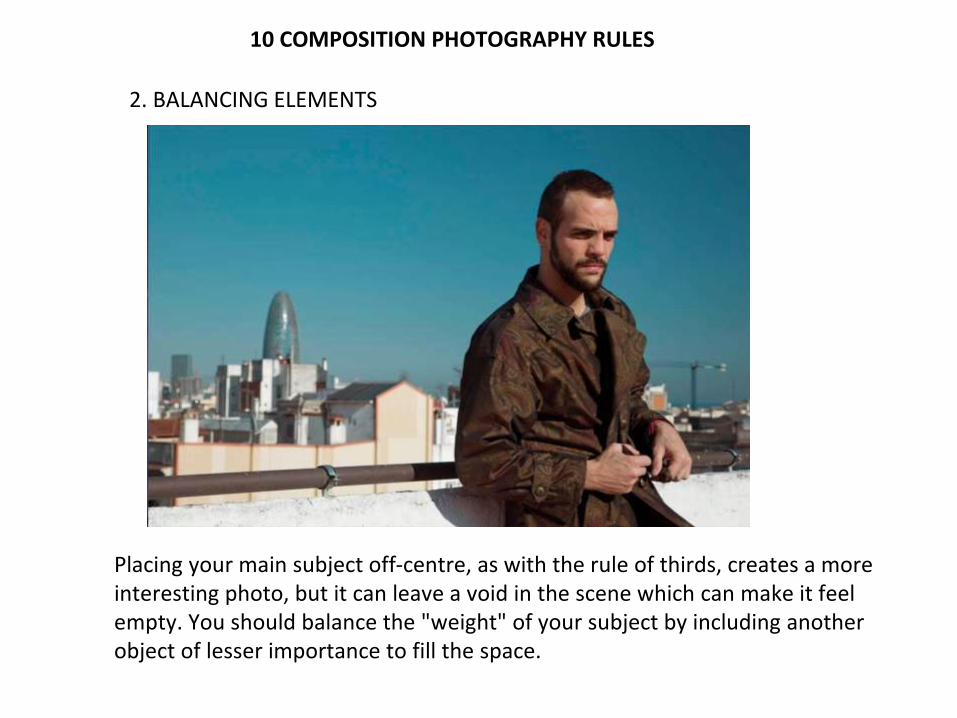
Placing your main subject off-centre, as with the rule of thirds, creates a more interesting photo, but it can leave a void in the scene which can make it feel empty. You should balance the "weight" of your subject by including another object of lesser importance to fill the space.
2. BALANCING ELEMENTS

10 COMPOSITION PHOTOGRAPHY RULES
When we look at a photo our eye is naturally drawn along lines. By thinking about how you place lines in your composition, you can affect the way we view the image, pulling us into the picture, towards the subject, or on a journey "through" the scene. There are many different types of line - straight, diagonal, curvy, zigzag, radial etc - and each can be used to enhance our photo's composition.
3. LEADING LINES

10 COMPOSITION PHOTOGRAPHY RULES
We are surrounded by symmetry and patterns, both natural and man-made. Another great way to use them is to break the symmetry or pattern in some way, introducing tension and a focal point to the scene.
4. SYMMETRY AND PATTERNS
10 COMPOSITION PHOTOGRAPHY RULES
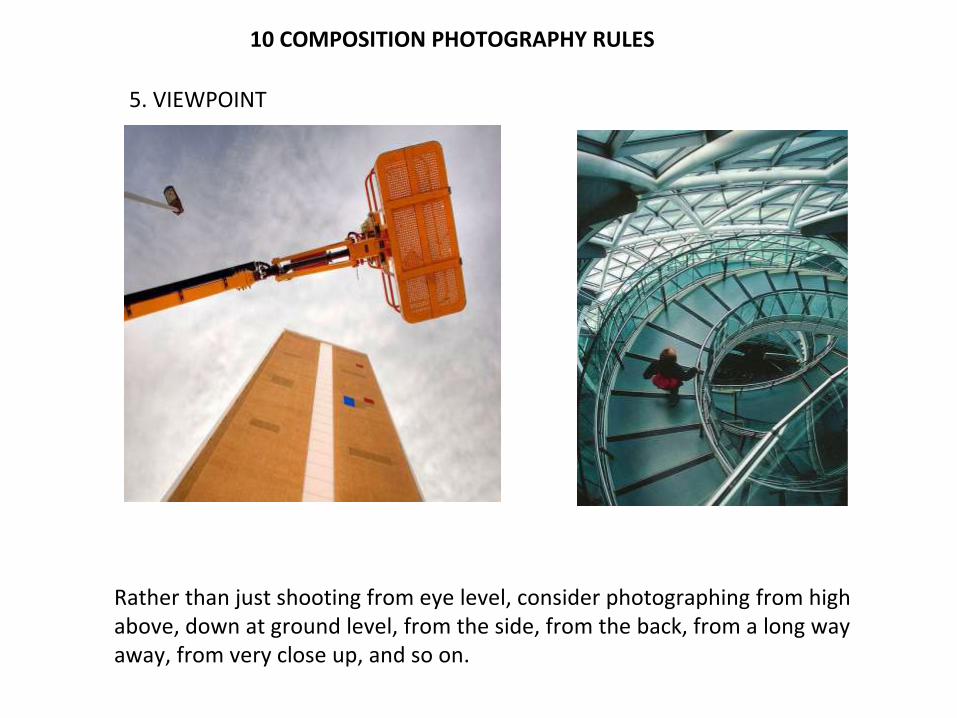
Rather than just shooting from eye level, consider photographing from high above, down at ground level, from the side, from the back, from a long way away, from very close up, and so on.
5. VIEWPOINT

10 COMPOSITION PHOTOGRAPHY RULES
Look around for a plain and unobtrusive background and compose your shot so that it doesn't distract or detract from the subject.
6. BACKGROUND

10 COMPOSITION PHOTOGRAPHY RULES
You can create depth in a photo by including objects in the foreground, middle ground and background. Another useful composition technique is overlapping, where you deliberately partially obscure one object with another. The human eye naturally recognizes these layers and mentally separates them out, creating an image with more depth.
7. DEPTH
10 COMPOSITION PHOTOGRAPHY RULES
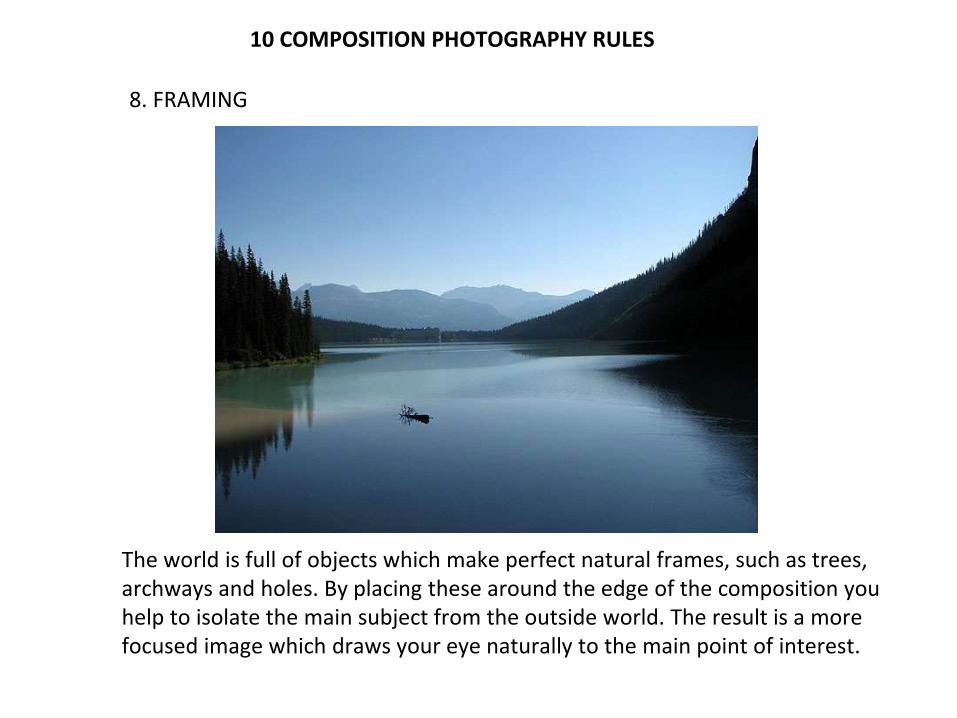
The world is full of objects which make perfect natural frames, such as trees, archways and holes. By placing these around the edge of the composition you help to isolate the main subject from the outside world. The result is a more focused image which draws your eye naturally to the main point of interest.
8. FRAMING

10 COMPOSITION PHOTOGRAPHY RULES
Often a photo will lack impact because the main subject is so small it becomes lost among the clutter of its surroundings. By cropping tight around the subject you eliminate the background "noise", ensuring the subject gets the viewer's undivided attention.
9. CROPPING
10 COMPOSITION PHOTOGRAPHY RULES
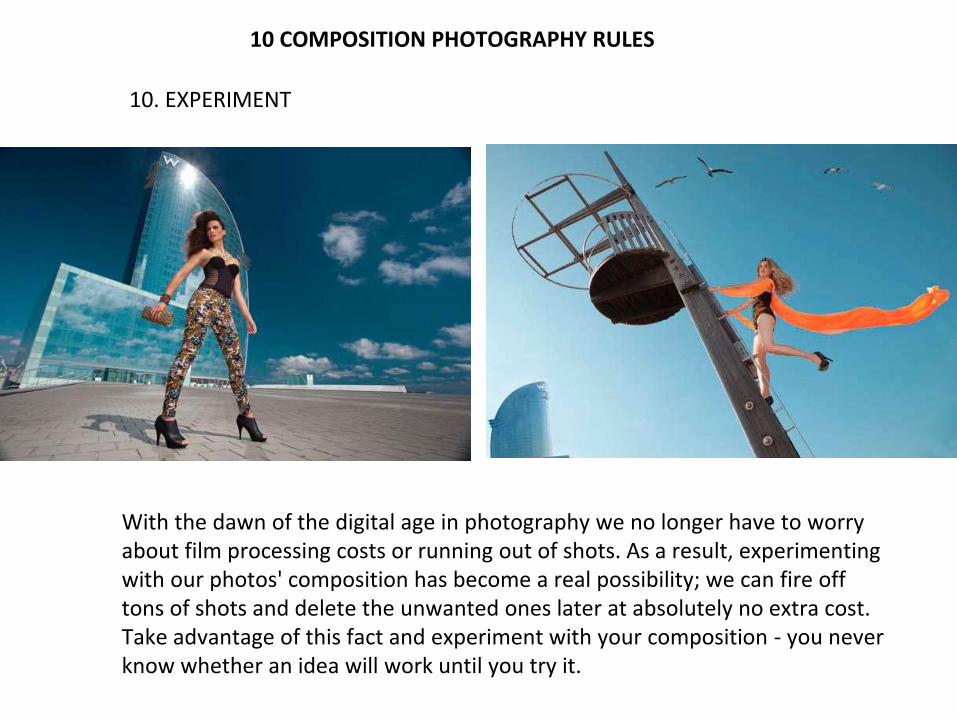
With the dawn of the digital age in photography we no longer have to worry about film processing costs or running out of shots. As a result, experimenting with our photos' composition has become a real possibility; we can fire off tons of shots and delete the unwanted ones later at absolutely no extra cost. Take advantage of this fact and experiment with your composition - you never know whether an idea will work until you try it.
10. EXPERIMENT

PORTRAITS
Avoid direct sunlightUse the shade
Use window light Use indirect light

CAMERA ANGLE AND PSYCOLOGICAL EFFECT
Where the camera is placed in relation to the subject, it affects the way the viewer perceives the subject.
High angle shot: when the camera is located high (often above head height)
Low angle shot: when the camera is positioned low (often a knee height), looking up. It makes the subject look powerful or threatening.
Bird-eye shot: refers to a shot looking directly down) on the subject. It can be used to emphasise the smallness or insignificance of the subjects.
Horizontal plain: when your scene is set horizontally, everything seems peaceful.
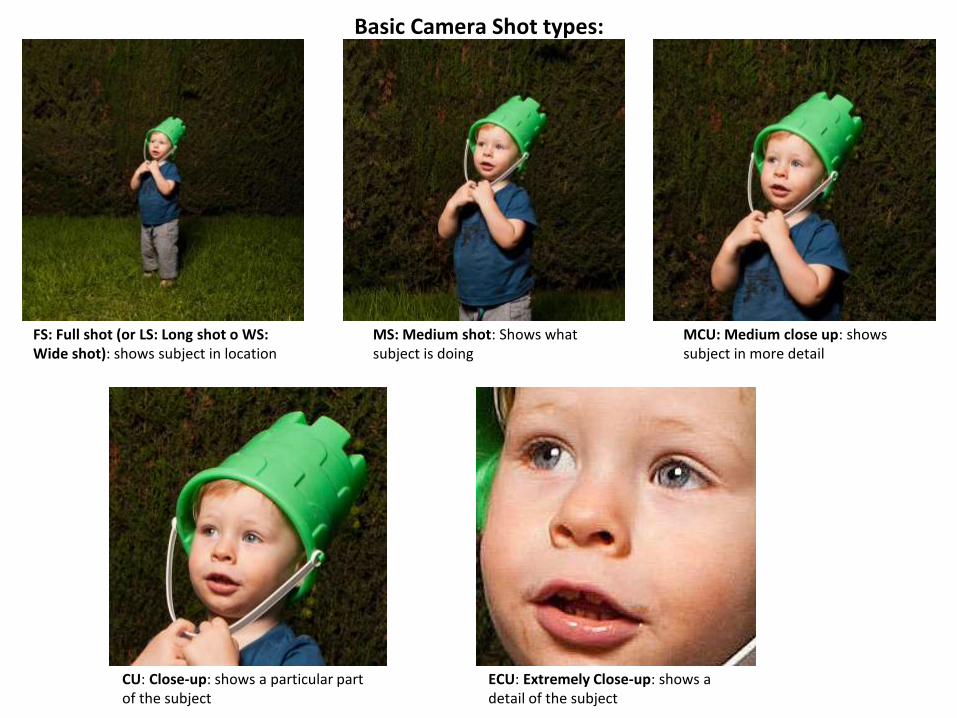
Basic Camera Shot types:
FS: Full shot (or LS: Long shot o WS: Wide shot): shows subject in location
MS: Medium shot: Shows what subject is doing
CU: Close-up: shows a particular part of the subject
MCU: Medium close up: shows subject in more detail
ECU: Extremely Close-up: shows a detail of the subject

Let’s go outside and take some pictures!
Pictures: @Joan Sèculi (except slide: 4, 13, 25 and 29)
Related Documents


