Part XV: Informix containerized deployment IBM

Welcome message from author
This document is posted to help you gain knowledge. Please leave a comment to let me know what you think about it! Share it to your friends and learn new things together.
Transcript
Part XV: Informix containerized deployment
IBM

© Copyright IBM Corp. 2021.
US Government Users Restricted Rights - Use, duplication or disclosure restricted by GSA ADP Schedule Contract with IBM Corp.

Tables of ContentsPart XV: Informix containerized deployment
Informix for Red Hat® OpenShift®Installing Informix on a Red Hat® OpenShift® cluster
Installing the Informix OperatorInstalling the Informix Operator from the IBM Operator CatalogInstalling the Informix Operator from the command lineInstalling the Informix Operator in an air-gapped environment
Installing through a bastion hostInstalling without a bastion host
Deploying InformixSetting up dedicated nodes for your Informix deploymentDeploying Informix using the Informix API
Administering InformixStopping and starting an Informix instanceMonitoring Informix startup after rebooting a nodeViewing Informix log files
Connecting to InformixConfiguring TLS connections with InformixRetrieving the Informix port numberConfiguring the Informix NodePort with an Ingress controller
Security in InformixUninstalling Informix
1111224469
111112121313131314151516
Informix containerized deployment
IBM® offers a number of Informix based solutions for small to enterprise size container environments.
Single container deploymentsIn a single container deployment, the database software and all of its component parts reside within one container. The container sits on one system and resources areshared by all the containerized components. An example of a single container deployment would be the Informix Developer Edition for Docker. This version is intended fornon-production use.
Container micro-service deploymentsIn a micro-service configuration, each component is separated into services, which run in one or more containers. These containers are deployed on worker nodes, whichare managed by one or more master nodes. These master nodes ensure that all of the component parts work as one orchestrated system.
One of the advantages of separating containerized services is that it improves fault isolation, as applications can remain largely unaffected by the failure of a single micro-service. The configuration is also easier to deploy, as provisioning, scaling, and redundancy are managed automatically by the master nodes.
Informix for Red Hat® OpenShift® is an example of Informix products designed for containerized micro-service deployments.
Informix for Red Hat® OpenShift® Informix® can be deployed in a Red Hat OpenShift cluster as a containerized micro-service, or pod, managed by Kubernetes.
Copyright© 2020 HCL Technologies Limited
Informix for Red Hat® OpenShift®
Informix® can be deployed in a Red Hat OpenShift cluster as a containerized micro-service, or pod, managed by Kubernetes.
Note: While it is possible to deploy the containerized version of Informix on other Kubernetes-managed container platforms, the documentation focuses on the Red HatOpenShift deployment.You deploy Informix to your OpenShift cluster through a series of API calls to the Informix Operator. The table below lists the Informix Operators that have been releasedin the V1.0 channel, and their supported Informix versions for deployment on OpenShift.
Table 1. Informix Operators and their associated Informix engines
Informix Operator version Informix Operator upgrade channel Informix Engine version Container Application Software forEnterprises (CASE) version
1.0.0 (Latest) v1.0 14.10.FC5 1.0.0
If you are new to the world of containers and Kubernetes and would like to learn more, please see the Core Concepts section of the Red Hat OpenShift Documentationsite.
Informix for Red Hat OpenShift
Copyright© 2020 HCL Technologies Limited
Installing Informix on a Red Hat® OpenShift® cluster
Informix® is now deployed to a Red Hat® OpenShift® cluster through the Informix Operator. To add a Informix database to a OpenShift cluster, you first prepare yourcluster to use the Informix Operator, and then install and deploy the database.
Installing the Informix Operator Deploying Informix
When you have installed the Informix® Operator to your OpenShift® cluster, you use the Informix API to deploy an Informix server. Before doing so, you also need toaccept the license terms, and configure your database storage.
Copyright© 2020 HCL Technologies Limited
Installing the Informix Operator
Informix® Version 14.10 and later versions for Red Hat® OpenShift® are Operator-enabled installations, allowing you more control over your deployment.
The Informix Operator is acquired from the IBM Operator Catalog. The IBM Operator catalog is accessible through your OpenShift UI console.
If your target Informix cluster is disconnected from the internet (air-gapped), you can use the IBM Cloud Pak CLI (cloudctl) command-line utility to install and configurethe Informix Operator. You can run the utility from a bastion host or from a suitably equipped portable device.
Installing the Informix Operator from the IBM Operator CatalogIBM provides a catalog of product offerings in the form of a catalog index image. The catalog image can be enabled on a Red Hat OpenShift V4.4 or later cluster
Part XV: Informix containerized deployment 1

through a CatalogSource resource, in order to show IBM offerings in the OpenShift Operator catalog.Installing the Informix Operator from the command lineYou can install the Informix® Operator using the IBM Cloud Pak CLI tool.Installing the Informix Operator in an air-gapped environmentThere are two ways of installing the Informix Operator in an air-gabbed environment, either through a bastion host or by transferring it to the cluster from a portabledevice.
Copyright© 2020 HCL Technologies Limited
Installing the Informix Operator from the IBM Operator Catalog
IBM provides a catalog of product offerings in the form of a catalog index image. The catalog image can be enabled on a Red Hat OpenShift V4.4 or later cluster through aCatalogSource resource, in order to show IBM offerings in the OpenShift Operator catalog.
To enable the IBM Operator Catalog in your OpenShift cluster:
1. From your OpenShift UI console, roll over the + icon on the tool bar and select Import YAML.2. Paste the following YAML content into the space provided:
apiVersion: operators.coreos.com/v1alpha1 kind: CatalogSource metadata: name: ibm-operator-catalog namespace: openshift-marketplace spec: displayName: "IBM Operator Catalog" publisher: IBM sourceType: grpc image: docker.io/ibmcom/ibm-operator-catalog updateStrategy: registryPoll: interval: 45m
3. Click Create.
From the navigation panel, under Provider Type, you should see an option for IBM Operators, from which you can install the Informix Operator.
You can verify the installation by running the following from the command line:
oc get CatalogSources ibm-operator-catalog -n openshift-marketplace
If the installation was successful, you should see output that is similar to this:
NAME DISPLAY TYPE PUBLISHER AGE ibm-operator-catalog IBM Operator Catalog grpc IBM 50s
If the installation failed, the following message is displayed:
Error from server (NotFound): catalogsources.operators.coreos.com "ibm-operator-catalog" not found
To help resolve this error, run the following command to check the pods and CatalogSource resources in the openshift-marketplace namespace:
oc get catalogsource,pods -n openshift-marketplace
The output should provide information about your CatalogSource resources and status of the pods; for example:
NAME DISPLAY TYPE PUBLISHER AGE catalogsource.operators.coreos.com/certified-operators Certified Operators grpc Red Hat 20d catalogsource.operators.coreos.com/community-operators Community Operators grpc Red Hat 20d catalogsource.operators.coreos.com/ibm-operator-catalog IBM Operator Catalog grpc IBM 48s catalogsource.operators.coreos.com/opencloud-operators IBMCS Operators grpc IBM 48s catalogsource.operators.coreos.com/redhat-marketplace Red Hat Marketplace grpc Red Hat 20d catalogsource.operators.coreos.com/redhat-operators Red Hat Operators grpc Red Hat 20d NAME READY STATUS RESTARTS AGE pod/certified-operators-575f586fd8-m2ldh 1/1 Running 0 41m pod/community-operators-57fd7676ff-sqzgs 1/1 Running 0 15h pod/ibm-operator-catalog-85b2w 1/1 Running 0 48s pod/marketplace-operator-5fcf68c65c-l8tcg 1/1 Running 0 5d8h pod/opencloud-operators-wbb9k 1/1 Running 0 48s pod/redhat-marketplace-665c9c6db4-hhfkd 1/1 Running 0 41m pod/redhat-operators-8678ddbc5-6szpp 1/1 Running 0 4d1h
Copyright© 2020 HCL Technologies Limited
Installing the Informix Operator from the command line
You can install the Informix® Operator using the IBM Cloud Pak CLI tool.
You will need to install the cloudctl tool before proceeding.
The IBM Cloud Pak CLI (cloudctl) provides significant benefits when dealing with air-gapped (disconnected) environments for case management. It provides a commonframework for IBM operators around a consistent and optimized air gap install experience, using bastion, non-bastion or portable storage.
2 Part XV: Informix containerized deployment
1. Log in to My IBM and click Copy key to copy the displayed entitlement key.2. Using the cloudctl tool, create an Image Pull Secret with the entitlement key. This is needed by your OpenShift® cluster prior to installing Informix.
# ## Set the variables to the correct values # ## Use cp for the value of the docker-username field # ENTITLEDKEY=<the 'Entitlment Key' copied from My IBM> EMAIL=<Use the email value> NAMESPACE=<Use the targeted namespace value> STORAGECLASS=<Use the storage class name>
oc create secret docker-registry ibm-registry \ --docker-server=cp.icr.io \ --docker-username=cp \ --docker-password=${ENTITLEDKEY} \ --docker-email=${EMAIL} \ --namespace=${NAMESPACE}
3. Make the image pull secret accessible to the Informix API. You can do this by modifying your cluster's OpenShift Global Image Pull Secret, or by supplying it directlyto the API.Note:Modifying the OpenShift Global Image Pull Secret requires you to have cluster administrator privileges. Once you have modified the global pull secret, OpenShiftpropagates the update to the entire cluster. Before deploying Informix, all OpenShift workers need to be in a Ready state.
Modify your OpenShift Global Image pull secret:
echo $(oc get secret pull-secret -n openshift-config --output="jsonpath={.data.\.dockerconfigjson}" | base64 --decode; \ oc get secret ibm-registry -n ${NAMESPACE} --output="jsonpath={.data.\.dockerconfigjson}" | base64 --decode) | \ jq -s '.[0] * .[1]' > dockerconfig_merged oc set data secret/pull-secret -n openshift-config --from-file=.dockerconfigjson=dockerconfig_merged
orReference the IBM Entitled Registry Image Pull Secret in the InformixCluster API during deployment.:
account: privileged: true imagePullSecrets: - ibm-registry
4. Download and extract the Container Application Software for Enterprises (CASE) bundle:a. Set up environment variables.
Review the following parameters for your environment and then run the following commands to set up the environment:
export CASE_NAME=ibm-informix-operator export CASE_VERSION=<CASE version of latest Informix Operator> export CASE_ARCHIVE=${CASE_NAME}-${CASE_VERSION}.tgz export OFFLINEDIR=/tmp/cases export CASEPATH="https://github.com/IBM/cloud-pak/raw/master/repo/case/${CASE_ARCHIVE}
b. Create a directory to save the CASE bundle to a local directory:
mkdir -p ${OFFLINEDIR}
c. Download the CASE bundle:
$ cloudctl case save --case ${CASEPATH} --outputdir ${OFFLINEDIR} Downloading and extracting the CASE ... - Success Retrieving CASE version ... - Success Validating the CASE ... - Success Creating inventory ... - Success Finding inventory items - Success Resolving inventory items ... Parsing inventory items - Success
d. Verify that the CASE bundle and images csv have been downloaded:
$ ls ${OFFLINEDIR} total 128K drwxr-xr-x 2 root root 6 Jan 20 11:10 charts/ -rw-r--r-- 1 root root 116K Jan 20 11:10 ibm-informix-operator-1.0.x.tgz -rw-r--r-- 1 root root 32 Jan 20 11:10 ibm-informix-operator-1.0.x-charts.csv -rw-r--r-- 1 root root 5.2K Jan 20 11:10 ibm-informix-operator-1.0.x-images.csv
e. Extract the CASE bundle:
cd ${OFFLINEDIR} tar -xvzf ${CASE_ARCHIVE}
5. Install the Informix catalog:
cloudctl case launch \ --case ${CASE_NAME} \ --namespace ${NAMESPACE} \ --inventory ibmInformixOperatorSetup \
Part XV: Informix containerized deployment 3
--action installCatalog \ --tolerance 1
6. Install the Informix operator:
cloudctl case launch \ --case ${CASE_NAME} \ --namespace ${NAMESPACE} \ --inventory ibmInformixOperatorSetup \ --action installOperatorNative \ --tolerance 1
7. Deploy Informix, using the Informix API.
Copyright© 2020 HCL Technologies Limited
Installing the Informix Operator in an air-gapped environment
There are two ways of installing the Informix Operator in an air-gabbed environment, either through a bastion host or by transferring it to the cluster from a portabledevice.
Installing through a bastion host You can install the Informix® Operator to an air-gapped OpenShift® cluster that uses a bastion host for connections.
Installing without a bastion host You can install the Informix® Operator to a air-gapped OpenShift® cluster by doing an on-site transfer of the required components from a portable device.
Copyright© 2020 HCL Technologies Limited
Installing through a bastion host
You can install the Informix® Operator to an air-gapped OpenShift® cluster that uses a bastion host for connections.
Before installing the Informix Operator on your bastion machine, ensure that it is properly configured by logging onto the machine and performing the following tasks:
Verify that the bastion machine has access to the following:public internet [to download the required Container Application Software for Enterprises (CASE) bundle]a target image registry ( where the images are mirrored)a target OpenShift cluster onto which to install the operator
Download and install the dependent command line tools:oc - For interacting with the OpenShift Clustercloud-pak-cli - For downloading and installing the CASE bundle
Note: Do all the steps in the following procedure from the bastion machine.
1. Download and extract the CASE bundle:a. Set up the environment variables. Review the following parameters for your environment and then run the following commands to set up the environment:
export NS=<Namespace of target installation on OpenShift cluster> export CASE_NAME=ibm-informix-operator export CASE_VERSION=<CASE version of latest Informix Operator>
export CASE_ARCHIVE=${CASE_NAME}-${CASE_VERSION}.tgz export OFFLINEDIR=/tmp/cases export OFFLINECASE=${OFFLINEDIR}/${CASE_NAME} export CASEPATH="https://github.com/IBM/cloud-pak/raw/master/repo/case/${CASE_ARCHIVE}"
# Details of the source registry to copy from export EXTERNAL_REGISTRY=cp.icr.io export EXTERNAL_REGISTRY_USER=cp export EXTERNAL_REGISTRY_PASSWORD="actualkey" # Actual entitlement key goes here
# Details of the target registry to copy to export TARGET_REGISTRY_HOST="" # Target registry host export TARGET_REGISTRY_PORT=5000 # Target registry port number export TARGET_REGISTRY=${TARGET_REGISTRY_HOST}:${TARGET_REGISTRY_PORT} export TARGET_REGISTRY_USER="user" # Actual username goes here export TARGET_REGISTRY_PASSWORD="key" # Actual API Key goes here
# Details of the storage class for the deployment export STORAGECLASS="Use the storage class name"
b. Create a directory to save the CASE to a local directory:
$ mkdir ${OFFLINEDIR}
c. Download and extract the CASE bundle:
$ cloudctl case save --case ${CASEPATH} --outputdir ${OFFLINEDIR} Downloading and extracting the CASE ... - Success Retrieving CASE version ... - Success Validating the CASE ... - Success
4 Part XV: Informix containerized deployment
Creating inventory ... - Success Finding inventory items - Success Resolving inventory items ... Parsing inventory items - Success
d. Verify the CASE and images csv has been downloaded:
$ ls ${OFFLINEDIR} total 128K drwxr-xr-x 2 root root 6 Jan 20 11:10 charts/ -rw-r--r-- 1 root root 116K Jan 20 11:10 ibm-informix-operator-1.0.x.tgz -rw-r--r-- 1 root root 32 Jan 20 11:10 ibm-informix-operator-1.0.x-charts.csv -rw-r--r-- 1 root root 5.2K Jan 20 11:10 ibm-informix-operator-1.0.x-images.csv
e. Extract the CASE:
cd ${OFFLINEDIR} tar -xvzf ${CASE_ARCHIVE}
2. Configure your registry authentication secrets:a. Create an authentication secret for the source image registry:
Create registry secret for source image registry (if the registry is public which doesn't require credentials, this step can be skipped)
```bash $ cloudctl case launch \ --case ${OFFLINECASE} \ --namespace ${NS} \ --inventory IBM ibmInformixOperatorSetup\ --action configure-creds-airgap \ --args "--registry ${EXTERNAL_REGISTRY} --user ${EXTERNAL_REGISTRY_USER} --pass ${EXTERNAL_REGISTRY_PASSWORD}" ```
b. Create an authentication secret for target image registry:
```bash $ cloudctl case launch \ --case ${OFFLINECASE} \ --namespace ${NS} \ --inventory IBM ibmInformixOperatorSetup\ --action configure-creds-airgap \ --args "--registry ${TARGET_REGISTRY} --user ${TARGET_REGISTRY_USER} --pass ${TARGET_REGISTRY_PASSWORD}" ```
The credentials are now saved to `~/.airgap/secrets/<registry-name>.json`Copy code
3. Copy the images from your saved CASE (images.csv) to the target registry in the air-gapped cluster.
$ cloudctl case launch \ --case ${OFFLINECASE} \ --namespace ${NS} \ --inventory IBM ibmInformixOperatorSetup \ --action mirror-images \ --args "--registry ${TARGET_REGISTRY} --inputDir ${OFFLINEDIR}"
4. Configure the air-gapped cluster to use its internal/target image registry:Warning: Cluster resources must adjust to the new pull secret, which can temporarily limit the usability of the cluster. Authorization credentials are stored in$HOME/.airgap/secrets and /tmp/airgap* to support this action.
a. Apply an image source content policy. Doing so causes each worker node to restart:
$ cloudctl case launch \ --case ${OFFLINECASE} \ --namespace ${NS} \ --inventory IBM ibmInformixOperatorSetup \ --action configure-cluster-airgap \ --args "--registry ${TARGET_REGISTRY} --inputDir ${OFFLINEDIR}"
b. Add the target registry to the cluster insecureRegistries list if the target registry isn't secured by a certificate. Run the following command to restart all nodes,one at a time:
$ oc patch image.config.openshift.io/cluster --type=merge -p "{\"spec\":{\"registrySources\":{\"insecureRegistries\ ":[\"${TARGET_REGISTRY_HOST}:${TARGET_REGISTRY_PORT}\", \"${TARGET_REGISTRY_HOST}\"]}}}"
5. Install the catalog source:
cloudctl case launch \ --case ${OFFLINECASE} \ --namespace ${NAMESPACE} \ --inventory IBM ibmInformixOperatorSetup \ --action installCatalog \ --tolerance 1
6. Install the Informix Operator:
cloudctl case launch \ --case ${OFFLINECASE} \ --namespace ${NAMESPACE} \ --inventory IBM ibmInformixOperatorSetup \ --action installOperatorNative \ --tolerance 1
Part XV: Informix containerized deployment 5
7. Deploy Informix, using the InformixuCluster API.
Copyright© 2020 HCL Technologies Limited
Installing without a bastion host
You can install the Informix® Operator to a air-gapped OpenShift® cluster by doing an on-site transfer of the required components from a portable device.
Prepare a portable device, such as a laptop, with the required Container Application Software for Enterprises (CASE) bundle.
Verify that the portable device has access to the following:public internet (to download CASE and images)a target image registry ( where the images will be mirrored)a target OpenShift cluster onto which to install the operator
Download and install the dependent command line tools:oc - For interacting with the OpenShift Clustercloud-pak-cli - For downloading and installing the CASE bundle
Note: Do all the steps in the following procedure from the bastion machine.
1. Download and extract the CASE bundle:a. Set up the environment variables. Review the following parameters for your environment and then run the following commands to set up the environment:
export NS=<Namespace of target installation on OpenShift cluster> export CASE_NAME=ibm-informix-operator export CASE_VERSION=<CASE version of latest Informix Operator>
export CASE_ARCHIVE=${CASE_NAME}-${CASE_VERSION}.tgz export OFFLINEDIR=/tmp/cases export OFFLINECASE=${OFFLINEDIR}/${CASE_NAME} export CASEPATH="https://github.com/IBM/cloud-pak/raw/master/repo/case/${CASE_ARCHIVE}"
# Details of the source registry to copy from export EXTERNAL_REGISTRY=cp.icr.io export EXTERNAL_REGISTRY_USER=cp export EXTERNAL_REGISTRY_PASSWORD="actualkey" # Actual entitlement key goes here
# Details of the target registry to copy to export TARGET_REGISTRY_HOST="" # Target registry host export TARGET_REGISTRY_PORT=5000 # Target registry port number export TARGET_REGISTRY=${TARGET_REGISTRY_HOST}:${TARGET_REGISTRY_PORT} export TARGET_REGISTRY_USER="user" # Actual username goes here export TARGET_REGISTRY_PASSWORD="key" # Actual API Key goes here
# Details of the storage class for the deployment export STORAGECLASS="Use the storage class name"
b. Create a directory to save the CASE to a local directory:
$ mkdir ${OFFLINEDIR}
c. Download and extract the CASE bundle:
$ cloudctl case save --case ${CASEPATH} --outputdir ${OFFLINEDIR} Downloading and extracting the CASE ... - Success Retrieving CASE version ... - Success Validating the CASE ... - Success Creating inventory ... - Success Finding inventory items - Success Resolving inventory items ... Parsing inventory items - Success
d. Verify the CASE and images csv has been downloaded:
$ ls ${OFFLINEDIR} total 128K drwxr-xr-x 2 root root 6 Jan 20 11:10 charts/ -rw-r--r-- 1 root root 116K Jan 20 11:10 ibm-informix-operator-1.0.x.tgz -rw-r--r-- 1 root root 32 Jan 20 11:10 ibm-informix-operator-1.0.x-charts.csv -rw-r--r-- 1 root root 5.2K Jan 20 11:10 ibm-informix-operator-1.0.x-images.csv
e. Extract the CASE:
cd ${OFFLINEDIR} tar -xvzf ${CASE_ARCHIVE}
2. Copy the images to the local container registry on the portable device:a. Set up environment variables. Review the following parameters for your environment and then run the following commands to set up the environment:
export NS=<Namespace of target installation on OpenShift cluster> export CASE_NAME=ibm-informix-operator export CASE_VERSION=<CASE version of latest Informix Operator>
6 Part XV: Informix containerized deployment
export CASE_ARCHIVE=${CASE_NAME}-${CASE_VERSION}.tgz export OFFLINEDIR=/tmp/cases export OFFLINECASE=${OFFLINEDIR}/${CASE_NAME} export CASEPATH="https://github.com/IBM/cloud-pak/raw/master/repo/case/${CASE_ARCHIVE}"
# Details of the source registry to copy from export EXTERNAL_REGISTRY=cp.icr.io export EXTERNAL_REGISTRY_USER=cp export EXTERNAL_REGISTRY_PASSWORD="actualkey" # Actual entitlement key goes here
# Details of the intermediate registry if not using a Bastion server export PORTABLE_REGISTRY_HOST=localhost export PORTABLE_REGISTRY_PORT=5000 export PORTABLE_REGISTRY=${PORTABLE_REGISTRY_HOST}:${PORTABLE_REGISTRY_PORT} export PORTABLE_REGISTRY_USER="user" # Actual username goes here export PORTABLE_REGISTRY_PASSWORD="key" # Actual API Key goes here export PORTABLE_REGISTRY_PATH=${OFFLINEDIR}/registry export PORTABLE_STORAGE_LOCATION="" # Override
# Details of the target registry to copy to export TARGET_REGISTRY_HOST="" # Target registry host export TARGET_REGISTRY_PORT=5000 # Target registry port number export TARGET_REGISTRY=${TARGET_REGISTRY_HOST}:${TARGET_REGISTRY_PORT} export TARGET_REGISTRY_USER="user" # Actual username goes here export TARGET_REGISTRY_PASSWORD="key" # Actual API Key goes here
b. Set the source and target registries:
export SOURCE_REGISTRY=${EXTERNAL_REGISTRY} export SOURCE_REGISTRY_USER=${EXTERNAL_REGISTRY_USER} export SOURCE_REGISTRY_PASS=${EXTERNAL_REGISTRY_PASSWORD}
export TARGET_REGISTRY=${PORTABLE_REGISTRY} export TARGET_REGISTRY_USER=${PORTABLE_REGISTRY_USER} export TARGET_REGISTRY_PASS=${PORTABLE_REGISTRY_PASSWORD}
c. Initialize the Docker registry by running the following command:
cloudctl case launch \ --case ${OFFLINECASE} \ --inventory IBM ibmInformixOperatorSetup\ --action init-registry \ --args "--registry $PORTABLE_REGISTRY_HOST --user $PORTABLE_REGISTRY_USER --pass $PORTABLE_REGISTRY_PASSWORD --dir $PORTABLE_REGISTRY_PATH"
d. Start the Docker registry by running the following command:
cloudctl case launch \ --case ${OFFLINECASE} \ --inventory IBM ibmInformixOperatorSetup\ --action start-registry \ --args "--registry $PORTABLE_REGISTRY --user $PORTABLE_REGISTRY_USER --pass $PORTABLE_REGISTRY_PASSWORD --dir $PORTABLE_REGISTRY_PATH"
3. Configure your registry authentication secrets:a. Create an authentication secret for the source image registry:
Create registry secret for source image registry (if the registry is public which doesn't require credentials, this step can be skipped)
```bash $ cloudctl case launch \ --case ${OFFLINECASE} \ --namespace ${NS} \ --inventory IBM ibmInformixOperatorSetup\ --action configure-creds-airgap \ --args "--registry ${EXTERNAL_REGISTRY} --user ${EXTERNAL_REGISTRY_USER} --pass ${EXTERNAL_REGISTRY_PASSWORD}" ```
b. Create an authentication secret for target image registry:
```bash $ cloudctl case launch \ --case ${OFFLINECASE} \ --namespace ${NS} \ --inventory IBM ibmInformixOperatorSetup\ --action configure-creds-airgap \ --args "--registry ${TARGET_REGISTRY} --user ${TARGET_REGISTRY_USER} --pass ${TARGET_REGISTRY_PASSWORD}" ```
The credentials are now saved to `~/.airgap/secrets/<registry-name>.json`Copy code
4. Copy the images from your saved CASE (images.csv) to the target registry in the air-gapped cluster.
$ cloudctl case launch \ --case ${OFFLINECASE} \ --namespace ${NS} \ --inventory IBM ibmInformixOperatorSetup \ --action mirror-images \ --args "--registry ${TARGET_REGISTRY} --inputDir ${OFFLINEDIR}"
5. Copy the offline case inventory images and registry data folder to the portable storage device:
cp -r ${OFFLINEDIR} ${PORTABLE_STORAGE_LOCATION}
Part XV: Informix containerized deployment 7
6. Copy the images to the target registry behind the firewall:a. Set up environment variables.Review the following parameters for your environment and then run the following commands to set up the environment:
export NS=<Namespace of target installation on OpenShift cluster> export CASE_NAME=ibm-informix-operator export CASE_VERSION=<CASE version of latest Informix Operator>
export CASE_ARCHIVE=${CASE_NAME}-${CASE_VERSION}.tgz export OFFLINEDIR=/tmp/cases export OFFLINECASE=${OFFLINEDIR}/${CASE_NAME} export CASEPATH="https://github.com/IBM/cloud-pak/raw/master/repo/case/${CASE_ARCHIVE}"
# Details of the source registry to copy from export EXTERNAL_REGISTRY=cp.icr.io export EXTERNAL_REGISTRY_USER=cp export EXTERNAL_REGISTRY_PASSWORD="actualkey" # Actual entitlement key goes here
# Details of the intermediate registry if not using a Bastion server export PORTABLE_REGISTRY_HOST=localhost export PORTABLE_REGISTRY_PORT=5000 export PORTABLE_REGISTRY=${PORTABLE_REGISTRY_HOST}:${PORTABLE_REGISTRY_PORT} export PORTABLE_REGISTRY_USER="user" # Actual username goes here export PORTABLE_REGISTRY_PASSWORD="key" # Actual API Key goes here export PORTABLE_REGISTRY_PATH=${OFFLINEDIR}/registry export PORTABLE_STORAGE_LOCATION="" # Override
# Details of the target registry to copy to export TARGET_REGISTRY_HOST="" # Target registry host export TARGET_REGISTRY_PORT=5000 # Target registry port number export TARGET_REGISTRY=${TARGET_REGISTRY_HOST}:${TARGET_REGISTRY_PORT} export TARGET_REGISTRY_USER="user" # Actual username goes here export TARGET_REGISTRY_PASSWORD="key" # Actual API Key goes here
# Details of the storage class for the deployment export STORAGECLASS="Use the storage class name"
b. Set the source and target registries.The source container registry is now the local registry on the portable device, for example localhost:5000 and the destination is the registry behind thefirewall, for example 10.10.4.6:5000, or the host and port in your air-gap environment. You need to set up the environment variables, mirror the images, andthen install the catalog.
Set up the environment variables:
export SOURCE_REGISTRY=${PORTABLE_REGISTRY} export SOURCE_REGISTRY_USER=${PORTABLE_REGISTRY_USER} export SOURCE_REGISTRY_PASS=${PORTABLE_REGISTRY_PASSWORD}
export TARGET_REGISTRY=${INTERNAL_REGISTRY} export TARGET_REGISTRY_USER=${INTERNAL_REGISTRY_USER} export TARGET_REGISTRY_PASS=${INTERNAL_REGISTRY_PASSWORD}
Override the registry storage location to point to the location of the portable storage:
export PORTABLE_STORAGE_LOCATION=#Provide external storage path hereCopy code
Copy the offline case inventory images and registry data folder from the portable storage device to the node.
cp -r ${PORTABLE_STORAGE_LOCATION} ${OFFLINEDIR}Copy code
c. Initialize the Docker registry:
cloudctl case launch \ --case ${OFFLINECASE} \ --inventory IBM ibmInformixOperatorSetup\ --action init-registry \ --args "--registry $PORTABLE_REGISTRY_HOST --user $PORTABLE_REGISTRY_USER --pass $PORTABLE_REGISTRY_PASSWORD --dir $PORTABLE_REGISTRY_PATH"
d. Start the Docker registry by running the following command:
cloudctl case launch \ --case ${OFFLINECASE} \ --inventory IBM ibmInformixOperatorSetup\ --action start-registry \ --args "--registry $PORTABLE_REGISTRY --user $PORTABLE_REGISTRY_USER --pass $PORTABLE_REGISTRY_PASSWORD --dir $PORTABLE_REGISTRY_PATH"
7. Configure your registry authentication secrets:a. Create an authentication secret for the source image registry:
Note: If the registry is public, which doesn't require credentials, skip this step.
$ cloudctl case launch \ --case ${OFFLINECASE} \ --namespace ${NS} \ --inventory IBM ibmInformixOperatorSetup \ --action configure-creds-airgap \ --args "--registry ${SOURCE_REGISTRY} --user ${SOURCE_REGISTRY_USER} --pass ${SOURCE_REGISTRY_PASSWORD}"
b. Create an authentication secret for target image registry:
$ cloudctl case launch \ --case ${OFFLINECASE} \ --namespace ${NS} \ --inventory IBM ibmInformixOperatorSetup \
8 Part XV: Informix containerized deployment
--action configure-creds-airgap \ --args "--registry ${TARGET_REGISTRY} --user ${TARGET_REGISTRY_USER} --pass ${TARGET_REGISTRY_PASSWORD}"
8. Copy the images from the saved CASE (images.csv) to the target registry in the air-gap environment:
$ cloudctl case launch \ --case ${OFFLINECASE} \ --namespace ${NS} \ --inventory IBM ibmInformixOperatorSetup \ --action mirror-images \ --args "--registry ${TARGET_REGISTRY} --inputDir ${OFFLINEDIR}"
9. Configure the air-gapped cluster to use its internal/target image registry:
Warning Cluster resources must adjust to the new pull secret, which can temporarily limit the usability of the cluster. Authorization credentials are stored in $HOME/.airgap/secrets and /tmp/airgap* to support this action.
a. Apply an image source content policy. Doing so causes each worker node to restart:
$ cloudctl case launch \ --case ${OFFLINECASE} \ --namespace ${NS} \ --inventory IBM ibmInformixOperatorSetup \ --action configure-cluster-airgap \ --args "--registry ${TARGET_REGISTRY} --inputDir ${OFFLINEDIR}"
b. Add the target registry to the cluster insecureRegistries list if the target registry isn't secured by a certificate. Run the following command to restart all nodes,one at a time:
$ oc patch image.config.openshift.io/cluster --type=merge -p "{\"spec\":{\"registrySources\":{\"insecureRegistries\":[\"${TARGET_REGISTRY_HOST}:${TARGET_REGISTRY_PORT}\", \"${TARGET_REGISTRY_HOST}\"]}}}"
10. Install the catalog source:
cloudctl case launch \ --case ${OFFLINECASE} \ --namespace ${NAMESPACE} \ --inventory IBM ibmInformixOperatorSetup \ --action installCatalog \ --tolerance 1
11. Install the Informix Operator:
cloudctl case launch \ --case ${OFFLINECASE} \ --namespace ${NAMESPACE} \ --inventory IBM ibmInformixOperatorSetup \ --action installOperatorNative \ --tolerance 1
12. Deploy Informix, using the InformixuCluster API.
Copyright© 2020 HCL Technologies Limited
Deploying Informix
When you have installed the Informix® Operator to your OpenShift® cluster, you use the Informix API to deploy an Informix server. Before doing so, you also need toaccept the license terms, and configure your database storage.
Accepting the Informix on OpenShift license termsIn order to successfully deploy Informix, the license terms detailed inside the Informix API need to be reviewed and accepted inside the Informix Custom Resource.
Storage requirementsStorage can be dynamically created or pre-created PVs can be specified. Dynamic provisioning enables storage volumes to be created on-demand. To do so, your clusteradministrator needs to create one or more StorageClass objects.
If no storage class is specified, the Informix operator will use the default storage class set in your Openshift cluster. You can use storageClass to overwrite the defaultvalue.
For Example:
persistence: size: 100Gi storageClass: rook-cephf
Informix supports storage classes for the following storage types:
Portworx (required storage class: portworx-informix-sc). For information on the storage class definition, see Creating Portworx storage classes.Red Hat® OpenShift® Container Storage (required storage class: ocs-storagecluster-ceph-rbd)NFS
For more information, see Dynamic Volume Provisioning in the Kubernetes documentation
Part XV: Informix containerized deployment 9

The Informix service has the following prerequisites for the persistent storage:
Only ReadWriteOnce (RWO) is currently supportedOwner and Group of the file system must be informixAccess mode must be 755
PodSecurityPolicy RequirementsThe Informix operand requires a PodSecurityPolicy to be bound to the target namespace prior to deployment:
apiVersion: policy/v1beta1 kind: PodSecurityPolicy metadata: name: informix-psp spec: allowPrivilegeEscalation: true readOnlyRootFilesystem: false privileged: false allowedCapabilities: - "SYS_RESOURCE" - "IPC_OWNER" - "SYS_NICE" - "NET_RAW" - "CHOWN" - "DAC_OVERRIDE" - "FSETID" - "FOWNER" - "SETGID" - "SETUID" - "SETFCAP" - "SETPCAP" - "NET_BIND_SERVICE" - "SYS_CHROOT" - "KILL" - "AUDIT_WRITE" fsGroup: rule: RunAsAny hostIPC: true hostNetwork: false hostPID: false hostPorts: - max: 65535 min: 1 runAsUser: rule: RunAsAny seLinux: rule: RunAsAny supplementalGroups: rule: RunAsAny volumes: - '*'
SecurityContextConstraints RequirementsThe Informix operand requires the following SCC to be bound to the target namespace prior deployment:
kind: SecurityContextConstraints apiVersion: security.openshift.io/v1 metadata: name: informix-scc allowHostDirVolumePlugin: false allowHostIPC: true allowHostNetwork: false allowHostPID: false allowHostPorts: false allowPrivilegedContainer: false allowedCapabilities: - "SYS_RESOURCE" - "IPC_OWNER" - "SYS_NICE" - "NET_RAW" - "CHOWN" - "DAC_OVERRIDE" - "FSETID" - "FOWNER" - "SETGID" - "SETUID" - "SETFCAP" - "SETPCAP" - "NET_BIND_SERVICE" - "SYS_CHROOT" - "KILL" - "AUDIT_WRITE" readOnlyRootFilesystem: false runAsUser: type: RunAsAny seLinuxContext: type: MustRunAs fsGroup: type: RunAsAny supplementalGroups: type: RunAsAny
10 Part XV: Informix containerized deployment
If your target namespace is not bound to this SecurityContextConstraints resource you can bind it with the following command:
oc adm policy add-scc-to-group informix-scc system:serviceaccounts:namespace
Setting up dedicated nodes for your Informix deployment You can dedicate one or more worker nodes to your Informix service. The nodes are then used exclusively by the database containers or pods.
Deploying Informix using the Informix API Once the Informix® Operator is installed, the Informix API provides the interface required to deploy Informix. This API is supported by an OpenShift Custom
Resource definition.
Copyright© 2020 HCL Technologies Limited
Setting up dedicated nodes for your Informix deployment
You can dedicate one or more worker nodes to your Informix service. The nodes are then used exclusively by the database containers or pods.
Informix on Red Hat® OpenShift® uses the concepts of taint and toleration to dedicate Informix to particular nodes. Nodes are tainted and labeled:
A taint prevents pods from being deployed on a tainted node.A label allows for a pod with a matching toleration to be treated as an exception.
Taint and toleration work together to provide node exclusivity to deploying Informix on particular nodes
Perform these steps for each worker node that you plan to dedicate to the database deployment. The steps use Red Hat OpenShift CLI commands. The node_name is thename of a worker node on which you plan to host Informix.
Considerations for software-defined storage (such as OpenShift Container Storage)
When storage and compute share the same nodes, some additional considerations apply so that Informix and software-defined storage can be properly scheduled on thesame worker nodes. See the optional Step 2 below.
1. Retrieve the name of the worker node that you want to dedicate to Informix:
oc get nodes
2. Optional: If you are using OpenShift Container Storage, see OpenShift documentation for information about dedicating nodes that is specific to that platform.3. Taint the node with the NoSchedule effect and safely evict all of the pods from that node:
oc adm taint node node_name Tainted4Informix=IfxSccGroup:NoSchedule
Informix server POD has toleration for IfxSccGroup taint. If you have a need for Informix server POD to be deployed exclusively on a subset of worker nodes in acluster then those worker nodes to be appled with IfxSccGroup taint and informix-scc-nodes label. The node affinity preference for this label is set topreferredDuringSchedulingIgnoredDuringExecution.
4. Label the node:
oc label node node_name informix-scc-nodes=ifx-custom-scc
5. Optional: Verify that the node is labeled:
oc get node --show-labels
Copyright© 2020 HCL Technologies Limited
Deploying Informix using the Informix API
Once the Informix® Operator is installed, the Informix API provides the interface required to deploy Informix. This API is supported by an OpenShift Custom Resourcedefinition.
Configure the database nameSpecifies the name of the desired Informix resource.
For Example:
kind: Informix metadata: name: server1
Configure memory and CPU consumptionWhen deploying Informix using the Informix Operator, you have the ability to assign a CPU and Memory profile. This will assign CPU/MEM values to the container runningthe Informix server.
For Example:
spec: informix: resources: limits:
Part XV: Informix containerized deployment 11
cpu: 2 memory: 2Gi requests: cpu: 2 memory: 2Gi
Configure storageIf no storage class is specified, the Informix operator will use the default storage class set in your Openshift cluster. You can use storageClass to overwrite the defaultvalue.
For example:
persistence: size: 100Gi storageClass: rook-cephfs
See Certified storage options for Informix for a full list of for supported storage solutions.
Example of a complete Informix Custom ResourceapiVersion: ifx.ibm.com/v1alpha1 kind: Informix metadata: name: server1 labels: app.kubernetes.io/instance: informix app.kubernetes.io/managed-by: informixes.ifx.ibm.com app.kubernetes.io/name: informix spec: informix: resources: limits: cpu: 300m memory: 512Mi requests: cpu: 300m memory: 512Mi persistence: size: 100Gi storageClass: rook-cephfs replicaCount: 1 license: accept: true
Copyright© 2020 HCL Technologies Limited
Administering Informix
The following information describes common tasks that an administrator performs to maintain an Informix database in production.
Exec into the Informix pod To do some common administration tasks, you must be able to run the exec command on the Informix pod.
Stopping and starting an Informix instance Stop and start an Informix instance inside a container to perform maintenance tasks.
Monitoring Informix startup after rebooting a node When a node is restarted, confirm that Informix successfully starts up by monitoring the startup progress.
Viewing Informix log files Use one of the following procedures to view the Informix server logs.
Copyright© 2020 HCL Technologies Limited
Stopping and starting an Informix instance
Stop and start an Informix instance inside a container to perform maintenance tasks.
1. Run the exec command on the Informix pod.2. Temporarily disable the live-ness probe:
cp $SCRIPTS/informix_alive.sh $SCRIPTS/informix_alive_probe.sh cp $SCRIPTS/informix_alive_always.sh $SCRIPTS/informix_alive.sh
3. Run the onmode -kuy command and perform the maintenance tasks that you want.4. When the maintenance tasks are completed, restart Informix with the oninit command.5. Re-enable the live-ness probe:
cp $SCRIPTS/informix_alive_probe.sh $SCRIPTS/informix_alive.sh
6. Confirm that the Informix server is online:
onstat -
12 Part XV: Informix containerized deployment
Tip: You might have to run these commands several times before the Informix server is shown as online.
Copyright© 2020 HCL Technologies Limited
Monitoring Informix startup after rebooting a node
When a node is restarted, confirm that Informix successfully starts up by monitoring the startup progress.
Informix should automatically start up after a Kubernetes worker node is started and the kubelet starts all the pods on the node. You can run a series of commands tomonitor the startup progress.
1. Run the command oc get nodes and check the output to verify the following:The Kubernetes worker nodes that were rebooted are in a ready state.All nodes with the etcd operator role are in a ready state.
2. Monitor the Informix pod startup progress:
oc -n <namespace> get pods | grep informix
3. Check that all Informix database services pods are in a running state:
oc -n <namespace> get pods --selector app.kubernetes.io/name=ibm-informix-prod
4. Confirm that the Informix instance is healthy.a. Exec into the Informix pod.b. Run the following commands for a sanity test on the health of the Informix instance:
onstat - # Should show 'On-Line' dbaccess sysmaster - # Confirm you can connect to the database
Copyright© 2020 HCL Technologies Limited
Viewing Informix log files
Use one of the following procedures to view the Informix server logs.
1. To view Informix container log files, do the following:a. Get the name of the Informix database server pod:
oc -n <namespace> get pods --selector app.kubernetes.io/name=ibm-informix-prod
b. Use oc logs to view the Informix database container logs:
oc -n <namespace> logs <Informix engine POD name> | more -
2. To view Informix log files, do the following:a. Run the exec command on the Informix pod.b. Go to the Informix server log directory folder /opt/ibm/data/logs/.c. View/tail the Informix log:
tail -f online.log
Copyright© 2020 HCL Technologies Limited
Connecting to Informix
You can connect clients and applications to the Informix server in Red Hat OpenShift.
Configuring TLS connections with Informix Use transport layer security (TLS) to create secure connections from Informix clients to the integrated Informix database server deployed on Red Hat OpenShift.
Retrieving the Informix port number The Informix service exposes the following network communication ports to allow connections from outside of the Red Hat® OpenShift® cluster.
Configuring the Informix NodePort with an Ingress controller If you use an external infrastructure node to route external Informix traffic into the Red Hat® OpenShift® cluster, the cluster might be in a private zone and you need
to configure an external-facing Ingress controller to route the traffic to the OpenShift nodes.
Copyright© 2020 HCL Technologies Limited
Configuring TLS connections with Informix
Use transport layer security (TLS) to create secure connections from Informix clients to the integrated Informix database server deployed on Red Hat OpenShift.
An Informix deployment on Red Hat OpenShift has TLS connections enabled by default. This task outlines how to extract the TLS certificate from the Informix pod.
Part XV: Informix containerized deployment 13
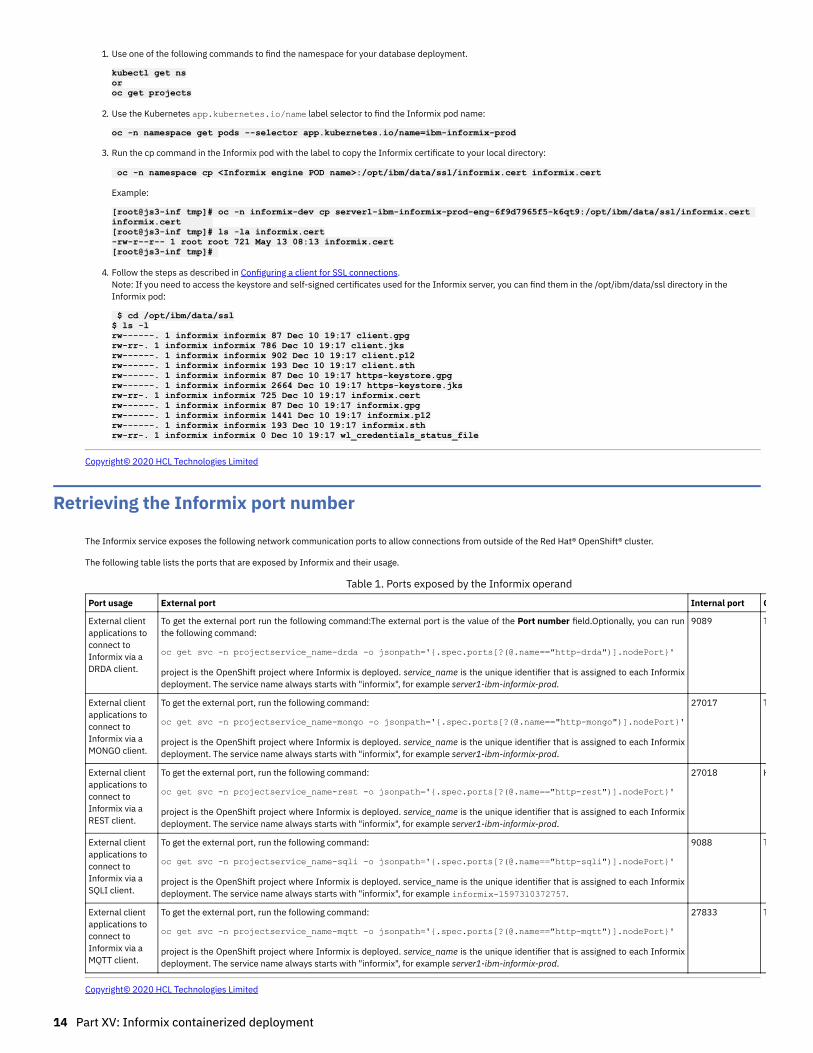
1. Use one of the following commands to find the namespace for your database deployment.
kubectl get ns or oc get projects
2. Use the Kubernetes app.kubernetes.io/name label selector to find the Informix pod name:
oc -n namespace get pods --selector app.kubernetes.io/name=ibm-informix-prod
3. Run the cp command in the Informix pod with the label to copy the Informix certificate to your local directory:
oc -n namespace cp <Informix engine POD name>:/opt/ibm/data/ssl/informix.cert informix.cert
Example:
[root@js3-inf tmp]# oc -n informix-dev cp server1-ibm-informix-prod-eng-6f9d7965f5-k6qt9:/opt/ibm/data/ssl/informix.cert informix.cert [root@js3-inf tmp]# ls -la informix.cert -rw-r--r-- 1 root root 721 May 13 08:13 informix.cert [root@js3-inf tmp]#
4. Follow the steps as described in Configuring a client for SSL connections.Note: If you need to access the keystore and self-signed certificates used for the Informix server, you can find them in the /opt/ibm/data/ssl directory in theInformix pod:
$ cd /opt/ibm/data/ssl $ ls -l rw------. 1 informix informix 87 Dec 10 19:17 client.gpg rw-rr-. 1 informix informix 786 Dec 10 19:17 client.jks rw------. 1 informix informix 902 Dec 10 19:17 client.p12 rw------. 1 informix informix 193 Dec 10 19:17 client.sth rw------. 1 informix informix 87 Dec 10 19:17 https-keystore.gpg rw------. 1 informix informix 2664 Dec 10 19:17 https-keystore.jks rw-rr-. 1 informix informix 725 Dec 10 19:17 informix.cert rw------. 1 informix informix 87 Dec 10 19:17 informix.gpg rw------. 1 informix informix 1441 Dec 10 19:17 informix.p12 rw------. 1 informix informix 193 Dec 10 19:17 informix.sth rw-rr-. 1 informix informix 0 Dec 10 19:17 wl_credentials_status_file
Copyright© 2020 HCL Technologies Limited
Retrieving the Informix port number
The Informix service exposes the following network communication ports to allow connections from outside of the Red Hat® OpenShift® cluster.
The following table lists the ports that are exposed by Informix and their usage.
Table 1. Ports exposed by the Informix operand
Port usage External port Internal port C
External clientapplications toconnect toInformix via aDRDA client.
To get the external port run the following command:The external port is the value of the Port number field.Optionally, you can runthe following command:
oc get svc -n projectservice_name-drda -o jsonpath='{.spec.ports[?(@.name=="http-drda")].nodePort}'
project is the OpenShift project where Informix is deployed. service_name is the unique identifier that is assigned to each Informixdeployment. The service name always starts with "informix", for example server1-ibm-informix-prod.
9089 T
External clientapplications toconnect toInformix via aMONGO client.
To get the external port, run the following command:
oc get svc -n projectservice_name-mongo -o jsonpath='{.spec.ports[?(@.name=="http-mongo")].nodePort}'
project is the OpenShift project where Informix is deployed. service_name is the unique identifier that is assigned to each Informixdeployment. The service name always starts with "informix", for example server1-ibm-informix-prod.
27017 T
External clientapplications toconnect toInformix via aREST client.
To get the external port, run the following command:
oc get svc -n projectservice_name-rest -o jsonpath='{.spec.ports[?(@.name=="http-rest")].nodePort}'
project is the OpenShift project where Informix is deployed. service_name is the unique identifier that is assigned to each Informixdeployment. The service name always starts with "informix", for example server1-ibm-informix-prod.
27018 H
External clientapplications toconnect toInformix via aSQLI client.
To get the external port, run the following command:
oc get svc -n projectservice_name-sqli -o jsonpath='{.spec.ports[?(@.name=="http-sqli")].nodePort}'
project is the OpenShift project where Informix is deployed. service_name is the unique identifier that is assigned to each Informixdeployment. The service name always starts with "informix", for example informix-1597310372757.
9088 T
External clientapplications toconnect toInformix via aMQTT client.
To get the external port, run the following command:
oc get svc -n projectservice_name-mqtt -o jsonpath='{.spec.ports[?(@.name=="http-mqtt")].nodePort}'
project is the OpenShift project where Informix is deployed. service_name is the unique identifier that is assigned to each Informixdeployment. The service name always starts with "informix", for example server1-ibm-informix-prod.
27833 T
Copyright© 2020 HCL Technologies Limited
14 Part XV: Informix containerized deployment
Configuring the Informix NodePort with an Ingress controller
If you use an external infrastructure node to route external Informix traffic into the Red Hat® OpenShift® cluster, the cluster might be in a private zone and you need toconfigure an external-facing Ingress controller to route the traffic to the OpenShift nodes.
Because Informix is externally exposed through a NodePort, the Ingress controller also needs to expose the NodePort in order to allow traffic into the cluster.
The configuration below is only applicable with an HAProxy Ingress controller. For more detail about configuring networking, see Understanding networking in theOpenShift documentation.
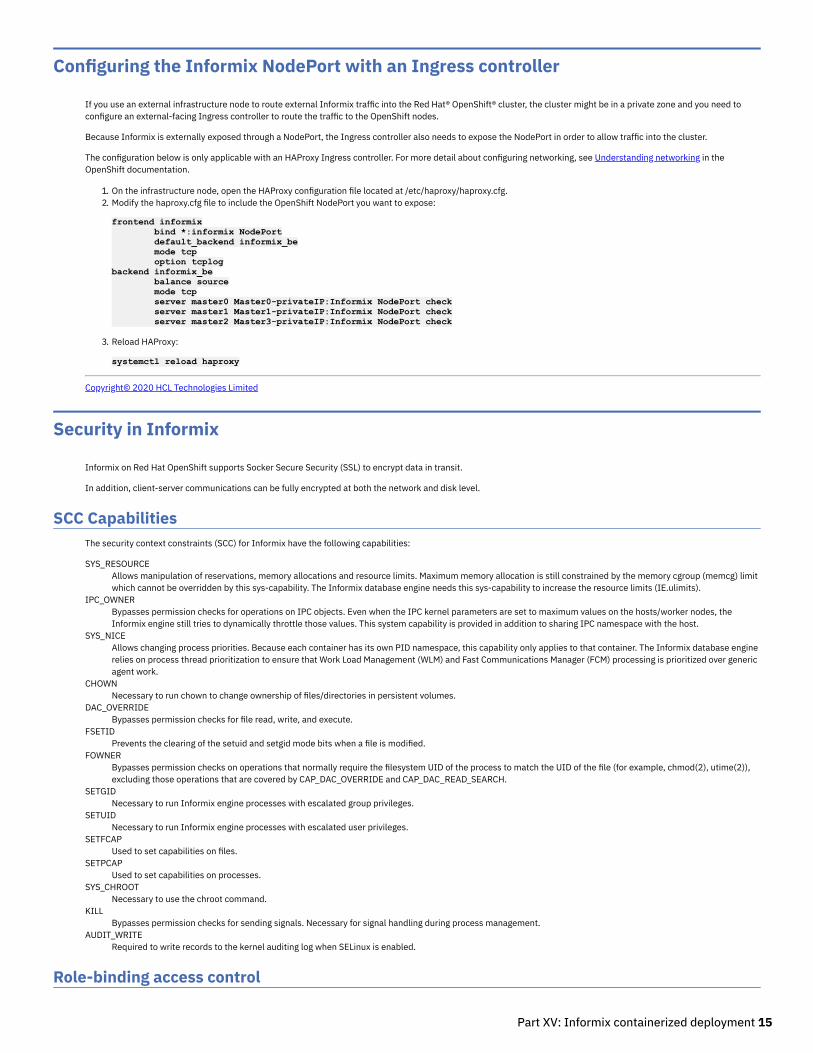
1. On the infrastructure node, open the HAProxy configuration file located at /etc/haproxy/haproxy.cfg.2. Modify the haproxy.cfg file to include the OpenShift NodePort you want to expose:
frontend informix bind *:informix NodePort default_backend informix_be mode tcp option tcplog backend informix_be balance source mode tcp server master0 Master0-privateIP:Informix NodePort check server master1 Master1-privateIP:Informix NodePort check server master2 Master3-privateIP:Informix NodePort check
3. Reload HAProxy:
systemctl reload haproxy
Copyright© 2020 HCL Technologies Limited
Security in Informix
Informix on Red Hat OpenShift supports Socker Secure Security (SSL) to encrypt data in transit.
In addition, client-server communications can be fully encrypted at both the network and disk level.
SCC CapabilitiesThe security context constraints (SCC) for Informix have the following capabilities:
SYS_RESOURCEAllows manipulation of reservations, memory allocations and resource limits. Maximum memory allocation is still constrained by the memory cgroup (memcg) limitwhich cannot be overridden by this sys-capability. The Informix database engine needs this sys-capability to increase the resource limits (IE.ulimits).
IPC_OWNERBypasses permission checks for operations on IPC objects. Even when the IPC kernel parameters are set to maximum values on the hosts/worker nodes, theInformix engine still tries to dynamically throttle those values. This system capability is provided in addition to sharing IPC namespace with the host.
SYS_NICEAllows changing process priorities. Because each container has its own PID namespace, this capability only applies to that container. The Informix database enginerelies on process thread prioritization to ensure that Work Load Management (WLM) and Fast Communications Manager (FCM) processing is prioritized over genericagent work.
CHOWNNecessary to run chown to change ownership of files/directories in persistent volumes.
DAC_OVERRIDEBypasses permission checks for file read, write, and execute.
FSETIDPrevents the clearing of the setuid and setgid mode bits when a file is modified.
FOWNERBypasses permission checks on operations that normally require the filesystem UID of the process to match the UID of the file (for example, chmod(2), utime(2)),excluding those operations that are covered by CAP_DAC_OVERRIDE and CAP_DAC_READ_SEARCH.
SETGIDNecessary to run Informix engine processes with escalated group privileges.
SETUIDNecessary to run Informix engine processes with escalated user privileges.
SETFCAPUsed to set capabilities on files.
SETPCAPUsed to set capabilities on processes.
SYS_CHROOTNecessary to use the chroot command.
KILLBypasses permission checks for sending signals. Necessary for signal handling during process management.
AUDIT_WRITERequired to write records to the kernel auditing log when SELinux is enabled.
Role-binding access control
Part XV: Informix containerized deployment 15
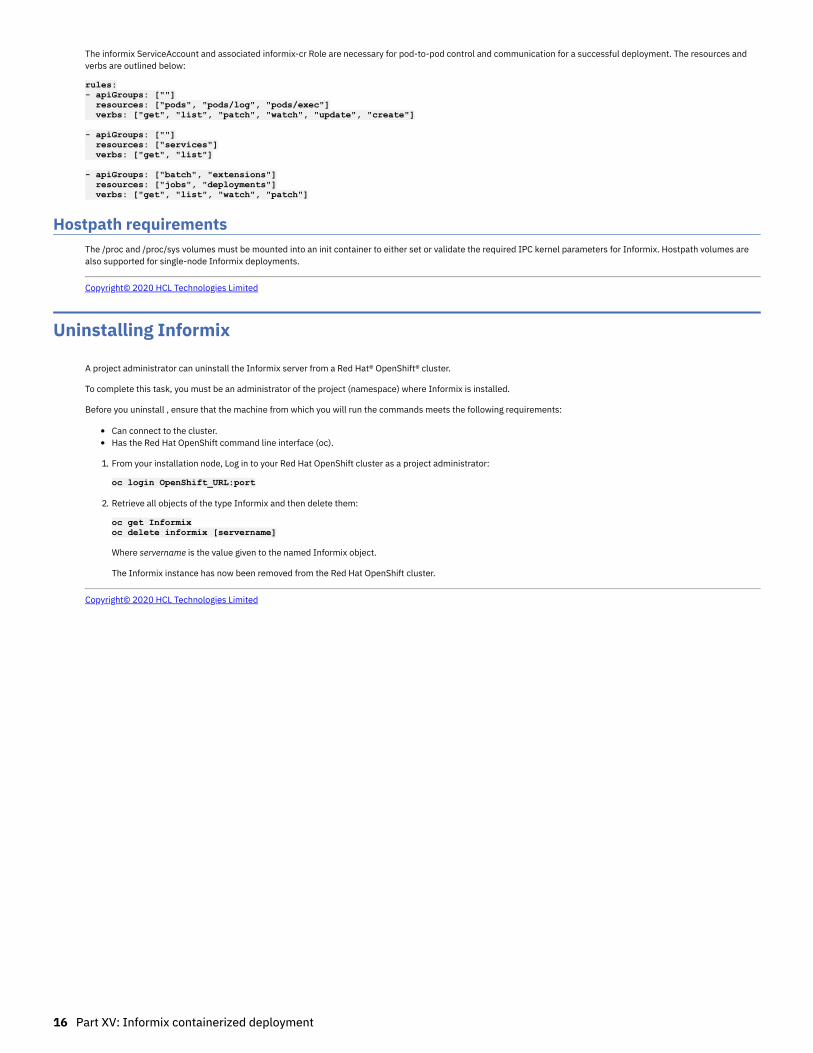
The informix ServiceAccount and associated informix-cr Role are necessary for pod-to-pod control and communication for a successful deployment. The resources andverbs are outlined below:
rules: - apiGroups: [""] resources: ["pods", "pods/log", "pods/exec"] verbs: ["get", "list", "patch", "watch", "update", "create"]
- apiGroups: [""] resources: ["services"] verbs: ["get", "list"]
- apiGroups: ["batch", "extensions"] resources: ["jobs", "deployments"] verbs: ["get", "list", "watch", "patch"]
Hostpath requirementsThe /proc and /proc/sys volumes must be mounted into an init container to either set or validate the required IPC kernel parameters for Informix. Hostpath volumes arealso supported for single-node Informix deployments.
Copyright© 2020 HCL Technologies Limited
Uninstalling Informix
A project administrator can uninstall the Informix server from a Red Hat® OpenShift® cluster.
To complete this task, you must be an administrator of the project (namespace) where Informix is installed.
Before you uninstall , ensure that the machine from which you will run the commands meets the following requirements:
Can connect to the cluster.Has the Red Hat OpenShift command line interface (oc).
1. From your installation node, Log in to your Red Hat OpenShift cluster as a project administrator:
oc login OpenShift_URL:port
2. Retrieve all objects of the type Informix and then delete them:
oc get Informix oc delete informix [servername]
Where servername is the value given to the named Informix object.
The Informix instance has now been removed from the Red Hat OpenShift cluster.
Copyright© 2020 HCL Technologies Limited
16 Part XV: Informix containerized deployment
Related Documents