PARACORD! How to Make the Best Bracelets, Lanyards, Key Chains, Buckles, and More Todd Mikkelsen Skyhorse Publishing

Welcome message from author
This document is posted to help you gain knowledge. Please leave a comment to let me know what you think about it! Share it to your friends and learn new things together.
Transcript

Paracord!How to Make the Best Bracelets, Lanyards, Key Chains,
Buckles, and More
Todd Mikkelsen
Skyhorse Publishing
Contents
1. Tools 0002. Tips And Tricks 0003. Stopper Knots 0004. Two Color Solomon Bar Bracelet 0005. Elastic Solomon Bar Bracelet 0006. Thin Line And Charm Bracelet 0007. Solomon V Bar Bracelet 0008. Shark Jaw Bone Bracelet 0009. Snake Knot Bracelet 000
10. Locked Half Hitch Bracelet 00011. Slanted Locked Half Hitch Bracelet 00012. Dragon’s Breath Bracelet 00013. West Country Whipping Inverted Bracelet 00014. Solomon Quick Deploy Strap 00015. Genoese Quick Deploy Strap 00016. Millipede Quick Deploy Strap 00017. Zipper Quick Deploy Sinnet 00018. Reaver Quick Deploy Sinnet 00019. Round Crown Sinnet Key Fob 00020. Four Strand Round Braid Loop-Knot Necklace 00021. Three Cord Braid With Break-Away Clasps 00022. I.D. Lanyard 00023. Thick Zipper Sinnet Belt 00024. Solomon Twist Handle Wrap 00025. Common Whipping Handle Wrap 000
1
Tools and Supplies
2 • Paracord!
If paracord, or parachute cord, is a hobby or business and you wish to make paracord crafts, then you may need several of the suggested tools that will assist you in making them. These tools will reduce the time it takes to make most paracord crafts and help reduce anxiety and frustration when working on a craft project.
Keep in mind that these are the tools that I prefer to use. Other paracordists may have differing opinions. The reader may want to purchase the following items:
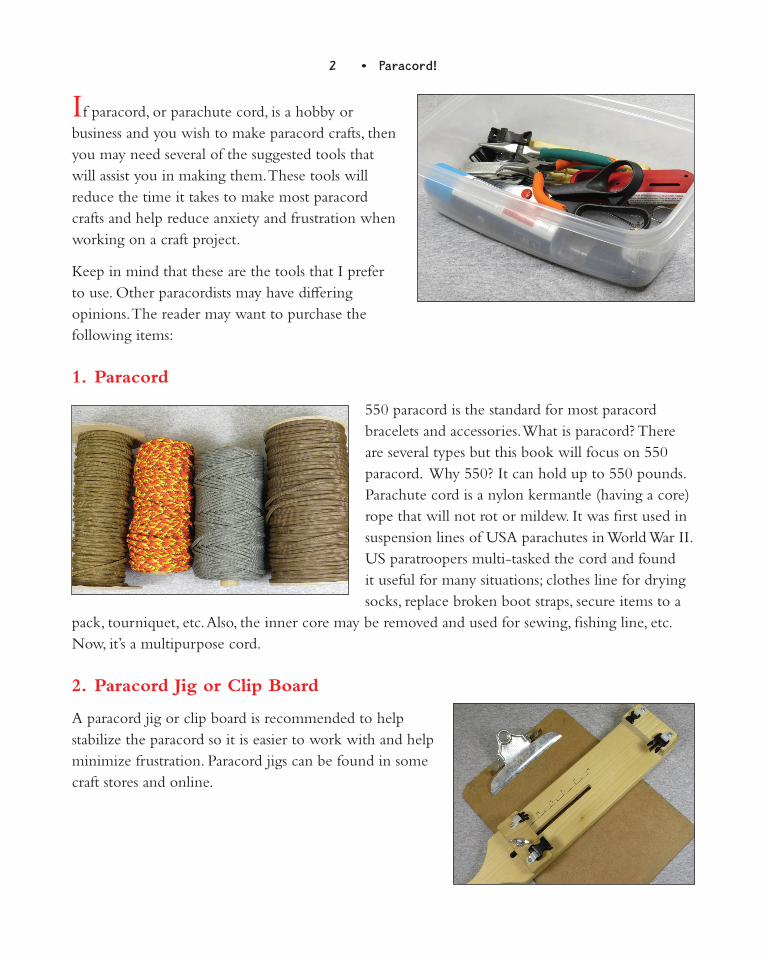
1. Paracord
550 paracord is the standard for most paracord bracelets and accessories. What is paracord? There are several types but this book will focus on 550 paracord. Why 550? It can hold up to 550 pounds. Parachute cord is a nylon kermantle (having a core) rope that will not rot or mildew. It was first used in suspension lines of USA parachutes in World War II. US paratroopers multi-tasked the cord and found it useful for many situations; clothes line for drying socks, replace broken boot straps, secure items to a
pack, tourniquet, etc. Also, the inner core may be removed and used for sewing, fishing line, etc. Now, it’s a multipurpose cord.
2. Paracord Jig or Clip Board
A paracord jig or clip board is recommended to help stabilize the paracord so it is easier to work with and help minimize frustration. Paracord jigs can be found in some craft stores and online.
Tools and Supplies • 3
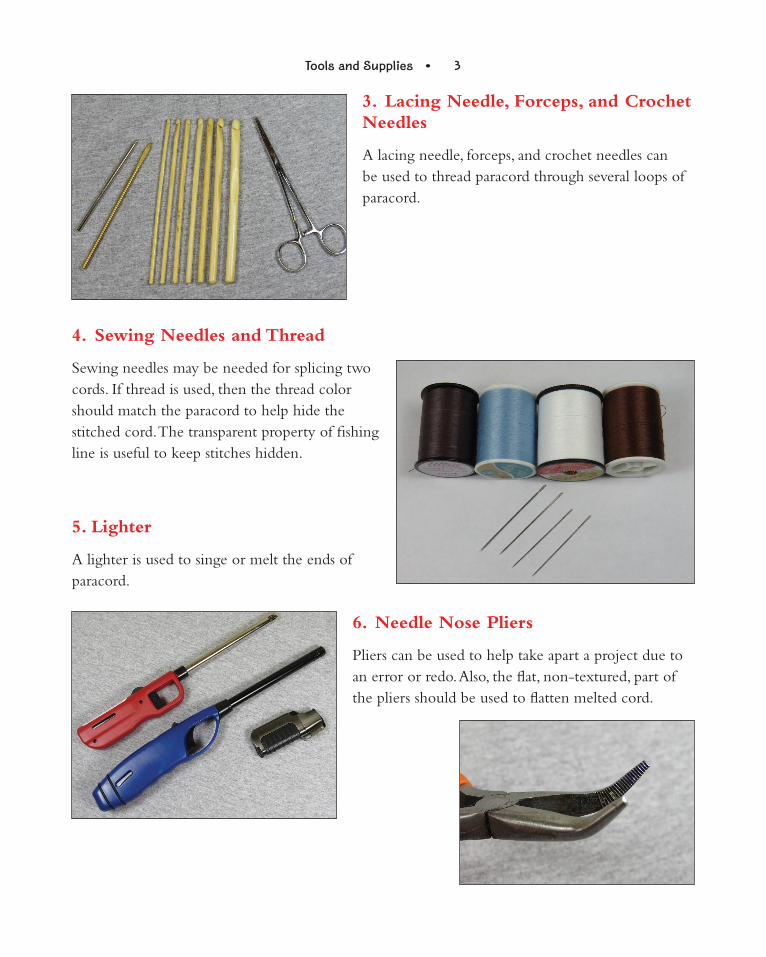
3. Lacing Needle, Forceps, and Crochet Needles
A lacing needle, forceps, and crochet needles can be used to thread paracord through several loops of paracord.
4. Sewing Needles and Thread
Sewing needles may be needed for splicing two cords. If thread is used, then the thread color should match the paracord to help hide the stitched cord. The transparent property of fishing line is useful to keep stitches hidden.
5. Lighter
A lighter is used to singe or melt the ends of paracord.
6. Needle Nose Pliers
Pliers can be used to help take apart a project due to an error or redo. Also, the flat, non-textured, part of the pliers should be used to flatten melted cord.
4 • Paracord!
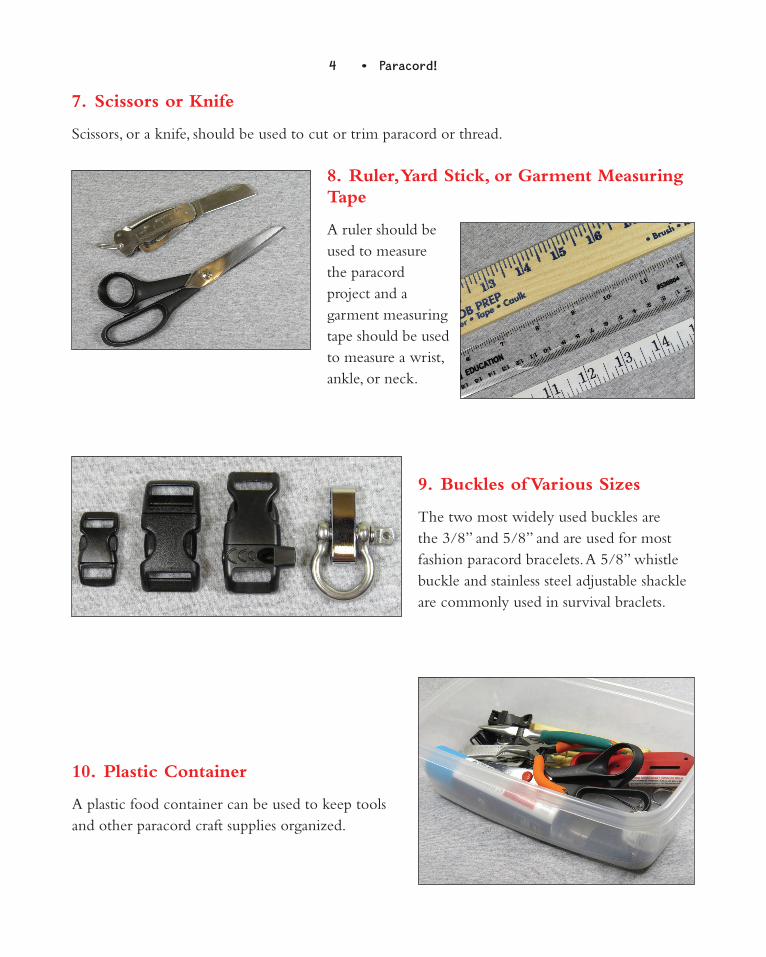
7. Scissors or Knife
Scissors, or a knife, should be used to cut or trim paracord or thread.
8. Ruler, Yard Stick, or Garment Measuring Tape
A ruler should be used to measure the paracord project and a garment measuring tape should be used to measure a wrist, ankle, or neck.
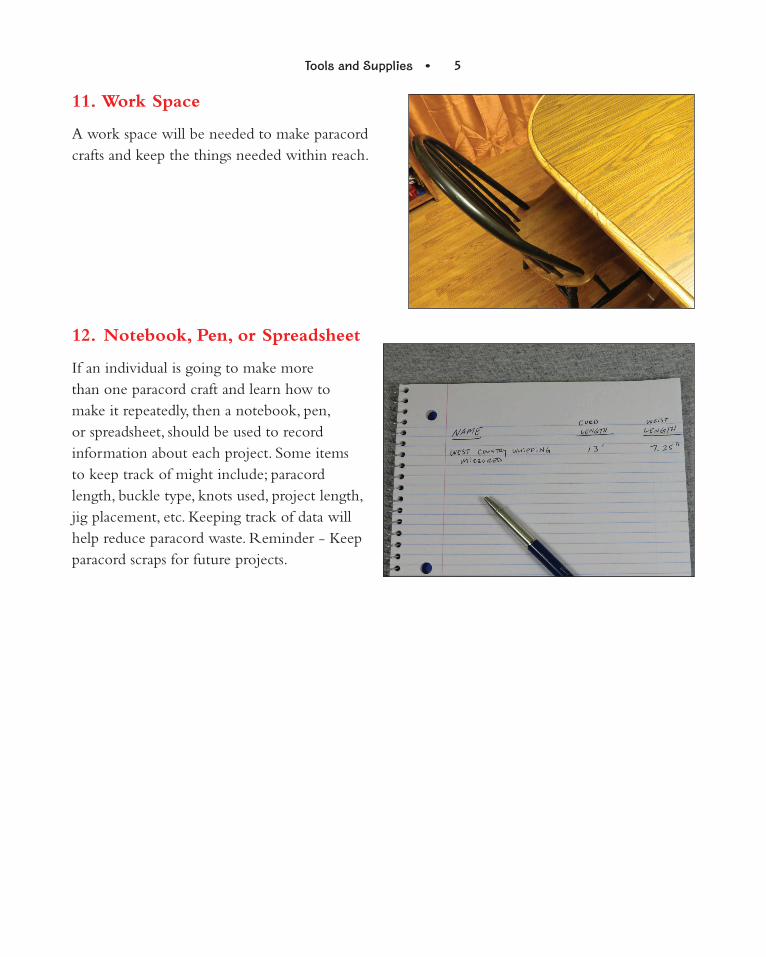
9. Buckles of Various Sizes
The two most widely used buckles are the 3/8” and 5/8” and are used for most fashion paracord bracelets. A 5/8” whistle buckle and stainless steel adjustable shackle are commonly used in survival braclets.
10. Plastic Container
A plastic food container can be used to keep tools and other paracord craft supplies organized.
Tools and Supplies • 5
11. Work Space
A work space will be needed to make paracord crafts and keep the things needed within reach.
12. Notebook, Pen, or Spreadsheet
If an individual is going to make more than one paracord craft and learn how to make it repeatedly, then a notebook, pen, or spreadsheet, should be used to record information about each project. Some items to keep track of might include; paracord length, buckle type, knots used, project length, jig placement, etc. Keeping track of data will help reduce paracord waste. Reminder - Keep paracord scraps for future projects.

2
Tips and Tricks
8 • Paracord!
1 – Pre-Shrink Paracord
A person’s, or a business’, reputation can be ruined due to how a paracord project is made. Paracord will shrink the first time it gets wet. It is a good idea to pre-shrink paracord before making a project.
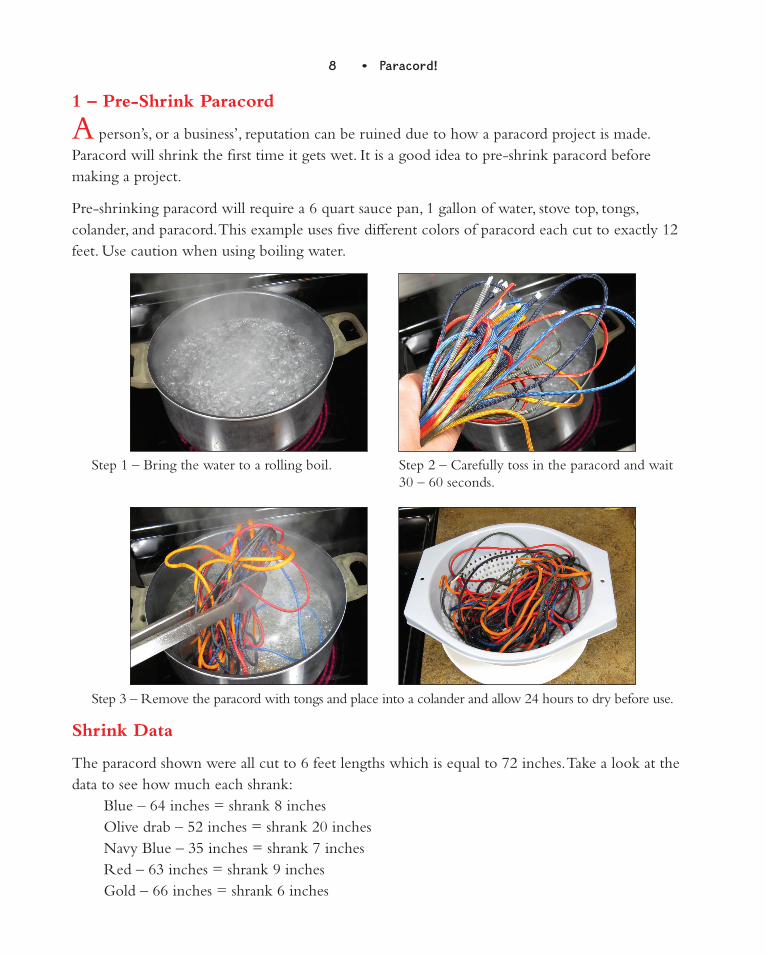
Pre-shrinking paracord will require a 6 quart sauce pan, 1 gallon of water, stove top, tongs, colander, and paracord. This example uses five different colors of paracord each cut to exactly 12 feet. Use caution when using boiling water.
Step 1 – Bring the water to a rolling boil. Step 2 – Carefully toss in the paracord and wait 30 – 60 seconds.
Step 3 – Remove the paracord with tongs and place into a colander and allow 24 hours to dry before use.
Shrink Data
The paracord shown were all cut to 6 feet lengths which is equal to 72 inches. Take a look at the data to see how much each shrank:
Blue – 64 inches = shrank 8 inchesOlive drab – 52 inches = shrank 20 inchesNavy Blue – 35 inches = shrank 7 inchesRed – 63 inches = shrank 9 inchesGold – 66 inches = shrank 6 inches
Tips and Tricks • 9
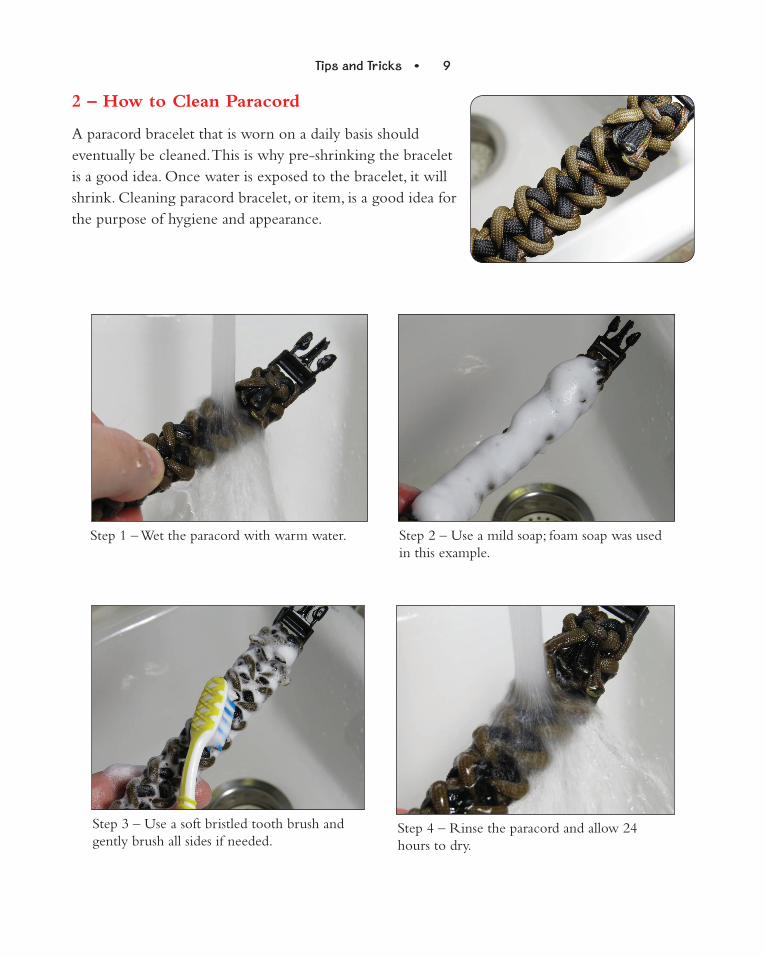
2 – How to Clean Paracord
A paracord bracelet that is worn on a daily basis should eventually be cleaned. This is why pre-shrinking the bracelet is a good idea. Once water is exposed to the bracelet, it will shrink. Cleaning paracord bracelet, or item, is a good idea for the purpose of hygiene and appearance.
Step 1 – Wet the paracord with warm water.
Step 3 – Use a soft bristled tooth brush and gently brush all sides if needed.
Step 4 – Rinse the paracord and allow 24 hours to dry.
Step 2 – Use a mild soap; foam soap was used in this example.
10 • Paracord!
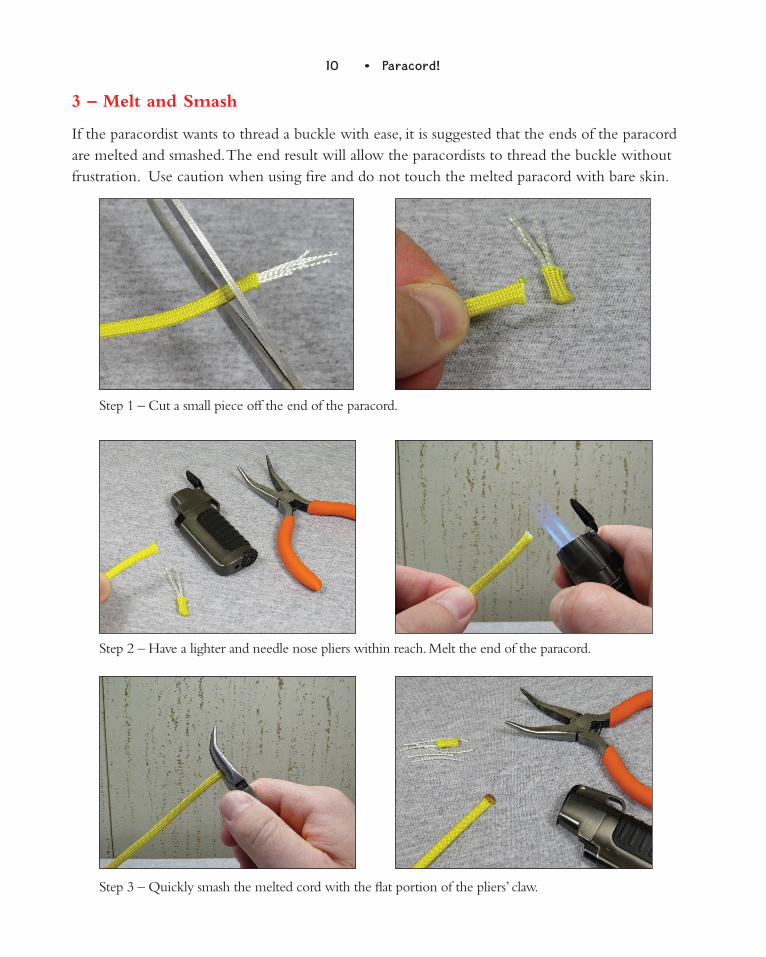
3 – Melt and Smash
If the paracordist wants to thread a buckle with ease, it is suggested that the ends of the paracord are melted and smashed. The end result will allow the paracordists to thread the buckle without frustration. Use caution when using fire and do not touch the melted paracord with bare skin.
Step 1 – Cut a small piece off the end of the paracord.
Step 2 – Have a lighter and needle nose pliers within reach. Melt the end of the paracord.
Step 3 – Quickly smash the melted cord with the flat portion of the pliers’ claw.

Tips and Tricks • 11
4 – Two Color Splicing: Sleeve and Stitch Method
Most paracordists will simply melt two ends of paracord and smash them together until the melted cord hardens. This is known as the Melt and Smash Method of Splicing. However, once the paracordists attempts to thread a buckle, the splice may not go through a buckle. The melted splice can also cause a bulge in the design of the paracord weave in any design.
The Melt and Smash Method of splicing paracord is shown here.
Step 1 – Pull roughly one inch of the 7 strand core out and trim. Run fingers over the otter core to reduce the slack.
A solution to this problem is using the Sleeve and Stitch Method of splicing. This method may take more time but the end result in a design with no bulge and is easy to use.
12 • Paracord!
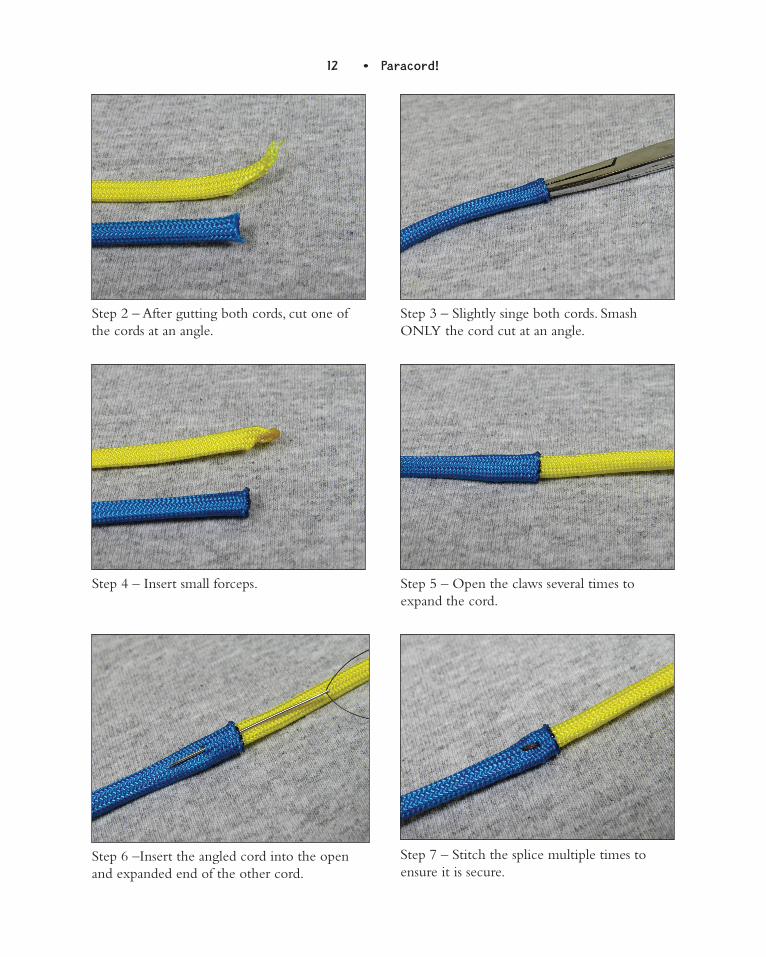
Step 2 – After gutting both cords, cut one of the cords at an angle.
Step 4 – Insert small forceps.
Step 6 –Insert the angled cord into the open and expanded end of the other cord.
Step 3 – Slightly singe both cords. Smash ONLY the cord cut at an angle.
Step 5 – Open the claws several times to expand the cord.
Step 7 – Stitch the splice multiple times to ensure it is secure.

Tips and Tricks • 13
5 – How to Thread a 3/8 inch Buckle
Step 1 – Start from the top and thread both ends into the bottom buckle.
Step 5 – Tighten the cord creating a Lark’s Head Knot. Notice the loop is on the bottom. This will be used to tuck paracord to finish the bracelet.
Step 3 – Thread the two ends through the one inch loop.
Step 2 – Pull the cord through and leave a one inch loop.
Step 6 – Start from the top and thread both ends into the top buckle.
Step 4 – Pull the cord through.
14 • Paracord!
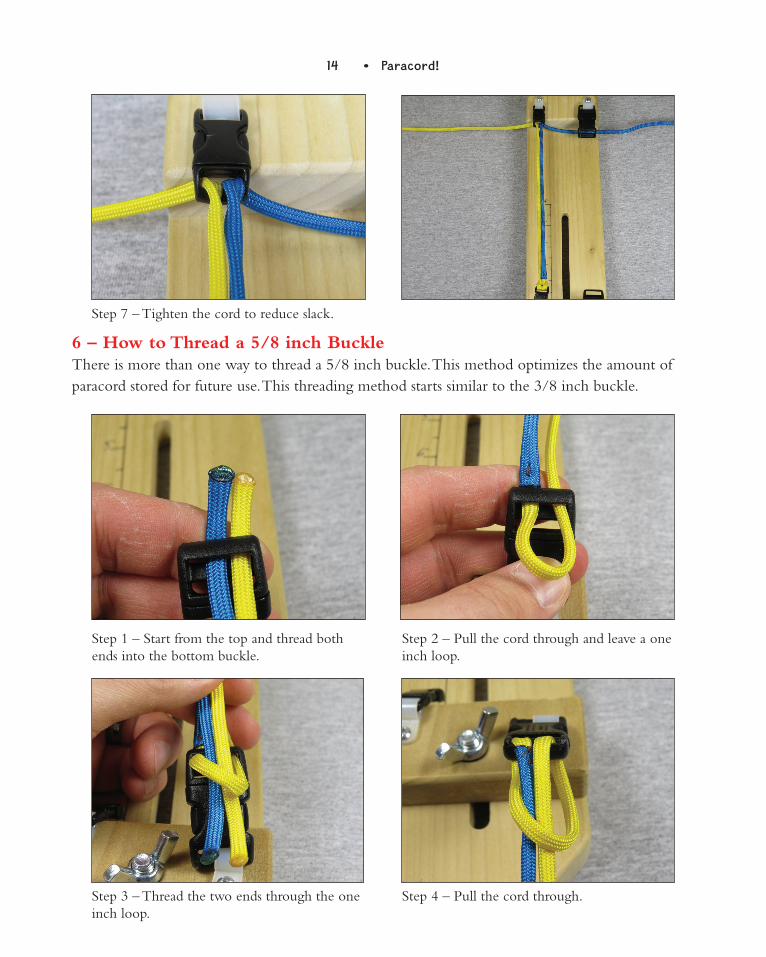
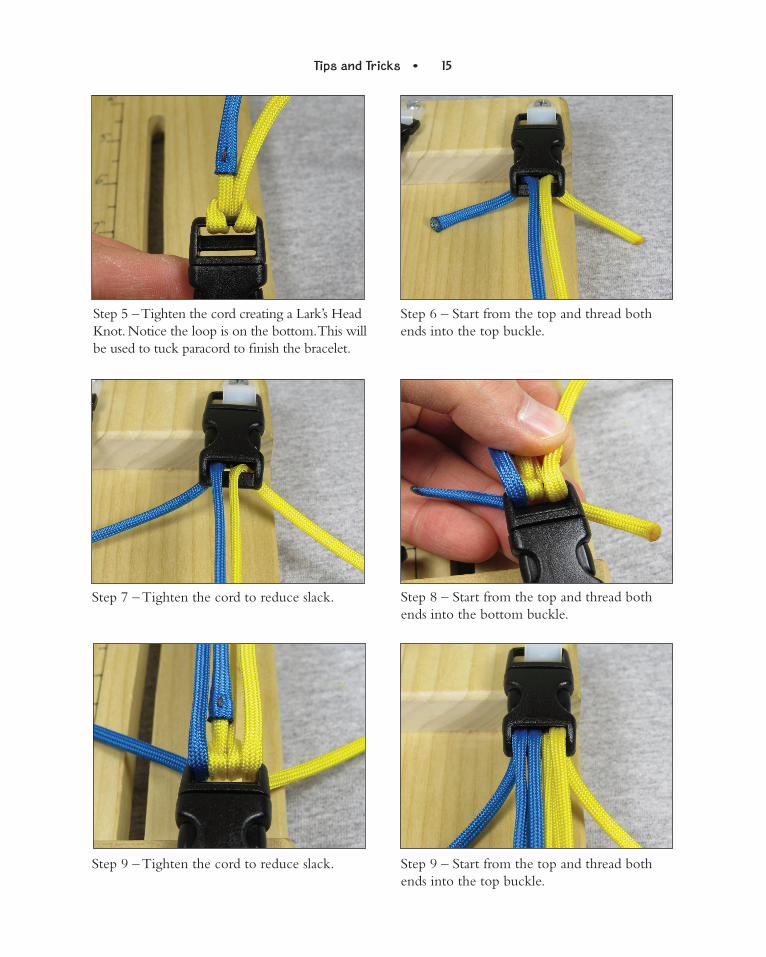
6 – How to Thread a 5/8 inch BuckleThere is more than one way to thread a 5/8 inch buckle. This method optimizes the amount of paracord stored for future use. This threading method starts similar to the 3/8 inch buckle.
Step 7 – Tighten the cord to reduce slack.
Step 1 – Start from the top and thread both ends into the bottom buckle.
Step 3 – Thread the two ends through the one inch loop.
Step 2 – Pull the cord through and leave a one inch loop.
Step 4 – Pull the cord through.
Tips and Tricks • 15
Step 5 – Tighten the cord creating a Lark’s Head Knot. Notice the loop is on the bottom. This will be used to tuck paracord to finish the bracelet.
Step 6 – Start from the top and thread both ends into the top buckle.
Step 7 – Tighten the cord to reduce slack.
Step 9 – Tighten the cord to reduce slack.
Step 8 – Start from the top and thread both ends into the bottom buckle.
Step 9 – Start from the top and thread both ends into the top buckle.
16 • Paracord!
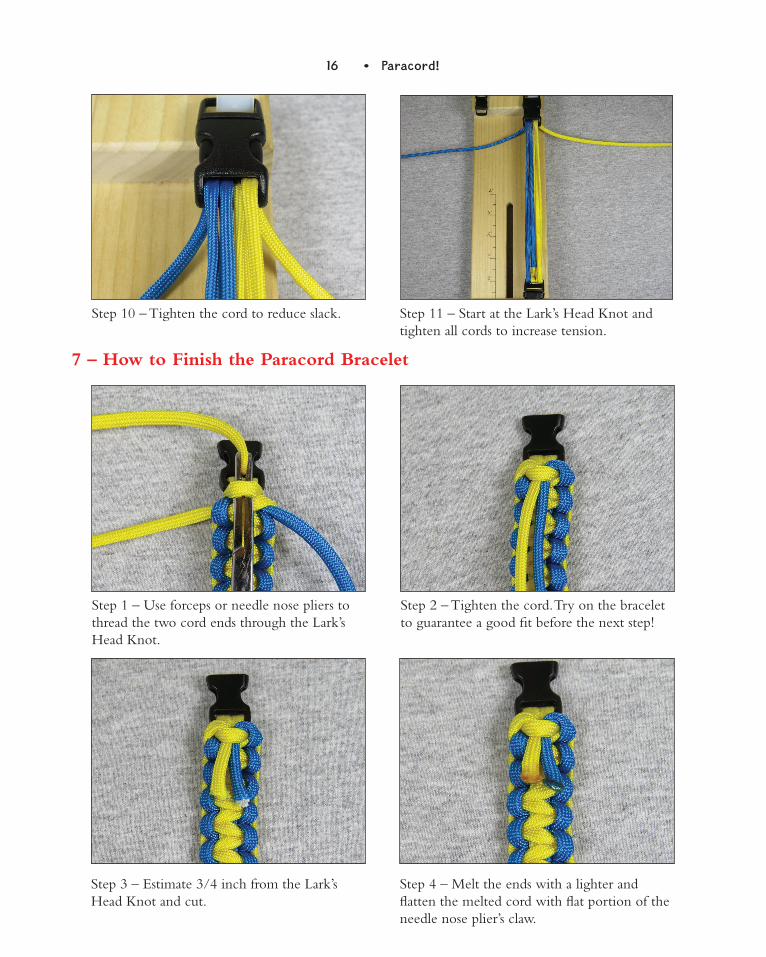
Step 10 – Tighten the cord to reduce slack.
Step 1 – Use forceps or needle nose pliers to thread the two cord ends through the Lark’s Head Knot.
Step 3 – Estimate 3/4 inch from the Lark’s Head Knot and cut.
Step 2 – Tighten the cord. Try on the bracelet to guarantee a good fit before the next step!
Step 4 – Melt the ends with a lighter and flatten the melted cord with flat portion of the needle nose plier’s claw.
Step 11 – Start at the Lark’s Head Knot and tighten all cords to increase tension.
7 – How to Finish the Paracord Bracelet
Tips and Tricks • 17
8 – Fashion versus Survival
There are several misconceptions about paracord bracelets in general. Several individuals tend to think that if a bracelet is made of paracord, then it must be a survival bracelet. This is incorrect!
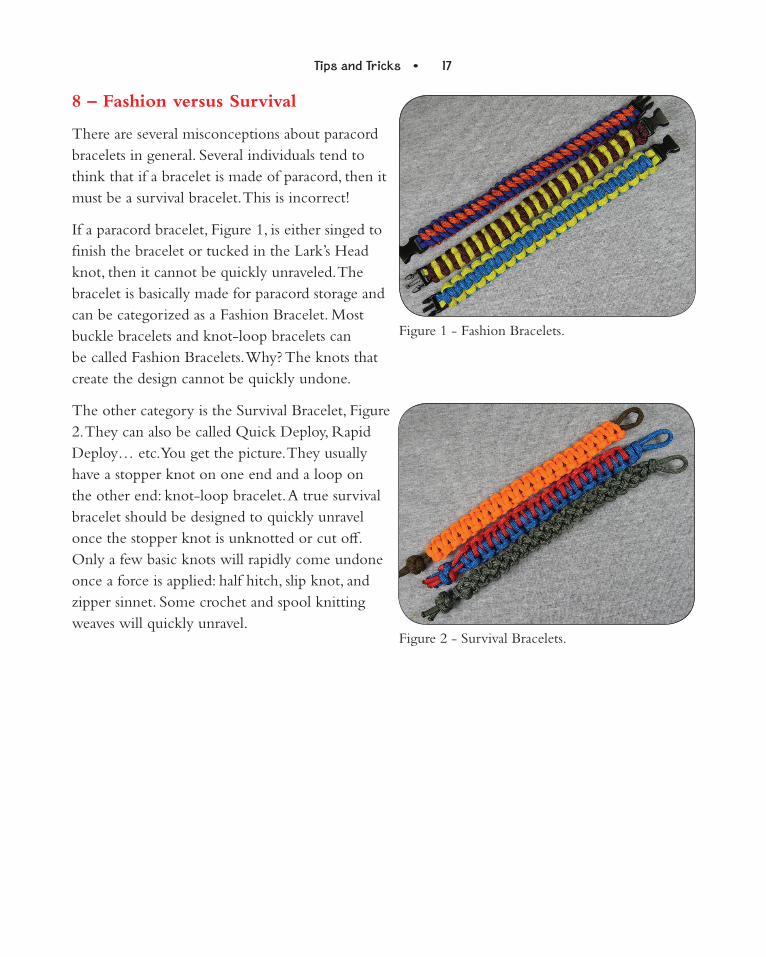
If a paracord bracelet, Figure 1, is either singed to finish the bracelet or tucked in the Lark’s Head knot, then it cannot be quickly unraveled. The bracelet is basically made for paracord storage and can be categorized as a Fashion Bracelet. Most buckle bracelets and knot-loop bracelets can be called Fashion Bracelets. Why? The knots that create the design cannot be quickly undone.
The other category is the Survival Bracelet, Figure 2. They can also be called Quick Deploy, Rapid Deploy… etc. You get the picture. They usually have a stopper knot on one end and a loop on the other end: knot-loop bracelet. A true survival bracelet should be designed to quickly unravel once the stopper knot is unknotted or cut off. Only a few basic knots will rapidly come undone once a force is applied: half hitch, slip knot, and zipper sinnet. Some crochet and spool knitting weaves will quickly unravel.
Figure 1 - Fashion Bracelets.
Figure 2 - Survival Bracelets.
Related Documents