Tip #16 Painting wood textures in watercolor - step by step If you paint landscapes and nature at all, sooner or later you'll find yourself faced with the challenge of painting the texture of wood. Really, it's no more difficult than anything else, if you take it step by step. When painting bark, it isn't necessary to do a completely detailed and accurate rendering of each tree species- unless you're illustrating a field guide! It IS nice to give a suggestion that matches the tree at hand, though- shagbark hickories are very different from oaks, and both are different from smooth-sided birch. If you are painting the side of a barn or an old wooden fence, the process of painting is the same...observation and a bit of patience while you wait for the washes to dry are really all that's required. Art 16-1 Art 16-1, Manmade Wood Texture Old lumber often weathers beautifully ... if you're painting a barn door, an old house, or other surface, try this sequence. At top left, flood in a varied underlayer, using warm and cool shades and allowing them to blend. Then, when that layer is completely dry, use a drybrush or fan brush (or both!) to suggest the grain of the wood, as at upper right. Use a linear approach and follow the grain of the wood, then let dry. Finally, add any details you want, as at bottom center-as much or as little as you like. Knots, cracks, the spaces between boards-a small round brush works well for this, and a stencil brush or old toothbrush is great for adding spatter for texture. The tiny dots look like insect holes...be careful not to make them too uniform, and blot some of them with a tissue for an interesting variation.

Welcome message from author
This document is posted to help you gain knowledge. Please leave a comment to let me know what you think about it! Share it to your friends and learn new things together.
Transcript

Tip #16
Painting wood texturesin watercolor - step by step
If you paint landscapes and nature at all, sooner or later you'll findyourself faced with the challenge of painting the texture of wood.Really, it's no more difficult than anything else, if you take it step by step.
When painting bark, it isn't necessary to do a completely detailed and accurate rendering of each tree species-unless you're illustrating a field guide! It IS nice to give a suggestion that matches the tree at hand, though-shagbark hickories are very different from oaks, and both are different from smooth-sided birch.
If you are painting the side of a barn or an old wooden fence, the process of painting is the same...observation anda bit of patience while you wait for the washes to dry are really all that's required.
Art 16-1
Art 16-1, Manmade Wood TextureOld lumber often weathers beautifully ... ifyou're painting a barn door, an old house, orother surface, try this sequence. At top left,flood in a varied underlayer, using warm andcool shades and allowing them to blend.
Then, when that layer is completely dry, use adrybrush or fan brush (or both!) to suggest thegrain of the wood, as at upper right. Use a linear approach and follow the grain of the wood, then let dry.
Finally, add any details you want, as at bottom center-as much or as little as you like. Knots, cracks, the spacesbetween boards-a small round brush works well for this, and a stencil brush or old toothbrush is great for addingspatter for texture. The tiny dots look like insect holes...be careful not to make them too uniform, and blot someof them with a tissue for an interesting variation.
© Copyright Cathy Johnson, Graphics/Fine Arts, All Rights ReservedWebsite: http://www.cathyjohnson.infoEmail: [email protected]
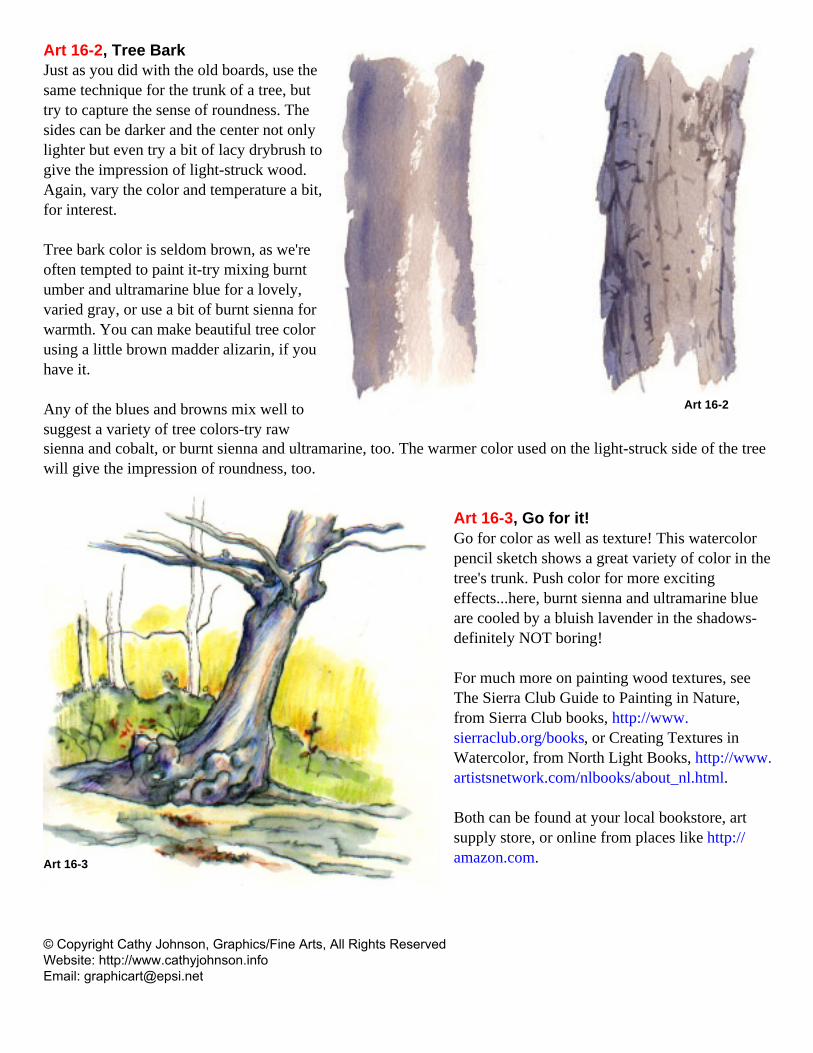
Art 16-2, Tree BarkJust as you did with the old boards, use thesame technique for the trunk of a tree, buttry to capture the sense of roundness. Thesides can be darker and the center not onlylighter but even try a bit of lacy drybrush togive the impression of light-struck wood.Again, vary the color and temperature a bit,for interest.
Tree bark color is seldom brown, as we'reoften tempted to paint it-try mixing burntumber and ultramarine blue for a lovely,varied gray, or use a bit of burnt sienna forwarmth. You can make beautiful tree colorusing a little brown madder alizarin, if youhave it.
Any of the blues and browns mix well tosuggest a variety of tree colors-try raw
Art 16-2
sienna and cobalt, or burnt sienna and ultramarine, too. The warmer color used on the light-struck side of the treewill give the impression of roundness, too.
Art 16-3, Go for it!Go for color as well as texture! This watercolorpencil sketch shows a great variety of color in thetree's trunk. Push color for more excitingeffects...here, burnt sienna and ultramarine blueare cooled by a bluish lavender in the shadows-definitely NOT boring!
For much more on painting wood textures, seeThe Sierra Club Guide to Painting in Nature,from Sierra Club books, http://www.sierraclub.org/books, or Creating Textures inWatercolor, from North Light Books, http://www.artistsnetwork.com/nlbooks/about_nl.html.
Both can be found at your local bookstore, artsupply store, or online from places like http://amazon.com.Art 16-3
Related Documents