Operator’s Manual COOL ARC ® 55 S WATER COOLER Register your machine: www.lincolnelectric.com/registration Authorized Service and Distributor Locator: www.lincolnelectric.com/locator IM10134 | Issue Date Oct-13 © Lincoln Global, Inc. All Rights Reserved. For use with machines having Code Numbers: 11949 Save for future reference Date Purchased Code: (ex: 10859) Serial: (ex: U1060512345)

Welcome message from author
This document is posted to help you gain knowledge. Please leave a comment to let me know what you think about it! Share it to your friends and learn new things together.
Transcript

Operator’s Manual
COOL ARC ® 55 S WATER COOLER
Register your machine: www.lincolnelectric.com/registration
Authorized Service and Distributor Locator: www.lincolnelectric.com/locator
IM10134 | Issue D ate Oct-13
© Lincoln Global, Inc. All Rights Reserved.
For use with machines having Code Numbers:
11949
Save for future reference
Date Purchased
Code: (ex: 10859)
Serial: (ex: U1060512345)

THANK YOU FOR SELECTING A QUALITY PRODUCT BY LINCOLN ELEC TRIC.
PLEASE EXAMINE CARTON AND EQUIPMENT FORDAMAGE IMMEDIATELY
When this equipment is shipped, title passes to the purchaserupon receipt by the carrier. Consequently, claims for materialdamaged in shipment must be made by the purchaser against thetransportation company at the time the shipment is received.
SAFETY DEPENDS ON YOU
Lincoln arc welding and cutting equipment is designed and builtwith safety in mind. However, your overall safety can be increasedby proper installation ... and thoughtful operation on your part. DO NOT INSTALL, OPERATE OR REPAIR THIS EQUIPMENT WITHOUT READING THIS MANUAL AND THE SAFETYPRECAUTIONS CONTAINED THROUGHOUT. And, most importantly,think before you act and be careful.
This statement appears where the information must be followedexactly to avoid serious personal injury or loss of life.
This statement appears where the information must be followedto avoid minor personal injury or damage to this equipment.
KEEP YOUR HEAD OUT OF THE FUMES.
DON’T get too close to the arc.Use corrective lenses if necessaryto stay a reasonable distanceaway from the arc.
READ and obey the Safety DataSheet (SDS) and the warning labelthat appears on all containers ofwelding materials.
USE ENOUGH VENTILATION orexhaust at the arc, or both, tokeep the fumes and gases from your breathing zone and the general area.
IN A LARGE ROOM OR OUTDOORS, natural ventilation may beadequate if you keep your head out of the fumes (See below).
USE NATURAL DRAFTS or fans to keep the fumes away from your face.
If you de velop unusual symptoms, see your supervisor. Perhaps the welding atmosphere and ventilation system should be checked.
WEAR CORRECT EYE, EAR & BODY PROTECTION
PROTECT your eyes and face with welding helmetproperly fitted and with proper grade of filter plate(See ANSI Z49.1).
PROTECT your body from welding spatter and arcflash with protective clothing including woolenclothing, flame-proof apron and gloves, leatherleggings, and high boots.
PROTECT others from splatter, flash, and glarewith protective screens or barriers.
IN SOME AREAS, protection from noise may be appropriate.
BE SURE protective equipment is in good condition.
Also, wear safety glasses in work areaAT ALL TIMES.
SPECIAL SITUATIONS
DO NOT WELD OR CUT containers or materials which previouslyhad been in contact with hazardous substances unless they areproperly cleaned. This is extremely dangerous.
DO NOT WELD OR CUT painted or plated parts unless specialprecautions with ventilation have been taken. They can releasehighly toxic fumes or gases.
Additional precautionary measures
PROTECT compressed gas cylinders from excessive heat,mechanical shocks, and arcs; fasten cylinders so they cannot fall.
BE SURE cylinders are never grounded or part of an electrical circuit.
REMOVE all potential fire hazards from welding area.
ALWAYS HAVE FIRE FIGHTING EQUIPMENT READY FORIMMEDIATE USE AND KNOW HOW TO USE IT.
WARNING
CAUTION
Safety 01 of 04 - 5/16/2018
SECTION A:WARNINGS
CALIFORNIA PROPOSITION 65 WARNINGS
WARNING: Breathing diesel engine exhaustexposes you to chemicals known to the Stateof California to cause cancer and birth defects,
or other reproductive harm.• Always start and operate the engine in a
well-ventilated area.• If in an exposed area, vent the exhaust to the outside.• Do not modify or tamper with the exhaust system. • Do not idle the engine except as necessary.For more information go to www.P65 warnings.ca.gov/diesel
WARNING: This product, when used for welding or
cutting, produces fumes or gases which contain
chemicals known to the State of California to cause
birth defects and, in some cases, cancer. (California
Health & Safety Code § 25249.5 et seq.)
WARNING: Cancer and Reproductive Harm
www.P65warnings.ca.gov
ARC WELDING CAN BE HAZARDOUS. PROTECTYOURSELF AND OTHERS FROM POSSIBLE SERIOUSINJURY OR DEATH. KEEP CHILDREN AWAY. PACEMAKER WEARERS SHOULD CONSULT WITHTHEIR DOCTOR BEFORE OPERATING.
Read and understand the following safety highlights. Foradditional safety information, it is strongly recommended that you purchase a copy of “Safety in Welding & Cutting - ANSI Standard Z49.1” from the American Welding Society, P.O. Box 351040, Miami, Florida 33135 or CSA Standard W117.2-1974. A Free copy of “Arc Welding Safety” booklet E205 is available from the Lincoln Electric Company, 22801 St. Clair Avenue, Cleveland, Ohio 44117-1199.
BE SURE THAT ALL INSTALLATION, OPERATION,MAINTENANCE AND REPAIR PROCEDURES AREPERFORMED ONLY BY QUALIFIED INDIVIDUALS.
FOR ENGINE POWEREDEQUIPMENT.
1.a. Turn the engine off before troubleshootingand maintenance work unless themaintenance work requires it to be running.
1.b. Operate engines in open, well-ventilated areas or vent the engineexhaust fumes outdoors.
1.c. Do not add the fuel near an open flame weldingarc or when the engine is running. Stop theengine and allow it to cool before refueling toprevent spilled fuel from vaporizing on contact
with hot engine parts and igniting. Do not spill fuel when fillingtank. If fuel is spilled, wipe it up and do not start engine untilfumes have been eliminated.
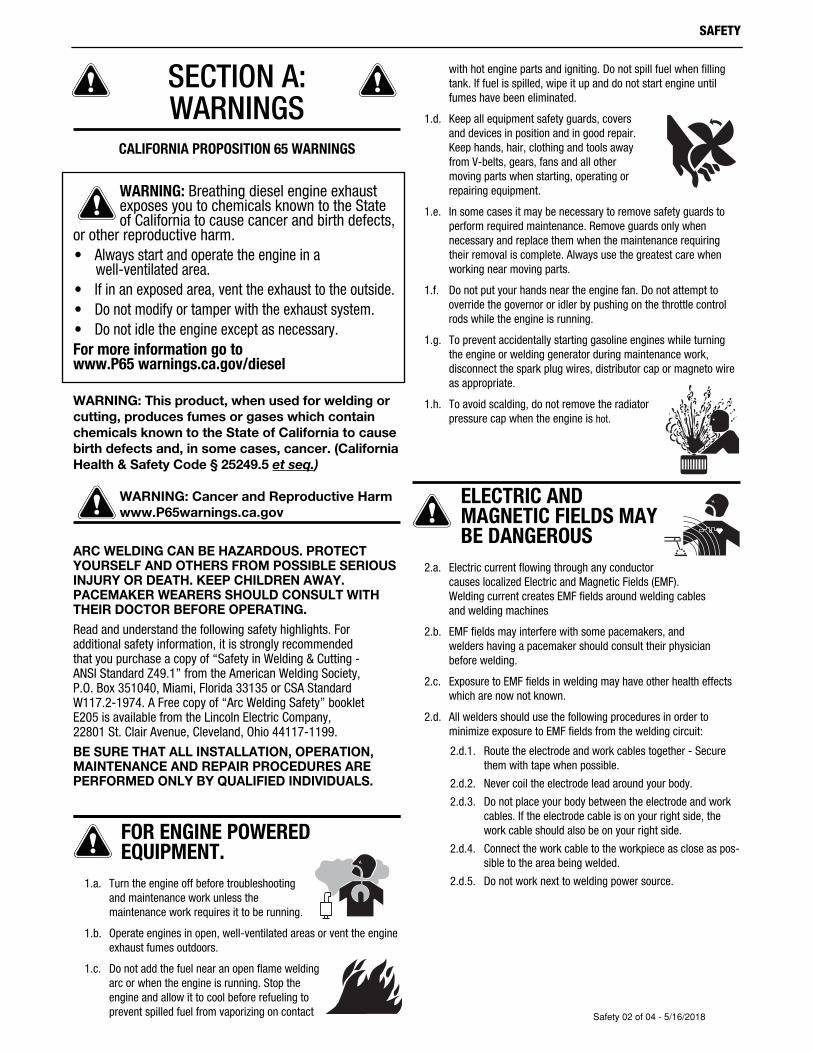
1.d. Keep all equipment safety guards, covers and devices in position and in good repair.Keep hands, hair, clothing and tools away from V-belts, gears, fans and all other moving parts when starting, operating orrepairing equipment.
1.e. In some cases it may be necessary to remove safety guards toperform required maintenance. Remove guards only whennecessary and replace them when the maintenance requiringtheir removal is complete. Always use the greatest care whenworking near moving parts.
1.f. Do not put your hands near the engine fan. Do not attempt tooverride the governor or idler by pushing on the throttle controlrods while the engine is running.
1.g. To prevent accidentally starting gasoline engines while turningthe engine or welding generator during maintenance work,disconnect the spark plug wires, distributor cap or magneto wireas appropriate.
1.h. To avoid scalding, do not remove the radiatorpressure cap when the engine is hot.
ELECTRIC ANDMAGNETIC FIELDS MAYBE DANGEROUS
2.a. Electric current flowing through any conductorcauses localized Electric and Magnetic Fields (EMF). Welding current creates EMF fields around welding cables and welding machines
2.b. EMF fields may interfere with some pacemakers, and welders having a pacemaker should consult their physicianbefore welding.
2.c. Exposure to EMF fields in welding may have other health effectswhich are now not known.
2.d. All welders should use the following procedures in order tominimize exposure to EMF fields from the welding circuit:
2.d.1. Route the electrode and work cables together - Securethem with tape when possible.
2.d.2. Never coil the electrode lead around your body.
2.d.3. Do not place your body between the electrode and workcables. If the electrode cable is on your right side, thework cable should also be on your right side.
2.d.4. Connect the work cable to the workpiece as close as pos-sible to the area being welded.
2.d.5. Do not work next to welding power source.
SAFETY
Safety 02 of 04 - 5/16/2018

ELECTRIC SHOCK CAN KILL.
3.a. The electrode and work (or ground) circuits areelectrically “hot” when the welder is on. Donot touch these “hot” parts with your bare skin or wet clothing.Wear dry, hole-free gloves to insulate hands.
3.b. Insulate yourself from work and ground using dry insulation.Make certain the insulation is large enough to cover your full areaof physical contact with work and ground.
In addition to the normal safety precautions, if
welding must be performed under electrically
hazardous conditions (in damp locations or while
wearing wet clothing; on metal structures such as
floors, gratings or scaffolds; when in cramped
positions such as sitting, kneeling or lying, if there
is a high risk of unavoidable or accidental contact
with the workpiece or ground) use the following
equipment:
• Semiautomatic DC Constant Voltage (Wire) Welder.
• DC Manual (Stick) Welder.
• AC Welder with Reduced Voltage Control.
3.c. In semiautomatic or automatic wire welding, the electrode,electrode reel, welding head, nozzle or semiautomatic weldinggun are also electrically “hot”.
3.d. Always be sure the work cable makes a good electricalconnection with the metal being welded. The connection shouldbe as close as possible to the area being welded.
3.e. Ground the work or metal to be welded to a good electrical (earth)ground.
3.f. Maintain the electrode holder, work clamp, welding cable andwelding machine in good, safe operating condition. Replacedamaged insulation.
3.g. Never dip the electrode in water for cooling.
3.h. Never simultaneously touch electrically “hot” parts of electrodeholders connected to two welders because voltage between thetwo can be the total of the open circuit voltage of bothwelders.
3.i. When working above floor level, use a safety belt to protectyourself from a fall should you get a shock.
3.j. Also see It ems 6.c. and 8.
ARC RAYS CAN BURN.
4.a. Use a shield with the proper filter and cover plates to protect youreyes from sparks and the rays of the arc when welding orobserving open arc welding. Headshield and filter lens shouldconform to ANSI Z87. I standards.
4.b. Use suitable clothing made from durable flame-resistant materialto protect your skin and that of your helpers from the arc rays.
4.c. Protect other nearby personnel with suitable, non-flammablescreening and/or warn them not to watch the arc nor exposethemselves to the arc rays or to hot spatter or metal.
FUMES AND GASESCAN BE DANGEROUS.
5.a. Welding may produce fumes and gaseshazardous to health. Avoid breathing thesefumes and gases. When welding, keep your head out of the fume.Use enough ventilation and/or exhaust at the arc to keep fumesand gases away from the breathing zone. When welding
hardfacing (see instructions on container or SDS)
or on lead or cadmium plated steel and other
metals or coatings which produce highly toxic
fumes, keep exposure as low as possible and
within applicable OSHA PEL and ACGIH TLV limits
using local exhaust or mechanical ventilation
unless exposure assessments indicate otherwise.
In confined spaces or in some circumstances,
outdoors, a respirator may also be required.
Additional precautions are also required when
welding
on galvanized steel.
5. b. The operation of welding fume control equipment is affected byvarious factors including proper use and positioning of theequipment, maintenance of the equipment and the specificwelding procedure and application involved. Worker exposurelevel should be checked upon installation and periodicallythereafter to be certain it is within applicable OSHA PEL andACGIH TLV limits.
5.c. Do not weld in locations near chlorinated hydrocarbon vaporscoming from degreasing, cleaning or spraying operations. Theheat and rays of the arc can react with solvent vapors to formphosgene, a highly toxic gas, and other irritating products.
5.d. Shielding gases used for arc welding can displace air and causeinjury or death. Always use enough ventilation, especially inconfined areas, to insure breathing air is safe.
5.e. Read and understand the manufacturer’s instructions for thisequipment and the consumables to be used, including theSafety Data Sheet (SDS) and follow your employer’s safetypractices. SDS forms are available from your weldingdistributor or from the manufacturer.
5.f. Also see item 1.b.
SAFETY
Safety 03 of 04 - 5/16/2018
WELDING AND CUTTINGSPARKS CAN CAUSEFIRE OR EXPLOSION.
6.a. Remove fire hazards from the welding area. Ifthis is not possible, cover them to prevent the welding sparksfrom starting a fire. Remember that welding sparks and hotmaterials from welding can easily go through small cracks andopenings to adjacent areas. Avoid welding near hydraulic lines.Have a fire extinguisher readily available.
6.b. Where compressed gases are to be used at the job site, specialprecautions should be used to prevent hazardous situations.Refer to “Safety in Welding and Cutting” (ANSI Standard Z49.1)and the operating information for the equipment being used.
6.c. When not welding, make certain no part of the electrode circuit istouching the work or ground. Accidental contact can causeoverheating and create a fire hazard.
6.d. Do not heat, cut or weld tanks, drums or containers until theproper steps have been taken to insure that such procedures will not cause flammable or toxic vapors from substances inside.They can cause an explosion even though they have been“cleaned”. For information, purchase “Recommended SafePractices for the Preparation for Welding and Cutting ofContainers and Piping That Have Held Hazardous Substances”,AWS F4.1 from the American Welding Society (see address above).
6.e. Vent hollow castings or containers before heating, cutting orwelding. They may explode.
6.f. Sparks and spatter are thrown from the welding arc. Wear oil freeprotective garments such as leather gloves, heavy shirt, cufflesstrousers, high shoes and a cap over your hair. Wear ear plugswhen welding out of position or in confined places. Always wearsafety glasses with side shields when in a welding area.
6.g. Connect the work cable to the work as close to the welding areaas practical. Work cables connected to the building framework orother locations away from the welding area increase thepossibility of the welding current passing through lifting chains,crane cables or other alternate circuits. This can create firehazards or overheat lifting chains or cables until they fail.
6.h. Also see item 1.c.
6.I. Read and follow NFPA 51B “Standard for Fire Prevention DuringWelding, Cutting and Other Hot Work”, available from NFPA, 1Batterymarch Park, PO box 9101, Quincy, MA 022690-9101.
6.j. Do not use a welding power source for pipe thawing.
CYLINDER MAY EXPLODE IFDAMAGED.
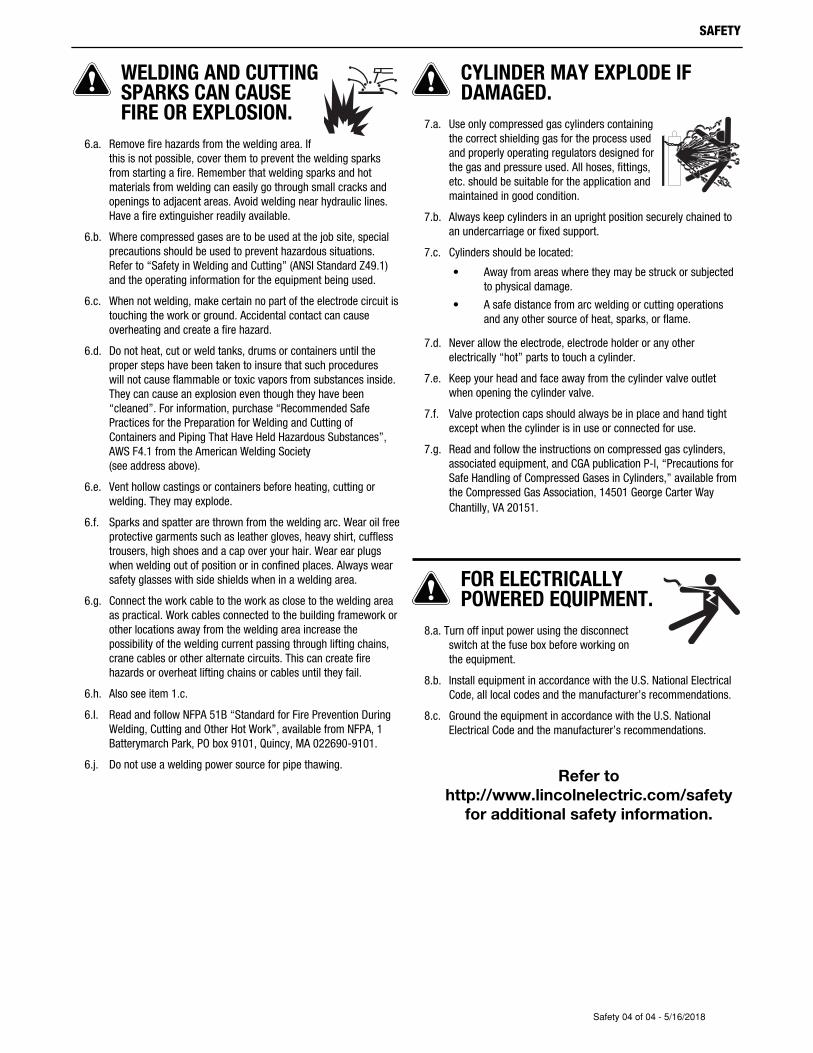
7.a. Use only compressed gas cylinders containingthe correct shielding gas for the process usedand properly operating regulators designed forthe gas and pressure used. All hoses, fittings,etc. should be suitable for the application andmaintained in good condition.
7.b. Always keep cylinders in an upright position securely chained toan undercarriage or fixed support.
7.c. Cylinders should be located:
• Away from areas where they may be struck or subjectedto physical damage.
• A safe distance from arc welding or cutting operationsand any other source of heat, sparks, or flame.
7.d. Never allow the electrode, electrode holder or any otherelectrically “hot” parts to touch a cylinder.
7.e. Keep your head and face away from the cylinder valve outletwhen opening the cylinder valve.
7.f. Valve protection caps should always be in place and hand tightexcept when the cylinder is in use or connected for use.
7.g. Read and follow the instructions on compressed gas cylinders,associated equipment, and CGA publication P-l, “Precautions forSafe Handling of Compressed Gases in Cylinders,” available fromthe Compressed Gas Association, 14501 George Carter WayChantilly, VA 20151.
FOR ELECTRICALLYPOWERED EQUIPMENT.
8.a. Turn off input power using the disconnectswitch at the fuse box before working on the equipment.
8.b. Install equipment in accordance with the U.S. National ElectricalCode, all local codes and the manufacturer’s recommendations.
8.c. Ground the equipment in accordance with the U.S. NationalElectrical Code and the manufacturer’s recommendations.
Refer to
http://www.lincolnelectric.com/safety
for additional safety information.
SAFETY
Safety 04 of 04 - 5/16/2018

vi vi TABLE OF CONTENTS
Page
Installation .......................................................................................................Section ATechnical Specifications ........................................................................................A-1Safety Precautions.................................................................................................A-2
Unpacking the COOL ARC® 55 S...................................................................A-2Installation on Power Source .........................................................................A-2Location and Mounting....................................................................................A-2Filling the Coolant Reservoir ...........................................................................A-3Coolant “In” and “out” Connections .................................................................A-4Input Power Connection..................................................................................A-4Arclink Connections ........................................................................................A-4
Installation of Water Cooled Accessories ..............................................................A-5Water Cooled TIG Torch and MIG Gun ..........................................................A-5Connection to Wire Feeders ...........................................................................A-5K529-10 Power Input Cable with Water and Gas Hoses ................................A-5
________________________________________________________________________Operation .........................................................................................................Section B
Safety Precautions.................................................................................................B-1Product Description, Power-Up Sequence.............................................B-1Recommended Processes and Equipment, Common Equipment Packages .......B-1Turning the System “On”.................................................................................B-1Cooling Efficiency............................................................................................B-2Equipment Limitations, Case Front Description ..............................................B-3Case Back Descriptions ..................................................................................B-4
________________________________________________________________________Accessories .....................................................................................................Section C
Optional Equipment (Field Installed) ....................................................................C-1________________________________________________________________________
Maintenance ....................................................................................................Section DSafety Precautions ................................................................................................D-1
Routine Maintenance ......................................................................................D-1Periodic Maintenance .....................................................................................D-1Pump Maintenance .........................................................................................D-1Pump Motor ....................................................................................................D-1Heat Exchanger ..............................................................................................D-1Reservoir Coolant Level..................................................................................D-1Coolant Treatment Recommendation .............................................................D-2Pump Inlet Strainer .........................................................................................D-2Inspect Condition of Coolant...........................................................................D-2Service the Pump Inlet Strainer ......................................................................D-3Additional Service Notes.................................................................................D-3
________________________________________________________________________Troubleshooting ..............................................................................................Section E
Safety Precautions.................................................................................................E-1How to Use Troubleshooting Guide ................................................................E-1
Using the Status LED to Troubleshoot System .....................................................E-2Error Codes for COOL ARC® 55 S........................................................................E-3Troubleshooting Guide ..........................................................................................E-4
________________________________________________________________________Wiring Diagrams ..............................................................................................Section F
Wiring Diagram ......................................................................................................F-1Dimension Print......................................................................................................F-2
________________________________________________________________________Parts List.................................................................................................................P-716
________________________________________________________________________

K3086-2 ( COOL ARC® 55 S )VIA 3-Prong Plug NEMA Type 5-15P
115VAC 60 Hz 1 Phase 40 VDC (ArcLink®)
3.8 Amps 115 VAC .5 Amps 40 VDC
60 psi (414 kPa) (4.14 bar)Max.1.66 gal/min. (6.28 liter/min) Max.
53-57 psi (365-393 kPa).45-.60 gal/min. (1.7-2.3 liter/min)
2.375 gal. (9 liters)
For Use Above Freezing: Clean tap, distilled or de-ionized water.
For Use Below Freezing: 50% water and 50% pure ethylene glycol(reagent or industrial grade) mixture.
DO NOT USE: Automotive anti-freeze that contains rust inhibitors or leak stoppers.These coolants will damage the pump and block the small internal passageways of theheat exchanger, affecting cooling performance. To acquire the proper coolant contacta local welding distributor.DO NOT USE: Pre-packaged welding industry coolants◊. These coolants may containoil-based substances, which attack the plastic components of the cooler. Once addedto the cooler, these substances are virtually impossible to purge from the water linesand heat exchanger.◊Magnum Pro AL coolant may be used.
64 lbs (29 kg)
83.7 lbs (38 kg)
26.5 in. (673.1mm)
13.9 in. (353.0mm)
11.5 in. (292.1mm)
Category 1
14°F to 104°F (-10°C to 40°C)
1.43 kW (4880 BTU/hr.) @ 1 L/min.*
A-1INSTALLATION
COOL ARC® 55 S
A-1
Product No. / Model
Input
Current Draw @ 60Hz Input
Maximum Operating Pressure and Flow Rate(Open Flow, Without Welding Torch Restriction)
Typical Operating Pressure and Flow Rate(With Welding Torch Restriction)
Reservoir Size
Recommended Coolant
ShippingWeight
ReservoirFull (Water)
L
WDimensions
H (Top Face)
EMC Classification
Temperature Range
Cooling Power
TECHNICAL SPECIFICATIONS – COOL ARC® 55 S
EXPLANATION OF SYMBOLS THAT APPEAR ON THIS EQUIPMENT
ArcLink®
STATUS
COOLANTOUT
COOLANTIN
*Cooling Power is measured at a 1 L/min. flow rate with a 40°C coolant temperature rise in a 25°C (77ºF) environment.

A-2INSTALLATION
COOL ARC® 55 S
A-2
SAFETY PRECAUTIONS
UNPACKING THE COOL ARC® 55 SThe packaging of the Cooler is designed to withstand shippingabuse, and contains a cardboard liner that surrounds the unit. Ifany shipping damage has occurred, contact your certifiedLincoln distributor or service center. When unpacking the unit,avoid thrusting sharp objects through the carton liner, whichmay puncture the plastic reservoir. Save the instruction manualand service directory supplied with the COOL ARC® 55 Sfor parts orders and future maintenance service.
Read this entire installation section before youstart installation.
------------------------------------------------------------------------
INSTALLATION ON POWER SOURCE
The COOL ARC® 55 S is designed to mount directlyto the bottom of a Power Wave “S” series powersource.
Always place the COOL ARC® 55 S on a level surfaceto avoid causing the machine to topple over.
LOCATION AND MOUNTING(See Figure A.1)
To mount the COOL ARC® 55 S to the bottom of acompatible Power Wave® “S” series power source uti-lize the quick lock mechanism as shown.
If using the COOL ARC® 55 S in conjuntion withanother module such as the STT® Module, alwaysmount the COOL ARC® 55 S on the bottom. TheCOOL ARC® 55 S will operate in harsh environmentsand can be used outdoors. It is important that simplepreventative measures are followed in order to assurelong life and reliable operation.
• The machine must be located where there is freecirculation of clean air such that movement intoand out of the louvers will not be restricted.
• Dirt and dust that can be drawn into the machineshould be kept to a minimum. The use of air filterson the air intake is not recommended because nor-mal air flow may be restricted. Failure to observethese precautions can result in poor cooling perfor-mance.
• Keep the machine dry. Shelter from rain and snow.Do not place on wet ground or in puddles.
• Always mount the COOL ARC® 55 S underneathother machines. Never attach a module under-neath the cooler.
• Do not mount the Power Wave® “S” series powersource and COOL ARC® 55 S combination overcombustible surfaces. Where there is a com-bustible surface directly under stationary or fixedelectrical equipment, that surface shall be coveredwith a steel plate at least .060” (1.6mm) thick,which shall extend not less than 5.90” (150mm)beyond the equipment on all sides.
• Avoid placing the cooler near areas of extremeheat.
• Avoid placing the cooler near a flux hopper or anarea where dust build-up is extreme.
FIGURE A.1
ELECTRIC SHOCK can kill.• Only qualified persons should perform
this installation.• Turn off the power source at the dis-
connect switch before connecting orworking inside of the equipment.
• Use only grounded receptacle.• Do not remove the power cord ground prong.
HOT COOLANT CAN BURN SKIN• Always be sure coolant is not hot before
doing any work on cooler parts.
ROTATING FAN BLADES ARE HAZARDOUS
• Do not put your hands near operating fan.• Keep all equipment safety guards, covers
and devices in position and in good repair.Keephands, hair, clothing and tools away from V-belts,gears, fans and all other moving parts when starting,operating or repairing equipment.
• In some cases it may be necessary to remove safetyguards to perform required maintenance. Removeguards only when necessary and replace them whenthe maintenance requiring their removal is complete.Always use the greatest care when working near mov-ing parts.
---------------------------------------------------------------------
WARNING

A-3INSTALLATION
COOL ARC® 55 S
A-3
FILLING THE COOLANT RESERVOIR:Recommended Coolant• For Use Above Freezing: Clean tap, distilled or de-
ionized water.• For Use Below Freezing: 50% water and 50% pure
ethylene glyco (reagent or industrial grade) mixture.• DO NOT USE: Automotive anti-freeze that contains
rust inhibitors or leak stoppers. These coolants will damage the pump and block thesmall internal passageways of the heat exchanger,affecting cooling performance.
• DO NOT USE: Pre-packaged welding industrycoolants. These coolants may contain oil-basedsubstances, which attack the plastic components ofthe cooler. Once added to the cooler, these sub-stances are virtually impossible to purge from thewater lines and heat exchanger.
To avoid freeze damage and water leakage in ship-ment, the COOL ARC® 55 S unit is delivered emptywith no coolant in the system. To fill the unit, locatethe plastic screw on reservoir fill cap at the front of theunit and remove by turning counter-clockwise.
Clean tap water, distilled water, de-ionized water, a50/50 mix of pure ethylene glycol and water, or anyother coolant specified by the manufacturer of thewater cooled product that the Cooler is used with, canbe added into the coolant reservoir. The opening ofthe fill cap mates with most coolant containers but, toavoid spillage of coolant, a funnel should be placedinto the reservoir hole when filling the COOL ARC® 55S.
NOTE: Pure solutions and mixtures of, or materials(i.e. towels) wetted with ethylene glycol are toxic tohumans and animals. They must not be haphazardlydiscarded, especially by pouring liquids down thedrain. Contact the local EPA office for responsible dis-posal methods or for recycling information.
For best results when using the COOL ARC® 55 Swith Lincoln guns or torches, use distilled or de-ion-ized water, although if not available, tap water can beused. If protection from freezing is desired, use a 50%water and 50% pure ethylene glycol (reagent or indus-trial grade) mixture. An alcohol and water mixture isalso acceptable.
When using the COOL ARC® 55 S with other prod-ucts, consult the manufacturer's instruction manual forrecommended coolants.
DO NOT USE OIL BASED COOLANTS OR COOLANTSTHAT CONTAIN RUST INHIBITORS OR LEAK STOPPERS. -------------------------------------------------------------------------------------
UNPLUG THE COOLER BEFORE FILLING THE COOLANTRESERVOIR:
Carefully add 2.375 gallons (9 liters) of coolantthrough a funnel into the coolant reservoir fill hole.
The cooler is "FULL" when the coolant lies just belowthe coolant reservoir opening .
NOTE: DO NOT ADD MORE THAN 2.375 GAL-LONS (9 LITERS) OF COOLANT INTO THE RESER-VOIR. The fill cap contains a pressure release airhole, which must not be blocked by overfilling thereservoir with coolant.
Be certain to replace the reservoir fill cap when thereservoir is full. Operation of the COOL ARC® 55 Swithout the fill cap in place can cause poor coolingefficiency, evaporation loss of coolant and reducedproduct life.
CAUTION

A-4INSTALLATION
COOL ARC® 55 S
A-4
COOLANT "IN" AND "OUT" CONNECTIONS
The fittings located on the COOL ARC® 55 S are twofemale Quick Disconnect fittings. These mate withwater hoses typically used in the welding industry.Two couplers converting from quick disconnect to 5/8-18 left-hand thread (CGA style) are also included. Refer to Figure A.2.
Water or Coolant Line Connections to the COOL ARC® 55 S
Take the male quick disconnect of the water hose andcheck if it matches the coupler or the quick disconnecton the front of the unit. When using water hoses withthreaded nuts use the supplied couplers to convertfrom 5/8-18 left hand male thread to male quick dis-connect.
(Reference FIG. A.2) Take the accessory "INLET"hose (colored or tagged blue on most hoses) and plugit into the coolant "OUT" fitting located on the front ofthe cooler. If necessary use the supplied coupler,making sure to secure the connector nut of the hosetightly into the fitting with a wrench so that leakingdoes not occur. Then take the accessory "OUTLET"hose (colored or tagged red on most hoses) and plugit into the coolant "IN" fitting located on the front of thecooler. Again, if necessary use the coupler, tightlysecuring the connector nut of the hose into the fittingwith a wrench to ensure that no leaking occurs.
NOTE: BE CERTAIN THAT NO LEAKS EXISTWHEN THE COOLER IS TURNED ON. A LEAKWILL DEPLETE RESERVOIR VOLUME, CAUSINGPOOR COOLING PERFORMANCE AND REDUCINGGUN OR TORCH LIFE.
FIGURE A.2Inlet and Outlet Hose Connection Diagram
FROM HHEATSOSOURCURCE
(RED)
TO HHEATSOURCURCE(BLUE)
INPUT POWER CONNECTION
Plug the input power cord on the COOL ARC® 55 Sinto a standard 115V NEMA circuit breaker protectedreceptacle. The receptacle must have overload pro-tection and a grounding conductor pin.
ArcLink® CONNECTIONS
The pigtail connection on the COOL ARC® 55 Sincludes signal and power lines required for properoperation. With the COOL ARC® 55 S securely fas-tened to the power source, connect the pigtail to itsrespective 5 pin receptacle on the back of the powersource. The Arclink receptacle on the back of theCOOL ARC® 55 S should be used for connection tocompatible wire feeders. Best results will be obtainedwhen control cables are routed separately from thewelding cables. It is recommended that the total com-bined length of the Arclink control cable network doesnot exceed 200 ft. (61m).

A-5INSTALLATION
COOL ARC® 55 S
A-5
INSTALLATION OF WATER COOLEDACCESSORIESAfter following the installation instructions above, theCOOL ARC® 55 S is ready for connection to a water-cooled accessory.
WATER COOLED TIG TORCH AND MIG GUNFollow Figure A.3 when using the COOL ARC® 55 Swith water-cooled TIG torches. Follow Figure A.5when using the COOL ARC® 55 S with water-cooledMIG gun. Consult the manufacturer's instruction man-ual when using the COOL ARC® 55 S with otherwater-cooled TIG and MIG accessories.
CONNECTION TO WIRE FEEDERSFollow Figure A.4 when using the COOL ARC® 55 Sin conjunction with a wire feeder. The feeder will needto have pass-through water hoses installed in order tocorrectly function with the COOL ARC® 55 S, sincethe cooler requires continuous flow. DO NOT USE AWATER SOLENOID VALVE with the COOL ARC® 55S. Water pass-through connection kits are availablefor wire feeders. Refer to product literature or the wirefeeder's instructions manual for kit availability and fur-ther connection details. It is not required to run thewater lines through the wire feeder, but is does pro-vide a very neat MIG gun connection. If pass-throughwater hoses are unavailable, connect the MIG gun asshown in Figure A.5.
DO NOT USE A WATER SOLENOID VALVE withthe COOL ARC® 55 S. When a solenoid valve clos-es, the pump would dead-head, causing the pumpto heat up excessively leading to premature failureof the pump.
K529-10 POWER INPUT CABLE WITH WATERAND GAS HOSESThis cable assembly includes a (1) power cable, (1)control cable, (1) gas hose and (2) water hoses toconnect a power source to a wire feeder. The cablelength is 10'. The water hoses have 5/8"-18 left handmale hose fittings and the gas hose has a 5/8"-18right hand male hose fitting. The cable and hoselengths are designed to connect a wire feeder to aCOOL ARC® 55 S. Refer to Figure A.6 for an illustra-tion of this connection.
CAUTION
COOLANT
COOLANT
TO WWORK
COOLANTNTOUTUT
COOLANTNTIN
= BBLUE HHOSE
= RRED HHOSE
GASGAS
K16162222-4 A4 ADAPTER
FEMALELE TTO FFEMALELECGA FFITTING
KP504 WATER HOSES ANDFEMALE TO FEMALE 5/8" LHCGA ADAPTER COUPLINGS
FEMALE TO FEMALECGA FITTING
COOLANT
COOLANT
GUN CABLE
COOLANTOUT
COOLANTIN
= BLUE HOSE
= RED HOSE
COOLANTOUT
COOLANTIN
= BLUE HOSE
= RED HOSE
COOLANT
COOLANT
GUN CABLE
COOLANTCOOLANT
TO WORK
GAS
ELECTRODE CABLE
NOTE:ORDER K1859-1 FOR WIREFEEDERS WITH QUICKDISCONNECT FITTINGS.
CONTOLCABLE
COOLANTOUT
COOLANTIN
= BLUE HOSE
= RED HOSE
K1859-1 FORCONNECTING TOWIRE FEEDERS
COOLANT
COOLANT
COOLANT
COOLANT
GUN CABLE
FIGURE A.3Water Cooled TIG Torch Connection
FIGURE A.4Water Cooled MIG Gun Connection
FIGURE A.5Connection to Wire Feeder (Do Not Use Water Solenoid)
FIGURE A.6Connection to Wire Feeder (Do Not Use Water Solenoid)

B-1OPERATIONB-1
POWER-UP SEQUENCE
The COOL ARC® 55 S will be powered up at the sametime as the power source. The status light will blinkgreen for about a minute while the system is configuring.After this time, the status lights will turn a steady greenindicating the machine is ready.
The pump and fan in the COOL ARC® 55 S will run onlywhen welding begins, or while holding the switch on thefront of the unit.
RECOMMENDED PROCESSES ANDEQUIPMENT
The COOL ARC® 55 S is designed for use with water-cooled TIG, MIG, PAC (Plasma Arc Cutting) and PAW(Plasma Arc Welding) guns and torches. The COOLARC® 55 S can be used with MIG wire feeders and Sseries power sources.
COMMON EQUIPMENT PACKAGES
K3086-2 COOL ARC® 55 S K2823-3 POWER WAVE® S350K2230-1 POWER FEED® 10MK1543-XX ArcLink® CABLE (5 PIN ) - connects
wire feeder to cooler.
TURNING THE SYSTEM "ON"
After connecting the COOL ARC® 55 S per the instal-lation instructions above, plug the unit into a 115VNEMA electrical receptacle for start-up operation. Becertain that the power input into the unit matches theCooler's rated input.
Although the cooler is designed to turn on/off as need-ed while welding, for initial setup and when installing anew gun you will first need to fill the system withcoolant. This can be done by using the momentaryswitch on the front of the unit. Remove the fill cap andhold the switch down until you see coolant return intothe tank. The system is now primed and ready for use.
You will be able to hear the fan running and feel air-flow out of the sides of the unit when the cooler isoperating.
COOL ARC® 55 S
SAFETY PRECAUTIONS
ELECTRIC SHOCK can kill.
• Do not operate with covers removed.
• Do not operate if cables are wet orimmersed in water.
• Moving parts can injure. Never placefingers into openings of Cooler.
• Hot coolant can burn skin. Alwaysbe sure coolant is NOT HOT beforeservicing the cooler.
• Do not pour used ethylene glycolcoolant down the drain.
----------------------------------------------------------------------See additional warning information atfront of this operatorʼs manual.
-----------------------------------------------------------PRODUCT DESCRIPTION
The COOL ARC® 55 S is a re-circulation cooling sys-tem designed for use with water-cooled TIG, MIG,PAC (Plasma Arc Cutting) and PAW (Plasma ArcWelding) guns and torches. The COOL ARC® 55 S isdesigned for use with S series power sources andrequires 115 VAC power input and an ArcLink® con-nection. The cooler will communicate via ArcLink®
with the wire feeder and power source to automatical-ly turn on when welding is taking place, and off a fewminutes after welding.
The COOL ARC® 55 S is equipped with a flow sensorto only allow welding to occur when coolant is flowing.When a low or no flow condition is sensed, weldingwill be shut down to protect valuable torches andguns.
Adding coolant to the reservoir is simple and connect-ing to the coolant "IN" and "OUT" connections areeasily made by hand with the quick disconnects.
The COOL ARC® 55 S coolant flow is circulatedthrough a heat exchanger to remove heat energy fromthe coolant. The coolant flow is then deposited intothe coolant reservoir. The pump draws its coolant sup-ply from the coolant reservoir and delivers coolant tothe welding torch or gun. Refer to Figure B.1 andB.2.
WARNING

B-2OPERATIONB-2
The coolant FLOW INDICATOR is accessed by removal ofthe fill cap. Actual return flow is directly visible, via the fillopening.
When first starting the unit, check all of the coolant hoses toensure that no water leaks are present. Water leakagecauses poor welding performance, poor cooling perfor-mance, low welding component life and potential electricalsafety hazards.• The cooler will automatically turn “ON” when the trigger is
pulled. • The cooler will automatically turn "OFF" when welding is
not taking place for long periods of time.• The manual control switch on the front of the cooler can
be used to run the cooler without the “smart” features.This should be used to prime the system on initial setupand when changing guns.
• Never operate the cooler with the reservoir fill capremoved. Unless checking coolant flow.
• Avoid kinking or putting sharp bends in any water lines.• Keep all water lines clean and free of any blockage.• Do not operate cooler without coolant in reservoir. Never
run pump dry.COOLING EFFICIENCY
The high cooling efficiency of the COOL ARC® 55 S offers acooler, more comfortable weld than conventional air-cooledprocedures as well as leading competitors water cooled sys-tems.
The COOL ARC® 55 S effectively removes the heat of thearc away from the gun or torch handle and places it into theexiting air flow at the sides of the cooler. Ambient air tem-perature affects the coolant temperature of the COOL ARC®
55 S.
COOL ARC® 55 S
COOLANT
COOLANT
ROOM AIR IN
HOTAIROUT
HOTAIROUT
PUMP
HEAT EXCHANGER
FAN
RESERVOIR
FLOWSWITCH
RELAY
FIGURE B.1Coolant Circulation Diagram
FIGURE B.2

B-3OPERATIONB-3
EQUIPMENT LIMITATIONS
The COOL ARC® 55 S is intended for use with compati-ble medium range “S” – series POWER WAVE® powersources such as the S350 and S500.
COOL ARC® 55 S
FIGURE B.3
CASE FRONT DESCRIPTIONS (See Figure B.3)
1. Status LED – Provides ArcLink® status of COOL ARC® 55 S.
Note: During normal power-up, the LED will flash green up to 60 seconds as the equipment performs self tests.
2. MANUAL OPERATION SWITCH - Allows you to manually run the cooler without the ArcLink® communicationsor while you are not welding. On initial setup and when changing guns, you should use this switch to fill the sys-tem with coolant. If you do not use this to prime the system, the flow switch inside the cooler may not close andwill shut down your welding.
3. COOLER INPUT
4. COOLER OUTPUT
LED conditionSteady green.Blinking green.
Alternating greenand red.
DefinitionSystem okay. The power source and wire feeder are communicating normally.Occurs during a reset and indicates the power source is identifying each component in thesystem. This is normal for the first 60 seconds after power-up, or if the system configurationis changed during operation.Non-recoverable system fault. If the power source or wire feeder status LED is flashing anycombination of red and green, errors are present in the system. Read the error code beforethe machine is turned off.
FROM HEATSOURCE
(RED)
TO HEATSOURCE(BLUE)
2
1
3
4

B-4OPERATIONB-4
COOL ARC® 55 S
CASE BACK DESCRIPTIONS (See Figure B.4)
1. 115 VAC Input Cord - Provides primary power for the pump and fan. Connect to 115VAC receptacle on thepower source or other location.
2. ArcLink® Pigtail – Connects directly to the ArcLink® Out receptacle on the rear of the power source.
3. ArcLink® (Out) – Provides an ArcLink® pass through connection for all compatible ArcLink® wire feeders.
FIGURE B.4
3
1
2

C-1ACCESSORIESC-1
OPTIONAL EQUIPMENT (Field Installed)
K15436-xx ArcLink® Cable (5 Pin):
Connects wire feeder to water cooler.
KP1529-1 Quick Connect Water Adapter:
Converts a male 5/8"-18 left hand hose fitting (CGAStyle) to a female quick connect fitting. The femalequick connect mates with the male quick connects onwater cooled MIG guns or hoses.
K1859-1 Water Cooler to Wire Feeder Hoses:
This kit includes two 25ʼ(7.6m) – 3/16 I.D. water hoseswith a 5/8" LH CGA style fitting on one end and amale quick disconnect on the other. Most wire feedershave female quick disconnects and this kit allowsdirect hook up between the water cooler and the wirefeeder.
5/8"-18 Left Hand Male Hose Fitting Parts: (CGA Style)
Fittings that convert a standard 3/16" I.D. hose to a5/8"-18 left hand male hose fitting. These male hosefittings mate with the fittings on the back of the COOLARC® 55 S.
Order the following:(See Parts Lists for Itemʼs below)(2) Connector Nuts(2) Nipples for 3/16" I.D. Hose(2) Hose Clamps
The connector and nipple listed fit tightly onto 5/32”(4.0mm) to 3/16" (4.8mm) inner diameter hose, but ifclamped tightly to the hose, can fit up to a .25”(6.4mm) inner diameter hose. These fittings are alsoreadily available from any industrial welding supplier.
K529-10 Power Input Cable with Water and Gas Hoses:
This cable assembly includes the following: (1) powercable, (1) control cable, (1) gas hose and (2) waterhoses. The cable assembly connects a power sourceto a wire feeder for water-cooled MIG applications.The cable length is 10'(3.1m). The water hoses have5/8"-18 left hand male hose fittings and the gas hosehas a 5/8"-18 right hand male hose fitting. The cableand hose lengths are designed to connect a wire feed-er to a COOL ARC® 55 S that is vertically mounted atthe rear of a power source on a dual cylinder under-carriage. Refer to Figure A.6 for an illustration of thisconnection.
COOL ARC® 55 S
KP504 TIG Hook Up Kit:
The Hook-Up Kit includes: (2) water hoses, (1) gashose, (2) water adapter fittings, male to male 5/8" LHthread, (1) water hose coupler, female to female 5/8"LH thread and (1) power cable adapter. Threads on allhoses and fittings are CGA style.
DO NOT USE A WATER SOLENOID VALVE withthe COOL ARC® 55 S. When a solenoid valvecloses, the pump would dead-head, causing thepump to heat up excessively leading to prematurefailure of the pump.
Coolant Hoses:
Coolant hoses are readily available from an industrialwelding supplier or in various MIG or TIG hook-up kitsprovided by Lincoln Electric. Refer to Magnum acces-sory literature sheets.
For lengths of coolant hoses over 25Ft(7.6m). and upto 50Ft.(15.2m), 5/16 I.D. hose is recommended. 5/16I.D. hose and accommodating fittings are availablefrom an industrial welding supplier.
CAUTION

D-1MAINTENANCED-1
ROUTINE MAINTENANCE
Remove accumulated dust and dirt from the internal compo-nents of the cooler by blowing it out with a low pressure air hoseor removing it with a vacuum hose.
PERIODIC MAINTENANCE
In dirty or dusty environments or if biological growth occurs inthe coolant, it may be necessary to flush the coolant reservoir.Drain the old coolant, rinse the inside of the reservoir and circu-late rinsing solution through the coolant system. Add newcoolant when cleaning is finished. It is recommended to flushthe coolant at least once a year. A cooling system free fromdebris offers increased cooling efficiency and longer pump andtorch life. See the Coolant Treatment Recommendation inthis “Maintenance Section”.
NOTE: Pure solutions, mixtures of, or materials (i.e. towels wet-ted) with ethylene glycol are toxic to humans and animals.They must not be haphazardly discarded, especially by pouringliquids down the drain. Contact the local EPA office for respon-sible disposal methods or for recycling information.
PUMP MAINTENANCE
The pump head has a "built in" strainer on the inlet side of thepump. It is recommended to clean or replace the pump'sinlet strainer at least once a year. (See Above):
• Drain the coolant reservoir and all coolant lines. Dispose ofthe coolant properly as specified above.
• Hold the pump head firmly to apply a counter-torque whenloosing the strainer's 7/8" acorn nut located on the bottom. Donot confuse with 3/4" acorn nut. Remove nut and slide inletstrainer down and out from the pump head.
• Gently rinse the strainer under running water to thoroughlyclean it.
• Use a mirror to inspect the inside of the pump for contamina-tion. Carefully remove hardened debris with a dental pick ifnecessary, without scratching the inside of the pump.
• Reinstall the strainer and 7/8 acorn nut, tightening with 75+/-15 in-lbs. of torque. Wipe dry all area wetted with coolant.Dispose of coolant soaked towels properly as specified above.
• For a more in depth procedure, See “Maintenace Section”,“Pump Inlet Strainer”.
PUMP MOTOR The COOL ARC® 55 S is rated for continuous operation. It isrecommended to re-oil the pump motor bearings once a year asfollows:
• Remove the plastic plugs located on the top of both theinboard and outboard bearing end-caps.
• Re-oil each bearing with 30-35 drops of SAE 20 oil then rein-stall both plugs.
HEAT EXCHANGER
To maintain maximum cooler efficiency, the heat exchangershould be kept free of dust and dirt build-up. Clean the heatexchanger periodically using a vacuum hose or a low-pressureair line. Avoid placing the unit near a flux hopper or a flux wastecontainer. A clean heat exchanger offers better cooling perfor-mance and longer product life. In extremely dirty environments,it may be necessary to remove the heat exchanger completelyfrom the cooler and clean the fins with soap and water. Usecare to avoid damaging the fins.
RESERVOIR COOLANT LEVEL
The reservoir volume should be checked daily before using thecooler. Remove the reservoir fill cap and check the coolantlevel. The reservoir is full when the coolant level is just belowthe reservoir fill opening. Keep the reservoir full, especially afterdisconnecting the water lines or changing the accessory beingcooled.
COOL ARC® 55 S
Have qualified personnel do the maintenance work. Insome cases, it may be necessary to remove safetyguards to perform required maintenance. Removeguards only when necessary and replace them whenthe maintenance requiring their removal is complete.Always use the greatest care when working nearmoving parts.
-------------------------------------------------------------------------------ELECTRIC SHOCK can kill.• Do not touch electrically live parts or
electrode with skin or wet clothing.• Insulate yourself from work and ground• Always wear dry insulating gloves.
• Disconnect input power by removing plug fromreceptacle before working inside Cooler.
• Do not touch electrically “hot” parts inside Cooler.• Have qualified personnel do the installation, mainte-
nance and troubleshooting work.• Unplug the cooler before performing general mainte-
nance.--------------------------------------------------------------------------------
MOVING PARTS can injure.• Do not operate with doors open or guards
off.• Keep away from moving parts.
-------------------------------------------------------------------------------Observe all Safety Guidelines detailed throughout thismanual. Be sure to disconnect the Cooler from thePower Source before performing any maintenanceprocedures.-----------------------------------------------------------
WARNINGSAFETY PRECAUTIONS

D-2MAINTENANCED-2
COOLANT TREATMENTRECOMMENDATIONThis procedure is intended to provide a means ofreducing the objectionable amount of fungal and bac-terial contamination that has occurred in COOL ARC®
55 S water coolers and cooling systems.
Additive:
The recommended additive can be purchased at localpool supply stores. An example is "Maintain Pool Pro30% Non-Foam Algaecide"
Limitations:
• This additive should be used with fresh coolants con-taining only pure water.
• This additive should not be used with coolants con-taining any other substance, including antifreezesubstances.
• No other additives shall be used with the specifiedcoolant that has been treated with the recommendedadditive.
• This procedure is no permanent substitute for a peri-odic maintenance schedule for the specified coolers
• A 1 quart bottle of additive is sufficient to disinfectand treat about 500 coolers.
• Check with the manufacturer of your guns ortorches to be sure that this procedure is compat-ible with your equipment.
Prepare the disinfectant:
Make a quantity of only what is needed to avoid an excessBulk preparation (for coolers serviced in quantity):
2.75 gals. (10.41 liters) of pure, fresh water per cooler1.922 ml of additive per cooler. Example: for 100 coolers,add 192.2 ml to 275.0 gals. of pure fresh water. Pour2.375 gals. (9 liters) of disinfectant into the empty reser-voir. Recap the reservoir, tape over the air vent in thecap, roll disinfectant around the inside the reservoir tothoroughly coat all of its surfaces. Remove the tape fromthe reservoir cap. Prime the cooling system by position-ing cooler horizontally and circulate disinfectant throughit for 10 to 15 minutes. Drain disinfectant from the coolingsystem. Do not reuse this solution. Add new, freshcoolant to the cooling system. Add 0.375 gals. (1.42liters) of fresh disinfectant to the system by pouring it intothe reservoir, then reduce the concentration to the nomi-nal 30 ppm:
Add the balance 2.0 gals. (7.55 liters) of fresh, purewater to the reservoir to create the treated coolant con-centration. Prime the cooling system.
Check coolant level. Add more fresh, pure water ifrequired, without adding more than 0.125 gal. (0.475liters) of pure water to prevent diluting the coolant addi-tive.
PUMP INLET STRAINER
Poor cooler performance can usually be traced to apartially or completely blocked pump inlet strainer.This is a user-serviceable item and can be cleanedand reused, or replaced. Continued pump operationwith a blocked strainer can cause:• Voiding of cooler service warranty• Cavitation damage to the pump headʼs inlet areas• Welding accessory damage from overheating due to
insufficient coolant flow rate.
A new or properly cleaned pump inlet strainer shouldrestore the coolerʼs performance.
For additional service and periodic maintenancedetails and for recommended coolants, follow the rec-ommendations listed below.
Procedure and Preparation:
• Always switch off the COOL ARC® 55 S machinepower
• Always disconnect the COOL ARC® 55 Smachine from service input power.
• Always allow the coolant in the system to coolenough to avoid burn injuries.
• Avoid contact with contaminated coolant. Wearwaterproof gloves and protective eye wear.
• Do not remove the pump relief valveʼs 3/4 in.acorn hex nut or attempt to adjust the relief valvesetting.
------------------------------------------------------------------------
INSPECT CONDITION OF COOLANT
If coolant is contaminated or old:
• Drain the system of coolant and dispose of it in anenvironmentally responsible manner.
• Flush system of old coolant.• Fill with fresh tap or distilled water, run for ten min-
utes, and drain.• Proceed to adding coolant..
If coolant is clean and fresh:
• If clean, dedicated coolant handling equipment,including a clean siphon pump and a clean holdingtank are available then proceed to servicing thePump Inlet Strainer.
COOL ARC® 55 S
WARNING

D-3MAINTENANCED-3
Removing Coolant:
a. Drain coolant from the reservoir using clean siphon-ing equipment
b. Coolant level should be drained below the strainerʼspressure fitting:
• This prevents coolant from streaming out of unitwhen strainer nut is removed
SERVICE THE PUMPʼS INLET STRAINER:
a. Remove all power to the unit (115VAC andArcLink®). Place absorbent towels underneathpump head to prevent stray coolant from wettingcoolerʼs electrical components.
b. See figure D.1. Hold pump head to apply counter-torque when loosening strainerʼs 7/8 acorn nut. Donot confuse with 3/4 acorn nut. Remove nut andslide inlet strainer down and out from pump head.
c. Inspect strainer for damage or excessive clogging:• Replace or Gently rinse strainer under running
water to thoroughly clean it.d. Use a mirror to inspect inside of pump for contami-
nation. If hardened debris is present and interfereswith filter seating, carefully remove it with dentalpick without scratching inside of the pump. Usecare not to drop debris into pump.
e. Reinstall strainer and acorn nut, tightening with75±15 in.-lbs. of torque.• Hold pump head to apply counter-torque when
loosening strainers 7/8 acorn nut.
f. Wipe dry all areas wetted by coolant. Dispose oftowels in an environmentally responsible manner.
Add coolant:
a. Add 2.375 gallons of coolant, either the recommen-dations off the water cooled accessory or if none,see the design specification summary listed in thismanual.
ADDITIONAL SERVICE NOTES:
1. Always use a back-up wrench on pump head whenloosening or tightening pump fittings.
2. Never run the pump dry. Always use a recommend-ed coolant, otherwise pump damage may result.
3. Flush coolant from system and replace withfresh, recommended coolant at least once ayear. More frequent flushing may be necessary,depending upon the userʼs particular system orits usage, especially if it is prone to cloggingfrom biological growth in the coolant.
COOL ARC® 55 S
FIGURE D.1

E-1TROUBLESHOOTINGE-1
COOL ARC® 55 S
If for any reason you do not understand the test procedures or are unable to perform the tests/repairs safely, contact yourLocal Lincoln Authorized Field Service Facility for technical troubleshooting assistance before you proceed.
CAUTION
This Troubleshooting Guide is provided to help youlocate and repair possible machine malfunctions.Simply follow the three-step procedure listed below.
Step 1. LOCATE PROBLEM (SYMPTOM).Look under the column labeled “PROBLEM (SYMP-TOMS)”. This column describes possible symptomsthat the machine may exhibit. Find the listing thatbest describes the symptom that the machine isexhibiting.
Step 2. POSSIBLE CAUSE.The second column labeled “POSSIBLE CAUSE” liststhe obvious external possibilities that may contributeto the machine symptom.
Step 3. RECOMMENDED COURSE OF ACTIONThis column provides a course of action for thePossible Cause, generally it states to contact yourlocal Lincoln Authorized Field Service Facility.
If you do not understand or are unable to perform theRecommended Course of Action safely, contact yourlocal Lincoln Authorized Field Service Facility.
HOW TO USE TROUBLESHOOTING GUIDE
Service and Repair should only be performed by Lincoln Electric Factory Trained Personnel.Unauthorized repairs performed on this equipment may result in danger to the technician andmachine operator and will invalidate your factory warranty. For your safety and to avoid ElectricalShock, please observe all safety notes and precautions detailed throughout this manual.
__________________________________________________________________________
WARNING

E-2TROUBLESHOOTINGE-2
COOL ARC® 55 S
If for any reason you do not understand the test procedures or are unable to perform the tests/repairs safely, contact yourLocal Lincoln Authorized Field Service Facility for technical troubleshooting assistance before you proceed.
CAUTION
USING THE STATUS LED TO TROUBLESHOOT SYSTEM PROBLEMS
The COOL ARC® 55 S is equipped with a Status Light. If a problem occurs it is important to notethe condition of the status lights. Therefore, prior to cycling power to the system, check thepower source status light for error sequences in Table E.1.
LightCondition
Steady Green
Blinking Green
Fast Blinking Green
Alternating Green and Red
Steady Red
Blinking Red
Meaning
System OK. Power source is operational, and is communicating normally with all healthyperipheral equipment connected to its ArcLink®network.
Occurs during power up or a system reset, and indicates the power source ismapping (identifying) each component in the system. Normal for first 1-30 sec-onds after power is turned on, or if the system configuration is changed duringoperation.
Under normal conditions indicates Auto-mapping has failed. Also used by the diagnostic utility (included in the Weld Manager® Utilitiesavailable at www.powerwavesoftware.com) to identify the selected machinewhen connecting to a specific IP address.
Non-recoverable system fault. If the Status lights are flashing any combinationof red and green, errors are present. Read the error code(s) before themachine is turned off.
Error Code interpretation through the Status light is detailed in the ServiceManual. Individual code digits are flashed in red with a long pause betweendigits. If more than one code is present, the codes will be separated by agreen light. Only active error conditions will be accessible through the StatusLight.
Error codes can also be retrieved with the diagnostics utility (included in theWeld Manager® Utilities available at www.powerwavesoftware.com). This isthe preferred method, since it can access historical information contained inthe error log. To clear the active error(s), turn power source off, and back onto reset.
Not applicable.
Not applicable.
TABLE E.1

E-3TROUBLESHOOTINGE-3
COOL ARC® 55 S
If for any reason you do not understand the test procedures or are unable to perform the tests/repairs safely, contact yourLocal Lincoln Authorized Field Service Facility for technical troubleshooting assistance before you proceed.
CAUTION
Observe all Safety Guidelines detailed throughout this manual
COOL ARC® 55 S
ERROR CODES FOR THE COOL ARC® 55 SThe following is a partial list of possible error codes for the COOL ARC® 55 S.
Error Code #
92 Flow Sensor Fault
(Other
Indication
The flow sensor is not detecting proper flow. Check to make sure allhoses are connected and that there is enough coolant in the system.Be sure the system is primed as described in the “Turning the SystemOn” (Operation Section). Also there could be a blocked line or apump failure.
A complete list of error codes is available in the Power Wave ManagerUtility (available at www.powerwavesoftware.com).
Error codes that contain three or four digits are defined as fatal errors.These codes generally indicate internal errors on the COOL ARC® 55S Status PC Board. If cycling the input power on the machine does notclear the error, contact the Service Department.

E-4TROUBLESHOOTINGE-4
COOL ARC® 55 S
Observe all Safety Guidelines detailed throughout this manual
If for any reason you do not understand the test procedures or are unable to perform the tests/repairs safely, contact yourLocal Lincoln Authorized Field Service Facility for technical troubleshooting assistance before you proceed.
CAUTION
PROBLEMS(SYMPTOMS)
POSSIBLECAUSE
RECOMMENDEDCOURSE OF ACTION
Cooler does not operate.Error 92 on cooler.(See below)
Internal water leak.
Torch or gun runs hot.
Fan operates but there is low coolantflow.
Fan operates but there is no coolantflow.
Pump operates, but fan does not.Cooler trips outlet circuit breaker.
Cooler trips outlet circuit breaker.
Error 92.
1. Input cord unplugged.2. Power harness damaged.3. Water lines blocked, crimped or
disconnected.4. Leak in gun or water hoses.5. Coolant reservoir empty.6. The system needs to be primed.
1. Hose clamp loose on one of inter-nal hoses.
2. Internal hose punctured.3. Heat exchanger leaking.4. Pump seal is leaking.
1. Unit placed by area of extremeheat.
2. Low coolant flow.3. No coolant flow. (Arclink cable
unplugged).4. Fan not operating.5. Heat exchanger clogged.
1. Leak in torch/gun or hoses.2.Torch/gun or hoses partial ly
obstructed.3. Reservoir empty or very low.4. Pump strainer is dirty.
1. Pump or pump motor failure.2. Pump strainer is blocked.
1. Loose or disconnected fan lead.2. Obstruction in fan blade.3. Fan motor failure.
1. Circuit overloaded.2. Fan or pump motor failure.
1. Flow switch not closing within sev-eral seconds of welding.
2. Make sure hoses are properlyconnected and coolant is returningto the cooler.
If all recommended possible areas ofmisadjustment have been checkedand the problem persists, Contactyour local Lincoln AuthorizedField Service Facility.

F-1DIAGRAMF-1
COOL ARC® 55 S
NO
TE
:T
his
diag
ram
is fo
r re
fere
nce
only
. It
may
not
be
accu
rate
for
all m
achi
nes
cove
red
by th
is m
anua
l. T
he s
peci
fic d
iagr
am fo
r a
part
icul
ar c
ode
is p
aste
d in
side
the
mac
hine
on
one
of th
e en
clos
ure
pane
ls.
If th
e di
agra
m is
ille
gibl
e, w
rite
to th
e S
ervi
ce D
epar
tmen
t for
a r
epla
cem
ent.
Giv
e th
e eq
uipm
ent c
ode
num
ber.

F-2DIMENSION PRINTF-2
COOL ARC® 55 S
L160
90

COOL ARC® 55 S
NOTES

WARNING
AVISO DEPRECAuCION
ATTENTION
WARNuNG
ATENÇÃO
Spanish
French
German
Portuguese
Japanese
Chinese
Korean
Arabic
READ AND UNDERSTAND THE MANUFACTURER’S INSTRUCTION FOR THIS EQUIPMENT AND THE CONSUMABLES TO BEUSED AND FOLLOW YOUR EMPLOYER’S SAFETY PRACTICES.
SE RECOMIENDA LEER Y ENTENDER LAS INSTRUCCIONES DEL FABRICANTE PARA EL USO DE ESTE EQUIPO Y LOSCONSUMIBLES QUE VA A UTILIZAR, SIGA LAS MEDIDAS DE SEGURIDAD DE SU SUPERVISOR.
LISEZ ET COMPRENEZ LES INSTRUCTIONS DU FABRICANT EN CE QUI REGARDE CET EQUIPMENT ET LES PRODUITS AETRE EMPLOYES ET SUIVEZ LES PROCEDURES DE SECURITE DE VOTRE EMPLOYEUR.
LESEN SIE UND BEFOLGEN SIE DIE BETRIEBSANLEITUNG DER ANLAGE UND DEN ELEKTRODENEINSATZ DES HER-STELLERS. DIE UNFALLVERHÜTUNGSVORSCHRIFTEN DES ARBEITGEBERS SIND EBENFALLS ZU BEACHTEN.
l Do not touch electrically live parts orelectrode with skin or wet clothing.
l Insulate yourself from work andground.
l No toque las partes o los electrodosbajo carga con la piel o ropa moja-da.
l Aislese del trabajo y de la tierra.
l Ne laissez ni la peau ni des vête-ments mouillés entrer en contactavec des pièces sous tension.
l Isolez-vous du travail et de la terre.
l Berühren Sie keine stromführendenTeile oder Elektroden mit IhremKörper oder feuchter Kleidung!
l Isolieren Sie sich von denElektroden und dem Erdboden!
l Não toque partes elétricas e elec-trodos com a pele ou roupa molha-da.
l Isole-se da peça e terra.
l Keep flammable materials away.
l Mantenga el material combustiblefuera del área de trabajo.
l Gardez à l’écart de tout matérielinflammable.
l Entfernen Sie brennbarres Material!
l Mantenha inflamáveis bem guarda-dos.
l Wear eye, ear and body protection.
l Protéjase los ojos, los oídos y elcuerpo.
l Protégez vos yeux, vos oreilles etvotre corps.
l Tragen Sie Augen-, Ohren- und Kör-perschutz!
l Use proteção para a vista, ouvido ecorpo.

WARNING
AVISO DEPRECAuCION
ATTENTION
WARNuNG
ATENÇÃO
Spanish
French
German
Portuguese
Japanese
Chinese
Korean
Arabic
LEIA E COMPREENDA AS INSTRUÇÕES DO FABRICANTE PARA ESTE EQUIPAMENTO E AS PARTES DE USO, E SIGA ASPRÁTICAS DE SEGURANÇA DO EMPREGADOR.
l Keep your head out of fumes.l Use ventilation or exhaust to
remove fumes from breathing zone.
l Los humos fuera de la zona de res-piración.
l Mantenga la cabeza fuera de loshumos. Utilice ventilación oaspiración para gases.
l Gardez la tête à l’écart des fumées.l Utilisez un ventilateur ou un aspira-
teur pour ôter les fumées des zonesde travail.
l Vermeiden Sie das Einatmen vonSchweibrauch!
l Sorgen Sie für gute Be- undEntlüftung des Arbeitsplatzes!
l Mantenha seu rosto da fumaça.l Use ventilação e exhaustão para
remover fumo da zona respiratória.
l Turn power off before servicing.
l Desconectar el cable de ali-mentación de poder de la máquinaantes de iniciar cualquier servicio.
l Débranchez le courant avant l’entre-tien.
l Strom vor Wartungsarbeitenabschalten! (Netzstrom völlig öff-nen; Maschine anhalten!)
l Não opere com as tampas removidas.l Desligue a corrente antes de fazer
serviço.l Não toque as partes elétricas nuas.
l Do not operate with panel open orguards off.
l No operar con panel abierto oguardas quitadas.
l N’opérez pas avec les panneauxouverts ou avec les dispositifs deprotection enlevés.
l Anlage nie ohne Schutzgehäuseoder Innenschutzverkleidung inBetrieb setzen!
l Mantenha-se afastado das partesmoventes.
l Não opere com os paineis abertosou guardas removidas.

CUSTOMER ASSISTANCE POLICY
The business of The Lincoln Electric Company is manufacturing andselling high quality welding equipment, consumables, and cuttingequipment. Our challenge is to meet the needs of our customers andto exceed their expectations. On occasion, purchasers may askLincoln Electric for advice or information about their use of ourproducts. We respond to our customers based on the best informationin our possession at that time. Lincoln Electric is not in a position towarrant or guarantee such advice, and assumes no liability, withrespect to such information or advice. We expressly disclaim anywarranty of any kind, including any warranty of fitness for anycustomer’s particular purpose, with respect to such information oradvice. As a matter of practical consideration, we also cannot assumeany responsibility for updating or correcting any such information oradvice once it has been given, nor does the provision of informationor advice create, expand or alter any warranty with respect to the saleof our products.
Lincoln Electric is a responsive manufacturer, but the selection anduse of specific products sold by Lincoln Electric is solely within thecontrol of, and remains the sole responsibility of the customer. Manyvariables beyond the control of Lincoln Electric affect the resultsobtained in applying these types of fabrication methods and servicerequirements.
Subject to Change – This information is accurate to the best of ourknowledge at the time of printing. Please refer to www.lincolnelectric.com for any updated information.
Related Documents