40530\b08int 1108 ECO 301 Operating Instructions 16845

Welcome message from author
This document is posted to help you gain knowledge. Please leave a comment to let me know what you think about it! Share it to your friends and learn new things together.
Transcript
40530\b08int 1108
ECO 301
Operating Instructions
1684
5
1
2
3
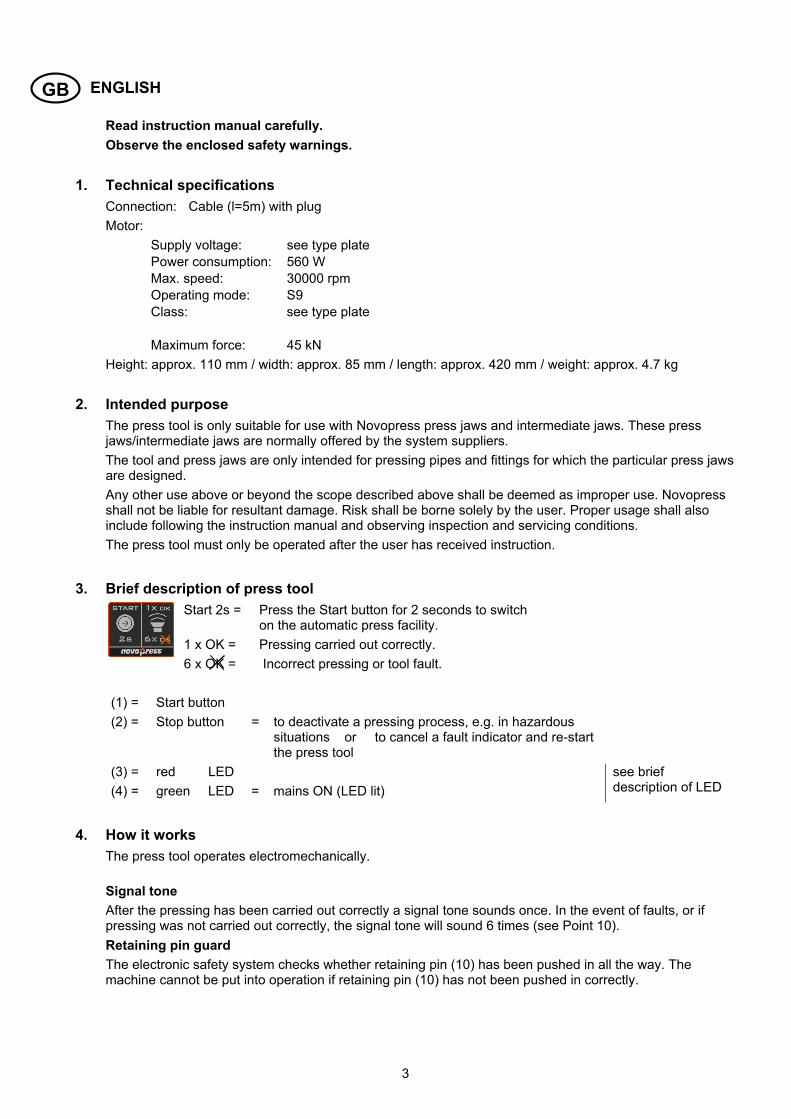
ENGLISH
Read instruction manual carefully. Observe the enclosed safety warnings.
1. Technical specificationsConnection: Cable (l=5m) with plugMotor:
Supply voltage: see type plate Power consumption: 560 W Max. speed: 30000 rpm
Operating mode: S9 Class: see type plate
Maximum force: 45 kN Height: approx. 110 mm / width: approx. 85 mm / length: approx. 420 mm / weight: approx. 4.7 kg
2. Intended purposeThe press tool is only suitable for use with Novopress press jaws and intermediate jaws. These pressjaws/intermediate jaws are normally offered by the system suppliers.The tool and press jaws are only intended for pressing pipes and fittings for which the particular press jawsare designed.Any other use above or beyond the scope described above shall be deemed as improper use. Novopressshall not be liable for resultant damage. Risk shall be borne solely by the user. Proper usage shall alsoinclude following the instruction manual and observing inspection and servicing conditions.The press tool must only be operated after the user has received instruction.
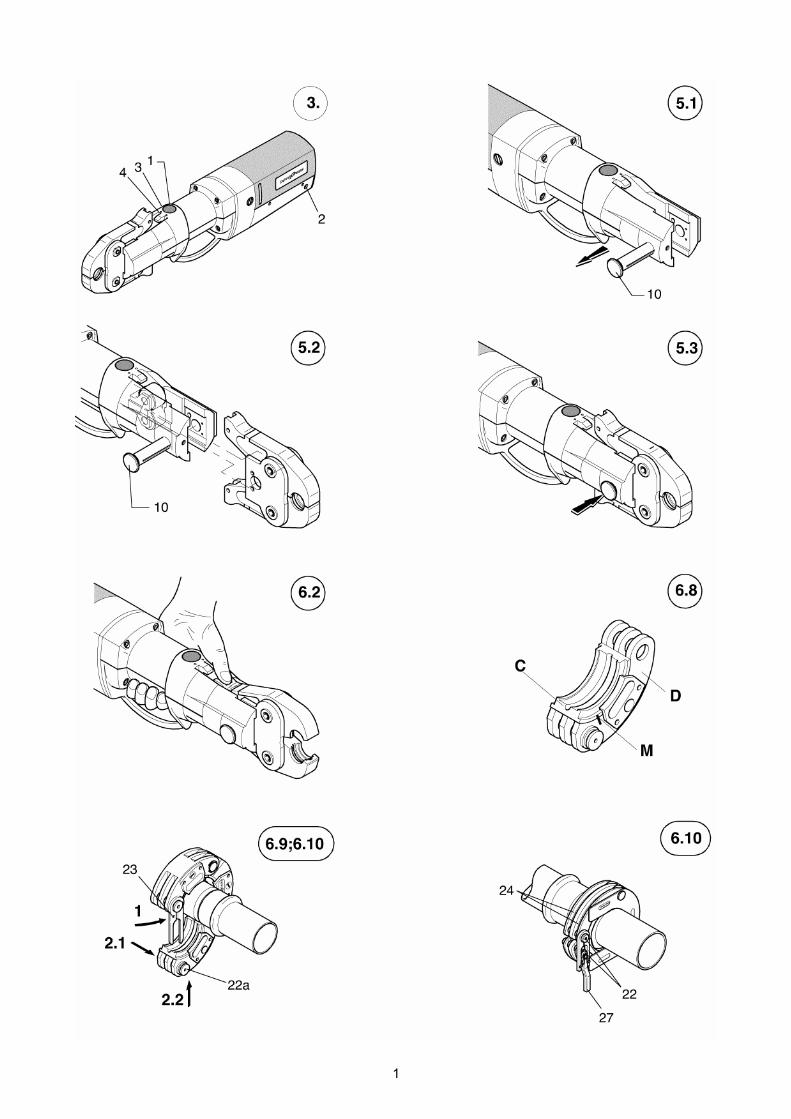
3. Brief description of press toolStart 2s =
1 x OK = 6 x OK =
Press the Start button for 2 seconds to switch on the automatic press facility. Pressing carried out correctly. Incorrect pressing or tool fault.
(1) = Start button(2) = Stop button = to deactivate a pressing process, e.g. in hazardous
situations or to cancel a fault indicator and re-start the press tool
(3) = red LED (4) = green LED = mains ON (LED lit)
see brief description of LED
4. How it worksThe press tool operates electromechanically.
Signal toneAfter the pressing has been carried out correctly a signal tone sounds once. In the event of faults, or ifpressing was not carried out correctly, the signal tone will sound 6 times (see Point 10).Retaining pin guardThe electronic safety system checks whether retaining pin (10) has been pushed in all the way. Themachine cannot be put into operation if retaining pin (10) has not been pushed in correctly.
GB
4
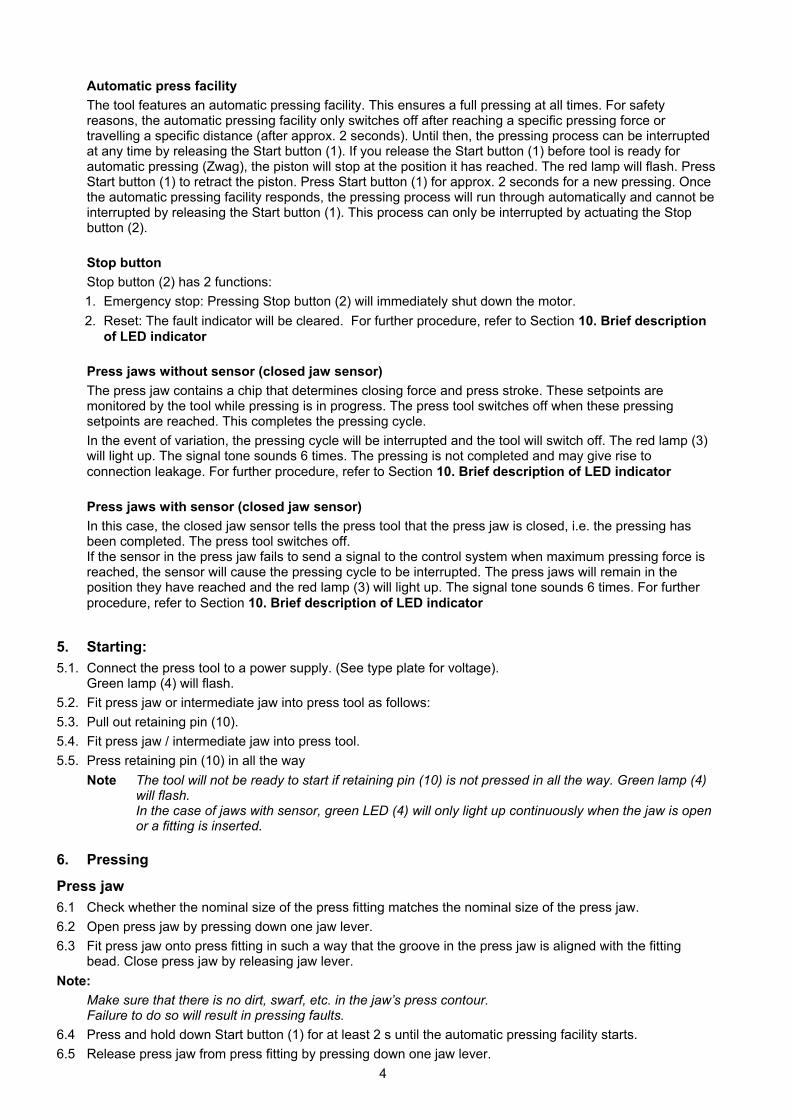
Automatic press facility The tool features an automatic pressing facility. This ensures a full pressing at all times. For safety reasons, the automatic pressing facility only switches off after reaching a specific pressing force or travelling a specific distance (after approx. 2 seconds). Until then, the pressing process can be interrupted at any time by releasing the Start button (1). If you release the Start button (1) before tool is ready for automatic pressing (Zwag), the piston will stop at the position it has reached. The red lamp will flash. Press Start button (1) to retract the piston. Press Start button (1) for approx. 2 seconds for a new pressing. Once the automatic pressing facility responds, the pressing process will run through automatically and cannot be interrupted by releasing the Start button (1). This process can only be interrupted by actuating the Stop button (2).
Stop button Stop button (2) has 2 functions: 1. Emergency stop: Pressing Stop button (2) will immediately shut down the motor.2. Reset: The fault indicator will be cleared. For further procedure, refer to Section 10. Brief description
of LED indicator
Press jaws without sensor (closed jaw sensor) The press jaw contains a chip that determines closing force and press stroke. These setpoints are monitored by the tool while pressing is in progress. The press tool switches off when these pressing setpoints are reached. This completes the pressing cycle. In the event of variation, the pressing cycle will be interrupted and the tool will switch off. The red lamp (3) will light up. The signal tone sounds 6 times. The pressing is not completed and may give rise to connection leakage. For further procedure, refer to Section 10. Brief description of LED indicator
Press jaws with sensor (closed jaw sensor) In this case, the closed jaw sensor tells the press tool that the press jaw is closed, i.e. the pressing has been completed. The press tool switches off. If the sensor in the press jaw fails to send a signal to the control system when maximum pressing force is reached, the sensor will cause the pressing cycle to be interrupted. The press jaws will remain in the position they have reached and the red lamp (3) will light up. The signal tone sounds 6 times. For further procedure, refer to Section 10. Brief description of LED indicator
5. Starting:5.1. Connect the press tool to a power supply. (See type plate for voltage).
Green lamp (4) will flash. 5.2. Fit press jaw or intermediate jaw into press tool as follows: 5.3. Pull out retaining pin (10). 5.4. Fit press jaw / intermediate jaw into press tool. 5.5. Press retaining pin (10) in all the way
Note The tool will not be ready to start if retaining pin (10) is not pressed in all the way. Green lamp (4) will flash. In the case of jaws with sensor, green LED (4) will only light up continuously when the jaw is open or a fitting is inserted.
6. Pressing
Press jaw 6.1 Check whether the nominal size of the press fitting matches the nominal size of the press jaw. 6.2 Open press jaw by pressing down one jaw lever. 6.3 Fit press jaw onto press fitting in such a way that the groove in the press jaw is aligned with the fitting
bead. Close press jaw by releasing jaw lever. Note:
Make sure that there is no dirt, swarf, etc. in the jaw’s press contour. Failure to do so will result in pressing faults.
6.4 Press and hold down Start button (1) for at least 2 s until the automatic pressing facility starts. 6.5 Release press jaw from press fitting by pressing down one jaw lever.
5
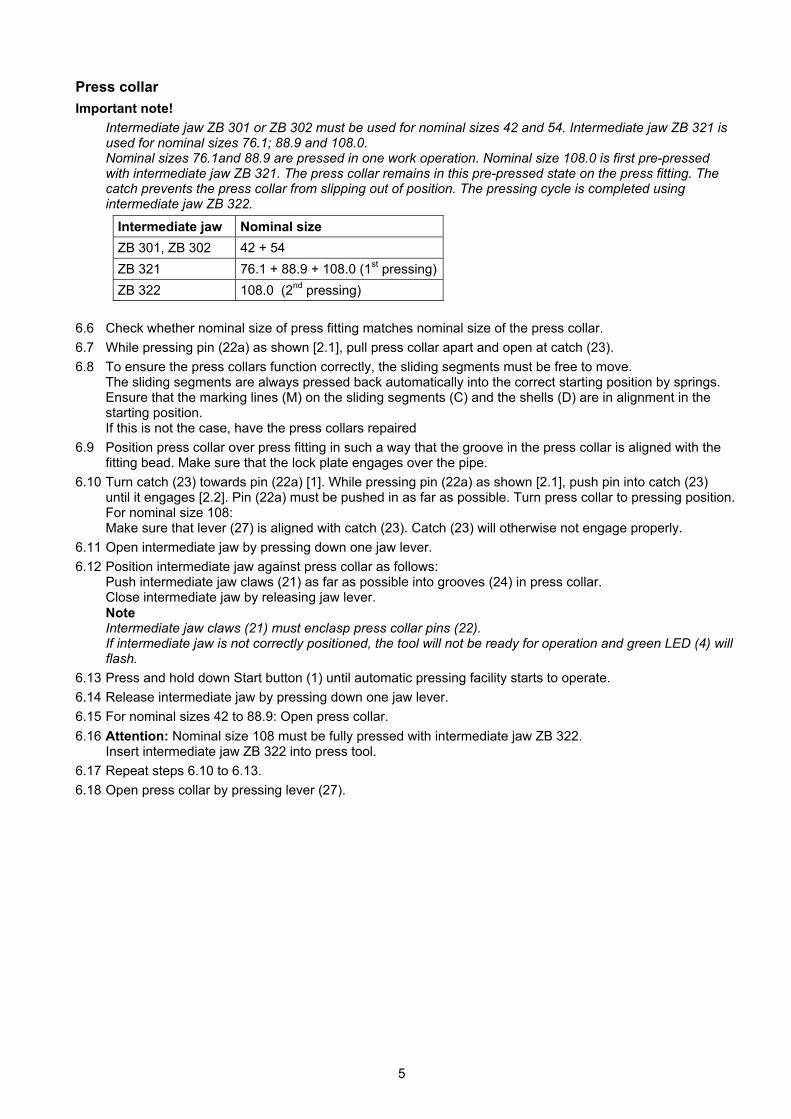
Press collar Important note!
Intermediate jaw ZB 301 or ZB 302 must be used for nominal sizes 42 and 54. Intermediate jaw ZB 321 is used for nominal sizes 76.1; 88.9 and 108.0. Nominal sizes 76.1and 88.9 are pressed in one work operation. Nominal size 108.0 is first pre-pressed with intermediate jaw ZB 321. The press collar remains in this pre-pressed state on the press fitting. The catch prevents the press collar from slipping out of position. The pressing cycle is completed using intermediate jaw ZB 322.
Intermediate jaw Nominal size ZB 301, ZB 302 42 + 54 ZB 321 76.1 + 88.9 + 108.0 (1st pressing)ZB 322 108.0 (2nd pressing)
6.6 Check whether nominal size of press fitting matches nominal size of the press collar. 6.7 While pressing pin (22a) as shown [2.1], pull press collar apart and open at catch (23). 6.8 To ensure the press collars function correctly, the sliding segments must be free to move.
The sliding segments are always pressed back automatically into the correct starting position by springs. Ensure that the marking lines (M) on the sliding segments (C) and the shells (D) are in alignment in the starting position. If this is not the case, have the press collars repaired
6.9 Position press collar over press fitting in such a way that the groove in the press collar is aligned with the fitting bead. Make sure that the lock plate engages over the pipe.
6.10 Turn catch (23) towards pin (22a) [1]. While pressing pin (22a) as shown [2.1], push pin into catch (23) until it engages [2.2]. Pin (22a) must be pushed in as far as possible. Turn press collar to pressing position. For nominal size 108: Make sure that lever (27) is aligned with catch (23). Catch (23) will otherwise not engage properly.
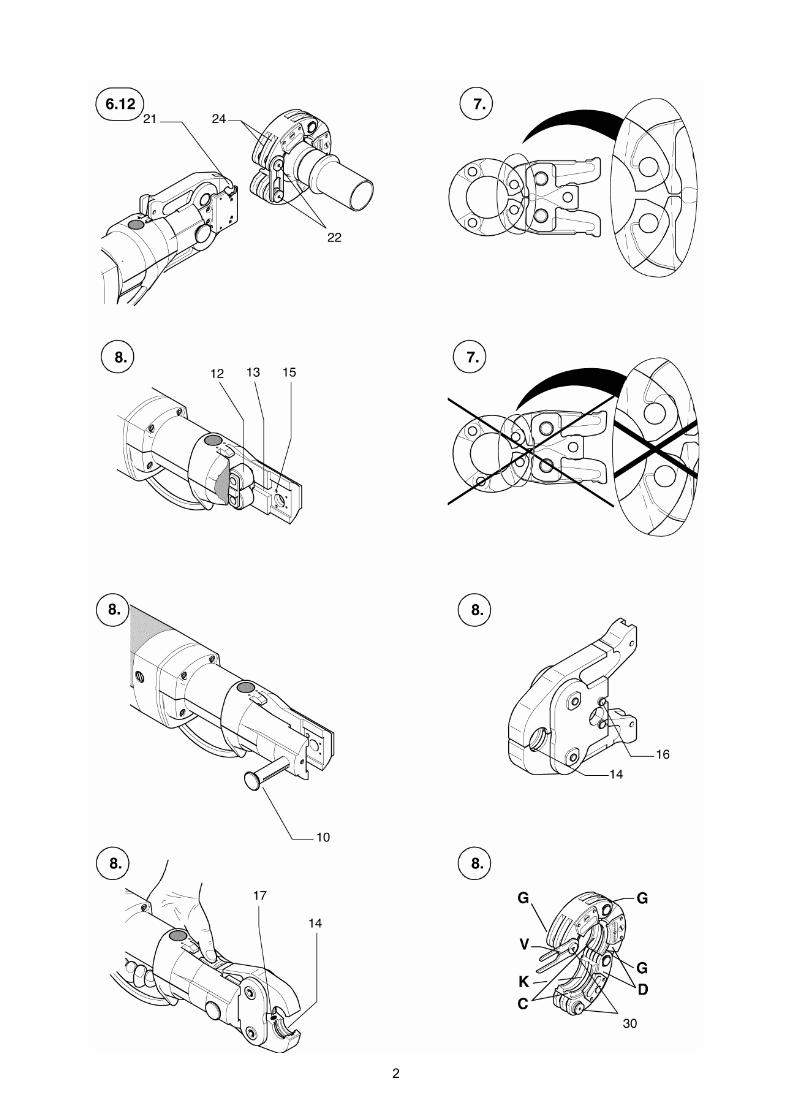
6.11 Open intermediate jaw by pressing down one jaw lever. 6.12 Position intermediate jaw against press collar as follows:
Push intermediate jaw claws (21) as far as possible into grooves (24) in press collar. Close intermediate jaw by releasing jaw lever. Note Intermediate jaw claws (21) must enclasp press collar pins (22). If intermediate jaw is not correctly positioned, the tool will not be ready for operation and green LED (4) will flash.
6.13 Press and hold down Start button (1) until automatic pressing facility starts to operate. 6.14 Release intermediate jaw by pressing down one jaw lever. 6.15 For nominal sizes 42 to 88.9: Open press collar. 6.16 Attention: Nominal size 108 must be fully pressed with intermediate jaw ZB 322.
Insert intermediate jaw ZB 322 into press tool. 6.17 Repeat steps 6.10 to 6.13. 6.18 Open press collar by pressing lever (27).
6
7. RE-PRESSINGRe-pressing is always necessary if pressing has not been fully completed. There are a few peculiaritiesthat must be observed for re-pressing, in contrast to pressing.Ensure that the claws of the intermediate jaw enclasp the press collar pins during the re-pressing process.During the re-pressing, the tool can be started, even though the claws are not enclasping the pins properly.The tool is able to travel a large idle stroke as a result of the respective pre-pressing of the fitting.Because the tool is not correctly secured and a change in position occurs during this phase, the claws myno longer enclasp the collar pins properly.Note!The claws of the intermediate jaw may break as a result and the press-collar pins may become damaged.Injury hazard!!!!
8. Cleaning and lubricationWARNING! Before carrying out any repair or maintenance work observe safety warnings and
always disconnect mains plug
Regularly or when soiled: Clean roller drive (12) and retaining pin (10) of press tool. Remove dirt with brush or blow air. Now lubricate roller drive (12), its guide (13) and retaining pin (10) with grease or machine oil. Clean the contacts (15) in the cylinder. Clean the closed jaw sensor (17). The contacts (15) and the jaw-closing sensor (17) must be free of grease and corrosion-protection agents.
Press jaw/intermediate jaw: Regularly or when soiled: • Remove deposits from pressing contour (K).• Clean pressing contour (K) of press jaw using a solvent.• Lubricate pins in press jaw/intermediate jaw with machine oil.• Coat press jaw, intermediate jaw all over with a rust-inhibiting and anti-corrosion spray.• Clean contacts (16) in press jaw.
Clean closed jaw sensor (17).• The contacts (16) and the jaw-closing sensor (17) must be free of grease and corrosion-protection
agents.Press collars:
Regularly and when soiled: Press collars should be cleaned with compressed air. Clean pressing contour (K) of press collars with a solvent (e.g. methylated spirit). Coat pressing contour (K) all over with lubricant. Apply rust and corrosion-inhibiting spray all over press collar. Recommended anti-corrosion product: - OKS 2101 sprayRecommended lubricants:- OKS 260 - white assembly paste- OKS 2501 and OKS 471 - white assembly paste spray
(OKS Spezialschmierstoffe GmbH, Munich)
Clean contacts (30). The contacts (30) must be free of grease and corrosion-protection agents. After every 200 pressings: Spray press collar joints (G) with graphite oil. Spray graphite oil between moving segments (C) and curved sections (D).
7
9. Maintenance and repairWARNING! Before carrying out any repair or maintenance work observe safety warnings and
always disconnect mains plug
We recommend our authorised NOVOPRESS workshops for maintenance and repair work (see Service addresses). The tool must be serviced by a qualified technician only. The next recommended date for servicing is shown on press jaws, intermediate jaws, press collars and press tools.
Regularly: Check mains connection lead, including plug and extension cable, for signs of external damage and have them repaired if necessary. Clean and lubricate press tool (see Section 8 Cleaning and lubrication). Every 6 months:
• Press toolInspection to DIN VDE 0701-1 and DIN VDE 0702 for Class I electric power tools by a qualified electrician,an authorised workshop or Novopress Neuss
• Press jaws/intermediate jawsCheck screw joints and tighten if necessary.Check jaw levers for ease of action.
• Press collarsCheck moving segments (C), catch (V) and curved sections (D) for ease of action.Once a year: Have press jaws, intermediate jaws, press collars and press tools checked by an authorised NOVOPRESS workshop. (Also see warranty conditions for new equipment)
Use GENUINE NOVOPRESS REPLACEMENT PARTS ONLY.
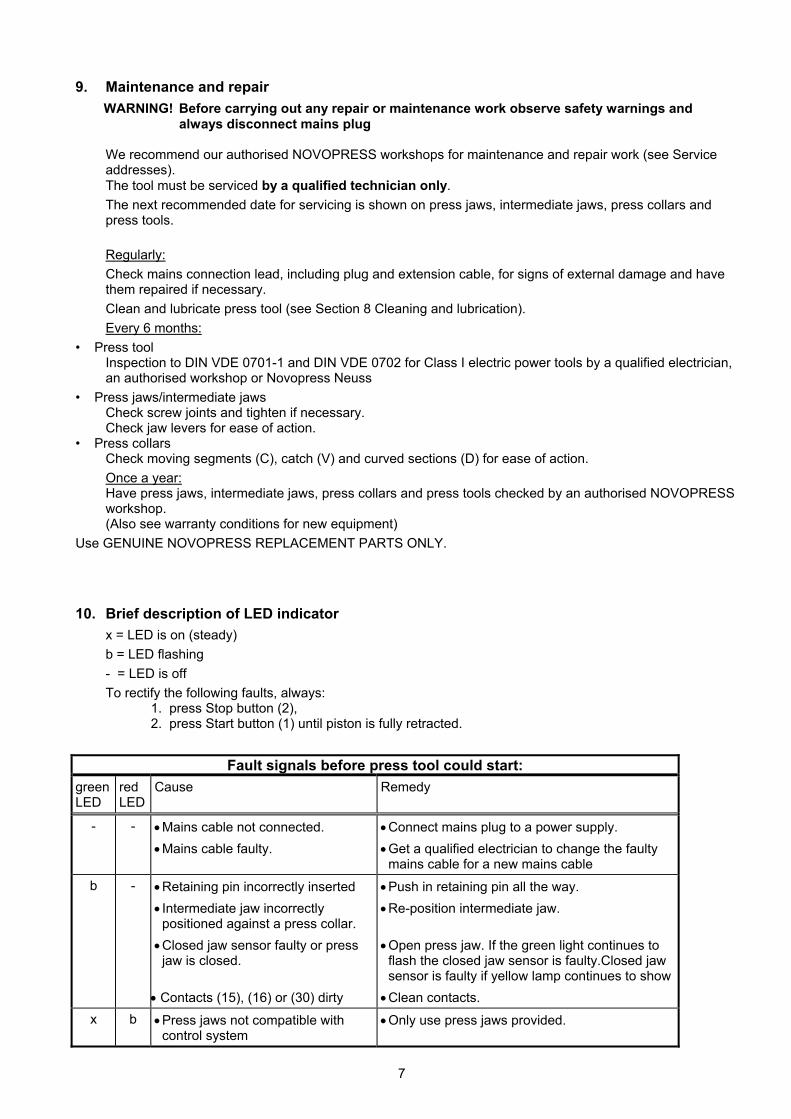
10. Brief description of LED indicatorx = LED is on (steady)b = LED flashing- = LED is offTo rectify the following faults, always:
1. press Stop button (2),2. press Start button (1) until piston is fully retracted.
Fault signals before press tool could start: green LED
red LED
Cause Remedy
- - • Mains cable not connected.• Mains cable faulty.
• Connect mains plug to a power supply.• Get a qualified electrician to change the faulty
mains cable for a new mains cableb - • Retaining pin incorrectly inserted
• Intermediate jaw incorrectlypositioned against a press collar.
• Closed jaw sensor faulty or pressjaw is closed.
• Contacts (15), (16) or (30) dirty
• Push in retaining pin all the way.• Re-position intermediate jaw.
• Open press jaw. If the green light continues toflash the closed jaw sensor is faulty.Closed jawsensor is faulty if yellow lamp continues to show
• Clean contacts. x b • Press jaws not compatible with
control system• Only use press jaws provided.
8
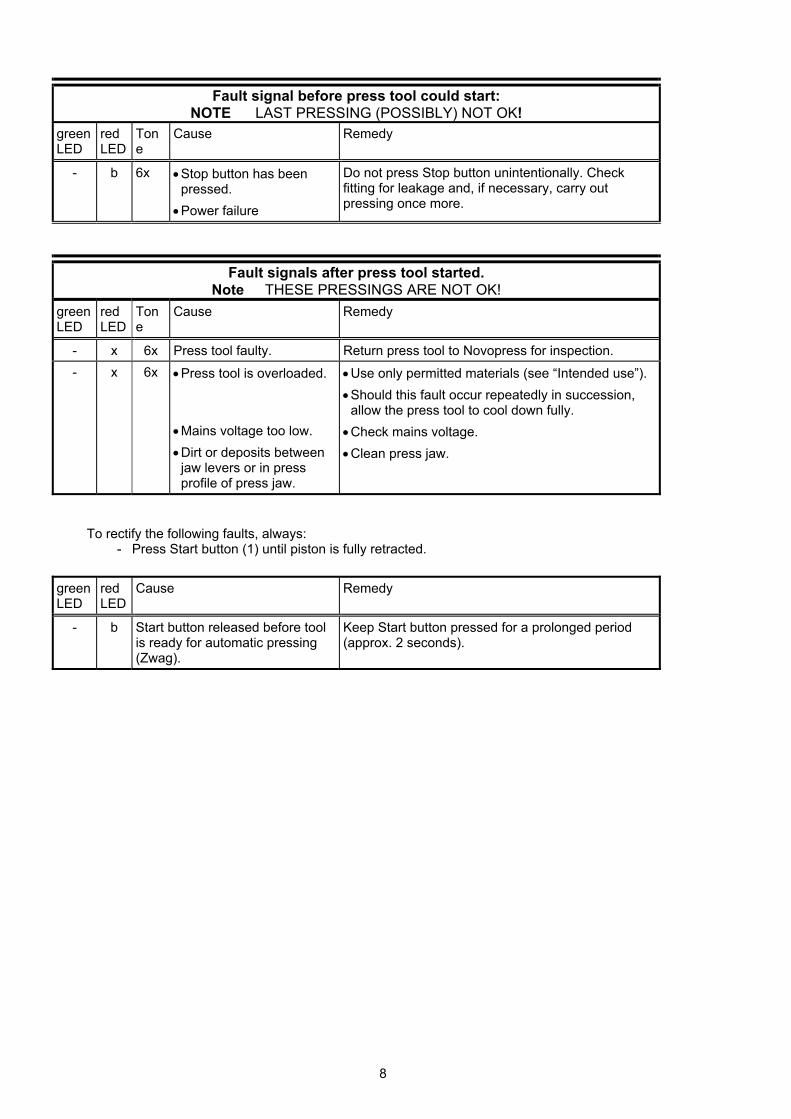
Fault signal before press tool could start: NOTE LAST PRESSING (POSSIBLY) NOT OK!
green LED
red LED
Tone
Cause Remedy
- b 6x • Stop button has beenpressed.
• Power failure
Do not press Stop button unintentionally. Check fitting for leakage and, if necessary, carry out pressing once more.
Fault signals after press tool started. Note THESE PRESSINGS ARE NOT OK!
green LED
red LED
Tone
Cause Remedy
- x 6x Press tool faulty. Return press tool to Novopress for inspection. - x 6x • Press tool is overloaded.
• Mains voltage too low.• Dirt or deposits between
jaw levers or in pressprofile of press jaw.
• Use only permitted materials (see “Intended use”).• Should this fault occur repeatedly in succession,
allow the press tool to cool down fully.• Check mains voltage.• Clean press jaw.
To rectify the following faults, always: - Press Start button (1) until piston is fully retracted.
green LED
red LED
Cause Remedy
- b Start button released before tool is ready for automatic pressing (Zwag).
Keep Start button pressed for a prolonged period (approx. 2 seconds).

Repairs / Service
Related Documents