Preview Copy

Welcome message from author
This document is posted to help you gain knowledge. Please leave a comment to let me know what you think about it! Share it to your friends and learn new things together.
Transcript
Preview Copy
OpenStack Administration with Ansible
Design, build, and automate 10 real-world OpenStack administrative tasks with Ansible
Walter Bentley
BIRMINGHAM - MUMBAI
OpenStack Administration with Ansible
Copyright © 2016 Packt Publishing
All rights reserved. No part of this book may be reproduced, stored in a retrieval system, or transmitted in any form or by any means, without the prior written permission of the publisher, except in the case of brief quotations embedded in critical articles or reviews.
Every effort has been made in the preparation of this book to ensure the accuracy of the information presented. However, the information contained in this book is sold without warranty, either express or implied. Neither the author, nor Packt Publishing, and its dealers and distributors will be held liable for any damages caused or alleged to be caused directly or indirectly by this book.
Packt Publishing has endeavored to provide trademark information about all of the companies and products mentioned in this book by the appropriate use of capitals. However, Packt Publishing cannot guarantee the accuracy of this information.
First published: January 2016
Production reference: 1210116
Published by Packt Publishing Ltd.Livery Place35 Livery StreetBirmingham B3 2PB, UK.
ISBN 978-1-78588-461-0
www.packtpub.com
Credits
AuthorWalter Bentley
ReviewerDiego Woitasen
Commissioning EditorVeena Pagare
Acquisition EditorMeeta Rajani
Content Development EditorSusmita Sabat
Technical EditorMadhunikita Sunil Chindarkar
Copy EditorSneha Singh
Project CoordinatorMilton Dsouza
ProofreaderSafis Editing
IndexerHemangini Bari
Production CoordinatorShantanu N. Zagade
Cover WorkShantanu N. Zagade
About the Author
Walter Bentley is a private cloud solutions architect with Rackspace. He has a diverse background in production systems administration and solutions architecture. He has over 15 years of experience across numerous industries, such as online marketing, finance, insurance, aviation, food, education, and now in technology product space. In the past, he has typically been the requestor, consumer, and advisor to companies in the use of technologies such as OpenStack. He is now a promoter of OpenStack technology and a cloud educator.
In Walter's current role, he is focused on helping customers build, design, and deploy private clouds built on OpenStack. His role also involves professional services, engagements around operating the built OpenStack clouds, and DevOps engagements creating playbooks/roles with Ansible.
Recently, Walter was given the honor to be present at the OpenStack Vancouver and Tokyo Summits. As well as this, he was given the great opportunity to present at AnsibleFest events in London and New York. Some of his other experiences involve performing webinars, blogging about OpenStack, and speaking at various technology conferences. Another wonderful experience is Walter being allowed to take part in the technical review of the newly launched OpenStack Cloud Computing Cookbook, Third Edition, Packt Publishing.

Acknowledgments
I would like to thank my wife and best friend, Tasha, for allowing me to take on this life-changing opportunity; I don't think it would have been possible without her understanding and support. She is truly my life's motivation. Also, I wish to thank my wonderful daughters, London and Rio, for bringing so much joy to our lives. I would like to thank my mother and father for cultivating the technical spirit within me from a very early age (that Commodore 64 was definitely my springboard… LOL).
I would also like to thank my coworker and fellow architect Kevin Jackson, for providing me with the courage to take on this project. I also wish to say thanks and express my gratitude to all of my mentors over the years that I have had the privilege to work for; those individuals include David Bartlett, Tyrone Paige, Steve Contrabasso, and Mike Childress. Their multitude of great advice has allowed me to be where I am today.

About the Reviewer
Diego Woitasen has more than 10 years of experience in the Linux and open source consulting industry. He is (with Luis Vinay) the co-founder of http://flugel.it/, self-denominated infrastructure developers; they apply all those years of experience to help all sorts of companies to embrace the DevOps culture and the new movements related with interdisciplinary cooperative working environments.
www.PacktPub.com
Support files, eBooks, discount offers, and moreFor support files and downloads related to your book, please visit www.PacktPub.com.
Did you know that Packt offers eBook versions of every book published, with PDF and ePub files available? You can upgrade to the eBook version at www.PacktPub.com and as a print book customer, you are entitled to a discount on the eBook copy. Get in touch with us at [email protected] for more details.
At www.PacktPub.com, you can also read a collection of free technical articles, sign up for a range of free newsletters and receive exclusive discounts and offers on Packt books and eBooks.
TM
https://www2.packtpub.com/books/subscription/packtlib
Do you need instant solutions to your IT questions? PacktLib is Packt's online digital book library. Here, you can search, access, and read Packt's entire library of books.
Why subscribe?• Fully searchable across every book published by Packt• Copy and paste, print, and bookmark content• On demand and accessible via a web browser
Free access for Packt account holdersIf you have an account with Packt at www.PacktPub.com, you can use this to access PacktLib today and view 9 entirely free books. Simply use your login credentials for immediate access.

[ i ]
Table of ContentsPreface viiChapter 1: An Introduction to OpenStack 1
OpenStack overview 1The OpenStack foundation 2
Reviewing the OpenStack services 2OpenStack Compute (codename Nova) 3OpenStack Object Storage (codename Swift) 3OpenStack Image Service (codename Glance) 3OpenStack Identity (codename Keystone) 4OpenStack Dashboard (codename Horizon) 4OpenStack Networking (codename Neutron) 4OpenStack Block Storage (codename Cinder) 5OpenStack Orchestration (codename Heat) 5OpenStack Telemetry (codename Ceilometer) 6OpenStack Database (codename Trove) 6OpenStack Data Processing (codename Sahara) 6OpenStack Bare Metal Provisioning (codename Ironic) 7
OpenStack supporting components 7Features and benefits 7
Fully distributed architecture 8Uses commodity hardware 8Scale horizontally or vertically 8Meets high availability requirements 8Compute isolation and multi-DC support 8Robust role-based access control 9
Table of Contents
[ ii ]
Working examples – list the services and endpoints 9Listing the OpenStack services 9
Via API 9Via CLI 11
Listing the OpenStack endpoints 12Via API 13Via CLI 13
Summary 14Chapter 2: An Introduction to Ansible 15
Ansible overview 15What are playbooks, roles, and modules? 17
Playbooks 17Roles 19Modules 20
Variables and facts 21Variables 22
Setting variable placeholders 22Defining variable values 22Registering variables 23
Facts 24Defining the inventory 24
Dynamic inventory 26Summary 27
Chapter 3: Creating Multiple Users/Tenants 29Creating users and tenants 29
Manually creating users and tenants 30Creating a user 30Creating a tenant 31Assigning users role and tenant access 31
Automation considerations 32Defining variables globally or per role 32The OpenStack API or CLI 33Where to run Ansible 34
Coding the playbook and roles 35The playbook and role review 43Summary 45
Chapter 4: Customizing Your Cloud's Quotas 47Define and create quotas 47
Creating quotas manually 49Setting up default quotas 50

Table of Contents
[ iii ]
Reset quota values 52Automation considerations 52Coding the playbook and roles 52Playbook and role review 57Summary 59
Chapter 5: Snapshot Your Cloud 61Define backups and snapshots 61
Creating backups and snapshots manually 63Restore an instance backup 65
Automation considerations 66Coding the playbook and roles 66Playbook and role review 71Summary 73
Chapter 6: Migrating Instances 75Instance migration 75
Manually migrating instances 78Migrating an instance to a specific compute node 80
Automation considerations 81Coding the playbook and roles 81Playbook and role review 88Summary 91
Chapter 7: Setting up Isolated Tenants 93Multi-tenant isolation explained 94Setting up multi-tenant isolation 98
Pre-configuration steps 98Step 1 98Step 2 99
Tenant configuration steps 100Step 1 – create a new or use an existing tenant 100Step 2 – create new host aggregate 100Step 3 – add hosts to the new host aggregate 101Step 4 – update host aggregate metadata 102Step 5 – create a custom flavor to include the tenant filter 102Step 6 – apply volume type quotas 103
Automation considerations 104Coding the playbook and roles 105Playbook and role review 111Summary 115
Table of Contents
[ iv ]
Chapter 8: Deploying OpenStack Features 117Multiple hypervisor support 118What is Docker (aka Docker Engine)? 119Setting up Docker and nova-docker 119
Docker configuration 120Install Docker on a new compute node 120
Configuring nova-docker 121Step 1 – install nova-docker 121Step 2 – update the Nova compute_driver parameter 122Step 3 – add the docker.filters file to the Nova rootwrap.d folder 122Step 4 – add and remove filters on the compute node(s) Nova scheduler 123Step 5 – add and remove filters on the controller node(s) Nova scheduler 124Step 6 – create a custom Docker flavor with extra specs 124Step 7 – create a new host aggregate for the Docker compute node(s) 125Step 8 – add docker to the Glance API container_formats 126
Coding the playbook and roles 127Install Docker 127nova-docker 128nova-update 128openstack-config 130nova-scheduler 131glance-update 132
Playbook and role review 134Summary 141
Chapter 9: Inventory Your Cloud 143Collecting cloud metrics 144
User report 144Tenant report 146Network report 147Volume report 149Cloud-at-a-glance report 151
Coding the playbook and roles 153cloud-inventory 153cloud-usage 154user-inventory 155tenant-inventory 156network-inventory 157volume-inventory 157
Playbook and role review 161Summary 167
Table of Contents
[ v ]
Chapter 10: Health Check Your Cloud 169Monitoring the cloud 170
OpenStack service processes 171Infrastructure services 172
MariaDB and Galera 172RabbitMQ 174
Core OpenStack services 175Service and process check examples 177
Coding the playbook and roles 178cloud-infra-check 178cloud-core-os-check 180os-service-status 181
Playbook and role review 184Summary 189
Index 191

[ vii ]
PrefaceAs OpenStack is now being considered to be more of a mainstream cloud platform, the challenge of operating it after it is built has become prevalent. While all cloud tasks can be executed via the API or CLI tool on a one-by-one basis, it will not be the best method to handle larger cloud deployments. The need for a more automated approach to administer OpenStack is now clear. Most organizations are seeking methods to improve business agility and have realized that just having a cloud is not enough. Being able to improve application deployments, reduce infrastructure downtime, and eliminate daily manual tasks, can only be accomplished through some sort of automation. OpenStack and Ansible will help any organization close that gap. With the IaaS capabilities that OpenStack has to offer coupled with Ansible, an easy to use configuration management tool assures a more complete cloud implementation.
Whether you are new to OpenStack or a seasoned cloud administrator, this book will aid you in managing your OpenStack cloud once it is all set up. Packed with real world OpenStack administrative tasks, we will first have a look at the working examples natively and then transition to walking through instructions on how to automate these tasks using one of the most popular open source automation tools, Ansible.
Ansible has become a market leader in the open source orchestration and automation space. With it being built using Python, similar to OpenStack, it makes for an easy marriage. The ability to leverage existing and/or new OpenStack modules will allow you to quickly move along your playbook creation.
Preface
[ viii ]
We will start with a brief overview of OpenStack and Ansible, highlighting some of the best practices. Next, the beginning of each of the following chapters will allow you to become more familiar with handling cloud operator administration tasks, such as creating multiple users/tenants, setting up multi-tenant isolation, customizing your cloud's quotas, taking instance snapshots, deploying additional OpenStack features, running cloud health checks, and so on. Finally, each chapter will conclude with a step-by-step tutorial on how to automate these tasks with Ansible. As an added bonus, the fully functional Ansible code will be published on GitHub for your reference while reviewing the chapter and/or for later review.
Consider this book to be a 2-for-1 learning experience, a deep OpenStack-based cloud administrative knowledge and familiarity with how Ansible works. As a reader, you will be encouraged to put hands to the keyboard and give the tasks a try.
What this book coversChapter 1, An Introduction to OpenStack, is a high-level overview of OpenStack and the projects that make up this cloud platform. This introduction will set the level of the reader on the OpenStack components, concepts, and verbiage.
Chapter 2, An Introduction to Ansible, is a detailed review of Ansible, its features, and the best practices to use, in order to set a solid starting foundation. It reviews why leveraging Ansible to automate OpenStack tasks is the easiest option.
Chapter 3, Creating Multiple Users/Tenants, guides the reader through the process of creating users and tenants within OpenStack manually and the creation considerations in order to automating such a process using Ansible.
Chapter 4, Customizing Your Cloud's Quotas, makes you understand what quotas are and how they are used to restrict your cloud's resources. It shows the reader how to create quotas manually in OpenStack. After that, it walks the reader through how to automate this process with Ansible to take into account when handle tasks for multiple tenants at the same time.
Chapter 5, Snapshot Your Cloud, shows you how to create snapshots of your cloud instances manually within OpenStack and how to automate this process using Ansible. It also lets you explore the power of being able to snapshot all instances within a tenant in one shot.
Chapter 6, Migrating Instances, introduces the concept of migrating select instances across compute nodes in the traditional OpenStack method. It then demonstrates the required steps to automate this task while grouping instances together. It also shows the additional options that Ansible can offer in handling a task of this matter.
Preface
[ ix ]
Chapter 7, Setting up Isolated Tenants, walks the reader through the concept of multi-tenant isolation functionality within OpenStack. It tells us about the building blocks of accomplishing this successfully and next demonstrate how to automate all the steps required to set it up. It emphasizes how automation of this level prevents incorrect configurations, missed steps, and provides an easily repeatable process.
Chapter 8, Deploying OpenStack Features, presents the process to add additional OpenStack features to your cloud with Ansible. We will use the example of multi-hypervisor support built into OpenStack, as an example to demonstrate how Ansible code can be created to deploy new features.
Chapter 9, Inventory Your Cloud, explores how the reader can dynamically inventory all the OpenStack cloud user resources with one Ansible playbook. It walks them through the necessary metrics to gather information and how that can be stored for later reference. This is a very powerful tool to have as a cloud administrator/operator.
Chapter 10, Health Check Your Cloud, demonstrates some useful tips and tricks on how to check the health of your cloud manually and leveraging Ansible to trigger hourly and/or daily reports.
What you need for this bookIn order to truly benefit from this book, it is best to have deployed or have access to an OSA (OpenStack-Ansible) cloud running with the Juno release or better. The OSA deployment method provides an environment that will install both OpenStack and Ansible.
If you plan to deploy any of the other OpenStack distributions, you will still need to be running the OpenStack Juno release or better. You should also have Ansible version 1.6 or better installed on the same nodes or on your workstation.
Also, having a good text editor, such as TextWrangler, Notepad++, or Vim, will be very useful if you plan to add to or edit any of the Ansible playbooks/roles found in the GitHub repository.
Preface
[ x ]
Who this book is forIf you are an OpenStack-based cloud operator and/or infrastructure administrator with basic OpenStack knowledge already and are interested in automating administrative functions, then this book is exactly what you are looking for. You will take your basic OpenStack knowledge to the next level by learning how to automate simple and advanced OpenStack administration tasks. Having a functioning OpenStack environment is helpful but most certainly not required.
ConventionsIn this book, you will find a number of text styles that distinguish between different kinds of information. Here are some examples of these styles and an explanation of their meaning.
Code words in text, database table names, folder names, filenames, file extensions, pathnames, dummy URLs, user input, and Twitter handles are shown as follows: "This action is accomplished by first sourcing your OpenRC file and then by executing the service-list command."
A block of code is set as follows:
{"endpoints": [{"adminurl": "http://172.29.236.7:8774/v2/%(tenant_id)s","enabled": true,"id": "90603842a5a54958a7768dd909d43237","internalurl": "http://172.29.236.7:8774/v2/%(tenant_id)s","publicurl": "http://172.29.236.7:8774/v2/%(tenant_id)s","region": "RegionOne","service_id": "020cc772b9c942eb979fc587877a9239"},...
Any command-line input or output is written as follows:
$ keystone endpoint-list
Preface
[ xi ]
Warnings or important notes appear in a box like this.
Tips and tricks appear like this.
Reader feedbackFeedback from our readers is always welcome. Let us know what you think about this book—what you liked or disliked. Reader feedback is important for us as it helps us develop titles that you will really get the most out of.
To send us general feedback, simply e-mail [email protected], and mention the book's title in the subject of your message.
If there is a topic that you have expertise in and you are interested in either writing or contributing to a book, see our author guide at www.packtpub.com/authors.
Customer supportNow that you are the proud owner of a Packt book, we have a number of things to help you to get the most from your purchase.
Downloading the example codeYou can download the example code files from your account at http://www.packtpub.com for all the Packt Publishing books you have purchased. If you purchased this book elsewhere, you can visit http://www.packtpub.com/support and register to have the files e-mailed directly to you.
Preface
[ xii ]
ErrataAlthough we have taken every care to ensure the accuracy of our content, mistakes do happen. If you find a mistake in one of our books—maybe a mistake in the text or the code—we would be grateful if you could report this to us. By doing so, you can save other readers from frustration and help us improve subsequent versions of this book. If you find any errata, please report them by visiting http://www.packtpub.com/submit-errata, selecting your book, clicking on the Errata Submission Form link, and entering the details of your errata. Once your errata are verified, your submission will be accepted and the errata will be uploaded to our website or added to any list of existing errata under the Errata section of that title.
To view the previously submitted errata, go to https://www.packtpub.com/books/content/support and enter the name of the book in the search field. The required information will appear under the Errata section.
PiracyPiracy of copyrighted material on the Internet is an ongoing problem across all media. At Packt, we take the protection of our copyright and licenses very seriously. If you come across any illegal copies of our works in any form on the Internet, please provide us with the location address or website name immediately so that we can pursue a remedy.
Please contact us at [email protected] with a link to the suspected pirated material.
We appreciate your help in protecting our authors and our ability to bring you valuable content.
QuestionsIf you have a problem with any aspect of this book, you can contact us at [email protected], and we will do our best to address the problem.
[ 1 ]
An Introduction to OpenStackThis chapter will serve as an overview of OpenStack and all the projects that make up this cloud platform. It is very important to lay a clear foundation of OpenStack, in order to describe the OpenStack components, concepts, and verbiage. Once the overview is covered, we will transition into discussing the core features and benefits of OpenStack. Lastly, the chapter will finish up with two working examples of how you can consume the OpenStack services via the application program interface (API) and command-line interface (CLI). In this chapter, we will cover the following points:
• OpenStack overview• Reviewing the OpenStack services• OpenStack supporting components• The features and benefits• Working examples: listing the services and endpoints
OpenStack overviewIn the simplest definition possible, OpenStack can be described as an open source cloud operating platform that can be used to control large pools of compute, storage, and networking resources throughout a data center. It is all managed through a single interface controlled by either an API, CLI, and/or web graphical user interface (GUI) dashboard. The power that OpenStack offers the administrators is the ability to control all these resources, while still empowering the cloud consumers to provision the same resources through other self-service models. OpenStack was built in a modular fashion; the platform is made up of numerous components. Some of the components are considered as core services and are required in order to have a functional cloud, while the other services are optional and are only required unless they fit into your personal use case.
An Introduction to OpenStack
[ 2 ]
The OpenStack foundationBack in early 2010 Rackspace, at that time was just a technology hosting company focused on providing service and support thru an offering called "Fanatical Support", decided to create an open source cloud platform. After two years of managing the OpenStack project with its 25 initial partners, it was decided to transfer the intellectual property and governance of OpenStack to a non-profit member run foundation that is known as the OpenStack Foundation.
The OpenStack Foundation is made up of voluntary members governed by an appointed board of directors and project based tech committees. The collaboration occurs around a six-month, time-based major code release cycle. The release names are run in alphabetical order and refer to the region encompassing the location where the OpenStack design summit will be held. Each release incorporates something called OpenStack Design Summit, which is meant to build collaboration among OpenStack operators/consumers; thus, allowing the project developers to have live working sessions and also agree on release items.
As an OpenStack Foundation member, you can take an active role in helping develop any of the OpenStack projects. There is no other cloud platform that allows such participation.
To learn more about the OpenStack Foundation, you can go to the www.openstack.org website.
Reviewing the OpenStack servicesGetting to the heart of what makes up OpenStack as a project would be to review the services that make up this cloud ecosystem. One thing to be kept in mind in reference to the OpenStack services is that each service will have an official name and a code name associated with it. The use of the code name has become very popular among the community and most documentation will refer to the services in that manner. Thus, becoming familiar with the code names is important and will ease the adoption process.
The other thing to be kept in mind is that each service is developed as an API driven REST web service. All the actions are executed via the API, enabling ultimate consumption flexibility. Behind the scenes, API calls are executed and interpreted even while using the CLI or web-based GUI.
As of the Kilo release, the OpenStack project consists of twelve services/programs. The services will be reviewed in the order of their release to show an overall service timeline. That timeline will show the natural progression of the OpenStack project overall, also showing how it is now surely Enterprise ready.
Chapter 1
[ 3 ]
OpenStack Compute (codename Nova)It was integrated in the release Austin and was one of the first and is still the most important service part of the OpenStack platform. Nova is the component that provides the bridge to the underlying hypervisor, which is used to manage the computing resources.
One common misunderstanding is that Nova is a hypervisor in itself, which is simply not true. Nova is a hypervisor manager of sorts and is capable of supporting many different types of hypervisors.
Nova will be responsible for scheduling instance creation, sizing options for the instance, managing the instance location, and, as mentioned earlier, keeping track of the hypervisors available to the cloud environment. It also handles the functionality of segregating your cloud into isolation groups called cells, regions, and availability zones.
OpenStack Object Storage (codename Swift)It was also integrated in the Austin release and this service is one of the first services that were a part of the OpenStack platform. Swift is the component that provides object storage as a service to your OpenStack cloud. It is capable of storing petabytes of data; in turn, adding highly available, distributed, and eventually consistent object/blob store. Object storage is intended to be a cheap and cost effective storage solution for static data such as images, backups, archives, and static content. The objects can then be streamed over standard web protocols (HTTP/HTTPS), to or from the object server to the end user initiating the web request. The other key feature of Swift is that all data is automatically made available as it is replicated across the cluster. The storage cluster is meant to scale horizontally, by simply adding new servers.
OpenStack Image Service (codename Glance)It was integrated in the Bextar release and this service was introduced during the second OpenStack release and is responsible for managing/registering/maintaining server images for your OpenStack cloud. It includes the capability to upload or export OpenStack compatible images and store instance snapshots, and is used as a template/backup for later use. Glance can store the images on a variety of locations either locally and/or on distributed storage, such as object storage. Most Linux kernel distributions already have OpenStack compatible images available for download. You can also create your own server images from existing servers. There exists support for multiple image formats including: RAW, VHD, QCOW2, VMDK, OVF, and VDI.
An Introduction to OpenStack
[ 4 ]
OpenStack Identity (codename Keystone)It was integrated in the Essex release and this service was introduced during the fifth OpenStack release. Keystone is the authentication and authorization component built into your OpenStack cloud. Its key role is to handle creation, registry, and management of users, tenants, and all the other OpenStack services. Keystone is the first component to be installed when starting an OpenStack cloud. It has the capability to connect to external directory services, such as LDAP. Another key feature of Keystone is that it is built based on role-based access controls (RBAC), thus allowing cloud operators to provide distinct role-based access to individual service features to the cloud consumers.
OpenStack Dashboard (codename Horizon)It was also integrated in the Essex release and this service is the second service to be introduced in the fifth OpenStack release. Horizon provides cloud operators and consumers with a web based GUI to control their compute, storage, and network resources. The OpenStack dashboard runs on top of Apache and the Django REST framework; thus, making it very easy to integrate into and extend to meet your personal use case. On the backend, Horizon also uses the native OpenStack APIs. The basic principle behind Horizon was to be able to provide cloud operators with a quick and overall view of the state of their cloud and cloud consumers a self-service provisioning portal to the cloud resources designated to them.
Note that horizon can handle approximately 70% of the overall available OpenStack functionality. To leverage 100% of the OpenStack functionality, you will need to utilize the API's directly and/or utilize the CLI for each service.
OpenStack Networking (codename Neutron)It was integrated in the Folsom release and this service is probably the second most powerful component within your OpenStack cloud next to Nova.
OpenStack Networking is intended to provide a pluggable, scalable, and API-driven system to manage networks and IP addresses.
Chapter 1
[ 5 ]
This quote was taken directly from the OpenStack Networking documentation, as it best reflects exactly the purpose behind Neutron. Neutron is responsible to create your virtual networks with your OpenStack cloud. This will entail the creation of virtual networks, routers, subnets, firewalls, load balancers, and similar network functions. Neutron was developed with an extension framework, which allows the integration of additional network components (physical network device control) and models (flat, layer-2 and/or layer-3 networks). The various vendor specific plugins and adapters have been created to work in line with Neutron. This service adds to the self-service aspect of OpenStack; thus, removing the network aspect from being a roadblock to consume your cloud.
With Neutron being one of the most advanced and powerful components within OpenStack, a whole book was dedicated to it.
OpenStack Block Storage (codename Cinder)It was also integrated in the Folsom release, Cinder is the component that provides block storage as a service to your OpenStack cloud by leveraging local disks or attached storage devices. This translates into persistent block level storage volumes available to your instances. Cinder is responsible for managing and maintaining the block volumes created, attaching/detaching those volumes, and also backup creation of that volume. One of the highly notable features of Cinder is its ability to connect to multiple types of backend shared storage platforms at the same time. This capability spectrum spans all the way down to being able to leverage simple Linux server storage as well. As an added bonus, Quality of Service (QoS) roles can be applied to different types of backends; thus, extending the ability to use the block storage devices to meet various application requirements.
OpenStack Orchestration (codename Heat)It was integrated in the Havana release and this was one of the two services to be introduced in the eighth OpenStack release. Heat provides the orchestration capability over your OpenStack cloud resource. It is described as a main-line project part of the OpenStack orchestration program. This infers the additional automation functionality that is in the pipeline for OpenStack.
The built-in orchestration engine is used to automate provisioning of applications and its components, known as stack. A stack might include instances, networks, subnets, routers, ports, router interfaces, security groups, security group rules, auto scaling rules, and so on. Heat utilizes templates to define a stack and is written in a standard markup format, YAML. You will notice these templates being referred to as Heat Orchestration Template (HOT) templates.
An Introduction to OpenStack
[ 6 ]
OpenStack Telemetry (codename Ceilometer)It was also integrated in the Havana release and this is the second of the two services introduced in the eighth OpenStack release. Ceilometer collects the cloud usage and performance statistics together into one centralized data store. This capability becomes a key component to a cloud operator as it gives clear metrics into the overall cloud, which can be used to make scaling decisions.
You have the option of choosing the data store backend to Ceilometer. Such options include: MongoDB, MySQL, PostgreSQL, HBase, and DB2.
OpenStack Database (codename Trove)It was integrated in the Icehouse release, Trove is the component that provides database as a service to your OpenStack cloud. This capability includes providing scalable and reliable relational and non-relational database engines. The goal behind this service was to remove the burden of needing to understand database installation and administration. With Trove, the cloud consumers can provision database instances just by leveraging the services API. Trove supports multiple single-tenant databases within a Nova instance.
The following data store types are currently supported by OpenStack: MySQL, MongoDB, Cassandra, Redis and CouchDB.
OpenStack Data Processing (codename Sahara)It was integrated in the Juno release, Sahara is the component that provides data processing as a service to your OpenStack cloud. This capability includes the ability to provision an application cluster tuned to handle large amounts of analytical data. The data store options available are Hadoop and/or Spark. This service will also aid the cloud consumer in being able to abstract the complication of installing and maintaining this type of cluster.
Chapter 1
[ 7 ]
OpenStack Bare Metal Provisioning (codename Ironic)It was integrated in the Kilo release and this service has been one of the most anxiously awaited components of the OpenStack project. Ironic provides the capability to provision physical bare metal servers from within your OpenStack cloud. It is commonly known as a bare metal hypervisor API and leverages a set of plugins to enable interaction with the bare metal servers. It is the newest service to be introduced to the OpenStack family and is still under development.
OpenStack supporting componentsIt is similar to any traditional application, there are dependent core components that are pivotal to the functionality but not necessarily the application itself. In the case of the base OpenStack architecture, there are two core components that will be considered as the core or backbone of the cloud. The OpenStack functionality requires access to an SQL-based backend database service and an Advanced Message Queuing Protocol (AMQP) software platform. Just as with most things OpenStack related there are the most commonly used/recommended choices adopted by the OpenStack community. From a database perspective, the common choice will be MySQL and the default AMQP package is RabbitMQ. These two dependencies must be installed, configured, and functional before you can start an OpenStack deployment.
There are additional optional software packages that can also be used to provide further stability as a part of your cloud design. The information about this management software and OpenStack architecture details can be found at the following link:
http://docs.openstack.org/arch-design/generalpurpose-architecture.html
Features and benefitsThe power of OpenStack has been tested true by numerous Enterprise grade organizations; thus, gaining the focus of many of the leading IT companies. As this adoption increases, we will surely see an increase in consumption and additional improved features/functionality. For now, let's review some of OpenStack's features and benefits.
An Introduction to OpenStack
[ 8 ]
Fully distributed architectureEvery service within the OpenStack platform can be grouped together and/or separated to meet your personal use case. Also, as mentioned earlier, only the core services (Keystone, Nova, and Glance) are required to have a functioning cloud; all other components can be optional. This level of flexibility is something every administrator seeks for an Infrastructure as a Service (IaaS) platform.
Uses commodity hardwareOpenStack was uniquely designed to accommodate almost any type of hardware. The underlying OS is the only dependency of OpenStack. As long as OpenStack supports the underlying OS and that OS is supported on the particular hardware, you are all set to go! There is no requirement to purchase OEM hardware or even hardware with specific specs. This gives yet another level of deployment flexibility for administrators. Good example of this can be giving your old hardware sitting around in your data center new life within an OpenStack cloud.
Scale horizontally or verticallyThe ability to easily scale your cloud is another key feature to OpenStack. Adding additional compute nodes is as simple as installing the necessary OpenStack services on the new server. The same process is used to expand the OpenStack services control plane as well. Just as with other platforms, you can add more computing resources to any node as an alternate approach to scaling up.
Meets high availability requirementsOpenStack is able to certify meeting high availability (99.9%) requirements for its own infrastructure services, if implemented via the documented best practices.
Compute isolation and multi-DC supportAnother key feature of OpenStack is the support to handle compute hypervisor isolation and the ability to support multiple OpenStack regions across data centers. Compute isolation includes the ability to separate multiple pools of hypervisors distinguished by hypervisor type, hardware similarity, and/or vCPU ratio.
The ability to support multiple OpenStack regions, which is a complete installation of functioning OpenStack clouds with shared services, such as Keystone and Horizon, across data centers is a key function to maintain highly available infrastructure. This model eases overall cloud administration; thus, allowing a single pane of glass to manage multiple clouds.
Chapter 1
[ 9 ]
Robust role-based access controlAll the OpenStack services allow RBAC while assigning authorization to cloud consumers. This gives cloud operators the ability to decide the specific functions allowed by the cloud consumers. An appropriate example will be to grant a cloud user the ability to create instances but denying the ability to upload new server images or adjust instance-sizing options.
Working examples – list the services and endpointsSo we have covered what OpenStack is, the services that make up OpenStack, and some of the key features of OpenStack. It is only appropriate to show a working example of the OpenStack functionality and the methods available to manage/administer your OpenStack cloud.
To re-emphasize, OpenStack management, administration, and consumption of services can be accomplished either by an API, CLI, and/or web dashboard. When considering some level of automation, the last option of the web dashboard is normally not involved. So, for the remainder of this book, we will solely focus on using the OpenStack APIs and CLIs.
Listing the OpenStack servicesNow, let's take a look at how you can use either the OpenStack API or CLI to check for the available services and endpoints active within your cloud. We will first start with listing the available services.
Via APIThe first step in using the OpenStack services is authentication against Keystone. You must always first authenticate (tell the API who you are) and then receive authorization (API ingests your username and determines what predefined task(s) you can execute) based on what your user is allowed to do. That complete process ends with providing you with an authentication token.
The Keystone can provide two different types of token formats: UUID or PKI. A typical UUID token looks similar to 53f7f6ef0cc344b5be706bcc8b1479e1. While a PKI token is a much longer string and harder to work with. It is suggested to set Keystone to provide UUID tokens within your cloud.
An Introduction to OpenStack
[ 10 ]
In the following section, there is an example of making an authentication request for a secure token. Making API requests using cURL, a useful tool to interact with RESTful APIs, is the easiest approach. Using cURL with various options, you can simulate actions similar to ones using the OpenStack CLI or the Horizon dashboard:
$ curl -d @credentials.json –X POST -H "Content-Type: application/json" http://127.0.0.1:5000/v2.0/tokens | python -mjson.tool
Since the credential string is fairly long and easy to manipulate incorrectly, it is suggested to utilize the –d @<filename> functionality part of cURL. This allows you to insert the credential string into a file and then pass it into your API request by just referencing the file. This exercise is very similar to creating a client environment script (also known as OpenRC files).Adding | python -mjson.tool to the end of your API request makes the JSON output easier to read.
The following is an example of the credential string:
{"auth": {"tenantName": "admin", "passwordCredentials": {"username": "raxuser", "password": "raxpasswd"}}}
When the example is executed against the Keystone API, it will respond with an authentication token. That token should be used for all subsequent API requests. Keep in mind that the token does expire, but traditionally, a token is configured to last 24 hours from the creation timestamp.
The token can be found in the second to last section of the JSON output, in the section labeled token as shown in the following code snippet:
"token": {"audit_ids": ["tWnOdGc-Qpu71Ag6QUo9JQ"],"expires": "2015-06-30T04:53:27Z","id": "907ca229af164a09918a661ffa224747","issued_at": "2015-06-29T16:53:27.191192","tenant": {"description": "Admin Tenant","enabled": true,"id": "4cc43830491046ada1f0f26317da41c0","name": "admin"}}
Chapter 1
[ 11 ]
Once you have the authentication token, you can begin crafting subsequent API requests to request information about your cloud and/or execute tasks. Now, we will request the list of services available in your cloud, using the following command:
$ curl -X GET http://127.0.0.1:35357/v2.0/OS-KSADM/services -H "Accept: application/json" -H "X-Auth-Token: 907ca229af164a09918a661ffa224747" | python -mjson.tool
The output from this API request will be the complete list of services registered within your cloud by name, description, type, id, and whether it is active. An abstract of the output will look similar to the following code block:
{"OS-KSADM:services": [{"description": "Nova Compute Service","enabled": true,"id": "020cc772b9c942eb979fc587877a9239","name": "nova","type": "compute"},{"description": "Nova Compute Service V3","enabled": true,"id": "1565c929d84b423fb3c9561b22e4468c","name": "novav3","type": "computev3"},...
Via CLIAll the base principles applied to using the API in the preceding section also applies to using the CLI. The major difference with the CLI is that all you need to do is create an OpenRC file with your credentials and execute defined commands. The CLI handles the formatting of the API calls behind the scenes and also takes care of grabbing the token for subsequent requests and even handles formatting the output.
As discussed earlier, first you need to authenticate against Keystone to be granted a secure token. This action is accomplished by first sourcing your OpenRC file and then by executing the service-list command. The following example will demonstrate this in more detail.

An Introduction to OpenStack
[ 12 ]
Here is an example of an OpenRC file named openrc:
# To use an OpenStack cloud you need to authenticate against keystone.export OS_ENDPOINT_TYPE=internalURLexport OS_USERNAME=adminexport OS_TENANT_NAME=adminexport OS_AUTH_URL=http://127.0.0.1:5000/v2.0
# With Keystone you pass the keystone password.echo "Please enter your OpenStack Password: "read -sr OS_PASSWORD_INPUTexport OS_PASSWORD=$OS_PASSWORD_INPUT
Once you create and source the OpenRC file, you can begin using the CLI to execute commands, such as requesting the list of services; you can follow the following working example:
$ source openrc
$ keystone service-list
The output will look similar to this:
Listing the OpenStack endpointsWe will now move onto listing the available endpoints registered within your cloud. You will note that the process is very similar to the previous steps just explained.
Chapter 1
[ 13 ]
Via APISince we are already authenticated against Keystone in the previous example, we can just execute the following command to get back the full list of API endpoints available for your OpenStack cloud.
$ curl -X GET http://127.0.0.1:35357/v2.0/endpoints -H "Accept: application/json" -H "X-Auth-Token: 907ca229af164a09918a661ffa224747" | python -mjson.tool
The output of this API request will be the complete list of endpoints registered within your cloud by adminurl, internalurl, publicurl, region, service_id, id, and whether it is active. An abstract of the output will look similar to the following code block:
{"endpoints": [{"adminurl": "http://172.29.236.7:8774/v2/%(tenant_id)s","enabled": true,"id": "90603842a5a54958a7768dd909d43237","internalurl": "http://172.29.236.7:8774/v2/%(tenant_id)s","publicurl": "http://172.29.236.7:8774/v2/%(tenant_id)s","region": "RegionOne","service_id": "020cc772b9c942eb979fc587877a9239"},...
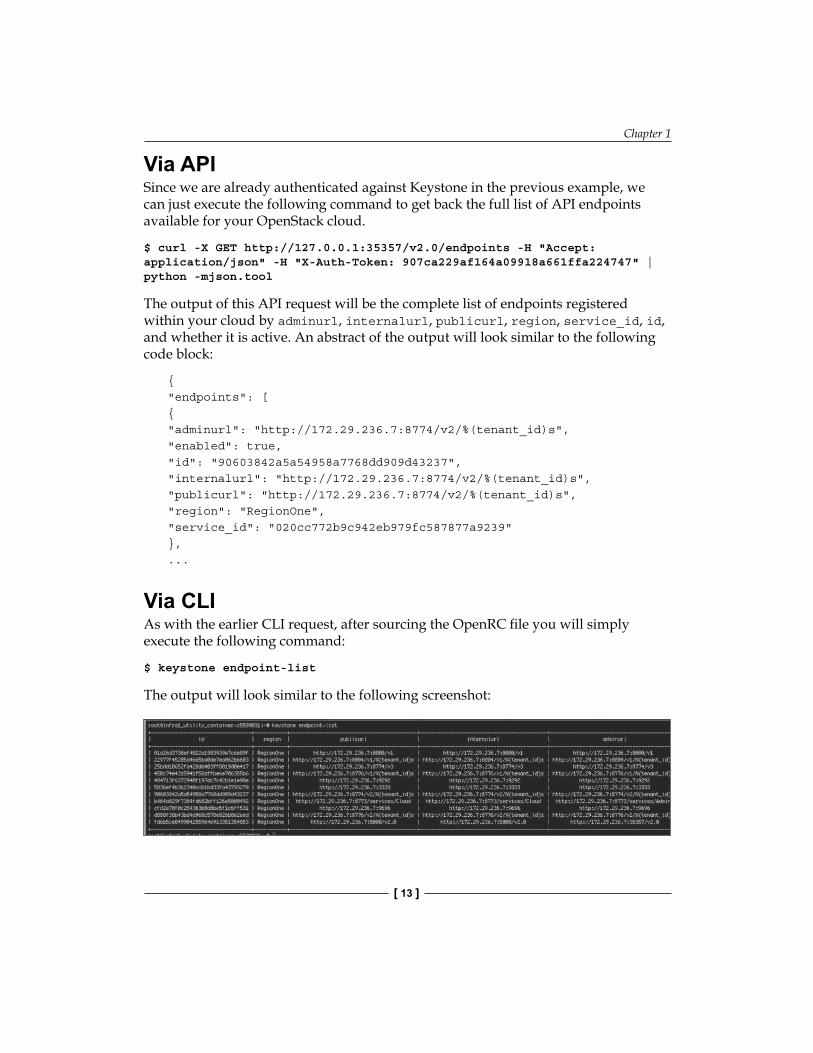
Via CLIAs with the earlier CLI request, after sourcing the OpenRC file you will simply execute the following command:
$ keystone endpoint-list
The output will look similar to the following screenshot:
An Introduction to OpenStack
[ 14 ]
Downloading the example codeYou can download the example code files from your account at http://www.packtpub.com for all the Packt Publishing books you have purchased. If you purchased this book elsewhere, you can visit http://www.packtpub.com/support and register to have the files e-mailed directly to you.
SummaryAt this point in the book, you should have a clear understanding of OpenStack and how to use the various services that make up your OpenStack cloud. Also, you should be able to communicate some of the key features and benefits to using OpenStack.
We will now transition into learning about Ansible and why using it in conjunction with OpenStack is a great combination.
[ 15 ]
Deploying OpenStack Features
In this chapter, we will review a few possible approaches to adding new or existing features to your OpenStack cloud. The power of OpenStack is in the many capabilities that exist within the many OpenStack projects that make up the ecosystem. Some examples of these features can be seen in the different hypervisors supported by Nova, network plugins created for Neutron from many of the network device providers, and the storage drivers available that can be added to your Cinder configuration. Of course, there are many more features that can be easily enabled. Since we have to start somewhere, it felt best to cover one of the most asked-about features of Nova, the multiple hypervisor support. We will also go through the process of enabling a secondary hypervisor type. For our exercise here, we will cover the steps need to deploy Docker as a hypervisor on to your OpenStack cloud. I decided to pick a very popular hypervisor this time, in order to show relevance as to why one should consider this feature (and because I love a challenge). As with all the previous chapters, we will be creating a fully working Ansible playbook that will implement all the configurations to set up Docker as a compute node. In this chapter, we will cover the following topics:
• Multiple hypervisor support• What is Docker?• Setting up Docker and nova-docker• Docker configuration• Configuring nova-docker• Coding the playbook and roles• Playbook and role review
Deploying OpenStack Features
[ 16 ]
Multiple hypervisor supportThis topic happens to be one of my favorites because I love to see the shocked faces of most folks when I say "OpenStack is not a hypervisor". Yes, I repeat, "OpenStack is NOT a hypervisor". It has to be said twice in order to make sure that the point is being driven home. A very common misunderstanding in reference to OpenStack is that it will be directly compared to other hypervisors that are popular in the market. I am not going to name them, but most of us know what/who I am referring to. From a base level, this type of comparison is similar to literally comparing apples and oranges. One of the first principles that should be made clear when working with OpenStack is that it should be seen more as a hardware and hypervisor manager. The role OpenStack has regarding the hypervisor is to manage the hypervisor's functions and report on its health. OpenStack does not honestly care which hypervisor is made available, as long as there is a code to support that particular system. Inside the OpenStack community, a favorite or default hypervisor was selected, which is KVM; however, this has no bearing on utilizing the other options made available. YOU have options!
At the time this book was published, the following hypervisors were supported:
• KVM (libvirt)• Hyper-V• VMware• XenServer• Docker• LXC via libvirt
More details on the OpenStack-supported hypervisors and their testing status can be found at https://wiki.openstack.org/wiki/HypervisorSupportMatrix. Please keep in mind that each hypervisor will provide varying features within your cloud and all hypervisors do not have the same OpenStack features available. Take time to review the Nova Hypervisor Support Matrix, found at the preceding link, in detail.
Now, let's focus on the hypervisor we have selected for this example. We will first explain some of Docker's hypervisor-like features at a very very high level, just in case you are not familiar, and cover some additional considerations around the nova-docker configuration.
Chapter 8
[ 17 ]
What is Docker (aka Docker Engine)?Just in case you are new to technology as a whole or have not lived among humans for the past 2-3 years I will do my best to explain what Docker is.
Docker is an open source project similar to OpenStack and Ansible, which streamlines the deployment of applications inside the software containers.
Docker can at times be likened to other virtualization software but with much less overhead. Docker basically will add an abstraction layer between the container(s) and the bare metal Linux kernel, allowing the container to run on any Linux server and enabling process isolation. Once your application is deployed within the container, that container can then run on any Linux server where Docker is configured, thus adding a whole new level of portability, flexibility, and encapsulation to your application deployment process.
Docker is governed by a simple API, which is used to manage the containers created. The containers do not require an operating system, but rather utilize the base server's kernel functionality in an isolated fashion. Feel free to dive deeper into Docker by visiting their website at www.docker.com. It is well worth the time investment.
Setting up Docker and nova-dockerUsing Docker as a hypervisor always made perfect sense to me. The ability to launch pre-defined containers using a centralized API/CLI-driven platform, such as OpenStack, just works. Similar to Kubernetes (of course Kubernetes has a slightly different approach to managing the containers), OpenStack will keep track of your containers across multiple Docker hosts. The power of having the option to do traditional cloud virtualization with KVM right alongside a cluster of Docker nodes speaks of the flexibility OpenStack offers to a cloud operator: no more having to choose one or the other.
In this section, we will review the manual steps to set up Docker and nova-docker within your OpenStack cloud. A brief snapshot of the steps is outlined, as follows:
1. Install Docker on a new compute node(s).2. Install nova-docker on the compute node(s) (the commit version pulled is
very specific and important if running Juno/Kilo).3. Update the Nova compute_driver parameter.4. Add the docker.filters file to the Nova rootwrap.d folder.
Deploying OpenStack Features
[ 18 ]
5. Add the AggregateInstanceExtraSpecsFilter filter to the Nova scheduler.
6. Remove the ComputeCapabilitiesFilter, AggregateCoreFilter, and AggregateDiskFilter filters from the Nova scheduler.
7. Create a custom Docker flavor with extra specs.8. Create a new host aggregate for the Docker compute node(s).9. Add Docker to the Glance API container_formats.
Now, let's go step by step through each configuration step shown in the preceding section, demonstrating the working configuration examples.
Docker configurationThe next steps will now involve installing the Docker packages and all the dependent OpenStack integrations, known as nova-docker, for them to work together. The following section instructs you how to do this.
Install Docker on a new compute nodeInstalling Docker on a Linux server is actually very easy, and as Docker matures the process simplifies even more. I have chosen to install Docker in a bit of an old-school method. The instructions on the Docker website have changed a bit since I originally attempted this; the good news is my method still works. Feel free to change the install approach later within your role, if you want.
We will install Docker using the wget command, as shown:
$ wget -qO- https://get.docker.com/ | sh
After the installation is complete, it is wise to verify the Docker installation by issuing the following command:
$ docker run hello-world
Chapter 8
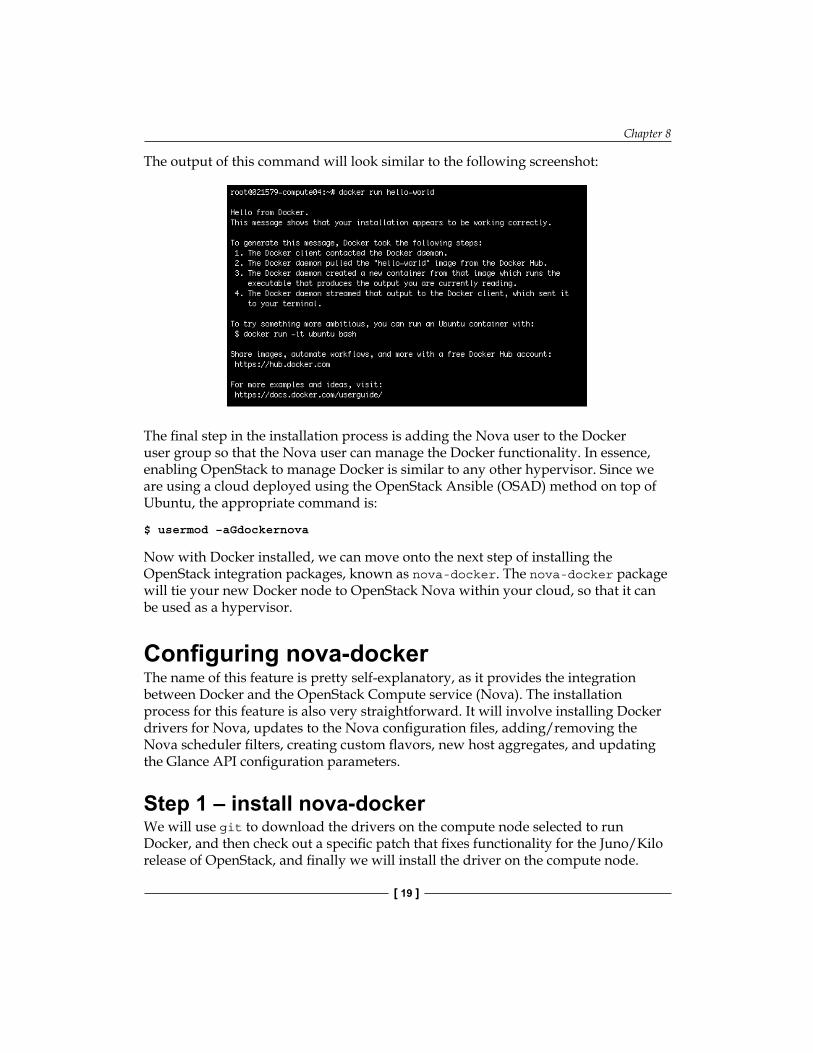
[ 19 ]
The output of this command will look similar to the following screenshot:
The final step in the installation process is adding the Nova user to the Docker user group so that the Nova user can manage the Docker functionality. In essence, enabling OpenStack to manage Docker is similar to any other hypervisor. Since we are using a cloud deployed using the OpenStack Ansible (OSAD) method on top of Ubuntu, the appropriate command is:
$ usermod –aGdockernova
Now with Docker installed, we can move onto the next step of installing the OpenStack integration packages, known as nova-docker. The nova-docker package will tie your new Docker node to OpenStack Nova within your cloud, so that it can be used as a hypervisor.
Configuring nova-dockerThe name of this feature is pretty self-explanatory, as it provides the integration between Docker and the OpenStack Compute service (Nova). The installation process for this feature is also very straightforward. It will involve installing Docker drivers for Nova, updates to the Nova configuration files, adding/removing the Nova scheduler filters, creating custom flavors, new host aggregates, and updating the Glance API configuration parameters.
Step 1 – install nova-dockerWe will use git to download the drivers on the compute node selected to run Docker, and then check out a specific patch that fixes functionality for the Juno/Kilo release of OpenStack, and finally we will install the driver on the compute node.
Deploying OpenStack Features
[ 20 ]
We will move into the /opt directory and then issue the following command to pull down the nova-docker drivers:
$ cd /opt
$ git clone http://github.com/stackforge/nova-docker.git
Next, we have to go pick up the OpenStack patch:
$ cd /opt/nova-docker
$ git checkout -b pre-i18n d1ad84793b7f2182de04df8a5323d6928af672ca
The final part of this step is to install the nova-docker feature. The nova-docker package is installed via pip from inside the /opt/nova-docker directory:
$ pip install
Step 2 – update the Nova compute_driver parameterIn this step, we will notify the new compute node via the nova.conf file that it has the capability to utilize the nova-docker feature as a hypervisor. You need to update the nova.conf file, most likely located in the /etc/nova directory. The compute_driver parameter needs to be updated as follows:
compute_driver=novadocker.virt.docker.DockerDriver
The following additional configuration parameters should be added to the nova.conf file as well:
[docker]# Commented out. Uncomment these if you'd like to customize:vif_driver=novadocker.virt.docker.vifs.DockerGenericVIFDriver## snapshots_directory=/var/tmp/my-snapshot-tempdir
After updating the configuration file, you will have to restart the nova-compute service on the compute node.
Step 3 – add the docker.filters file to the Nova rootwrap.d folderNext, we will add a new filter file named docker.filters inside the /etc/nova/rootwrap.d directory in order to enable the networking capability for the Docker compute node.
Chapter 8
[ 21 ]
The contents of the file will look similar to this:
# nova-rootwrap command filters for setting up network in the docker driver# This file should be owned by (and only-writeable by) the root user
[Filters]# nova/virt/docker/driver.py: 'ln', '-sf', '/var/run/netns/.*'ln: CommandFilter, /bin/ln, root
Step 4 – add and remove filters on the compute node(s) Nova schedulerSimilar to the steps taken in the previous chapters to add the additional Nova scheduler filters, we will update the nova.conf file. The filter to be added is named AggregateInstanceExtraSpecsFilter.
The small difference in this step is that we will be removing three filters from the scheduler. The Nova scheduler filters can cause a conflict among themselves when adding new filters and enabling certain OpenStack features. This process can be sort of a trial and error type of scenario. Based on the error output from the scheduler, you can troubleshoot the filters that are conflicting with one another. Fortunately, the smart folks of the OpenStack community have figured out some of this for us.
You need to remove the following Nova scheduler filters: ComputeCapabilitiesFilter, AggregateCoreFilter, and AggregateDiskFilter. You will note that removing these filters can potentially break some features that you might be utilizing within your OpenStack cloud. Personally, I did not run into any issues and still had all the commonly-used Nova capabilities within the cloud. You need to make sure to evaluate whether you can safely remove these filters.
Once the updates are complete, it looks similar to the following example:
...scheduler_available_filters = nova.scheduler.filters.all_filtersscheduler_default_filters = AggregateInstanceExtraSpecsFilter, RetryFilter,AvailabilityZoneFilter,RamFilter,ComputeFilter,ImagePrope rtiesFilter,ServerGroupAntiAffinityFilter,ServerGroupAffinityFilterscheduler_driver_task_period = 60...

Deploying OpenStack Features
[ 22 ]
Step 5 – add and remove filters on the controller node(s) Nova schedulerIn this step, you will repeat the actions executed in step 4 for the Nova scheduler on the controller node(s). The scheduler configurations must match in order for the feature to work correctly.
You will also need to add the additional configuration parameters found in step 2 to the nova.conf file on the controller node(s). For clarity's sake, the new parameters added to the nova.conf file will match the following example:
[docker]# Commented out. Uncomment these if you'd like to customize:vif_driver=novadocker.virt.docker.vifs.DockerGenericVIFDriver## snapshots_directory=/var/tmp/my-snapshot-tempdir
Step 6 – create a custom Docker flavor with extra specsIn order to notify the Nova scheduler that the instance being created is actually a Docker container, we will need to create a custom flavor with extra specs. This will allow the cloud consumer to easily use this new capability. The basic command to create a custom shared flavor is as follows:
$ nova flavor-create <flavor name> <id> <ram> <disk> <vcpus>
$ nova flavor-create m1.custom.small auto 2048 20 1
With the flavor now created, we need to append the extra specs to it in order to be able to identify the virt_type (hypervisor) in which the instance using this flavor should be sent to. Note that in the earlier steps we configured our new Docker compute node to know that it was a specific hypervisor type (Docker); adding this extra spec creates the linkage between an instance using this custom flavor and the Docker compute node. The command to add the extra spec needed here will look similar to the following example:
$ nova flavor-key <flavor name> set virt_type=docker
$ nova flavor-key m1.custom.small set virt_type=docker
Chapter 8
[ 23 ]
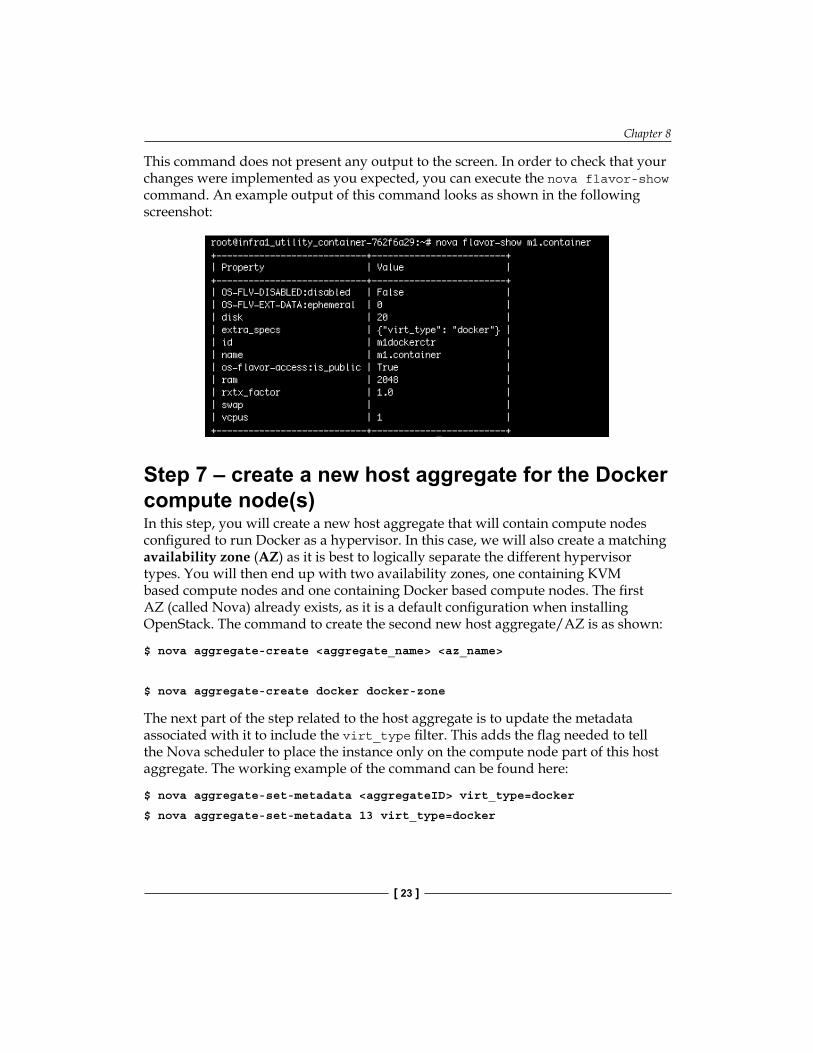
This command does not present any output to the screen. In order to check that your changes were implemented as you expected, you can execute the nova flavor-show command. An example output of this command looks as shown in the following screenshot:
Step 7 – create a new host aggregate for the Docker compute node(s)In this step, you will create a new host aggregate that will contain compute nodes configured to run Docker as a hypervisor. In this case, we will also create a matching availability zone (AZ) as it is best to logically separate the different hypervisor types. You will then end up with two availability zones, one containing KVM based compute nodes and one containing Docker based compute nodes. The first AZ (called Nova) already exists, as it is a default configuration when installing OpenStack. The command to create the second new host aggregate/AZ is as shown:
$ nova aggregate-create <aggregate_name> <az_name>
$ nova aggregate-create docker docker-zone
The next part of the step related to the host aggregate is to update the metadata associated with it to include the virt_type filter. This adds the flag needed to tell the Nova scheduler to place the instance only on the compute node part of this host aggregate. The working example of the command can be found here:
$ nova aggregate-set-metadata <aggregateID> virt_type=docker
$ nova aggregate-set-metadata 13 virt_type=docker
Deploying OpenStack Features
[ 24 ]
The last part of this step is to add host(s) to the new host aggregate. The following command will have to be repeated for every host being added. It is best to use the aggregateID from the previous step. For my lab environment, I have added one additional compute node configured with Docker and nova-docker. In keeping with our working example, the command will be:
$ nova aggregate-add-host <aggregateID> <host_name>
$ nova aggregate-add-host 13 021579-compute04
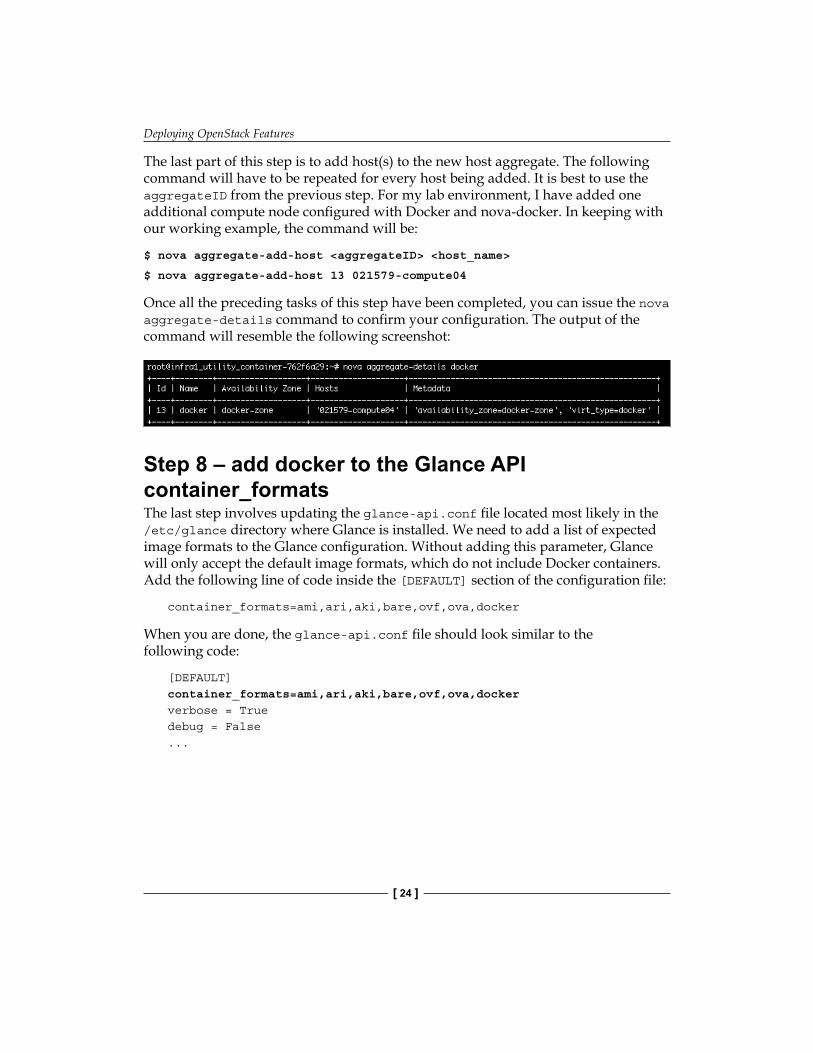
Once all the preceding tasks of this step have been completed, you can issue the nova aggregate-details command to confirm your configuration. The output of the command will resemble the following screenshot:
Step 8 – add docker to the Glance API container_formatsThe last step involves updating the glance-api.conf file located most likely in the /etc/glance directory where Glance is installed. We need to add a list of expected image formats to the Glance configuration. Without adding this parameter, Glance will only accept the default image formats, which do not include Docker containers. Add the following line of code inside the [DEFAULT] section of the configuration file:
container_formats=ami,ari,aki,bare,ovf,ova,docker
When you are done, the glance-api.conf file should look similar to the following code:
[DEFAULT]container_formats=ami,ari,aki,bare,ovf,ova,dockerverbose = Truedebug = False...
Chapter 8
[ 25 ]
At this point, your new Docker compute node(s) are ready to go and the other corresponding OpenStack services now know how to handle requests regarding Docker containers. The effectiveness of automating something similar to this comes into play when you have to repeat the process once more, 10 more times, or even possibly 100 more times. In the next section, we will review the required steps to automate this process.
Coding the playbook and rolesIn this section, we will now create the playbooks and roles to add the OpenStack feature of provisioning Docker compute node(s) as a hypervisor to your cloud. When creating Ansible automation code for something of this nature, I typically like to create multiple tasks broken up into separate roles. This format allows you to reuse the roles created with other playbooks. We will end up with four playbooks and six roles to automate the steps outlined in the previous section. Each role will be broken up into its own area within this section of the chapter. At the end, we will recap the playbooks consuming those roles.
Install DockerThe first role that we will create will include the tasks needed to install Docker on the new compute node(s). The name of the file will be main.yml located within the role directory named install-docker/tasks. The contents of this file will be as shown:
---
- name: Install additional packagesapt: name={{item}} state=presentwith_items: - git - wget
- name: Pull down and install Docker packagesshell: chdir=/opt wget -qO- https://get.docker.com/ | sh
- name: Verify the Docker installcommand: docker run hello-world
- name: Add Nova user to Docker groupcommand: usermod -aGdocker nova
Deploying OpenStack Features
[ 26 ]
The first task will install the additional packages needed (if not already present) for the other tasks that are a part of this role or others; the git and wget packages are needed to add this feature. The second task is meant to download and install the Docker packages onto the compute node(s). The next two tasks will first test the Docker installation, and whether it can successfully add the Nova user to the Docker user group on the compute node(s).
nova-dockerThe next role to be created will handle the tasks of installing the nova-docker package onto the new compute node(s). Just as with the previous role, the file will be named main.yml and located within the role directory name nova-docker/tasks. The contents of this file will be similar to the following example:
---
- name: Pull down nova-docker packagecommand: chdir=/opt git clone http://github.com/stackforge/nova-docker.git
- name: Check out nova-docker branch pre-i18ncommand: chdir=/opt/nova-dockergit checkout -b pre-i18n d1ad84793b7f2182de04df8a5323d6928af672ca
- name: Install nova-docker packagecommand: chdir=/opt/nova-docker pip install
This role begins with a task that will clone the GitHub repository where the nova-docker package is located. The next role handles the checking of a specific patch related to the package. Lastly, the final task will install the nova-docker package using pip.
nova-updateThis role will take care of the OpenStack service-specific configuration adjustments on the new compute node(s). The file will be named main.yml within the role directory named nova-update/tasks. The initial contents of this file will be as follows:
---
- name: Copy Docker filter filecopy: src=docker.filtersdest=/etc/nova/rootwrap.d mode=0644
Chapter 8
[ 27 ]
Since this is our first time using the copy module for Ansible, I felt that we should pause here to break down what the preceding task will do. The copy module enables us to copy files locally to the remote location where the role is being executed. I am personally very fond of this module, as it can be a royal pain moving the pre-configured files to various remote locations. The best part of this module and Ansible is that you can then store the file to be moved within the role directory in another directory named files. Earlier, in Chapter 2, An Introduction to Ansible, we discussed the role directory structure. The files directory is where you can store files of any format that will be moved by the copy module.
This task will pick up the file named docker.filters and copy it to the /etc/nova/rootwrap.d directory on new compute node(s). The other tasks that are a part of this role are as follows:
- name: Change default scheduler filtersshell: chdir=/bin sed -i 's/^scheduler_default_filters.*/scheduler_default_filters = AggregateInstanceExtraSpecsFilter,RetryFilter, AvailabilityZoneFilter,RamFilter,ComputeFilter,ImagePropertiesFilter, ServerGroupAntiAffinityFilter,ServerGroupAffinityFilter/' /etc/nova/ nova.conf
- name: Update Nova compute drivershell: chdir=/bin sed -i 's/^compute_driver.*/compute_driver =novadocker.virt.docker.DockerDriver/' /etc/nova/nova.conf
The preceding tasks handle updating the nova.conf file using the sed command. The sed command is defined to be a stream editor that can be used to perform simple text transformations on a file. In these two tasks, we did a search for a specific text inside of the nova.conf file and replaced the line with a new line designated in the command.
The next two tasks will then copy a file containing a pre-defined parameter block to the compute node(s) and then append that parameter block onto the end of the nova.conf file. The code used to accomplish this looks similar to the following example:
- name: Copy Docker section filecopy: src=dockerdest=/usr/share mode=0644
- name: Insert Docker section into Nova configshell: chdir=/usr/share cat /usr/share/docker>> /etc/nova/nova.confnotify: restart nova-compute
Deploying OpenStack Features
[ 28 ]
Again, we will use the copy module for Ansible to move the file containing the parameter block to the compute node(s). Now that the file is copied to the node, we can use that file in the next task with the cat command. As a part of the last task, we have included a hat trick to restart the nova-compute service once the task is completed. This is accomplished using the notify action included within the playbooks/roles. The action will be triggered at the end of each block of tasks and is only executed once, no matter how many times it is called from other tasks.
The last line of the task will trigger an action to call the main.yml file located within the handler's directory of the role. The contents of this file will include a pointer to the triggered action called nova-compute. The following are the contents of this file:
---- name: restart nova-computeservice: name=nova-compute state=restarted
openstack-configFor this role, we will create the custom flavor and host aggregate dedicated to the Docker compute node(s). As reviewed earlier, these new items will have extra metadata associated with them in order to inform the Nova scheduler how to handle them when executed. The file will be named main.yml within the role directory name openstack-config/tasks.
For these tasks, we used the Nova CLI commands nova flavor-create, nova flavor-key, nova aggregate-create, and nova aggregate-set-metadata to complete the required actions. The code to do this will look similar to this:
---
- name: Create new instance flavor for Dockercommand: nova --os-username={{ OS_USERNAME }} --os-password={{ OS_PASSWORD }} --os-tenant-name={{ OS_TENANT_NAME }} --os-auth-url={{ OS_AUTH_URL }} flavor-create {{ FLAVOR_NAME }} {{ FLAVOR_ID }} 2048 20 1
- name: Define extra specs for Docker flavorcommand: nova --os-username={{ OS_USERNAME }} --os-password={{ OS_PASSWORD }} --os-tenant-name={{ OS_TENANT_NAME }} --os-auth-url={{ OS_AUTH_URL }} flavor-key {{ FLAVOR_ID }} set virt_type=docker
- name: Create new Host Aggregate for Docker nodescommand: nova --os-username={{ OS_USERNAME }} --os-password={{ OS_PASSWORD }} --os-tenant-name={{ OS_TENANT_NAME }} --os-auth-url={{ OS_AUTH_URL }} aggregate-create {{ AGG_NAME }} {{ AVAIL_ZONE }}
Chapter 8
[ 29 ]
- name: Create new Host Aggregate for Docker nodescommand: nova --os-username={{ OS_USERNAME }} --os-password={{ OS_PASSWORD }} --os-tenant-name={{ OS_TENANT_NAME }} --os-auth-url={{ OS_AUTH_URL }} aggregate-set-metadata {{ AGG_NAME }} virt_type=docker
The unique part of the commands discussed in the preceding section relates mainly to the nova flavor-key and nova aggregate-set-metadata commands. You will notice that we are setting special metadata parameters related to setting up these new compute node(s) as Docker hypervisors. Setting the virt_type=docker metadata is the linkage needed to direct the Nova scheduler to the correct compute node(s) when this specific flavor is used.
nova-schedulerThe tasks outlined in this role almost exactly match those described for the nova-update role created in the earlier section. The difference is that this role will be run against the Nova scheduler container running on the control plane instead of the new compute node(s). Note that the changes in the Nova scheduler filter need to match with the Nova scheduler and the compute node(s). This role will handle keeping them in sync. The file will be named main.yml within the role directory named nova-scheduler/tasks.
---
- name: Change default scheduler filtersshell: chdir=/bin sed -i 's/^scheduler_default_filters.*/scheduler_default_filters = AggregateInstanceExtraSpecsFilter,RetryFilter, AvailabilityZoneFilter,RamFilter,ComputeFilter,ImagePropertiesFilter, ServerGroupAntiAffinityFilter,ServerGroupAffinityFilter/' /etc/nova/nova.conf
- name: Copy Docker section filecopy: src=dockerdest=/usr/share mode=0644
- name: Insert Docker section into Nova configshell: chdir=/usr/share cat /usr/share/docker>> /etc/nova/nova.confnotify: restart nova-scheduler

Deploying OpenStack Features
[ 30 ]
glance-updateThis last and final role will add the list of image formats Glance should expect/support. If we do not add this, Glance will use the default image formats. Since Docker is not considered a default image format, the build of your container will fail. This is why we have to add a pre-defined list of formats to the Glance API configuration file. The file will be named main.yml within the role directory named glance-update/tasks.
---
- name: Add container formats to Glance API config fileshell: chdir=/bin sed -i '/^\[DEFAULT/a container_formats=ami,ari,aki,bare,ovf,ova,docker' /etc/glance/glance-api.confnotify: restart glance-api
One word of caution is that Docker is new, even newer than OpenStack, and could at times stop working with the nova-docker drivers. What can I say? It is one of the causalities of open source software; for better and for worse. Do not worry, you get used to it but I will always encourage you not to give up and find a way to get it to work. Yes, it is officially the time to celebrate again, as you have just completed your sixth OpenStack administration Ansible role.
To support these roles, we now need to create the variable file that will go along with it. For this series of roles, we will use a global variable file to simplify things a bit. The file will be named util_container and we will be saving it to the group_vars/ directory of the playbook.
Keep in mind that the values defined in the variable file are intended to be changed before each execution for normal everyday use.
The variables defined in the following section should look very familiar at this point. The standard variables needed to authenticate your OpenStack cloud and the other OpenStack configurations requiring user input exist here.
# Here are variables related to the nova-docker setup
OS_USERNAME: adminOS_PASSWORD: passwdOS_TENANT_NAME: adminOS_AUTH_URL: http://172.29.236.7:35357/v2.0FLAVOR_NAME: m1.containerFLAVOR_ID: m1dockerctrAGG_NAME: dockerAVAIL_ZONE: docker-zone

Chapter 8
[ 31 ]
Word of cautionDue to the contents of this file, it should be stored as a secure file within the code repository that you may use to store your Ansible playbooks/roles. Gaining access to this information might compromise your OpenStack cloud security.
Let's take a moment to break down the new variables. The summary will be:
FLAVOR_NAME # the name of the custom flavor to be created
FLAVOR_ID # the ID associated with the custom flavor
AGG_NAME # name of the new host aggregate to create
AVAIL_ZONE # the zone name associated with the new host aggregate
With the variable file completed, we can now move on to creating the master playbook files. For our demonstration, I decided to break up the playbook files into separate files. This was totally my choice and could be combined into one file with no issues. The list of playbook files will be described, as follows:
base.ymlinstall-dockernova-dockernova-update
base-openstack.ymlopenstack-config
base-scheduler.ymlnova-scheduler
base-glance.ymlglance-update
The playbook and role names can be anything you choose. Specific names have been provided here in order to allow you to easily follow along and reference the complete code found in the GitHub repository. The only warning being that whatever you decide to name them, the roles must remain uniform when referenced from within the playbook(s).
Since adding this feature to OpenStack involved adjustment to more services, we needed to add additional hosts to our host inventory file. The following is a quick recap of how these files are configured.
Deploying OpenStack Features
[ 32 ]
The hosts file in the root of the playbook directory is:
[docker_nodes]021579-docker02
[util_container]172.29.236.179
[nova_schedulers]172.29.236.218
[glance_container]172.29.236.115
Well done everyone, you just added Docker to your OpenStack cloud. This was one of my favorite features to add so far, outside of configuring Trove. As always, for us to keep up with our tradition, we will finish up the chapter with a quick review of the playbook and role just created.
Playbook and role reviewLet's jump right into examining the roles we created.
The completed role and file named main.yml located in the install-docker/tasks directory looks similar to this:
---
- name: Install additional packagesapt: name={{item}} state=presentwith_items: - git - wget
- name: Pull down and install Docker packagesshell: chdir=/opt wget -qO- https://get.docker.com/ | sh
- name: Verify the Docker installcommand: docker run hello-world
- name: Add Nova user to Docker groupcommand: usermod -aGdocker nova
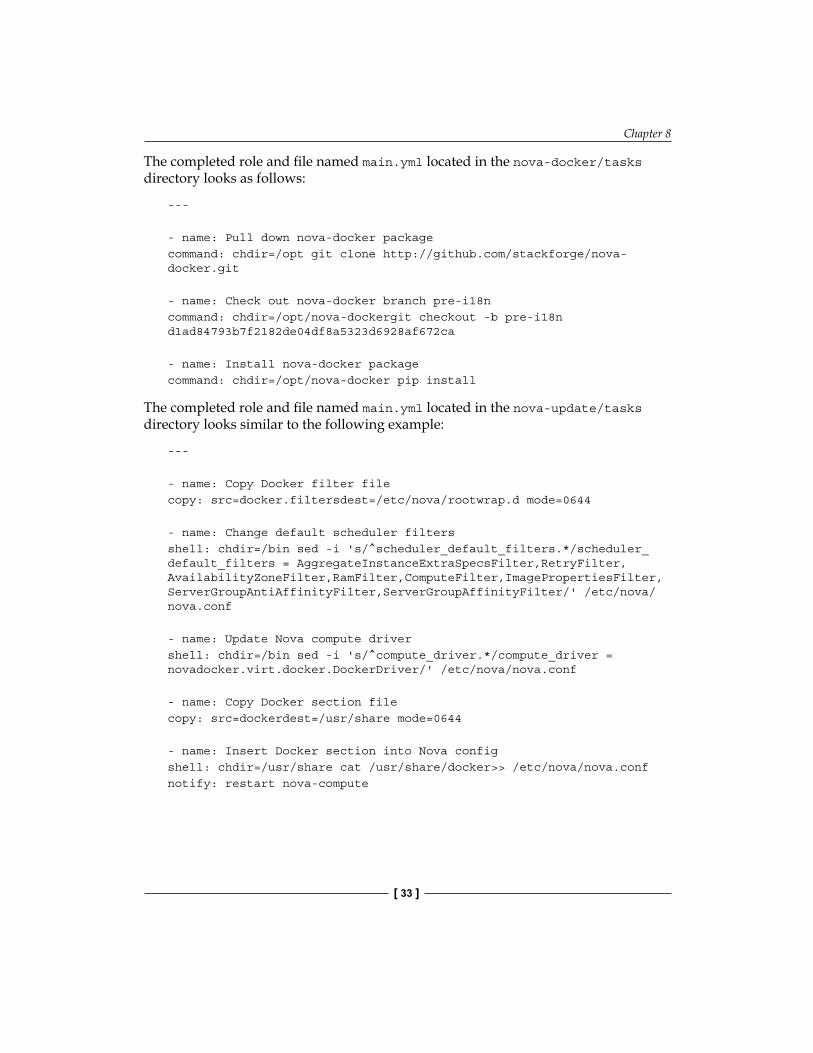
Chapter 8
[ 33 ]
The completed role and file named main.yml located in the nova-docker/tasks directory looks as follows:
---
- name: Pull down nova-docker packagecommand: chdir=/opt git clone http://github.com/stackforge/nova-docker.git
- name: Check out nova-docker branch pre-i18ncommand: chdir=/opt/nova-dockergit checkout -b pre-i18n d1ad84793b7f2182de04df8a5323d6928af672ca
- name: Install nova-docker packagecommand: chdir=/opt/nova-docker pip install
The completed role and file named main.yml located in the nova-update/tasks directory looks similar to the following example:
---
- name: Copy Docker filter filecopy: src=docker.filtersdest=/etc/nova/rootwrap.d mode=0644
- name: Change default scheduler filtersshell: chdir=/bin sed -i 's/^scheduler_default_filters.*/scheduler_default_filters = AggregateInstanceExtraSpecsFilter,RetryFilter, AvailabilityZoneFilter,RamFilter,ComputeFilter,ImagePropertiesFilter, ServerGroupAntiAffinityFilter,ServerGroupAffinityFilter/' /etc/nova/nova.conf
- name: Update Nova compute drivershell: chdir=/bin sed -i 's/^compute_driver.*/compute_driver = novadocker.virt.docker.DockerDriver/' /etc/nova/nova.conf
- name: Copy Docker section filecopy: src=dockerdest=/usr/share mode=0644
- name: Insert Docker section into Nova configshell: chdir=/usr/share cat /usr/share/docker>> /etc/nova/nova.confnotify: restart nova-compute
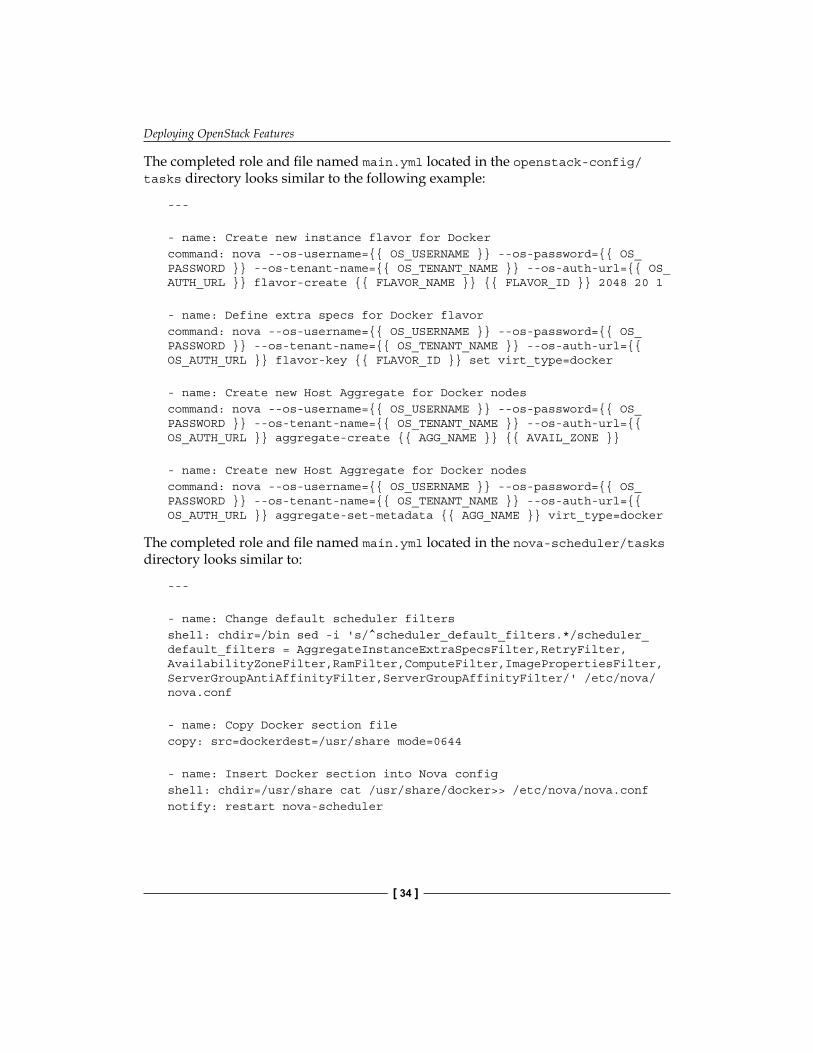
Deploying OpenStack Features
[ 34 ]
The completed role and file named main.yml located in the openstack-config/tasks directory looks similar to the following example:
---
- name: Create new instance flavor for Dockercommand: nova --os-username={{ OS_USERNAME }} --os-password={{ OS_PASSWORD }} --os-tenant-name={{ OS_TENANT_NAME }} --os-auth-url={{ OS_AUTH_URL }} flavor-create {{ FLAVOR_NAME }} {{ FLAVOR_ID }} 2048 20 1
- name: Define extra specs for Docker flavorcommand: nova --os-username={{ OS_USERNAME }} --os-password={{ OS_PASSWORD }} --os-tenant-name={{ OS_TENANT_NAME }} --os-auth-url={{ OS_AUTH_URL }} flavor-key {{ FLAVOR_ID }} set virt_type=docker
- name: Create new Host Aggregate for Docker nodescommand: nova --os-username={{ OS_USERNAME }} --os-password={{ OS_PASSWORD }} --os-tenant-name={{ OS_TENANT_NAME }} --os-auth-url={{ OS_AUTH_URL }} aggregate-create {{ AGG_NAME }} {{ AVAIL_ZONE }}
- name: Create new Host Aggregate for Docker nodescommand: nova --os-username={{ OS_USERNAME }} --os-password={{ OS_PASSWORD }} --os-tenant-name={{ OS_TENANT_NAME }} --os-auth-url={{ OS_AUTH_URL }} aggregate-set-metadata {{ AGG_NAME }} virt_type=docker
The completed role and file named main.yml located in the nova-scheduler/tasks directory looks similar to:
---
- name: Change default scheduler filtersshell: chdir=/bin sed -i 's/^scheduler_default_filters.*/scheduler_default_filters = AggregateInstanceExtraSpecsFilter,RetryFilter, AvailabilityZoneFilter,RamFilter,ComputeFilter,ImagePropertiesFilter,ServerGroupAntiAffinityFilter,ServerGroupAffinityFilter/' /etc/nova/nova.conf
- name: Copy Docker section filecopy: src=dockerdest=/usr/share mode=0644
- name: Insert Docker section into Nova configshell: chdir=/usr/share cat /usr/share/docker>> /etc/nova/nova.confnotify: restart nova-scheduler
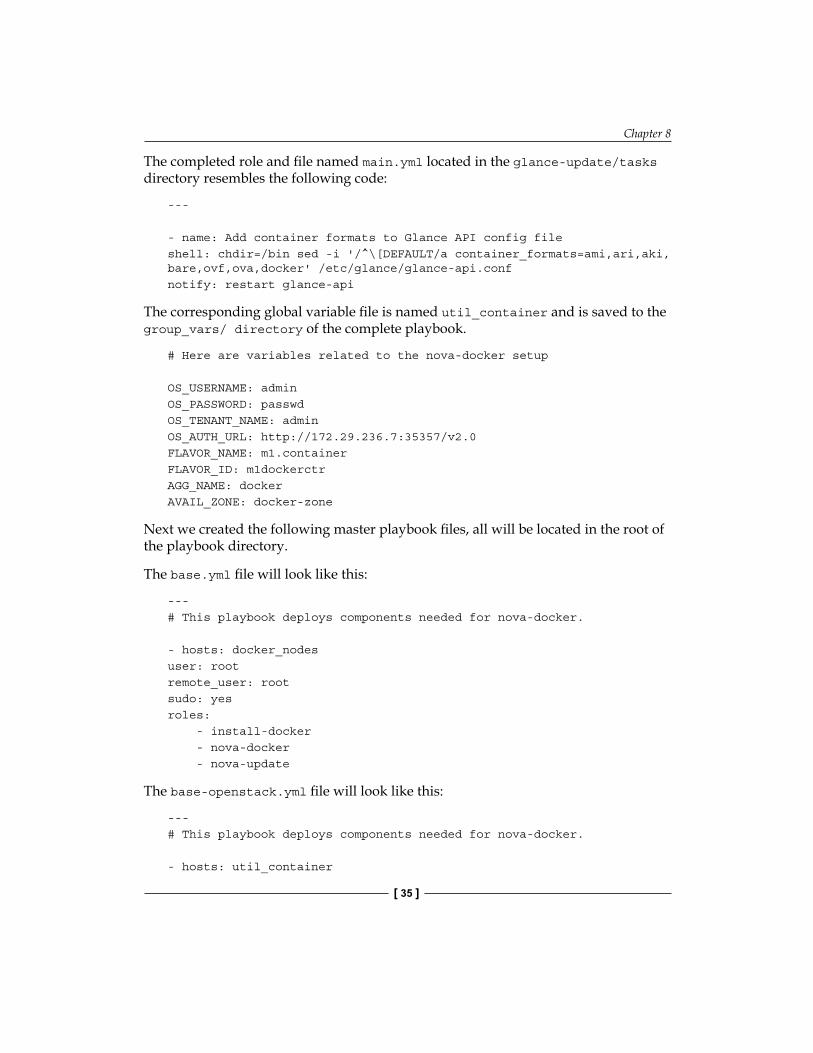
Chapter 8
[ 35 ]
The completed role and file named main.yml located in the glance-update/tasks directory resembles the following code:
---
- name: Add container formats to Glance API config fileshell: chdir=/bin sed -i '/^\[DEFAULT/a container_formats=ami,ari,aki,bare,ovf,ova,docker' /etc/glance/glance-api.confnotify: restart glance-api
The corresponding global variable file is named util_container and is saved to the group_vars/ directory of the complete playbook.
# Here are variables related to the nova-docker setup
OS_USERNAME: adminOS_PASSWORD: passwdOS_TENANT_NAME: adminOS_AUTH_URL: http://172.29.236.7:35357/v2.0FLAVOR_NAME: m1.containerFLAVOR_ID: m1dockerctrAGG_NAME: dockerAVAIL_ZONE: docker-zone
Next we created the following master playbook files, all will be located in the root of the playbook directory.
The base.yml file will look like this:
---# This playbook deploys components needed for nova-docker.
- hosts: docker_nodesuser: rootremote_user: rootsudo: yesroles: - install-docker - nova-docker - nova-update
The base-openstack.yml file will look like this:
---# This playbook deploys components needed for nova-docker.
- hosts: util_container
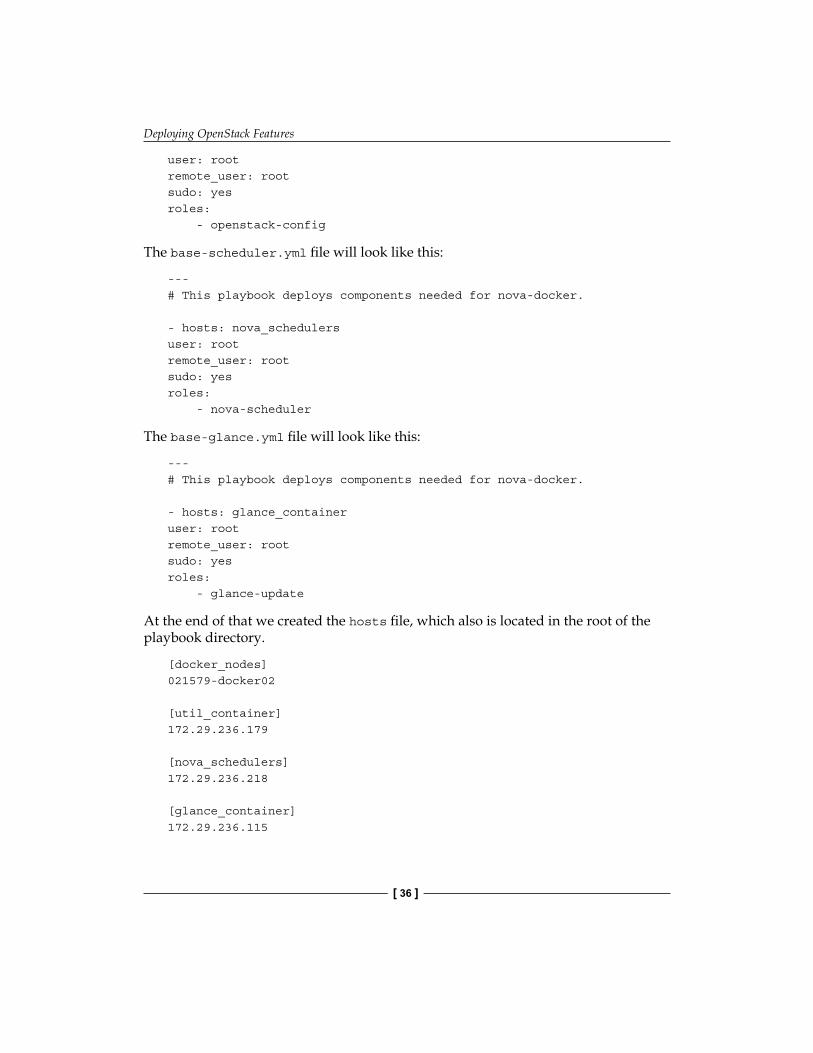
Deploying OpenStack Features
[ 36 ]
user: rootremote_user: rootsudo: yesroles: - openstack-config
The base-scheduler.yml file will look like this:
---# This playbook deploys components needed for nova-docker.
- hosts: nova_schedulersuser: rootremote_user: rootsudo: yesroles: - nova-scheduler
The base-glance.yml file will look like this:
---# This playbook deploys components needed for nova-docker.
- hosts: glance_containeruser: rootremote_user: rootsudo: yesroles: - glance-update
At the end of that we created the hosts file, which also is located in the root of the playbook directory.
[docker_nodes]021579-docker02
[util_container]172.29.236.179
[nova_schedulers]172.29.236.218
[glance_container]172.29.236.115
Chapter 8
[ 37 ]
The complete set of code can again be found in the following GitHub repository: https://github.com/os-admin-with-ansible/os-admin-with-ansible/tree/master/nova-docker.
Now the fun part, time to test out our new playbooks and roles. There are a few more steps required to completely test this new feature. Those additional steps are outlined in the following section. Assuming that you cloned the GitHub repository earlier, the command to test out the playbook from the Deployment node will be as follows:
$ cd os-admin-with-ansible/nova-docker
$ ansible-playbook –i hosts base.yml
$ ansible-playbook –i hosts base-openstack.yml
$ ansible-playbook –i hosts base-scheduler.yml
$ ansible-playbook –i hosts base-glance.yml
You must now add the Docker compute node(s) to the host aggregate that was just created via the preceding roles. This can be done through the Horizon dashboard and/or via the Nova CLI. If you choose to use the CLI, the nova aggregate-add-host command will add the compute nodes to the host aggregate. The order in which they are added does not matter. As a challenge, why don't you try to add this task to the roles we just created? Do share it with us on GitHub once you do, we would love to see how you handled it.
Next, we are ready to pull a Docker image and save it directly to Glance. First, you must log into the Docker compute node(s) that you just set up. You can pull any image of your choice or use the following example:
$ sourceopenrc
$ docker pull busybox
$ docker save busybox | glance image-create --is-public=True \
--container-format=docker --disk-format=raw --name busybox
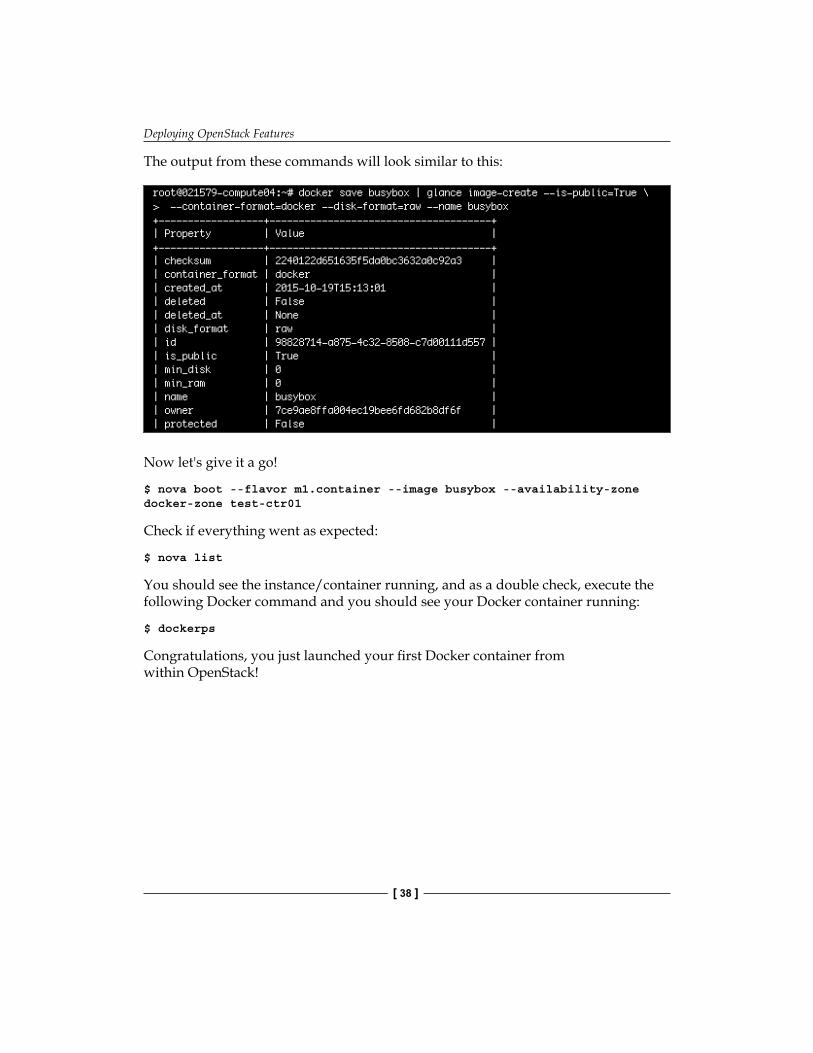
Deploying OpenStack Features
[ 38 ]
The output from these commands will look similar to this:
Now let's give it a go!
$ nova boot --flavor m1.container --image busybox --availability-zone docker-zone test-ctr01
Check if everything went as expected:
$ nova list
You should see the instance/container running, and as a double check, execute the following Docker command and you should see your Docker container running:
$ dockerps
Congratulations, you just launched your first Docker container from within OpenStack!
Chapter 8
[ 39 ]
SummaryYes! You just added a new OpenStack feature to your cloud. The flexibility and gained capability due to having multiple hypervisors as a part of your cloud is huge. Have fun with your new Docker compute node(s). But before concluding this chapter, let's take a moment to recap. We talked about the benefits of multiple hypervisor support and explained why using Docker as a hypervisor within OpenStack is a good use case. Next we manually walked through the setup process for adding Docker as a compute node (Docker and nova-docker driver). Lastly, we developed the Ansible playbook and role to automate adding the OpenStack feature of using Docker as a hypervisor to your cloud
The next chapter happens to be something that came in as a customer demand for a pretty large OpenStack cloud. There is no cloud operator out there who does not want to know or have a complete inventory of their cloud. Tracking resources, auditing users, and recapping network utilization are just a few things that are a part of the daily/weekly routine for us. Imagine you can have a complete report created on one command. Possible? Well, I am not telling; you will have to read Chapter 9, Inventory Your Cloud, to find out.

Thank you for buying OpenStack Administration with Ansible
About Packt PublishingPackt, pronounced 'packed', published its first book, Mastering phpMyAdmin for Effective MySQL Management, in April 2004, and subsequently continued to specialize in publishing highly focused books on specific technologies and solutions.Our books and publications share the experiences of your fellow IT professionals in adapting and customizing today's systems, applications, and frameworks. Our solution-based books give you the knowledge and power to customize the software and technologies you're using to get the job done. Packt books are more specific and less general than the IT books you have seen in the past. Our unique business model allows us to bring you more focused information, giving you more of what you need to know, and less of what you don't.Packt is a modern yet unique publishing company that focuses on producing quality, cutting-edge books for communities of developers, administrators, and newbies alike. For more information, please visit our website at www.packtpub.com.
About Packt Open SourceIn 2010, Packt launched two new brands, Packt Open Source and Packt Enterprise, in order to continue its focus on specialization. This book is part of the Packt Open Source brand, home to books published on software built around open source licenses, and offering information to anybody from advanced developers to budding web designers. The Open Source brand also runs Packt's Open Source Royalty Scheme, by which Packt gives a royalty to each open source project about whose software a book is sold.
Writing for PacktWe welcome all inquiries from people who are interested in authoring. Book proposals should be sent to [email protected]. If your book idea is still at an early stage and you would like to discuss it first before writing a formal book proposal, then please contact us; one of our commissioning editors will get in touch with you. We're not just looking for published authors; if you have strong technical skills but no writing experience, our experienced editors can help you develop a writing career, or simply get some additional reward for your expertise.
Learning OpenStackISBN: 978-1-78398-696-5 Paperback: 272 pages
Set up and maintain your own cloud-based Infrastructure as a Service (IaaS) using OpenStack
1. Build and manage a cloud environment using just four virtual machines.
2. Get to grips with mandatory as well as optional OpenStack components and know how they work together.
3. Leverage your cloud environment to provide Infrastructure as a Service (IaaS) with this practical, step-by-step guide.
OpenStack Networking CookbookISBN: 978-1-78528-610-0 Paperback: 282 pages
Harness the power of OpenStack Networking for public and private clouds using 90 hands-on recipes
1. Build and manage virtual switching, routing, and firewall-based networks in OpenStack using Neutron.
2. Develop plugins and drivers for Neutron to enhance the built-in networking capabilities.
3. Monitor and automate OpenStack networks using tools like Ceilometer and Heat.
Please check www.PacktPub.com for information on our titles
Learning OpenStack High AvailabilityISBN: 978-1-78439-570-4 Paperback: 156 pages
Build a resilient and scalable OpenStack cloud, using advanced open source tools
1. Leverage the power of OpenStack to achieve high availability.
2. Get to grips with concepts such as Galeria Cluster for Glance and Cinder, MariaDB, and validation.
3. Using clustering and high-availability solutions, this book provides a comprehensive plan for you to connect them with Red Hat Enterprise Linux OpenStack Platform.
Mastering AnsibleISBN: 978-1-78439-548-3 Paperback: 236 pages
Design, develop, and solve real world automation and orchestration needs by unlocking the automation capabilities of Ansible
1. Discover how Ansible works in detail.
2. Explore use cases for Ansible's advanced features including task delegation, fast failures, and serial task execution.
3. Extend Ansible with custom modules, plugins, and inventory sources.
Please check www.PacktPub.com for information on our titles
Related Documents


![Installing Cisco VTS on OpenStack€¦ · Installing Cisco VTS on OpenStack Setting Up Ansible Install Through an SSH Proxy (for RHEL OpenStack Platform Director) [proxied_hosts:children]](https://static.cupdf.com/doc/110x72/5fdbcab0086d502bf5673295/installing-cisco-vts-on-openstack-installing-cisco-vts-on-openstack-setting-up-ansible.jpg)