Office 2003 Introductory Concepts and Techniques M i c r o s o f t PowerPoint Project 2 Using the Outline Tab and Clip Art to Create a Slide Show

Office 2003 Introductory Concepts and Techniques M i c r o s o f t PowerPoint Project 2 Using the Outline Tab and Clip Art to Create a Slide Show.
Dec 16, 2015
Welcome message from author
This document is posted to help you gain knowledge. Please leave a comment to let me know what you think about it! Share it to your friends and learn new things together.
Transcript

Office 2003Introductory Concepts
and Techniques
M i c r o s o f t
PowerPoint Project 2
Using the Outline Tab and Clip Art to Create
a Slide Show

2PowerPoint Project 2: Using the Outline Tab and Clip Art to Create a Slide Show
Objectives
• Start and customize a new slide show from an outline
• Add a slide and create a closing slide on the Outline tab
• Create text slides with multi-level bulleted lists on the Outline tab
• Save and review a presentation• Insert clip art

3PowerPoint Project 2: Using the Outline Tab and Clip Art to Create a Slide Show
Objectives
• Add a header and footer to outline pages• Animate clip art• Add an animation scheme and run an animated
slide show• Print a presentation outline
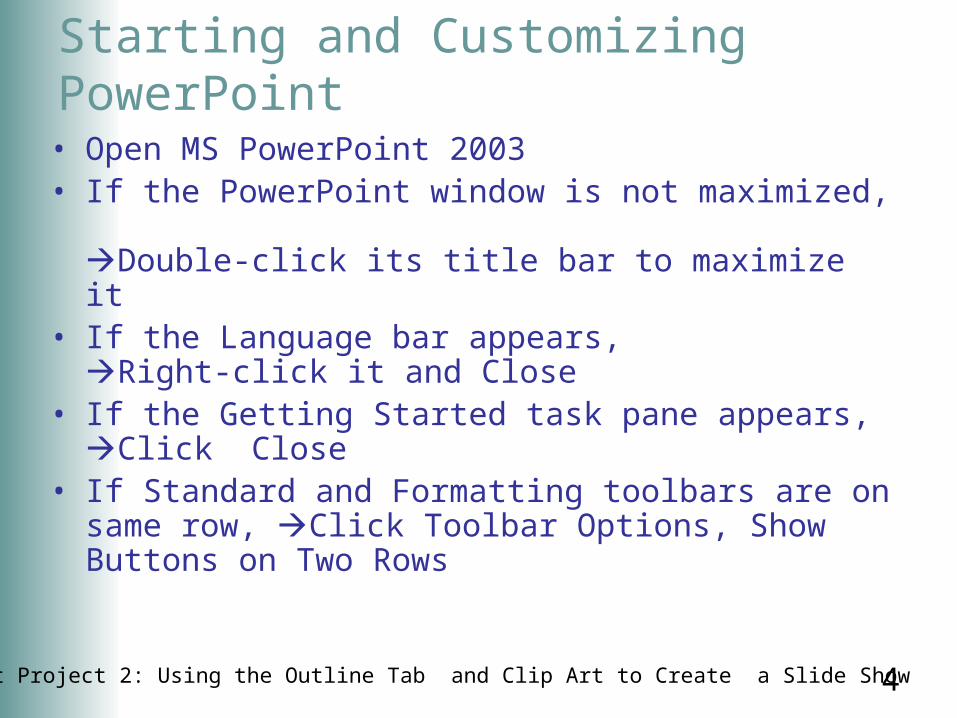
4PowerPoint Project 2: Using the Outline Tab and Clip Art to Create a Slide Show
Starting and Customizing PowerPoint
• Open MS PowerPoint 2003• If the PowerPoint window is not maximized,
Double-click its title bar to maximize it• If the Language bar appears,
Right-click it and Close• If the Getting Started task pane appears,
Click Close• If Standard and Formatting toolbars are on same row,
Click Toolbar Options, Show Buttons on Two Rows

5PowerPoint Project 2: Using the Outline Tab and Clip Art to Create a Slide Show
1. Click Slide Design button on toolbar.
2. Click down scroll arrow in the list.
3. Click the Axis template.
4. Click the Close button in the task pane.
Start and Customize PowerPoint -Reference Book: Page PPT 85
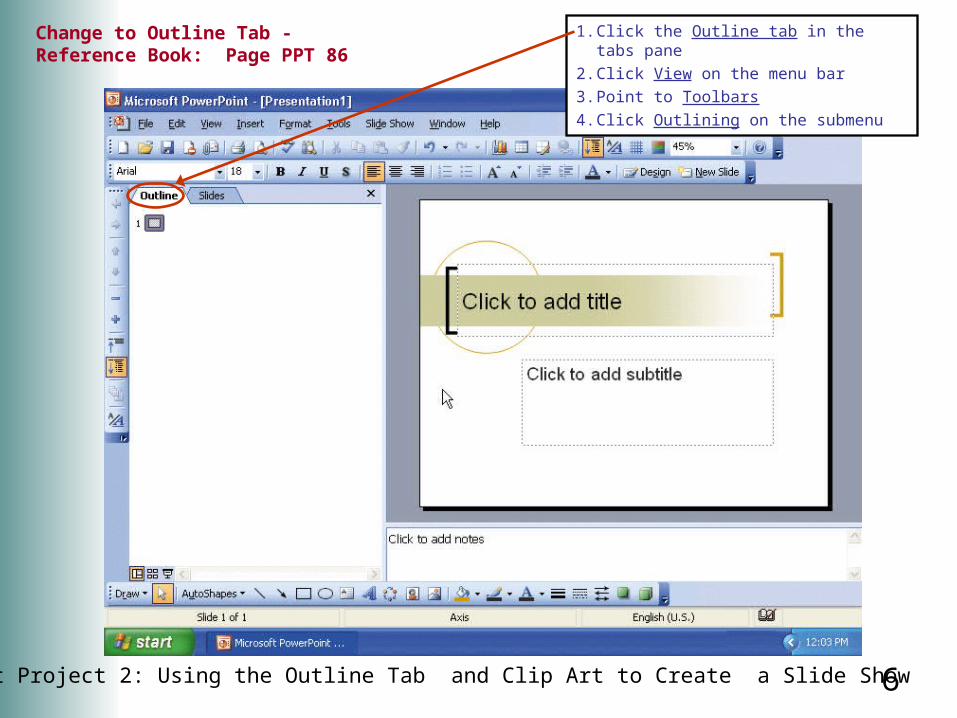
6PowerPoint Project 2: Using the Outline Tab and Clip Art to Create a Slide Show
1. Click the Outline tab in the tabs pane
2. Click View on the menu bar
3. Point to Toolbars
4. Click Outlining on the submenu
Change to Outline Tab -Reference Book: Page PPT 86

7PowerPoint Project 2: Using the Outline Tab and Clip Art to Create a Slide Show
1. Click Slide 1 slide icon on the Outline tab
2. Type “Healthy Eating”
3. Press SHIFT + ENTER
4. Type “Healthy Living”
5. Press ENTER
6. Click Demote button on Outlining toolbar
Create a Title Slide -Reference Book: Page PPT 88-89
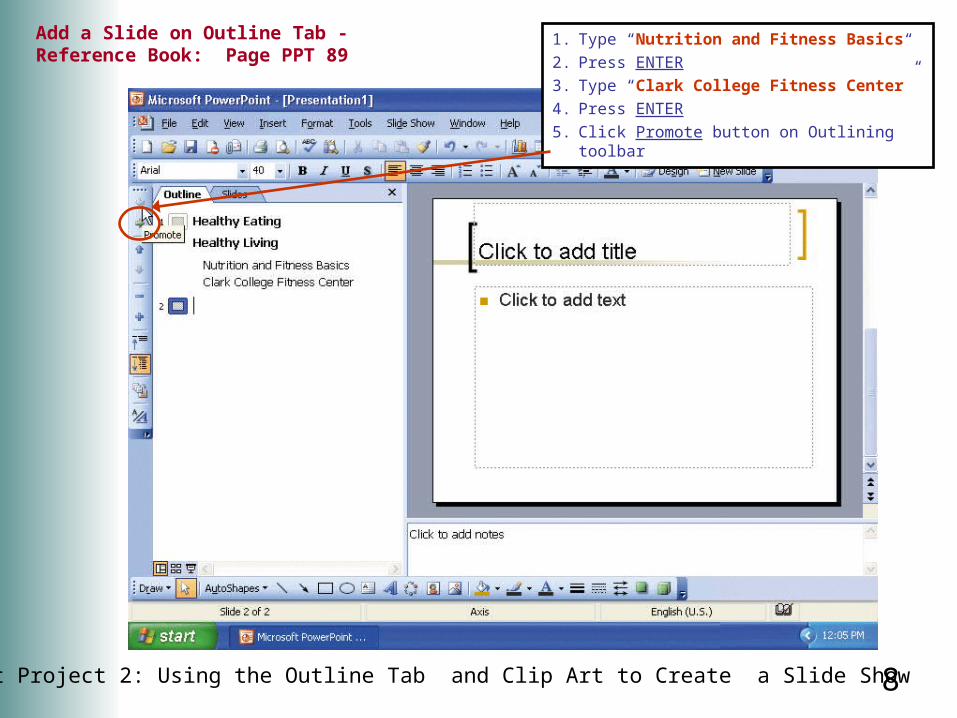
8PowerPoint Project 2: Using the Outline Tab and Clip Art to Create a Slide Show
1. Type “Nutrition and Fitness Basics“
2. Press ENTER
3. Type “Clark College Fitness Center”
4. Press ENTER
5. Click Promote button on Outlining toolbar
Add a Slide on Outline Tab -Reference Book: Page PPT 89

9PowerPoint Project 2: Using the Outline Tab and Clip Art to Create a Slide Show
1. Type “Nutrition Guidelines”2. Press ENTER3. Click Demote button (now on 2nd level)4. Type “Healthy Eating Pyramid”5. Press ENTER6. Click Demote button (now on 3rd level)7. Type “Eat more vegetables”8. Press ENTER9. Type “Eat less pasta”10. Press ENTER
Add a Slide on Outline Tab -Reference Book: Page PPT 89-91

10PowerPoint Project 2: Using the Outline Tab and Clip Art to Create a Slide Show
1. Click Promote button two times
2. Type “Healthy Living Benefits”
3. Press ENTER
4. Click Demote button
5. Type “Lowers cholesterol, blood pressure”
6. Press ENTER
7. Type “Reduces heart disease risk”
8. Press ENTER
9. Type “Maintains body weight”
10. DO NOT press ENTER
Add a Closing Slide on Outline Tab -Reference Book: Page PPT 94
11PowerPoint Project 2: Using the Outline Tab and Clip Art to Create a Slide Show
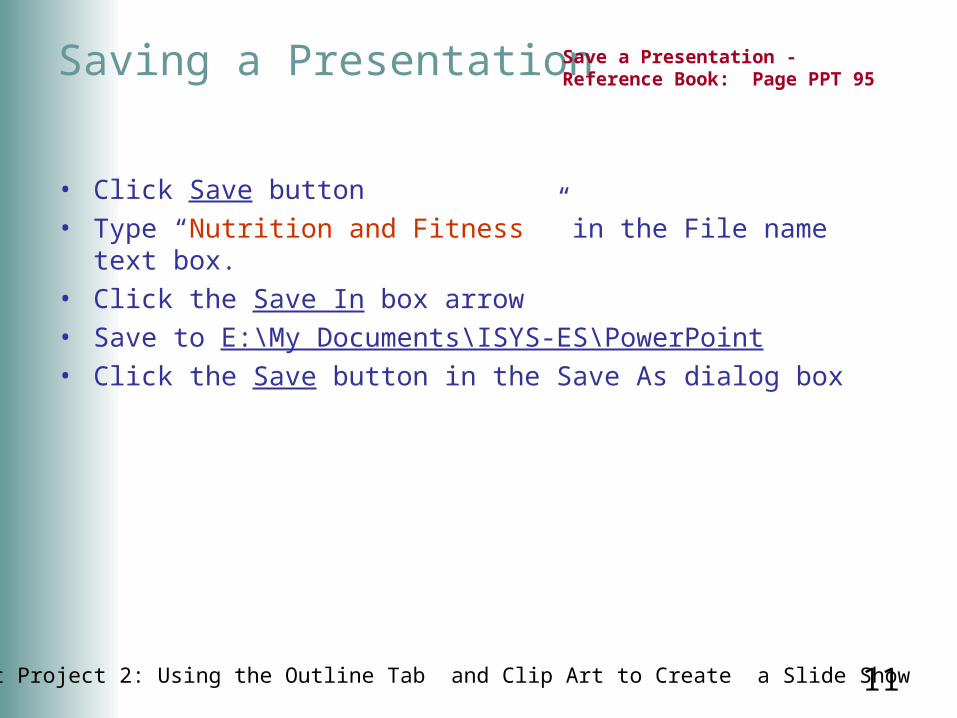
Saving a Presentation
• Click Save button• Type “Nutrition and Fitness ” in the File name text box.• Click the Save In box arrow• Save to E:\My Documents\ISYS-ES\PowerPoint• Click the Save button in the Save As dialog box
Save a Presentation -Reference Book: Page PPT 95
12PowerPoint Project 2: Using the Outline Tab and Clip Art to Create a Slide Show
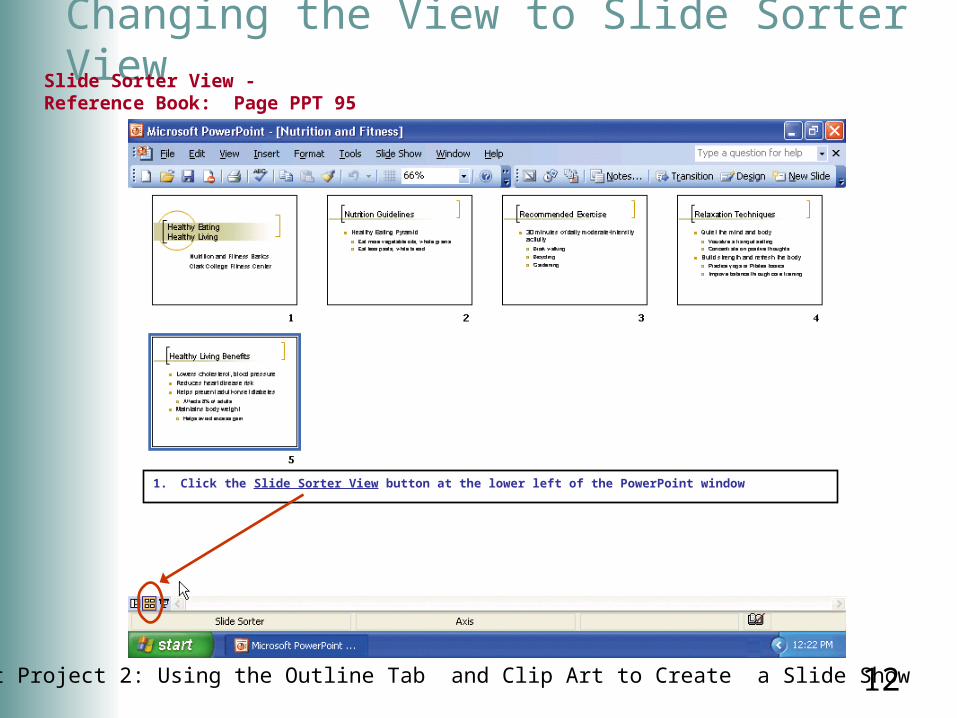
Changing the View to Slide Sorter View
1. Click the Slide Sorter View button at the lower left of the PowerPoint window
Slide Sorter View -Reference Book: Page PPT 95

13PowerPoint Project 2: Using the Outline Tab and Clip Art to Create a Slide Show
Changing the View to Normal ViewChange to Normal View -Reference Book: Page PPT 96
1. Click Slide 2 slide thumbnail
2. Click Normal View button (at bottom left)
3. Click Slides tab in the tabs pane

14PowerPoint Project 2: Using the Outline Tab and Clip Art to Create a Slide Show
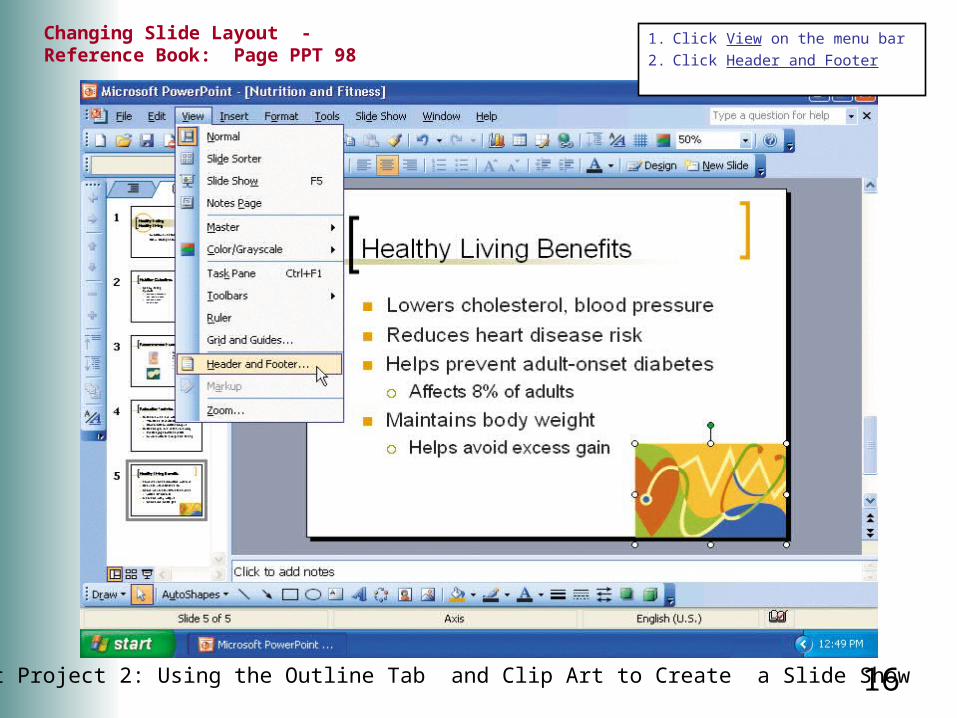
1. Click Format
2. Click Slide Layout
3. Click down arrow in the Apply slide layout area
4. Click Title, Text, and Content
5. Click Close button in the Slide Layout task pane
Changing Slide Layout -Reference Book: Page PPT 98

15PowerPoint Project 2: Using the Outline Tab and Clip Art to Create a Slide Show
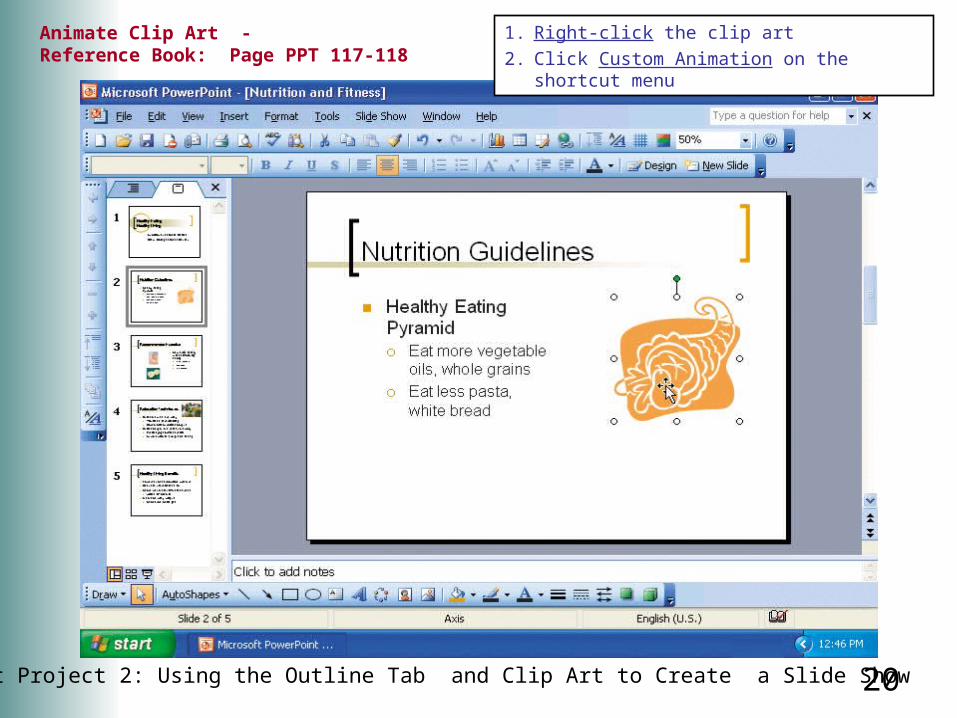
1. Click Insert Clip Art button in the content placeholder
2. Type “food“ in the Search text box
3. Click Go button
4. Click the cornucopia clip to select it
5. Click OK button
6. Click the Close button on the Picture toolbar
Changing Slide Layout -Reference Book: Page PPT 98
16PowerPoint Project 2: Using the Outline Tab and Clip Art to Create a Slide Show
1. Click View on the menu bar
2. Click Header and Footer
Changing Slide Layout -Reference Book: Page PPT 98

17PowerPoint Project 2: Using the Outline Tab and Clip Art to Create a Slide Show
Changing Slide Layout -Reference Book: Page PPT 98
1. Click Notes and Handouts tab
2. Click Update automatically option
3. Click Header text box
4. Type “Healthy Eating, Healthy Living“
5. Click Footer text box
6. Type “Clark College Fitness Center”
7. Click Apply to All button

18PowerPoint Project 2: Using the Outline Tab and Clip Art to Create a Slide Show
1. Click Slide Show
2. Click Animation Schemes
Add an Animation Scheme -Reference Book: Page PPT 114-115

19PowerPoint Project 2: Using the Outline Tab and Clip Art to Create a Slide Show
1. Click Float in the Exciting category
2. Click Apply to All Slides
3. Click Close button
Add an Animation Scheme -Reference Book: Page PPT 114-115
20PowerPoint Project 2: Using the Outline Tab and Clip Art to Create a Slide Show
1. Right-click the clip art
2. Click Custom Animation on the shortcut menu
Animate Clip Art -Reference Book: Page PPT 117-118
21PowerPoint Project 2: Using the Outline Tab and Clip Art to Create a Slide Show
Animate Clip Art -Reference Book: Page PPT 117-118
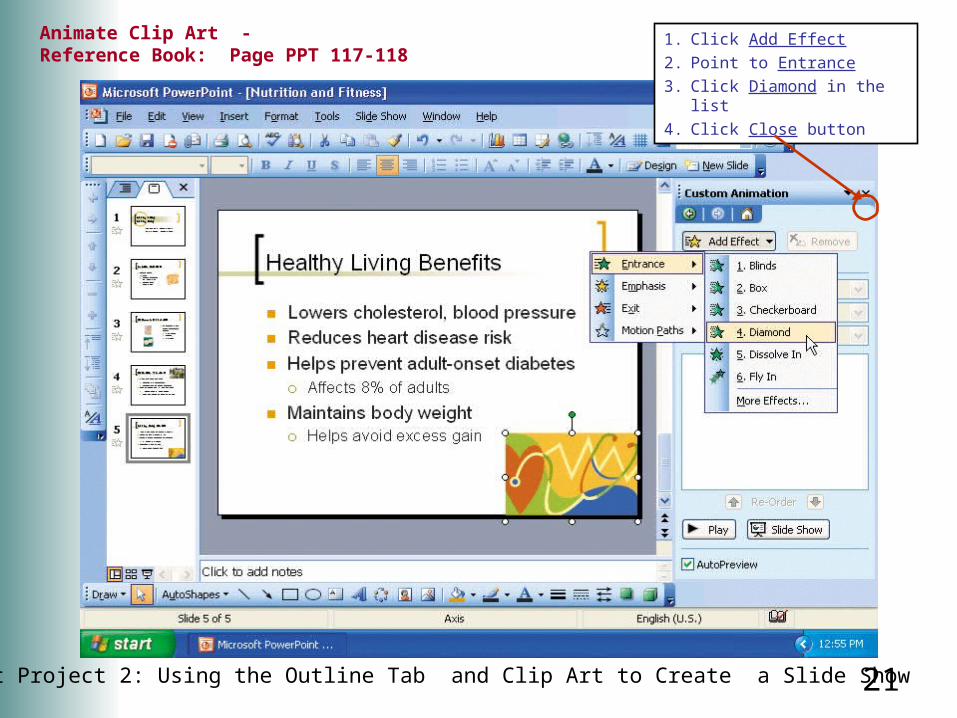
1. Click Add Effect
2. Point to Entrance
3. Click Diamond in the list
4. Click Close button
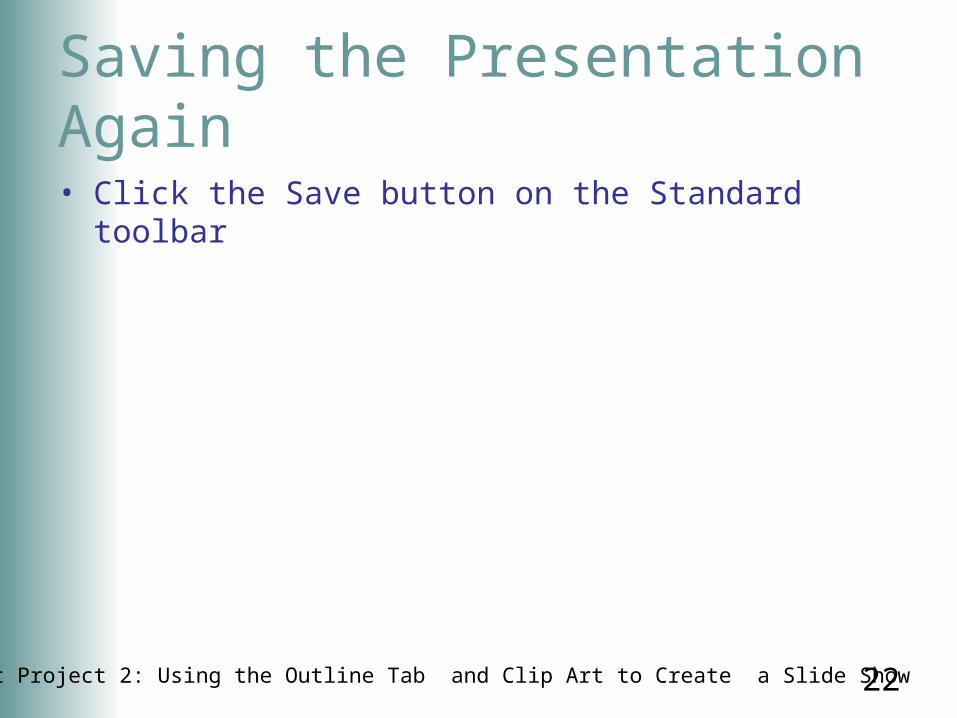
22PowerPoint Project 2: Using the Outline Tab and Clip Art to Create a Slide Show
Saving the Presentation Again
• Click the Save button on the Standard toolbar
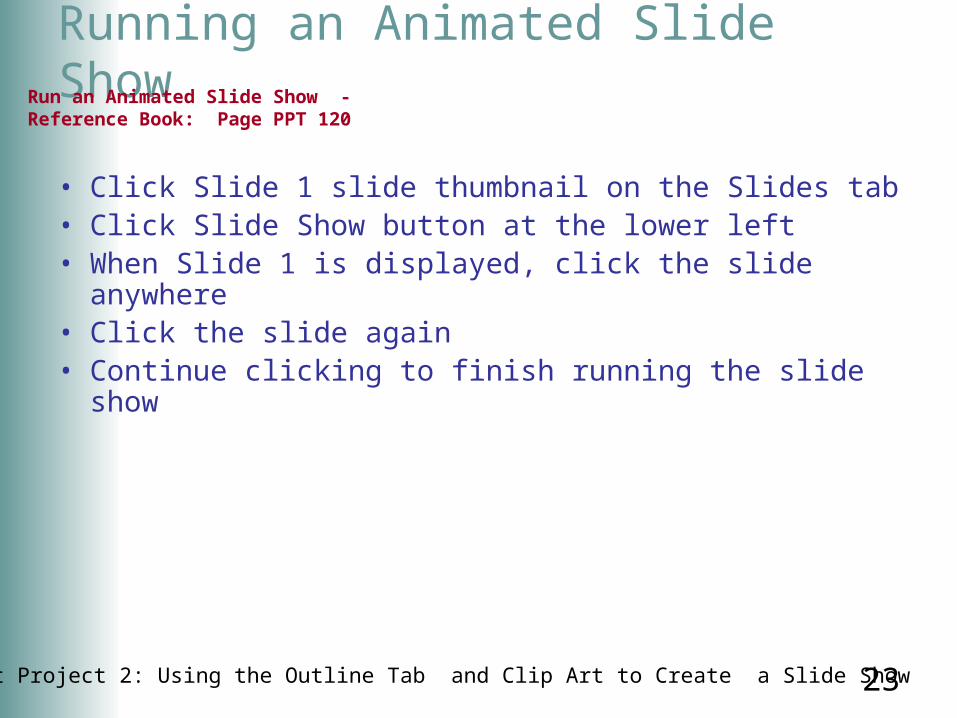
23PowerPoint Project 2: Using the Outline Tab and Clip Art to Create a Slide Show
Running an Animated Slide Show
• Click Slide 1 slide thumbnail on the Slides tab• Click Slide Show button at the lower left• When Slide 1 is displayed, click the slide anywhere• Click the slide again• Continue clicking to finish running the slide show
Run an Animated Slide Show -Reference Book: Page PPT 120
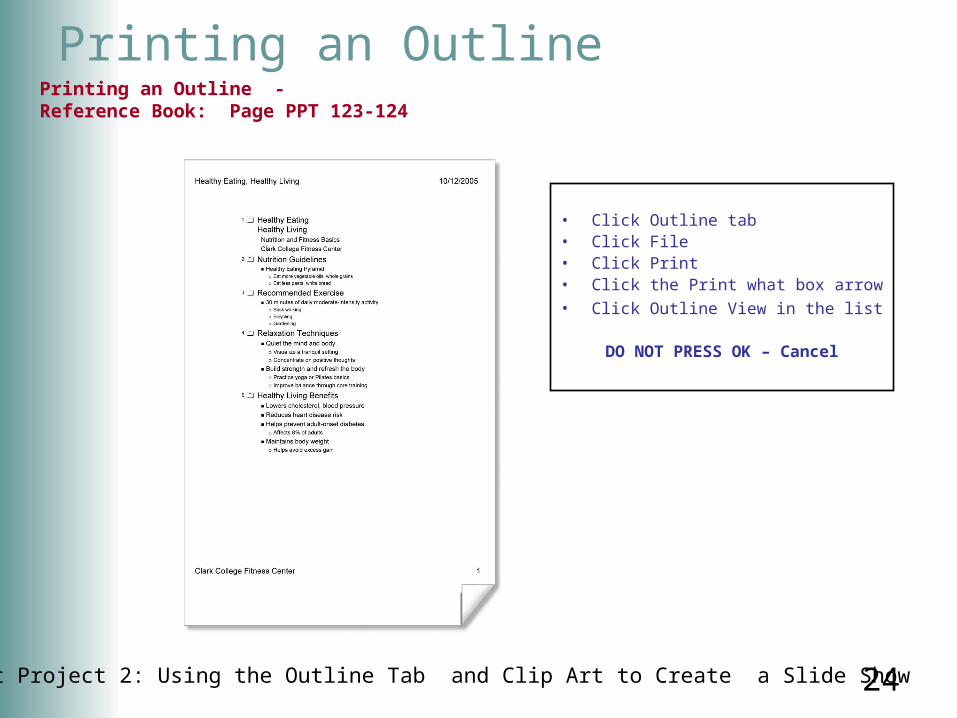
24PowerPoint Project 2: Using the Outline Tab and Clip Art to Create a Slide Show
Printing an Outline
• Click Outline tab• Click File• Click Print• Click the Print what box arrow
• Click Outline View in the list
DO NOT PRESS OK – Cancel
Printing an Outline -Reference Book: Page PPT 123-124

25PowerPoint Project 2: Using the Outline Tab and Clip Art to Create a Slide Show
Saving Changes & Quitting PowerPoint
• Click Close button on the PowerPoint title bar• If prompted, click the Yes button to save changes

26PowerPoint Project 2: Using the Outline Tab and Clip Art to Create a Slide Show
Summary
• Start and customize a new slide show from an outline• Add a slide and create a closing slide on the Outline tab• Create text slides with multi-level bulleted lists on the
Outline tab• Save and review a presentation• Insert clip art
27PowerPoint Project 2: Using the Outline Tab and Clip Art to Create a Slide Show
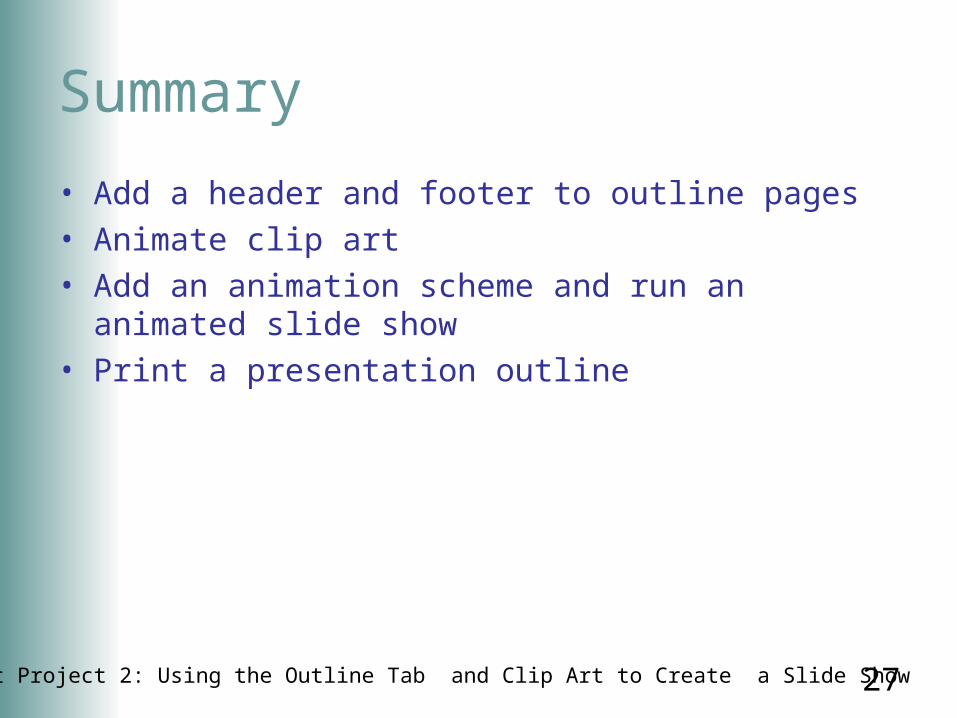
Summary
• Add a header and footer to outline pages• Animate clip art• Add an animation scheme and run an animated slide
show• Print a presentation outline
Office 2003Introductory Concepts
and Techniques
M i c r o s o f t
PowerPoint Project 2 Complete
Any questions?
Related Documents