NZ subduction zone model Instructions Page 1 You will need: Page 1 and 2 of Nisland_model_pieces.pdf printed onto paper (ordinary photocopy paper, 80gms), then pasted (spray glue is ideal) onto 5mm white foam board (a white foam core sandwiched between layers of paper – very easy to cut) Page 3 and 4 of Nisland_model_pieces.pdf printed onto thick paper (120 or 140gms) Craft knife Metal ruler Cutting mat PVA glue Piece of soft, flexible paper (e.g. crepe paper) - 70mm x 70mm General comments • On the printed sheets, a number in a circle (e.g. ) is the piece number • On some pieces are areas enclosed by dotted lines. These indicate where a piece needs to be glued – a number refers to the piece to be attached • Cut out and glue as accurately as you can • When cutting straight lines, use a metal ruler as a guide • Keep the knife vertical when cutting foam board • Don’t over-do the glue! Assemble base • Cut out foam board pieces 1-5, and paper piece 6 • Glue 4 onto the end of piece 1. With 1 flat on the table, make sure 4 is vertical. Note that printed side faces inwards. 12

Welcome message from author
This document is posted to help you gain knowledge. Please leave a comment to let me know what you think about it! Share it to your friends and learn new things together.
Transcript
NZ subduction zone model Instructions Page 1 You will need: Page 1 and 2 of Nisland_model_pieces.pdf printed onto paper (ordinary photocopy paper, 80gms), then pasted (spray glue is ideal) onto 5mm white foam board (a white foam core sandwiched between layers of paper – very easy to cut) Page 3 and 4 of Nisland_model_pieces.pdf printed onto thick paper (120 or 140gms) Craft knife Metal ruler Cutting mat PVA glue Piece of soft, flexible paper (e.g. crepe paper) - 70mm x 70mm General comments
• On the printed sheets, a number in a circle (e.g. ) is the piece number
• On some pieces are areas enclosed by dotted lines. These indicate where a piece needs to be glued – a number refers to the piece to be attached
• Cut out and glue as accurately as you can
• When cutting straight lines, use a metal ruler as a guide
• Keep the knife vertical when cutting foam board
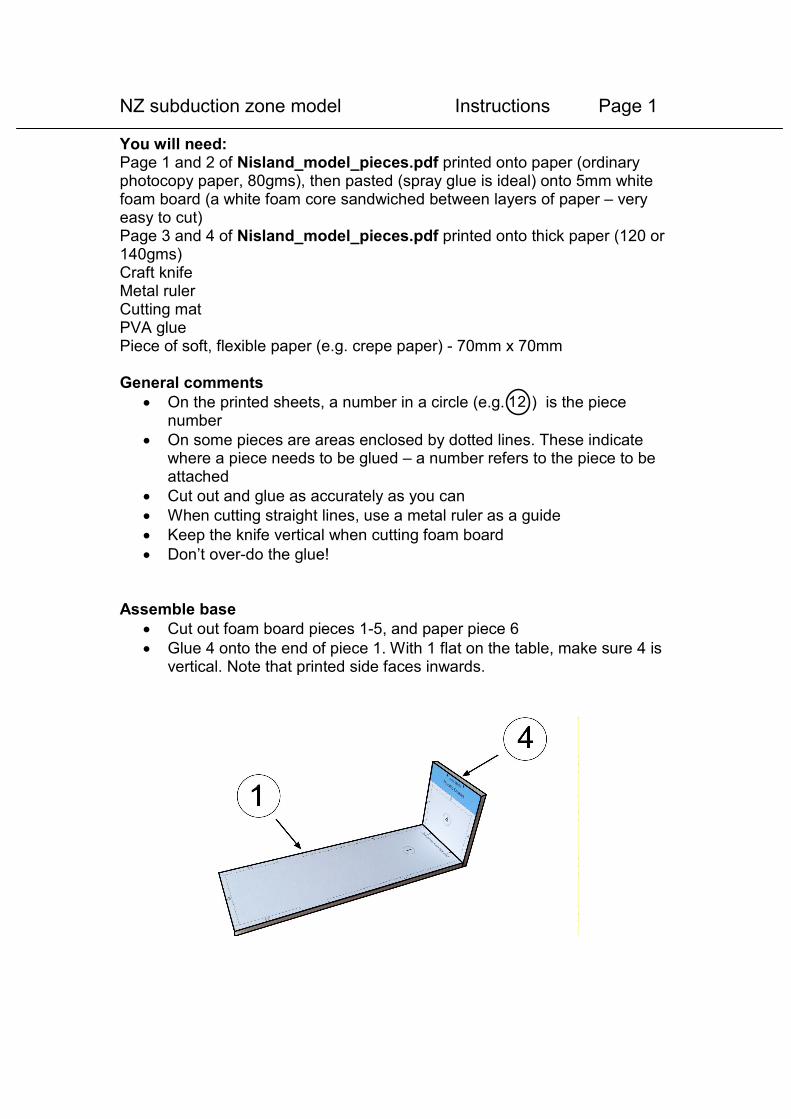
• Don’t over-do the glue! Assemble base
• Cut out foam board pieces 1-5, and paper piece 6
• Glue 4 onto the end of piece 1. With 1 flat on the table, make sure 4 is vertical. Note that printed side faces inwards.
12
NZ subduction zone model Instructions Page 2
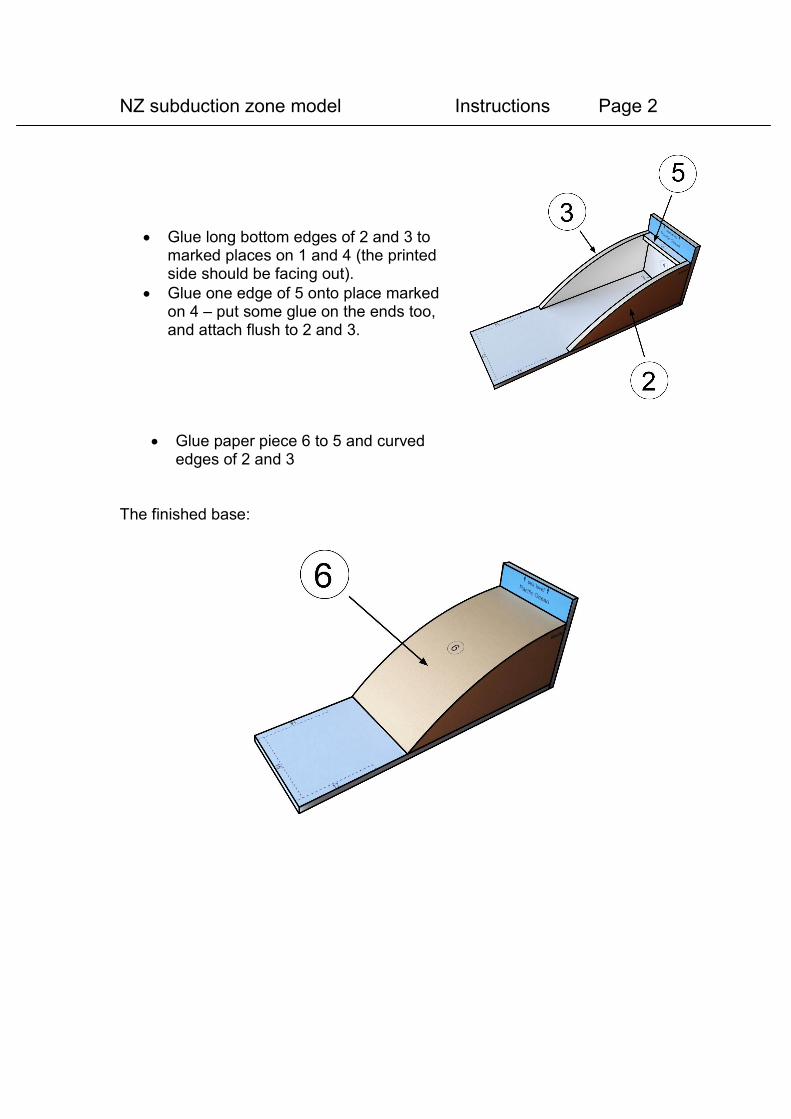
• Glue long bottom edges of 2 and 3 to marked places on 1 and 4 (the printed side should be facing out).
• Glue one edge of 5 onto place marked on 4 – put some glue on the ends too, and attach flush to 2 and 3.
• Glue paper piece 6 to 5 and curved edges of 2 and 3
The finished base:
NZ subduction zone model Instructions Page 3 Assemble the Pacific Plate
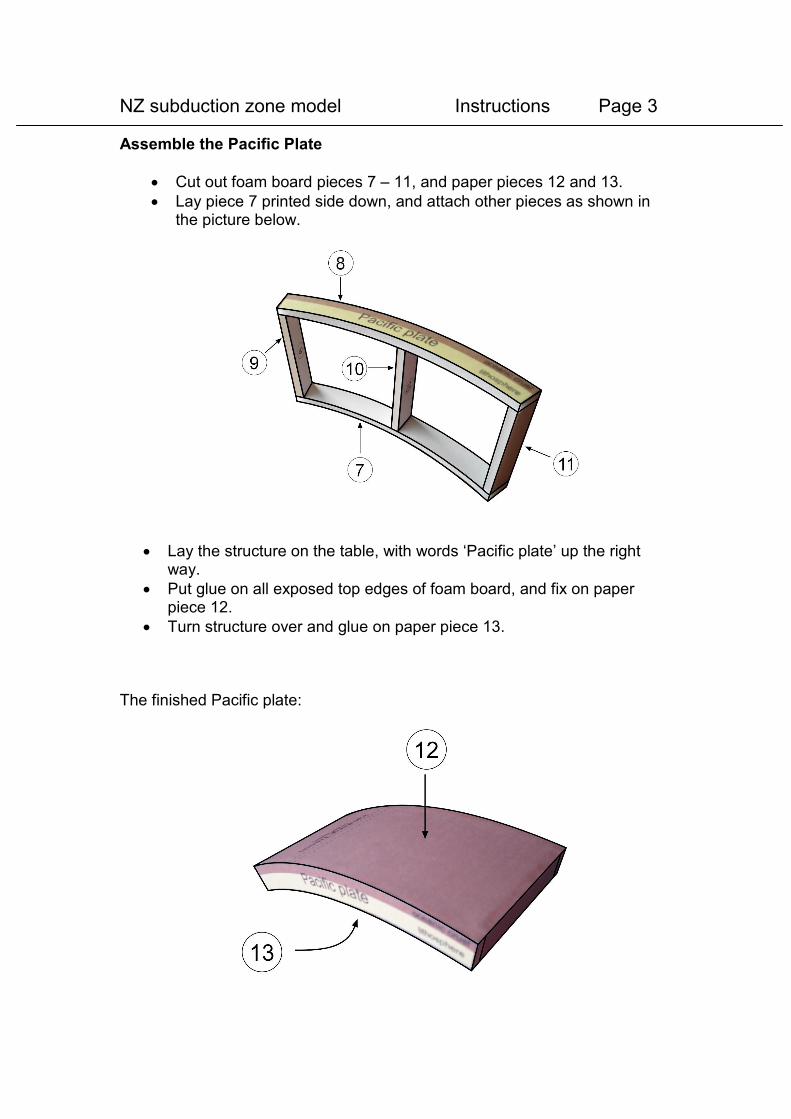
• Cut out foam board pieces 7 – 11, and paper pieces 12 and 13.
• Lay piece 7 printed side down, and attach other pieces as shown in the picture below.
• Lay the structure on the table, with words ‘Pacific plate’ up the right way.
• Put glue on all exposed top edges of foam board, and fix on paper piece 12.
• Turn structure over and glue on paper piece 13. The finished Pacific plate:
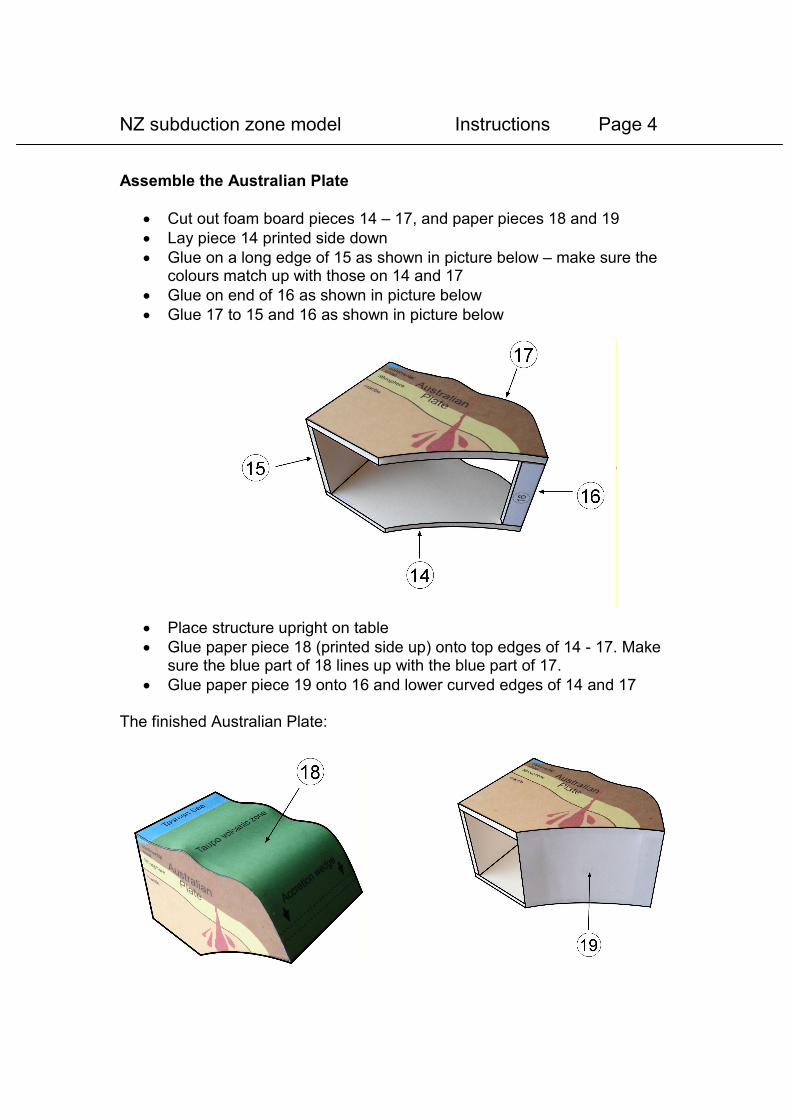
NZ subduction zone model Instructions Page 4 Assemble the Australian Plate
• Cut out foam board pieces 14 – 17, and paper pieces 18 and 19
• Lay piece 14 printed side down
• Glue on a long edge of 15 as shown in picture below – make sure the colours match up with those on 14 and 17
• Glue on end of 16 as shown in picture below
• Glue 17 to 15 and 16 as shown in picture below
• Place structure upright on table
• Glue paper piece 18 (printed side up) onto top edges of 14 - 17. Make sure the blue part of 18 lines up with the blue part of 17.
• Glue paper piece 19 onto 16 and lower curved edges of 14 and 17 The finished Australian Plate:

NZ subduction zone model Instructions Page 5 Putting it all together
• Place the Pacific plate on top of the curve of the base (see picture below). The Hikurangi Trench should be nearer the top.
• Glue the bottom of the Australian Plate structure on to places marked 14, 15 and 17 on base. You may need to adjust the exact position of the Australian Plate so that it traps the Pacific plate firmly against the base. The Pacific plate should stay at the top of the slope, and only move down when pushed.
• Take the piece of 70 x 70mm soft paper and fold over 5mm of one side – make a sharp crease
• Glue this tab between the dotted lines marked ‘Accretion wedge’ on the Australian Plate. Don’t let glue spread outside this area. Use picture below as guide.
• Glue the other end of the soft paper between the dotted lines marked Hikurangi Trench on the Pacific plate. Keep glue between the dotted lines.
• Cut out the two small foam board volcanoes (pieces 20) or make your own volcanoes. Place these in the Taupo Volcanic Zone.
You have finished your model:
Related Documents