Nursing Procedure Manual Nobel Medical College Teaching Hospital Biratnager,Nepal

Welcome message from author
This document is posted to help you gain knowledge. Please leave a comment to let me know what you think about it! Share it to your friends and learn new things together.
Transcript

Nursing Procedure Manual
Nobel Medical College Teaching
Hospital Biratnager,Nepal

Nursing Procedure Manual
Nobel Medical College Teaching Hospital Biratnager,
Nepal
Editors
Ms. Nilam Jha, Asst. Professor, Ac. Nursing Director
Ms. Suja Khatri, Lecturer
Ms. Pammi Shah, Lecturer
Co –Editors
Ms. Rameshwari Singh, Lecturer
Ms. Khushi Pokhrel, Lecturer
Ms. Nyamika K. C, Lecturer
Ms. Mamta K.C, Lecturer
Ms. Bhumika Khatiwada, Lecturer
Ms Nisha Shah, Lecturer
Ms Banhi Pokhrel, Lecturer
First Edition
Year of Publication: 2022
Published By
Nursing Faculty and Clinical Nursing Administration
Nobel Medical College and Teaching Hospital

Users of the Nursing Procedure Manual
1. Nursing Academy and Clinical Nursing
Administration
2. Nursing Faculty
3. Nursing Instructor
4. Nursing Supervisor
5. Nursing Incharge
6. Nursing staff
7. Different Level Nursing students
8. Administration
9. Other Health care workers

FOREWORD
It gives me great pride and joy in presenting the 'Nursing Procedure Manual' for Nobel Medical
College Teaching Hospital Biratnagar 4, Nepal.
Knowledge gained through education has been the driving force for the progress of mankind. This
coupled with human experience has helped to provide quality care. The workforce of nurses is an
extremely vital component of healthcare and they act as a direct interface between the hospital and
patients. Working in a tertiary care institute places several demands upon them for efficient
delivery of their responsibilities.
This manual provides guidance on basic nursing procedures on various aspects of nursing services.
I am thankful to the academic and clinical nursing team for spearheading this task.
I am sure that this manual will provide a fresh and engaging perspective on the aforementioned
subjects for the present and future nursing manpower.

FOREWORD
Nursing service is an integral part in the health care delivery system. Nursing service is considered
to be the backbone of the health care facility. This Nursing Procedure Manual aims at providing a
positive resource to nurses, so that they can be further more competent theoretically and practically
to improve the quality, wellbeing and safety of the patients working in one of the largest tertiary
care institutions in Eastern part of Nepal.
My heartly congratulations to Academic and Clinical Nursing Department Team, for successfully
taking out the 1st edition of Nursing Procedure Manual. I also congratulate all the members directly
and indirectly contributed in making this manual a knowledge resource.
This manual will be helpful for nursing professional working in our students , different clinical
areas and will also assist in training new staff . It will provide key information and as a guidance
about the Nursing Services in both theory and practical manner.

FOREWORD
I feel great pleasure to be able to write the foreword for Nursing Procedure Manual, Nobel Medical
College Teaching Hospital. The excellent writing and contents of the manual cover issues
applicable to various facets of nursing services, which are commonly faced in healthcare settings.
On any given day, nursing professionals handle a wide array of responsibilities ranging from
patient care, ward management, human resources, facilities management, as well as attendants’
management. This manual is aimed at standardizing nursing procedures, assisting in training new
staff, and having information readily available to the nursing fraternity. I congratulate the academic
and clinical nursing departments for their commitment and efforts in developing this manual.

PREFACE
Nursing procedure manual is the first nursing procedure manual published in Nobel Medical
College Teaching Hospital. Nursing service is an integral part of NMCTH, which aims at high
quality nursing care to the patients. The professional nurses work in an environment that
encourages professionalism and expertise in providing comprehensive patient care with the
members of allied disciplines in the hospital.
Nursing is a unique profession that combines both an “art” and a “science.” The “art” or caring
component of nursing is an aspect that each of us brings to the profession with our individual
backgrounds and experiences. This manual identifies the psychomotor activities required to
perform nursing skills safely. Psychomotor skills are an integral component of the practice of
nursing. Both the teaching and learning of psychomotor skills include an emphasis on cognitive
learning. One week of workshop programme was conducted with the expertise from various
speciality of nursing and the manual was published entitled “NURSING PROCEDURE
MANUAL’’. This procedure manual would serve nursing students, avid readers as well as a
reference to healthcare professionals working in different areas of practice with an up to date
information addendum in different basic nursing procedure.
Special thanks to Ms. Indira Sharma Baral,Managing Director of Nobel Medical College Teaching
Hospital, Prof. Dr.Ram Hari Ghimire, Principal of NMCTH, Dr.BiswanthAdhikari, Deputy CEO,
Dr. Rajesh Nepal,Hospital Director,Prof.Dr.RituBaral, Vice Principal,Dr.Mukti Acharya,Deputy
Hospital Director of NMCTH and Mr. Rudra Prasad Sharma,General Manager of NMCTH and Mr
Dipesh Rai, Chief Administrative Officer for their generous help in publishing this book by
NMCTH.
With the active involvement of Ms.Pratikshya Tripathi, Clinical Nursing Director,Nursing
faculties,Matron, Ms. Kalpana Pokharel,Nursing Supervisor and ward Incharges of NMCTH for
their valuable contributions. Similarly, I want to acknowledge the valuable contributions of
finance, administrative department and IT staffs of NMCTH for their kind help.
To conclude, I hope that, this manual, "Nursing Procedure Manual” shall help all medical
professionals and students involved in the management of patients working in different settings.

List of Contributors
S.N. Name Designation Department 1 Ms. Nilam Jha Asst. Professor& Ac. Nursing
Director
Dept. Medical-Surgical
Nursing, Nursing Department
2 Ms. PratikshyaTripathi Asst. Professor& Clinical
Nursing Director
Dept. Women’s Health
Development, Clinical Nursing
Administration
3 Ms. Kalpana Pokhrel Ac. Matron Clinical Nursing
Administration
4 Ms. Sita Chapagain Lecturer Dept. Psychiatry Nursing,
Nursing Department
5 Ms. Rameswory singh Lecturer Dept. Medical-Surgical
Nursing, Nursing Department
6 Ms. Indira Pokhrel Lecturer Dept. Child Health Nursing,
Nursing Department
7 Ms. Sarswata Neupane Lecturer Dept. Women’s Health &
Development, Nursing
Department
8 Ms. Suja Khatri Lecturer Dept. Psychiatry Nursing,
Nursing Department
9 Ms. Kabita Dhami Lecturer Dept. Medical-Surgical
Nursing, Nursing Department
10 Ms. Mamta Kc Lecturer Dept. Women’s Health &
Development, Nursing
Department
11 Ms. Khushi Pokhrel Lecturer Dept. Medical-Surgical
Nursing, Nursing Department
12 Ms. Banhi Pokhrel Lecturer Dept. Community Health
Nursing, Nursing Department
13 Ms. Pammi Shah Lecturer Dept. Medical-Surgical
Nursing, Nursing Department
14 Ms. Nisha Shah Lecturer Dept. Child Health Nursing,
Nursing Department
15 Ms. Bhumika Khadiwada Lecturer Dept. Psychiatry Nursing,
Nursing Department
16 Ms. Nyamika K.c. Lecturer Dept. Medical-Surgical
Nursing, Nursing Department
17 Ms. Dikshya Gautam Nursing Supervisor Obstetrics & gynecology ward
18 Ms .Deepika Biswash Nursing Supervisor Critical Area
9 Ms. Anshu Rajbanshi Nursing Incharge Postnatal Ward
20 Ms. Krishna Chaudhary- Nursing Incharge NICU, PICU

Contents
SN CONTENTS PAGE No.
1. Fundamentals of Nursing Procedures
1-123
2. Medical-Surgical Nursing Procedures
124-192
3. Maternal and Neonatal Health Procedures
193-229
4. Pediatric Nursing Procedures
230-294
5. Psychiatric Nursing Procedure
295-307

TABLE OF CONTENTS
FUNDAMENTAL OF NURSING
S.N. LIST OF PROCEDURES PAGE NO.
1. Admission of the patient 1-2
2. Transfer of patient 2-3
3. Discharge procedure 3-4
4. Bed making a. Unoccupied bed b. Occupied bed c. Post-operative bed
4-13 4-8
8-11 11-13
5. Recording of vital signs a. Vitals signs b. Temperature: Oral, Axillary and groin, Rectal c. Pulse: Radial, Apical d. Respiration e. Measuring Blood Pressure
13-31 13-16 17-19 20-23
24 25-31
6. Measuring Intake output 31-33
7. Personal Hygiene a. Oral care: Unconscious patient, Conscious patient b. Bed bath c. Hair wash d. Back care e. Nail care
34-50 34-40 41-44 45-47 47-48 48-50
8. Bowel care a. Irrigating Enema b. Retention Enema c. Rectal suppository
50-54 51-52 52-53 53-54
9. Bladder care: a. Urinary Catheterization b. Applying condom catheter c. Catheter care
54-59 54-57
57 58-59
10. Collection of specimen a. Performing Venipuncture b. Assisting in obtaining blood for culture c. Collecting urine specimen d. Collecting a single voided specimen e. Collecting a 24 hour urine specimen f. Collecting a urine specimen from a retention catheter g. Collecting a urine culture h. Collecting a stool specimen i. Collecting a sputum specimen
- Routine test - Collecting a sputum culture
59-78 59-63 63-65
65 66-68 68-69 70-71 71-73 73-75 75-78 75-77 77-78

11. Administration of medication a. Administration of oral medication b. Administration through Naso-Gastric(NG) tube c. Loading of medication from an ampoule d. Loading of medication from a vial e. Prevention of needle stick injury f. Giving an intra muscular injection g. Starting an Intra-venous infusion h. Maintenance of an Intra-venous system i. Administration medication by Heparin Lock j. Nebulization Therapy
79-106 79-82 83-85 85-87 87-89
90 91-95
96-100 100-103
104 105-106
12. Cleaning a wound and applying a sterile dressing 106-109
13. Supplying oxygen inhalation a. Nasal cannula method b. Mask method: simple face mask
110-115 112-114 114-115
14.
Care for NG tube a. Insertion of NG tube b. Removal of NG tube
115-118 115-118
118
15. Using Personnel Protective Equipment (PPE) 119-121
16. Glasgow Coma Scale (GCS) 121-122
17. Care of a dead body 122-123


1
ADMISSION PROCEDURE
Definition
Admission of a patient means allowing and facilitating a patient to stay in the hospital
unit or ward for observation, investigation and treatment of the diseases he or she is
suffering.
Purposes:
• To provide the immediate care.
• To provide comfort and safety to the patient.
• To assist the patient in adjusting to the hospital environment.
• To obtain information about the client to establish therapeutic nurse –patient
relationship.
• To undertake different laboratory and diagnostic procedures.
• To involve patient and family in planning and providing comprehensive care.
Types of admission:
1. Routine admission: These are planned for clients suffering from clinical
disorders and who need to undergo any treatment modality or diagnostic
procedure.
2. Emergency admission: These are done for clients suffering from acute
conditions or life threatening conditions like cardiac arrest, stroke, poisoning,
accidents etc.
Equipment’s
• Admission form
• TPR sheet, medicine chart, I/O chart, nurses record chart
• Vitals signs tray
• Height/weight scale
Procedure:
1. Wash hands. Prepare all required equipment’s.
2. Prepare an appropriate type of bed with adequate adjusted height of the bed.
3. Receive the patient and his/her family with warm approach.
4. Identify the patient with the admission slip. Greet the patient and his/her
relatives in a pleasant manner and introduce yourself, other staff members to
them.
5. Make the patient comfortable and assist him/her according to needs.
6. Check the details such as advance payment, ward and unit assigned.
7. Check for admission consent whether patient and relatives duly sign it.
8. Prepare case sheet and bedside chart.
9. Assess and record the vital signs including height and weight of patient.
10. Obtain initial patient history and perform head to examination of patient.

2
11. Assess the immediate need, see the chart and follow the immediate instructions
including medications.
12. Help the patient to change hospital’s gown. Handover the patient’s valuable
things to family.
13. Orient the patient and family with ward, ward routines, supportive hospital
facilities such as pharmacy, canteen, etc.
14. Explain the hospital policies regarding visitor hours, gate pass, attendants
staying with patients and restriction in ward.
15. Explain the daily routine of the ward, including morning care, doctors round,
mealtime, and medication time.
16. Ask the patient’s relatives to bring daily use equipment such as towel, soap, oil,
brush, toothpaste, comb, etc.
17. Record the patient details in admission book and census form according to
hospital policy.
18. Write a complete admission report in the patient’s chart including date, time or
arrival, client’s condition, vital signs, any abnormalities and interventions done.
TRANSFER OF PATIENT
Definition
Transfer of a patient is defined as process of shifting the patient from one unit to another
in the same hospital or between hospitals.
Purposes:
• To provide more specialized care to according to patients need.
• To continue the care in another unit or hospital.
Equipment’s
• Wheel chair/ stretcher
• O2 cylinder with tube
Procedure
1. Check written transfer order and assess the reason for transfer.
2. Explain to the patient and visitor about the purpose of transfer.
3. Complete the patient chart and up to date.
4. Inform the receiving unit and ensure the bed is ready.
5. Assess the patient’s physical condition and determine the mode of
transportation.
6. Instruct the visitor to collect the belongings of patient and keep ready for
shifting.
7. Assist in transferring the patient to stretcher or wheel chair using proper body
mechanics.

3
8. Gather equipment supplies and prescription that the patient has taken.
9. Check the final assessment of patient’s stability (vital signs, clear airway, IV
lines, level of consciousness, O2 supply etc.)
10. Record the transfer out in admission/discharge register specifying the ward/unit.
11. Doctor/ Nurse/ Attendant should accompany the patient to receiving unit or
hospital.
12. Handover patient along with his/her document to the receiving person in
concerned unit.
13. After the patient has gone, the bed should be made clean, tidy, and keep ready
for next use.
DISCHARGE PROCEDURE
Definition
Discharge is the preparation of the patient for departure from the hospital with approval
of the doctors.
Purposes:
• To reduce the duration of stay at the hospital.
• To prepare the patient and family member for continuity of care at home.
• To co-ordinate referrals to appropriate hospital or rehabilitation center.
Equipment’s:
• Patient’s all record
• Discharge paper/slip
• Admission/ discharge register
• Wheel chair or stretcher
Procedure:
1. Check written order for discharge.
2. Inform the patient and relatives in time.
3. Prepare and compile the patient’s entire document.
4. Collect the written discharge letter.
5. Send the client discharge file to billing section.
6. After clearance, provide instructions according the discharge ticket
7. Provide discharge instruction about diet, rest sleep and exercise, medication
including dose, time, duration, and complication of diseases, home care and
follow up visits.
8. Provide information about home care facilities available.
9. Handover the patient’s belonging and any valuable which have been kept safely
to the patient’s relatives.

4
10. Assist the patient in gathering and packing personal items to go home.
11. If the patient is ambulatory, instruct relatives to assist him.
12. Obtain wheel chair or stretcher for the patient who is unable to ambulate.
13. Complete the documentation of discharge with entry in admission/ discharge
register and census form.
14. Record the discharge report in nurse’s note.
15. After the patient has gone, the bed should be made clean and tidy to keep ready
for next use.
BED MAKING
UNOCCUPIED BED
Definition
A bed made without patient in the bed.
Purpose
• To provide clean and comfortable bed for the patient.
• To reduce the risk of infection by maintaining a clean environment.
• To prevent bed sores by ensuring there are no wrinkles to cause pressure
points.
Equipment
• Mattress (1)
• Bed sheets (2)
• Bottom sheet (1)
• Top sheet (1)
• Pillow (1)
• Pillow cover (1)
• Mackintosh (1)
• Draw sheet (1)
• Blanket (1)
• Savlon water or Dettol water in basin
• Sponge cloth (4)
• to wipe with solution (1)
• to dry (1)
• When two nurses do bed make, sponge cloth is needed two each.
• Kidney tray or paper bag (1)
• Laundry bag or Bucket (1)
• Trolley (1)

5
Procedure
Action Rationale
1) Explain the purpose and procedure to
the client.
• Providing information fosters
cooperation.
2) Perform hand hygiene. • To prevent the spread of
infection.
3) Prepare all required Equipment’s
and bring the articles to the bedside.
• Organization facilitates
accurate skill performance
4) Move the chair and bed side locker • It makes space for bed
making and helps effective
action.
5) Clean bed side locker: wipe with wet
dry
• To maintain the cleanliness
6) Clean the mattress:
a. Stand in right side.
b. Start wet wiping from top to center
and from center to bottom in right
side of mattress.
c. Gather the dust and debris to the
bottom.
d. Collect them into kidney tray.
e. Give dry wiping as same as procedure
2).
f. Move to left side.
g. Wipe with wet and dry the left side.
• To prevent the spread of
infection

6
7) Move to right side
Bottom sheet:
a. Place and slide the bottom sheet
upward over the top of the bed
leaving the bottom edge of the
sheet.
b. Open it lengthwise with the
centerfold along the bed center.
c. Fold back the upper layer of the
sheet toward the opposite side of the
bed.
d. Tuck the bottom sheet securely
under the head of the mattress
(approximately 20-30cm). Make a
mitered corner.
i. Pick up the selvage edge with
your hand nearest the hand of the
bed.
ii. Lay a triangle over the side of the
bed
iii. Tuck the hanging part of the
sheet under the mattress.
iv. Drop the triangle over the side of
the bed.
v. Tuck the sheet under the entire
side of bed.
e. Repeat the same procedure at the
end of the corner of the bed
f. Tuck the remainder in along the side
• Unfolding the sheet in this
manner allows you to make
the bed on one side.
• A mitered corner has a neat
appearance and keeps the
sheet securely under the
mattress.
• Tucking the bottom sheet
will be done by turn, the
corner of top firstly and the
corner of the bottom later.
• To secure the bottom sheet on
one side of the bed.
8) Mackintosh and draw sheet:
a. Place a mackintosh at the middle
of the bed (if used), folded half,
with the fold in the center of the
bed Used), folded half, with the
fold in the center of the bed.
b. Lift the right half and spread it
forward the near Side.
c. Tuck the mackintosh under the
mattress.
d. Place the draw sheet on the
• Mackintosh and draw sheet
are additional protection for
the bed and serves as a lifting
or turning sheet for an
immobile client.

7
mackintosh. Spread and tuck as
same as procedure.
9) Move to the left side of the bed.
Bottom sheet , mackintosh and draw sheet:
a. Fold and tuck the bottom sheet as in
the above procedure 7.
b. Fold and tuck both the mackintosh
and the draw sheet under the mattress
as in the above procedure 8.
• Secure the bottom sheet,
mackintosh and draw sheet
on one side of the bed
10) Return to the right side. Top sheet
and blanket:
a. Place the top sheet evenly on the
bed, centering it in the below 20-
30cm from the top of the
mattress.
b. Spread it downward.
c. Cover the top sheet with blanket
in the below 1 feet from the top
of the mattress and spread
downward.
d. Fold the cuff (approximately 1
feet) in the neck part
e. Tuck all these together under
the bottom of mattress. Miter the
corner.
f. Tuck the remainder in along the
side
• A blanket provides warmth.
• Making the cuff at the
neck part prevents
irritation from blanket edge.
• Tucking all these pieces
together saves time and
provides a neat appearance
11) Repeat the same as in the above
procedure 10 in left side.
• To save time in this manner
12) Return to the right side. Pillow and
pillow cover
a. Put a clean pillow cover on the
pillow.
b. Place a pillow at the top of the bed
in the center with the open end away
from the door.
• A pillow is a comfortable
measure.
• Pillow cover keeps
cleanliness of the pillow and
neat.
• The open end may collect
dust or organisms.
• The open end away from
the door also makes neat.
13) Return the bed, the chair and bedside
table to their proper place.
• Bedside necessities will be
within easy reach for the
client.

8
14) Replace all Equipment’s in
proper place. Discard lines
appropriately.
• It makes well setting for the
next.
• Proper line disposal
prevents the spread of
infection.
15) Perform hand hygiene • To prevent the spread of
infection.
❖ Nursing Alert
• Do not let your uniform touch the bed and the floor not to contaminate yourself.
• Never throw soiled lines on the floor not to contaminate the floor.
• Staying one side of the bed until one-step completely made saves steps and
time to do effectively and save the time.
OCCUPIED BED
Definition
A bed made with patient in the bed.
Purpose:
• To provide clean and comfortable bed for the patient.
• T reduce the risk of infection by maintaining a clean environment.
• To prevent bed sores by ensuring there are no wrinkles to cause pressure points.
Equipment
• Bed sheets(2)
• Bottom sheet ( or bed cover) (1)
• Top sheet (1)
• Draw sheet (1)
• Mackintosh (1) (if contaminated or needed to change)
• Blanket (1) ( if contaminated or needed to change)
• Pillow cover (1)
• Savlon water or Dettol water in bucket
• Sponge cloth (2)- to wipe with solution (1)
-to dry (1) when two nurses do the procedure, sponge cloth is
needed two each.
• Kidney tray or paper bag (1)
• Laundry bag or bucket (1)
• Trolley (1)

9
Procedure
Care Action Rationale
1) Check the client’s identification and
condition.
• To assess necessity and sufficient
condition
2) Explain the purpose and procedure
to the client
• Providing information fosters
cooperation
3) Perform hand hygiene • To prevent the spread of infection.
4) Prepare all required Equipment’s
and bring the articles to the
bedside.
• Organization facilitates accurate
skill performance
5) Close the curtain or door to the
room. Put screen.
• To maintain the client’s privacy.
6) Remove the client’s personal
belongings from bedside and put
then into the bedside locker or safe
place.
• To prevent personal belongings
from damage and loss.
7) Lift the client’s head and move
pillow from center to the left side.
• The pillow is comfortable measure
for the client.
8) Assist the client to turn toward left
side of the bed. Adjust the pillow.
Leaves top sheet in place.
• Moving the client as close to the
other side of the bed as possible
gives you more room to make the
bed.
• Top sheet keeps the client warm and
protect his or her privacy.
9) Stand in right side: Loose bottom bed
linens. Fanfold (or roll) soiled linens
from the side of the bed and wedge
them close to the client.
• Placing folded (or rolled) soiled
linen close to the client allows
more space to place the clean
bottom sheets.
10) Wipe the surface of mattress by
sponge cloth with wet and dry.
• To prevent the spread of infection.
11) Bottom sheet, mackintosh and draw
sheet:
a. Place the clean bottom sheet
evenly on the bed folded
lengthwise with the centerfold as
close to the client’s back as
possible.
b. Adjust and tuck the sheet tightly
under the head of the mattress,
making mitered the upper
corner.
c. Tighten the sheet under the end of
the mattress and make mitered the
• Soiled linens can easily be
removed and clean linens are
positioned to make the other side of
the bed.

10
lower corner.
d. Tuck in alongside.
e. Place the mackintosh and the
draw sheet on the bottom sheet and
tuck in them together.
12) Assist the client to roll over the
folded (rolled) linen to right side
of the bed. Readjust the pillow and
top sheet.
• Moving the client to the bedother
side allows you to make the bed on
that side.
13) Move to left side: Discard the soiled
linens appropriately. Hold them
away from your uniform. Place
them in the laundry bag (or bucket).
• Soiled linens can contaminate
your uniform, which may come
into contact with other clients.
14) Wipe the surface of the mattress by
sponge cloth with wet and dry.
• To prevent the spread of infection.
15) Bottom sheet, mackintosh and draw
sheet:
a. Grasp clean linens and gently pull
them out from under the client.
b. Spread them over the bed’s
unmade side. Pull the linens taut
c. Tuck the bottom sheet tightly
under the head of the mattress and
miter the corner.
d. Tighten the sheet under the end
of the mattress and make mitered
the lower corner.
e. Tuck in alongside.
f. Tuck the mackintosh and the
draw sheet under the mattress.
• Wrinkled linens can cause skin
irritation.
16) Assist the client back to the center
of the bed. Adjust the pillow
• The pillow is comfort measure for
the client.
17) Return to right side: Clean top sheet,
blanket:
a. Place the clean top sheet at the top
side of the soiled top sheet.
b. Ask the client to hold the upper
edge of the clean top sheet.
c. Hold both the top of the soiled
sheet and the end of the clean sheet
with right hand and withdraw to
• Tucking these pieces together
saves time and provides neat,
tight corners.

11
downward. Remove the soiled top
sheet and put it into a laundry bag
(or a bucket).
d. Place the blanket over the top
sheet. Fold top sheet back over the
blanket over the client.
e. Tuck the lower ends securely under
the mattress. Miter corners.
f. After finishing the right side, repeat
the left side.
18) Remove the pillow, replace the pillow
cover with clean one, and reposition
the pillow to the bed under the
client’s head.
• The pillow is a comfortable
measures for a client
19) Replace personal belongings
back. Return the bedside locker
and the bed as usual.
• To prevent personal belongings
from loss and provide safe
surroundings
20) Return all Equipment’s to proper
place.
• To prepare for the next procedure
21) Discard linens appropriately.
Perform hand hygiene.
• To prevent the spread of infection.
POST-OPERATIVE BED
Definition:
It is a special bed prepared to receive and take care of a patient returning from surgery.
Purpose:
• To receive the post-operative client from surgery and transfer him/her from a
stretcher to a bed
• To arrange client’s convenience and safety
Equipment required:
• Bed sheets:
• Bottom sheet (1)
• Top sheet (1)
• Draw sheet (1-2)
• Mackintosh or rubber sheet (1-2)
✽According to the type of operation, the number required of mackintosh
and draw sheet is different.
• Blanket (1)
• Hot water bag with hot water

12
• (104- 140 ℉) if needed (1)
• Tray1(1)
• Thermometer, stethoscope, sphygmomanometer: 1 each
• Spirit swab
• Artery forceps (1)
• Gauze pieces
• Adhesive tape (1)
• Kidney tray (1)
• Trolley (1)
• IV stand
• Client’s chart
• Client’s cardex
• According to doctor’s orders:
✓ Oxygen cylinder with flow meter
✓ O2 cannula or simple mask
✓ Suction machine with suction tube
• Airway
✓ Tongue depressor
✓ SpO2 monitor
✓ ECG
• Infusion pump, syringe pump
Procedure
Action Rationale
1) Perform hand hygiene • To prevent the spread of infection
2) Assemble Equipment’s and bring
bed-side
• Organization facilitates accurate
skill performance
3) Strip bed. Make foundation bed as
usual with a large mackintosh, and
cotton draw sheet.
• Mackintosh prevents bottom sheet
from wetting or soiled by sweat,
drain or excrement.
• Place mackintosh according to
operative technique.
• Cotton draw sheet makes the
client felt dry or comfortable
without touching the mackintosh
directly.

13
4) Place top bedding as for closed
bed but do not tuck at foot
• Tuck at foot may hamper the
client to enter the bed from a
stretcher
5) Fold back top bedding at the foot of
bed.
• To make the client ‘s transfer
smooth
6) Tuck the top bedding on one side only. • Tucking the top bedding on one
side stops the bed linens from
slipping out of place and
7) On the other side, do not tuck the top
sheet.
a. Bring head and foot corners of it
at the center of bed and form right
angles.
b. Fold back suspending portion in
1/3 and repeat folding top bedding
twice to opposite side of bed.
• The open side of bed is more
convenient for receiving client than
the other closed side.
8) Remove the pillow. • To maintain the airway
9) Place a kidney-tray on bedside. • To receive secretion
10) Place IV stand near the bed. • To prepare it to hang I/V soon
11) Check locked wheel of the bed. • To prevent moving the bed
accidentally when the client is
shifted from a stretcher to the bed.
12) Place hot water bags(or hot
bottles) in the middle of the bed
and cover with fan folded top if
needed
• Hot water bags (or hot bottles)
prevent the client from taking
hypothermia
13) When the patient comes, remove
hot water bags if put before
• To prepare enough space for
receiving the client
14) Transfer the client:
a. Help lifting the client into the bed
b. Cover the client by the top sheet
and blanket immediately
c. Tuck top bedding and miter a corner
in the end of the bed.
• To prevent the client from
chilling and /or having
hypothermia

14
RECORDING VITAL SIGNS
TEMPERATURE, PULSE, RESPIRATION, BLOOD PRESSURE,
INTAKE OUTPUT CHART
Definition:
Recording vital signs defined as the procedure that takes the sign of basic
physiology that includes temperature, pulse, respiration and blood pressure. If any
abnormality occurs in the body, vital signs change immediately.
Purpose:
• To assess the client’s condition
• To determine the baseline values for future comparisons
• To detect changes and abnormalities in the condition of the client
Equipment’s required:
• Oral/ axilla / rectal thermometer (1)
• Stethoscope (1)
• Sphygmomanometer with appropriate cuff size (1)
• Watch with a second hand (1)
• Spirit swab or cotton (1)
• Sponge towel (1)
• Paper bag (2): for clean (1)
▪ For discard (1)
• Record form
• Ball- point pen: blue (1)
▪ Black (1)
▪ Red (1)
• Steel tray (1): to set all materials
Equipment’s required of taking a vital sign

15
Stethoscope
A stethoscope consists of earpieces, tubing, two heads such as the bell and the
diaphragm.
The bell of head of stethoscope
The bell has cup-shaped and used to correct low-frequency sounds, such as abnormal heart
sounds.
The diaphragm of head of stethoscope
The diaphragm is flat side of the head and used to test high-frequency sounds: breath,
normal breath, and bowel sounds.

Aneroid manometer
Aneroid manometer is a
kind of sphygmomanometer.

17
TEMPERATURE
Taking axillary temperature
Definition:
Measuring/ monitoring patient’s body temperature using clinical thermometer
Purpose:
• To determine body temperature
• To assist in diagnosis
• To evaluate patient’s recovery from illness
• To determine if immediate measures should be implemented to reduce
dangerously elevated body temperature or converse body heat when body
temperature is dangerous low
• To evaluate patient’s response once heat conserving or heal reducing
measures have been implemented
Procedure:
Care Action Rationale
1. Wash your hands. • Handwashing prevents the spread
of infection
2. Prepare all required equipment’s • Organization facilitates accurate
skill performance.
3. Check the client’s identification. • To confirm the necessity
4. Explain the purpose and the
procedure to the client.
• Providing information fasters
cooperation and understanding
5. Close doors or use a screen. • Maintains client’s privacy and
minimize
embarrassment.
6. Take the thermometer and wipe it
with cotton swab from bulb towards
the tube.
• Wipe from the area where few
organisms are present to the area
where more organisms are present
to limit spread of infection
7. Shake the thermometer with
strong wrist movements until the
mercury line falls to at least 95 ℉
(35 ℃).
• Lower the mercury level within
the stem so
that it is less than the client’s
potential body temperature
8. Assist the client to a supine or sitting
position.
• To provide easy access to axilla.
9. Move clothing away from shoulder
and arm
• To expose axilla for correct
thermometer bulb placement

18
10. Be sure the client’s axilla is dry. If it
is moist, pat it dry gently before
inserting the thermometer.
• Moisture will alter the reading.
Under the condition moistening,
temperature is generally
measured lower than the real.
11. Place the bulb of thermometer in
hollow of axilla at anterior inferior
with 45 degree or horizontally. (Fig.
A)
• To maintain proper position of
bulb against blood vessels in
axilla.
12. Keep the arm flexed across the chest,
close to the side of the body (Fig. B)
• Close contact of the bulb of the
thermometer with the superficial
blood vessels in the axilla ensures
more accurate temperature
registration.
13. Hold the glass thermometer in
place for 3 minutes.
• To ensure an accurate reading
14. Remove and read the level of
mercury of thermometer at eye
level.
• To ensure an accurate reading
15. Shake mercury down carefully
and wipe the thermometer from the
stem to bulb with spirit swab.
• To prevent the spread of infection
16. Explain the result and instruct
him/her if he/she has fever or
hypothermia.
• To share his/her data and provide
care needed immediately
17. Dispose of the equipment properly
and wash your hands
• To prevent the spread of infection
18. Replace all equipment’s in proper
place.
• To prepare for the next procedure
19. Shake mercury down carefully
and wipe the thermometer from the
stem to bulb with spirit swab
• To prevent the spread of infection
20. Record in the client’s chart and give
signature on the chart.
• Axillary temperature readings
usually are lower than oral
readings. Giving signature
maintains professional
accountability
21. Report an abnormal reading to the
senior staff.
• Documentation provides ongoing
data collection

19
F i g . A P l a c i n g the glass thermometer
Into the axilla Fig. B keeping the forearm across the chest
Taking Oral temperature
Place the thermometer under the tongue for 1 minutes and keeps the lips closed
Taking rectal temperature
Lubricate the thermometer and insert half to 1 inch into the rectum for one minute, then, hold the
buttock closed.
The rectal temperature, a core temperature, is considered one of the most accurate routes.
The rectal site should not be used in newborns, children with diarrhea and in patients who had
undergone rectal surgery because the insertion of the thermometer into the rectum can slow heart
rate by stimulating the vagus nerve
Average Normal Temperature for Healthy Adults at various sites
Axillary Oral Rectal
36.5˚C/97.7˚F 37.0˚C/98.6˚F 37.5˚C/99.5˚F

20
PULSE
Measuring a Radial Pulse
Definition: Checking presence, rate, rhythm and volume of throbbing of artery.
Purpose:
• To determine number of heart beats occurring per minute(rate)
• To gather information about heart rhythm and pattern of beats
• To evaluate strength of pulse
• To assess heart's ability to deliver blood to distant areas of the blood viz. fingers
and lower extremities
• To assess response of heart to cardiac medications, activity, blood volume and gas
exchange
• To assess vascular status of limbs
Procedure:
Care Action Rationale
1. Wash hands. • Hand washing prevents the
spread of infections
2. Prepare all equipment’s required
on tray.
• Organization facilitates accurate
skill problems
3. Check the client’s identification • To confirm the necessity
4. Explain the procedure and
purpose to the client.
• Providing information fosters
cooperation and understanding
5. Assist the client in assuming a
supine or sitting position.
a) If supine, place client’s forearm
straight alongside body with
extended straight (Fig. C) or
upper abdomen with extended
straight (Fig. D)
b) If sitting, bend client’s elbow
90 degrees and support lower
arm on chair (Fig. E) or on
nurse’s arm slightly flex the wrist
(Fig. F)
• To provide easy access to pulse
sites
• Relaxed position of forearm and
slight flexion of wrist promotes
exposure of artery to palpation
without restriction.
6. Count and examine the pulse
a) Place the tips of your first, index,
and third finger over the client's
radial artery on the inside of the
wrist on the thumb side.
• The fingertips are sensitive and
better able to feel the pulse. Do
not use your thumb because it
has a strong pulse of its own.
• Moderate pressure facilitates
palpation of the pulsations. Too

21
b) Apply only enough pressure to
radial pulse.
c) Using watch, count the pulse
beats for a full minute.
d) Examine the rhythm and the
strength of the pulse.
much pressure obliterates the
pulse, whereas the pulse is
imperceptible with too little
pressure
• Counting a full minute permits
a more accurate reading and
allows assessment of pulse
strength and rhythm.
• Strength reflects volume of
blood ejected against arterial
wall with each heart
contraction.
7. Record the rate on the client’s
chart. Sign on the chart.
• Documentation provides
ongoing data collection to
maintain professional
accountability
8. Wash your hands • Handwashing prevents the spread
of infection
9. Report to the senior staff if you
find any abnormalities.
• To provide nursing care and
medication properly and
continuously

22
Fig. C Care Action 5. 1
Placing the client's forearm straight alongside body and putting the fingertips over the
radial pulse
Fig E. Care Action 5. 2
Placing the client’s forearm on the
armrest of chair and putting the
fingertips over the radial pulse

23
Fig. D Care action 5.1
Placing the client’s forearm straight
of across upper abdomen and
putting the fingertips over the radial
pulse
Fig. F Care Action 5. 2 Supporting the client’s
forearm by nurse’s palm with extended
straight and putting three fingertips over
radial pulse

24
RESPIRATION
Definition: Monitoring the involuntary process of inspiration and expiration in a
patient
Purposes:
• To determine number of respirations occurring per minute
• To gather information about rhythm and depth
• To assess response of patient to any related therapy/ medication
Procedure:
Care Action Rationale
1. Close the door and/or use screen. • To maintain privacy
2. Make the client's position
comfortable, preferably sitting or
lying with the head of the elevated
45 to 60 degrees.
• To ensure clear view of chest wall
and abdominal movements. If
necessary, move the bed linen.
3. Prepare count respirations by
keeping your fingertips on the
client’s pulse.
• A client who knows are counting
respirations may not breathe
naturally.
4. Counting respiration:
a) Observe the rise and fall of the
client’s (one inspiration and one
expiration).
b) Count respirations for one full
minute.
c) Examine the depth, rhythm,
facial expression, cyanosis, cough
and movement accessory.
• One full cycle consists of an
inspiration and an expiration.
• Allow sufficient time to assess
respirations, especially when the
rate is with an irregular
• Children normally have an
irregular, more rapid rate. Adults
with an irregular rate require more
careful assessment including depth
and rhythm of respirations.
5. Replace bed linens if necessary.
Record the rate on the client’s
chart. Sign the chart
• Documentation provides ongoing data
collection. Giving signature
maintains professional
accountability
6. Perform hand hygiene • To prevent the spread of infection
7. Report any irregular findings to the
senior staff.
• To provide continuity of care

25
MEASURING BLOOD PRESSURE
Definition: Monitoring blood pressure using palpation and/or sphygmomanometer
Purpose:
• To obtain baseline data for diagnosis and treatment
• To compare with subsequent changes that may occur during care of patient
• To assist in evaluating status of patient’s blood volume, cardiac output and
vascular system
• To evaluate patient’s response to changes in physical condition as a result of
treatment with fluids or medications
Procedure: by palpation and aneroid manometer
Care Action Rati
onal
e
1. Wash your hands. • Handwashing prevents the spread of
infection
2. Gather all equipment’s. Cleanse
the stethoscope’s earpieces and
diaphragm with a spirit swab
wipe.
• Organization facilitates performance
of the skill.
• Cleansing the stethoscope
prevents spread of infection.
3. Check the client’s
identification. Explain the
purpose and procedure to the client.
• Providing information
fosters the client’s
cooperation and understanding.
4. Have the client rest at least 5
minutes before measurement.
• Allow the client to relax and helps to
avoid falsely elevate readings.
5. Determine the previous baseline
blood pressure, if available, from
the client’s record.
• To avoid misreading of the client’s
blood pressure and find any
changes his/her blood pressure from
the usual
6. Identify factors likely to interfere
which accuracy of blood pressure
measurement: exercise, coffee
and smoking
• Exercise and smoking can cause
false elevations in blood pressure.

26
7. Setting the position:
a) Assist the client to a comfortable
position. Be sure room is warm,
quiet and relaxing
b) Support the selected arm. Turn
the palm upward. (Fig. G)
c) Remove any constrictive clothing.
• The client's perceptions that the
physical or interpersonal
environment is stressful affect the
blood pressure measurement.
• Ideally, the arm is at heart level
for accurate measurement. Rotate
the arm so the brachial pulse is
easily accessible.
• Not constricted by clothing is
allowed to access the brachial pulse
easily and measure accurately. Do
not use an arm where circulation
is compromised in any way.
Fig. G Care Action 7. b
Placing the selected arm on the bed and turn the palm upward
Care Action Rationale
8. Checking brachial artery and
wrapping the cuff:
a) Palpate brachial artery.
b) Center the cuff’s bladder
approximately 2.5 cm (1
inch) above the site where
you palpated the brachial
pulse
c) Wrap the cuff snugly around
the client’s arm and secure the
• Center the bladder to ensure even cuff
inflation over the brachial artery
• Loose-fitting cuff causes false high
readings.
• Appropriate way to wrap is that you can
put only two fingers between the arm and
cuff.
• Improper height can alter perception of
reading.

27
end approximately (Fig.H)
d) Check the manometer
whether if it is at level with
the client’s heart (Fig. I).
Fig. H Care Action 8. 3 Fig. I Care Action 8. 3
Wrapping the cuff with appropriate way Placing manometer at the level
of heart

28
Care Action Rationale
9. Measure blood pressure
by two step methods:
(A) Palpatory method
a) Palpate brachial pulse
distal to the cuff with
fingertips of non-dominant
hand.
b) Close the screw clamp on
the bulb.
c) Inflate the cuff while still
checking the pulse with
other hand. (Fig. J)
d) Observe the point where
pulse is no longer
palpable
e) Inflate cuff to pressure 20-
30 mmHg above point at
which pulse disappears.
f) Open the screw clamp,
deflate the cuff fully and
wait 30 seconds.
(B) Auscultation
a) Position the stethoscope’s
earpieces comfortably in
your ears (turn tips slightly
forward). Be sure sounds are
clear, not muffled.
b) Place the diaphragm over
the client’s brachial artery.
Do not allow chest piece to
touch cuff or clothing. (Fig.
K)
• Palpation identifies the approximate
systolic reading. Estimating prevents
false low readings, which may result in
the presence of an auscultory gap.
• Maximal inflation point for accurate
reading can be determined by palpation.
• Short interval eases any venous
congestion that may have occurred.
• Each earpiece should follow angle of ear
canal to facilitate hearing.
• Proper stethoscope placement ensures
optimal sound reception.
• Stethoscope improperly positioned
sounds that often result in false low
systolic and high diastolic readings.

29
Fig. J Care Action 9. (A) 3 Palpatory method Fig. K Care action 9 (B) 2
Inflating the cuff while
Checking brachial artey

30
Care Action Rationale
c) Close the screw clamp on the
bulb and inflate the cuff to a
pressure30 mmHg above the
point where the pulse had
disappeared
d) Open the clamp and allow the
aneroid dial to fall at rate of 2 to
3 mmHg per second.
e) Note the point on the dial when
first clear sound is heard. The
sound will slowly increase in
intensity.
f) Continue deflating the cuff
and note the point where the
sound disappears. Listen for 10
to 20 mmHg after the last
sound.
g) Release any remaining air
quickly in the cuff and remove
it.
h) If you must recheck the reading
for any reason, allow a 1-
minute interval before taking
blood pressure again.
• Ensure that the systolic reading is not
underestimated.
• If deflation occurs too rapidly, reading
may be inaccurate.
• This first sound heard represents the
systolic pressure or the point where the
heart is able to force blood into the
brachial artery.
• This is the adult diastolic pressure. It
represents the pressure that the artery
walls exert on the blood at rest.
• Continuous cuff inflation causes
arterial occlusion, resulting in
numbness and tingling of client’s arm.
• The interval eases any venous
congestion and provides for an accurate
reading when you repeat the
measurement.
10. Assist the client to a
comfortable position. Advise
the client of the reading.
• Indicate your interest in the client's
well-being and allow him/her to
participate in care.
11. Wash your hands. • Handwashing prevents the spread of
infection.
12. Record blood pressure on the
client’s chart. Sign on the chart.
Report any findings to senior
staffs.
• Documentation provides ongoing data
collection.
• Giving signature
maintains professional
accountability
13. Replace the instruments to
proper place and discard.
• To prepare for the next procedure.

31
Conversion of temperature Measurement
• Formula for converting Centigrade (C) to Fahrenheit (f): (C×9/5) +32=F
• Formula for converting Fahrenheit (f) to Centigrade (C): (F-32) ×5/9=C
MEASURING INTAKE OUTPUT CHART
Fluid intake and output means fluid intake equal to fluid loss. Intake is any
measurable fluid that goes into the client's body. It includes fluids such as water,
soup, fruit juice etc. solids composed primarily of liquids such as ice cream, gelatin,
that are taken mouth, fluids that are introduced by intra venous route and fluids that
are introduced by tube. Output is any measurable fluid that comes from the body
such as urine, drainage, vomits, and watery stools.
In certain condition e.g. unconscious patient, surgery of gastrointestinal tract, kidney
and cardiac disease, etc. balance is disturbed. This is maintained by an intake and
output chart. The main fluid in body is water. Total body water is 60% of body
weight. Input of water is regulated mainly through ingested fluids, which in turns
depends on thrust. The body's homeostatic control mechanisms, which maintain a
constant internal environment, ensure that a balance between fluid gain and fluid
loss is maintained. The hormones ADH and Aldosterone play a major role in this.
Purposes
• To judge the condition of the patient.
• The monitor the fluid and electrolyte balance.
• To assess the fluid requirement.
• To determine the treatment.
Patients who need intake and output charting are:
• Unconscious patient.
• Patients with diarrhea and vomiting. Patient with kidney and heart disease.
• Patient with burns.
• Patients under iontropic drugs.
• Patients taking diuretic drugs.
• Pre-operative/pos-operative patients. (Particularly after surgery of urinary
tract and gastrointestinal tract). Patient with tube feeding, liquid diet, NPO,
I/V fluids, etc.
Equipment
• Intake/output chart
• Measuring glass to drink fluid
• Jug, bed pan, urinal

32
• Gloves
• Syringes (20 ml, 50 ml, etc.) for NG tube aspiration.
Procedure to record intake
• Check the physician's instruction.
• Explain the patient and patient party about the importance of maintaining
I/O chart.
• Prepare the required equipment and carry them all to the patient's bed side.
• Prepare the fluid to be given orally e.g. tea, fruit juice, milk, glucose water,
etc.
• Prepare the IV fluid or tube feeding as advised by the doctor.
• Measures the amount accurately. If a feeding cup is used, measure the
capacity of the feeding cup.
• If the patient's own container is used measures the capacity of the container
and mark accurately with an adhesive tape.
• Keep the measuring glass near the patient's bed side.
• Record and report date, time, amount, type of fluid, total intake and output
for a fluid. Total intake and output for 24 hrs is calculated in the morning by
the nurse
• Procedure to record output
• Wear disposable gloves to prevent contact with micro-organisms drainage
bag or bottle.
• Ask the client to void in a urinal or bed pan of aspiration or vomits.
• Pour the voided urine into a celebrated container or an empty I/V bottle.
• After measuring urine from a client who has an indwelling catheter, place
the container under the urine collection bag so that the spout of the bag is
above the container but touching it open the spout and permit the urine to
flow into the container. Close the spot.
• Holding the container at eye level, read the amount in the container. Discard
the urine the toilet.
• If nasogastric tube for aspiration, measure the aspiration fluid and record.
Remove gloves and wash hands.
• Record the amount of output each time of the patient's urinals or aspiration
by nasogastric tube or vomit in intake output chart.
• In the patient vomits into basin or has diarrhea in bed pan, you should
measure them the same as urine.

33
• Urine output should be at least 30ml/hour for ICU patients, if urine output
is less than 30ml/hour then report to doctor.
• Rinse bed pan or urinal, measuring jug and return the proper place.
• Drainage tube.
Points to remember
• Intake oral fluid, intravenous fluid, tube feeding and output (emesis,
diarrhea, unite suction aspiration, drainage) must be measured carefully and
recorded in the appropriate columns on the I/O chart of the patient.
• If the patient passes urine in the bed, estimate the amount of urine passed in
ml and make comment on the chart (bed wet).
• Intake output records only the amount of fluid taken. If the patient takes solid
food, rec in comment column.
• Many clients can measure and record their own urine output, when it is
explained to them.

34
A. ORAL CARE
Definition:
Mouth care is defined as the scientific care of the teeth and mouth.
Purpose:
• To keep the mucosa clean, soft, moist and intact
• To keep the lips clean, soft, moist and intact
• To prevent oral infections
• To remove food debris as well as dental plaque without damaging the gum
• To alleviate pain, discomfort and enhance oral intake with appetite
• To prevent halitosis or relieve it and freshen the mouth
Equipment required:
• Tray (1)
• Gauze-padded tongue depressor (1): to suppress tongue
• Torch (1)
• Appropriate equipment for cleaning:
✓ Tooth brush
✓ Foam swabs
✓ Gauze-padded tongue depressor
✓ Cotton ball with artery forceps (1) and dissecting forceps (1)
• Oral care agents:
Tooth paste/ antiseptic solution
❖NURSING ALERT
You should consider nursing assessment, hospital policy and doctor’s prescription if there is,
when you select oral care agent. Refer to Table 1. on the next page.
•If you need to prepare antiseptic solution as oral care agent: Gallipot (2), antiseptic solution
(1) to set up cotton ball after squeezed (1)
• Cotton ball

35
• Kidney tray (1)
• Mackintosh (1): small size
• Middle towel (1)
• Jug with tap water (1)
• Paper bag (2): for cotton balls (1) for dirt (1)
• Gauze pieces as required: to apply a lubricant
• Lubricants: Vaseline/ Glycerin/ soft white paraffin gel/ lip cream (1)
• Suction catheter with suction apparatus (1): if available
• Disposable gloves (1) pair: if available
NOTE:
TABLE 1. VARIOUS ORAL CARE AGENTS FOR ORAL HYGIENE
The choice of an oral care agent is dependent on the aim of care. The various agents are
available and should be determined by the individual needs of the client.
Agents Potential benefits Potential harms
Tap water • To refresh, available • Short lasting, not contain a
bactericide
Tooth paste • Not specified
• To remove debris
• To refresh
• It can dry the oral cavity if
not adequately rinsed.
Nystatin • To treat fungal infections • Tastes unpleasant
Chlorhexidine gluconate:
A compound with broad-
spectrum
anti-microbial activity
• To suppress the growing of bacteria in
doses of 0.01-0.2 % solution
• Not be significant to prevent
chemotherapy- induced
mucositis
• Tastes unpleasant
• Stainable teeth with prolonged
use
Sodium bicarbonate: • To dissolve viscous mucous • Tastes unpleasant
• May bring burn if not
diluted adequately
• Can alter oral pH allowing
bacteria to multiply
Fluconazole:
An orally absorbed
antifungal azole, soluble
in water
• For the treatment of candidiasis of the
oropharynx, esophagus and variety of
deep tissue sites
• not reported

36
Sucralfate:
a mouth-coating agent
• Initially for the clients under radiotherapy
and chemotherapy
• To reduce pain of mucositis
• not reported
Fluoride • To prevent and arrest tooth decay
• Especially radiation caries,
demineralization and decalcification
• To show toxicity in high density
Glycerin and thymol • To refresh • Refreshing lasts only 20-30
seconds.
• Can over-stimulate the
salivary glands leading to
reflex action and exhaustion
Other solutions for oral care such as Potassium permanganate (1:5000), Sodium chloride (1 teaspoon
to a pint of water), Potassium chloride (4 to 6 %), Hydrogen peroxide (1: 8 solution) are used
commonly.
i)Oral care of conscious patient:
Procedure:
Care Action Rationale
1.Explain the procedures • Providing information, fosters cooperation,
understanding and participation in care
2. Collect all instruments required • Organization facilitates accurate skill performance
3. Close door and /or put screen • To maintain privacy
4. Perform hand hygiene and wear
disposable gloves if possible
• To prevent the spread of infection
5. 4. If you use solutions such as sodium
bicarbonate, prepare solutions required.
• Solutions must be prepared each time before use to
maximize their efficacy
5. Assist the client a comfortable upright
position or sitting position
• To promote his/her comfort and safety and
effectiveness of the care including oral inspection and
assessment.
6. Inspect oral cavity
• Inspect whole the oral cavity, such
as teeth, gums, mucosa and
tongue, with the aid of gauze-
padded tongue depressor and
torch
• Take notes if you find any
abnormalities, e.g., bleeding,
swollen, ulcers, sores, etc.
• Comprehensive assessment is essential to determine
individual needs
• Some clients with anemia, immunosuppression,
diabetes, renal impairment epilepsy and taking
steroids should be paid attention to oral condition.
• They may have complication in oral cavity.
8. 7.Place face towel over the client chest
or on the thigh with mackintosh (Fig. 1)
• To prevent the clothing form wetting and not to give
uncomfortable condition
9. 8. Put kidney tray in hand or assist
the client holding a kidney tray
• To receive disposal surely

37
Fig.1: Setting the kidney tray up with face towel covered mackintosh
Care Action Rationale
9. Instruct the client to
brush teeth Points of
instruction
• Client places a soft toothbrush at a
45 °angle to the teeth.
• Client brushes in direction of
the tips of the bristles under the
gum line with tooth paste.
Rotate the bristles using
vibrating or jiggling motion
until all outer and inner surfaces
of the teeth and gums are clean.
• Client brushes biting surfaces of the
teeth
• Client clean tongue from inner to
outer and avoid posterior direction.
• Effective in dislodging debris and
dental plaque from teeth and gingival
margin
• Cleansing posterior direction of the
tongue may cause the gag reflex
1 10.If the client cannot tolerate
toothbrush (or cannot be available
toothbrush), form swabs or cotton balls
can be used
• When the client is prone to bleeding and/or pain,
tooth brush is not advisable
11. Rinse oral cavity
a. Ask the client to rinse with fresh water and
void contents into the kidney tray.
b. Advise him/her not to swallow water. If
needed, suction equipment is used to remove
any excess.
•
• To make comfort and not to remain
any fluid and debris.
• To reduce potential for infection and
12. Ask the client to wipe mouth and • To make comfort and provide the well-

38
around it. appearance
1 13.Confirm the condition of client’s teeth,
gums and tongue. Apply lubricant to lips.
• To moisturize lips and reduce risk for
cracking
1 14.Rinse and dry tooth brush thoroughly.
Return the proper place for personal
belongings after drying up.
• To prevent the growth of
microorganisms
15. Replace all instruments • To prepare Equipment’s for the next
procedure
16. Discard dirt properly and safety • To maintain standard precautions
17. Remove gloves and wash your hands • To prevent the spread of infection
18. Document the care and sign on the
records.
• Documentation provides ongoing data
collection and coordination of care
• Giving signature maintains professional
• Accountability
19. Report any findings to senior staffs • To provide continuity of care
i) Oral care of unconscious patient:
Fig.2: Equipment’s required for oral care in depending client
Procedure: The procedure with cotton balls-soaked sodium bicarbonate is showed here.
Care Action Rationale
1. Check client’s identification and condition • Providing nursing care for the correct
client with appropriate way.
2. Explain the purpose and procedure to the client • Providing information fosters
cooperation and understanding.
3. Perform hand hygiene and wear disposable gloves. • To prevent the spread of infection.

39
4. Prepare Equipment’s:
a. Collect all required Equipment’s and bring the articles
to the bedside.
b. Prepare sodium bicarbonate solutions in gallipot.
❖Nursing Alert❖
If the client is unconscious, use plain tap water.
a. Soak the cotton ball in sodium bicarbonates solution (3
pinches / 2/3 water in gallipot) with artery forceps.
b. Squeeze all cotton balls excess solution by artery
c. forceps and dissecting forceps and put into another
gallipot
• Organization facilitates
accurate skill performance
• Solutions must be prepared
each time before use to
maximize their efficacy
• To reduce potential infection
• Cleaning solutions aids in
removing residue on the
client’s teeth and softening
encrusted areas.
• To avoid inspiration of the
solution
5. Close the curtain or door to the room. Put screen. • It maintains the client’s privacy
6.6.Keep the client in a side lying or in comfortable
position.
• Proper positioning prevents back
strain
• Tilting the head downward
encourages fluid to drain out
of the client’s mort and it
prevents aspiration.
Care Action Rationale
7. 7.Place the mackintosh and towel on the neck to chest. • The towel and mackintosh protect the
client and bed from soakage.
8. 8.Put the kidney tray over the towel and mackintosh
under the chin. (Fig. 3)
• It facilitates drainage from the client’s
mouth.
9. Inspect oral cavity:
a. Inspect whole the oral cavity, such as teeth, gums,
mucosa and tongue, with the aid of gauze-padded
tongue depressor and torch.
b. Take notes if you find any abnormalities, e.g.,
bleeding, swollen, ulcers, etc.
• Comprehensive assessment is
essential to determine individual
needs.
• Some clients with anemia,
immunosuppression, diabetes, renal
impairment, epilepsy and taking
steroids should be paid attention to oral
condition.
• They may have complication in oral
cavity.
10. Clean oral surfaces: (Fig.4)
a. Ask the client to open the mouth and insert the padded
tong depressor gently from the angle of mouth toward
the back molar area. You never use your fingers to open
the client’s mouth.
• The tong depressor assists in keeping
the client’s mouth open. As a reflex
mechanism, the client may bite your
fingers.
b. Clean the client’s teeth from incisors to molars using
up and down movements from gums to crown.
• Friction cleanses the teeth.
c. Clean oral cavity from proximal to distal, outer to inner
parts, using cotton ball for each stroke.
• Friction cleanses the teeth.

40
11. Discard used cotton ball into small kidney tray. • To prevent the spread of infection.
12. Clean tongue from inner to outer aspect. • Microorganisms collect and grow
on tongue surface and contribute to
bad breath.
Fig.3: Placing a kidney tray on the mackintosh Fig. 4: Cleansing teeth with supporting covered
a face towel Padded tongue depressor
Care Action Rationale
13. Rinse oral cavity:
a. Provide tap water to gargle mouth and position
kidney tray.
b. If the client cannot gargle by him/herself,
i. rinse the areas using moistened cotton balls or
ii. insert of rubber tip of irrigating syringe into the
client’s mouth and rinse gently with a small
amount of water.
Assist to void the contents into kidney tray. If the
client cannot spit up, especially in the case
of unconscious client, suction any solution.
• To remove debris and make refresh
• Rinsing or suctioning removes cleaning
solution and debris.
• Solution that is forcefully irrigated may
cause aspiration.
• To avoid aspiration of the solution.
1 14.Confirm the condition of client’s teeth,
gums, mucosa and tongue.
• To assess the efficacy of oral care and
determine any abnormalities
1 15.Wipe mouth and around it. Apply lubricant
to lips by using foam swab or gauze piece
with artery forceps
• Lubricant prevents lips from drying and cracking.
16. Reposition the client in comfortable position. • To provides for the client’s comfort and safety.
17. Replace all Equipment’s in proper place. • To prepare Equipment’s for the next care
18. Discard dirt properly and safety • To maintain standard precautions
19. Remove gloves and perform hand hygiene • To prevent the spread of infection
20. Document the care and sign on the records. • Documentation provides ongoing data
collection and coordination of care.
• Giving signature maintains professional
accountability

41
❖Nursing Alert❖
Oral care for the unconscious clients
1. Special precautions while the procedure:
⮚ The client should be positioned in the lateral position with the head turned toward the side.
(Rationale: It can not only provide for drainage but also prevent accidental aspiration.)
⮚ Suction apparatus is required. (Rationale: It prevents aspiration.)
⮚ To use plain water for cleaning of oral cavity of unconscious clients may be advisable.
(Rationale: Potential infection may be reduced by using plain water when the solution flows
into the respiratory tract by accident.)
2. Frequency of care:
➢ Oral care should be performed at least every four hours. (Rationale: Four hourly care will reduce
the potential for infection from microorganisms.
B. BED BATH:
Definition:
A bath given to client who is in the bed (unable to bath itself).
Purpose:
• To prevent bacteria spreading on skin
• To clean the client’s body
• To stimulate the circulation
• To improve general muscular tone and joint
• To make client comfort and help to induce sleep
• To observe skin condition and objective symptoms
Equipment’s required:
• Basin (2): for without soap (1)
for with soap (1)
• Bucket (2): for clean hot water (1)
for waste (1)
• Jug (1)
• Soap with soap dish (1)
• Sponge cloth (2): for wash with soap (1)
for rinse (1)
• Face towel (1)
• Bath towel (2): Ⓐ for covering over mackintosh (1)
Ⓑ for covering over client’s body (1)
• Gauze piece (2-3)
• Mackintosh (1)
• Trolley (1)
21. Report any findings to the senior staff. • To provide continuity of care

42
• Thermometer (1)
• Old newspaper
• Paper bag (2): for clean gauze (1)
for waste (1)
Procedure: Complete bed bath
Care Action Rationale
1. Confirm Dr.’s order.
Check client identification and condition.
• The bath order may have changed.
• In some instances, a bed bath may be harmful for a
client, who is in pain, hemorrhaging, or weak.
Nursing staff need to defer the bath.
2.Explain the purpose and procedure to the
client. If he or she is alert or oriented, question
the client about personal hygiene preferences
and ability to assist with the bath.
• Providing information fosters cooperation.
• Encourage the client to assist with care and to
promote independence.
3. Gather all required equipment’s. • Organization facilitates accurate skill performance.
4. Wash your hands and put on gloves. • To prevent the spread of organisms. Gloves are
optional but you must wear them if you are giving
perineal and anal care.
5.Bring all Equipment’s to bed-side. • Organization facilitates accurate skill
performance.
6. Close the curtain or the door. • To ensure that the room is warm.
• To maintain the client’s privacy.
7.Put the screen or curtain. • To protect the client’s privacy.
8.Prepare hot water (60℃). • Water will cool during the procedure.
9. 9.Remove the client’s cloth. Cover the client’s
body with a top sheet or blanket.
If an IV is present on the client’s upper
extremity, thread the IV tubing and bag through
the sleeve of the soiled cloth. Rehang the
IV solution. Check the IV flow rate.
• Removing the cloth permits easier access when
washing the client’s upper body.
• Be sure that IV delivery is uninterrupted and that
you maintain the sterility of the setup.
1 10.Fill two basins about two-thirds full with
warm water (43-46℃ or 110-115F).
• Water at proper temperature relaxes him/her and
provides warmth. Water will cool during the
procedure.
1 11.Assist the client to move toward the side of
the bed where you will be working. Usually, you
will do most work with your dominant hand.
• Keep the client near you to limit reaching across
the bed.

43
12. Face, neck, ears:
• Put mackintosh and big towel Ⓐ
under the client’s body from the head
to shoulders. Place face towel under the
chin which is also covered the top
sheet.
• Make a mitt with the sponge towel and
moisten with plain water.
• Wash the client’s eyes. Cleanse from
inner to outer corner. Use a different
section of the mitt to wash each eye.
• Wash the client’s face, neck, and ears.
• Use soap on these areas only if the client
prefers. Rinse and dry carefully.
• To prevent the bottom sheet from making
wet.
• Soap irritates the eyes.
• Washing from inner to outer corner
prevents sweeping debris into the client’s
eyes. Using a separate portion of the mitt
for each eye prevents the spread of
infection.
• Soap is particularly drying to the face.
13. Upper extremities:
• Move the mackintosh and big towel A
to under the client’s far arm.
• Uncover the far arm.
• Fold the sponge cloth and moisten.
• Wash the far arm with soap and rinse.
Use long strokes: wrist to elbow→
elbow to shoulder→ axilla→ hand
• Dry by face towel
• Move the mackintosh and big towel A
to under the near arm and uncover it
• Wash, rinse, and dry the near arm as
same as procedure 4.
• To prevent sheet from making wet
• Washing the far side first prevents
dripping bath water onto a clean area.
• Long strokes improve circulation be
facilitating venous return
14. Chest and abdomen:
• Move the mackintosh and bath
towel A to under the upper trunk
• Put another bath towel B to over the
chest
• Fold the sponge towel and moisten
• Wash breasts with soap and rinse. Dry
by the big towel covering.
• Move the bath towel B covering the
chest to abdomen.
• Fold the sponge cloth and moisten.
• Wash abdomen with soap, rinse and dry
• Cover the trunk with top sheet and
remove the bath towel B from the
abdomen.
• Mackintosh and bath towel A prevent
sheet from wetting
• Bath towel B provides warmth and
privacy
15. Exchange the warm water. • Cool bath water is uncomfortable. The water is
probably unclean. You may change water earlier if
necessary to maintain the proper temperature.

44
16. Lower extremities:
• Move the mackintosh and bath towel
A to under the far leg. Put pillow or
cushion under the bending knee. Cover
the near leg with bath towel B.
• Fold the sponge cloth and moisten.
• Wash with soap, rinse and dry.
• Direction to wash: From foot joint to
knee→ from knee to hip joint.
• Repeat the same procedure as 16.1- 3
on the near side.
• Cover the lower extremities with top
sheet Remove the cushion,
mackintosh and big towel A.
• Pillow or cushion can support the lower leg and
makes the client comfort.
Care Action Rationale
1 17.Turn the client on left lateral position with back
towards you.
• To provide clear visualization and easier
contact to back and buttocks care.
18.Back and buttocks:
• Move the mackintosh and big towel A under
the trunk.
• Cover the back with big towel B.
• Fold the towel and moisten. Uncover the back.
• Wash with soap and rinse. Dry with big towel
B.
• Back rub if needed.
• Remove the mackintosh and big towel A.
• Skin breakdown usually occurs over
bony prominences. Carefully observe the
sacral area and back for any indications.
19. Return the client to the supine position. • To make sustainable position for perineal
care.
20. Perineal care:
✽See our nursing manual “Perineal care”
• Clean the perineal area to prevent skin
irritation and breakdown and to decrease
the potential odor.
21. Assist the client to wear clean cloth. • To provide for warmth and comfort
22. After bed bath:
• Make the bed tidy and keep the client
in comfortable position.
• Check the IV flow and maintain it with the
speed prescribed if the client is given IV.
• These measures provide for comfort
and safety
• To confirm IV system is going
properly and safely
23. Document on the chart with your signature and
report any findings to senior staff.
• Documentation provides coordination of
care
• Giving signature maintains

45
professional accountability.
C. HAIR WASH:
Definition:
Hair washing defines that is one of general care provided to a client who cannot clean the hair by
himself/ herself.
Purpose:
• To maintain personal hygiene of the client
• To increase circulation to the scalp and hair and promote growing of hair
• To make him/her feel refreshed
Equipment’s required:
• Mackintosh (2): to prevent wet (1)
• Big towel (2): to cover mackintosh (1) to round the neck (1)
• Middle towel (1)
• Shampoo or soap (1)
• Hair oil (1): if necessary
• Brush, comb: (1)
• Paper bag (2): for clean (1)
• for dirty (1)
• Cotton ball with oil or non-refined cotton
• Bucket (2): for hot water (1)
▪ for wasted water (1)
• Plastic jug (1)
• Cloth pin or clips (2)
• Steel Tray (1)
• Kidney tray (1)
• Cushion or pillow (1)
• Clean cloth if necessary
• Old newspaper
• Trolley (1)
Procedure:
Care Action Rationale
1. Perform hand hygiene • To prevents the spread of infection
2.Gather all Equipment’s • Organization facilitates accurate skill
performance
3.Check the condition of client. Explain the purpose
and the procedure to the client.
• Proper explanation may allay his/her
anxiety and foster cooperation
4. Bring and set up all Equipment’s to the bed-side • To save the time and promote effective care

46
5. Help the client move his/her head towards edge of the
bed and remove the pillow from the head.
• To arrange appropriate position with
considering
• your body mechanics
6. Put another pillow or a cushion under the bending
knee. Make him/her comfortable position.
• Putting a pillow or a cushion could
prevent from having some pain while the
hair washing process.
7. Setting mackintosh and towel to the client:
• Place a mackintosh covered a big towel under
the upwards from the client head to the
shoulders of client
• Have a big towel around his/her neck
• Roll another mackintosh to make the shape of a
funnel, by using the way to hold from both sides
in a slanting way. The narrow end should be
folded and put under the client’s neck and the free
end should be put into the bucket to drain for the
waste water.
• Put the folding mackintosh under the client’s neck.
• To prevent the sheet from soiling
• To prevent the cloth and the body
from soling
• To induce water drainage
8. Washing:
a. Brush the hair.
• Insert the cotton balls into the ears
• Wet the hair by warm water and wash it
roughly.
• Apply soap or shampoo and massage the scalp
well while washing the hair using finger nails.
• Rinse the hair and reapply shampoo for a
second washing, if indicated.
• Rinse the hair thoroughly
• Apply conditioner if requested or if the scalp
appears dry.
• To remove dandruff and fallen
hairs, and make the hair easier
washing.
• To prevent water from entering into
the ears
9. Wrapping the hair:
• Remove the cotton balls from the ears into the
paper bag and mackintosh with the towel from
the client's neck.
• Wrap the hairs in the big towel which are used to
cover the client's neck part.
10. Drying the hair:
• Wipe the face and neck if needed
• Dry the hair as quick as possible
• Massage the scalp with oil as required
• Comb the hair and arrange the hair according to
the client’s preference
• Make the client tidy and provide comfortable
position
• To prevent him/her from becoming
chilled
• To increase circulation of the
scalp and promote sense of well-
being
• To raise self-esteem

47
11. Clean the Equipment’s and replace them to proper
place. Discard dirty.
• To prepare for the next procedure
12. Perform hand hygiene • To prevent the spread of infection
1 13. Document the condition of the scalp, hair and any
abnormalities on the chart with your signature.
Report any abnormalities to senior staff.
• Documentation provides coordination of
care
• Giving signature maintains
professional accountability
D. BACK CARE:
Definition:
Back care means cleaning and massaging back, paying special attention to pressure points.
Especially back massage provides comfort and relaxes the client, thereby it facilitates the physical
stimulation to the skin and the emotional relaxation.
Purpose:
• To improve circulation to the back
• To refresh the mode and feeling
• To relieve from fatigue, pain and stress
• To induce sleep
Equipment’s required:
• Basin with warm water (2)
• Bucket for waste water (1)
• Gauze pieces (2)
• Soap with soap dish (1)
• Face towel (1)
• Sponge cloth (2): 1 for with soap
1 for rinse
• Big Towel (2): 1 for covering a mackintosh
1 for covering the body
• Mackintosh (1)
• Oil/ Lotion/ Powder (1): according to skin condition and favor
• Tray (1)
• Trolley (1)
• Screen (1)
Procedure:
Care Action Rationale
1. Perform hand hygiene • To prevent spread of infection
2.Assemble all Equipment’s required. • Organization facilitates accurate
skill performance
3. Check the client's identification and condition. • To assess sufficient condition on the client
4.Explain to the client about the purpose and the
procedure.
• Providing information fosters cooperation

48
5.Put all required Equipment’s to the bed-side and set
up.
• Appropriate setting can make the time of
the procedure minimum and effective.
6.Close all windows and doors, and put the screen or /
and utilize the curtain if there is.
• To ensure that the room is warm.
• To maintain the privacy.
7.Placing the appropriate position:
a. Move the client near towards you.
b. Turn the client to her/ his side and put the mackintosh
covered by big towel under the client's body.
• To make him/her more comfortable and provide
the care easily.
• Mackintosh can avoid the sheet from wetting.
8. Expose the client's back fully and observe it whether
if there are any abnormalities.
• To find any abnormalities soon is
important to that you prevent more
complication and/ or provide proper
medication and/or as soon as
possible.
• If you find out some redness, heat or
sores, you cannot give any massage to
that place.
• If the client has already some red sore or
broken- down area, you need to report to
the senior staff and /or doctor.
9. Lather soap by sponge towel. Wipe with soap and
rinse with plain warm water.
• To make clean the back before we give
massage with oil/ lotion/ powder.
10. Put some lotion or oil into your palm. Apply the
oil or the lotion and massage at least 3-5 minutes
by placing the palms:
from sacral region to neck
from upper shoulder to the lowest parts of
buttocks.
• Don’t apply oil or lotion directly to the
back skin. Too much apply may bring
irritation and discomfort.
11. Help for the client to put on the clothes and return
the client to comfortable position.
• To provide for warmth and comfort
12. Replace all Equipment’s in proper place. • To prepare for the next procedure
13. Perform hand hygiene. • To prevent the spread of infection
1 14.Document on the chart with your signature,
including date, time and the skin condition.
Report any findings to senior staff.
• Documentation provides coordination of
care
• Giving signature maintains
professional accountability
E. NAIL CARE:
Definition:
Nail cutting that one of nursing care and general care for personal hygiene is to cut nails
on hands and foots.
Purpose:

49
• To keep nails clean
• To make neatness
• To prevent the client’s skin from scratching
• To avoid infection caused by dirty nail
Equipment’s required:
• Nail Cutter (1)
• Gallipot with water (1): for cotton
• Kidney tray (1)
• Sponge cloth (1)
• Middle towel (1)
• Mackintosh (1)
• Plastic bowl in small size (1)
• Soap with soap dish (1)
Fig.5: Equipment’s required for nail cutting
Procedure: Caring for Fingernails
Care Action Rationale
1. Perform hand hygiene • To prevent the spread of infection
2. Gather all the required Equipment’s. • Organization facilitates accurate
skill
• Performance
3. Check the client’s identification. • To assess needs
4. Explain to the client about the purpose and the
procedure.
• Providing explanation fosters cooperation
5. Put all the required Equipment’s to the bed-side
and set up it.
• To save the time an promote effective care
6. Assist the client to a comfortable upright
position.
• To provide for comfort
1. In sitting position:
Soaking
• Put a mackintosh with covering towel on the bed.
• Mackintosh can prevent the sheet from

50
• Put the basin with warm water over the
mackintosh.
• Soak the client’s fingers in a basin of warm
water and mild soap.
• Scrub and wash them up.
• Dry the client’s hands thoroughly by using the
middle towel covering the mackintosh.
Cutting
• Trim the client’s nails with nail clippers.
• Wipe all fingernails from thumb to 5th nail side
by side by wet cotton ball. One cotton ball is
used for one nail finger.
• Shape the fingernails with a file, rounding the
• corners and wipe both hands by a sponge towel.
wetting
• To make nails soft, thereby you can cut
nails easily and safety
• Special orders are required before cutting the
nails or cuticles of a client with diabetes
to avoid accidental injury to soft tissues.
8. Replace Equipment’s and discard dirty. • To prepare Equipment’s for the next
procedure
9. Perform hand hygiene. • To prevent the spread of infection
Procedure: Caring for Toenails
Follow the same procedure as for the fingernails with some exceptions:
Care Action Rationale
Cutting
• Cut toenails straight across and do not round off the
corners.
• Do not shape corners.
• Cutting into the corners may
cause ingrown nails. If the
nails tend to grow inward at
the corners, place a wisp of
cotton under the nail to
prevent toe pressure.
• A notch cut in the center will
pull in edges and corners.
Sometimes, very thick, hard
toenails require surgical
removal.
❖ NURSING ALERT❖
Never cut the toenails of the clients with diabetes or hemophilia. These clients are
particularly susceptible to injury.
BOWELCARE
A. ENEMA
DEFINITION
Enema is the introduction of plain or medicated fluid into the rectum.
Enema means introduction of solution into the large intestine for removing faeces and
cleaning the bowel.
PURPOSES

51
• To relieve constipation, flatulence or distension.
• To prevent involuntary escape of fecal matter during surgical procedure and delivery.
• To promote visualization of the intestinal tract during a radiographic or instrumental
examination like proctoscopy.
• To stimulate peristalsis
• Pre- operative preparation for bowel surgeries.
• To sooth or treat irritated mucosa of the colon.
• To supply fluids, nutrients or medications like sedatives.
• To induce labour.
• To relieve the retention of urine by reflex stimulation of bladder.
• To diagnose disease conditions of the colon such as ulcer, tumors or new growth.
• To established regular bowel functions during bowel training program.
TYPES
A. Irrigating enema
B. Retention enema
IRRIGATING ENEMA
DEFINITION
This types of enema is expel completely up to 30min after instillation
ARTICLE REQUIRED:
A tray containing:
• Enema container with attached rectal tube and clamp
• Lubricant for the rectal tube
• Small mackintosh
• A small green sheet
• Cotton swabs
• Screen for privacy
• Prescribed amount of ordered lukewarm solution
• Gloves
• Kidney tray
• Bed pan with cover
• Enema stand
PROCEDURE
1. Explain the procedure to the patient.
2. Provide privacy for the patient.
3. Wash hands.
4. Take all the Equipment’s to the bed side.
5. Place the mackintosh under the patient.
6. Apply green sheet above the mackintosh.

52
7. Remove the pillow from the patients bed.
8. Position the patient in left lateral position with their knee flexed.
9. Gently examine the rectal tube about 4 inch into the patient’s rectum. Unclamp the rectal
tube and allow the fluid to flow into the patient.
10. If the patient feel any discomfort, lower the enema container.
11. When the enema container is nearly empty, clamp the rectal tube and withdraw the rectal
tube gently from the patient’s rectum.
12. Place the rectal tube into the kidney tray.
13. Tell the patient to hold the fluid inside for 20-30 min.
14. Place the bed pan in position.
15. Once the enema has taken effect, assist in cleaning the patient.
16. Assist the patient to take a comfortable position.
17. Remove and replace the article after cleaning.
18. Wash hands.
19. Record the effectiveness of the enema in the patients chart.
RETENTION ENEMA
DEFINITION
Retention enemas are retained in the bowel for a prolonged period for different reasons.
PURPOSE:
• To use an emollient by softening the tissue
• To replace electrolytes
• To administer medications
ARTICLES REQUIRED:
A tray containing
• IV set with clamp for the rectal tube
• Water-soluble lubricant
• Small mackintosh
• Small green sheet
• Kidney dish
• Rectal tube
• Funnel and small container
• Ordered solution e.g : olive oil
• Syringe for administering medication
• Adhesive tape
PROCEDURE
1. Explain the procedure to the patient
2. Provide privacy for the patient
3. Wash hands
4. Take all the Equipment’s to the bed side
5. Place the mackintosh under the patient
6. Apply green sheet above the mackintosh.

53
7. Remove the pillow from the patient’s bed.
8. Position the patient in left lateral position with knee flexed
9. Gently insert the rectal tube about 4inchs into the patient’s rectum. Unclamp the rectal tube
and allow the fluid to flow into the patient.
10. Lubricate the rectal tube and gently insert it about four inches into the patient’s rectum.
11. Instillation of medication: attach a syringe filled with ordered medication to the rectal tube
and slowly instill the medication.
Instillation of olive oil: attach the funnel to the rectal tube and slowly pour the olive oil into
the funnel.
Instillation of replacement solution: attach the solution to IV tubing so that it is attached to
the rectal tube. Unclamp the IV tubing and install the ordered solution.
12. After instilling the fluid, hold the patient’s buttocks together
13. Instruct the patient to avoid defecation for 30min
14. Assist the patient to take a comfortable position
15. Remove and replace articles after cleaning
16. Wash hands
17. Record the effectiveness of the enema in the patient’s chart.
NURSING ALERT
➢ Check the temperature of the solution before administering to prevent burning the patient
➢ Always place the patient in left lateral position unless contraindicated.
➢ Infant dose: 250ml or less, children dose: 250-500ml, adult dose 500-1000ml
➢ Always check the doctor’s order for the correct medication or solution.
B. RECTAL SUPPOSITORY
DEFINITION
A suppository is a conical or oval solid substance shaped for easy insertion into a body
cavity and designed to melt at body temperature.
PURPOSE
To soften the stool.
To stimulate the defecation and treat constipation
To clean bowels
ARTICLES REQUIRED
A tray containing
• Gloves
• Suppository as required
• Bed pan if necessary
• Warm water

54
PROCEDURE
1. Explain the procedure to the patient and position the patient
2. Keep the patient in left lateral position
3. Wear gloves
4. Prepare medicine/ pill out the suppository
5. Push the suppository inside the rectum gently
6. Allow to retain suppository for at least 20min, then allow to toilet or provide bed pan
7. Wash hands
8. Record the result of procedure
NURSING ALERT
Patient should not allow defecating for 20mins after application of suppository.
BLADDER CARE
A. URINARY CATHETERIZATION
Definition:
Urinary catheterization is the process of introduction of a catheter through the urethra into
the bladder by maintaining aseptic technique for the purpose of withdrawing urine.
Purposes:
• To relieve urinary retention.
• To obtain a sterile urine specimen.
• To measure the amount of residual urine in the bladder.
• To obtain a urine specimen when a specimen cannot secure satisfactory by other means.
• To empty bladder before and during surgery and before certain diagnostic examinations.
Equipment’s Required:
• Dressing trolley
• Catheterization set containing:
✓ Kidney tray
✓ Sponge forceps
✓ Gauze pieces
✓ Peri sheet
✓ Cotton ball
✓ Sterile bottle (for specimen)
• Lubricant(Xylocaine jelly/KY jelly)
• Sterile urinary catheter according to the size of the lumen. (Number 14/16 French for adult
female, 18/20 French for adult male, number 8 /10 French catheters are commonly used for
children.)
• Syringe with10cc of sterile water
• Urobag
• Rubber mackintosh or draw sheet

55
• Sterile gloves
• Betadine
• Adhesive tape
• Screen for privacy
• Flash light or lamp
Preparation of the Patient:
1. Adequate exploration: On some instances, catheterization is the last resort, use other
techniques first for drawing out the urine before proceeding to catheterization.
2. Position: Dorsal recumbent for the female and supine for the male using a firm mattress or
treatment table, Sim’s or lateral position can be an alternate for the female patient
3. Provision for privacy
Figure: Placement of urinary catheter
Procedure:
S.N. Care action Rationale
1. • Explain to the patient and family about the
procedure while maintaining privacy.
• Explanation encourages patient
cooperation and reduces
apprehension.
2. • Place the patient in the lithotomy position.
• Provide for good light.
• Proper positioning allows adequate
visualization of the urinary meatus.
• Good lighting is necessary to see
the meatus clearly.
3. • Bring the necessary Equipment’s to the
bedside.
• Place the mackintosh and draw sheet under
the hip and place the kidney dish between
the patient's legs.
• Prevents spoilage in the bed.
4. • Open the catheterization set (by the assistant
if available).
• Placement of equipment near
worksite increases efficiency.

56
5. • Wash hands with soap and water.
• Open the sterile tray and wear sterile gloves.
• Hand hygiene reduces the spread
of microorganisms.
• Gloves reduce the risk of exposure
to blood and body fluids.
6. • Clean the vagina/penis with betadine swabs.
Move from the inside to the outside starting
at the top to downward.
• Cleaning reduces microorganisms
near the urethral meatus and
provides opportunity to visualize
perineum and landmarks prior to
procedure.
7. • Take Xylocaine/KY Jelly in one piece of
gauze and hold the catheter. Then apply
Xylocaine/KY Jelly on the tip of the
catheter.
• Lubrication facilitates catheter
insertion and reduces tissue
trauma.
8. • Insert the catheter gently into the meatus 4
to 5 cm for females and 17 to 20 cm for
males. Once urine starts to flow, hold the
catheter in place with the left hand to
prevent the catheter from slipping out.
• Bladder or sphincter contraction
could push the catheter out.
9. • Collect the urine in the specimen bottle, if
needed.
10. • Connect the Urobag to the Foley's catheter,
if continuous drainage is needed.
• Expand the balloon with sterile water
(according to the capacity of the balloon).
• Apply tape to secure the catheter to the inner
thigh.
• This facilitates connection of the
catheter to the drainage system and
provides for easy access.
• Closed drainage system minimizes
the risk for microorganisms being
introduced into the bladder.
• Improper inflation can cause
patient discomfort and mal-
positioning of catheter.
11. • Remove equipment and dispose of
according to facility policy
• Wash and dry the perineal area as needed.
• Proper disposal prevents the spread
of microorganisms.
• Cleaning promotes comfort and
appropriate personal hygiene.
12. • Place the patient in a comfortable position
• Positioning and covering provide
warmth and promote comfort.
13. • Measure and observe the urine output. • Provides baseline data.
14. • Clean all Equipment’s and replace them.
• Remove gloves and wash hands.
• Hand hygiene deters the spread of
microorganisms.
15. Record and report the following about the
procedure:
• Date and time.
• Amount of urine output
• Provide evidence for future.

57
• Any abnormality of colour, odor,
sedimentation
• Signature of nursing staff.
*Nursing Alert*
1. Label the specimen clearly.
2. Send the specimen to the laboratory for testing if needed.
3. Instruct the patient to report if burning and discomfort occurs.
B. APPLYING A CONDOM CATHETER
Definition:
To allow for urinary drainage externally while maintaining skin integration and preventing
Urinary Tract Infection (UTI).
Purpose:
• To prevent soiling from urinary incontinence.
• To collect urinary specimen.
• To prevent and treat skin irritation.
Articles Required:
A tray containing:
• Disposal condom
• Hypoallergic tape
• Urinary drainage bag and tubing
• Clean disposable gloves
• Soap and sponge towel
• Towel
• Tincture Benzoin/Betadine
Procedure:
S.N. Care action Rationale
1. • Explain to the patient and family about the procedure
while maintaining privacy.
• Explanation encourages
patient cooperation and
reduces apprehension.
2. • Position the patient in supine position.
• Provide for good light.
• Proper positioning allows
adequate visualization of
the urinary meatus.
• Good lighting is necessary
to see the meatus clearly.

58
3. • Bring the necessary equipment to the bedside.
• Place the mackintosh and draw sheet under the hip
and place the kidney dish between the patient's legs.
• Prevents spoilage in the
bed.
4. • Open the catheterization set (by the assistant if
available).
• Placement of equipment
near worksite increases
efficiency.
5. • Wash hands with soap and water.
• Open the sterile tray and wear sterile gloves.
• Hand hygiene reduces the
spread of microorganisms.
• Gloves reduce the risk of
exposure to blood and
body fluids.
6. • Clean the genital area; retract the foreskin and clean
glans of penis, tip of penis first in circular motion
from the meatus outward. Clean the shaft of the penis
using downward strokes toward the pubic area.
• Rinse and dry.
• Remove gloves and perform hand hygiene again.
• Cleaning removes urine,
secretions and
microorganisms.
• Cleaning and drying helps
to minimize skin irritation.
• Hand hygiene reduces the
spread of microorganisms.
7. • Place the condom sheath outward onto itself over the
Glans penis and roll along with the penis shaft. Leave
1" to 2"(2.5-5cm) of space between tip of penis and
end of condom sheath.
• Allows for easier
application.
• Space prevents irritation to
tip of penis and allows free
drainage of urine.
8. • Attach the condom catheter to the drainage system.
• Check catheter and tubing to ensure drainage.
• This facilitates connection
of the catheter to the
drainage system and
provides for easy access.
• Closed drainage system
minimizes the risk for
microorganisms being
introduced into the bladder
9. • Make patient comfortable • Positioning and covering
provide warmth and
promote comfort.
10. • Remove the gloves and replace articles.
• Wash hands.
• Hand hygiene deters the
spread of microorganisms.
11. • Document the procedure. • Provide evidence for
future.

59
58
C. CATHETER CARE
C.1 CARING FOR THE PATIENT WITH AN INDWELLING CATHETER
*Nursing Alert*
Be sure to wash hands before and after caring for a patient with an indwelling
catheter.
Clean the perineal area thoroughly, especially around the meatus, twice a day and
after each bowel movement. This helps prevent organisms for entering the bladder
Use soap or detergent and water to clean the perineal area and rinse the area well
Make sure that the patient maintains a generous fluid intake. This helps prevent
infection and irrigates the catheter naturally by increasing urinary output
Encourage the patient to be up and about as ordered
Record the patient’s intake and output
Note the volume and character of urine and record observations carefully
Teach the patient the importance of personal hygiene, especially the importance
of careful cleaning after having bowel movement and thorough washing of hands
frequently
Report any signs of infection promptly. These include a burning sensation and
irritation at the meatus, cloudy urine, a strong odor to the urine, an elevated
temperature and chills
Plan to change indwelling catheters only as necessary. The usual length of time
between catheter changes varies and can be anywhere from 5 days to 2 weeks.
The less often a catheter is changed, the less the likelihood than an infection will
develop
C.2.REMOVING THE INDWELLING CATHETER AND AFTERCARE OF THE
PATIENT
*Nursing Alert*
Be sure the balloon is deflated before attempting to remove the catheter. This may
be done by inserting a syringe into the balloon valve and withdrawing the distilled
water.
Have the patient take several deep breaths to help him relax while gently
removing the catheter. Wrap the catheter in a towel or disposable, waterproof
drape.

59
Clean the area at the meatus thoroughly with antiseptic swabs after the catheter is
removed.
See to it that the patient’s fluid intake is generous and record the patient’s intake
and output. Instruct the patient to void into the bedpan or urinal.
Observe the urine carefully for any signs of abnormality.
Record and report any usual signs such as discomfort, a burning sensation when
voiding, bleeding and changes in vital signs, especially the patient’s temperature.
Be alert to any signs of infection and report them promptly.
COLLECTING BLOOD SPECIMEN
A. PERFORMING VENIPUNCTURE
Definition
Venipuncture is using a needle to withdraw blood from a vein, often from the inside
surface of the forearm near the elbow.
Purpose
To examine the condition of client and assess the present treatment.
To diagnose disease
Equipment required
Laboratory form
Sterilized syringe
Sterilized needles
Tourniquet (1)
Blood collection tubes or specimen vials as ordered
Spirit swabs
Dry gauze
Disposable Gloves if available (1)
Adhesive tape or bandages
Sharps Disposal Container (1)
Steel Tray (1)
Ball point pen (1)
Procedure:
S.N. Care action Rationale
1. Identify the patient. This information must match

60
Outpatient are called into the
phlebotomy area and asked their
name and date of birth.
Inpatients are identified by asking
their name and date of birth.
the requisition.
2. Reassure the client that the
minimum amount of blood required
for testing will be drawn
To perform once properly
without any unnecessary
venipuncture
3. Assemble the necessary equipment
appropriate to the client's physical
characteristics.
Organization facilitates
accurate skill performance
4. Explain to the client about the
purpose and the procedure.
Providing explanation fosters
his/her cooperation and
allays anxiety.
5. Perform hand hygiene and put on
gloves if available.
To prevent the infection of
spreading.
6. Positioning
Make the client to be seated
comfortably or supine position.
Assist the client with the arm
extended to form a straight-line
from shoulder to wrist.
Place a protective sheet under the
arm.
To make the position safe
and comfortable is helpful to
success venipuncture at one
try.
To prevent the spread of
blood
7. Check the client’s requisition form,
blood collection tubes or vials and
make the syringe-needle ready.
To assure the doctor’s order
with the correct client and to
make the procedure
smoothed
8. Select the appropriate vein for
venipuncture.
The larger median cubital,
basilica and cephalic veins
are most frequently used, but
other may be necessary and
will become more prominent
if the client closes his/her fist
tightly.
9. Applying the tourniquet:
Apply the tourniquet 3-4 inches (8
- 10 cm) above the collection site.
Never leave the tourniquet on for
To prevent the venipuncture
site from touching the
tourniquet and keep clear
vision

61
over 1 minute.
If a tourniquet is used for
preliminary vein selection, release
it and reapply after two minutes.
Tightening of more than 1
minute may bring erroneous
results due to the change of
some blood composition.
10. Selection of the vein:
Feel the vein using the tip of the
finger and detect the direction,
depth and size of vein.
Massage the arm from wrist to
elbow. If the vein is not prominent,
try the other arm.
To assure venipuncture at
one try.
11. Disinfect the selected site:
Clean the puncture site by making
a smooth circular pass over the site
with the spirit swab, moving in an
outward spiral from the zone of
penetration.
Allow the skin to dry before
proceeding.
Do not touch the puncture site after
cleaning.
After blood is drawn the desired
amount, release the tourniquet and
ask the client to open his/her fist
Place dry gauze over the puncture
site and remove the needle.
Immediately apply slight pressure.
Ask the client to apply pressure for
at least 2 minutes.
When bleeding stops, apply a fresh
bandage or gauze with tape.
To prevent the infection from
venipuncture site
Disinfectant has the effect on
drying
To prevent the site from
contaminating.
To avoid making
ecchymoma.
The normal coagulation time
is 2-5 minutes.
12. Transfer blood drawn into
appropriate blood specimen bottles
or tubes as soon as possible using a
needless syringe.
The container or tube containing an
additive should be gently inverted
5-8 times or shaking the specimen
container by making figure of 8.
A delay could cause
improper coagulation.
Do not shake or mix
vigorously.

62
13. Dispose of the syringe and needle
as a unit into an appropriate sharps
container.
To prevent the spread of
infection
14. Label all tubes or specimen bottles
with client name, age, sex,
inpatient no., date and time.
To prevent the blood tubes or
bottles from misdealing.
15. Send the blood specimen to the
laboratory immediately along with
the laboratory order form.
To avoid misdealing and
taking erroneous results.
16. Replace Equipment’s and disinfects
materials if needed.
To prepare for the next
procedure and prevent the
spread of infection.
17. Put off gloves and perform hand
hygiene.
To prevent the spread of
infection
*Nursing Alert*
Factors to consider in site selection:
Extensive scarring or healed burn areas should be avoided.
Specimens should not be obtained from the arm on the same side as a
mastectomy.
Avoid areas of hematoma.
If an I.V. is in place, samples may be obtained below but NEVER above the I.V.
site.
Do not obtain specimens from an arm having a cannula, fistula, or vascular graft.
Allow 10-15 minutes after a transfusion is completed before obtaining a blood
sample.
Safety
Observe universal (standard) precaution safety precautions. Observe all applicable
isolation procedures.
Needle are never recapped, removed, broken or bent after phlebotomy procedure.
Gloves are to be discarded in the appropriate container immediately after the
procedure.
Contaminated surfaces must be cleaned with freshly prepared 10 % bleach
solution. All surfaces are cleaned daily with bleach.
In the case of an accidental needle-stick, immediately wash the area with an
antibacterial soap, express blood from the wound, and contact your supervisor.

63
If a blood sample is not available,
Reposition the needle.
Loosen the tourniquet
Probing is not recommended.
A patient should never be stuck more than twice unsuccessfully by a same staff.
The supervisor or a senior staff should be called to assess the client.
B. ASSISTING IN OBTAINING BLOOD FOR CULTURE
Definition
Collecting of blood specimen for culture is a sterile procedure to obtain blood specimen.
Sterile techniques are used in whole of the procedure.
Purpose
To identify s disease-causing organisms
To detect the right antibiotics to kill the particular microorganisms
Equipment Required
Laboratory form
Sterilized syringes (10 mL): (2-3)
Sterilized needles: (2-3)
Tourniquet (1)
Blood culture bottles or sterile tubes containing a sterile anticoagulant solution as
required
Disinfectant : Povidone-iodine or spirit swabs
Dry gauze
Disposable gloves if available (1)
Adhesive tape or bandages
Sharps Disposal Container (1)
Steel Tray (1)
Ball point pen (1)
Procedure
*Nursing Alert*: You are responsible to notify the proper client when the culture is to
be done. Use the following actions in assisting with blood cultures:

64
S.N. Care Action Rationale
1. Identify the patient. This information must match
the requisition.
2. Reassure the client that the
minimum amount of blood
required for testing will be
drawn.
To perform once properly
without any unnecessary
collecting of blood
3. Assemble the necessary
equipment appropriate to the
client's physical characteristics.
Organization facilitate
accurate skill performance
4. Explain to the client about the
purpose and the procedure.
Providing explanation fosters
his/her cooperation and
allays anxiety.
5. Label all tubes or specimen
bottles with client name, age,
sex, inpatient number, date and
time.
To prevent the blood tubes or
bottles from misdealing.
6. Perform hand hygiene and put
on gloves if available.
To prevent the infection of
spreading.
7. Protect the bed with a pad under
the client’s arm.
To prevent the bed of
escaping or wetting the
disinfectant and blood.
8. Place the arm with proper
position and disinfect around
the injection site approximate 2-
3 inches
To prevent unnecessary
injury and protect of entering
organisms from the skin
surfaces
9. While puncturing:
Assist the person who is
drawing blood
Confirm the amount
After obtaining sufficient blood
specimen, receive and place the
specimen into the specimen
container with strict sterile
technique.
Close the container promptly
and tightly
Sometimes the blood may be
placed into two or more tubes
or bottles.
To secure the sterilized
condition of container
10. After puncturing:

65
Place a sterile gauze pad and
folded into a compress tightly
over the site.
Secure firmly with tape.
Check the stop of bleeding a
few minutes later.
To make sure all bleeding
has stopped
11. Dispose of the syringe and
needle as a unit into an
appropriate sharps container.
To prevent the spread of
infection
12. Send the specimen to the
laboratory immediately along
with the laboratory order form.
To avoid misdealing and
taking erroneous results.
13. Replace Equipment’s and
disinfects materials if needed.
To prepare for the next
procedure and prevent the
spread of infection.
14. Put off gloves and perform
hand hygiene.
To prevent the spread of
infection.
15. Document the procedure in the
designated place and mark it off
on the Cardex.
To avoid duplication
Documentation provides
coordination of care.
C. COLLECTING URINE SPECIMEN
Definition
Urinalysis, in which the components of urine are identified, is part of every client
assessment at the beginning and during an illness.
Purpose
To diagnose illness.
To monitor the disease process
To evaluate the efficacy of treatment
Procedure
S.N. Care Action Rationale
1. Label specimen containers or Reduce handling after the

66
bottles before the client voids. container or bottle is
contaminated.
2. Note on the specimen label if the
female client is menstruating at
that time.
One of the tests routinely
performed is a test for blood
in the urine. If the female
client is menstruating at the
time a urine specimen is
taken, a false-positive reading
for blood will be obtained
3. To avoid contamination and
necessity of collecting another
specimen, soap and water
cleansing of the genitals
immediately preceding the
collection of the specimen is
supported
Bacteria are normally present
on the labia or penis and the
perineum and in the anal area.
4. Maintain body substances
precautions when collecting all
types of urine specimen.
To maintain safety.
5. Wake a client in the morning to
obtain a routine specimen.
If all specimens are collected
at the same time, the
laboratory can establish a
baseline.
And also this voided specimen
usually represents that was
collecting in the bladder all
night.
6. Be sure to document the procedure
in the designated place and mark it
off on the Cardex.
To avoid duplication.
D. COLLECTING A SINGLE VOIDED SPECIMEN
Equipment required
Laboratory form
Clean container with lid or cover (1): wide-mouthed container is recommended

67
Bedpan or urinal (1): as required
Disposable gloves (1): if available
Toilet paper as required
Procedure
S.N. Care Action Rationale
1. Explain the procedure Providing information fosters
his/her cooperation
2. Assemble equipment and
check the specimen form with
client’s name, date and
content of urinalysis
Organization facilitates accurate
skill performance.
Ensure that the specimen
collecting is correct.
3. Label the bottle or container
with the date, client’s name,
department identification, and
doctor's name.
Ensure correct identification and
avoid mistakes.
4. Perform hand hygiene and put
on gloves
To prevent the spread of infection
5. Instruct the client to void in a
clean receptacle.
To prevent cross-contamination
6. Remove the specimen
immediately after the client
has voided.
Substances in urine decompose
when exposed to air.
Decomposition may alter the test
results
7. Pour about 10-20 mL of urine
into the labeled specimen
bottle or container and cover
the bottle or container
Ensure the client voids enough
amount of the urine for the
required tests.
Covering the bottle retards
decomposition and it prevents
added contamination.
8. Dispose of used equipment or
clean them
Remove gloves and perform
hand hygiene.
To prevent the spread of infection
9. Send the specimen bottle or
container to the laboratory
immediately with the
specimen form.
Organisms grow quickly at room
temperature.

68
10. Document the procedure in the
designated place and mark it
off on the Cardex.
To avoid duplication.
Documentation provides
coordination of care.
E. COLLECTING A 24-HOUR URINE SPECIMEN
Definition
Collection of a 24-hour urine specimen is defined as the collection of all the urine voided
in 24 hours, without any spillage of wastage.
Purpose
To detect kidney and cardiac diseases or conditions
To measure total urine component
Equipment Required
Laboratory form
Bedpan or urinal (1)
24 hours collection bottle with lid or cover (1)
Clean measuring jar (1)
Disposable gloves if available (1)
Paper issues if available
Ballpoint pen (1)
Procedure:
S.N. Care Action Rationale
1. Explain the procedure. Providing information fosters
his/her cooperation.
2. Assemble equipment and check
the specimen form with client’s
name, date and content of
urinalysis
Organization facilitates
accurate skill performance.
Ensure that the specimen
collecting is correct.
3. Label the bottle or container with
the date, client’s name,
department identification, and
Doctor’s name.
Ensure correct identification
and avoid mistakes.
4. Instruct the client:

69
Before beginning a 24 hour urine
collection, ask the client to void
completely.
Document the starting time of a-
24 hour urine collection on the
specimen form and nursing
record.
Instruct the client to collect all
the urine into a large container
for the next 24 hours.
In the exact 24 hours later, ask
the client to void and pour into
the large container.
Measure total amount of urine
and record it on the specimen
form and nursing record.
Document the time when
finished the collection.
To measure urinal component
and assess the function of
kidney and cardiac function
accuracy.
The entire collected urine
should be stored in a covered
container in a cool place
5. Sending the specimen:
Perform hand hygiene and put on
gloves if available.
Mix the urine thoroughly.
Collect some urine as required or
all the urine in a clean bottle with
lid.
Transfer it to the laboratory with
the specimen form immediately
To prevent the contamination
Ensure the client voids enough
amount of the urine for the
required tests.
Covering the bottle retards
decomposition and it prevents
added contamination.
Substances in urine
decompose when exposed to
air.
Decomposition may alter the
test results
6. Dispose of used equipment or
clean them.
Remove gloves and perform
hand hygiene.
To prevent the spread of
infection.
7. Document the procedure in the
designated place and mark it off
on the cardex.
To avoid duplication.
Documentation provides
coordination of care

70
F. COLLECTING A URINE SPECIMEN FROM A RETENTION CATHETER
Equipment Required
Laboratory form
Disposable gloves if available (1)
Container with label as required
Spirit swabs or disinfectant swabs
10-20-mLsyringe with 21-25-gauge needle
Clamp or rubber band (1)
Ballpoint pen (1)
Procedure
S.N. Care Action Rationale
1. Assemble equipment.
Label the container.
Organization facilitates accurate
skill performance
2. Explain the procedure to the
client.
Providing information fosters
his/her cooperation
3. Perform hand hygiene and put
on gloves if available.
To prevent the spread of
infection.
4. Clamp the tubing:
1) Clamp the drainage tubing or bend
the tubing
2) Allow adequate time for urine
collection
*Nursing Alert*
You should not clamp longer than
15minutes.
Collecting urine from the tubing
guarantees fresh urine.
Long-time clamp can lead back
flow of urine and is able to
cause urinary tract infection
5. Cleanse the aspiration port with
a spirit swab or another
disinfectant swab (e.g.,
Betadine swab)
Disinfecting the port prevents
organisms from entering the
catheter.
6. Withdrawing the urine:
1) Insert the needle into the aspiration
port
2) Withdraw sufficient amount of urine
gently into the syringe .
This technique for
uncontaminated urine
specimen, preventing
contamination of the client’s
bladder.
7. Transfer the urine to the labeled
specimen container
*Nursing Alert*
Carefullabeling and transfer
prevents contamination or
confusion of the urine specimen

71
The container should be clean for a
routine urinalysis and be sterile for a
culture
Appropriate container brings
accurate results of urinalysis.
8. Unclamp the catheter The catheter must be
unclamped to allow free urinary
flow and to prevent urinary
stasis.
9. Prepare and pour urine to the
container for transport.
Proper packaging ensures that
the specimen is not an infection
risk.
10. Dispose of used equipment and
disinfect if needed.
Remove gloves and perform
hand hygiene
To prevent the spread of
infection.
11. Send the container to the
laboratory immediately.
Organisms grow quickly at
room temperature
12. Document the procedure in the
designated place and mark it
off on the Cardex.
To avoid duplication.
Documentation provides
coordination of care.
G. COLLECTING A URINE CULTURE
Definition
Collecting a urine culture is a process in which urine specimen is obtained with sterile
technique.
Purpose
To collect uncontaminated urine specimen for culture and sensitivity test.
To detect the microorganisms causes urinary tract infection (UTI).
To diagnose and treat with specific antibiotic
Equipment Required
Laboratory form
Sterile gloves (1)
Sterile culture bottle with label as required

72
Sterile kidney tray or sterile container with wide mouthed if needed
Bed pan if needed (1)
Paper tissues if needed
Ballpoint pen (1)
Procedure
S.N. Care action Rationale
1. Assemble equipment and check
the specimen form with client’s
name, date and content of
urinalysis.
Organization facilitates
accurate skill performance.
Ensure that the specimen
collecting is correct.
2. Label the bottle or container
with the date, Client’s name,
department identification, and
Doctor’s name.
Ensure correct identification
and avoid mistakes.
3. Explain the procedure to the
client.
Providing information fosters
his/her cooperation.
4. Instruct the client:
Instruct the client to clean
perineum with soap and water
Open sterilized container and
leave the cover facing inside
up.
Instruct the client to void into
sterile kidney tray or sterilized
container with wide mouth.
If the client is needed bed-rest
and needs to pass urine more,
put bed pan after you collected
sufficient amount of sterile
specimen.
To prevent the contamination
of specimen from perineum
area.
The cover should be kept the
state sterilized.
To secure the specimen kept
in sterilized container surely.
5. Remove the specimen
immediately after the client has
voided. Obtain 30-50 mL at
midstream point of voiding
Substances in urine
decompose when exposed to
air.
Decomposition may alter the
test results.
Ensure the client voids enough
amount of the urine for the
required tests.
Emphasize first and last

73
portions of voiding to be
discarded.
6. Close the container securely
without touching inside of
cover or cap.
Covering the bottle retards
decomposition and it prevents
added contamination.
7. Dispose of used equipment or
clean them.
Remove gloves and perform
hand hygiene.
To prevent the spread of
infection
8. Send the specimen bottle or
container to the laboratory
immediately with the specimen
form.
Organisms grow quickly at
room temperature
9. Document the procedure in the
designated place and mark it
off on the Cardex.
To avoid duplication.
Documentation provides
coordination of care
H. COLLECTING A STOOL SPECIMEN
Definition
Collection of stool specimen deters a process which is aimed at doing chemical
bacteriological or parasitological analysis of fecal specimen.
Purpose:
To identify specific pathogens
To determine presence of ova and parasites.
To determine presence of blood and fat.
To examine for stool characteristics such as color, consistency and odor
Equipment Required
Laboratory form
Disposable gloves if available (1)
Clean bedpan with cover (1)
Closed specimen container as ordered
Label as required

74
Wooden tongue depressor (1-2)
Kidney tray or plastic bag for dirt (1)
Procedure
S.N Care Action Rationale
1. Assemble equipment.
Label the container.
Organization facilitates
accurate skill performance.
Careful labeling ensures
accuracy of the report and alerts
the laboratory personnel to the
presence of a contaminated
specimen.
2. Explanation:
Explain the procedure to the
client.
Ask the client to tell you
when he/she feels the urge to
have a bowel movement.
Providing information fosters
his/her cooperation.
Most of clients cannot pass on
command.
3. Perform hand hygiene and put
on gloves if available.
To prevent the spread of
infection.
4. Placing bedpan:
Close door and put curtains/ a
screen.
Give the bedpan when the
client is ready.
Allow the client to pass feces
Instruct not to contaminate
specimen with urine
To provide privacy.
You are most likely to obtain a
usable specimen at this time.
To gain accurate results.
5. Collecting a stool specimen:
Remove the bedpan and assist
the client to clean if needed.
Use the tongue depressor to
transfer a portion of the feces
to the container without any
touching.
Take a portion of feces from
three different areas of the
stool specimen.
Cover the container
It is grossly contaminated
To gain accurate results.
It prevents the spread of odor.
6. Remove and discard gloves. To prevent the spread of

75
Perform hand hygiene. infection
7. Send the container
immediately to the laboratory.
Stools should be examined when
fresh.
Examinations for parasites, ova,
and organisms must be made
when the stool is warm.
8. Document the procedure in
the designated place and mark
it off on the Cardex.
To avoid duplication
Documentation provides
coordination of care.
*Nursing Alert*
The procedure is exact same in routine test of stool and culture. But when you collect
stool specimen you should caution on the next point;
Collect stool specimen with clean wooden tongue depressor or spatula for routine
stool test.
Collect stool specimen with sterile wooden tongue depressor or spatula for
culture.
I. COLLECTING A SPUTUM SPECIMEN
A. ROUTINE TEST
Definition
Collecting a sputum specimen is defined as a one of diagnostic examination using sputum
Purpose
To diagnose respiratory infection.
To assess the efficacy of treatment to diseases such as TB.
Equipment Required
Laboratory form
Disposable gloves if available (1)
Sterile covered sputum container (1)
Label as required
Sputum mug or cup (1)

76
Kidney tray or plastic bag for dirt (1)
Paper tissues as required
Ballpoint pen (1)
Procedure
S.N. Care Action Rationale
1. Assemble equipment.
Label the container.
Organization facilitates accurate
skill performance.
Careful labeling ensures
accuracy of the report and alerts
the laboratory personnel to the
presence of a contaminated
specimen.
2. Explain the procedure to the
client.
Providing information fosters
his/her cooperation.
3. Perform hand hygiene and put
on gloves if available.
To prevent the spread of
infection.
The sputum specimen is
considered highly contaminated,
so you should treat it with
caution.
4. Collecting the specimen:
Instruct the client to cough up
secretions from deep in the
respiratory passage.
Have the client expectorate
directly into the sterile
container.
Instruct the client to wipe
around mouth if needed.
Discard it properly.
Close the specimen
immediately
A sputum specimen should be
from the lungs and bronchi. It
should be sputum rather than
mucous.
Avoid any chance of outside
contamination to the specimen
or any contamination of other
objects.
Paper tissues used by any client
are considered contaminated.
To prevent contamination.
5. Remove and discard gloves.
Perform hand hygiene
To prevent contamination of
other objects, including the
label
6. Send specimen to the
laboratory immediately.
To prevent the increase of
organisms.
7. Document the procedure in the To avoid duplication.

77
designated place and mark it
off on the Cardex.
Documentation provides
coordination of care
B. COLLECTING A SPUTUM CULTURE
Definition
Collection of coughed out sputum for culture is a process to identify respiratory
pathogens.
Purpose
To detect abnormalities.
To diagnose disease condition.
To detect the microorganisms causes respiratory tract infections.
To treat with specific antibiotics.
Equipment Required
Laboratory form
Disposable gloves if available (1)
Sterile covered sputum container (1)
Label as required
Kidney tray or plastic bag for dirt (1)
Paper tissues as required
Ballpoint pen (1)
*Nursing Alert*
Provide proper and understandable explanation to the client:
1. Give specimen container on the previous evening with instruction how to treat.
2. Instruct to raise sputum from lungs by coughing, not to collect only saliva.
3. Instruct the client to collect the sputum in the morning
4. Instruct the client not to use any antiseptic mouth washes to rinse his/her
mouth before collecting specimen.
Procedure
S.N. Care Action Rationale
1. Assemble equipment. Organization facilitates accurate

78
Label the container. skill performance.
Careful labeling ensures accuracy
of the report and alerts the
laboratory personnel to the
presence of a contaminated
specimen.
2. Explain the procedure to the
client.
Providing information fosters
his/her cooperation
3. Perform hand hygiene and put
on gloves if available.
To prevent the spread of infection.
The sputum specimen is
considered highly contaminated,
so you should treat it with caution.
4. Instruct the client:
Instruct the client to collect
specimen early morning
before brushing teeth.
Instruct the client to remove
and place lid facing upward.
Instruct the client to cough
deeply and expectorate
directly into specimen
container.
Instruct the client to
expectorate until you collect
at least 10 mL of sputum.
Close the container
immediately when sputum
was collected.
Instruct the client to wipe
around mouth if needed.
Discard it properly
To obtain overnight accumulated
secretions.
To maintain the inside of lid as
well as inside of container.
A sputum specimen should be
from the lungs and bronchi. It
should be sputum rather than
mucous.
To obtain accurate results.
To prevent contamination.
Paper tissues used by any client
are considered contaminated.
5. Remove and discard gloves. Perform hand hygiene .
To prevent contamination of other
objects, including the label.
6. Send specimen to the
laboratory immediately.
To prevent the increase of
organisms.
7. Document the procedure in
the designated place and mark
it off on the Cardex.
To avoid duplication.
Documentation provides
coordination of care.

79
ADMINSTRATION OF MEDICATION
A.ORAL MEDICATION
Definition
Oral medication is defined as the administration of medication by mouth.
Purposes
To prevent the disease and take supplement in order to maintain health
To cure the disease
To promote the health
To give palliative treatment
To give as a symptomatic treatment
Equipment Required
Steel tray (1)
Drinking water in jug (1)
Doctor’s prescription
Medicine prescribed
Medicine cup (1)
Pill crusher/ tablet cutter if needed
Kidney tray/ paper bag (to discard the waste) (1)
Procedure
S.N. Care Action Rationale
1. Perform hand hygiene To prevent the spread of infection
2. Assemble all Equipment’s Organization facilitates accurate
skill performances
3. Verify the medication order
using the client’s Cardex.
Check any inconsistencies
with Doctor before
administration
To reduce the chance of
medication errors
4. Prepare one client’s
medication at a time.
Lessen the chances for medication
errors

80
5. Proceed from top to bottom of
the Cardex when preparing
medications
This ensures that you do not miss
any medication orders.
6. Select the correct medication
from the shelf or drawer and
compare the label to the
medication order on the
Cardex.
a. From the multidose bottle:
Pour a pill from the multidose
bottle into the container lid
and transfer the correct
amount to a medicine cup.
b. In the case of unit packing:
Leave unit dose medication in
wrappers and place them in a
medication cup
c. Liquid medications:
Measure liquid medications
by holding the medicine cup
at eye level and reading the
level at the bottom of the
meniscus. Pour from the
bottle with the label
uppermost and wipe the
neck if necessary
Comparing medication to the
written order is a check that helps
to prevent errors
Pouring medication into the lid
eliminates handling it.
Unit dose wrappers keep
medications clean and safe.
Holding a cup at eye level to pour
a liquid gives the most accurate
measurement.
Pouring away from the label and
wiping the lip helps keep the label
readable
7. Recheck each medication with
the Cardex.
To ensure preparation of the
correct dose
8. When you have prepared all
medications on a tray,
compare each one again to the
medication order.
To check all medications three
times to prevent errors.
9 Crush pills if the client is
unable to swallow them:
1. Place the pill in a pill crusher
and crush the pill until it is in
powder form.
(Do not crush time-
release capsules or enteric-
coated tablets)
Crushed medications are often
easier to swallow.

81
2. Dissolve substance in water or
juice, or mix with apple sauce
to mask the taste.
3. If no need to crush, cut tablets
at score mark only.
Enteric-coated tablets that are
crushed may irritate the stomach’s
mucosal lining.
Opening and crushing the
contents of a time-release capsule
may interfere with its absorption
10. Bring medication to the client
you have prepared
Hospital agency policy considers
30 minutes before after the
ordered time as an acceptable
variation
11. Identify the client before giving the
medication:
a. Ask the client his/her name.
b. Ask a staff member to identify
the client.
c. Check the name on the
identification bracelet if
available
To abide by twelve rights to
prevent medication errors.
Checking the identification
bracelet is the most reliable
12. Complete necessary
assessments before giving
medications.
Additional checking includes
taking vital signs and allergies to
medications, depending on the
medication’s action.
13. Assist the client to a
comfortable position to take
medications.
Sitting as upright as possible
makes swallowing medication
easier and less likely to cause
aspiration.
14. Administer the medication:
Offer water or fluids with the
medication.
Open unit dose medication
package and give the
medication to the medicine
cup.
Review the medication’s
name and purpose.
Discard any medication that
falls on the floor.
Mix powder medications with
fluids at the bedside if needed.
You should be aware of any fluid
restrictions that exist.
Powdered forms of drugs may
thicken when mixed with fluid.
You should give them

82
Record fluid intake on the
balance sheet
immediately.
Recording fluid taken with
medications maintains accurate
documentation.
15. Remain with the client until
he/she has taken all
medication.
Confirm the client’s mouth if
needed.
Be sure that the client takes the
medication.
Leaving medication at the bedside
is unsafe.
16. Perform hand hygiene To prevent the spread of infection
17. Record medication administration on
the appropriate form:
Sign after you have given the
medication.
If a client refused the
medication, record according
to your hospital/agency policy
on the record.
Document vital sign’s or
particular assessments
according to your hospital’s
form.
Sign in the narcotic record for
controlled substances when
you remove them from the
locked area (e.g, drawer or
shelf).
Documentation provides
coordination of care and giving
signature maintains professional
accountability.
To verify the reason medications
were omitted as well as the
specific nursing assessments
needed to safely administer
medication.
To confirm medication’s action.
Hospital policy regulates special
documentation for controlled
narcotic substances.
18. Check the client within 30
minutes after giving
medication.
To verify the client’s response to
the medication.
Particularly, you should check the
response after administered pain
killer whether if the medication
relieves pain or not.

83
B. ADMINISTERING ORAL MEDICATIONS THROUGH A NASO-
GASTRIC TUBE
Purpose
To reduce the risk of aspiration.
To administer medication in patient with dysphagia, esophageal trauma.
Equipment's Required
Client’s cardex and chart
Prescribed Medications
Medicine cup -1
Water or other fluids as needed
Mortar and pestle or pill crusher if an order to crush medications has been
obtained
Disposable gloves-1pair (if available)
Large syringe (50 mL) (1)
Small syringe (3-5 mL)(1)
Stethoscope (1)
Procedure
S.N. Care Action Rationale
1. Confirmation of the medication:
Check the name, dosage, type,
time of medication with the
client’s cardex.
If you are going to give more
than one medication, make
sure they are compatible.
Ensures administration of correct
medication and dosage to the
correct client.
2. Check the cardex and the
client’s record for allergies to
medications.
You cannot administer a
medication to which the client
previously experienced an allergic
reaction.
3. Perform hand hygiene. To prevent the spread of
infection.
4. Assemble all equipment. Organization helps to eliminate
the possibility of medication
errors.
5. Set up medication following
the twelve rights of
administration.
To decrease the possibility of
errors.

84
6. Explain the procedure It fosters client’s cooperation and
understanding.
7. Put on gloves if available
To reduce the risk of infection.
8. Check the placement of the naso-
gastric tube:
Connect a small syringe to the
end of tube
Gently aspirate the gastric
juice or endogastric
substances with a syringe.
Ensure that medication will be
delivered into the stomach.
9. After checking for the placement of
the gastric tube, pinch or clamp the
tubing and remove the syringe.
1. Flush the tube with 30 ml
water.
2. Administering medications:
Pour required liquid
medication into the medicine
cup. (Pills must be crushed
and capsules opened.)
Add 15-20 ml of water and
stir thoroughly.
Remove the plunger from the
syringe and insert the syringe
tip in the NG tube.
Release the clamp and pour
the medication into the
syringe.
If the medication does not
flow freely down the tube,
insert the plunger and gently
apply a slight pressure.
After you have administered
the medication, flush the tube
with 15 to 30 ml of water.
Clamp the tubing and remove
the syringe.
Prevents endogastric c substances
from escaping through the tubing.
Ensure that no air enters the
stomach, causing discomfort for
the client.
To ensure tube patency.
Allows medication to flow into
the NG tube.
Pressure helps start the flow.
To prevent tube blockage.

85
Replace the tubing plug. If
feeding is continued,
reconnect the tubing to the
feeding tubing.
3. Assist the patient in a
comfortable position.
4. Document time, medication
type and amount, and the
amount of water on the I/O
chart.
To promote comfort.
Documentation provides
continuity of care and giving
signature maintains professional
accountability.
*Note:
Never crush a mixture of tablets together.
Never combine drugs in the syringe.
Never mix liquid formulations.
Flush with an appropriate volume of water (usually 10 ml) before administering
another drug.
C. LOADING MEDICATIONS FROM AN AMPOULE
Purpose
To prepare medication for the administration by sterile method
Equipment required
Medication chart
Sterile syringe (1)
Sterile needle (1)
Second needle (optional)
Spirit swab
Ampoule of medication prescribed
Ampoule cutter if available (1)Kidney tray (1)
Steel Tray (1)
Container for discarding if possible (1)
Procedure
S.N. Care Action Rationale
1. Gather equipment.
Check the medication order
against the original Doctor's
order according to hospital/
agency policy.
To prevent medication error.
2. Perform hand hygiene. To prevent the spread of
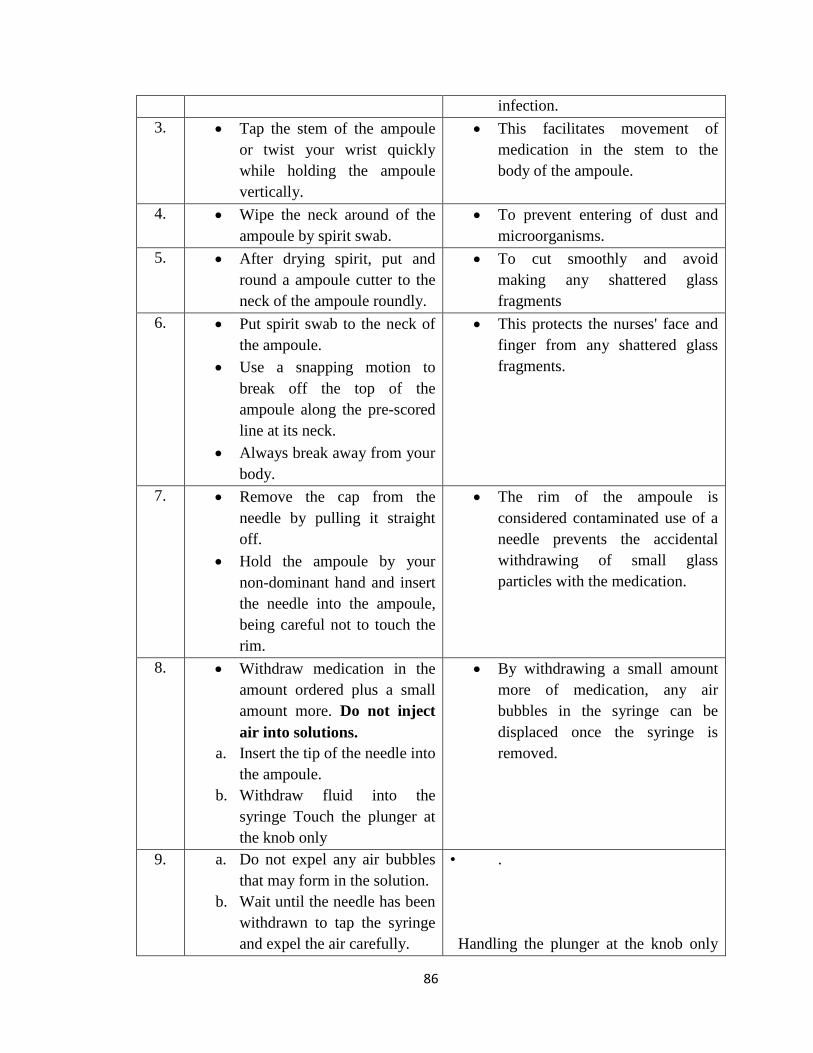
86
infection.
3. Tap the stem of the ampoule
or twist your wrist quickly
while holding the ampoule
vertically.
This facilitates movement of
medication in the stem to the
body of the ampoule.
4. Wipe the neck around of the
ampoule by spirit swab.
To prevent entering of dust and
microorganisms.
5. After drying spirit, put and
round a ampoule cutter to the
neck of the ampoule roundly.
To cut smoothly and avoid
making any shattered glass
fragments
6. Put spirit swab to the neck of
the ampoule.
Use a snapping motion to
break off the top of the
ampoule along the pre-scored
line at its neck.
Always break away from your
body.
This protects the nurses' face and
finger from any shattered glass
fragments.
7. Remove the cap from the
needle by pulling it straight
off.
Hold the ampoule by your
non-dominant hand and insert
the needle into the ampoule,
being careful not to touch the
rim.
The rim of the ampoule is
considered contaminated use of a
needle prevents the accidental
withdrawing of small glass
particles with the medication.
8. Withdraw medication in the
amount ordered plus a small
amount more. Do not inject
air into solutions.
a. Insert the tip of the needle into
the ampoule.
b. Withdraw fluid into the
syringe Touch the plunger at
the knob only
By withdrawing a small amount
more of medication, any air
bubbles in the syringe can be
displaced once the syringe is
removed.
9. a. Do not expel any air bubbles
that may form in the solution.
b. Wait until the needle has been
withdrawn to tap the syringe
and expel the air carefully.
• .
Handling the plunger at the knob only

87
c. Check the amount of
medication in the syringe and
discard any surplus.
will keep the shaft of the plunger sterile.
Ejecting air into the solution increases
pressure in the ampoule and can force the
medication to spill out over the ampoule.
Careful measurement ensures that the
correct dose is withdrawn.
-If not all of the medication has been
removed from the ampoule, it must be
discarded because there is no way to
maintain the sterility of the contents in an
unopened ampoule.
10. Discard the ampoule in a
kidney tray or a suitable
container after comparing
with the medication chart.
11. Dispose the syringe by sterile
method and keep the syringe
in safe and clean tray. If the
medication is to be given IM
or if agency policy requires
the use of a needle to
administer medication, attach
the selected needle to the
syringe.
12. Perform hand hygiene.
D. LOADING OF MEDICATION FROM VIAL
Definition
To remove medication form a vial defines that you prepare medication from an ampoule
for IV, IM or another administration of medication.
Purpose
To prepare medication for administration of medication by sterilized method.
Equipment’s required
Medication chart
Sterile syringe (1)
Sterile needle (1)

88
Size depends on medication being administration and client
Vial of medication prescribed
Spirit swabs
Second needle (optional)
Size depends on medication being administration and client
Kidney Tray (1)
Steel Tray (1)
Procedure
S.N. Care Action Rationale
1. Gather Equipment’s.
Check medication order
against the original doctor's
order according to agency
policy.
This comparison helps to identify
errors that may have occurred
when orders were transcribed.
2. Perform hand hygiene. To prevent the spread of
infection.
3. Remove the metal or plastic
cap on the vial that protects
the rubber stopper
The metal or plastic cap prevents
contamination of the rubber top.
4. Swab the rubber top with the
spirit swab.
Sprit removes surface bacteria
contamination.
This should be done the first the
rubber stopper is entered, and
with any subsequent re-entries
into the vial.
5. Remove the cap from the
needle by pulling it straight
off.. Draw back an amount of
air into the syringe that is
equal to the specific dose of
medication to be withdrawn.
Before fluid is removed, injection
of an equal amount of air is
required to prevent the formation
of a partial vacuum because a vial
is a sealed container. If not
enough air is injected, the
negative pressure makes it
difficult to withdraw the
medication
6. Pierce the rubber stopper in
the center with the needle tip
and inject the measured air
into the space above the
solution. The vial may be
Air bubbled through the solution
could result in withdrawal of an
inaccurate amount of medication.

89
positioned upright on a flat
surface or inverted
7. Invert the vial and withdraw
the needle tip slightly so that
it is below the fluid level.
This prevents air from being
aspirated into the syringe.
8. Draw up the prescribed
amount of medication while
holding the syringe at eye
level and vertically.
Nursing Alert
Be careful to touch the plunger at the
knob.
Holding the syringe at eye level
facilitates accurate reading, and
vertical position makes removal
of air bubbles from the syringe
easy.
Handling the plunger at the knob
only will keep the shaft of the
plunger sterile.
9. Removal of air:
If any bubbles accumulate in
the syringe, tap the barrel of
the syringe sharply and move
the needle past the fluid into
the air space to re-inject the
air bubble into the vial.
Return the needle tip to the
solution and continue
withdrawing the medication.
Removal of air bubbles is
necessary to ensure that the dose
of medication is accurate.
10. After the correct dose is
withdrawn, remove the needle
from the vial and carefully
replace the cap over the
needle.
Nursing Alert
Some agencies recommended
changing needles, if needed to
administer the medication, before
administering the medication.
This prevents contamination of he
needle and protects the nurse
against accidental needle sticks.
This method can decrease
possibility of contamination by
the first needle and maintain sharp
of the tip on needle.
11. If a multi-dose vial is being used,
label the vial with the date and time
opened, and store the vial containing
the remaining medication according
to agency policy.
Because the vial is sealed, the
medication inside remains sterile
and can be used for future
injections.
12. Perform hand hygiene. To prevent the spread of
infection.

90
E. PREVENTION OF THE NEEDLE-STICK INJURIES:
ONE-HANDED NEEDLE RECAPPING TECHNIQUE
Definition
One-handed needle recapping is a method that places the cap to needle on clean and safe
place such as inside a big tray.
Purpose
To prevent own finger or another person by needle from sticking accidentally
Procedure
S.N. Care Action Rationale
1. Until giving injection:
Before giving the injection,
place the needle cover on a
solid, immovable object such
as the rim of a bedside table
or big tray.
The open end of the cap
should face the nurse and be
within reach of the nurse’s
dominant, or injection hand.
Give the injection
Plan safe handling and disposal if
needles before beginning the
procedure.
2. Recapping:
Place the tip of the needle at
the entrance of the cap.
Gently slide the needle into
the needle cover.
This method can allow time.
3. Once the needle is inside the
cover, use the object’s
resistance to completely cover
the needle.
Confirm that the needle is covered
by the cap.
4. Dispose of the needle at the
first opportunity
This can reduce the risk of
needle-sticking.
5. Perform hand hygiene. To prevent the spread of
infection.
*Nursing Alert*
This procedure should be used only when a sharps disposal box is unavailable and the
nurse cannot leave the client’s room.

91
F. GIVING AN INTRA-MUSCULAR INJECTION
Definition:
Intra-muscular injection is the injection of medicine into muscle tissue. To produce quick
action an patient as the medicine given by injection is rapidly absorbed. Intramuscular
injections are often given in the deltoid, vastus laterials, ventrogluteal and dorsogluteal
muscles.
Purpose
To administer medication deeply into muscle tissue, without injury to the patient.
To administer a medication with absorption and onset of action quicker than the
oral and that may be irritating to the subcutaneous tissues.
To promote and prevent from disease.
Equipment’s required
Client’s chart and Cardex
Prescribed medication
Sterile syringe (3-5 mL) (1)
Sterile needle in appropriate size: commonly used 21 to 23 G with 1.5”(3.8cm)
needle (1)
Spirit swabs
Kidney tray (1)
Disposable container (1)
Ampoule cutter if available (1)
Steel Tray (1)
Disposable gloves if available (1)
Pen
*Nursing Alert*
The needle may be packaged separately or already attached to the sterile syringe.
Prepackaged loaded syringes usually have a needle that is 1” long. BUT! Check
the package with care before opening it.
The needles used for IM injections are longer than subcutaneous needles
(Rationale: Needles must reach deep into the muscle.)
Needle length also depends on the injection site, client’s size, and amount of
subcutaneous fat covering the muscle.
The needle gauge for IM injections should be larger to accommodate viscous
solutions and suspensions.

92
Procedure
S.N. Care Action Rationale
1. Assemble Equipment’s and
check the doctor’s
instructions.
This ensures that the client
receives the right medication at
the right time by the proper route.
2. Explain the procedure to the
client.
Explanation fosters his/her
cooperation and allays anxiety.
3. Perform hand hygiene and put
on gloves if available.
To prevent the spread of
infection.
Gloves act as a barrier and protect
the nurse’s hands from accidental
exposure to blood during the
injection procedure
4. Withdraw medications from
an ampoule or a vial as
described in the procedure
“Removing medication from
an ampoule” or ” Removing
medication from a vial”
*Nursing Alert*
Do not add any air to the syringe
To prepare correct medication
safely before using.
Addition of air bubble to the
syringe is unnecessary and
potentially dangerous because it
could result in an overdose of
medication as well as transfer
microorganism of surrounding to
syringe..
5. Identify the client carefully using the
following way:
Check the name in the
identification bracelet/patient
chart.
Ask the client his/her name
Verify the client’s
identification with a staff
member/ visitors who knows
the client.
You should not rely on the name
on the door, on the board or over
the bed. It is sometimes
inaccurate.
This is the most reliable method if
available.
This requires an answer from the
client. In the elderly and/or illness
the method may causes confusion.
This is double-checked identify.
6. Close the door and put a
screen
To provide for privacy.
7. Assist the client to a Collect site identification

93
comfortable position.
Select the appropriate
injection site using anatomic
landmarks.
Locate the site of choice
*Nursing Alert*
Ensure that the area is not tender and
is free of lumps or nodules.
decreases the risk of injury.
God visualization is necessary to
establish the correct location of
the site and avoid damage to
tissues.
Nodules or lumps may indicate a
previous injection site where
absorption was inadequate.
8. Cleanse the skin with a spirit swab:
Start from the injection site
and move outward in a
circular motion to a
circumference of about 2” (5
cm) from the injection site.
Allow the area to dry.
Place a small, dry gauze or
spirit swab on a clean, nearby
surface or hold it between the
fingers of your non-dominant
hand.
Cleansing the injection site
prepares it for the injection.
This method removes pathogen
away from the injection site.
Alcohol or spirit gives full play to
disinfect after dried.
To prepare a dry gauze or spirit
swab to give light pressure
immediately after I.M.
9. Remove the needle cap by
pulling it straight off.
This technique lessens the risk of
accidental needle-stick and also
prevents inadvertently unscrewing
the needle from the barrel of the
syringe.
10. Spread the skin at the
injection site using your non-
dominant hand.
This makes the tissue taut and
facilitates needle entry. You may
minimize his/her discomfort.
11. Hold the syringe in your
dominant hand like a pencil.
This position keeps your fingers
off the plunger, preventing
accidental medication loss while
inserting the needle.
12. Insert the needle quickly into
the tissue at a 90 degree angle.
A quick insertion is less painful.
This angle ensures you will enter
muscle tissue.
13. Release the skin and move
your non-dominant hand to
steady the syringe’s lower
end.
To prevent movement of the
syringe.

94
14. Aspiration blood:
Aspirate gently for blood
return by pulling back on the
plunger with your dominant
hand.
If blood enters the syringe on
aspiration, withdraw the
needle and prepare a new
injection with a new sterile
set-up
A blood return indicates IV
needle placement.
Possibly a serious reaction may
occur if a drug intended for
intramuscular use is injected into
a vein.
Blood contaminates the
medication, which must be
redrawn.
15. If no blood appears, inject the
medication at a slow and
steady rate(; 10 seconds/ mL
of medication)
Rapid injection may be painful for
the client. Injecting slowly
reduces discomfort be allowing
time for the solution to disperse in
the tissues.
16. Remove the needle quickly at
the same angle you inserted it.
Slow needle withdrawal may be
uncomfortable for the client.
17. Massage the site gently with a
small, dry gauze or spirit
swab, unless contraindicated
for specific Medication.
If there are contraindications
to massage, apply gentle
pressure at the site with small,
dry gauze or a spirit swab.
Massaging the site promotes
medication absorption and
increases the client’s comfort.
Do not massage a heparin site
because of the medication’s
anticoagulant action.
Light pressure causes less trauma
and irritation the tissues. Massage
can force medication into the
subcutaneous tissues in some
medications.
18. Discard the needle:
Do not recap the needle.
Discard uncapped needle and
syringe in appropriate
container if available.
Most accidental needle-sticks
occur while recapping needles.
Proper disposal prevents injury.
19. Assist the client to a position
of comfort.
To facilitate comfort and make
him/her relax.
20. Remove your gloves and
perform hand hygiene.
To prevent the spread of
infection.

95
21. Recording:
Record the medication
administered, dose, date, time,
route of administration, and
IM site on the appropriate
form.
Documentation provides
coordination of care.
Site rotation prevents injury to
muscle tissue
22. Evaluation the client’s response:
Check the client's response to
the medication within an
appropriate time.
Assess the site within 2 to 4
hours after administration.
Drugs administered parenterally
have a rapid onset.
Assessment of the site deters any
untoward effects
*Nursing Alert*
No more than 5 mL should be injected into a single site for an adult with well-
developed muscles.
If you must inject more than 5 mL of solution, divide the solution and inject it at
two separate sites.
The less developed muscles of children and elderly people limit the intramuscular
injection to 1 to 2 ml.
Special considerations for pediatric: The gluteal muscles can be used as the
injection site only after a toddler has been walking for about 1 year.
Special considerations for elder: IM injection medications can be absorbed more
quickly than expected because elder clients have decreased muscle mass.

96
G. STARTING AN INTRA-VENOUS INFUSION
Definition:
Starting intra-venous infusion is a process that gives insertion of Intra-venous catheter
for IV therapy
Purpose:
• To give nutrient instead of oral route
• To provide medication by vein continuously
• To prevent and treat shock and collapse.
• To administer blood product to establish therapeutic blood level.
Equipment’s required:
• Prescribed I.V. solution
• I.V. infusion set/ IV. tubing (1)
• IV. catheter or butterfly needle in appropriate size (1)
• Spirit swabs
• Adhesive tape
• Disposable gloves if available (1)
• IV. stand (1)
• Arm board, if needed, especially for infant
• Steel Tray (1)
• Kidney tray (1)
Procedure
Action Rational
1. Assemble all Equipment’s and bring to
bedside.
• Having equipment available saves time
and facilitates accurate skill performance
2. Check I.V. solution and medication
additives with Dr.’s order
• Ensures that the client receives the correct
I.V. solution and medication as ordered by
Dr
3. Explain procedure to the client • Explanation allays his/her anxiety and
fosters his/her cooperation
4. Perform hand hygiene • To prevent the spread of infection
5. Prepare I.V. solution and tubing:
a) Maintain aseptic technique when
opening sterile packages and I.V. solution
• This prevents spread of microorganisms
b) Clamp tubing, uncap spike, and insert
into entry site on bag as manufacturer
directs.
• This punctures the seal in the I.V. bag
c) Squeeze drip chamber and allow it to fill
at least one-third to half way.
• Suction effects cause to move into drip
chamber. Also prevents air from moving
down the tubing

97
d) Remove cap at end of tubing, release
clamp, allow fluid to move through tubing.
Allow fluid to flow until all air bubbles have
disappeared.
• This removes air from tubing that can, in
larger amounts, act as an air embolus
e) Close clamp and recap end of tubing,
maintaining sterility of set up.
• To maintain sterility
f) If an electric device is to be used, follow
manufacturer’s instructions for inserting
tubing and setting infusion rate
• This ensures correct flow rate and proper
use of equipment
g) Apply label if medication was added to
container
• This provides for administration of correct
solution with prescribed medication or
additive.
• Pharmacy may have added medication and
applied label.
h) Place time-tape (or adhesive tape) on
container as necessary and hang on I.V. stand
• This permits immediate evaluation of I.V.
according to schedule.
6. Preparation the position:
a) Have the client in supine position or
comfortable position in bed.
b) Place protective pad under the client’s
arm.
• Mostly the supine position permits either
arm to be used and allows for good body
alignment
7. Selection the site for venipuncture:
a) Select an appropriate site and palpate
accessible veins
•The selection of an appropriate site
decreases discomfort for the client and
possible damage to body tissues
b) Apply a tourniquet 5-6 inches above the
venipuncture site to obstruct venous
blood flow and distend the vein.
• Interrupting the blood flow to the heart
causes the vein to distend.
• Distended veins are easy to see
c) Direct the ends of the tourniquet away
from the site of injection
d) Check to be sure that the radial pulse is
still present
•The end of the tourniquet could
contaminate the area of injection if
directed toward the site of injection.
•Too much tight the arm makes the client
discomfort.
•Interruption of the arterial flow impedes
venous filling.
8. Palpation the vein
a) Ask the client to open and close his/her
fist.
• Contraction of the muscle of the forearm
forces blood into the veins, thereby
distending them further
b) Observe and palpate for a suitable vein • To reduce several puncturing
c) If a vein cannot be felt and seen, do the
following:

98
• Release the tourniquet and have the client
lower his/her arm below the level of the
heart to fill the veins. Reapply tourniquet
and gently over the intended vein to help
distend it
• Tap the vein gently
• Remove tourniquet and place warmed-
moist compress over the intended vein for
10-15 minutes.
• Lowering the arm below the level of the
heart, tapping the vein, and applying
warmth help distend veins by filling them
with blood.
9. Put on clean gloves if available. • Care must be used when handling any
blood or body fluids to prevent
transmission of HIV and other blood-born
infectious disease
10. Cleanse the entry site with an antiseptic
solution (such as spirit) according to hospital
policy.
a) Use a circular motion to move from the
center to outward for several inches
b) Use several motions with same direction
as from the upward to the downward
around injection site approximate 5-6
inches
• Cleansing that begins at the site of entry
and moves outward in a circular motion
carries organisms away from the site of
entry
• Organisms on the skin can be introduced
into the tissues or blood stream with the
needle
11. Holding the arm with un-dominant hand
a) Place an un-dominant hand about 1 or 2
inches below entry site to hold the skin
taut against the vein.
b) Place an un-dominant hand to support
the forearm from the back side
❖Nursing Alert❖
Avoid touching the prepared site
• Pressure on the vein and surrounding
tissues helps prevent movement of the
vein as the needle or catheter is being
inserted.
• The needle entry site and catheter must
remain free of contamination from un-
sterile hands.
12.Puncturing the vein and withdrawing
blood:
a) Enter the skin gently with the catheter
held by the hub in the dominant hand,
bevel side up, at a 15-30degree angle.
b) The catheter may be inserted from
directly over the vein or the side of the
vein.
c) While following the course of the vein,
advance the needle or catheter into the
vein.
d) A sensation can be felt when the needle
enters the vein.
• This technique allows needle or catheter
to enter the vein with minimum trauma
and deters passage of the needle through
the vein.

99
e) When the blood returns through the
lumen of the needle or the flashback
chamber of the catheter, advance either
device 1/8 to 1/4 inch farther into the
vein.
f) A catheter needs to be advanced until
hub is at the venipuncture site
• The tourniquet causes increased venous
pressure resulting in automatic backflow.
• Having the catheter placed well into the
vein helps to prevent dislodgement
13. Connecting to the tube and stabilizing the
catheter on the skin:
a) Release the tourniquet.
b) Quickly remove protective cap from the
I.V. tubing
c) Attach the tubing to the catheter or
needle
d) Stabilize the catheter or needle with non-
dominant hand
•The catheter which immediately is
connected to the tube causes minimum
bleeding and patency of the vein is
maintained
14.Starting flow
a) Release the clamp on the tubing
b) Start flow of solution promptly
c) Examine the drip of solution and the
issue around the entry site for sign of
infiltration
• If catheter accidentally slips out of vein,
solution will accumulate and infiltrate into
surrounding tissue
15.Fasten the catheter and applying the
dressing:
a) Secure the catheter with narrow non-
allergenic tape
b) Place strictly sided-up under the hub and
crossed over the top of the hub.
c) Loop the tubing near the site of entry
•Non-allergenic tape is less likely to tear
fragile skin.
•The weight of tubing is enough to pull it
out of the vein if it is not well anchored.
•There is various way to anchor the hub.
You should follow agency /hospital
policy.
•To prevent the catheter from removing
accidentally
16. Bring back all Equipment’s and dispose
in proper manner
• To prepare for the next procedure
17.Remove gloves and perform hand
hygiene
• To prevent the spread of infection
18. If necessary, anchor arm to an arm board
for support
• An arm board helps to prevent change in
the position of the catheter in the vein. Site
protectors also will be used to protect the
I.V. site.

100
19.Adjust the rate of I.V. solution flow
according to Dr.’s order.
• Dr. prescribed the rate of flow or the
amount of solution in day as required to
the client’s condition
• Some medications are given very less
amount. You may use infusion pump to
maintain the flow rate
20. Document the procedure including the
time, site, catheter size, and the client’s
response
• This ensures continuity of care
21. Return to check the flow rate and observe
for infiltration
•To find any abnormalities immediately
❖Nursing Alert❖
You should have special consideration for the elderly and infant.
To Older adults
• Avoid vigorous friction at the insertion site and using too much alcohol. (Rationale:
Both can traumatize fragile skin and veins in the elderly)
To Infant and Children
• Hand insertion sites should not be the first choice for children. (Rationale: Nerve
endings are more very close to the surface of the skin and it is more painful).
H. MAINTENANCE OF I.V. SYSTEM
Definition:
Maintenance of I.V. system is defined as routine care to keep well condition of I.V.
therapy.
Purpose:
• To protect injection site from infection
• To provide safe IV therapy
• To make the patient comfort with IV therapy
• To distinguish any complications as soon as possible
Equipment’s required:
• Steel Tray (1)
• Spirit swab
• Dry gauze or cotton

101
• Adhesive tape
• IV infusion set if required
• Kardex, patient’s record
• Kidney tray (1)
Maintenance of I.V. system: General caring for the patient with an I.V.
Care Action Rationale
1.Make at least hourly checks of the rate,
tubing connections, and amount and type of
solution present. If using an electronic infusion
device (pump or controller), check that all
settings
are correct.
• Regular checking gives proper amount
2.Watch for adverse reactions. One such
problem is infiltration, in which the I.V. solution
infuses into tissues instead of the vein.
Check the insertion site for redness, swelling,
or tenderness hourly.
Document that you have checked the site.
• Keen observation prevents any
complications with I.V.
3. Report any difficulty at once. The doctor
may order the I.V. line to be discontinued or to
be irrigated.
4. Safeguard the site and be aware of tubing
and pump during transfers, ambulation, or other
activities.
• If a controller is being used, remember this
system works on the principle of gravity.
• If the bag of solution is too low, blood will
flow up the tubing and may cause
complications.
5. Change the I.V. dressing every 72 hours and
if it becomes wet or contaminated with
drainage.
• Change of the dressing with wet or
contamination of drainage prevents
infection in the I.V. insertion site.
6. Wear gloves when changing dressings or
tubing.
• Wear gloves prevents from infection.
• The few times that nurse handle dressings,
the lower the patient’s risk of infection.
7. Be sure to double-check all clamps when
changing tubing, adding medications, or
removing I.V. tubing (from a pump or
controller).
• Double -check system prevents from
medical error.

102
8. If the rate of flow is not regulated properly, it
could result in the patient receiving a bolus of
mediation.
• The rate of flow regulated prevent the
patient from overdose.
9. Always check to make sure medications,
solutions, or additives are compatible before
adding them to existing solutions.
• Checking before adding avoid having
incompatibility.
10. Protect the I.V. site from getting wet or
soiled.
• Protection of the I.V. site reduces the
possibility of infection.
11. If the patient will be away from the nursing
unit for tests or procedures, be sure there is
adequate solution to be infused while he/she is
gone.
• It will avoid having shortage of IV. or
making coagulation while having tests or
procedures.
Maintenance of I.V. system: Changing of I.V. system
Care Action Rationale
1.Check I.V. solution. • Ensure that correct solution will be used.
2.Determine the compatibility of all I.V.
fluids and additives by consulting
appropriate literature.
• Incompatibilities may lead to
precipitate
• formation and can cause physical,
chemical, and therapeutic patient changes.
3.Determine patient’s understanding of need
for continued I.V. therapy.
• Reveals need for patient instruction.
4. Assess patency of current I.V. access site. • If patency is occluded, a new I.V. access
site may be needed. Notify a doctor.
5.Have next solution prepared and
accessible (at least 1 hour) before needed.
Check that solution is correct and properly
labeled. Check solution expiration date
and for presence of precipitate and
discoloration.
• Adequate planning reduces risk of clot
formation in vein caused by empty I.V.
bag.
• Checking prevents medication error.
6.Prepare to change solution when less than
50 ml of fluid remains in bottle or bag or
when a new type of solution is ordered.
• Preparation ahead of time prevents air
from entering tubing and vein from clotting
from lack of flow.
7.Prepare patient and family be explaining
the procedure, its purpose, and what is
expected of patient.
• Appropriate explanation decreases
his/her anxiety and promote cooperation.
8.Be sure drip chamber is at least half full. • Half full in Chamber provides fluids to
vein while bags are changed.

103
9 Perform hand hygiene. • Hand hygiene reduces transmission of
microorganisms.
10.Prepare new solution for changing. If
using plastic bag, remove protective
cover from I.V. tubing port. If using
glass bottle, remove metal cap.
• It permits quick, smooth and organized
change from old to new solution.
11. Move roller clam to stop flow rate. • It Prevents solution removing in drip
chamber from emptying while changing
solutions.
12. Remove old I.V. fluid container from I.V.
stand.
• Brings work to nurse's eye level.
13. Quickly remove spike from old solution
bag or bottle and, without touching tip,
insert spike into new bag or bottle.
• Reduces risk of solution in drip
chamber running dry and maintains
sterility.
14. Hang new bag or bottle of solution on I.V.
stand.
• Gravity assists delivery of fluid into
drip chamber.
15. Check for air in tubing. If bubbles form,
they can be removed by closing the roller
clamp, stretching the tubing downward,
and tapping the tubing with the finger.
• Reduces risk of air embolus.
16. Make sure drip chamber is one-third to
one-half full. If the drip chamber is too full,
pinch off tubing below the drip chamber,
invert the container, squeeze the drip
chamber, hang, hang up the bottle,
replace the tubing.
• Reduces risk of air entering tubing.
17. Regulate flow to prescribed rate. • Deliver I.V. fluid as ordered.
18.Place on bag. (Mark time on label tape or
on glass bottle).
• Ink from markers may leach through
polyvinylchloride containers.
19.Observe patient for signs of overhydration
or dehydration to determine response to
I.V. fluid therapy.
• Provides ongoing evaluation of patient’s
fluid and electrolyte status.
20.Observe I.V. system for patency and
development of complications.
• Provides ongoing evaluation of I.V.
system.

104
I. ADMINISTERING MEDICATIONS BY HEPARIN LOCK
Definition:
A heparin lock is an IV catheter that is inserted into a vein and left in place
either for intermittent administration of medication or as open line in the case of an
emergency. Administering medications by heparin lock is defined as one of IV therapy
which can allow to be freedom clients while he/she has not received IV therapy.
Purpose:
• To provide intermittent administration of medication
• To administer medication under the urgent condition
Equipment’s required:
• Patient’s chart and cardex
• Prescribed medication
• Spirit swabs
• Disposable gloves if available (1)
• Kidney tray (1)
• Steel Tray (1)
For flush
• Saline vial or saline in the syringe (1)
• Heparin flush solution (1)
• Syringe (3-5 mL) with 21–25-gauge needle (1)
For Intermittent infusion
• IV bag or bottle with 50-100 solution (1)
• IV tubing set (1)
• IV stand (1)
• 21–23-gauge needle (1)
• Adhesive tape
❖Nursing Alert
• A heparin lock has an adapter which is attached to the hub(end)of the catheter.
• An anticoagulant, approximately 2 mL heparin, is injected into the heparin lock.
• To reduce the possibility of clotting, flush the heparin lock with 2-3 mL of saline 8
hourly (or once a every duty); Saline lock.
• Choose heparin lock or saline lock to decrease the possibility of making
coagulation according to your facility’s policy or Dr.’s order.

105
J. NEBULIZATION THERAPY
Definition
Nebulization is the process of medication administration via inhalation. It utilizes a
nebulizer which transport medications to the lung by means of mist inhalation.
Purposes
• To administer medications directly into respiratory tract for sputum
expectoration.
• To liquefy and remove retained thick secretion from the lower respiratory tract.
• To increase vital capacity.
• To relive dyspnea
• To reduce inflammatory and allergic responses of upper respiratory tract.
• To prevent post- operative complication.
Equipment required
• Medication and saline solution
• Face mask
• Sputum cup with disinfectant
• Cotton ball
• Disposable syringe 5ml
• Kidney tray
• Nebulizer and nebulizer connecting tubes.
Procedure
1. Identify the patient and check physician’s instructions and nursing care plan.
2. Monitor heart rate before and after treatment for patient using bronchodilator
drugs. Bronchodilators may cause tachycardia, palpitation dizziness, nausea and
nervousness.
3. Explain the procedure to the patient.
4. Assemble equipment at bedside.
5. Place the patient in a comfortable sitting or a semi flower’s position.
6. Wash hands.
7. Add the prescribed amount of medication and saline or sterile water to the
nebulizer. Connect the tubing to the compressor.
8. Position the patient appropriately, allowing optimal ventilation.
9. Place mask on the patient’s face to cover his mouth and nose and instruct him
to inhale deeply and slowly through mouth, hold breath and then exhale several
times.

106
10. Instruct the patient to breath slowly and deeply until all the medication is
nebulized. Continue until medication is consumed. Medication usually
nebulized within 5minutes.
11. Reassess patient status from breath sounds, respiratory status, pulse rate and
other significant respiratory functions needed. Compare and record significant
changes and improvement. Refer if necessary.
12. On completion of the treatment, encourage the patient to cough after several
deep breaths. The medication may dilate airways facilitating expectoration of
secretions.
13. Make the patient comfortable.
14. Observe the patient for any adverse reaction to the treatment.
15. Record medication used and description of secretion expectorant.
16. Disassemble and clean nebulizer after each used.
17. Wash hands.
11. CLEANING A WOUND AND APPLYING A STERILE DRESSING
Definition:
Sterile protective covering applied to a wound/incision, using aseptic technique with or
without medication
Purpose:
• To promote wound granulation and healing
• To prevent micro-organisms from entering wound
• To decrease purulent wound drainage
• To absorb fluid and provide dry environment
• To immobilize and support wound
• To assist in removal of necrotic tissue
• To apply medication to wound
• To provide comfort
Equipment required:
• Sterile gloves (1)
• Gauze dressing set containing scissors and forceps (1)
• Cleaning disposable gloves (1)
• Cleaning basin (optional) (1) as required
• Plastic bag for soiled dressings or bucket (1)
• Waterproof pad or mackintosh (1)
• Tape (1)

107
• Surgical pads as required
• Additional dressing supplies as ordered, e.g., antiseptic ointments, extra dressings
• Acetone or adhesive remover (optional)
• Sterile normal saline (Optional)
Procedure:
Action Rationale
1. Explain the procedure to the patient. • Providing information fosters his/her
cooperation and allays anxiety.
2. Assemble equipment • Organization facilitates accurate skill
performance.
3. Perform hand hygiene • To prevent the spread of infection
4.Check Dr’s order for dressing change. Note
whether drain is present.
• The order clarifies type of dressing
5. Close door and put screen or pull curtains. • To provide privacy
6. Position waterproof pad or mackintosh under
the patient if desired.
• To prevent bed sheets from wetting body
substances and disinfectant.
7. Assist patient to comfortable position that
provides easy access to wound area.
• Proper positioning provides for comfort.
8. Place opened, cuffed plastic bag near working
area.
• Soiled dressings may be placed in
disposal bag without contamination
outside surfaces of bag.
9.Loosen tape on dressing. Use adhesive
remover if necessary. If tape is soiled, put on
gloves.
• It is easier to loosen tape before putting in
gloves.
10.
a) Put on disposable gloves
b) Removed soiled dressings carefully in a clean
to less clean direction.
c) Do not reach over wound.
d) If dressing is adhering to skin surface, it may
be moistened by pouring a small amount of
sterile saline or NS onto it.
e) Keep soiled side of dressing away from
patient’s view.
• Using clean gloves protect the nurse when
handling contaminated dressings.
• Cautious removal of dressing(s) is more
comfortable for patient and ensures that
drain is not removed if it is present.
• Sterile saline provides for easier removal
of dressing.

108
11. Assess amount, type, and odor of drainage. • Wound healing process or presence of
infection should be documented.
12.
a) Discard dressings in plastic disposable bag.
b) Pull off gloves inside out and drop it in the
bag when your gloves were contaminated
extremely by drainage.
• Proper disposal dressings prevent the
spread of microorganisms by
contaminated dressings.
13.Cleaning wound:
When you clean wearing sterile gloves:
a) Open sterile dressings and supplies on work
area using aseptic technique.
b) Open sterile cleaning solution
c) Pour over gauze sponges in place container
or over sponges placed in sterile basin.
d) Put on gloves.
e) Clean wound or surgical incision:
• Clean from top to bottom or from center
outward
• Use one gauze square for each wipe,
discarding each square by dropping into
plastic bag. Do not touch bag with
gloves.
• Clean around drain if present, moving
from center outward in a circular motion.
• Use one gauze square for each circular
When you clean using sterile forceps:
a) Open sterile dressings and supplies on work
area using aseptic technique.
b) Open sterile cleaning solution
c) Pour over gauze sponges or cottons in
place container or over sponges or cottons
placed in sterile basin.
d) Clean wound or surgical incision:
Follow the former procedure using sterile gloves.
• Supplies are within easy reach, and
sterility is maintained.
• Sterility of dressings and solution is
maintained.
• Cleaning is done from least to most
contaminated area.
• Previously cleaned area is re-
contaminated.
• Do not touch bag with sterile forceps to
prevent contamination
14. Dry wound or surgical incision using
gauze sponge and same motion.
• Moisture provides microorganisms.

109
15. Apply antiseptic ointment by forceps if
ordered.
• Growth of microorganisms may be
retarded and healing process improved.
16. Apply a layer of dry, sterile dressing over
wound using sterile forceps.
• Primary dressing serves as a wick for
drainage.
17. If drainage is present:
Use sterile scissors to cut sterile 4 X 4 gauze
square to place under and around drain.
• Drainage is absorbed, and surrounding
skin area is protected.
18. Apply second gauze layer to wound site. • Additional layers provide for increased
absorption of drainage.
19. Place surgical pad over wound as outer
most layer if available.
• Wound is protected from
microorganisms in environment.
20. Remove gloves from inside out and
discard them in plastic bag if you wore.
• To prevent cross-infection
21. Apply tape or existing tape to secure dressings • Tape is easier to apply after gloves
have been removed.
22.
a) Perform hand hygiene.
b) Remove all equipment’s and disinfect them
as needed. Make him/her comfortable.
• To prevent the spread of infection
23. Document the following:
a) Record the dressing change
b) Note appearance of wound or surgical
incision including drainage, odor, redness, and
presence of pus and any complication.
c) Sign the chart
• Documentation provides coordination of
care.
• Giving signature maintains
professional accountability.
24. Check dressing and wound site every shift. • Close observation can find any
complication as soon as possible.

110
12. SUPPLYING OXYGEN INHALATION
Definition:
Method by which oxygen is supplemented at higher percentages than what is available
in atmospheric air.
Purpose:
• To relieve dyspnea.
• To reduce or prevent hypoxemia and hypoxia.
• To alleviate associated with struggle to breathe.
Sources of Oxygen:
Therapeutic oxygen is available from two sources
1. Wall Outlets (; Central supply)
2. Oxygen cylinders
❖Nursing Alert
• Explain to the patient the dangers of lighting matches or smoking cigarettes,
cigars, pipes. Be sure the patient has no matches, cigarettes, or smoking
materials in the bedside table.
• Make sure that warning signs (oxygen- no smoking) are posted on the
patient’s door and above the patient’s bed.
• Do not use oil on oxygen equipment. (Rationale: Oil can ignite if exposed to
oxygen.)
• With all oxygen delivery systems, the oxygen is turned on before the mask is
applied to the client.
• Make sure the tubing is patent at all times and that the equipment is working
properly.
• Maintain a constant oxygen concentration for the patient to breathe; monitor
equipment at regular intervals.
• Give pain medications as needed, prevent chilling and try to ensure that the
patient gets needed rest. Be alert to cues about hunger and elimination.
(Rationale: The patient’s physical comfort is important.)
• Watch for respiratory depression or distress.
• Encourage or assist the patient to move about in bed. (Rationale: To prevent
hypostatic pneumonia or circulatory difficulties.) Many clients are reluctant to
move because they are afraid of the oxygen apparatus.
• Provide frequent mouth care. Make sure the oxygen contains proper
humidification. (Rationale: Oxygen can be drying to mucous membrane.)
• Discontinue oxygen only after a physician has evaluated the client.
Generally, you should not abruptly discontinue oxygen given in medium-to-
high concentrations (above 30%). Gradually decrease it in stages, and monitor

111
the patient’s arterial blood gases or oxygen saturation level. (Rationale:
These steps determine whether the patient needs continued support.)
• Always be careful when you give high levels of oxygen to a patient with COPD.
The elevated levels of oxygen in the patient’s body can depress their stimulus to
breathe.
• Never use oxygen in the hyperventilation patient.
• Wear gloves any time you might come into contact with the patient’s
respiratory secretions. (Rationale: To prevent the spread of infection).
Equipment required:
• Patient’s chart and Kardex
• Oxygen connecting tube (1)
• Flow meter (1)
• Humidifier filled with sterile water (1)
• Oxygen source: Wall Outlets or Oxygen cylinder
• Tray with nasal cannula of appropriate size or oxygen mask (1)
• Kidney tray (1)
• Adhesive tape
• Scissors (1)
• Oxygen stand (1)
• Gauze pieces, Cotton swabs if needed
• “No smoking” sign board
• Globes if available (1)
Note:
Characteristics of low flow system of oxygen administration
Method Flow
rate
(L/min)
Oxygen
concentration
delivered
Advantages Disadvantages
Nasal
cannula
1
2
3
4
5
6
22-24 %
26-28 %
28-30 %
32-36 %
36-40 %
40-44 %
• Convenient
• Comfortable more than
face mask
• bring less anxiety
• Allows patient to talk and
eat
• Mouth breathing does
not affect the
concentration of delivered
oxygen
• Assumes an
adequate breathing
pattern
• Unable to deliver
concentrations above
44 %

112
Simple
face mask
5-6
6-7
7-8(-10)
40 %
50 %
60 %
• Can deliver high
concentration of oxygen
more than nasal cannula
• May cause anxiety
• Able to lead
hotness and
claustrophobic
• May cause dirty
easier, so cleansing
is needed
frequently
• Should be removed
while eating and
talking
• Tight seal or long
wearing can cause
skin irritation on
face
High flow devices such as venture mask, oxygen hood and tracheostomy mask. You
should choose appropriate method of oxygen administration with Dr’s prescription
and nursing assessment.
Procedure: a. Nasal Cannula Method
Action Rationale
1. Check doctor’s prescription including
date, time, flow liter/minute and methods
• To avoid medical error
2. Perform hand hygiene and wear
gloves if available
• To prevent the spread of infection
3.Explain the purpose and procedures
to the Patient
• Providing information fosters the
patient’s cooperation and allays his/her
anxiety
4. Assemble equipment’s • Organization facilitates accurate
skill performance
5.Prepare the oxygen equipment:
a) Attach the flow meter into the wall
outlet or oxygen cylinder
b) Fill humidifier about 1/3 with sterile
water or boiled water
c) Blow out dusts from the oxygen cylinder
d) Attach the cannula with the connecting
tubing to the adapter on the humidifier
• Humidification prevents drying of the
nasal mucosa
• To prevent entering dust from exist of
cylinder to the nostril
6. Test flow by setting flow meter at 2-3L/
minute and check the flow on the hand.
• Testing flow before use is needed to
provide prescribed oxygen to the client

113
7. Adjust the flow meter’s setting to the
ordered flow rate.
• The flow rate via the cannula should not
exceed 6L/m. Higher rates may cause excess
drying of nasal mucosa.
8.Insert the nasal cannula into patient’s
nostrils, adjust the tubing behinds the
patient’s ears and slide the plastic
adapter under the patient’s chin until he
or she is comfortable.
• Proper position allows unobstructed oxygen
flow and eases the patient’s respirations
9. Maintain sufficient slack in oxygen tubing • To prevent the tubing from getting out of
place accidentally
10.Encourage the patients breathe through
the nose rather than the mouth and
expire from the mouth.
• Breathing through the nose inhales more
oxygen into the trachea, which is less likely to
be exhaled through the mouth
11. Initiate oxygen flow • To maintain doctor’s prescription and avoid
oxygen toxicity
12.Assess the patient’s response to
oxygen and comfort level.
• Anxiety increases the demand for oxygen
13. Dispose of gloves if you wore and
perform hand hygiene
• To prevent the spread of infection
14. Place “No Smoking” signboard at entry
into the room
• The sign warns the patient and visitors
that smoking is prohibited
because oxygen is combustible
15.Document the following:
Date, time, method, flow rate,
respiratory condition and response to
oxygen
• Documentation provides coordination of care
• Sometimes oxygen inhalation can bring
oxygen intoxication.
16. Sign the chart • To maintain professional accountability
17. Report to the senior staff • To provide continuity of care and confirm the
• patient’s condition
18. Check the oxygen setup including the
water level in the humidifier. Clean the
cannula and assess the patient’s nares at
least every 8 hours.
• Sterile water needs to be added when the level
falls below the line on the humidification
container.
• Nares may become dry and irritated and
required the use of a water-soluble lubricant.
• In long use cases, evaluate for pressure sores
over ears, cheeks and nares.
114
❖Nursing Alert❖
After used the nasal cannula, you should cleanse it as follows:
1. Soak the cannula in clean water for an hour
2. Dry it properly
3. Cleanse the tip of cannula by spirit swab before applying to client
13. CARE OF NASO-GASTRIC TUBE
A. INSERTING A NASO-GASTRIC TUBE
Definition:
Method of introducing a tube through the nose into the stomach
Purpose:
• To feed client with fluids when oral intake is not possible
• To dilute and remove consumed poison
• To instill ice-cold solution to control gastric bleeding
• To prevent stress on operated site by decompressing stomach of secretions and gas
• To relieve vomiting and distention
Equipment:
Nasogastric tube in the appropriate size (1)
• Syringe 10 ml (1)
• Lubricant
• Cotton balls
• Kidney tray (1)
• Adhesive tape
• Stethoscope (1)
• Clamp (1)
• Marker (1)
• Tray (1)
• Disposable gloves if available (1 pair)
Procedure:
Action Rationale
1.Check the Doctor’s order for the insertion of
the Naso-gastric tube.
• This clarifies the procedure and type of
equipment required.
2. Explain the procedure to the client. • Explanation facilitates client cooperation.
3. Gather the equipment • Organization provides accurate skill
performance.

115
4. Assess client’s abdomen • Assessment determines the presence of
bowel sounds and the amount of abdominal
distention.
5. Perform hand hygiene. Wear disposable
gloves if available.
• Hand hygiene deters the spread of
microorganisms. But sterile technique is
not needed because the digestive tract is not
sterile.
• Gloves protect from exposure to blood or
body fluids.
6. Assist the client to high Fowler’s position,
or 45 degrees, if unable to maintain the
upright position.
• Upright position is more natural for
swallowing and protects against
aspiration if the client should vomit.
7. Checking the nostril:
a. Check the nares for patency by asking the
client to occlude one nostril and breathe
normally through the other.
b. Clean the nares by using cotton balls
c. Select the nostril through which air passes
more easily.
• Tube passes more easily through the
nostril with the largest opening.
8. Measure the distance to insert the tube
by placing:
a. Place the tip of tube at client’s nostril
extending to tip of earlobe
b. Extend it to the tip of xiphoid process
c. Mark tube with a marker pen or a piece of
tape
• Measurement ensures that the tube will
be long enough to enter the client’s
stomach.
9. Lubricant the tip of the tube (at least 1-2
inches) with a water-soluble lubricant
• Lubricant reduces friction and facilitates
the passage of the tube into the stomach.
• Xylocaine jelly may not be
recommended to use as a lubricant due to
the risk of xylocaine shock.
• Water-soluble lubricant will not
cause pneumonia if the tube accidentally
enters the lungs.

116
10. Inserting the tube:
a. Insert the tube into the nostril while
directing the tube downward and
backward.
b. The client may gag when the tube
reaches the pharynx.
c. Instruct the client to touch his chin to his
chest.
d. Encourage him/her to swallow even if no
fluids are permitted.
e. Advance the tube in a downward and
backward direction when the client
swallow.
f. Stop when the client breathes
g. If gagging and coughing persist,
check the placement of tube with a
tongue depressor and flashlight if
necessary.
h. Keep advancing the tube until the
marking or the tape marking is reached.
❖Nursing Alert❖
• Do not use force. Rotate the tube if it meets
resistance.
• Discontinue the procedure and remove the
tube if there are signs of distress, such as
gasping, coughing, cyanosis, and the
inability to speak or hum.
• Following the normal contour of the
nasal passage while inserting the tube
reduces irritation and the likelihood of
mucosal injury
• The gag reflex stimulated by the tube
• Swallowing helps advance the tube,
causes the epiglottis to cover the opening of
the trachea, and helps to eliminate gagging
and coughing
• Excessive coughing and gagging may
occur if the tube has curled in the back of
the throat.
• Forcing the tube may injure mucous
membranes.
• The tube is not in the esophagus if the
client shows signs of distress and is
unable to speak or hum.
11. While keeping one hand on the tube,
verify the tube’s placement in the stomach.
a. Aspiration of a small amount of
stomach contents:
Attach the syringe to the end of the tube and
aspirate small amount of stomach contents.
Visualize aspirated contents, checking for
color and consistency
b. Auscultation:
Inject a small amount of air (10- 15 ml) into
the nasogastric tube while you listen with a
stethoscope approximately 3 inches (about 8
cm) below the sternum.
c. Obtain radiograph of placement of
• The tube is in the stomach if its contents
can be aspirated.
• If the tube is in the stomach, you will be
able to hear the air enter (a whooshing
sound) If the tube is in the esophagus,
injecting the air will be difficult or
impossible. In addition, injection of air
often causes the client to belch

117
tube (as ordered by doctor.) immediately. If the tube is in the larynx,
the client usually is unable to speak
12. Secure the tube with tape to the client’s
nose.
❖Nursing Alert❖
• Be careful not to pull the tube too
tightly against the nose.
• Constant pressure of the tube against
the skin and mucous membranes causes
tissue injury.
13. Clamp the end of the nasal-gastric tube
while you bend the tube by fingers not to open
• Bending tube prevents the inducing of
secretion
14. Putt off and dispose the gloves, perform
hand hygiene
• To prevent the spread of infection
15. Replace and properly dispose of equipment • To prepare for the next procedure
16. Record the date and time, the size of
the nasal-gastric tube, the amount and
color of drainage aspirated, relevant client
reactions and sign the chart
• Documentation provides coordination of
care
B. REMOVING A NASO-GASTRIC TUBE
Procedure
Action Rationale
1. Assemble the appropriate equipment, such
as kidney tray, tissues or gauze, and
disposable gloves, at the client’s bedside.
• Organization facilitates accurate
performance
2. Explain to the client what you are going to
do.
• Providing explanation fosters cooperation
3. Put on the gloves • To prevent the spread of infection
4. Remove the tube
a) Take out the adhesive tape holding the
naso-gastric tube to the client’s nose
b) Simply pulling it out, slowly at first
and then rapidly when the client begins
to cough.
c) Conceal the tube.
d) Be sure to remove any tapes from the
client’s face. Acetone may be necessary.
• Do not remove the tube if you encounter
any resistance not to harm any membranes
or organs. Do another attempt in an hour.
• Continuous slow pulling it out can lead to
coughing or discomfort
• Acetone helps any adhesive substances
from the face. You should also wipe
acetone out after removing tapes because
the remaining acetone may irritate the
skin.
6. Provide oral care if needed. • To provide comfort
7. Take off gloves and perform hand hygiene. • To prevent the spread of infection

118
8. Record the date, time and the client’s
condition on the chart. Be alert for
complaints of discomfort, distension, or
nausea after removal. Sign the chart.
• Documentation provides coordination of
care
• Giving signature maintains
professional accountability.
9. Dispose the equipment and replace them. • To prepare for the next procedure
10. Report to the senior staff. • To provide continuity of care
14. PERSONAL PROTECTIVE EQUIPMENT
Definition
Personal protective equipment (PPE) refers to specialized clothing or equipment worn
by an employee for protection against infection materials. PPE is used in health care
setting to improve personal safety in health care environment through the appropriate
use of PPE (CDC, 2004)
Equipment’s
• Gloves
• Mask (surgical or particulate respirator)
• Impervious gown
• Protective eye wear (does not include eye glasses)
Donning on PPE
Action Rational
1.Check medical record and nursing plan of
care for type of precautions and review
precautions in infection control manual
• Mode of transmission of organism
determines types of precautions required
2.Plan nursing activities before entering
patient room
• Organization facilitates performance of
task and adherence to precautions
3.Perform hand hygiene • Prevents the spread of micro-organism.
4.Provide instruction about precautions to
patient, family members and visitors
• Encourages co-operation of patient and
family
5.Put on gown gloves, mask and protective
eyewear based on the type of exposure
anticipated and category of isolation
precautions
• Use of PPE interrupts chain of infection
and protects patient and nurse. Gown
should protect entire uniform. Gloves
protects hands and wrist from micro-
organism. Mask protect droplet nuclei and
large particles aerosols. Eye wears protects

119
a. Put on the gown with opening the back.
Tie gown securely at neck and waist.
b.Put on the mask or respirator over your
nose, mouth, and chin. Secure ties or
elastic band at the middle of head and
neck. If respirator is used, perform a fit
check. Inhale the respirator should
collapse. Exhale: air should not leak out.
c. Put on goggles. Place over eyes and adjust
to fit. Alternately a face shield could be
used to take the place of mask and
goggles.
d.Put on clean disposable gloves. Extend
gloves to cover the cuffs of the gown.
mucous membrane in the eye from
splashes.
• Gown should fully cover the torso from the
neck to knees, arm to the end of wrists, and
wrap around the back
• Mask protect droplet nuclei and large
particles aerosols. A mask fit securely to
provide protection.
• Eye wears protects mucous membrane in
the eye from splashes. A fit securely to
provide protection.
• Gloves protects hands and wrist from
micro- organism.
6.Identify the patient. Explain the procedure.
Continue with patient care as appropriate
• It validates the correct patient and correct
procedure which may reduce anxiety and
prepare the patient what to expect.
Donning off PPE
Action Rational
1.Remove PPE: Except for respirator, remove
PPE at the doorway or in an anteroom and
closing door
a. If impervious gown has been tied in front
of the body at the waist line, untie waist
string before removing gloves
b.Gasp the one hand of glove with the
opposite glove hand and peel off. Turning
the gloves inside out as you pull it off.
Hold the removed glove in the remaining
gloved hand.
c. Slide fingers of ungloved hand under the
remaining glove at the wrist, taking care
not to touch the counter surface of the
glove.
d.Peel off the glove over the first glove,
containing one glove inside the other.
Discard in appropriate container
• Proper removal prevents contact with, and
the spread of micro-organism.
• Front of gown, includes waist strings, are
contaminated. If tied in front of body, the
tie must be untied before removing gloves
• Outside of gloves are contaminated
• Ungloved hand is clean and should not
touch contaminated areas
• Proper disposal prevents transmission of
micro-organism

120
e. To remove the face shield or goggles:
handle by the head band or earpieces. Lift
away from the face place in designated
receptacle for reprocessing or in an
appropriate waste container
f. To remove gown: unfasten ties, if at the
neck and back. Allow the gown to fall
away from shoulders. Touching only the
inside of the gown, pull away from the
torso. Keeping hands on the inner surface
of the gown, pull from arms. Turn gown
inside out. Fold or roll into a bundle and
discard
g.To remove mask or respirator: grasp the
neck ties or elastic, then top ties or elastic
and remove. to care to avoid touching
front of mask or respirator, save for future
use in designated area.
• Prevents transmission of infection.
• Gown front and sleeves are contaminated.
Touching only the inside of the gown and
pull it away from the torso prevents
transmission of organism. Proper disposal
prevents transmission of micro-organism
• Front of mask or respirator is
contaminated; do not touch, prevents
transmission of micro-organism
2.Perform hand hygiene immediately after
removing all PPE
• Prevents transmission of infection
Evaluation
1. Transmission of microorganism is prevented
2. Patient and staff remain free from exposure to potential infection
16. GLASSGLOW COMA SCALE
Definition
A tool used to assess a patient level of consciousness by grading the patient’s best
response to stimuli using a numerical scale.
Purposes
• To determine a change in a patient’s condition based on changes in their level
of consciousness.
Equipment’s
• Neurological head chart
• Torch light
• Scale to measure pupil size

121
SN Category Response
1 Eye Opening Response
• Spontaneous--open with blinking at baseline
• To verbal stimuli, command, speech
• To pain only (not applied to face)
• No response
4 point
3 point
2 point
1 point
2 Verbal Response
• Oriented
• Confused conversation, but able to answer
questions
• Inappropriate words
• Incomprehensible speech
• No response
5 point
4 point
3 point
2 point
1 point
3 Motor Response
• Obeys commands for movement
• Purposeful movement to painful stimulus
• Withdraws in response to pain
• Flexion in response to pain (decorticate
posturing)
• Extension response in response to pain
(decerebrate posturing)
• No response
6 point
5 point
4 point
3 point
2 point
1 point
Procedures
• Rate the patient level of consciousness in each of the three categories by using
the criteria
• Add the patient scores in each category to determine the total score
• If the record is different from the previous record inform the doctor
Nursing alert
• 3-7 the patient is in coma
• 8-14 the patent level of consciousness is decreased
• 15 the patient is fully conscious
Head injury classification:
• Severe Head Injury-: GCS score of 8 or less
• Moderate Head Injury-: GCS score of 9 to 12
• Mild Head Injury-: GCS score of 13 to 15

122
17. CARE OF DEAD BODY
Definition
Dead body care means cleansing and preparation of the body following declaration of
death by the physician.
Purposes:
• To prepare the body for postmortem examination or funeral at home.
• To ensure proper identification of the patient.
• To maintain hygiene and prevent from spread of infection.
• To show respect for dead person.
• To facilitate transportation to mortuary/residence.
Equipment’s:
• Gloves
• Plastic apron
• Tray/ Trolley
• Soap, towel, water, bowl
• Bucket
• Bandage, cotton
• Patient’s cloth
• Identification level, tape, comb
Procedure:
1. As the physician attending the patient has declared the death, inform and
express sympathy to the family members.
2. Ask if they wish to view the body, observe their response and offer them the
opportunity to ask questions.
3. Ask about religious preference and cultural rituals.
4. Explain to the family that the body will be first care by the nurse before the
body is given to the family.
5. Determine if patient was on isolation precautions for the infectious disease as
precautions must be taken to prevent spread of disease to others.
6. Wash hands and collect articles.
7. Place the body in dorsal/flat position with only a small pillow under the head to
prevent pooling of blood in the face and subsequent discoloration.
8. Remove all appliances used for the care of the patient e.g, IV lines/catheter, NG
tube, urinary catheter, drainage tube, O2 line etc.
9. Clean and close the eyes gently.
10. Clean the body thoroughly and plug the body opening such as nose, mouth,
vagina, rectum with cotton swabs.

123
11. Put a clean gown on. Place an absorbent pad under the patient’s buttocks.
12. Straighten legs, bring feet together and tie big toes.
13. Comb the person’s hair neatly remove any clips, hair pins or rubber bands.
14. Dress the patient in own clean clothes.
15. Complete the identification tags and attaches one to patient’s ankle.
16. Ensure all the documentation is completed including death certificate.
17. Handover the body to relatives after the bill has been settled and get the relative
to sign in register.
18. In case of medico-legal case, notify to concerned/legal authorities before
handing over the body to relatives.
19. Carefully transfer the body to a stretcher keeping the body aligned and covered
with a clean sheet.
20. Remove remaining soiled linen, dressing, gown from room. Clean and disinfect
all the articles properly.

TABLE OF CONTENTS
MEDICAL SURGICAL NURSING
S.N. PROCEDURE PAGE NO.
1. Monitoring central venous pressure (CVP) 124-128
2. Assisting for emergency tracheostomy 128-1129
3. Tracheal / endotracheal suctioning 129-130
4. Tracheostomy care 130-133
5. Assisting for lumbar puncture 133-134
6. Assisting in endotracheal intubation and extubation
a. Endotracheal intubation
b. Assisting in extubation
135-138
135-137
137-138
7. Performing cardio pulmonary resuscitation (CPR) 138-142
8. Care of patients on hemodialysis and peritoneal dialysis
a. Care of patient on hemodialysis
b. Care of patient on peritoneal dialysis
142-146
142-144
144-146
9. Preoperative and postoperative nursing care
a. Preoperative nursing care
b. Post-operative care
146-151
146-151
151-153
10. Gastric decompression/ nasogastric aspiration 153-154
11. Tube feeding
Gastrostomy/Jejunostomy feeding
154-155
156-157
12. Colostomy care 157-159
13. Bladder irrigation 160-161
14. Chest tube drainage 161-163
15. Assisting in cardioversion 163-164
16. Electrocardiogram (ECG monitoring/ obtaining) 165-169
17. Assisting in echocardiography 170-171
18. Assisting in Holter monitoring 171-172

19. Tread mill test (stress ECG test) 173-174
20. Arterial blood gas sample collection 174-175
21. Arterial blood pressure monitoring 175-178
22. Traction care 178-185
23. Nursing care of patient with mechanical ventilation 185-186
24. Pacemaker implantation 187-190
25. Triage 190-192

124
1. MONITORING CENTRAL VENOUS PRESSURE (CVP)
Definition
Central venous pressure (CVP) describes the pressure of blood in the thoracic vena cava, near
the right atrium of the heart. CVP reflects the amount of blood returning to the heart and the
ability of the heart to pump the blood into the arterial system. Central Venous pressure
monitoring means measurement of pressure within the right atrium of the heart either by fluid
filled manometer connected to central venous catheter or transducer.
The normal central venous pressure is 2-6 mm of Hg
A CVP greater than 6mm of Hg indicates elevated right ventricular preload and the common
cause of an elevated CVP are hypovolemia or right sided heart failure.
A CVP less than 2mm of Hg indicates reduced right ventricular preload and the common
cause of low CVP are hypovolemia, excessive blood loss, dehydration, vomiting or diarrhea.
The common insertion sites are:
- Internal jugular vein
- Subclavian vein
- Axillary vein
- Femoral vein
- Veins of the arm (also known as peripherally
inserted central catheter)
Purpose
• To serve as a guide for fluid replacement in seriously ill patients.
• To estimate blood volume deficits.
• To determine pressures in the right atrium and central veins.
• To evaluate for circulatory failure (in context with total clinical picture of a patient)
Articles
• Venous pressure tray
• Cut-down tray
• Infusion solution and infusion set
• 3-way or 4-way stopcock (a pressure transducer may also be used)
• IV pole attached to bed
• Arms board
• Adhesive tape
• ECG monitor
• Carpenter’s level (for establishing zero point)

125
Procedure
Action Rationale
1. Assemble equipment according to
manufacture directions.
2. Explain that the procedure is similar to an IV
and that the patient may move in bed as desired
after passage of the CVP catheter.
3. Place the patient in a position of comfort.
This is the baseline used for subsequent
readings.
4. Attached manometer to the IV pole. The zero
point of the manometer should be on a level
with the patient’s right atrium.
5. Mark the mid- axillary line on the patient
with an indelible pencil.
6. The CVP catheter is connected to a 3-way
stopcock that communicates to an open IV and
to a manometer.
7. Start the IV flow and fill the manometer 10
cm above anticipated reading (or until the level
of 20cm, HOH is reached). Turn the stopcock
and fill the rubbing with fluid.
8. The CVP site is surgically cleansed. The
physician, introduces the CVP catheter
Serial CVP readings should be made with
the patient in the same position.
Inaccuracies in CVP readings can be
produced by changes in positions,
coughing, or straining during the reading.
The right atrium is at the mid- axillary line,
which is about 1/3 of the distance from the
anterior to the posterior chest wall.
The maxillary line is an external reference
point for the zero level of the manometer
(which coincides with level of the right
atrium).
Or, the CVP catheter may be connected to
a transducer and an electric monitor CVP
wave either digital or calibrated CVP
wave read out.
If the catheter is inserted through the
subclavian or internal jugular vein, place
patient in a head-down position to increase

126
percutaneously or by direct venous cut down
and threaded through an antecubital,
subclavian, or internal or external jugular vein
into the superior vena cava just before it enters
the right atrium.
9. When the catheter enters the thorax an
inspiratory fall and expiratory rise in venous
pressure are observed.
10. The patient may be monitored by ECG
during catheter insertion.
11. The catheter may be sutured and taped in
place. A sterile dressing is applied.
12. The infusion is adjusted to flow into the
patient’s vein by a slow continuous drip.
venous filling and reduced risk of air
embolism. The correct catheter placement
can be confirmed by fluoroscopy or chest
x-ray.
The fluid level fluctuates with respiration.
If rises sharply with coughing/straining.
When the tip of the catheter contacts the
wall of the right atrium it may produce
aberrant impulses and disturb cardiac
rhythm.
Label dressing with time and date of
catheter insertion.
The infusion may cause a significant
increase in venous pressure if permitted to
flow too rapidly.
Measuring Central Venous Pressure
Care Action Rationale
1. Place the patient in the identified position
and confirm zero point. Intravascular
pressures are measured to the atmospheric
pressure at the middle of the right atrium;
this is the zero point or external reference
point.
2. Position the zero point of the manometer
at the level of the right atrium.
3. Turn the stopcock so that the IV solution
The zero point or baseline for the manometer
should be on level with the patient’s right
atrium. The middle of the right atrium is the
mid-axillary line in the fourth intercostal
space.
All personal taking the CVP measurement
use the same zero point.
The column of fluid will fall until it meets an
equal pressure (i.e., the patient’s central

127
flows into the manometer filling to about the
20-25cm level. Then turn the stopcock so
that the solution in manometer flows into the
patient. Observe the fall in the height of the
column of fluid in the manometer. Record
the level at which the solution stabilizes or
stops moving downward. This is the central
venous pressure. Record CVP and the
position of the patient.
4. The CVP my range from 5-12cm. HOH.
5. Assess patient’s clinical condition.
Frequent changes in measurements
(interpreted within the context of the clinical
situation) will serve as a guide to detect
whether the heart can handle its fluid load
and whether hypovolemia or hypervolemia
is present.
6. Turn the stopcock again to allow IV
solution to flow from solution bottle into the
patient’s veins.
venous pressure). The reading is reflected by
the height of a column of fluid in the
manometer when there’s open
communication between the catheter and the
manometer. The fluid in the manometer will
fluctuates slightly with the patient’s
respirations. This confirms that the CVP is
not obstructed by clotted blood.
The change in CVP is a more useful
indication of adequacy of venous blood
volume and alterations of cardiovascular
function. CVP is a dynamic measurement.
The normal values may change from patient
to patient. The management of the patient’s
not based on one reading but on repeated
serial readings in correlation with patient’s
clinical status.
CVP is interpreted by considering the
patient’s entire clinical picture, hourly urine
output, heart rate, blood pressure, cardiac
output measurements.
• A CVP zero indicates that patient is
hypovolemia (verified if rapid
infusion causes patient to improve)
• A CVP above 15-20cm. HOH may be
due to either hypervolemic or poor
cardiac contractility.

128
When readings are not being made, flow is
from a very slow micro drip to the catheter,
bypassing the manometer.
2. ASSISTING FOR EMERGENCY TRACHEOSTOMY
Definition
Assisting in making surgical opening into anterior wall of trachea and inserting tube to
maintain a patient airway.
Purpose
• To bypass upper airway obstruction and trauma.
• To remove tracheobronchial secretions.
• To promote long term use of mechanical ventilation
• To prevent aspiration of oral or gastric secretion in unconscious or paralysed patients.
• To replace an endotracheal tube when long term mechanical ventilation is required.
Equipment
• Tracheostomy set containing:
• Toothed dissecting forceps (1)
• Curved mosquito forceps (2)
• Straight mosquito forceps (2)
• Artery forceps (2)
• Alice forceps (2)
• Needle holder
• Double hook rectrators (2)
• Blunt hook
• Cricoids hook
• Sharp scissor
• Tracheal dilator
• Dressing cups(2)
• Suction catheter with connection
• Cutting edge suture needle with thread
• Dressing forceps
• Hand towel
• Kidney tray
• Scalpel blade
• Gloves
• Mask
• Apron
• Antiseptic solution : Betadine or spirit

129
• Local anesthetic xylocaine 2%
• Disposable syringes
• Sand bag
• Soot light
• Tracheostomy tube
Procedure:
1. Explain procedure to patient if conscious and get consent from patient or relatives.
2. Place patient in supine position with full extension of neck and head.
3. Remove gown and expose neck.
4. Keep suction and oxygen ready for use.
5. Assist in preparing skin and administering anesthesia.
6. Assist and support patient as incision is made and provide suitable tracheostomy tube for
insertion.
7. Assist in securing tracheostomy tube to neck by tying with tape.
8. Assist while the tube is being sutured.
9. Place Vaseline gauze around tbe to provide lubrication.
10. Assist patient to a comfortable postion.
11. Replace equipment.
12. Document time, tube size, purpose of tracheostomy and patient’s condition.
Post procedure care
1. Connect to ventilator (if needed)
2. Place patient in semi- fowler position.
3. Check vital signs.
4. Administer analgesic as per order.
5. Watch for complication like bleeding, respiratory failure, blockage of tracheostomy tube
with secretions e.g. pneumothorax, subcutaneous emphysema etc for 24 hours.
6. If metal tube is inserted, secure stillet at end if bed.
7. Place suction apparatus and suction tube ready at bedside.
3. TRACHEAL∕ENDOTRACHEAL SUCTIONING
Definition
Endotracheal suctioning is define as the procedure to remove pulmonary secretion
mechanically from patient’s airway passages via nose or mouth where ETT (endotracheal tube)
is in place.
Purpose
• To maintain patient airway by removing accumulated secretions using sterile technique.
• To improve oxygenation and reduce the work of breathing.
• Stimulate the cough reflex.

130
• Prevent infection and atelectasis from retained secretion.
Equipment
• Suction tray
• Suction catheter
• Sterile water for irrigation
• Normal saline
• Ambu bag
• Suction apparatus
• Face mask
• Gloves
• Kidney tray
Procedure:
1. Explain procedure to patient if conscious ∕ relative.
2. Wear mask
3. Give nebulizer and chest physio if secretions are thick.
4. Open suction tray.
5. Place sterile catheter in tray.
6. Fill cup with sterile water
7. Hyper oxygenate patient with Ambu bag.
8. Wear sterile gloves.
9. Fix catheter to suction tube.
10. Turn on suction source (keep one hand sterile throughout procedure).
11. Pinch and insert suction catheter into tracheostomy tube∕ endotracheal tube.
12. Releases suction tube, take out catheter in rotator movements (each suction should not
exceed 10-15 sec).
13. Repeat same step till tracheostomy ∕ ET tube is clear.
14. Rinse catheter in sterile water.
15. Discard suction catheter and replace equipment.
16. Document time, colour, amount and consistency of secretions patient’s condition and
cooperation.
4. TRACHEOSTOMY CARE
Definition
A tracheostomy is an opening through the neck into the trachea. A tracheostomy opens the
airway and aids breathing.
A tracheostomy may be done in an emergency, at the patient’s bedside or in an operating room.
Depending on the person’s condition, the tracheostomy may be temporary or permanent.
Tracheostomy care includes changing a tracheostomy inner tube, cleaning tracheostomy site
and changing dressing around the site.
Purpose

131
• To maintain airway patency
• To prevent infection at the tracheostomy site
• To facilitate healing and prevent skin excoriation around.
• To promote comfort
• To access condition of ostomy
Articles required
• Gallinpots-3
• Sterile towel
• Sterile nylon brush/tube brush
• Sterile gauze square
• Cotton twill ties or tracheostomy tie tapes
• A clean tray containing
- Hydrogen peroxide
- Normal saline
- Sterile gloves – 1 pair
- Face mask and eye shield
- Waterproof pad
Procedure
Action Rationale
1. Asses condition of stoma: redness, swelling,
character of secretions,
presence of purulence all bleeding.
Presence of any of these indicates
infection and culture examination may be
warranted
2. Examine neck for subcutaneous emphysema
evidenced by crepitus around the ostomy site.
Indicates air leak into subcutaneous
tissue.
3. Explain procedure to the patient and teach
means of communication such as eye blinking
or raising a finger to indicate pain or distress
Obtain cooperation of patient.
4. Assist patient to a fowlers position and place
waterproof pad on chest
Promote lung expansion. Prevent soiling
of linen.
5. Wash hand thoroughly Prevent cross-infection
6. Assemble equipments
a. Open the sterile tracheostomy kit, pour
hydrogen peroxide and sterile normal saline
on separate gallipots.
b. Open the other sterile supplies as needed
including sterile applicators, suction kit and
tracheostomy care kit.
c. Put on face mask and eye shield
Hydrogen peroxide and saline removes
mucus and crust which promote bacterial
growth. Enhance performance phase of
procedure. Protect the nurse.

132
7. Assist patient to fowlers position and place
waterproof pad on chest
Promote lung expansion.
Prevents soiling of linen.
8. Unlock the inner cannula and remove it by
gently pulling it out toward you in the line
with it curvature. Place the inner cannula in
the bowel with hydrogen peroxide suction.
Hydrogen peroxide moistens and loosens
dried secretions.
9. Remove the soiled tracheostomy dressing,
discard the dressing and gloves.
10. Clean the flange of the tube using sterile
applicators or gauze moistened with hydrogen
peroxide and then with normal saline. Use
each applicator once only.
Using the applicator or gauze once only,
avoids contaminating a clean area with a
soiled gauze.
11. Clean the stoma tube with the gauze half
strength hydrogen peroxide may be used.
Thoroughly rinse the cleaned area using
gauze squares moistened with sterile normal
saline.
Hydrogen peroxide help toloosen dry
crusted secretions. Hydrogen peroxide is
irritating to the skin and inhibits healing
if not removed thoroughly.
12. Dry the stoma tube with dry sterile gauze. An
infected wound nay be cleaned with guaze
saturated with an antiseptic solution, then
dried. A thin layer of antibiotic ointment may
be applied to the stoma with a cotton swab.
May help to clear the wound infection.
13. Cleaning the inner cannula
• Remove the inner cannula from the soaking
solution
• Clean the lumen and entire cannula
thoroughly using the brush.
• Rinse the clean cannula by rinsing it with
sterile normal saline.
Thoroughly rinsing is important to
remove hydrogen peroxide from inner
cannula.
Removes solution adhering on the
cannula.
14. Replace the inner cannula and secure it in
place
• Insert the inner cannula by grasping the outer
• Lock the cannula in place by turning the lock
into position.
This secure the flange of the inner
cannula to the outer cannula.
15. Apply sterile dressing
• Open and refold a 4*4 gauze dressing into a
‘V’ shape and place under the flange on the
tracheostomy tube. Do not cut gauze pieces.
• Ensure that the tracheostomy tube is securely
supported while applying dressing.
Avoid using cotton- filled 4*4 gauze.
Cotton
Or gauze fiber cab be aspirated by the
patient potentially creating a tracheal
abscess.
Excessive movement of the
tracheostomy tube irritates the trachea.
16. Change the tracheostomy ties
• Leave the soiled tape in place until the new
one is applied.
• Grasp slit end of clean tape and pull it through
opening on one side of the tracheostomy tube.
• Pull the other end of the tape securely
thoroughly the slit end of tracheostomy tube
on the other side.
Leaving tape in place ensures that tube
will not be expelled if the patient move
or cough.
This action provides a secure attachment
with knot.
Prevents irritation and aids in rotation of
pressure site.

133
Consideration:
a. Tracheostomy dressing should be done every 8 hours or whenever dressing are soiled.
b. Tracheostomy tube may come with disposable inner cannula or without the inner cannula.
If disposable inner cannula is present, then replace the one that is inside with a new one.
c. If only single lumen is present, clean the neck plate and tracheostomy site.
d. Emphasize the importance of handwashing before performing tracheostomy care.
e. Proper way on how to remove, change and replace the inner cannula
f. Check and clean tracheostomy stoma.
g. Assess for symptoms of infection.
5. ASSISTING FOR LUMBAR PUNCTURE
Definition
Assisting in aspiration of cerebro spinal fluid (CSF) from sun arachnoid space (lumbar cistern),
by puncturing the space between spinous processes of L3 –L4 or L4-L5 using aseptic
technique.
Purpose:
• To aspirate CSF for diagnostic\ therapeutic.
• To determine pressure.
• To introduce drugs intrathecally.
• To do myelogram.
• To give spinal anesthesia.
Articles required:
A dressing trolley with tray containing
• Betadine
• Tr. Benzoin
• Spirit
• Lignocaine 2%
• 5cc or 2cc syringe
• 20 or 22 no. needle
• Gloves
• Mask
• Lumber puncture set containing;
- Dressing bowl -1
• Tie the tape at the side to side of the neck in a
square knot.
Exce ssive tightness compresses jugular
veins, decrease blood circulation to the
skin and results in discomfort for patient.
17. Document all relevant information in the
chart
• Tracheostomy care carried out
• Dressing change and
• Observations.

134
- Cotton balls
- Gauze pieces
- Dressing forceps-1
- Specimen bottles-3
- Biopsy towel-1
- Surgical towel-1
- LP needle-1
- Manometer (if pressure has to be measured)
Procedure:
1. Obtain informal written consent.
2. Explain procedure to patient and relatives and reassure patient throughout procedure.
3. Provide privacy
4. Position patient on left side with pillow under head and between legs. patients tofirm
surface with spine parallel to edge of bed.
5. Place patient in knee chest position so that chin touches knee and assist patient to
maintain this posture throughout procedure.
6. Cover patient with top sheet and expose only back.
7. Wash hands.
8. Provide sterile gloves to physician.
9. Open lumbar puncture set.
10. Assist physician in preparing site.
11. Open 5cc or 2cc syringe. 20no and 22no. needles and one by one into sterile tray.
12. After showing label to physician, clean top of local anesthetic bottlr and assist to
withdraw ,medication.
13. Specimen is collected in respective containers and pressure reading is obtained.
14. After collecting specimens, needle is withdrawn. Assist physician to seal puncture with
Tr. Benzoin swab.
Post procedure care:
1. Instruct patient to lie in supine position for 6-24hours without pillow.
2. Check pulse and respiration for 4-5hours and till stable
3. Encourage liberal fluid intake.
4. Label specimens and sand to lab with investigation slip.
5. Replace equipment after rinsing.
6. Wash hands.
7. Document appearance of spinal fluid, specimens, sent lab, condition and reaction of
patient.
8. Observe for headache, nausea, loss of sensation or movement in limbs.
9. Check puncture site frequently for CSF leakage.

135
6. ASSISTING IN ENDOTRACHEAL INTUBATION AND EXTUBATION
a. Endotracheal Intubation
Definition
Endotracheal intubation (ETI) is a rapid, simple, safe, and non-surgical technique that achieves
all the goals of airway management, namely, maintaining airway patency, protecting the lungs
from aspiration, and permitting leak free ventilation during mechanical ventilation, and remains
the gold standard procedure for airway management.
Purpose
• To maintain airway patency
• To protect the lungs
• To maintain ventilation
Equipment
• Laryngoscope with a curved or straight blade and working light source (check batteries
and bulb regularly)
• Endotracheal (ET) tube with low-pressure cuff and adapter to connect tube to ventilator
or
• Adhesive tape or tube fixation system
• Sterile anesthetic lubricant jelly (water-soluble)
• 10-mL syringe
• Suction source
• Suction catheter and tonsil suction
• Resuscitation bag and mask connected to oxygen source
• Sterile towel
• Gloves
• End tidal CO2 detector
Procedure
1. Assess the patient's heart rate, level of consciousness, and respiratory status.
2. Remove the headboard from the bed
3. Prepare equipment
a. Ensure function of resuscitation bag with mask and suction
b. Assemble laryngoscope. Make sure light bulb is tightly attached and functional
c. Select ET tube of appropriate size

136
4. Place the ET tube on a sterile towel
5. Inflate the cuff then deflate maximally to make sure it assumes symmetrical shape and holds
volume without leakage.
6. Lubricate the distal end of the tube liberally with the sterile anaesthetic water-soluble jelly.
7. Insert the stylet into the tube (if oral intubation is planned). Nasal intubation does not employ
the use of the stylet
8. Ventilate and oxygenate the patient with the resuscitation bag and mask before intubation
9. Elevate the bed to position the patient at the level of own lower sternum
10. Hold the handle of the laryngoscope in the left hand and hold the patient's mouth open with
the right hand by placing crossed fingers on the teeth.
11. Insert the curved blade of the laryngoscope along the right side of the tongue, push the
tongue to the left, and use right thumb and index finger to pull patient's lower lip away from
lower teeth.
12. Hold the handle of the laryngoscope in the left hand and hold the patient's mouth open with
the right hand by placing crossed fingers on the teeth.
13. Lift the laryngoscope forward (toward ceiling) to expose the epiglottis.
14. Lift the laryngoscope upward and forward at a 45-degree angle to expose the glottis and
visualize vocal cords
15. As the epiglottis is lifted forward (toward ceiling), the vertical opening of the larynx between
the vocal cords will come into view.
16. Once the vocal cords are visualized, insert the tube into the right corner of the mouth and
pass the tube while keeping vocal cords in constant view.
17. Once the vocal cords are visualized, insert the tube into the right corner of the mouth and
pass the tube while keeping vocal cords in constant view.
18. Stop insertion just after the tube cuff has disappeared from view beyond the cords.
19. Withdraw laryngoscope while holding ET tube in place. Disassemble mask from
resuscitation bag, attach bag to ET tube, and ventilate the patient.
20. Inflate the cuff with the minimal amount of air required to occlude the trachea.
21. Insert a bite block if necessary.
22. Ascertain expansion of both sides of the chest by observation and auscultation of breath
sounds. To ensure correct placement
23. Record distance from proximal end of tube to the point where the tube reaches the teeth.

137
24. Secure the tube to the patient's face with adhesive tape or apply a commercially available
endotracheal tube stabilization device.
25. Obtain a chest X-ray to verify tube position.
26. Document and monitor tube distance from lips to end of ET tube.
27. Record tube type and size, cuff pressure, and patient tolerance of the procedure. Auscultate
breath sounds every 2 hours or if signs and symptoms of respiratory distress occur. Assess
ABGs after intubation if requested by the health care provider.
b. Assisting In Extubation
Definition
Extubation is the removal of an endotracheal tube (ETT), which is the last step in liberating a
patient from the mechanical ventilator.
Purposes
To allow patient to breath on their own once:
• the underlying condition that led to the need for an artificial airway is reversed or
improved. hemodynamic stability is achieved, with no new reasons for continued artificial
airway support.
• the patient is able to effectively clear pulmonary secretions.
• airway problems have resolved; minimal risk for aspiration exists.
• mechanical ventilatory support is no longer needed.
Equipment
• All equipment needed for intubation
• Suction catheter of appropriate size
• Normal Saline
• Scissors
• 10cc syringe (for cuffed endotracheal tubes)
• Appropriate oxygen delivery system
• Nebulizer
• AMBU bag

138
Procedure
1. All necessary equipment should be available for extubation management and the rest of the
equipment available nearby in case extubation does not go as planned
2. Explain the procedure
3. Place the patient in an upright sitting position.
4. Preoxygenate with 100% oxygen
5. Both the ETT and oral cavity should be suctioned
6. Preoxygenate with 100% oxygen again
7. Cut or loosen the tape
8. Ask the patient to take a deep breath and exhale and then pull the ET tube as the patient
exhales
9. After the removal of the ETT, suction the oral cavity and ask the patient to take a deep breath
and cough out all secretions.
10. The patient should be placed on supplemental oxygen as per physician’s order
11. Confirm patient can vocalize.
12. Auscultate neck first for stridor, then lung fields. Encourage the patient to take deep breath
and cough
13. Monitor patient’s vital signs and respiratory patterns closely
14. Document the date and time of extubation
7. PERFORMING CARDIO PULMONARY RESUSCITATION (CPR)
Definition
Cardiopulmonary resuscitation (CPR), also known as basic life support, is used in the
absence of spontaneous respirations and heartbeat to pre serve heart and brain function
while waiting for defibrillation and advanced cardiac life-support care. It is a
combination of chest compressions, which manually pump the heart to circulate blood
to the body systems, and "mouth-to-mouth" or rescue breathing, which supplies oxygen
to the lungs. The American Heart Association uses the letters C-A-B to help people
remember the order to perform the steps of CPR.
C: compressions
A: airway
B: breathing
Purpose
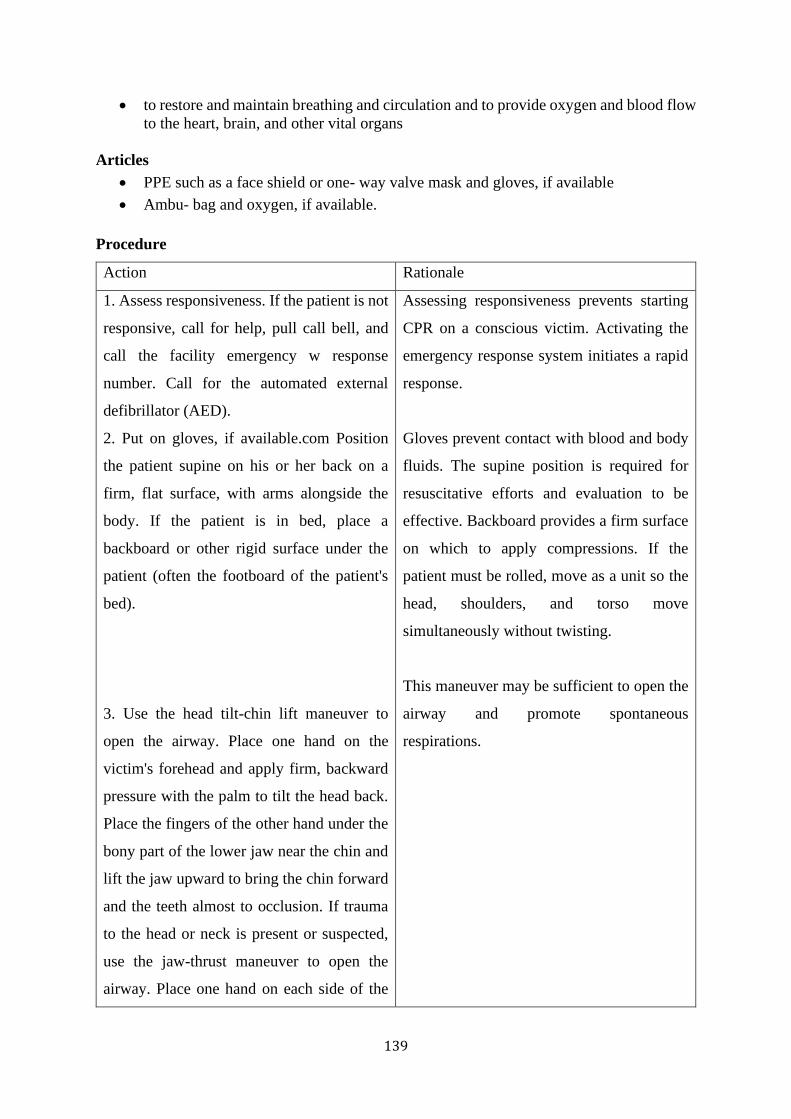
139
• to restore and maintain breathing and circulation and to provide oxygen and blood flow
to the heart, brain, and other vital organs
Articles
• PPE such as a face shield or one- way valve mask and gloves, if available
• Ambu- bag and oxygen, if available.
Procedure
Action Rationale
1. Assess responsiveness. If the patient is not
responsive, call for help, pull call bell, and
call the facility emergency w response
number. Call for the automated external
defibrillator (AED).
2. Put on gloves, if available.com Position
the patient supine on his or her back on a
firm, flat surface, with arms alongside the
body. If the patient is in bed, place a
backboard or other rigid surface under the
patient (often the footboard of the patient's
bed).
3. Use the head tilt-chin lift maneuver to
open the airway. Place one hand on the
victim's forehead and apply firm, backward
pressure with the palm to tilt the head back.
Place the fingers of the other hand under the
bony part of the lower jaw near the chin and
lift the jaw upward to bring the chin forward
and the teeth almost to occlusion. If trauma
to the head or neck is present or suspected,
use the jaw-thrust maneuver to open the
airway. Place one hand on each side of the
Assessing responsiveness prevents starting
CPR on a conscious victim. Activating the
emergency response system initiates a rapid
response.
Gloves prevent contact with blood and body
fluids. The supine position is required for
resuscitative efforts and evaluation to be
effective. Backboard provides a firm surface
on which to apply compressions. If the
patient must be rolled, move as a unit so the
head, shoulders, and torso move
simultaneously without twisting.
This maneuver may be sufficient to open the
airway and promote spontaneous
respirations.
140
patient's head. Rest elbows on the flat surface
under the patient, grasp the angle of the
patient's lower jaw, and lift with both hands.
4. Look, listen, and feel for air exchange.
Take at least 5 seconds and no more than 10
seconds.
5. If the patient resumes breathing or
adequate respirations and signs of circulation
are noted, place the patient in the recovery
position.
6. If no spontaneous breathing is noted, seal
the patient's mouth and nose with the face
shield, one-way valve mask, or Ambu-bag
(handheld resuscitation bag), if available. If
not available, seal patient's mouth with
rescuer's mouth.
7. Instill two breaths, each lasting 1 second,
making the chest rise.
These techniques provide information about
the patient's breathing and the need for rescue
breathing.
The recovery position maintains alignment
of the back and spine while allowing for
continued observation and maintains access
to the patient.
Sealing the patient's mouth and nose prevents
air from escaping. Devices, such as masks,
reduce the risk for transmission of infections.
Breathing into the patient pro vides oxygen
to the patient's lungs. Hyperventilation
results in increased positive chest pressure
and decreased venous return. Blood flow to
the lung’s during CPR is only about 25% to
33% normal; patient requires less ventilation
to provide oxygen and remove carbon
dioxide. Longer breaths reduce the amount of
blood that refills the heart, reducing blood
flow generated by compressions. Delivery of
large, forceful breaths may cause gastric
inflation and distension.
Inability to ventilate indicates that the airway
may be an obstructed. Repositioning

141
8. If you are unable to ventilate the patient or
the chest does not rise during ventilation,
reposition the patient's head and reattempt to
ventilate. If still unable to ventilate, begin
CPR. Each subsequent time the airway is
opened to administer breaths, look for an
object. If an object is visible in the mouth,
remove it. If no object is visible, continue
with CPR.
9. Check the carotid pulse, simultaneously
evaluating for breathing, coughing, or
movement. This assessment should take at
least 5 seconds and no more than 10 seconds.
Place the patient in the recovery position if
breathing resumes.
10. If the patient has a pulse, but remains
without spontaneous breathing, continue
rescue breathing at a rate of one breathe
every 5 to 6 seconds, for a rate of 10 to 12
breaths per minute.
11. If the patient is without signs of
circulation, position the heel of one hand in
the center of the chest between the nipples,
directly over the lower half of the sternum.
Place the other hand directly on top of the
first hand. Extend or interlace fingers to keep
fingers above the chest. Straighten arms and
position shoulders directly over hands.
maneuvers may be sufficient to open the
airway and promote spontaneous
respirations. It is critical to minimize
interruptions in chest compressions, to
maintain circulatory perfusion.
Pulse and other assessments evaluate cardiac
function. The femoral pulse may be used for
the pulse check.
Rescue breathing maintains adequate
oxygenation.
Proper hand positioning ensures that the
force of compressions is on the sternum,
thereby reducing the risk of rib fracture, lung
puncture, or liver laceration.
Direct cardiac compression and
manipulation of intrathoracic pressure
supply blood flow during CPR. Compressing

142
12. Perform 30 chest compressions at a rate
of 100 per minute, counting "one, two, etc."
up to 30, keeping elbows locked, arms
straight, and shoulders directly over the
hands. Chest compressions should depress
the sternum 1½ to 2 inches. Push straight
down on the patient's sternum. Allow full
chest recoil (re-expand) after each
compression.
13. Give two rescue breaths after each set of
30 compressions. Do five complete cycles of
30 compressions and two ventilations.
14. Defibrillation should be provided at the
earliest possible moment, as soon as AED
becomes available.
15. Continue CPR until advanced care
providers take over, the patient starts to
move, you are too exhausted to continue, or
a physician discontinues CPR. Advanced
care providers will indicate when a pulse
check or other therapies are appropriate
(AHA, 2006).
16. Remove gloves, if used. Perform hand
hygiene.
the chest 1½ to 2 inches ensures that
compressions are not too shallow and
provides adequate blood flow. Full chest
recoil allows adequate venous return to the
heart.
Breathing and compressions simulate lung
and heart function, providing oxygen and
circulation.
The interval from collapse to defibrillation is
the most important determinant of survival
from cardiac arrest.
Once started, CPR must continue until one of
these conditions is met. In a hospital setting,
help should arrive within a few minutes.
Removing PPE properly reduces the risk for
infection transmission and contamination of
other items. Hand hygiene prevents
transmission of microorganisms.
8. CARE OF PATIENTS ON HEMODIALYSIS AND PERITONEAL DIALYSIS
a. Care of Patient on Hemodialysis
Definition
Hemodialysis, a method of removing fluid and wastes from the body, requires access to the
patient's vascular system via the insertion of a catheter into a vein or the creation of a fistula or
graft. If a catheter is used, it is cared for in the same manner as a central venous access device.
An arteriovenous fistula is a surgically created passage that connects an artery and vein. An

143
arteriovenous graft is a surgically created connection between an artery and vein using a
synthetic material. Only specially trained healthcare team members should do accessing a
hemodialysis arteriovenous graft or fistula.
Purpose
• To remove waste products such as urea, creatinine and others excess substances from the
blood
• To maintain fluid balance
• To remove toxins in cases of poisoning
• To relieve suffering caused by excess fluid and metabolic waste products in the blood
Equipment
• Reverse osmosis solution
• Hemodialysis machine
• Hemodialysis set containing:
- Sponge holder
- 3 Sterile towels
- 2 liters of normal saline solution
- 2 Forceps
- 4 Towel clips
- 2 Gallipots
- Disposable syringes, (20cc, 10cc, 2cc)
- Betadine solution
- Haemodialyzer fluid concentrate
- Gauze pieces
- Cotton
- Fistula needles
- Dialyzer and blood line
- Rubber sheet
- Bucket
- Sterile gloves
- Dialysate solution
- IV set
- Transducer filters
- Heparin (if ordered)
- Adhesive tape and scissors

144
Procedure
1. Perform hand hygiene and put on PPE, if indicated.
2. Identify the patient.
3. Close curtains around bed and close the door to the room, if possible. Explain what you
are going to do, and why you are going to do it, to the patient.
4. Inspect the area over the access site for any redness, warmth, tenderness, or blemishes.
Palpate over the access site, feeling for a thrill or vibration. Palpate pulses distal to the site.
Auscultate over the access site with bell of stethoscope, listening for a bruit or vibration.
5. Ensure that a sign is placed over the head of the bed informing the healthcare team, which
arm, is affected. Do not measure blood pressure, perform a venipuncture, or start an IV on
the access arm. Instruct the patient not to sleep with the arm with the access site under
head or body.
6. Instruct the patient not to lift heavy objects with, or put pressure on, the arm with the access
site. Advise the patient not to carry heavy bags (including purses) on the shoulder of that
arm.
7. Remove PPE, if used. Perform hand hygiene.
b. Care of Patient on Peritoneal Dialysis
Definition
Peritoneal dialysis is a method of removing fluid and wastes from the body of a patient with
kidney failure. A catheter inserted through the abdominal wall into the peritoneal cavity allows
a special fluid (dialysate to be infused and then drained from the body, removing waste products
and excess fluid. The exit site is not disturbed initially after insertion, to allow for healing.
Generally, this time frame is 7 to 10 days post-insertion. Once the exit site has healed, exit site
care is an important part of patient care. The catheter insertion site is a site for potential
infection, possibly leading to catheter tunnel infection and peritonitis (inflammation of the
peritoneal membrane). Therefore, meticulous care is needed. The incidence of exit site
infections can be reduced through a daily cleansing regimen by the patient or caregiver. Often,
in the acute care setting. catheter care is performed using aseptic technique, to reduce the risk
for a hospital-acquired infection. At home, clean technique can be used by the patient and
caregivers.
Purpose
• To correct an imbalance of fluid or electrolytes in the blood

145
• To remove toxins, drugs or other wastes normally excreted by the kidneys.
Articles
• Face masks (2)
• Venesection tray
• Bucket
• Peritoneal dialysis catheter, tubing and clamps (dialysate) as ordered by the doctor
• Peritoneal dialysis solution
• 4 disposable syringe 20cc, 10cc, 1% or 2% xylocaine
• Sterile gloves
• Nonsterile gloves
• Sterile drain sponge
• Suture set
• Rubber sheet
• Betadine solution and warm water
• Measuring tape
• ECG Monitor
• Scissor and measuring jug
• Topical antibiotic, such as mupirocin or gentamicin, depending on order and policy
• Additional PPE, as indicated
• Antimicrobial cleansing agent, per facility policy
• Sterile applicator
• Plastic trash bag
• Bath blanket
• Sterile gauze squares (4)
• Sterile basin
• Stethoscope
Procedure
1. Bring necessary equipment to the bedside stand or over bed table.
2. Perform hand hygiene and put on PPE, if indicated, identify the patient.
3. Close curtains around bed and close the door to the room, if possible. Explain what you are
going to do and why you are going to do it to the patient. Encourage the patient to observe
or participate, if possible.
4. Adjust bed to comfortable working height, usually elbow height of the
5. Assist the patient to a supine position. Expose the abdomen, draping the patient's chest with
the bath blanket, exposing only the catheter site.
6. Put on clean gloves. Put on one of the facemasks; have patient put on the other mask.

146
7. Gently remove old dressing, noting odor, amount and color of drainage, leakage, and
condition of skin around the catheter. Discard dressing in appropriate container
8. Remove gloves and discard. Set up sterile field. Open packages. Using aseptic technique,
place two sterile gauze squares in basin with antimicrobial agent. Leave two sterile gauze
squares opened on sterile field. Alternately (based on facility's policy), place sterile
antimicrobial swabs on the sterile field. Place sterile applicator on field. Squeeze a small
amount of the topical antibiotic on one of the gauze squares on the sterile field.
9. Put on sterile gloves. Pick up dialysis catheter with non-dominant hand. With the
antimicrobial-soaked gauze/swab, cleanse the skin around the exit site using a circular
motion, starting at the exit site and then slowly going outward 3 to 4 inches. Gently remove
crusted scabs if necessary.
10. Continue to hold catheter with your non-dominant hand. After skin has dried, clean the
catheter with an antimicrobial-soaked gauze, beginning at exit site, going around catheter,
and then moving up to end of catheter. Gently remove crusted secretions on the tube, if
necessary.
11. Using the sterile applicator, apply the topical antibiotic to the catheter exit site, if prescribed.
12. Place sterile drain sponge around exit site. Then place a 4 x 4 gauze over exit site. Remove
your gloves and secure edges of gauze pad with tape. Some institutions recommend placing
a transparent dressing over the gauze pads instead of tape. Remove masks.
13. Coil the exposed length of tubing and secure to the dressing or the patient's abdomen with
tape.
14. Assist the patient to a comfortable position. Cover the patient with bed linens. Place the bed
in the lowest position.
15. Put on clean gloves. Remove or discard equipment and assess the patient's response to the
procedure.
16. Remove gloves and additional PPE, if used. Perform hand hygiene
10. PREOPERATIVE AND POSTOPERATIVE NURSING CARE
a. Preoperative Nursing Care
Definition
The preparation of patient before surgery including the necessary teaching and physical
preparation for surgical intervention and transfer of the patient to operative table.
Purpose

147
• To help the patient feel comfortable and relaxed about the surgery.
• To teach the patient about the surgery and what they can except.
• To teach the patient about health exercise they may need to do after the surgery.
Equipment:
• Shaving set
• Soap and water
• Brush
• Enema can
• Bed Pan
• Patient gown
Procedure:
Action Rationale
1. Check the patient’s chart for the type of
surgery and review the medical orders. Review
the nursing database, history, and physical
examination. Check that the baseline data are
recorded; report those that are abnormal.
These checks ensure that the care will be
provided for the right patient and any specific
teaching based on the type of surgery will be
addressed. Also, this review helps to identify
patients who are at increased surgical risk.
2. Check that diagnostic testing has been
completed and results are available; identify and
report abnormal results.
This check may influence the type of surgery
performed and anesthetic used, as well as the
timing of surgery or the need for additional
consultation
3. Gather the necessary supplies and bring to the
bedside stand or overbed table.
Preparation promotes efficient time
management and organized approach to the
task. Bringing everything to the bedside
conserves time and energy. Arranging items
nearby is convenient, saves time, and avoids
unnecessary stretching and twisting of muscles
on the part of the nurse.
4. Perform hand hygiene and put on PPE, if
indicated
Hand hygiene and PPE prevent the spread of
microorganisms. PPE is required based on
transmission precautions
5. Identify the patient. Identifying the patient ensures the right patient
receives the intervention and helps prevent
errors.
6. Close curtains around bed and close the door
to the room, if possible. Explain what you are
going to do and why you are going to do it to the
This ensures the patient’s privacy. Explanation
relieves anxiety and facilitates cooperation.

148
patient.
7. Explore the psychological needs of the patient
related to the surgery as well as the family.
a. Establish the therapeutic relationship,
encouraging the patient to verbalize concerns or
fears.
b. Use active learning skills, answering
questions and clarifying any misinformation.
c. Use touch, as appropriate, to convey genuine
empathy.
d. Offer to contact spiritual counselor (priest,
minister, rabbi) to meet spiritual needs.
Meeting the psychological needs of the patient
and family before surgery can have a beneficial
effect on the postoperative course.
Spiritual beliefs for some patients and family
can provide a source of support over the
perioperative course.
8. Identify learning needs of patient and family.
Ensure that the informed consent of the patient
for the surgery has been signed, witnessed, and
dated. Inquire if the patient has any questions
regarding the surgical procedure .
This enhances surgical recovery and allays
anxiety by preparing the patient for
postoperative convalescence, discharge plans,
and self-care.
9. Provide teaching about deep breathing
exercises.
Deep breathing exercises improve lung
expansion and volume, help expel anesthetic
gases and mucus from the airway, and facilitate
the oxygenation of body tissues.
10. Provide teaching regarding coughing and
splinting (providing support to the incision)
Coughing helps remove retained mucus from
the respiratory tract. Splinting minimizes pain
while coughing or moving.
11.Provide teaching regarding incentive
spirometer
Incentive spirometry improves lung expansion,
helps expel anesthetic gases and mucus from the
airway, and facilitates oxygenation of body
tissues.
12.Provide teaching regarding leg exercises, as
appropriate
Leg exercises assist in preventing muscle
weakness, promote venous return, and decrease
complications related to venous stasis. Leg
exercises may be contraindicated for patients
with certain conditions, such as lower extremity
fractures.
13. Assist the patient in putting on antiembolism
stockings and demonstrate how the pneumatic
Antiembolism stockings and pneumatic
compression devices are used postoperatively

149
compression device operates. for patients who are at risk for a deep-vein
thrombosis (DVT) and pulmonary embolism.
14. Provide teaching regarding turning in the
bed.
Turning and repositioning of the patient is
important to prevent postoperative
complications and to minimize pain.
15. Provide teaching about pain management.
a. Discuss past experiences with pain and
interventions that the patient has used to reduce
pain.
b. Discuss the availability of analgesic
medication postoperatively.
c. Explore the use of other alternative and
nonpharmacologic methods to reduce pain, such
as position change, massage,
relaxation/diversion, guided imagery, and
meditation
Using ordered analgesics to minimize pain helps
prevent postoperative complications.
Past experiences with pain can impact patient’s
ability to manage the pain of surgery. Pain is a
subjective experience and individuals vary on
what interventions are effective in reducing
pain.
These measures may reduce anxiety and may
decrease the amount of pain medication that is
needed. Analgesic therapy should involve a
multimodal approach influenced by age, weight,
and comorbidity.
16. Review equipment that may be used. a.
Show the patient various equipment, such as IV
pumps, electronic blood pressure cuff, tubes,
and surgical drains.
Knowledge can reduce anxiety about
equipment. The patient may need an indwelling
urinary (Foley) catheter during and after surgery
to keep the bladder empty and to monitor
urinary output. Drains are frequently used to
remove excess fluid around the surgical
incision.
17. Provide skin preparation. a. Ask the patient
to bathe or shower with the antiseptic solution.
Remind the patient to clean the surgical site.
An antiseptic shower may be ordered 1 or 2
days before surgery and repeated the morning of
surgery to begin the process of preparing the
skin before surgery and to prevent infection.
Recent research advises against hair removal of
the surgical site due to increased potential for
infection.
The Centers for Disease Control and Prevention
(CDC) recommends that if shaving is necessary,

150
it should be performed immediately before the
surgery, using disposable supplies and aseptic
technique. Follow agency policy regarding skin
preparation of the surgical patient. In addition,
immediately before the surgical procedure, the
skin of the patient’s operative site will be
cleansed with a product that is compatible with
the antiseptic used for showering.
18. Provide teaching about and follow
dietary/fluid restrictions.
a. Explain to the patient that both food and fluid
will be restricted before surgery to ensure that
the stomach contains a minimal amount of
gastric secretions. This restriction is important
to reduce the risk of aspiration. Emphasize to
the patient the importance of avoiding food and
fluids during the prescribed time period, because
failure to adhere may necessitate cancellation of
the surgery.
Common practice in preparation for surgery has
included having the patient fast after midnight,
nothing by mouth (NPO) the night before
surgery. At times, this restriction involves
fasting up to 10 to 12 hours when surgery was
performed in the later part of the next day.
Recent research on both adults and children is
challenging this NPO standard or fasting
practice before surgery, claiming that a less
restricted fluid intake of clear fluids could be
safely taken up to 2 hours before surgery for
individuals who are considered low risk for
aspiration or regurgitation, and depending on
the type of surgery (American Society of
Anesthesiologists, 1999). Follow agency policy
regarding the time period when this restriction
will need to be followed
19. Provide intestinal preparation, as
appropriate. In certain situations, the bowel will
need to be prepared by administering enemas or
laxatives to evacuate the bowel and to reduce
the intestinal bacteria.
a. As needed, provide explanation of the
purpose of enemas or laxatives before surgery.
This preparation will be needed when major
abdominal, perineal, perianal, or pelvic surgery
is planned.
Enemas can be stressful, especially when
repeated enemas are required to obtain a clear
fluid return. Repeated enemas may cause fluid
and electrolyte imbalance, orthostatic
hypotension, and weakness. Follow safety
151
precautions to guard against patient falls.
Anesthetic agents and abdominal surgery can
interfere with normal elimination function
during the initial postoperative period.
20. Check administration of regularly scheduled
medications. Review with the patient routine
medications, over-the-counter medications, and
herbal supplements that are taken regularly.
Check the physician’s orders and review with
the patient which medications he or she will be
permitted to take the day of surgery.
Many patients take medications for a variety of
chronic medical conditions. Adjustments in
taking these medications may be needed before
surgery. Certain medications, such as aspirin,
are stopped days before surgery due to their
anticoagulant effect. Certain cardiac and
respiratory drugs may be taken the day of
surgery per physician’s order. If the patient is
diabetic and takes insulin, the insulin dosage
may be reduced.
21. Remove PPE, if used. Perform hand hygiene Removing PPE properly reduces the risk for
infection transmission and contamination of
other items. Hand hygiene prevents the spread
of microorganisms.
b. Post-Operative Care
Definition
Post operative nursing care is the care given to patient from time of completion of the time
patient is discharged from hospital setting (which includes immediate and later post operative
care).
Purpose:
• To help patient to return to normal functioning condition
• To provide comfort and maintain safety of patient. To detect and manage
postoperative complications.
• To plan care for patient following discharge.
Articles Required:
• Sphygmomanometer Stethoscope
• Thermometer tray
• Mouth care tray
• Injection tray with needles and syringes
• IV fluids
• Oxygen inhalation articles
• Suction

152
• Sterile dressing set
• Emergency tray
• Hot water bag
• Extra blanket
• Kidney tray
• Urinal
• Bed pan
Procedure:
Immediate Post Operative:
From the time the operation is completed to the time when general condition of patient is
stabilized.
1. Preparation of bed and unit: Keep surgical bed and unit ready to receive patient after
surgery. Arrange in such a way that there is enough space on side of bed for stretcher.
When patient arrives, help shift patient from stretcher to post operative bed.
2. Position: Place patient in supine position with no pillow under head, head turned to
oneside to prevent tongue falling back into throat and aspiration of mucus or vomiting.
The patient may have plastic airway.
3. Attach any equipment that may be necessary such as oxygen,suction, intravenous
infusion or urinary catheter drainage and labeled ofblood pressure.
4. Collection of information: Observe patients colour, Pulse ,respiration
5. Side by side review the following:
a. Operation performed
b. Anaesthesia given
c. Any problemes during surgery or severe hemorrhage patient had in Operation theater
that has bearing on postoperative care.
d. Infusions or transfusion given in the operation theatre
e. Any special symptoms or complications to be observed
f. Doctors order to be carried out immediately.
g. Any information to be shared with family.
6. Suction if necessary.
7. Carry out any immediate orders with regard to medication or as specified.
8. Observe-skin colour, vital signs (pulse, respiration, BP), level of consciousne general
condition, every 15 minutes until stable, monitoring vital sign every 30 for 1 hour,
every hour until the patient general condition normalizes, urine d wound site for
drainage/bleeding, comfort level (restlessness/discomfort), Che tubes and drain for
patency and proper functioning.
9. Check intravenous infusion rate frequently. Plan IV fluids for 24 hours according t
order, adjust the drop/min. and check for flow. Administer IV fluids and electrolytes
as orderd.

153
10. Maintain accurate intake and output record.
11. Administer post operative medication as ordered.
12. Give mouth care, every 4 hours.
13. If patient is on nasogastric tube, aspirate gastric contents every 15 minutes minutes as
necessary.
14. Observe patient for voiding.
15. Maintain calm and quite environment Maintain safety including side rails on t patient
completely come out from anaesthesia.
16. interpret data recorded continuously and report to doctor for any complicatie as shock,
hemorrhage and hypoxia due to respiratory obstruction.
17. Raise foot end of bed using bed wooden blocks, if shock is anticipated
Late post operative care:
1. Provide later post operative care by continuing positioning according to patients
comfort.
2. Maintain IV fluids as per order.
3. Ambulating patient on same day or after 24 hours depending on type of surgery.
4. Dressing wound after wound inspection by doctor.
5. Providing post operative exercise including steam inhalation.
6. Providing health education on relevant topics each day.
7. Administering medications as per written order.
8. Assist for suture removal, drainage etc.
9. Documentation of care given.
10. GASTRIC DECOMPRESSION/ NASOGASTRIC ASPIRATION
Definition
A method of removal of fluid, gas and other contents from the stomach and intestines through
a gastrointestinal tube.
Purpose
• To remove fluid/gas in abdominal distention (paralytic ileus or intestinal obstruction).
• To prepare patient for surgery.
• To remove irritants from gastro intestinal tract.
• To manage bleeding from esophageal varices.
• To aid wound healing in gastro intestinal surgeries.
Equipment
A tray containing:
• Gastrointestinal tube
• 20ml syringe(glass/plastic)
• Gauze pieces
• Water in bowl
• Mackintosh
• Towel

154
• Drainage collecting bottle/bag
Procedure:
Action Rationale
1. Obtain doctor's instruction. Helps to be on safe site.
2. Explain the procedure and its
purpose to the client.
Providing information fosters his/her
cooperation
3. Assemble equipment to the
bedside.
Organization facilitates accurate skill
performance.
4. Maintain privacy.
5. Perform hand hygiene and put on
gloves if available
To prevent the spread of infection.
6. Take a guaze piece with left hand
and keep under the tube end.
To prevent contamination.
7. Take syringe with right hand and
keep under the tube end.
8. Aspirate contents into collecting
device after reassuring the correct
placement of the tube. Repeat
aspiration until contents are
completely removed or when
negative pressure is felt.
Helps in emptying the gastrointestinal
content.
9. Place the soiled gauze in kidney
basin.
To prevent contamination of other objects
To prevent the increase of organisms.
10. Rinse the used syringe. To prevent the increase of organisms.
11. Make the patient comfortable. Positioning and covering provide warmth
and promote comfort.
12. Remove and discard gloves. Perform hand hygiene .
To prevent contamination of other objects,
including the label.
13. Remove aspiration tray.
14. Wash, dry and replace articles
15. Perform hand hygiene. To prevent the spread of infection.
16. Document the procedure in the
designated place and mark it off on
the Cardex.
17. Record date and time of aspiration,
amount, color, order and
constituents of drainage, patient's
condition.
To avoid duplication.
Documentation provides coordination of
care.
11. TUBE FEEDING
a. Naso- gastric Tube Feeding
Definition:
A naso-gastric tube feeding is a means of providing liquid nourishment through a tube into
the intestinal tract, when the client is unable to take food or any nutrients orally
Purpose:

155
• To provide adequate nutrition
• To give large amounts of fluids for therapeutic purpose
• To provide an alternative manner to some specific clients who have potential or
acquired swallowing difficulties
Equipment:
• Disposable gloves (1)
• Feeding solution as prescribed
• Feeding bag with tubing (1)
• Water in jug
• Large catheter tip syringe (50 ml) (1)
• Measuring cup (1)
• Clamp if available (1)
• Paper towel as required
• Dr.’s prescription
• Stethoscope (1)
Procedure
1. Assemble all equipment and supplies after checking the Dr.’s prescription for tube feeding
2. Prepare formula:
a. Canned liquid type: Shake the can thoroughly. Check expiration date
b. Powder type: Mix according to the instructions on the package, prepare enough for 24
hours only and refrigerate unused formula. Label and date the container. Allow formula to
reach room temperature before using.
c. liquid type prepared by hospital or family at a time: Make formula at a time and allow
formula to reach room temperature before using.
3. Explain the procedure to the client
4. Perform hand hygiene and put on disposable gloves if available
5. Position the client with the head of the bed elevated at least 30 degree angle to 45 degree angle
6. Determine placement of feeding tube by:
Aspiration of stomach secretions
• Attach the syringe to the end of the feeding tube
• Gently pull back on the plunger

156
• Measure amount of residual fluid
• Return residual fluid to the stomach via tube and proceed to feed.
❖Nursing Alert❖
If the amount of the residual exceeds hospital protocol or Dr.’s order, refer to these order.
- Injecting 10- 20 mL of air into the tube:
- Attach syringe filled with air to the tube
- Inject air while listening with the stethoscope over the left upper quadrant
b. Gastrostomy/Jejunostomy Feeding
Definition:
Fluid/food administered through jejunostomy which is an opening stomach/jejunum.
Purpose:
• To administer fluid/food to maintain nutrition.
• To prevent regurgitation/aspiration.
Equipment:
▪ Towel
▪ Syringe
▪ Feeds
▪ Adhesives
▪ Scissors
▪ IV stand
Procedure:
1. Explain the procedure to the patient.
2. Wash hands.
3. Connect milk drip set /IV set to a bottle containing feed.
4. Fix adhesive around cork in feeding bottle. Expel the air in IV tubing or adjust cork in
milk drip set.
5. Check patency of gastrostomy/jejunostomy tube.
6. Connect IV/milk drip set to gastrostomy/jejunostomy tube.
7. Adjust drops per minute and ensure smooth flow.
8. Replace equipment.
9. Record in intake output chart, time, date, amount, feed.

157
10. Wash hands.
12. COLOSTOMY CARE
Definition:
Maintenance of hygiene by regular emptying colostomy bag and cleaning colostomy site.
Purpose:
• To prevent leakage
• To prevent excoriation of skin and stoma
• To observe stoma and surrounding skin.
• To teach patient and relatives about care of colostomy and collection bag
Equipment’s required:
• Clean tray containing:
• Rubber sheet
• Long sheet
• Towel
• Gloves (one pair)
• Cotton swabs and gauze pieces
• Wash cloth
• Water in a basin
• Mild Soap in a dish
• Disposable colostomy bag with clamp
• Stoma measuring guide
• Skin barrier
• Bedpan with cover
Procedure:
1. Collect articles at bed side.
2. Explain procedure to patient.
3. Maintain privacy.
4. Position patient in semi fowler/fowler position and cover with top sheet.
5. Arrange rubber sheet and towel to protect bedding and gown.
6. Wash hands and put on clean gloves.
7. Change colostomy collection bag as follows.
a. If bag is full, remove, clamp and empty contents into bed pan.
b. Gently remove bag, remove clamp and keep in Kidney basin.
c. Place gauze piece over stoma to absorb any drainage.

158
d. Once the appliance has been removed, the peristomal skin should be cleaned gently
using warm tap water and dried with gauze pad.
e. Soap has a drying effect on skin and should not be used on a regular basis.
f. Patient can take bath with or without pouch. Water will not enter the stoma.
g. Avoid any soaps with oils, perfumes, and deodorants. These can cause skin irritation
or even keep your skin barrier from sticking to your skin properly.
h. Optionally, adhesive remover wipes which can better remove adhesive residue that
may have been left behind by your ostomy appliance.
i. Rinse well to remove all soap as it can hinder adherence of bag.
j. Pat dry thoroughly with a towel.
k. Remove paper backing of skin barrier, center hole over stoma and press firmly. See that
there are no wrinkles.
l. Fold bottom end twice and clamp.
8. Empty colostomy collection bag as follows:
a. Remove clamp.
b. Unfold bottom end of bag.
c. Allow contents to drain through opening into bedpan/Kidney basin grad container
directly if to be measured. d. Rinse bag with water instilled from bottom opening with
syringe.
d. Instill deodorant into lag,
e. clean bottom of bag with cotton or gauze pieces.
g. Fold bottom end twice and clamp
9. Place patient in comfortable position.
10. Ask patient to inform any discomfort at stoma site.
11. Remove, clean, dry and replace articles.
12. Wash hands.
13.Rrecord time of procedure, type and size of bag, observation stoma and surrounding skin.
Emptying the pouch
Pouch is emptied when it is one-third or one half full.
To remove it,
- Patient assumes comfortable sitting or standing position.
- Skin is gently pressed down while pulling the pouch up and down away from
the stoma.
- Don’t empty stoma shortly after the meal.

159
- Appropriate time is early in the morning.
- Pouch needs to be changed regularly – usually between one and three times a
day depending on the amount of feces
- The appliance requires emptying when half full and is changed every 1–3
days.
Applying the pouch
a. Requires practice
b. Firstly, gently remove the old pouch by pushing down the skin.
c. Stoma is measured to determine the correct size of the pouch. The pouch opening
should be 1/8th inch larger than the stoma (3-4 millimeters).
d. The size of stoma can be ascertained by type and consistency of the output.

160
13. BLADDER IRRIGATION
Definition:
A process of washing the urinary bladder with a continuous stream of solution through a 3-
way Foley catheter.
Purpose:
• To prevent urinary tract obstruction.
• To remove blood clots.
• To stop bleeding inside the bladder.
• To treat an irritated, inflamed or infected bladder lining.
Equipment Required:
• Catheterization set
• Sterile lubricant jelly
• IV stand
• Urobag
• 10 ml sterile syringe
• Irrigation syringe
• Adhesive tape
• 3-way foley catheter
• continous incigation set (IV set) with Y-type tubing
• irrigating solution as ordered by the doctor (e.g. normal saline, glycing,or distilled
water)
• Bottles for output collection
• Spirit swab or betadine
• Gloves
Procedure:
1. Explain the procedure to the patient
2. Obtain the patient's written consent for the procedure.
3. Maintain privacy for the patient.
4. Bring the required articles to the patient's bedside.
5. Thoroughly wash hands with soap and water.
6. Place the patient in a lithotomy position.
7. Fix the connection of the IV set and prepare the irrigation solution
8. Open the catherization set and set up the sterile tray with the necessary articles
9. Put on sterile gloves.
10. Check the catheter's balloon for intactness by filling the syringe with distilled water
and inflating and then deflating the balloon.
11. Clean the area and insert the catheter into the urinary meatus

161
12. Instill the distilled water into the catheter to inflate the balloon
13. If the patient complains of discomfort, immediately deflate the balloon and advance
catheter further before again inflating.
14. Tap the catheter to the patient's thigh. Connect the Y-tubing to the 2 containers
irrigating solution.
15. Flush the tubing to remove the air. 17. Hang the irrigating solution on the IV stand.
16. Connect the outflow lumen of the catheter to the tubing leading to the urobag
17. Wipe the opening to the inflow lumen of the catheter with a betadine or spirit swab
18. Connect the distal end of the IV tubing into the inflow lumen of the catheter.
19. Open the clamps and set the drip rate as ordered by the doctor.
20. Empty the urobag when it is full.
21. Maintain input and output charting for the length of time the patient has a catheter,
a. Total calculation of output in ml (TO)
b. Total irrigation input in ml (TI)
c. Urinary output = Total output- Total irrigation input
22. Continuously chek the irrigation system for any blockage.
23. Watch the patients urine for the preseence of blood (haematuria) and inform the
doctor.
24. Record and report the amount , colour, consistency, and odour of the urine.
25. Decontaminate the used articles and clean them properly
26. Replace the articles to their proper places.
27. Wash hands
Nursing Alert
a) When the urine is bright red, in spite of continuous irrigation, inform to the doctor.
b) The total fluid intake shou'd balance with the total fluid output.
14. CHEST TUBE DRAINAGE
Definition:
The insertion of drainage tube into the chest cavity to drain fluid, air, pus or blood from
pleural cavity by applying negative pressure.
Purpose:
• To drain air, blood, pus or fluid.
• To allow for proper expansion of the lungs.

162
Equipment:
• Sterile gloves
• Mackintosh
• Betadine solution
• Local anaesthetic agent
• 10cc Disposable syringe Normal saline solution
• Spirit gauze
• Suture set
• Chest tube drainage system.
• Suction machine
• 22 gauge 1 inch needle
• 25 gauge needle
• Sterile scalpel
• Steriledrainage tubing and connector
• Sterile forceps
• 2 artery forceps (for clamp)
• Adhesive tape
• Chest tube with trocar
Procedure:
Insertion of a chest tube:
1. Explain the procedure to the patient
2. obtain the patient's written consent for the procedure.
3. Prepare all the equipment for the chest tube insertion.
4. Start an IV line in the patient.
5. Check the patient's vital signs and assess their respiratory function,
6. Assist the doctor and support the patient during the insertion of the chest tube
7. After the insertion of the chest tube, a thest x -ray is done to confirm its proper
placement.
8. Assess the patient's vital signs and lung sounds every 15 minutes for 1 hour and then
every hour.
9. Record the date, time of insertion, insertion site, presence of draining presence of
bubbling, and the condition of the patient.

163
Care of a chest tube:
1. Monitor the water-seal bottle/bag for air bubbling.
2. Ensure the water-seal bottle is filled with 200 to 300 ml of distilled water.
3. Record and report the colour of the drainage (if present).
4. Milk the tubing 3 times a day by squeezing the tubing between the fingers.
5. The drainage collection bottle should be emptied when the bottle is 2/3 full.
6. Frequently monitor the patient's vital signs and respiratory condition
7. Do not allow the tubing to be twisted or kinked
8. Frequently check for leaks in the tubing or bottles.
Nursing Alert
a. Frequently assess the respiratory condition and vital signs of the patient, the colour
and amount of drainage fluid, and the water level in the water-seal bottle.
b. Keep 2 artery forcep for rubber clamps at the bedside in case the airtight system is
disrupted.
c. Tell the patient not to hold the bottle above their chest level.
d. If chest tube is accidently removed by any mean, immediately ask the patint to hold
breathe, apply pressure on the site of insertion of chest tube by dressing pad and
inform doctor immediately.
15. ASSISTING IN CARDIOVERSION
Definition
Cardioversion is a procedure used to return an abnormal heartbeat to a normal rhythm. This
involves the direct delivery of electric voltage to the heart by means of paddles placed on chest
or placed directly on the heart when the chest is opened during cardiac surgery.
Purpose
• To restore the patient’s heart rhythm to normal sinus rhythm.
• To eliminate life threatening arrhythmias (e.g. VT, SVT, VF flutter and asystole).
• To assist the patient in appropriate cardiac rehabilitation.
Equipment
• Defibrillator machine
• Electrode paste
• Blood pressure instrument
• Suctioning equipment

164
• Emergency cart
• Cardiac medications
• ECG monitor
• Oxygen with connecting tube, face and nasal mask
• Ambu-bag
Procedure
1. Obtain the consent from patient /relative .
2. Explain the procedure to the patient .
3. Keep the patient in comfortable position.
4. The IV line should be checked for patency and maintained throughout the procedure.
5. Obtain a 12 lead ECG (a 12 lead ECG is needed before and after cardioversion)
6. Give the patient 100% oxygen by inhalation.
7. Apply electrode paste to the D.C paddles and rub it into the skin at the 2 paddles sites.
8. Sedate the patient if they are conscious.
9. Turn OFF the oxygen to the patient . A spark from the paddles could start the oxygen
in fire
10. Set the energy level to the lowest level of electrical energy that may covert to patient’s
rhythm to a normal sinus rhythm.
11. Be sure “ ALL CREAR”. No one should touch the patient or the bed during
cardioversion.
12. Initially 25- 100 joules is applied or as per the advice of cardiologist .
13. Quick check the rhythm on the ECG monitor during and after each electric shock.
14. Observe the patient closely after cardioversion and check their ECG rhythm frequently.
15. Keep the patient in a comfortable position as they awaken from sedation and give 100%
oxygen by inhalation.
16. Report and record the procedure date, time, joules( energy) conduction of the patient
and ECG rhythm.
17. Clean the paddle with a spirit swab.
18. Clean the defibrillator paddles and replace the defibrillator in the proper place.
Nursing Alert
a) The ECG rhythm should be checked before and after each shock and medication.
b) Give the patient 100% oxygen by inhalation before and after cardioversion.

165
16. ELECTROCARDIOGRAM (ECG MONITORING/ OBTAINING)
Definition
Electrocardiogram is medical test that records the heart’s electrical activity. The ECG device
measure and averages the differences between the electrical potential of the electrode sites for
each lead and graphs them over time, creating the standard ECG complex, called PQRST.
Purpose
• To identify myocardial ischemia and infarction.
• To detect different types of arrhythmias.
• To assess the condition of a patient over a time period
• To evaluate the effectiveness of patient’s treatment.
• To detect congenital heart disease (e.g. ASD, long QT syndromes)
• To detect pericardial effusion and pericarditis ( low voltage ECG)
• To detect acute corpulmonale or pulmonary embolism
• To detect an electrolyte imbalance.
Equipment
• ECG machine
• Recording paper
• Disposable pre-gelled electrodes
• ECG adhesive gel
• Gauze pads
Procedure
Action Rationale
1. Verify the order for an ECG on the
patient’s medical record.
This ensures that the correct intervention is
performed on the correct patient.
2. Gather all equipment and bring to
bedside.
Having equipments available saves time
and facilitates accomplishment of the
procedure.
3. Perform hand hygiene and put on PPE,
if indicated
Hand hygiene and PPE prevent the spread
of microorganisms. PPE is required based
on transmission precautions.

166
4. Identify the patient . Identifying the patient ensures the right
patient ensures the right patient receives the
intervention and helps prevent errors.
5. Close curtains around bed and close
the door to the room, if possible. As
you set up the machine to record a 12-
lead ECG, explain the procedure to the
patient. Tell the patient the test
typically takes about 5 mins. Ask the
patient about allergies to adhesive, as
appropriate.
This ensures patient’s privacy. Explanation
relieves anxiety and facilitates cooperation.
Possible allergies may exist related to
adhesive on ECG leads.
6. Place the ECG machine close to the
patient’s bed , and plug the power cord
into the wall outlet
Having equipment available saves time and
facilitates accomplishment of the task.
7. If bed is adjustable, raise bed to
comfortable working height, usually
elbow height of the caregiver.
Having the bed at proper height prevents
back and muscle strain of caregiver.
8. Have the patient lie supine in the
center of the bed with the arms at the
sides. Raise the head of the bed, if
necessary, to promote comfort. Expose
the patient's arms and legs, and drape
appropriately. Encourage the patient to
relax the arms and legs. If the bed is
too narrow, place the patient's hands
under the but tocks to prevent muscle
tension. Also use this technique if the
patient is shivering or trembling .
Make sure the feet do not touch the
bed’s footboard.
This helps to increase patient comfort and
will produce a better tracing. Having the
arms and legs relaxed minimizes muscles
trembling, which can cause electrical
interference.
9. Select flat. fleshy areas on which to
place the electrodes. Avoid muscular
and bony areas. If the patient has an
Tissue conducts the current more
effectively than bone, producing a better
tracing.

167
amputated limb, choose a site on the
stump.
10. If an area is excessively hairy, clip the
hair. Do not shave hair. Clean excess
oil or other substances from the skin
with soap and water and dry it
completely.
Shaving causes micro abrasions on the chest
skin. Oils and excess hair interfere with
electrode contact and function. Alcohol,
benzoin, and antiperspirant are not
recommended to prepare the skin.
11. Apply the limb lead electrodes. The tip
of each lead wire is lettered and color-
coded for easy identification. The
white (or RA) lead goes to the right
arm; the green (or RL) lead to the right
leg; the red (or LL) lead to the left leg;
the black (or LA) lead to the left arm.
Peel the contact paper off the self-
sticking disposable electrode and apply
directly to the prepared site, as
recommended by the manufacturer.
Position disposable electrodes on the
legs with the lead connection pointing
superiorly.
Having the lead connection pointing
superiorly guarantees the best connection to
the lead wire.
12. Connect the limb lead wires to
electrodes. Make sure the metal parts
of the electrodes are clean and bright.
Dirty or corroded electrodes prevent good
electrical connection.
13. Expose the patient’s chest. Apply the
precordial lead electrodes. The tip of
each lead wire is lettered and color-
coded for easy identification. The
brown (or V, to V) leads are applied to
the chest. Peel the contact paper off the
self-sticking disposable electrode and
apply directly to the prepared site, as
recommended by the manufacturer.
Proper lead placement is necessary for
accurate test results.

168
Position chest electrodes as follows
V₁: Fourth intercostal space at right
sternal border
V₂: Fourth intercostal space at left sternal
border
V3: Halfway between V₂ and V₁
V4: Fifth intercostal space at the left
midclavicular line
V5: Fifth intercostal space at anterior
axillary line (halfway between V4 and
V6)
V6: Fifth intercostal space at midaxillary
line, level with V4.
14. Connect the precordial lead wires to
the electrodes. Make sure the metal
parts of the electrodes are clean and
bright.
Dirty or corroded electrodes prevent a good
electrical connection.
15. After the application of all the leads,
make sure the paper-speed selector
25m/sec and that the machine is set to
full voltage.
This machine will record a normal
standardization mark-a square that is the
height of 2 large squares or 10 small
squares on the recording paper.
16. If necessary, enter the appropriate
patient identification data into the
machine.
This allows for proper identification of
ECG strip.
17. Ask the patient to relax and breath
normally.
Instruct the patient to lie still and not to
talk while you record the ECG.
Lying still and not talking produces a better
tracing.
18. Press the AUTO button. Observe the
tracing quality, The machine will
record all 12 leads automatically,
Observation of tracing quality allows for
adjustments to be made, if necessary.

169
recording three consecutive leads
simultaneously. Some machines have a
display screen so you can preview
waveforms before the machine records
them on paper. Adjust waveform, if
necessary. If any part of the waveform
extends beyond the paper when you
record the ECG, adjust the normal
standardization to half standardization
and repeat. Note this adjustment on the
ECG strip, because this will need to be
considered in interpreting the results.
Notation of adjustments ensures accurate
interpretation of results.
19. When the machine finishes recording
the 12-lead ECG, remove the
electrodes and clean the patient's skin,
if necessary, with adhesive remover
for sticky residue.
Removal and cleaning promotes patient
comfort.
20. After disconnecting the lead wires
from the electrodes, dispose of the
electrodes. Return the patient to a
comfortable position. Lower bed
height and adjust head of bed to a
comfortable position.
Proper disposal deters the spreads of
microorganism.
Promotes patient comfort and safety.
21. Clean ECG machine, per facility
policy. If not done electronically from
data entered into machine, label the
ECG with the patient's name, date of
birth, location. date and time of
recording, and other relevant
information, such as symptoms that
occurred during the recording .
Cleaning equipment between patient uses
decreases the risk for transmission of
microorganisms. Accurate labeling ensures
the ECG is recorded for the correct patient.
22. Removal additional PPE, if used.
Perform hand hygiene.
Helps to prevent transmission of
microorganisms.

170
17. ASSISTING IN ECHOCARDOGRAPHY
Definition
Echocardiography is a technique which uses the principles of ultrasound to examine the heart.
It is an important diagnostic tool for detecting pericardial effusion, valve abnormalities, and
enlargement of the structures within the heart.
Purpose
• To assist with the diagnosis of congenital abnormalities or heart disease.
• To evaluate the condition of heart after treatment.
Equipment’s required
• Echocardiogram machine
• Recording paper
• Echocardiography cream
• Tissue paper
Procedure
Action Rationale
1. Verify the order for an
Echocardiography on the patient’s
medical record.
This ensures that the correct
intervention is performed on the
correct patient.
2. Gather all equipment and bring to
bedside.
Having equipment available saves
time and facilitates accomplishment
of the procedure.
3. Perform hand hygiene and put on
PPE, if indicated
Hand hygiene and PPE prevent the
spread of microorganisms. PPE is
required based on transmission
precautions.
4. Identify the patient. Identifying the patient ensures the
right patient ensures the right patient
receives the intervention and helps
prevent errors.

171
5. Close curtains around bed and
close the door to the room, if
possible.
This ensures patient’s privacy.
6. Explain the procedure to the
patient .
Explanation relieves anxiety and
facilitates cooperation.
7. Transfer the patient to the
Echocardiography room.
This ensures patient’s privacy
8. Place the patient in a supine
position.
This helps to increase patient comfort
and will produce a better tracing.
9. Place echocardiography cream on
the patient’s chest area.
This cream helps to enhance the
image quality.
10. Assist the doctor as necessary. This ensures patient’s comfort and
save times.
11. After the test, clean the
echocardiography cream off the
patient with a tissue paper.
Removal and cleaning promotes
patient comfort.
12. Attach the printed film(photos) to
the patient’s report.
This reduces the chances of
misplacing the film.
13. Record the findings in the register
book clearly.
This helps to maintain clear record of
the patient.
14. Assist the patient back to their
bed.
This ensures patient’s comfort
15. Clean all the equipment with soft
clean paper.
Cleaning equipment between patient
uses decreases the risk for
transmission of microorganisms.
16. Removal additional PPE, if used.
Perform hand hygiene
Helps to prevent transmission of
microorganisms
18. ASSISTING IN HOLTER MONITORING
Definition: A Holter monitor is an ambulatory ECG monitoring device used to detect cardiac
arrhythmias, abnormal changes in cardiac rate, and silent myocardial ischemia.
Purpose
• Detects suspected rhythm disturbances
• Monitors myocardial function after myocardial infraction

172
• Evaluates high risk cardiac patients
Equipment’s required
• Holter monitor with electrodes, wire, and belts
• Recording paper
• Battery
• Cassettes or diskettes
• Spirit swab
• Holter monitor analysis machine
Procedure:
1. Explain the procedure to the patient.
2. Explain the deposit needed for the Holter monitor.
3. Have the patient take a bath and shave the hair on their chest where the electrodes will be
placed.
4. Clean the chest area where the electrodes will be applied with a spirit swab.
5.Apply the chest electrodes to the correct locations and connect the ECG wires.Turn on the
monitor.
6. Instruct the patient to record any occurrences on a piece of paper during the time they wear
the monitor (e.g. palpitations, chest pain, syncopal episodes, and dizziness).
7. Instruct the patient to wear the monitor for 24 hours.
8. After 24 hours, remove the Holter monitor from the patient.
9. Remove the cassettes from the Holter monitor and place them inside the holter analysis
machine.
10. Obtain the analyzed record from the holter analysis machine.
11. Inform the doctor.
12. Give the report to the patient and their family.
13. Clean the holter machine thoroughly and return it to the proper place.
Nursing Alert
a) Prevent the Holter monitor from getting wet. Therefore, advise the patient not to take
bath or a shower while wearing the Holter monitor.

173
19. TREAD MILL TEST (STRESS ECG TEST)
Definition
Exercise testing is an evaluation of stress effects on the heart function and blood circulation
reveals whether the heart receives a sufficient amount of oxygen when its work load is
increased (e.g. during physical activity).
Purpose
• To evaluate non -specific chest pain
• To evaluate the prognosis of patient with coronary disease
• To evaluate the success of revascularization
• To evaluate the success of therapeutic intervention
• To help diagnose exercise induced cardiac arrhythmia
Equipment
• Tread mill machine
• Defibrillator
• Shaving set
• Emergency chart
• Spirit swab
• Scissors
• ECG machine
• Oxygen with nasal cannula and face mask
• Blood pressure apparatus
• Chest electrodes
• Adhesive tape
Procedure
1. Explain the procedure to the patient
2. Obtain written consent from the patient and relatives
3. The patient should not have any cardio active drugs for 12 hours before the test
4. Advice the patient to avoid strenuous physical work in the day before the test
5. Instruct the patient to avoid having food, alcohol, or tobacco for 2 hours before the test
6. The patient may have light breakfast in the morning the exercise test is scheduled after
10 am
7. Have the patient bath and shave if necessary

174
8. Have the patient wear loose clothes and sport shoes
9. Only family member is requested to attend the procedure
10. The patient chart including the 12 lead ECG, echocardiogram, and referral sheet should
be sent with the patient to the test
11. Transfer the patient to the TMT
12. Record the patient name, age, sex, height, weight, vital signs and regular medications
13. Clean the patient chest thoroughly with spirit gauze
14. Apply the chest electrode, connect the ECG leads, and turn On the ECG monitor
15. The patient begins the test by walking on the treadmill. Slowly their speed and incline
is increased in order to increase the stress in their heart
16. The patient and the ECG machine should be closely watched
17. If the patient experiences any problem during the exercise, stop exercise immediately
18. Treat and manage any problem that arise
19. Take the patient vital sign throughout the exercise test
20. After the test remove the chest electrode and clean the area
21. Record and report the findings of the test
22. Instruct the patient to follow up the doctor
23. Clean all of the equipment and return it to the proper place
24. Wash hand
Nursing alert
➢ Carefully monitor the patient appearance, ECG rhythm, and vital signs before, during
and after the procedure.
20. ARTERIAL BLOOD GAS SAMPLE COLLECTION
Definition
The evaluation of gaseous exchange in the lungs by measuring the partial pressure of oxygen
(PaO2), the partial pressure of carbon dioxide (PacO2), and pH level of the arterial blood.
Purpose
• To evaluate the efficiency of pulmonary gas exchange.
• To assess the ventilation functioning of the lungs.
• To monitor respiratory therapy.
• To determine the acid/base level of the blood.

175
Articles Required:
• 2cc disposable syringe with a 22- or 23-gauge needle.
• Spirit swab or betadine
• Syringe with heparin
• Ice pack
Procedure:
1. Explain the procedure to the patient.
2. Perform Allen’s test.
3. Wash hands with soap and water and put on gloves.
4. Flush the syringe with heparin.
5. Assess the patient's condition during the procedure. Puncture the artery with the
needle. The arterial blood pressure will push up plunger as blood fills the syringe. 1
ml of arterial blood is required for the test.
6. After the blood sample is obtained, carefully recap the needle using a one-ha
technique. Press on the puncture site firmly for 5-10 minutes.
7. Send the blood sample to the lab or ICU lab and label it as an arterial sample along
the date, time, and the patient's name.
Nursing Alert:
• Do not take an arterial blood sample during or immediately after physiotherapy.
21. ARTERIAL BLOOD PRESSURE MONITORING
Definition
A method of direct, continuous monitoring of the systemic arterial pressure by inserting
catheter into a peripheral artery in the leg or arm. The catheter is connected with a transducer
which converts the arterial blood pressure into the electrical signal.
Purpose
• Continuous measurement of the arterial blood pressure
Equipment
• IV catheter
• Bedside ECG monitoring with transducer
• Pressurize bag

176
• Heparin
• 3- way stop clock
• IV stand
• Normal saline
• Extension tubing
• 2ml, 3ml, 5ml, and 10ml syringes
• Leveling scale
• IV set
Procedural safety checklist insertion of arterial line
a. Before any procedure, review checklist together with the other members of the
procedural team.
- Are there any contraindications or special concerns that should be considered before
starting procedure (e.g., prolonged INR/PTT or bleeding risk, abnormal vascular
anatomy, prior thrombosis or increased morbidity should a pneumothorax occur)
- Does the patient have allergies or contraindication to prep solutions, catheter
materials or tapes?
b. Standard central line catheters are impregnated with chlorhexidine
c. Procedure is performed by the doctors and assisted by nurses
d. Obtain consent (informal or formal) or notify family.
Equipment Considerations
• Ensure correct catheter size and length before starting (e.g., 15-16 cm for adult IJ/ SC
catheter)
• Document size, type and model number in case of product recall or issues
• Central and Arterial Line Insertion trays with appropriate drapes/gowns
• Prefilled saline syringes FOR USE ON A STERILE FIELD are required to flush each
lumen of before and after insertion
• Sterile ultrasound gel
• Obtain single use product for local anaesthetics
• Face mask with shield and hair net for everyone within 1 meter of sterile field
• Extra sterile gowns and gloves; required for everyone directly involved in the insertion
procedure.
• Obtain sutures or sterile securement devices

177
Dressing Site Preparations
• Hair clippers (no razors) for hair removal (if required) prior to prepping skin
• Large 2% chlorhexidine with 70% alcohol swabs require minimum 3 minute dry time
Other Preparation Considerations
• Hand hygiene before entering room, before donning sterile gown and gloves and after
last patient contact/glove removal
• Ensure adequate analgesia and sedation is available
• Are extra personnel required for patient positioning?
• Discuss possible complications and review emergency management plans (e.g. air
embolism or hemorrhage/hematoma).
• Review PPE and hand hygiene requirements
Confirm placement following insertion:
• Following central line insertion, pressure monitoring waveform or blood gases need to
be assessed to rule out arterial placement and is required immediately following
insertion
Procedures
1. Explain the procedure to the patient
2. Prepare the all equipment
3. Assist the doctor during the insertion of arterial line
4. Make sure that the transducer is fixed at the height of the heart of the patient
5. Check that the pressure bag filled with the normal saline mixed with heparin has a
continual pressure of 300 mm Hg
6. To zero, turn the three way stop clock of the arterial line off to the patient. Connect the
transducer line to the open airway in the 3 –way stop clock. Pressure the zero button on
the monitor. Open the 3 way stop clock between the patient and the transducer and begin
monitoring the blood pressure.
7. Flush the arterial line every four hour and every time after a blood sample is taken.
8. Return the equipment to the proper place
Nursing alert
a. Never give a medication through an arterial line
b. Always check the pressure of the pressurized bag and maintain a pressure of 300 mm
Hg

178
c. After the arterial line removed always compress the site for atleast 10 minutes
d. Do not take any arterial blood sample during or immediately after physiotherapy
22. TRACTION CARE
Skin Traction
Definition
Traction is the application of a pulling force to a part of the body. It is used to reduce fractures,
treat dislocations, correct or prevent deformities, improve or correct contractures, or decrease
muscle spasms. It must be applied in the correct direction and magnitude to obtain the
therapeutic effects desired.
Equipment
• Bed with traction frame and trapeze
• Weights
• Velcro straps or other straps
• Rope and pulleys
• Boot with footplate
• Elastic antiembolism stocking, as appropriate
• Clean gloves and/or other PPE, as indicated
• Skin cleansing supplies
Procedure
Actions Rationale
1. Review the medical record and the
nursing plan of care to determine the
type of traction being used and care
for the affected body part
To validates the correct patient and correct
procedure.
2. Perform hand hygiene. Put on PPE, as
indicated.
To prevent the spread of microorganisms.
PPE is required based on transmission
precautions.
3. Identify the patient. Explain the
procedure to the patient, emphasizing
the importance of maintaining
Patient identification validates the correct
patient and correct procedure. Discussion
and explanation help to reduce anxiety and

179
counterbalance, alignment, and
position.
prepare the patient for what to expect.
4. Perform a pain assessment and assess
for muscle spasm. Administer
prescribed medications in sufficient
time to allow for the full effect of the
analgesic and/or muscle relaxant
Assessing pain and administering analgesics
promote patient comfort.
5. Close curtains around bed and close
the door to the room, if possible.
Place the bed at an appropriate and
comfortable working height.
Closing the door or curtains provides for
privacy. Proper bed height prevents back and
muscle strain
Applying Skin Traction
Actions Rationale
6. Ensure the traction apparatus is
attached securely to the bed. Assess
the traction setup.
Assessment of traction setup and weights
promotes safety
7. Check that the ropes move freely
through the pulleys. Check that all
knots are tight and are positioned
away from the pulleys. Pulleys should
be free from the linens.
Checking ropes and pulleys ensures that
weight is being applied correctly, promoting
accurate counterbalance and function of the
traction
8. Place the patient in a supine position
with the foot of the bed elevated
slightly. The patient’s head should be
near the head of the bed and in
alignment.
Proper patient positioning maintains proper
counterbalance and promotes safety.
9. Cleanse the affected area. Place the
elastic stocking on the affected limb,
as appropriate.
Skin care aids in preventing skin breakdown.
Use of elastic antiembolism stocking
prevents edema and neurovascular
complications
10. Place the traction boot over the
patient’s leg. Be sure the patient’s
The boot provides a means for attaching
traction; proper application ensures proper

180
heel is in the heel of the boot. Secure
the boot with the straps.
pull.
11. Attach the traction cord to the
footplate of the boot. Pass the rope
over the pulley fastened at the end of
the bed. Attach the weight to the hook
on the rope, usually 5 to 10 pounds for
an adult. Gently let go of the weight.
The weight should hang freely, not
touching the bed or the floor.
Attachment of weight applies the pull for the
traction. Gently releasing the weight
prevents a quick pull on the extremity and
possible injury and pain. Properly hanging
weights and correct patient positioning
ensure accurate counterbalance and function
of the traction.
12. Check the patient’s alignment with
the traction
Proper alignment is necessary for proper
counterbalance and ensures patient safety.
13. Check the boot for placement and
alignment. Make sure the line of pull
is parallel to the bed and not angled
downward
Misalignment causes ineffective traction and
may interfere with healing. A properly
positioned boot prevents pressure on the
heel.
14. Place the bed in the lowest position
that still allows the weight to hang
freely.
Proper bed positioning ensures effective
application of traction without patient injury.
15. Remove PPE, if used. Perform hand
hygiene
Removing PPE properly decreases the risk
for infection transmission and contamination
of other items. Hand hygiene prevents the
spread of microorganisms.
Caring for a Patient With Skin Traction
16. Perform a skin-traction assessment
per facility policy. This assessment
includes checking the traction
equipment, examining the affected
body part, maintaining proper body
alignment, and performing skin and
neurovascular assessments
Assessment provides information to
determine proper application and alignment,
thereby reducing the risk for injury.
Misalignment causes ineffective traction and
may interfere with healing.
17. Remove the straps every 4 hours per
the physician’s order or facility
Removing the straps provides assessment
information for early detection and prompt

181
policy. Check bony prominences for
skin breakdown, abrasions, and
pressure areas. Remove the boot, per
physician’s order or facility policy,
every 8 hours. Put on gloves and
wash, rinse, and thoroughly dry the
skin.
intervention of potential complications
should they arise. Washing the area enhances
circulation to skin; thorough drying prevents
skin breakdown. Using gloves prevents
transfer of microorganisms.
18. Assess the extremity distal to the
traction for edema, and assess
peripheral pulses. Assess the
temperature, color, and capillary refill
and compare with the unaffected
limb. Check for pain, inability to
move body parts distal to the traction,
pallor, and abnormal sensations.
Assess for indicators of deep-vein
thrombosis, including calf
tenderness, and swelling
Doing so helps detect signs of abnormal
neurovascular function and allows for
prompt intervention. Assessing
neurovascular status determines the
circulation and oxygenation of tissues.
Pressure within the traction boot may
increase with edema.
19. Replace the traction and remove
gloves and dispose of them
appropriately.
Replacing traction is necessary to provide
immobilization and facilitate healing. Proper
disposal of gloves prevents the transmission
of microorganisms.
20. Check the boot for placement and
alignment. Make sure the line of pull
is parallel to the bed and not angled
downward.
Misalignment causes ineffective traction and
may interfere with healing. A properly
positioned boot prevents pressure on the
heel.
21. Ensure the patient is positioned in the
center of the bed, with the affected leg
aligned with the trunk of the patient’s
body.
Misalignment interferes with the
effectiveness of traction and may lead to
complications.
22. Examine the weights and pulley
system. Weights should hang freely,
off the floor and bed. Knots should be
Checking the weights and pulley system
ensures proper application and reduces the
risk for patient injury from traction

182
secure. Ropes should move freely
through the pulleys. The pulleys
should not be constrained by knots
application.
23. Perform range-of-motion exercises
on all unaffected joint areas, unless
contraindicated. Encourage the
patient to cough and deep breathe
every 2 hours
Range-of-motion exercises maintain joint
function. Coughing and deep breathing help
to reduce the risk for respiratory
complications related to immobility.
24. Raise the side rails. Place the bed in
the lowest position that still allows
the weight to hang freely.
Raising the side rails promotes patient
safety. Proper bed positioning ensures
effective application of traction without
patient injury
25. Remove PPE, if used. Perform hand
hygiene.
Removing PPE properly decreases the risk
for infection transmission and contamination
of other items. Hand hygiene prevents the
spread of microorganisms.
Skeletal Traction
Definition
Skeletal traction provides pull to a body part by attaching weight directly to the bone, using
pins, screws, wires, or tongs. It is used to immobilize a body part for prolonged periods. This
method of traction is used to treat fractures of the femur, tibia, and cervical spine.
Equipment
• Sterile gloves
• Sterile applicators
• Cleansing agent for pin care, usually sterile normal saline or chlorhexidine, per
physician order or facility policy
• Sterile container
• Antimicrobial ointment, if ordered
• Foam, nonstick, or gauze dressing, per medical order or facility policy
• PPE, as indicated

183
Actions Rationale
1. Review the medical record and the
nursing plan of care to determine the
type of traction being used and the
prescribed care.
Reviewing the medical record and plan of
care validates the correct patient and correct
procedure.
2. Perform hand hygiene. Put on PPE,
as indicated
Hand hygiene and PPE prevent the spread of
microorganisms. PPE is required based on
transmission precautions.
3. Identify the patient. Explain the
procedure to the patient, emphasizing
the importance of maintaining
counterbalance, alignment, and
position
Patient identification validates the correct
patient and correct procedure. Discussion
and explanation help allay anxiety and
prepare the patient for what to expect.
4. Perform a pain assessment and assess
for muscle spasm. Administer
prescribed medications in sufficient
time to allow for the full effect of the
analgesic and/or muscle relaxant.
Assessing for pain and administering
analgesics promote patient comfort
5. Close curtains around bed and close
the door to the room, if possible.
Place the bed at an appropriate and
comfortable working height.
Closing the door or curtains provides for
privacy. Proper bed height prevents back and
muscle strain.
6. Ensure the traction apparatus is
attached securely to the bed. Assess
the traction setup, including
application of the ordered amount of
weight. Be sure that the weights hang
freely, not touching the bed or the
floor
Proper traction application reduces the risk
of injury by promoting accurate
counterbalance and function of the traction.
7. Check that the ropes move freely
through the pulleys. Check that all
knots are tight and are positioned
Free ropes and pulleys ensure accurate
counterbalance and function of the traction.

184
away from the pulleys. Pulleys
should be free from the linens.
8. Check the alignment of the patient’s
body, as prescribed.
Proper alignment maintains an effective line
of pull and prevents injury
9. Perform a skin assessment. Pay
attention to pressure points, including
the ischial tuberosity, popliteal space,
Achilles’ tendon, sacrum, and heel.
Skin assessment provides early intervention
for skin irritation, impaired tissue perfusion,
and other complications.
10. Perform a neurovascular assessment.
Assess the extremity distal to the
traction for edema and peripheral
pulses. Assess the temperature and
color and compare with the
unaffected limb. Check for pain,
inability to move body parts distal to
the traction, pallor, and abnormal
sensations. Assess for indicators of
deep-vein thrombosis, including calf
tenderness, and swelling
Neurovascular assessment aids in early
identification and allows for prompt
intervention should compromised circulation
and oxygenation of tissues develop
11. Assess the site at and around the pins
for redness, edema, and odor. Assess
for skin tenting, prolonged or
purulent drainage, elevated body
temperature, elevated pin site
temperature, and bowing or bending
of the pins.
Pin sites provide a possible entry for
microorganisms. Skin inspection allows for
early detection and prompt intervention
should complications develop
12. Provide pin site care.
a. Using sterile technique, open the
applicator package and pour the
Performing pin site care prevents crusting at
the site that could lead to fluid buildup,
infection, and osteomyelitis

185
cleansing agent into the sterile
container.
b. Put on the sterile gloves.
c. Place the applicators into the
solution.
d. Clean the pin site starting at the
insertion area and working outward,
away from the pin site
e. Use each applicator once. Use a new
applicator for each pin site.
a. Using sterile technique reduces the
risk for transmission of
microorganisms.
b. Gloves prevent contact with blood
and/or body fluids
c. For aseptic environment
d. Cleaning from the center outward
ensures movement from the least to
most contaminated area
e. Using an applicator once reduces the
risk of transmission of
microorganisms.
13. Depending on physician order and
facility policy, apply the
antimicrobial ointment to pin sites
and apply a dressing.
Antimicrobial ointment helps reduce the risk
of infection. A dressing aids in protecting the
pin sites from contamination and contains
any drainage
14. Remove gloves and any other PPE, if
used. Perform hand hygiene.
Removing PPE properly decreases the risk
for infection transmission and contamination
of other items. Hand hygiene prevents the
spread of microorganisms.
15. Perform range-of-motion exercises
on all joint areas, unless
contraindicated. Encourage the
patient to cough and deep breathe
every 2 hours.
Range-of-motion exercises promote joint
mobility. Coughing and deep breathing
reduce the risk of respiratory complications
related to immobility
Nursing alerts
• Document the time, date, type of traction, and the amount of weight used.
• Include skin and pin site assessments, and pin site care.
• Document the patient’s response to the traction and the neurovascular status of the
extremity

186
23. NURSING CARE OF PATIENT WITH MECHANICAL VENTILATION
Definition
A mechanical ventilator is a machine that provides the patient require respiratory assistance.
Purpose:
• To maintain adequate ventilation.
• To decrease the patient's respiratory effort.
• To improve pulmonary gas exchange.
Articles Required:
• Intubation set
• Suction machine
• Ventilator machine.
• Pulse oximeter
• Bedside ECG monitor
Procedure:
1. Explain the procedure to the patient.
2. Set the ventilator mode parameters as per the doctor's orders.
3. Check the functioning of the ventilator.
4. The doctor will intubate the patient.
5. Connect the patient to the ventilator.
6. The patient's oxygen saturation level should be checked continuously until it stabilizes
in the normal range (94-99%).
7. Perform suctioning as needed.
8. Frequently assess respiratory status including frequent arterial blood gas analysis to
monitor the effectiveness of the ventilator.
9. Document the patient's condition including vital signs, arterial blood gas values, and
ventilator parameter settings
Nursing Alert
▪ Carefully assess the patient's respiratory condition including their saturation level.
▪ Ensure the intubation set is ready in case of the need for emergency management

187
24. PACEMAKER IMPLANTATION
Definition
A pacemaker is an electronic device that provides electrical stimuli to the heart muscle.
Pacemakers are usually used when a patient has a slower-than-normal impulse formation or a
conduction disturbance that causes symptom
Type of pacemaker
Temporary pacemaker
Permanent pacemaker
A. Temporary pacemaker
This is an artificial device used to simulate the heart for short-term treatment. The pulse
generator, containing the circuitry and batteries, is located outside the body and the
pacemaker wire is located in the right ventricle.
Purpose:
• To initiate and maintain the heart rate when the natural pacemaker of the heart is
unable to do so
• To prevent circulatory failure.
• To slow rapid arrhythmias that do not respond to drugs or cardioversion
Equipment:
• Temporary pacemaker set with wire and introducer
• Fluoroscope machine
• Blood pressure apparatus with stethoscope
• Emergency cart with drugs
• Suction machine
• Laparotomy set-operation sheet, towel Sterile drum with cotton pads
• Gown, mask, cap, gloves
• Scalpels of different sizes
• 1% or 2% xylocaine
• Spirit swab, betadine, betadine hand wash, cidex, virex
• Surgical drapes
• Pulse generator with square battery and battery checker
• ECG monitor
• Defibrillator machine
• Isoprenaline

188
• Oxygen with nasal cannula or face mask
• Lead apron
• Temporary pace pacemaker set, suture set
• Normal saline, 5% dextrose, hacemacceal, ringer’s lactate
• Tape and scissors (adhesive tape and elastoplast)
• Syringes of different sizes
• The operation should be performed in the Cardiac Catheter Laboratory
Procedure:
1. Patient preparation:
- Explain the procedure to the patient.
- Obtain written consent from the patient & their relatives.
- Clean and shave the area.
- Start an IV line with 5% dextrose solution or normal saline solution.
2. Article preparation:
- Prepare the isoprenaline drip.
- Check the pulse generator machine wire and battery.
- Prepare the emergency cart, the defibrillator, and the ECG monitor. Set up all equipment
for the insertion of the pacemaker.
- The nurse should be knowledgeable about the pacemaker machine including the power
switch, indicator light for pacing and sensing, stimulus output dial, sensitivity dial, and
the proper settings
3. Assist the doctor and the scrub nurse during the procedure.
4. Scrub hands thoroughly and put on sterile gloves aseptically.
5. Assist with the insertion of the catheter. The pacemaker wire should be inserted into the
femoral, subclavian or internal jugular vein and passed into the right ventricular apex. The
inserted catheter and the connection between the pulse generator units should be fixed
properly and the parameters should be recorded and fixed.
6. The main unit (pacemaker leads) should be fixed securely.
7. After the pacemaker implant:
- Assess the condition of the patient including their vital signs. In addition, monitor the
patient for arrhythmias, and assess the pacemaker’s spike and waves, pacing
parameters, battery, and wire connection.
- The patient should remain on bed rest for 12 hours after the procedure.

189
- A 12 lead ECG and chest x-ray should be done
- A sterile dressing change should be done after 48 hours.
- Explain to the patient that their mobility is limited.
- Cover the dial of the pacemaker to prevent accidental malfunction.
B. Permanent Pacemaker
An artificial device used to stimulate the heart for long-term treatment. The pulse generator is
permanently implanted in the body. It is most commonly used in patients with complete heart
block.
Purpose:
• Commonly used in patients with complete heart block caused by congenital
degeneration.
• To initiate and maintain the heart rate when the natural pacemaker of the heart is unable
to do so
• To prevent circulatory failure.
• To slow rapid arrhythmias that does not respond to drugs or cardio-version
Equipment
• All articles from the temporary pacemaker section are required.
• Additional equipment required
• Permanent pacemaker (introducer wire, battery)
• Pacing system analyzer (PSA)
• Elastoplast
• Permanent pacemaker set
• Surgical drape
Procedure
Under local anesthesia, a small incision is made just below the clavicle on the right or left side
of the upper chest wall. The catheter is inserted into the right or left subclavian vein and
advanced to the apex of the right ventricle, and secured in the vein by a ligature. The end of
the catheter is joined to the battery-powered pulse generator The pulse generator is placed into
a pocket in the subcutaneous area in the left or right upper chest.
Caring for Patient with Pacemaker
- After a temporary or a permanent pacemaker is inserted, the patient’s heart rate and rhythm

190
are monitored by ECG.
- The pacemaker’s settings are noted and compared with the ECG recordings to assess
pacemaker function.
- Pacemaker malfunction is detected by examining the pacemaker spike and its relationship
to the surrounding ECG complexes.
- In addition, cardiac output and hemodynamic stability are assessed to identify the patient’s
response to pacing and the adequacy of pacing.
- The incision site where the pulse generator was implanted (or the entry site for the pacing
electrode, if the pacemaker is a temporary transvenous pacemaker) is observed for
bleeding, hematoma formation, or infection, which may be evidenced by swelling, unusual
tenderness, unusual drainage, and increased heat.
- The patient may complain of continuous throbbing or pain. These symptoms are reported
to the physician.
- The patient with a temporary pacemaker is also assessed for electrical interference and the
development of microshock.
- The nurse observes for potential sources of electrical hazards. All electrical equipment
used in the vicinity of the patient should be grounded.
- Improperly grounded equipment can generate leakage of current capable of producing
ventricular fibrillation.
- Exposed wires must be carefully covered with nonconductive material to prevent
accidental ventricular fibrillation from stray currents.
- The nurse, working with a biomedical engineer or electrician, should make certain that the
patient is in an electrically safe environment.
- Patients, especially those receiving a permanent pacemaker, should be assessed for
anxiety.
- In addition, for those receiving permanent pacemakers, the level of knowledge and
learning needs of the patient and the family and the history of adherence to the therapeutic
regimen should be identified.
25. TRIAGE
Definition
Triage is a process which places the right patient in the right place at the right time to receive
the right level of care”

191
Purpose
• To set out priorities for the evacuations of the victims.
• To assess the victims who are in life-threatening situations and need immediate
therapeutic interventions.
• To expedite the care of noncritical cases.
• To improve the traffic flow through the emergency departments.
Triage Categories
Class I (Emergent) Red
Victims with serious injuries that are life-threatening but have a high probability of survival if
they received immediate care. They require immediate surgery or other life-saving
intervention. Eg. Comprised airway, shock, hemorrhage
Class II (Urgent)
Victims who are seriously injured and whose life is not immediately threatened; and can delay
transport and treatment for 2 hours. Their condition is stable for the moment but requires
monitoring and frequent re triage. Eg. Open fracture
Class III (Non-urgent) Green
“Walking Wounded”, patients with relatively minor injuries, condition unlikely to deteriorate
over days, may be able to assist in own care.
Class IV (Expectant) Black
They are so severely injured that they will die of their injuries, possibly in hours or days. They
should be taken to a holding area and given painkillers as required to reduce suffering. Eg.
Large body burns, severe trauma etc.

192
START (Simple Triage and Rapid Treatment) Algorithm

PEDIATRIC NURSING
S. N Procedure Page No
1. Anthropometric measurement
• Weight
• Height/ Length
• Head Circumference
• Chest Circumference
• Abdominal Girth
• Mid Upper Arm Circumference
193-197
2. Vitals Signs Monitoring 197-203
3. I/V Cannulation 203-204
4. Drug Calculation 205
5. Capillary puncture for GRBS 209-207
6. Arterial Blood Gas Analysis 207-209
7. Urinary Catheterization 210-212
8. Suctioning 212-213
9. Oxygen Inhalation 213-215
10. NG Insertion and Feeding 215-217
11. Care of child in incubator/ radiant warmer 217-220
12. Phototherapy care 220-222
13. GCS scoring 222-223
14. Assisting in Lumbar puncture/ bone marrow
aspiration
223-227
15. Chest physiotherapy 227-229

193
1. ANTHROPOMETRIC EXAMINATION
Introduction
• Anthropos - "man" and Metron "measurement”
• A branch of anthropology that involves the quantitative measurement of the human body.
A. WEIGHT
The measurement of weight is most reliable criteria of assessment of health and nutritional
status of children.
Purpose
To evaluate whether the Childs weight is appropriate to his age.
To calculate the nutritional requirement and medication doses requirement.
To monitor the effect of therapy and drugs.
Equipment
Infant weighing scale
Weight can be recorded using:
1. Beam type weighing balance
2. Electronic weighing scales for infants and children
3. Salter spring machine (in field conditions)
Draw sheet
Procedure
Note infant last weight recording
Place draw sheet on the top of the scale in which the infant to be placed
Balance the scale to Zero
The weighing machine should be kept in firm surface with proper balance to prevent the infant from
fall

194
Undress the baby completely and place him on the scale.
Record weight after it is stabilized.
Take off the baby from the scale and help mother to dress baby.
Compare the baby weight with previous weight.
Difference of more than 100gm need to be clarified by rechecking the infants weight once again
If the difference is still same then notify doctor
Document the child’ weight in file accurately.
B. HEIGHT
Up to 2 years of age recumbent Length is measured with the help of an Infantometer .In older
children Standing Height or Stature is recorded.
Purpose
To obtain baseline data at birth
To monitor growth and development
To assess nutritional status of child
Equipment
Infantometer
Stadiometer
Procedure
Length measurement
Explain the procedure to the parents.
Keep the infantometer on examination table.
Place the infant supine on the infantometer.
Ask assistant or mother to keep the vertex or top of the head snugly touching the fixed
vertical plank.
Ensure the leg are fully extended by pressing over the knife, and feet are kept vertical at
90⁰, the movable pedal flank of infantometer is snuggly apposed against soles.
Note the length from the scale.

195
Height measurement
Instruct the child to remove shoes/slipper.
Make the child stand against the calibrated stand of stadiometer.
Ensure that child is looking forward head, scapula, buttock, and heels of the child are touching the
stand.
Scroll down sliding board of the stand gradually till it tousles the head of the child.
Mark the reading shown by sliding board and record.
C. HEAD CIRCUMFERENCE
Head circumference (HC) is a measurement of the head around its largest area, typically
measured on infants and children until the age of five years as part of routine child care.
Purpose
To obtain information on health, development and nutritional status
To detect any abnormal brain or skull growth
Equipment
Non stretching inch tape
Procedure
The child should be standing, seated or seated on parent/guardians lap depending on age and ability.
Any hair ornaments or braiding should be removed if possible.
Place the tape over the child’s head above the ears and eyebrows on the most anterior protuberance
of the forehead (frontal bone) and around the occipital prominence at the back of the head.

196
Aim to measure the largest circumference possible.
The tape should be pulled tight so that any hair is compressed.
The measurement should be read and recorded to the nearest millimeter
Repeat the measurement if there is a difference of >0.5cm.
D. CHEST CIRCUMFERENCE
Chest circumference is measured at the level of the nipple, at the end of expiration, to the nearest 0.1 cm
using a non-elastic, flexible, fiber glass measuring tape.
Purpose
To assess the normal growth of the child
To detect malnutrition
Equipment
Non stretching inch tape
Procedure
Place the child in lying or sitting position
Encircle the chest with tape over the nipple line
Ensure the tape is placed accurately
Take the measurement to the nearest millimeter at the end of expiration
Record the findings
E. ABDOMINAL GIRTH
It is the process of measuring circumference of abdomen.
Purpose
To detect the collection of gas/fluid in abdominal cavity.

197
Equipment
Non stretching inch tape
Procedure
Place the child in lying or sitting position
Encircle the chest with tape over umbilical line
Ensure the tape is placed accurately
Take the measurement to the nearest millimetre at the end of expiration
Record the findings
F. MID UPPER ARM CIRCUMFERENCE
It is the process of measuring circumference of arm Purpose
To elicit malnutrition
Equipment
Non stretching inch tape
MUAC measuring tape
Procedure
Place the child in lying or sitting position.
Encircle the chest with tape over umbilical line.
Ensure the tape is placed accurately.
Take the measurement to the nearest millimeter.
Record the findings.
2. VITAL SIGNS
Definition: The process of the checking and observing the baby’s condition including their
temperature, heart rate, respiratory rate and blood pressure.
Purposes:
It helps to provide the baseline information as well as the condition of the child.
It gives a glimpse into the overall wellbeing.
They signal early signs of infection, prevent a misdiagnosis, detect symptoms less medical
problems and helps to make better choices.

198
Equipment: A clean tray containing
Digital Thermometer
Watch
Paediatric BP cuff
Stethoscope
Hand scrub
Spirit swab
Kidney tray
Components of vital signs:
Temperature
Respiratory rate
Heart rate (pulse rate)
Blood pressure
A. Temperature:
Definition: It is a process of checking the body temperature of the child and identifying the
deviation (hypothermia, hyperthermia) from the normal body temperature.
Paediatric normal body temperature range according to the age:
Age Fahrenheit Celsius
0-1 year 99.4-99ºF 37.5-37.7ºC
3-5 years 98.6-99.0ºF 37.0-37.2 ºC
6-9 years 98.1-98.3 ºF 36.7-36.8 ºC
≥10 years 97.8 ºF 36.6 ºC
Procedure:
Care Action Rational
1. Explain the procedure to the patient and
care giver, in appropriate manner.
To relieve the anxiety of the patient and
care giver.
2. Perform hand hygiene before the
procedure.
To maintain the aseptic precautions.
3. Prepare all the required equipment. Organization facilitates accurate skill
performance.
4.Close the doors and / or use screen Maintains client’s privacy and
minimizes embarrassment.
5. Clean the thermometer with spirit swab
from the bulb to stem.
To limit the spread of the infection.
6. Place the bulb in the roof of axilla with
arm pressed close to body.
To make accurate reading.
7. Leave in place for 3-5 minutes, or until
electronic thermometer beeps.
To ensure an accurate readings.
8. Remove and the read the thermometer. To document the findings.
9. Clean the thermometer with the spirit To limit the spread of the infection.

199
swab from stem to bulb and return to
thermometer.
10. Document the findings and inform to
senior staffs of doctor in case of abnormal
findings.
To maintain the recording and
reporting of the findings.
11. Replace the articles and perform hand
washing.
Organization facilitates accurate skill
performance.
B. Pulse (heart ) rate:
Definition: Checking presence, rate, rhythm and volume of throbbing of artery.
Purpose:
To determine number of heart beats occurring per minute (rate).
To gather information about heart rhythm and pattern of beats.
To evaluate strength of pulse.
To assess heart's ability to deliver blood to distant areas of the blood viz. fingers and lower
extremities.
To assess response of heart to cardiac medications, activity, blood volume and gas exchange.
To assess vascular status of limbs.
Normal Range of heart rate:
Age Range (beats per minute)
Newborn 120-160b/min
6 months to 1 year 90-130 b/min
3 -5 years 80-120 b/min
5 -10 year 70-110b/min
10 to 14 years 60-100b/min
Sites of pulse:
Radial pulse
Branchial pulse
Apical pulse
Carotid pulse
Temporal pulse

200
Procedure:
Care Action Rationale
1. Wash hands. • Handwashing prevents the spread of infection
2. Prepare all equipment’s required on tray. • Organization facilitates accurate skill
problems
3. Check the client’s identification • To confirm the necessity
4. Explain the procedure and purpose to the
client.
• Providing information fosters cooperation
and
Understanding
5. a) Place,1st, 2nd, 3rd fingers along the client’s
radial artery, and press gently the radius, rest
your thumb in opposition to fingers on the
back of the wrist.
b) Count and examine the pulse.
c) In case of monitoring apical pulse, palpate the
5th intercostal space on the left mid clavicular
line. Place the diaphragm of the stethoscope
over the apex of the heart and listen to the “lub
dub” sound.
• To provide easy access to pulse sites
6. Count and examine the pulse
a) Apply only enough pressure to radial pulse
b) Using watch, count the pulse beats for a
full minute.
c) Examine the rhythm and the strength of
the pulse.
• The fingertips are sensitive and better able to
feel the pulse. Do not use your thumb because
it has a strong pulse of its own.
• Moderate pressure facilitates palpation of
the pulsations. Too much pressure
obliterates the pulse, whereas the pulse is
imperceptible with too little pressure
• Counting a full minute permits a more
accurate reading and allows assessment of
pulse strength
and rhythm.
• Strength reflects volume of blood ejected
against arterial wall with each heart
contraction.
7. Record the rate on the client’s chart.
Sign on the chart.
• Documentation provides ongoing data
collection
• To maintain professional accountability
8. Wash your hands. • Handwashing prevents the spread of infection
9. Report to the senior staff if you find
any
Abnormalities.
• To provide nursing care and medication
properly
and continuously

201
C. Respiration
Definition: Monitoring the involuntary process of inspiration and expiration in a patient.
Purposes:
To determine number of respirations occurring per minute.
To gather information about rhythm and depth.
To assess response of patient to any related therapy/ medication.
To identify the signs of the respiratory distress in children.
Normal Respiratory Rate:
Age Range (breathe per minute)
0-2 months < 60 b/min
2months to 1 year <50 b/min
1 to 5 years <40 b/min
Procedure:
Care Action Rationale
1. Close the door and/or use screen. • To maintain privacy
2. Make the client's position comfortable,
preferably sitting or lying with the head of
the elevated 45 to 60 degrees.
• To ensure clear view of chest wall and abdominal
movements. If necessary, move the bed linen.
3. Prepare count respirations by keeping
your fingertips on the client’s pulse.
• A client who knows are counting respirations
may
not breathe naturally.
4. Counting respiration:
a) Observe the rise and fall of the client’s
chest or abdomen (one inspiration
and one expiration).
b) Count respirations for one full minute.
c) Examine the depth, rhythm, facial
expression, cyanosis, and cough and
movement accessory.
• One full cycle consists of an inspiration and an
expiration.
• Allow sufficient time to assess respirations,
especially when the rate is with an irregular
• Children normally have an irregular, more rapid
rate. Adults with an irregular rate require more
careful assessment including depth and rhythm
of respirations.
5. Replace bed linens if necessary. Record
the rate on the client’s chart. Sign the chart
• Documentation provides ongoing data collection.
• Giving signature maintains professional
accountability
6. Perform hand hygiene • To prevent the spread of infection
7. Report any irregular findings to the senior
staff.
• To provide continuity of care
D. Blood pressure
Definition: Monitoring blood pressure using palpation and/or sphygmomanometer.

202
Purpose:
To obtain baseline data for diagnosis and treatment.
To compare with subsequent changes that may occur during care of patient.
To assist in evaluating status of patient’s blood volume, cardiac output and vascular system.
To evaluate patient’s response to changes in physical condition as a result of treatment with fluids or
medications.
Procedure: by palpation and aneroid manometer
Care Action Rationale
1. Wash your hands. Handwashing prevents the spread of infection
2. Gather all equipment’s. Cleanse the
stethoscope’s earpieces and diaphragm
with a spirit swab wipe.
Organization facilitates performance of the
skill.
Cleansing the stethoscope prevents spread
of infection.
3. Check the client’s identification.
Explain the purpose and procedure to the
client.
Providing information fosters the
client’s cooperation and understanding.
4. Have the client rest at least 5 minutes
before measurement.
Allow the client to relax and helps to avoid
falsely elevate readings.
5. Determine the previous baseline blood
pressure, if available, from the client’s
record.
To avoid misreading of the client’s blood
pressure and find any changes his/her blood
pressure from the usual.
6. Identify factors likely to interfere which
accuracy of blood pressure measurement :
exercise, coffee and smoking
Exercise and smoking can cause false
elevations in blood pressure.
7. Setting the position:
a) Assist the client to a comfortable position.
Be sure room is warm, quiet and relaxing.
b) Support the selected arm. Turn the
palm upward.
c) Remove any constrictive clothing.
The client's perceptions that the physical
or interpersonal environment is stressful
affect the blood pressure measurement.
Ideally, the arm is at heart level for
accurate measurement. Rotate the arm so
the brachial pulse is easily accessible.
Not constricted by clothing is allowed to
access the brachial pulse easily and measure
accurately.
Do not use an arm where circulation is
compromised in any way.
Nursing Alert:
The systolic pressure of the child may be raised by crying, vigorous exercise, or anxiety so choose
the time when the child is quiet and calm.

203
The width of the cuff should cover approximately two thirds of the upper arm (or thigh) or be
20%greater than the diameter of the extremity without causing pressure in the axilla or impinging on
the antecubital fossa.
Do not measure the blood pressure in an extremity with damaged or altered blood flow or an IV.
3. INTRAVENOS CANNULATION
Definition: IV cannulation is required for the infusion of fluids or drugs. Any blood sampling necessary may
be also be done at the time of insertion.
Equipment:
A dressing set
Alcohol spirit and povidone iodine solution
IV cannula- 22 G or 24 G
Tourniquet
Syringe
0.9% saline solution
Fixing tape or transparent occlusive dressing to fix cannula in site
Local anesthesia cream if required
Procedure:
Carefully identify a suitable vein. The dorsum of the hand or foot or antecubital fossa is ideal. Other
suitable sites include the volar aspect of forearm, great saphenous vein at the medial malleolus or
knee.
Consider at least 45 mins of local anesthesia cream applied under an occlusive dressing over the
intended vein before starting. Remove the cream before starting.
Ensure good vein perfusion, e.g warm extremity before cannulation.
If needed, ask an assistant to help with keeping the child’s limb steady. This may require wrapping a
young child in a towel or sheet.
In older children, apply a tourniquet proximal to the vein. In infants, if attempting the hand dorsum,
apply compression and immobilization by flexing the wrist, then grasping with the index and middle
fingers over the dorsum, while thumb is placed over the child’s fingers.
Clean the site with alcohol-based solution.
Insert the cannula at an angle of 10-15° to the skin with the bevel upright, just distal and along the
line of the vein.
When the stylet tip penetrates into the vein lumen blood will flash back (not always if the vein is
small)
Remove stylet, and collect any blood required from the cannula hub.
Flush cannula with 0.9% saline to confirm IV placement (fluid should infuse without resistance) and
to prevent clotting, then connect IV line.
Secure cannula with appropriate adhesive tape or dressing leaving the skin over the cannula tip visible
so that extravasation can be observed.
Note: This is a difficult procedure to master, particularly in the newborn. Do not be afraid to ask for senior
help if unsuccessful after 2 or 3 attempts.

204
Figure 1: holding an infant's hand
Figure 2: shallow angle of insertion
Figure 3: passive blood collection for infants
Figure 4: aspirating blood for culture or gas

205
4. DRUG CALCULATION
Drug calculation formula
Volume to be given = dose ordered × volume of solution
Dose available
IV fluid (drip rate calculation):
Fluid rate: volume in ml × drop factor
Time in min
Fluid rate: no of drops per min
Drop factor: no of drops per ml (1ml = 60 micro drops) Time in minute: intended duration of infusion
The Holliday - Segar 4-2-1 Rule to estimate
Maintenance hourly fluid Requirements
Weight
(Kg)
Hourly Daily
<10 kg 4ml/kg/hr 100 ml/kg/day
10 kg-20
kg
40 ml+2ml/kg for every
kg>10 kg
1000 ml+50ml/kg/day for every
kg>10 kg
>20 kg 60 ml+1 ml/kg for every
kg>20 kg
1500 ml+20ml/kg/day for every
kg>20 kg
4-2-1 rule Examples
For a 5 kg infant, maintenance hourly fluid requirements would be 4 × 5=20ml/hr Daily rate: 20 ×24 hr=
480 ml/day
For a 15 kg child, maintenance hourly fluid requirements would be 4 × 10 = 40ml
+ 2 × 5 = 10ml
Total: 40+10=50ml/hr
Daily rate: 50 ×24 hr= 1200 ml/day

206
5. CAPILLARY PUNCTURE
Definition
Capillary puncture is a convenient method for collection of small amounts of blood for routine
but frequently repeated investigations like blood sugar in infants.
Equipments
• Lancets
• Glucometer
• Glucostrips
• Gloves
• Antiseptic solution
• Gauze
• Sharp disposal container
• Bandages or tape
Procedure
Identify the child.
Reassure the child/parents and explain the procedure.
Collect the required equipment.
Wash the hand and put on the gloves.
Position the infant with the head slightly elevated.
Warm the heel from which the blood is to be obtained.
Clean the heel with alcohol preparation and dry with sterile gauze as alcohol
can influence test result.
Using a lancet, puncture the most medial or lateral portion of the plantar
surface.
• Puncture no more than 2.4mm.

207
• Wipe away the first drop of blood with sterile gauze.
• Allow another drop of blood to form. Place the glucostrip gently after inserting
in glucometer.
• When finished clean the site and apply pressure with clean gauze or apply
adhesive bandage to stop bleeding.
• Read the glucose level and note.
• Dispose the gloves and other disposable articles.
• Perform hand hygiene.
• Documentation of the procedure.
6. ARTERIAL BLOOD GAS SAMPLING (ABG)
Definition: The evaluation of gaseous exchange in the lungs by measuring the partial pressure of
oxygen (PaO2), the partial pressure of carbon dioxide (PacO2), and pH level of the arterial blood.
Purpose:
To evaluate the efficiency of pulmonary gas exchange.
To assess the ventilation functioning of the lungs.
To monitor respiratory therapy.
To determine the acid/base level of the blood.
Articles Required:
2cc disposable syringe with a 22- or 23-gauge needle.
Spirit swab or betadine
Syringe with heparin
Ice pack
Normal Range:
Components Range
pH (blood ph) 7.35-7.45
PO2 (partial oxygen) 80-100 mm of Hg
PCO2 (partial carbon dioxide) 35-45 mm of Hg
HCO3 (bicarbonates) 22-28 meq/ ltr
Procedure:
Care Action Rational
1. Gather all the equipment. Organization facilitates performance of

208
the skill.
2. Select an appropriate site for the
arterial puncture. Site selection should be
based on
Availability of collateral circulation
• Accessibility
• Presence of other surrounding
anatomical structures such as nerves,
• Accompanying veins or bone.
• Condition of the site.
The sites to be used in order of preference
are:
• Radial artery
• Brachial artery
• Dorsalis pedis
• Posterior tibial
To prevent re puncture of the site and for
the easy access for collection of the
sample.
3. Check the FIO2 prior to initiation of
the puncture.
To assess the O2 level in the body.
4. Locate the radial artery.
Hold the arm supine and slightly extend
the wrist. Severe extension of the wrist
may obscure the pulse.
Palpate the radial artery pulse in the
distal bone notch of the radius below the
base of the thumb and lateral to the
tendon.
To perform the Allen test for the
identification of proper blood circulation.
5.Determine that collateral circulation is
adequate by using the Modified Allen
Test as follows:
Hold patient's hand overhead with fist
clenched to drain blood while
compressing both radial and ulnar
arteries.
a) Lower the hand and open the fist.
b) Release pressure over ulnar artery.
c) Check to see if color returns within six
(6) seconds, indicating a patent ulnar
artery and intact superficial palmar arch.
To assess the adequate collateral
circulation of the blood.
6. Scrub the site with povidone iodine
solution on cotton swab.
To minimize the risk of infection.
7. Palpate the artery for the site of the To perform the procedure.

209
strongest arterial impulse.
Enter the skin at 30 to 45 angle. The
skin is entered just proximal to the
wrist at about the level of the
proximal skin crease. Insert the
needle gently but firmly in the area
where maximum impulse is felt.
8 a. When the artery has been punctured,
attach pre-heparinized tuberculin
syringe. Aspirate slowly and gently.
Collect a minimum of 0.2 ml in the
tuberculin syringe.
8 b. After obtaining the sample,
withdraw the needle and apply direct
constant pressure for a minimum of five
(5) minutes by the clock using a dry
cotton ball or gauze. Even if an attempt
is unsuccessful or results in an
inadequate sample, pressure must be
applied. If bleeding has not stopped after
five (5) minutes of continuous pressure
on the site, continue to apply pressure.
To prevent the blood clot and collection
of the sample.
Application of the pressure above the
puncture prevents risk of bleeding as
arterial blood flow has high pressure.
9. Check sample for presence of small
bubbles. If small bubble gets into sample,
point the top of the syringe up and expel
the air bubbles immediately and cap
syringe.
An air bubble in the sample can change
the blood gas values.
10. Label the syringe and take the sample
to the lab immediately.
To prevent clotting of the sample and
mismatch of the sample.
11. Perform hand washing and replace all
the articles.
To minimize the source of infection.
Complications:
Bleeding
Hematoma
Sloughing of skin
Infection
Trauma to adjacent structure (nerve, bones)

210
7. URINARY CATHETERIZATION
Definition
Urinary catheterization is a procedure used to drain the bladder and collect urine, through a
flexible tube called a catheter.
Purpose
• To relieve urinary retention
• To empty the Bladder before, during, or after surgery
• Collection of uncontaminated urine specimen.
• For accurate measurement & monitoring of urine output.
• For bladder irrigation.
• Intermittent decompression for neurogenic bladder.
Equipment
• Catheter tray (with drapes, fenestrated drape, cotton balls, forceps)
• Catheter(appropriate size)
• Sterile drainage tubing with collection bag
• Correct size syringe (check catheter balloon)
• Sterile water
• Cleansing solution
• Lubricant
• Sterile gloves
• Specimen container
• Tape (to anchor tubing)

211
Procedure
• Assurance to the child.
• Maintain adequate lighting.
• Position female child: Dorsal recumbent (supine with knees bent and hip flexed). Male
child: supine position.
• If soiling evident, clean genital area with soap and water first.
• Perform hand hygiene.
• Assemble all the equipment.
• Open the sterile catherization kit, using sterile technique.
• Put on the sterile gloves.
• Apply sterile drapes. Place a fenestrated drape. Female child- over perineum. Male child-
over penis.
• Lubricate the catheter.
• Pour the antiseptic solution over the cotton balls.
• Place the urine specimen collection container within easy reach.
• Clean meatus: female child: Using swabs held in forceps in the other hand clean the
labial folds and the urethral meatus. Move swab from above the urethral meatus down
towards the rectum. Discard swab after each urethral stroke. Male child: Foreskin if not
circumcised hold penis below glans. Using other hand clean the meatus with swab held
in forceps. Use a circular motion from the meatus to the base of the penis.
• For older boys insert the Xylocaine gel into the urethra (Holding the penis
perpendicularly) and wait 2-5 minutes before proceeding to next step.
• Insert catheter until urine flows, advance 2.5-5cm more.
• Then inflate the balloon with distilled water.
• Gently pull catheter until resistance is felt.
• Connect catheter to drainage system.

212
• Secure the catheter to thigh.
• Position drainage bag lower than the bladder.
• Dispose the gloves & other disposable articles.
• Perform hand hygiene.
• Documentation of the procedure.
8. SUCTIONING
Definition: The process of applying a negative pressure to the distal ET tube or trachea by
introducing a suction catheter to clear excess, or abnormal secretion.
Oropharyngeal suction: A suction catheter through the mouth to clear secretions.
Nasopharyngeal suction: A suction catheter is passed through the nose to clear secretions.
Purposes:
To safely maintain airway patency by removing pulmonary secretions or foreign matter
from the endotracheal tube (ETT) or tracheostomy tube as a component of bronchial
hygiene and mechanical ventilation.
To reduce the risk of hypoxaemia and potential for infection.
It also enables collection of tracheal aspirates for diagnostic purposes.
Clinical indications for ETT suction:
Desaturations
Bradycardia/tachycardia
Absent or decrease chest movement
Visible secretions in ETT
Coarse or decreased breath sounds
Increase in work of breathing
Recent history of large amounts of thick/tenacious secretions
Equipment required:
Sterile gloves
Sterile water or 0.9% Nacl
Portable suction machine
Suction catheter
Suction Pressure:
Neonates: 80-100 mm of Hg
Paediatrics: 120-180 mm of Hg

213
Procedure:
Care Action Rational
1. Explain the procedure to the patient. To reduce anxiety of the client.
2. Perform hand washing and collect all
the needed articles.
To minimize the risk of infection.
3. Determine the suction catheter size
and check the suction pressure.
To prevent injury to the client.
4. Hyper oxygenate with 100% of
oxygen before suctioning.
To prevent hypoxaemia.
5. Wear sterile gloves and ensure that the
suction catheter does not touch anything
that could contaminate it.
To reduce the risk of infection.
6. Apply negative pressure and rotate the
suction catheter gently and the duration
should not exceed 6 seconds.
For the removal of the secretions.
7. Repetitive catheter passes are not used
unless the volume indicates it.
To minimize the risk of injury.
8. Observe infant’s post suction
parameters.
To obtain baseline information.
9. Use small amount of sterile water if
needed to clear secretions from suction
tubing.
For the removal of the secretions.
10. Turn off the vacuum pressure.
Dispose of contaminated catheter,
remove gloves and perform hand
washing.
To minimize the risk of infection.
11. Ensure the child in comfortable
position and document the findings.
Recording and reporting.
Complications:
Hypoxaemia
Bradycardia/tachycardia
Atelectasis
Decrease tidal volume
Pneumothorax
Pneumonia
ETT dislodgement
Airway mucosal trauma
9. OXYGEN INHALATION
Definition: Oxygen can be lifesaving, but is to be used with almost care, treating it as potentially
toxic agent whose use should continue no longer than is absolutely necessary. It is the
administration of oxygen as a medical therapy.
Purposes:
To increase oxygenation of blood.

214
To decrease cardiac and respiratory load.
Equipment required:
Portable cylinder
Delivery tubes
Mask of different sizes and types
Regulator
Humidifier
Reservoir bag
Bath towel
Methods of delivery:
Nasal cannula
Face mask (simple facemask, partial re- breather mask, non-breather mask, venturi mask)
Hood box
1. Simple face mask: Simple re breathing type of face mask deliver about 30-60%
concentration at flow rate of 6-10 l/min. The non-rebreathing type of face masks have an
oxygen reservoir attached to them which helps to deliver a higher concentration of oxygen,
up to 95% with flow rates of 10 to 12 l/min.
2. Nasal cannula/ prongs: These deliver low flow (1-2 l/min), low concentration (30-35%)
oxygen with two prongs that are inserted in the anterior nares and held by adhesive tapes.
3. Hood box: Used for neonates and young children. Delivers about 30% oxygen
concentration and does not require humidification.
4. Venturi mask: It allows to deliver the most precise concentration of oxygen. This has a
large tube with an O2 inlet. As, the tube narrows, the pressure drops, causing air to locked
in through side posts.
5. Partial re breather mask: It is mixed with 100% O2 for the next inhalation and is attached
with the reservoir bag. Bag should be deflated slightly with inspiration.
Procedure:
Care Action Rationale
Explain the procedure to the patient and
review safety precaution.
To reduce the anxiety of the patient.
Wash hands. To minimize the risk of infection.
Connect the nasal cannula to the O2 set
up humidification.
To deliver the required oxygen.
Observe all the safety precaution. To minimize the effects of hazards.
Adjust the flow as prescribed. To deliver prescribed need of the oxygen.
Check that oxygen is flowing out of the
prongs.
For effective delivery of the oxygen.
Place the prongs in the client’s nostrils
and adjust.
Organization facilitates accurate skill
problems
Use gauze pads at ear beneath the tubing. To reduce risk of injury.
Encourage the client to breathe through
his or her nose and mouth closed.
For proper inspiration and expiration of
the client.
Wash hands and re assess client’s To minimize the risk of infection.

215
response to therapy.
Records the vital signs and inform to
senior staff or doctors about the
abnormal findings.
Recording and reporting and for
documentation.
Points to remember:
Assess the client frequently for the identification of signs of oxygen toxicity.
Handle the cylinder with care, O2 stand should be used to prevent falling and causing
injury to someone or the equipment.
Oxygen cylinder should be stored in cool temperature and should be away from electrical
supplies and fires.
Regular monitoring of the nasal prongs and tubes to be done for effective delivery of the
oxygen.
10. NASOGASTRIC TUBE INSERTION AND FEEDING
Definition
Nasogastric tube feeding is a means of providing food by way of a catheter passed through the
nares or mouths, past the pharynx, down the esophagus and into the stomach.
Purpose:
To feed infants and children who are not able to take in enough calories by mouth.
To administer medication that require minimal child effort when the child is unable to
suck and swallow adequately.
Age < 4
months
4
months
to
2 years
2-4
years
4-8 years > 8
years
Tube for
medication
and feeding
5-6F
6-8F
8F
8-10F
10-12F
Tube for
decompress
ion
6-8F 8-10F 10F 10-12F 10-14F

216
Equipment:
NG tube
Measuring container and spoon
Stethoscope
Syringe - 5-10 mL.
Sterile water or normal saline
Water soluble lubricant
Tape - Hypoallergenic
Feeding Formula
Gloves
Procedure:
1. Explain the procedure and gain verbal consent from the parents.
2. Collect necessary equipment.
3. Perform the hand washing.
4. Position the infant to facilitate insertion and comfort.
Lying supine.
Lying with the bed head elevated 30-40º.
Older children may feel comfortable sitting upright.
Infant and young children may need holding/ restraining which need parent consent.
5. Measure the distance from the infant nose to ear lobe to Xiphoid process of sternum and
mark the length on the feeding tube with tape.
6. Have suction apparatus ready to clear the airway and prevent aspiration if regurgitation
occurs.
7. Lubricate the catheter with sterile water or normal saline or water soluble lubricant.
8. Stabilize the infant’s head with one hand; use the other hand to insert the catheter.
Slip the catheter into the nostril and direct it toward the occiput in a horizontal plane along
the floor of nasal cavity. Do not direct the catheter upward and observe for respiratory
distress.
9. If the infant swallows, passage of the tube may be synchronized with the swallowing. Do
not push against resistance. If there is no swallowing insert the tube quickly and smoothly.
10. When the catheter has been inserted to the re measured length, carefully remove the guide
wire. Use the free end of the tape on the child’s nose to keep the tube in place.
11. Check the placement of the tube.

217
Pull back the plunger of the syringe to draw up 5 ml of air.
Place the syringe on the head of the NG tube while the other opening is capped off.
Place the stethoscope over the child’s stomach (upper left side of the abdomen)
Inject the air into the tube and listen for a “whoosh” sound. This sound will tell the tube is
in the right place. If you do not hear the sound, remove the tube and repeat the steps in
placing the tube.
FEEDING THE CHILD
1. The feeding position should be right side lying or supine, with head and chest elevated 30
degrees.
2. Aspirate the tube before feeding begins to assess for residual contents and to remove any air
3. If over one-half of the previous feeding is obtained by aspiration, withhold the next feeding
4. If small residual of feeding is obtained attach the feeding syringe after removing the plunger
and fill with feeding fluid. Hold the infant while feeding.
5. The flow of the feeding should be slow. Do not apply pressure. Elevate the reservoir 6-8
inches (15-20 cm) above the patient’s head.
6. Feeding given too rapidly may interfere with peristalsis, causing abdominal distention,
regurgitation
7. When the feeding is completed, the catheter may be irrigated with clear water. Before the
fluid reaches the end of the catheter, clamp it off and keep in place for next feeding.
8. Discard the left over solution.
9. Burp the child.
10. Place the child on his right side for at least 1 hour.
11. Observe the child’s condition after feeding: bradycardia and apnea
12. Note vomiting or abdominal distention.
13. Note the infant’s activity.
14. Accurately describe and record procedure, including type and size of tube used, verification
of placement, time of feeding, type and amount of feeding given and activity before, during
and after feeding.
218
11. CARE OF NEWBORN IN INCUBATOR
Introduction:
Incubator is an apparatus for maintaining an infant, especially a premature infant, in
an environment of controlled temperature, humidity, and oxygen concentration.
Incubators have simple alarm system to alert the clinical staffs if there is any danger
of overheating of the device. In some cases power is reduced automatically to prevent
overheating.
Principle:
Infant incubator is in the form of trolley normally with mattress on the top covered
by plastic cover. This chamber provides a clean environment and help to protect the
baby noise, infection and excessive handling.
Purpose:
An infant may require an incubator for the following reasons:
When they are not maintaining their own temperature with clothing and wrapping.
When they are acutely unwell and close observations required.
When they are at risk of abnormal heat loss.
They have a known infection or the potential to develop sepsis.
Main purpose of keeping and caring a neonate in incubator are
Maintenance of thermo neutral ambient temperature
Provision of desired humidity and oxygenation.
Observation of very sick neonate.
Isolation newborn babies from infection, unfavorable external environment.
Functions:
1. Temperature control
2. O2 concentration
3. Humidity control
4. Breathing gas filtration
Types:
1. Portable and non portable: Portable incubation can be used to shift the baby to
another area of hospital as needed.
2. Open box type: It is the also known as Armstrong , here neonate is keep on the
Plexiglas bassinet to keep unstable babies or newly born babies. A radiant warmer
can be attached if child needs.
NOTE:

219
The main disadvantage of this type of incubator is it can not maintain thermoneutral
environment if lids are open frequently. Despite it can not filter the air and neonate is
directly in the contact with external environment. It has only advantage that neonate
in this incubator can be observed well and can be handled easily.
3. Close type: It has special function to concentrate fresh air after filtration. It prevents
water loss from radiation. As neonate remain inside the box the risk of infection is
minimum.
4. Double walled: The incubator has two walls. As air is not good conductor of heat
the incubator prevents heat and fluid loss.
Step:
1. Prepare the incubator
2. Care of baby
3. Adjusting incubator temperature
4. Monitoring
5. Use of humidification
12. CARE OF NEWBORN IN RADIANT WARMER
Introduction:
The radiant warmer (also called open care system) was developed as an open
incubator that ensures ready access to the baby.
The overhead quartz heating element produces heat which is reflected by the
parabolic reflector on to the baby on the bassinet.
The quantity of heat produced is displayed in the heater output display plan.
Temperature selection knobs select the desired skin temperature.
Radiant warmers provide intense source of radiant heat energy. They also reduce
the conductive heat losses by providing a warm microenvironment surrounding the
baby.
Modes of radiant warmer:
1. Serve mode
2. Manual mode
1. Serve mode
Set temperature at 36.5ºC, heater output will adjust automatically to keep baby at set
temperature.
If the baby temperature is below the set temperature, the heart output will increase;
if the baby is
at set temperature or higher the heater output will become zero.
Look for probe displacement when the baby in servo mode every hours.
Servo system is the preferred method of running the open care system.

220
In the servo mode, whenever the baby temperature rises by more than 0.5C above the
set temperature,
a visual/audible alarm is activated.
Caregiver must pay attention to sort out the fault.
Often this occurs when the temperature probe comes off the baby’s skin.
2. Manual mode
The heat output from the quartz heating rod could also be increased or decreased
manually.
This is done by the heater output control knobs. This is called the manual mode of
operation
Parts of radiant warmer
Bassinet: For placing the neonate
Quartz rod: Provides radiant heat
Skin probe: When attached to the baby’s skin, displays skin temperature
Control panel: Has a collection of displays and control features/knobs
Heater output display indicates how much is the heater output.
Heater output control knobs: For increasing or decreasing the heater output manually.
Steps for use of warmer:
Connect the unit to the mains. Switch it on.
Once connected to mains, heater output can be regulated by knob on front panel.
The output is displayed as% or bars or bulbs.
Select manual mode.
Select heater output to 100% for some time (20 minutes) to allow quick pre-warming
of the bassinet covered with linen.
Select servo mode
Read the temperature on display
Select the desired set temperature of baby as 36.5 ºC.
Place the baby on the bassinet.
Connect skin probe to the baby’s abdomen with sticking tape.
If the manual mode to be used, the desired heater output.
In the manual mode, record baby’s axillary temperature at 30 minutes and then 2
hourly.
Response to alarm immediately. Identify the fault and rectify it.
Ensure the baby’s head is cover with cap and baby with clothes unless indicated to
keep naked.
Turn the baby frequently.
Use of cling wrap.

221
13. PHOTOTHERAPY
Definition: Phototherapy is the use of visible light to treat severe jaundice in the neonatal
period. Treatment with phototherapy is implemented in order to prevent the neurotoxic
effects of high serum unconjugated bilirubin. Phototherapy is a safe, effective method for
decreasing or preventing the rise of serum unconjugated bilirubin levels and reduces the need
for exchange transfusion in neonates.
Purposes:
To support the care of babies with hyperbilirubinemia.
To decrease infant serum bilirubin levels.
To maintain phototherapy treatment safely and effectively.
To minimize the infant- maternal separation and facilitate breast feeding.
Types:
Single light phototherapy
Double light phototherapy
Triple light phototherapy
Risk factors:
Mothers with a positive antibody screen
A family history of G6PD deficiency
A previously affected sibling
Cephalhematoma, bruising and trauma from instrumental birth
Delayed passage of meconium
Prematurity
Dehydration
Inadequate breast feeding
ABO incompatibility
Rh incompatibility
Nursing care of child under Phototherapy:
Commence phototherapy once TSB/SBR is greater than the appropriate reference
range for neonate’s gestation/ weight and presence of risk factors.
Normal hand washing measures should be attended to during care of a neonate
receiving phototherapy.
Neonates should be nursed naked apart from a nappy under phototherapy and will
need to be nursed in an isolate to maintain an appropriate neutral thermal
environment.
Position phototherapy units no more than 45 cm from the patient.

222
Expose as much as of the skin surface as possible to the phototherapy light. To
maximize skin exposure, cover the baby genital area and their eye with protective
shield only.
Cover the eyes with appropriate opaque eye covers.
Ensure eye covers are removed 4-6 hourly for eye care during infant cares or feeding.
Observe for discharge/ infection/damage and document any changes.
Daily fluid requirement should be reviewed and individualized for gestational and
postnatal age.
Maintain a strict fluid balance chart.
Breast feeds should be done continuously to maintain the hydration of child and
relieve mother child separation anxiety.
Monitor vital signs and temperature at least 4 hourly, more often if needed.
Ensure that the phototherapy unit is turned off during collection of blood for
TSB/SBR levels, as both conjugated and unconjugated bilirubin are photo oxidized
when exposed to white or ultraviolent lights.
Observe for signs of potential side effects.
Potential complications:
Overheating
Water loss from increased peripheral blood flow and diarrhea
Diarrhea from intestinal hypermobility
Ileus
Rash
Retinal damage
Bronzing of neonates with conjugated hyperbilirubinemia
Temporary lactose intolerance
14. BLANTYRE COMA SCALE
Blantyre coma scale: It is a modification of the Glasgow coma scale used to assess the level
of consciousness in the children. The score assigned by the Blantyre Coma scale is a number
from 0 to 5. The score is determined by adding the results from three groups: Motor response,
Verbal response and Eye movement.
Purposes:
To assess the level of consciousness in children.
It is used to assess children with severe falciparum malaria, particularly cerebral
malaria.
It is used as a diagnostic procedure.
It is used as a guide for early management of children with head injury and
neurological disorders.

223
S.N Response Coma Score Parameter Score
1. Motor response Localizes painful stimulus 2
Withdraws limb from painful stimulus 1
No response or inappropriate response 0
2. Verbal response Cries appropriately with pain or if
verbal speaks
2
Moans or cries abnormally with pain 1
No vocal response to pain 0
3. Eye movement Watches or follows 1
Fails to watch or follow 0
Total score 5
Interpretation: The minimum score is 0 which indicates poor results while the maximum is
5 indicating good results.
15. ASSITING IN LUMBAR PUNCTURE AND BONE MARROW ASPIRATION
LUMBAR PUNCTURE:
Definition: Lumbar puncture (LP) is also known as spinal tap, is an invasive procedure,
where a hollow needle is inserted into the space surrounding the subarachnoid space in the
lower back to obtain samples of CSF.
Indication:
Measure CSF pressure
Diagnosis of meningitis, meningoencephalitis, intracranial or subarachnoid
haemorrhage, some malignant disorders
Infuse medications which include spinal anaesthesia before surgery, contrast material
for diagnostic imagining such as CT- myelography and chemotherapy drugs.
Treat normal pressure hydrocephalous, cerebrospinal fistulas, and idiopathic
hypertension.
Placement of a lumbar CSF drainage catheter.
Contraindication:
Increased intracranial pressure due to brain tumour
Skin infection near the puncture site
Severe coagulopathy
Severe degenerative vertebral joint disease
Equipment required:
Sterile gloves

224
Sterile drapes and procedure tray
Sterile gauze pads
Aseptic solution (betadine, spirit)
Local anaesthesia: lidocaine 1% solution
25 G needle
10 ml syringe (1)
CSF tube (2 to 4)
Procedure:
Care Action Procedure
1. Explain the procedure to the patient. To reduce the anxiety of the client.
2. Obtain the informed consent. To prevent legal issues.
3. Promote comfort to the client and
instruct to empty bladder and bowel
before procedure.
4. Establish a baseline assessment and
monitor vital signs.
To obtain baseline information.
5. Position the patient to fetal position.
The patient is positioned on his side at
the edge of the bed with his knees drawn
up to his abdomen and chin tucked
against his chest (fetal position) or sitting
while leaning over a bedside table.
For the proper flow and collection of the
sample.
6. The skin is prepared and draped, and a
local anaesthetic is injected.
To minimize the sensation of pain.
7. The needle is inserted in the midline
between the spinous processes of the
vertebrae (usually between the third
fourth or the fourth and fifth lumbar
vertebrae.
For the collection of the sample.
8. Collect the specimen and placed in the
appropriate containers.
9. Remove the needle and a small sterile
dressing is applied.
To reduce the leakage of the CSF.
10. Apply brief pressure to the puncture
site and place the patient flat on bed for 4
to 6 hours depending upon the condition
of the client.
To prevent bleeding and leakage of CSF.
11. Monitor vital signs and the puncture
site for signs of CSF leakage and
To obtain baseline information.

225
drainage of blood
Complications:
Post lumbar puncture headache
Back pain
Bleeding
Pain or numbness
Brainstem herniation
BONE MARROW ASPIRATION
Definition: A procedure in which a small sample of bone marrow (soft, sponge-like tissue
in the center of most bones) and bone is removed.
Purposes:
To diagnosis/ staging of diseases.
o Leukaemia
o Multiple myeloma
o Lymphoma
o Anaemia
o Thrombocytopenia
o Pancytopenia
To monitor the development of haemolytic disease and respond towards the treatment
given.
To obtain more information on haematopoiesis.
To obtain microbiological cultures in children with fever of unknown origin.
Indications:
• Haematological disorder
• Fever Unknown Origin (FUO)
• Lymphadenopathy
• Hepatosplenomegaly
• Metastatic tumour

226
• Tuberculosis
Contraindication:
Haemorrhagic disorders such as congenital coagulation factor deficiencies (e.g
haemophilia), DIC and concomitant use of anticoagulant.
Skin infection or recent radiation therapy at the sampling site.
Bone disorders such as osteomyelitis or osteogenesis imperfecta.
Common sites:
• Iliac Crest ( posterior and superior)
• Sternum (2nd space of sternum)
• Tibia Crest (babies below 1 year)
Procedure:
Make sure the doctor have obtain consent from client.
Provide clear explanation and counsel the patient.
Check vital signs and make sure the puncture site has been cleaned.
Prepare equipment and prepare trolley aseptically
Make sure equipment are complete.
Help client to remain in the right position.
Assist the doctor in the procedure.
Monitor vital signs during procedure to detect complication.
Place the client in supine position and apply sandbag at the puncture site at
least for 6 hours to prevent bleeding complication.
Observe the pressure dressing is tight, clean and no signs of bleeding to
prevent infection.
Observe the client until their condition stable and recover.
Monitor vital signs after the procedure.
Replace equipment and make sure CSSD instruments are complete before
sending to autoclave.
Complications:
Hemorrhage
Pain
Infection

227
Perforation of major vessel
Risk of general anesthesia and sedation.
16. CHEST PHYSIOTHERAPY
Definition: Chest Physiotherapy is a set of manoeuvers that aid in postural drainage of
secretions from specific areas of the lungs by the use of gravity and percussion.
Purpose
• To remove bronchial secretion
• To improve ventilation of lungs
• To assist in coughing
• To increase the efficiency of the respiratory muscles
Articles required:
• Trendelenburg bed
• Pillows, patient gown and towel
• Sterilized clothes
• Stethoscope
• Suction Apparatus
• Mechanical percussor
• Cardiac monitoring, pulse oximeter
• chest radiograph
• Emergency airway
Procedure:
Verify physician’s orders and identify patient using two identifiers.
Collect needed equipment.
Wash hands.

228
Explain procedure and rationale to the patient.
Assess the chest x-ray for pulmonary findings.
Assess respiratory rate, breathing pattern, rhythm, skin color, Blood
pressure, heart rate of the patient.
Assess the patient’s ability to take deep breath.
Position patient according to segment drainage chart. Allow 30-45 minutes
after patient’s completion of a meal.
If patient’s status does not allow full positioning, position him as close as
possible to proper angle.
Perform chest physiotherapy.
Monitor the following throughout the therapy reaction, discomfort and
dyspnea, heart rate and rhythm, respiratory rate, sputum production,
breathe sound, skin color, mental status, oxygen saturation, blood pressure.
Modify the techniques of CPT according to patient tolerance.
PERCUSSION/ CLAPPING
Chest percussion involves rhythmically clapping on the chest wall over
the area being drained to force secretions into larger airway for
expectoration.
Position the hand so the fingers and thumb touch and the hands are
cupped.
• Perform the hand so the fingers and the thumb touch and the hands are cupped.
• The procedure should produce a hollow sound and should not be painful.
• Perform percussion over a single layer of clothing, not over buttons or zippers.
• Percussion is contraindicated in patients with the bleeding disorders,
osteoporosis, fractured ribs and open wounds and surgeries.
• Do not percuss over the spine, sternum, stomach or lower back as trauma can
occur to the spleen, liver or kidneys.

229
• Typically, each area is percussed for 30 to 60 seconds several times a day.
• If the patient has tenacious secretions, the area must be percussed for 3-5
minutes several times per day.
VIBRATION:
Vibration is a gentle, shaking pressure applied to the chest wall to move
secretions into larger airways.
The nurse uses rhythmic contractions and relaxations of arm and shoulder
muscles over the patient’s chest.
During vibration, place your flat hand firmly against the chest wall, on the
appropriate lung segment to bed rained.
• Vibrate the chest wall as the patient exhales slowly through the pursed lips.
• After each vibration, encourage the child to cough and
expectorate secretions into the sputum container.
POST CPT:
Patient should be advised to practice oral hygiene procedure to decrease
the bad taste and odor.
Record the procedure.
Report all the significant findings.
Disinfect all non-disposable equipment used and store appropriately.

TABLE OF CONTENT
MATERNAL AND NEONATAL HEALTH NURSING PROCEDURE
I. Maternal nursing procedure
S.N Contents
Page number
1 Antenatal Examination
230- 237
2 Admission of woman for delivery
237-239
3 Vaginal Examination
239-241
4 Induction of labour
241-245
5 Partograph
245-250
6 Conduction of normal vaginal delivery
250-253
7 Episiotomy
253-254
8 Perineal Repair
255-256
9 Placenta examination
256-257
10 Transfer of patient from labour room to ward
257-258
11 Postnatal examination of mother
258-260
12 Perineal care
260-262
13 Caesarean section
262-265
14 Administration of magnesium sulphate on severe
preeclampsia and eclampsia
266-267
15 Condom temponade
267-269
16 Breast care
269-270
17 Inverted or flat nipple care
270-271
18 Engorged breast care
271-272
19 Postnatal exercise 272-274

II. Neonatal nursing procedure
S.N Contents
Page number
1 Immediate care of a newborn
275-276
2 Newborn examination
276-278
3 APGAR score
278-280
4 Assisting with breast feeding
280-283
5 Manual expression of milk
283-284
6 Daily care of newborn
285
7 Care of the umbilical cord
285-286
8 Eye care
286-287
9 Kangaroo mother care
287-288
10 Baby bath
288-291
11 Transfer of patient from labour to ward
291
12 Neonatal resuscitation
292-294

230
1. ANTENATAL EXAMINATION
Definition
Systematic supervision (examination and advice) of a woman during pregnancy is called
antenatal (prenatal care). The care should start from the beginning of pregnancy and end at
delivery.
Purpose
• To maintain the woman in good health during pregnancy and to help to achieve a
healthy fetus.
• To make plans to educate the woman and her family in order to take appropriate
action when complications arise.
• To identify the feta growth and health condition.
• To evaluate the progress of pregnancy
• To help mother to prepare to breast feed successfully, experience normal puerperium
and take good care of the child physically, psychologically and socially.
Equipments
• BP instrument
• Thermometer
• Fetescope
• Tape measure
• Weight machine
• Torch
• Watch
• Examination bed or table
Steps:
1. History taking
2. Physical examination
- General examination
- Obstetrical examination ( Breast examination and abdominal examination)
1. History taking
- Demographic data : Name, age, address religion, marital status, occupation,
education, gravida , para, education of husband, occupation of husband)
- Chief complain
- Socioeconomic History: Housing, environmental status, economic status of the
family, water supply, sewage disposal, family support to the pregnant.
- Personal History: Sleep and rest, dietary pattern, smoking, alcohol and other
harmful substance , Food allergy history, contraceptive history

231
- Menstrual history: Age of menarche, menstrual period, menstrual cycle, LMP
- Past obstetric history : Year and date of delivery, Pregnancy events
(convulsions, abortion), Labor events (uterine rupture, tears through rectum,
PPH), Methods of delivery, puerperium condition, Baby wt and sex, condition at
birth, duration of breast feeding, immunization
- Present obstetric history: Gravida, Para, LMP, EDD, Week of gestation:
Completeness of immunization, medicine taken, additional supplementation, ANC
visit, quickening, minor and major problem (nausea, vomiting, P/V bleeding,
headache, blurred vision, fatigue etc) of mother if any.
- Past medical and surgical history: Antihypertensive, Hypoglycemic,
Antidepressant, Corticosteroid, Anticoagulant
- Family history
Calculation of EDD and week of gestation
Naegele’s formula:
EDD means expected date of delivery which is 40 weeks counting from the 1st day of
last menstrual period if mother have regular menstrual period.
EDD= 1st day of last menstrual period + 9 month and 7 days.
Eg. If LMP is 10/ 10/ 2070 then
EDD= 10/10/2070 + 9 month 7 days
=17/7/2071
Calculation of weeks of gestation
1st method
Weeks of gestation= Clinical visit day – 1st day of last menstrual period.
If clinical visit day= 2070/8/16
LMP= 2070/1/8
WOG= 2070/8/16-2070/1/8
= 7/8 means 7 month and 8 days.
Now 1 month= 30 days so total days
= 7*30+ 8
=210+8= 218 days

232
Now converting it into weeks dividing by 7
218/7=31 weeks and 1 day. It is write by 31+ 1weeks of gestation.
2nd method: Calculation from Month
• Take date of LMP and date of clinic visit
• Count the full month between those two period
• Calculate 1 month equal to 4 weeks and 3 month equal to 13 week
• Count the days after the LMP date and before the clinic visit date in partial das of
month
• Convert the days in weeks and add both weeks to estimate the weeks of gestation
LMP date: 2059/4/20
Clinic visit date : 2059/10/15
Count full month between these two dates
56
7
(when count 3 week add 1 week ( because each month have 4 weeks 4 week = 28
days and 2 days is left in each month so add 1 week in every 3 month)
8
9
( 8 weeks)
• Count the partial days after LMP which is 10 days
• The partial days before clinic visit is 15 days
Total = 25 days
• Convert the days into weeks by dividing with 7
25/7=3 and 4 days Remaining
✓ Now add the weeks of gestation of month and days.
• Therefore the weeks of gestation of LMP 2059/4/20 on 2059/10/15 is
13+8+3 weeks and 4 days
= 24 weeks and 4 days

233
2. Physical examination
- Assembly the necessary equipments.
- Hand wash should be performed before and after patient contact. The
examiner should have warm hand and short fingers.
- Explain the women about the procedure
- Ask the women to empty the bladder.
- Ensure the women's privacy
- Help her onto the examination table.
- Position the woman's in comfortable position.
- Ask to loosen the clothing
- The examiner should stand on the right side of the patient
A. General examination
I. Observe: Gait and movements, facial expression – alert and responsive, skin- lesions
and bruises, nutritional status, personal hygiene.
II. Clinical examination
• Height – short stature if less than 150 cm
• Weight
• Blood pressure – measure BP while the woman is seated and relaxed.
• If diastolic BP is > 90 mm of Hg, ask the woman if she has severe headache, blurred
vision or epigastric pain and check her urine for protein.
• Pulse
• Pallor- observe conjunctiva, under surface of the tongue and nail beds.
• Jaundice- observe bulbar conjunctiva, under surface of the tongue, hard palate and
skin.
III. Systematic examination
• Head: Inspect woman's hair color, texture, cleanliness, check lies, extra grow
• Eye: Examined especially color of lower palpebral conjunctiva (mucous membrane
inside of eyelids) for anemia, sclera to jaundice and other eye condition (discharge
swollen eyelids and eye movements)
• Ears: Examine hearing ability using wristwatch, any discharge, and abnormality
should be noted.
• Mouth: Look (dorsum of the tongue) for pallor, and glossitis, tooth decay, gum
bleeding, cyanosis. Normally is moist mouth, pink lips, no swelling and bleeding
gums. Ask for swallowing difficulty,
• Neck: Inspect and palpate the neck gland for any tenderness and enlargement. Note
the position of head and neck, and ability to move neck. Inspect the enlarge neck vein
(slight physiological enlargement of the thyroid gland occurs during pregnancy in
50% of cases).
• Axilla: Check any tenderness and enlargement of lymph nodes of both sides
• Hand: Inspect the arms hand for movement, cleanliness, edema, nail beds for anemia.

234
• Chest: Check for breathing pattern, size and shape of chest, chest movement.
Auscultation apex beat of heart and count for one minute, note any abnormal beat and
murmur. Auscultation anterior and posterior chest wall for the lungs sound.
• Breast Examination
- Inspection: Shape, size, primary and secondary areola, vein enlarge, nipple
size, striae and nipple for inverted or flat, secretion of colostrums.
- Palpation:
➢ Start palpation from the far side.
➢ Ask to raise the arm above the shoulder.
➢ Use three or four fingers of right hand to feel the breast firmly, carefully and
thoroughly.
➢ Beginning at the outer edge, press the flat part of fingers in small circle,
moving the circles slowly around the breast.
➢ Gradually work towards the nipple.
➢ Be sure to cover the whole breast.
➢ More attention to the area between the breast and the underarm, including the
underarm itself.
➢ Feel for any unusual lumps or masses under the skin.
➢ Repeat the examination on near side breast.
• Abdomen: In early pregnancy, examine bimanually for spleen, liver, kidney and
stomach for any abnormality. In later pregnancy, abdominal is palpated for gravid
uterus. (See antenatal abdominal examination).
• Legs: Inspect legs for joint movement and deformities, redness, swelling. Note any
pain when she moves joint. Inspect and note presence of varicose veins an edema.
Examine both the legs for edema over the medial malleolus and anterior surface of the
lower 1/3 of the tibia, dorsum of feet. The area is pressed with the thumb for at least 5
second. Examine for edema should be done at each antenatal visit. Edema is typically
described using a scale of 1+ to 4+.
- 1 + minimal edema on pedal and pre-tibial area.
- 2+ obvious edema of lower extremities.
- 3+ edema of face, hands, sacrum and abdomen.
- 4 + indicates massive, generalized edema (anasarca)
B. Antenatal abdominal examination consists of 3 methods:
- Inspection
- Palpation
- Auscultation

235
Inspection: Observe for shape ,size ,contour, skin changes (Striae gravidarum, linea nigra,
rashes, sores or any evidence of trauma, surgical scars on abdomen) fetal movement, uterine
contraction.
Palpation: It includes
- Estimation of fundal height
- Fundal palpation (first Leopold)
- lateral palpation (second Leopold)
- Pawlik's grip (third Leopold)
- Pelvic grip (fouth Leopold)
- Estimation of fundal height: Utilization of the tape measure to determine fundal
height is called symphysis fundal height.
• Palpate the upper margin of the fundus using the ulner aspect of the dominant
hand and palpate the symphysis pubic using index and middle finger of non-
dominant hand.
• Measure the distance with the centimeter side of tape facing upward to avoid
examiner basis.
• The measuring tape must lie on the mother's abdomen skin, holding the zero
on the tape at the symphysis pubis.
• The height of the fundus after 22 weeks, the SFH approximates to the number
of weeks upto 36 weeks .A variation of ± accepted as normal.
- Fundal Palpation (first leopald): Fundal palpation also helps determine the fetal part
occupying the fundus. The information will help to diagnose the lie and presentation
of the fetus. Procedure
• Make sure hands are clean and warm.
• Examiner should face towards the patient's head.
• Place both hands are gently placed around the fundus.
• Use the tip of the finger close together and curving round the upper border
uterus.
• Gently palpated with the fingers of the both hands, in order to discover which
pole of the fetus (breech or head) is lying in the fundus:
➢ Broad, soft and irregular mass suggestive of breech and will be less
mobile
➢ Smooth, hard and globular mass suggestive of head. The head is more
mobile than the buttock.
➢ In transverse lie, neither of the fetal poles are palpated in the fundal
area

236
- Lateral Palpation: Lateral palpation helps to determine the position of the fetas (fetal
back or spine a fetal limb) and lie (longitudinal or transverse).
Procedure:
• Palpation is done facing the woman's face.
• Hands are placed at umbilicus level on either side of the uterus or halfway
between the symphysis pubis and the fundus.
• Gentle pressure is applied alternatively with each hand.
• Palpate in a circular motion starting upward to down ward, turn by turn.
• Detect the position of the back of the fetus i.e. smooth, firm, curve of the back
of the fetus and regular part is thought to be the back of the fetus and knob-
like irregular part the limb.
- Pawlik's grip (third leopald): The most efficient means of abdominal palpation to
determine which part of the fetus occupies the lower pole and lies over the pelvic
brim, is the pawlik's grip.
Procedure
• The examination is done facing towards the patient face.
• The right hands is placed slowly and gently over the lower part of the above
the symphysis pubis, with the fingers on the left and the thumb on the
woman's abdomen.
• The left hand's is placed on the fundus to steady the uterus.
• Make sure that the woman's knees are bent slightly and ask to take a deep
breath.
• Grasp the portion of the lower abdomen immediately above the symphysis
between the thumb and middle finger on hand.
• Move the part from side to side to determine presenting part free or fixed
• You will feel a movable mass if the presenting part is not engaged. The head
will feel hard and round, and mobile, if it's not entered the pelvic brim
• If the presenting part is engaged it cannot be moved.
- Pelvic Grip (Fourth Leopold): Pelvic palpation at the lower pole of the uterus just
above the pelvic to decide which part of the fetus is in the lower part of the uterus.
Procedure
• Palpation is done facing the woman's feet.
• Advice the woman to bend knees slightly and encourage breathing.
• Place the hands, one on either side of the lower pole of the uterus (below the
level the umbilicus) with the fingers just above the pelvic crests (finger directed
toward the symphysis pubis) on either side of the woman's abdomen and the
thumbs at the umbilicus level.
• The finger are pressed downward in a manner of approximation of finger tips
to palpate the part occupying the lower pole of the uterus i.e. hard or soft, bigger
or small (hard fetal head is felt in cephalic, soft breech in breech presentation).

237
• See engagement of the presenting part. Fetal head can be moved from side to
side when it is unengaged.
Auscultation
• Place fetal stethoscope on abdomen at right angles to it on the same side that you
palpated the fetal back.
• Place your ear in close, firm contact with fetal stethoscope.
• Move fetal stethoscope around to where fetal heart is heard most clearly.
• Remove hands from fetal stethoscope and listen to fetal heart.
• Listen for a full minute, counting beats again second hand of clock/watch. (see
fetal heart monitoring)
Post-procedure
- Replace the equipment
- Wash hands
- Document the following finding
a. Lie
b. presentation
c. position
d. Attitude
e. Engagement
f. Fetal heart rate
2. ADMISSION OF WOMAN FOR DELIVERY
Definition:
It is a process of admission of a pregnant woman to the hospital for the delivery and
care of the woman and neonate.
Purpose:
• To observe and report signs and symptoms and general condition of patient.
• To closely monitor a woman with a history of complication.
• To manage and prevent complications.
• To assist in a safe delivery of the baby.
• To provide immediate care, safety and comfort of the mother and child.
Equipments:
− Sphygmomanometer
− Temperature tray
− Weight machine
− Vaginal examination tray

238
− Measuring tape
− Fetoscope
− Shaving set
− Light source
− Sterile cotton swabs (wet and dry)
− Dipstick to test urine
− Admission and investigation forms
− Enema set if needed
− Shaving set if needed
Procedure:
1. Welcome the woman and observe her gait, position and general condition.
2. Assist the woman onto the examination table.
3. If the booking case, check the woman`s antenatal card or ask for the following
information and record responses:
− Age
− Any disease and surgery
− Allergies
− Number of previous pregnancy / delivery
− Problems with previous pregnancy / delivery
− Number of living children
− Type of delivery, if caesarean section ask indication
− Type of medical problems
− Any used medication
4. Ask the woman if she has experienced labour, fetal movement, pain, show, membrane
rupture and leaking.
5. Ask when the pain started, its length, strength and frequency of contraction.
6. Perform handwashing.
7. Check the woman`s temperature, pulse, respiratory rate, blood pressure, weight and
height.
8. Check the woman`s conjunctiva and palms for pallor.
9. Check the presence of edema.
10. Ask the woman to empty her bladder and obtain a midstream urine sample to test for
protein and glucose if necessary.
11. Help the woman on to the examination table or bed and place a pillow under her head
and upper shoulders.
12. Explain the abdominal examination.
13. Perform antenatal abdominal examination.
14. Listen to the fetal heart sound.
15. Estimate the fundal height.
16. Palpate and perform the presentation, position and lie.
17. Assess the descent of the fetal head.

239
18. Stop the abdominal examination if the woman has contraction and observe perineum
for bloody show and appearance of amniotic fluid if membrane ruptures.
19. Do a vaginal examination to find out the stage of labour.
20. Wash hands.
21. Inform the on duty doctor / senior staffs.
22. Record all of the information thoroughly.
23. Obtain a written consent from her relative.
24. If the doctor orders an enema, administer and record the result.
25. If unbooked case, collect blood for complete blood count and grouping / cross match.
26. Start an intravenous fluid according to doctor`s orders (intravenous fluid start if
necessary).
27. Ask the family for a deposit and inpatient number.
28. Transfer the woman to the ward if she is not in active labour.
29. If the woman ins in active labour, transfer her in waiting room of labour.
30. If the primi gravida woman is in second stage of labour, assist her in putting the
gown.
31. Transfer the woman to the delivery room and prepare for the delivery.
32. Ask the family to bring the necessary medicines and clothing for the newborn and
mother.
33. If the multigravida woman is in the second stage with strong uterine contraction,
remember delivery is to be done in the admission room.
3. VAGINAL EXAMINATION
Definition:
It is the examination done per vagina to detect the status of the vagina and cervix, and
to assess the progress of labor as the fetal presenting part descends through the birth
canal.
Purpose:
• To detect whether the women is in labour.
• To determine the progress of labour.
• To access the adequacy of birth canal in relation to the fetus.
• To detect the likelihood of cord prolapse in polyhydramnious and multiple
pregnancy.
• To determine the cause of delay in progress of labour.
• To detect whether second stage has begun to assess status of head and degree
of moulding.
• To apply fetal scalp electrode.
Equipments
• Articles for hand washing (soap and running water)

240
• Examination table or bed well protected with mackintosh and draw sheet
• Bucket at the end of the table to discard soiled swab
• A trolley containing sterile articles:
• One bowl with cotton swab
- Cheatle forceps and jar
- Light
- Sterile gloves
- Antiseptic solution
Procedure:
1. Explain procedure during the examination.
2. Read the chart of previous findings if done before.
3. Position the woman in dorsal recumbent position with knees flexed.
4. Drape the patient.
5. Do a surgical hand washing.
6. Put on sterile gloves.
7. Observe the external genitalia for the following.
• Sign of varicosities, edema vulval warts or sores.
• Scar from previous episiotomy or laceration.
• Discharge or bleeding from vaginal orifice.
• Color and odor of amniotic fluid, if membranes have ruptured.
8. Cleaned the vulva and Perineal area.
9. Dip the first two fingers of the right hand into the antiseptic solution.
10. Holding the labia apart with thumb and index fingers of left hand, insert the
lubricated fingers into vagina, palm side down, pressing downwards.
11. With the fingers inside, explore the vagina for required information taking care
not to touch the clitoris or anus.
Note the following:
• The feel on touch of vaginal walls.
• Consistency of vaginal walls.
• Scare from previous perineal wound, cystocele or rectocele.
12. Examine the cervix with the fingers in the vagina turned upwards. Locate the
cervical os by sweeping the fingers from side to side.
Assess the cervix for:
• Effacement
• Dilatation
• Consistency
• Forewaters.
13. Assess the level of presenting part in relation to maternal ischial spines for station.
14. Identify the presentation by feeling the hard bones of the vault of the skull, the
fontanels.
15. Identify the position by feeling the features of presenting part.
16. With fingers follow the sagittal suture to feel the fontanels.
17. Assess the moulding, by feeling the amount of overlapping of skull bones.

241
18. At the completion of the examination, withdraw fingers from vagina; take care to
note the presence of any blood or amniotic fluid.
19. Remove gloves and wash hands.
20. Auscultate the fetal heart tones.
21. Assist the woman to comfortable position and inform her of the progress of labor.
22. Record the findings and observations in the patient's chart and inform the
obstetrician about the findings and progress of labor.
4. INDUCTION OF LABOUR
Definition
Induction of labour is a process for initiating of uterine activity to achieve vaginal delivery.
Purpose
• To stimulate uterine contractions during pregnancy before labor begins on its own to
achieve a vaginal birth.
Preparation
Patient
Physical
- Skin preparation
- The patient should be encouraged to empty the bowel and bladder.
Physiological preparation
- Check the lab values for Hb, ESR, grouping. HIV, Hbs,etc
Psychological preparation:
- The decision to induce labor should only be made with consent of the patient. The
patient and relatives must be explained clearly about the procedure.
Equipment
- Articles required for per vaginal examination
- Cleaning articles (surgical induction)
- Drugs needed for induction - pitocin, ceirpiene, cytotec
- Kocher's artery forceps-for rupture of membranes, amniotic needle
- Surgical gloves
- Kidney tray/ bowl to collect amniotic fluid.
Procedure
Induction is frequently divided as
Medical induction - where the drugs alone are used to induce uterine contraction and
cervical dilatation and the amniotic sac remains intact.
Surgical induction - where the membranes are artificially ruptured /ARM.

242
Combined is the usually followed method.
1. Medical Induction
Indications
• Intrauterine death
• Premature rupture of the membranes.
• In cases of failure of surgical induction as an alternative to caesarean section.
• In combination with surgical induction.
Drugs used
• Oxytocin
• Prostaglandins - PGE, & PGE₂
Oxytocin
The synthetic preparation is widely used as intravenous drip infusion. The oxytocin should be
started with a low dose but escalated quickly when there is no response. When the optimal
response is achieved (uterine contractions sustained for about 45 seconds and numbering 2-3
contractions in 10 minutes), the administration of the particular concentration in ml/ minute is
to be continued. This is called oxytocin titration technique.
• The oxytocin is not only to initiate effective uterine contractions but also to maintain
the normal pattern of uterine activity till delivery and at least 30-60 minutes beyond
that.
• The patient should preferably lie on one side or in semi-fowler's position to minimize
venacaval compression.
• In majority of cases, a dose of less than 16 mill units per minute (2.5 units in 500 ml
5% dextrose with a drop rate of 60/min) is enough to achieve the objective. However,
in an unresponsive state, higher doses may be required.
Prostaglandins
The topical application of prostaglandin α2, intravaginally in a viscous base is an effective,
safe and highly acceptable method. The usual dose is 2.5-5 mg, which may be repeated after
6-8 hours, if necessary.
2. Surgical Induction
The initiation of labor is attempted by surgical method and is almost exclusively done by
rupture of the membranes.

243
Indications
• Antepartum haemorrhage
• Chronic hydramnios
• Severe pre-eclampsia, eclampsia.
• In adjunct to medical induction
Methods
i) Artificial rupture of the membranes
• Low rupture of the membrane (LRM)
• High rupture of the membrane (HRM)
3. Combined induction
- Medical induction
- Surgical induction
4. Others
- Foley catheter
Artificial rupture of the membranes (ARM):
The membranes below the presenting part overlying the internal OS are ruptured to drain
some amount of amniotic fluid i.e. forewaters.
Procedure
1. Women should be encourage to keep bowel and bladder empty
2. The patient is positioned in dorsal lithotomy position
3. Surgical asepsis is to be taken. Perineal and vaginal toileting with antiseptic solution and
draping are done,
4. The surgeon should wear sterile mask, gowns and gloves.
5. Two fingers are introduced into the vagina smeared with antiseptic ointment. The index
finger is passed through the cervical canal beyond the internal OS.
6. The membranes are swept free from the lower segment as far as reached by the finger-
stripping.
7. With one or two fingers still in the cervical canal with the palmar surface upwards, a
Kocher's forceps with the blades closed, is introduced along the palmar aspect of the
finger up to the membranes.
8. The blades are opened to seize the membranes and are torn by twisting movements
9. This is followed by the visible escape of amniotic fluid.
10. After the membranes are ruptured, the following are to be noted:
- Colour of the amniotic fluid
- Status of the cervix
- Station of the head
- Presence or absence of cord prolapse

244
- Quality of F.H.R., rate & rhythm
11. After being fully satisfied, a sterile vulval pad is placed and the patient is returned to
bed. Prophylactic antibiotics are started.
Recording
Record the type of induction, if ARM is done , the colour of the fluid , status of mother ,
amount of fluid , any complication.
MISOPROSTOL
1. Use misoprostol to ripen the cervix. Place misoprostol 25 mcg to 50 mcg in the
posterior fornix of the cervix as per doctor order.
2. Check the women's pulse, blood pressure and contraction and check the fetal heart
rate. Record finding on a partograph.
3. Before administrating misoprostol ask women to empty the bladder.
4. Administer 25 mcg misoprostol in the posterior fornix of the vagina. Repeat after 6
hours, if required.
5. If there is no response after 2 doses of 25 mcg, increase to 50 mcg every six 6 hours.
6. Do not use more than 50 mcg at a time and do not exceed four doses (200 mcg)
7. Let the mother lie down in the left lateral position
8. Monitor FHS and contraction every 30 minutes
CARE DURING INDUCTION OF OXYTOCIN
1. Monitor the women's pulse, blood pressure and contraction and check the fetal heart
rate.
2. Review the indications
3. Ensure that the women in on her left side
4. Record the rate of infusion of oxytocin ,duration and frequency of contraction and
fetal heart rate every 30 minutes in partograph.
5. Listen FHS every 30 minutes always immediately after a contraction.
6. Infuse oxytocin 2.5 units in 500 ml of RL at 10 drops/min for multi and 5 units in 500
ml of R/L at 10 drops /min for primi.
7. Increase the infusion rate by 10 drops per minute every 30 minutes until a good
contraction ( 3-4 contractions in 10 minutes, each lasting more than 40 seconds)
pattern is established but not more than 60 drops.
8. If there are in a good contraction pattern established (3-4 contractions in 10 minutes,
each lasting more than 40 seconds), maintain the same rate until delivery.
9. If there are more than four contractions in 10 minutes, or if any contraction lasts
longer than 60 seconds, stop the infusion and manage hyper stimulation.
• Discontinue oxytocin infusion immediately.
• Relax the uterus using tocolytics. Terbutaline 250 mcg IV slowly over 5 minutes
or salbutamol 10 mg in 1l in fluid (Normal saline or RL ) at 10 drops per minute.
• Place the mother in left lateral position
• Monitor FHS

245
• Give oxygen to the women
• Inform the doctor on duty
10. Women receiving oxytocin should never be left alone.
11. Be sure that induction is indicated, as failed induction is usually followed by
caesarean section.
5. PARTOGRAPH
Definition:
Partograph graphic recording of progress of labour and condition of the mother and the fetus.
It has been used to detect labour that is not progressing normally, to indicate when
augmentation of labour is appropriate and to recognize cephalopelvic disproportion long
before labour becomes obstructed.
Purpose:
• To record the observations accurately regarding the progress of labour.
• To identify the difference between latent and active phase of labour.
• To recognize any deviation from the normal labour.
• To monitor the progress of labor, recognize the need for action at the appropriate time
and decide on timely referral.
Procedure:
A partograph is used to record all observations made on a woman in labor. Zero time for
spontaneous labor is the time of admission and that for induced labor is the time of induction.
It is a sigmoid curve and the first stage of labor has got two phases, a latent phase and an
active phase. The active phase has got 3 components.
1. Acceleration phase with cervical dilatation of 3-4 cm.
2. Phase of maximum slope of 4-9 cm dilatation.
3. Phase of deceleration of 9-10 cm dilatation.
In primigravidae, the latent phase is often long (about 8 hours) during which effacement
occurs; the cervical dilatation averaging only 0.35 cm/hour. In multigravidae, the latent phase
is short (about 4 hours) and effacement and dilatation occur simultaneously. Dilatation of
cervix at the rate of 1cm per hour in primigravidae and 1.5 cm in multigravidae beyond 3 cm
dilatation is considered satisfactory.
Observations charted on the partograph:
Observations and recordings will be explained in the following sequence
1. The progress of labor
• Cervical dilatation in cms

246
• Uterine contractions Frequency per 10 minutes, duration, type of contractions (mild,
moderate or strong/severe)
• Membranes and liquor
2. The fetal condition
• Foetal heart rate and rhythm
• Moulding of the fetal skull
• Descent of fetal head-Abdominal palpation of fifth of head felt above the pelvic brim.
3. The maternal condition
• Pulse, blood pressure and temperature Urine protein, acetone)
• Urine (volume, protein, acetone)
• Drugs and IV fluids
• Oxytocin regimen

247

248
The progress of labor:
1. Cervical dilatation
• The rate of cervical dilatation changes from the latent to the active phase of labor.
• The latent phase is from 0-2 cm with a gradual shortening of the cervix (slow period
of cervical dilatation).
• The active phase is from 3 cm to 10 cm (faster period of full cervical dilatation).
In the center of the partograph is a graph. Along the left side are numbers 0-10 against
squares. Each square represents 1 cm dilatation. Along the bottom are numbers 0-24 and each
square represents 1 hour of the labor on the partograph, immediately below the fetal heart rate
recordings.
This observation is made at every per vaginal examination.
Moulding of the fetal skull bones:
Moulding is an important indication of how adequately the fetal head can accommodate
through the pelvis.
There are 4 different ways to record the moulding on the partograph.
1. If bones are separated and the sutures can be felt easily, record as the letter."0"
2. If bones are just touching each other, record as +
3. If bones are overlapping, record as ++
4. If bones are overlapping severely, record as +++
The maternal condition:
All the recordings for the maternal condition are entered at the foot of the partograph, below
the recording of uterine contractions.
1. Pulse, blood pressure and temperature
• Pulse- every half hour.
• Blood pressure - once every 1 hour, or more frequently, if indicated.
• Temperature - once every 4 hours, or more frequently, if indicated.
2. Urine: Volume, protein and acetone
• Check for protein or acetone in the urine .
• Measure urine volume.
3. Drugs and IV fluids: These are charted in the appropriate column just below the area for
oxytocin regime.
4. Oxytocin regime: There is a separate area for recording oxytocin titration just below the
column for contractions. All entries are recorded in relation to the time at which the
observations are made.
Descent of the fetal head:
This is assessed by abdominal examination before doing vaginal examination.
Descent of the fetal head is measured in number of fingers that can still cover the head when
palpated on external examination.
Descent of head recorded as a circle (o) at every four hourly.

249
• A head that is entirely above the symphysis pubis is five-fifths (5/5) palpable.
• A head that is entirely below the symphysis pubis or sinciput is at the level of
symphysis pubis is zero-fifth (0/5) palpable
• A head accommodates two fingers above the symphysis is two-fifths (2/5)
Uterine contraction:
In normal labour contractions usually become, more frequent and last longer as labour
progresses. Record strength and frequency of uterine contraction every half hourly.
Duration of the contraction is from the time the contraction is first feeled abdominally to time
when the contraction passes off, and is measured in seconds.
Palpate the number of contractions in 10 minutes and their duration in second.
Shadow the duration of contraction as given below:
• Use dots to fill in the squares for mild contractions lasting less than 20 seconds.
• Use diagonal lines to fill in the squares for moderate contractions lasting 20 to 40
seconds.
• Use solid color to fill in the squares for strong contractions lasting longer than 40
seconds.
Frequency of contraction: It is time of the interval from the beginning of one contraction to
beginning of the next contraction.
The frequency, duration and intensity of uterine contraction can be estimated by palpation.
The fetal condition:
1. Fetal heart rate
• Observing the fetal heart rate is a safe and reliable clinical way of knowing the fetal
well being. The best time to listen to the fetal heart is just after the contraction has
passed its strongest phase. Listen to the fetal heart for 1 minute with the woman in the
left lateral position if possible. The foetal heart rate is recorded at the top of the
partograph.
• It is recorded every half hour and each square represents one half hour. The lines for
120 and 160 are the normal limits of the normal fetal heart rate.
• If the rate is> 160 beats / minute (tachycardia) and <120 beats / minute (bradycardia)
it may indicate fetal distress.
• A heart rate of 100 or lower indicates very severe distress and action should be taken
immediately
2. Membranes and liquor
The state of the liquor can assist in assessing the fetal condition. There are 4 different ways
to record the state.
1. If the membranes are intact (Record the letter I for intact)
2. If the membranes are ruptured and liquor is clear. (Record as the letter "C" for clear)
3. If the membranes are ruptured and liquor is meconium stained. (Record as the letter "M"
for meconium)

250
4. If the membranes are ruptured and liquor is absent .( Record as the letter "A" for absent)
Abnormal progress of labor
1. Prolonged latent phase
If a woman is admitted in labor in the latent phase (less than 3 cm dilated) and remains in the
latent phase for the next 8 hours, progress is abnormal and further action must be taken.
2. Prolonged active phase
Moving to the right of the alert line:
In the active phase of labor, plotting of cervical dilatation will normally remain on, or to the
left of the alert line. But some will move to the right of the alert line and this warns that labor
may be prolonged. If it reaches action line i.e. beyond alert line, action to deliver fetus
immediately should be taken.
When the dilatation moves to the right of the alert line and if adequate facilities are not
available to deal with obstetric emergencies, the woman must be transferred to a hospital
unless she is nearing delivery.
At the action line: The action line is 4 hours to the right of the alert line. If a woman's labor
reaches this line, a decision must be made about the cause of the slow progress, and
appropriate action must be taken.
6. CONDUCTION OF NORMAL VAGINAL DELIVERY
Normal labour:
It is defined as one in which the fetus presents by the vertex, labour start spontaneously at
term, and terminates naturally without artificial aid and without complications to mother and
baby. Normal labour is called when it is fulfilling the following criteria :
• Spontaneous in onset and at term
• With vertex presentation
• Without undue prolongation
• Natural termination with minimal aid
• Without having any complications affecting health of the mother and/or baby.
Equipment for delivery
Delivery set contains:
• Sponge holder or forceps- 1
• Plain artery forceps- 2
• Cord scissor- 1
• Galipot- 1

251
• Bowl- 1
• Gauze pieces and cotton balls (Sterile)
• Perineal pads
• Sterile cloths: 4
- Perineal sheet-2
- Baby wrapper-2
• Sterile gloves and gown for nurses conducting delivery
• Antiseptic solution or boiled water.
Equipment needed for baby
• Resuscitation with overhead radiant heater (switched on) and light, piped oxygen,
manometer and suction.
• Infant laryngoscope, spare batteries and bulb.
• Neonatal endo-tracheal tube in different sizes- 2.5, 3.0 and 3.5 mm size and connector
• Neonatal airways sizes 0,00,000
• Mucus extractor
• Suction catheter sizes 6,8 and 10 FG
• Newborn size, self -inflating resuscitation bag
• Newborn size mask 0 size for small baby i.e. less than 2.5 kg at birth or born before
37 weeks gestational age and size 1 for a normal size baby. (mask should be soft and
circular)
• Syringe 2cc and 5cc and assorted needles
• Baby clothing (Bhoto, topi, napkin, wrapper and blanket)
For midwives:
• Mask, gown, sterile gloves, plastic apron
Others
• Boots and eye goggles
• Sterile water/boilwater
• Fetoscope
• Sphygmomanometer and stethoscope
• Baby identification card
• Light source
Procedure
1. Greeting or warm welcome to mothers.
2. Prepare the necessary equipment.
3. Encourage the mother to adopt the position of choice and continue spontaneous
bearing down effort.
4. Tell the women what is going to be done listen to her and respond attentively to her
questions and concern.

252
5. Provide continual emotional support and reassurances as feasible.
6. Monitor the contraction and FHS regularly.
7. Put on personal protective barriers.
- Conducting the delivery.
• Wash hand thoroughly with soap and water and dry with a clean clothes or air dry.
• Open the delivery set and put the sterile gloves.
• Clean the women's perineum with antiseptic solution.
• Catheterize the mother if necessary.
• Place the perineal sheet and abdominal sheet.
• Encourage mother to push with each uterine contraction.
• Decides whether episiotomy is necessary or not.
• Ask the women to pant or give only small pushes with contraction as the baby's
head is born.
• As the pressure of the head thins out the perineum control the birth of the head
with the fingers of one hand.
• Use the other hand to support the perineum by using a sterile vulval pad and allow
the head to extend slowly and be born spontaneously.
• Wipe the mucous and blood from the baby's mouth, nose, and eyes, with clean
gauze.
• Feel around the baby's neck to ensure the umbilical cord is around the neck or not.
• Allows the baby's head to turn spontaneously.
• After the head turns place a hand on each side of the baby's head over the ears and
apply slow, gentle pressure downward until the anterior shoulder slips under the
pubic bone.
• When the axillaries crease is seen, guide the head upward towards the mother's
abdomen as the posterior shoulder is born over the perineum.
• Move the topmost hand from the head to support the rest of the baby's body as it
slides out.
• Place the baby on the mother's abdomen and notes the time of birth.
• Thoroughly dries the baby and covers with a clean, dry cloth. Assess the APGAR
scores.
If the baby is breathing normally, clamp and cut the umbilical cord one to three
minutes after birth of the baby.
• Ensure the baby is kept warm and skin to skin contact on the mother's chest and
cover the bay with a cloth or blanket, including the head.
• Palpate the mother's abdomen to rule out the pressure of additional baby and
proceed with active management of third stage.
✓ Give oxytocin 10 units IM.
✓ Clamp the cord close to the perineum and hold the clamped cord and the end of
the clamp in one hand and apply CCT methods for placenta delivery.
✓ Massage the uterus and teach mother continuous every 15 minutes till 2 hour

253
• Examine the placenta and membranes; make sure that mother's vitals have been
taken.
• Inspect the lower vagina and perineum for tear and repair if necessary .Repair
episiotomy /tear if one have happened.
• Swabs vulva areas, put sterile pad, remove soiled clothes.
• Make the women comfortable.
- Decontaminates and clean all equipment and replace it in proper place.
- Washes hand thoroughly with soap and water and dry with clean towel.
- Records all information in patients chart and record book.
7. EPISIOTOMY
Definition:
An episiotomy is a surgical incision into the perineum to enlarge the vaginal orifice for
obstetrical purpose.
Purpose
• To minimize over stretching perineal muscles as in the case of a very large baby.
• To enlarge vaginal introitus.
• To speed up delivery in fetal distress in second stage of labour.
• To minimize the risk of intracranial damage during pre-term and breech delivery.
• To an assisted delivery such as forceps or ventouse extraction.
• To prevent a recurrence of previous third or fourth degree tears.
• To decrease the length of second stage for women who are ill with heart disease and
eclampsia etc.
Equipment
• Perineal sheet-1
• Sponge holder-1
• Small bowl-1
• Episiotomy scissor - 1
• Suture cutting scissor -1
• Needle holder -1
• Tooth dissecting forceps-1
• Chromic catgut 2-0
• Injection xylocain 2% or 1% or 0.5%
• 5 cc or 10 cc disposable syringe with needle
• Gauze pieces and cotton balls 5-6
• Perineal pads -2
• Sterile water or antiseptic solution.
• For staff (plastic apron, mask, cap and high level disinfected or sterile gloves.)

254
Procedure
1. Prepare the necessary equipment
2. Tell the woman what is going to be done and encourage her to ask questions.
3. Make sure that the woman has no allergies to lignocaine or related drugs.
4. Provide emotional support and reassurance.
5. Place the woman in a dorsal position with legs flexed.
6. Put high level disinfected or sterile surgical gloves on both hands.
7. Clean the perineum with antiseptic solution e.g. betadine solution.
8. Draw 10 ml of 0.5% lignocaine into a 10 ml syringe
9. Place two fingers (index and middle) into vagina along proposed incision line .
10. Explain the woman about injection.
11. Insert needle beneath skin for 4-5 cm following same line.
12. Draw back the plunger of syringe to make sure that needle is not in a blood vessel.
- If blood is returned in syringe, remove needle, recheck position carefully and
try again.
- If no blood is withdrawn, continue as follows.
13. Inject lignocaine into vaginal mucosa, beneath skin of perineum and deeply into
perineal muscle.
14. Wait two minutes and then pinch incision site with forceps
15. If the woman feel the pinch, wait two more minute and then retest.
16. Wait to perform episiotomy until perineum is thinned out: 3-4 cm of the baby's head
is visible during a contraction.
17. Place two fingers (index and middle) between the baby's head and the perineum
a. (posterior vaginal wall).
18. Insert open blade of scissors between perineum and two fingers:
- Cut the perineum about 3-4 cm in a medio-lateral direction. Deliberate cut
should be made starting from the centre of the fourchett extending laterally
either to the right or to the left. It is directed diagonally in a straight line which
runs about 2.5cm away from the anus.
- Cut 2-3 cm up middle of posterior vagina.
19. If birth of head does not follow immediately, apply pressure to episiotomy site
between contraction using a piece of gauze to minimize bleeding
20. Control the baby's head and shoulders to avoid extension of the episiotomy.
21. Post procedure examine woman carefully for tears of the vagina, perineum, and cervix
or extension of the episiotomy incision and repair episiotomy.

255
8. PERINEAL REPAIR
Definition: The suturing of the episiotomy or tear after the complete removal of the
placenta, membrane.
Purpose
• To bring the tissues close together.
• To insure homeostasis
• Suture without tension
Types of repairing episiotomies or perineal tears are;
• Interrupted suturing
• Continuous suturing
The repair is to be done in the following order
• Vaginal mucosa and submucosal tissue.
• Perineal muscles
• Skin and subcutaneous tissues.
Procedure
1. Ask the woman to position her buttocks toward lower end of bed or table (use
a. stirrups if available).
2. Ask an assistance to direct a strong light onto the woman's perineum.
3. Drape the perineum properly with perineal sheet.
4. Apply antiseptic solution to the area around the episiotomy.
5. If the episiotomy is extended through the anal sphincter or rectal mucosa, manage as
third or fourth degree tears. Inform the doctor immediately.
6. Place the needle in the needle holder at a 900 angle. Clamp firmly, and lock.
7. Repair the vaginal mucosa.
8. Using 2-0 suture
➢ Start the repair about 1 cm above the apex (top) of the episiotomy.
Continue the suture to the level of the vaginal opening.
➢ At the opening of the vagina, bring together the cut edges of the vaginal
opening.
➢ Bring the needle under the vaginal opening and out through the incision and
tie.
9. Trim the free end suture at approximately 1 cm.
10. Close the perineal muscle using interrupted 2-0 sutures from the top of the perineal
incision downward.
11. Close the skin using interrupted (or subcuticular) 2-0 sutures to bring skin edges
together.
12.

256
12. Apply antiseptic solution to the sutured area.
13. Clean the perineal area with clean water and apply the clean perineal pad.
14. Insert your smallest finger inside the rectal sphincter. Feel for any stitches in rectum.
Gentle lift the finger and identify the sphincter. Feel for the tone or tightness of the
sphincter.
15. If it has it must be removed and re-sutured.
16. Remove the wet clothes and change the clean clothes.
17. Make the woman comfortable.
18. Place instruments in 0.5% chlorine solution for 10 minutes for decontamination.
19. Clean and disinfect all articles and return them to the proper place.
20. Place needle and syringe in a puncture proof container.
21. Remove gloves in 0.5% chlorine solution for 10 minutes to decontaminate.
22. Wash hand thoroughly with soap and water and dry with clean, dry cloth or air-dry.
23. Record the procedure accurately (type of suture, number of suture, date and time of
suture, condition of the patient.
9. PLACENTA EXAMINATION
Definition:
Examination of placenta, membranes and cord examination of placenta and membranes
should be performed to determine its normal and abnormal features.
Purpose:
• To identify any abnormality of placenta and membranes.
• To check for retro placental clot.
• To check for completeness of cotyledons and membranes.
• To check weight of placenta and measure cord length.
• To prevent post partum hemorrhage and infection.
Equipments:
• Large Kidney tray
• Placenta weighting scale
• Measuring tape
• Gloves
Procedure:
1. Put on clean gloves.
2. Hold the placenta on the palm of the hands (palms should be kept flat) with maternal
side facing upward.

257
3. Spread maternal surface of placenta over the two hands then check whether all lobules
are present and fit together. The surface is arranged in about 20 lobes which are
separated by sulci (furrows).
4. Hold the umbilical cord with one hand and allow the placenta and membrane to hang
down. Check that the membranes are complete
5. The amnion should be peeled from the chorion right up to the umbilical cord, which
allows the chorion to be fully viewed.
6. Insert the right hands between two membranes, with fingers spread out and inspect for
completeness and differentiate between two membranes.
7. Inspect cord for number of blood vessels (2 arteries and one vein), length (average
8. is about 50 cm) and cord insertion.
9. Weigh the placenta.
10. Measure the blood loss.
11. Dispose the placenta membrane in proper place.
12. Remove gloves and wash hand with soap and water.
13. Replace the articles
14. Record all findings in delivery sheet, and report to doctor if there are any abnormal
Nursing Alert:
1. Placenta should be examined by person conducting delivery.
2. Weigh retro placental clots separately if present and record
10. TRANSFER OF PATIENT FROM LABOUR ROOM TO WARD
Definition
A process of shifting patient from labour room to ward after delivery.
Purpose
• For continuous care and observation.
Procedure
1. Find out a availability of empty beds according to unit.
2. Explain the patient and relatives about transfer and handover belongings.
3. Check the following before transferring :
- Transfer order on doctors order sheet
- Postnatal prescription
- Vital signs
- PV Bleeding
- Episiotomy site if present
- Whether mother has voided or not
- If voided, fundal height checked and marked in the TPR sheet

258
- Condition of the baby , feeding , cord bleeding and completion of baby card
- Completion of labour folder and chart
Transfer mother and baby together if baby is with mother
4. Document time, condition of mother and baby, transferring notes in nurses record and
folder at the time of transfer.
5. Write name of patient, hospital number, sex of baby and ward transferred in discharge
book.
6. Report any deviation from normal immediately to 2nd on call in labour room.
7. The nurse receiving mother in ward should check for the following:
a. Name of patient
b. Tag of baby
c. Sex of baby
d. Condition or both mother and baby
e. Prescription and completion of charting
f. Postnatal order.
11. POSTNATAL EXAMINATION OF MOTHER
Definition:
• It is a systematic process of examination of mother after third stage of labour until six
weeks of puerperium.
Purpose:
• To observe the general condition of the mother.
• To detect and treat life threatening complications of mother and newborn.
• To establish breastfeeding to the baby and prevent breast complications.
• To improve mental and physical health of mother.
• To provide necessary health teaching to mother and family.
Equipments:
• Sphygmomanometer
• Thermometer
• TPR tray
• Screen
• Measuring tape
• Clean gloves
• Kidney tray
• Weight machine
• Clean swabs and gauze piece

259
• Torch
• Draw sheet
Procedure:
1. Prepare and arrange the necessary equipment on the right side of examiner.
2. Explain about the procedure and its purpose.
3. Screen the patient to maintain privacy.
4. Collect detail information about mother and baby.
5. Ask the mother to empty her bladder.
6. Wash the hands with soap and water.
7. Inspect the mother’s general appearance (happy or sad mood, sick looking, tired,
general behaviour and attitude toward the baby)
8. Take the mother’s vital signs;
a) Temperature: Elevation of temperature after delivery can occur as a result of
exertion or dehydration.
b) Pulse: Pulse rate drops slightly because of decreased cardiac effort. Any rise
of pulse may indicate excessive bleeding.
c) Blood pressure: Blood pressure is monitored routinely and as per need if
there has been any history of bleeding, hypertension during pregnancy.
9. Auscultate the chest and heart sound as needed.
10. .Assist the mother on to the examination table or bed and place a pillow under her
head and upper shoulder.
11. Ask the mother about breastfeeding e.g, position, frequency of needs, attachment on
suckling and baby’s satisfaction with feedings.
12. Examine the breast for size, symmetry and shape and palpate both breast for
engorgement, redness or nodules. The areola and nipple should be carefully examined
for cracked, retracted or flat.
13. Inspect the abdomen for distention, fundus and full bladder.
14. Palpate abdomen for distention, pain or any masses.
15. Examine abdomen for involution of uterus (measure fundal height) and firmness of
the uterus.
❖ Technique for taking fundal height
• The bladder should be empty.
• The mother should be kept in dorsal recumbent or supine position.
• Palpate abdomen from symphysis pubis and feel the uterus.
• Press the abdomen just above the uterine fundus by ulnar side of the
hand.
• Measure the length from symphysis pubis to the fundus of uterus and
record the fundal height.
16. Examine the lower extremities for signs and symptoms of thrombophlebitis, DVT and
edema.
17. Put on new or clean gloves.

260
18. Examine the vulva and perineum for suture and vulval swelling and lochia to note the
colour, amount, consistency and smell.
19. Assess any minor or major discomfort.
20. Remove the gloves and wash hand thoroughly.
21. Ask the mother about diet and sleeping pattern.
22. Ask the mother if she has any additional question.
23. Educate the mother about personal hygiene, nutrition, rest, family planning,
immunization, baby care and exclusive breastfeeding for up to 6 months.
24. Send a blood test for hemoglobin if a clinical sign of anaemia is presented.
25. After procedure, the equipment must be clean and replace it in their respective place.
26. Record all relevant findings accurately and report any abnormality to the senior or
doctor.
Remembering the postpartum examination, check eight letters spell (BUBBLEHR)
B : Breast
U : Uterus
B : Bladder
B : Bowel
L : Lochia
E : Episiotomy
H : Homans sign
E : Emotional reaction
12. PERINEAL CARE
Definition:
Cleaning the patient's genitalia and surrounding skin using antiseptic solution during or after
delivery, abortion, after an operation of the birth canal or perineum.
Purposes
• To clean the perineal area
• To reduce the chances of infection of episiotomy wound
• To stimulate circulation
• To reduce body odors and improve self- image
• To improve the feeling of well being

261
• To observe the amount, color, odour and consistency of the lochia
Equipment
• Screen
• A trolley containing
- Pericare set (Kidney tray- 1,sponge holder- 1, gauze pieces)
- Cheatle forcep with jar-1
- Sterile drum containing sterile cotton and gauzes
- Betadine solution
- Measuring tape
- Rubber sheet
- Sterile gloves
- Sanitary pad and clean panty
- Kidney tray
- Large sheet
- Peri light (if procedure is done at bedside)
- Clean gloves
- Dustbin
Procedure
1. Explain the procedure and purpose to the patient.
2. Assembly the articles to the bedside or in the treatment room
3. Ask the patient to empty her bowel and bladder and wash the perineal area before
coming for the perineal care. If the women is unable to walk, provide a bedpan.
4. Screen the bed or close the door as appropriate.
5. Place the patient in dorsal recumbent position with knees bend and drape the patient.
6. Place the mackintosh under the buttocks.
7. Wash hand and wear clean gloves
8. Uncover the perineal area
9. Remove the pad and observe the lochia for type, amount ,color and odour.
10. Discard soiled perineal pad in kidney tray
11. Examine the perineum and genitalia for the condition of stitches and swelling.
12. Massage the uterus with left hand and expel any clots.
13. Wash hand with soap and water and dry.
14. Open the sterile set and arrange articles with cheatle forcep and pour antiseptic
solution (betadine) in the kidney tray.
15. Put on sterile gloves.
16. Take the swab with sponge holder, dip in betadine and squeeze excess solution with
thumb forcep into the kidney tray.
17. With the swab, clean from urethra towards anus. Clean the area from the midline
outward in the following order until clean and discard the swab after each stroke.
Strokes are to be in the following order:

262
- Separate the vestibule with non-dominant hand and clean vestibule starting
from clitoris to fourchette.
- Inside the labia minora downward farther side then nearer side.
- Take off the non-dominant hand
- Labia majora downward farthest side then nearer side.
- Clean the episiotomy wound from center outward and outside of episiotomy
both sides.
- Clean the thigh of far side first and then near side. Clean inward to outward.
18. Dry in same manner as described for wet.
19. Clean the anus
20. Place all the used swab in kidney tray.
21. Place sanitary pad and remove the pan if kept.
22. Dry buttock area by turning mother on side.
23. Tic the pad with the underpants to hold the pad in place.
24. Remove the mackintosh and place the mother in a comfortable position
25. If needed provide perineal light for 10 minutes. Light should be kept 18 inches away
from the perineal area. The heat should be comfortable to bear.
26. Assess the level of the uterus. Place the left hand in the abdomen on the umbilical
region and palpate gently until the fundus is located.
27. Measure the height of fundus by measuring tape.
28. Explain the mother about the condition of stitch, lochia ,etc
29. Advice the mother about perineal hygiene and use clean pad.
30. Clean, decontaminate and replace the equipment.
31. Removes gloves and wash your hand with soap and water and dry.
32. Record and report of fundus height, amount , color of lochia, stitches, and appearance
of the area. If any abnormal finding should be reported to the senior or on duty officer
immediately.
13. CAESAREAN SECTION
Definition:
Caesarean section is the delivery of the baby and the placenta through an incision in
the abdominal wall and an incision in the uterine wall after 28 weeks of gestation. It
can be either planned or elective.
A. Preoperative care:
• It is a period of psychological and physical preparation of a woman before caesarean
section.
Equipments:
A trolley containing;

263
• Infusion and injection tray with pre-medication
• Kidney tray
• Mackintosh
• Cap, gown for woman
• Shaving set (if necessary)
• Betadine solution
• Foley catheter according to order
Procedure:
1. Explain the reason for caesarean section to the patient and patient`s family.
2. Take the written consent.
3. Assist the woman and her family to prepare emotionally and psychologically for the
procedure
4. Estimation of the Hb, grouping, cross- match must be done and keep blood ready.
5. Give a soap water enema or ezivac enema as per doctor`s instruction.
6. Shave or trim and clean the anterior abdominal wall and the mons pubis with soap and
water.
7. Remove all jewellery and make sure that the patient hand over all her jewellery to her
relatives.
8. Monitor and record vital signs.
9. Fetal heart rate should continue to be assessed until the operation begins.
10. Give preoperative antibiotic according to doctor`s instruction in cases of premature
rupture of membranes, prolonged labour and trial or failed forceps.
11. Give preoperative perinorm and ranitidine if it is an emergency section, to reduce the
risk of gastric content aspiration.
12. Change into a loose and clean cotton gown.
13. Cover hair with a cap.
14. Start intravenous infusion (Ringer`s lactate or Normal saline) at rate appropriate for
the woman`s condition.
15. Insert a Foley`s catheter to keep bladder empty and monitor urine output.
16. Attach all the investigation and report to the patient`s chart.
17. Recheck the following : consent, laboratory investigations, jewellery removed,
surgical preparation done, vital signs taken, premedication given on time, patient is on
operation room cloth.
18. Send woman to the operation room and handover.
B. Postoperative care
Definition:
Postoperative care is from the time when the patient leaves the operating theatre, to the time
when the patient leaves the hospital.
Equipments required in post operative period:
• Post operative bed with side rails. B.P instrument with stethoscope

264
• Airway
• Tongue depressor
• Oxygen cylinder set
• Suction machine with suction catheter set
• IV stand Torchlight
• Emergency drug
Procedure
In recovery room:
1. Place woman in the recovery room.
2. Proper positioning of the woman on her side with her head.
3. Suctioning secretion from the throat as and when necessary.
4. Assess the woman's condition:
- Check vital signs every 15 minutes during the first hour or until stable, then
every 30 minutes for the next hour.
- Assess the level of consciousness every 15 minutes until the woman is alert.
- Assess the fundus and the amount of lochia.
- Assess the condition of the incision dressing.
5. Preventing the patient from falling out of bed by the use of bedsides rails.
6. Maintain intake and output chart.
7. Medication according to doctor's order. Note the amount, route, and time.
8. Blood transfuse if necessary.
9. Breast-feeding can be initiated if the mother feels like trying.
10. Maintaining record of observation made and the nursing care and treatment
performed.
11. Woman transferred to the post operative unit after 1 to 2 hours, once her condition is
stable and the effect of anesthesia have worn off (e.g. alert, oriented, moving all
extremities).
Care In the first 24 hours:
• Receive and transfer woman in warm comfortable bed without touching the operated
site.
• Position the woman should lie with face turned to one side.
• Check vital signs every 30 minutes but the frequency reduced to every 2-4 hours
depending upon the improvement in the condition of woman.
• Watch the dressing for the soakage.
• Watch the bleeding per vagina.
• Give 2 liters of IV fluids as an average in first 24 hours (according to doctor order).
Record type of fluid, rate and amount in a given period of time.
• Maintain intake and output chart. Give analgesics as prescribed (at least for the first
24 hours).
• Give antibiotics according to the doctor's instruction.
• Transfuse blood if necessary according to doctor's instruction.

265
• If the urine is clear, remove the catheter 8 hours after surgery or after the first
postoperative night (as per doctor’s order).
• Ambulation on the first postoperative day.
• Encourage deep breathing and foot and leg exercise and mobilizeas soon as possible,
usually within 24 hours.
• Help to the woman for breast-feeding.
• Record and report.
Care after the first 24 hours:
• Oral fluid, usually warm plain water is given 24 hours after theoperation followed by
tea, fruit juices, and clear soup. Follow withsoft biscuits, and semi solids when the
woman is passing gas.
• Intravenous fluids should be continued until she is taking liquids well.
• Explain postoperative procedure to the woman.
• Help the woman to change the position.
• Encourage bladder and bowel movement.
• Ambulation, in the beginning mother may need support. Later on she could walk
slowly by herself.
• Encourage deep breathing exercise.
• Watch for wound soakage, if soaked changed the dressing usingsterile technique.
• Daily care includes perineal care, and routine hygiene care.
• Encourage mother to breast-feed her baby.
• Assess the woman's vital sign, fundus and lochia.
• Advice at the time of discharge in following:
- Explain to the patient why the operation was done.
- Need for hospital care during subsequent pregnancy anddelivery.
- Avoid heavy or hard work for 3-4 month.
- Use suitable contraceptive after 6 week of delivery.
- Checkup according to doctor's instruction (usually 7 day after discharge and 6
weeks the date of delivery).
- Come for follow up if any wound infection pain and other complication
arises.
- Explain the immunization schedule for the baby.
- Give information about diet, exercise, activity, breast care, sexual activity,
medication, infant care, self-care and sign of complication.

266
14. ADMINISTRATION OF MAGNESIUM SULPHATE ON SEVERE PRE-
ECLAMPSIA AND ECLAMPSIA
Action/ Pharmacodynamics Of Magnesium Sulphate:
- Magnesium Sulphate reduces motor end plate sensitivity to acetylcholine and thereby
reduces neuromuscular irritability. Magnesium blocks neural calcium influx also. It
induces vasodilation, dilates uterine arteries, increases production of endothelial
prostacylin and inhibits platelets activation. It has no detrimental effect on neonate
within therapeutic level
Purpose:
- Prevention and control of seizures in pre- eclampsia and eclampsia.
Equipment:
A tray containing
• Injection Mgso4
• 5 ml,10ml ,20 ml syringe
• 2% xylocaine
• Inj. Calcium gluconate
• Distil water
• Knee hammer
• Vital tray
PROCEDURE:
Administrating Loading Dose of Magnesium Sulphate
1. Wash hand thoroughly with soap and water and dry with a clean, dry cloth orair dry.
2. Tell the woman that she may experience a feeling of warmth when magnesium
Sulphate is given.
3. Draw up 4 grams of Magnesium Sulphate 50% and dissolve with 12ml distilled water
to make 20% solution (20 ml)
4. Give by IV injection SLOWLY over 5 minutes.
5. Take 10ml syringe and draw up 2% lignocaine 1 ml and 5gm of Magnesium Sulphate
50% solution.
6. Take another 10ml syringe and draw up 2% lignocaine 1 ml and 5 gm of Sulphate
50% solution.
7. Give 5/5 grams by DEEP IM injection in each buttock.
8. Place needle and syringe in puncture proof container.
9. Wash hand thoroughly with soap and water and dry with a clean, dry cloth orair dry.
10. If convulsion recur AFTER 15 minutes:

267
• Draw up 2grams of Magnesium Sulphate 50% solution (4 ml).
• Give IV injection SLOWLY over 5 minutes.
Administrating maintenance Dose of Magnesium Sulphate
1. Take another 10 ml syringe and draw up 2% Lignocaine 1 ml and 5 gm Magnesium Sulphate
50% solution.
2. Give 5 grams of Magnesium Sulphate 50% solution, together with 1 ml o 2% lignocaine in
the same syringe, by DEEP IM injection into alternate buttocks (every 4 hours).
• Continue Magnesium Sulphate for 24 hours following birth or the most recent
convulsion which occurs last.
- Before repeat administration check that:
• Respiratory rate is at least 16 per minutes
• Patellar reflexes are present
• Urinary output is at least 30 ml per hour over 4 hours
WITHHOLD or DELAY drug if:
• Respiratory rate falls below 16 breaths per minutes
• Patellar reflexes are absent
• Urinary output falls below 30 ml per hour over the preceeding 4 hours
- If respiratory arrest occurs:
• Assist ventilation
• Give antidote Calcium Gluconate1 gm (10 ml of 10% solution)by IV injection.
SLOWLY until respiration begins.
- Continuously Monitoring for Toxicity
- Record drug administration and findings on the woman’s record.
15. CONDOM TEMPONADE
Definition: It is one of the effective method used in the management of postpartum
haemorrhage.
Purpose
- To control postpartum hemorrhage
Equipment
- Insertion
• Condom- 1
• Foley’ catheter- 1
• I/V set- 1
• Thread (suture)- 2
• Syringe (50cc)- 1
• Kidney Tray-1

268
• Sponge Holder-1
• Sims speculum-1
• NS- 1
- Removal
• Sponge holder- 1
• Syringe (50cc)- 1
• Scissor- 1
• Kidney Tray-1
Procedure
Preparation
1. Prepare the necessary equipment.
2. Tell the woman (and her support person) what is going to be done, listen to her and
respond attentively to her questions and concerns.
3. Provide continual emotional support and reassurance, as feasible.
4. Ensure the bladder is empty, catheterize it if necessary
5. Maintain privacy
6. Put on protective barriers.
Insertion
1. Wash hand and forearm thoroughly and put on high- level disinfected or sterile
surgical gloves (use elbow-length gloves, if available).
2. Place condom over the Foley catheter leaving a small portion of the condom beyond
the tip of catheter.
3. Using a sterile suture or a string, tie the lower end of the condom on the Foley
catheter. Tie should be tight enough to prevent leakage of saline solution but should
not strangulate catheter and prevent inflow of water.
4. Place a Sims speculum in the posterior vaginal wall. Hold the anterior lip of cervix
with the sponge or ring forceps. Using an aseptic technique place the condom end
high into uterine cavity by digital manipulation or with the aid of forceps.
5. Connect outlet of Foley catheter to I/V set connected to a saline bag or bottle of
saline. Inflate condom with saline to about 300-500 ml (or to amount at which no
further bleeding is observed).
6. Fold over the end of the catheter and tie with a thread or a cord clamp when desired
volume is achieved and bleeding is controlled
7. Maintain in-situ for 12-24 hours if bleeding controlled and client is stable.
8. Continue uteronic infusion : 20IU oxytocin in1000ml saline solution, 60 drops/
minutes
9. Continue to monitor client closely, resuscitate and /or treat necessary
10. If bleeding is controlled within 15 minutes of initial insertion of condom tamponade
abandon the procedure and seek surgical intervention immediately.

269
Deflation
1. When no further bleeding has occurred and the client has been stable for at least 12 to
24 hours slowly deflate condom by letting out 50-100 ml of saline every hour.
2. Re –inflate to previous level if bleeding reoccurs while deflating.
3. Cord catheter while deflating.
Post Procedure Tasks
• Remove gloves and discard in the container or plastic bag.
• Wash hand thoroughly
• Regular monitor vaginal bleeding, take the woman’s vital signs and make sure that
the uterus firmly contracted
• Recording and reporting.
16. BREAST CARE
Definition: Breast care is the process of cleaning the breast of mother that helps in
maintaining hygiene and prevent from cross infection during feeding.
Purpose
• To teach the mother about how to clean the breast and nipples.
• Prevent from breast and nipple disorder during puerperium.
• To stimulate blood circulation on the breast.
• To give health teaching about diet, personal hygiene, how to care baby etc.
• To prevent from infection
Equipments
A tray containing
• Bowl of cotton swabs
• Sponge cloths
• Towel
• Kidney tray
• Small mackintosh
• One basin with luke warm water
• Jug
• Screen.
• Gauze pieces
Procedure
1. Prepare all the articles
2. Explain the procedure to the woman.
3. Take articles to the bedside.
4. Make the woman sit facing towards you to facilitate comfort and care while carry out
procedure.

270
5. Maintain privacy by screening the bed.
6. Expose the breast.
7. Examine the both breast by inspection and palpation.
8. Place the mackintosh and towel under the breasts.
9. Pour water in the breasts, first clean the far side breast from midwife.
10. Wash the breast with sponge by using lukewarm water.
11. Clean the nipples and remove all the plugs with plain cotton swabs and prevent
blockage of the ducts.
12. Check for cracked nipple or engorgement of the breast.
13. If there is any engorgement, lift up the breast with one hand and grasp the areola and
compress the area with deep inward movement and express the milk till the breast is
soft.
14. Give cold compress to promote comfort and relieve the pain due to engorgement.
15. Dry the breast with towel and put the baby on the breast.
16. Clean the breasts with wet clothes after feeding and leave small amount of milk on
nipple and dry on air to prevent cracked nipple.
17. Advice her to wear supportive brassier to prevent over stretching of the tissue.
18. Make the mother and child comfortable.
19. After cleaning them, replace all articles in their respective place.
20. Record if there are any abnormalities,
17. INVERTED OR FLAT NIPPLE CARE
Definition: Care given to a mother with flat or inverted nipples.
Purpose • To assist the mother and baby for successful breastfeeding.
Equipments:
• 10 ml disposable syringe (cut the base of the syringe at the needle end)
• Small clean bowl or glass
Procedure:
1. Explain the need for breast care during breastfeeding.
2. Maintain the mother's privacy.
3. Have the mother roll her nipple between her fingers slowly to make her nipple erect
Follow the procedure to help in breastfeeding The sucking of the baby will naturally draw
out the nipple. After the feeding, suction may be used to further draw out the nipple.
Suctioning of the nipples:
• Take the syringe piston out and put it in the cut side.
• Place the top of the syringe over the nipple and pull the piston very slowly creating suction.

271
• If milk is secreted inside the syringe, put it in a sterile bowl or glass.
• Repeat the procedure
If the baby is ready to be breastfed, breastfeed the baby.
Points to be remembered
a) Do not continue suctioning if the mother complains of pain.
b) If the nipple is cracked and bleeding there is a risk of introducing infection to the baby
therefore. DO NOT perform this procedure.
18. ENGORGED BREAST CARE
Definition:
Breast engorgement is a condition in which the breast becomes extremely painful and
tender due to fullness. The skin on the breast appears shiny. It usually occurs due to
collection of milk in the breasts because of improper and inadequate breast feeding.
Purpose of care:
• To prevent breast engorgement
• To reduce the discomfort caused by breast engorgement
• To prevent complications of breast engorgement
Procedure:
1. Perform preliminary assessment
• Check the extent of engorgement, size, colour and tenderness.
• Identify the breast engorgement in the early period itself.
• Find out the feeding habit of the baby
• Make sure that the mother is following correct technique of breast feeding.
2. Explain to the women that breast engorgement is normal when the milk starts to
come in around 2-3 days after birth, it should get better with time.
3. If the women is breastfeeding and the baby is not able to suckle, encourage the
women to express milk by hand
4. If the women is breastfeeding and the baby is able to suckle
➢ Encourage the women to breastfeed more frequently, using both breasts at
each feeding.
➢ Show the women how to hold the baby and help it attach.
➢ Relief measures before feeding may include:
• Apply warm compresses (5-10 minutes)to the breast just before
breastfeeding or encourage the woman to take a warm shower. Gently
message the breast to allow milk to flow more easily.
• Massage the woman's neck and back.
• Have the woman express some milk manually before breastfeeding and
wet the nipple area to help the baby latch on properly and easily.

272
➢ Breastfeed often, at least every 2-3 hours (demand feed).
➢ At each feed, empty the first breast before offering the other breast to the baby.
➢ If the breasts still feel full after a breast feed, encourage the baby to feed longer or
express breast milk for a few minutes (until the breasts feel softer).
➢ Relief measures after feeding may include:
o Support breasts with a breast binder or brassiere (avoid tight fitting bra) which
can press on a duct and cause it to block.
o Apply cold compress to the breasts between feedings to reduce swelling and
pain.
o Give oral analgesics as prescribed, may be taken 30 minutes before
breastfeeding if prescribed.
19.POSTNATAL EXERCISE
Definition: A series of physical exercise that are performed by the postnatal mother to bring
about optimal function of all systems and prevent complications.
Purposes:
• To improve the tone muscles which are stretched during pregnancy and labour
specially the abdominal and perineal muscles .
• To educate the mother about correct posture and mechanics.
• To minimize the risk or puerperal venous thrombosis by promoting circulation and
preventing venous stasis.
• To prevent backache , genital prolapsed and stress incontinence of urine
Procedure
Teach exercise in the early postpartum period to strength the abdominal muscles and firm the
waist. The exercise can be started soon after childbirth and repeated up to five times a day, at
first. The number of exercises is gradually increased as the mother gains strength.
Firstly explain the procedure to the mother and maintain privacy
1. Abdominal exercises:
a. Abdominal breathing (for strengthening the diaphragm): This exercise can be
started within a few days after childbirth.
Instruct mother to:
• Assume a supine position with knees bent.
• Inhale through the nose, keep the rib cage as stationary as possible, and allow the
abdomen to expand and then contract the abdominal muscles as she exhales
slowly through the mouth.

273
• Place one hand on the chest and one on the abdomen when inhaling. The hand on
the abdomen should rise and the hand on the chest should remain stationary.
• Repeat the exercise five times
b. Head lift (for strengthening the abdominal muscles):This exercise can be started
within a few day after childbirth
Instruct mother to:
• Lie supine with knees bent and arms out stretched at her side at first
• Then instruct her to inhale deeply at first and then exhale while lifting the heads
slowly, to hold the position for 10 second and relax.
• Rep eat for 10 times
c. Head and shoulder raising (for strengthening abdominal muscles):
Instruct mother to :
• On the 2nd postpartum day, instruct mother to :- lie flat without pillow and raise
head until the chin touches the chest.
• On the 3rd postpartum day, instruct mother to :- raise both head and shoulder of
the bed and lower them slowly.
• Gradually increase the number of repetitions until she is able to do this for 10
times
d. Leg raising (this exercise can be started on the 7th postpartum day)
Instruct mother to :
• Lie down on the floor with no pillows under the head, point toe and slowly raise
one leg keeping the knee straight.
• Lower the leg slowly
• Gradually increase to 10 times each leg
e. Pelvic tilting or rocking (will help tone and strengthening abdominal muscles and
relief backache)
Instruct mother to :
• Lie flat on the floor with knees bent
• Tightening her stomach and buttock muscles to tilt her pelvis
• Flatten the small of her back against her floor and hold for a count of 2-3 seconds.
• Increase gradually to a count of 10.
• Relax and exhale.
• Repeat 3-5 times.
f. Leg sliding/stretches
Instruct mother to:
• Lie on her back with one knee bent
• Keep her back flat while sliding the heel of the straight leg up and down the
surface on which she is lying.

274
• Work only within the range where she can keep her back flat.
• Repeat 3-5 times with each leg
g. Abdominal tightening
Instruct mother to :
• Sit comfortably or kneel on all fours .
• Breathe in and out then pull in the lower part of the abdomen below the umbilical
while continuing to breathe normally
• Hold for upto 10 seconds and repeat upto 10 times
2. Circulatory exercise
This exercise must be performed very frequently in the immediate postnatal period to
improve circulation, to reduce edema and to prevent deep vein thrombosis.
a. Foot and leg exercises:
Instruct mother to :
• Sit or half lie with legs supported
• Bend and stretched the ankles at least 12 times.
• Circle both feet at the ankle at least 20 times in each direction
• Brace both knees , hold for the count of 4 , then relax
• Repeat 10 times
3. Kegal exercise (pelvic floor exercise)
Kegal exercise strengthening the muscle of the pelvic floor. These muscles are weakened by
the birth process and should be exercised right after birth. However, it may be hard to do
these exercises soon after delivery. Instruct to do as many as mother can, and the tone will
slowly return.
Instruct mother to:
• May be done lying down ,sitting or standing
• Instruct her to close and draw up around the anal passages as though preventing a
bowel action then repeat for front passages (vaginal and urethra) as if to stop the flow
of urine in mid-stream.
• Hold the contraction for 10 seconds
• This is repeated up to 10 times
• Continue to do this exercise for 2-3 months
• Don’t be discouraged if these are hard to do at first. They will become easier with
practice.
• After 3 months if the mother is able cough deeply with full bladder with leaking urine,
she may stop the exercise
• If leaking occurs, she may continue the exercise for the rest of her life.

275
NEONATAL NURSING PROCEDURE
1. IMMEDIATE CARE OF A NEW BORN
Definition:
Provision of care to a baby soon after delivery,
Purpose:
• To keep baby clean and warm.
• To clear air passage and facilitate breathing.
• To assess condition of new born.
• To observe for any external anomalies.
Equipment Required:
• Suction machine/vacuum or mucous socker
• Radiant warmer
• Cord clamp
• Sterile cotton balls
• Sterile cord cutting scissors
• Measuring tape
• Thermometer
• Baby clothes with cap
• Baby wrapper
• Identification tag
Procedure:
1. Clear mouth and nose as soon as head is born.
2. Receive baby in a clean and warm sheet:
3. Assess condition of newborn
4. Place baby under radiant warmer comfortably.
5. Dry baby well, remove wet sheet, and mummify baby with a clean warm sheet
6. Assess breathing and color.
7. Decide if the baby needs resuscitation.
8. Tie and cut cord according to guidelines
a. Tie 1: Tie 2 finger from the baby's abdomen.
b. Tie 2: Tie 3 fingers from the baby's abdomen.

276
c. Tie3: Tie 4 fingers from the baby's abdomen.
i. If use holister cord clamp, clamp three finger from the baby's abdomen. Clamp
2nd with artery forceps or ties with thread 4 fingers from the baby’s abdomen.
ii. If use artery forceps, clamp 3 fingers from the baby's abdomen clamp 2 with
artery forceps 4 fingers from the baby's abdomen.
9. Give the baby to the mother to keep warm.
10. Put identification tag which has mother's name and hospital number on wrist of
11. Help the mother breast feeding.
12. Give eye care.
13. Quickly examine the newborn (head to toe) for any deviations or abnormality.
14. Dress the baby.
15. Weigh the baby and wrap properly.
16. Replace equipment and leave the baby care area clean and tidy.
17. Wash hands.
18. Document the procedure and report any abnormalities present to ward sister and inform
neonatologist.
Alert:
• The emergency equipment for neonatal resuscitation should be kept ready always in
neonatal area.
• Stimulate baby by rubbing the back in case of maternal sedation.
• Do not stimulate baby by rubbing back or sucking nose and avoid bagging baby if
amniotic fluid is meconium stained.
• If there is any deviation from normal, neonatologist should be informed. If mother has
diabetes mellitus and on insulin, and if baby's weight is less than 2.5kgs or more than
4kg transfer to nursery. 2. NEWBORN EXAMINATION
Definition:
This is a process of examining the newborn baby from head to toe.
Purpose:
• To detect major and minor neonatal health problems.
• To identify birth defects and birth injuries
• To plan care for the baby

277
Equipments Required:
A tray containing:
- Thermometer set
- Stethoscope
- Measuring tape
- Weighing scale
- Torch light
- Spirit swab Napkin
- Kidney tray
- Baby's chart or card
- Pen
General Consideration:
1. Prepare the room for safety, comfort (room temperature shouldn't be less than 28 F
switch off the fan).
2. Breast feed the baby adequately before examination.
3. Take the brief related history i.e. antenatal, natal and postnatal.
Procedure:
1. Explain the mother about the procedure.
2. Prepare necessary equipment
3. Wash hands and dry..
4. Record vital signs.
5. Undress the baby and assess general condition (activity, movement, seizures, and twitching
muscle) of baby.
6. Assess color and condition of skin.
7. Measure head and chest circumference
8. Measure height (Crown-rump) and weight correctly
9. Examine head for shape size, fontanella and sutures caput, moulding, haematoma.
10. Examine eyes for color, jaundice, edema, discharge and hemorrhage
11. Examine ears for location, structure, discharge, cartilage.
12. Examine nose for structure, septum, discharge and nasal fares.
13. Examine mouth for cleft palate and cleft lip, decidual teeth, oral thrush, tongue tie and
protruded tongue.
14. Observe face for any abnormalities or injury
15. Examine neck for any abnormalities including clavicle fractures.
16. Inspect chest for any abnormality, injuries and assess heart sound/lungs sound
17. Inspect abdomen for distension, any other abnormalities and condition of the card. 18.
Examine limbs for movements, dislocations, fractures, paralysis, extra digits, and range of
motion.

278
19. Examine genitalia for congenital hydrocele, urethral opening, and absence of testes in
scrotum in male baby. For female baby exposure of labia minora, pseudomenstruation, hymen,
vesico vaginal fistula, absence of vagina.
20. Inspect back for structure, depression of vertebra, spina bifida, meningocele and
meningomyelocele.
21. Check rectum for patency, passage of meconium.
22. Check reflexes (rooting, sucking, grasping, walking and Moro reflexes).
23. Dress the baby.
24. Explain mother about your findings in simple and understandable language.
25. Advise mother as per need.
26. Ensure comfort of mother and baby before leaving them.
27. Replace all equipment after proper care.
28. Wash hands.
29. Record all findings in the chart accurately and report if any abnormality noted.
3. APGAR SCORE
Definition: APGAR score is numeric expression of the condition of a new born obtained by
rapid assessment at 1 and 5 minute of age. Apgar scoring system is used to assess the initial
condition of the neonate .
Purpose:
• To assess the effectiveness of resuscitative effort.
• To assess general condition of baby after birth.
APGAR score is assessed by observing the 5 areas or five signs (heart rate, respiratory effort,
muscle tone, reflex irritability and colour). A score of 0, 1, or 2 is awarded to each of the
signs in accordance with the guidelines in table. Each area has maximum score of 2 and
minimum of 0.

279
• The total score (maximum) is 10.
Assess the components of the Apgar score:
• Heart rate is auscultated with the stethoscope or the umbilical cordis palpated
at its junction with the skin.
• Respiration effort is assessed by listening for breath sounds with the
stethoscope or by observing the chest movements.
• Colour assessment of the skin colour may be difficult due to the severe
bruising or dark pigmentation. Looking at the mucus membranes of mouth may
be helpful, bluish colour indicating cyanosis and pinkish appearance normal
oxygenation.
• Muscle tone reflects the degree of flexion and the amount of resistance to
straightening of the extremities. Normally the term infant is well flexed at
elbows and hips resisting the extension of the extremities.
• Reflex irritability is a reflection of the infant's response to flicking of the sole
of the foot or to the insertion of a nasal catheter. (Following suctioning of the
mouth).

280
Suggested implication of the following APGAR score at one minute:
• 8 to 10: on asphyxia
• 5 to 7: mild asphyxia
• 3 to 4: moderate asphyxia.
• 0 to 2: severe asphyxia
4. ASSISTING WITH BREASTFEEDING
Definition:
Assisting mother to feed baby at breast by using appropriate technique.
Purpose:
• To assist mother to breastfeed her baby.
• To educate mother on importance of breastfeeding and its technique.
• To create positive attitude towards breastfeeding.
• To help baby receive all benefits of breastmilk.
Equipments:
• Bowl with lukewarm water
• Tray with a gauze or sponge towel
• Kidney tray
Procedure:
• Explain the importance of breastfeeding and each step as you do it, so the mother can
do it herself.
• Make sure mother has taken a bath and washed her hands before feeds.
• Assist in cleaning her breast if necessary
• With a gauze piece/ clean cloth first clean nipple area then clean breast with lukewarm
water in a circular motion.
• Clean one breast at a time.
• Change baby’s soiled linens before feed.
• Help the mother and baby into a comfortable position. The mother can take any
position that is comfortable for her and her baby. She could sit down or lie down. If
she desired, use pillow or folded blankets under her head if she is lying down or under
her arm if she is sitting.
• Look for good positioning and assist the mother of baby’s positioning if needed;
- Baby’s head and body straight
- Baby’s body turned toward the mother, nose opposite the nipple
- Baby’s body touching mother abdomen
- Baby’s whole body well supported, not just neck or shoulder.

281
- Look and assist the mother positions to hold the baby during breastfeed. Use
different positions to hold the baby is following :
Cradle position: (Common position)
Mother sits in a comfortable chair or bed and lays the baby on her side across her lap, facing
her. She supports the baby’s head in the bend of her elbow and the back and buttocks with her
forearm. Place pillows under elbow to decrease tension and fatigue.
Side-lying position
Both the mother and baby lie on their sides facing each other. The mother may use either her
hand or forearm or pillow behind the baby's back to support him, positioning baby's head at
her lower breast. This position useful for night feeding or when mother had a caesarean
delivery.
Football hold position or under arm hold
This position is the most comfortable position if mother have large breasts, if the infant is very
small or premature or if mother have had a caesarean delivery. Sit in a bed or chair with pillow
under mother arm on the feeding side.
Cross cradle hold position
This position is almost like the cradle hold position but the mother uses her other arm to hold
the baby. The baby’s head is held by the mother’s open hand. This position makes it easy to
move the baby to the breast.

282
• Help the baby attach to the breast Ask mother to hold her breast in a “c" hold
(thumb on top and other fingers below the breast) with her finger away from
the areola. Tell the attachment is good:
❖ Baby's chin is touching the breast.
❖ Baby's mouth is wide open.
❖ Baby's lower lip is turned outward.
❖ Upper areola more visible than the lower areola.
• Tell the sucking is good. If there are slow deep sucks with somepauses.
• If the baby is not attached or sucking well, take the baby off the breast and try
again
• Let baby suck as long as he wants or until he releases the breast Use both
breasts.
• The baby should finish emptying one breast to get before starting on the second
breast

283
5. MANNUAL EXPRESSION OF MILK
Purpose:
• To express breast milk when unable to nurse infant, to relive engorgement, and to
stimulate milk production.
Equipment:
• Sterile wide necked jug, bowl or cup
• Well-fitting lid or cover
• Towel
• Plastic bottle
• Pot with lid
Procedure:
1. Adhere to universal precaution
2. Explain the procedure to mother when she needs to express breast milk and how to boil
a cup at home to collect the express breast milk.
3. Find a private place where the mother can relax near to her baby.
4. Wash hand thoroughly with soap and water, dry with a clean dry cloth and instruct
mother on importance of washing hands before expressing milk.
5. Put on clean gloves if available but mother does not need gloves
6. Explain to the mother how to stimulate the let- down reflex (Oxytocin reflex).

284
• Sit comfortable
• Hold the baby skin to skin if possible.
• Put clean warm wet clothes on the breast for 5 minutes to help open milk tubes,
if needed.
• Show the mother how to massage her breast from the outside towards the
nipple to help bring milk down.
• Have a cup or container near with wide opening that was boiled.
7. Teach the mother about how to express milk:
• Use flattened hand to exert gentle pressure in a circular motion on the breast starting at
the chest wall and spiraling around the breast toward the areola. Use palms of hands,
not fingers, for firm pressure. The warm compresses and breast massage should help
stimulate “let down”.
• Hold the breast in a “C” hold (Thumb on top and other fingers below the breast),
• Position thumb pad 1” inches behind the nipple and finger.
• Lean slightly forward so that milk will go into the container.
• Squeeze thumb and other fingers together.
• Press and release. Try using the same rhythm as the baby sucking.
- Be patient, even if no milk comes at beginning.
- Express the milk from one breast for at least 3-5 minutes until the flow slow, then
express from the other breast, and then repeat from both breasts.
- Explain expressing milk can take 30 minutes or longer in the beginning.
- After expressing breast milk, the mother can feed it to the baby right away or save it
for later. Fresh breast milk has the highest quality.
- Put a lid on the bowl or cup, label it and storing if the baby is not fed immediately.
Milk storage:
• Room temperature:
✓ 19-22 degree centigrade for 10 hours
✓ 26 degree centigrade for 6 hours
✓ If it is hotter than 26 degree centigrade, only 1-2 hours
• Refrigerator
✓ At 0-4 degree centigrade for 24-48 hours.
• Freezer
✓ If the freezer is inside a refrigerator, upto 2 weeks. In a separate deep freezer at 18
degree centigrade upto 3 months.
- Instruct mother to date each bottle or plastic liner. Use the oldest milk first.
- Do not re- freeze breast milk.
- Do not save milk from used bottle for use at another feeding.
After Care:
- Instruct the patient in the procedure and proper storage of breast milk.
- Document in patient’s record:
• Condition of nipples, amount of breast milk pumped, and ease of procedure
• Instructions given to patient
• Patient’s ability to express milk

285
6. DAILY CARE OF THE NEWBORN
Definition: The process of providing care of newborn baby daily.
Purpose:
• To ensure wellness of the newborn.
• To observe any deviation from normal and immediate intervention.
Equipments:
A tray containing
➢ Thermometer set
➢ Stethoscope
➢ Watch
➢ Sprit swab
➢ Bowel with warm water
➢ Gauze pieces
➢ Kidney tray
Procedure
1. Explain the mother about procedure.
2. Assemble the articles.
3. Wash hands.
4. Check the vitals (baby should be calm).
5. Ask the mother about baby's feeding pattern.
6. Ask the mother about elimination.
7. Undress the baby.
8. Observe face, abdomen including whole body for color, texture, distension.
9. Observe umbilical stump for cord bleeding and signs of infection.
10.Clean the face with warm soaked gauze piece followed by fold of neck, back of the
earlobes, axilla, groin and genitals
11. Dress the baby with clean and pre-warmed clothes.
12. Replace the articles.
13. Wash hands.
14. Recording and reporting.
7. CARE OF THE UMBILICAL CORD
Definition:
It is the cord that connects the developing fetus with the placenta while the fetus is in the
uterus. It carries oxygenated blood and nutrients from the placenta to the fetus through the
abdomen, where the navel forms. It also carries deoxygenated blood and waste products from
the fetus to the placenta.

286
Purpose:
• To prevent infection of umbilical stump site.
• To treat infected umbilical cord.
Equipments:
• Sterile cotton swab
• Boiled water
• Gloves
Procedure:
1. Adhere to Universal Precautions.
2. Assemble required articles.
3. Expose the umbilical cord and inspect for any bleeding or signs of infection.
4. Wipe base of cord or stump site with boiled soaked cotton swabs.
5. Once stump has fallen off wash umbilical area gently during normal bath, dry
thoroughly.
8. EYE CARE
Definition:
Eye care of newborn means proper cleaning of eyes of the baby by following strict aseptic
technique.
Purpose:
•To keep the eye clean by removing discharges
•To prevent from infection
Equipments:
A tray containing:
•Sterile bowl containing cotton balls
•Normal saline
•Sterile thumb forceps
•kidney tray
•Ointment if required
Procedure:
1.Prepare the necessary equipments
2.Explain the procedure to the mother and let her hold the baby.
3.The environment should be comfortable for the baby.
4.There should be adequate lighting for observation.

287
5.Wash hand thoroughly with soap and water and dry.
6.Ask assistant to open the tray
7.Using thumb forceps take out one cotton ball and dip the edge of that in the saline.
8.Squeeze out extra saline from the swabs.
9.For cleaning, use the other area of the cotton which is not touched by the fingers.
10.Gently wipe the leads of the left eye from inner to the outer canthus without applying any
pressure on the eye ball. While cleaning eye, support the forehead to prevent movement of
head, using lower portion of your palm.
11.Use one swab for one swabbing only.
12.Repeat the procedure on other eye.
Note: For crusted secretions place wet, warm cotton swab over closed eye and leave it in place
until the crust softens.
13.Apply ointment if required in the following way:
14.Place the thumb below the lower eyelid and the four fingers above the upper eyelid and
gently open the eye.
15.Apply a small amount of ointment to the inside corner out, taking care not to contaminate
the tip of tube of lubricants.
16.Repeat the procedure on the other eye.
17.Wipe off excess ointment from each eye with separate swab or clean cloth.
18.Wash hand thoroughly with soap and water and dry.
19.Take all articles to the utility room.
20.Record the procedure on chart.
9. KANGAROO MOTHER CARE
Definition: Kangaroo mother care is a method of keeping the baby warm through continuous
skin to skin contact in a vertical position between mothers breast or against the father’s chest
for a non- specific period of time. KMC is universally available, a simple inexpensive and
biologically sound method of care for low Birth Weight infants. The method was first
introduced in Bogota Columbia in the late 1970s.
Purposes
• To provide skin to skin care to the LBW baby.
• To assist in maintaining temperature of infant.
• To facilitate breast feeding.
• To help to increase duration of breast feeding
• To improve mother infant bonding.
Procedure
1. Explain to the mother and family why preterm babies need KMC.
2. Explain the benefits of KMC.
3. Start KMC as soon after birth as possible.

288
4. Place the baby between the mother’s breasts with the baby’s feet below the mother’s
breasts and the baby’s hand above. The mother and baby should be chest to chest with
the baby’s head turn to one side.
5. The hip should be flexed and abducted in a “FROG” position, the arm should also flex.
6. Baby’s abdomen should be at the level of the mother’s epigastrium. Mother’s
breathing stimulates the baby, thus reducing the occurrence of apnea.
7. Put a cloth between the baby’s leg to collect feces and urine.
8. Use a long piece of cloth.
9. Place the center of a long cloth over the baby on the mother’s chest.
10. Wrap both ends of the cloth firmly around the mother, under her arms, to her back.
11. Cross the cloth ends behind the mother and tie the ends of the cloth in a secure knot.
12. If the cloth is long, bring both ends of the cloth to front and tie the ends of the cloth in
a knot under the baby.
13. The wrap should not be so tight that it constricts the baby. Leave room for the baby’s
abdominal breathing.
14. Encourage the baby to suckle at breast as often as he wants, but at least once in every 2
hours.
15. Mother should sleep propped up so that the baby stays upright; mother can stand/walk
if baby is secured properly.
16. Make sure that baby’s trunk, palms and feet are warm to touch.
17. Wash and dry hands.
Note:
- To breastfeed, loosen cloth and feed baby on demand, at least every 2 hours.
- To sleep, the mother should keep her upper body raised some (about 30 degrees) to
keep the baby in a head up position.
- Mother should be involved in observing (breathing, color, temperature) the baby
during KMC.
- Use KMC continuously.
- Another family member (father, grand- mother, aunty) may do the skin- to – skin
contact for short periods of time.
- Continue KMC until the baby weights at least 2500 grams.
10. BABY BATH
Definition: Baby bath means giving a bath to the newborn or other baby. It allows cleansing
and observation as well as promotes comfort.
Purposes:
• To provide comfort to the baby.
• To prevent from any possible infection.
• To detect any abnormalities or deviation from normal.

289
• To maintain blood circulation.
Equipments:
Trolley containing
• A big tray
• Sterile eye care set (sterile bowl and cotton)
• Normal saline
• A bown containing dry cotton, swasbs
• Axillary thermometer
• Stethoscope
• Measuring tape
• Weighing machine
• Paper bag or kidney tray
• Soap in a dish
• Soft Towel
• Clean clothes for baby along with cap.
• Baby wrapper
• 2 basin
• Water jug-2 (1 for hot water and 1 for cold water)
• Mackintosh
• Oil or powder to apply after bath
• Napkin for the baby
• Cord cleaning equipment (NS / clean water and swab)
• Golves (in hospital setting only if necessary)
• Bucket to receive dirty water
• Plastic apron
• Bath table
Procedure:
1. Explain the procedure to the mother.
2. Maintain room temperature at 28 degree celsius to 31 degree Celsius , clean
adequate
3. Prepare all the articles required and take to the baby’s bathroom.
4. Wash and dry your hands.
5. Place the mackintosh on bath table and keep the baby
6. Before bathing observe baby activities breathing, color and temperature, eyes
(discharge, pus and swelling).
7. Do not give bath if temperature is below 95 degree F or above 99 degree F.
8. Take the weight and other measurement before bath.

290
9. Arrange all the articles keeping in easy site .Open the sterile eye care set and pour
NS/clean water.
10. Mix the hot and cold water and make lukewarm water in one basin.
11. Put the plastic apron
12. Wash and dry the hand.
13. Clean the eyes using a sterile cotton swab dipped in boiled water or normal saline.
Use the swab only once.
14. Wash the face using a soft cloth or cotton swab.
15. Check and clean the nostrils.
16. Clean the buttocks if necessary by using wet cotton or soft cotton cloth.
17. Expose the baby’s head and put dry cotton on both ears to prevent to enter.
18. Check the temperature (98 -99 degree f) of water, it should be felt pleasantly warm
19. Lift the baby up to support his head, back with one arm, and hold the head over the
basin.
20. Rise his head by holding the head slightly lower than the body, apply soap with
one hand in a circular motion ( do not directly apply soap).The infant's hair should
be rinsed with clean water allowing excess to drip into the basin.
21. Place the baby on bath table and dry his head by mopping up.
22. Cover the baby’s head with a warm cap or dry cloth.
23. Discard dirty water in bucket.
24. Mix the hot and cold water and make lukewarm water in both the basin
25. Undress the baby and cover the baby with a bath towel or clean cloth.
26. Check the temperature of water.
27. Expose the baby and slowly put it in a basin and wet it .
28. Apply soap in your hands and massage the body from upward to downward
starting from neck, arm, hands, lower extremities and roll him towards back
massage it, then clean the genitalia, giving special care to the skin folds (groin,
buttocks, neck, axilla etc)
29. Scrubbing is not necessary but most babies enjoy their arms and legs being
massaged with gentle strokes during a bath.
30. Hold the baby very carefully placing the left hand under his shoulder and grasp the
left upper arm, baby’s head will rest on your wrist.
31. Put your right hand under his buttocks and grasp the left thigh.
32. Put him into the basin containing clean lukewarm water with his head out of the
water then rinse off the soap.
33. Expect baby to cry the first few times you bath him/her.
34. Grasp the baby with left hand with his body supported with your elbow and keep
on bed table.
35. Dry the bay by mapping up the clean towel
36. Wrap the baby immediately after mopping up.
37. Expose the abdominal area to clean the cord and make it dry

291
38. Quickly dress the baby. Dress should be appropriate for the climate. The
extremities should be free for movements.
39. Put the baby in skin to skin contact with the mother after bath and cover them and
encourage to breastfeed.
40. Clean and replace all equipments.
41. Report and record the findings.
11. TRANSFER OF PATIENT FROM LABOUR ROOM TO WARD
Definition
A process of shifting patient from labour room to ward after delivery.
Purpose
For continuous care and observation
Procedure
1. Find out a availability of empty beds according to unit.
2. Explain the patient and relatives about transfer and handover belongings.
3. Check the following before transferring :
- Transfer order on doctors order sheet
- Postnatal prescription
- Vital signs
- PV Bleeding
- Episiotomy site if present
- Whether mother has voided or not
- If voided, fundal height checked and marked in the TPR sheet
- Condition of the baby , feeding , cord bleeding and completion of baby card
- Completion of labour folder and chart
- Transfer mother and baby together if baby is with mother
4. Document time, condition of mother and baby, transferring notes in nurses record and
folder at the time of transfer.
5. Write name of patient, hospital number, sex of baby and ward transferred in discharge
book.
6. Report any deviation from normal immediately to 2nd on call in labour room.
7. The nurse receiving mother in ward should check for the following:
g. Name of patient
h. Tag of baby
i. Sex of baby
j. Condition or both mother and baby
k. Prescription and completion of charting
l. Postnatal order

292
12. NEONATAL RESUSCITATION
Definition: Neonatal resuscitation includes stimulation, assisted ventilation, cardiac massage,
use of volume expansion and medications.
Purpose:
• To expand lungs and maintain adequate ventilation and oxygenation.
• To maintain adequate cardiac output and tissue perfusion.
• To maintain normal core temperature and to avoid hypoglycemia while stabilizing
infant for transport to nursery.
Articles Required:
• Laryngoscope with '00' (VLBW), 0 (preterm infant) and '1' size blade (term infant)
• Scissors
• Ambu bag and appropriate sized mask
• Stethoscope
• Suction apparatus with mucus sucker.
• ET tube with stillet
• O2 source
• Heat and light source
• IV fluids, IV canula, syringes and needles
• Gloves
• Drugs: Naloxone, Adrenaline, NaHCo3
• Adhesive tape
• Stop clock
• One set baby linen
Procedure
1. Prepare area for resuscitation by preheating cot.
2. Check whether suction and warmer is in working condition and is kept ready
3. Be certain that oxygen is available.
4. Keep laryngoscope, appropriate sized blades, ET tubes and other equipment ready
5. Receive baby promptly and wipe baby,
6. Wrap in dry, warm clothes and place under radiant warmer.
7. Keep neck slightly extended and suction throat first and then nasal.(M=5 cm ,N=3 cm)
8. Give oxygen ( as necessary and available)
9. Evaluate respiratory rate, heart rate, color of baby, muscle tone and response to
stimulation (APGAR) score.
10. Decide action based on evaluation
• Give supportive care: if baby is breathing, heart rate is above 100, baby is pink &

293
• has good muscle tone. Baby may be given to mother for warm, breastfeeding.
• Keep the baby warm, stimulate, and give oxygen (if available); if baby is breathing,
heart rate is above 100 but baby has cyanosis.
• If HR 60-100 bag and mask ventilation.
• IF HR<60 continue ventilation, intubate and start chest compression
Ventilate the baby
11. Explain to the mother and family about procedure.
12. Make sure baby has neck slightly extended.
13. Mask should be properly sealed over the newborn's nose and mouth.
14. Ventilate the baby 2 times and look for a gentle rise and fall of the baby's chest.
15. If the chest doesn't rise:
• Check head position
• Check that the mask and seal are correct
• Check for fluid in the mouth, if there is fluid, suction
15. Ventilate the baby 20-30 times in 30 seconds:
• Evaluate chest rise with each breath
• When the baby begins to breathe normally, stop ventilating.
16. After each 30 seconds ventilation, reassess the baby's breathing heart rate and color.
• If the baby breathe spontaneously and heart rate is > 100. Stop resuscitation and
continue to give supportive care.
• If the baby is not breathing or is gasping or the heart rate < 100, continue to ventilate
20-30 times in 30 sec. and re-evaluate.
17. If the baby doesn't breath after 2-3 minutes of resuscitation, continue resuscitation and
closely monitor baby for:
Breathing problems (i.e. chest in drawing, gasping or grunting, breathing <30 or> 60 breaths
in 1 min), color (blue or pale) and muscle tone (poor)
18. If baby breathes normally check heart rate. Count beats for 6 seconds, and multiply by 10
to get rate per minute quickly.
19. If baby breathes normally, heart rate is over 100/min and are pink in colour, no further
resuscitation is needed.
20. If baby has central cyanosis, administer oxygen at the rate of 5 liters/minute.
21. If baby is breathing and heart rate is below 100/min continue bag and mask ventilation
immediately.
22. Use enough pressure to ensure adequate chest movements.
23. If a chest movement does not occur, reposition baby, suction throat and apply mask
properly.
24. Insert an open orogastric tube if bagging is required for more than 2 minutes.
25. Check heart rate after 30 minutes of bagging. If above 100/min bagging may be stopped.
26. Continue bagging if heart rate is between 60 to 100/min for another 30 second and
reevaluate heart rate.
27. Check if mother was given inj pethidine in labour. If so, give inj naloxone (0.1mg/kg)
IM, IV or S/C.

294
28. If heart rate is below 60/min, start chest compression
29. Give chest compressions at the lower third of sternum between two nipples but above
xiphisternum.
30. Compress at about ½ to ¾ inches at the rate of 120 per minute using thumb technique or
two finger technique. The ratio of massage to inflation should be 3:1.Do 15 cycle (1 cycle=1
breath +3 compression, 1 cycle =2 second)
31. Palpate femoral pulse and reevaluate heart rate after 30 seconds.
• If HR <60 again do 15 cycles
• If HR >60 continue ventilation
• If HR >100 watch for self respiration
(Stop ventilation and Chest compression after 20 min if no response.)
32. If heart rate is below 60/minute, assist in administering emergency drugs.
33. Keep baby in supine position with neck slightly extended.
34. Hold laryngoscope in left hand and insert blade through the right angle of mouth pushing
tongue to left.
35. Gently lift laryngoscope and apply gently pressure on trachea till the ET tube is in the
middle third of trachea.
36. Do gentle suctioning.
37. Insert ET tube with stiletto through the right side of mouth till ET tube is in the middle
third of trachea.
38. Hold tube in place and carefully remove laryngoscope from the mouth.
39. Connect tube to a self inflating bag and confirm position of tube.
40. Secure tube with adhesive tapes, continue IPPR.
41. Monitor heart rate. If heart rate is >80.mt discontinue IPPR and give oxygen.
42. Continue to monitor condition of baby, heart rate, respiratory status.
43. Replace equipment in the respective areas.
44. Wash hands.
45. Document procedure, medications given and condition of baby.

TABLE OF CONTENT
PSYCHIATRIC NURSING
S.N. List of Procedure Page No.
1. Admission procedure 295
2. Discharge procedure 296
3. Mental Status Examination 297-299
4. Counselling 300-301
5. Management of violent patient 301
6. Restraint 302
7. Guidelines for drug administration 303
8. Preparing for ECT 304-305
9. Nursing approach to a patient experiencing
hallucination and delusion
306-307

295
ADMISSION PROCEDURE
Definition: Admission of patient to the psychiatric hospital or unit for observation,
investigation, treatment and care.
Purpose:
• To provide care to the psychiatric condition which are unmanageable at home.
• For diagnostic purpose.
• To provide treatment and care.
Equipment:
• Admission slip (nurses cardex, TPR sheet, lab sheet, treatment order sheet etc)
• Thermometer
• BP Apparatus
• Weighing Scale
Procedure
1. Provide patient/relatives with a comfortable chair and permit them to sit down for
a few minutes before processing with admission procedure
2. Provide orientation to patient and their family regarding the rules of hospital
ward, timing of medication, timing of meals and timing of different activities in
ward.
3. Informed written consent for admissions.
4. Check for payment receipt/ Deposit or inpatient number.
5. Ensure that room is ready.
6. Check vital sign, weight and height of patient and record appropriately.
7. Give stat medicines if any as per physician’s order.
8. Provide safety to the patient.
9. Keep all the harmful items such as knife, rope, nail cutters, glass ware, belts etc of
the patient in custody because it may cause harm to self and others.
10. Collect necessary information (demography data, past and present psychiatric
history and past and present medical history and treatment history.
11. Assess the patient’s mental status examination.
12. Document all the information of admission in the nurse’s record and report as
needed.

296
DISCHARGE PROCEDURE
Definition: Preparation of patient to leave hospital and return to home environment.
Purpose:
• To permit patient to return and reside at home.
• To import relevant knowledge and information to patient/relatives regarding
home care.
Equipment
• Discharge register book
• Discharge paper
• Stamp
• Census form
• All patient record
Procedure
1. Inform the patient’s party at least 24 hours before discharge.
2. Ensure written order for discharge by doctor.
3. Complete discharge slip and get clearance from billing counter and pharmacy.
4. Handover discharge medicine to relatives and explain about the medicine
(dose/timing/route/possible side effect).
5. Advise them to keep the hospital document safe/secure and remind them to bring
follow up visit.
6. If the patient is a police case, the nurse on duty should inform the police before
the patient leaves the hospital and ask the police to sign the date and time.

297
MENTAL STATUS EXAMINATION (MSE)
Definition: The mental status examination is the part of the clinical assessment that
describes the sum total of the examiner's observations and impressions of the psychiatric
patient at the time of the interview.
Propose
• To get a baseline measure of psychological functioning.
• To reach tentative diagnosis.
• To determine the general condition of cerebral function.
• To gives a note of prognosis.
• To gives a set of management recommendations.
• To find-out of both positive and negative findings of mental status.
• To assess the presence and extent of a person’s mental impairment.
Format for mental status examination
1. Identification data
2. Date and time
3. Venue, language of interview
4. Time taken for interview
5. Ask the patient following components
i. General appearance and behavior
ii. Speech
iii. Mood
iv. Thought process
v. Perception
vi. Cognitive (higher mental functions)
consciousness
orientation
attention
concentration
memory
intelligence
abstract thinking
vii. Insight
viii. Judgement
298
Procedure
1. Greet the client and develop rapport.
2. Explain the purpose and importance of mental status examination to client, care
taker and obtain verbal consent.
3. Welcome the client in examination room and make him/her comfortable by
requesting to sit on chair.
4. Assure safety for the client and the examiner before starting and during
examination.
5. Maintain privacy during examination e.g., Doing MSE in examination or separate
room.
6. Observe client’s gait while coming to interview.
7. Maintain rapport during examination.
8. Observe client’s appearance e.g., Physical cleanliness, clothing and physical
characteristics and record accurately.
9. Observe and describe client’s behavior during interview i.e., Posture, facial
expression, general movements, eye contact, quality of speech and client’s
relationship with interviewer and record any deviation from normal.
10. Perform subjective and objective assessment of mood and emotional reactions.
Ask questions and listen to answers by observing client’s feeling (affect/ mood),
liability of affect and predominant mood.
11. Ask questions and listen to answers by observing client’s thought content, stream
of thought.
12. Allow the client to explain things in his/her own way. Listen and observe for cues
from client.
13. Record patient’s verbatim in descriptive terms.
14. Ask questions and listen attentively to identify the state of perception and very/
differentiate between illusion and different types of hallucination.
15. Encourage the client to elaborate and explain if any abnormality.
16. Acknowledge and validate client’s distress/ concerns.
17. Ask questions so as to check the higher mental functions i.e., consciousness,
orientation, attention, concentration, memory, intelligence, abstract thinking
18. Ask about time, place and person to identify client’s orientation condition.
19. Identify the immediate, recent and remote memory status of client. To check
immediate memory, tell the patient to name and repeat 3 unrelated objects and ask
to recall after five minutes. For recent memory ask any recent events of 24 hours,
and for remote memory, ask for the date and place of marriage, name and birthday
of children, school joining age, passed date of S.L.C. and other relevant question
from the client’s past event.
20. Ask him/her to tell the days or months in reverse order or to do simple arithmetic
practice to identify the concentration.

299
21. Ask question according to his/her educational and social background to identify
intelligence level e.g., Name of prime minister/ president, capital of country and
simple arithmetic calculation, reading writing etc.
22. Test abstract thinking by asking socio- cultural proverbs (meaning) and asking
about similarities and differences between familiar objects e.g., Table/chair,
banana/orange, dog/lion, eye/ear
23. Assess the client by giving the situation like road and baby, house and fire, facing
a snake suddenly test to identify judgment.
24. Compare client’s judgment and decision making between pre-illness and post-
onset of symptoms.
25. Ask the questions about his/her present state of illness to identify the level of
insight.
26. Record all the findings in descriptive terms.
27. Thanks to the client and care taker and complete the examination.
28. Summarize the findings of examination.
Nursing consideration
• Perform MSE in context of age, developmental level, past history, presenting
issues educational level and socio-cultural background.
• Ask the open-ended questions carefully and listen attentively.
• Apply skillful observation.
• Avoid interrupting client.
• Avoid asking ‘why’ questions during interview.

300
COUNSELLING
Definition
Counselling is face to face communication by which one person help another person to
make decision or solve a problem and act on them.
Purpose
• To identify the problems of person.
• To help people use their existing problem- solving skills more effectively or to
develop new or better coping skills.
• To provide an opportunity for the person to describe their feelings and problems
for themselves and then to reach decisions and actions that are based on informed
choices.
• To helps people build skills they can use in solving their problems.
• To facilitate to increase self-esteem and coping abilities.
• To provide emotional support to a patient and their family, and assist them
problems or difficult situations.
• To increase the compliance of treatment by encouraging self-determination.
Procedure
1. Greet the client.
2. Take informed consent from patient and family.
3. Ensure privacy and quiet environment.
4. Establish rapport with the patient and or family.
5. Arrange the seating in order for comfortable distance and easy eye contact.
6. Maintain eye contact and convey interest in what the patient is saying.
7. Encourage the patient to share by asking open-ended questions.
8. Provide empathy and understanding by being aware of the patient’s feelings and
cultural beliefs.
9. Communicate understanding by repeating what you understand the patient is
saying.
10. Assist the patient to see the situation from a new perspective and focus on what
they might do to cope more effectively.
11. Provide realistic reassurance and support.
12. Help the patient see what strengths and resources they might use.
13. Summarize what has been said and the main ideas that have been discussed.
14. Formally terminate the counselling session and plan for the date and time for next
session.

301
Nursing consideration
1. Ensure privacy and quiet environment (if possible, examination or separate room,
two exit door)
2. Speak confidently and listen carefully with patience.
3. Communicate acceptance and do not judge the patient.
4. Keep the conversation focused on the patient.
5. Ensure that there are no interruptions and that there is sufficient time for the
conversation.
6. Maintain patient confidentiality at all times.
MANAGEMENT OF VIOLENT PATIENT
Definition: Violence is physical aggression by one person on another which is common
in psychotic disorder, personality disorder, delirium, drug intoxication or withdrawal, etc.
Guidelines to manage violent patient
1. Protect yourself while taking care of patient.
2. Call for assistance to manage any situation.
3. Keep the harmful weapon far away from the patient.
4. Keep the doors open, but need to have close observation.
5. Approach the patient in cool and calm way with low key voice.
6. Do restrain, if necessary. Be sure that sufficient staff members are there to restrain the
patients.
7. Remove neck tie or jewelry.
8. Do not keep any provocative family member or friend in the room and avoid
confrontation.
9. Do not sit close to the patient.
10. Show concern, establish support and assure the patient.

302
RESTRAINTS
Definition: Restraints are methods used to limit or restrict the movement of the patient.
They are used to protect the health and safety of the restrained patient, other patient, and
caregivers. It should never be used as punishment or for convenience of staff.
Purpose:
• To manage agitation and aggression of violent patient.
• To immobilize the patient safely.
• To facilitate examination, treatment and care.
Procedure:
1. Get doctor’s order to restrain a patient. In emergency situation verbal order is
acceptable.
2. Explain about the restraining to relatives and encourage voluntary application of
restraints by explaining to patient.
3. For the physical restraints make sure adequate personnel are present (ideally there
should be 5 people.
4. Gently place patient supine with one arm extended above head and other arm at
side.
5. Apply restraints to upper limbs followed by application to lower limbs. Place legs
far to each other.
6. Hold patient head by one person to prevent biting.
7. Do not leave patient alone after restraints have been applied.
8. Provide continuous monitoring of patient’s response to procedure and physical
need, comfort safety.
9. Check restrained patient for proper application, colour of skin, adequate
circulation to limbs, mental status. respiration, hydration and elimination need,
every 15 minutes record accurately.
10. Orders for restraints or seclusion must be reissued by a physician every 4 hours
for adults age 18 and older, 2 hours for children and adolescents ages 9 to 17 and
every hour for children younger than 9 years.
11. Support and reassurance are essential during restraining.
1. Documentation is very important.
a) Time of Restraint
b) Time of discontinuation/duration of restraints.
c) Alternative interventions (verbal communication) and patient’s response.

303
GUIDELINES FOR DRUG ADMINISTRATION
Definition: The drugs which have a significant effect on higher mental functions, are
called psychoactive or psychotropic drugs.
Special instructions for administration of psychotropic drugs
1. The nurse should not administer any drug unless there is a written order.
2. Do not hesitate to consult the doctor when in doubt about any medication.
3. All medications given must be charted on the patient’s case record sheet.
4. In giving medications:
- Always address the patient by name and make certain of his identification.
- Do not leave the patient until drug is swallowed.
- Do not permit the patient to go to the bathroom to take the medicine.
- Do not allow one patient carry medicine to another.
- Do not leave the tray within the reach of the patient.
5. Check drugs daily for any changes in color order and number.
6. Bottles should be tightly closed and labeled. Labels should be written legibly and
in bold.
7. Do not force oral medication because of the danger of aspiration.
8. Make sure no patient has access to the cupboard.
9. Assess blood pressure before giving medication.
10. Prepare the medication correctly. Ensuring the ten rights of drug administration.
11. If the patient is unable to hold medication place medication cup to the lip and give
water to swallow the medication.
12. Documentation the medication administration in medicine cardex.
13. Observe the side effect and therapeutic responses of the drugs.
14. Do not miss any doses of medicine.
15. Teach patient and relatives about importance of continuation of medicine even
after recovery.
16. Explain that one of the family members must take the responsibility for
medication administration and supervision.

304
PREPARING FOR ELECTROCONVULSIVE THERAPY (ECT)
Definition: ECT is the artificial induction of grandmal seizure through the application of
electrical current to the brain.
Purpose:
• To help to treat the patient’s psychiatric disorder.
• To treat the major mental illness when the drug therapies fail or have serious side-
effects.
Equipments:
• ECT machine, conduct gel
• I/V fluids, I/V set, I/V cannula, syringes
• Emergency trolley: Ambu bag, laryngoscope, ET tube, airway, emergency drugs
• Oxygen supply
• Mouth gag, tongue depressor, kidney tray
• Vital signs tray
• Alcohol swab, gauze pieces,
• Pulse oximeter
Procedure:
Pre-ECT care
1. Explain about ECT procedure, its indications, side-effects, complication to the
patient’s relatives.
2. Ensure informed consent is obtained.
3. Keep NPO for at least 6 hours before ECT.
4. Collect and report all investigation.
5. Monitor vital signs and report any abnormal findings.
6. Withhold night doses of drugs which increase seizure threshold like diazepam,
barbiturates and anticonvulsants.
7. Withhold the oral medications on the day of ECT.
8. Ensure the patient’s hair is washed in the morning and should be dry and clean.
9. Remove all the jewellary, watch, spectacles, prosthesis, contact lenses, hearing aids,
dentures, metal objects like hair clips and waist belts.
10. Change the patient’s clothes and put on hospital gown.
11. Encourage patient to empty bladder and bowel before entering ECT room.
12. Administer inj. Atropine 0.6mg atropine IM 15 to 30 minutes before the treatment.
13. Take the patient on the stretcher to the waiting room.

305
During ECT care
1. Keep all the equipment ready.
2. Place the patient comfortable on the ECT table in supine position.
3. Stay with the patient to avoid anxiety and fear.
4. Assist in administering anesthetic agent and muscle relaxant for modified ECT.
5. Monitor vital signs and administer 100% oxygen.
6. Mouth gag or airway should be inserted to prevent possible tongue bite.
7. The place of electrode placement should be cleaned with normal saline or conducting
gel.
8. Minimal physical restraints at shoulder, elbow, hips, and knees are applied to prevent
injury during convulsion.
9. Monitor voltage, intensity and duration of electrical stimulus given.
10. Check the vital signs immediately after procedure.
11. Record the findings and medicines given in the patient’s chart.
Post ECT care
1. Receive the patient from ECT room.
2. Place the patient in side lying position e.g., railing cot, without pillow in comfortable
bed.
3. Suction if necessary.
4. Provide oxygen as needed.
5. Check vital signs.
6. Observe for cyanosis, respiratory distress and excess secretions.
7. Check for bleeding from injuries to gum or tongue.
8. Assess for nausea, headache, confusion, delirium.
9. Review and follow doctor’s instructions for IV fluids and medication.
10. Instruct relatives to give oral fluids after 2 hours and if there is no vomiting, give
normal diet.
11. Provide frequent reassurance and orientation to patient after ECT, because there may
be memory impairment and mental confusion.
12. Record the following in the nursing note:
• Date, time, type of ECT given
• Amount of voltage and duration of treatment
• Type and duration of convulsion
• Complications if any present and action taken
• Vital signs before, during and after procedure

306
NURSING APPROACH TO A PATIENT EXPERIENCING
HALLUCINATION/DELUSION
Hallucination: A hallucination is a perception experienced in the absence of an external
stimulus.
Guidelines:
1. Establish therapeutic relationship by developing trust.
2. Keep environment calm, quiet and as free of stimuli as possible.
3. Show calm, patience, acceptance, active listening.
4. Observe for behavior clues
5. Identify whether drugs or alcohol have been used.
6. Asses for symptoms duration, intensity and frequency.
7. Help to record number of hallucinations.
8. Focus on symptoms and help to describe the happening.
9. Help to describe and compare current and past hallucinations.
10. Encourage to remember when it began first.
11. Pay attention to the content may helpful in predicting the behavior.
12. alert for commanding hallucination.
13. Do not argue.
14. Do not make promises, which you cannot keep.
15. Do not joke or judge the client’s behavior.
16. Help the client understand the connection between anxiety and hallucination.
17. Keep a comfortable distance away from the patient (arm length)
18. Orient client to reality as required. Call the client by name.
19. Determine the impact of the patient’s symptoms on ADL.
20. Engage client in reality-based activity.
21. Provide feedback on coping responses.
Delusion: False unshakable belief which is out of keeping with the patient’s social and
cultural background.
Guidelines:
1. Develop trust
2. Asses for symptoms duration, intensity and frequency.
3. Identify all the components, triggering factors. Triggers related to stress or
anxiety.
4. If related with anxiety, teach anxiety management skills.
5. Fleeting delusions can be worked out in a short time frame.

307
6. Listen quietly.
7. Identify emotional components.
8. Respond to the underlying feeling.
9. Encourage discussions with out assuming right or wrong.
10. Observe for evidence of concrete thinking.
11. Observe speech for symptoms of a thought disorder.
12. Recognize between description and facts of the situation.
13. Encourage personal responsibility in wellness and recovery.
14. Promote distraction as a way to stop focusing on delusions.
15. Promote physical activities
16. Recognize and reinforce healthy and positive aspects of personality.

BIBILOGRAPHY
FUNDAMENTAL OF NURSING
• Smith FS,Dwell DJ. Clinical Nursing Skills: Basic to Advance Skills. 4th ed. Applotion
& Larger Stamford:Connecticut; 2996.
• Delaune S. Fundamental of Nursing: Standards & Practice,2nd ed. Australai: Delmar
Thomson:2002.
• Suresh S, editor. Potter and perry’s fundamentals of nursing: Second south Asia edition.
2nd ed. New Delhi, India: Elsevier; 2017.
• Lynn.P, Cram101 Textbook Reviews. Studyguide for Taylors clinical nursing skills: A
nursing process approach by Lynn, Pamela, ISBN 9780781774659. La Vergne, TN:
Cram101; 2012.
• Taylor C, Lillis C, Lynn P. Fundamentals of nursing. 8th ed. Baltimore, MD: Wolters
Kluwer Health; 2014.
• Japan International cooperation agency (JICA) Nepal.1st edition.kathmandu Nepal
(https://www.jica.go.jp/nepal/english/office/topics/pdf/topics02_01.pdf)
• Standard of care: Arterial line monitoring.critical care trauma centre. September 30,
2021.(https://www.lhsc.on.ca/critical-care-trauma-centre/standard-of-care-arterial-
line-monitoring)
• Prakash.R,Manipal Manual of Nursing Procedures, Fundamentals of Nursing. Vol-1,
Part A,B Edition 1sted. Noida ( UP).
• 1-36. ADMINISTRATION OF MEDICATION THROUGH A NASOGASTRIC
TUBE | Nursing Care Related to the Gastrointestinal and Genitourinary Systems
(brooksidepress.org)
• Medication management of patients with enteral feeding tubes | Working party
guideline/algorithm | Guidelines

MEDICAL SURGICAL NURSING
• Smeltzer, Boyer. Textbook of medical surgical nursing. 10th ed. Philadelphia, PA:
Lippincott William and Wilkins; 2003.
• Burke KM, LeMone P, Mohn-Brown E, Eby L. Medical surgical nursing care. 3rd ed.
Upper Saddle River, NJ: Pearson; 2010.
• Black JM, Hawks JH. Medical surgical nursing: Elimination, renal and urinary systems
disorders. Tutiany T, Syarif H, editors. Singapore, Singapore: Elsevier; 2021.
• Swearingen PL, Ross D. Manual of medical surgical nursing care: Nursing interventions
and collaborative management. 4th ed. London, England: Mosby; 1998.
• Lynn.P, Cram101 Textbook Reviews. Studyguide for Taylors clinical nursing skills: A
nursing process approach by Lynn, Pamela, ISBN 9780781774659. La Vergne, TN:
Cram101; 2012.
• Swearingen PL. Manual of medical surgical nursing care: Nursing interventions and
collaborative management. 3rd ed. London, England: Mosby; 1993.
• Osborn KS, Watson AS, Wraa CE. Medical surgical nursing: Preparation for practice,
volume 1. Upper Saddle River, NJ: Pearson; 2009
• Leeper B. Cardiac review, an issue of critical care nursing clinics - E-book. Saunders;
2011.

PEDIATRIC NURSING
• Agrawal, R. Deorari, A. Paul, VK. AIIMS protocols in Neonatology. 1st
ed. CBS Publishers & Distributors Pvt.Ltd. 2016
• Gupta, P. Essential Pediatric Nursing. 3rd ed. India. CBS Publishers &
Distributors Pvt. Ltd. 2014
• Lippincott Williams & Wilkins. Manual of Nursing Practice. 9th ed.
India. Wolters Kluwer publication. 2010
• Prakash, R. Manipal Manual of Nursing Procedure. Volume II. India.
CBS Publishers & Distributors Pvt.Ltd. 2010
• Clinical Guidelines (Nursing):The Royal Children Hospital Melbourne
(www.rch.org.au/clinicalguide/suctioning)
• Suctioning- Paediatric/ Neonate patient ventilated: Royal University Hospital
and Saskatoon City Hospital, St. Paul’s Hospital revised on March 2017
(www.askatoonhealthregion.ca/about/nursingmanual)
• Guidelines for nasopharyngeal suction of a child or young adult: Association
of paediatric chartered physiotherapists
(www.apcp.csp.org.uk/system/file/guidelines)
• Neonatal/Paediatric Arterial Puncture: UTMB Respiratory Care Services
revised on May 2018 (www.utmb.edu/policies_and_procedures/Non-IHOP/)
• Lumbar puncture: Nurse lab (www.com/lumbar-puncture-spinal-tap/)
• Peripheral Intravenous cannulation Best practice Guidelines. University
health Board. Revised on April 2020
(http://www.wales.nhs.uk/sitesplus/documents/863/18-E-
038%20ABM%20peripheral%20cannula%20guidelines%20April%202017.
pd)
• Service Guidance and Standard for Phototherapy Units. British Association
of Dermatologist. Revised on March 2018 (Service Guidance and Standards
For Phototherapy (bad.org.uk)
• Guideline on Women and babies: Phototherapy- Nursing Management of the
Neonate: Health Sydney Local health District. Reviewed on December 2017
(Women and babies: Phototherapy – Nursing management of the neonate
(nsw.gov.au)

MATERNAL AND NEONATAL HEALTH NURSING
• Dutta, DC. 2019, Textbook of Obstetrics, Ninth edition., Jaypee brothers medical
publishers Pvt. Ltd: New Delhi.
• Tuitui R.2018, Midwifery and Gynecological Nursing III, 13th edition., Vidyarthi
Pustak Bhandar: Kathmandu
• Subedi D., Gautam S.2017, Midwifery Nursing III, 3rd edition., Medhavi
Publication: Kathmandu.
• Subedi D., Gautam S.2019, Midwifery Nursing II, 4th edition., Medhavi
Publication: Kathmandu.
• Subedi D., Gautam S.2019, Midwifery Nursing I, 4th edition., Medhavi
Publication: Kathmandu.
• Prakash R.2008, Manipal manual of Nursing procedures Volume II, 1 st edition.,
CBS publishers Pvt.Ltd: New Delhi.
• Ministry of Health and Population, National Health Training Center, Maternal and
newborn care 2071

PSYCHIATRIC NURSING
• Ahuja, N. A Short Text of Psychiatry. 7 th ed. New Delhi: Jaypee Brothers; 2011
• Prasai, D. Mental Health & Psychiatric Nursing. 4 th ed. Dillibazaar,
Kathmandu: Makalu
Publication House; 2018
• Shreevani, R. A Guide to Mental Health & Psychiatric Nursing. 3 rd ed. New
Delhi:
Jaypee Brothers; 2018
• Sharma, C. Sharma, P. Essentials of Psychiatric & Mental Health Nursing. 2 nd
ed.
Kathmandu: Saurav & Awish publication; 2016
• Stuart, G. Principle & Practice of Psychiatric Nursing. 10 th ed. St. Louis,
Mosby Inc; 2013
• Townsend. M, Psychiatric Mental Health Nursing. 6 th ed. Philadelphia: F. A. Davis
company; 2009


T
Thank you !!
Related Documents