Nokia N92-1

Welcome message from author
This document is posted to help you gain knowledge. Please leave a comment to let me know what you think about it! Share it to your friends and learn new things together.
Transcript

Nokia N92-1
ITTED BY APPLICABLE LAW, UNDER NO R ANY OF ITS LICENSORS BE RESPONSIBLE FOR R ANY SPECIAL, INCIDENTAL, CONSEQUENTIAL VER CAUSED.NT ARE PROVIDED "AS IS". EXCEPT AS REQUIRED TIES OF ANY KIND, EITHER EXPRESS OR IMPLIED,
, THE IMPLIED WARRANTIES OF FOR A PARTICULAR PURPOSE, ARE MADE IN LIABILITY OR CONTENTS OF THIS DOCUMENT. EVISE THIS DOCUMENT OR WITHDRAW IT AT ANY
ucts and applications and services for these se check with your Nokia dealer for details, and
ities, technology or software subject to export and other countries. Diversion contrary to law is
o interference (for example, when using a ceiving equipment). The FCC or Industry Canada r telephone if such interference cannot be ce, contact your local service facility. This device rules. Operation is subject to the following two t cause harmful interference, and (2) this device
eived, including interference that may cause or modifications not expressly approved by Nokia operate this equipment.
ided with your device may have been created and ties not affiliated with or related to Nokia. Nokia tellectual property rights to the third-party
not take any responsibility for end-user support, or the information in the applications or these any warranty for the third-party applications.U ACKNOWLEDGE THAT THE APPLICATIONS ARE ANTY OF ANY KIND, EXPRESS OR IMPLIED, TO THE
DECLARATION OF CONFORMITY Hereby, NOKIA CORPORATION declares that this RM-100 product is in compliance with the essential requirements and other relevant provisions of Directive 1999/5/EC. A copy of the Declaration of Conformity can be found at http://www.nokia.com/phones/declaration_of_conformity/.© 2007 Nokia. All rights reserved.Nokia, Nokia Connecting People, Navi, Nseries, N92, Pop-Port, and Visual Radio are trademarks or registered trademarks of Nokia Corporation. Nokia tune is a sound mark of Nokia Corporation. Other product and company names mentioned herein may be trademarks or tradenames of their respective owners.Reproduction, transfer, distribution, or storage of part or all of the contents in this document in any form without the prior written permission of Nokia is prohibited.
This product includes software licensed from Symbian Software Ltd (c) 1998-2007. Symbian and Symbian OS are trademarks of Symbian Ltd.
Java™ and all Java-based marks are trademarks or registered trademarks of Sun Microsystems, Inc.
US Patent No 5818437 and other pending patents. T9 text input software Copyright (C) 1997-2007. Tegic Communications, Inc. All rights reserved.This product is licensed under the MPEG-4 Visual Patent Portfolio License (i) for personal and noncommercial use in connection with information which has been encoded in compliance with the MPEG-4 Visual Standard by a consumer engaged in a personal and noncommercial activity and (ii) for use in connection with MPEG-4 video provided by a licensed video provider. No license is granted or shall be implied for any other use. Additional information, including that related to promotional, internal, and commercial uses, may be obtained from MPEG LA, LLC. See <http://www.mpegla.com>.Nokia operates a policy of ongoing development. Nokia reserves the right to make changes and improvements to any of the products described in this document without prior notice.
TO THE MAXIMUM EXTENT PERMCIRCUMSTANCES SHALL NOKIA OANY LOSS OF DATA OR INCOME OOR INDIRECT DAMAGES HOWSOETHE CONTENTS OF THIS DOCUMEBY APPLICABLE LAW, NO WARRANINCLUDING, BUT NOT LIMITED TOMERCHANTABILITY AND FITNESSRELATION TO THE ACCURACY, RENOKIA RESERVES THE RIGHT TO RTIME WITHOUT PRIOR NOTICE.The availability of particular prodproducts may vary by region. Pleaavailability of language options.Export controlsThis device may contain commodlaws and regulations from the USprohibited.FCC/INDUSTRY CANADA NOTICEYour device may cause TV or raditelephone in close proximity to recan require you to stop using youeliminated. If you require assistancomplies with part 15 of the FCCconditions: (1) This device may nomust accept any interference recundesired operation. Any changescould void the user's authority to
The third-party applications provmay be owned by persons or entidoes not own the copyrights or inapplications. As such, Nokia doesfunctionality of the applications,materials. Nokia does not provideBY USING THE APPLICATIONS YOPROVIDED AS IS WITHOUT WARR
MAXIMUM EXTENT PERMITTED BY APPLICABLE LAW. YOU FURTHER ACKNOWLEDGE THAT NEITHER NOKIA NOR ITS AFFILIATES MAKE ANY REPRESENTATIONS OR WARRANTIES, EXPRESS OR IMPLIED, INCLUDING BUT NOT LIMITED TO WARRANTIES OF TITLE, MERCHANTABILITY OR FITNESS FOR A PARTICULAR PURPOSE, OR THAT THE APPLICATIONS WILL NOT INFRINGE ANY THIRD-PARTY PATENTS, COPYRIGHTS, TRADEMARKS, OR OTHER RIGHTS.
Issue 2 EN, 9246540
........................................................ 20
........................................................ 20
........................................................ 21
........................................................ 21ams ................................................ 22........................................................ 22 and programs ............................ 23........................................................ 23........................................................ 24
......................................25........................................................ 25otographs ................................... 28
........................................................ 29
......................................31 clips ............................................ 31
........................................................ 32
........................................................ 33
........................................................ 34
........................................................ 34
s ..................................35
Copyrigh
CoFor yo
Your ModesMobileMedia MultimUseful SettingNokia sSoftwaTransfeEssentiKeypadVolumeClock ..HeadseMemorHelp....Tutoria
MobiFirst st
t © 2006 Nokia. All rights reserved.
ntentsur safety...........................................7
Nokia N92.......................................10..................................................................................... 10 TV .............................................................................. 12keys ............................................................................ 12edia key.................................................................... 12shortcuts .................................................................. 12s.................................................................................. 13upport and contact information....................... 13re updates................................................................ 13r content from another device .......................... 14al indicators............................................................. 14 lock (keyguard) ..................................................... 16 and loudspeaker control.................................... 16
..................................................................................... 16t .................................................................................. 17y card ........................................................................ 17..................................................................................... 18l................................................................................... 18
le TV .................................................19art-up ........................................................................ 19
View programs .............Services ..........................Program guide..............Record programs .........Watch recorded progrSearch.............................Subscribe to channelsSettings..........................Indicators.......................
Camera................Take pictures ................Tips on taking good phRecord videos ...............
Gallery.................View images and videoEdit images ...................Image print ...................Presentations................Albums ...........................
Media application
ht © 2006 Nokia. All rights reserved.
....................................66
..................................................... 66
..................................................... 66
..................................................... 66
.....................................................67 items........................................ 68..................................................... 68.....................................................68
....................................70.....................................................70..................................................... 70ntries.........................................71.....................................................71
....................................72..................................................... 72..................................................... 72..................................................... 73..................................................... 73..................................................... 76..................................................... 77..................................................... 78..................................................... 79..................................................... 79..................................................... 82
Copyrig
Music player..........................................................................35RealPlayer ..............................................................................37Flash Player ...........................................................................39Visual Radio ..........................................................................39Web .........................................................................................41Recorder .................................................................................42
Messaging................................................ 43Write text ..............................................................................44Write and send messages..................................................45Inbox—receive messages ...................................................47Mailbox...................................................................................49View messages on a SIM card .........................................51Messaging settings .............................................................51
Contacts (Phonebook) ............................ 56Save names and numbers .................................................56Copy contacts.......................................................................57Add ringing tones for contacts........................................58Create contact groups........................................................58
Make calls ............................................... 59Voice calls..............................................................................59Video calls..............................................................................61Answer or decline a call ....................................................62Log ...........................................................................................63
Services.................Access point.....................Bookmarks view..............Connection security.......Browse...............................Download and purchaseEnd a connection............Settings .............................
Calendar................Create calendar entriesCalendar views................Manage your calendar eCalendar settings ...........
My own.................Mobile Search .................Download! ........................Go to—add shortcuts.....IM—instant messaging .Positioning .......................Landmarks ........................Navigator..........................3-D tones..........................Nokia Lifeblog .................Games................................
......................................................104
................................... 105......................................................105......................................................106......................................................108......................................................109......................................................120
ent ............................................121......................................................122
Q&A ......................... 123
on ............................. 127ing...............................................127ication guidelines ...................127
ance ......................... 130
information............. 132
................................... 136
Copyright © 2006 Nokia. All rights reserved.
Connectivity .............................................83Bluetooth connectivity ...................................................... 83Infrared connection............................................................ 86Data cable ............................................................................. 87Synchronization................................................................... 87Wireless LAN ........................................................................ 89Connection manager.......................................................... 91Device manager ................................................................... 92Home network ..................................................................... 93PC connections .................................................................... 97
Office ........................................................98Calculator.............................................................................. 98Converter............................................................................... 98Notes ...................................................................................... 98Quickoffice .......................................................................... 99Adobe Reader .....................................................................100
Personalize your device ........................ 102Profiles—set tones.............................................................102Change the look of your device ....................................103
Active standby mode..
Tools....................File manager .................Application manager..Settings wizard............Settings..........................Voice commands .........Digital rights managemMemory card tool........
Troubleshooting:
Battery informatiCharging and dischargNokia battery authent
Care and mainten
Additional safety
Index ...................
7
WHEN REFUELING Do not use refueling point. Do not use near
cals.
NEAR BLASTING Follow any o not use the device where progress.
Y Use only in the positions as he product documentation. Do antenna areas unnecessarily.
RVICE Only qualified personnel repair this product.
NTS AND BATTERIES Use only ancements and batteries. Do not
patible products.
STANCE Your device is not nt. Keep it dry.
PIES Remember to make back-eep a written record of all ormation.
TO OTHER DEVICES When any other device, read its user
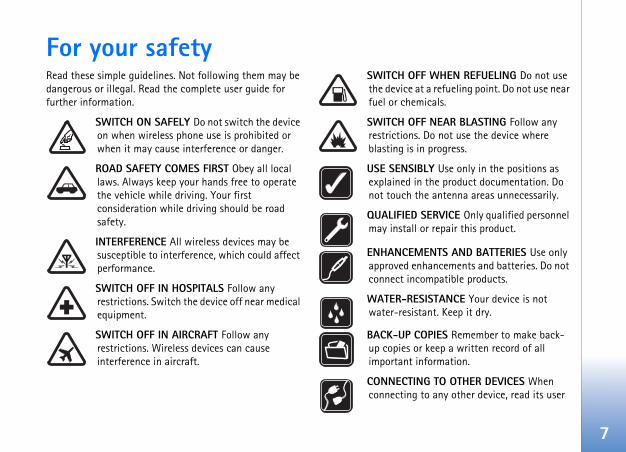
For your safetyRead these simple guidelines. Not following them may be dangerous or illegal. Read the complete user guide for further information.
SWITCH ON SAFELY Do not switch the device on when wireless phone use is prohibited or when it may cause interference or danger.
ROAD SAFETY COMES FIRST Obey all local laws. Always keep your hands free to operate the vehicle while driving. Your first consideration while driving should be road safety.
INTERFERENCE All wireless devices may be susceptible to interference, which could affect performance.
SWITCH OFF IN HOSPITALS Follow any restrictions. Switch the device off near medical equipment.
SWITCH OFF IN AIRCRAFT Follow any restrictions. Wireless devices can cause interference in aircraft.
SWITCH OFF the device at afuel or chemi
SWITCH OFF restrictions. Dblasting is in
USE SENSIBLexplained in tnot touch the
QUALIFIED SEmay install or
ENHANCEMEapproved enhconnect incom
WATER-RESIwater-resista
BACK-UP COup copies or kimportant inf
CONNECTINGconnecting to
8
s in this device, obey all laws, and rivacy and legitimate rights of ghts.
ay prevent some images, music ), and other content from being erred or forwarded.
any features in this device, other , the device must be switched on. vice on when wireless device use ce or danger.
support common features of oint, and Excel (Microsoft Office
ot all file formats can be viewed or
ion such as an active video call and tion, the device may feel warm. In on is normal. If you suspect the roperly, take it to the nearest ity.
me bookmarks or links preinstalled to sites provided by third parties a. Nokia does not endorse or these sites. If you choose to access e same precautions, for security or ith any internet site.
guide for detailed safety instructions. Do not connect incompatible products.
EMERGENCY CALLS Ensure the phone function of the device is switched on and in service. Press the end key as many times as needed to clear the display and return to the start screen. Enter the emergency number, then press the call key. Give your location. Do not end the call until given permission to do so.
About your deviceThe wireless device described in this guide is approved for use on the EGSM 900/1800/1900 and UMTS 2100 networks. Contact your service provider for more information about networks.
Your device supports Internet connections and other methods of connectivity. Like computers, your device may be exposed to viruses, malicious messages and applications, and other harmful content. Exercise caution and open messages, accept connectivity requests, download content, and accept installations only from trustworthy sources. To increase the security of your devices, consider installing, using, and regularly updating anti-virus software, firewall, and other related software on your device and any connected computer.
When using the featurerespect local customs, pothers, including copyri
Copyright protections m(including ringing tonescopied, modified, transf
Warning: To usethan the alarm clockDo not switch the demay cause interferen
The office applications Microsoft Word, PowerP2000, XP, and 2003). Nmodified.
During extended operathigh speed data connecmost cases, this conditidevice is not working pauthorized service facil
Your device may have sofor or may allow accessnot affiliated with Nokiassume any liability for them, you should take thcontent, as you would w
9
, batteries, and
off and disconnect the charger ery.
of any charger before use with intended for use when supplied or AC-4 charger and from an with a CA-44 charger adapter.
use with this device is BP-5L.
batteries, chargers, and ed by Nokia for use with this use of any other types may l or warranty, and may be
ed enhancements, please check ou disconnect the power cord of and pull the plug, not the cord.
Network servicesTo use the phone you must have service from a wireless service provider. Many of the features require special network features. These features are not available on all networks; other networks may require that you make specific arrangements with your service provider before you can use the network services. Your service provider can give you instructions and explain what charges will apply. Some networks may have limitations that affect how you can use network services. For instance, some networks may not support all language-dependent characters and services.
Your service provider may have requested that certain features be disabled or not activated in your device. If so, these features will not appear on your device menu. Your device may also have a special configuration such as changes in menu names, menu order, and icons. Contact your service provider for more information.
This device supports WAP 2.0 protocols (HTTP and SSL) that run on TCP/IP protocols. Some features of this device, such as MMS, browsing, e-mail, and content downloading using the browser or over MMS, require network support for these technologies.
For availability and information on using SIM card services, contact your SIM card vendor. This may be the service provider or other vendor.
EnhancementschargersAlways switch the devicebefore removing the batt
Check the model numberthis device. This device iswith power from an AC-3AC-5 charger when used
The battery intended for
Warning: Use onlyenhancements approvparticular model. The invalidate any approvadangerous.
For availability of approvwith your dealer. When yany enhancement, grasp

10
can continue listening to them.
, the cover display provides clock When the device is in standby h and battery indicators, time cators, and the name of the active neral) may be shown. If the TV is w the Mobile TV program channel,
rogram schedule, and recording lay. If you are using the music nd clip, volume bars and track d. Use the side volume key to turn
.
adio in the Fold closed mode, the own on the cover display. You can ions with the station name, information. This information is play.
ms and notes for missed calls and are also displayed. To view received ext and image objects of received pen the fold, and view the message
Your
Nok
ia N
92 Your Nokia N92Model number: Nokia N92-1
Hereinafter referred to as Nokia N92.
ModesYour device has four mechanical modes that are optimized for different use situations: Fold closed for carrying; Fold open for traditional mobile phone use; Imaging for recording video and taking pictures; and View for viewing Mobile TV, your images, and videos. To switch between the modes, turn the fold and the swing axis display. There is a short time-out before a mode is activated.
Fold closed modeWhen the fold is closed, the main display deactivates and the cover display lights up. Ongoing calls end, unless the loudspeaker is in use or a compatible headset is connected. To change the settings, see ‘Standby mode’, p. 110. If you are using the radio,
TV, or music player, you
In the Fold closed modeand status information.mode the signal strengtinformation, status indiprofile (if other than Geswitched on, you can vieprogram information, pstatus on the cover dispplayer to listen to a souinformation are displayethe volume up or down
If you are using Visual Rvisual content is not shstore several preset statfrequency, and locationshown on the cover dis
Calendar and clock alarnew received messages text messages and the tmultimedia messages, oon the main display.

Your
Nok
ia N
92
11
p to 90
d up so es you, vated. ated, to be
can ctures. See ‘Camera’, p. 25.
number keypad is not active. You the volume key as a zoom key, ion keys of the keypad.
nd you lift the side of the swing de is activated. The number -black characters, and the screen are in use.
Incoming calls are indicated by their normal tone and a note. In the cover display settings, select Answer if fold opened > Yes to answer a call when you open the fold. If a compatible headset is connected to the device, press the answer key on the headset. To change the settings, see ‘Standby mode’, p. 110.
To make calls or use the menu, open the fold.
Fold open modeWhen you open the fold, the Fold open mode is activated automatically: the main display lights up, the keypad is available, and you can access the menu. Scroll in the menu with the scroll key.
The Fold open mode is activated even if the fold is not fully opened. The fold opens about 160 degrees, as shown in the picture. Do not force the fold to open more.
Imaging modeWhen you open the fold udegrees, hold the device sideways, and turn the folthat the main display facthe Imaging mode is actiThe main camera is activand you can see the viewcaptured.
In the Imaging mode, yourecord videos and take pi
In the Imaging mode, the can use the capture key, power key, and the select
View modeWhen the fold is closed aaxis display, the View mokeypad uses the white-onselection keys below the
12
orresponding direction. To exit the an application, press .
, press , and scroll down. To that are shown when you press iddle, and Right and the
fixed, and you are not able to
ts get the most from your device. tions in this user guide for further
.
TV application, press and hold . ’, p. 12.pplications that are open, press
lect an application. If memory is close some applications. The device ata before closing an application. running in the background d on battery power and reduces
ailbox (network service), press and
Your
Nok
ia N
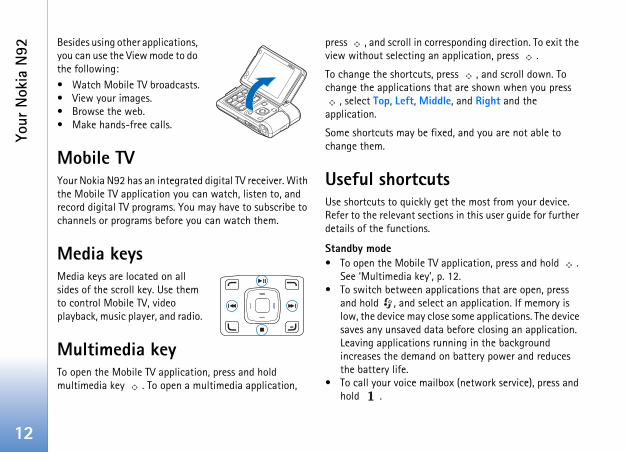
92 Besides using other applications, you can use the View mode to do the following:• Watch Mobile TV broadcasts.• View your images.• Browse the web.• Make hands-free calls.
Mobile TVYour Nokia N92 has an integrated digital TV receiver. With the Mobile TV application you can watch, listen to, and record digital TV programs. You may have to subscribe to channels or programs before you can watch them.
Media keysMedia keys are located on all sides of the scroll key. Use them to control Mobile TV, video playback, music player, and radio.
Multimedia keyTo open the Mobile TV application, press and hold multimedia key . To open a multimedia application,
press , and scroll in cview without selecting
To change the shortcutschange the applications
, select Top, Left, Mapplication.
Some shortcuts may bechange them.
Useful shortcuUse shortcuts to quicklyRefer to the relevant secdetails of the functions
Standby mode• To open the Mobile
See ‘Multimedia key• To switch between a
and hold , and selow, the device may saves any unsaved dLeaving applicationsincreases the demanthe battery life.
• To call your voice mhold .
Your
Nok
ia N
92
13
and contact
pport or your local Nokia ion of the user guide, additional
and services related to your
et information on the use of es. If you need to contact
he list of local Nokia contact /customerservice.
, check your nearest Nokia kia.com/repair.
tesce software updates that may ced functions, or improved able to request these updates h the Nokia Software Updater device software, you need a PC
P operating system, broadband patible data cable to connect
• To change the profile, press , and select a profile.• To switch between General and Silent profiles, press
and hold . If you have two phone lines (network service), this action switches between the two lines.
• To open the last dialed numbers list, press .• To use voice commands, press and hold .• To start browsing the web (network service), press and
hold . See ‘Services’, p. 66.• To adjust the brightness of the display, press and hold
the bottom left corner selection key (in the Fold open mode) and scroll left or right.
For further shortcuts available in the standby mode, see ‘Active standby mode’, p. 104.
SettingsYour Nokia N92 normally has MMS, GPRS, streaming, and mobile internet settings automatically configured in the device, based upon your network service provider information. You may have settings from your network service providers already installed in your device, or you may receive the settings from the network service providers as a special text message.
Nokia support informationCheck www.nokia.com/suwebsite for the latest versinformation, downloads, Nokia product.
On the website, you can gNokia products and serviccustomer service, check tcenters at www.nokia.com
For maintenance servicesservice center at www.no
Software updaNokia may at times produoffer new features, enhanperformance. You may befrom a compatible PC witapplication. To update thewith Windows 2000 or Xinternet access, and a comyour device to the PC.

14
on the other device, and select OK. paired. See ‘Pair devices’, p. 85.els, the Transfer application is
vice as a message. To install er device, open the message, and ns on the display., connect the two devices. See ’, p. 86.2, select the content you want to device.
the memory and compatible d) of the other device to the in your Nokia N92 and memory pying time depends on the amount d. You can cancel copying and
tion of a previous transfer, in the fer log.
have copied or transferred data select Phones.
atorsused in a GSM network.
used in a UMTS network (network
Your
Nok
ia N
92 For more information and the Nokia Software Updater application, visit www.nokia.com/softwareupdate or your local Nokia website.
Transfer content from another device
You can copy content such as contacts and calendar entries from a compatible Nokia phone to your Nokia N92 using Bluetooth connectivity or infrared. The type of content that can be copied depends on the phone model.
You can insert your SIM card in the other device. When your Nokia N92 is switched on without a SIM card, the offline profile is automatically activated.Transfer content1 Press , and select Tools > Transfer on your Nokia
N92.2 In the information view, select Continue.3 Select whether you want to use Bluetooth
connectivity or infrared to transfer the data. Both devices must support the selected connection type.
4 If you select Bluetooth connectivity, to have your Nokia N92 search for devices with Bluetooth connectivity, select Continue. Select your other device from the list. You are asked to enter a code on your Nokia N92. Enter a code (1-16 digits), and select OK.
Enter the same codeThe devices are nowFor some phone modsent to the other deTransfer on the othfollow the instructioIf you select infrared‘Infrared connection
5 From your Nokia N9copy from the other
Content is copied from memory card (if insertecorresponding location card (if inserted). The coof data to be transferrecontinue later.
To view the log informamain view, select Trans
To view the devices youfrom, in the main view,
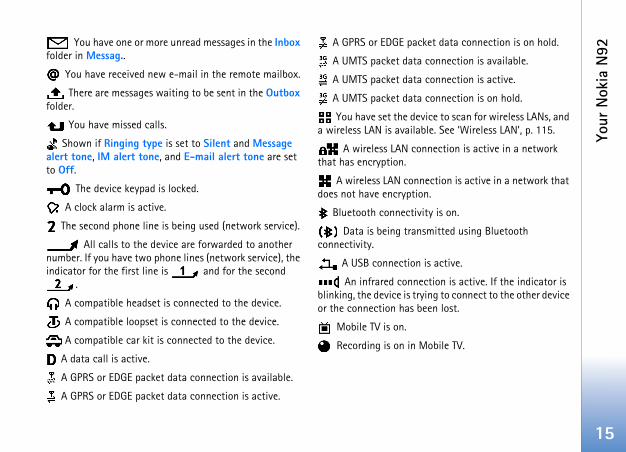
Essential indic The device is being
The device is beingservice).
Your
Nok
ia N
92
15
et data connection is on hold.
onnection is available.
onnection is active.
onnection is on hold.
ce to scan for wireless LANs, and e. See ‘Wireless LAN’, p. 115.
nection is active in a network
ction is active in a network that .
y is on.
itted using Bluetooth
active.
tion is active. If the indicator is ng to connect to the other device en lost.
obile TV.
You have one or more unread messages in the Inbox folder in Messag..
You have received new e-mail in the remote mailbox.
There are messages waiting to be sent in the Outbox folder.
You have missed calls.
Shown if Ringing type is set to Silent and Message alert tone, IM alert tone, and E-mail alert tone are set to Off.
The device keypad is locked.
A clock alarm is active.
The second phone line is being used (network service).
All calls to the device are forwarded to another number. If you have two phone lines (network service), the indicator for the first line is and for the second
.
A compatible headset is connected to the device.
A compatible loopset is connected to the device.
A compatible car kit is connected to the device.
A data call is active.
A GPRS or EDGE packet data connection is available.
A GPRS or EDGE packet data connection is active.
A GPRS or EDGE pack
A UMTS packet data c
A UMTS packet data c
A UMTS packet data c
You have set the devia wireless LAN is availabl
A wireless LAN conthat has encryption.
A wireless LAN connedoes not have encryption
Bluetooth connectivit
Data is being transmconnectivity.
A USB connection is
An infrared connecblinking, the device is tryior the connection has be
Mobile TV is on.
Recording is on in M
16
ker during a call, select Options >
ker, select Options > Activate
on or off during a call, select
ctivate the loudspeaker by using
ck. To set a new alarm, select hen an alarm is active, is
lect Stop, or to stop the alarm for e.
hed while the device is switched itself on and starts sounding the Stop, the device asks whether you vice for calls. Select No to switch make and receive calls. Do not s phone use may cause
Your
Nok
ia N
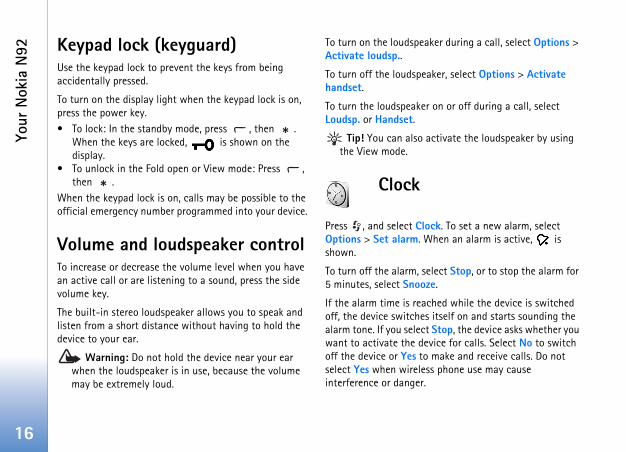
92 Keypad lock (keyguard)Use the keypad lock to prevent the keys from being accidentally pressed.
To turn on the display light when the keypad lock is on, press the power key.• To lock: In the standby mode, press , then .
When the keys are locked, is shown on the display.
• To unlock in the Fold open or View mode: Press , then .
When the keypad lock is on, calls may be possible to the official emergency number programmed into your device.
Volume and loudspeaker controlTo increase or decrease the volume level when you have an active call or are listening to a sound, press the side volume key.
The built-in stereo loudspeaker allows you to speak and listen from a short distance without having to hold the device to your ear.
Warning: Do not hold the device near your ear when the loudspeaker is in use, because the volume may be extremely loud.
To turn on the loudspeaActivate loudsp..
To turn off the loudspeahandset.
To turn the loudspeakerLoudsp. or Handset.
Tip! You can also athe View mode.
Clock
Press , and select CloOptions > Set alarm. Wshown.
To turn off the alarm, se5 minutes, select Snooz
If the alarm time is reacoff, the device switchesalarm tone. If you selectwant to activate the deoff the device or Yes toselect Yes when wirelesinterference or danger.
Your
Nok
ia N
92
17
cted. Check that the time is time zone.
adset to system
u use to hear fected. here it .
miniSD card ur device. You ion from your d.
SD memory cards approved by vice. Nokia uses approved mory cards, but some brands le with this device. Incompatible rd and the device and corrupt
To cancel an alarm, select Clock > Options > Remove alarm.
Clock settingsTo change the clock settings, select Clock > Options > Settings.
To change the time or date, select Time, Time zone, or Date.
To change the clock shown in the standby mode, select Clock type > Analogue or Digital.
To allow the mobile phone network to update the time, date, and time zone information to your device (network service), select Network operator time > Auto-update.
To change the alarm tone, select Clock alarm tone.
World clockTo open the world clock view, open Clock, and press . In the world clock view, you can view the time in different cities.
To add cities to the list, select Options > Add city. You can add a maximum of 15 cities to the list.
To set your current city, scroll to a city, and select Options > My current city. The city is displayed in the clock main view, and the time in your device is changed
according to the city selecorrect and matches your
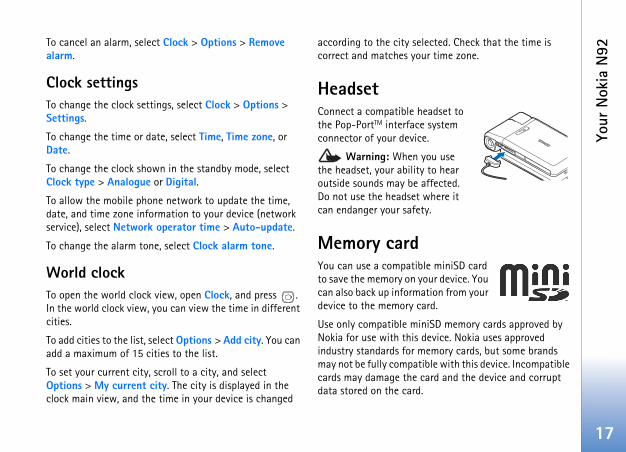
HeadsetConnect a compatible hethe Pop-PortTM interface connector of your device.
Warning: When yothe headset, your ability outside sounds may be afDo not use the headset wcan endanger your safety
Memory cardYou can use a compatibleto save the memory on yocan also back up informatdevice to the memory car
Use only compatible miniNokia for use with this deindustry standards for memay not be fully compatibcards may damage the cadata stored on the card.
18
-sensitive help. When an ct Options > Help to access help
he instructions, to switch between n that is open in the background,
ain menu, select Tools > Help. cation to view its help topics.
l
formation about some of the The tutorial starts automatically vice on for the first time. To access , press , and select My own > you want to view.
Your
Nok
ia N
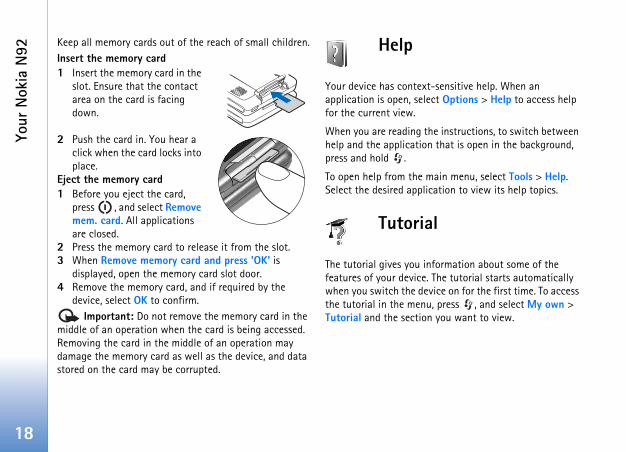
92 Keep all memory cards out of the reach of small children.Insert the memory card1 Insert the memory card in the
slot. Ensure that the contact area on the card is facing down.
2 Push the card in. You hear a click when the card locks into place.
Eject the memory card1 Before you eject the card,
press , and select Remove mem. card. All applications are closed.
2 Press the memory card to release it from the slot.3 When Remove memory card and press 'OK' is
displayed, open the memory card slot door.4 Remove the memory card, and if required by the
device, select OK to confirm. Important: Do not remove the memory card in the
middle of an operation when the card is being accessed. Removing the card in the middle of an operation may damage the memory card as well as the device, and data stored on the card may be corrupted.
Help
Your device has contextapplication is open, selefor the current view.
When you are reading thelp and the applicatiopress and hold .
To open help from the mSelect the desired appli
Tutoria
The tutorial gives you infeatures of your device.when you switch the dethe tutorial in the menuTutorial and the section
Mob
ile T
V
19
echnology when Mobile TV is ast reception may be stopped if ith Bluetooth wireless
application, press and hold the The system shows the program ble in your location. In the first e a few minutes.uide, scroll to it, and press . he available channels. This may an change the program guide
guide and the last watched TV xt time you open the Mobile TV
any program guides when you ptions > Rescan to search for rogram guides; select one of the
Mobile TVWith Mobile TV, you can access mobile television and radio services (network service) or watch, listen to, and record digital TV programs. Your Nokia N92 has an integrated DVB-H receiver that uses the Mobile TV application to access the Mobile TV services.
Mobile TV services may only be available upon subscription. Check the Mobile TV network coverage and the availability of and instructions on accessing datacast services and pricing with your service provider.
In some countries owners of a television receiver are required to pay a television licence fee. Contact your local authorities for more information.
You cannot watch live TV without a SIM card or when the offline profile is activated.
If you need to change your device or your SIM card, contact your service provider for the availability of the service. You may have to resubscribe to this service.
If you do not have access to the mobile TV service, the service providers in your area may not support mobile TV services.
The TV program content provider or the Mobile TV service provider may prevent or limit the use of external devices
with Bluetooth wireless tused. For example, broadcyou are using a headset wtechnology.
First start-up1 To open the Mobile TV
multimedia key . guides that are availastart-up, this may tak
2 To select a program gThe system arranges ttake some time. You clater in the settings.
The last selected programchannel are shown the neapplication.
If the device cannot find open Mobile TV, select Oand display the available pguides.

20
, select Options > Full screen. To , select Options > Normal screen.
ss the * key to switch between full iew.
f your service provider, select e. The menu command may vary. eb page may require a network
e side volume key or the scroll key.
e sound, select Options > Mute or
hold the device near your ear when use, because the volume may be
conds, select Options > Replay, if
itional interactive services, such as to purchase or vote for something applications.
nstall and use applications and sted sources, such as applications
Mob
ile T
V Mobile TV uses a large amount of device memory to store the program guide. The device attempts to update the program guide periodically even if Mobile TV is not on. If there is not enough memory for the update, the device notifies you that device memory is low. Remove data to free memory. For information on how to free device memory, see “Memory low—free memory”, p. 105.
View programsYou may have to subscribe to a channel before you can view it with the Mobile TV application. See ‘Subscribe to channels and programs’, page 23. You may be able to preview a program that you have not subscribed to.
To watch a brief preview of the current program or channel, select Options > Preview, if available.
To view a list of available channels, scroll up or down, and press to select a channel.
You can also use the media keys to browse the channels or stop receiving the broadcast. You can press the number keys to select a channel. Press # to enter two-digit channel numbers.
To change the order of the channels, select Options > Settings. See ‘Settings’, p. 23.
To switch to full screenreturn to normal screen
Tip: You can also prescreen and normal v
To view the web page oOptions > Provider pagAccess to the provider wconnection.
To adjust volume, use th
To mute and unmute thUnmute.
Warning: Do not the loudspeaker is inextremely loud.
To replay the last 30 seavailable.
ServicesChannels may offer addweb links or possibilitiesor install and use JavaTM
Important: Only iother software from tru
Mob
ile T
V
21
und if the device is turned off.
ram, select a program from the t Options > Programme details.
sam that you are viewing, press rding stops when the program g before that, press the stop
rent or next program, select mme and one of the options in
limit that is higher than that settings, you must enter the lock the recording. The age limit does program, which can be watched lock code.
Options > Stop recording.
Options > Pause recording. The terrupted. To continue recording, recording.
in the background while using else. To stop recording, open tions > Stop recording.
that are Symbian Signed or have passed the Java VerifiedTM testing
To view the available services of the channel you are currently viewing, select Options > Services. Services vary, and many TV programs may not include services.
Additional charges may apply for using the network required to access the services.
Program guideIn a program guide, the available channels and programs are listed according to their starting time.
To view the program guide, select Options > Programme guide. To change the channel in the program guide, scroll right or left. To view programs, scroll up or down.
To watch the currently running program, select Options > Watch programme.
To set a reminder for an upcoming program, select Options > Remind. indicates a program with a reminder. To define the time before the start of the program that the reminder goes off, see “Settings”, p. 23. Active reminders may not work if you change the program guide or if a program is removed from the program guide.
To remove a reminder in a program guide, select Options > Remove reminder.
The reminder does not so
To view details on a progprogram guide, and selec
Record programTo start recording a progrthe capture key. The recoends. To stop the recordinkey.
To start recording the curOptions > Record prograthe submenu.
If the program has an agewhich you defined in the code before you can startnot apply to the recordedwithout first entering the
To stop recording, select
To pause recording, selectbroadcast continues uninselect Options > Resume
You can record a programthe device for somethingMobile TV, and select Op
22
lect Options > Pause. To continue s > Resume or Resume in full e the corresponding media key.
off, select Options > Mute or
Options > Rename.
as File name, Duration or Size, etails.
e does not run out of memory, the eleted starting from the older
gainst automatic deletion, select To remove the protection, select tection.
to other folders in your device or d, select Options > Copy to folder reate a new folder, select
aracters in the currently selected ollowing:arch.
, or press to select from your s. You can limit the search to a
Mob
ile T
V To start recording a program shown in the program guide, select the program from the list, and select Options > Record programme. To adjust the recording time, see “Settings”, p. 23.
You may not be able to record some programs if you have not subscribed to the program or the TV program content provider does not allow the recording.
Using other applications during the recording may cause interference to the recorded TV program.
Recording may fail if the (digital TV) DVB-H network is not available or reception signal is too low.
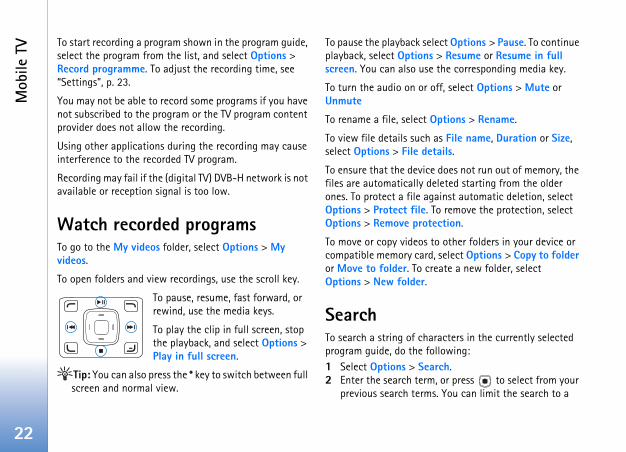
Watch recorded programsTo go to the My videos folder, select Options > My videos.
To open folders and view recordings, use the scroll key.
To pause, resume, fast forward, or rewind, use the media keys.
To play the clip in full screen, stop the playback, and select Options > Play in full screen.
Tip: You can also press the * key to switch between full screen and normal view.
To pause the playback seplayback, select Optionscreen. You can also us
To turn the audio on orUnmute
To rename a file, select
To view file details suchselect Options > File d
To ensure that the devicfiles are automatically dones. To protect a file aOptions > Protect file.Options > Remove pro
To move or copy videoscompatible memory caror Move to folder. To cOptions > New folder.
SearchTo search a string of chprogram guide, do the f1 Select Options > Se2 Enter the search term
previous search term
Mob
ile T
V
23
you can start watching the
hout a SIM card or when the . If you change SIM cards, you
nnels and programs. If you al SIM card, the original d, if they are still valid.
criptions > My subscriptions. ., Channels, or Programmes. an item, select Options > Item
s subscription, select Options >
V settings, select Options > wing:
he general status of the Mobile h. To update the signal strength g and open it again.
e the default channel order. mark the items you want to
specific channel, or specify a weekday or a genre for the search.
3 Select Find to start the search.4 Select a found program and Options to watch or listen
to the program, subscribe to it, view the details, or set a reminder or recording.
Subscribe to channels and programsSome TV channels and programs may require a subscription. Unsubscribed items are indicated with . A channel package is a set of channels that you can subscribe to as one package.
To view a list of items you have subscribed, select Options > Subscriptions > My subscriptions. To retrieve subscribed items in case they have been lost from the device, select Options > Retrieve subscriptions.
To subscribe to an item, do the following:1 Select Options >Subscriptions > New subscription.2 Select from a list of unsubscribed items: Channel
pckgs., Channels, or Programmes.3 Select Options > Subscribe.4 Select the length of the subscription.5 To accept the subscription, select Verify.
A note is displayed whenchannel or program.
You cannot subscribe witoffline profile is activatedmust re-subscribe to chachange back to the originsubscriptions are activate
End subscriptions1 Select Options >Subs2 Select Channel pckgs3 To view the details of
details.To end your continuouUnsubscribe.
SettingsTo configure the Mobile TSettings. Define the follo
System status—to view tTV and the signal strengtindicator, close this dialo
Channel order—to changSelect Options > Mark to
24
llowed
ideos
Mob
ile T
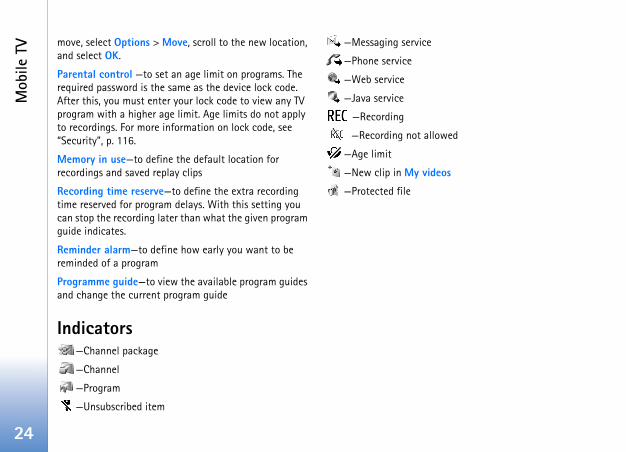
V move, select Options > Move, scroll to the new location, and select OK.
Parental control —to set an age limit on programs. The required password is the same as the device lock code. After this, you must enter your lock code to view any TV program with a higher age limit. Age limits do not apply to recordings. For more information on lock code, see “Security”, p. 116.
Memory in use—to define the default location for recordings and saved replay clips
Recording time reserve—to define the extra recording time reserved for program delays. With this setting you can stop the recording later than what the given program guide indicates.
Reminder alarm—to define how early you want to be reminded of a program
Programme guide—to view the available program guides and change the current program guide
Indicators—Channel package
—Channel
—Program
—Unsubscribed item
—Messaging service
—Phone service
—Web service
—Java service
—Recording
—Recording not a
—Age limit
—New clip in My v
—Protected file

Cam
era
25
era, rotate the display to the era is in video mode, scroll left
e capture key or the scroll key. A
r adjustments before taking a and lighting’, p. 27.
e may take longer if you change or settings.
ow the following:
ing on the selected image
CameraYour Nokia N92 has two cameras. The high resolution main camera activates when you rotate the display to the Imaging mode. The lower resolution secondary camera on the front activates in the Fold open mode. Both cameras can be used to take still pictures and record video.
Your device supports an image capture resolution of 1600x1200 pixels. The image resolution in this guide may appear different.
To activate the main camera, switch to the Imaging mode. See ‘Imaging mode’, p.11. In the viewfinder, you can see the view to be captured. To switch between cameras, select Options > Use second. camera or Use main camera.
You can send images and video clips in a multimedia message, as an e-mail attachment, with infrared or wireless LAN, or by using Bluetooth connectivity.
Take picturesTo activate the main camImaging mode. If the camto select image mode.
To take a picture, press thred indicator led flashes.
To make lighting and colopicture, see ‘Adjust color
Saving the captured imagthe zoom, lighting, or col
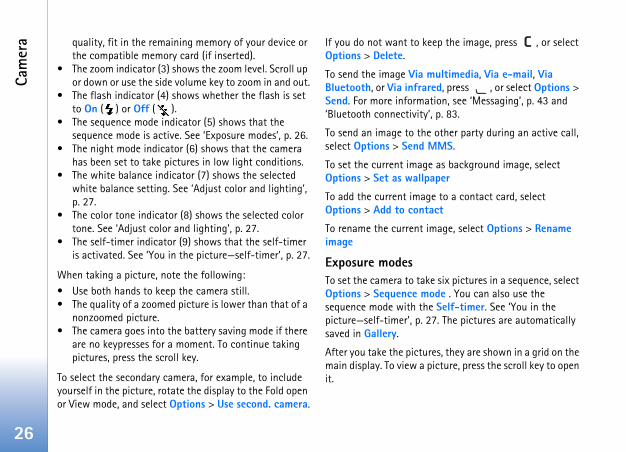
The camera indicators sh• The device
memory ( ) and memory card ( ) indicators (1) show where images are saved.
• The images indicator (2) estimates how many images, depend
26
eep the image, press , or select
ultimedia, Via e-mail, Via red, press , or select Options > tion, see ‘Messaging’, p. 43 and ’, p. 83.
other party during an active call, MMS.
e as background image, select aper
e to a contact card, select act
mage, select Options > Rename
e six pictures in a sequence, select ode . You can also use the e Self-timer. See ‘You in the 7. The pictures are automatically
res, they are shown in a grid on the icture, press the scroll key to open
Cam
era quality, fit in the remaining memory of your device or
the compatible memory card (if inserted).• The zoom indicator (3) shows the zoom level. Scroll up
or down or use the side volume key to zoom in and out.• The flash indicator (4) shows whether the flash is set
to On ( ) or Off ( ).• The sequence mode indicator (5) shows that the
sequence mode is active. See ‘Exposure modes’, p. 26.• The night mode indicator (6) shows that the camera
has been set to take pictures in low light conditions.• The white balance indicator (7) shows the selected
white balance setting. See ‘Adjust color and lighting’, p. 27.
• The color tone indicator (8) shows the selected color tone. See ‘Adjust color and lighting’, p. 27.
• The self-timer indicator (9) shows that the self-timer is activated. See ‘You in the picture—self-timer’, p. 27.
When taking a picture, note the following:• Use both hands to keep the camera still.• The quality of a zoomed picture is lower than that of a
nonzoomed picture.• The camera goes into the battery saving mode if there
are no keypresses for a moment. To continue taking pictures, press the scroll key.
To select the secondary camera, for example, to include yourself in the picture, rotate the display to the Fold open or View mode, and select Options > Use second. camera.
If you do not want to kOptions > Delete.
To send the image Via mBluetooth, or Via infraSend. For more informa‘Bluetooth connectivity
To send an image to theselect Options > Send
To set the current imagOptions > Set as wallp
To add the current imagOptions > Add to cont
To rename the current iimage
Exposure modesTo set the camera to takOptions > Sequence msequence mode with thpicture—self-timer’, p. 2saved in Gallery.
After you take the pictumain display. To view a pit.
Cam
era
27
lightingreproduce colors and lighting ptions and from the following
the flash according to the lash’, p. 27.
—Select the current lighting is allows the camera to
curately.
elect a color effect from the list.
es to match any settings you the change affects the pictures
y depending on the selected
mera specific; if you change the camera, the settings in the main e setup settings do, however, ge and video modes.
mera settingsngs, select Options > Settings> e following options:
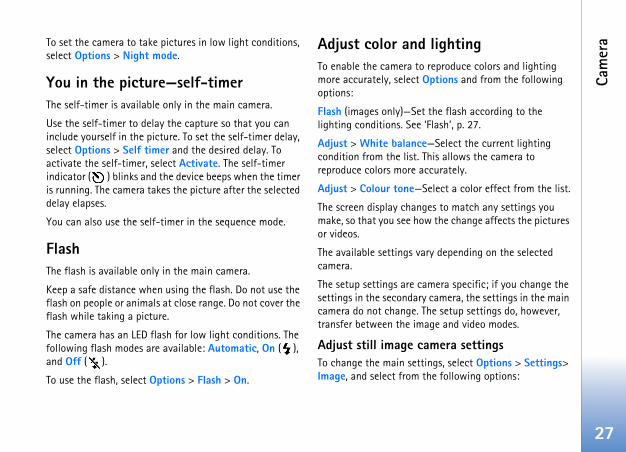
To set the camera to take pictures in low light conditions, select Options > Night mode.
You in the picture—self-timerThe self-timer is available only in the main camera.
Use the self-timer to delay the capture so that you can include yourself in the picture. To set the self-timer delay, select Options > Self timer and the desired delay. To activate the self-timer, select Activate. The self-timer indicator ( ) blinks and the device beeps when the timer is running. The camera takes the picture after the selected delay elapses.
You can also use the self-timer in the sequence mode.
FlashThe flash is available only in the main camera.
Keep a safe distance when using the flash. Do not use the flash on people or animals at close range. Do not cover the flash while taking a picture.
The camera has an LED flash for low light conditions. The following flash modes are available: Automatic, On ( ), and Off ( ).
To use the flash, select Options > Flash > On.
Adjust color and To enable the camera to more accurately, select Ooptions:
Flash (images only)—Set lighting conditions. See ‘F
Adjust > White balancecondition from the list. Threproduce colors more ac
Adjust > Colour tone—S
The screen display changmake, so that you see howor videos.
The available settings varcamera.
The setup settings are casettings in the secondary camera do not change. Thtransfer between the ima
Adjust still image caTo change the main settiImage, and select from th

28
ments it may be necessary to use tting. To define the quality in the mera, select Options > Settings.
nd. For portraits and other pictures ng your subject in front of a ground that may distract attention the camera, or the subject, when be met. Move the camera closer to er portraits.
pes and sceneries, to add depth to ects into the foreground. If the close to the camera, it may be
onsount, and direction of light can
matically. The following are some ns: the subject. Avoid placing your
strong light source. If the light subject or visible in the display, the y have weak contrast, may be too
Cam
era Image quality—High, Normal, or Basic. The better the
image quality, the more memory the image consumes.
Image resolution—High (resolution 1600x1200), Normal (resolution 1152x864), or Basic (resolution 640x480). The higher the image resolution, the more memory the image consumes. The quality of a zoomed picture is lower than that of a nonzoomed picture.
Default image name—Set a name for the pictures you take. For example, if you set Beach as the default name, the camera names the pictures you take Beach, Beach(001), Beach(002), and so on, until you change the setting again.
Show captured img.—Select Yes if you want to see the captured image after it is taken, or No if you want to continue taking pictures immediately.
Memory in use—Select where to store your images.
Tips on taking good photographs
Picture qualityUse the appropriate picture quality. The camera has three picture quality modes (High, Normal, and Basic). Use the High setting to ensure that the camera produces the best picture quality available. Note however, that better picture quality requires more storage space. For
MMS and e-mail attachthe Normal or Basic seImaging mode in the ca
BackgroundUse a simple backgrouwith people, avoid havicluttered, complex backfrom the subject. Movethese conditions cannotthe object to take clear
DepthWhen shooting landscayour pictures, place objforeground object is tooblurred.
Lighting conditiChanging the source, amchange photographs dratypical lighting conditio• Light source behind
subject in front of asource is behind the resulting picture ma
Cam
era
29
wn. The red LED light is lit, and a g to the subject that video is
ny time, select Pause. The pause e display. Video recording recording is set to pause and s within a minute.
sume recording. cording. The video clip is o the Imgs. & video folder of p. 31.
w the following:
) and memory card ( ) here the video is saved.ator shows that the
hich appears on the side pane, Scroll up or down or use the side or zoom out.
rded:he video clip you just recorded, . keep the video, press , or te. the other party during an active Send MMS.
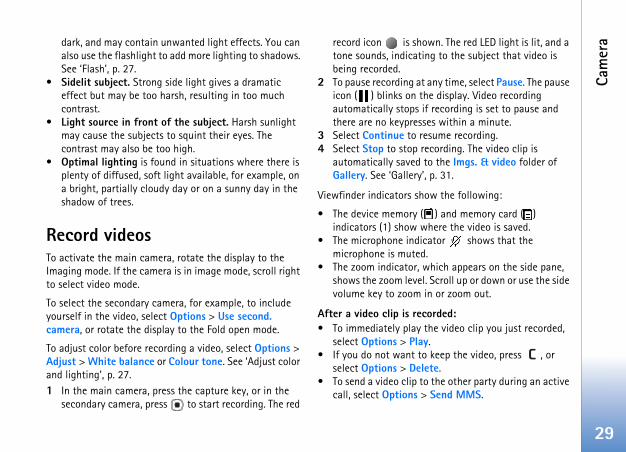
dark, and may contain unwanted light effects. You can also use the flashlight to add more lighting to shadows. See ‘Flash’, p. 27.
• Sidelit subject. Strong side light gives a dramatic effect but may be too harsh, resulting in too much contrast.
• Light source in front of the subject. Harsh sunlight may cause the subjects to squint their eyes. The contrast may also be too high.
• Optimal lighting is found in situations where there is plenty of diffused, soft light available, for example, on a bright, partially cloudy day or on a sunny day in the shadow of trees.
Record videosTo activate the main camera, rotate the display to the Imaging mode. If the camera is in image mode, scroll right to select video mode.
To select the secondary camera, for example, to include yourself in the video, select Options > Use second. camera, or rotate the display to the Fold open mode.
To adjust color before recording a video, select Options > Adjust > White balance or Colour tone. See ‘Adjust color and lighting’, p. 27.1 In the main camera, press the capture key, or in the
secondary camera, press to start recording. The red
record icon is shotone sounds, indicatinbeing recorded.
2 To pause recording at aicon ( ) blinks on thautomatically stops ifthere are no keypresse
3 Select Continue to re4 Select Stop to stop re
automatically saved tGallery. See ‘Gallery’,
Viewfinder indicators sho
• The device memory (indicators (1) show w
• The microphone indicmicrophone is muted.
• The zoom indicator, wshows the zoom level.volume key to zoom in
After a video clip is reco• To immediately play t
select Options > Play• If you do not want to
select Options > Dele• To send a video clip to
call, select Options >

30
Cam
era Video settings
There are two kinds of settings for the video recorder: temporary settings and default settings. To adjust contrast, brightness, and color settings, see ‘Adjust color and lighting’, p. 27. The temporary settings return to the default settings after you close the camera, but the default settings remain the same until you change them again. To change the default settings, select Options > Settings > Video and from the following:
Length: —To optimize video clips for MMS, select Short.
Video resolution—Select High (CIF, 352x288), Normal (QCIF 176x144), or Basic (SubQCIF 128x96). The higher the resolution, the more memory the video consumes.
Default video name:—Set a name for the video taken. Select Date or Text. If you select Text, the videos are named in the format “Video” by default. For example, if you set Beach as the default name, Camera names the video clips you take Beach, Beach(001), Beach(002), and so on, until you change the setting again.
Memory in use—Define the default memory store: device memory or memory card (if inserted).
Galle
ry
31
und clips into Gallery using the Sound clips folders, select Track . To download images or videos, lder, select the download icon. ou can select a bookmark you items.
d in Gallery with other through wireless LAN, you must your wireless LAN home IAP, netw. application. See ‘Wireless
me netw. are not available in s for Home netw. have been
nd video clipsclips recorded with the camera video folder in Gallery. Images e sent to you in a multimedia
tachment, through Bluetooth infrared. To be able to view a lip in the gallery or in the media
GalleryTo store and organize your images, video clips, sound clips, playlists, and streaming links, or share your files with other compatible Universal Plug and Play (UPnP) devices through wireless LAN, press , and select Gallery. To open the gallery from the Camera application, select Options > Go to Gallery. From Camera, only the Imgs. & video folder is available.
Select Imgs. & video , Tracks , Sound clips , Streaming links , Presentations , or All files , and press to open it.
You can browse and open folders, and mark, copy, and move items to folders. Video clips, .ram files, and streaming links are opened and played in the RealPlayer application. See ‘RealPlayer’, p. 37. You can also create albums and mark, copy, and add items to albums. See ‘Albums’, p. 34.
To open a file, press . Videos open in RealPlayer, and music and sound clips in Music player. See ‘View images and video clips’, p. 31.
To copy or move files to the compatible memory card (if inserted) or to device memory, select a file and Options > Move and copy > Copy to memory card/Move to memory card or Copy to phone mem./Move to phone mem..
To download tracks or sobrowser, in the Tracks or downl., or Sound downl.in the Images & video foThe browser opens, and ywant to use to download
To share media files savecompatible UPnP devicesfirst create and configurethen configure the HomeLAN’, p. 89.
The options related to HoGallery before the settingconfigured.
View images aPictures taken and video are stored in the Images &and video clips can also bmessage, as an e-mail atconnectivity, or by using received image or video c
32
r taking them, or the ones already Options > Edit.
crop and rotate the image; adjust ntrast, and resolution; and add a frame to the picture.
t Options > Apply effect > Crop. anually, select Manual, or select
io from the list. If you select s in the upper left corner of the key to select the area to crop, and s appears in the lower right corner. be cropped. To adjust the first ck. The selected areas form a the cropped image.
ined aspect ratio, select the upper o be cropped. To resize the e scroll key. To freeze the selected the area within the picture, use
the area to be cropped, press .
eyes in an image, select Options > reduction. Move the cross onto loop appears on the display. To
e size of the eye, move the scroll ess, press .
Galle
ry player, you must save it in the device memory or on a compatible memory card (if inserted).
Open the Imgs. & video folder in Gallery. The images and video clip files are in a loop, and ordered by date. The number of files is displayed. To browse the files one by one, scroll left or right. To browse files in groups, scroll up or down.
To edit a photo, select Options > Edit. An image editor opens. See ‘Edit images’, p. 32.
To add an image or a video clip to an album in the gallery, select Options > Albums > Add to album. See ‘Albums’, p. 34.
To print your images on a compatible printer, or to store them on your compatible memory card (if inserted) for printing, select Options > Print. See ‘Image print’, p. 33.
To zoom in an image, open the image, and select Options > Zoom in. To zoom out, select Options > Zoom out. The zooming ratio is shown at the top of the display. The zooming ratio is not stored permanently.
To use the picture as a background image, select the picture and Options > Assign > Set as wallpaper.
To delete an image or video clip, press .
Edit imagesTo edit the pictures aftesaved in Gallery, select
Select Apply effect to the brightness, color, coeffects, text, clip art, or
To crop an image, selecTo crop the image size ma predefined aspect ratManual, a cross appearimage. Move the scroll select Set. Another crosAgain select the area toselected area, select Barectangle, which forms
If you selected a predefleft corner of the area thighlighted area, use tharea, press . To movethe scroll key. To select
To reduce redness of theApply effect > Red eyethe eye, and press . Aresize the loop to fit thkey. To reduce the redn
Galle
ry
33
t for the first time, a list of yed after you select the image. er is set as the default printer.
rinter compatible with tible data cable, the printer is
t available, a list of available ed.
ter, select Options > Settings >
ens only when you start printing
isplayed using predefined out, scroll left and right through he selected printer. If the images , scroll up or down to display the
y, depending on the capabilities selected.
elect Options > Default printer.
Shortcuts in the image editor:• To view an image in the full screen, press . To return
to the normal view, press again.• To rotate an image clockwise or counterclockwise,
press or .• To zoom in or out, press or .• To move on a zoomed image, scroll up, down, left, or
right.
Image printUse Image print to print your images using a compatible USB data cable or Bluetooth connectivity, or wireless LAN (if available). You can also store images to a compatible memory card (if available) and print them using a compatible printer that has a memory card reader.
To print images with Image print, select the image you want to print, and the print option in the gallery.
To print to a printer compatible with PictBridge, connect the data cable before you select the print option.
You can only print images that are in .jpeg format. The pictures taken with the camera are automatically saved in .jpeg format.
Printer selection
When you use Image prinavailable printers is displaSelect a printer. The print
If you have connected a pPictBridge using a compaautomatically displayed.
If the default printer is noprinting devices is display
To change the default prinDefault printer.
Print previewThe print preview view opan image in the gallery.
The selected images are dlayouts. To change the laythe available layouts for tdo not fit on a single pageadditional pages.
Print settingsThe available options varof the printing device you
To set a default printer, s
34
n album, press . The file is not & video folder in Gallery.
Galle
ry To select the paper size, select Paper size, the size of paper from the list, and OK. Select Cancel to return to the previous view.
PresentationsWith presentations, you can view SVG (scalable vector graphics) files, such as cartoons and maps. SVG images maintain their appearance when printed or viewed with different screen sizes and resolutions. To view SVG files, select the Presentations folder, scroll to an image, and select Options > Play.
To zoom in, press . To zoom out, press .
To switch between full screen and normal screen, press *.
AlbumsWith albums you can conveniently manage your images and video clips. To view the albums list, in the Imgs. & video folder, select Options > Albums > View albums.
To add a picture or a video clip to an album in the gallery, scroll to a picture or video clip, and select Options > Albums > Add to album. A list of albums opens. Select the album to which you want to add the picture or video clip, and press .
To remove a file from adeleted from the Imgs.
Med
ia a
pplic
atio
ns
35
c yed ed. ,
ay.
o
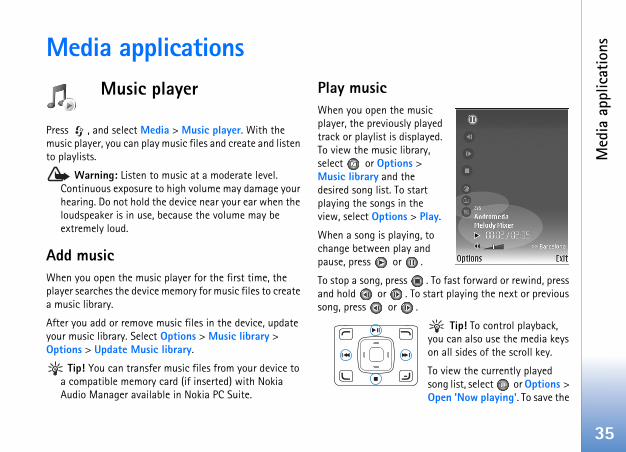
To fast forward or rewind, press tart playing the next or previous
Tip! To control playback, you can also use the media keys on all sides of the scroll key.
To view the currently played song list, select or Options > Open 'Now playing'. To save the
Media applicationsMusic player
Press , and select Media > Music player. With the music player, you can play music files and create and listen to playlists.
Warning: Listen to music at a moderate level. Continuous exposure to high volume may damage your hearing. Do not hold the device near your ear when the loudspeaker is in use, because the volume may be extremely loud.
Add musicWhen you open the music player for the first time, the player searches the device memory for music files to create a music library.
After you add or remove music files in the device, update your music library. Select Options > Music library > Options > Update Music library.
Tip! You can transfer music files from your device to a compatible memory card (if inserted) with Nokia Audio Manager available in Nokia PC Suite.
Play musicWhen you open the musiplayer, the previously platrack or playlist is displayTo view the music libraryselect or Options > Music library and the desired song list. To startplaying the songs in the view, select Options > Pl
When a song is playing, tchange between play andpause, press or .
To stop a song, press .and hold or . To ssong, press or .

36
files, if available. Some tag format upported.
rtists, genres, or composers to a s and Options > Add to track list. laylist or add to an existing one.
Track lists. To create a new > New track list. When viewing a d, to add more songs, select
ss . Deleting a playlist only the music files.
e music playback, select Options >
t equalizer settings, select it with t Activate.
resetsset, select Options > New preset. g preset select Options > Edit.ncy settings, scroll to the left or id, or, high frequency and up or
decrease the volume of the and.
Med
ia a
pplic
atio
ns song list as a playlist, select Options > Add to track list, and create a new playlist, or select a saved playlist.
To adjust the volume, use the volume key on the side of the device. If you are playing a file that is stored on another home network device through wireless LAN, use and to adjust the volume.
To select between random play and normal play mode, select Options > Random play. To select whether playing stops at the end of the playlist or restarts from its beginning, select Options > Loop.
Tip! To leave the application open and music playing in the background, press twice to return to the standby mode. To return to the application, press and hold , and select Music player.
To open your web bookmarks for downloading music, select Options > Track downloads.
To return to the standby mode and leave the music playing in the background, select Options > Play in background.
Music libraryTo view the music library, select Options > Music library. All tracks lists all music. To view sorted songs, select Albums, Artists, Genres, or Composers. The album, artist, genre, and composer information is collected from the ID3
or M4A tags of the songvariations may not be s
To add songs, albums, aplaylist, select the itemYou can create a new p
To view playlists, selectplaylist, select Optionsplaylist you have createOptions > Add tracks.
To delete a playlist, predeletes the playlist, not
EqualizerTo modify the tone of thEqualiser.
To use one of the presethe scroll key, and selec
Modify equalizer p1 To create a new pre
To modify an existin2 To adjust the freque
right to select low, mdown to increase orselected frequency b
Med
ia a
pplic
atio
ns
37
play one of the last six files
file saved in Gallery.
ess to play the file.
clip in full screen mode, press rmal screen mode, press any key.
and hold . media file, press and hold .ess the volume key to decrease displayed. To turn on the sound,
to increase the volume until you
ack, you can also use the media key.
ver the airquire you to use an internet r default access point. Other u to use a WAP access point.
configured when you first start
ider for more information.
3 To reset the settings to their original values, select Options > Reset to defaults.
To delete a preset, scroll to it, and press . The default presets cannot be deleted.
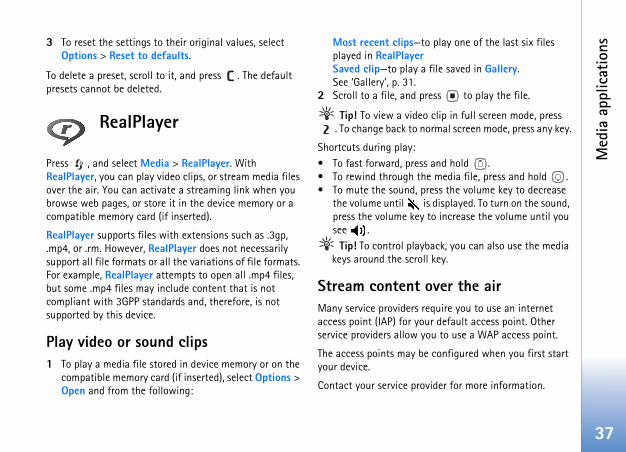
RealPlayer
Press , and select Media > RealPlayer. With RealPlayer, you can play video clips, or stream media files over the air. You can activate a streaming link when you browse web pages, or store it in the device memory or a compatible memory card (if inserted).
RealPlayer supports files with extensions such as .3gp, .mp4, or .rm. However, RealPlayer does not necessarily support all file formats or all the variations of file formats. For example, RealPlayer attempts to open all .mp4 files, but some .mp4 files may include content that is not compliant with 3GPP standards and, therefore, is not supported by this device.
Play video or sound clips1 To play a media file stored in device memory or on the
compatible memory card (if inserted), select Options > Open and from the following:
Most recent clips—toplayed in RealPlayerSaved clip—to play a See ‘Gallery’, p. 31.
2 Scroll to a file, and pr
Tip! To view a video. To change back to no
Shortcuts during play:• To fast forward, press• To rewind through the• To mute the sound, pr
the volume until ispress the volume key see . Tip! To control playb
keys around the scroll
Stream content oMany service providers reaccess point (IAP) for youservice providers allow yo
The access points may beyour device.
Contact your service prov
38
ter the IP address of the proxy
ter the port number of the proxy
vers are intermediate servers ers and their users. Some service o provide additional security or
rowser pages that contain sound or
croll to the access point you want internet, and press .
me for RealPlayer to disconnect you pause a media clip playing Select User defined, and press . ct OK.
r the lowest port number of the minimum value is 1024.
er the highest port number of the maximum value is 65535.
ced settings to edit the fferent networks.
Med
ia a
pplic
atio
ns In RealPlayer, you can only open an rtsp:// URL address. However, RealPlayer recognizes an http link to a .ram file.
To stream content over the air, select a streaming link saved in Gallery, on a web page, or received in a text message or multimedia message. Before live content begins streaming, your device connects to the site and starts loading the content. The content is not saved in your device.
Receive RealPlayer settingsYou may receive RealPlayer settings in a special text message from the service provider. See ‘Data and settings’, p. 48. For more information, contact your service provider.
Change the RealPlayer settingsSelect Options > Settings and from the following:
Video—to have RealPlayer automatically repeat video clips after they finish playing
Connection—to select whether to use a proxy server, change the default access point, and set the port range used when connecting. Contact your service provider for the correct settings.
Proxy sett.:
Use proxy—To use a proxy server, select Yes.
Proxy serv. address—Enserver.
Proxy port number—Enserver.
Glossary: Proxy serbetween media servproviders use them tspeed up access to bvideo clips.
Netw. sett.:
Default access point—Sto use to connect to the
Online time—Set the tifrom the network whenthrough a network link. Enter the time, and sele
Lowest UDP port—Enteserver’s port range. The
Highest UDP port—Entserver’s port range. The
Select Options > Advanbandwidth values for di
Med
ia a
pplic
atio
ns
39
s and from the following:
back
k
yback quality. If the playback , select Normal or Low.
ile using the entire display. To en, select Normal screen.
visible in full screen, the key ilable when you press either key
file in its original size after
to move around the display with ave zoomed in
adio
ia > Radio. You can use the al FM radio with automatic s, or with parallel visual radio program on the display, if
offer Visual Radio service. The packet data (network service).
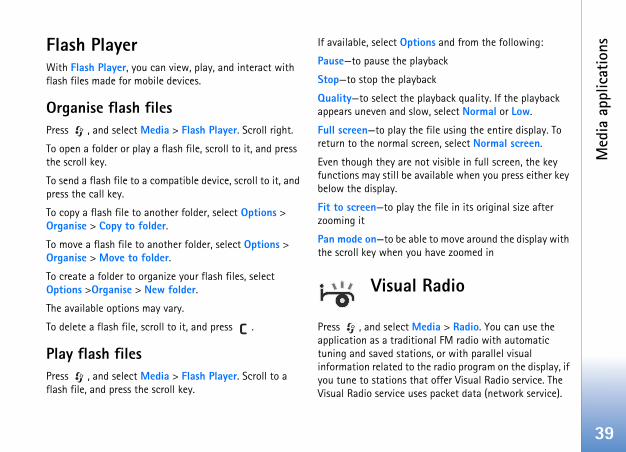
Flash PlayerWith Flash Player, you can view, play, and interact with flash files made for mobile devices.
Organise flash filesPress , and select Media > Flash Player. Scroll right.
To open a folder or play a flash file, scroll to it, and press the scroll key.
To send a flash file to a compatible device, scroll to it, and press the call key.
To copy a flash file to another folder, select Options > Organise > Copy to folder.
To move a flash file to another folder, select Options > Organise > Move to folder.
To create a folder to organize your flash files, select Options >Organise > New folder.
The available options may vary.
To delete a flash file, scroll to it, and press .
Play flash filesPress , and select Media > Flash Player. Scroll to a flash file, and press the scroll key.
If available, select Option
Pause—to pause the play
Stop—to stop the playbac
Quality—to select the plaappears uneven and slow
Full screen—to play the freturn to the normal scre
Even though they are notfunctions may still be avabelow the display.
Fit to screen—to play thezooming it
Pan mode on—to be able the scroll key when you h
Visual R
Press , and select Medapplication as a traditiontuning and saved stationinformation related to theyou tune to stations thatVisual Radio service uses

40
aved radio stations, select or r previous saved station, or press
ber key to select the memory
se the side volume key. To listen to speaker, select Options > Activate
to music at a moderate level. to high volume may damage your
the device near your ear when the , because the volume may be
ns based on location, select ctory (network service).
d station to your station list, select . To open the list of your saved > Stations.
y mode and leave the FM radio nd, select Options > Play in
se the media keys around the scroll dio.
Med
ia a
pplic
atio
ns You can listen to the FM radio while using other applications.
If you do not have access to the Visual Radio service, the service providers and radio stations in your area may not support Visual Radio.
You can normally make a call or answer an incoming call while listening to the radio. The radio is muted when there is an active call.
The radio selects the used frequency band based on the country information received from the network. If this information is not available, you may be asked to select the region you are located in, or you can select the region in the Visual Radio settings. See ‘Settings’, p. 41.
Listen to the radioThe quality of the radio broadcast depends on the coverage of the radio station in that particular area.
The FM radio depends on an antenna other than the wireless device antenna. A compatible headset or enhancement needs to be attached to the device for the FM radio to function properly.
Press , and select Media > Radio. To start a station search, select or . To change the frequency manually, select Options > Manual tuning.
If you have previously s to go to the next o
the corresponding numlocation of a station.
To adjust the volume, uthe radio using the loudloudspeaker.
Warning: Listen Continuous exposurehearing. Do not holdloudspeaker is in useextremely loud.
To view available statioOptions > Station dire
To save the current tuneOptions > Save stationstations, select Options
To return to the standbplaying in the backgroubackground.
Tip! You can also ukey to control the ra
Med
ia a
pplic
atio
ns
41
ether a tone is played when the
ct Yes to have the Visual Radio ly when you select a saved service.
access point used for the data eed an access point to use the y FM radio.
he region you are currently displayed only if there was no he application was started.
ia > Web to open a ser (network service) optimized at are not originally formatted
al page layout.
a page. A smaller image of the ed frame that indicates the
age of the current page, you can ming options > Page overview.
View visual contentTo check availability and costs, and to subscribe to the service, contact your service provider.
To view available visual content for a tuned station, select or Options > Start visual service. If the visual service
ID has not been saved for the station, enter it, or select Retrieve to search for it in the station directory (network service).
When the connection to the visual service is established, the display shows the current visual content.
To adjust display settings for the visual content view, select Options > Display settings.
Saved stationsYou can save up to 20 radio stations in the radio. To open your station list, select Options > Stations.
To listen to a saved station, select Options > Station > Listen. To view available visual content for a station with Visual Radio service, select Options > Station > Start visual service.
To change station details, select Options > Station > Edit.
SettingsSelect Options > Settings and from the following:
Start-up tone—Select whapplication is started.
Auto-start service—Seleservice start automaticalstation that offers visual
Access point—Select theconnection. You do not napplication as an ordinar
Current region—Select tlocated in. This setting isnetwork coverage when t
Web
Press , and select Medsupplementary web browfor browsing web sites thfor mobile browsing.
Web preserves the origin
Scroll in any direction onpage is displayed with a rcurrently shown area.
To view the thumbnail imalso select Options > Zoo
42
Med
ia a
pplic
atio
ns Move the red frame with the scroll key and press the scroll key to return to normal view.
To view recently visited pages as thumbnails, select Options > Navigation options > History.
To block pop-up windows, select Options > Settings > Block pop-ups.
To search for a text in real time, select Options > Navigation options > Find and start entering the search string. The matching string is displayed as you enter the text.
You can subscribe to news and blog feeds hosted by many web sites. The web feeds feature of the browser alerts you when feed links are available for a web site.
For information on other features and options in Web, see ‘Services’, p. 66.
Recorder
To record voice memos, press , and select Media > Recorder. To record a telephone conversation, open Recorder during a voice call. Both parties hear a tone every 5 seconds during recording.
The recorder cannot be used when a data call or GPRS connection is active.
Mes
sagi
ng
43
ges that have not been sent are
essages that have been sent, using Bluetooth connectivity or To change the number of e ‘Other settings’, p. 55.
aiting to be sent are temporarily
e placed in the outbox when your coverage. You can also schedule nt the next time you connect to
quest the network to send you a t messages and multimedia network service). Receiving a media message that has been may not be possible.
opened any of the default een the folders, press or .
requests (also known as USSD ation commands for network
MessagingPress , and select Messag. (network service). In Messaging, you can create, send, receive, view, edit, and organize text messages, multimedia messages, e-mail messages, and special text messages containing data. You can also receive web service messages, cell broadcast messages, and send service commands. Messages and data received using Bluetooth connectivity or infrared are received in the Inbox folder in Messaging.
To create a new message, select New message.
Only devices that have compatible features can receive and display multimedia messages. The appearance of a message may vary depending on the receiving device.
Messaging contains the following folders:
Inbox—Received messages, except e-mail and cell broadcast messages, are stored here. E-mail messages are stored in the Mailbox.
My folders—Organize your messages into folders.
Tip! To avoid rewriting messages that you send often, use texts in the templates folder.
Mailbox—Connect to your remote mailbox to retrieve your new e-mail messages or view your previously retrieved e-mail messages offline. See ‘E-mail’, p. 53.
Drafts—Draft messastored here.
Sent—The last 20 mexcluding messages sent infrared, are stored here. messages to be saved, se
Outbox—Messages wstored here.
For example, messages ardevice is outside networke-mail messages to be seyour remote mailbox.
Reports—You can redelivery report of the texmessages you have sent (delivery report of a multisent to an e-mail address
Tip! When you havefolders, to switch betw
To enter and send servicecommands), such as activ

44
ocated on the same key as the til the cursor appears (or press period), and enter the letter.ess . To move the cursor to the three times.
nputr with a single keypress. Predictive built-in dictionary to which you
is displayed when you write xt input.e text input, press repeatedly ayed.word,
. once
okia"
d, for o, and
changes after each keypress.ting the word correctly, press ss to add a space.
Mes
sagi
ng services, to your service provider, select Options > Service command in the main view of Messaging.
Cell broadcast (network service) allows you to receive messages on various topics, such as weather or traffic conditions, from your service provider. For available topics and relevant topic numbers, contact your service provider. In the main view of Messaging, select Options > Cell broadcast. In the main view, you can see the status of a topic, a topic number, name, and whether it has been flagged ( ) for follow-up.
Cell broadcast messages cannot be received in UMTS networks. A packet data connection may prevent cell broadcast reception.
Write textABC, abc, and Abc indicate the selected character mode. 123 indicates the number mode.
Traditional text input is displayed when you are writing text using
traditional text input.• Press a number key ( — ) repeatedly until the
desired character appears. There are more characters available for a number key than are printed on the key.
• If the next letter is lpresent one, wait unto end the time-out
• To insert a space, prnext line, press
Predictive text iYou can enter any lettetext input is based on acan add new words. text using predictive te1 To activate predictiv
until is displ2 To write the desired
press the keys —Press each key only for one letter. For example, to write "Nwhen the English dictionary is selectepress for N,
for k, for i, for a.
The word suggestion3 When you finish wri
to confirm it, or pre

Mes
sagi
ng
45
fferent character modes, press
ss . To delete more than one .
ation marks are available under
haracters, press .
l special characters at the same you select each character.
messagesimedia message may vary, g device.
ultimedia message or write an e correct connection settings in and e-mail settings’, p. 47 and
limit the size of MMS messages. eeds this limit, the device may
can be sent by MMS.
and from the following:d a text message—to send a multimedia message
If the word is not correct, press repeatedly to view the matching words the dictionary has found one by one.If the ? character is shown after the word, the word is not in the dictionary. To add a word to the dictionary, select Spell, enter the word using traditional text input, and select OK. The word is added to the dictionary. When the dictionary is full, a new word replaces the oldest added word.
4 Start writing the next word.
Write compound wordsWrite the first half of a compound word; to confirm it, press . Write the last part of the compound word. To complete the compound word, press to add a space.
Turn predictive text input offTo turn predictive text input off, press repeatedly until
is displayed.
Tip! To turn predictive text input on or off, quickly press twice.
Tips on text inputTo insert a number in the letter mode, press and hold the desired number key.
To switch between the letter and number mode, press and hold .
To switch between the di.
To delete a character, precharacter, press and hold
The most common punctu.
To open a list of special c
Tip! To insert severatime, press when
Write and sendThe appearance of a multdepending on the receivin
Before you can create a me-mail, you must have thplace. See ‘Receive MMS ‘E-mail’, p. 53.
The wireless network mayIf the inserted picture excmake it smaller so that it
1 Select New message Text message—to senMultimedia message(MMS)
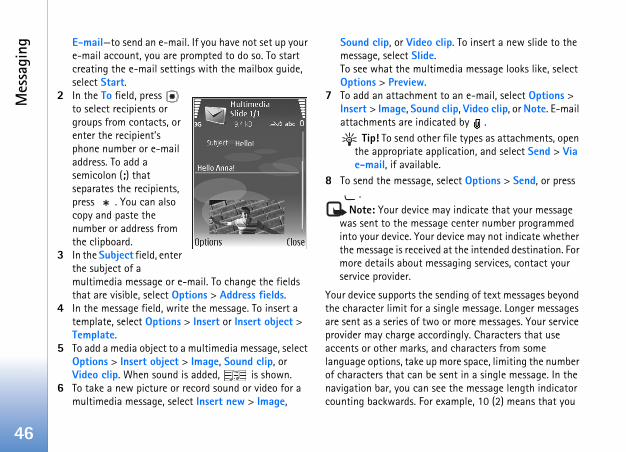
46
clip. To insert a new slide to the e.timedia message looks like, select
nt to an e-mail, select Options > nd clip, Video clip, or Note. E-mail icated by .er file types as attachments, open pplication, and select Send > Via le., select Options > Send, or press
may indicate that your message sage center number programmed r device may not indicate whether ed at the intended destination. For essaging services, contact your
e sending of text messages beyond single message. Longer messages o or more messages. Your service
cordingly. Characters that use and characters from some p more space, limiting the number e sent in a single message. In the see the message length indicator r example, 10 (2) means that you
Mes
sagi
ng E-mail—to send an e-mail. If you have not set up your e-mail account, you are prompted to do so. To start creating the e-mail settings with the mailbox guide, select Start.
2 In the To field, press to select recipients or groups from contacts, or enter the recipient’s phone number or e-mail address. To add a semicolon (;) that separates the recipients, press . You can also copy and paste the number or address from the clipboard.
3 In the Subject field, enter the subject of a multimedia message or e-mail. To change the fields that are visible, select Options > Address fields.
4 In the message field, write the message. To insert a template, select Options > Insert or Insert object > Template.
5 To add a media object to a multimedia message, select Options > Insert object > Image, Sound clip, or Video clip. When sound is added, is shown.
6 To take a new picture or record sound or video for a multimedia message, select Insert new > Image,
Sound clip, or Videomessage, select SlidTo see what the mulOptions > Preview.
7 To add an attachmeInsert > Image, Souattachments are ind
Tip! To send oththe appropriate ae-mail, if availab
8 To send the message.
Note: Your devicewas sent to the mesinto your device. Youthe message is receivmore details about mservice provider.
Your device supports ththe character limit for aare sent as a series of twprovider may charge acaccents or other marks,language options, take uof characters that can bnavigation bar, you cancounting backwards. Fo
Mes
sagi
ng
47
ive, retrieve, reply to, and do the following: access point (IAP) correctly. See
ttings correctly. If you select ging main view and have not set t, you are prompted to do so. To ail settings with the mailbox e also ‘E-mail’, p. 53.rate e-mail account. Follow the our remote mailbox and internet
eceive messages
indicates an unread text ultimedia message, data
, and data received through
age, and 1 new message mode. To open the message, essage in Inbox, scroll to it, and
ssage, select Options > Reply.
can still add 10 characters for the text to be sent as two messages.
E-mail messages are automatically placed in Outbox before sending. If sending does not succeed, the e-mail is left in the Outbox first with the Queued status, and then, if the sending has failed several times, with the Failed status.
Tip! You can combine images, video, sound, and text to a presentation and send it in a multimedia message. Start to create a multimedia message, and select Options > Create presentation. The option is shown only if MMS creation mode is set to Guided or Free. See ‘Multimedia messages’, p. 52.
Receive MMS and e-mail settingsYou may receive the settings in a message from your network service provider. See ‘Data and settings’, p. 48.Enter the MMS settings manually1 Press , select Tools > Settings > Connection >
Access points, and define the settings for a multimedia messaging access point. See ‘Connection’, p. 112.
2 Press , and select Messag. > Options > Settings > Multimedia message > Access point in use and the access point you created as the preferred connection. See also ‘Multimedia messages’, p. 52.
Before you can send, receforward e-mail, you must• Configure an internet
‘Connection’, p. 112.• Define your e-mail se
Mailbox in the Messaup your e-mail accounstart creating the e-mguide, select Start. SeYou must have a sepainstructions given by yservice provider (ISP).
Inbox—r
In the Inbox folder, message, an unread mreceived through infraredBluetooth connectivity.
When you receive a messare shown in the standbyselect Show. To open a mpress .
To reply to a received me
48
s many kinds of messages that
—You may receive settings from r company information nt in a configuration message. To Options > Save all.
the information to Contacts, select ss card. Certificates or sound files s card are not saved.
the ringing tone, select Options >
the logo shown in the standby twork service provider’s own tions > Save.
he invitation, select Options >
the bookmark to the bookmarks select Options > Add to age contains both access point , to save the data, select Options >
Mes
sagi
ng To print a text or a multimedia message on a compatible Basic Print Profile (BPP) equipped printer with Bluetooth connectivity (such as HP Deskjet 450 Mobile Printer or HP Photosmart 8150), select Options > Print.
Multimedia messagesImportant: Exercise caution when opening
messages. Multimedia message objects may contain malicious software or otherwise be harmful to your device or PC.
You may receive a notification that a multimedia message is waiting in the multimedia message center. To start a packet data connection to retrieve the message to your device, select Options > Retrieve.
When you open a multimedia message ( ), you may see an image and a message. is shown if sound is included, or if video is included. To play the sound or the video, select the indicator.
To see the media objects that have been included in the multimedia message, select Options > Objects.
If the message includes a multimedia presentation, is displayed. To play the presentation, select the indicator.
Data and settingYour device can receivecontain data ( ):
Configuration messageyour service provider, omanagement departmesave the settings, select
Business card—To save Options > Save busineattached to the busines
Ringing tone—To save Save.
Operat. logo—To have mode instead of the neidentification, select Op
Calen. entry—To save tSave to Calendar.
Web message—To savelist in the web browser,bookmarks. If the messsettings and bookmarksSave all.
Mes
sagi
ng
49
ox and retrieve new e-mail lect Yes. When you view continuously connected to a ata connection. See also
ed e-mail messages offline, e-mail messages offline, your
o the remote mailbox.
essagesptions > Connect to start a mailbox.
e caution when opening es may contain malicious harmful to your device or PC.
en connection to a remote s > Retrieve e-mail and one of
ew e-mail messagesonly the e-mail messages that
ssages from the mailboxsages, select Cancel. e-mail messages, you can
online, or select Options >
E-mail notif.—The note tells you how many new e-mail messages you have in your remote mailbox. An extended notification may list more detailed information.
Web service messagesWeb service messages ( ) are notifications (for example, news headlines) and may contain a text message or a link. For availability and subscription, contact your service provider.
Mailbox
If you select Mailbox and have not set up your e-mail account, you are prompted to do so. To start creating the e-mail settings with the mailbox guide, select Start. See also ‘E-mail’, p. 53.
When you create a new mailbox, the name you give to the mailbox replaces Mailbox in the Messaging main view. You can have up to six mailboxes.
Open the mailboxWhen you open the mailbox, the device asks if you want to connect to the mailbox (Connect to mailbox?).
To connect to your mailbheadings or messages, semessages online, you areremote mailbox using a d‘Connection’, p. 112.
To view previously retrievselect No. When you viewdevice is not connected t
Retrieve e-mail mIf you are offline, select Oconnection to the remote
Important: Exercismessages. E-mail messagsoftware or otherwise be
1 When you have an opmailbox, select Optionthe following:New—to retrieve all nSelected—to retrieve have been markedAll—to retrieve all meTo stop retrieving mes
2 After you retrieve thecontinue viewing them
50
ssages automaticallytomatically, select Options > E-tic retrieval > Header retrieval >
y in home net., and define when sages are retrieved.
ges automatically may increase e data traffic.
essagesf an e-mail message from the ng it in the remote mailbox, select lete msg. from:, select Phone
-mail headings in the remote delete the message content, the your device. If you want to remove must first delete the e-mail
ote mailbox, then make a evice to the remote mailbox again
the device and the remote > Delete. In Delete msg. from:, r.
mail is deleted first from your connection to the remote mailbox,
Mes
sagi
ng Disconnect to close the connection and view the e-mail messages offline.E-mail status indicators:
The new e-mail (offline or online mode) has not been retrieved to your device.
The new e-mail has been retrieved to your device. The e-mail message has been read, and it has not
been retrieved to your device. The e-mail message has been read. The e-mail heading has been read and the
message content has been deleted both from the device and from the server.
3 To open an e-mail message, press . If the e-mail message has not been retrieved and you are offline, you are asked if you want to retrieve this message from the mailbox.
To view e-mail attachments, open a message that has the attachment indicator , and select Options > Attachments. If the attachment has a dimmed indicator, it has not been retrieved to the device; select Options > Retrieve.
To print an e-mail message on a compatible Basic Print Profile (BPP) equipped printer with Bluetooth connectivity (such as HP Deskjet 450 Mobile Printer or HP Photosmart 8150), select Options > Print.
Retrieve e-mail meTo retrieve messages aumail settings > AutomaAlways enabled or Onland how often the mes
Retrieving e-mail messayour call costs due to th
Delete e-mail mTo delete the contents odevice while still retainiOptions > Delete. In Deonly.
The device mirrors the emailbox. Although you e-mail heading stays in the heading as well, youmessage from your remconnection from your dto update the status.
To delete an e-mail frommailbox, select Optionsselect Phone and serve
If you are offline, the e-device. During the next
Mes
sagi
ng
51
ingsth Must be defined or with a red ctions given by your service tain settings from your service n message.
ers or access points may be your service provider, and you e, create, edit, or remove them.
sag. > Options > Settings > he following:
list of all text message centers
use character conversion to when available, select Reduced
ct which message center is used
hether the network sends essages (network service).
how long the message center he first attempt fails (network annot be reached within the
it is automatically deleted from the remote mailbox. If you are using the POP3 protocol, messages marked to be deleted are removed only after you have closed the connection to the remote mailbox.
To cancel deleting an e-mail from the device and server, scroll to an e-mail that has been marked to be deleted during the next connection ( ), and select Options > Restore.
Disconnect from the mailboxWhen you are online, to end the data connection to the remote mailbox, select Options > Disconnect.
View messages on a SIM cardBefore you can view SIM messages, you must copy them to a folder in your device.1 In the Messaging main view, select Options > SIM
messages.2 Select Options > Mark/Unmark > Mark or Mark all to
mark messages.3 Select Options > Copy. A list of folders opens.4 To start copying, select a folder and OK. To view the
messages, open the folder.
Messaging settFill in all fields marked wiasterisk. Follow the instruprovider. You may also obprovider in a configuratio
Some or all message centpreset for your device by may not be able to chang
Text messagesPress , and select MesText message and from t
Message centres—View athat have been defined.
Character encoding— Toanother encoding systemsupport.
Msg. centre in use—Seleto deliver text messages.
Receive report—Select wdelivery reports on your m
Message validity—Selectresends your message if tservice). If the recipient c
52
lect which access point is used as n for the multimedia message
Select how you want to receive ssages automatically in your home twork used by the network service d is in your device), select Auto. in your home cellular network, you at there is a message to retrieve in e center.
our GSM or UMTS home network, ultimedia messages may cost you
a retrieval > Always automatic, lly makes an active packet data he message both in and outside
lect whether you want to reject ymous sender.
e whether you want to receive vertisements.
whether you want the status of the wn in the log (network service). ort of a multimedia message that ail address may not be possible.
Mes
sagi
ng validity period, the message is deleted from the message center.
Message sent as—Change this option only if you are sure that your message center is able to convert text messages into these other formats. Contact your service provider.
Preferred conn.—Select the connection used for sending text messages: GSM network or packet data, if supported by the network. See ‘Connection’, p. 112.
Reply via same ctr.—Select whether you want the reply message to be sent using the same text message center number (network service).
Multimedia messagesPress , and select Messag. > Options > Settings > Multimedia message and from the following:
Image size—Define the size of the image in a multimedia message: Small, Large, or Original (shown only when the MMS creation mode is set to Guided or Free).
MMS creation mode —If you select Guided, the device informs you if you try to send a message that may not be supported by the recipient. Select Restricted; the device prevents you from sending messages that may not be supported.
Access point in use—Sethe preferred connectiocenter.
Multimedia retrieval—messages. To receive mecellular network (the neprovider whose SIM carhome network. Outsidereceive a notification ththe multimedia messag
When you are outside ysending and receiving mmore.
If you select Multimediyour device automaticaconnection to retrieve tyour home network.
Allow anon. msgs.—Semessages from an anon
Receive adverts—Definmultimedia message ad
Receive report—Select sent message to be shoReceiving a delivery rephas been sent to an e-m
Mes
sagi
ng
53
ssword. If you leave this field or the password when you try to ailbox.
er the IP address or host name of ves your e-mail.
ct an internet access point (IAP).
ame for the mailbox.
e e-mail protocol that your ovider recommends. The options is setting can be selected only ged if you have saved or exited s. If you use the POP3 protocol, pdated automatically when you st e-mail messages, you must
ew connection to your mailbox.
the security option used to the remote mailbox.
e connection.
OP3 only)—Use with the POP3 nding of passwords to the
le connecting to the mailbox.
e e-mail you send, select m the following:
Deny report sending—Select whether you want to prevent your device from sending delivery reports of received multimedia messages.
Message validity—Select how long the message center resends your message if the first attempt fails (network service). If the recipient cannot be reached within the validity period, the message is deleted from the message center.
E-mailPress , and select Messag. > Options > Settings > E-mail and from the following:
Mailboxes—Select a mailbox to change the following settings: Connection settings, User settings, Retrieval settings, and Automatic retrieval.
Mailbox in use— Select which mailbox you want to use for sending e-mail.
To create a new mailbox, select Options > New mailbox in the Mailboxes main view.
Connection settingsTo edit the settings for the e-mail you receive, select Incoming e-mail and from the following:
User name—Enter your user name, given to you by your service provider.
Password—Enter your pablank, you are prompted fconnect to your remote m
Incoming mail serv.—Entthe mail server that recei
Access point in use—SeleSee ‘Connection’, p. 112.
Mailbox name—Enter a n
Mailbox type—Defines thremote mailbox service prare POP3 and IMAP4. Thonce and cannot be chanfrom the mailbox settinge-mail messages are not uare online. To see the latedisconnect and make a n
Security (ports)—Select secure the connection to
Port—Define a port for th
APOP secure login (for Pprotocol to encrypt the seremote e-mail server whi
To edit the settings for thOutgoing e-mail and fro
54
ect whether you want to receive ons, a tone and a note, when new ailbox.
fine which parts of the e-mail are , Size limit, Messages (for IMAP4 hs..
ine how many new e-mail to the mailbox.
r IMAP4 only)—Define the folder bscribed.
r IMAP4 only)—Subscribe to other ailbox and retrieve content from
lt whether you want the device to omatically. You can define when, sages are retrieved.
trieve e-mail automatically may of large amounts of data through etwork. Contact your service about data transmission charges.
Mes
sagi
ng My e-mail address—Enter the e-mail address given to you by your service provider. Replies to your messages are sent to this address.
Outgoing mail serv.—Enter the IP address or host name of the mail server that sends your e-mail. You may only be able to use the outgoing server of your service provider. Contact your service provider for more information.
Access point in use—Select an internet access point (IAP). See ‘Connection’, p. 112.
The settings for User name, Password, Security (ports), and Port are similar to the ones in Incoming e-mail.
User settingsMy name—Enter your own name. Your name replaces your e-mail address in the recipient’s device when the recipient’s device supports this function.
Send message—Define how e-mail is sent from your device. Select Immediately for the device to connect to the mailbox when you select Send message. If you select During next conn., e-mail is sent when the connection to the remote mailbox is available.
Send copy to self—Select whether you want to save a copy of the e-mail to your remote mailbox and to the address defined in My e-mail address.
Include signature—Select whether you want to attach a signature to your e-mail messages.
New e-mail alerts—Selthe new e-mail indicatimail is received to the m
Retrieval settingsE-mail to retrieve—Deretrieved: Headers onlyonly), or Msgs. & attac
Retrieval amount—Defmessages are retrieved
IMAP4 folder path (fopath for folders to be su
Folder subscriptions (fofolders in the remote mthose folders.
Automatic retrievaHeader retrieval—Selecretrieve new e-mail autand how often, the mes
Setting the device to reinvolve the transmissionyour service provider's nprovider for information
Mes
sagi
ng
55
ect whether you want to save a s, multimedia messages, or e- Sent folder.
ne how many sent messages are at a time. The default limit is 20 t is reached, the oldest message
patible memory card is inserted emory where you want to save
emory or Memory card.
Web service messagesPress , and select Messag. > Options > Settings > Service message. Select whether you want to receive service messages. If you want to set the device to automatically activate the browser and start a network connection to retrieve content when you receive a service message, select Download messages > Automatically.
Cell broadcastCheck the available topics and related topic numbers with your service provider. Press , and select Messag. > Options > Settings > Cell broadcast and from the following:
Reception—Select whether you want to receive cell broadcast messages.
Language—Select the languages in which you want to receive messages: All, Selected, or Other.
Topic detection—Select whether the device automatically searches for new topic numbers, and saves the new numbers without a name to the topic list.
Other settingsPress , and select Messag. > Options > Settings > Other and from the following:
Save sent messages—Selcopy of the text messagemail that you send to the
No. of saved msgs.—Defisaved to the Sent folder messages. When the limiis deleted.
Memory in use—If a comin the device, select the myour messages: Phone m
56
to keep. Press to delete the
t contact cards, use Nokia Contacts okia PC Suite.
nail image to a contact card, open lect Options > Edit > Options > mbnail image is shown when the
is a quick way to call frequently an assign speed dialing keys to s. See ‘Speed dial a phone number’,
ct information, select the card you Options > Send > Via text edia, Via e-mail (shown only if
ailbox), Via Bluetooth, or Via ging’, p. 43 and ‘Send data using ity’, p. 85.
roup, select Options > Add to ou have created a group). See , p. 58.
Cont
acts
(Ph
oneb
ook) Contacts (Phonebook)
Press , and select Contacts. In Contacts you can add a personal ringing tone or a thumbnail image to a contact card. You can also create contact groups, which allow you to send text messages or e-mail to many recipients at the same time. You can add received contact information (business cards) to contacts. See ‘Data and settings’, p. 48. Contact information can only be sent to or received from compatible devices.
Save names and numbers1 Select Options > New contact.2 Fill in the fields that you want, and select Done.
To edit contact cards in Contacts, scroll to the contact card you want to edit, and select Options > Edit.
Tip! To print contact cards on a compatible Basic Print Profile (BPP) equipped printer with Bluetooth connectivity (such as HP Deskjet 450 Mobile Printer or HP Photosmart 8150), select Options > Print.
To delete a contact card in Contacts, select a card, and press . To delete several contact cards at the same time, select Options > Mark/Unmark > Mark all to mark all the contacts, then Mark/Unmark > Unmark to unmark
the contacts you want marked contacts.
Tip! To add and ediEditor available in N
To attach a small thumbthe contact card, and seAdd thumbnail. The thucontact calls.
Tip! Speed dialing used numbers. You ceight phone numberp. 60.
Tip! To send contawant to send. Selectmessage, Via multimyou have set up a minfrared. See ‘MessaBluetooth connectiv
To add a contact to a ggroup: (shown only if y‘Create contact groups’
Cont
acts
(Ph
oneb
ook)
57
irect., or Options > Copy > To ontact card fields supported by
.
rom a compatible memory card, t to copy and Options > Copy > memory card.
onize your contacts to a okia PC Suite.
d other SIM servicesation on using SIM card card vendor. This may be the
vendor.
tacts > Options > SIM y to see the names and numbers the SIM directory you can add, ontacts, and you can make calls.
aling numbers, select Options > alling contacts. This setting is y your SIM card.
r device to selected phone > Activ. fixed dialling. To add dialing list, select Options > eed the PIN2 code for these
To view the amount of contacts, groups, and the available memory in Contacts, select Options > Contacts info.
Default numbers and addressesYou can assign default numbers or addresses to a contact card. In this way if a contact has several numbers or addresses, you can easily call or send a message to the contact to a certain number or address. The default number is also used in voice dialing.1 In the address book, select a contact, and press .2 Select Options > Defaults.3 Select a default to which you want to add a number or
an address, and select Assign.4 Select a number or an address you want to set as a
default.
The default number or address is underlined in the contact card.
Copy contactsTo copy names and numbers from a SIM card to your device, press , and select Contacts > Options > SIM contacts > SIM directory. Select the names you want to copy and Options > Copy to Contacts.
To copy contacts to your SIM card, press , and select Contacts. Select the names you want to copy and
Options > Copy to SIM dSIM directory. Only the cyour SIM card are copied
To copy contacts to and fselect the names you wanTo memory card or From
Tip! You can synchrcompatible PC with N
SIM directory anFor availability and informservices, contact your SIMservice provider or other
Press , and select Concontacts > SIM directorstored on the SIM card. Inedit, or copy numbers to c
To view the list of fixed diSIM contacts > Fixed dionly shown if supported b
To restrict calls from younumbers, select Optionsnew numbers to the fixedNew SIM contact. You nfunctions.
58
t groups to open the groups list.
w group.e group or use the default name K. select Options > Add members.nd press to mark it. To add
t a time, repeat this action on all nt to add.e contacts to the group.
ct Options > Rename, enter the K.
rs from a groupen the group you want to modify.
t, and select Options > Remove
e the contact from the group.hich groups a contact belongs, , and select Options > Belongs to
Cont
acts
(Ph
oneb
ook) When you use Fixed dialling, packet data connections are
not possible, except when sending text messages over a packet data connection. In this case, the message center number and the recipient’s phone number must be included on the fixed dialing list.
When fixed dialing is activated, calls may be possible to the official emergency number programmed into your device.
Add ringing tones for contactsWhen a contact or group member calls you, the device plays the chosen ringing tone (if the caller’s telephone number is sent with the call and your device recognizes it).1 Press to open a contact card or go to the groups
list, and select a contact group.2 Select Options > Ringing tone. A list of ringing tones
opens.3 Select the ringing tone you want to use for the
individual contact or the selected group.
To remove the ringing tone, select Default tone from the list of ringing tones.
Create contac1 In Contacts, press 2 Select Options > Ne3 Write a name for th
Group , and select O4 Open the group, and5 Scroll to a contact, a
multiple members athe contacts you wa
6 Select OK to add th
To rename a group, selenew name, and select O
Remove membe1 In the groups list, op2 Scroll to the contac
from group.3 Select Yes to remov
Tip! To check to wscroll to the contactgroups.
Mak
e ca
lls
59
hone number of your voice select Tools > Voice mail > mber. Enter the number ervice provider), and select OK.
umber in the standby mode, umber, and press .
ce callt participant.her participant, select Options > ll is automatically put on hold.answered, to join the first ference call, select Options >
o the call, repeat step 2, and ference > Add to conference. conference calls between a ipants, including yourself.ersation with one of the tions > Conference > Private.
and Private. The conference call device. The other participants conference call. After you finish on, select Options >
Make callsVoice calls
Tip! To increase or decrease the volume during a call, press the volume key on the side of the device.
1 In the standby mode, enter the phone number, including the area code. To remove a number, press . For international calls, press twice for the + character (replaces the international access code), and enter the country code, area code (omit the leading zero if necessary), and phone number.
2 Press to call the number.3 Press to end the call (or to cancel the call attempt).
Pressing always ends a call, even if another application is active.
To make a call from Contacts, press , and select Contacts. Scroll to the desired name, or enter the first letters of the name to the search field. Matching contacts are listed. To call, press . Select the call type Voice call.
You must copy the contacts from your SIM card to Contacts before you can make a call this way. See ‘Copy contacts’, p. 57.
To call your voice mailbox (network service), press and hold in the standby mode. See also ‘Call divert’, p. 119.
Tip! To change the pmailbox, press , andOptions > Change nu(obtained from your s
To call a recently dialed npress . Scroll to the n
Make a conferen1 Make a call to the firs2 To make a call to anot
New call. The first ca3 When the new call is
participant in the conConference.To add a new person tselect Options > ConYour device supports maximum of six particTo have a private convparticipants, select OpScroll to a participantis put on hold on yourcan still continue the the private conversati
60
ct is the name or nickname that is rd. To listen to the synthesized ct card, and select Options > Play
voice tag tags may be difficult in a noisy g an emergency, so you should not e dialing in all circumstances.
ing, the loudspeaker is in use. Hold tance away when you say the voice
, in the standby mode, press and ion key. If you are using a with the headset key, press and to start voice dialing.
d, and Speak now is displayed. Say nickname that is saved on the
ynthesized voice tag for the in the selected device language, e and number. After a time-out of ice dials the number.ntact was not correct, select Next r matches, or Quit to cancel voice
Mak
e ca
lls Conference > Add to conference to return to the conference call.To drop a participant, select Options > Conference > Drop participant, scroll to the participant, and select Drop.
4 To end the active conference call, press .
Speed dial a phone numberTo activate speed dialing, press , and select Tools > Settings > Call > Speed dialling > On.
To assign a phone number to one of the speed dialing keys ( — ), press , and select Tools > Spd. dial. Scroll to the key to which you want to assign the phone number, and select Options > Assign. is reserved for the voice mailbox.
To call in the standby mode, press the speed dial key and .
Voice dialingYour device supports enhanced voice commands. Enhanced voice commands are not dependent on the speaker’s voice, so the user does not record voice tags in advance. Instead, the device creates a voice tag for the entries in contacts, and compares the spoken voice tag to it. The voice recognition in the device adapts to the main user’s voice to recognize the voice commands better.
The voice tag for a contasaved on the contact cavoice tag, open a contavoice tag.
Make a call with aNote: Using voice
environment or durinrely solely upon voic
When you use voice dialthe device at a short distag.1 To start voice dialing
hold the right selectcompatible headset hold the headset key
2 A short tone is playeclearly the name or contact card.
3 The device plays a srecognized contact and displays the nam2.5 seconds, the devIf the recognized coto view a list of othedialing.

Mak
e ca
lls
61
sending during a video call, the ideo call. Check the pricing with
device is not compatible) you are normal call or send a text
en you see two video images and e loudspeaker. The call recipient
), in which case you only see a still image or a grey
If several numbers are saved under the name, the device selects the default number, if it has been set. Otherwise the device selects the first available number of the following: Mobile, Mobile (home), Mobile (business), Telephone, Tel. (home), and Tel. (business).
Video callsWhen you make a video call (network service), you can see a real-time, two-way video between you and the recipient of the call. The live video image, or video image captured by the camera in your device is shown to the video call recipient.
To be able to make a video call, you must have a USIM card and be in the coverage of a UMTS network. For availability of and subscription to video call services, contact your service provider.
A video call can only be made between two parties. The video call can be made to a compatible mobile device or an ISDN client. Video calls cannot be made while another voice, video, or data call is active.
Icons: You are not receiving video (the recipient is not
sending video or the network is not transmitting it). You have denied video sending from your device. To
send a still image instead, see ‘Call’, p. 111.
Even if you denied video call is still charged as a vyour service provider.1 To start a video call,
enter the phone number in the standbymode, or select Contacts and a contact.
2 Select Options > Call > Video call.
Starting a video call maytake a while. Waiting forvideo image is shown. If the call is not successful (for example, video calls are not supported by the network, or the receiving asked if you want to try amessage instead.
The video call is active whhear the sound through thmay deny video sending (hear the sound and may background graphic.

62
ding it. To set up this option and essage, see ‘Call’, p. 111.
t a video calls, is displayed.
ging tone for video calls, press , ofiles.
video call. Allow video image to ars on the display. To start sending t Yes.
he video call, video sending is not hear the sound of the caller. A grey of the video image. To replace the image captured by the camera in mage in video call, p. 111.
ress .
hile you have another call in ivated Call waiting (network ings > Call.
all, press . The first call is put
Mak
e ca
lls To change between showing video or hearing only sound, select Options > Enable/Disable > Sending video, Sending audio or Sending audio & video.
To change the camera in use, select Options > Use main camera or Use secondary camera.
To zoom your own image, select Options> Zoom in or Zoom out. The zoom indicator is shown on the top of the display.
To switch the places of the sent video images on the display, select Options >Change image order.
To end the video call, press .
Answer or decline a callTo answer the call, press .
To mute the ringing tone when a call comes in, select Silence.
If you do not want to answer a call, press . If you have activated the Call divert > If busy function to divert calls, declining an incoming call also diverts the call. See ‘Call divert’, p. 119.
When you decline an incoming call, you can send a text message to the caller informing why you cannot answer the call. Select Options > Send text message. You can
edit the text before senwrite a standard text m
Answer or rejecWhen a video call arrive
Tip! To assign a rinand select Tools >Pr
Press to answer thebe sent to caller? appea live video image, selec
If you do not activate tactivated, and you only screen is shown in placegrey screen with a still your device, see ‘Call’, I
To end the video call, p
Call waitingYou can answer a call wprogress if you have actservice) in Tools > Sett
To answer the waiting con hold.
Mak
e ca
lls
63
epeatedly. Select OK to send the
MF tones to the Phone number ntact card.
video callideo call for the following e (video, audio, or both), patible headset with Bluetooth
or Activate handsfree (when a Bluetooth connectivity is p., End active call, Open active ra/Use secondary camera, om in/Zoom out, and Help.
y vary.
mbers of missed, received, and , and select My own > Log >
registers missed and received supports these functions, the within the network service area.
To switch between the two calls, select Swap. To connect an incoming call or a call on hold with an active call and to disconnect yourself from the calls, select Options > Transfer. To end the active call, press . To end both calls, select Options > End all calls.
Options during a voice callMany of the options that you can use during a voice call are network services. Select Options during a call for some of the following options: Mute or Unmute, Answer, Reject, Swap, Hold or Unhold, Activate handset, Activate loudsp., or Activate handsfree (if a compatible headset with Bluetooth connectivity is attached), End active call or End all calls, New call, Conference, Transfer, and Open active standby. Select from the following:
Replace—to end an active call and replace it by answering the waiting call.
Send MMS (in UMTS networks only)—to send an image or a video in a multimedia message to the other participant of the call. You can edit the message and change the recipient before sending. Press to send the file to a compatible device (network service).
Send DTMF—to send DTMF tone strings, for example, a password. Enter the DTMF string or search for it in Contacts. To enter a wait character (w) or a pause
character (p), press rtone.
Tip! You can add DTor DTMF fields in a co
Options during aSelect Options during a voptions: Enable or DisablActivate handset (if a comconnectivity is attached) compatible headset with attached), Activate loudsstandby, Use main cameChange image order, Zo
The available options ma
Log
To monitor the phone nudialed voice calls, press Recent calls. The device calls only if the network device is switched on, and
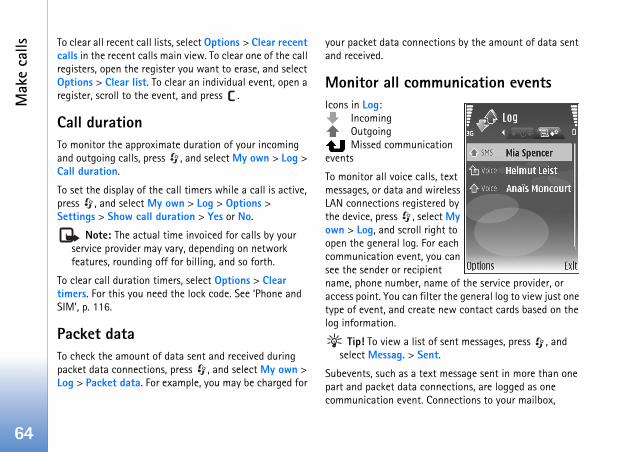
64
ctions by the amount of data sent
munication events
ation
ls, text ireless red by ect My ight to r each ou can
ent ame of the service provider, or ter the general log to view just one e new contact cards based on the
of sent messages, press , and nt.
xt message sent in more than one nnections, are logged as one onnections to your mailbox,
Mak
e ca
lls To clear all recent call lists, select Options > Clear recent calls in the recent calls main view. To clear one of the call registers, open the register you want to erase, and select Options > Clear list. To clear an individual event, open a register, scroll to the event, and press .
Call duration To monitor the approximate duration of your incoming and outgoing calls, press , and select My own > Log > Call duration.
To set the display of the call timers while a call is active, press , and select My own > Log > Options > Settings > Show call duration > Yes or No.
Note: The actual time invoiced for calls by your service provider may vary, depending on network features, rounding off for billing, and so forth.
To clear call duration timers, select Options > Clear timers. For this you need the lock code. See ‘Phone and SIM’, p. 116.
Packet dataTo check the amount of data sent and received during packet data connections, press , and select My own > Log > Packet data. For example, you may be charged for
your packet data conneand received.
Monitor all comIcons in Log:
Incoming Outgoing Missed communic
events
To monitor all voice calmessages, or data and wLAN connections registethe device, press , selown > Log, and scroll ropen the general log. Focommunication event, ysee the sender or recipiname, phone number, naccess point. You can filtype of event, and creatlog information.
Tip! To view a list select Messag. > Se
Subevents, such as a tepart and packet data cocommunication event. C
Mak
e ca
lls
65
multimedia messaging center, or web pages are shown as packet data connections.
To add an unknown phone number from Log to your contacts, select Options > Add to contacts.
To filter the log, select Options > Filter and a filter.
To erase the contents of the log, recent calls register, and messaging delivery reports permanently, select Options > Clear log. Select Yes to confirm. To remove a single event from the log, press .
To set the Log duration, select Options > Settings > Log duration. The log events remain in the device memory for a set number of days after which they are automatically erased to free memory. If you select No log, all the log contents, recent calls register, and messaging delivery reports are permanently deleted.
To view the details of a communication event, in the general log view, scroll to an event, and press .
Packet data counter and connection timer: To view how much data, measured in kilobytes, is transferred and how long a certain packet data connection lasts, scroll to an incoming or outgoing event indicated by Pack., and select Options > View details.
66
oint. Follow the instructions given ovider. See ‘Connection’, p. 112. To oint as the default access point, gs > Access point.
ewens when you open Services.
me bookmarks or links preinstalled to sites provided by third parties a. Nokia does not endorse or these sites. If you choose to access e same precautions, for security or ith any internet site.
ng page defined for the default
curity is displayed during a nsmission between the device and server is encrypted.
Serv
ices Services
Press , and select Services (network service).
Various service providers maintain pages specifically designed for mobile devices. These pages use the wireless markup language (WML), extensible hypertext markup language (XHTML), or hypertext markup language (HTML).
Check the availability of services, pricing, and fees with your service provider. Service providers will also give you instructions on how to use their services.
Shortcut: To start a connection, press and hold in the standby mode.
Access pointTo access pages, you need service settings for the page that you want to use. You may receive the settings in a special text message from the service provider that offers the web page. See ‘Data and settings’, p. 48. For more information, contact your service provider.
Tip! Settings may be available on the web site of a service provider.
To enter settings manually, press , and select Tools > Settings > Connection > Access points, and define the
settings for an access pto you by your service prset the created access pselect Options > Settin
Bookmarks viThe bookmarks view op
Your device may have sofor or may allow accessnot affiliated with Nokiassume any liability for them, you should take thcontent, as you would w
indicates the startiaccess point.
Connection seIf the security indicatorconnection, the data trathe internet gateway or
Serv
ices
67
to jump to the end of a page and of a page.
e while browsing, select Back. If ct Options > Navigation a chronological list of the pages sing session.
tent from the server, select tions > Reload.
t Options > Save as bookmark.
okmarks view while browsing, return to the browser view, to page.
sing, select Options > e page. You can save pages to
patible memory card (if m when offline. To access the he bookmarks view to open the
ss, select Options > Navigation ress.
ands or actions specific for the ct Options > Service options, if
at cannot be shown on the ging tones, images, operator
The security icon does not indicate that the data transmission between the gateway and the content server (or place where the requested resource is stored) is secure. The service provider secures the data transmission between the gateway and the content server.
Select Options > Details > Security to view details about the connection, encryption status, and information about server and user authentication.
Security certificates may be required for some services, such as banking services. For more information, contact your service provider. See also ‘Certificate management’, p. 117.
BrowseImportant: Use only services that you trust and that
offer adequate security and protection against harmful software.
To download a page, select a bookmark, or enter the address in the field ( ).
On a browser page, new links appear underlined in blue and previously visited links in purple. Images that act as links have a blue border around them.
To open links and make selections, press .
Shortcut: Press to the beginning
To go to the previous pagBack is not available, seleoptions > History to viewyou visited during a brow
To retrieve the latest conOptions > Navigation op
To save a bookmark, selec
Tip! To access the bopress and hold . Toselect Options > Back
To save a page while browAdvanced options > Savthe device memory or cominserted), and browse thepages later, press in tSaved pages view.
To enter a new URL addreoptions > Go to web add
To open a sublist of commcurrently open page, seleavailable
You can download files thbrowser page, such as rin
68
tionnd view the browser page offline, ced options > Disconnect, or to close the browser, select
eces you have accessed are stored in e device.
cation that is used to store data tried to access or have accessed n requiring passwords, empty the e information or services you have he cache. To empty the cache, ced options > Clear cache.
gs and from the following:
the default access point. See me or all access points may be y your service provider, and you ge, create, edit, or remove them.
home page.
Serv
ices logos, themes, and video clips. To download an item, scroll
to the link, and press .
When you start a download, a list of ongoing, paused, and completed downloads from the current browsing session is displayed. You can also view the list by selecting Options > Tools > Downloads. In the list, scroll to an item, and select Options to pause, resume, or cancel ongoing downloads, or open, save, or delete completed downloads.
Download and purchase itemsYou can download items such as ringing tones, images, operator logos, themes, and video clips. These items can be provided free, or you can purchase them. Downloaded items are handled by the respective applications in your device, for example, a downloaded photo can be saved in Gallery.
Important: Only install and use applications and other software from trusted sources, such as applications that are Symbian Signed or have passed the Java VerifiedTM testing
1 To download the item, scroll to the link, and press .2 Select the appropriate option to purchase the item.3 Carefully read all the information provided.
To continue the download, select Accept. To cancel the download, select Cancel.
End a connecTo end the connection aselect Options > Advanend the connection andOptions > Exit.
Empty the cachThe information or servithe cache memory of th
A cache is a memory lotemporarily. If you haveconfidential informatiocache after each use. Thaccessed are stored in tselect Options > Advan
SettingsSelect Options > Settin
Access point—Change ‘Connection’, p. 112. Sopreset for your device bmay not be able to chan
Homepage—Define the
Serv
ices
69
lect whether you want to sends DTMF tones during a ns during a voice call’, p. 63.
Load imgs. & sounds—Select whether you want to load images while browsing. If you select No, to load images later during browsing, select Options > Show images.
Font size—Select the text size.
Default encoding—If text characters are not shown correctly, you can select another encoding according to language.
Auto. bookmarks—Enable or disable automatic bookmark collecting. If you want to continue collecting automatic bookmarks but hide the folder from the bookmarks view, select Hide folder.
Screen size—Select what is shown when you are browsing: Select. keys only or Full screen.
Search page—Define a web page that is downloaded when you select Navigation options > Open search page in the bookmarks view, or when browsing.
Rendering—If you want the page layout shown as accurately as possible when in Small screen mode, select By quality. If you do not want external cascading style sheets to be downloaded, select By speed.
Cookies—Enable or disable the receiving and sending of cookies.
Java/ECMA script—Enable or disable the use of scripts.
Security warnings—Hide or show security notifications.
Conf. DTMF sending—Seconfirm before the devicevoice call. See also ‘Optio
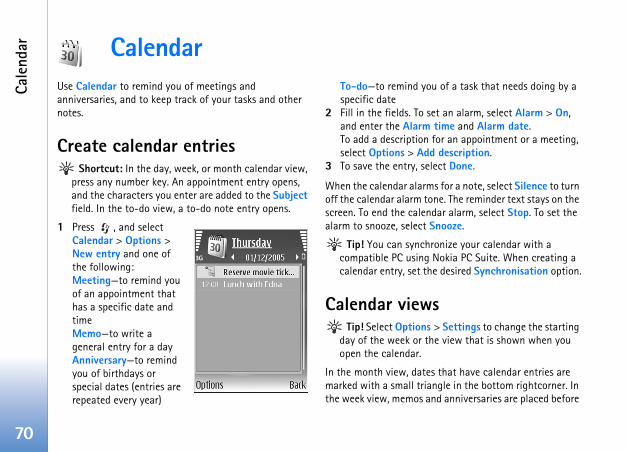
70
u of a task that needs doing by a
et an alarm, select Alarm > On, time and Alarm date. for an appointment or a meeting, d description.lect Done.
s for a note, select Silence to turn one. The reminder text stays on the dar alarm, select Stop. To set the Snooze.
ronize your calendar with a Nokia PC Suite. When creating a e desired Synchronisation option.
s> Settings to change the starting
he view that is shown when you
s that have calendar entries are ngle in the bottom rightcorner. In nd anniversaries are placed before
Cale
ndar Calendar
Use Calendar to remind you of meetings and anniversaries, and to keep track of your tasks and other notes.
Create calendar entries Shortcut: In the day, week, or month calendar view,
press any number key. An appointment entry opens, and the characters you enter are added to the Subject field. In the to-do view, a to-do note entry opens.
1 Press , and select Calendar > Options > New entry and one of the following:Meeting—to remind you of an appointment that has a specific date and timeMemo—to write a general entry for a dayAnniversary—to remind you of birthdays or special dates (entries are repeated every year)
To-do—to remind yospecific date
2 Fill in the fields. To sand enter the AlarmTo add a descriptionselect Options > Ad
3 To save the entry, se
When the calendar alarmoff the calendar alarm tscreen. To end the calenalarm to snooze, select
Tip! You can synchcompatible PC usingcalendar entry, set th
Calendar view Tip! Select Options
day of the week or topen the calendar.
In the month view, datemarked with a small triathe week view, memos a
Cale
ndar
71
8 a.m. To switch between the month view, week view, day view, and to-do view, press .
To go to a certain date, select Options > Go to date. To jump to today, press .
To send a calendar note to a compatible device, select Options > Send.
To print calendar entries on a compatible Basic Print Profile (BPP) equipped printer with Bluetooth connectivity (such as HP Deskjet 450 Mobile Printer or HP Photosmart 8150), select Options > Print.
Manage your calendar entriesDeleting past entries in Calendar saves space in your device memory.
To delete more than one event at a time, go to the month view, and select Options > Delete entry > Before date or All entries.
To mark a task as completed, scroll to it in the to-do view, and select Options > Mark as done.
Calendar settingsTo modify the Calendar alarm tone, Default view, Week starts on, and Week view title, select Options > Settings.
72
twork services to access the most information on additional items load!, contact your service or manufacturer of the item.
oing updates, and provides you our service provider offers for your ntent in Download! manually, h list.
alog from the list, for example, to use frequently, select Options >
idden items visible again, select
in the main view, a folder, or a > Buy. A submenu opens where on of the item and view price le options depend on the service
at is free of charge, select
My
own My own
Mobile Search
Use Mobile Search to get access to search engines, and find and connect to local services, web sites, images, and mobile content.
Press , and select My own > Search. A list of categories is displayed. Select a category (for example, images), and enter your text into the search field. Select Search. The search results are displayed on the screen.
Download!
Download! (network service) is a mobile content shop available on your device. You can browse, download, and install items, such as applications and media files, to your device from the internet. The items are categorized under catalogs and folders provided by different service providers. The available content depends on your service provider.
Press , and select My own > Download!
Download! uses your neup-to-date content. Foravailable through Downprovider, or the supplier
Download! receives ongwith the latest content ydevice. To update the coselect Options > Refres
To hide a folder or a catview only the items youHide. To make all the hOptions > Show all.
To buy the selected itemcatalog, select Optionsyou can select the versiinformation. The availabprovider.
To download an item thOptions > Get.
My
own
73
following: opens Calendar, opens Notes.
ant messaging
own > IM.
rk service) allows you to le using instant messages and groups) with specific topics.
maintain IM servers that you can r to an IM service. Service eir support of features.
tart or continue a conversation acts to create, edit, or view the ontacts; IM groups to start or ation with multiple IM users; or revious instant messaging
gss to access the service that you ive the settings in a special text provider that offers the IM tings’, p. 48. You can also enter e ‘Chat server settings’, p. 76.
Settings for Download!To change the settings, select Options > Settings and from the following:
Access point—Select which access point is used to connect to the service provider’s server and whether to have the device to ask for the access point every time you use it.
Automatic open—To automatically open the content or application after downloading, select Yes.
Preview confirmation—To automatically download a preview of the content or application, select No. To be asked separately each time before downloading a preview, select Yes.
Buy confirmation—To be asked for confirmation before buying content or an application, select Yes. To start the buying process immediately after you select Buy, select No.
After you complete the settings, select Back.
Go to—add shortcuts
Press , and select My own > Go to.
Default shortcuts are the opens Inbox, and
IM—inst
Press , and select My
Instant messaging (netwoconverse with other peopjoin discussion forums (IMVarious service providers log in to after you registeproviders may differ in th
Select Conversations to swith an IM user; IM contonline status of your IM ccontinue a group conversRecord. chats to view a psession that you saved.
Receive IM settinYou must save the settingwant to use. You may recemessage from the serviceservice. See ‘Data and setthe settings manually. Se
74
ct how your IM contacts are or By online status.
select how to update information contacts are online or offline, nual.
t whether IM contacts with an in the IM contacts list.
Select the color of the instant
Select the color of the instant
the tone played when you receive
roups and users the IM groups view, select can search by Group name, Topic,
he IM contacts view, select tact > Search from server. You me, User ID, Phone number, and
My
own Connect to an IM server
1 To connect to the IM server in use, open IM, and select Options > Login. To change the IM server in use and save new IM servers, see ‘Chat server settings’, p. 76.
2 Enter your user ID and password, and press to log in. You obtain the user ID and password for the IM server from your service provider.
3 To log out, select Options > Logout.
Modify your IM settingsSelect Options > Settings > IM settings and from the following:
Use screen name (shown only if IM groups are supported by the server)—To enter a nickname, select Yes.
Show my availability—To allow others to see if you are online, select To everyone.
Allow messages from—To allow messages from all, select All.
Allow invitations from—To allow invitations only from your IM contacts, select IM contacts only. IM invitations are sent by IM contacts who want you to join their groups.
Msg. scrolling speed—Select the speed at which new messages are displayed.
Sort IM contacts—Selesorted: Alphabetically
Availabil. reloading—Toabout whether your IMselect Automatic or Ma
Offline contacts—Selecoffline status are shown
Own message colour—messages you send.
Received msg colour—messages you receive.
IM alert tone—Changea new instant message.
Search for IM gTo search for groups, inOptions > Search. You and Members (user ID).
To search for users, in tOptions > New IM concan search by User's naE-mail address.
My
own
75
hat are exchanged during a are joined in a IM group, select o stop recording, select g. To view the recorded chats, in ord. chats.
nversationshows a list of the individual that you have an ongoing ng conversations are n you exit IM.
croll to a participant, and press
tion, write your message, and
tions list without closing the . To close the conversation, versation.
on, select Options > New
rticipant to your IM contacts, IM contacts.
Join IM groupsThe IM groups view shows a list of the IM groups that you have saved or are currently joined to.
To join a saved IM group, press .
To join an IM group that is not on the list, but for which you know the group ID, select Options > Join new group.
To leave the IM group, select Options > Leave IM group.
ChatAfter you join an IM group, you can view the messages that are exchanged there, and send your own messages.
To send a message, write the message in the message editor field, and press .
To send a private message to a participant, select Options > Send private msg..
To reply to a private message sent to you, select the message and Options > Reply.
To invite IM contacts who are online to join the IM group, select Options > Send invitation.
To prevent receiving messages from certain participants, select Options > Blocking options.
Record chatsTo record the messages tconversation or while youOptions > Record chat. TOptions > Stop recordinthe main view, select Rec
View and start coThe Conversations view sconversation participantsconversation with. Ongoiautomatically closed whe
To view a conversation, s.
To continue the conversapress .
To return to the conversaconversation, select Backselect Options > End con
To start a new conversaticonversation.
To save a conversation paselect Options > Add to
76
e access point you want to use for
address of the IM server
assword
ning
y own > Position.. With able one or more positioning atible applications to receive the the current location of your device. itioning method you can, for ion information of your current and Navigator.
y be network based (network uire that you use a compatible GPS sitioning method, scroll the ions > Enable.
ible GPS receiver with Bluetooth ning, scroll to Bluetooth GPS, and . If asked, select your GPS receiver
with Bluetooth connectivity, and air devices”, p. 85.
My
own IM contacts
In the IM contacts view, you can retrieve chat contact lists from the server, or add a new chat contact to a contact list. When you log in to the server, the previously used chat contact list is retrieved from the server automatically.
Chat server settingsSelect Options > Settings > Server settings. You may receive the settings in a special text message from the service provider that offers the chat service. You obtain the user ID and password from your service provider when you register to the service. If you do not know your user ID or password, contact your service provider.
Servers—View a list of all defined IM servers.
Default server—Change the IM server to which you want to connect.
IM login type—To log in automatically when you start IM, select On app. start-up.
To add a new server to your list of IM servers, select Servers > Options > New server. Enter the following settings:
Server name—the name for the chat server
Access point in use—ththe server
Web address—the URL
User ID—your user ID
Password—your login p
Positio
Press , and select MPositioning, you can enmethods to allow compposition information of When you enable a posexample, save the positlocation in Landmarks
Positioning methods maservice) or they may reqreceiver. To enable a pomethod, and select Opt
To start using a compatconnectivity for positioselect Options > Enablefrom the found devicespair the devices. See “P

My
own
77
rks
own > Landmarks. With the position information of device. You can sort the saved ategories, such as business, and ch as addresses, to them. You arks in compatible navigation igator in your Nokia N92.
, select Options > New s connected to a compatible GPS positioning request for the nt location. Select Current osition information. To enter the ually, select Enter manually.
n to a saved landmark, for , scroll to a landmark, and press field and enter the information.
rks into the preset categories, s. To edit and create new ll right in Landmarks, and select s.
tegory, scroll to the landmark, to category. Scroll to each
The Global Positioning System
The Global Positioning System (GPS) is operated by the government of the United States, which is solely responsible for its accuracy and maintenance. The accuracy of location data can be affected by adjustments to GPS satellites made by the United States government and is subject to change with the United States Department of Defense civil GPS policy and the Federal Radionavigation Plan. Accuracy can also be affected by poor satellite geometry. Availability and quality of GPS signals may be affected by your location, buildings, natural obstacles, and weather conditions. The GPS receiver should only be used outdoors to allow reception of GPS signals.
GPS should only be used as a navigation aid. It should not be used for precise location measurement and you should never rely solely on location data from the GPS receiver for positioning or navigation.
You may receive a request from a network service to receive your position information. Service providers may offer information about local topics, such as weather or traffic conditions, based upon the location of your device.
When you receive a position request, a message is displayed showing the service that is making the request. Select Accept to allow your position information to be sent, or select Reject to deny the request.
Landma
Press , and select My Landmarks, you can savespecific locations in yourlocations into different cadd other information, sucan use your saved landmapplications, such as Nav
To create a new landmarklandmark. If your device ireceiver, you can make a coordinates of your curreposition to retrieve the pposition information man
To edit or add informatioexample, a street address
. Scroll to the desired
You can sort your landmaand create new categorielandmark categories, scroOptions > Edit categorie
To add a landmark to a caand select Options > Add
78
rotating compass on the device s the direction to the destination, stance to it is shown inside the
ned to show the straightest route ce to the destination, measured in acles on the route, such as stacles, are ignored. Differences in
nto account when calculating the e is active only when you move.
ion, select Options > Set a landmark or waypoint as the e latitude and longitude p navigation to clear the trip.
n informationormation of your current location, compatible GPS receiver, scroll to
The GPS receiver can calculate its y of meters. An estimate of the is shown on the display.
ation as a waypoint or landmark, osition. Waypoints are locations se in Navigator only. Landmarks more information, and they can
My
own category to which you want to add the landmark, and
press the scroll key to select it.
To send one or several landmark to a compatible device, select Options > Send. Your received landmarks are placed in the Inbox folder in Messaging.
Navigator
Press , and select My own > Navigator. Navigator is designed to provide route guidance information to a selected destination, position information about your current location, and traveling information, such as the approximate distance to the destination and approximate duration of travel.
To use Navigator as a navigation aid, your device must be connected to a compatible GPS receiver. The GPS receiver must receive position information from at least three satellites to calculate the coordinates of your location.
Route guidanceTo use route guidance, scroll to Navigation, and press . Start the route guidance outdoors. If started indoors, the GPS receiver may not receive the necessary information from the satellites.
Route guidance uses a display. A red ball showand the approximate dicompass ring.
Route guidance is desigand the shortest distana straight line. Any obstbuildings and natural obaltitude are not taken idistance. Route guidanc
To set your trip destinatdestination, and selectdestination, or enter thcoordinates. Select Stodestination set for your
Retrieve positioTo view the position infconnect your device to aPosition, and press .location to the accuracaccuracy of the location
To save your current locselect Options > Save pthat you can save and uare saved locations with
My
own
79
t that is applied to the ringing tory and the desired effect. To from the following settings:
left or right to adjust the speed m one direction to another. This r all ringing tones.
n to have the ringing tone sound r to your device, and lower when en you get closer to the device, to become higher, and lower m it. This setting is not available sound trajectories.
e type of echo.
ne with the 3–D effect, select
es but do not select any 3-D applied to the ringing tone.
volume, select Tools > sonalise > Ringing volume.
ifeblog
nation of software for mobile a multimedia diary of the items
be used in other compatible applications and transferred between compatible devices.
Trip meterScroll to Trip distance, and press . Select Options > Start to activate trip distance calculation, and Stop to deactivate it. The calculated values remain on the display.
Select Reset to set the trip distance and time, and average and maximum speeds to zero, and to start a new calculation. Select Restart to also set the odometer and total time to zero.
The trip meter has limited accuracy, and rounding errors may occur. Accuracy can also be affected by availability and quality of GPS signals.
3-D tones
Press , and select My own > 3-D tones. With 3-D tones you can enable three-dimensional sound effects for ringing tones. Not all ringing tones support 3-D effects.
To enable the 3-D effects, select 3-D ringing tone effects > On. To change the ringing tone, select Ringing tone and the desired tones.
To change the 3–D effectone, select Sound trajecmodify the effect, select
Trajectory speed—Scroll at which sound moves frosetting is not available fo
Doppler effect—Select Ohigher when you are closeyou are farther away. Whthe ringing tone appears when you move away frofor all ringing tones and
Reverberation—Select th
To listen to the ringing toOptions > Play tone.
If you enable the 3-D toneffect, stereo widening is
To adjust the ringing toneProfiles > Options > Per
Nokia L
Nokia Lifeblog is a combiphone and PC that keeps
80
is not already installed on your PC, e time with Lifeblog PC.
vice and your PCand a compatible PC using a ble:e installed Nokia PC Suite.ta cable to the device and the PC. our device to the PC for the first installed Nokia PC Suite, the PC river for your device. This may take
log PC application.
and a compatible PC using nology:e installed Nokia PC Suite on your
e paired your device and the PC ireless technology with Get PC Suite. See Nokia PC Suite user h connectivity”, p. 83.onnectivity on your device and on
My
own that you collect with your device. Nokia Lifeblog
automatically keeps track of your multimedia items and organizes your photos, videos, sounds, text messages, multimedia messages, and weblog posts into a chronology that you can browse, search, share, publish, and back up.
For more information on weblog services and their compatibility with Nokia Lifeblog, visit www.nokia.com/lifeblog, or press F1 in the Nokia Lifeblog PC application to open Nokia Lifeblog Help.
To start Lifeblog on your device, press , and select My own > Lifeblog.
Installation on your PCBefore you install Lifeblog PC on a compatible PC, you need the following:• 1 GHz Intel Pentium or equivalent, 128 MB RAM• 400 MB of available hard disk space (if Microsoft
DirectX and Nokia PC Suite must be installed) • Graphics capability of 1024x768 and 24-bit color• 32 MB graphics card• Microsoft Windows 2000 or Windows XP
To install Nokia Lifeblog on your PC:1 Insert the CD-ROM.2 Install Nokia PC Suite (includes Nokia Connectivity
Cable Drivers for USB connection).3 Install Nokia Lifeblog for PC.
If Microsoft DirectX 9.0it is installed at the sam
Connect your deTo connect your device compatible USB data ca1 Ensure that you hav2 Connect the USB da
When you connect ytime after you have installs the specific da while.
3 Start the Nokia Lifeb
To connect your device Bluetooth wireless tech1 Ensure that you hav
PC.2 Ensure that you hav
through Bluetooth wConnected in Nokia guide and “Bluetoot
3 Activate Bluetooth cyour PC.
My
own
81
ites, select the items that you eb. to Web.for the first time, Nokia Lifeblog from the weblog server.g opens. Select the weblog you Post to: list. If you have created te the weblog list, select og list.tion for the post. You can also
r description in the body text
ady, select Options > Send.
from your PC:ites, select the items (a you want to post to the web.web.s.tion for the post. You can also
r description in the body text
t you want to use from the Post
ady, click the Send button.
other sourcesages of your imaging device, you ges and .3gp and .mp4 video
Copy itemsTo copy new or edited items from your device to your PC, and copy the selected items from your PC to your device:1 Connect your device to the PC.2 Start the Nokia Lifeblog application on your PC.3 In the Nokia Lifeblog PC application, select File > Copy
from Phone and to Phone.
The new items from your device are copied to your PC. The items in the To Phone view on your PC are copied to your device.
Post to the webTo share your best Nokia Lifeblog items, send them to your weblog on the internet for others to see.
You must first create an account with a weblog service, create one or more weblogs that you use as the destination of your posts, and add the weblog account to Nokia Lifeblog. The recommended weblog service for Nokia Lifeblog is TypePad from Six Apart, www.typepad.com.
On your device, add the weblog account in Nokia Lifeblog in the weblog settings. On your PC, edit accounts in the Edit log accounts window.
To post items to the web from your device:
1 In Timeline or Favourwant to post to the w
2 Select Options > Post3 If you use the feature
retrieves a weblog list4 The weblog post dialo
want to use from the new weblogs, to updaOptions > Refresh bl
5 Enter a title and a capwrite a longer story ofield.
6 When everything is re
To post items to the web1 In Timeline or Favour
maximum of 50) that2 Select File > .Post to 3 Enter a title and a cap
write a longer story ofield.
4 Select the weblog thato list.
5 When everything is re
Import items fromIn addition to the .jpeg imcan also import .jpeg ima
82
My
own clips, .arm sound files, and .txt text files from other
sources (such as a CD, DVD, or folders on your hard disk) into Nokia Lifeblog.
To import images or videos from a compatible PC to Nokia Lifeblog for PC, in the timeline or favorites, select File > Import from PC....
GamesPress , and select My own and a game. For instructions on how to play, select Options > Help, if available.

Conn
ectiv
ity
83
Access Profile. To ensure other devices supporting e Nokia approved enhancements h the manufacturers of other r compatibility with this device.
rresponds to a service or a how different devices connect. s-Free Profile is used between nd the phone. For devices to be support the same profiles.
on using Bluetooth technology with your local authorities or
technology, or allowing such kground while using other and on battery power and
d, you cannot use Bluetooth y’, p. 116 for more information
nnectivity in the Offline profile. is activated before entering the
ConnectivityBluetooth connectivity
You can connect wirelessly to other compatible devices with wireless Bluetooth technology. Compatible devices may include mobile phones, computers, and enhancements such as headsets and car kits. You can use Bluetooth connectivity to send images, video clips, music and sound clips, and notes; connect wirelessly to your compatible PC (for example, to transfer files); and connect to a compatible printer to print images with Image print in Gallery. See ‘Image print’, p. 33.
Since devices with Bluetooth technology communicate using radio waves, your device and the other device do not need to be in direct line-of-sight. The two devices only need to be within 10 meters (33 feet) of each other, but the connection may be subject to interference from obstructions such as walls or from other electronic devices.
This device is compliant with Bluetooth Specification 2.0 supporting the following profiles: Generic Access Profile, Serial Port Profile, Generic Object Exchange Profile, Dial-up Networking Profile, Object Push Profile, File Transfer Profile, Headset Profile, Hands-Free Profile, Basic Imaging Profile, Basic Printing Profile, Human Interface Device
Profile, and Remote SIM interoperability between Bluetooth technology, usfor this model. Check witdevices to determine thei
Glossary: A profile cofunction, and defines For example, the Handthe handsfree device acompatible, they must
There may be restrictionsin some locations. Check service provider.
Features using Bluetoothfeatures to run in the bacfeatures, increase the demreduce the battery life.
When the device is lockeconnectivity. See ‘Securiton locking the device.
You can use Bluetooth coIf Bluetooth connectivity
84
IM mode with your device. Before ed, the two devices must be paired d from the other device. When asscode, and set the other device
devices’, p. 85. Activate the remote er device.
ode is on in your Nokia N92, d in the standby mode. The ess network is turned off, as signal strength indicator area, and d services or features requiring ge. However, a wireless LAN ive during the remote SIM mode.
ce is in the remote SIM mode, you ble connected enhancement, such receive calls. Your wireless device except to the emergency numbers evice, while in this mode. To make ou must first leave the remote SIM been locked, enter the lock code to
mode, press the power key, and ode.
Bluetooth connectivity, select phone's visibility > Hidden.
Conn
ectiv
ity Offline profile, it will be deactivated. To use Bluetooth connectivity in the Offline profile, you must reactivate it.
SettingsPress , and select Connect. > Bluetooth. When you open the application for the first time, you are asked to define a name for your device. After you set Bluetooth connectivity on and change My phone's visibility to Shown to all, your device and this name can be seen by other users with devices using Bluetooth technology.
Select from the following:
Bluetooth—Select On or Off. To connect wirelessly to another compatible device, first set Bluetooth connectivity On, then establish a connection.
My phone's visibility—To allow your device to be found by other devices with Bluetooth technology, select Shown to all. To hide it from other devices, select Hidden.
My phone's name—Edit the name of your device.
Remote SIM mode—To enable another device, such as a compatible car kit enhancement, to use the SIM card in your device to connect to the network, select On.
Remote SIM modeTo use the remote SIM mode with a compatible car kit enhancement, set Bluetooth connectivity on, and enable
the use of the remote Sthe mode can be activatand the pairing initiatepairing, use a 16-digit pas authorized. See ‘Pair SIM mode from the oth
When the remote SIM mRemote SIM is displayeconnection to the wirelindicated by in the you cannot use SIM carcellular network coveraconnection remains act
When the wireless devican only use a compatias a car kit, to make or will not make any calls,programmed into your dcalls from your device, ymode. If the device has unlock.
To leave the remote SIMselect Exit rem. SIM m
Security tipsWhen you are not usingBluetooth > Off or My
Conn
ectiv
ity
85
omputer, phone, audio or other device.h, select Stop. which you want to connect.uires pairing before data can be unds, and you are asked to enter evices’, p. 85.
has been established, Sending
g. does not store messages sent vity.
for devices, some devices may address (device address). To find your device, enter the code by mode.
s view ( ), in the Bluetooth ess .
is needed. Before pairing, agree er device on the passcode (1-16 code on both devices. Devices terface have a factory-set used only once.
ct Options > New paired less Bluetooth technology within
Do not pair with or accept connection requests from an unknown device. In this way, you can better protect your device from harmful content.
Send data using Bluetooth connectivitySeveral Bluetooth connections can be active at a time. For example, if you are connected to a compatible headset, you can also transfer files to another compatible device at the same time.
Bluetooth connectivity indicators• When is shown in the standby mode, Bluetooth
connectivity is on.• When is blinking, your device is trying to connect
with another device.• When is shown continuously, data is being
transmitted using Bluetooth connectivity. Tip! To send text using Bluetooth connectivity, open
Notes, write the text, and select Options > Send > Via Bluetooth.
1 Open the application where the item you want to send is stored. For example, to send an image to another compatible device, open Gallery.
2 Select the item and Options > Send > Via Bluetooth. Devices with Bluetooth technology within range start to appear on the display.
Device icons are cvideo device, and To interrupt the searc
3 Select the device with4 If the other device req
transmitted, a tone soa passcode. See ‘Pair d
5 When the connectiondata is shown.
The Sent folder in Messausing Bluetooth connecti
Tip! When searchingshow only the unique the unique address of*#2820# in the stand
Pair devicesTo open the paired deviceapplication main view, pr
During pairing, a passcodewith the owner of the othdigits), and use the samethat do not have a user inpasscode. The passcode is
To pair with a device, seledevice. Devices with wire
86
nected to a device and delete the , pairing is removed immediately,
witched off.
ing Bluetooth
through Bluetooth connectivity, a re asked if you want to accept the is shown, and the item is er in Messag.. Messages received ectivity are indicated by . See s’, p. 47.
tooth connectivity connectivity, select Bluetooth >
d connection
transfer data such as business nd media files with a compatible
Conn
ectiv
ity range start to appear on the display. Select the device, and enter the passcode. The same passcode must be entered on the other device as well. After pairing, the device is saved to the paired devices view.
Paired devices are indicated by in the device search.
Tip! To define a short name (nickname or alias) for a paired device, scroll to the device, and select Options > Assign short name in the paired devices view. This name helps you to recognize a certain device during device search or when a device requests a connection.
To set a device as authorized or unauthorized, scroll to a device, and select from the following options:
Set as authorised—Connections between your device and this device can be made without your knowledge. No separate acceptance or authorization is needed. Use this status for your own devices, such as your compatible headset or PC, or devices that belong to someone you trust. indicates authorized devices in the paired devices view.
Set as unauthorised—Connection requests from this device must be accepted separately every time.
To cancel a pairing, scroll to the device, and select Options > Delete. To cancel all pairings, select Options > Delete all.
If you are currently conpairing with that deviceand the connection is s
Receive data usconnectivityWhen you receive data tone sounds, and you amessage. If you accept,placed in the Inbox foldthrough Bluetooth conn‘Inbox—receive message
Switch off BlueTo switch off BluetoothOff.
Infrare
With infrared, you can cards, calendar notes, adevice.
Conn
ectiv
ity
87
vices are trying to connect, or a .
tinuously, the infrared your device is ready to send and ared port.
able
nect. > Data cbl.. In Data cable B data cable connection is used ite, Data transfer, or Image ask the purpose of the cable is connected, select Ask
nization
nect. > Sync. Sync enables you ct, calendar, or notes with
dar and address book ible PC or on the internet. You nchronization settings.
ication uses SyncML technology nformation on SyncML
Do not point the infrared (IR) beam at anyone's eye or allow it to interfere with other IR devices. This device is a Class 1 laser product.
Send and receive data using infrared1 Ensure that the infrared ports of the sending and
receiving devices are pointing at each other, and that there are no obstructions between the devices. The preferable distance between the two devices is up to 1 meter (3 feet).
2 The user of the receiving device activates the infrared port.To activate the infrared port of your device to receive data through infrared, press , and select Connect. > Infrared.
3 The user of the sending device selects the desired infrared function to start the data transfer.To send data through infrared, locate the desired file in an application or the file manager, and select Options > Send > Via infrared.
If data transfer is not started within 1 minute after the activation of the infrared port, the connection is canceled and must be started again.
All items received through infrared are placed in the Inbox folder in Messaging. New infrared messages are indicated by .
When blinks, the deconnection has been lost
When is shown conconnection is active, and receive data using its infr
Data c
Press , and select Conmode, select what the USfor: Media Player, PC Suprint. To have the deviceconnection each time theon connection.
Synchro
Press , and select Conto synchronize your contavarious compatible calenapplications on a compatcan also create or edit sy
The synchronization applfor synchronization. For i
88
ter a name for the profile.
e applications to synchronize with , Contacts and Calendar. Scroll to ress the scroll key to define its s:ect Yes if you want to synchronize
Enter a correct path to the remote ok, or database on the server.pe—Select Normal (two-way server only, or To phone only.
efine the following. Contact your m administrator for the correct
ct the synchronization protocol the server. server ID (shown only if Server ). the connection type: Internet or
n only if Data bearer is set to access point to use for the data
the IP address of the remote
er port number (shown only if Data rnet).
Conn
ectiv
ity compatibility, contact the supplier of the application with which you want to synchronize your device data.
You may receive synchronization settings in a special text message. See ‘Data and settings’, p. 48.
Synchronize dataIn the Sync main view, you can see the different synchronization profiles.1 Select a synchronization profile and Options >
Synchronise. The status of the synchronization is shown on the display.To cancel synchronization before it finishes, select Cancel.
2 You are notified when the synchronization is complete. Select Yes to view the log file showing the synchronization status and how many entries have been added, updated, deleted, or discarded (not synchronized) in your device or on the server.
Create a new synchronization profileTo create a new profile in addition to existing ones, select Options > New sync profile. Choose whether you want to use the default setting values or copy the values from an existing profile.
Define the following:
Sync profile name—En
Applications—Select ththis profile, for exampleeach application, and psynchronization setting• Include in sync—Sel
the application.• Remote database—
calendar, address bo• Synchronisation ty
synchronization), To
Connection settings—Dservice provider or systevalues.• Server version—Sele
version to use with • Server ID—Enter the
version is set to 1.2• Data bearer—Select
Bluetooth.• Access point (show
Internet)—Select anconnection.
• Host address—Enterdatabase server.
• Port—Enter the servbearer is set to Inte
Conn
ectiv
ity
89
technology, or allowing such kground while using other and on battery power and
following wireless LAN features:rd
ncy of 2.4 GHzacy (WEP) with keys up to 128 ccess (WPA), and 802.1x hese functions can be used only by the network.
t access point (IAP) in a wireless ations that need to connect to
enable one of the available crease the security of your Using encryption reduces the ss to your data.
ss pointonnect. > Conn. mgr. >
r wireless LANs within range. in which you want to create an s > Define access point.AP with default settings. To view gs, see ‘Access points’, p. 112. If
• User name—Enter your user ID for the synchronization server.
• Password—Enter your password for the synchronization server.
• Allow sync requests—Select Yes if you want to allow the server to start a synchronization.
• Accept all sync reqs.—Select No if you want your device to ask you before the server starts a synchronization.
• Network authentic. (shown only if Data bearer is set to Internet)—Select Yes to enter a network user name and password. Scroll down to view the user name and password fields.
Select Back to save the settings and return to the main view.
Wireless LANYour device supports wireless local area network (wireless LAN). With wireless LAN, you can connect your device to the internet and compatible devices that have wireless LAN. For information about using your device in a home network, see ‘Home network’, p. 93.
Some places, like France, have restrictions on the use of wireless LAN. Check with your local authorities for more information.
Features using Bluetoothfeatures to run in the bacfeatures, increase the demreduce the battery life.
Your device supports the • IEEE 802.11b/g standa• Operation at a freque• Wired equivalent priv
bits, Wi-Fi protected aencryption methods. Tif they are supported
You can create an interneLAN, and use it for applicthe internet.
Important: Alwaysencryption methods to inwireless LAN connection.risk of unauthorized acce
Create an internet acce1 Press , and select C
Availab. WLAN.2 The device searches fo
Scroll to the network IAP, and select Option
3 The device creates an Ior change these settin
90
izard
you to connect to a wireless LAN ss LAN connections.
s the status of your wireless LAN e standby mode. To view the
to the row showing the status, and
ess LANs, and for example, WLAN yed, to automatically create an IAP er using this IAP, select the status, rowsing, and the network.
ireless LAN network, you are asked sscodes. To connect to a hidden the correct network name (service
a wireless LAN, the IAP name is eb browser using this IAP, select
n Continue Web browsing. To end ireless LAN, select the status and WLAN.
g is off and you are not connected LAN scanning off is displayed. To rch for available wireless LANs, scanning off.
Conn
ectiv
ity you have selected a secured WLAN network, you must define the access point yourself in the connection settings.
When an application asks you to select an access point, select the created access point.
A wireless LAN connection is established when you create a data connection using a wireless LAN internet access point. The active wireless LAN connection ends when you end the data connection. To end the connection, see ‘Connection manager’, p. 91.
You can use wireless LAN during a voice call or when packet data is active. You can only be connected to one wireless LAN access point device at a time, but several applications can use the same wireless LAN connection.
When you activate the Offline profile, you can still use wireless LAN (if available). Remember to comply with any applicable safety requirements when establishing and using a wireless LAN connection.
Tip! To check the unique media access control (MAC) address that identifies your device, enter *#62209526# in the standby mode.
WLAN w
The WLAN wizard helpsand manage your wirele
The WLAN wizard showconnections in the activavailable options, scrollpress .
If the search finds wirelnetwork found is displaand start the web browsthe option Start Web b
If you select a secured wto enter the relevant panetwork, you must enterset identifier, SSID).
If you are connected todisplayed. To start the wthe status and the optiothe connection in the wthe option Disconnect
If wireless LAN scanninto any wireless LAN, Wset scanning on and seaselect the status WLAN
Conn
ectiv
ity
91
ode, devices can send and each other. To create an internet c network, see ‘Access points’, p.
ion manager
nect. > Conn. mgr.. To view the s or end connections in GSM and ss LAN, select Act. data conn.. s available within range, select h the list of available networks,
view, you can see the open data ), packet data connections (
connections ( ).
ime invoiced for calls by your ary, depending on network for billing, and so forth.
ct Options > Disconnect. To s, select Options > Disconnect
To start a search for available wireless LANs, select a status and the option Search for WLAN. To set wireless LAN scanning off, select a status and the option WLAN scanning off.
To access the WLAN wizard in the menu, press , and select Connect. > WLAN wiz..
Wireless LAN access pointsTo search for wireless LANs available within range, press
, and select Connect. > WLAN wiz.. To create an IAP in a wireless LAN, select Options > Define access point. To view the details of a network shown in the list, select Options > Details.
When an application asks you to select an access point, select the created access point. You can also create an IAP by selecting Search for WLAN.
You can also use Conn. mgr. to create IAPs. See ‘Connection manager’, p. 91.
Operating modesThere are two operating modes in wireless LAN: infrastructure and ad hoc.
The infrastructure operating mode allows two kinds of communication: wireless devices are connected to each other through a wireless LAN access point device, or wireless devices are connected to a wired LAN through a wireless LAN access point device.
In the ad hoc operating mreceive data directly withaccess point for the ad ho112.
Connect
Press , and select Constatus of data connectionUMTS network and wireleTo search for wireless LANAvailab. WLAN. To refresselect Options > Reload.
Data connectionsIn the active connectionsconnections: data calls (or ), and wireless LAN
Note: The actual tservice provider may vfeatures, rounding off
To end a connection, seleclose all open connectionall.
92
are updates are available, select pdates. Select an internet access
, information about it is displayed. to download the update or Cancel . The download may take several ur device during the download.
updates may involve the ounts of data through your service tact your service provider for transmission charges.
ice battery has enough power, or fore starting the update.
stall a software update, you e, even to make emergency calls, is completed and the device is backup data before accepting the date.
complete, select Yes and then date, or No to install it later by update. The installation may take
software and restarts. To complete hen asked, select an internet
e sends the software update status
Conn
ectiv
ity To view the details of a connection, select Options > Details. The details shown depend on the connection type.
Wireless LANThe available wireless LAN view shows a list of wireless LANs within range, their network mode (Infrastructure or Ad-hoc), and signal strength indicator. is shown for networks with encryption, and if your device has an active connection in the network.
To view the details of a network, select Options > Details.
To create an internet access point in a network, select Options > Define access point.
Device manager
Software updatesYou may view and update the current software version of your device, and check the date of a possible previous update (network service). This feature only works in the Fold open mode.
In the Fold open mode, press and select Connect. > Device mgr..
To check whether softwOptions > Check for upoint when asked.
If an update is availableSelect Accept to acceptto cancel the downloadminutes. You can use yo
Downloading software transmission of large amprovider's network. Coninformation about data
Make sure that the devconnect the charger be
Warning: If you incannot use the devicuntil the installationrestarted. Be sure toinstallation of an up
When the download is Accept to install the upusing Options >Install several minutes.
The device updates the the update, select OK. Waccess point. Your devicto the server.
Conn
ectiv
ity
93
access point to be used when
URL address of the server.
ber of the server.
—Enter your user name and
receive configuration settings s.
s—If you want your device to ask ccepting a configuration from
—Select whether network
Network password—Enter your assword to identify your device ns are shown only if network
etwork
with Universal Plug and Play g a wireless LAN access point router, you can create a home patible UPnP devices that
To view the server profile settings used for software updates, select Options >Settings.
Server profilesPress , select Connect. > Device mgr. and scroll right.
You may receive server profiles and different configuration settings from your service provider or company information management department. These configuration settings may include access point settings for data connections and other settings used by different applications in your device.
To connect to a server and receive configuration settings for your device, scroll to a profile, and select Options > Start configuration.
To create a new server profile, select Options > New server profile. To edit a server profile, select Options > Edit profile.
Server profile settingsContact your service provider for the correct settings.
Server name—Enter a name for the configuration server.
Server ID—Enter the unique ID to identify the configuration server.
Server password—Enter a password to identify your device to the server.
Access point—Select an connecting to the server.
Host address—Enter the
Port—Enter the port num
User name and Passwordpassword.
Allow configuration—Tofrom the server, select Ye
Auto-accept all requestfor confirmation before athe server, select No.
Network authenticationauthentication is used.
Network user name andnetwork user name and pto the server. These optioauthentication is used.
Home n
Your device is compatiblearchitecture (UPnP). Usindevice or a wireless LAN network and connect com
94
our Nokia N92 or search for other twork folder.
ity informationur wireless LAN home network, ethod, first on your access point r devices you intend to connect to
fer to the documentation of the odes secret and in a safe place es.
ttings of the wireless LAN internet kia N92, see ‘Access points’, p. 112.
erating mode to create a home ible device, enable one of the WLAN security mode when you ccess point. This step reduces the
rty joining the ad hoc network.
if another device attempts to ome network. Do not accept m an unknown device.
in a network that does not have haring Nokia N92 files with other any private media files. To change me network settings’, p. 95.
Conn
ectiv
ity support wireless LAN to the network, such as your Nokia N92, a compatible PC, a compatible printer, and a compatible sound system or TV, or a sound system or TV equipped with a compatible wireless multimedia receiver.
Using the wireless LAN function of the Nokia N92 in a home network requires a working wireless LAN home connection setup and the other target home devices to be UPnP enabled and to be connected to the same home network.
The home network uses the security settings of the wireless LAN connection. Use the home network feature in a wireless LAN infrastructure network with a wireless LAN access point device and encryption enabled.
You can share media files saved in Gallery with other compatible UPnP devices using the home network. To manage your home network settings, press , and select Connect. > Home netw.. You can also use the home network to view, play, copy, or print compatible media files from Gallery. See ‘View and share media files’, p. 96.
Important: Always enable one of the available encryption methods to increase the security of your wireless LAN connection. Using encryption reduces the risk of unauthorized access to your data.
Your device is connected to the home network only if you accept a connection request from another compatible device, or in Gallery, select the option to view, play, print,
or copy media files on ydevices in the Home ne
Important securWhen you configure yoenable an encryption mdevice, then on the otheyour home network. Redevices. Keep any passcseparate from the devic
To view or change the seaccess point in your No
If you use the ad hoc opnetwork with a compatencryption methods in configure the internet arisk of an unwanted pa
Your device notifies youconnect to it and the hconnection requests fro
If you use wireless LANencryption, switch off sdevices, or do not sharesharing settings, see ‘Ho
Conn
ectiv
ity
95
ork, Create new to define a new automatically when you use d to select an access point, or ork does not have wireless LAN you get a security warning. You the wireless LAN security on he access point, and first switch
rity. See Wireless LAN in ‘Access
me for your device that is shown evices in the home network.
e content
netw. > Share content.
or deny sharing media files with t set Content sharing on before
he other settings. If you set ther UPnP compatible devices in
ew and copy your files you have e Images & video and Music
ic—Select media files for sharing the sharing status of Images & te the content of the folders, content.
Home network settingsTo share media files saved in Gallery with other compatible UPnP devices through wireless LAN, you must first create and configure your wireless LAN home internet access point, then configure the Home netw. application. See ‘Wireless LAN’, p. 89 and the wireless LAN settings in ‘Access points’, p. 112.
To connect a compatible PC to the home network, on the PC, you must install the related software from the CD-ROM.
The options related to Home netw. are not available in Gallery before the home network settings have been configured.
When you access the home network application for the first time, the setup wizard opens, and helps you to define the home network settings for your device. To use the setup wizard later, in the home network main view, select Options > Run wizard, and follow the instructions on the display.
Configure settings
To configure the Home netw. application, select Connect. > Home netw. > Settings and from the following:
Home access point—Select Always ask if you want the device to ask for the home access point every time you
connect to the home netwaccess point that is used Home netw., User defineNone. If your home netwsecurity settings enabled,can continue, and switchlater; or cancel selecting ton the wireless LAN secupoints’, p. 112.
Device name— Enter a nato the other compatible d
Set sharing on and defin
Select Connect. > Home
Content sharing—Allow compatible devices. Do noyou have configured all tContent sharing on, the othe home network can viselected for sharing in thfolders.
Images & video and Muswith other devices, or viewvideo and Music. To updaselect Options > Refresh
96
me network. Your device starts the patible devices. Device names start play. the list. edia you want to view from the ailable file types depend on the r device.eo clip, or music clip or folder you lect Options > Show via home eo) or Play via home network
which the file is shown.
ia file, select Options > Stop
Gallery through Home netw. with ter, select the print option in t’, p. 33. Content sharing does not .
erent criteria, select Options > files, select Options > Sort by.
sia files from your device to another as a UPnP compatible PC, select a ions > Move and copy > Copy to
Conn
ectiv
ity View and share media filesIf Content sharing is on in your device, the other UPnP compatible devices in the home network can view and copy the media files you have selected to share in Share content. If you do not want the other devices to access your files, set Content sharing off. Even if Content sharing is off in your device, you can still view and copy the media files stored in another home network device if it is allowed by the other device.
Show media files stored in your deviceTo select images, videos, and sound clips stored in your device, and show them in another home network device, such as a compatible TV, do the following:1 In Gallery, select an image, a video clip, or a sound
clip.2 Select Options > Show via home net..3 Select a compatible device in which the media file is
shown. The images are shown both in the other home network device and your device, and the video clips and sound clips are played only in the other device.
Show media files stored in the other deviceTo select media files that are stored on another home network device, and show them in your device (or in a compatible TV, for example), do the following:
1 In Gallery, select Hosearch of other comto appear on the dis
2 Select a device from3 Select the type of m
other device. The avfeatures of the othe
4 Select the image, vidwant to view, and senet. (images and vid(music).
5 Select the device in
To stop sharing the medshowing.
To print images saved ina UPnP compatible prinGallery. See ‘Image prinhave to be switched on
To search files with diffFind. To sort the found
Copy media fileTo copy or transfer medcompatible device, suchfile in Gallery, and Opt
Conn
ectiv
ity
97
Get Connected wizard available
home network or Move to home network. Content sharing does not have to be switched on.To copy or transfer files from the other device to your device, select a file in the other device, and Options >Move and copy > Copy to phone or Copy to memory card (the name of the memory card if the memory card is available). Content sharing does not have to be switched on.
PC connectionsYou can use your device with a variety of PC connectivity and data communications applications. With Nokia PC Suite you can, for example, transfer images between your device and a compatible PC.
Always create the connection from the PC to synchronize with your device.
Your device as a modemYou can use your device as a modem to send and receive e-mail, or to connect to the internet with a compatible PC by using Bluetooth connectivity, or a USB data cable (network service). Detailed installation instructions can be found in the user guide for Nokia PC Suite.
Tip! When using Nokia PC Suite for the first time, to connect your device to a compatible PC and to use
Nokia PC Suite, use thein Nokia PC Suite.
98
cy and exchange rates> Options > Currency rates.
rrency conversions, you must select exchange rates. The rate of the
1.
change base currency, you must rates because all previously set leared.
, and select Office > Notes. You atible devices, and save plain text ou receive to Notes.
patible Basic Print Profile (BPP) luetooth connectivity (such as HP ter or HP Photosmart 8150), select
Off
ice Office
Calculator
To add, subtract, multiply, divide, and calculate square roots and percentages, press , and select Office > Calculator.
Note: This calculator has limited accuracy and is designed for simple calculations.
Converter
To convert measures from one unit to another, press , and select Office > Converter.
Converter has limited accuracy, and rounding errors may occur.1 In the Type field, select the measure you want to use.2 In first Unit field, select the unit from which you want
to convert. In the next Unit field, select the unit to which you want to convert.
3 In the first Amount field, enter the value you want to convert. The other Amount field changes automatically to show the converted value.
Set base currenSelect Type > CurrencyBefore you can make cua base currency and addbase currency is always
Note: When you enter new exchangeexchange rates are c
Notes
To write notes, press can send notes to compfiles (.txt format) that y
To print a note on a comequipped printer with BDeskjet 450 Mobile PrinOptions > Print.
Off
ice
99
n view native Microsoft Excel .xls format and created with , XP, and 2003.
ess , and select Office > t and the spreadsheet.
f Quicksheet that supports Upgrade to edit. The upgrade is
n view native Microsoft files created in .ppt format and owerPoint 2000, XP, and 2003.
ress , and select Office > t and the presentation.
f Quickpoint that supports Upgrade to edit. The upgrade is
can download software, es, and other useful
Quickoffice
With Quickoffice, you can view .doc, .xls, .ppt, and .txt files. Not all variations or features of the mentioned file formats are supported. Apple Macintosh is not supported.
Press , and select Office > Quickoffice. A list of files in the .doc, .xls, .ppt and .txt formats saved on your device and on a compatible memory card opens.
To open Quickword, Quicksheet, or Quickpoint, or Quickmanager, press to reach the desired view.
For more information, visit www.quickoffice.com. Support is also available by sending an e-mail to [email protected].
QuickwordWith Quickword, you can view native Microsoft Word document files saved in .doc or.txt format and created with Microsoft Word 97, 2000, XP, and 2003.
To open a document, press , and select Office > Quickoffice > Quickword and the document.
To upgrade to a version of Quickword that supports editing, select Options > Upgrade to edit. The upgrade is chargeable.
QuicksheetWith Quicksheet, you caspreadsheet files saved inMicrosoft Excel 97, 2000
To open a spreadsheet, prQuickoffice > Quickshee
To upgrade to a version oediting, select Options > chargeable.
QuickpointWith Quickpoint, you caPowerPoint presentation created with Microsoft P
To open a presentation, pQuickoffice > Quickpoin
To upgrade to a version oediting, select Options > chargeable.
QuickmanagerWith Quickmanager, you including updates, upgrad
10
wse and open documents stored in and on the memory card.nsure your device is set up with an t before browsing.
sPDF files, press , and select ur recent files are listed in the file nt, scroll to it, and press .
ions and from the following:
wse for PDF files in the device tible memory card.
ault zoom level and viewing mode
, select Options and one of the
or to a selected percentage. You ment to the screen width, or fit the screen.
ument for a text.
Off
ice
0
applications. You can pay for the downloads by phone bill or credit card.
To upgrade your Quickword, Quicksheet, or Quickpoint to a version that supports editing, you need to buy a license.
To open Quickmanager, press , and select Office > Quickoffice > Quickmanager.
Adobe Reader
With Adobe Reader you can read PDF documents on the display of your device.
Note: This application has been optimised for PDF document content on handsets and other mobile devices, and provides only a limited set of features compared with PC versions.
Access and open documents in the following ways:• Press , and select Office > Adobe PDF. Select
Options > Browse for file to browse and open documents stored in the device memory and on a compatible memory card.
• Open an e-mail attachment from received e-mail messages (network service).
• Send a document using Bluetooth connectivity to your Inbox in Messag..
• Use File mgr. to brothe device memory
• Browse web pages. Einternet access poin
Manage PDF fileTo browse and manage Office > Adobe PDF. Yoview. To open a docume
You can also select Opt
Browse for file—To bromemory or on a compa
Settings—To modify defof PDF documents.
View PDF filesWhen a PDF file is openfollowing:
Zoom—To zoom in, out,can also resize the docuwhole PDF page to the
Find—To search the doc
Off
ice
101
View—To view the document in a full screen mode. You can also rotate the PDF document by 90 degrees in either direction.
Go to—To move to a selected page, next page, previous page, first page, or last page.
Save—To save the file to device memory or memory card.
Settings—To modify default zoom level and default viewing mode.
Details—To display the properties of the PDF document.
More informationFor more information, visit www.adobe.com.
To share questions, suggestions, and information about the application, visit the Adobe Reader for Symbian OS user forum at http://adobe.com/support/forums/main.html.
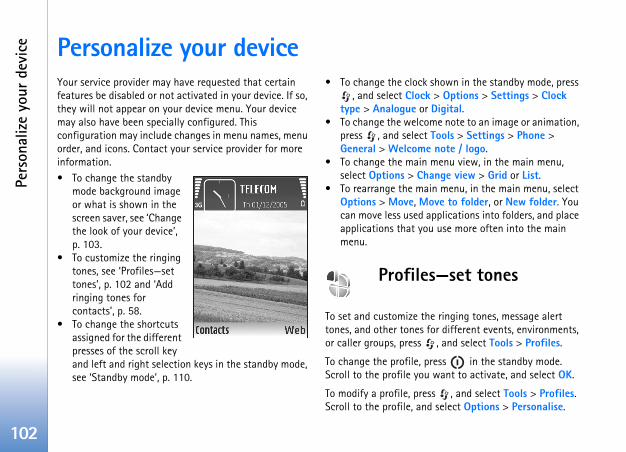
10
shown in the standby mode, press > Options > Settings > Clock
Digital.me note to an image or animation, Tools > Settings > Phone > note / logo.
menu view, in the main menu, ange view > Grid or List.in menu, in the main menu, select ove to folder, or New folder. You pplications into folders, and place
u use more often into the main
s—set tones
e ringing tones, message alert or different events, environments,
, and select Tools > Profiles.
ress in the standby mode. want to activate, and select OK.
ss , and select Tools > Profiles. select Options > Personalise.
Pers
onal
ize
your
dev
ice
2
Personalize your deviceYour service provider may have requested that certain features be disabled or not activated in your device. If so, they will not appear on your device menu. Your device may also have been specially configured. This configuration may include changes in menu names, menu order, and icons. Contact your service provider for more information.• To change the standby
mode background image or what is shown in the screen saver, see ‘Change the look of your device’, p. 103.
• To customize the ringing tones, see ‘Profiles—set tones’, p. 102 and ‘Add ringing tones for contacts’, p. 58.
• To change the shortcuts assigned for the different presses of the scroll key and left and right selection keys in the standby mode, see ‘Standby mode’, p. 110.
• To change the clock, and select Clock
type > Analogue or• To change the welco
press , and selectGeneral > Welcome
• To change the mainselect Options > Ch
• To rearrange the maOptions > Move, Mcan move less used aapplications that yomenu.
Profile
To set and customize thtones, and other tones for caller groups, press
To change the profile, pScroll to the profile you
To modify a profile, preScroll to the profile, and
Pers
onal
ize
your
dev
ice
103
profiles. If the device has been code.
the Offline profile, you can still example, to read your e-mail or ember to comply with any ents when establishing and
ection. See ‘Wireless LAN’, p. 89.
ile, press the power key, and e device re-enables wireless there is sufficient signal nnectivity is activated before ile, it will be deactivated. To use the Offline profile, reactivate it. automatically reactivated after e. See ‘Settings’, p. 84.
the look of your
display, such as the wallpaper elect Tools > Themes. The active . In Themes you can group ther themes or select images nalize themes further. The
ard (if inserted) are indicated by emory card are not available if
Scroll to the setting you want to change, and press to open the choices. Tones stored on the memory card are indicated with . You can scroll through the tone list and listen to each one before you make your selection. To stop the sound, press any key.
When you choose a tone, Tone downloads (network service) opens a list of bookmarks. You can select a bookmark and connect to a web page to download tones.
If you want the caller’s name to be said when your device rings, select Options > Personalise, and set Say caller's name to On. The caller’s name must be saved in Contacts.
To create a new profile, select Options > Create new.
Offline profileThe Offline profile lets you use the device without connecting to the wireless network. When you activate the Offline profile, the connection to the wireless network is turned off, as indicated by in the signal strength indicator area. All wireless RF signals to and from the device are prevented. If you try to send messages, they are placed in the outbox to be sent later.
Important: In the offline profile you cannot make or receive any calls, or use other features that require cellular network coverage. Calls may still be possible to the official emergency number programmed into your device. To make calls, you must first activate the phone
function by changing locked, enter the lock
When you have activateduse the wireless LAN, for browse the internet. Remapplicable safety requiremusing a wireless LAN conn
To leave the Offline profselect another profile. Thtransmissions (providing strength). If Bluetooth coentering the Offline profBluetooth connectivity inBluetooth connectivity isleaving the Offline profil
Changedevice
To change the look of theand icons, press , and stheme is indicated by together elements from ofrom the Gallery to persothemes on the memory c
. The themes on the m
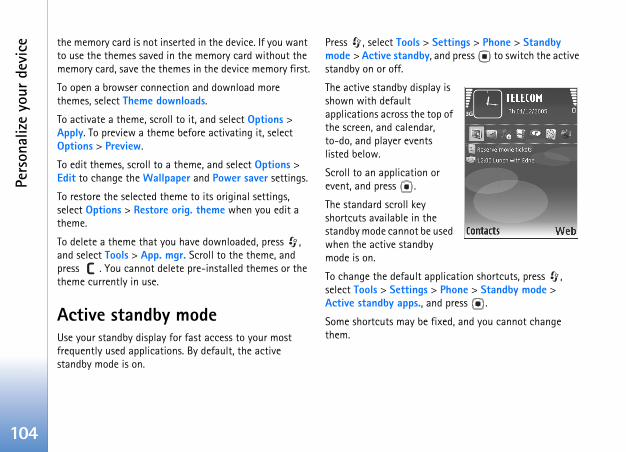
10
Settings > Phone > Standby , and press to switch the active
lay is
top of r, s
or
e used y
pplication shortcuts, press , > Phone > Standby mode > nd press .
fixed, and you cannot change
Pers
onal
ize
your
dev
ice
4
the memory card is not inserted in the device. If you want to use the themes saved in the memory card without the memory card, save the themes in the device memory first.
To open a browser connection and download more themes, select Theme downloads.
To activate a theme, scroll to it, and select Options > Apply. To preview a theme before activating it, select Options > Preview.
To edit themes, scroll to a theme, and select Options > Edit to change the Wallpaper and Power saver settings.
To restore the selected theme to its original settings, select Options > Restore orig. theme when you edit a theme.
To delete a theme that you have downloaded, press , and select Tools > App. mgr. Scroll to the theme, and press . You cannot delete pre-installed themes or the theme currently in use.
Active standby modeUse your standby display for fast access to your most frequently used applications. By default, the active standby mode is on.
Press , select Tools >mode > Active standbystandby on or off.
The active standby dispshown with default applications across the the screen, and calendato-do, and player eventlisted below.
Scroll to an applicationevent, and press .
The standard scroll key shortcuts available in thstandby mode cannot bewhen the active standbmode is on.
To change the default aselect Tools > SettingsActive standby apps., a
Some shortcuts may bethem.
Tool
s
105
sumptiona you have in the device and how nt data types consume, select ils. The amount of available free memory.
e memory the device or the memory card
ansfer data to a compatible one. Mark files to be moved, and o folder > Memory card and a
e Browser available in Nokia PC our device, to view the different ce and transfer data.
emory, use File mgr. or the r example, you can remove the
box, Drafts, and Sent folders in
ages from the device memory
ToolsFile manager
Many features of the device, such as contacts, messages, images, videos, ringing tones, calendar notes, documents, and downloaded applications, use memory to store data. The free memory available depends on how much data is already saved in the device memory.
You can use a compatible memory card as extra storage space. Memory cards are rewritable, so you can delete old information and save new data on a memory card.
To browse files and folders in the device memory or on a memory card (if inserted), press , and select Tools > File mgr.. The device memory view ( ) opens. Press to open the memory card view ( ), if available.
To move or copy the selected file to a folder, select Options > Move to folder or Copy to folder.
To find a file, select Options > Find and the memory from which to search, and enter a search text that matches the file name.
View memory conTo view what types of datmuch memory the differeOptions > Memory detamemory is shown in Free
Memory low—freThe device notifies you ifmemory is low.
To free device memory, trmemory card, if you have select Options > Move tfolder.
Tip! Use Nokia PhonSuite, supplied with ymemories in your devi
To remove data to free mrespective application. Fofollowing:• Messages from the In
Messag.• Retrieved e-mail mess
10
lorer to transfer a file, save the file y card (local disk).
ns and softwareication, a Java application, ot fully installed, and that the on the memory card.
install and use applications and sted sources, such as applications or have passed the Java VerifiedTM
the following:ion type, version number, and the turer of the application, select ails.ity certificate details of the ptions > View certificate. See ent’, p. 117.
at contains an update or repair to ion, you can only restore the if you have the original installation copy of the removed software he original application, remove the all the application again from the file or the back-up copy.
Tool
s
6
• Saved web pages• Saved images, videos, or sound files• Contact information• Calendar notes• Downloaded applications. See also ‘Application
manager’, p. 106.• Any other data that you no longer need
Application manager
Press , and select Tools > App. mgr.. You can install two types of applications and software to your device:• J2METM applications based on Java technology with
the extension .jad or .jar ( ). • Other applications and software suitable for the
Symbian operating system ( ). The installation files have the .sis extension. Only install software specifically designed for your Nokia N92. Software providers will often refer to the official model number of this product: the Nokia N92-1.
Installation files may be transferred to your device from a compatible computer, downloaded during browsing, or sent to you in a multimedia message, as an e-mail attachment, or using Bluetooth connectivity or infrared. You can use Nokia Application Installer in Nokia PC Suite to install an application to your device. If you use
Microsoft Windows Expto a compatible memor
Install applicatio indicates a .sis applthat the application is napplication is installed
Important: Only other software from truthat are Symbian Signedtesting
Before installation, note• To view the applicat
supplier or manufacOptions > View det
• To display the securapplication, select O‘Certificate managem
• If you install a file than existing applicatoriginal application file or a full back-uppackage. To restore tapplication, and instoriginal installation
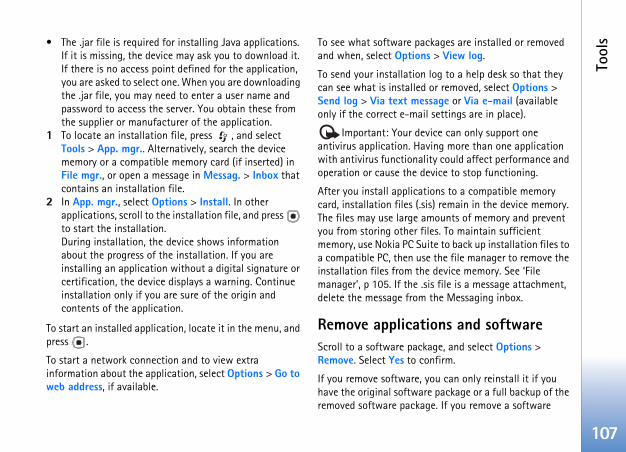
Tool
s
107
kages are installed or removed > View log.
log to a help desk so that they or removed, select Options > sage or Via e-mail (available settings are in place).
ice can only support one ing more than one application ty could affect performance and vice to stop functioning.
ons to a compatible memory s) remain in the device memory.
ounts of memory and prevent es. To maintain sufficient ite to back up installation files to the file manager to remove the device memory. See ‘File is file is a message attachment, the Messaging inbox.
ons and softwareage, and select Options > nfirm.
ou can only reinstall it if you e package or a full backup of the e. If you remove a software
• The .jar file is required for installing Java applications. If it is missing, the device may ask you to download it. If there is no access point defined for the application, you are asked to select one. When you are downloading the .jar file, you may need to enter a user name and password to access the server. You obtain these from the supplier or manufacturer of the application.
1 To locate an installation file, press , and select Tools > App. mgr.. Alternatively, search the device memory or a compatible memory card (if inserted) in File mgr., or open a message in Messag. > Inbox that contains an installation file.
2 In App. mgr., select Options > Install. In other applications, scroll to the installation file, and press to start the installation.During installation, the device shows information about the progress of the installation. If you are installing an application without a digital signature or certification, the device displays a warning. Continue installation only if you are sure of the origin and contents of the application.
To start an installed application, locate it in the menu, and press .
To start a network connection and to view extra information about the application, select Options > Go to web address, if available.
To see what software pacand when, select Options
To send your installation can see what is installed Send log > Via text mesonly if the correct e-mail
Important: Your devantivirus application. Havwith antivirus functionalioperation or cause the de
After you install applicaticard, installation files (.siThe files may use large amyou from storing other filmemory, use Nokia PC Sua compatible PC, then useinstallation files from themanager’, p 105. If the .sdelete the message from
Remove applicatiScroll to a software packRemove. Select Yes to co
If you remove software, yhave the original softwarremoved software packag
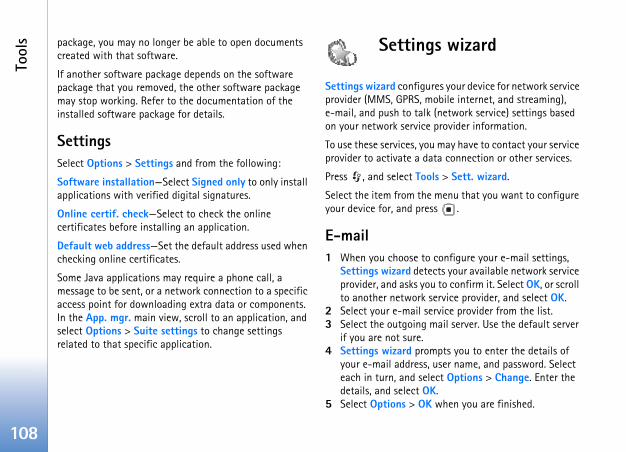
10
s wizard
res your device for network service obile internet, and streaming), (network service) settings based provider information.
u may have to contact your service ata connection or other services.
ls > Sett. wizard.
menu that you want to configure ss .
configure your e-mail settings, ects your available network service u to confirm it. Select OK, or scroll service provider, and select OK.ervice provider from the list.mail server. Use the default server
mpts you to enter the details of , user name, and password. Select lect Options > Change. Enter the K. when you are finished.
Tool
s
8
package, you may no longer be able to open documents created with that software.
If another software package depends on the software package that you removed, the other software package may stop working. Refer to the documentation of the installed software package for details.
SettingsSelect Options > Settings and from the following:
Software installation—Select Signed only to only install applications with verified digital signatures.
Online certif. check—Select to check the online certificates before installing an application.
Default web address—Set the default address used when checking online certificates.
Some Java applications may require a phone call, a message to be sent, or a network connection to a specific access point for downloading extra data or components. In the App. mgr. main view, scroll to an application, and select Options > Suite settings to change settings related to that specific application.
Setting
Settings wizard configuprovider (MMS, GPRS, me-mail, and push to talkon your network service
To use these services, yoprovider to activate a d
Press , and select Too
Select the item from theyour device for, and pre
E-mail1 When you choose to
Settings wizard detprovider, and asks yoto another network
2 Select your e-mail s3 Select the outgoing
if you are not sure.4 Settings wizard pro
your e-mail addresseach in turn, and sedetails, and select O
5 Select Options > OK
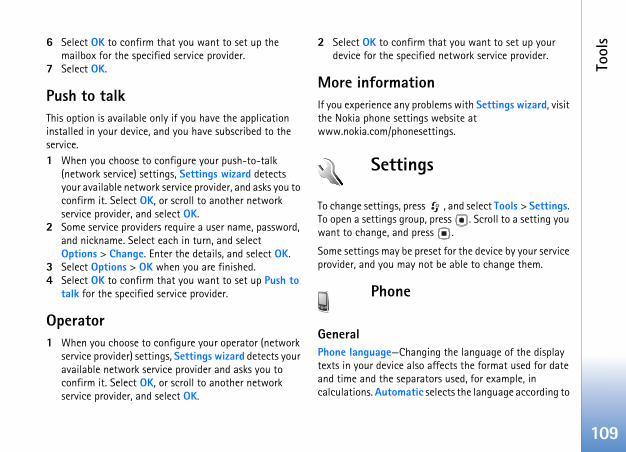
Tool
s
109
that you want to set up your d network service provider.
lems with Settings wizard, visit website atttings.
, and select Tools > Settings. press . Scroll to a setting you s .
set for the device by your service t be able to change them.
ing the language of the display affects the format used for date ors used, for example, in elects the language according to
6 Select OK to confirm that you want to set up the mailbox for the specified service provider.
7 Select OK.
Push to talkThis option is available only if you have the application installed in your device, and you have subscribed to the service.1 When you choose to configure your push-to-talk
(network service) settings, Settings wizard detects your available network service provider, and asks you to confirm it. Select OK, or scroll to another network service provider, and select OK.
2 Some service providers require a user name, password, and nickname. Select each in turn, and select Options > Change. Enter the details, and select OK.
3 Select Options > OK when you are finished.4 Select OK to confirm that you want to set up Push to
talk for the specified service provider.
Operator1 When you choose to configure your operator (network
service provider) settings, Settings wizard detects your available network service provider and asks you to confirm it. Select OK, or scroll to another network service provider, and select OK.
2 Select OK to confirm device for the specifie
More informationIf you experience any probthe Nokia phone settingswww.nokia.com/phonese
Settings
To change settings, press To open a settings group, want to change, and pres
Some settings may be preprovider, and you may no
Phone
GeneralPhone language—Changtexts in your device also and time and the separatcalculations. Automatic s
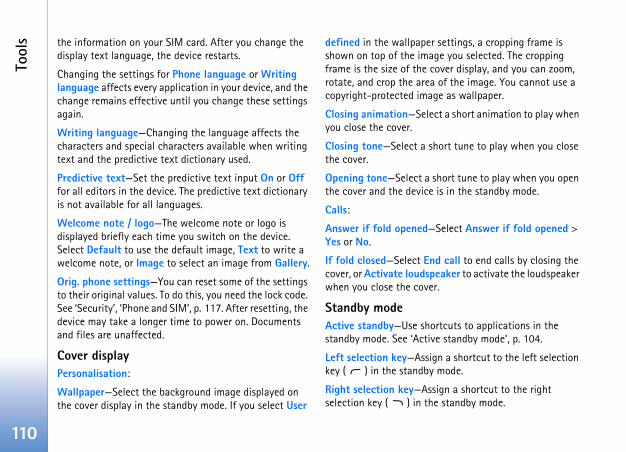
11
r settings, a cropping frame is age you selected. The cropping cover display, and you can zoom, a of the image. You cannot use a age as wallpaper.
ect a short animation to play when
short tune to play when you close
short tune to play when you open e is in the standby mode.
—Select Answer if fold opened >
nd call to end calls by closing the peaker to activate the loudspeaker er.
ortcuts to applications in the ive standby mode’, p. 104.
ign a shortcut to the left selection y mode.
ssign a shortcut to the right he standby mode.
Tool
s
0
the information on your SIM card. After you change the display text language, the device restarts.
Changing the settings for Phone language or Writing language affects every application in your device, and the change remains effective until you change these settings again.
Writing language—Changing the language affects the characters and special characters available when writing text and the predictive text dictionary used.
Predictive text—Set the predictive text input On or Off for all editors in the device. The predictive text dictionary is not available for all languages.
Welcome note / logo—The welcome note or logo is displayed briefly each time you switch on the device. Select Default to use the default image, Text to write a welcome note, or Image to select an image from Gallery.
Orig. phone settings—You can reset some of the settings to their original values. To do this, you need the lock code. See ‘Security’, ‘Phone and SIM’, p. 117. After resetting, the device may take a longer time to power on. Documents and files are unaffected.
Cover displayPersonalisation:
Wallpaper—Select the background image displayed on the cover display in the standby mode. If you select User
defined in the wallpapeshown on top of the imframe is the size of the rotate, and crop the arecopyright-protected im
Closing animation—Selyou close the cover.
Closing tone—Select a the cover.
Opening tone—Select athe cover and the devic
Calls:
Answer if fold openedYes or No.
If fold closed—Select Ecover, or Activate loudswhen you close the cov
Standby modeActive standby—Use shstandby mode. See ‘Act
Left selection key—Asskey ( ) in the standb
Right selection key—Aselection key ( ) in t
Tool
s
111
a subscription (Set by network)
activated call waiting (network ifies you of a new incoming call rogress. Set the function on , or check whether the function s).
elect Yes to send a text message you could not answer the call. call’, p. 62.
xt to be sent in a text message
ideo is not sent during a video image to be displayed instead.
On, and your device makes a to connect the call after an . To stop automatic redialing,
ivate this setting if you want the he approximate duration of the
n, and the numbers assigned to - ) can be dialed by
key. See also ‘Speed dial a phone
Active standby apps.—Select the application shortcuts you want to appear in the active standby. This setting is only available if Active standby is on.
You can also assign keypad shortcuts for the different presses of the scroll key. The scroll key shortcuts are not available if the active standby is on.
Operator logo—This setting is only available if you have received and saved an operator logo. Select Off if you do not want the logo to be shown.
DisplayBrightness—Adjust the basic brightness level of the display to lighter or darker. In the Fold open mode you can also press and hold the bottom left corner selection key, and scroll left or right to adjust the brightness.
Power saver time-out—Select the time-out period after which the power saver is activated.
Light time-out—Select a time-out after which the backlight of the display is switched off.
Call
Send my caller ID—You can set your phone number to be displayed to (Yes) or hidden from (No) the person to whom you are calling, or the value may be set by your service
provider when you make (network service).
Call waiting—If you haveservice), the network notwhile you have a call in p(Activate) or off (Cancel)is activated (Check statu
Reject call with SMS—Sto a caller informing whySee ‘Answer or decline a
Message text—Write a tewhen you reject a call.
Image in video call—If vcall, you can select a still
Automatic redial—Selectmaximum of 10 attemptsunsuccessful call attemptpress .
Summary after call—Actdevice to briefly display tlast call.
Speed dialling—Select Othe speed dialing keys (pressing and holding the number’, p. 60.
11
connection. In the UMTS network, n active during voice calls.
less LAN data connection. See ly one connection in one wireless
time.
ection, an access point is required. t kinds of access points, such as:o send and receive multimedia
Web application to view WML or
t (IAP) to send and receive e-mail internet
s point you need with your service you want to access. For availability ket data connection services, ervice provider.
point settings in a message from a ta and settings’, p. 48. Some or all
eset for your device by your service ot be able to change, create, edit, icates a protected access point.
ata access point, and a nt.
Tool
s
2
Anykey answer—Select On, and you can answer an incoming call by briefly pressing any keypad key, except
, , , and .
Line in use—This setting (network service) is shown only if the SIM card supports two subscriber numbers, that is, two phone lines. Select which phone line you want to use for making calls and sending text messages. Calls on both lines can be answered irrespective of the selected line. If you select Line 2 and have not subscribed to this network service, you will not be able to make calls. When line 2 is selected, is shown in the standby mode.
Tip! To switch between the phone lines, press and hold in the standby mode.
Line change—To prevent line selection (network service), select Disable if supported by your SIM card. To change this setting, you need the PIN2 code.
Connection
Data connections and access pointsYour device supports packet data connections (network service), such as GPRS in the GSM network. When you use your device in GSM and UMTS networks, multiple data connections can be active at the same time, and access
points can share a datadata connections remai
You can also use a wire‘Wireless LAN’, p. 92. OnLAN can be active at a
To establish a data connYou can define differen• MMS access point t
messages• Access point for the
XHTML pages• Internet access poin
and connect to the
Check the type of accesprovider for the service and subscription to paccontact your network s
Access pointsYou may receive access service provider. See ‘Daaccess points may be prprovider, and you may nor remove them. ind
indicates a packet dwireless LAN access poi
Tool
s
113
e may be needed to make a data y provided by the service
must enter the password every r, or if you do not want to save ice, select Yes.
ay be needed to make a data y provided by the service
ormal or Secure.
n the access point you are address or the address of the nter.
ed settings to change the
e internet protocol type to use: ttings depend on the selected
4 only)—Enter the IP address of
DNS address, enter the IP S server. In Secondary DNS
s of the secondary DNS server. vice provider to obtain these
Tip! To create an internet access point in a wireless LAN, press , and select Connect. > Conn. mgr. > Availab. WLAN > Options > Define access point.
To create a new access point, select Options > New access point. Select Use default settings to use the default access point settings, or Use existing settings to select an existing access point as the basis for the new access point..
To edit the settings of an access point, select Options > Edit. Follow the instructions from your service provider
Connection name—Enter a descriptive name for the connection.
Data bearer—Select the data connection type.
Depending on the data connection you select, only certain setting fields are available. Fill in all fields marked with Must be defined or with a red asterisk. Other fields can be left empty, unless you have been instructed otherwise by your service provider.
To be able to use a data connection, the network service provider must support this feature, and if necessary, activate it for your SIM card.
Packet data access points
Follow the instructions from your service provider.
Access point name—You obtain the access point name from your service provider.
User name—The user namconnection, and is usuallprovider.
Prompt password—If youtime you log in to a serveyour password in the dev
Password—A password mconnection, and is usuallprovider.
Authentication—Select N
Homepage—Depending osetting up, enter the webmultimedia messaging ce
Select Options > Advancfollowing settings:
Network type—Select thIPv4 or IPv6. The other senetwork type.
Phone IP address (for IPvyour device.
DNS address—In Primaryaddress of the primary DNaddr., enter the IP addresContact your internet seraddresses.
11
elect Open or Shared for the ween your device and the wireless .
er WEP encryption (length of the (ASCII or Hexadecimal), and WEP in the selected format).
2.1x and WPA/WPA2:
means of authentication: EAP to ntication protocol (EAP) plug-in, or a password. Complete the
nly for EAP)—Enter the settings as structs.
r Pre-shared key)—Enter a sword must be entered on the nt device.
t whether Temporal Key Integrity
me page.
ced settings and from the
address (the IP address of your the subnet IP address), Default , and DNS address—Enter the IP
Tool
s
4
Proxy serv. address—Define the address for the proxy server.
Proxy port number—Enter the proxy port number.
Wireless LAN access points
Follow the instructions from your service provider.
WLAN netw. name—Select Enter manually or Search for netw.. If you select an existing network, WLAN netw. mode and WLAN security mode are determined by the settings of its access point device.
WLAN netw. mode—Select Ad-hoc to create an ad hoc network and to allow devices to send and receive data directly; a wireless LAN access point device is not needed.
WLAN security mode—Select the encryption used: WEP, 802.1x (not for ad hoc networks), or WPA/WPA2. If you select Open network, no encryption is used. The WEP, 802.1x, and WPA functions can be used only if the network supports them.
WLAN security sett.—Enter the settings for the selected security mode:
Security settings for WEP:
Wep key in use—Select the WEP key number. You can create up to four WEP keys. The same settings must be entered on the wireless LAN access point device.
Authentication type—Sauthentication type betLAN access point device
WEP key settings—Entkey), WEP key format key (the WEP key data
Security settings for 80
WPA mode—Select theuse an extensible authePre-shared key to use appropriate settings:
EAP plug-in settings (oyour service provider in
Pre-shared key (only fopassword. The same paswireless LAN access poi
TKIP encryption—SelecProtocol (TKIP) is used.
Homepage—Define a ho
Select Options > Advanfollowing:
IPv4 settings: Phone IPdevice), Subnet mask (gateway (the gateway)
Tool
s
115
tocol) settings are needed for using SIP. You may receive the message from yourservice elete, or create these setting
ct all access points using a GSM
a calls to disconnect e-out if there is no activity. To ser defined, and enter the time nlimited, data calls are not
lly.
t whether is displayed when e.
u set Show availability to Yes, e searches for available wireless icator.
s, select Options > Advanced ss LAN advanced settings is not
addresses of the primary and secondary DNS server. Contact your internet service provider for these addresses.
IPv6 settings > DNS address—Select Automatic, Well-known, or User defined.
Ad-hoc channel (only for Ad-hoc)—To enter a channel number (1-11) manually, select User defined.
Proxy serv. address—Enter the address for the proxy server.
Proxy port number—Enter the proxy port number.
Packet dataThe packet data settings affect all access points using a packet data connection.
Packet data conn.—If you select When available and you are in a network that supports packet data, the device registers to the packet data network. Starting an active packet data connection (for example, to send and receive e-mail) is quicker. If there is no packet data coverage, the device periodically tries to establish a packet data connection. If you select When needed, the device uses a packet data connection only if you start an application or action that needs it.
Access point—The access point name is needed to use your device as a packet data modem to your computer.
SIP settingsSIP (Session Initiation Procertain network services settings in a special text provider. You can view, dprofiles in SIP settings.
Data callThe data call settings affedata call connection.
Online time—Set the datautomatically after a timenter a time-out, select Uin minutes. if you select Udisconnected automatica
Wireless LANShow availability—Seleca wireless LAN is availabl
Scan for networks—If yoselect how often the devicLANs and updates the ind
To view advanced settingsettings. Changing wirelerecommended.
11
s similar to the emergency idental dialing of the emergency
an set an autolock period, a e device automatically locks. To riod, select None.
ter the lock code.
ed, calls may be possible to the ber programmed into your device.
vice manually, press . A list of lect Lock phone.
You can set the device to ask for unknown SIM card is inserted into maintains a list of SIM cards that wner’s cards.
can specify a group of people to who can call you (network service).
o closed user groups, calls may be mergency number programmed
You can set the device to display when you are using a SIM card ).
ck codes
Tool
s
6
ConfigurationsYou may receive trusted server settings from your service provider in a configuration message, or the settings may be stored on your (U)SIM card. You can save these settings to your device, view, or delete them in Configurations.
Date and time
See ‘Clock settings’, p. 17 and language settings in ‘General’, p. 109.
Security
Phone and SIMPIN code request—When active, the code is requested each time the device is switched on. Deactivating the personal identification number (PIN) code request may not be allowed by some SIM cards. See ‘Glossary of PIN and lock codes’, p. 116.
PIN code, PIN2 code, and Lock code—You can change the lock code, PIN code, and PIN2 code. These codes can only include the numbers from 0 to 9. If you forget any of these codes, contact your service provider. See ‘Glossary of PIN and lock codes’, p. 116.
Avoid using access codenumbers to prevent accnumber.
Autolock period—You ctime-out after which thturn off the autolock pe
To unlock the device, en
When the device is lockofficial emergency num
Tip! To lock the decommands opens. Se
Lock if SIM changed—the lock code when an your device. The device are recognized as the o
Closed user group—Youwhom you can call and
When calls are limited tpossible to the official einto your device.
Confirm SIM services—confirmation messages service (network service
Glossary of PIN and lo
Tool
s
117
digits) is required to change a code is not supplied with the etwork service provider whose ce.
ent guarantee safety; they are used tware.
ment main view, you can see a es that are stored in your device. ersonal certificates, if available.
be used if you want to connect her site or remote server for ferring confidential information. if you want to reduce the risk of software and be sure of the hen downloading and installing
he use of certificates makes the onnections and software smaller, they must be used fit from increased security. The does not offer any protection by ager must contain correct, ificates for increased security to have a restricted lifetime. If rtificate not valid yet is shown
If you forget any of these codes, contact your service provider.
Personal identification number (PIN) code—This code protects your SIM card against unauthorized use. The PIN code (4 to 8 digits) is usually supplied with the SIM card. After three consecutive incorrect PIN code entries, the code is blocked, and you need the PUK code to unblock it.
UPIN code—This code may be supplied with the USIM card. The USIM card is an enhanced version of the SIM card and is supported by UMTS mobile phones.
PIN2 code—This code (4 to 8 digits) is supplied with some SIM cards, and is required to access some functions in your device.
Lock code (also known as security code)—This code (5 digits) can be used to lock the device to avoid unauthorized use. The factory setting for the lock code is 12345. To avoid unauthorized use of your device, change the lock code. Keep the new code secret and in a safe place separate from your device. If you forget the code, contact your service provider.
Personal unblocking key (PUK) code and PUK2 code—These codes (8 digits) are required to change a blocked PIN code or PIN2 code, respectively. If the codes are not supplied with the SIM card, contact the network service provider whose SIM card is in your device.
UPUK code—This code (8 blocked UPIN code. If theUSIM card, contact the nUSIM card is in your devi
Certificate managemDigital certificates do notto verify the origin of sof
In the certificate managelist of authority certificatPress to see a list of p
Digital certificates shouldto an online bank or anotactions that involve transThey should also be used viruses or other maliciousauthenticity of software wsoftware.
Important: Even if trisks involved in remote cinstallation considerably correctly in order to beneexistence of a certificate itself; the certificate manauthentic, or trusted certbe available. Certificates Expired certificate or Ce
11
ngs
rtificate settings, you must make t the owner of the certificate and ly belongs to the listed owner.
ertificate, and select Options > ng on the certificate, a list of the e the selected certificate is shown.
n: Yes—The certificate is able to a new Symbian operating system
ertificate is able to certify servers.es—The certificate is able to certify Java application.
rust setting to change the value.
jected music files may include a elect whether you allow the h the music file if you send or vider of the music file can use the istribution of the files.
y module (if available) in Security press the scroll key. To view
Tool
s
8
even if the certificate should be valid, check that the current date and time in your device are correct.
Before changing any certificate settings, you must make sure that you really trust the owner of the certificate and that the certificate really belongs to the listed owner.
View certificate details—check authenticity
You can only be sure of the correct identity of a server when the signature and the period of validity of a server certificate have been checked.
You are notified if the identity of the server is not authentic or if you do not have the correct security certificate in your device.
To check certificate details, scroll to a certificate, and select Options > Certificate details. When you open certificate details, the validity of the certificate is checked, and one of the following notes may be displayed:• Certificate not trusted—You have not set any
application to use the certificate. See ‘Change the trust settings’, p. 118.
• Expired certificate—The period of validity has ended for the selected certificate.
• Certificate not valid yet—The period of validity has not yet begun for the selected certificate.
• Certificate corrupted—The certificate cannot be used. Contact the certificate issuer.
Change the trust setti
Before changing any cesure that you really trusthat the certificate real
Scroll to an authority cTrust settings. Dependiapplications that can usFor example:• Symbian installatio
certify the origin of application.
• Internet: Yes—The c• App. installation: Y
the origin of a new
Select Options > Edit t
Track protected obSome copyright-protecttransaction identifier. Sidentifier to be sent witforward the file. The proidentifier to track the d
Security moduleTo view or edit a securitmodule, scroll to it, and
Tool
s
119
option, and set it on (Activate) whether the option is active ing affects all calls, including
rting cannot be active at the
lls may be possible to certain ers.
ically switch between the GSM GSM network is indicated with . The UMTS network is indicated
nly if supported by the network which network to use. If you vice uses the GSM or UMTS ccording to the network ing agreements between the . Contact your network service
ct Automatic to set the device ne of the available networks, or ct the network from a list of
detailed information about a security module, scroll to it, and select Options > Security details.
Call divert
Call divert allows you to divert your incoming calls to your voice mailbox or another phone number. For details, contact your service provider.
Select which calls you want to divert and the desired diverting option. To divert voice calls when your number is busy or when you reject incoming calls, select If busy. Set the option on (Activate) or off (Cancel), or check whether the option is activated (Check status).
Several diverting options can be active at the same time. When all calls are diverted, is shown in the standby mode.
Call barring and call diverting cannot be active at the same time.
Call barring
Call barring (network service) allows you to restrict the calls that you make or receive with the device. To change the settings, you need the barring password from your service provider.
Select the desired barringor off (Cancel), or check (Check status). Call barrdata calls.
Call barring and call divesame time.
When calls are barred, caofficial emergency numb
Network
Your device can automatand UMTS networks. The
in the standby modewith .
Network mode (shown oservice provider)—Select select Dual mode, the denetwork automatically, aparameters and the roamnetwork service providersprovider for more details.
Operator selection—Seleto search for and select oManual to manually sele

12
e profile that you want activated a certain enhancement to your t tones’, p. 102.
t whether you want the device to ll automatically after 5 seconds. If o Beep once or Silent, automatic
—Set whether lights remain on, or he time-out.
ommands
ands to control your device. For t the enhanced voice commands e, see ‘Voice dialing’, p. 60.
ice commands for starting and select Tools > Voice cm.; the s for the applications. To add more select Voice cm. > Options > New and create voice tags for profiles, r in Voice cm.
commands, press and hold in say a voice command. The voice f the application or profile
Tool
s
0
networks. If the connection to the manually selected network is lost, the device sounds an error tone and asks you to reselect a network. The selected network must have a roaming agreement with your home cellular network, that is, the network service provider whose SIM card is in your device.
Glossary: A roaming agreement is an agreement between two or more network service providers to enable the users of one network service provider to use the services of other network service providers.
Cell info display—Select On to set the device to indicate when it is used in a cellular network based on microcellular network (MCN) technology and to activate cell info reception.
Enhancement settings
In the standby mode, indicates a compatible headset is connected, and that the headset is unavailable, or Bluetooth connectivity to a headset is lost. indicates a compatible loopset is connected.
Select Headset, Loopset, Bluetooth handsfree, or Car kit, and from the following:
Default profile—Set theach time you connect device. See ‘Profiles—se
Automatic answer—Seanswer an incoming cathe ringing type is set tanswer is disabled.
Lights (for car kit only)are switched off after t
Voice c
You can use voice commmore information abousupported by your devic
To activate enhanced voappications, press , device creates voice tagapplications to the list, application. To activateopen the Profiles folde
To use enhanced voice the standby mode, and command is the name odisplayed in the list.
Tool
s
121
protected with other types of RM-protected content.
t (DRM) protected content activation key that defines your .
M protected content, to back up and the content is to use the C Suite. Other transfer methods vation keys which need to be t for you to be able to continue tected content after the device may also need to restore the e files on your device get
r DRM protected content stored and select Tools > Actv. keys
at are connected to one or more e validity period has not started
hat are not valid; the time period exceeded or there is a protected ut no connected activation key.
t have no media files connected
To add a second voice command that can be used to startan application or profile, select Options > Change command, and enter the new voice command as text. Avoid very short names, abbreviations, and acronyms.
To listen to the synthesized voice tag, select Options > Playback.
To change voice command settings, select Options > Settings. To switch off the synthesizer that plays recognized voice tags and commands in the selected device language, select Synthesiser > Off. To reset voice recognition learning, for example, when the main user of the device has changed, select Reset voice adapts..
Digital rights managementContent owners may use different types of
digital rights management (DRM) technologies to protect their intellectual property, including copyrights.This device uses various types of DRM software to access DRM protected content. With this device you can access content protected with OMA 1.0 and OMA 2.0. If certain DRM software fails to protect the content, content owners may ask that such DRM software's ability to access new DRM-protected content be revoked. Revocation may also prevent renewal of such DRM-protected content already in your device. Revocation of such DRM software does not
affect the use of contentDRM or the use of non-D
Digital rights managemencomes with an associatedrights to use the content
If your device has OMA DRboth the activation keys backup feature of Nokia Pmay not transfer the actirestored with the contenthe use of OMA DRM promemory is formatted. Youactivation keys in case thcorrupted.
To view activation keys foin your device, press ,and from the following:
Valid keys—View keys thmedia files and keys whosyet.
Invalid keys—View keys tfor using the media file ismedia file in the device b
Not in use—View keys thato them in the device.
12
supplied preformatted and others sult your retailer to find out if you ry card before you can use it.
d, select Options > Format mem. irm.
Tool
s
2
To buy more usage time or extend the usage period for a media file, select an invalid activation key and Options > Get activation key. Activation keys cannot be updated if web service message reception is disabled. See ‘Web service messages’, p. 55.
To view detailed information, such as the validity status and ability to send the file, scroll to an activation key, and press the scroll key.
Memory card tool
Press , and select Tools > Memory. You can use a compatible miniSD memory card as extra storage space and for backing up the information in the device memory.
To back up information from the device memory to a memory card, select Options > Backup phone mem.
To restore information from the memory card to the device memory, select Options > Restore from card.
Format a memory cardWhen a memory card is reformatted, all data on the card is permanently lost.
Some memory cards arerequire formatting. Conmust format the memo
To format a memory carcard. Select Yes to conf

Trou
bles
hoot
ing:
Q&
A
123
ile TV sometimes, even when I’m ork coverage?
d use a virtual private network a VPN connection active. You n a VPN connection is active.
m guide show programs for the
f the program guide, 3-7 days are on a program guide contains, the example, the less days can be
r the lock, PIN, or PUK codes?
12345. If you forget or lose the device dealer.IN or PUK code, or if you have not ontact your network service
asswords, contact your access ple, a commercial internet service rk service provider.
g
cation that is not responding?
Troubleshooting: Q&AMobile TV
Q: Why can’t the device find any program guides?
A: Select Options > Rescan. If this does not help, select Options > Settings to view System status. If there is no signal strength or it is low, change location. Close and reopen the Settings dialog to see if the signal is better.
Q: Why can’t I open a channel or program?
A: Select Options > Settings to view System status. If there is no signal strength or it is low, change location. Close and reopen the Settings dialog to see if the signal is better. If this does not help, contact the service provider. Note also that the service may not be available in your current location.
Q: Why are there are problems with picture quality?
A: In environments with a low quality AC supply voltage, the picture may be degraded. To fix this, remove the charger from the AC outlet. If that does not help, switch the device off and on again, or remove and insert the battery.
Q: I tried to record a program but it failed. What went wrong?
A: Possible reasons:• You maybe outside or on the limit of the Mobile TV
network coverage• Other functions of the device have interrupted or
interfered the recoding.
Q: Why can’t I watch Mobwithin the Mobile TV netw
A: If you have installed an(VPN) client, you may havecannot use Mobile TV whe
A: Why doesn’t the prograwhole week?
Q: Depending on the size oshown. The more informatinumber of TV channels, forshown.
Access codes
Q: What is my password fo
A: The default lock code islock code, contact yourIf you forget or lose a Preceived such a code, cprovider.For information about ppoint provider, for examprovider (ISP), or netwo
Application not respondin
Q: How do I close an appli
12
plastic film covering the display and he camera lens protection window is
lored, or bright dots appear on the rn on my device?
of this type of display. Some displays dots that remain on or off. This is
evice see the files stored on my
configured the home network ring is turned on in your device, and nP compatible.
ear empty?
d a filter, and no communication er have been logged. To see all events, . Scroll right to open the general log Filter > All communication.
evice memory is low?
Trou
bles
hoot
ing:
Q&
A
4
A: To open the application switching window, press and hold . Scroll to the application, and press to close the
application.
Bluetooth connectivity
Q: Why can’t I find my friend’s device?
A: Check that both devices have activated Bluetooth connectivity.Check that the distance between the two devices is not over 10 meters (33 feet) and that there are no walls or other obstructions between the devices.Check that the other device is not in hidden mode.Check that both devices are compatible.
Q: Why can’t I end a Bluetooth connection?
A: If another device is connected to your device, you can either end the connection using the other device or by deactivating Bluetooth connectivity. Select Connect. > Bluetooth > Off.
Browser services
Q: What do I do if the following message is displayed: No valid access point defined. Define one in Services settings.?
A: Insert the correct browser settings. Contact your service provider for instructions.
Camera
Q: Why do images look smudgy?
A: Remove the protectivecamera. Ensure that tclean.
Display
Q: Why do missing, discoscreen every time I tu
A: This is a characteristicmay contain pixels ornormal, not a fault.
Home network (UPnP)
Q: Why can’t the other ddevice?
A: Ensure that you have settings, Content shathe other device is UP
Log
Q: Why does the log app
A: You may have activateevents fitting that filtselect My own > Logand select Options >
Memory low
Q: What can I do if my d
Trou
bles
hoot
ing:
Q&
A
125
a compatible memory card.
tact?
ot have a phone number or an missing information to the ts.
the device cannot receive a cause memory is full?
needed is indicated in the error memory to retrieve message. . To view what kind of data you mory the different data groups d select Tools > File manager > ails.
ssage is shown briefly. What is
trieve a multimedia message from ing center. for multimedia messaging are at there are no mistakes in phone elect Messag. > Options > message.
connection when the device starts n and again?
making a data connection, select Settings > Multimedia
A: You can delete the following items regularly to avoid memory getting low:
• Messages from Inbox, Drafts, and Sent folders in Messaging
• Retrieved e-mail messages from the device memory
• Saved browser pages
• Images and photos in Gallery
To delete contact information, calendar notes, call timers, call cost timers, game scores, or any other data, go to the respective application to remove the data. If you are deleting multiple items and one of the following notes are shown: Not enough memory to perform operation. Delete some data first. or Memory low. Delete some data., try deleting items one by one (starting from the smallest item).
Q: How can I save my data before deleting it?
A: Save your data using one of the following methods:
• Use Nokia PC Suite to make a back-up copy of all data to a compatible computer.
• Send images to your e-mail address, then save the images to your computer.
• Send data using Bluetooth connectivity to a compatible device.
• Store data on
Messaging
Q: Why can’t I select a con
A: The contact card does ne-mail address. Add thecontact card in Contac
Multimedia messaging
Q: What should I do whenmultimedia message be
A: The amount of memory message: Not enough Delete some data firsthave and how much meconsume, press , anOptions >Memory det
Q: The note Retrieving mehappening?
A: The device is trying to rethe multimedia messagCheck that the settingsdefined correctly and thnumbers or addresses. SSettings > Multimedia
Q: How can I end the data a data connection agai
A: To stop the device fromMessaging > Options>

12
ss point for the network on your
N off on my Nokia device?
WLAN on your Nokia device. To ption, you can specify that your
t scan for available networks.
round scan:nd select Tools > Settings > > Wireless LAN.
for networks > Never.
r changes, select Back.
orks is set to Never, your Nokia available networks, and you can use orks as usual.
Trou
bles
hoot
ing:
Q&
A
6
message > Multimedia retrieval and one of the following:Manual—to have the multimedia messaging center save messages to be retrieved later. You receive a notification when there is a new multimedia message that you can retrieve in the multimedia message center.
Off—to ignore all incoming multimedia messages. After this change, the device does not make any network connections related to multimedia messaging.
PC connectivity
Q: Why do I have problems in connecting the device to my PC?
A: Ensure that Nokia PC Suite is installed and running on your compatible PC. See the user guide for Nokia PC Suite on the CD-ROM. For further information on how to use Nokia PC Suite, see the help function on Nokia PC Suite or visit the support pages at www.nokia.com.
Q: Can I use my device as a fax modem with a compatible PC?
A: You cannot use your device as a fax modem. However, with call diverting (network service), you can divert incoming fax calls to another phone number.
Wireless LAN
Q: Why can't I see a wireless LAN (WLAN) access point even though I know I'm within its range?
A: The WLAN access point may use a hidden service set identifier (SSID). You can only access networks that use a hidden SSID if you know the correct SSID and have created
a WLAN Internet acceNokia device.
Q: How do I switch WLA
A: You cannot switch offreduce battery consumNokia device does no
To turn off the backg1 Press , a
Connection
2 Select Scan
3 To save you
When Scan for netwdevice still listens to available WLAN netw

Batt
ery
info
rmat
ion
127ht © 2006 Nokia. All rights reserved.
hese look like metal strips on the , for example, when you carry a t or purse. Short-circuiting the battery or the connecting object.
or cold places, such as in a closed nditions, will reduce the capacity . Always try to keep the battery °F and 77°F). A device with a hot rk temporarily, even when the ttery performance is particularly ll below freezing.
in a fire as they may explode. if damaged. Dispose of batteries ns. Please recycle when possible.
ld waste.
cells or batteries. In the event of a he liquid to come in contact with t of such a leak, flush your skin or er, or seek medical help.
authentication
batteries for your safety. To check ginal Nokia battery, purchase it
Copyrig
Battery informationCharging and dischargingYour device is powered by a rechargeable battery. The battery can be charged and discharged hundreds of times, but it will eventually wear out. When the talk and standby times are noticeably shorter than normal, replace the battery. Use only Nokia approved batteries, and recharge your battery only with Nokia approved chargers designated for this device.
If a replacement battery is being used for the first time or if the battery has not been used for a prolonged period, it may be necessary to connect the charger, then disconnect and reconnect it to begin charging the battery.
Unplug the charger from the electrical plug and the device when not in use. Do not leave a fully charged battery connected to a charger, since overcharging may shorten its lifetime. If left unused, a fully charged battery will lose its charge over time.
If the battery is completely discharged, it may take several minutes before the charging indicator appears on the display or before any calls can be made.
Use the battery only for its intended purpose. Never use any charger or battery that is damaged.
Do not short-circuit the battery. Accidental short-circuiting can occur when a metallic object such as a coin, clip, or pen causes direct connection of the positive (+) and negative (-)
terminals of the battery. (Tbattery.) This might happenspare battery in your pocketerminals may damage the
Leaving the battery in hot car in summer or winter coand lifetime of the batterybetween 15°C and 25°C (59or cold battery may not wobattery is fully charged. Balimited in temperatures we
Do not dispose of batteriesBatteries may also explodeaccording to local regulatioDo not dispose as househo
Do not dismantle or shred battery leak, do not allow tthe skin or eyes. In the eveneyes immediately with wat
Nokia battery guidelinesAlways use original Nokia that you are getting an ori
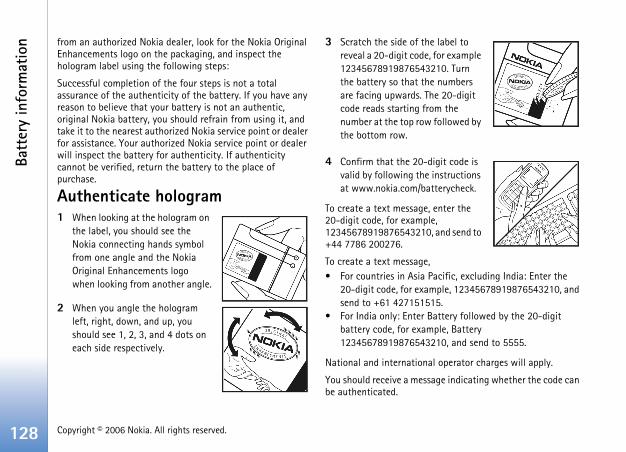
12
e label to , for example 210. Turn e numbers he 20-digit om the followed by
digit code is instructions tterycheck.
, enter the le, , and send to
,Pacific, excluding India: Enter the mple, 12345678919876543210, and 15.
Battery followed by the 20-digit ple, Battery
210, and send to 5555.
al operator charges will apply.
age indicating whether the code can
Batt
ery
info
rmat
ion
8 Copyright © 2006 Nokia. All rights reserved.
from an authorized Nokia dealer, look for the Nokia Original Enhancements logo on the packaging, and inspect the hologram label using the following steps:
Successful completion of the four steps is not a total assurance of the authenticity of the battery. If you have any reason to believe that your battery is not an authentic, original Nokia battery, you should refrain from using it, and take it to the nearest authorized Nokia service point or dealer for assistance. Your authorized Nokia service point or dealer will inspect the battery for authenticity. If authenticity cannot be verified, return the battery to the place of purchase.
Authenticate hologram1 When looking at the hologram on
the label, you should see the Nokia connecting hands symbol from one angle and the Nokia Original Enhancements logo when looking from another angle.
2 When you angle the hologram left, right, down, and up, you should see 1, 2, 3, and 4 dots on each side respectively.
3 Scratch the side of threveal a 20-digit code12345678919876543the battery so that thare facing upwards. Tcode reads starting frnumber at the top rowthe bottom row.
4 Confirm that the 20-valid by following theat www.nokia.com/ba
To create a text message20-digit code, for examp12345678919876543210+44 7786 200276.
To create a text message• For countries in Asia
20-digit code, for exasend to +61 4271515
• For India only: Enter battery code, for exam12345678919876543
National and internation
You should receive a messbe authenticated.

Batt
ery
info
rmat
ion
129ht © 2006 Nokia. All rights reserved.
CopyrigWhat if your battery is not authentic?
If you cannot confirm that your Nokia battery with the hologram on the label is an authentic Nokia battery, please do not use the battery. Take it to the nearest authorized Nokia service point or dealer for assistance. The use of a battery that is not approved by the manufacturer may be dangerous and may result in poor performance and damage to your device and its enhancements. It may also invalidate any approval or warranty applying to the device.
To find out more about original Nokia batteries, visit www.nokia.com/battery.
13
mage the device and may violate radio devices.
p of data you want to keep, such as r notes.om time to time for optimum ff the device and remove the battery.
equally to your device, battery, ent. If any device is not working arest authorized service facility for
heeled-bin symbol on your product, aging reminds you that in the ll electrical and electronic products, umulators must be taken to separate nd of their working life. Do not roducts as unsorted municipal waste.
ts to collection to prevent possible onment or human health from te disposal and to promote the of material resources. Collection ilable from the product retailer, local , national producer responsibility your local Nokia representative. For
Care
and
mai
nten
ance
0 Copyright © 2006 Nokia. All rights reserved.
Care and maintenanceYour device is a product of superior design and craftsmanship and should be treated with care. The following suggestions will help you protect your warranty coverage.• Keep the device dry. Precipitation, humidity, and all types
of liquids or moisture can contain minerals that will corrode electronic circuits. If your device does get wet, remove the battery, and allow the device to dry completely before replacing it.
• Do not use or store the device in dusty, dirty areas. Its moving parts and electronic components can be damaged.
• Do not store the device in hot areas. High temperatures can shorten the life of electronic devices, damage batteries, and warp or melt certain plastics.
• Do not store the device in cold areas. When the device returns to its normal temperature, moisture can form inside the device and damage electronic circuit boards.
• Do not attempt to open the device other than as instructed in this guide.
• Do not drop, knock, or shake the device. Rough handling can break internal circuit boards and fine mechanics.
• Do not use harsh chemicals, cleaning solvents, or strong detergents to clean the device.
• Do not paint the device. Paint can clog the moving parts and prevent proper operation.
• Use a soft, clean, dry cloth to clean any lenses, such as camera, proximity sensor, and light sensor lenses.
• Use only the supplied or an approved replacement antenna. Unauthorized antennas, modifications, or
attachments could daregulations governing
• Use chargers indoors.• Always create a backu
contacts and calenda• To reset the device fr
performance, power o
These suggestions apply charger, or any enhancemproperly, take it to the neservice.
Disposal
The crossed-out wliterature, or packEuropean Union abatteries, and acccollection at the edispose of these p
Return the producharm to the enviruncontrolled wassustainable reuseinformation is avawaste authoritiesorganizations, or

Care
and
mai
nten
ance
131ht © 2006 Nokia. All rights reserved.
Copyrigmore information, see product Eco-Declaration or country-specific information at www.nokia.com.
13
ansmitting equipment, including rfere with the functionality of edical devices. Consult a physician or medical device to determine if they rom external RF energy or if you have your device in health care facilities ted in these areas instruct you to do re facilities may be using equipment external RF energy.
ices Manufacturers of medical a minimum separation of 15.3 ould be maintained between a planted medical device, such as a
cardioverter defibrillator, to avoid th the medical device. Persons who :less device more than 15.3 ) from the medical device when the ed on.
s device in a breast pocket.ice to the ear opposite the medical e potential for interference.ice off immediately if there is any t interference is taking place.
Addi
tiona
l saf
ety
info
rmat
ion
2 Copyright © 2006 Nokia. All rights reserved.
Additional safety informationSmall children
Your device and its enhancements may contain small parts. Keep them out of the reach of small children.
Operating environment
Remember to follow any special regulations in force in any area, and always switch off your device when its use is prohibited or when it may cause interference or danger. Use the device only in its normal operating positions. This device meets RF exposure guidelines when used either in the normal use position against the ear or when positioned at least 1.5 centimeters (5/8 inches) from the body. When a carry case, belt clip, or holder is used for body-worn operation, it should not contain metal and should position the device the above-stated distance from your body.
To transmit data files or messages, this device requires a quality connection to the network. In some cases, transmission of data files or messages may be delayed until such a connection is available. Ensure that the above separation distance instructions are followed until the transmission is completed.
Parts of the device are magnetic. Metallic materials may be attracted to the device. Do not place credit cards or other magnetic storage media near the device, because information stored on them may be erased.
Medical devices
Operation of any radio trwireless phones, may inteinadequately protected mthe manufacturer of the are adequately shielded fany questions. Switch offwhen any regulations posso. Hospitals or health cathat could be sensitive to
Implanted medical devdevices recommend that centimeters (6 inches) shwireless device and an impacemaker or implanted potential interference wihave such devices should• Always keep the wire
centimeters (6 incheswireless device is turn
• Not carry the wireles• Hold the wireless dev
device to minimize th• Turn the wireless dev
reason to suspect tha
Addi
tiona
l saf
ety
info
rmat
ion
133ht © 2006 Nokia. All rights reserved.
stalled and the air bag inflates,
ing in aircraft is prohibited. Switch ing an aircraft. The use of wireless ay be dangerous to the operation wireless telephone network, and
environments
n in any area with a potentially obey all signs and instructions. spheres include areas where you to turn off your vehicle engine. cause an explosion or fire resulting th. Switch off the device at ar gas pumps at service stations. use of radio equipment in fuel ution areas; chemical plants; or are in progress. Areas with a sphere are often, but not always, e below deck on boats, chemical s, vehicles using liquefied pane or butane), and areas where or particles such as grain, dust, or
Copyrig
• Read and follow the directions from the manufacturer of their implanted medical device.
If you have any questions about using your wireless device with an implanted medical device, consult your health care provider.
Hearing aids Some digital wireless devices may interfere with some hearing aids. If interference occurs, consult your service provider.
Vehicles
RF signals may affect improperly installed or inadequately shielded electronic systems in motor vehicles such as electronic fuel injection systems, electronic antiskid (antilock) braking systems, electronic speed control systems, and air bag systems. For more information, check with the manufacturer, or its representative, of your vehicle or any equipment that has been added.
Only qualified personnel should service the device or install the device in a vehicle. Faulty installation or service may be dangerous and may invalidate any warranty that may apply to the device. Check regularly that all wireless device equipment in your vehicle is mounted and operating properly. Do not store or carry flammable liquids, gases, or explosive materials in the same compartment as the device, its parts, or enhancements. For vehicles equipped with an air bag, remember that air bags inflate with great force. Do not place objects, including installed or portable wireless equipment in the area over the air bag or in the air bag deployment area. If in-vehicle wireless
equipment is improperly inserious injury could result.
Using your device while flyoff your device before boardteledevices in an aircraft mof the aircraft, disrupt the may be illegal.
Potentially explosive
Switch off your device wheexplosive atmosphere, andPotentially explosive atmowould normally be advisedSparks in such areas could in bodily injury or even dearefueling points such as neObserve restrictions on thedepots, storage, and distribwhere blasting operations potentially explosive atmoclearly marked. They includtransfer or storage facilitiepetroleum gas (such as prothe air contains chemicals metal powders.
13
y call, give all the necessary s possible. Your wireless device
communication at the scene of an all until given permission to do so.
ation (SAR)
guidelines for exposure to radio
io transmitter and receiver. It is limits for exposure to radio waves onal guidelines. These guidelines pendent scientific organization
margins designed to assure the egardless of age and health.
r mobile devices employ a unit of e Specific Absorption Rate or SAR. ICNIRP guidelines is 2.0 watts/over 10 grams of tissue. Tests for tandard operating positions with its highest certified power level in The actual SAR level of an low the maximum value because e only the power required to reach
changes depending on a number of ou are to a network base station.
er the ICNIRP guidelines for use of 2 W/kg.
nd enhancements may result in alues may vary depending on
Addi
tiona
l saf
ety
info
rmat
ion
4 Copyright © 2006 Nokia. All rights reserved.
Emergency calls
Important: Wireless phones, including this device, operate using radio signals, wireless networks, landline networks, and user-programmed functions. Because of this, connections in all conditions cannot be guaranteed. You should never rely solely on any wireless device for essential communications like medical emergencies.
To make an emergency call: 1 If the device is not on, switch it on. Check for adequate
signal strength. Some networks may require that a valid SIM card is properly inserted in the device.
2 Press the end key as many times as needed to clear the display and ready the device for calls.
3 Enter the official emergency number for your present location. Emergency numbers vary by location.
4 Press the call key.
If certain features are in use, you may first need to turn those features off before you can make an emergency call. If the device is in the offline or flight profile mode, you may need to change the profile to activate the phone function before you can make an emergency call. Consult this guide or your service provider for more information.
If certain features are in use, you may first need to turn those features off before you can make an emergency call. Consult this guide or your service provider for more information.
When making an emergencinformation as accurately amay be the only means of accident. Do not end the c
Certification inform
This mobile device meets waves.
Your mobile device is a raddesigned not to exceed therecommended by internatiwere developed by the indeICNIRP and include safety protection of all persons, r
The exposure guidelines fomeasurement known as thThe SAR limit stated in thekilogram (W/kg) averaged SAR are conducted using sthe device transmitting at all tested frequency bands.operating device can be bethe device is designed to usthe network. That amount factors such as how close yThe highest SAR value undthe device at the ear is 0.9
Use of device accessories adifferent SAR values. SAR v
Addi
tiona
l saf
ety
info
rmat
ion
135ht © 2006 Nokia. All rights reserved.
Copyrignational reporting and testing requirements and the network band. Additional SAR information may be provided under product information at www.nokia.com.

13
subscribing 23tSee instant messaging
ar screenSee standby mode
ckalarm 16settings 17
eslock code 117PIN code 117PIN2 code 117security code 117puter connections 97ference call 59nection settings 112tact cardsadding 56copying 57inserting pictures 56sending 56storing DTMF tones 63
ying contacts 57yright protectionsee activation keys
6 Copyrigh
IndAaccess pactivatiactive salarms
ala
BbackingBluetoo
devheapaisecsenswi
bookma
Ccache, ccalenda
cresyn
call logSee
calls
t © 2006 Nokia. All rights reserved.
exoints 112
on keys 121tandby mode 10421rm clock 16
up 122th 83ice address 85dset 120ring 85urity 84ding data 85tching off 86rks 66
learing 68rating entries 70chronizing PC Suite 70
log
barring 119dialed callsdiverting 119duration 64international 59missed callsreceived callssettings 111transferring 63
cameraadjusting lighting and color 25, 27flash 27image setup settings 27imaging mode 11saving video clips 29self-timer 27sending images 26sequence mode 26still image camera settings 27video recorder settings 30video setup settings 27
certificates 117channel packages
subscribing 23channels
cha
cle
clo
cod
comconconcon
copcop
137ht © 2006 Nokia. All rights reserved.
See Webnet access points (IAP)See access points
See applicationsapplications 106
code 117
call duration 64recent callsuration 65et settings 120peaker 16
ox 49ox, automatic retrieving 50a filesfast forward 37file formats 37mute sound 37rewind 37oryclearing memory 64, 105viewing memory consumption 105ory card 122
Copyrig
Ddata connections
details 91ending 91indicators 14network 8
date 16device manager 92digital rights management, DRM
see activation keysDownload! 72
Ee-mail
automatic retrieving 50opening 50remote mailbox 49retrieving from mailbox 49sending 45settings 53viewing attachments 50
Ffile formats
.jad 106
.jar 106, 107
.sis 106RealPlayer 37
file manager 105
fixed dialing 57FM radio 39full screen 20
Ggallery 31
ordering files in albums 34presentations 34
GSMnetwork 8
guidesprogramme guides 21
guides, programme guides 22
Hhandsfree
see loudspeakerheadset settings 120help application 18
Iicons 24indicators 14installing applications 106instant messaging
blocking 75connecting to a server 74recording messages 75sending instant messages 75
Internet
Inter
JJava
Java
Llock log
log dloopslouds
Mmailbmailbmedi
mem
mem
13
personal 58personal ringing tone 58receiving in a text message 48
urityanti-virus software 8
urity codeSee lock code 117
dingcontact cards, business cards 56images 26
vice commands 44vices
See Webvices 20tings
access codes 116access points 112age limit 24Bluetooth connectivity 84calendar 71call barring 119call diverting 119certificates 117data connections 112date and time 116display 111IM 73, 74, 76
8 Copyright © 2006 Nokia. All rights reserved.
menu, rearranging 102messaging
e-mail 46multimedia messages 45text messages 45
Mobile TVindicators 24program guide 21recording 21searching programs 22services 20settings 23starting 19subscribing to programs 23viewing 20watching recordings 22
modesfold closed 10fold open 11imaging 11view mode 11
multimedia messages 45music player 35mute sound 37
Ooffice applications 99
Ppacket data settings 115PC connections 97PC Suite
calendar data 70synchronization 97transferring music files to your
memory card 35viewing device memory data 105
personalization 103phonebook
See contact cardsPIN code 117profiles 102programme guides 21, 22programmes
alarms 21details 21viewing 20
QQuickoffice 99
Rradio 39reminders 21remote mailbox 49remote SIM mode 84ringing tones
Ssec
sec
sen
serSer
serset
139ht © 2006 Nokia. All rights reserved.
l Radioviewing content 41visual service ID 41 commands 120 dialing 60 mailbox 59changing the phone number 59diverting calls to voice mailbox
119 messages 59 tags 60, 120e 20e control 16
access points, see access pointsbrowser 66ess LAN 89access point settings 114creating IAP 91creatong IAP 89security 94see also Universal Plug and Playwizard 90
ing 20
Copyrig
language 109lock code 117original 110personalizing the phone 102PIN code 117screen saver 111UPIN code 117UPUK code 117
shortcuts 12SIM card
copying contacts to device 57messages 51names and numbers 57
sis file 106snooze 16software update 13, 92software, transferring a file to your
device 106sound clips 31sounds
muting a ringing tone 62recording sounds 42
speed dialing 60standby mode 102status indicators 24subscribing
channel packages 23channels 23
svg files 34synchronization 87
Ttext messages 45themes 103time 16To 29transferring content from another
device 14
UUMTS
network 8Universal Plug and Play 94UPIN code 117UPUK code 117USSD commands 44
Vvideo call
answering 62making 61rejecting 62
video clips 31video player
See RealPlayerviewing
programmes 20services 20
Visua
voicevoicevoice
voicevoicevolumvolum
WWeb
wirel
Zzoom
Related Documents