Networking General networking Networking overview A network is a collection of devices such as computers, printers, Ethernet hubs, wireless access points, and routers connected together for communication through cables or through a wireless connection. A network can be either wired, wireless, or designed to have both wired and wireless devices. Devices on a wired network use cables to communicate with each other. Devices on a wireless network use radio waves instead of cables to communicate with each other. For a device to be able to communicate wirelessly, it must have a wireless print server attached or installed that enables it to receive and transmit radio waves. Common home network configurations For desktop computers, laptops, and printers to communicate with each other over a network, they must be connected by cables and/or have wireless network adapters built in or installed in them. There are different ways a network can be set up. Five common examples appear below. Note: The printers in the following diagrams represent Lexmark printers with Lexmark internal print servers built in or installed in them so that they can communicate over a network. Lexmark internal print servers are devices made by Lexmark to enable Lexmark printers to be connected to wired or wireless networks. Wired network example • A computer, a laptop, and a printer are connected by Ethernet cables to a hub, router, or switch. • The network is connected to the Internet through a DSL or a cable modem. Internet Wireless network examples Four common wireless networks appear below: • Scenario 1: Laptop and printer connected wirelessly with Internet • Scenario 2: Computer, laptop, and printer connected wirelessly with Internet • Scenario 3: Computer, laptop, and printer connected wirelessly without Internet • Scenario 4: Laptop connected wirelessly to printer without Internet 31

Welcome message from author
This document is posted to help you gain knowledge. Please leave a comment to let me know what you think about it! Share it to your friends and learn new things together.
Transcript
Networking
General networking
Networking overviewA network is a collection of devices such as computers, printers, Ethernet hubs, wireless access points, and routersconnected together for communication through cables or through a wireless connection. A network can be eitherwired, wireless, or designed to have both wired and wireless devices.
Devices on a wired network use cables to communicate with each other.
Devices on a wireless network use radio waves instead of cables to communicate with each other. For a device tobe able to communicate wirelessly, it must have a wireless print server attached or installed that enables it to receiveand transmit radio waves.
Common home network configurationsFor desktop computers, laptops, and printers to communicate with each other over a network, they must beconnected by cables and/or have wireless network adapters built in or installed in them.
There are different ways a network can be set up. Five common examples appear below.
Note: The printers in the following diagrams represent Lexmark printers with Lexmark internal print servers built inor installed in them so that they can communicate over a network. Lexmark internal print servers are devices madeby Lexmark to enable Lexmark printers to be connected to wired or wireless networks.
Wired network example• A computer, a laptop, and a printer are connected by Ethernet cables to a hub, router, or switch.
• The network is connected to the Internet through a DSL or a cable modem.
Internet
Wireless network examples
Four common wireless networks appear below:
• Scenario 1: Laptop and printer connected wirelessly with Internet
• Scenario 2: Computer, laptop, and printer connected wirelessly with Internet
• Scenario 3: Computer, laptop, and printer connected wirelessly without Internet
• Scenario 4: Laptop connected wirelessly to printer without Internet
31
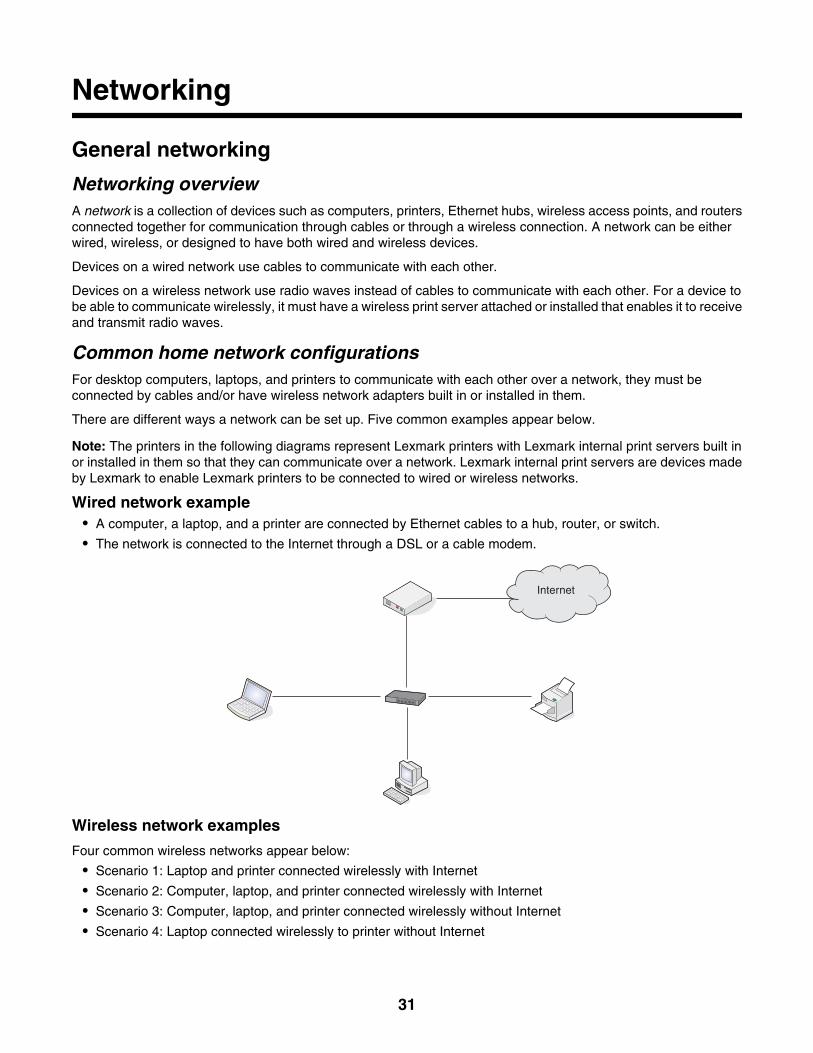
Scenario 1: Laptop and printer connected wirelessly with Internet• A computer is connected to a wireless router by an Ethernet cable.
• A laptop and a printer are connected wirelessly to the router.
• The network is connected to the Internet through a DSL or a cable modem.
Internet
Scenario 2: Computer, laptop, and printer connected wirelessly with Internet• A computer, a laptop, and a printer are connected wirelessly to a wireless router.
• The network is connected to the Internet through a DSL or a cable modem.
Internet
32
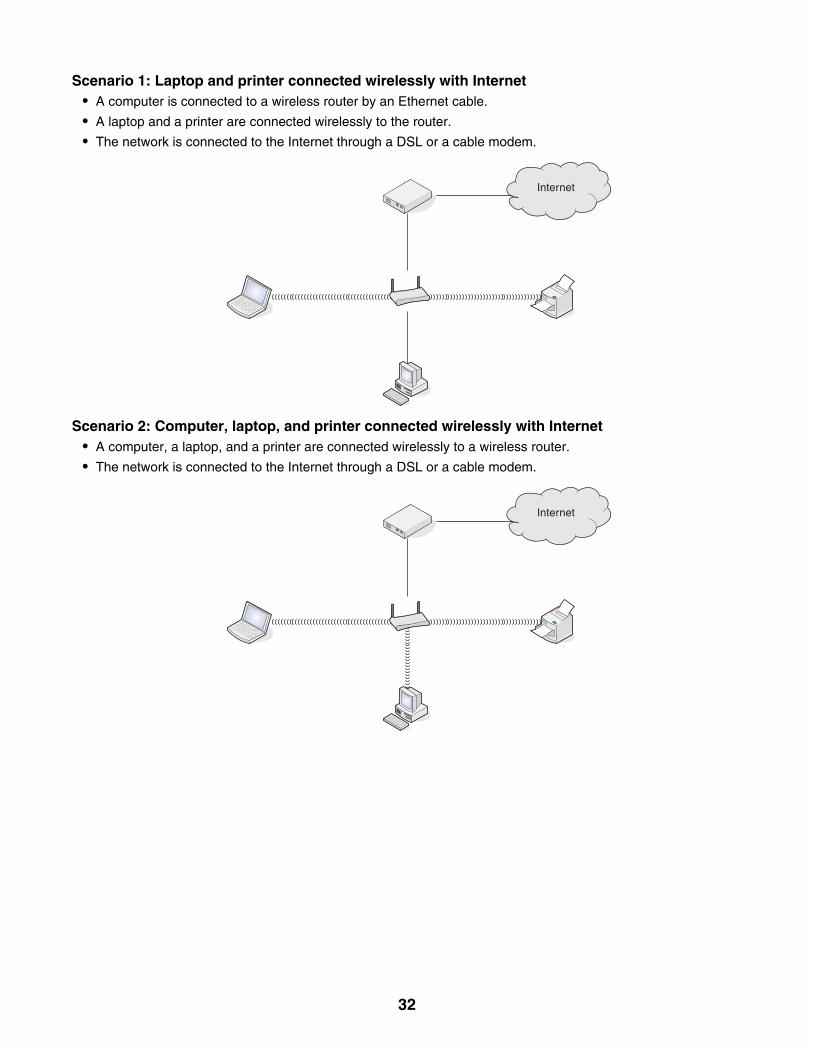
Scenario 3: Computer, laptop, and printer connected wirelessly without Internet• A computer, a laptop, and a printer are connected wirelessly to a wireless access point.
• The network has no connection to the Internet.
Scenario 4: Laptop connected wirelessly to printer without Internet• A laptop is directly connected wirelessly to a printer without going through a wireless router.
• The network has no connection to the Internet.
What information do I need and where do I find it?This printer may contain an internal wireless print server, which allows the printer to be used on a wireless network.You need the following settings from your existing wireless network:
• The network name, also known as the SSID
• The wireless mode (the type of wireless network you are using, either infrastructure or ad hoc)
• The type of security used on the network (WEP, WPA, or WPA2)
• Any applicable security keys or passwords used with the network security encryption type
Note: You must know this information in order to properly set up the printer for use on the wireless network. Toobtain these settings, see the documentation that came with your wireless router or consult the person who set upyour wireless network.
Finding the MAC addressMost network equipment has a unique hardware identification number to distinguish it from other devices on thenetwork. This is called the Media Access Control (MAC) address.
If your printer has a factory installed internal wireless print server, the MAC address is a series of letters and numberslocated on the back of your printer.
33
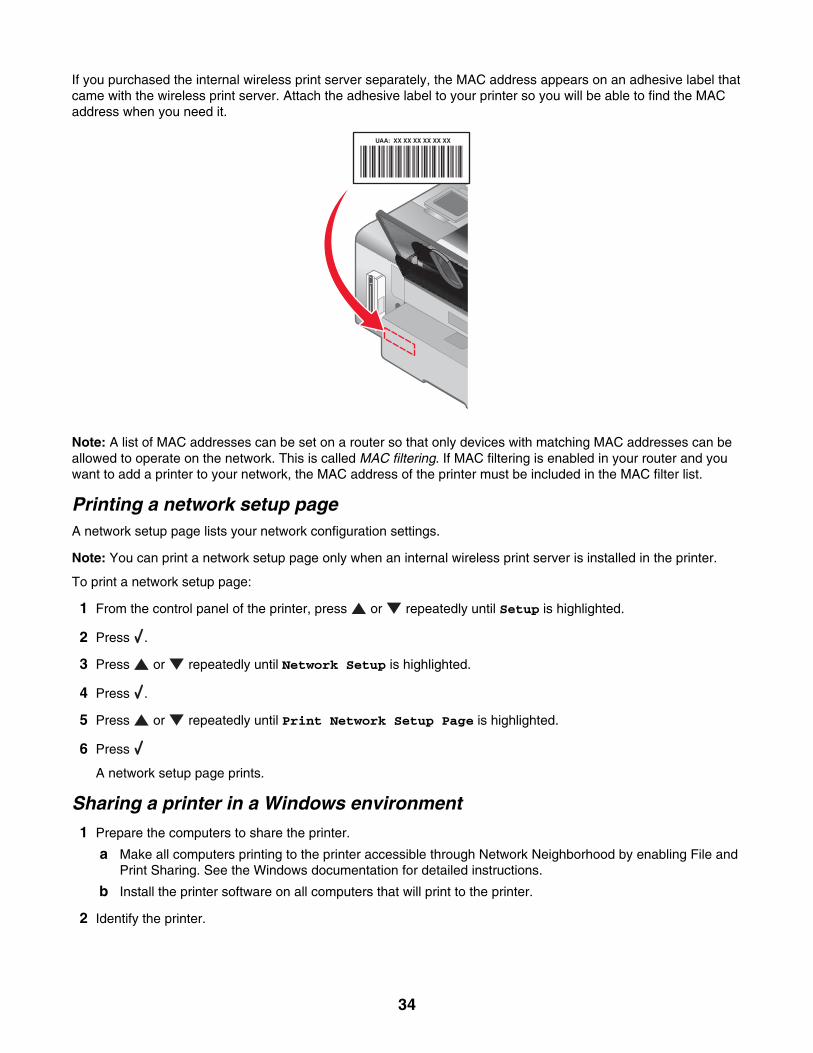
If you purchased the internal wireless print server separately, the MAC address appears on an adhesive label thatcame with the wireless print server. Attach the adhesive label to your printer so you will be able to find the MACaddress when you need it.
UAA: XX XX XX XX XX XX
Note: A list of MAC addresses can be set on a router so that only devices with matching MAC addresses can beallowed to operate on the network. This is called MAC filtering. If MAC filtering is enabled in your router and youwant to add a printer to your network, the MAC address of the printer must be included in the MAC filter list.
Printing a network setup pageA network setup page lists your network configuration settings.
Note: You can print a network setup page only when an internal wireless print server is installed in the printer.
To print a network setup page:
1 From the control panel of the printer, press or repeatedly until Setup is highlighted.
2 Press .
3 Press or repeatedly until Network Setup is highlighted.
4 Press .
5 Press or repeatedly until Print Network Setup Page is highlighted.
6 Press
A network setup page prints.
Sharing a printer in a Windows environment
1 Prepare the computers to share the printer.
a Make all computers printing to the printer accessible through Network Neighborhood by enabling File andPrint Sharing. See the Windows documentation for detailed instructions.
b Install the printer software on all computers that will print to the printer.
2 Identify the printer.
34
On the computer that is attached to the printer:
a Click Start Settings Printers or Printers and Faxes.
b Right-click the Lexmark 4800 Series icon.
c Click Sharing.
d Click Shared As, and give the printer a distinctive name.
e Click OK.
3 Locate the printer from the remote computer.
Note: The remote computer is the one that is not attached to the printer.
Windows 2000 or Windows XP users only:a Click Start Settings Printers and Faxes.
b Right-click the Lexmark 4800 Series icon.
c Click Properties.
d Click the Ports tab, and then click Add Port....
e Select Local Port, and then click New Port....
f Enter the Universal Naming Convention (UNC) Port name which consists of the server name and thedistinctive printer name that was specified in step 2 on page 34. The name should be in the form \\server\printer.
g Click OK.
h Click Close on the Printer Ports dialog box.
i Make sure the new port is selected on the Ports tab, and then click Apply.
The new port is listed with the printer name.
j Click OK.
Finding a printer/print server located on remote subnetsThe printer software CD can automatically find the printers that are located on the same network as the computer.If the printer and print server are located on another network (called a subnet), you must manually enter an IP addressduring printer software installation.
Wireless networking
Finding IP addressesAn IP address is a unique number used by devices on an IP network to locate and communicate with each other.Devices on an IP network can only communicate with each other if they have unique and valid IP addresses. Aunique IP address means no two devices on the same network have the same IP address.
How to locate a printer IP address
You can locate the printer IP address by printing out the printer network setup page. For more information, see“Printing a network setup page” on page 34.
How to locate a computer IP address
1 Do one of the following:
• In Windows Vista, click All Programs Accessories Command Prompt.
• In Windows XP, click Start Programs or All Programs Accessories Command Prompt.
2 Type ipconfig.
35
3 Press Enter.
The IP address appears as four sets of numbers separated by periods, such as 192.168.0.100.
Assigning an IP addressAn IP address may be assigned by the network using DHCP. The print object, created at the end of the installation,sends all print jobs across the network to the printer using this address.
Many networks have the ability to automatically assign an IP address. Auto-IP is the ability for individual devices toassign themselves a unique IP address. Most networks use DHCP to assign addresses.
During the Direct IP printing installation of printer software, the IP address is visible in the printer list only as it isbeing assigned. The print object that is created in the Printers folder of the operating system will reference the MACaddress of the printer in the port name.
If the IP address is not automatically assigned, you can try manually entering an address after selecting your printerfrom the available list.
Configure IP addressIf you have lost communication with the printer over a network, select Use DHCP to reestablish communication withthe printer.
You must assign an IP address in any of the following situations:
• You manually assigned IP addresses for the other network devices.
• You want to assign a specific IP address.
• You move the printer to a remote subnet.
• The printer is listed as Unconfigured in the Configuration Utility.
Contact your system support person for more information.
Finding the signal strengthWireless devices have built-in antennas that transmit and receive radio signals. The signal strength listed on theprinter network setup page indicates how strongly a transmitted signal is being received. Many factors can affectthe signal strength. One factor is interference from other wireless devices or even other devices such as microwaveovens. Another factor is distance. The farther two wireless devices are from each other, the more likely it is that thecommunication signal will be weaker.
Installing the printer on a networkFollow the instructions for the networking method you want to use. Make sure the selected network is set up andworking properly, and that all relevant devices are turned on. For more information on your specific network, seeyour network documentation or consult the person who set up the network.
Sharing the printer on a networkSharing the printer on the network (on the host computer)
Windows Vista users only:
1 For more information, see the setup information that came with your printer.
2 Click Start icon Control Panel Printers.
3 Right-click your printer icon, and select Sharing.
4 Click Change sharing options.
5 Click Continue.
36
6 Click Share this printer, and assign a name to your printer.
7 Follow the directions on the computer screen until installation is complete.
Windows 2000 or Windows XP users only:
1 For more information, see the setup information that came with your printer.
2 Click Start Settings Printers.
3 Right-click your printer icon, and select Sharing.
4 Click Shared as, and assign a name to your printer.
5 Follow the directions on the computer screen until installation is complete.
Installing the shared printer on other network computers (on the client computers)
Using the peer-to-peer method Using the point-and-print method
1 Go to a network computer that you want to enableto print to the shared printer.
2 Insert the printer software CD.
3 Agree to the license agreement, and then clickNext.
4 Select Manual Setup.
5 From the Network Printer Setup dialog, select thePeer-to-Peer client option, and then click Next.
6 Select the appropriate printer from the list, and thenclick Next.
7 Select the software you want to install, and then clickNext.
8 When setup is complete, click Finished.
9 Repeat this procedure for each network computeryou want to access the shared printer.
1 Go to a network computer that you want to enable toprint to the shared printer.
2 Browse the Network Neighborhood until you find thename of the shared printer assigned in step 4 onpage 37.
3 Right-click the printer icon, and select Open orConnect.
4 This will copy a subset of the printer software fromthe host computer. A printer object will be created inthe Printers folder of the client.
Configure network printersConfigure
To configure a network printer, select a printer from the list in the window. Click Configure to assign the printer anInternet Protocol (IP) address. Contact your system support person for more information.
Add printers
Specify remote subnets that may have direct network attached printers. If the software detects a direct networkattached printer, you must first highlight the printer in the window, and then click Configure to manually assign anIP address to the printer. Contact your system support person for more information.
Note: The software does not automatically configure printers found on remote subnets.
Refresh
Click Refresh to have the Configuration Utility automatically search to find and configure newly added printers.
37
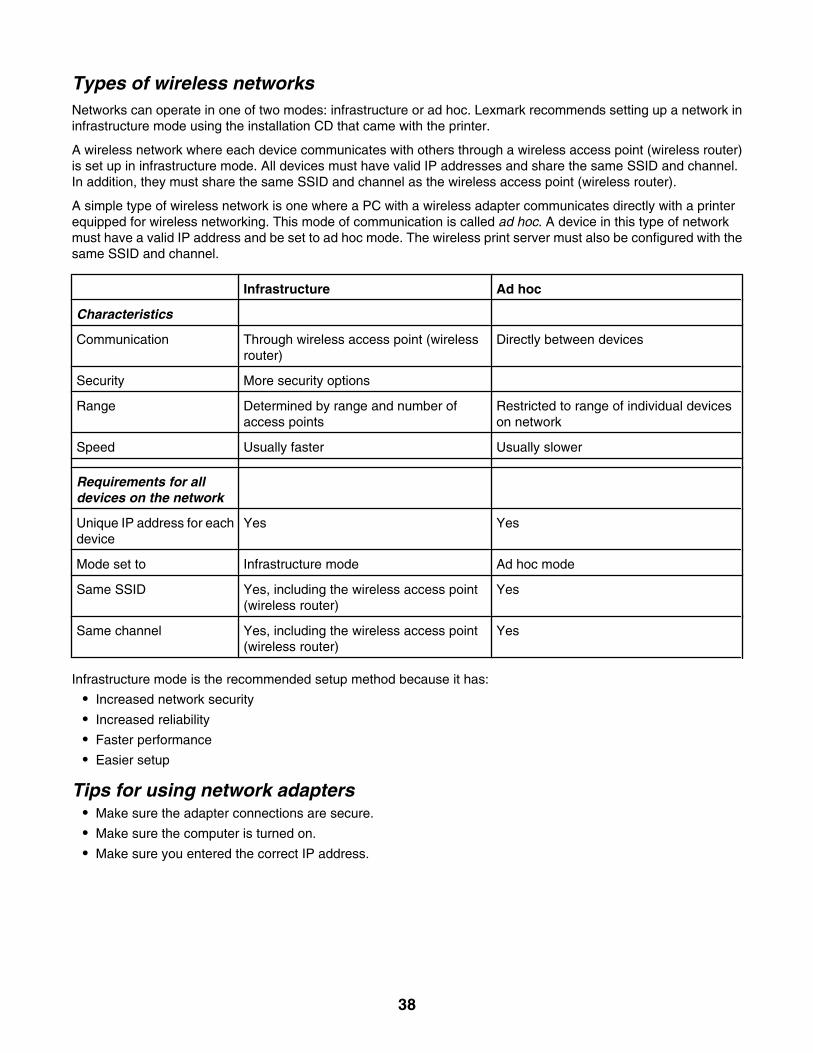
Types of wireless networksNetworks can operate in one of two modes: infrastructure or ad hoc. Lexmark recommends setting up a network ininfrastructure mode using the installation CD that came with the printer.
A wireless network where each device communicates with others through a wireless access point (wireless router)is set up in infrastructure mode. All devices must have valid IP addresses and share the same SSID and channel.In addition, they must share the same SSID and channel as the wireless access point (wireless router).
A simple type of wireless network is one where a PC with a wireless adapter communicates directly with a printerequipped for wireless networking. This mode of communication is called ad hoc. A device in this type of networkmust have a valid IP address and be set to ad hoc mode. The wireless print server must also be configured with thesame SSID and channel.
Infrastructure Ad hoc
Characteristics
Communication Through wireless access point (wirelessrouter)
Directly between devices
Security More security options
Range Determined by range and number ofaccess points
Restricted to range of individual deviceson network
Speed Usually faster Usually slower
Requirements for alldevices on the network
Unique IP address for eachdevice
Yes Yes
Mode set to Infrastructure mode Ad hoc mode
Same SSID Yes, including the wireless access point(wireless router)
Yes
Same channel Yes, including the wireless access point(wireless router)
Yes
Infrastructure mode is the recommended setup method because it has:
• Increased network security
• Increased reliability
• Faster performance
• Easier setup
Tips for using network adapters• Make sure the adapter connections are secure.
• Make sure the computer is turned on.
• Make sure you entered the correct IP address.
38
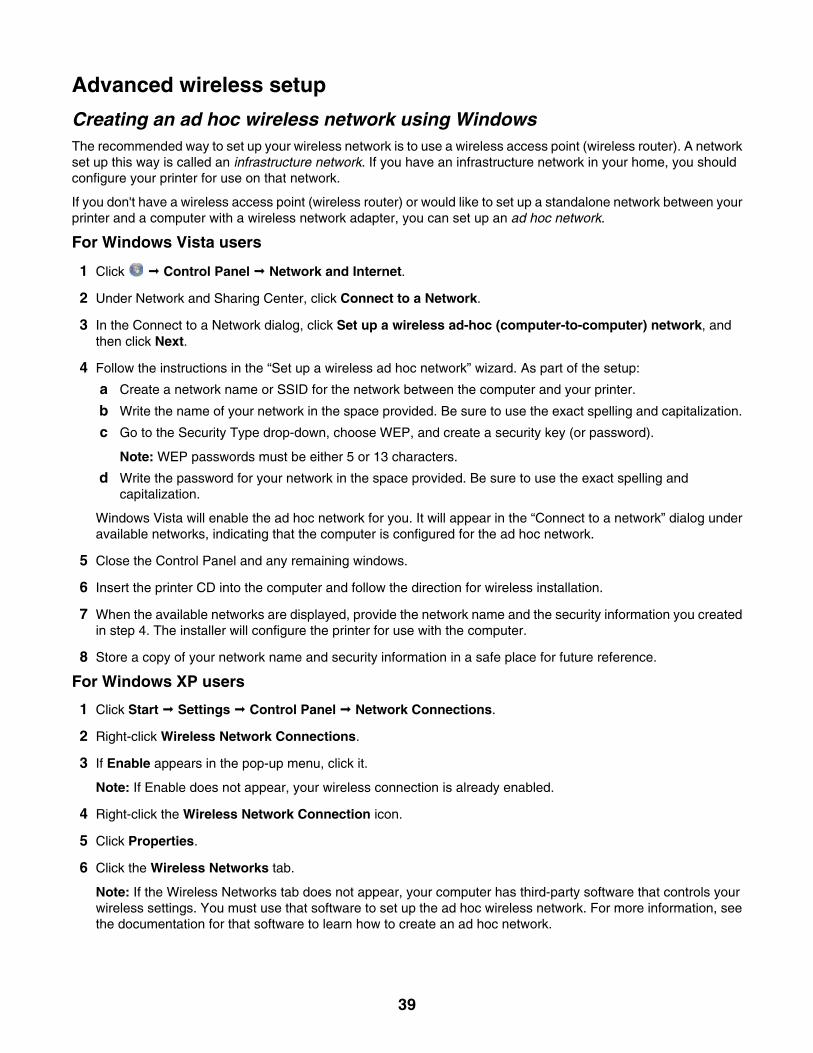
Advanced wireless setup
Creating an ad hoc wireless network using WindowsThe recommended way to set up your wireless network is to use a wireless access point (wireless router). A networkset up this way is called an infrastructure network. If you have an infrastructure network in your home, you shouldconfigure your printer for use on that network.
If you don't have a wireless access point (wireless router) or would like to set up a standalone network between yourprinter and a computer with a wireless network adapter, you can set up an ad hoc network.
For Windows Vista users
1 Click Control Panel Network and Internet.
2 Under Network and Sharing Center, click Connect to a Network.
3 In the Connect to a Network dialog, click Set up a wireless ad-hoc (computer-to-computer) network, andthen click Next.
4 Follow the instructions in the “Set up a wireless ad hoc network” wizard. As part of the setup:
a Create a network name or SSID for the network between the computer and your printer.
b Write the name of your network in the space provided. Be sure to use the exact spelling and capitalization.
c Go to the Security Type drop-down, choose WEP, and create a security key (or password).
Note: WEP passwords must be either 5 or 13 characters.
d Write the password for your network in the space provided. Be sure to use the exact spelling andcapitalization.
Windows Vista will enable the ad hoc network for you. It will appear in the “Connect to a network” dialog underavailable networks, indicating that the computer is configured for the ad hoc network.
5 Close the Control Panel and any remaining windows.
6 Insert the printer CD into the computer and follow the direction for wireless installation.
7 When the available networks are displayed, provide the network name and the security information you createdin step 4. The installer will configure the printer for use with the computer.
8 Store a copy of your network name and security information in a safe place for future reference.
For Windows XP users
1 Click Start Settings Control Panel Network Connections.
2 Right-click Wireless Network Connections.
3 If Enable appears in the pop-up menu, click it.
Note: If Enable does not appear, your wireless connection is already enabled.
4 Right-click the Wireless Network Connection icon.
5 Click Properties.
6 Click the Wireless Networks tab.
Note: If the Wireless Networks tab does not appear, your computer has third-party software that controls yourwireless settings. You must use that software to set up the ad hoc wireless network. For more information, seethe documentation for that software to learn how to create an ad hoc network.
39
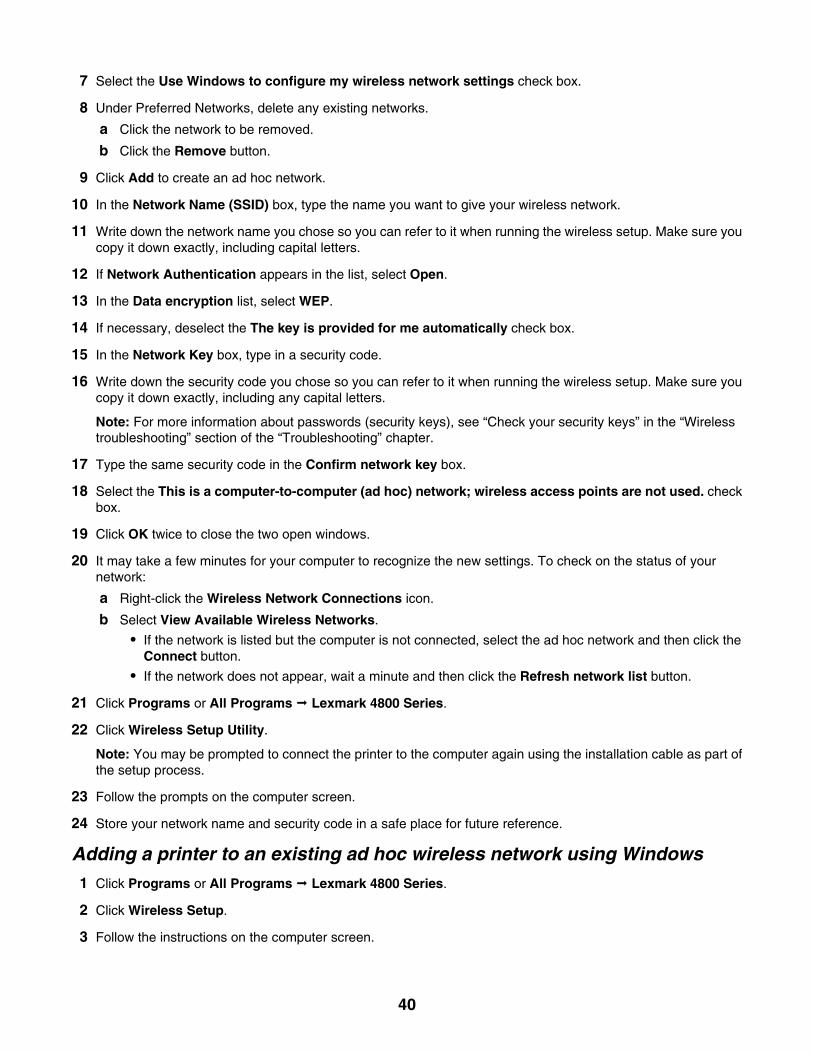
7 Select the Use Windows to configure my wireless network settings check box.
8 Under Preferred Networks, delete any existing networks.
a Click the network to be removed.
b Click the Remove button.
9 Click Add to create an ad hoc network.
10 In the Network Name (SSID) box, type the name you want to give your wireless network.
11 Write down the network name you chose so you can refer to it when running the wireless setup. Make sure youcopy it down exactly, including capital letters.
12 If Network Authentication appears in the list, select Open.
13 In the Data encryption list, select WEP.
14 If necessary, deselect the The key is provided for me automatically check box.
15 In the Network Key box, type in a security code.
16 Write down the security code you chose so you can refer to it when running the wireless setup. Make sure youcopy it down exactly, including any capital letters.
Note: For more information about passwords (security keys), see “Check your security keys” in the “Wirelesstroubleshooting” section of the “Troubleshooting” chapter.
17 Type the same security code in the Confirm network key box.
18 Select the This is a computer-to-computer (ad hoc) network; wireless access points are not used. checkbox.
19 Click OK twice to close the two open windows.
20 It may take a few minutes for your computer to recognize the new settings. To check on the status of yournetwork:
a Right-click the Wireless Network Connections icon.
b Select View Available Wireless Networks.
• If the network is listed but the computer is not connected, select the ad hoc network and then click theConnect button.
• If the network does not appear, wait a minute and then click the Refresh network list button.
21 Click Programs or All Programs Lexmark 4800 Series.
22 Click Wireless Setup Utility.
Note: You may be prompted to connect the printer to the computer again using the installation cable as part ofthe setup process.
23 Follow the prompts on the computer screen.
24 Store your network name and security code in a safe place for future reference.
Adding a printer to an existing ad hoc wireless network using Windows
1 Click Programs or All Programs Lexmark 4800 Series.
2 Click Wireless Setup.
3 Follow the instructions on the computer screen.
40
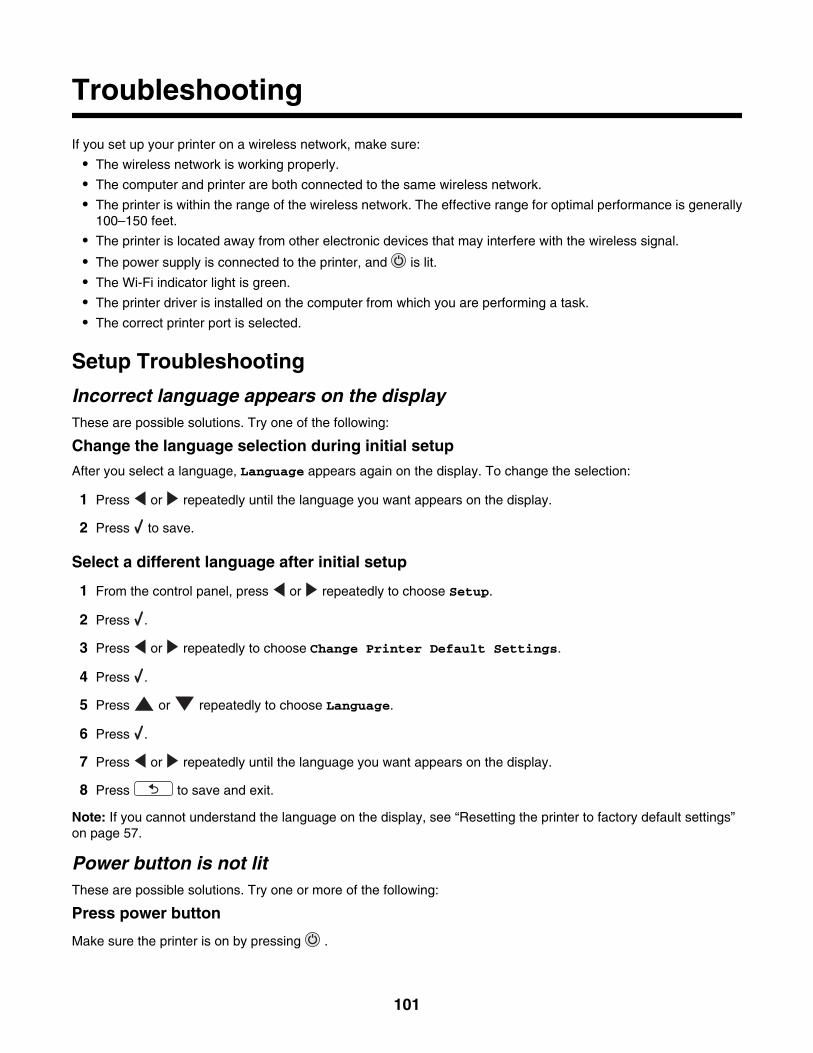
Troubleshooting
If you set up your printer on a wireless network, make sure:
• The wireless network is working properly.
• The computer and printer are both connected to the same wireless network.
• The printer is within the range of the wireless network. The effective range for optimal performance is generally100–150 feet.
• The printer is located away from other electronic devices that may interfere with the wireless signal.
• The power supply is connected to the printer, and is lit.
• The Wi-Fi indicator light is green.
• The printer driver is installed on the computer from which you are performing a task.
• The correct printer port is selected.
Setup Troubleshooting
Incorrect language appears on the displayThese are possible solutions. Try one of the following:
Change the language selection during initial setup
After you select a language, Language appears again on the display. To change the selection:
1 Press or repeatedly until the language you want appears on the display.
2 Press to save.
Select a different language after initial setup
1 From the control panel, press or repeatedly to choose Setup.
2 Press .
3 Press or repeatedly to choose Change Printer Default Settings.
4 Press .
5 Press or repeatedly to choose Language.
6 Press .
7 Press or repeatedly until the language you want appears on the display.
8 Press to save and exit.
Note: If you cannot understand the language on the display, see “Resetting the printer to factory default settings”on page 57.
Power button is not litThese are possible solutions. Try one or more of the following:
Press power button
Make sure the printer is on by pressing .
101
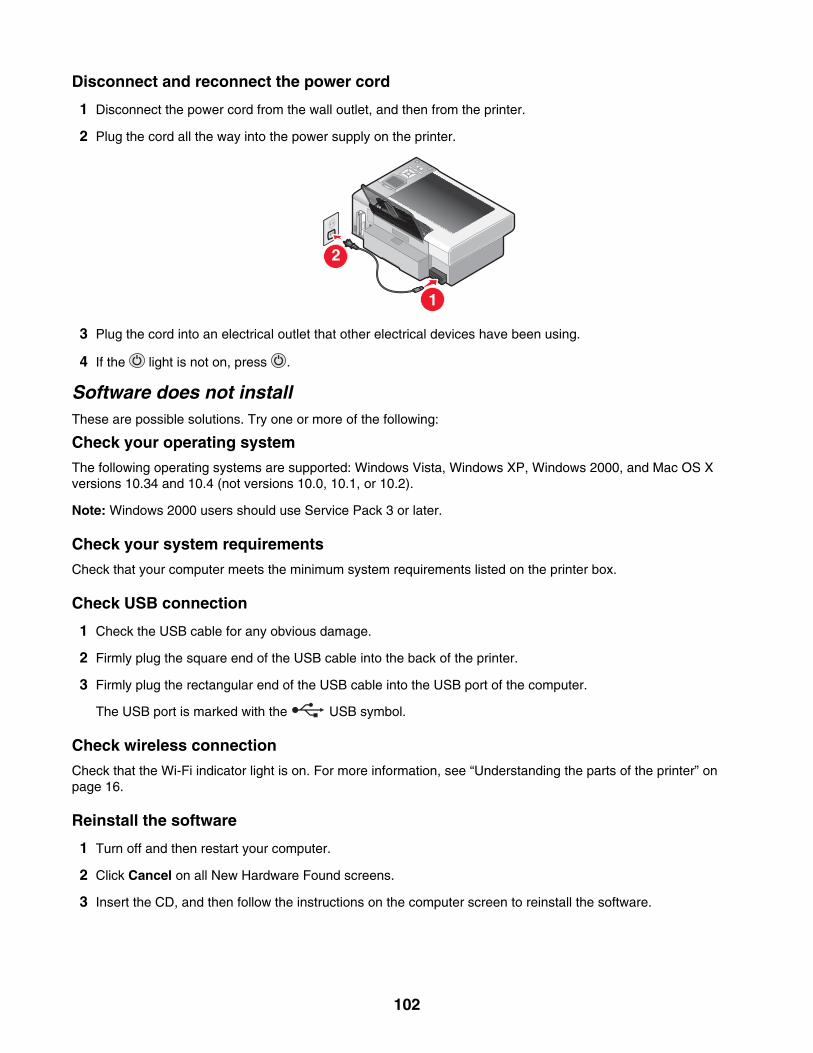
Disconnect and reconnect the power cord
1 Disconnect the power cord from the wall outlet, and then from the printer.
2 Plug the cord all the way into the power supply on the printer.
1
2
3 Plug the cord into an electrical outlet that other electrical devices have been using.
4 If the light is not on, press .
Software does not installThese are possible solutions. Try one or more of the following:
Check your operating system
The following operating systems are supported: Windows Vista, Windows XP, Windows 2000, and Mac OS Xversions 10.34 and 10.4 (not versions 10.0, 10.1, or 10.2).
Note: Windows 2000 users should use Service Pack 3 or later.
Check your system requirements
Check that your computer meets the minimum system requirements listed on the printer box.
Check USB connection
1 Check the USB cable for any obvious damage.
2 Firmly plug the square end of the USB cable into the back of the printer.
3 Firmly plug the rectangular end of the USB cable into the USB port of the computer.
The USB port is marked with the USB symbol.
Check wireless connection
Check that the Wi-Fi indicator light is on. For more information, see “Understanding the parts of the printer” onpage 16.
Reinstall the software
1 Turn off and then restart your computer.
2 Click Cancel on all New Hardware Found screens.
3 Insert the CD, and then follow the instructions on the computer screen to reinstall the software.
102
Reconnect power supply
1 Press to turn the printer off.
2 Disconnect the power cord from the wall outlet.
3 Gently remove the power supply from the printer.
4 Reconnect the power supply to the printer.
5 Plug the power cord into the wall outlet.
6 Press to turn the printer on.
Disable anti-virus programs
1 Close all open software applications.
2 Disable any antivirus programs.
3 Double-click the My Computer icon.
In Windows XP, click Start to access the My Computer icon.
4 Double-click the CD–ROM drive icon.
5 If necessary, double-click setup.exe.
6 Follow the instructions on the computer screen to install the software.
Uninstall and reinstall software
Uninstall the printer software, and then reinstall it. For more information, see “Removing and reinstalling the software”on page 105.
Page does not printThese are possible solutions. Try one or more of the following:
Check messages
If an error message is displayed, resolve the error before trying to print again.
Check power
If the light is not on, make sure the printer is plugged into a properly grounded outlet. Make sure the power cordis properly connected to the printer.
Reload paper
Remove and then load paper.
Check ink
Check the ink levels, and install new print cartridges if necessary.
103
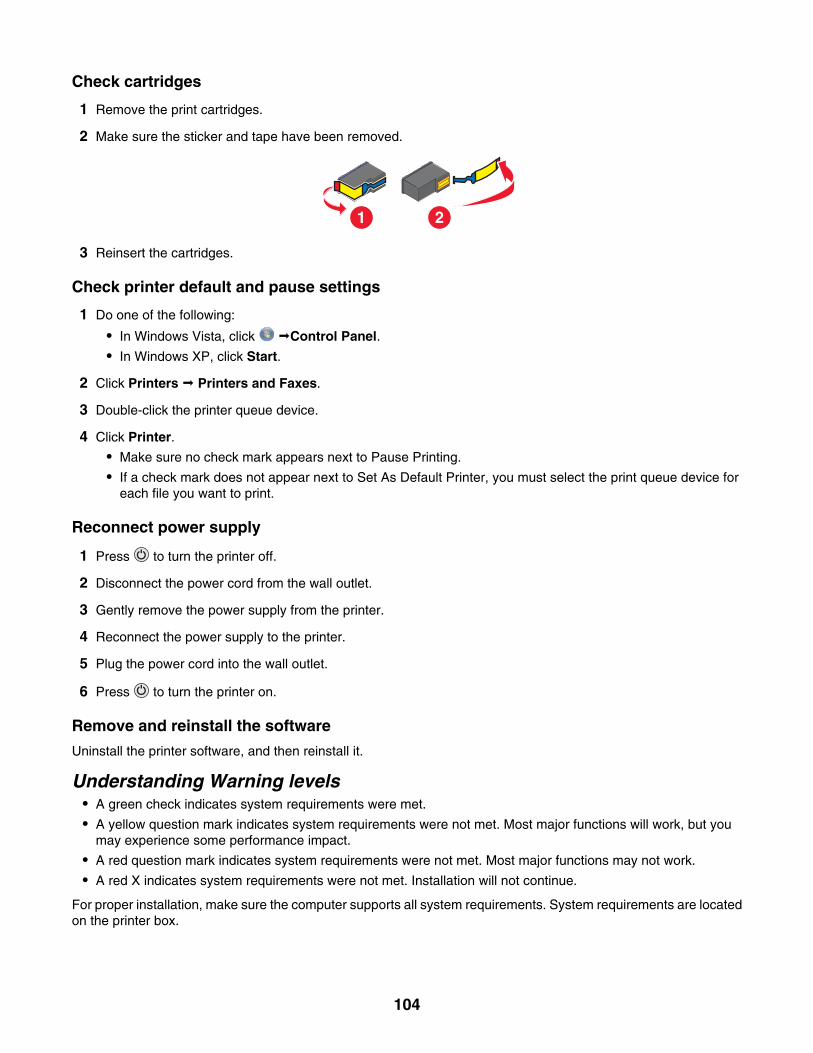
Check cartridges
1 Remove the print cartridges.
2 Make sure the sticker and tape have been removed.
1 2
3 Reinsert the cartridges.
Check printer default and pause settings
1 Do one of the following:
• In Windows Vista, click Control Panel.
• In Windows XP, click Start.
2 Click Printers Printers and Faxes.
3 Double-click the printer queue device.
4 Click Printer.
• Make sure no check mark appears next to Pause Printing.
• If a check mark does not appear next to Set As Default Printer, you must select the print queue device foreach file you want to print.
Reconnect power supply
1 Press to turn the printer off.
2 Disconnect the power cord from the wall outlet.
3 Gently remove the power supply from the printer.
4 Reconnect the power supply to the printer.
5 Plug the power cord into the wall outlet.
6 Press to turn the printer on.
Remove and reinstall the software
Uninstall the printer software, and then reinstall it.
Understanding Warning levels• A green check indicates system requirements were met.
• A yellow question mark indicates system requirements were not met. Most major functions will work, but youmay experience some performance impact.
• A red question mark indicates system requirements were not met. Most major functions may not work.
• A red X indicates system requirements were not met. Installation will not continue.
For proper installation, make sure the computer supports all system requirements. System requirements are locatedon the printer box.
104
Removing and reinstalling the softwareIf the printer is not functioning properly, or if a communications error message appears when you try to use theprinter, you may need to remove and reinstall the printer software.
1 In Windows Vista, click . In Windows XP or earlier, click Start.
2 Click Programs or All Programs Lexmark 4800 Series.
3 Select Uninstall.
4 Follow the instructions on the computer screen to remove the printer software.
5 Restart the computer before reinstalling the printer software.
6 Click Cancel on all New Hardware Found screens.
7 Insert the CD, and then follow the instructions on the computer screen to reinstall the software.
Note: If the install screen does not appear automatically after you restart your computer, click Start Run, andthen type D:\setup, where D is the letter of your CD-ROM drive.
If the software still does not install correctly, visit our Web site at www.lexmark.com to check for the latest software.
1 In all countries or regions except the United States, select your country or region.
2 Click the links for drivers or downloads.
3 Select your printer family.
4 Select your printer model.
5 Select your operating system.
6 Select the file you want to download, and then follow the directions on the computer screen.
Enabling the USB portTo confirm that the USB port is enabled on the computer:
1 Open the Device Manager.
In Windows Vista:
a Click Control Panel.
b Click System and Maintenance System.
c Click Device Manager.
In Windows XP:
a Click Start.
b Click Control Panel Performance and Maintenance System.
c From the Hardware tab, click Device Manager.
In Windows 2000:
a Click Start.
b Click Settings Control Panel System.
c From the Hardware tab, click Device Manager.
2 Click the plus sign (+) beside Universal Serial Bus Controller.
If USB Host Controller and USB Root Hub are listed, then the USB port is enabled.
105
For more information, see the computer documentation.
Solving printer communication problemsThe printer and the computer cannot exchange data.
These are possible solutions. Try one or more of the following:
Establish bidirectional communication between the printer and the computer
For more information, see “Bidirectional communication is not established” on page 135.
Make sure the printer is not in sleep mode
If the power light is blinking on and off slowly, the printer is in sleep mode.
1 Unplug the power cable from the wall outlet.
2 Wait ten seconds, and then insert the power cable into the wall outlet.
3 Press to turn the printer on.
Wireless troubleshooting
How do I find out what type of security my network is using?You must know the security key and security mode in order to properly set up the printer for use on the wirelessnetwork. To obtain this information, see the documentation that came with your wireless router, see the Web pageassociated with the router, or consult the person who set up your wireless network.
Check your security keysA security key is like a password. All devices on the same network share the same security key.
Note: Make sure you copy down the security key exactly, including any capital letters, and store it in a safe placefor future reference.
The security key must follow the following criteria.
WEP key• Exactly 10 or 26 hexadecimal characters. Hexadecimal characters are A–F and 0–9.
• Exactly 5 or 13 ASCII characters. ASCII characters are letters, numbers, and symbols found on a keyboard.
WPA-PSK or WPA2-PSK key• Up to 64 hexadecimal characters. Hexadecimal characters are A–F and 0–9.
• Between 8 and 64 ASCII characters. ASCII characters are letters, numbers, and symbols found on a keyboard.
Printer is configured correctly, but cannot be found on the networkMake sure:
• The printer has power and the light is on.
• The printer is within range of the wireless network.
• The printer is located away from other electronic devices that may interfere with the wireless signal.
• Your wireless network is using a unique network name (SSID). If not, it is possible that the printer/print serveris communicating over a different, nearby network that uses the same network name.
• The printer has a valid IP address on the network.
106
Wireless network printer does not printThese are possible solutions. Try one or more of the following:
Check power
Make sure the light is on.
Check cable• Make sure the power cable is connected to the printer and to the electrical outlet.
• Make sure the USB cable or the installation cable is not connected.
Check Wi-Fi indicator light
Make sure the Wi-Fi indicator light is green. If it is not green, see “Wi-Fi indicator light is orange” or “Wi-Fi indicatorlight is blinking orange during installation” in “Wireless troubleshooting.”
Check if printer driver is installed
Make sure the printer driver is installed on the computer from which you are sending the print job.
1 Do one of the following:
• In Windows Vista, click: Control Panel Printers.
• In Windows XP, click:Start Settings Printers and Faxes.
• In Windows 2000 and earlier, click: Start Settings Printers.
If you cannot find the icon for your printer, then the printer driver is not installed.
2 If the printer driver is not installed, insert the installation software CD into your computer.
3 Follow the instructions on the computer screen.
Note: You must install the printer driver on each computer that uses the network printer.
Check if printer is connected to the wireless network
1 Print a network setup page. For more information, see “Printing a network setup page.”
2 Check to see if “Status: Connected” appears under Network Card.
Reboot the computer
Turn off and restart the computer.
Check printer ports
Make sure the correct printer port is selected.
1 Click:
• In Windows Vista: Control Panel Printers.
• In Windows XP: Start Settings Printers and Faxes.
• In Windows 2000 and earlier: Start Settings Printers.
2 Right-click the Lexmark 4800 Series icon.
3 Click Properties Ports.
107
4 Verify that XXXX_Series_nnnnnn_P1 is selected, where XXXX is the model series number of your printer andnnnnnn is the last six numbers of the MAC address of your printer.
Note: The MAC address is located at the back of the printer beside the serial number.
5 If USB is selected instead:
a Select the port name from step 4.
b Click Apply.
c Close the window, and try printing again.
Reinstall software
Uninstall and then reinstall the printer software.
Note: If more than one printer appears in the ”Select your printer” list, pick the printer with the MAC address thatmatches the address on the back of your printer.
Wi-Fi indicator is not litThese are possible solutions. Try one or more of the following:
Check power
Make sure the printer power light is on. For more information, see “Power button is not lit”.
Remove and reinstall the optional internal print server
Note: This solution does not apply to printers that came with the internal wireless print server already installed.
Reinstall the internal wireless print server. For more information, see “Installing an optional internal wireless printserver”.
Wi-Fi indicator light is blinking orange during installationWhen the Wi-Fi indicator light is blinking orange, it indicates that the printer has been set up for wireless networkingbut cannot connect to the network for which it has been configured. The printer may be unable to join the networkbecause of interference or its distance from the wireless access point (wireless router), or until its settings arechanged.
These are possible solutions. Try one or more of the following:
Make sure the access point is on
Check the access point and, if necessary, turn it on.
Move your wireless access point (wireless router) to minimize interference
There may be temporary interference from other devices such as microwave ovens or other appliances, cordlessphones, baby monitors, and security system cameras. Make sure your wireless access point (wireless router) is notpositioned too closely to these devices.
Try adjusting external antennas
Generally, antennas work best if they are pointing straight up. You may find, however, that reception improves if youexperiment with different angles for your printer and/or wireless access point (wireless router) antennas.
108
Move your computer and/or printer
Move the computer and/or printer closer to the wireless access point (wireless router). Although the possible distancebetween devices in 802.11b or 802.11g networks is 300 feet, the effective range for optimal performance is generally100–150 feet.
You can find the signal strength of the network on the network setup page. For information on how to print a setuppage, see “Printing a network setup page” on page 34.
Check security keys
Make sure security keys are correct. For more information, see “Check your security keys” on page 106.
Check MAC address
If your network uses MAC address filtering, provide the MAC address for the printer to your network. If you needhelp finding the MAC address, see “Finding the MAC address” on page 33.
Ping the wireless access point (wireless router) to make sure the network is working
1 If you do not already know it, find the IP address of the access point.
a Click:
• In Windows Vista: All Programs Accessories Command Prompt.
• In Windows XP and earlier: Start Programs or All Programs Accessories CommandPrompt.
b Type ipconfig.
c Press Enter.
• The “Default Gateway” entry is typically the wireless access point (wireless router).
• The IP address appears as four sets of numbers separated by periods, such as 192.168.0.100. Your IPaddress might also start with the numbers 10 or 169. This is determined by your operating system orwireless network software.
2 Ping the wireless access point (wireless router).
a Click:
• In Windows Vista: All Programs Accessories Command Prompt.
• In Windows XP and earlier: Start Programs or All Programs Accessories CommandPrompt.
b Type ping followed by a space and the IP address of the wireless access point (wireless router). Forexample:
ping 192.168.0.100
c Press Enter.
3 If the wireless access point (wireless router) responds, you will see several lines appear that start with “Replyfrom”. Turn off and restart the printer.
4 If the wireless access point (wireless router) does not respond, it will take several seconds and then you will see“Request timed out.”
Try the following:
a Click:
• In Windows Vista: Control Panel Network and Internet Network and Sharing Center
• In Windows XP and earlier: Start Settings or Control Panel Network Connection
109
b Select the appropriate connection from the ones shown.
Note: If the computer is connected to the access point (router) by an Ethernet cable, the connection maynot include the word “wireless” in its name.
c Right-click the connection, and then click Repair.
Run the wireless setup again
If your wireless settings have changed, you must run the printer wireless setup again. Some reasons your settingsmay have changed include your having manually changed your WEP or WPA keys, channel, or other networksettings; or the wireless access point (wireless router) having been reset to factory defaults.
Notes:
• If you change network settings, change them on all the network devices before changing them for the wirelessaccess point (wireless router).
• If you have already changed the wireless network settings on your wireless access point (wireless router), youmust change the settings on all the other network devices before you can see them on the network.
1 Click:
• In Windows Vista: .
• In Windows XP and earlier: Start.
2 Click Programs or All Programs Lexmark 4800 Series.
3 Click Wireless Setup.
Note: You may be prompted to connect the printer to the computer again using the installation cable as part ofthe setup process.
4 Follow the instructions on the computer screen.
Wi-Fi indicator light is orangeThese are possible solutions. Try one or more of the following:
Check cable
Make sure the installation cable is not connected to the printer.
Configure the optional internal wireless print server
Note: This solution does not apply to printers that have a pre-installed internal wireless print server.
If you purchased the optional internal wireless print server after your printer was already set up, see “Configuringthe optional internal wireless print server” in the “Setting up the printer” chapter.
Check network name
Make sure your network does not have the same name as another network near you. For example, if you and yourneighbor both use a manufacturer's default network name, your printer could be connecting to your neighbor'snetwork.
If you are not using a unique network name, consult the documentation for your wireless access point (wirelessrouter) to learn how to set a network name.
If you set a new network name, you must reset the printer and computer SSID to the same network name.
For more information, see “Checking your network name” in the “Wireless troubleshooting” section.
110
Check security keys
Make sure security keys are correct. For more information, see “Check your security keys” on page 106.
Move your computer and/or printer
Move the computer and/or printer closer to the wireless access point (wireless router). Although the possible distancebetween devices in 802.11b or 802.11g networks is 300 feet, the effective range for optimal performance is generally100–150 feet.
You can find the signal strength of the network on the network setup page. For information on how to print a setuppage, see “Printing a network setup page” on page 34.
Check MAC address
If your network uses MAC address filtering, provide the MAC address for the printer to your network. If you needhelp finding the MAC address, see “Finding the MAC address” on page 33.
Wireless printer is no longer workingThese are possible solutions. Try one or more of the following:
Check power• Make sure the printer power light is on. For more information, see “Power button is not lit” in the “Troubleshooting”
chapter.
• Make sure the wireless access point (wireless router) is on.
Move your wireless access point (wireless router) to minimize interference
There may be temporary interference from other devices such as microwaves or other appliances, cordless phones,baby monitors, and security system cameras. Make sure your wireless access point (wireless router) is not positionedtoo closely to these devices.
Move your computer and/or printer
Move the computer and/or printer closer to the wireless access point (wireless router). Although the possible distancebetween devices in 802.11b or 802.11g networks is 300 feet, the effective range for optimal performance is generally100–150 feet.
You can find the signal strength of the network on the network setup page. For more information, see “Printing anetwork setup page” in the “Networking” chapter.
Try adjusting external antennas
Generally, antennas work best if they are pointing straight up. You may find, however, that reception improves if youexperiment with different angles for your printer and/or wireless access point (wireless router) antennas.
Check network name
The network name, or SSID (Service Set Identifer) is a setting on a wireless device that allows devices to join thesame wireless network.
For more information, see “Checking your network name” for Windows or Mac in the “Wireless troubleshooting”section.
Reboot the computer
Turn off and restart the computer.
111
Ping the wireless access point
Ping the wireless access point (wireless router) to make sure the network is working.
For more information, see “Ping the access point” for Windows or Mac in the “Wireless troubleshooting” section
Ping the printer
Ping the printer to make sure it is on the network.
For more information, see “Ping the printer” for Windows or Mac in the “Wireless troubleshooting” section.
Run the wireless setup again
If your wireless settings have changed, you will need to run the printer wireless setup again. Some reasons yoursettings may have changed include your having manually changed your WEP or WPA keys, channel, or othernetwork settings, or the wireless access point (wireless router) having been reset to factory defaults.
Notes:
• If you change network settings, change them on all the network devices before changing them for the wirelessaccess point (wireless router).
• If you have already changed the wireless network settings on your wireless access point (wireless router), youmust change the settings on all the other network devices before you can see them on the network.
For more information, see “Run the Wireless Setup Utility” for Windows or “Run the Wireless Setup Assistant” forMac.
Network printer does not show up in the printer selection list duringinstallationCheck whether the printer is on the same wireless network as the computer
The SSID of the printer must match the SSID of the wireless network.
1 If you do not know the SSID of the network, use the following steps to obtain it before rerunning the WirelessSetup Utility.
a Enter the IP address of your wireless access point (wireless router) into the Web address field of yourbrowser.
If you do not know the IP address of the wireless access point (wireless router):1 Do one of the following:
• In Windows Vista, click All Programs Accessories Command Prompt.
• In Windows XP, click Start Programs or All Programs Accessories CommandPrompt.
2 Type ipconfig.
3 Press Enter.
• The “Default Gateway” entry is typically the wireless access point (wireless router).
• The IP address appears as four sets of numbers separated by periods, such as 192.168.0.100.
b Enter your user name and password when prompted.
c Click OK.
d On the main page, click Wireless or any other selection where settings are stored. The SSID will bedisplayed.
e Write down the SSID, security type, and the security keys if they are shown.
Note: Make sure you copy them down exactly, including any capital letters.
112
2 Click Programs or All Programs Lexmark 4800 Series.
3 Click Wireless Setup.
Note: You may be prompted to connect the printer to the computer again using the installation cable as part ofthe setup process.
4 Follow the instructions on the computer screen, including typing in the SSID of the wireless access point (wirelessrouter) and the security keys when prompted.
5 Store the SSID and the security keys in a safe place for future reference.
Printer cannot connect to the wireless networkThese are possible solutions. Try one or more of the following:
Make sure your computer is connected to your wireless access point (wireless router)• See whether you have access to the Internet by opening your Web browser and accessing any site.
• If there are other computers or resources on your wireless network, check to see if you can access them fromyour computer.
Move the computer and/or printer closer to the wireless router
Although the possible distance between devices in 802.11b or 802.11g networks is 300 feet, the effective range foroptimal performance is generally 100–150 feet.
Try setting up the printer again by rerunning the Wireless Setup Utility.
1 Select one of the following:
• In Windows Vista, click .
• In Windows XP and earlier: Click Start.
2 Click Programs or All Programs Lexmark 4800 Series.
3 Click Wireless Setup.
Note: You may be prompted to connect the printer to the computer again using the installation cable as part ofthe setup process.
4 Follow the instructions on the computer screen.
Check whether the printer is on the same wireless network as the computer
The SSID of the printer must match the SSID of the wireless network.
If you do not know the SSID of the network, use the following steps to obtain it, and then rerun the Wireless SetupUtility to set up the printer again.
1 Enter the IP address of your wireless access point (wireless router) into your browser's Web address field.
If you do not know the IP address of the wireless access point (wireless router):
a Click:
• In Windows Vista: All Programs Accessories Command Prompt.
• In Windows XP and earlier: Start Programs or All Programs Accessories CommandPrompt.
b Type ipconfig.
113
c Press Enter.
• The “Default Gateway” entry is typically the wireless access point (wireless router).
• The IP address appears as four sets of numbers separated by periods, such as 192.168.0.100. Your IPaddress might also start with the numbers 10 or 169. This is determined by your operating system orwireless network software.
2 Enter your user name and password when prompted.
3 Click OK.
4 On the main page, click Wireless or other selection where settings are stored. The SSID will be displayed.
5 Write down the SSID, security type, and the security keys if they are shown.
Note: Make sure you copy them down exactly, including any capital letters.
6 Store the SSID and the security keys in a safe place for future reference.
Check your security keys
A security key is like a password. All devices on the same network will share the same security key.
• If you are using the WPA type of security, make sure you entered the correct key. Security keys are casesensitive.
• If you are using the WEP type of security, you should enter the key as a series of digits (0–9) and letters (A–F).
Note: If you do not know this information, see the documentation that came with the wireless network, or contactthe person who set up your wireless network.
Check your advanced security settings• If you are using MAC address filtering to limit access to your wireless network, you must add the printer's MAC
address to the list of addresses allowed to connect to your wireless access point (wireless router).
• If you set your wireless access point (wireless router) to issue a limited number of IP addresses, you must changethis so that the printer can be added.
Note: If you do not know how to make these changes, see the documentation that came with the wireless network,or contact the person who set up your wireless network.
Wireless Setup Utility cannot communicate with the printer duringinstallation (Windows users only)These are possible solutions for Windows users. Try one or more of the following:
Check power
If the light is not on, see “Power button is not lit”.
Check the installation cable
1 Disconnect the installation cable and check it for any obvious damage.
2 Firmly plug the rectangular end of the USB cable into the USB port of the computer.
The USB port is marked with the USB symbol.
3 Firmly plug the square end of the USB cable into the USB port on the back of the printer.
4 Cancel the software installation.
5 Click Programs or All Programs Lexmark 4800 Series.
114
6 Click Wireless Setup Utility.
7 Follow the prompts on the computer screen to reinstall the software.
Checking your network name (Windows users only)Make sure your network does not have the same name as another network near you. For example, if you and yourneighbor both use a manufacturer's default network name, your printer could be connecting to your neighbor'snetwork.
If you are not using a unique network name, consult the documentation for your wireless access point (wirelessrouter) to learn how to set a network name.
If you set a new network name, you must reset the printer and computer SSID to the same network name.
• To reset the computer network name, see the documentation that came with your computer.
• To reset the printer name:
1 Click Programs or All Programs Lexmark 4800 Series.
2 Click Wireless Setup Utility.
3 Follow the instructions on the computer screen, and enter the new network name when prompted.
Ping the access point1 If you do not already know it, find the IP address of the wireless access point (wireless router).
a Do one of the following:
• In Windows Vista, click All Programs Accessories Command Prompt.
• In Windows XP, click Start Programs or All Programs Accessories Command Prompt.
b Type ipconfig.
c Press Enter.
• The “Default Gateway” entry is typically the wireless access point (wireless router).
• The IP address appears as four sets of numbers separated by periods, such as 192.168.0.100.
2 Ping the wireless access point (wireless router).
a Do one of the following:
• In Windows Vista, click All Programs Accessories Command Prompt.
• In Windows XP, click Start Programs or All Programs Accessories Command Prompt.
b Type ping followed by a space and the IP address of the wireless access point (wireless router). Forexample:
ping 192.168.0.100
c Press Enter.
3 If the wireless access point (wireless router) responds, you will see several lines appear that start with “Replyfrom”. Turn off and restart the printer.
4 If the wireless access point (wireless router) does not respond, after several seconds you will see “Requesttimed out.”
a Do one of the following:
• In Windows Vista, click the Control Panel Network and Internet Network and SharingCenter.
• In Windows XP, click Start Settings or Control Panel Network Connection.
115
b Select the appropriate connection from the ones shown.
Note: If the computer is connected to the access point (router) by an Ethernet cable, the connection maynot include the word “wireless” in its name.
c Right-click the connection, and then click Repair.
Ping the printer1 Do one of the following:
• In Windows Vista, click All Programs Accessories Command Prompt.
• In Windows XP, click Start Programs or All Programs Accessories Command Prompt.
2 Type ping followed by the IP address of the printer. For example,
ping 192.168.0.25
3 Press Enter.
4 If the printer responds, you will see several lines appear that start with “Reply from”.
Turn off and restart the printer, and then try resending your print job.
5 If the printer does not respond, you will see “Request timed out.”
a Check that the computer has a wireless IP address.1 Do one of the following:
• In Windows Vista, click All Programs Accessories Command Prompt.
• In Windows XP, click Start Programs or All Programs Accessories CommandPrompt.
2 Type ipconfig.
3 Press Enter.4 Check the Windows IP Configuration screen that appears for the wireless IP address of the computer.
Note: Your computer may have an IP address for a wired network, a wireless network, or both.5 If your computer does not have an IP address, see the documentation that came with your wireless
access point (wireless router) to learn how to connect your computer to the wireless network.
b The printer may need to be reconfigured for new wireless network settings. For more information, see “Runthe Wireless Setup Utility”.
Run the Wireless Setup Utility (Windows users only)1 Click Programs or All Programs Lexmark 4800 Series.
2 Click Wireless Setup Utility.
Note: You may be prompted to connect the printer to the computer again using the installation cable as part ofthe setup process.
3 Follow the instructions on the computer screen.
Changing wireless settings after installationTo change your password, network name, or other wireless setting, rerun the wireless setup. For more information,see “Run the Wireless Setup Utility” for Windows or the “Run the Wireless Setup Assistant” for Mac.
116
Resetting an internal wireless print server to factory default settings
1 From the control panel, press or repeatedly until Setup appears.
2 Press .
3 Press or repeatedly until Network Setup appears.
4 Press .
5 Press or repeatedly until Reset Network Adapter Defaults appears.
6 Press .
The following message appears: This will reset all wireless network settings. Are yousure?
7 Press to select Yes.
The message Clearing Network Settings appears.
Check printer ports (Windows users only)Make sure the correct printer port is selected.
1 Click Start Control Panel Printers.
2 Right-click Lexmark XXXX, where XXXX is the model series number of your printer.
3 Click Properties Ports.
4 Verify that XXXX_Series_nnnnnn_P1 is selected, where XXXX is the model series number of your printer andnnnnnn is the last six numbers of the MAC address of your printer.
Note: The MAC address is located at the back of the printer beside the serial number.
5 If USB is selected instead:
a Select the port name from step 4.
b Click Apply.
c Close the window, and try printing again.
Print troubleshooting
Partial 4 x 6 in. (10 x 15 cm) photo prints when using a PictBridge-enableddigital cameraMake sure photo size and paper size are set correctly
The printer displays Paper Mismatch when your chosen photo size does not match the paper size that is set. Thistypically happens when you are trying to print from your PictBridge-enabled digital camera. You may have left theprinter control panel Photo Size menu item setting at 8.5 x 11 in. or 5 x 7 in. size, but your camera has aprint size of 4 x 6 in. or L. You need to make sure your chosen photo size on the printer is 4 x 6 in. or10 x 15 cm, depending on the typically used photo size for your country or region.
• Make sure the 4 x 6 in. (10 x 15 cm) photo paper is loaded correctly in the paper support.
• If your camera lets you change the print size setting, change the print size selection to 4 x 6 in. (10 x 15 cm) onthe PictBridge-enabled digital camera.
117
• If your camera does not allow you to change the paper size setting, use the control panel to change the papersize to 4 x 6 in. (10 x 15 cm).
1 Insert the USB cable that came with your camera into the camera, and insert the other end into the PictBridgeport on the front of the printer.
2 Turn the camera on, and choose your first photo using the camera control panel.
3 Wait for PictBridge Printing to appear on the display of the printer control panel.
Notes:
– If Paper Mismatch appears, press to make changes in the Paper Handling screen.
– Press or to return to the Photo Print Settings Menu.
4 Press .
5 Press or repeatedly until Photo Size appears.
6 Press .
7 Press or repeatedly until 10 x 15 cm or 4 x 6 in. appears.
8 Press .
9 Press or repeatedly until Paper Setup appears.
10 Press .
11 Press or repeatedly until Paper Size appears.
12 Press .
13 Press or repeatedly until 10 x 15 cm or 4 x 6 in. appears.
14 Press .
15 Press Start Color or Start Black.
Improving print qualityThese are possible solutions. Try one or more of the following:
Check paper• Use the appropriate paper for the document. If you are printing photos or other high-quality images, for best
results use Lexmark Photo Paper or Lexmark PerfectFinish Photo Paper. Do not use Lexmark Premium PhotoPaper. Your print cartridges are not compatible with this type of paper.
• Use a paper that is a heavier weight or bright white.
Select a higher print quality
1 Press or to choose Copy, Scan, or Photo.
2 Press .
3 Press or repeatedly to chooseQuality.
4 Press .
5 Press or repeatedly to choose the quality that you want.
6 Press .
118
Check print cartridges
If the document still does not have the print quality you want, follow these steps:
1 Align the print cartridges. For more information, see “Aligning print cartridges” on page 97. If print quality hasnot improved, continue to the next step.
2 Clean the print cartridge nozzles. For more information, see “Cleaning the print cartridge nozzles” on page 97.If print quality has not improved, continue to the next step.
3 Remove and reinsert the print cartridges. For more information, see “Removing a used print cartridge” onpage 96. If print quality has not improved, continue to the next step.
4 Wipe the print nozzles and contacts. For more information, see “Wiping the print cartridge nozzles and contacts”on page 97.
If print quality is still not satisfactory, replace the print cartridges. For more information, see “Ordering supplies”on page 99.
Poor text and graphic quality
• Blank pages
• Dark print
• Faded print
• Incorrect colors
• Light and dark bands in print
• Skewed lines
• Smudges
• Streaks
• White lines in print
These are possible solutions. Try one or more of the following:
Check ink
Check the ink levels, and install new print cartridges if necessary.
Remove sheets as they are printed
To avoid ink smudging when you are working with the following media, remove each sheet as it exits, and allow itto dry:
• Documents with graphics or images
• Photo paper
• Heavyweight matte or glossy paper
• Transparencies
• Labels
• Envelopes
• Iron-on transfers
Note: Transparencies may take up to 15 minutes to dry.
Use a different brand of paper
Each paper brand accepts ink differently and prints with color variations. If you are printing photos or otherhigh-quality images, for best results use Lexmark photo papers.
Check paper condition
Use only new, unwrinkled paper.
119
Removing and reinstalling the software
Software may not be installed correctly.
Poor quality at the edges of the pageThese are possible solutions. Try one or more of the following:
Check minimum print settings
Unless you are using the borderless feature, use these minimum print margin settings:
• Left and right margins:
– 6.35 mm (0.25 in.) for letter-size paper
– 3.37 mm (0.133 in.) for all paper sizes except letter
• Top margin: 1.7 mm (0.067 in.)
• Bottom margin: 12.7 mm (0.5 in.)
Select the Borderless print feature
1 From the software application, click File Print.
2 Click Properties, Preferences, Options, or Setup.
3 Click Print Layout.
4 Click Borderless.
Select the Borderless resize feature (when copying)
1 From the control panel, press or repeatedly to choose Copy.
2 Press .
3 Press or repeatedly to choose Resize.
4 Press .
5 Press or repeatedly to choose Borderless.
6 Press .
7 Press Start, or press to temporarily save settings.
Select the Borderless photo feature (when printing photos)
1 From the control panel, press or repeatedly to choose Photo.
2 Press .
3 Press or repeatedly to choose Layout.
4 Press .
5 Press or repeatedly to choose Borderless.
6 Press .
7 Press Start, or press to temporarily save settings.
120

Make sure you use photo paper
Borderless printing requires photo paper. Small margins are printed when you select the Borderless feature whenyou are printing on plain paper.
Make sure the paper size matches the printer setting
1 From the software application, click File Print.
2 Click Properties, Preferences, Options, or Setup.
3 Click Paper Setup.
4 Check the paper size.
Print speed is slowThese are possible solutions. Try one or more of the following:
Maximize computer processing speed• Close all applications not in use.
• Minimize the number and size of graphics and images in the document.
• Remove as many unused fonts as possible from your system.
Add memory
Consider purchasing more RAM.
Select a lower print quality
1 From the software application, click File Print.
2 Click Properties, Preferences, Options, or Setup.
3 Click Quality/Copies.
4 From the Quality/Speed area, select a lower print quality.
Remove and reinstall the software
It is sometimes helpful to remove the existing printer software and reinstall it.
Partial document or photo printsThese are possible solutions. Try one or more of the following:
Check document placement
Make sure the document or photo is loaded facedown on the scanner glass in the lower right corner.
Check paper size
Make sure the paper size being used matches the document or photo size you selected.
Photo smudges or scratchesTo prevent photo smudging or scratching, avoid touching the printed surface with your fingers or sharp objects. Forbest results, remove each printed sheet individually from the paper exit tray, and allow the prints to dry at least 24hours before stacking, displaying, or storing.
121

Checking the print cartridgesAre the print cartridges properly installed?
For more information, see “Installing print cartridges” on page 94.
Are the sticker and tape removed from the cartridges?
Lift the scanner unit. Press down on the cartridge carrier latches to raise the cartridge carrier lids.
Are the cartridges low on ink?
1 Do one of the following:
• In Windows Vista, click .
• In Windows XP and earlier, click Start.
2 Click Programs or All Programs Lexmark 4800 Series.
3 Click Solution Center.
4 If an exclamation point (!) appears on a cartridge, the ink level is low. Install a new cartridge. For more information,see “Installing print cartridges” on page 94.
For cartridge-ordering information, see “Ordering supplies” on page 99.
Ink levels seem incorrectThese are possible solutions. Try one or more of the following:
Are you printing graphics or photos?
When you print documents with a large number of graphics, or with the Photo Quality/Speed setting, the printer usesmore ink. The type of documents you print and the print quality you select affect the amount of ink the printer uses.
Are you printing a large file?
The ink levels displayed in the printer software are not updated during a print job; they represent the ink level at thebeginning of a print job. The ink levels may seem inconsistent in the Printing Status window when you are printinga large file.
Ink levels seem to go down too quicklyThese are possible solutions. Try one or more of the following:
Are you printing photos or documents with a large number of graphics?
Because photos and graphics require more ink than text documents, ink usage increases when you print photos orgraphics.
Are you printing with the Best Quality/Speed setting?
To reduce ink usage, select Best only when you are printing on photo or heavyweight matte paper. All other papertypes print best at a lower Quality/Speed setting. Use the Quick Print or Normal setting to print most text documents.
A blank or incorrect page printsRemove the sticker and tape from the print cartridges
Lift the scanner unit, and remove the print cartridges from the print cartridge carrier. Make sure the sticker and tapeare removed from the print nozzles located on the bottom of the cartridges.
122
Make sure the cartridges are properly installed
With the front of the printer facing you, check for proper print cartridge installation. If you are using a color cartridge,make sure it is properly installed in the right carrier. If you are using a black or photo cartridge, make sure it is properlyinstalled in the left carrier.
Check the USB connection
1 Check that the USB cable is connected to the computer. The USB port on the back of the computer is markedby the USB symbol. Plug the long, flat end of the USB cable into this port.
2 Make sure that the smaller, more square end of the USB cable is plugged into the back of the printer.
3 Check that the USB cable is not damaged and that the light is on.
Close other open files before printing
Before sending a file to print, close all other open files in the program you are using. The printer prints a blank pagewhen too many files are open in the same program.
Characters on printout are missing or unexpectedThese are possible solutions. Try one or more of the following:
Make sure the fonts are applied correctly in the program
Most programs do not print a stretched or resized font.
Make sure the TrueType font is available on the computer
The font you are trying to print may not be available in the program font selection box. Not all fonts are designed tobe printed; make sure the font is a TrueType font. See the program documentation for more information.
Make sure the document was formatted or created for the printer
Windows may substitute different fonts. Line and page breaks may change with the font. Use the program thatcreated the document to fix these problems, and then save the changes for the next time you print.
Colors on printout are faded or differ from colors on the screenCheck the following. When you think you have solved the problem, test the solution by sending a document to print.
Are the color and print speed settings correct?
You may need to adjust the color and print speed.
Are the print cartridges low on ink?
1 Do one of the following:
• In Windows Vista, click Control Panel.
• In Windows XP or 2000, click Start.
2 Click Programs or All Programs Lexmark 4800 Series.
123
3 Click Solution Center.
4 If an exclamation point (!) appears on either of the print cartridges, the ink level is low. Install a new cartridge.
Glossy photo paper or transparencies stick togetherDo photos or transparencies dry and stick together on the paper exit tray?
Remove the photos or transparencies from the paper exit tray as they exit the printer. Allow them to dry beforestacking. It takes longer for the ink to dry on the surface of photo paper or transparencies than it does on mostprintouts.
Are you using a transparency or photo paper designed for an inkjet printer?
For information on ordering supplies, see “Choosing compatible specialty paper types” on page 50.
Page prints with different fontsMake sure the correct printer is selected
When printing from an application, make sure the selected printer is the correct printer you want to use to print yourjob.
It is useful to have the default printer set to be the printer you use most often for printing.
Make sure the TrueType font is available on the computer
The font you are trying to print may not be available in the program font selection box. Not all fonts are designed tobe printed; make sure the font is a TrueType font. See the program documentation for more information.
Make sure the fonts are applied correctly in the program
Most programs do not print a stretched or resized font.
Print is too dark or smudgedThese are possible solutions. Try one or more of the following:
Make sure the ink dry before handling the paper
Remove the paper as it exits, and let the ink dry before handling.
Make sure the Quality/Speed setting is appropriate for the paper type loaded in the printer
The Photo Quality/Speed setting may cause smearing if used with plain paper. If you are using plain paper, try usingthe Normal setting.
Make sure the print cartridge nozzles are clean
You may need to clean the print cartridge nozzles.
124
Printed characters are improperly formed or are not aligned correctlyHave you added spaces at the left margin?
If the print is not aligned correctly, make sure you have not added spaces by pressing Enter or the spacebar (hard-coded spaces).
Do you need to align the print cartridges?
The cartridges may be out of alignment.
1 Do one of the following:
• In Windows Vista, click Control Panel.
• In Windows XP or 2000, click Start.
2 Click Programs or All Programs Lexmark 4800 Series.
3 Click Solution Center.
4 Click the Maintenance tab.
5 Click Align to fix blurry edges.
Are the print cartridges clean?
You may need to clean the print cartridge nozzles.
Printouts have alternating bands of light and dark printIf the printer pauses frequently during a print job and prints pages with alternating bands of light and dark print, it isprinting data faster than the computer can send it. Banded printing occurs when the printer pauses frequently. Youmay need to change the printer software settings, or the problem may be that the printer and the computer are notable to communicate properly.
Are the printer and the computer able to communicate data?
Check the printer status:
1 Do one of the following:
• In Windows Vista, click Control Panel.
• In Windows XP or 2000, click Start.
2 Click Programs or All Programs Lexmark 4800 Series.
3 Click Solution Center.
4 If the Printer Status is:
• Cannot Communicate, the problem could be hardware or printer software settings.
• Ready or Busy Printing, the problem may be with the printer software settings.
Transparencies or photos contain white linesAdjust the Quality/Speed settings
1 With a document or photo open, click File Print.
2 Click Properties, Preferences, Options, or Setup.
125
3 From the Quality/Copies tab, select:
• Photo when printing photos
• Normal when printing transparencies
Check the program settings
Use a different fill pattern in the program. For more information, see the program documentation.
Perform maintenance on the print catridges
You may need to clean the print cartridge nozzles.
Vertical straight lines are not smoothAdjust the Quality/Speed settings
1 With a document or photo open, click File Print.
2 Click Properties, Preferences, Options, or Setup.
3 From the Quality/Copies tab, select:
• Photo when printing photos
• Normal when printing transparencies
Align the print cartridges
1 Do one of the following:
• In Windows Vista, click Control Panel.
• In Windows XP or 2000, click Start.
2 Click Programs or All Programs Lexmark 4800 Series.
3 Click Solution Center.
4 Click the Maintenance tab.
5 Click Align to fix blurry edges.
White lines appear in graphics or solid black areasAdjust the Quality/Speed settings
• For excellent print quality and reduced print speed, select Photo.
• For good print quality and average print speed, select Normal.
• For reduced print quality and faster print speed, select Quick Print.
Adjust the program settings for the document
Use a different fill pattern in the program. For more information, see the program documentation.
Perform maintenance on the print catridges
You may need to clean the print cartridge nozzles.
126
Checking the printer statusWindows Vista users only
1 Click Control Panel Printer.
2 Make sure:
• The printer icon does not say Paused. If the printer is paused, right-click the icon, and then click ResumePrinting.
• The printer icon says Ready. If it says Offline, right-click the icon, and then click Use Printer Online.
• The printer icon has a check mark indicating that the printer is set as the default printer. If it is not, right-clickthe icon, and then click Set as Default.
Windows XP users only
1 Click Start Settings Printers and Faxes.
2 Make sure:
• The printer icon does not say Paused. If the printer is paused, right-click the icon, and then click ResumePrinting.
• The printer icon says Ready. If it says Offline, right-click the icon, and then click Use Printer Online.
• The printer icon has a check mark indicating that the printer is set as the default printer. If it is not, right-clickthe icon, and then click Set as Default.
Windows 2000 users only
1 Click Start Settings Printers.
2 Right-click the Lexmark 4800 Series icon.
3 Make sure:
• Set as Default Printer is selected.
• Pause Printing is not selected.
• Use Printer Offline is not selected.
Settings are not savedThese are possible solutions. Try one or more of the following:
Change time-out settings
If you press to select a setting, an * appears next to the selected setting. The printer reverts to the default settingafter two minutes of inactivity or if the printer is turned off.
Save settings
If you press to select a setting, an * appears next to the selected setting.
Checking printer readinessThe printer may not be ready to print. Check the following. When you think you have solved the problem, test thesolution by sending a document to print.
Make sure the printer has paper and is properly loaded
Make sure you have followed the correct loading instructions for your printer.
127
Remove the sticker and tape from the print cartridges
1 Lift the scanner unit.
2 Remove the print cartridges from the print cartridge carrier.
3 Make sure the sticker and tape are removed from the bottom and back of the cartridges.
Do the print cartridges have ink?
1 Do one of the following:
• In Windows Vista, click .
• In Windows XP and earlier, click Start.
2 Click Programs or All Programs Lexmark 4800 Series.
3 Click Solution Center.
If an exclamation point (!) appears on either of the print cartridges, the ink level is low. Install a new cartridge.
Check the USB connection
1 Check that the USB cable is connected to the computer. The USB port on the back of the computer is markedby the USB symbol. Plug the long, flat end of the USB cable into this port.
2 Make sure that the smaller, more square end of the USB cable is plugged into the back of the printer.
3 Check that the USB cable is not damaged and that the light is on.
Checking the Spool Settings for banner printingBanner printing is not possible if certain Spool Settings are selected. Verify that you have the right settings selected.
1 For Windows Vista, click Control Panel Printer.
For Windows XP, click Start Settings Printers or Printers and Faxes.
2 Right-click the Lexmark 4800 Series icon.
3 Select Properties.
4 Click the Advanced tab.
5 At the bottom of the Advanced tab, click Print Processor.
6 Verify that the Default data type is LEMF. If it is not, select LEMF from the available choices, and then clickOK.
Resolving font problemsHave you applied the fonts correctly in the program?
Most programs do not print a stretched or resized font.
Is the font a TrueType font? Is it available on the computer?
The font you are trying to print may not be available in the program font selection box. Not all fonts are designed tobe printed; make sure the font is a TrueType font. See the program documentation for more information.
128
Was the document formatted or created for the printer?
Windows may substitute different fonts. Line and page breaks may change with the font. Use the program thatcreated the document to fix these problems, and then save the changes for the next time you print.
Printer is busy printing another jobWait until the printer has finished printing all other print jobs before sending this job to print.
Ready or Busy Printing is listed as the statusIf Ready or Busy Printing is listed as the Printer Status on the Status tab of the Solution Center while you areattempting to print, try the suggestions below. Next, test the solution by sending a document to print.
Is there a problem with the connections?
1 Check that the USB cable is connected to the computer. The USB port on the back of the computer is markedby the USB symbol. Plug the long, flat end of the USB cable into this port.
2 Make sure that the smaller, more square end of the USB cable is plugged into the back of the printer.
3 Check that the USB cable is not damaged and that the light is on.
Do you need to adjust the Quality/Speed settings?
Select Photo from the Quality/Copies tab in Printing Preferences.
1 Click File Print.
2 Click Properties, Preferences, Options, or Setup.
3 From the Quality/Copies tab, make changes as needed.
4 Click OK to close any dialog boxes that are open.
Is the problem with the program?
Try printing a different image. If it prints correctly, the problem may be with the program you are using. For moreinformation, see the program documentation.
Printing a test page
1 Do one of the following:
• In Windows Vista, click .
• In Windows XP and earlier, click Start.
2 Click Programs or All Programs Lexmark 4800 Series.
3 Click Solution Center.
4 From the Maintenance tab, click Print a test page.
5 Compare the printed page to the image displayed on the computer screen. If the printed image matches theimage displayed on the screen, then you are finished.
6 If the test page did not print at all or has quality problems, attend to any error messages that appear on thescreen.
129

Test page does not printThese are possible solutions. Try one or more of the following:
Make sure the printer is receiving power
If is not on, the printer may not be receiving power.
• Press .
• Plug the printer into a different electrical outlet.
• If the printer is plugged into a surge protector, unplug the printer, and plug it directly into an electrical outlet.
Check the USB connection
1 Check that the USB cable is connected to the computer. The USB port on the back of the computer is markedby the USB symbol. Plug the long, flat end of the USB cable into this port.
2 Make sure that the smaller, more square end of the USB cable is plugged into the back of the printer.
3 Check that the USB cable is not damaged and that the light is on.
Make sure the cartridges are properly installed
With the front of the printer facing you, check for proper print cartridge installation. If you are using a color cartridge,make sure it is properly installed in the right carrier. If you are using a black cartridge or photo cartridge, make sureit is properly installed in the left carrier.
Make sure the sticker and tape are removed from the print cartridges:
1 Lift the scanner unit.
2 Remove the print cartridges from the print cartridge carrier.
3 Make sure the sticker and tape are removed from the bottom and back of the print cartridges.
Try printing a test page again
1 Do one of the following:
• In Windows Vista, click Control Panel.
• In Windows XP or 2000, click Start.
2 Click Programs or All Programs Lexmark 4800 Series.
3 Click Solution Center.
4 Click the Maintenance tab.
5 Click Print a test page.
External print server is not workingIf there is an external device connected between the computer and the printer, make sure it supports bidirectionalcommunication.
Disconnect the printer from the external device, and connect it directly to the computer. If the printer works, theremay be a problem with the print server. See the documentation that shipped with the print server.
There may be a problem with the USB cable. Try a different cable.
130
Duplex unit does not operate correctlyThese are possible solutions. Try one or more of the following:
Check paper size and type
Check the paper size and type to make sure the paper is supported by the printer. If you are using automaticduplexing, use only letter- or A4-size plain paper.
Check for paper jams
Check for and clear any paper jams. For more information, see “Paper jam in the duplex unit” on page 139.
Make sure the duplex unit is properly installed
Remove the duplex unit and reinstall it. For more information, see “Paper jam in the duplex unit” on page 139.
Removing an external print server
1 Press to turn the printer off.
2 Make sure the power to the print server is off.
3 Remove the USB cable from the external print server.
4 Disconnect the external print server from the computer.
5 Connect the printer USB cable to the printer.
6 Press to turn the printer back on.
Cable is not connected, is loose, or is damagedThe printer cable must be fully connected and undamaged for proper communication.
Make sure the USB cable is connected to the USB port on the back of the computer
The USB port on the back of the computer is marked by . Plug the long, flat end of the USB cable into thisport.
Make sure the other end of the USB cable is connected to the back of the printer
Plug the smaller, more square end of the USB cable into the back of the printer.
Make sure the cable is not damaged or loose
Make sure:
• The USB cable is not damaged.
• The light is on.
For more information, see the related topic below.
Printer is plugged in but does not printThese are possible solutions. Try one or more of the following:
Make sure the printer is set as the default printer
Try printing a test page.
131
Make sure the print queue is ready to print
Make sure the printer is set as the default printer and is not being held or paused.
Printer is trying to print to FileIf the computer is sending the print jobs to File rather than to the printer connected to the computer, first make surethe printer is attached with a USB cable to a USB port on the computer.
To verify the USB port:
1 In Windows Vista, click Control Panel Printers (under Hardware and Sound).
In Windows XP, click Start Settings Printers and Faxes.
2 Right-click the Lexmark 4800 Series icon.
3 From the sidebar menu, select Properties.
4 Click the Ports tab.
5 Make sure:
• The port is set to a USB port.
• File is not set as the port.
If the document still does not print, then the USB port may not be enabled in the computer. For more information,see the related topic, “Enabling the USB port.”
Cannot print documents from a memory card or flash driveCheck the type of files contained on the memory card or flash drive
The printer recognizes:
• Files that have the following extensions:
– .doc (Microsoft Word)
– .xls (Microsoft Excel)
– .ppt (Microsoft PowerPoint)
– .pdf (Adobe Portable Document Format)
– .rtf (Rich Text Format)
– .docx (Microsoft Word Open Document Format)
– .xlsx (Microsoft Excel Open Document Format)
– .pptx (Microsoft PowerPoint Open Document Format)
– .wps (Microsoft Works)
– .wpd (WordPerfect)
• Photos
Check the memory card or flash drive
Make sure the memory card or flash drive is not corrupted. Remove memory devices properly from the printer toavoid corruption or loss of data.
Check network connections and power
Make sure the printer is connected to your computer through a USB cable, and that both the printer and the computerare turned on. You cannot print documents from a memory card or flash drive through a wireless network.Applications supporting the formats listed above must be on the connected computer.
132
Cannot print from digital camera using PictBridgeThese are possible solutions. Try one or more of the following:
Enable PictBridge printing from camera
Enable PictBridge printing on the camera by selecting the correct USB mode. If the camera USB selection is incorrect,the camera will be detected as a USB storage device, or an error message will be displayed on the control panel ofthe printer. For more information, see the digital camera documentation.
Make sure the camera is a PictBridge-enabled digital camera
1 Disconnect the camera.
2 Connect a PictBridge-enabled digital camera to the PictBridge port. See the digital camera documentation todetermine whether it is PictBridge-enabled.
Check USB cable
Use only the USB cable that came with the camera.
Remove memory cards
Remove any memory cards from the printer.
Check messages
If an error message appears on the display, see “Error messages on the computer screen” on page 153.
Printer cannot communicate with computers over peer-to-peer networkThese are possible solutions. Try one or more of the following:
Check the status of the host computer and printer
Make sure:
• The host computer is on and is directly connected to the printer.
• The host computer can print to the printer.
• The printer is shown as Shared in the Printers and Faxes folder (Windows XP and Windows 2000) or Printersfolder (Windows Vista) on the host computer.
Check the printer status
Windows Vista users:
1 Click:
• (default Start menu) Settings Printers.
• (Classic Start menu) Control Panel Printers.
2 Right-click the Lexmark 4800 Series icon.
3 Click Sharing.
4 Click Change Sharing Options, and confirm the Windows prompt.
5 Select Share this printer, and then give the printer a distinctive name.
6 Click OK.
133
Windows XP users:
1 Click Start Settings Printers and Faxes.
2 Right-click the Lexmark 4800 Series icon.
3 Click Sharing.
4 Select Share this printer, and then give the printer a distinctive name.
5 Click OK.
Windows 2000 users:
1 Click Start Settings Printers.
2 Right-click the Lexmark 4800 Series icon.
3 Click Sharing.
4 Select Shared as, and then give the printer a distinctive name.
5 Click OK.
Try to locate the printer from the remote computer
If the printer is shown as Shared on the host computer, but you still cannot print, try to locate the printer from theremote computer.
Windows 2000, Windows XP, or Windows Vista users:
1 Open the Printers or Printers and Faxes folder.
2 Right-click the Lexmark 4800 Series icon.
3 Click Properties.
4 Click the Ports tab, and then click the Add Port button.
5 Select Local Port, and then click the New Port button.
6 Type the Universal Naming Convention (UNC) Port name, which consists of the server name and the distinctiveprinter name.
The name should be in the form \\server\printer.
7 Click OK.
8 Click Close.
9 Make sure the new port has been selected on the Ports tab, and then click Apply.
The new port is listed with the printer name.
10 Click OK.
Restart the host computer and the remote computer
Try printing again.
Printer is not able to communicate with the computerThe printer and computer are not able to exchange data. Verify that the printer is plugged in, and the light is on.
134
Problems when copying, scanning, or faxingClose other software
Close all programs not being used.
Change the scanning resolution to a lower value
1 Load an original document facedown on the scanner glass.
2 From the desktop, double-click the Productivity Studio icon.
3 From the left pane of the Welcome screen, click Scan.
4 Click Custom Settings.
5 Select a lower scan resolution.
6 Click Start.
Is the original document loaded correctly on the scanner glass?• Make sure the original document is placed in the upper left corner of the scanner glass.
• Place the item you want to copy facedown on the scanner glass.
• Make sure the upper left corner of the front of the item lines up with the arrows in the corner of the scanner glass.
Wrong printer is attachedThe printer attached to the computer is not the correct printer. See the setup documentation for help attaching theprinter.
Updating the printer softwareThe printer software needs to be updated to run properly.
1 Start Windows.
2 When the desktop appears, insert the software CD for Windows.
The installation screen appears.
3 Click Install.
4 When the Existing Printer Driver Found dialog box appears, select Update the existing driver software.
Bidirectional communication is not establishedThe printer and computer may not be able to exchange data.
These are possible solutions. Try one or more of the following:
Check the USB connection
1 Check that the USB cable is connected to the computer. The USB port on the back of the computer is markedby the USB symbol. Plug the long, flat end of the USB cable into this port.
2 Make sure that the smaller, more square end of the USB cable is plugged into the back of the printer.
3 Check that the USB cable is not damaged and that the light is on.
135
Make sure the printer is receiving power
If the button is not lit, the printer may not be receiving power.
• Plug the printer into a different outlet.
• If the printer is plugged into a surge protector, unplug the printer, and plug it directly into an electrical outlet.
Make sure the external print server is working
If the printer is connected to an external print server, the problem may be with this print server. Check to make surethe device is working properly and that the printer is connected to the network.
Experiencing poor quality or incorrect outputSee the topic that best describes the problem.
• Print is too dark or smudged
• Vertical straight lines are not smooth
• White lines appear in graphics or solid black areas
• Characters are missing or unexpected
• Colors on printout are faded or differ from colors on the screen
• Printouts have alternating bands of light and dark print
• Page prints with different fonts
• Printed characters are improperly formed or are not aligned correctly at the left margin
• Transparencies or photos contain white lines
• Glossy photo paper or transparencies stick together
Checking the port setting
1 Click Start Settings Printers or Printers and Faxes.
2 Right-click the Lexmark 4800 Series icon.
3 From the sidebar menu, select Properties.
4 Click the Details tab if you are using Windows 98/Me, or click the Ports tab if you are using Windows 2000 orWindows XP.
5 Make sure:
• The port is set to a USB port.
• File is not set as the port.
Jams and misfeeds troubleshooting
How to clear and avoid paper jamsTo clear the paper path:
1 Pull firmly on the paper to remove it. If you cannot reach the paper because it is too far into the printer, lift thescanner unit to open the printer.
2 Pull the paper out.
3 Close the scanner unit.
136
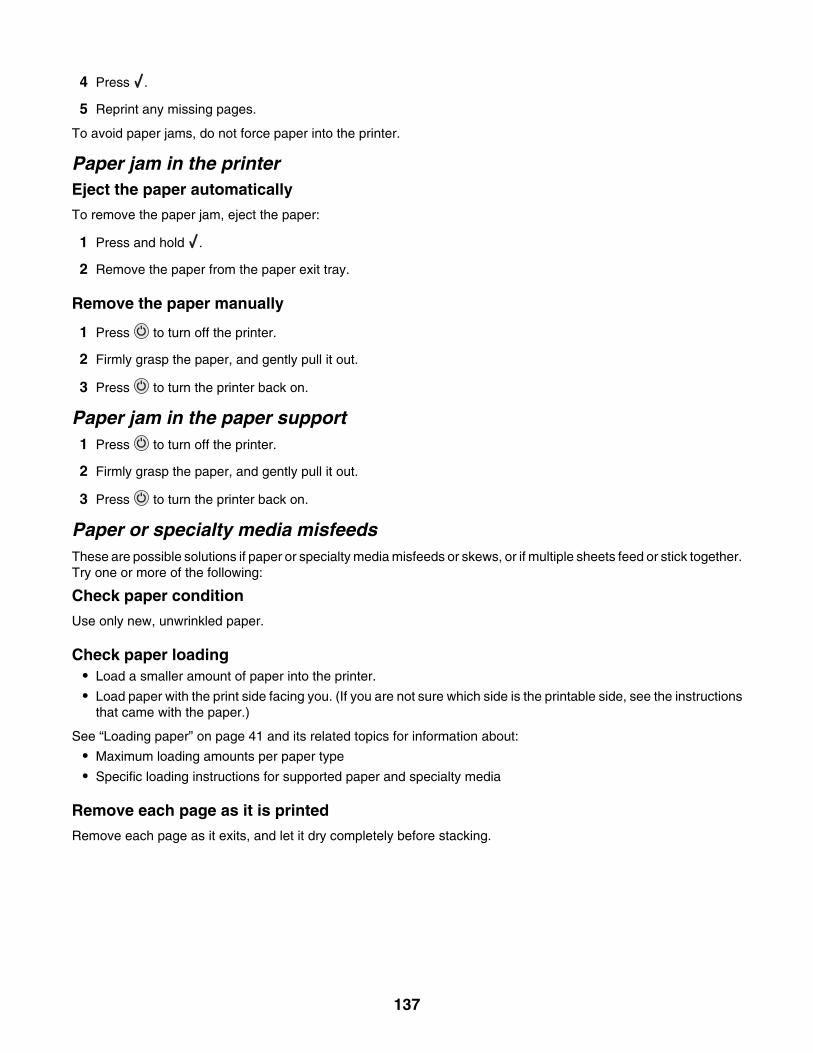
4 Press .
5 Reprint any missing pages.
To avoid paper jams, do not force paper into the printer.
Paper jam in the printerEject the paper automatically
To remove the paper jam, eject the paper:
1 Press and hold .
2 Remove the paper from the paper exit tray.
Remove the paper manually
1 Press to turn off the printer.
2 Firmly grasp the paper, and gently pull it out.
3 Press to turn the printer back on.
Paper jam in the paper support1 Press to turn off the printer.
2 Firmly grasp the paper, and gently pull it out.
3 Press to turn the printer back on.
Paper or specialty media misfeedsThese are possible solutions if paper or specialty media misfeeds or skews, or if multiple sheets feed or stick together.Try one or more of the following:
Check paper condition
Use only new, unwrinkled paper.
Check paper loading• Load a smaller amount of paper into the printer.
• Load paper with the print side facing you. (If you are not sure which side is the printable side, see the instructionsthat came with the paper.)
See “Loading paper” on page 41 and its related topics for information about:
• Maximum loading amounts per paper type
• Specific loading instructions for supported paper and specialty media
Remove each page as it is printed
Remove each page as it exits, and let it dry completely before stacking.
137
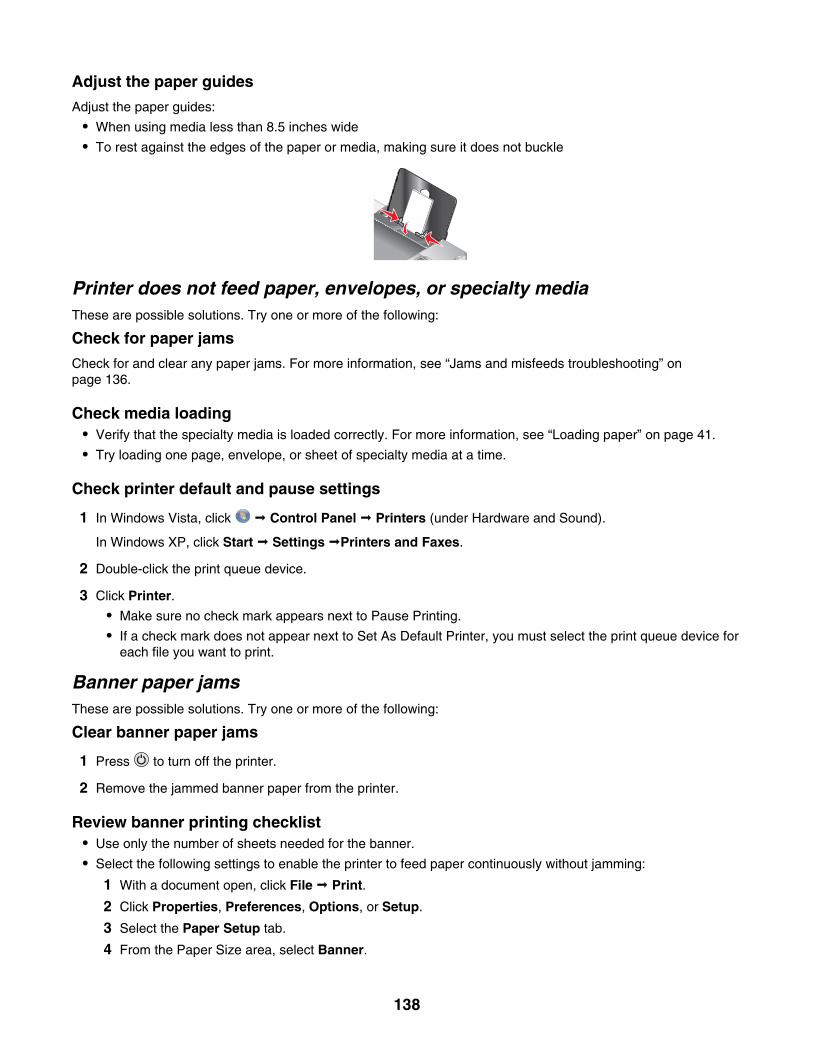
Adjust the paper guides
Adjust the paper guides:
• When using media less than 8.5 inches wide
• To rest against the edges of the paper or media, making sure it does not buckle
Printer does not feed paper, envelopes, or specialty mediaThese are possible solutions. Try one or more of the following:
Check for paper jams
Check for and clear any paper jams. For more information, see “Jams and misfeeds troubleshooting” onpage 136.
Check media loading• Verify that the specialty media is loaded correctly. For more information, see “Loading paper” on page 41.
• Try loading one page, envelope, or sheet of specialty media at a time.
Check printer default and pause settings
1 In Windows Vista, click Control Panel Printers (under Hardware and Sound).
In Windows XP, click Start Settings Printers and Faxes.
2 Double-click the print queue device.
3 Click Printer.
• Make sure no check mark appears next to Pause Printing.
• If a check mark does not appear next to Set As Default Printer, you must select the print queue device foreach file you want to print.
Banner paper jamsThese are possible solutions. Try one or more of the following:
Clear banner paper jams
1 Press to turn off the printer.
2 Remove the jammed banner paper from the printer.
Review banner printing checklist• Use only the number of sheets needed for the banner.
• Select the following settings to enable the printer to feed paper continuously without jamming:
1 With a document open, click File Print.
2 Click Properties, Preferences, Options, or Setup.
3 Select the Paper Setup tab.
4 From the Paper Size area, select Banner.
138
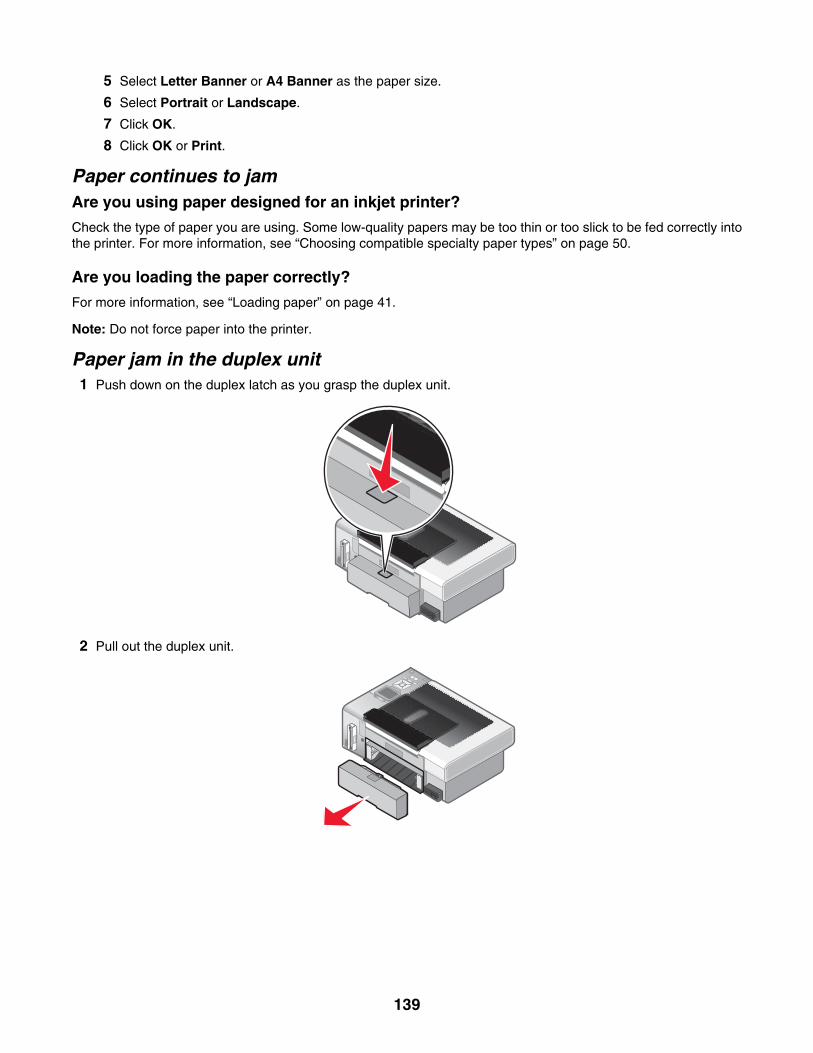
5 Select Letter Banner or A4 Banner as the paper size.
6 Select Portrait or Landscape.
7 Click OK.
8 Click OK or Print.
Paper continues to jamAre you using paper designed for an inkjet printer?
Check the type of paper you are using. Some low-quality papers may be too thin or too slick to be fed correctly intothe printer. For more information, see “Choosing compatible specialty paper types” on page 50.
Are you loading the paper correctly?
For more information, see “Loading paper” on page 41.
Note: Do not force paper into the printer.
Paper jam in the duplex unit1 Push down on the duplex latch as you grasp the duplex unit.
2 Pull out the duplex unit.
139
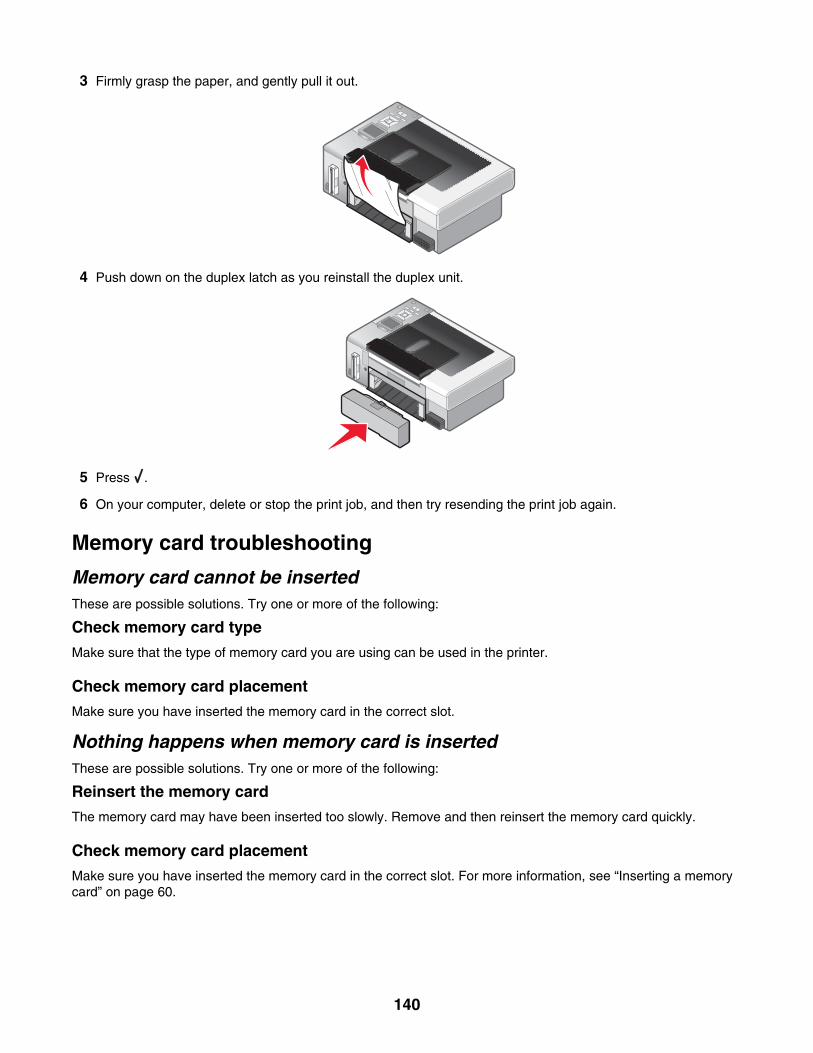
3 Firmly grasp the paper, and gently pull it out.
4 Push down on the duplex latch as you reinstall the duplex unit.
5 Press .
6 On your computer, delete or stop the print job, and then try resending the print job again.
Memory card troubleshooting
Memory card cannot be insertedThese are possible solutions. Try one or more of the following:
Check memory card type
Make sure that the type of memory card you are using can be used in the printer.
Check memory card placement
Make sure you have inserted the memory card in the correct slot.
Nothing happens when memory card is insertedThese are possible solutions. Try one or more of the following:
Reinsert the memory card
The memory card may have been inserted too slowly. Remove and then reinsert the memory card quickly.
Check memory card placement
Make sure you have inserted the memory card in the correct slot. For more information, see “Inserting a memorycard” on page 60.
140
Check memory card type
Make sure that the type of memory card you are using can be used in the printer. For more information, see “Insertinga memory card” on page 60.
Check to see if the memory card is damaged
Check that there is no obvious damage to the memory card.
Check to see if the memory card contains photos
Insert a memory card that contains photos.
Make sure the USB cable is connected
If the printer is connected to the computer through a USB cable:
1 Check the USB cable for any obvious damage.
2 Firmly plug the square end of the USB cable into the back of the printer.
3 Firmly plug the rectangular end of the USB cable into the USB port of the computer.
The USB port is marked with the USB symbol.
Check the network connection
If the printer and computer are connected over a network, make sure that the correct host and device arecommunicating. Select the printer from the computer or the computer from the printer.
Photos do not transfer from a memory card across a wireless networkThese are possible solutions. Try one or more of the following:
Select the printer on your wireless network
Windows users only
If you have more than one printer and use Windows, you must select your wireless network printer.
1 Do one of the following:
• In Windows Vista, click Control Panel Printers.
• In Windows XP and earlier, click Start Settings Printers and Faxes.
2 From the list shown, select the printer on your wireless network.
Note: To select the printer, right click the printer, and then select Set as Default Printer.
3 Insert the memory card in the printer.
4 From the control panel, press .
5 Press to choose Select Computer.
6 Press .
7 From the list shown, select the computer on your wireless network.
8 Follow the prompts on the computer screen. For more information, see the “Working with photos” chapter in theUser's Guide: Comprehensive Version.
141
Check memory card placement
Make sure you inserted the memory card into the correct slot.
Check memory card type
Make sure that the type of memory card you are using can be used in the printer.
Check to see if the memory card is damaged
Check to see that there is no obvious damage to the memory card. Remove memory cards properly from the printerto avoid corruption of data.
Check to see if the memory card contains photos
Insert a memory card that contains photos. The printer reads photos that are in the JPEG format. For moreinformation, see the documentation that came with your camera.
Check to see if your printer or the computer is turned on
Make sure that your printer and your computer are turned on. Make sure that Windows is open.
Check to see if your wireless connection is active
Make sure that your wireless network is connected and active.
Note: If your wireless connection is down, use your configuration cable to connect your printer to your computer.
Copy troubleshooting
Copier does not respondThese are possible solutions. Try one or more of the following:
Check messages
Resolve all error messages.
Check power
If the light is not on, make sure the printer is plugged into a properly grounded outlet. Make sure the power cordis properly connected to the printer.
Scanner unit does not close1 Lift the scanner unit.
2 Remove any obstruction keeping the scanner unit open.
3 Lower the scanner unit.
142
Poor copy quality
• Blank pages
• Checkerboard pattern
• Distorted graphics or pictures
• Missing characters
• Faded print
• Dark print
• Skewed lines
• Smudges
• Streaks
• Unexpected characters
• White lines in print
These are possible solutions. Try one or more of the following:
Check messages
If an error message is displayed, see “Error messages on the computer screen” on page 153.
Check ink
Check the ink levels, and install a new print cartridge if necessary.
Clean the scanner glass
If the scanner glass is dirty, gently wipe it with a clean, lint-free cloth dampened with water.
Review steps to improve print quality
See “Improving print quality” on page 118.
Adjust the brightness of the copy
1 Load the document facedown on the scanner glass.
2 From the control panel, press or repeatedly to choose Copy.
3 Press .
4 Press repeatedly to choose Lighter/Darker.
5 Press or repeatedly to lighten or darken the copy.
6 Press Start.
Check quality of original document
If the quality of the original document is not satisfactory, try using a clearer version of the document or image.
Are you scanning from photo or glossy paper, a magazine, or a newspaper?
If you are copying or scanning from photo or glossy paper, a magazine, or a newspaper, see “Removing wavypatterns from scanned photos, magazines, or newspapers” on page 70.
Check document placement
Make sure the document or photo is loaded facedown on the scanner glass in the lower right corner.
143
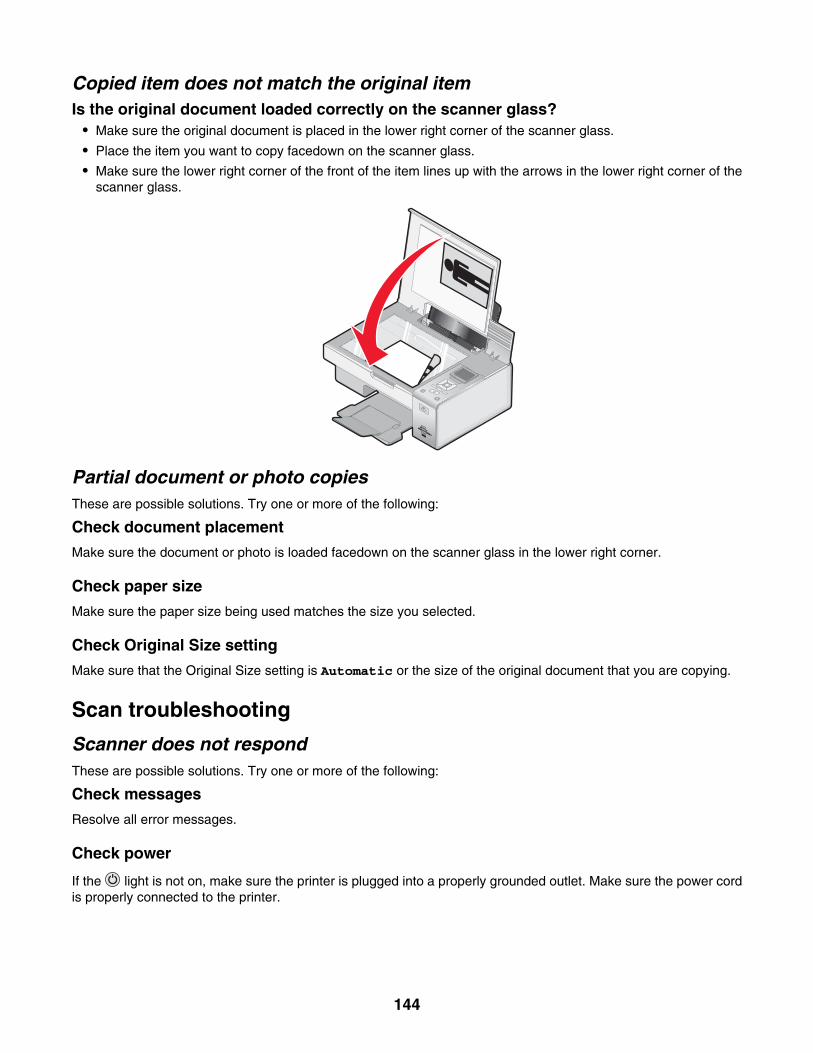
Copied item does not match the original itemIs the original document loaded correctly on the scanner glass?
• Make sure the original document is placed in the lower right corner of the scanner glass.
• Place the item you want to copy facedown on the scanner glass.
• Make sure the lower right corner of the front of the item lines up with the arrows in the lower right corner of thescanner glass.
W
FI
IPRINTING
Partial document or photo copiesThese are possible solutions. Try one or more of the following:
Check document placement
Make sure the document or photo is loaded facedown on the scanner glass in the lower right corner.
Check paper size
Make sure the paper size being used matches the size you selected.
Check Original Size setting
Make sure that the Original Size setting is Automatic or the size of the original document that you are copying.
Scan troubleshooting
Scanner does not respondThese are possible solutions. Try one or more of the following:
Check messages
Resolve all error messages.
Check power
If the light is not on, make sure the printer is plugged into a properly grounded outlet. Make sure the power cordis properly connected to the printer.
144
Check printer default and pause settings
1 Do one of the following:
• In Windows Vista, click Control Panel.
• In Windows XP, click Start.
2 Click Printer or Printers and Faxes.
3 Double-click the printer you want to check.
4 Click Printer.
5 Make sure no check mark appears next to Pause Printing. If a check mark appears next to Set As Default Printer,you must select the correct printer from a list each time you print.
Removing and reinstalling the software
For more information, see “Removing and reinstalling the software” on page 105.
Scan was not successfulThese are possible solutions. Try one or more of the following:
Check USB cable connection
1 Check the USB cable for any obvious damage.
2 Firmly plug the square end of the USB cable into the back of the printer.
3 Firmly plug the rectangular end of the USB cable into the USB port of the computer.
The USB port is marked with the USB symbol.
Restart computer
Turn off and then restart your computer.
Scanning takes too long or freezes the computerThese are possible solutions. Try one or more of the following:
Close other software
Close all programs not being used.
Change the scanning resolution to a lower value
1 Load an original document facedown on the scanner glass.
2 From the desktop, double-click the Productivity Studio icon.
3 From the Welcome Screen, click Scan.
4 Click Custom Settings.
5 From the Scan Resolution drop-down list, select a lower scan resolution.
6 Click Start.
145
Poor scanned image qualityThese are possible solutions. Try one or more of the following:
Check messages
If an error message is displayed, see “Error messages on the printer display” on page 147.
Clean the scanner glass
If the scanner glass is dirty, gently wipe it with a clean, lint-free cloth dampened with water.
Adjust the quality of the scan
1 Load an original document facedown on the scanner glass.
2 From the desktop, double-click the Productivity Studio icon.
3 From the Welcome screen, click Scan.
4 Click Custom Settings.
5 Select a higher scan resolution.
6 Click Start.
Review steps to improve print quality
See “Improving print quality” on page 118.
Are you scanning from photo or glossy paper, a magazine, or a newspaper?
If you are copying or scanning from photo or glossy paper, a magazine, or a newspaper, see “Removing wavypatterns from scanned photos, magazines, or newspapers” on page 70.
Check quality of original document
If the quality of the original document is not satisfactory, try using a clearer version of the document or image.
Check document placement
Make sure the document or photo is loaded facedown on the scanner glass in the lower right corner.
Partial document or photo scansThese are possible solutions. Try one or more of the following:
Check document placement
Make sure the document or photo is loaded facedown on the scanner glass in the lower right corner.
Check paper size
Make sure the paper size being used matches the size you selected.
Check Original Size setting
Make sure the Original Size setting is Auto Detect or the size of the original document you are scanning.
Cannot scan to a computer over a networkSee “Scanning to a computer over a network using the control panel” on page 89.
146
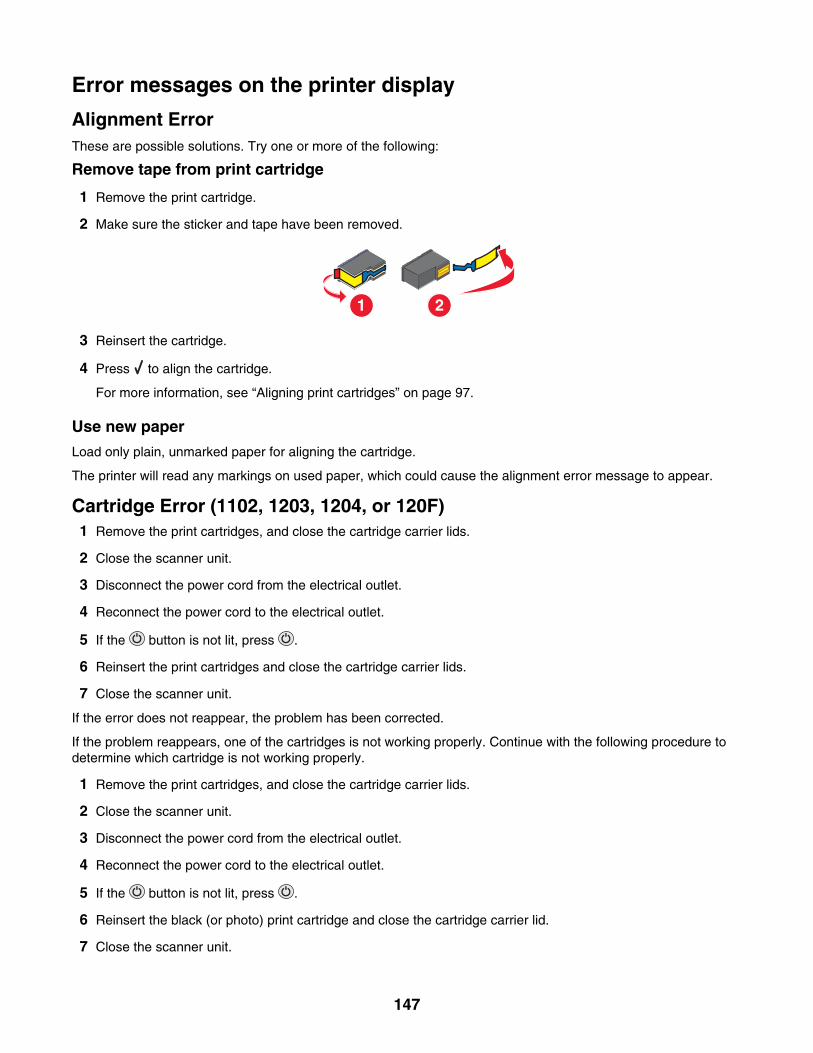
Error messages on the printer display
Alignment ErrorThese are possible solutions. Try one or more of the following:
Remove tape from print cartridge
1 Remove the print cartridge.
2 Make sure the sticker and tape have been removed.
1 2
3 Reinsert the cartridge.
4 Press to align the cartridge.
For more information, see “Aligning print cartridges” on page 97.
Use new paper
Load only plain, unmarked paper for aligning the cartridge.
The printer will read any markings on used paper, which could cause the alignment error message to appear.
Cartridge Error (1102, 1203, 1204, or 120F)1 Remove the print cartridges, and close the cartridge carrier lids.
2 Close the scanner unit.
3 Disconnect the power cord from the electrical outlet.
4 Reconnect the power cord to the electrical outlet.
5 If the button is not lit, press .
6 Reinsert the print cartridges and close the cartridge carrier lids.
7 Close the scanner unit.
If the error does not reappear, the problem has been corrected.
If the problem reappears, one of the cartridges is not working properly. Continue with the following procedure todetermine which cartridge is not working properly.
1 Remove the print cartridges, and close the cartridge carrier lids.
2 Close the scanner unit.
3 Disconnect the power cord from the electrical outlet.
4 Reconnect the power cord to the electrical outlet.
5 If the button is not lit, press .
6 Reinsert the black (or photo) print cartridge and close the cartridge carrier lid.
7 Close the scanner unit.
147
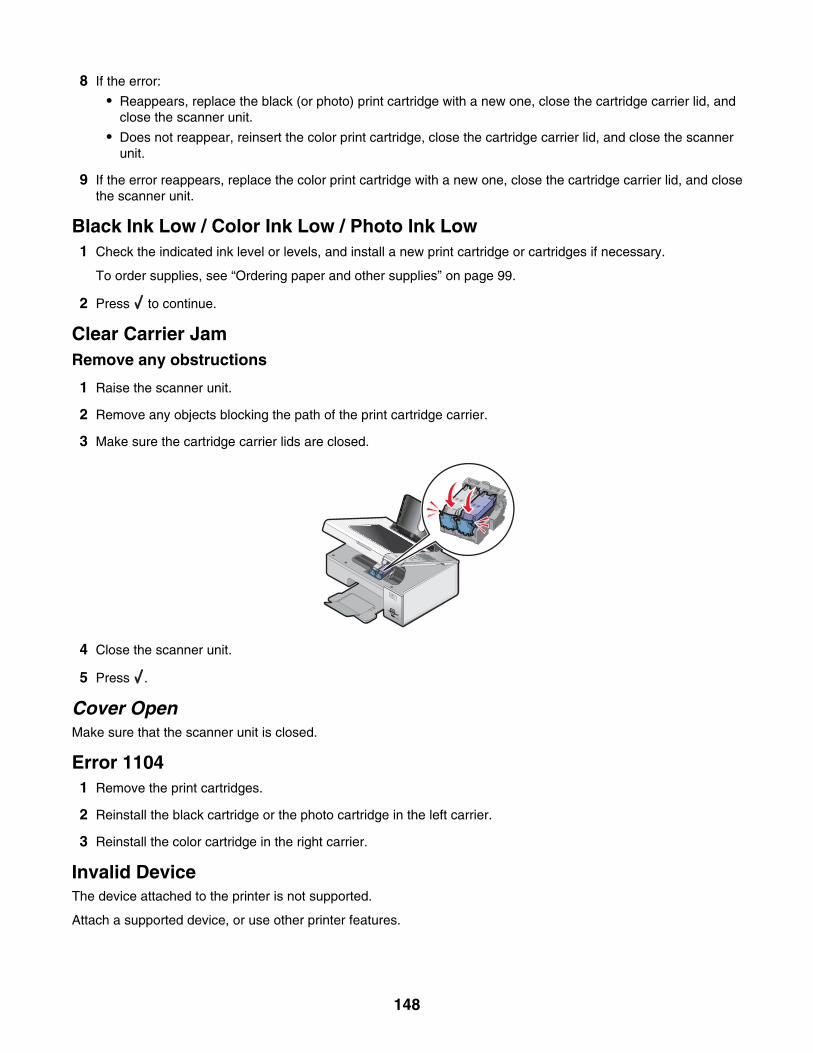
8 If the error:
• Reappears, replace the black (or photo) print cartridge with a new one, close the cartridge carrier lid, andclose the scanner unit.
• Does not reappear, reinsert the color print cartridge, close the cartridge carrier lid, and close the scannerunit.
9 If the error reappears, replace the color print cartridge with a new one, close the cartridge carrier lid, and closethe scanner unit.
Black Ink Low / Color Ink Low / Photo Ink Low1 Check the indicated ink level or levels, and install a new print cartridge or cartridges if necessary.
To order supplies, see “Ordering paper and other supplies” on page 99.
2 Press to continue.
Clear Carrier JamRemove any obstructions
1 Raise the scanner unit.
2 Remove any objects blocking the path of the print cartridge carrier.
3 Make sure the cartridge carrier lids are closed.
W
FI
IPRINTING
4 Close the scanner unit.
5 Press .
Cover OpenMake sure that the scanner unit is closed.
Error 11041 Remove the print cartridges.
2 Reinstall the black cartridge or the photo cartridge in the left carrier.
3 Reinstall the color cartridge in the right carrier.
Invalid DeviceThe device attached to the printer is not supported.
Attach a supported device, or use other printer features.
148

Left Cartridge Error / Right Cartridge ErrorThis message may also appear as Error 1205 (Left Cartridge) or Error 1206 (Right Cartridge).
1 Remove the indicated print cartridge and close the cartridge carrier lid.
2 Close the scanner unit.
3 Disconnect the power cord from the electrical outlet.
4 Reconnect the power cord to the electrical outlet.
5 If the button is not lit, press .
6 Reinsert the print cartridge and close the cartridge carrier lid.
7 Close the scanner unit.
8 If the error:
• Does not reappear, the problem has been corrected.
• Reappears, replace the print cartridge with a new one, close the cartridge carrier lid, and close the scannerunit.
Left Cartridge Incorrect / Right Cartridge Incorrect1 Remove the indicated print cartridge and close the cartridge carrier lid.
2 Close the scanner unit.
3 Disconnect the power cord from the electrical outlet.
4 Reconnect the power cord to the electrical outlet.
5 If the button is not lit, press .
6 Reinsert the print cartridge and close the cartridge carrier lid.
7 Close the scanner unit.
8 If the error:
• Does not reappear, the problem has been corrected.
• Reappears, replace the print cartridge with a new one, close the cartridge carrier lid, and close the scannerunit.
Left Cartridge Missing / Right Cartridge MissingOne or both print cartridges are missing or not installed properly. For more information, see “Installing print cartridges”on page 94.
Notes:
• You can make a color copy with only the color cartridge installed.
• You can print a black-and-white document with only the black cartridge installed.
• You cannot copy or print when only the photo cartridge is installed.
• To remove the error message, press .
149
Memory FailureThese are possible solutions. Try one or more of the following:
Reduce memory use
If applicable:
• Print pending received faxes.
• Send fewer pages.
Select the After Dial setting
1 From the desktop, double-click the Productivity Studio icon.
2 From the Welcome Screen, click Fax History and Settings.
3 Click Adjust speed dial list and other fax settings.
4 Click the Dialing and Sending tab.
5 From the “Sending options” area, select After Dial from the “When to scan document” section.
6 Click OK.
7 Resend the fax.
No images have been selectedYou have not selected any of the options on step 1 of the photo proof sheet you printed and scanned.
1 Make sure you completely fill in your selected circle or circles.
2 Press to continue.
No photo/paper size selection has been madeYou have not selected any of the options on step 2 of the photo proof sheet you printed and scanned.
1 Make sure you completely fill in your selected circle or circles.
2 Press to continue.
Could not detect a proof sheetThe document placed on the scanner glass is not a valid proof sheet. For more information, see “Printing photosstored on a memory device using the proof sheet” on page 74.
No proof sheet informationThe photo proof sheet you printed and scanned is no longer valid.
You may have removed the memory card or flash drive from the printer, or turned off the printer, before scanningthe photo proof sheet.
For more information, see “Printing photos stored on a memory device using the proof sheet” on page 74.
No valid photo image files detectedNo supported images have been found on the memory card or flash drive.
The printer supports Baseline JPEG files (including Exif) ending with the extensions JPEG, JPE, and JPG.
150
The following TIFF formats as read from a camera card or USB flash drive are supported:
• RGB uncompressed data: Baseline TIFF Rev. 6.0 RGB Full Color Images
• YCbCr uncompressed data: TIFF Rev. 6.0 Extensions YCbCr Images
Only TIFF files created directly from digital cameras and not modified by computer software are supported.
Only one photo enhancement may be chosen at a timeYou have selected more than one option on step 2 of the photo proof sheet you printed and scanned.
1 Make sure you completely fill in only one circle for each option.
2 Press to continue.
Only one photo/size selection can be chosen at a timeYou have selected more than one option on step 2 of the photo proof sheet you printed and scanned.
1 Make sure you completely fill in only one circle for each option.
2 Press to continue.
Paper MismatchThe size of the paper loaded in the printer is not supported by the current mode.
1 Load the correct paper.
2 Press .
Paper JamFor more information, see “Jams and misfeeds troubleshooting” on page 136.
Paper Out1 Load paper.
2 Press .
Paper or Photo Size errorOne or more photos selected for printing have a size that does not match the size of the paper loaded in the printer.
Change the photo size to match the size of the paper loaded in the printer, or change the paper size to match thephoto size.
Paper Size/Type errorThe paper loaded in the printer is not supported for duplex printing.
Load plain letter- or A4-size paper.
Photo size error. Photo must fit on page.There are one or more photos larger than the paper size you selected on the printer menu.
1 Press to clear the error message.
2 Press or repeatedly until Paper Size appears on the display.
3 Press .
151
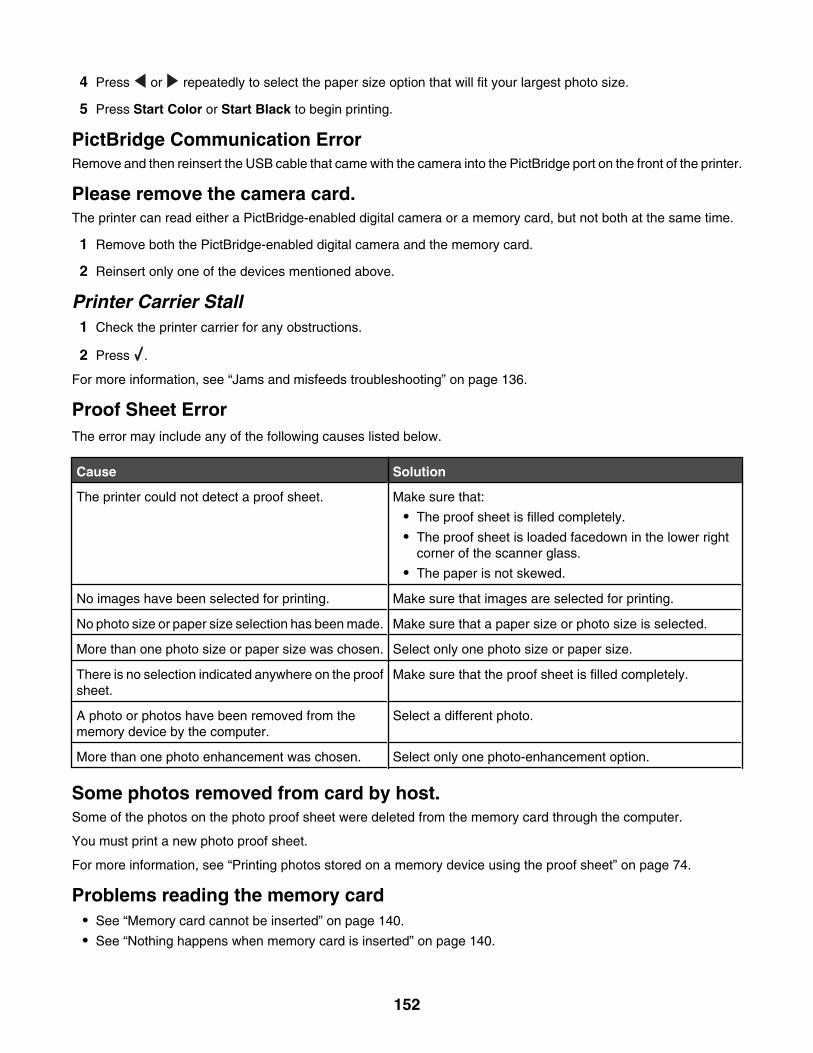
4 Press or repeatedly to select the paper size option that will fit your largest photo size.
5 Press Start Color or Start Black to begin printing.
PictBridge Communication ErrorRemove and then reinsert the USB cable that came with the camera into the PictBridge port on the front of the printer.
Please remove the camera card.The printer can read either a PictBridge-enabled digital camera or a memory card, but not both at the same time.
1 Remove both the PictBridge-enabled digital camera and the memory card.
2 Reinsert only one of the devices mentioned above.
Printer Carrier Stall1 Check the printer carrier for any obstructions.
2 Press .
For more information, see “Jams and misfeeds troubleshooting” on page 136.
Proof Sheet ErrorThe error may include any of the following causes listed below.
Cause Solution
The printer could not detect a proof sheet. Make sure that:
• The proof sheet is filled completely.
• The proof sheet is loaded facedown in the lower rightcorner of the scanner glass.
• The paper is not skewed.
No images have been selected for printing. Make sure that images are selected for printing.
No photo size or paper size selection has been made. Make sure that a paper size or photo size is selected.
More than one photo size or paper size was chosen. Select only one photo size or paper size.
There is no selection indicated anywhere on the proofsheet.
Make sure that the proof sheet is filled completely.
A photo or photos have been removed from thememory device by the computer.
Select a different photo.
More than one photo enhancement was chosen. Select only one photo-enhancement option.
Some photos removed from card by host.Some of the photos on the photo proof sheet were deleted from the memory card through the computer.
You must print a new photo proof sheet.
For more information, see “Printing photos stored on a memory device using the proof sheet” on page 74.
Problems reading the memory card• See “Memory card cannot be inserted” on page 140.
• See “Nothing happens when memory card is inserted” on page 140.
152
Two-sided paper type errorYou have not selected the correct paper type or size for duplex printing.
1 Select .
2 Press to choose Paper Handling.
3 Press to choose Type or Size.
4 Press or to choose the correct selection.
Note: Use only plain paper in letter or A4 size. The printer will not make duplex copies on envelopes, card stock, orphoto paper.
Two-sided printing is not supported on the current paper sizeThe paper size is not supported for duplex printing.
1 Select .
2 Press to choose Paper Handling.
3 Press to choose Size.
4 Press or to choose the correct paper size.
Note: The printer supports duplex printing only on Letter and A4.
Two-sided printing is not supported on the current paper typeThe paper type is not supported for duplex printing.
1 Select .
2 Press to choose Paper Handling.
3 Press to choose Type.
4 Press or to choose the correct paper type.
Note: The printer supports duplex printing only on plain paper.
Error messages on the computer screen
Clearing error messages
1 Correct the error condition explained in the error message. Click Help on the error message dialog box forspecific instructions.
2 After correcting the error condition, click Continue to resume printing.
If the error remains, but you want to clear the error message:
1 Click Cancel Printing. The error message closes, and the Canceling Printing dialog box appears.
2 Follow the instructions on the Canceling Printing dialog box.
153
Left/Right Cartridge Missing
?
This message indicates that one of the necessary cartridges is missing. You need to install a print cartridge.
Communication not availableThe printer and computer may not be able to exchange data.
Is the printer receiving power?
If is not lit, the printer may not be receiving power.
• Plug the printer into a different outlet.
• If the printer is plugged into a surge protector, unplug the printer, and plug it directly into an electrical outlet.
Is there a problem with the connections?
If the printer is connected to an external device, the problem may be with the device. Check the setup informationthat came with the device to make sure it is properly installed.
If printing using a USB cable, make sure the cable is securely attached to both the printer and the computer.
Before you print, you may need to restart the computer.
General Printing ProblemYou cannot receive a more specific error message because the printer and the computer do not have bidirectionalcommunication.
To receive a more specific error message, see “Bidirectional communication is not established” on page 135.
To find the problem without establishing bidirectional communication, see “Checking printer readiness” onpage 127.
Ink LowA print cartridge is almost out of ink.
Install a new cartridge. For more information, see “Installing print cartridges” on page 94.
To order a new cartridge, see “Ordering supplies” on page 99.
Out of MemoryThe printer software cannot obtain enough memory to print.
154
Try the following:
• Before sending a document to print, close any other open programs. The printer may print a blank page whentoo many programs are open on the computer.
• Follow the instructions on the error screen. These instructions reduce the amount of memory needed to print.
Out of Paper1 Load paper.
2 Press to continue printing.
Note: Do not force paper into the printer.
Fixing a printing failureFollow the instructions on the computer screen.
If the printer still does not print:
1 Do one of the following:
• In Windows Vista, click .
• In Windows XP and earlier, click Start.
2 Click Programs or All Programs Lexmark 4800 Series.
3 Click Solution Center, and then click the Contact Information tab.
Paper JamThe printer has a paper jam, and you must clear the paper path.
Note: To avoid paper jams, do not force paper into the printer.
Multiple All-In-Ones foundMultiple Lexmark printers, attached either locally or over a network, have been detected on your computer. You canchoose which printer you want to use:
1 Select the printer from the list.
2 Click OK.
Print File ErrorTo use the Print Files function, your printer must be connected to a computer, and both the printer and computermust be on.
The error may include any of the following causes listed below.
Cause Solution
The printer failed to find an application or software onthe computer to print the file or files stored on thememory device.
Make sure you have software installed on your computerthat can open files with the desired file extensions.
The printer failed to retrieve the file or files stored onthe memory device.
Make sure that:
• The memory device has not been removed.
• The memory card or flash drive is not damaged orcorrupted.
155
Networking glossary
ad hoc mode A setting for a wireless device that lets it communicate directly with other wirelessdevices without an access point or router
ad hoc network A wireless network that does not use an access point
AutoIP address An IP address automatically assigned by a network device. If the device is set to useDHCP, but no DHCP server is available, an AutoIP address may be assigned by thedevice.
BSS (Basic Service Set) Basic Service Set describes the type of wireless network that you are using. The BSStype can be one of the following: Infrastructure network or Ad-Hoc network.
channel A specific radio frequency used by two or more wireless devices to communicate witheach other. All devices on the network must use the same channel.
DHCP (Dynamic Host ConfigurationProtocol)
A language used by DHCP servers
DHCP IP address An IP address automatically assigned by a DHCP server
DHCP server A computer or router that gives a unique IP address to each device on the network.Unique addresses prevent conflicts.
infrastructure mode A setting for a wireless device that lets it communicate directly with other wirelessdevices using an access point or router
installation cable Connects the printer to the computer temporarily during some methods of installation.
internal wireless print server A device that lets computers and printers talk to each other over a network without cables
IP (Internet Protocol) address The network address of a computer or printer. Each device on the network has its ownnetwork address. The address may be assigned manually by you (Static IP address),automatically by the DHCP server (DHCP IP address), or automatically by the device(AutoIP address).
ipconfig A command that displays the IP address and other network information of a Windowscomputer
MAC (Media Access Control) address A hardware address that uniquely identifies each device on a network. You can usuallyfind the MAC address printed on the device.
MAC filtering A method of limiting access to your wireless network by specifying which MAC addressesmay communicate on the network. This setting may be specified on wireless routers oraccess points.
network adapter/card A device that lets computers or printers talk to each other over a network
network hub A device that connects multiple devices on a wired network
network name See “SSID (Service Set Identifier)” on page 166
ping A test to see if your computer can communicate with another device
printer nickname The name you assign to your printer so that you and others can identify it on the network
router A device that shares a single Internet connection with multiple computers or otherdevices. The basic router controls network traffic.
security key A password, such as a WEP key or a WPA pass phrase, used to make a network secure
signal strength Measure of how strongly a transmitted signal is being received
SSID (Service Set Identifier) The name of a wireless network. When you connect a printer to a wireless network, theprinter needs to use the same SSID as the network. Also referred to as network nameor BSS (Basic Service Set).
Static IP address An IP address assigned manually by you
switch A device similar to a network hub that can connect different networks together
166
UAA (Universally Administered Address) An address assigned to a network printer or print server by the manufacturer. To findthe UAA, print a network setup page and look for the UAA listing.
USB cable A lightweight, flexible cable that lets the printer communicate with the computer at muchhigher speeds than parallel cables
USB port A small, rectangular port on the back of the computer that connects the peripheraldevices using a USB cable, and lets them communicate at high speeds
WEP (Wired Equivalent Privacy) A security setting that helps prevent unauthorized access to a wireless network. Otherpossible security settings are WPA and WPA2.
wireless access point A device that connects wireless devices together to form a wireless network
wireless router A router that also serves as a wireless access point
Wi-Fi An industry term that describes the technology used to create an interoperable wirelesslocal area network (WLAN).
WPA (Wi-Fi Protected Access) A security setting that helps prevent unauthorized access to a wireless network. WPAis not supported on ad hoc wireless networks. Other possible security settings are WEPand WPA2.
WPA2 A newer version of WPA. Older routers are less likely to support this. Other possiblesecurity settings are WPA and WEP.
167
Index
Aad hoc wireless network
adding a printer usingWindows 40creating using Windows 39
adjusting brightnessautomatically 68, 70adjusting the hue of a photo 69adjusting the saturation of aphoto 69Advanced button 25aligning print cartridges 97alignment error 147assigning IP address 36
Bbanner paper jams 138banner paper, loading 43banner printing problems
checking spool settings 128banner, printing 53bidirectional communication,establishing 135black ink low 148blank or incorrect page prints 122blurring photo 68booklet, assembling 52booklets
printing 52box contents 15Brightness
automatic adjustment 68, 70Brightness / Contrast setting
changing 70buttons, control panel
Back arrow 26Cancel 26Down arrow 26Left arrow 26Menu 26Power 26Right arrow 26Select 26Start 26Two-sided 26Up arrow 26
buttons, Productivity Studio Copy 23E-mail 23Fax 23Photo Greeting Cards 23
Photo Packages 23Poster 23Scan 23Transfer Photos 23using 23
buttons, Solution Center Advanced 25How To 25Maintenance 25Troubleshooting 25using 25
Ccable connections
checking 129, 131camera
connecting 59canceling
scan job 87canceling print jobs 48cannot print from a flash drive 132cannot print from digital camerausing PictBridge 133cannot scan to computer overnetwork 146cards
loading 42memory card 60printing 50
carrier jam error 148cartridge error 147cartridge missing error 154cartridges, print
aligning 97cleaning 97installing 94ordering 99preserving 98removing 96using genuine Lexmark 96wiping 97
CD printing photos from 71transferring all photos usingcomputer 64transferring selected photos usingthe computer 64
Change Printer Default Settingssubmenu 56changing
temporary files preferences 65
changing default settings copy 82scan 90
changing e-mail screenpreferences 92changing gamma value of a photoor image 69changing library preferences 66Changing photo resolution/size 67changing scan settings 90changing searched folderspreferences 65changing temporary filespreferences 65changing transfer settings 66changing wireless settings afterinstallation 116characters on printout are missingor unexpected 123check printer ports (Windows) 117checking external devices 130checking printer readiness 127checking your network name(Windows) 115cleaning
exterior of the printer 99cleaning print cartridge nozzles 97collating copies 80color effects
applying 70color ink low 148colors on paper do not match colorson the screen 123communication not availableerror 154communication problems
establishing bidirectionalcommunication 135
connecting cables 129, 131contents, box 15control panel 16
Copy Mode menu 83navigating menus 27Photo Card Mode menu 58PictBridge menu 62Print Files Mode menu 48saving settings 28Scan menu 88using 26
copied item does not matchoriginal 144
168
copier does not respond 142copy
making 77Copy button 23copy quality, adjusting 79copy troubleshooting
copier does not respond 142partial document or photocopies 144poor copy quality 143scanner unit does not close 142
copying 77adjusting quality 79changing default settings 82cloning an image 81collating copies 80customizing settings 83enlarging an image 78in black and white 83in color 83making a color or black-and-whitecopy 77making a copy lighter ordarker 79multiple pages on one sheet 82N-up 82on both sides of paper 81photos 77reducing an image 78repeating an image 81
copying a photo 78could not detect a proof sheet 150cover open 148creating and viewing slideshow 75cropping
photo 66customizing settings
copy 83scan 88
custom-size paper, loading 43custom-size paper, printing 52
Ddefault settings
saving 28shown with asterisk 28using 28
defaults resetting printer software to factorydefaults 56resetting printer to factorydefaults 57Scan menu 88
defaults, change Photo Card Mode menu 58
Print Files Mode menu 48descreening 70Despeckle
change setting 69digital camera
printing photos using thecomputer 71
documents attaching to e-mail 92e-mailing 92faxing using the software 93loading on scanner glass 44making color or black-and-whitescan 86printing 45scanning images for editing 85scanning text for editing 85scanning using the computer 84scanning using the controlpanel 84
duplex unit 17does not operate correctly 131
duplexing automatically 54manually 55understanding 54
duplexing copies 81
Eediting
document text (OCR) 85photos using control panel 66scanned images 85
emissionnotices 157, 158, 159, 160Enhancements tab
blur 68enhance 69hue 69saturation 69selecting color effect 70sharpen 68
enhancing photo 69enlarging an image 78envelopes
loading 41printing 50
error 1104 148error 1205 149error 1206 149error messages
alignment error 147black ink low 148cartridge error 147cartridge missing 154
clear carrier jam 148clearing 153color ink low 148communication not available 154could not detect a proofsheet 150error 1104 148error 1205 149error 1206 149general printing problem 154ink low 154Invalid Device 148left cartridge error 149left cartridge incorrect 149left cartridge missing 149memory full 150no images have beenselected 150no photo/paper size selection hasbeen made 150no proof sheet information 150no valid photo image filesdetected 150only one photo enhancement maybe chosen at a time 151only one photo/size selection canbe chosen at a time 151out of memory 154out of paper 155paper jam 155paper or photo size error 151paper out 151photo ink low 148photo size error 151PictBridge communicationerror 152please remove the cameracard 152printing failure 155problem reading memorycard 152proof sheet error 152right cartridge error 149right cartridge incorrect 149right cartridge missing 149some photos removed from cardby host 152two-sided paper type error 153two-sided printing not supportedon current paper size 153two-sided printing not supportedon current paper type 153
error messages troubleshooting cover open error 148paper jam 151
169
paper mismatch 151paper size/type error 151print file error 155printer carrier stall 152
Exposure changing setting 70
exterior of the printer cleaning 99
external devices checking 130
e-mail attaching a scanned image 91attaching files 91
E-mail button 23e-mail screen preferences
changing 92e-mailing an image 92
Ffactory default settings
resetting internal wireless printserver 117resetting printer software 56resetting printer to 57
faded colors 123fax
receiving automatically 93Fax button 23faxing
using the software 93FCC notices 157files
attaching to e-mail message 91finding
information 11publications 11Web site 11
flash drive inserting 60printing documents from 49printing files from 49printing photos using thecomputer 71printing photos using the proofsheet 74transferring all photos usingcomputer 64transferring selected photos usingthe computer 64
fonts resolving problems 128
Ggamma value
changing 69
general printing problem error 154getting a document to print 132glossy paper, loading 41glossy photo paper ortransparencies stick together 124greeting cards
loading 42printing 50
Hheavyweight matte paper,loading 41How To button 25
Iimage, changing gamma value 69images
e-mailing 92incorrect language appears ondisplay 101index cards
loading 42printing 50
information, finding 11ink levels seem incorrect 122ink levels seem to go downquickly 122ink low error 154inserting
flash drives 60memory cards 60
installing network printer 36print cartridges 94printer on a network 36printer software 29, 105software and sharing printer onnetwork 36
internal wireless print server resetting to factory defaultsettings 117
Invalid Device 148IP address, assigning 36iron-on transfers, loading 43iron-on transfers, printing 53
Jjams and misfeeds troubleshooting
banner paper jams 138paper jam in the duplex unit 139paper jam in the papersupport 137paper jam in the printer 137paper or specialty mediamisfeeds 137
printer does not feed paper,envelopes, or specialtymedia 138
Llabels, loading 42language
changing 101last page first 47left cartridge error 149left cartridge incorrect 149left cartridge missing 149Lexmark Productivity Studio
creating and viewingslideshow 75
library preferences changing 66
loading banner paper 43custom-size paper 43documents on the scannerglass 44envelopes 41glossy paper 41greeting cards 42heavyweight matte paper 41index cards 42iron-on transfers 43labels 42paper 41photo cards 42photo paper 41photos on the scanner glass 44postcards 42transparencies 43
MMAC address 33magazine articles, loading on thescanner glass 44Maintenance button 25memory card
inserting 60printing documents from 49printing files from 49printing photos using thecomputer 71printing photos using the proofsheet 74transferring all photos using thecomputer 63transferring selected photos usingthe computer 63
memory card cannot beinserted 140
170
memory card slots 16memory card troubleshooting
memory card cannot beinserted 140nothing happens when memorycard is inserted 140
memory full error message 150moire patterns, removing fromscanned images 70
Nnetwork adapters
using 38network printer
installing 36network printer does not show up inprinter selection list duringinstallation (Windows) 112network printers
configuring 37network scanning 89network setup page, printing 34networking
installing printer 36IP addresses 35using the peer-to-peermethod 37using the point-and-printmethod 37
newspapers, loading on thescanner glass 44no images selected error 150no photo/paper size error 150no proof sheet informationerror 150no valid photo image filesdetected 150noise emission levels 160nothing happens when memorycard is inserted 140notices 157, 158, 159, 160, 161N-up copies 82N-up feature 47
OOCR, editing document text 85One-Click Auto Fix 68only one photo enhancement maybe chosen at a time 151only one photo/size selection canbe chosen at a time 151ordering paper and othersupplies 99out of memory error 154out of paper error 155
Ppage does not print 103page prints with different fonts 124paper
choosing specialty 50paper and other supplies
ordering 99paper continues to jam 139paper exit tray 16paper feed guard 16paper guide 16Paper Handling submenu 44paper jam 151paper jam error 155paper jam in the duplex unit 139paper jam in the papersupport 137paper jam in the printer 137paper mismatch 151paper or photo size error 151paper or specialty mediamisfeeds 137paper out error 151paper size/type error 151paper support 16paper type
choosing automatically 41paper, loading 41partial 4x6in. (10x15cm) photoprints when using PictBridge 117partial document or photocopies 144partial document or photoprints 121partial document or photoscans 146parts
control panel 16duplex unit 17memory card slots 16paper exit tray 16paper feed guard 16paper guide 16paper support 16PictBridge port 16power supply port 17print cartridge carrier 17scanner glass 16scanner unit 17top cover 16USB port 17Wi-Fi indicator 16
pausing print jobs 48PDF
creating from a scan 87
peer-to-peer method 37photo
adjusting hue 69adjusting saturation 69applying color effect 70blurring 68cropping 66enhancing 69sharpening 68
Photo Card Mode menu 58photo cards, loading 42Photo Greeting Cards button 23photo ink low 148Photo Packages 72Photo Packages button 23photo paper, loading 41Photo resolution/size
changing 67photo scratches 121photo size error 151photo smudges 121photo, changing gamma value 69photos
automatic red-eye reduction 68copying 78copying photos 77editing using control panel 66loading on the scanner glass 44printing a photo or selectedphotos 73printing all 74printing from a Web page 46printing from CD using thecomputer 71printing from digital camera usingDPOF 75printing from digital camera usingthe computer 71printing from removable storagedevice using the computer 71printing using the proof sheet 74red-eye reduction 68rotating 67scanning multiple photos at onetime using computer 86scanning to Work with Documentsand Photos 85scratches, preventing 121smudges, preventing 121transferring all photos from CD orflash drive using computer 64transferring all photos frommemory card using thecomputer 63
171

transferring from memory card toflash drive 65transferring from memory deviceusing control panel 62transferring selected photos fromCD or flash drive using thecomputer 64transferring selected photos frommemory card using thecomputer 63viewing a slideshow on controlpanel display 73
photos do not print from memorycard across wireless network 141photos removed from card byhost 152PictBridge communicationerror 152PictBridge menu 62PictBridge port 16PictBridge-enabled camera,connecting 59ping the printer (Windows) 116ping the wireless access point(Windows) 115please remove the cameracard 152point-and-print method 37poor copy quality 143poor quality at the edges of thepage 120poor scanned image quality 146poor text and graphic quality 119port setting
checking 136postcards
loading 42printing 50
poster 51Poster button 23posters, printing 51power button is not lit 101power supply port 17preferences, e-mail screen
changing 92preferences, library
changing 66preferences, searched folders
changing 65preferences, temporary files
changing 65previewing jobs 28print cartridge
checking 122print cartridge carrier 17
print cartridge nozzles,cleaning 97print cartridges
aligning 97cleaning 97installing 94ordering 99preserving 98refilling 96removing 96using genuine Lexmark 96wiping 97
print file error 155Print Files Mode menu 48print is dark or smudged 124print jobs
canceling 48print settings
saving and deleting 55print speed is slow 121print troubleshooting
cannot print from a flashdrive 132duplex unit does not operatecorrectly 131improving print quality 118ink levels seem incorrect 122ink levels seem to go downquickly 122partial 4x6in. (10x15cm) photoprints when using PictBridge 117partial document or photoprints 121photo scratches 121photo smudges 121poor quality at the edges of thepage 120poor text and graphic quality 119print speed is slow 121
printed characters are improperlyformed or not aligned 125printer
no communication 134sharing 34sharing in Windows 34
printer cannot communicate overpeer-to-peer network 133printer cannot connect to wirelessnetwork 113printer carrier stall 152printer does not feed paper,envelopes, or specialty media 138printer plugged in but does notprint 131
printer software installing 29reinstalling 105removing 105updating 135
printer status checking 127
printing a photo or selected photos 73all photos 74banner 53booklets 52cards 50collate 47custom-size paper 52document 45documents from memory card orflash drive 49envelopes 50files from memory card or flashdrive 49greeting cards 50index cards 50iron-on transfers 53last page first 47multiple pages on one sheet 47network setup page 34on both sides of the paper 54, 55Photo Packages 72photos from CD using thecomputer 71photos from digital camera usingDPOF 75photos from digital camera usingthe computer 71photos from ProductivityStudio 71photos from removable storagedevice using the computer 71photos from the ProductivityStudio 71photos using the proof sheet 74postcards 50poster 51posters 51reverse page order 47test page 129transparencies 53two-sided 54, 55Web page 45Web page, photos only 46
printing failure error 155printouts have alternating bands oflight and dark print 125
172
problem reading memory carderror 152problems when copying, scanning,or faxing 135Productivity Studio
printing photos 71viewing photos 71
Productivity Studio buttons Copy 23E-mail 23Fax 23Photo Greeting Cards 23Photo Packages 23Scan 23Transfer Photos 23understanding 23
Productivity Studio,understanding 23proof sheet error 152proof sheet, using 74publications, finding 11
Qquality settings, checking 129Quick Fixes tab
using One-Click Auto Fix 68
Rready or busy printing is listed asstatus 129receiving a fax
automatically 93recycling
WEEE statement 160reducing an image 78red-eye
automatic reduction 68manual reduction 68
refilling print cartridges 96removing an external device 131removing print cartridges 96repeating an image 81reverse page order 47right cartridge error 149right cartridge incorrect 149right cartridge missing 149rotating photo 67run the Wireless Setup Utility(Windows) 116
Ssafety information 2saving a scanned image 89saving and deleting printsettings 55
Scan menu 88
scan and edit text 85Scan button 23Scan Enhancements tab
Brightness / Contrast 70Brightness / Contrast setting 70Despeckle setting 69Exposure setting 70
scan settings changing 90
scan troubleshooting cannot scan to computer overnetwork 146partial document or photoscans 146poor scanned image quality 146scan was not successful 145scanner does not respond 144scanning takes too long or freezesthe computer 145
scan was not successful 145scanned image
attaching to e-mail message 91scanned images
saving 89scanner does not respond 144scanner glass 16
cleaning 99loading documents 44
scanner unit 17scanner unit does not close 142scanning
canceling a scan 87changing default settings 90creating a PDF from a scan 87customizing settings 88customizing settings usingcomputer 87editing images 85editing text 85from magazines andnewspapers 70making color or black-and-whitescan 86multiple photos at one time usingcomputer 86over a network 89photo to Work with Documentsand Photos 85removing wavy (moire)patterns 70to computer 89using the computer 84using the control panel 84
scanning takes too long or freezesthe computer 145scratching, preventing inphotos 121searched folders preferences
changing 65security information 30security keys 106settings are not saved 127settings, saving 28Setup menu
Change Printer Default Settingssubmenu 56Paper Handling submenu 44
setup troubleshooting cannot print from digital camerausing PictBridge 133incorrect language appears ondisplay 101page does not print 103power button is not lit 101software does not install 102
shared printing peer-to-peer method 36point-and-print method 36
sharing printer in Windows 34sharpening photo 68slideshow
creating and viewing 75viewing photos on control paneldisplay 73
smudging, preventing inphotos 121software
Productivity Studio 23removing and reinstalling 105Solution Center 25
software does not install 102software settings, printer
resetting to factory defaults 56Solution Center
understanding 25Solution Center buttons
Advanced 25How To 25Maintenance 25Troubleshooting 25understanding 25
solving printer communicationproblems 106speed settings, checking 129
Ttest page
printing 129
173
test page does not print 130Toolbar
printing a Web page 45printing only the photos from aWeb page 46
top cover 16Transfer Photos button 23transfer settings
changing 66transferring photos
from CD using computer 64from CD using the computer 64from flash drive usingcomputer 64from flash drive using thecomputer 64from memory card to flashdrive 65from memory card using thecomputer 63from memory device using controlpanel 62
transparencies loading 43printing 53
transparencies or photos containwhite lines 125troubleshooting
blank or incorrect pageprints 122cartridge missing error 154characters on printout are missingor unexpected 123checking port setting 136checking printer status 127checking quality/speedsettings 129colors on paper do not matchcolors on the screen 123communication not availableerror 154copied item does not matchoriginal 144establishing bidirectionalcommunication 135external devices, checking 130faded colors 123font selections 123general printing problemerror 154getting document to print 132glossy photo paper ortransparencies sticktogether 124ink low error 154
out of memory error 154out of paper error 155page prints with differentfonts 124paper continues to jam 139paper jam error 155port setting 136print is dark or smudged 124printed characters are improperlyformed or not aligned 125printer cannot communicate overpeer-to-peer network 133printer communicationproblems 106printer is trying to print to file 132printer not communicating withcomputer 134printer plugged in but does notprint 131printer status 127printing failure error 155printouts have alternating bands oflight and dark print 125problems when copying,scanning, or faxing 135ready or busy printing is listed asstatus 129removing an external device 131resolving font problems 128test page does not print 130transparencies or photos containwhite lines 125vertical straight lines are notsmooth 126white lines appear in graphics orblack areas 126wrong printer attached 135
Troubleshooting button 25troubleshooting, copy
copier does not respond 142partial document or photocopies 144poor copy quality 143scanner unit does not close 142
troubleshooting, error messages alignment error 147black ink low 148cartridge error 147clear carrier jam 148color ink low 148could not detect a proofsheet 150cover open 148error 1104 148error 1205 149
error 1206 149Invalid Device 148left cartridge error 149left cartridge incorrect 149left cartridge missing 149memory full 150no images have beenselected 150no photo/paper size selection hasbeen made 150no proof sheet information 150no valid photo image filesdetected 150only one photo enhancement maybe chosen at a time 151only one photo/size selection canbe chosen at a time 151paper jam 151paper mismatch 151paper or photo size error 151paper out 151paper size/type error 151photo ink low 148photo size error 151PictBridge communicationerror 152please remove the cameracard 152print file error 155printer carrier stall 152problem reading memorycard 152proof sheet error 152right cartridge error 149right cartridge incorrect 149right cartridge missing 149some photos removed from cardby host 152two-sided paper type error 153two-sided printing not supportedon current paper size 153two-sided printing not supportedon current paper type 153
troubleshooting, jams andmisfeeds
banner paper jams 138paper jam in the duplex unit 139paper jam in the papersupport 137paper jam in the printer 137paper or specialty mediamisfeeds 137printer does not feed paper,envelopes, or specialtymedia 138
174
troubleshooting, memory card memory card cannot beinserted 140nothing happens when memorycard is inserted 140
troubleshooting, print cannot print from a flashdrive 132duplex unit does not operatecorrectly 131improving print quality 118ink levels seem incorrect 122ink levels seem to go downquickly 122partial 4x6in. (10x15cm) photoprints when using PictBridge 117partial document or photoprints 121photo scratches 121photo smudges 121poor quality at the edges of thepage 120poor text and graphic quality 119print speed is slow 121
troubleshooting, scan cannot scan to computer overnetwork 146partial document or photoscans 146poor scanned image quality 146scan was not successful 145scanner does not respond 144scanning takes too long or freezesthe computer 145
troubleshooting, setup cannot print from digital camerausing PictBridge 133incorrect language appears ondisplay 101page does not print 103power button is not lit 101software does not install 102
troubleshooting, wireless changing wireless settings afterinstallation 116check printer ports(Windows) 117checking network name(Windows) 115network printer does not show upin printer selection list duringinstallation (Windows) 112photos do not print from memorycard across wirelessnetwork 141
ping printer (Windows) 116ping wireless access point(Windows) 115printer cannot connect to wirelessnetwork 113run Wireless Setup Utility(Windows) 116wireless network printer does notprint 107wireless printer is no longerworking 111Wireless Setup Utility cannotcommunicate with printer duringinstallation 114Wi-Fi indicator is not lit 108Wi-Fi indicator light is blinkingorange 108Wi-Fi indicator light isorange 110
two-sided paper type error 153two-sided printing
automatic method 54manual method 55understanding 54
two-sided printing not supported oncurrent paper size 153two-sided printing not supported oncurrent paper type 153
Uupdating printer software 135USB port 17
enabling 105using One-Click Auto Fix 68
Quick Fixes tab 68
Vvertical straight lines are notsmooth 126viewing
photos from ProductivityStudio 71photos in the ProductivityStudio 71
voice notification turning on or off 29
WWeb page
printing 45printing only the photos 46
Web site finding 11
white lines appear in graphics orblack areas 126
wireless network adding a printer to existing ad hocnetwork using Windows 40common home configurations 31creating an ad hoc network usingWindows 39MAC address 33networking overview 31printing a network setup page 34security keys 106signal strength 36types of wireless networks 38
wireless network compatibility 14wireless network printer does notprint 107wireless printer is no longerworking 111Wireless Setup Utility cannotcommunicate with printer duringinstallation 114wireless troubleshooting
changing wireless settings afterinstallation 116check printer ports(Windows) 117checking network name(Windows) 115network printer does not show upin printer selection list duringinstallation (Windows) 112photos do not print from memorycard across wirelessnetwork 141ping printer (Windows) 116ping wireless access point(Windows) 115printer cannot connect to wirelessnetwork 113run Wireless Setup Utility(Windows) 116wireless network printer does notprint 107wireless printer is no longerworking 111Wireless Setup Utility cannotcommunicate with printer duringinstallation 114Wi-Fi indicator is not lit 108Wi-Fi indicator light is blinkingorange 108Wi-Fi indicator light isorange 110
Wi-Fi indicator 16Wi-Fi indicator is not lit 108
175

Wi-Fi indicator light is blinkingorange 108Wi-Fi indicator light is orange 110Wi-Fi indicator lights
description 29Work with Documents and Photos
scanning a photo to 85wrong printer attached 135
176
Related Documents