NATURE REVEALED Discover Nature Schools Pre-K Instructional Unit TEACHER GUIDE

Welcome message from author
This document is posted to help you gain knowledge. Please leave a comment to let me know what you think about it! Share it to your friends and learn new things together.
Transcript

NATURE REVEALEDDiscover Nature Schools Pre-K Instructional Unit
TEACHER GUIDE


NATURE REVEALEDDiscover Nature Schools Pre-K Instructional Unit
TEACHER GUIDEBy Sherri Griffin
Missouri Department of Conservation

About the authorSherri Griffin, Ph.D., is a professor of early childhood education at Central Methodist University in Fayette, Missouri. She also teaches and learns at Millersburg Preschool, Alumni School and Cedar Creek Club in Millersburg, Missouri. She presents workshops at local, state, and national conferences on sharing nature and conservation with young children.
Illustrator: David Besenger (puzzles and storyboard characters)Designer: Marci Porter
Missouri Department of ConservationP.O. Box 180Jefferson City, MO 65102-0180mdc.mo.gov
Copyright © 2013, 2014 by the Conservation Commission of the State of Missouri.
Equal opportunity to participate in and benefit from programs of the Missouri Department of Conservation is available to all individuals without regard to their race, color, nationality, sex, age, or disability. Questions should be directed to the Department of Conservation, P.O. Box 180, Jefferson City, MO 65102, 573-751-4115 (voice), or 1-800-735-2966 (TTY), or to the U.S. Fish and Wildlife Service Division of Federal Assistance, 4401 N. Fairfax Drive, Mail Stop: MBSP-4020, Arlington, VA 22203.

1
Table of ContentsAcknowledgments ..................................................................................................................................... 10Purpose and Overview ...................................................................................................................... 10
Unit overview .......................................................................................................................................................... 10
Discover Nature Schools .............................................................................................................. 10Principles of Sharing Nature With Children .......................................................11
Adventure ..................................................................................................................................................................11
Fantasy and imagination ........................................................................................................................................11
Animal allies ..............................................................................................................................................................11
Maps and paths ....................................................................................................................................................... 12
Special places .......................................................................................................................................................... 12
Small worlds ............................................................................................................................................................. 12
Hunting and gathering .......................................................................................................................................... 12
Leading Nature Experiences With Confidence ........................................... 13Choose the right clothing ...................................................................................................................................... 13
Keep activity-related tools on hand .................................................................................................................... 13
Encourage observation ......................................................................................................................................... 13
Take advantage of teachable moments ............................................................................................................. 13
Nature Walks ..................................................................................................................................................... 13Scavenger or treasure hunts ................................................................................................................................. 14
Explore an area ........................................................................................................................................................ 14
Collecting Artifacts ...............................................................................................................................15Discuss safe and specific items to collect ........................................................................................................... 15
Respect the area ...................................................................................................................................................... 15
Consider alternative methods of collection....................................................................................................... 15
Don’t collect live plant and animal specimens .................................................................................................. 15

2
DO NOT release purchased tadpoles, insects, or plants into the wild .......................................................... 15
About collecting feathers ...................................................................................................................................... 15
Learn to recognize poison ivy .............................................................................................................................. 16
Always leave the area cleaner than you found it .............................................................................................. 16
Science Notebooks and Sketch Boards ............................................................. 16Model scientific behavior for the children ......................................................................................................... 16
Accept whatever they choose to draw or write in their notebooks .............................................................. 16
Make the science notebooks available for children to use at any time of the day ..................................... 16
How to make hand-sewn science notebooks .................................................................................................... 17
Dealing With Difficult Questions About Outdoor Activities ........ 17Hunting ..................................................................................................................................................................... 17
Pretend gunplay ..................................................................................................................................................... 18
Fishing ....................................................................................................................................................................... 18
Tree harvest ............................................................................................................................................................. 18
Rural versus urban .................................................................................................................................................. 18
References ..........................................................................................................................................................19Project Construct ....................................................................................................................................19Project Construct Domains, Areas, and Goals for Students ........................................................19
Sociomoral domain ................................................................................................................................................ 19
Cognitive domain ................................................................................................................................................... 19
Representational domain ...................................................................................................................................... 20
Physical development domain ............................................................................................................................. 20
Missouri Early Learning Goals ...........................................................................................20Approaches to Learning ................................................................................................................... 21
Social and Emotional Development ............................................................................................... 22
Knowledge of self ................................................................................................................................................... 22
Knowledge of others .............................................................................................................................................. 22
Physical Development, Health, and Safety ................................................................................... 23
Physical development ............................................................................................................................................ 23

3
Health and self-care ............................................................................................................................................... 23
Safety ........................................................................................................................................................................ 23
Language and Literacy ..................................................................................................................... 24
Symbolic development .......................................................................................................................................... 24
Listening and understanding (Receptive Language) ....................................................................................... 24
Speaking (Expressive Language) ......................................................................................................................... 24
Reading ..................................................................................................................................................................... 25
Writing ...................................................................................................................................................................... 25
Mathematics ....................................................................................................................................... 26
Counting and cardinality ....................................................................................................................................... 26
Operations and algebraic thinking ..................................................................................................................... 26
Number and operations in base ten .................................................................................................................... 26
Measurement and data .......................................................................................................................................... 26
Geometry ................................................................................................................................................................. 26
Science ................................................................................................................................................. 27
Physical science (Forces and Interactions) ......................................................................................................... 27
Life science (Interdependent Relationships in Ecosystems) ........................................................................... 27
Earth (Weather and Climate)................................................................................................................................. 28
Understanding the World ................................................................................................................ 28
Family ........................................................................................................................................................................ 28
People and communities ....................................................................................................................................... 28
Technology ............................................................................................................................................................... 28
Expressive Arts ................................................................................................................................... 29
Music and movement ............................................................................................................................................. 29
Visual arts ................................................................................................................................................................. 29
Drama ........................................................................................................................................................................ 29
Learning Centers ....................................................................................................................................30Learning Center Opportunities ....................................................................................................... 30
Learning center focus: ART ................................................................................................................................... 30
Learning center focus: BLOCKS............................................................................................................................ 32
Learning center focus: DISPLAY ........................................................................................................................... 34
Learning center focus: FIELD TRIP....................................................................................................................... 35

4
Learning center focus: GROUP ............................................................................................................................. 36
Learning center focus: LARGE MOTOR ............................................................................................................... 37
Learning center focus: MANIPULATIVE .............................................................................................................. 39
Learning center focus: MUSIC .............................................................................................................................. 40
Learning center focus: NUTRITION ..................................................................................................................... 42
Learning center focus: OUTSIDE .......................................................................................................................... 43
Learning center focus: PRETEND PLAY .............................................................................................................. 45
Learning center focus: READING ......................................................................................................................... 47
Learning center focus: SCIENCE ........................................................................................................................... 48
Learning center focus: WRITING .......................................................................................................................... 50
Learning center focus: WOODWORKING ........................................................................................................... 52
Learning Experience Components ..............................................................................53Seasonal Learning Experiences ......................................................................................55
Fall ..........................................................................................................................................................................57Fall 1 — What Can You See? .................................................................................................................................. 59FIELD TRIP: Explore the neighborhood and practice observing and collecting
Fall 2 — Tree Skin .................................................................................................................................................... 61OUTSIDE: Examine tree bark and create rubbings
Fall 3 — Hang On! ................................................................................................................................................... 63SCIENCE: Discover the importance of tree roots
Fall 4 — Do Trees Get Drinks? ............................................................................................................................... 65SCIENCE: Conduct an experiment to discover how water moves through trees
Fall 5 — Tree Puzzle ................................................................................................................................................ 67MANIPULATIVE: Put together a tree and find out the functions of its parts
Fall 6 — Woodworking Comparisons .................................................................................................................. 69WOODWORKING: Discover ways people use wood and experience different types of wood
Fall 7 — Tree Books ................................................................................................................................................ 71WRITING: Document knowledge of trees through writing, drawing, and painting
Fall 8 — Leaf Lotto .................................................................................................................................................. 73MANIPULATIVE: Match leaves
Fall 9 — Nature Jar .................................................................................................................................................. 75OUTSIDE: Collect seeds and find out their value to people and wildlife
Fall 10 — I’m a Little Milkweed Cradle ................................................................................................................ 77MUSIC: Sing about how seeds are dispersed

5
Fall 11 — The Harvest ............................................................................................................................................. 79READING: Hear a story about a typical farming operation
Fall 12 — Something Corny ................................................................................................................................... 81SCIENCE: Sample different methods of corn preservation
Fall 13 — Apple Pizzas ........................................................................................................................................... 83NUTRITION: Use apples to make pizza while discovering their unique characteristics
Fall 14 — Baby Plants ............................................................................................................................................. 85GROUP: Match seeds to the plants that produce them
Fall 15 — Animal Harvest ...................................................................................................................................... 87NUTRITION: Cook up some products we get from animals
Fall 16 — Everything Needs Something to Live ................................................................................................ 89READING: Listen to a story about how plants and animals are dependent upon each other
Fall 17 — Habitat ..................................................................................................................................................... 91GROUP: Explore habitat and adaptations
Fall 18 — Cave Life .................................................................................................................................................. 93ART: Discover special features of caves and their inhabitants and construct a likeness
Fall 19 — Worth Their Weight ............................................................................................................................... 95SCIENCE: Simulate feeding habits of bats
Fall 20 — I’m a Little Fox Squirrel ......................................................................................................................... 97MUSIC: Sing about what fox squirrels eat and how they store food
Fall 21 — See How the Turkey Grows .................................................................................................................. 99READING: Listen to a story about the life cycle of a turkey
Fall 22 — I’m a Very Fine Turkey ......................................................................................................................... 101MUSIC: Sing about the turkey’s habits
Winter ..............................................................................................................................................................103Winter 1 — Bird Feeders ...................................................................................................................................... 105SCIENCE: Construct a bird feeder
Winter 2 — Pick a Beak ........................................................................................................................................ 107MANIPULATIVE: Explore how a bird’s beak enables it to feed
Winter 3 — Bird Puzzles ...................................................................................................................................... 109MANIPULATIVE: Examine feet, beaks, and colors of birds
Winter 4 — Stuffed Birds ......................................................................................................................................111ART: Create your own bird
Winter 5 — Explore a Feather..............................................................................................................................113SCIENCE: Discover how feathers help birds
Winter 6 — I’m a Cardinal .....................................................................................................................................115MUSIC: Sing about the unique characteristics of the cardinal
Winter 7 — Migration Obstacles .........................................................................................................................117LARGE MOTOR/OUTSIDE: Experience migration

6
Winter 8 — Track Puzzles .....................................................................................................................................119MANIPULATIVE: Match animals with their tracks
Winter 9 — Willie the Woodchuck ..................................................................................................................... 121READING: Listen to a story about hibernation
Winter 10 — Three Little Snowflakes ................................................................................................................ 123MUSIC: Sing about snow falling
Winter 11 — Skaters Away .................................................................................................................................. 125LARGE MOTOR: Experience one way people use natural resources
Winter 12 — What’s the Temperature? ............................................................................................................. 127SCIENCE: Document the temperature and discuss how it affects people
Winter 13 — Melt the Ice Cube ........................................................................................................................... 129GROUP: Experiment with ways to melt ice
Winter 14 — What Is Energy?.............................................................................................................................. 131GROUP: Explore energy and its source
Winter 15 — B, T, and U........................................................................................................................................ 133READING: Listen to a story about energy
Winter 16 — Energy Puzzles ............................................................................................................................... 135MANIPULATIVE: Match energy users with their energy needs
Winter 17 — No Electricity .................................................................................................................................. 137GROUP: Discover what human life is like without some natural resources
Winter 18 — Does the Sun Give Us Energy? .................................................................................................... 139SCIENCE: Explore the sun’s energy
Winter 19 — Saving Energy ................................................................................................................................ 141GROUP: Discuss energy conservation
Winter 20 — Grocery Shopping ......................................................................................................................... 143PRETEND PLAY: Experience re-use as a conservation practice
Winter 21 — Fred’s Forest ................................................................................................................................... 145READING: Listen to a story illustrating preservation, restoration, and management
Winter 22 — Insulation ........................................................................................................................................ 147SCIENCE: Discover the role of insulation in energy conservation
Winter 23 — Winter Fabrics ................................................................................................................................ 149SCIENCE: Identify some fabrics from which winter clothes are made
Spring ..................................................................................................................................................................151Spring 1 — Drip and Drop ................................................................................................................................... 153READING: Listen to a story about the water cycle
Spring 2 — Hanging Out ..................................................................................................................................... 156PRETEND PLAY: Discover the process of water evaporation
Spring 3 — Where Do Animals Go When it Rains? ......................................................................................... 157MANIPULATIVE: Consider where animals find protection from the rain

7
Spring 4 — What Goes in the Wind? ................................................................................................................. 159ART: Create something to use in the wind
Spring 5 — Shadow Hunt .................................................................................................................................... 161OUTSIDE: Experiment with making different shadows
Spring 6 — What Is Soil? ...................................................................................................................................... 163SCIENCE: Discover how soil is made
Spring 7 — Where Do All the Dead Leaves Go? .............................................................................................. 165GROUP: Examine the process of decay
Spring 8 — Explore a Log .................................................................................................................................... 167SCIENCE: Discover how decomposed trees contribute to soil
Spring 9 — Mud Pies ............................................................................................................................................ 169OUTSIDE: Create mud pies and become aware of the different types of soil
Spring 10 — What Is Erosion? ............................................................................................................................. 171GROUP: Experiment with soil erosion
Spring 11 — What Lives in the Soil? .................................................................................................................. 173OUTSIDE: Discuss things that live in soil
Spring 12 — How Does Your Garden Grow? .................................................................................................... 175SCIENCE: Plant some flower seeds and watch them grow
Spring 13 — Flower Shop .................................................................................................................................... 177PRETEND PLAY: Work in a flower shop
Spring 14 — Dandelion Potpourri ..................................................................................................................... 179GROUP: Appreciate dandelions
Spring 15 — Seeds, Roots, Plants ...................................................................................................................... 181READING: Listen to a story about seeds and how they grow
Spring 16 — Let’s Go Camping ........................................................................................................................... 183PRETEND PLAY: Discover the joy of camping
Spring 17 — Molly and the Forest Fire .............................................................................................................. 185READING: Listen to a story about a forest fire and the consequences of the fire
Spring 18 — What’s an Insect? ........................................................................................................................... 187SCIENCE: Examine insects and discover some of their characteristics
Spring 19 — My Friend Little Caterpillar .......................................................................................................... 189MUSIC: Sing about caterpillars and how they change into moths or butterflies
Spring 20 — Who Am I? ....................................................................................................................................... 191MUSIC: Sing about the cottontail rabbit and discover some of its unique characteristics
Spring 21 — Do You Smell My Mother? ............................................................................................................ 193GROUP: Sniff out the way mammals use their sense of smell
Spring 22 — What Hatches From an Egg? ........................................................................................................ 195ART: Create an animal that hatches from an egg

8
Summer ........................................................................................................................................................ 197Summer 1 — What Has Eight Legs?................................................................................................................... 199SCIENCE: Discover some of the differences between insects and spiders
Summer 2 — Spider Web Toss ............................................................................................................................ 201LARGE MOTOR: Explore how spiders capture their food
Summer 3 — The Lights Go On ..........................................................................................................................203MUSIC: Sing about fireflies and their habits
Summer 4 — Ant Café ..........................................................................................................................................205OUTSIDE: Explore ants and their habits
Summer 5 — Roly-Poly Paradise ........................................................................................................................ 207SCIENCE: Explore some of the habits of a roly-poly
Summer 6 — Trash Pickup ..................................................................................................................................209FIELD TRIP: Explore the effects of littering on familiar places and wildlife
Summer 7 — What Is Air? .................................................................................................................................... 211SCIENCE: Become more aware of air
Summer 8 — What’s in the Air? .......................................................................................................................... 213SCIENCE: Detect things in the air
Summer 9 — Aquatic Life .................................................................................................................................... 215FIELD TRIP: Observe aquatic life in its natural habitat
Summer 10 — Joe’s Choice ................................................................................................................................. 217READING: Explore the meaning of “conservation”
Summer 11 — Fishing Permits ........................................................................................................................... 219ART: Explore the need for fishing permits and the role of conservation agents
Summer 12 — Let’s Go Fishing ........................................................................................................................... 221PRETEND PLAY: Experience pretend fishing
Summer 13 — Fish Song ......................................................................................................................................223MUSIC: Sing about the need for returning small fish to the water
Summer 14 — Frogs and Toads ..........................................................................................................................225READING: Hear about the life cycle of frogs and toads
Summer 15 — Five Green Speckled Frogs .......................................................................................................229MUSIC: Sing about a food chain
Summer 16 — You Can’t Find Me! ..................................................................................................................... 231OUTSIDE: Experience the concept of camouflage and discover its importance
Summer 17 — Foxy Predators ............................................................................................................................ 233LARGE MOTOR: Play a game to find out the relationship between predator and prey
Summer 18 — Harvest Time ............................................................................................................................... 235NUTRITION: Cook up some biscuits and identify products made from wheat
Summer 19 — Rock Collection ........................................................................................................................... 237FIELD TRIP: Explore rocks

9
Summer 20 — What Is a Mineral? ...................................................................................................................... 239SCIENCE: Explore minerals and mine for gold
Summer 21 — Concrete Hand Prints ................................................................................................................. 241OUTSIDE: Explore how people use rocks and minerals
Summer 22 — The Quest for Shiny Rocks ........................................................................................................ 243SCIENCE: Experiment with ways to make rocks shiny
Family Invitation and Calendar of Activities ............................................245Making home/school connections
Selected Children’s Literature and Field Guides ..................................261Puzzles ......................................................................................................................................................................271Storyboard Characters .............................................................................................................281Thematic Lesson Plans ..............................................................................................................353

10
AcknowledgmentsNature Revealed grew from many revisions of Conservation Seeds, which I wrote for the Missouri Department of Conservation in 1984. As I look back on that original publication, I see my own growth as a teacher of young children and a student of nature and conservation. Many people, experiences, and lessons have contributed to this new guide. Over the years, the Missouri Department of Conservation education consultants have listened and responded to my many stories and ideas. The learning experiences presented here would not be as varied or as deeply rooted in conservation and nature were it not for their patient conversations with me. My husband, John, wrote the curriculum’s stories and listened to many trial verses to the songs. I appreciate his wisdom and suggestions. But the most important component to this work is the sense of wonder I hope it inspires in teachers and children. This comes directly from the children and families at Millersburg Preschool. They keep me constantly wondering about how to develop my own understanding, as well theirs, of this complex ecosystem in which we live and learn.
Purpose and OverviewHelping you inspire a sense of wonder, meet state early learning goals, and engage families
Nature experiences for young children should emphasize feelings rather than knowledge. Rachel Carson called these feelings the sense of wonder and authored a book so-titled for parents and teachers. Her message encouraged us to make discovery fun and to stimulate children’s natural sense of wonder. Later, when they are ready, children will learn the science and management skills necessary to conserve nature, wherever they live, play, and work. Nature Revealed, the pre-K unit of the Missouri Department of Conservation's Discover Nature Schools Program, takes Carson’s message to heart and gives teachers and parents the planning tools, activities, and resources they need to stimulate children’s natural sense of wonder in nearby nature.
Unit overviewThe core of Nature Revealed is a rich, diverse collection of developmentally appropriate learning experiences keyed to specific learning centers that will help young learners discover the connections between nature and everyday living. You will also find a wealth of ideas and information to empower you to lead nature activities with confidence, knowledge, and skill. Missouri’s Project Construct goals and Missouri Early Learning Goals will help you meet state requirements and keep children engaged in outdoor learning throughout the year. In addition to the unit’s topics, learning experiences, and state goals, you will find materials families can use at home to support classroom learning and field experiences. Thematic lesson plans will further support your efforts to match classroom nature study with state early learning goals. Whether you use a few or all of the unit’s activities, tools, and suggestions, you will begin shaping the next generation’s lifelong attitudes about nature and the ways we use and conserve it.
Discover Nature SchoolsHands-on experiences in nature can help Missouri students become conservationists for life. The Missouri Department of Conservation's Discover Nature Schools (DNS) program gives Missouri educators the tools they need to get students outside and learning about nature, in nature. Aligned with Missouri Department of Elementary and Secondary Education Goals, DNS instructional units help schools develop a strong conservation ethic in students from pre-K through high school. Browse our primary, elementary, middle school, and high school instructional units at mdc.mo.gov/node/9019.

1 1
Principles of Sharing Nature With Children“It is more important to pave the way for the child to want to know than to put him on a diet of facts he is not ready to assimilate” (Rachel Carson, 1965).
Your approach can be as important as the activities themselves in sharing nature-learning experiences with children. In his book, Childhood and Nature: Design Principles for Educators, David Sobel (2008) identifies seven childhood play motifs we can use to help children build relationships with nature.
Throughout all the principles, Sobel cautions us to help children learn about and love their own local nature before challenging them to solve larger environmental problems, such as habitat loss or pollution. “If we prematurely ask children to deal with problems beyond their understanding and control, prematurely recruit them to solve the mammoth problems of an adult world, then I think we cut them off from the possible sources of their strength” (Sobel, 1996, p.5).
I followed Sobel’s advice and used his principles — along with knowledge of developmentally appropriate practice for three- to five-year-olds — to structure the Nature Revealed learning experiences. Recognizing and using these design principles will help you shape successful learning experiences for children. They also give you, as a teacher, permission to explore the unknown and experience the joy of learning along with the children, while keeping in mind the outcomes established by early childhood learning goals.
AdventureSobel’s first principle involves risk-taking and exploration of the unknown. One winter when my niece and nephews were staying with me, we adventured in the woods and snow on a daily basis. One of their most memorable experiences was “getting lost.” We were hiking in an area of the woods they had not visited before. I pointed out the direction to the house, then walked out to the road, and left them to find their way home. Their sense of adventure was piqued, and they became explorers in a new territory. They talked about and asked that this experience be repeated for months afterward. It was also the fodder for stories and mapmaking when we returned to the house and when they went back to school. Remember to set the stage for adventure as you explore experiences with the children.
Fantasy and imaginationSobel’s second principle involves engaging the child’s imagination and encouraging him or her to live the challenge. I often visit a creek with the children and families from the local preschool where I teach. There are a number of large trees that have fallen in recent years. These “jungle-gym trees” have grapevines hanging all around and the creek flowing by them. The children challenge their physical prowess as they climb and balance on these large trees. They become pirates walking the plank or leprechauns hiding their gold. During a visit, one boy climbed into a hole and hid his face. He challenged me to take his picture, and afterward we all looked to see if we could spot him in the photo. Indeed he was difficult to see! Children’s imaginations soar in this unstructured natural environment. Use the experiences in this guide to create worlds for children to imagine and explore, while also accomplishing the tasks designated in the learning goals. The goals guide our teaching and ensure a certain level of competence, but they shouldn’t make learning dull. Engage your imagination as well as the children’s, and everyone will remember the material you want them to learn.
Animal allies“Animals play a significant role in the evolution of children’s care about the natural world and in their own emotional development” (Sobel, 2008, p.29). In Sobel’s third principle, the best way to understand something is to become that thing: to live, breathe, and play as the animal or plant. Preschoolers are adept at this. They delight and deliberately engage in giving human characteristics to animals. Embrace this and use their natural inclinations to guide them to understand the animals in their environment. After experiencing life as an animal, the idea of habitat becomes real for them. Only after many of these types of experiences can children grasp the plant or animal’s role in the ecosystem. We can’t ask children to conserve nature until they really know it.

12
Maps and pathsSobel (2008) describes this fourth principle as “finding shortcuts, figuring out what’s around the next bend, following a map to a secret event. Children have an inborn desire to explore local geographies. Developing a local sense of place leads organically to a bioregional sense of place and hopefully to biospheric consciousness” (p.34).
One year, a shy five-year-old came to me with an activity she wanted to do. She thought we could use the map in her Tinker Bell book to find all the Pixie Hollow places at the creek. I was skeptical, but I copied the map and gave her the copies to hand out on our next creek adventure. Amazingly, the children used the maps to locate magical Pixie Hollow places along the creek. I took the maps very literally, but the children used them to delve into the hidden nooks and crannies of our familiar creek world. It was a memorable experience for everyone!
Several activities in Nature Revealed suggest making maps with children. Mapping challenges children to consider their space in new ways. It also allows adults to see what is important to them and how they view their immediate environment. Mapping activities will push children to express the internal maps they have of their familiar spaces. For very young learners, this may involve mapping the pretend-play area, the entire classroom, a nook in the play yard, or some other familiar small space.
Special places In his fifth principle, Sobel notes that children have an innate desire to find and create special places. For the youngest children, this might be building a house from the couch cushions in the living room. Older children may move farther afield. In the classic picture book, Roxaboxen (McLerran, 1991), children create an entire village from materials found near their homes, where they retreat to play, be alone, and act out the many puzzling aspects of the adult world. Children create these special places with or without adult assistance. As teachers, why not take advantage of this and work with children to create special places in the play yard? Take Nature Revealed learning experiences outside as often as possible, and make learning centers (see the Learning Centers section in the table of contents) available inside the classroom and outside on the play yard. Children will find their special places, but if you make a conscious effort to address and use these as part of the curriculum, the learning experiences will provide even stronger connections for both you and the children.
Small worldsIn Sobel’s sixth principle, children love to create and play in miniature worlds. Playing in these worlds allows children to see and understand the larger picture. “It’s like the one-page organizational chart for the organization, the site map for the website, the logic model that describes the underlying assumptions for a project” (Sobel, 2008, p.46). The trail we use to access the creek is an old wagon crossing. It is still marked on the deed to the property. The path down to the creek is wide with a rocky ledge along one side. Along this ledge are many rocky nooks and crannies. They cry out to be homes to magical creatures. The children designated one of these nooks as a leprechaun house many years ago. It is a routine stop on our treks down to the creek. Over the years the leprechaun sometimes leaves notes and treasure for the children to find. Inside the house, he stores his gold (a small pile of fool’s gold) and his hat. The leprechaun or some of his friends, the raccoons or birds in the area, routinely move the hat. Several years ago the hat completely disappeared. The children speculated that the leprechaun must have taken it back to Ireland. It was a great surprise (to the children but especially to the grown-ups) when the hat reappeared several years later. The exploration of this rocky area has led the children to believe that all of the nooks and crannies are homes to leprechauns and fairies. They explore this miniature world, looking for signs of residence, as well as discovering much about the local flora and fauna. Mosses are left intact as fairy beds, and pillows and shells are added for fairy bathtubs. This magical place inspires respect and consideration for not disturbing the inhabitants, always returning the rocks to where they were found, and leaving nothing behind that isn’t already part of the environment.
Hunting and gatheringIn his seventh and final principle, Sobel describes hunting and gathering as an innate characteristic of being human — part of our survival instincts. He suggests that teachers follow these instinctual predispositions and use them to structure learning experiences that will foster a positive relationship between children and the natural world. Children routinely make collections of artifacts they find — rocks, shells, sticks, and flowers. The instinct to hunt and gather is the basis for several of the experiences we suggest in this guide. These activities provide opportunities for the young naturalist to sort, classify, and create, which is how children learn.

13
In addition, Sobel addresses the idea of hunting and gathering figuratively: “the quest, the search for the elusive” (2008, p.55). During our routine visits to the creek, one of the children’s primary activities is hunting for treasures. No one knows (including me) what we will find along the way. On one drizzly, wet trip to the creek, we stumbled upon a newborn fawn in the grass right next to the trail. When we returned to the classroom, research revealed that the fawn had not been abandoned, as the children thought. The mother stays away on purpose so she doesn’t leave her scent on the fawn. Our hunt led us to research that taught all of us more about the deer, with which we share the natural world.
Leading Nature Experiences With Confidence”If a child is to keep alive his inborn sense of wonder... he needs the companionship of at least one adult who can share it, rediscovering with him the joy, excitement and mystery of the world we live in” (Carson, 1965).
We recommend conducting many of the Nature Revealed learning experiences in learning centers you set up outside in the play yard or in your local neighborhood (read more about this in the Learning Centers section). Familiarize yourself with the outdoor area, making note of places to be avoided. Each time you plan to take children outside, look at the area with the objectives of the learning experience in mind. Try to anticipate what the children will find and what challenges they might encounter. Preparedness will assist you in guiding the children toward discoveries you want them to make and in facilitating their learning.
Choose the right clothingMake sure children wear the right clothing for the weather and the planned activity. Socks, comfortable shoes, and long pants will help prevent problems during outings in the woods. During the winter, keep extra gloves and hats on hand for those children who come to school unprepared. Of course, weather extremes should be avoided, but much can be learned through observations following or during a light rain or snowstorm.
Keep activity-related tools on handStoring routinely needed materials in a readily available outdoor space allows you to take advantage of teachable moments that arise.
Encourage observationMany of the learning experiences encourage children to explore with all of their senses. Model observing, sketching, and recording data about phenomena as you move through the area with the children. If you don’t consider yourself an artist and scientist, the children won’t think of themselves as artists or scientists, either. Ask direct questions that will help children focus and challenge them to think. Bring the observation to the child’s developmental level. For example, make comments regarding color, size, shape, texture, or smell rather than providing factual information.
Take advantage of teachable momentsThese are times when a child or a group of children expresses an interest in something or a phenomenon that unexpectedly presents itself. Seize the opportunity and expand upon the expressed interest — it may not be there when you are ready to do a unit on it. A study that I initiate won’t be nearly as successful or as valuable as one that occurs when I take advantage of the teachable and learnable moment. Children learn best when they are naturally interested in a topic. Following the children’s lead promotes learning experiences where everyone is actively involved in the learning, including the teacher.
Nature WalksNature walks are an easy, inexpensive way to share nature with young children. However, adults may be reluctant to lead nature walks if they feel they lack experience or knowledge. The following list of activities is designed to encourage teachers and parents to help children explore and make connections with nature as they walk.

Scavenger or treasure huntsThese can be as simple as challenging children to look for specific colors. Try a different focus each time you take your class out for a walk.
COLOR: Pick up some paint-sample chips at your hardware store in preparation for the walk. Give a different paint chip to each child and challenge him or her to find natural items that are the same color.
PICTURES: Pass out pictures of plants, animals, and other natural items that children might encounter on their walk. Challenge children to find the item on their picture. This works especially well with very young children. However, it can be very challenging for older children when the items in the picture are difficult to find. Hide several along the trail in their natural habitat and challenge children to look for them.
TEXTURE: Assign each child a texture to explore. For example, one child might look for smooth items, while others might look for items that are prickly, hard, hairy, soft, sticky, etc. Older children can feel for opposites in texture.
CONTRAST: Challenge children to look for contrasts on the nature walk. Ask them to find the driest and wettest place, the coldest and hottest, the place that receives the least and most sunlight, the oldest and youngest thing, most scary and most comforting, darkest and brightest, heaviest and lightest, etc.
SIZE COMPARISON: Challenge children to find items of different sizes and then to relate those things to themselves. For example, find a plant as tall as your waist, a leaf as wide as your foot, a rock as long as your little finger, a flower as big as your fist, etc.
SOUNDS: Play a recording of one or two birds whose habitats are at the nature walk. While outside, try to locate and identify the birds making those calls. Go on a silent listening walk and challenge the children to record their observations in science notebooks without talking.
SHAPES: Assign each child a different shape and then challenge him or her to find as many items as possible that share the same shape.
ANIMAL SIGNS: Challenge children to look for signs of animals. These could be places where an animal has eaten, or tracks, nests, etc. Speculate as a group about what the signs tell you about the animal and the evidence it left behind.
PEOPLE-MADE ITEMS: Look for people-made things along the trail. Carry a bag to collect any trash you find.
Explore an areaThis type of experience is different from a scavenger or treasure hunt in that children are challenged to focus on a small piece of their environment rather than walking or moving through the entire environment. As with all of these experiences, it is important that the teacher join in the activity and model behavior for the children.
LISTEN TO THE GRASS GROW: Ask children to lie on the ground and pretend to be part of the earth. Be sure everyone lies where they are not touching someone else. If children will allow you, have them close their eyes and lightly cover their faces and bodies with dry grass or twigs so they actually look like the ground. Explain that they must be quiet and blend in with their surroundings if they want to hear and see things. After several minutes, begin a discussion of how they felt and what they heard, saw, and smelled.
CIRCLE OF EXPLORING: Place circles of yarn around a small area in a park, wooded area, or play yard. Provide each child with a magnifying glass and a science notebook or sketch board. Challenge children to find all of the living and nonliving things in their circle. Try this activity in several different habitats and compare the results.
EXPLORE A TREE TRUNK: Challenge children to explore a rotting log or tree trunk in the woods. Again, provide magnifying glasses and science notebooks for sketching and recording their finds.
EXPLORE A HABITAT: Select a specific type of habitat for children to explore (fence row, wetland, creek bank, etc.). Return during different seasons of the year to see how the habitat has changed. Magnifying glasses and science notebooks will help children focus and record their findings.
14

15
Collecting ArtifactsCollecting artifacts and taking them back to the classroom is a wonderful way to extend an outdoor experience. Many of the learning experiences suggest collecting specific artifacts for sharing back in the classroom. Go over the following guidelines with your class before embarking on a collection adventure.
Discuss safe and specific items to collectYoung children are often very zealous in their collection process and don’t consider safety. Be sure to discuss what the children are collecting and how to make sure it is something safe before beginning the activity.
Respect the areaIf you are exploring an area beyond your schoolyard, read and follow any posted rules. Caution the children about taking only what they need for your specific purpose. The rest should be left behind for other visitors to enjoy. Talk about using nature wisely and speculate about the impact the children might leave on the area. For example, when collecting seeds or nuts, it’s a good idea to leave plenty for local wildlife. And when collecting wildflowers, it’s fair to leave plenty for the next visitors to enjoy.
Consider alternative methods of collectionCollecting artifacts doesn’t always mean physically removing them. Your class can also take photos and make sketches. Audio recordings and short videos can also serve as valuable reminders. Reviewing these recordings back in the classroom allows you to notice details you might have missed while in the area.
Don’t collect live plant and animal specimensCreatures encountered during an outdoor learning event should be observed in the natural habitat then released immediately. Tadpoles should be observed in a natural habitat rather than taken back to the classroom to be studied. Plants and animals held in captivity can be exposed to harmful diseases, viruses, and fungi that might be transferred to wild native species when you release them. As an alternative, consider building animal habitat (for example a small pond) in your play yard that will attract the animals or foster the plants you want to share with the children.
DO NOT release purchased tadpoles, insects, or plants into the wildMany of these purchased species are not native to Missouri and can create difficulties for native species, disrupting local ecosystems. The Wildlife Code of Missouri specifically prohibits possessing some species, such as Chinese mystery snails and rusty crayfish, which can be purchased out of state. Several invasive species around the country have been traced back to school-project releases. If you purchase plants or animals to observe and study in the classroom, dispose of them in a proper manner (humane euthanasia for animals or in a plastic bag deposited in the trash for plants).
About collecting feathersFeathers are wonderful artifacts to study and use in the classroom. However, laws regulate the possession of feathers from certain birds. The Migratory Bird Treaty Act (MBTA) of 1918 establishes a prohibition on the possession, purchase, sale, transport, etc. of any migratory bird and includes prohibition on any bird part, nest, or egg of any such bird. To legally possess feathers of birds protected by MBTA, contact a conservation agent of the Missouri Department of Conservation for assistance with obtaining the federal educational-use permit, which must remain with the specimen. Feathers and other parts (except meat) from legally obtained game birds may be legally possessed without permit. Other bird species, including house sparrow, European starling, and rock pigeon, are not protected under MBTA or state law and feathers from these birds may be legally possessed without permit. Also, feathers from farm-raised birds may be legally possessed as well as those purchased from classroom supply or hobby retail sources.

16
Learn to recognize poison ivyFind a color picture and full description of poison ivy in our online field guide at mdc.mo.gov/node/73.This native plant is common throughout the state. The foliage turns a brilliant red in the fall, enticing young hands to pick it during collection trips. Find the plant at the beginning of your walk or activity and show it to the children. Repeat the identification often. You might teach your class the following song, sung to the tune of Yankee Doodle:
Poison ivy has three leaves.White berries grow upon it.It is food for birds and deer,But people should not get near.Poison ivy leaves of three.Poison ivy let it be.Bush or vine do not touch itUnless you want to itch, itch, itch!
The song helps children remember what to look for but also encourages them to see the purpose poison ivy serves in nature.
Always leave the area cleaner than you found itTake along a trash bag to pick up trash, even when this isn’t your goal for the outdoor learning experience. You are modeling responsibility and caring for the environment.
Science Notebooks and Sketch BoardsScience notebooks help young children record their ideas and observations during nature walks and outdoor learning experiences. In addition, they give you insight into the children’s thinking, helping you see where to lead the study, or when to help a child clarify understanding.
The notebook can be several pieces of paper stapled together, a small spiral-bound notebook, or something more elaborate. You might consider making each child a science notebook at the beginning of the year (see How to make hand-sewn science notebooks below). Notebooks can be introduced in a variety of ways, such as gathering children together and focusing them on a particular experiment, or during a walk. Whatever strategy you use to introduce the notebooks, keep in mind several important points.
Model scientific behavior for the childrenWhen the teacher participates in an activity, then children see it as an important thing to do. I often talk aloud while writing and drawing in my science notebook so children can hear my thinking. Sometimes my notebook entries might be a drawing, chart, recipe, or merely a prediction. Just as the children aren’t always correct in their thinking, neither am I. My science notebook is also my place for keeping track of my data, thoughts, and ideas. If I place value on my notebook, take care of it, and write things that have meaning for me, so will the children.
Accept whatever they choose to draw or write in their notebooksChildren may be hesitant about writing and recording their thoughts, so assure them it is all right to pretend to write or draw pictures of their discoveries. Teacher expectations are important in how children feel about their entries. Everything, including drawings, scribbles, strings of letters, and invented spelling, should be accepted and acknowledged as writing. I always record the date and the subject of our experiment or entry in my notebook. The children are provided with a date stamp so they can also stamp the date on their entries. As I look back through their entries, I am often amazed to see how they really did represent the experiment or observation at the time.
Make the science notebooks available for children to use at any time of the dayIf we want children to learn to record their questions, observations, and conclusions, they need to have access to their notebooks any time they feel they have something worth recording. Once children learn to use their science notebooks as a tool, they frequently record information and data on their own.

17
Sketch boards are another tool for recording ideas and observations. I use small, inexpensive clipboards purchased at our local discount store. However, a sketch board could be as simple as a piece of sturdy cardboard and paper attached with a rubber band. I use sketch boards with the children when I want to use their work in documentation or display. However, usually with sketch boards, I provide colored pencils, and the focus is primarily on sketching or drawing.
How to make hand-sewn science notebooks1. Take a large piece of specially decorated paper (at least 8½ × 11 inches) and lay it face down on the
table. I usually use paper from the children’s art projects.
2. Glue two pieces of mat board (4½ × 6 inches) in the middle of the paper, leaving about ¼ to ½ inch between the two pieces of mat board and about ½ to 1 inch all the way around the outside. Smooth out the paper. (Mat board is available at most frame shops that will often donate their scraps.)
3. Cut away the corners of the paper to the corner of the mat board.
4. Wrap the paper around the mat board, like wrapping a present, and glue.
5. Take 10 to 12 half sheets of paper. Fold each in half individually. Open the paper and place one on top of the other, like a tent. These can be sewn on a sewing machine using a wide stitch or sewn by hand. If using a sewing machine, skip steps six through eight, moving on to step 9.
6. Take a yarn darner needle (or an awl) and poke three holes in the crease of the papers, one at the top, one in the middle, and one near the bottom.
7. Cut about a yard of crochet cotton. Wax the thread with beeswax (this keeps it from cutting the paper). Thread the needle.
8. Sew up the book like a figure 8 (from the side), starting and ending at the top.
9. Glue the first page to one piece of mat board and glue the last page to the other. Smooth out and try opening and shutting the book several times to make sure it stays in place.
Dealing With Difficult Questions About Outdoor Activities“Whether kids live in New York City or other urban areas or in the middle of rural Iowa, helping children reconnect with the natural world sparks wonder and curiosity” (Georgia Heard & Jennifer McDonough, 2009, p.6).
HuntingAs you delve into conservation education with young children, you will sometimes come across controversial issues. Sometimes, hunting is a difficult topic for teachers of young children. Hunting is addressed in Nature Revealed because animal harvest — or hunting and trapping — are management tools for wildlife. Several Nature Revealed stories characterize hunters as safe, ethical, and responsible. While hunting is not a prominent piece of the unit, it is part of the underlying conservation ethic. Many species of Missouri wildlife owe their health to hunters. In 1937, the Missouri white-tailed deer population was nearly gone. The state officially established the Conservation Commission, funded through sales of hunting and fishing permits. The commission began a comprehensive restoration program that included changes in hunting regulations, stricter enforcement, research, live trapping and distribution, and public-education efforts. As a result of those early efforts, Missouri has a very healthy deer population. Since deer have few animal predators in Missouri, the healthy deer population depends on human hunters. Without an annual deer harvest, deer would quickly outstrip the food supply, causing grave repercussions to its own survival as well as to many other natural resources, including people.

18
Pretend gunplayInevitably, along with the discussion of hunters comes the issue of pretend gunplay. For many years, I did not allow pretend gunplay in my classroom. Although I was married to a law-enforcement officer, I felt nothing constructive could come from children pretending to shoot guns. In the classroom, children continued to make and play with guns but became very adept at changing them to something else when I was in the area. Consequently, I missed many of the details of the play, and children were not given the opportunity or support to safely explore appropriate uses of guns.
One day I was observing two boys from across the room. I saw one move behind the sink in our pretend-play area with a duck puppet. The other had a long stick-like creation that he had made from connecting blocks. The boy behind the sink threw the puppet up into the air while the other took aim and shot his play gun. The duck fell and the boy behind the sink picked up the puppet in his mouth and, crawling on all fours, brought it to the shooter. They then proceeded to the play stove and shoved the duck in the oven. I wasn’t quite sure how to respond. This was gunplay in my classroom, but what I observed was really quality play. The children had a purpose, assigned roles, and had to coordinate their efforts. They were exploring what it was like to hunt, retrieve, cook, and eat duck. How could this be bad? Our classroom is a community of learners, and all constructive play should be valued. How could I make the decision about this play being inappropriate? As a result of that experience, I have rethought my pretend-gunplay policy. I still do not allow children to bring guns into the classroom. However, when guns are created in the classroom, we generally have a class meeting to discuss what the children think might be the most appropriate kinds of things to do about this play. Generally, they decide that guns should not be shot at people—good guys or bad guys. We have the opportunity to discuss our classroom being safe for everyone and that guns should not be used to hurt people. As a result, children generally decide to use the guns they create for target practice or hunting purposes.
FishingFishing might also be a controversial topic for some teachers. Responsibly harvesting fish, whether from a river, lake, or the ocean, can promote a healthy population. However, overfishing our oceans has caused depletion of some species to the point of endangerment. Conservation ethic promotes solid reasoning concerning management of each species. People ultimately make decisions about what is the wisest use of each natural resource. Exposing children to the idea of fishing and managing this resource on the small scale of their classroom will someday impact the decisions they make about managing this resource globally.
Tree harvestIn some areas, the harvest of trees is also a controversial and highly criticized practice. Nearly every single person uses some form of forest products on a regular basis. Although it is easy to criticize how this particular resource is managed, it is important to note that it is a renewable resource and, as such, the forest can benefit people and nature. No use at one extreme and unrestricted logging at the other are not wise choices for our forestlands. Selective, managed harvest will ensure the health of the forest — now and in the future. Consequently, it is vital that children be exposed to trees, their ecosystems, and how people use them so they will be able to make future choices concerning the harvest and management of this valuable resource.
Rural versus urbanRural versus urban understanding of conservation ethic may also become an issue in the classroom. Because children who live in large cities do not have the same experiences as their peers living in rural areas, teachers may believe that conservation concepts should be handled differently. However, people make wildlife management decisions every day in cities as well as rural areas. How to deal with the raccoon in the garbage, the deer eating flowers, geese fouling picnic areas, or trees growing where people want to build homes all involve making a conservation-management decision. Helping children gain an understanding of the many conservation-management decisions made wherever they live is important.
Sometimes it is difficult to know how to handle classroom discussions of these management decisions. It is important to value individual family backgrounds and beliefs, while honoring various practices, such as responsible hunting or logging. Conservation is a philosophy of daily living. As teachers, we have the power to influence that philosophy and to help children understand the interdependence of natural resources and people. Children who are encouraged to explore and value this interdependence will make good conservation choices in the future.

19
ReferencesCarson, Rachel. (1965). The sense of wonder. New York: Harper & Row.
Heard, G. & McDonough, J. (2009). A place for wonder: Reading and writing nonfiction in the primary grades. Portland ME: Stenhouse Publishers.
McLerran, Alice. (1991). Roxaboxen. New York: HarperCollins Publishers.
Sobel, David. (2008). Childhood and nature: Design principles for educators. Portland ME: Stenhouse Publishers.
Sobel, David. (1996). Beyond ecophobia: Reclaiming the heart in nature education. Great Barrington MA: The Orion Society.
Project ConstructThe Missouri Department of Elementary and Secondary Education developed Project Construct to meet a need for an early childhood curriculum and assessment framework. It is designed as a process-oriented approach to working with children ages three through seven, and it supports their characteristic ways of learning. It is based upon constructivist theory, which operates under the premise that children build theirknowledge and values as a result of interactions with the physical and social world. All children have an intrinsic desire to learn and make sense of the world. Often, in their hypothesis building and interactions, they make errors. However, those errors are key to developing understanding and, eventually, mastery.
Project Construct is not organized around traditional subject areas because young children do not categorize learning by the various disciplines that adults do. Rather, it is organized according to four interrelated domains: sociomoral, cognitive, representational, and physical development. The foundations for academic learning are embedded in the social and physical environment and integrated into contexts that are meaningful to young children and appropriate to their stages of development. Learn more about Project Construct at projectconstruct.org.
Project Construct domains, areas, and goals for students
SOCIOMORAL DOMAINSocial development
●● Build relationships of mutual trust and respect with adults●● Build relationships of mutual trust and respect with peers●● Consider the perspectives of others●● Cooperate and collaborate as a member of a learning community
Personal development●● Be inquisitive●● Take initiative●● Be confident●● Be inventive●● Be reflective
COGNITIVE DOMAINMathematical thinking
●● Develop logical thinking●● Develop numerical thinking●● Develop geometric, spatial, and temporal reasoning●● Analyze data●● Exchange mathematical ideas

20
Scientific thinking●● Increase knowledge of the physical world●● Develop and apply scientific reasoning●● Exchange scientific ideas
REPRESENTATIONAL DOMAINLanguage development
●● Develop effective listening and speaking abilities●● Develop as a reader●● Develop as a writer●● Use language to communicate in a variety of ways for different purposes and audiences●● Gather and comprehend information from a variety of sources
Symbolic expression●● Represent ideas and feelings through pretend play●● Represent ideas and feelings through music●● Represent ideas and feelings through art and construction●● Recognize that symbolic expression has social, cultural, and historical contexts
PHYSICAL DEVELOPMENT DOMAINMotor skills
●● Develop motor skills for personally meaningful purposes
Health and safety●● Develop healthy living practices●● Develop safe living practices
Movement and brain development●● Develop socially through regular physical activity●● Develop cognitively through regular physical activity
Missouri Early Learning GoalsBirth to entry into kindergartenThe Missouri Department of Elementary and Secondary Education sponsored and organized committees to create the state’s early learning goals. Committee members included early childhood professionals from higher education, elementary classrooms, Missouri Department of Elementary and Secondary Education, early childhood professional organizations, Parents as Teachers, and child-care programs.
The goals were developed as broad descriptions of what the committees felt most children should know and be able to do by the time they entered kindergarten. However, the goals were not intended to determine whether a child is ready to enter kindergarten, but to serve as guidance for adults to use in supporting the development of preschool children. Throughout the eight early learning goals, the content components, developmental goals, and indicators apply to all children from birth to entry into kindergarten unless otherwise noted. Learn more about Missouri’s current early learning standards and goals at dese.mo.gov/early-extended-learning/early-learning/publications.

Learning Centers Special places teachers create to conduct seasonal learning experiences and meet state goals
Learning centers allow children to work in small, self-chosen groups at individual levels. Teachers who create learning centers in their classrooms can provide one-on-one instruction while serving each group’s range of interests and developmental levels. For this reason, Nature Revealed’s learning experiences were developed with particular learning centers in mind.
In addition, learning centers are an effective way of helping children meet Project Construct goals, which are very broad and addressed through classroom environment and attitudes toward learning, rather than through individual activity. The Project Construct goals that each learning center might support are included in the Learning Center Opportunities lists below. Also included are Missouri’s early learning goals. The lists will help you find opportunities to use learning centers with Nature Revealed learning experiences to enhance learning and meet Missouri’s early learning goals.
The Thematic Lesson Plans at the back of the book can also help you align learning centers with learning experiences and nature-study topics to achieve state early learning goals.
Learning Center Opportunities Find guidance about how to set up and equip learning centers under the "How can teachers and parents help?" headings below.
Learning center focus: ART
What do children learn? ●● Aesthetics appreciation●● Exploration of different media●● Concepts about time●● Methods to demonstrate creativity, express self, and respect individual creativity●● Self-image and self-esteem●● Small and large motor skills●● Independence●● Strategies for questioning, exploration, and experimentation●● Symbolic understanding●● Concepts about color, shape, line, and texture
Which Project Construct Goals might be enhanced in this learning center?
SOCIOMORAL DOMAIN ●● Be inquisitive●● Be confident●● Be inventive●● Be reflective
COGNITIVE DOMAIN ●● Develop geometric, spatial, and temporal reasoning●● Increase knowledge of the physical world●● Develop and apply scientific reasoning●● Exchange scientific ideas
REPRESENTATIONAL DOMAIN ●● Represent ideas and feeling through art and construction●● Recognize that symbolic expression has social, cultural, and historical contexts
30

PHYSICAL DEVELOPMENT DOMAIN
●● Develop motor skills for personally meaningful purposes
Which Missouri Early Learning Goals might be enhanced in this learning center?
APPROACHES TO LEARNING ●● Shows curiosity●● Exhibits creativity and inventiveness●● Shows confidence●● Displays persistence●● Uses problem-solving skills
SOCIAL AND EMOTIONAL DEVELOPMENT ●● Exhibits self-awareness and self-confidence (Knowledge of Self)●● Manages feelings and behavior (Knowledge of Self)●● Builds relationships (Knowledge of Others)
PHYSICAL DEVELOPMENT, HEALTH, AND SAFETY ●● Uses fine motor skills with purpose and control (Physical)●● Responds to sensory input to function in the environment (Physical Development)
LANGUAGE AND LITERACY ●● Represents feelings and ideas in a variety of ways (Symbolic Development)●● Develops and expands vocabulary (Speaking — Expressive Language)●● Uses writing as a means of expression/communication (Writing)
MATHEMATICS ●● Investigates positions and locations (Geometry)●● Explores shapes in the environment (Geometry)
SCIENCE ●● Explores physical properties of objects and materials (Physical Science — Forces and Interactions)●● Investigates properties of objects and materials (Physical Science — Forces and Interactions)●● Solves problems involving physical properties of objects and materials (Physical Science — Forces and
Interactions)●● Represents observations of the physical world in a variety of ways (Physical Science — Forces and Interactions)●● Represents observations about living things in a variety of ways (Life Science — Interdependent Relationships
in Ecosystems)●● Represents observations about earth and sky in a variety of ways (Earth — Weather and Climate)
EXPRESSIVE ARTS ●● Shows interest in visual arts (Visual Arts)●● Explores visual arts (Visual Arts)
How can teachers and parents help? ●● Provide sufficient time for children to complete project; however, accept when the child states the project is
completed, even when it doesn’t look finished.●● Emphasize process rather than product; the product is merely a result of the process.●● Be nonjudgmental when talking with children about their work, discuss colors, lines, etc., rather than asking
what the work represents.●● Respect children’s work by showing genuine interest, making encouraging comments, identifying the piece
with the child’s name, date, the child’s comments about it, and then displaying the piece.●● Provide a variety of media and tools easily accessible for children.●● Provide choices.
31

●● Do not provide models or fill-in coloring books.●● Encourage children’s exploration, experimentation, and discussion with peers.●● Value children’s discoveries, thoughts, and creations.●● Encourage children to support and help one another rather than relying on adult assistance.●● Allow ample, uninterrupted time for children to pursue artistic endeavors.●● Do not compare one child’s work to another.
Learning center focus: BLOCKS
What do children learn? ●● Cooperation and social relations●● Creativity●● Mathematics: classification, order, number, fractions, etc.●● Science: balance, trial and error, inductive reasoning●● Language: shapes and sizes, labeling●● Eye-hand coordination●● Visual perception●● Symbolic understanding●● Problem-solving strategies
Which Project Construct Goals might be enhanced in this learning center?
SOCIOMORAL DOMAIN ●● Cooperate and collaborate as a member of a learning community●● Be inventive●● Be reflective
COGNITIVE DOMAIN ●● Develop logical thinking●● Develop numerical thinking●● Develop geometric, spatial, and temporal reasoning●● Exchange mathematical ideas●● Increase knowledge of the physical world●● Develop and apply scientific reasoning●● Exchange scientific ideas
REPRESENTATIONAL DOMAIN ●● Represent ideas and feelings through art and construction●● Recognize that symbolic expression has social, cultural, and historical contexts
PHYSICAL DEVELOPMENT DOMAIN ●● Develop motor skills for personally meaningful purposes●● Develop safe living practices
Which Missouri Early Learning Goals might be enhanced in this learning center?
APPROACHES TO LEARNING ●● Takes initiative●● Exhibits creativity and inventiveness●● Shows confidence●● Displays persistence●● Uses problem-solving skills
32

SOCIAL AND EMOTIONAL DEVELOPMENT
PHYSICAL DEVELOPMENT, HEALTH, AND SAFETY
LANGUAGE AND LITERACY
MATHEMATICS
SCIENCE
●● Exhibits self-awareness and self-confidence (Knowledge of Self) ●● Manages feelings and behavior (Knowledge of Self) ●● Builds relationships (Knowledge of Others)
●● Uses gross motor skills with purpose and coordination (Physical Development) ●● Uses fine motor skills with purpose and control (Physical Development) ●● Responds to sensory input to function in the environment (Physical Development) ●● Practices safe behaviors (Safety)
●● Represents feelings and ideas in a variety of ways (Symbolic Development) ●● Develops and expands vocabulary (Speaking — Expressive Language) ●● Uses writing as a means of expression/communication (Writing)
●● Uses number to show quantity (Counting and Cardinality) ●● Uses language to represent number of objects (Counting and Cardinality) ●● Solves problems using number (Counting and Cardinality) ●● Uses language to represent number of objects (Operations and Algebraic Thinking) ●● Uses numerical representations (Operations and Algebraic Thinking) ●● Makes comparisons (Measurement and Data) ●● Uses measurement (Measurement and Data) ●● Collects, organizes and displays information (Charting and Graphing) (Measurement and Data) ●● Investigates positions and locations (Geometry) ●● Explores shapes in the environment (Geometry)
●● Explores physical properties of objects and materials (Physical Science — Forces and Interactions) ●● Investigates properties of objects and materials (Physical Science — Forces and Interactions) ●● Solves problems involving physical properties of objects and materials (Physical Science — Forces and
Interactions) ●● Represents observations of the physical world in a variety of ways (Physical Science — Forces and Interactions)
How can teachers and parents help? ●● Provide sufficient time for children to actively engage in quality block play. ●● Encourage children to contribute to rule making for the area. ●● Allow children to work freely, within rules. ●● Provide sufficient materials that are easily accessible in an ample space. ●● Provide signs and labels so children know where blocks belong. ●● Provide pictures, props and basic designs to stimulate children’s interest. ●● Arrange block area in an inviting, aesthetically pleasing manner. ●● Value children’s discoveries, thoughts and creations. ●● Encourage exploration, experimentation and discussion between children. ●● Utilize error to enhance building experiences.
33

Learning center focus: DISPLAY
What do children learn? ●● Aesthetic appreciation ●● Facts about the world around them ●● Reflect on past experiences ●● Vocabulary ●● Self-image and self-esteem ●● Think critically and creatively ●● Enjoy sharing work ●● Enjoy interaction with others ●● Increase knowledge and ideas ●● Introduce and expand upon concepts ●● Strategies for organizing and sharing information
Which Project Construct Goals might be enhanced in this learning center?
SOCIOMORAL DOMAIN ●● Build relationships of mutual trust and respect with adults ●● Build relationships of mutual trust and respect with peers ●● Be inquisitive ●● Be confident
REPRESENTATIONAL DOMAIN ●● Develop as a reader ●● Use language to communicate in a variety of ways for different purposes and audiences ●● Gather and comprehend information from a variety of sources
Which Missouri Early Learning Goals might be enhanced in this learning center?
APPROACHES TO LEARNING ●● Shows curiosity ●● Shows confidence
SOCIAL AND EMOTIONAL DEVELOPMENT ●● Builds relationships (Knowledge of Others)
LANGUAGE AND LITERACY ●● Applies early reading skills (Literacy — Reading) ●● Uses concepts of print (Literacy — Reading)
How can teachers and parents help? ●● Place displays at child’s eye level. ●● Utilize children’s work and pictures of children participating in projects. ●● Involve children’s senses. ●● Encourage children to spend time talking about and interacting with peers about displays. ●● Rotate materials regularly. ●● Materials should be meaningful and culturally relevant to children rather than just “cute.” ●● Utilize photographs, real objects, or realistic pictures. ●● Capitalize on children interests and ideas. ●● Utilize safe materials. ●● Encourage and value children’s contributions to decision making.
34

Learning center focus: FIELD TRIP
What do children learn? ●● Knowledge of the world●● Observation skills●● Strategies for questioning, exploration and experimentation●● Social relations●● Symbolic understanding●● Occupations●● An understanding about similarities and differences between people●● Language●● Addition of experience to concepts●● Foundation for later understandings●● Strategies for gathering information and forming concepts
Which Project Construct Goals might be enhanced in this learning center?
SOCIOMORAL DOMAIN ●● Build relationships of mutual trust and respect with adults●● Build relationships of mutual trust and respect with peers●● Be inquisitive●● Be confident
COGNITIVE DOMAIN ●● Develop logical thinking●● Analyze data●● Increase knowledge of the physical world●● Develop and apply scientific reasoning
REPRESENTATIONAL DOMAIN ●● Gather and comprehend information from a variety of sources
Which Missouri Early Learning Goals might be enhanced in this learning center?
APPROACHES TO LEARNING ●● Shows curiosity●● Shows confidence
SOCIAL AND EMOTIONAL DEVELOPMENT ●● Builds relationships (Knowledge of Others)
LANGUAGE AND LITERACY ●● Listens for different purposes (Listening and Understanding — Receptive Language)●● Develops and expands vocabulary (Speaking — Expressive Language)
MATHEMATICS ●● Collects, organizes and uses information (Charting and Graphing) (Measurement and Data)
SCIENCE ●● Explores physical properties of objects and materials (Physical Science — Forces and Interactions)●● Investigates properties of objects and materials (Physical Science — Forces and Interactions)●● Explores characteristics of living things (Life Science — Interdependent Relationships in Ecosystems)●● Investigates characteristics of living things (Life Science — Interdependent Relationships in Ecosystems)
35

●● Explores properties of earth and sky (Earth — Weather and Climate) ●● Investigates properties of earth and sky (Earth — Weather and Climate)
UNDERSTANDING THE WORLD ●● Explores people and the community (People and Communities)
How can teachers and parents help? ●● Determine value of trip. ●● Scout site for appropriateness before setting up the field trip. ●● Actively involve children in planning, preparation and rule making. ●● Plan for opportunities for snack and lunch. ●● Plan experiences that engage children during travel and waiting periods. ●● Provide children with opportunities to record the experience through photography, sketching, collecting,
and/or journaling. ●● Document the experience through photographs, video and/or audiotaping. ●● Prepare documentation of the learning event for display in classroom to encourage and support children’s
memories, reflections and elaborations of the field trip. ●● Provide follow-up experiences that support development of concepts and ideas.
Learning center focus: GROUP
What do children learn? ●● Knowledge of the world ●● Expression of feelings and ideas ●● Observation skills ●● Communication skills ●● Problem solving strategies ●● Discussion techniques ●● Enjoyment of talking and listening to others ●● Self-esteem enhancement ●● Self expression ●● Strategies for exchanging thoughts and ideas ●● Negotiation strategies
Which Project Construct Goals might be enhanced in this learning center?
SOCIOMORAL DOMAIN ●● Build relationships of mutual trust and respect with adults ●● Build relationships of mutual trust and respect with peers ●● Consider the perspective of others ●● Cooperate and collaborate as a member of a learning community ●● Be inquisitive ●● Be confident ●● Be reflective
COGNITIVE DOMAIN ●● Analyze data ●● Exchange mathematical ideas
36

REPRESENTATIONAL DOMAIN ●● Develop effective listening and speaking abilities ●● Develop as a reader ●● Develop as a writer ●● Use language to communicate in a variety of ways for different purposes and audiences ●● Gather and comprehend information from a variety of sources
Which Missouri Early Learning Goals might be enhanced in this learning center?
APPROACHES TO LEARNING ●● Shows curiosity ●● Shows confidence ●● Displays persistence ●● Uses problem-solving skills
SOCIAL AND EMOTIONAL DEVELOPMENT ●● Exhibits self-awareness and self-confidence (Knowledge of Self) ●● Manages feelings and behavior (Knowledge of Self) ●● Builds relationships (Knowledge of Others)
LANGUAGE AND LITERACY ●● Listens for different purposes (Listening and Understanding — Receptive Language) ●● Uses language to communicate (Speaking — Expressive Language) ●● Develops and expands vocabulary (Speaking — Expressive Language) ●● Attends to sounds in language (phonological awareness) (Reading)
How can teachers and parents help? ●● Provide a comfortable, relaxed area with few distractions. ●● Talk with and listen to children on a daily basis. ●● Encourage children to share ideas and information with peers. ●● Speak clearly, using Standard English. ●● Ask open-ended questions. ●● Encourage children to brainstorm and problem solve. ●● Share group responsibilities with children. ●● Time allotted should be appropriate for developmental level of group. ●● Be prepared for activities before gathering children together. ●● Be respectful of children’s time. ●● Encourage children to help develop and monitor group time rules.
Learning center focus: LARGE MOTOR
What do children learn? ●● Awareness of their own bodies ●● Coordination and motor control ●● Self-image enhancement ●● Creativity ●● Spatial awareness ●● Balance ●● Pleasure and a sense of accomplishment ●● Underlying principles about biology, health and nutrition and physics
37

Which Project Construct Goals might be enhanced in this learning center?
SOCIOMORAL DOMAIN ●● Build relationships of mutual trust and respect with peers●● Be confident
COGNITIVE DOMAIN ●● Develop geometric, spatial, and temporal reasoning●● Increase knowledge of the physical world
REPRESENTATIONAL DOMAIN ●● Represent ideas and feelings through pretend play●● Represent ideas and feelings through movement
PHYSICAL DEVELOPMENT, HEALTH, AND SAFETY DOMAIN ●● Develop motor skills for personally meaningful purposes●● Develop healthy living practices●● Develop socially through regular physical activity●● Develop cognitively through regular physical activity
Which Missouri Early Learning Goals might be enhanced in this learning center?
APPROACHES TO LEARNING ●● Exhibits creativity and inventiveness●● Shows confidence●● Displays persistence
SOCIAL AND EMOTIONAL DEVELOPMENT ●● Exhibits self-awareness and self-confidence (Knowledge of Self)●● Manages feelings and behavior (Knowledge of Self)●● Builds relationships (Knowledge of Others)
PHYSICAL DEVELOPMENT, HEALTH, AND SAFETY ●● Uses gross motor skills with purpose and coordination (Physical Development)●● Responds to sensory input to function in the environment (Physical Development)●● Practices safe behaviors (Safety)
LANGUAGE AND LITERACY ●● Represents feelings and ideas in a variety of ways (Symbolic Development)
MATHEMATICS ●● Investigates positions and locations (Geometry)●● Explores shapes in the environment (Geometry)
SCIENCE ●● Represents observations of the physical world in a variety of ways (Physical Science — Forces and Interactions)●● Represents observations about living things in a variety of ways (Life Science — Interdependent Relationships
in Ecosystems) ●● Represents observations about earth and sky in a variety of ways (Earth — Weather and Climate)
How can teachers and parents help? ●● Plan daily large motor experiences.●● Allow adequate time and space for children to engage in activities.●● Present experiences in ways that will engage and interest children.
38

COGNITIVE DOMAIN
●● Encourage exploration and goal setting.●● Participate in the experiences on an equal level with children.●● Encourage everyone to participate while recognizing differences in children’s capabilities, interests and
experiences.●● Plan experiences that encourage children to use both sides of the body.●● Provide opportunities that challenge children to cross the midline of their bodies.
Learning center focus: MANIPULATIVE
What do children learn? ●● Fine-motor skills●● Eye-hand coordination●● Visual discrimination●● Math concepts●● Strategies for questioning, exploration and experimentation●● Language skills●● Independence
Which Project Construct Goals might be enhanced in this learning center?
SOCIOMORAL DOMAIN ●● Build relationships of mutual trust and respect with peers●● Consider the perspectives of others●● Cooperate and collaborate as a member of a learning community
●● Develop logical thinking●● Develop numerical thinking●● Develop geometric, spatial, and temporal reasoning
PHYSICAL DEVELOPMENT DOMAIN ●● Develop motor skills for personally meaningful purposes●● Develop socially through regular physical activity●● Develop cognitively through regular physical activity
Which Missouri Early Learning Goals might be enhanced in this learning center?
APPROACHES TO LEARNING ●● Shows curiosity●● Takes initiative●● Shows confidence●● Displays persistence●● Uses problem-solving skills
SOCIAL AND EMOTIONAL DEVELOPMENT ●● Exhibits self-awareness and self-confidence (Knowledge of Self)●● Manages feelings and behavior (Knowledge of Self)●● Builds relationships (Knowledge of Others)
PHYSICAL DEVELOPMENT, HEALTH, AND SAFETY ●● Uses fine motor skills with purpose and control (Physical Development)●● Responds to sensory input to function in the environment (Physical Development)
39

LANGUAGE AND LITERACY ●● Represents feelings and ideas in a variety of ways (Symbolic Development) ●● Uses language to communicate (Spoken — Expressive Language)
MATHEMATICS ●● Uses number to show quantity (Counting and Cardinality) ●● Uses language to represent number of objects (Counting and Cardinality) ●● Solves problems using number (Counting and Cardinality) ●● Uses numerical representation (Counting and Cardinality) ●● Uses language to represent number of objects (Operations and Algebraic Thinking) ●● Uses language to represent number of objects (Number and Operations in Base Ten) ●● Makes comparisons (Measurement and Data) ●● Uses measurement (Measurement and Data) ●● Collects, organizes and uses information (Charting and Graphing) (Measurement and Data) ●● Investigates positions and locations (Geometry) ●● Explores shapes in the environment (Geometry)
How can teachers and parents help? ●● Allow children to use materials as they wish (within reason). ●● Be sure all materials are complete. ●● Materials or activities should meet a wide range of developmental abilities. ●● Define area where materials can be used. ●● Provide sufficient materials that are easily accessible in an ample space. ●● Arrange materials in an aesthetically pleasing manner. ●● Clearly label shelving with pictures of materials to enable children to maintain area. ●● Share materials you enjoy. ●● Encourage and value children’s various ideas and uses for materials. ●● Allow sufficient time for children to interact with the materials provided.
Learning center focus: MUSIC
What do children learn? ●● Symbolic understanding ●● Sound discrimination ●● Appreciation and enjoyment of music ●● Development of voice range ●● Coordination of motor control ●● Expression of feelings and ideas ●● Knowledge of the world ●● Expression and development of creativity ●● Language ●● Coordination and rhythm ●● Foundation for understanding the elements of music ●● Patterning
Which Project Construct Goals might be enhanced in this learning center?
SOCIOMORAL DOMAIN ●● Build relationships of mutual trust and respect with peers ●● Be confident ●● Be inventive
40

REPRESENTATIONAL DOMAIN ●● Represent ideas and feelings through movement●● Represent ideas and feelings through music●● Recognize that symbolic expression has social, cultural, and historical contexts
PHYSICAL DEVELOPMENT DOMAIN ●● Develop motor skills for personally meaningful purposes●● Develop socially through regular physical activity●● Develop cognitively through regular physical activity
Which Missouri Early Learning Goals might be enhanced in this learning center?
APPROACHES TO LEARNING ●● Exhibits creativity●● Shows confidence
SOCIAL AND EMOTIONAL DEVELOPMENT ●● Exhibits self-awareness and self-confidence (Knowledge of Self)●● Manages feelings and behavior (Knowledge of Self)●● Builds relationships (Knowledge of Others)
PHYSICAL DEVELOPMENT, HEALTH, AND SAFETY ●● Uses gross motor skills with purpose and coordination (Physical Development)●● Uses fine motor skills with purpose and control (Physical Development)●● Responds to sensory input in function in the environment (Physical Development)
LANGUAGE AND LITERACY ●● Represents feelings and ideas in a variety of ways (Symbolic Development)●● Uses language to communicate (Spoken — Expressive Language)●● Attends to sounds in language (Reading)
SCIENCE ●● Represents observations of the physical world in a variety of ways (Physical Science — Forces and Interactions)●● Represents observations about living things in a variety of ways (Life Science — Interdependent Relationships
in Ecosystems) ●● Represents observations about earth and sky in a variety of ways (Earth — Weather and Climate)
EXPRESSIVE ARTS ●● Shows interest in music and movement (Music and Movement)●● Explores music and movement (Music and Movement)
How can teachers and parents help? ●● Plan and encourage musical activities throughout the day.●● Use music during waiting and transition times.●● Have necessary materials ready at the beginning of the activity.●● Encourage children to experiment and be creative.●● Encourage children but don’t force participation.●● Select songs with simple tunes.●● Select songs that use children’s names.●● Select songs of moderate or short length.●● Support children’s unique ways of singing.●● Encourage children to experiment with and compare different ways of expressing voice, sounds, patterns,
or rhythms.
41

●● Allow children to create music in divergent and imaginative ways.●● Allow children opportunities to be song makers.
Learning center focus: NUTRITION
What do children learn? ●● Sample a variety of foods●● Use of senses: sight, sound, smell, taste, and touch●● Math skills: counting and measuring●● Concepts of nutrition, health, and safety●● Ingredients in prepared foods●● Physical science concepts●● Food origins●● Foundation for understanding principles of math and chemistry●● Symbolic understanding
Which Project Construct Goals might be enhanced in this learning center?
SOCIOMORAL DOMAIN ●● Be inquisitive●● Be confident
COGNITIVE DOMAIN ●● Develop numerical thinking●● Develop geometric, spatial, and temporal reasoning●● Exchange mathematical ideas●● Increase knowledge of the physical world●● Develop and apply scientific reasoning●● Exchange scientific ideas
REPRESENTATIONAL DOMAIN ●● Develop as a reader●● Use language to communicate in a variety of ways for different purposes and audiences
PHYSICAL DEVELOPMENT DOMAIN ●● Develop healthy living practices●● Develop safe living practices
Which Missouri Early Learning Goals might be enhanced in this learning center?
APPROACHES TO LEARNING ●● Shows curiosity●● Shows confidence●● Uses problem-solving skills
SOCIAL AND EMOTIONAL DEVELOPMENT ●● Exhibits self-awareness and self-confidence (Knowledge of Self)
PHYSICAL DEVELOPMENT, HEALTH, AND SAFETY ●● Responds to sensory input to function in the environment (Physical Development)●● Practices healthy behaviors (Health and Self-Care)●● Practices safe behaviors (Safety)
42

LANGUAGE AND LITERACY ●● Listens for different purposes (Listening — Receptive Language)●● Uses language to communicate (Spoken — Expressive Language)●● Applies early reading skills (Reading)●● Uses concepts of print (Reading)
MATHEMATICS ●● Uses number to show quantity (Counting and Cardinality)●● Uses language to represent number of objects (Counting and Cardinality)●● Solves problems using number (Counting and Cardinality)●● Uses numerical representation (Counting and Cardinality)●● Makes comparisons (Measurement and Data)●● Uses measurement (Measurement and Data)
SCIENCE ●● Explores physical properties of objects and materials (Physical Science — Forces and Interactions)●● Investigates properties of objects and materials (Physical Science — Forces and Interactions)●● Solves problems involving physical properties of objects and materials (Physical Science)
How can teachers and parents help? ●● Keep activities short and simple.●● Utilize picture recipe cards for children to follow.●● Try recipes at home first.●● Discuss and practice sanitation and safety.●● Allow for tasting of individual ingredients and finished products — discuss differences.●● Point out chemical changes.●● Discuss smells, colors, sounds, textures and tastes.●● Invite guests to share the prepared delicacy.●● Remember, the more the adult does, the less children learn.●● Stay away from foods with high sugar content.●● Include children in planning, directing and producing the nutritional experience.
Learning center focus: OUTSIDE
What do children learn? ●● Facts about the world around them●● Discover and expand upon concepts●● Observation skills●● Strategies for questioning, exploration and experimentation●● Independence●● Respect for nature and all living things●● Appreciation for the beauty of the world around them●● Care for a play area●● Science concepts●● Understanding of the interaction and dependence between people and the environment●● Habitat needs
43

Which Project Construct Goals might be enhanced in this learning center?
SOCIOMORAL DOMAIN ●● Build relationships of mutual trust and respect with adults ●● Build relationships of mutual trust and respect with peers ●● Consider the perspectives of others ●● Be inquisitive ●● Take initiative ●● Be confident ●● Be reflective
COGNITIVE DOMAIN ●● Develop logical thinking ●● Analyze data ●● Increase knowledge of the physical world
PHYSICAL DEVELOPMENT DOMAIN ●● Develop motor skills for personally meaningful purposes ●● Develop healthy living practices ●● Develop safe living practices ●● Develop socially through regular physical activity ●● Develop cognitively through regular physical activity
Which Missouri Early Learning Goals might be enhanced in this learning center?
APPROACHES TO LEARNING ●● Shows curiosity ●● Takes initiative ●● Exhibits creativity and inventiveness ●● Shows confidence ●● Displays persistence ●● Uses problem-solving skills
SOCIAL AND EMOTIONAL DEVELOPMENT ●● Exhibits self-awareness and self-confidence (Knowledge of Self) ●● Builds relationships (Knowledge of Others)
PHYSICAL DEVELOPMENT, HEALTH, AND SAFETY ●● Uses gross motor skills with purpose and coordination (Physical Development) ●● Responds to sensory input to function in the environment (Physical Development) ●● Practices healthy behaviors (Health and Self-Care) ●● Practices safe behaviors (Safety)
LANGUAGE AND LITERACY ●● Represents feelings and ideas in a variety of ways (Symbolic Development) ●● Listens for different purposes (Listening — Receptive Language) ●● Uses language to communicate (Spoken — Expressive Language)
MATHEMATICS ●● Investigates positions and locations (Geometry)
SCIENCE ●● Explores physical properties of objects and materials (Physical Science — Forces and Interactions) ●● Investigates properties of objects and materials (Physical Science — Forces and Interactions)
44

●● Solves problems involving physical properties of objects and materials (Physical Science — Forces and Interactions)
●● Represents observations of the physical world in a variety of ways (Physical Science — Forces and Interactions) ●● Explores characteristics of living things (Life Science — Interdependent Relationships in Ecosystems) ●● Investigates characteristics of living things (Life Science — Interdependent Relationships in Ecosystems) ●● Solves problems related to living things (Life Science — Interdependent Relationships in Ecosystems) ●● Represents observations about living things in a variety of ways (Life Science — Interdependent Relationships
in Ecosystems) ●● Explores properties of earth and sky (Earth — Weather and Climate) ●● Investigates properties of earth and sky (Earth — Weather and Climate) ●● Solves problems involving earth and sky (Earth — Weather and Climate) ●● Represents observations about earth and sky in a variety of ways (Earth — Weather and Climate)
UNDERSTANDING THE WORLD ●● Explores people and the community (People and Communities)
How can teachers and parents help? ●● Provide sufficient time for children to actively engage in outside learning events. ●● Help individuals explore explanations for themselves. ●● Model observation techniques and encourage children to be observant. ●● Provide a variety of scientific instruments and tools that will assist children in their observations and
discoveries. ●● Encourage conservation or “wise use” of materials and resources. ●● Answer questions simply and honestly. ●● Value children’s errors in thinking as stepping-stones toward understanding rather than as ideas that should
be “correctly” explained by an adult. ●● Value children’s discoveries, thoughts and problem solving. ●● Repeat experiences. ●● Don’t be afraid of not knowing the answer. ●● Encourage exploration, experimentation and discussion between children. ●● Pursue children’s interests and ideas. ●● Ask questions that encourage inquiry and critical thinking.
Learning center focus: PRETEND PLAY
What do children learn? ●● Symbolic understanding ●● Problem solving ●● Cooperate and play together ●● Various occupations in the community ●● Respect and care for play materials ●● Self-worth ●● An understanding about similarities and differences between people ●● Language development ●● Social relations
Which Project Construct Goals might be enhanced in this learning center?
SOCIOMORAL DOMAIN ●● Build relationships of mutual trust and respect with peers ●● Consider the perspectives of others
45

●● Take initiative ●● Be inventive ●● Be reflective
REPRESENTATIONAL DOMAIN ●● Develop effective listening and speaking abilities ●● Develop as a writer ●● Use language to communicate in a variety of ways for different purposes and audiences ●● Represent ideas and feelings through pretend play ●● Represent ideas and feelings through movement ●● Recognize that symbolic expression has social, cultural, and historical contexts
Which Missouri Early Learning Goals might be enhanced in this learning center?
APPROACHES TO LEARNING ●● Takes initiative ●● Exhibits creativity and inventiveness ●● Uses problem-solving skills
SOCIAL AND EMOTIONAL DEVELOPMENT ●● Exhibits self-awareness and self-confidence (Knowledge of Self) ●● Manages feelings and behavior (Knowledge of Self) ●● Builds relationships (Knowledge of Others)
PHYSICAL DEVELOPMENT, HEALTH, AND SAFETY ●● Uses gross motor skills with purpose and coordination (Physical Development) ●● Uses fine motor skills with purpose and control (Physical Development) ●● Responds to sensory input to function in the environment (Physical Development)
LANGUAGE AND LITERACY ●● Represents feelings and ideas in a variety of ways (Symbolic Development) ●● Listens for different purposes (Listening — Receptive Language) ●● Uses language to communicate (Spoken — Expressive Language)
SCIENCE ●● Represents observations of the physical world in a variety of ways (Physical Science — Forces and Interactions) ●● Represents observations about living things in a variety of ways (Life Science — Interdependent Relationships
in Ecosystems) ●● Represents observations about earth and sky in a variety of ways (Earth — Weather and Climate)
UNDERSTANDING THE WORLD ●● Explores family (Family) ●● Explores people and the community (People and Communities)
EXPRESSIVE ARTS ●● Shows interest in dramatic arts (Drama) ●● Explores dramatic arts (Drama)
How can teachers and parents help? ●● Provide ample space with independent access to a variety of props and costumes. ●● Provide sufficient time for children to actively engage in quality pretend play. ●● Clearly label shelving with pictures of materials to enable children to maintain area independently. ●● Rotate materials in play area often. ●● Keep area clean, orderly, and aesthetically pleasing.
46

●● Encourage and value use of materials in divergent and creative ways.●● Carefully observe play and determine adult goals for involvement before becoming an active participant.●● Encourage exploration, experimentation and discussion between children.●● Value children’s discoveries, thoughts and creative endeavors.●● Provide books and experiences to enhance and extend pretend play.
Learning center focus: READING
What do children learn? ●● Enjoyment of reading and listening to a variety of genre●● Proper use and care of books●● Addition of concepts to experience●● Enjoyment of talking and listening to others●● Communication strategies●● Dramatization of familiar stories●● Story creation●● Social relations
Which Project Construct Goals might be enhanced in this learning center?
SOCIOMORAL DOMAIN ●● Build relationship of mutual trust and respect with adults●● Build relationships of mutual trust and respect with peers●● Consider the perspectives of others●● Be inquisitive●● Take initiative●● Be reflective
REPRESENTATIONAL DOMAIN ●● Develop effective listening and speaking abilities●● Develop as a reader●● Use language to communicate in a variety of ways for different purposes and audiences●● Gather and comprehend information from a variety of sources●● Represent ideas and feelings through pretend play●● Recognize that symbolic expression has social, cultural, and historical contexts
Which Missouri Early Learning Goals might be enhanced in this learning center?
APPROACHES TO LEARNING ●● Show curiosity●● Takes initiative●● Displays persistence●● Uses problem-solving skills
SOCIAL AND EMOTIONAL DEVELOPMENT ●● Manages feelings and behavior (Knowledge of Self)●● Builds relationships (Knowledge of Others)
LANGUAGE AND LITERACY ●● Listens for different purposes (Listening — Receptive Language)●● Uses language to communicate (Spoken — Expressive Language)
47

●● Applies early reading skills (Reading) ●● Uses concepts of print (Reading) ●● Attends to sounds in language (phonological awareness) (Sounds of Language)
How can teachers and parents help? ●● Support children’s unique ways of retelling stories. ●● Provide a comfortable, relaxed area. ●● Talk with and listen to each child on a daily basis. ●● Encourage children to share ideas and information. ●● Speak clearly, using Standard English. ●● Provide children with a flannel board, figures, puppets, a puppet theater, audio recording devices, etc. ●● Learn how to tell stories — be dramatic and enticing! ●● Model reading behavior to show the importance of reading on a daily basis. ●● Provide a variety of reading material from many genres that is inviting and accessible. ●● Rotate books and materials regularly. ●● Encourage children to solve literacy problems independently or with peers read to children daily.
Learning center focus: SCIENCE
What do children learn? ●● Facts about the world around them ●● Respect for nature and all living things ●● Appreciation for the beauty of the world around them ●● Care for a play area ●● Be curious and wonder “why” ●● Questioning, exploration and experimentation ●● Prediction ●● Problem-solving strategies ●● Logico-mathematical knowledge ●● Science concepts
Which Project Construct Goals might be enhanced in this learning center?
SOCIOMORAL DOMAIN ●● Build relationships of mutual trust and respect with adults ●● Build relationships of mutual trust and respect with peers ●● Be inquisitive ●● Take initiative ●● Be reflective
COGNITIVE DOMAIN ●● Develop logical thinking ●● Develop numerical thinking ●● Analyze data ●● Increase knowledge of the physical world ●● Develop and apply scientific reasoning ●● Exchange scientific ideas
REPRESENTATIONAL DOMAIN ●● Use language to communicate in a variety of ways for different purposes and audiences
48

Which Missouri Early Learning Goals might be enhanced in this learning center?
APPROACHES TO LEARNING ●● Shows curiosity ●● Takes initiative ●● Displays persistence ●● Uses problem-solving skills
SOCIAL AND EMOTIONAL DEVELOPMENT ●● Exhibits self-awareness and self-confidence (Knowledge of Self) ●● Builds relationships (Knowledge of Others)
PHYSICAL DEVELOPMENT, HEALTH, AND SAFETY ●● Uses fine motor skills with purpose and control (Physical Development) ●● Responds to sensory input to function in the environment (Physical Development) ●● Practices healthy behaviors (Health and Self-Care) ●● Practices safe behaviors (Safety)
LANGUAGE AND LITERACY ●● Listens for different purposes (Listening — Receptive Language) ●● Uses language to communicate (Spoken — Expressive Language) ●● Develops and expands vocabulary (Speaking — Expressive Language) ●● Uses writing as a means of expression/communication (Written Language) ●● Applies early reading skills (Reading) ●● Uses writing as a means of expression/communication (Writing)
MATHEMATICS ●● Solves problems using number (Counting and Cardinality) ●● Makes comparisons (Measurement and Data) ●● Uses measurement (Measurement and Data) ●● Collects, organizes and uses information (Charting and Graphing) (Measurement and Data) ●● Investigates positions and locations (Geometry) ●● Explores shapes in the environment (Geometry)
SCIENCE ●● Explores physical properties of objects and materials (Physical Science — Forces and Interactions) ●● Investigates properties of objects and materials (Physical Science — Forces and Interactions) ●● Solves problems involving physical properties of objects and materials (Physical Science — Forces and
Interactions) ●● Represents observations of the physical world in a variety of ways (Physical Science — Forces and Interactions) ●● Explores characteristics of living things (Life Science — Interdependent Relationships in Ecosystems) ●● Investigates characteristics of living things (Life Science — Interdependent Relationships in Ecosystems) ●● Solves problems related to living things (Life Science — Interdependent Relationships in Ecosystems) ●● Represents observations about living things in a variety of ways (Life Science — Interdependent Relationships
in Ecosystems) ●● Explores properties of earth and sky (Earth — Weather and Climate) ●● Investigates properties of earth and sky (Earth — Weather and Climate) ●● Solves problems involving earth and sky (Earth — Weather and Climate) ●● Represents observations about earth and sky in a variety of ways (Earth — Weather and Climate)
How can teachers and parents help? ●● Provide a well-lighted area with appropriate materials for close inspections and examinations. ●● Provide a variety of scientific instruments and tools accessible for independent use. ●● Provide science notebooks and other writing materials for recording of observations and experiments.
49

●● Arrange and label materials in an aesthetically pleasing manner. ●● Use hands-on experiences that allow children to discover for themselves. ●● Encourage conservation or “wise use” of materials and resources. ●● Encourage and model observation techniques. ●● Use a variety of media and provide a variety of experiences. ●● Repeat experiences. ●● Value children’s errors in thinking as stepping-stones toward understanding rather than an idea that should
be “correctly” explained by an adult. ●● Value children’s discoveries, thoughts, and problem solving. ●● Don’t be afraid of not knowing the answer. ●● Encourage exploration, experimentation, and discussion between children. ●● Pursue children’s interests and ideas. ●● Ask questions that encourage inquiry and critical thinking. ●● Consider age of children in relation to safety.
Learning center focus: WRITING
What do children learn? ●● Enjoyment of writing and sharing writing ●● Proper use and care of writing tools ●● Addition of concepts to experience ●● Creativity, expression of self and respect of individual creativity ●● Fine motor skills ●● Eye-hand coordination ●● Independence
Which Project Construct Goals might be enhanced in this learning center?
SOCIOMORAL DOMAIN ●● Build relationships of mutual trust and respect with peers ●● Take initiative ●● Be inventive ●● Be confident ●● Be reflective
COGNITIVE DOMAIN ●● Exchange mathematical ideas ●● Exchange scientific ideas
REPRESENTATIONAL DOMAIN ●● Develop as a writer ●● Use language to communicate in a variety of ways for different purposes and audiences ●● Gather and comprehend information from a variety of sources ●● Represent ideas and feelings through art and construction ●● Recognize that symbolic expression has social, cultural, and historical contexts
PHYSICAL DEVELOPMENT DOMAIN ●● Develop motor skills for personally meaningful purposes
50

Which Missouri Early Learning Goals might be enhanced in this learning center?
APPROACHES TO LEARNING ●● Takes initiative●● Exhibits creativity and inventiveness●● Shows confidence●● Displays persistence●● Uses problem-solving skills
SOCIAL AND EMOTIONAL DEVELOPMENT ●● Exhibits self-awareness and self-confidence (Knowledge of Self)●● Builds relationships (Knowledge of Others)
PHYSICAL DEVELOPMENT, HEALTH, AND SAFETY ●● Uses fine motor skills with purpose and control (Physical Development)
LANGUAGE AND LITERACY ●● Represents feelings and ideas in a variety of ways (Symbolic Development)●● Listens for different purposes (Listening — Receptive Language)●● Uses language to communicate (Spoken — Expressive Language)●● Applies early reading skills (Reading)●● Uses concepts of print (Reading)●● Attends to sounds in language (Phonological awareness) (Reading)●● Uses writing as a means of expression/communication (Writing)
MATHEMATICS ●● Uses numerical representation (Counting and Cardinality)
SCIENCE ●● Represents observations of the physical world in a variety of ways (Physical Science — Forces and Interactions)●● Represents observations about living things in a variety of ways (Life Science — Interdependent Relationships
in Ecosystems) ●● Represents observations about earth and sky in a variety of ways (Earth — Weather and Climate)
How can teachers and parents help? ●● Provide a comfortable, relaxed area for writing.●● Listen and respond to each child’s writing on a daily basis.●● Respond to children’s meaning intent.●● Encourage children to share ideas and information.●● Allow children to work freely and independently.●● Provide children with a variety of paper, writing tools, and materials such as envelopes, stamps, hole punches,
rubber stamps, stickers, etc.●● Arrange materials in an orderly, aesthetically pleasing manner that encourages and supports independent
use.●● Encourage children to invent and utilize writing at their own level of understanding.●● Support children’s unique ways of writing.●● Focus on process rather than product.●● Provide resources such as alphabet books.●● Encourage children to solve literacy problems independently or with peers.
51

Learning center focus: WOODWORKING
What do children learn? ●● Sensory experiences●● Large and small muscle skills●● Finger-hand control●● Eye-hand coordination●● A sense of accomplishment●● Verbal and math concepts●● Problem solving●● Care for tools and equipment●● Planning strategies●● Independence
Which Project Construct Goals might be enhanced in this learning center?
SOCIOMORAL DOMAIN ●● Build relationships of mutual trust and respect with adults●● Be confident●● Be inventive●● Be reflective
COGNITIVE DOMAIN ●● Develop geometric, spatial, and temporal reasoning●● Increase knowledge of the physical world
REPRESENTATIONAL DOMAIN ●● Represent ideas and feelings through art and construction
PHYSICAL DEVELOPMENT DOMAIN ●● Develop motor skills for personally meaningful purposes●● Develop healthy living practices●● Develop safe living practices●● Develop cognitively through regular physical activity
Which Missouri Early Learning Goals might be enhanced in this learning center?
APPROACHES TO LEARNING ●● Exhibits creativity and inventiveness●● Shows confidence●● Displays persistence●● Uses problem-solving skills
SOCIAL AND EMOTIONAL DEVELOPMENT ●● Manages feelings and behavior (Knowledge of Self)●● Builds relationships (Knowledge of Others)
PHYSICAL DEVELOPMENT, HEALTH, AND SAFETY ●● Uses gross motor skills with purpose and coordination (Physical Development)●● Uses fine motor skills with purpose and control (Physical Development)●● Responds to sensory input to function in the environment (Physical Development)●● Practices safe behaviors (Safety)
52

LANGUAGE AND LITERACY
●● Represents feelings and ideas in a variety of ways (Symbolic Development)
MATHEMATICS ●● Makes comparisons (Measurement and Data)●● Uses measurement (Measurement and Data)●● Investigates positions and locations (Geometry)
SCIENCE ●● Explores physical properties of objects and materials (Physical Science — Forces and Interactions)●● Investigates properties of objects and materials (Physical Science — Forces and Interactions)
How can teachers and parents help? ●● Provide standard “real” tools, such as hammers, saws, screwdrivers, rulers, pencils, nails, square,
sandpaper, safety goggles, etc.●● Provide a variety of types and shapes of wood.●● Discuss functions and correct use of tools with children before they work with them.●● Make rules clear to children before they begin.●● Provide support and encouragement.●● Allow children to work with tools without expecting them to produce a product.●● Projects should be simple enough for children to do without the adult “taking over.”●● Provide opportunities for disassembling small appliances and machines.●● Supervise work area closely.
Learning Experience Components Each Nature Revealed learning experience is outlined to help you choose, prepare, and successfully conduct the activity in your classroom or outdoor area.
Name of learning experience: The short, descriptive title quickly conveys the activity’s key concepts or topic.
Learning center: Learning centers are special places teachers create for child play and learning. They allow children to work in small, self-chosen groups while they pursue a Nature Revealed learning experience. Using learning centers allows you to support individualized learning at a wide variety of developmental levels. Each Nature Revealed activity describes a learning center that is ideal for that activity. In addition, learning centers are aligned with the Missouri Project Construct goals and early childhood learning goals outlined in the Learning Center Opportunities.
Notes from Sherri: These explain how the activity was developed, describe special circumstances that relate to the learning experience, or just provide helpful information.
Did you know: This is basic background knowledge about the conservation concepts addressed in the learning experience.
Children will: These are specific, observable actions or objectives that learners will engage in during the learning experience.
You’ll need: A list of materials you’ll need to conduct the activity. Some experiences call for puzzles and storyboard characters, which are grouped according to their related activities in the back of the book. Look for the icon in the upper right-hand corner of puzzle and character pages to match them with their related learning experiences.
Teacher preparation: Included in this section are activities you will need to do before conducting the activity. Use it to quickly determine if you’re prepared to present the learning event.
53

What to do: The numbered, step-by-step procedures show you how to introduce, conduct, and conclude the experience. Each learning event includes several open-ended questions that encourage children to make deeper connections and explore beyond the activity itself, and they often integrate concepts across the curriculum.
Selected children’s literature: These are annotated books that support or extend the learning experience. Not all activities include selected literature. Additional resources are listed in the Selected Children’s Literature and Field Guides section.
Additional learning experiences: This section includes supplemental learning experiences correlated with specific learning centers that support or expand upon learning in the main experiences. Home/school connections are also suggested in this section. Check the Family Invitation and Calendar of Activities for more ideas about home/school connections.
54

Seasonal Learning
Experiences Detailed activities and references help you
get your preschoolers outside and into nature every season of the year.
55

56

57
Fall C hildren are always eager about the approach of fall as seasonal changes trigger
changes in plant, animal, and human activity. Deciduous trees become a blaze of orange, red, and gold as cooler
temperatures and fewer daylight hours cause chemical changes in their leaves. Later in the fall, severe frosts or strong breezes carry the flashy leaves to the ground where they eventually decompose.
Deer begin their ancient courtship rituals all over the state. Their movement during the breeding season makes these large mammals easier to spot than at other times of the year.
Preparations for winter are in full swing. Farmers harvest crops, some birds start their seasonal migrations south, and many people and animals begin preparing their homes and storing food for the winter months ahead.
Yellow school buses appear, friendships are renewed, and a new learning season begins. Take advantage of the cooler days with the children in your care. Whenever possible eat lunch, have story time, or provide learning centers outside. Brainstorm with the children all the words they can think of to describe fall. Ask them questions that help them learn the five senses — how fall feels, smells, tastes, looks, and sounds different than at other times of the year. Celebrate the season with a fall event for families. This might be a bonfire, scarecrow building, leaf treasure hunt, fall equinox (when day and night are equal in length) party, or an apple celebration. Whatever you plan, it is sure to be an exciting outdoor event!
Fall learning experience topics include: ●● Trees and leaves●● Seasonal changes●● Harvest, both plant and animal●● Seeds●● Food preservation●● Land use

58

Fall 1 What Can You See?
FIELD TRIP: Explore the neighborhood and practice observing and collecting
!Children will: ●● Investigate the environment
around their school ●● Predict things they might see in a
walk around the neighborhood ●● Compare predictions to things
they actually saw on their walk ●● Collect artifacts during a nature
walk ●● Explore and discuss different
ways that people use land ●● Create a collage using artifacts
collected during the walk
You’ll need: ●● Safe route for children to walk
near school ●● Collection bag for each child
(to use on the walk) ●● Glue ●● Crayons ●● Scissors ●● Tape ●● Camera (optional) ●● Chart paper and markers ●● Heavy paper, poster board,
or plastic foam meat tray for each child
Notes from Sherri:
Did you know? Conservation is the wise use of our natural resources. One of the natural resources that people use is the land. This learning experience will help children become more aware of the world around them. It also will encourage them to explore the many different ways people use the land.
Teacher preparation:
The children commenting on environmental changes in our small community inspired this activity. Children quickly notice and comment on new construction as well as seasonal changes. With just a few, well-chosen questions, teachers can help children consider how people use land and how that use affects other natural resources, such as plants and wildlife.
●● Scout neighborhood to locate best route to see several ways people use the land.
●● Locate potential hazards such as poison ivy. ●● Draw a line down the center of a piece of chart paper. Write
“Things We Might See” to title one side of the paper and “Things We Saw” on the other side.
●● Consider rules most appropriate for walking and collecting artifacts.
●● Label bags with children’s names. ●● Gather materials to use in creating the collages.
What to do: 1. Gather children and prepare them for a walk around the
neighborhood.
2. Discuss some of the things they might see on their walk. Record their ideas on the piece of chart paper titled “Things We Might See”. As you write down their ideas (even those you know they could not possibly see) introduce the word predict and discuss how it relates to what they are doing.
3. Discuss things children might collect on the walk. Be sure to talk about dangerous or inappropriate items for the children to take back to the classroom.
59

4. Distribute collection bags to the children and take a walk. Encourage children to collect things, such as flower petals, rocks, trash, nuts, leaves, etc. Take photographs of things that can’t be taken back to the classroom. Be sure to direct the children’s attention to things they might miss, such as stores, telephone poles, electric wires, garbage cans, streets, sewers, fireplugs, clouds, etc. (Caution children not to pick flowers from private or public property.)
5. After the walk, compare the things the children saw with those they predicted they would see. Write the things they saw on the corresponding side of the chart paper.
6. Ask children open-ended questions such as:
●● What things did you see and collect that were living? Nonliving? ●● What are some different ways that you saw people using the land? ●● How do you think the neighborhood looked before people lived here? ●● What animals do you think live in this environment? What animals don’t? Why?
8. Make a classroom display using the completed chart paper, photographs, and the children’s work to document their learning.
7. Encourage children to use the gathered materials to create collages of their experience.
Related children’s literature: Showers, P., & Brandenberg, A. (1993). The listening walk. New York, NY: HarperCollins. ISBN-10: 9780064433228.
This story provides a realistic picture of what children might hear as they walk through a neighborhood. The illustrations by Aliki depict natural and people-made sounds.
Bunting, E. (2003). Anna’s table. Chanhassen, MN: NorthWord Press. ISBN-10: 1559718412. Anna collects beautiful natural treasures that she and her family find. She displays them on a “nature table” and tells the story behind each treasure. It will inspire children to look for and collect their own treasures.
Baker, J. (1991). Window. New York, NY: Greenwillow Books. ISBN-10: 0688089186. This picture book illustrates how the view from a young boy’s window changes from a wilderness to a city as he grows up.
Additional learning experiences BLOCKS: Put out various props so children can build houses and neighborhoods in the block area during self-selected activity time. Use green paper for grass, straws and twigs stuck in clay for trees and telephone poles, spools for fire plugs, etc. Display a map and pictures of various types of houses and buildings. Provide paper and pencils for children to create their own maps.
BLOCKS: Take photographs of landmarks along the route you travel. Include the school in the photos. Print the pictures and attach them to unit blocks. As children play, challenge them to use the photos from the walk to build a map of the neighborhood surrounding the school or the route taken on the walk.
FIELD TRIP: Visit other types of areas and compare what the children see. For example, visit a farm, park, wildlife area, and downtown shopping area. Discuss the different ways people use the land in each one.
FIELD TRIP: Take this same walk during the different seasons of the year. Discuss changes in the scenery, collected items, and weather. Refer back to previous documentation for a point of reference.
HOME/SCHOOL CONNECTION: Challenge parents to take their children on walks around their neighborhoods. Encourage them to talk with their children about things they saw that were similar to those seen on the school walk. Ask them to take pictures and send them in for their child to share the discoveries they made together.
PRETEND PLAY: During self-selected activity time put out dress-up props in the pretend play area for the types of stores or community helpers the children saw on their walk (grocery store, flower shop, farmer, logger, police officer, bricklayer, construction worker, etc.).
60

Tree Skin OUTSIDE: Examine tree bark and create rubbings Fall
2
Children will: ●● Explore different kinds of
tree bark ●● Create rubbings from different
types of trees ●● Compare tree bark from different
types of trees ●● Discuss similarities and
differences between people skin and tree bark
You’ll need: ●● Outdoor area with several
different types of trees ●● A field guide for identifying
different kinds of trees. Check the recommended field guides in Selected Children's Literature and Field Guides in the back.
●● Blank newsprint or drawing paper
●● Hand lens or magnifying glass for each child
●● Camera (optional)
Did you know? One way we can identify trees is by their bark. Persimmon trees have rough, bumpy bark, while the sweetgum and sycamore have smooth bark. This activity will encourage children to explore, compare, and contrast bark color and texture and discuss some of the effects people and animals have on the bark.
Teacher preparation: ●● Locate outdoor area with several different kinds of trees and
scout for potential hazards. ●● Look for scars or other interesting characteristics of the trees. ●● Peel crayons.
What to do: 1. Place crayons and paper near several trees in the play area for
use during outside self-selected activity time.
2. As interested children approach the trees, point out the texture of the barks. Model recording the texture of the tree’s bark by placing drawing paper flat against the tree and rubbing it with the flat side of a crayon.
3. Encourage children to make rubbings of several different trees.
4. Discuss similarities and differences in the various rubbings. Take photographs of various tree bark and interesting marks on the trees.
5. As children express interest, look for tree scars. Compare the children’s scrapes and cuts to scars on a tree. Use the hand lenses to more closely examine the tree scars and irregularities. Discuss the similarities between blood and tree sap.
6. Compare and contrast tree bark with people’s skin. Look at colors and textures of both kinds of skin. While discussing the unique features of the trees with the children ask open-ended questions such as:
●● How are tree bark and people skin alike? Different? ●● What causes trees to get scars? ●● Why do trees have different kinds of bark?
61

Related children’s literature: Gibbons, G. (2002). Tell me, tree: All about trees for kids. Boston, MA: Little, Brown Books for Young Readers.
ISBN-10: 0316309036. Providing a lovely introduction to trees for young children, Gibbons identifies the various parts of trees and their functions. In addition, she provides an identification guide to common trees, including a painting of tree, leaf, and bark. She also gives directions for making your own tree-identification guide, including bark rubbings.
Additional learning experiences: DISPLAY: Make a display matching the children’s tree rubbings with actual tree leaves and/or pictures of the tree.
HOME/SCHOOL CONNECTION: Challenge families to collect bark rubbings in places where they visit. Encourage them to also collect a leaf from the tree and information about where the collection took place.
OUTSIDE: Go on a leaf-rubbing treasure hunt. Provide children with one rubbing each and challenge them to find the tree it came from.
SCIENCE: Obtain a cross section of a tree trunk or branch (tree cookie), or visit a newly cut stump. Explain how the tree grows a new ring of wood each year. Encourage children to age the tree by counting the rings. Compare center rings with outside rings.
WRITING: Challenge children to make a collection of tree bark rubbings. Encourage them to take a leaf to put with each rubbing. Record information about where the tree was located and identify the tree, if possible. Children and families could also collect rubbings to place in the book with pictures of the families taking the collection. Place them in a binder to create a class tree book.
62

Fall 3
SCIENCE: Discover the importance of tree roots
Hang On!
Children will: ●● Explore how roots help
trees and soil ●● Discuss one of the many
benefits of trees ●● Record predictions ●● Compare predictions with actual
results of an experiment
You’ll need: ●● Tub of soil ●● Sticks and twigs ●● Water ●● Chart paper and marker ●● Science notebooks
Did you know? Trees help hold soil in place and keep it from washing away. This learning experience will enable children to explore this concept.
Teacher preparation: ●● Place soil in sensory table. ●● Gather materials. ●● Place science notebooks and pencils near sensory table.
What to do: 1. Encourage children to experiment and play with the soil during
self-selected time. Sticks and twigs can be added to represent trees.
2. As children are playing, discuss what would happen if water were added to the soil.
3. Encourage them to record their predictions in their science notebooks.
4. After recording their predictions, explain to the children that you will conduct an experiment to see what happens when water is added to the soil. Have each child put a hand in the tub of soil, grabbing a handful. Ask them to pretend their arms are trees and their hands are tree roots. Together they make up a forest of trees. A big storm is coming and the trees have to hang on. Add water to the soil, pretending it is a heavy rainstorm.
5. Discuss the results of the experiment. Ask open-ended questions such as:
●● How do tree roots help the tree? ●● What animals use the tree’s roots? How? ●● What happens to the soil when there aren’t any trees? ●● What other ways are there to keep soil in one place? ●● What other plants help hold the soil?
63

6. Record the children’s thoughts and ideas on the chart paper and compare them with their predictions in their science notebooks.
7. Repeat the experiment as different children visit the area and express interest.
Additional learning experiences: DISPLAY: Take pictures of the children as they are conducting the experiment. Display the pictures along with their predictions and ideas about the experiment.
FIELD TRIP: Visit a creek bank or a site where a bulldozer has pushed over trees and examine the exposed roots.
OUTSIDE: During outside self-selected activity time, encourage children to look for surface tree roots on the playground.
64

Fall 4 Do Trees Get Drinks?
SCIENCE: Conduct an experiment to discover how water moves through trees
Children will: ●● Conduct an experiment to
simulate how water travels through plant structures to the leaves
●● Record predictions in science notebooks
●● Discuss and compare predictions with the actual results of the experiment
You’ll need: ●● Knife ●● Celery stalk with leaves (works
best with celery that has been out of the refrigerator for several hours)
●● Two clear glasses or jars ●● Two colors of food coloring
(red and blue work best) ●● Science notebooks and pencils ●● Chart paper and marker ●● Camera (optional)
Did you know? Trees get water from the ground through their roots. The water travels up tubes in the tree all the way to the leaves at the top. If there isn’t enough water, the tree will die.
Teacher preparation: ●● Gather all materials and place near the science center for use
in small groups during self-selected activity time. ●● Prepare chart paper with the title “What do you think will
happen to the celery?” ●● Make sure science notebooks and pencils are readily
accessible.
What to do: 1. With a small group of children during self-selected activity time,
trim away the bottom part of the celery stalk and slice halfway through the center of the celery stalk lengthwise. (It takes several hours for the dye to travel through the celery, so do this activity at the beginning of the day or just before the children go home.)
2. Ask children to fill the two containers about three-quarters full of water and add enough food coloring to make a dark solution of one color for each container (red and blue work best).
3. Put the two containers next to each other and place the celery stalk so it has a cut end in the water in each jar. While you are working, ask children open-ended questions like these:
a. How do you think celery and trees are alike? How are they different?
b. What do you think will happen to the celery? Why?
4. Ask children to make predictions and write or draw in their science notebooks what they think will happen. Also record their ideas on the chart paper and photograph the various stages of the experiment.
65

5. Compare their predictions with their observations of the experiment. Encourage the children to look back in their science notebooks and compare the results with their own drawings and predictions.
6. Display the experiment, their predictions and conclusions, and pictures of the experiment so children can further discuss their ideas.
Related children’s literature: Kudlinski, K.V. (2007). What do roots do? Lanham, MD: Cooper Square Publishing LLC. (Original work
published 2005). ISBN-10: 155971980X. This poetic picture book takes readers underground to see what roots do for plants and trees. Share this book after conducting the experiment so children can make life-to-text connections.
Additional learning experiences: NUTRITION: Provide children with a healthy drink (milk or 100-percent juice) and a straw. Suggest that they are going to be like the tree. The straw is the stem or trunk of the tree. They are the leaves and the bottom of the cup or container is where the roots soak up the nutritious liquid. They should drink through the stems or trunks and consider how it is helping their bodies. This is how the tree sucks up moisture and nutrients that go to the leaves. The leaves, just like their bodies, convert that to energy to help the tree grow and develop. Talk about what happens when the container is empty, when the container holds more than they can drink, or the container is filled with something that isn’t good for them. Relate this to what happens to the tree.
SCIENCE: Add a control to the above experiment by placing a trimmed stalk of celery (with leaves) in a dry jar. Notice the difference between the two experiments.
SCIENCE: During self-selected activity time, provide a tub with water and have children soak and play with leaves in it. Discuss what happens to the veins. Compare them to the veins on the children’s hands. Include leaves of different shapes and different vein patterns.
66

Fall 5 Tree Puzzle
MANIPULATIVE: Put together a tree and find out the functions of its parts
Children will: ●● Experiment with putting
together the different parts of a tree
●● Discuss the various parts of a tree and their functions
●● Explore ways animals use trees
You’ll need: ●● Storyboard ●● Related storyboard characters
! Notes from Sherri: In my classroom, the storyboard is a favorite place for young children to work. However, in many programs, the storyboard area is often under-used. When I make this storyboard puzzle available, I begin with just the basic parts of the tree. As children manipulate and experiment with the tree itself, I add animals, birds, nests, and other trees, just a few pieces at a time. This keeps the activity interesting while providing an opportunity to discuss which tree parts are important to various animals and inter-dependence of all the plants and animals.
Did you know? Trees have several different parts — the roots, trunk, branches and leaves. Each part is important to the tree’s survival. This activity will encourage children to notice the various parts of a tree.
Teacher preparation: ●● Prepare storyboard characters. ●● Set up the storyboard as a learning center.
What to do: 1. Place the storyboard characters near the storyboard during self-
selected activity time.
2. Allow children to put the puzzle together as they choose.
3. Vary the parts of the puzzle as the seasons change.
4. As children play with the puzzle, discuss what they think the parts of the tree are called and what their functions might be. Accept all of their ideas and encourage children to discuss the possibilities with one another. Ask children open-ended questions like these:
●● Why do you think trees need all of these parts? ●● How does the tree change? ●● How do animals use trees? ●● Which animals use the roots? Trunk? Branches? Leaves? ●● How do people use trees?
67

5. Use the fruit, nuts, birds, squirrels and nests and other relevant animals to encourage play and discussion about the many uses of trees.
Related children’s literature: de Bourgoing, P. (1992). The tree. New York, NY: Cartwheel Books. ISBN-10: 0590452657. The bright
transparencies in this nonfiction book depict a chestnut tree, helping readers see the tree’s outside and inner workings, as well as vivid changes that occur in the tree throughout the seasons.
Ward, J., & Falkenstern, L. (2009). The busy tree. Tarrytown, NY: Marshall Cavendish Children’s Books. ISBN10: 0761455507. An oak tree describes all the things that happen inside its many parts.
Reed-Jones, C., & Canyon, C. (1995). The tree in the ancient forest. Nevada City, CA: Dawn Publications. ISBN-10: 1883220319. This repetitive cumulative verse depicts the web of plants and animals that live in and around an old fir tree.
Additional learning experiences: ART: Provide brown construction paper, paint, and leaf-shaped sponges, tissue paper, torn construction paper, and other materials for children to create their own trees. Place materials as well as tree pictures (actual photographs of trees in the neighborhood or pictures cut from magazines) in the art area during self-selected activity time. Vary the materials depending on the season and the children’s ideas.
MUSIC: Play Charlotte Diamond’s What Kind of Tree Are You? (1988. Diamond in the Rough. Vancouver, BC: Hug Bug Records) and move to the music.
OUTSIDE: Encourage children to discover the many different kinds of trees whenever they visit new places. Compare height, width, bark, leaves, branches, and any other features they happen to notice.
68

Fall 6 Woodworking
Comparisons WOODWORKING: Discover ways people use wood and experience different types of wood
Children will: ●● Explore and examine various
types of wood ●● Compare properties of various
types of wood ●● Experiment with ways people
use wood
You’ll need: ●● Several different varieties of
scrap lumber (pine, spruce, cedar, oak, maple, balsa, etc.)
●● Hammers ●● Nails ●● Hand saws ●● Hand drills ●● Rulers ●● Pencils ●● Safety goggles
! Notes from Sherri: Woodworking is an important part of any early childhood program. Introduce the woodworking area to children when everyone has demonstrated an adequate level of self-regulation. Establish rules from the beginning, and include the children in the rulemaking process. Currently the rules in our woodworking area are:
●● Tools may only be used in the woodworking area ●● Sawing can only be done on wood placed in a vise ●● Both hands must be on the handle of the saw while sawing ●● Hammering must be done on the floor on a hammering
block ●● Drilling can be done on wood placed on a hammering
block or in a vise ●● If all the tools are being used, sign-up for a turn ●● Wear the safety goggles if you think you need them
This activity occurred as a result of using a variety of wood scraps in our woodworking area. I noticed children searching for the “soft” wood because it was easier to saw. Their search led me to be more deliberate about the types and varieties of wood I placed in the wood barrel. I have found that woodworkers in our community are often helpful in making suggestions and providing some wood scraps as well as coming into the classroom and working with the children.
Did you know? Different trees produce wood that is different in color, texture, hardness, and odor. This learning experience will encourage the exploration of various types of wood and experimentation with ways people use wood.
Teacher preparation: ●● Set up a woodworking learning center. ●● Learn how to use each tool. ●● Establish rules for working in the woodworking learning
center. ●● Gather various types of wood in sizes appropriate for the
children and the space.
69

What to do: 1. Introduce a small group of children to the woodworking area by describing each tool and demonstrating its use.
2. Allow children to practice using the tools with close supervision. (Parents might be recruited to aid with this until children become comfortable using the tools.)
3. During self-selected activity time, provide a variety of types of wood for children to experiment with.
4. As children work, discuss similarities and differences between the various woods. Ask open-ended questions:
●● Which wood is the easiest for you to saw? Drill? Hammer? ●● Where does the sawdust come from? ●● How are these woods the same? Different?
5. As children become more able to use the equipment, encourage them to plan projects and select their wood accordingly.
Additional learning experiences: FIELD TRIP: Visit a lumberyard, furniture store, cabinet shop, sawmill, or musical instrument maker.
HOME/SCHOOL CONNECTION: Challenge families to find two things in their homes made from wood and take a picture of their child with the items. Make a display of the children’s pictures and their comments.
GROUP: Invite a fiddler or a woodworking craftsman to the classroom.
MANIPULATIVE: Create a matching game for the children with pictures of trees and the wood that comes from the tree.
NUTRITION: Serve various fruits and nuts for snack, and discuss what kind of tree/plant they came from.
PRETEND PLAY: During self-selected activity time, put out props in the pretend play corner for a carpenter and a tree surgeon. Have artificial fruits and nuts available for children to use in pretend cooking.
70

Fall 7
Tree Books WRITING: Document knowledge of trees through writing, drawing, and painting
Children will: ●● Draw and watercolor
a tree ●● Share facts they
know about trees ●● Compose a story or
information about trees for a class book
You’ll need: ●● Watercolors ●● Crayons ●● Watercolor paper
or other heavy, absorbent blank paper
●● Small cups of water for rinsing brushes
●● Watercolor brushes ●● Paper towels for
blotting brushes ●● Chart paper and
markers
! Notes from Sherri: One year as the children were noticing the seasonal changes in the trees on our playground, they were also engaged in a study of watercolors. Their interest in storytelling as well as creating watercolor trees was the inspiration for this learning experience. After making the book, the children were eager to check it out and share it with their families. Parents were amazed at what the children knew about trees, their creativity, and emerging literacy skills. That fall children drew and sketched numerous trees in their environments at home, in parks, in natural areas, wherever they happened to be. They even learned the names of many common trees in the neighborhood. The key for the success of the experience was channeling the children’s interest and helping them to focus their ideas and research.
Did you know? Young children already know an abundance of information about trees. This activity will help you gain more understanding of the children’s knowledge of trees, as well as provide children an opportunity to document that information.
Teacher preparation: ●● Prepare one piece of chart paper with the title “Things We Know About
Trees.” ●● Gather supplies and place in a container to take outside.
What to do: 1. During group time, ask children to share what they know about trees.
Record their ideas on the chart paper titled “Things We Know About Trees.” Include at least one idea from each child.
2. In small groups, take the children outside to an area with several trees. If an outside area is unavailable, put pictures of trees in the area where the children will be working.
3. Discuss unique features of trees with the children. Talk about the way the branches come out of the tree, the different leaf structures, and the roots visible on the ground. Ask the children open-ended questions:
●● What lives in trees? ●● How do trees help wildlife? ●● Why do people need trees? How do trees help people? ●● What do trees need to survive?
71

●● How can people help trees?
4. As children discuss people, wildlife, and trees, write their ideas on another piece of chart paper.
5. After the discussion, encourage each child to select a favorite tree. Ask children to stand next to the tree and spread their arms like the tree branches. Stretch their toes out like the roots reaching into the ground. Close their eyes and sway with the tree in the wind. Feel the birds landing on the branches. Reach to the sun and wiggle fingers like leaves reaching for the light. Imagine what it feels like to be the tree.
6. After they have experienced the tree, ask children to draw it with crayons, then use watercolors to paint their trees. Remind them to include the details they felt while they were the trees, the branches, leaves, the sturdy trunk, and the roots down under the ground.
7. When paintings have dried, encourage children to write and illustrate stories on the back of the paper. Remember, even very young children can pretend to write. After completing their stories, ask children to read them. Take dictation of the children reading or tape record and transcribe the reading. Attach the transcript to each child’s writing to their individual paintings.
8. Bind their recorded ideas, the paintings, and stories together to make a class book for all of the children and families to read and enjoy together.
Related children’s literature: Locker, T., & Christiansen, C. (2001). Sky tree: Seeing science through art. New York, NY: HarperCollins. (Original
work published 1995) ISBN-10: 0064437507. Portraying a tree’s seasonal changes, this book’s vibrant paintings and descriptive text explore questions about nature.
Additional learning experiences: ART: Take a photograph of a familiar or favorite tree on your play yard. This activity works best when the photo is taken of a deciduous tree after the leaves have fallen. Copy or print the photo in black and white on transparencies (one per child). Place the transparencies in the art area, either on a white surface or the light table. Make permanent markers in appropriate seasonal colors available for children to use during self-selected activity time. Interested children should be encouraged to embellish their trees to reflect the season. For example, in the fall include red, green, yellow, and orange markers to depict fall leaves and animals that might visit the tree. Hang the trees in a sunny window for everyone to enjoy.
BLOCKS: Make trees with twigs and clay. Set these out in the block area for children to include in their building during self-selected activity time.
●● What happens to trees in winter? Summer? Fall? Spring?
MANIPULATIVE: During self-selected activity time, provide animal cards for children to sort according to those animals that live in trees and those that don’t.
OUTSIDE: Adopt a tree. Make a list of the children’s ideas about how they can help care for it. Some suggestions might include watering it, mulching around its trunk, fertilizing it, not pulling on the branches, putting bird and squirrel feeders in it, planting flowers under it, etc.
OUTSIDE: During self-selected activity time, encourage children to look for bird nests and other signs of wildlife using trees. (Note: Bird nests should not be disturbed. Nests carry many diseases and may not be legally possessed.)
READING: Include a pocket and card in the class book so that it can be checked out and shared at home. Make an audio recording of the children reading their stories to go along with the class book.
WRITING: Put small, blank books in the writing center for children to create their own tree books during self-selected activity time.
72

Fall 8 Leaf Lotto
MANIPULATIVE: Match leaves
Children will: ●● Look closely at various types
of leaves ●● Match leaves ●● Discuss how leaves are alike
and different
You’ll need: ●● Two each of at least five different
types of leaves ●● Clear contact paper or access
to a laminator ●● Poster board or stiff paper
Did you know? Trees that drop their leaves in the fall and grow new ones in the spring are called deciduous (leaf-shedding). Trees that stay green all year (and drop their needles slowly throughout the year) are called coniferous or evergreen trees. Leaves are distinguishable by their margins (edge), vein structure, and lobes (projections or divisions).
Teacher preparation: ●● Create one or more leaf lotto games. Attach one set of leaves
to the poster board and laminate or cover with clear contact paper.
●● Laminate or cover the other set of leaves individually.
What to do: 1. Place the lotto game on a table during self-selected activity
time. Encourage children to match the leaf pairs.
2. As children work, ask open-ended questions:
●● How do you decide which leaves go together? ●● How are these leaves the same? Different? ●● Which animals use leaves? How?
3. Add names of trees to the game to make it more challenging for older children.
Related children’s literature: Ehlert, L. (1991). Red leaf, yellow leaf. Orlando, FL: Harcourt Children’s
Books. ISBN-10: 0152661972. A young child develops a relationship with a sugar maple tree that she planted.
Ehlert, L. (2005). Leaf man. Orlando, FL: Harcourt Children’s Books. ISBN-10: 0152053042. This beautifully illustrated book will inspire children to collect leaves and create creatures with them.
73

Additional learning experiences: ART: During self-selected activity time, provide children with leaves and crayons. Encourage interested children to create a leaf portrait of one particular leaf. Talk about studying the leaf and getting to know it. Once leaf portraits are complete, put leaves in a basket and later in the day, challenge children to find their leaf friend from their portrait.
ART: During self-selected activity time, provide glue and paper for children to make leaf collages with leaves collected on a field trip. These can be arranged between two pieces of clear contact paper to produce a leaf sun catcher.
ART: During self-selected activity time, provide real leaves and paint for children to create leaf prints.
ART: Demonstrate how to make leaf foil prints by placing aluminum foil over leaves and rubbing with the side of a pencil or fingertips. Provide materials for children to create their own during self-selected activity time.
ART: Demonstrate how to make leaf rubbings by placing a leaf under a piece of paper and rubbing over it with the side of a crayon. Provide children with materials to do this on their own during self-selected activity time. Younger children experience more success with this when leaves are taped to the table to prevent movement during the rubbing.
ART: Cut leaves from coffee filters. Place these along with fall colors of watercolors at the art table during self-selected time. Encourage children to paint the leaves. After the paint dries, laminate the leaves and hang with fishing line from a large branch.
ART: Read Leaf Man from the supporting children’s literature list above to the children, then encourage them to use collected leaves to create their own leaf creatures.
DISPLAY: Make a display of leaf rubbings from a variety of leaves. Under each rubbing, place a small piece of hook-and-loop fastener. Cover the leaves with clear contact paper and attach the opposite pieces of hook-and-loop fastener to the leaves. Place the leaves in a pocket on the display. During self-selected activity time, encourage children to place each leaf under it’s rubbing.
GROUP: Pass out pairs of identical leaves to children during group time and challenge them to find someone with a matching leaf.
HOME/SCHOOL CONNECTION: Challenge families to collect beautiful leaves to send to school with their child. Provide a special place to display the leaves. Laminate them and put hook-and-loop fastener or magnets on the back so they can be arranged in various ways on the storyboard.
MANIPULATIVE: Make a leaf memory or concentration game for children to play during self-selected activity time by placing leaves on cards and covering with clear contact paper. Include two of each type of leaf.
MANIPULATIVE: Cut out leaves from heavy cardboard and punch holes in them where veins would be. During self-selected activity time let children lace them with yarn for veins.
MANIPULATIVE: During self-selected activity time, provide materials for children to sort leaves by size, texture, insect damage, color, smell, etc.
MANIPULATIVE: Cover a variety of leaves with contact paper for children to manipulate, sort and play with during self-selected activity time.
OUTSIDE: Encourage children to make wet leaf prints on the sidewalks.
OUTSIDE: Pass out strips of construction paper or paint samples in a variety of fall colors or various shades of green. Challenge children to find leaves of a similar color while walking through a wooded area.
74

Fall 9
Nature Jar OUTSIDE: Collect seeds and find out their value to people and wildlife
Children will: ●● Collect seeds ●● Discuss how seeds help plants ●● Sort seeds ●● Use a hand lens to assist in
looking at seed parts
You’ll need: ●● Outdoor area with many trees
and weeds ●● Large, clear jar ●● Hand lenses or magnifying
glasses ●● Science notebooks and pencils
! Notes from Sherri: One of the discoveries we made during this experience occurred while examining the seeds we collected. The children found that, in addition to the seeds they put in the jar, they also collected seeds with their clothing and were curious as to why some seeds stuck to them and others did not. We used hand lenses to carefully examine the seeds that stuck to their clothing. The hooks on these seeds looked just like the hooks on hook-and-loop fasteners, such as Velcro. After a little research, we found that the hooks on seeds like these inspired the invention of Velcro. The children were amazed that something in nature inspired something created by people.
Did you know? The purpose of flowers is seed making. One flower can produce one or many seeds. Seeds are the plant’s way of reproducing itself. This activity will expose children to different kinds of seeds and their purpose.
Teacher preparation: ●● Locate an area appropriate for this learning experience. ●● Gather materials.
What to do: 1. During outside self-selected activity time, ask children to gather
seeds, berries, and other fruits to put into the jar. Emphasize that none of these are for eating and should not be put into their mouths. Be certain that children do not collect poison ivy berries.
2. Make the collection jar available for children to explore, sort, compare, and match the items.
3. Use the hand lenses to enable the children to examine the seeds more closely.
4. Provide science notebooks and pencils for children to record their observations.
75

5. As children work, talk about the purpose of seeds and how seeds come in pods, nuts or other fruits. Ask the children open-ended questions:
●● How do you know when something is a seed? ●● Why do plants make seeds? ●● How are seeds dispersed or scattered? ●● How do people use seeds? ●● How do animals use seeds? ●● What foods do people eat that are seeds?
Related children’s literature: Robbins, K. (2005). Seeds. New York, NY: Atheneum Books for Young Readers. ISBN-10: 0689850417. This
informational picture book presents a detailed, photographic chronicle of many different kinds of seeds and how they travel.
Additional learning experiences: ART: During self-selected activity time, provide materials for children to make seed collages.
GROUP: Play “what’s missing?” with several of the different kinds of seeds.
HOME/SCHOOL CONNECTION: Encourage children to search their yards and play areas at home for seeds to bring in and share with the rest of the class.
NUTRITION: Plan a “seed of the day” snack, serving a different type of seed each day (sunflower seeds, pumpkin seeds, peanuts, popcorn, etc.).
OUTSIDE: During outside self-selected activity time, encourage children to collect seeds and berries from weeds and trees. Compare with commercial birdseed. Put the collected birdseed in a bird feeder and see what the birds prefer. Make a chart recording the children’s observations.
SCIENCE: During self-selected activity time, display the nature jar in the classroom and let the children dump it out and match the seeds and fruits. Add a balance scale to the area so children can explore and compare weights of the various items. Be sure to have their science notebooks available to record discoveries.
76

!
Fall 10 I ’m a Little
Milkweed Cradle MUSIC: Sing about how seeds are dispersed
Children will: ●● Discuss seed dispersal ●● Sing a song illustrating one type
of seed dispersal
You’ll need: ●● One milkweed pod per child ●● Other types of seeds ●● Hand lens or magnifying glass
for each child
Notes from Sherri: Milkweed is a common wildflower often located along roadways and ditches. This activity is always a favorite of the children and is generally inspired by one of them bringing milkweed pods in to share with the class. The children will often spend days dispersing the seeds and singing the song.
Did you know? There are many different ways for seeds to be dispersed or scattered. Frequently, the wind helps. This song and activity will familiarize children with one type of seed dispersal and the role of the wind.
Teacher preparation: ●● Gather enough milk weed pods for everyone in the class. ●● Gather seeds that disperse in ways other than in the wind. ●● Practice the song.
What to do: 1. Gather children outside in a group.
2. Give each child a milkweed pod and encourage children to examine the pods using the hand lenses.
3. Encourage children to open the pods and disperse the seeds in any way they choose.
4. Ask open-ended questions:
●● How do you think seeds get from one place to another? ●● How might these seeds travel if there wasn’t any wind? ●● How long can you keep your milkweed seeds in the air?
5. Provide other types of seeds that are found in the wild and try dispersing them.
77

6. Teach children the following song to the tune of I’m A Little Teapot:
I’m a little milkweed cradle you see. (Cup hands together.) I have baby seeds in me. (Peek inside.) Open me up and hold me high. (Open hands and hold high.) Blow, blow wind and my seeds fly. (Blow on hands and wiggle fingers.)
Related children’s literature: Frost, H., & Gore, L. (2008). Monarch and milkweed. New York, NY: Atheneum Books for Young Readers.
ISBN-10: 1416900853. Beautiful illustrations show the connection between the life cycles of the monarch and the milkweed plant.
Additional learning experiences: ART: During self-selected activity time, provide materials for children to make collages with milkweed pods and seeds.
LARGE MOTOR/OUTSIDE: Provide children with several types of seeds that travel with the wind, such as milkweed, dandelions, cattails, etc. Challenge children to blow on the seeds and see how long they can keep the seeds in the air.
OUTSIDE: Challenge children to look on the playground or in a park for other seeds that travel with the wind.
PRETEND PLAY: Encourage children to pretend to be seeds and imagine how they might be dispersed.
SCIENCE: Place milkweed pods in the science area for children to further examine with hand lenses, weigh, or count the seeds during self-selected activity time. Have their science notebooks available.
SCIENCE: Provide soil, pots, and water for children to plant milkweed seeds if they so choose. Record the process and growth with photographs or drawings.
SCIENCE: Re-examine the seeds in the nature jar and sort them by how the children think they are dispersed.
78

Fall 11 The Harvest
READING: Hear a story about a typical farming operation
Children will: ●● Listen to a story about farming,
harvesting, and using corn ●● Examine how and why farmers
grow crops ●● Discuss how those crops help
people and wildlife
You’ll need: ●● Storyboard ●● Related storyboard characters
Did you know? Every year farmers across the nation test their soil, plant crops, fertilize them, cultivate them, and harvest them. Although most crops are harvested in the fall of the year, some crops, such as wheat, are harvested in the spring or summer. This story will expose children to how farmers grow their crops, the types of equipment involved, and what happens to the crops after harvest.
Teacher preparation: ●● Prepare storyboard characters. ●● Practice reading the story while placing the characters on the
storyboard at the appropriate times.
What to do: 1. Read the story on the following page to children, using the
storyboard and characters.
2. After reading the story, ask the children open-ended questions:
●● What other crops do farmers grow? ●● How does the cornfield help wild animals? ●● If he didn’t have animals, what could Farmer Fred do with
his corn? ●● Why do you think the part of corn we eat is called an ear?
Related children’s literature: Ehlert, L. (1994). Eating the alphabet. Orlando, FL: Sandpiper. ISBN
10: 0152009027. Colorful illustrations help preschoolers learn the alphabet and appreciate all kinds of fruits and vegetables.
Ray, M.L., & Root, B. (1996). Pumpkins: A story for a field. Orlando, FL: Sandpiper. ISBN-10: 015201358X. This is the story of a man who rescues a field from development by raising pumpkins in the field and selling them around the world. He uses the money to buy the field.
79

Farmer Fred went to his field. He got a little dirt. The laboratory tested it before he started work.
The laboratory wrote him. They said, “Your soil is fine. But if you want a good corn crop, add a little lime.”
Fred drove his truck and got some lime as quick as he could go. He spread it on his cornfield ‘til the soil was white as snow.
Fred got his plow and tractor and plowed it like he should. Then pulled his disc around the field and mixed the soil real good.
He put seeds in his planter. You need those to make corn grow. Straight up and down his tractor went and planted them in rows.
Farmer Fred went to his house. And soon the rain and sun made little corn plants in the field. The growing had begun.
Each day the plants got bigger. They all grew straight and green. Very soon small ears of corn could be seen.
The ears were wrapped in green leaves. Inside them corn will grow. There were ears on every plant, in every single row.
Soon the plants were very tall. The growing up was done. All the leaves on every plant turned brown in the sun.
The corn plants all died, but they didn’t fall down. Each plant stood straight and
held the ears high off the ground.
Farmer Fred looked at his field. “It’s time to get to work!” He jumped into his combine. It started with a jerk.
Down the rows the combine went. Click, click, the corn came down. The plants went through the combine and out onto the ground.
Clack, clack went the combine. It scraped seeds off every ear. Up a pipe the seeds went to a big box in the rear.
Farmer Fred took the corn, he put it in a bin. When he fed it to the pigs they’d look at him and grin.
He fed it to his milk cows. He fed it to his sheep. And through the long, cold winter they all had corn to eat.
By John Griffin
Additional learning experiences: BLOCKS: During self-selected activity time, put out toy farm equipment, and use thread spools or plastic vegetables for children to harvest.
DISPLAY: Display pictures of various kinds of farm equipment, and encourage discussion about their use.
FIELD TRIP: Visit a farm, farm implement company, grocery store, farmer’s market, or feed store.
MANIPULATIVE: Using pictures of fruits and vegetables, make a memory or concentration game for children to play during self-selected activity time. These same cards can be used for a fruit and vegetable sorting game.
NUTRITION: Make vegetable soup for snack or lunch. Encourage children do the preparation. Discuss where the vegetables came from.
OUTSIDE: Observe farmers harvesting their crops.
PRETEND PLAY: During self-selected activity time, set up a produce stand using artificial fruits and vegetables, baskets, signs, paper for making lists, money, and a cash register.
PRETEND PLAY: Put out overalls, caps, bandannas, buckets, etc., in the pretend play corner for children to pretend to be farmers during self-selected activity time. Make bean bags shaped like fruits and vegetables and provide a basket for children to harvest the crop.
WRITING: During self-selected activity time, provide magazine pictures, glue, markers, paper, and staplers for children to make food books of all the kinds of food grown in Missouri.
80

Fall 12 Something Corny
SCIENCE: Sample different methods of corn preservation
Children will: ●● Taste corn preserved in several
different ways ●● Discuss various methods to
preserve corn ●● Brainstorm reasons people
preserve food
You’ll need: ●● Popcorn ●● Frozen corn ●● Canned corn ●● Cream-style corn ●● Hominy ●● Field corn ●● Fresh sweet corn ●● Cornmeal ●● Toothpicks ●● Chart paper and marker
! Notes from Sherri: This activity came from a discussion the children had about different kinds of corn. Some of them talked about corn on the cob being their favorite while others preferred it out of the can. As a result of their discussion, a class taste test was set up. Not only did it promote discussion about favorite ways corn is prepared but also various methods for saving the corn to eat and enjoy later.
Did you know? Corn is a plant that stores its food in its seed. Many animals and people like to eat corn. There are several different ways to preserve corn, such as canning, freezing, and drying. This activity will enable children to explore different methods of preserving foods.
Teacher preparation: ●● Set up a tasting center using toothpicks and various types of
corn. Select only a few types of corn for younger children and provide more variety for older children.
●● Make a chart illustrating the various types of corn preservation so children can vote on the type of corn they like best.
What to do: 1. Encourage children to visit the tasting center during self-
selected activity time and try the various types of corn.
2. Ask them to sign their names under the type of corn they like best.
3. During group time, look at the voting chart and see which type of corn most people in class prefer.
4. During the discussion ask open-ended questions:
●● How are the different types of corn the same? Different? ●● Why do people preserve food? ●● How do you think these different kinds of corn were
preserved? ●● Which method of preservation do you think is best for
people? Animals?
81

Related children’s literature: Brandenberg, A. (1986). Corn is maize: The gift of the Indians. New York, NY: HarperCollins. ISBN-10:
0064450260. This simple nonfiction book tells the history of corn from its discovery by Native Americans to present day importance.
Gibbons, G. (2008). Corn. New York, NY: Holiday House. ISBN-10: 0823421694. This simple but engaging nonfiction book describes the history of corn, different types of corn, and how people use corn, as well as how corn is grown and harvested.
dePaola, T. (1988). The popcorn book. New York, NY: Holiday House. (Original work published 1978). ISBN-10: 0823403149. This book explains the history and science of popcorn.
Additional learning experiences: HOME/SCHOOL CONNECTION: Encourage children to discuss with their families the various types of preserved corn or other foods they eat at home.
MANIPULATIVE: Put out clean rocks for children to experiment with grinding their own cornmeal during self-selected activity time. Use their cornmeal to make cornbread for snack.
NUTRITION: Make popcorn for snack.
NUTRITION: Make Johnny cakes by mixing cornmeal and water together and making patties to fry. Try them for snack.
PRETEND PLAY: During self-selected activity time, place empty food containers from dried, frozen, and canned foods in the housekeeping area.
82

Fall 13 Apple Pizzas
NUTRITION: Use apples to make pizza while discovering their unique characteristics
Children will: ●● Prepare individual apple pizzas
for snack ●● Discuss other methods of apple
preparation ●● Discuss where apples come from
You’ll need: ●● Peeled and sliced apples ●● One-half English muffin or bagel
per child ●● Margarine ●● Sugar ●● Cinnamon ●● Shredded cheese (or let children
grate cheese) ●● Aluminum foil ●● Permanent marker
! Notes from Sherri: This is always a favorite fall snack in my classroom. Before preparing the pizzas, I set up an apple preparation area where children get to use an apple peeler, slicer, and corer. This child-friendly machine makes the job of preparing the apples fun, and we always enjoy eating the ribbon of peels while we prepare the apples or along with our pizzas. Sometimes we even collect them and make juice.
Did you know? Apples are harvested throughout Missouri. Many children have the opportunity to experience their growth and harvest first hand. This activity will reinforce the children’s knowledge and provide an opportunity for children to experience apples prepared in a new way.
Teacher preparation: ●● Tear enough small pieces of aluminum foil for each child to
have one. ●● Core, peel, and slice apples. ●● Set up a learning center for children to prepare their own
pizzas. Place the foil and the English muffins or bagels at the end of a table. Set out the margarine, apples, sugar, and cinnamon next and the shredded cheese last.
What to do: 1. During self-selected activity time, encourage children to
individually assemble their pizzas.
2. First, place an English muffin or bagel on a piece of foil.
3. Spread margarine over the muffin or bagel.
4. Add a few slices of apple.
5. Sprinkle with sugar and cinnamon.
6. Finally, sprinkle lightly with shredded cheese.
7. Encourage children to write their name on the foil with the permanent marker.
83

8. Place the pizzas (foil and all) on a cookie sheet and bake at 350 degrees F until the cheese melts.
9. Serve for snack.
10. As the children prepare or eat their pizzas, ask open-ended questions:
●● How do you prepare apples at your house? ●● Where do apples come from?
Related children’s literature: Hall, Z., & Halpern, S. (1996). The apple pie tree. New York, NY: Blue Sky Press. ISBN-10: 0590623826. For a
whole year, two siblings observe an apple tree year until they can harvest apples and make apple pie. Simple text and collage illustrations show how apples grow.
Additional learning experiences: FIELD TRIP: Visit an apple orchard.
LARGE MOTOR/OUTSIDE: Teach the children to play “worm through the apple.” The “apple” stands with legs wide. The “worm” tries to crawl through the “apple” without knocking it off the tree. Discuss other insects and animals that like to eat apples.
MANIPULATIVE: During self-selected activity time, allow children to help prepare apples and count the seeds in each one. Provide scales and tape measures for children to weigh and measure the apples. Make a chart to record the results.
MANIPULATIVE: Under close adult supervision, allow children to experiment using an apple peeler, slicer, and corer. Use the peeled and sliced apples for your apple pizzas.
NUTRITION: Provide opportunities for children to make applesauce, apple butter, apple pie, apple muffins, apple jelly, and/or apple juice.
SCIENCE: Set up an apple taste center using several different kinds of apples. During self-selected activitytime, encourage children to taste and compare flavors, textures, colors, sizes, and aromas. Record their
comments and make a chart to determine the favorite.
SCIENCE: During self-selected activity time, encourage a small group of interested children to examine the oxidation of an apple by putting one apple slice in lemon juice and leaving the other in the open air. Be sure to record their predictions before beginning. Compare, taste, and record the results. Photographs of the process make an interesting display and allow children to revisit the experience.
READING: Read about Johnny Appleseed.
84

Fall 14 Baby Plants
GROUP: Match seeds to the plants that produce them
Children will: ●● Discuss where fruits come from ●● Talk about seeds and their
purpose ●● Examine fruits and seeds closely
You’ll need: ●● Several different fruits (pumpkin,
apple, pear, cantaloupe, watermelon, etc.)
●● Pictures of the plant or tree that produced the fruit (you can also use the whole plant)
●● Chart paper and marker ●● Recording device (tape recorder,
video camera, etc.) ●● Science notebooks ●● Hand lenses or magnifying
glasses
Did you know? Each seed houses a tiny little plant, food for the plant, and a seed coat to protect it. This activity will help children relate seeds to the plants that produce them.
Teacher preparation: ●● Gather materials. ●● Set up a display of the various fruits. ●● Gather pictures of plants or trees that produce fruit. ●● Prepare the chart paper by writing “Fruits Come From … “
at the top of one piece and “Seeds Help the Plant … “ on a second piece of chart paper.
What to do: 1. During group time, display the fruits.
2. Ask the children where they think the fruits came from. Record the conversation with the recording device. Write the children’s ideas about where the fruits grew and how they came to be at school on the chart paper titled “Fruits Come From …”.
3. Cut open the fruits and examine the seeds. As you work ask the children open-ended questions:
●● How do plants make more plants? ●● How do seeds know which plant to grow into?
4. Listen to and record the children’s ideas about the purpose of the seeds on the chart paper titled “Seeds Help the Plant…”
5. Make hand lenses and science notebooks available so children can examine the fruits, make sketches, and record their thoughts.
6. If the discussion merits, display the pictures of the trees or plants that produced these fruits.
7. Plant some of the seeds to see what happens. Document the growth with photographs so children will be able to revisit the experience.
85

8. Make a classroom display showing the various fruits discussed and a transcript of the children’s conversation. Use this information to generate further discussion and study regarding fruits and their seeds.
Related children’s literature: Titherington, J. (1986). Pumpkin Pumpkin. New York, NY: Greenwillow Books. ISBN-10: 0688056954. Follow Jamie as
he plants a pumpkin seed and watches it grow. Pictures beautifully demonstrate the growth of a pumpkin from seed to fruit.
Ashton, D.H., & Long, S. (2007). A seed is sleepy. San Francisco, CA: Chronicle Books. ISBN-10: 0811855201. This elegant, poetic book introduces children to a variety of seed and plant facts.
Additional learning experiences: DISPLAY: Make a seed chart matching the seeds with pictures of the plants they produce.
FIELD TRIP: Visit a pumpkin patch.
MANIPULATIVE: During self-selected activity time, put out balance scales and other measuring devices to encourage children to weigh and measure pumpkins. Challenge children to line them up from tallest to shortest or heaviest to lightest. Be sure to provide science notebooks for children to record the results of their investigations.
NUTRITION: Roast pumpkin seeds for snack.
NUTRITION: Set up opportunities for children to make pumpkin bread, pie, cookies, pudding, or just cooked pumpkin.
SCIENCE: During self-selected activity time, encourage interested children to soak pumpkin or squash seeds in water. Open them to see the little plant inside. Point out the stored food for the plant. Be sure to provide hand lenses and science notebooks for children to record their observations.
86

Fall 15 Animal Harvest
NUTRITION: Cook up some food we get from animals
Children will: ●● Prepare bacon and scrambled
eggs for snack/lunch ●● Discuss where bacon, eggs, and
milk come from ●● Talk about how farmers earn
money to support their families ●● Brainstorm other products
farmers produce ●● Discuss how farm products get
to the grocery store and other places farmers sell their wares
You’ll need: ●● Bacon ●● Eggs (1 per child) ●● Milk ●● Electric skillet ●● Mixing bowl ●● Wire whisk or rotary beater ●● Wooden spoon ●● Pancake turner
! Notes from Sherri: This activity helps children understand two important concepts: our food comes from nature in the form of farm plants and animals, and farmers make money for their families by growing food in a way that conserves natural resources.
When discussing where meat comes from, be careful to keep information at a level children can process, mentally and emotionally. The fact that hamburgers come from cows, bacon comes from hogs, eggs come from chickens, etc. is about as much as young children can understand.
The idea that farmers raise animals and crops to feed and clothe their families is something young children can identify with, since they have experienced shopping for food, clothing, toys, and entertainment with their families.
Knowing that food comes from people who manage plants and animals for a living helps children appreciate and conserve natural resources.
Did you know? Farmers harvest their farm animals as well as their plants. Many of the foods we eat come from farm animals. This activity will help children identify some of the animal products people get from farmers.
Teacher preparation: ●● Gather supplies. ●● Set up a table in the classroom where the children, without
getting too close, can watch the bacon and eggs cook in the electric skillet.
What to do: 1. Gather children and prepare them for the cooking experience.
Challenge them to thoroughly wash their hands.
2. Once everyone has gathered around the cooking area, start the bacon frying in the skillet.
87

3. As the bacon fries, discuss bacon’s origin. Talk about other products hogs provide, such as sausage, ham, pork chops, etc. Talk about how the bacon changes and the aroma it produces as it fries.
4. Once the bacon is finished or as the bacon is frying, encourage each child to crack an egg and empty it into the mixing bowl.
5. Take turns beating the eggs for scrambled eggs.
6. Add milk and scramble the eggs in the skillet.
7. As the eggs are cooking, discuss where eggs come from and other products farmers get from chickens.
8. Serve milk with the bacon and eggs for snack or lunch.
9. As the children eat, talk about other products that come from animals. Discuss various farm animals and wild game, such as deer, fish, ducks, turkeys, rabbits, etc. Talk about how the farm animals help the farmer make money to buy clothing, food, and other essentials. Ask the children open-ended questions:
●● How does your family make money to buy clothing, food, and other essentials? ●● What farm products does your family use? ●● How do farm products get to the grocery store?
Related children’s literature: dePaola, T. (1991). Pancakes for breakfast. Orlando, FL: Sandpiper. (Original work published 1978). ISBN-10:
0156707683. This picture book features a woman who wants pancakes for breakfast. But first, she must gather eggs, milk the cow, churn the butter, and purchase the maple syrup.
Additional learning experiences: HOME/SCHOOL CONNECTION: Challenge families to discuss where the food they eat comes from. This might be a regular conversation during dinner.
MANIPULATIVE: Make plant and animal product puzzles for children to match pictures of plants and animals from Missouri with pictures of the products people use from them.
NUTRITION: During meals and snack times, discuss where the food was grown and harvested.
NUTRITION: Make butter by letting children shake whipping cream in small jars. It takes about five minutes of continuous shaking until it separates. Encourage children to taste the buttermilk. Wash the butter and add salt. Serve with crackers or biscuits.
PRETEND PLAY: Display pictures of various Missouri farm products in the pretend play corner. During self-selected activity time, put out various food props, such as plastic eggs (with insides made of felt), empty milk cartons, mounted cardboard pictures of fried eggs, hamburgers, bacon, etc. Add pails for milking cows and baskets for gathering eggs and farm clothes for dress-up.
SCIENCE: During self-selected activity time, display wool, feathers, honeycomb, wood, and leather articles for children to explore. Be sure to provide hand lenses, balance scales, and science notebooks for children to examine materials and record their discoveries.
88

Fall 16
Everything Needs Something to Live
READING: Listen to a story about how plants and animals are dependent upon each other
Children will: ●● Listen to a story ●● Discuss the food chain
introduced in the story ●● Talk about interdependency
between plants, animals, and people
You’ll need: ●● Storyboard ●● Related storyboard characters
Did you know? All animals eat plants or other animals. Plants get their nourishment from decaying animals and plants. This food-chain story will enable children to see one way that animals and plants are dependent on each other.
Teacher preparation: ●● Prepare storyboard characters. ●● Practice reading the story while placing the characters
on the storyboard at the appropriate times.
What to do: 1. Read the story on the following page to children, using
the storyboard and characters.
2. After reading the story ask open-ended questions:
●● What else might live in the leaves under the tree? ●● How do trees get their food? ●● What would happen if the tree weren’t there? ●● What would have happened to the leaves if the
bugs didn’t eat them? ●● What would have happened to the spider if there
were no bugs?
Related children’s literature: Franco, B., & Vitale, S. (2009). Pond circle. New York, NY:
Margaret K. McElderry Books. ISBN-10: 1416940219. This story depicts a food chain in a pond outside a young child’s home.
Zoehfeld, K. W., & Lamont, P. (2012). Secrets of the garden: Food chains and the food web in our backyard. New York, NY: Knopf Books for Young Readers. ISBN-10: 0517709902. Alice loves her backyard garden, where she discovers that many creatures also share her backyard habitat.
89
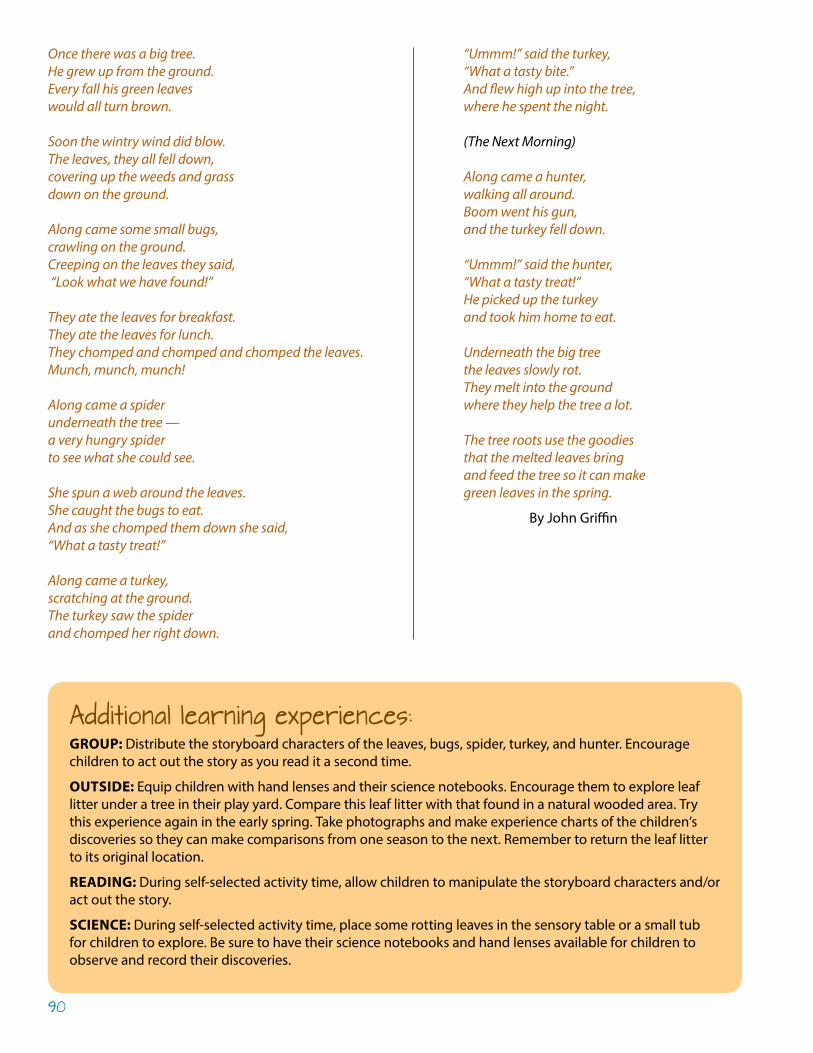
Once there was a big tree. He grew up from the ground. Every fall his green leaves would all turn brown.
Soon the wintry wind did blow. The leaves, they all fell down, covering up the weeds and grass down on the ground.
Along came some small bugs, crawling on the ground. Creeping on the leaves they said, “Look what we have found!”
They ate the leaves for breakfast. They ate the leaves for lunch. They chomped and chomped and chomped the leaves. Munch, munch, munch!
Along came a spider underneath the tree — a very hungry spider to see what she could see.
She spun a web around the leaves. She caught the bugs to eat. And as she chomped them down she said, “What a tasty treat!”
Along came a turkey, scratching at the ground. The turkey saw the spider and chomped her right down.
“Ummm!” said the turkey, “What a tasty bite.” And flew high up into the tree, where he spent the night.
(The Next Morning)
Along came a hunter, walking all around. Boom went his gun, and the turkey fell down.
“Ummm!” said the hunter, “What a tasty treat!” He picked up the turkey and took him home to eat.
Underneath the big tree the leaves slowly rot. They melt into the ground where they help the tree a lot.
The tree roots use the goodies that the melted leaves bring and feed the tree so it can make green leaves in the spring.
By John Griffin
Additional learning experiences: GROUP: Distribute the storyboard characters of the leaves, bugs, spider, turkey, and hunter. Encourage children to act out the story as you read it a second time.
OUTSIDE: Equip children with hand lenses and their science notebooks. Encourage them to explore leaf litter under a tree in their play yard. Compare this leaf litter with that found in a natural wooded area. Try this experience again in the early spring. Take photographs and make experience charts of the children’s discoveries so they can make comparisons from one season to the next. Remember to return the leaf litter to its original location.
READING: During self-selected activity time, allow children to manipulate the storyboard characters and/or act out the story.
SCIENCE: During self-selected activity time, place some rotting leaves in the sensory table or a small tub for children to explore. Be sure to have their science notebooks and hand lenses available for children to observe and record their discoveries.
90

Fall 17 Habitat
GROUP: Explore habitat and adaptations
Children will: ●● Discuss what a habitat is ●● Brainstorm habitat needs of
people, plants, and animals ●● Identify special adaptations of
animals to particular habitats
You’ll need: ●● Pictures of people’s homes ●● Pictures of several different
types of habitats (field, stream, park, backyard, etc.)
●● Animal cards ●● Chart paper and marker
! Notes from Sherri: One summer the children discovered a toad living in a rotting tree stump located in our sand box, where it stayed throughout the summer and into the fall. This led to a discussion about why the toad stayed there. The children talked about the toad’s food, shelter, space, and quality of life (especially with young children seeking him out every few days). They researched toads in books and recorded many of their ideas in their science notebooks. When they could no longer find the toad near the stump, they discussed what changed (the weather) to make the toad seek a different habitat. This real-life experience made the idea of habitats personally meaningful to the children.
Did you know? A plant’s or animal’s home is called its habitat. Habitat includes shelter, food, water, and space. This activity will introduce children to the concept of habitat. It will also help them understand how plants and animals live in the habitat best suited for them.
Teacher preparation: ●● Familiarize yourself with the concept of habitat. ●● Gather habitat pictures (these might be photographs you take
or pictures from books, magazines or the Internet) and prepare them for use with the children.
●● Select several animal cards to use with this learning experience. ●● Draw a line down a piece of chart paper. Label one side “Places
Where People Live” and the other side “Things People Need to Survive.”
●● Draw a line down a second piece of chart paper and label one side “Things Plants Need to Survive” and the other side “Things Animals Need to Survive.”
What to do: 1. During group time, ask children what they call the place where
they live. Write their ideas on the appropriate side of the first pieceof chart paper under “Places Where People Live.”
2. Talk about people’s survival needs. Write their ideas down on the side of the chart paper labeled “Things People Need to Survive.”
91

3. Explain that plants and animals have homes too but they are called habitats.
4. Talk about survival needs that plants and animals have. Write their ideas on the appropriate side of the second piece of chart paper. Discuss food, water, and space and how various habitats provide these for plants and animals.
5. Compare the list they created for people with the ones created for plants and animals. What things are the same on each list, what things are different?
6. Show the various pictures of people’s homes and the possible habitats for plants and animals. Discuss who would live there and why those habitats would be appropriate. For example, people can’t live in a pond, birds wouldn’t live underground, plants can’t grow in concrete, etc.
7. One at a time, share the animal cards selected for this experience. Brainstorm with the children the special features of each that enable it to live in a certain habitat — ducks and frogs have webbed feet to enable them to swim; moles have large, strong claws for digging; woodpeckers have long, thin beaks to make holes in trees and catch insects; etc.
8. Discuss what happens when people or nature changes the habitat. Ask open-ended questions:
●● Where do people go when there is a flood or tornado? ●● Where do animals go when people cut down a forest, burn a field, or build a city? ●● What makes your habitat a good place for you? ●● What habitats are on the playground?
9. Discuss how people make choices about how they use the land, and therefore affect the habitat of people, plants and animals.
Related children’s literature: Ashman, L., & Stringer, L. (2001). Castles, caves, and honeycombs. Orlando, FL: Harcourt Children’s Books.
ISBN-10: 0152022112. Paintings and text show what makes a home for many different creatures.
Albert, R.E., & Long, S. (1996). Alejandro’s gift. San Francisco, CA: Chronicle Books. (Original work published 1994). ISBN-10: 0811813428. Alejandro changes the habitat around his desert home to invite many different creatures to share his space.
Additional learning experiences: BLOCKS: Put out plants in the block area for children to build habitats for toy animals during self-selected activity time.
FIELD TRIP: Look for various types of habitats on your play yard. Compare to habitats discovered in a natural area. Discuss how people influence the two types of habitats.
GROUP: Explain that wild animals should not be kept as pets. Wild animals should be left in the wild to learn to hunt food and to grow up and have babies so there will be more of them. We help wild animals best by providing them with good habitat. Discuss ways to make some habitats better for animals.
LARGE MOTOR/OUTSIDE: During self-selected activity time, let children pretend to be animals. Encourage them to find their natural habitat on the play yard.
MANIPULATIVE: During self-selected activity time, encourage children to match animal cards with the appropriate habitat pictures or to sort animal cards by those that live in the sky, water, or on land.
MUSIC: Listen to Jan Syrigos’ Habitune (1996. Critter rock. Jefferson City, MO: Missouri Department of Conservation) and move to the music.
92

Fall 18 Cave Life
ART: Discover special features of caves and their inhabitants and construct a likeness
Children will: ●● Recall things they know about
caves ●● Determine what they want to
know about caves ●● Create a cave as they add to their
knowledge
You’ll need: ●● Chart paper and marker ●● Large roll of brown paper ●● Markers ●● Tape ●● Paint ●● Brushes ●● Scissors ●● Cave pictures ●● Bicycle helmets with flashlights
duct-taped on top ●● Flashlights ●● Animal replicas of animals that
might live in a cave
! Notes from Sherri:
Teacher preparation: ●● Determine the best place to put the “cave.” It will probably
be left up for several weeks, so an out-of-the-way classroom corner or hallway works well. Several large appliance boxes duct taped together might also work well.
●● Drape brown paper around the space for the cave. ●● Create a Know/Want to Know/Learn (KWL) chart:
●● Divide the chart paper into thirds. Label the first column “Things We Know About Caves.”
●● Label the second column “Things We Want To Know About Caves.”
●● Label the third column “Things We Learned About Caves.” ●● Begin gathering books and articles about caves.
What to do: 1. During group time, ask children if any have ever visited a cave.
Discuss their responses, what they saw or felt in the cave. Begin completing the KWL chart. Write all of their ideas that they know about caves in the first column.
This activity came about as a culminating experience from a summer study of caves. When we first began the study, I didn’t know much about caves. Although I was a little nervous about embarking on a study of a topic I knew so little about, I learned a great deal along with the children. That summer, many of the families involved in the program included cave visits in their summer vacation plans. Building the cave was a way for the children to put their knowledge of caves together. They offered tours to the community. Their role as tour guides allowed them to demonstrate all of their acquired knowledge about caves. It was also a wonderful way to assess their understanding.
Did you know? Missouri has more than 5,000 caves and is often called the Cave State. Caves provide a special kind of habitat for many forms of wildlife. This activity will help children become more aware of the special features of caves and their inhabitants.
93

2. Once this column is near completion or as soon as the first child wonders something or asks a question, begin the second column. Record things they want to learn here.
3. Explain that the third column will be completed as the children learn about caves as they build their cave in the classroom.
4. During self-selected activity time, display the cave pictures and the KWL chart near the cave sight. Provide materials for children to work on their cave.
5. Encourage children to research cave formations and animals that live in caves, and then make and place these throughout the cave. As children research, record what they have learned in the third column of the KWL chart. This project could continue over several days or weeks.
6. As the children work and research, ask open-ended questions:
●● How is the cave habitat different from other habitats we have talked about? ●● What makes a cave habitat special? ●● What plant life do you think would live in a cave? Why? ●● What animals might live in a cave? Where in the cave would they live? ●● How do you think caves are formed? ●● How could we get bats to live nearby? ●● Where can we go to find out more information about caves?
7. Stuffed cave animals and other artifacts can be added to the cave as the children play and learn more about the cave habitat. Add the bike helmets and flashlights once the children have researched cave safety.
8. When the cave is complete, encourage the children to give tours to parents, other children, or community members.
Related children’s literature: Silver, D.M., & Wynne, P. (1997). Cave. New York, NY: McGraw-Hill. ISBN-10: 0070579296. This informational
picture book illustrates the various parts of the cave and describes creatures that live there.
Additional learning experiences: ART: During self-selected activity time, provide an assortment of materials with which children can create small-scale models of caves.
FIELD TRIP: Visit a cave. Be sure to research the cave before your visit and have children wear bike helmets with flashlights duct-taped to the top, as well as cave appropriate clothing.
GROUP: Invite a local caving group to share information with the children.
MANIPULATIVE: During self-selected activity time, encourage children to sort animal cards by those that live in caves and those that don’t.
READING: Create a set of cave books to display near the cave.
94

Fall 19 Worth Their Weight
SCIENCE: Simulate feeding habits of bats
Children will: ●● Balance a scale with a bat replica
and a number of small plastic insects
●● Count insects ●● Discuss how bats help keep the
insect population under control
You’ll need: ●● Bat replica (may be plastic,
sponge, etc.) ●● Small plastic insects ●● Balance scale ●● Animal card: bat ●● Science notebooks and pencils
Did you know? Often misunderstood, bats are fascinating creatures that help control local insect populations. Bats find their way in the dark through a physiological process called echolocation. As the bat flies, it emits sounds that bounce off objects. These echoes indicate the objects’ locations, allowing the bat to navigate toward or away from them. Most North American bats eat mosquitoes, moths, and other insects. In fact, most bats eat their weight in insects each day. This activity will help children understand one of the ways bats help people.
Teacher preparation: ●● Gather materials ●● Place the scale, insects, and bat replica in the science area. ●● Display the bat animal card in the science area. ●● Place science notebooks and pencils near the scale.
What to do: 1. As children express interest, explain that bats eat their weight in
insects each day.
2. Challenge the children to predict how many insects that might be. Encourage them to write the prediction in their science notebooks.
3. After the children have made their prediction, place the bat replica on one side of the scale and see how many insects it takes to balance the scale.
4. Insects can be counted as they are placed on the scale or after the scale has been balanced.
5. Encourage the children to revisit their predictions and see how close to accurate they were.
95

6. As the children work ask open-ended questions:
●● What insects do you think a bat would eat? ●● How do bats know where to find insects? ●● What do you think would happen if there weren’t any bats to eat the insects? ●● Where do you think bats live? ●● How do you think bats find their way in the dark? ●● How are bats like other mammals? How are they different?
7. Make the materials available for children to use for several days so they can determine if the number is always the same.
Related children’s literature: Davies, N., & Fox-Davies, S. (2004). Bat loves the night. Logan, IA: Perfection Learning. (Original work published 2001).
ISBN-10: 0756965616. This simple story about a pipistrelle bat includes many bat habits and facts.
Additional learning experiences: ART: During self-selected activity time, provide materials for children to sponge-paint bats on black paper. Be sure to make pencils available to draw in the insects for the bats to eat.
GROUP: Conduct echo experiments with the children.
LARGE MOTOR/OUTSIDE: Set up a simple obstacle course (inside or outside) for children to go through blindfolded during self-selected activity time. As children are moving through the course, discuss how bats move in the dark.
MUSIC: Play Jan Syrigos’ Hairy Not Scary (1996. Critter rock. Jefferson City, MO: Missouri Department of Conservation) and move like bats to the music.
NUTRITION: Cut bat shapes from fruit leather for snack. Discuss similarities between the texture of the fruit leather and bat skin.
96

Fall 20 I’m a Little Fox Squirrel
MUSIC: Sing about what fox squirrels eat and how they store food
Children will: ●● Sing a song about fox squirrels
and their habits ●● Discuss how squirrels assist in
seed dispersal
You’ll need: ●● Animal card: fox squirrel
Did you know? Squirrels store most of the nuts they collect in the ground. This not only gives squirrels something to eat in winter, but it also aids in seed dispersal. This song will help children become aware that squirrels eat nuts and store them in the ground.
Teacher preparation: ●● Gather materials. ●● Practice singing the song.
What to do: 1. Show children the fox squirrel and teach them this song to the
tune of I’m A Little Teapot.
I’m a little fox squirrel, red and brown. (Put hands behind back like a squirrel tail.) I eat nuts that I have found. (Pretend to eat nuts.) I pick them up and bury them deep. (Pretend to pick up nuts and bury them.) When wintertime comes I’ll have lots to eat. (Rub tummy.)
2. Ask open-ended questions:
●● What happens when the squirrel forgets where it buried the nuts?
●● What else might a squirrel eat? ●● Where do you think squirrels live? Is it different in the city
and in the country? How? ●● What kind of sound do you think a squirrel makes? ●● What might like to eat a squirrel?
Related children’s literature: Ehlert, L. (2004). Nuts to you! Orlando, FL: Sandpiper. (Original work
published 1993). ISBN-10: 0152050647. Collage illustrations depict a gray squirrel in a city habitat, and the book includes more squirrel facts at the end.
97

Additional learning experiences: BLOCKS: Add play food (like fruits or nuts) for plastic or stuffed animals to eat or store during self-selected activity time.
FIELD TRIP: When winter snows come or the ground is muddy enough to show footprints, visit a wooded area or park and look for signs of where squirrels dug up nuts buried in the fall.
GROUP: Discuss where other animals store their food.
OUTSIDE: Pretend to be squirrels on the playground. Look for nuts and good places to bury them.
98

!
Fall 21 See How the
Turkey Grows READING: Listen to a story about the life cycle of a turkey
Children will: ●● Listen to a story about
the life cycle of a turkey
●● Discuss the predator prey relationship of the turkey to other animals
You’ll need: ●● Storyboard ●● Related storyboard
characters
Notes from Sherri: Many seasoned conservationists have remarked how this short, simple story is the best expression of conservation as it relates to wildlife management they have ever heard. The story includes elements of habitat, animal life cycle, species-specific habits, seasonal impact on animal population, food chains, predation, and responsible, ethical harvest. These all work together to ensure a wise and balanced use of any resource, and in the case of this story, a continuation of the species. The story simplifies these complicated concepts in a way children can easily understand and provides a powerful foundation for their future conservation of natural resources.
Did you know? The wild turkey has many enemies. It must escape predators its entire life. This activity will expose children to the life cycle of the wild turkey.
Teacher preparation: ●● Prepare storyboard characters. ●● Practice reading the story while placing the characters on the
storyboard at the appropriate times.
What to do: 1. Read the story on the following page to children, using the storyboard
and characters.
2. After reading the story, ask open-ended questions:
●● What do you think the fox would have eaten if it hadn’t been able to catch a turkey?
●● Why do you think turkeys have so many babies at one time and people usually have one baby at a time?
●● What do you think the hunter did with the turkey? ●● What do you think might have happened to Jane if the hunter
hadn’t harvested one of the turkeys?
Related children’s literature: Arnosky, J. (2009). I’m a turkey! New York, NY: Scholastic Press. ISBN-10:
0439903645. This playful picture book filled with facts about turkeys is also a song that can be downloaded from the Internet.
99

Momma turkey made her nest in some low brush and some grass. She had to lay some eggs soon, so she had to work real fast.
She clicked and kelped. She laid six eggs. She sat on them for weeks. Until one day Momma turkey heard five little “peeps.”
One egg didn’t hatch. it got wet from the rain. But five turkeys made it and one was named Jane.
Jane and the others followed Momma through the weeds. They were very watchful as they chomped bugs and seeds.
“Sssss” went a snake, who was lying in the grass. He chomped one of Jane’s brothers, he chomped him down real fast.
Four little turkeys left, more watchful than before. Along came a red fox and chomped up one more.
Jane and the other two, they would scratch and dig, uncovering bugs and acorns, they began to grow real big.
Soon it was fall, and the leaves turned brown. Along came a hunter, walking all around.
He waited for the turkeys. BOOM, went his gun. He saw all the turkeys, but he only shot one.
Then the winter snow came. It covered up the ground. It covered up the turkeys’ food, so none could be found.
The winter got Jane’s mother. It got her brother, too. But Jane scratched up some acorns so she made it through.
Now only Jane was left. She was all alone. But soon the warmth of spring came and she was nearly grown.
One day she heard a gobble. She gave a kelping sound. Here came a turkey, strutting all around.
He was a handsome turkey! And he had a fine song! So Jane thought she would stay with him, all day long.
Jane went and made a nest. And late in the spring, she laid six eggs and settled down to see what time would bring.
She clicked and kelped, she sat and sat. She sat on them for weeks. Until one day Jane heard six little “peeps.”
By John Griffin
Additional learning experiences: OUTSIDE: Encourage the children to act out the story while playing outside so they can scratch up food, hide in the grass, roost on the play structure, and strut through the forest.
READING: Make the storyboard and storyboard characters available for the children to retell the story during self-selected time.
100

Fall 22 I’m a Very Fine Turkey
MUSIC: Sing about the turkey’s habits
Children will: ●● Sing a song demonstrating how
wild turkeys live ●● Compare wild turkeys to
domestic turkeys
You’ll need: ●● Animal card: wild turkey ●● Picture of a domestic turkey ●● Chart paper and marker
! Notes from Sherri: Inviting a hunter to come and share turkey calls with the class is an informative as well as fun experience for the children. Often hunters can perform several different turkey calls, including the female or hen’s kelp. The tone of the hen’s kelp communicates different information to the poults or young turkeys. The young poults aren’t able to kelp yet, so they whistle at the same pitch. The hen and poults communicate to one another with this series of kelps. An experienced hunter can make a variety of these sounds and teach some to the children. Encouraging the children to be poults out looking for food and then having to hurry to the hen when the distress kelp is given provides them with better understanding of how the hen turkey cares for her young.
Did you know? Wild turkeys live in Missouri forests and roost in trees at night. They eat insects and seeds. This activity will help children understand that there are wild turkeys as well as domesticated farm turkeys. It will also introduce the concept of roost.
Teacher preparation: ●● Gather materials. ●● Divide the chart paper in half. Label one side “Ways Wild
Turkeys and Domestic Turkeys are Alike” and the other side “Ways Wild Turkeys and Domestic Turkeys are Different.”
What to do:
2. Discuss with children the differences and similarities between wild turkeys and domestic turkeys. Record their ideas on the chart paper.
1. During group time, explain that in Missouri people eat two different kinds of turkeys. Wild turkeys are those that live in thewoods, while domestic turkeys live on farms.
101

4. Teach the children the following song:
(Put hands under arms for wings.)
I’m a ve - r ne tur - key, and I sin ne song. gobble, gobble, gobble, gobble
all day long I strut through the forest; I roost in the trees,
and my favorite thing to eat is seeds, seeds, seeds!
3. Ask open-ended questions:
●● Where do wild turkeys live? ●● What do domestic turkeys eat? What do wild turkeys eat? ●● Where do domestic turkeys sleep? Where do wild turkeys sleep? ●● How do wild turkeys and domestic turkeys look the same? Different?
Additional learning experiences: FIELD TRIP: Visit a turkey farm to view domestic turkeys. Discuss differences between wild and domestic turkeys. Discuss how turkeys in the grocery store look compared to live ones.
GROUP: Invite a hunter to come into the classroom, reproduce turkey calls, and, if possible, bring in a legally harvested wild turkey.
LARGE MOTOR/OUTSIDE: Teach children to play “catch a turkey.” Several children are the hunters, the rest are wild turkeys. The hunters are sleepy so they take a nap (covers eyes while the turkeys hide). The hunters wake up hungry and want some wild turkey for supper. That means it’s time to go hunting. As the hunters tag the turkeys, both go and sit where the hunters were sleeping. Only one turkey is permitted for each hunter. To help the hunters find them, “turkeys” can gobble softly.
SCIENCE: Bring in domestic turkey feathers and legally harvested wild turkey feathers. During self-selected activity time, display them for children to compare and match them with pictures of the animals. Be sure to provide hand lenses and science notebooks for children to explore and record their thoughts and ideas.
102

103
Winter W inter is a time of anticipation for children and adults alike. Children dream
of deep, white snow for testing their new sleds, while many adults wish for mild weather. People throughout Missouri enjoy outdoor winter sports, such
as skiing, sledding, skating, and bird watching. All of these activities are examples of people using natural resources.
Winter changes throughout Missouri affect plants and animals, too. Ice storms can damage trees, while snow provides an insulating effect that protects some plants and animals. Fur-bearing mammals respond to the colder temperatures by growing dense underfur and long guard hairs.
Winter is a great time to get outside and enjoy Missouri’s wonders. Go outside with the children daily and look for seasonal signs. Talk about how it smells, sounds, tastes, looks and feels different than it did just a few months ago. Look for the sun. Remind children how it felt during the hot summer and discuss how it has changed. Go outside on a cold winter day and search out the coldest and warmest spots on the playground. Brainstorm words to describe the colors, textures, sounds, smells, and sparkle of winter. Look for animal signs on your playground. Plan a family event to celebrate the winter solstice. Take advantage of the shortest day of the year to look at the stars and moon in the clear night sky, play in your moon shadow or become familiar with Missouri’s natural nightlife. Whatever you decide to do, bundle up, and get outside to enjoy Missouri in winter!
Winter learning experience topics include: ●● Birds and their characteristics ●● Mammals in winter ●● Hibernation ●● Animal signs ●● Weather ●● Energy use

104

105
Winter1 Bird Feeders
SCIENCE: Construct a bird feeder
Children will:●● Create a bird feeder●● Predict which birds might visit
the feeders●● Determine where to hang bird
feeders
You’ll need:●● An empty cardboard tube from
a toilet paper roll or pinecone for each child
●● Soy butter, almond butter, or suet
●● Birdseed●● Hole punch●● Yarn●● Plastic knives●● Animal cards: birds that might
visit your feeders
! Notes from Sherri:One year after we experienced this activity, the children became so interested in the birds at our feeders that I bought ready-made feeders designed to stick to the windows. I spread birdseed on the ground beneath the feeders. It wasn’t long before birds joined us during group time. The children made detailed observations about the different kinds of birds and learned their names. They also looked for birds outside the classroom and even learned several of their calls.
Did you know?There are many different species of birds. A fun and educational experience for young children is to make bird feeders and observe the birds that feed at them. If you initiated a program of winter bird feeding, please continue it throughout the winter months.
Teacher preparation:●● Cardboard tubes provide a smoother surface to spread
nut butter for children with more limited fine motor skills. Pinecones require more fine motor dexterity to push nut butter between the scales.
●● Prepare the cardboard tubes by punching a hole near one end and stringing yarn through the hole. Prepare pinecones by tying a loop of yarn to the top. This provides a loop for hanging the feeder.
●● Put out the prepared toilet paper rolls or pinecones, nut butter, plastic knives, and a flat container of birdseed on a table during self-selected activity time. Display the animal cards of birds that might visit the feeders in the area.
What to do:1. During self-selected time, encourage interested children to
spread the nut butter on the cardboard tube or pinecone and then roll the feeder in birdseed.

2. As children are working and talking ask open-ended questions:
●● Which seeds do you think the birds will like best? ●● Where do you think is the best place to hang our feeders? ●● What kinds of birds do you think will visit our feeders?
3. Hang these feeders outside a classroom window, slightly above or next to a branch where birds can stand and reach the feeder. Be sure to hang the feeders high enough to discourage neighborhood cats. The birds should soon be regular visitors to your school.
4. Replace the birdfeeders once all the food has been eaten.
Related children’s literature: Bunting, E., & Rand, T. (1994). Night tree. Orlando, FL: Sandpiper. (Original work published 1991). ISBN-10: 0152001212.
This is the story of a family who makes their annual holiday pilgrimage to decorate a particular tree for wildlife.
Sams II, C. R., & Stoick, J. (2011). Tea with Lady Sapphire: Sharing the love of birds. Milford, MI: Carl R. Sams II Photography, Inc. ISBN-10: 0982762518. A grandmother and her grandchildren spend a snowy morning feeding and watching the birds.
Additional learning experiences: DISPLAY: Put up labeled pictures of birds seen at your feeders. Chart the number of sightings for each kind.
GROUP: Talk with the children about things to look for at the feeder. Observe and record the following: ●● What kinds of food do the birds prefer? ●● Where do the birds eat? ●● Who stays the longest at the feeder? ●● What time of day is the feeder the most popular? ●● Which bird is the most aggressive at the feeder? ●● Which kind of feeder do the birds prefer? ●● Which feeder location do the birds visit the most? Why?
HOME/SCHOOL CONNECTION: Encourage each of the children to make a bird feeder to take home. Provide a science notebook for them to compare the birds they see at home with those seen at school.
MANIPULATIVE: Use pictures or stickers of birds to make a bird memory, concentration, or a domino game for children to play during self-selected activity time.
OUTSIDE: Put up several different kinds of feeders and see which the birds prefer:
●● Fill half a grapefruit peel or half a coconut with birdseed and peanut butter. ●● Make a holiday tree for the birds by stringing popcorn and cranberries and hanging different feeders
on it. ●● Cut openings in the sides of a plastic milk jug and fill the bottom with birdseed. ●● Hang mesh or wire bags of suet or fat in the trees to attract woodpeckers.
SCIENCE: During self-selected activity time, provide materials for children to plant birdseed. Follow the growth progress over several days. Document the experience with photographs and transcriptions of the children’s discussions.
WOODWORKING: Display pictures and plans for bird feeders and birdhouses in the woodworking area.
WRITING: Make science notebooks available to children for recording their bird observations.
106

107
MANIPULATIVE: Explore how a bird’s beak enables it to feed Winter2 P ick a Beak
Children will: ●● Experiment with picking up food with
different types of utensils representing beaks
●● Discuss similarities between utensils and bird beaks
●● Explore how each type of beak is suited for the type of food eaten by the bird
You’ll need: ●● Pliers (seed eaters — cardinal and turkey) ●● Small tongs or children’s connected
chopsticks (worm eaters — robin) ●● Tweezers (insects eaters — woodpecker) ●● Slotted spoon (aquatic plant eaters —
duck) ●● Straw (nectar eaters — hummingbird) ●● Sugar water in a bottle (nectar) ●● Parsley in a bowl of water (aquatic plants) ●● Plastic insects or raisins in a bottle (insects) ●● Plastic fishing worms in can of wet mud ●● Acorns ●● Sunflower seeds ●● Animal cards: hummingbird, duck,
woodpecker, cardinal, robin, and turkey
! Notes from Sherri: This learning experience emerged from the children’s questions about why some birds ate at the feeders and others did not. A discussion about food and beak type resulted. When talking about habitat with children, it’s important to recognize how the plant or animal has adapted to take full advantage of the resources offered in its particular habitat. This activity can lead the children to this recognition on their own. The bird’s beak is adapted to the type of food it eats and how it obtains the food. For example, woodpeckers and flycatchers are both insect eaters and have tweezerlike beaks for grabbing insects. However, the woodpecker’s beak is long and very strong for drilling as well as grasping insects. The flycatcher’s beak is wider and shorter for catching insects in flight.
Did you know? The many different species of birds eat a variety of things. Some are insect eaters, some are seed eaters, some are birds of prey, and others are scavengers. Each bird has a beak that is adapted to its habitat and the food it needs for survival. This activity will help children gain an understanding of how a bird’s beak enables it to eat.
Teacher preparation: ●● Set up a learning center displaying the various bird
animal cards, utensils, and food.
What to do: 1. As children express interest in the center during
self-selected activity time, encourage them to try the different utensils for picking up the food.

2. Compare the utensils to the bird beaks shown in the bird pictures. As children work, ask open-ended questions:
●● How is this utensil like a bird beak? ●● Which utensil works best for each food? ●● What do you think would be the habitat of a bird with this kind of beak?
3. Record the children’s ideas about the bird beaks and display their findings along with the bird pictures.
Related children’s literature: Swinburne, Stephen R. (1999). Unbeatable beaks. NY: Henry Holt and Company. ISBN-10: 0805048022. Children will
delight in the matching birds with their beaks at the end of the book.
Collard, Sneed B. III. (2002). Beaks! Watertown, MA: Charlesbridge Publishing. ISBN-10: 1570913889. This simple nonfiction book describes various types of bird beaks and how birds use them to hunt, gather food, and eat.
Additional learning experiences: MANIPULATIVE: Make a chart of various foods birds eat, such as insects, seeds, small mammals, worms, etc. During self-selected activity time, encourage children to sort bird animal cards by what they eat.
NUTRITION: Serve dry, crispy rice cereal for snack and pretend that it’s birdseed. Let the children try to eat like birds. Discuss how well birds are suited for eating with their beaks but people are not so well suited with their mouths.
108

Winter3
Bird Puzzles MANIPULATIVE: Examine feet, beaks, and colors of birds
Children will: ●● Experiment with putting various
bird parts together ●● Consider ways that beaks and
feet help the bird in its habitat
You’ll need: ●● Storyboard ●● Related storyboard characters ●● Animal cards: cardinal, duck, and
woodpecker
! Notes from Sherri: This activity takes Pick A Beak (W–2) one step further by encouraging children to consider how the bird’s beak and feet work together to aid it in gathering food, finding or building shelter, escaping predators, and caring for their young.
Did you know? Birds’ feet and beaks vary according to habitats and the types of food they eat. Some birds need webbed feet for swimming, while others need claws for holding onto trees. Long, skinny beaks help birds get insects out of trees, while short, strong beaks are good for cracking seeds. This activity draws the children’s attention to the color and size of birds and to differences in their feet and beaks.
Teacher preparation: ●● Prepare storyboard characters. ●● Set up a display of the bird animal cards near the storyboard
and storyboard characters.
What to do: 1. During self-selected activity time, encourage children to
experiment with putting different feet and beaks on the birds.
2. As children work, ask them open-ended questions such as:
●● Why do you think that bird needs those kind of feet? ●● What does that bird eat? How does its beak help? How do
its feet help? ●● In what kind of habitat do you think that bird lives? How do
you know?
Related children’s literature: Sill, C., & Sill, J. (2013). About birds: A guide for children (2nd ed.).
Atlanta, GA: Peachtree Publishers. ISBN-10: 1561456993. This nonfiction picture book provides an introduction to birds and their characteristics and habits.
109

Additional learning experiences: DISPLAY: Make a display of bird beaks, feet, the foods they eat, and their habitats.
MANIPULATIVE: During self-selected activity time, make bird animal cards and pictures of various habitats available to the children for matching birds with their habitats. Invite children to sort bird pictures by type of beaks or feet.
MANIPULATIVE: Make more bird puzzles for children to experiment with by laminating and cutting apart pictures of birds.
PRETEND PLAY: Encourage children pretend to be birds. Challenge them to stand and feed like different kinds of birds with different types of feet and beaks.
SCIENCE: Challenge children to observe the different ways birds perch and eat at the feeders in the play yard. Encourage children to record their observations in their science notebooks.
1 10

1 1 1
Winter 4
Children will: ●● Create a unique bird ●● Name their bird ●● Discuss habitat needs of the bird
You’ll need: ●● Animal cards: birds ●● Small brown paper bags
(one per child) ●● Newspaper ●● Construction paper ●● Feathers (legally obtained) ●● Sequins ●● Pipe cleaners ●● Pom-poms ●● Yarn ●● Assortment of collage materials ●● Scissors ●● Glue
Stuffed BirdsART: Create your own bird
! Notes from Sherri: This learning experience was the result of the children wanting to create the birds they observed at the feeders. They brainstormed materials for creating the birds and spent several days putting their birds together. After hanging their birds in the classroom, they extended the experience to earth clay. Their representations of birds in a variety of media demonstrated their increased understanding of the various parts of birds and bird habits.
Did you know? Along with the variety of bird species comes a variety of names. Some birds have common names that are mini-descriptions of their color or special features, such as the blue jay and the tufted titmouse. Other birds are named for their songs, such as the bobwhite and mockingbird; or their habits and habitats, marsh wren and woodpecker; or their diets, such as kingfishers and flycatchers; or the person who discovered the bird, Cooper’s hawk and Bewick’s wren. This activity will help children become more aware of bird names and bird characteristics tied to those names.
Teacher preparation: ●● Set up a display of bird animal cards and/or other pictures of
birds, along with their names, in the art center. ●● If working with younger preschoolers, pre-stuff the paper
bags with wadded up newspaper and twist the top of the bag closed. Older preschoolers can stuff the bags for themselves. These are the bodies of the birds.
●● Attractively arrange the remaining materials in the art center.
What to do: 1. During self-selected activity time, encourage children to create a
bird using the materials available. The stuffed paper bag can be used for the body of the bird with the twisted top as either the neck/head or tail of the bird. However, be open to other ideas the children may suggest while creating their birds.

2. Challenge the children to use the feathers, construction paper, sequins, pipe clearers, and other collage materials to complete their birds.
3. As they work, talk with them about the names of the various birds displayed in the area. Ask open-ended questions such as:
●● What does your bird eat? ●● What does your bird’s song sound like? ●● What is your bird’s habitat? ●● How does your bird’s beak and feet help it in its habitat?
4. As they complete their birds, challenge children to name them. Record the names along with other details to be displayed along with the birds.
Related children’s literature: Henkes, K., & Dronzek, L. (2009). Birds. New York, NY: Greenwillow Books. ISBN-10: 0061363049.
Kevin Henkes introduces children to the many shapes, sizes, and colors of birds.
Additional learning experiences: ART: Make earth clay or any type of clay or dough available for children to sculpt birds during self-selected activity time. As they work, talk about various bird body parts.
DISPLAY: Hang the completed birds from the ceiling so they appear to be flying. In the fall or early winter, hang them so they are flying south. Change their direction to north as spring approaches.
DISPLAY: Create a bird museum. Attractively display the completed birds along with cards with their names and habitats. Be sure to provide a guest book for visitors to sign, along with a brochure describing the exhibit. Train children to be docents in the museum and invite community members, parents and/or other children to visit the museum.
OUTSIDE: Observe the birds as they perch, fly, and move around the area. Challenge children to try out various poses, imitating bird actions in a frozen position.
PRETEND PLAY: Make a pair of bird wings from a pair of pillowcases by sewing a long narrow seam on one side of each pillowcase. Children can slide their arms into the space and pretend to be birds. Pillowcases could be painted to present more realistic wings.
WRITING: Make bird field guides available for children to look through. During self-selected activity time, put out small blank books children can use to create individual field guides for their birds. Encourage them to name their birds, write descriptions of their birds, and describe their habits and habitats. Make a tape recorder available for children to record their bird’s unique song.
1 12

Winter5 Explore a Feather
SCIENCE: Discover how feathers help birds
Children will: ●● Examine and explore bird
feathers ●● Use hand lenses and balance
scales in feather explorations ●● Record feather discoveries in
science notebooks
You’ll need: ●● Animal cards: birds ●● Bird feathers (legally obtained) ●● Pan of water ●● Hand lenses ●● Balance scales ●● Science notebooks and pencils
Did you know? Although not all species of birds can fly, all have feathers and wings. Bird feathers are tough, lightweight, and very strong. The feathers are slightly oily, allowing them to shed water. Birds’ feathers also keep them warm. This activity will enable children to explore feathers and discover their importance to birds.
Teacher preparation: ●● Play with the feathers before making them available for the
children so you can make your own discoveries about the feathers to better facilitate the children’s discoveries.
●● Attractively arrange materials so they are readily accessible to children during self-selected activity time.
What to do: 1. During self-selected activity time, challenge interested children
to explore the feathers by putting them in water, touching them, examining them with hand lenses, pulling them apart, weighing them, running with them, etc.
2. As children work, ask open-ended questions:
●● How do you think feathers help birds when it rains? ●● Why do you think birds have feathers? ●● How would you describe a feather?
3. Encourage children to record their observations in their science notebooks.
1 13

Additional learning experiences: DISPLAY: Take pictures of the children exploring the feathers. Display the pictures, along with their thoughts, ideas, and dialogue about the bird feathers for parents to see and for children to revisit and reflect on their experience.
GROUP: Discuss and record all the ways children think a feather can be used.
1 14

Winter6 I’m a Cardinal
MUSIC: Sing about the unique characteristics of the cardinal
Children will: ●● Observe cardinals’ physical
characteristics ●● Discuss cardinals’ food and
habitat ●● Create sounds representing the
cardinal’s song ●● Sing a song depicting cardinals’
unique characteristics
You’ll need: ●● Animal card: cardinal ●● Chart paper and marker
Did you know? Birds can be identified by color, profile, and/or call. Common in hedgerows, wood margins, and suburbs throughout Missouri, cardinals, with their bright red color, pointed topknots, and memorable call, are easy to identify. Their small, cone-shaped beaks are good for cracking seeds, their primary food. This singing activity will help children learn and remember some of the cardinal’s unique characteristics.
Teacher preparation: ●● Practice the song and actions. ●● Title the chart paper “Cardinals.”
What to do: 1. During group time, show children the cardinal animal card.
2. Discuss some of the distinguishing characteristics of the cardinal. Write their ideas on the chart paper.
3. Ask open-ended questions:
●● How is the cardinal different from other birds? The same? ●● How do cardinals live in the winter? ●● How do cardinals’ beaks and feet help them survive?
Record the children’s responses on the chart paper.
4. Talk with the children about how bird watchers and naturalists often use words or phrases to help them identify birdcalls. Teach the children the phrase for the cardinal’s call:
WHAT-CHEER WHAT-CHEER BIRDY-BIRDY-BIRDY?
5. Teach children the following song to the tune of Frere Jacques:
I’m a cardinal, I am red. (Fold arms like wings and flap them.) I have a tuft, up on my head. (Make a point on head with hands.) I sing a pretty song, (Flap arms.) and my beak is small and strong. (Make beak with fingers.) So I can crack seeds when I feed. (Pretend to peck at seeds.)
1 15

6. After practicing the call, singing the song, and doing the motions several times, ask open-ended questions:
●● What other birds have you seen with a tuft? ●● Why do you think cardinals have a tuft? ●● What other birds have a beak like a cardinal?
Related children’s literature: Scott, M. (2009). What cheer, what cheer, says the cardinal! Mustang, OK: Tate Publishing. ISBN-10: 1606046225.
In this simple field guide Scott introduces the young ornithologist to common birds, their relatives, song, eggs, and food.
Franco, B., & Jenkins, S. (2007). Birdsongs. New York, NY: Margaret K. McElderry Books. ISBN-10: 0689877773. Franco introduces the reader to a variety of birds and their calls throughout the day. Steve Jenkins’ simple illustrations bring the text to life.
Additional learning experiences: ART: During self-selected activity time, challenge children to record the songs of birds in ways other than audio recording them. For example, they might write them, draw them, color them, etc.
FIELD TRIP: Select a special area to take children for a bird-watching walk. Before the field trip, explore the area yourself to see what birds are there. Using a birdcalls tape or CD, select two or three birdcalls for children to listen for and identify on the bird-watching walk. Have pictures of the birds available for children to associate the call with the visual images of the birds.
MUSIC: Purchase or borrow from the public library a birdcall CD and play it during self-selected activity time.
OUTSIDE: Sit quietly outside and listen to bird songs. In spring, when birds are mating, songs will be more prevalent (March–June).
PRETEND PLAY: Make binoculars for children to bird-watch in the pretend play area during self-selected activity time. Cover the ends of two toilet paper rolls with colored cellophane, tape them together and attach a yarn strap.
SCIENCE: Encourage children to watch for birds with conical beaks (for example, finches, sparrows, grosbeaks and buntings) at the bird feeder. Look for similarities and differences in males and females. Make science notebooks available for children to record their thoughts, observations, and ideas.
1 16

Winter 7 Migration Obstacles
LARGE MOTOR/OUTSIDE: Experience migration
Children will: ●● Discuss migration and what it
means ●● Move through an obstacle course
designed to represent various challenges birds face during migration
You’ll need: ●● Chart paper and marker ●● Equipment for an obstacle
course such as a balance beam, climber, carpet squares, mats, streamers, stuffed animals, etc.
●● Animal card: canada goose
! Notes from Sherri: During late fall, early winter, and spring, Missouri’s skies are laced with the familiar V formation of migrating waterfowl (ducks and geese), the birds most frequently associated with migration. Federal regulations govern waterfowl hunting, which occurs during fall and winter after breeding season.
Did you know? The seasonal movement of birds and other animals is called migration. Migration may be triggered by reduced hours of sunlight, a food shortage, or colder temperatures. There are many theories about how birds find their way. Some ornithologists believe some birds follow mountain ranges, coastlines, or rivers. Birds flying over the ocean are thought to follow the stars or angle of the sun. This activity will introduce the concept of bird migration to children.
Teacher preparation: ●● Write “Migration” at the top of the chart paper. ●● Set up an obstacle course (inside or outside) using any
materials at hand. Keep in mind various migration scenes the course could represent, such as a balance beam “river,” climber “mountain,” streamers hung for “rain,” carpet squares representing “food,” large boxes for “buildings,” stuffed animal “predators,” a balloon for "the hot sun," cotton balls for "snow," and a fan for "wind," etc.
●● Prepare a migration story, depicting the various scenarios, to tell as you demonstrate the migration course for the children.
What to do: 1. Before taking children through the course, show them the
Canada goose animal card. Ask if anyone has seen or heard geese. Talk about how they fly in a V formation. Discuss and define migration. Record the children’s ideas about things a bird might experience during migration on the chart paper.
1 17

2. Ask open-ended questions:
●● Why do you think some birds migrate and others don’t? ●● How do you think birds know where to go in the winter? ●● How do they know when to leave and when to return? ●● How do birds know where it is safe to rest and find food? ●● What dangers must birds look out for?
3. Move through the course, telling your migration story as you go. Allow the children to move through the course making up their own migration stories.
Related children’s literature: Gans, R., & Mirocha, P. (1996). How do birds find their way? New York, NY: HarperCollins Children’s Books.
ISBN-10: 006445150X. This nonfiction picture book describes bird migration.
Additional learning experiences: HOME/SCHOOL CONNECTION: Encourage families to look for and point out migratory waterfowl as they see them.
MANIPULATIVE: During self-selected activity time, display all of the bird animal cards. Challenge children to sort pictures into those that migrate and those that don’t.
OUTSIDE: Observe birds migrating.
SCIENCE: Repeat the bird feeder activity (W–1) during spring, summer, and fall. Compare the variety of birds seen at the feeder each season.
1 18

Winter8 Track Puzzles
MANIPULATIVE: Match animals with their tracks
Children will: ●● Match animals with their tracks
You’ll need: ●● Related animal track puzzles
Did you know? Animals can be identified by their tracks. Snow and mud make winter and early spring good times for observing tracks. This activity will help children begin to associate animals with their tracks.
Teacher preparation: ●● Prepare animal track puzzle pieces.
What to do: 1. Arrange the animal track puzzles on a table and allow children
to play with them during self-selected activity time. Use only a few of the puzzles for younger children and more for older children.
2. As the children play, discuss the distinguishing characteristics of each animal’s track. Ask open-ended questions:
●● How can you tell which animal this track belongs to? ●● What animal tracks have you found in the snow or mud? ●● Do you think this animal has a foot or hoof? ●● How many toes do you see? ●● Why do some tracks show claws and others don’t?
Related children’s literature: Selsam, M. E., & Donnelly, M. H. (1998). Big tracks, little tracks:
Following animal prints (Rev. ed). New York, NY: HarperCollins. ISBN-10: 0064451941. Children are encouraged to become nature detectives by reading the tracks left behind by various animals.
Hodgkins, F. (2008). Who’s been here? A tale in tacks. Camden, ME: Down East Books. ISBN-10: 0892727144. Three children and their dog travel through the woods looking for tracks.
George, L. B. (1999). In the snow: Who’s been here? NY: Greenwillow Books. (Original work published 1995). ISBN-10: 0688170560. Cammy, William, and their dog head out on a sledding adventure and discover clues about who has been in the woods before them.
1 19

Additional learning experiences: ART: During self-selected activity time, help children make child tracks by painting the bottom of each child’s bare feet and letting them walk on a large sheet of paper.
ART: During self-selected activity time, let children make different animals tracks by stamping their fingerprints on white paper.
DISPLAY: Make a crayon rubbing of the bottom of each child’s shoe. Make a display of these tracks, along with pictures of the children.
FIELD TRIP: Visit a natural area to look for tracks. Other animal signs children might look for include chewed nuts or stripped cones, scratch marks, holes, or gnaws on trees, nests, and scat (animal feces). Be sure to take along science notebooks, hand lenses, and field guides.
OUTSIDE: Take a few children out in the snow and make different types of tracks, then take the rest of the children out to piece together the story behind the tracks.
OUTSIDE: During self-selected activity time, have children carefully cover several cookie sheets with peanut butter. Before going outside, discuss with children where they think animals may live on the play yard. Decide where to place the cookie sheets to capture animal signs. Place the cookie sheets in the designated positions and check each day for animal signs. Discuss what animal made the various signs in the peanut butter.
OUTSIDE: In a shallow bed of wet sand or fresh snow have children make tracks of their shoes. Mix children up by asking them to run around, then challenge them to match up their shoes with the tracks.
OUTSIDE: Look for signs of animals while being careful not to disturb them. Be sure to look under bird feeders.
SCIENCE: Put out a track identification guide for children to explore during self-selected activity time.
120

Winter 9 Willie the Woodchuck
READING: Listen to a story about hibernation
Children will: ●● Discuss woodchucks and what
they are ●● Listen to a story about
hibernation
You’ll need: ●● Storyboard ●● Related storyboard characters ●● Animal card: woodchuck
Did you know? Animals hibernate in caves, hollow logs and trees, and holes in the ground. Many mammals move in and out of hibernation throughout the winter. In northern regions of the United States, woodchucks or groundhogs go into deep hibernation from November to February. They eat plants primarily and also bugs and snails. This activity will help children become aware of what hibernation is and how animals prepare for it.
Teacher preparation: ●● Prepare storyboard characters. ●● Practice reading the story while placing the characters on the
storyboard at the appropriate times.
What to do: 1. Share the woodchuck animal card and discuss its habits and
habitat.
2. Read the story on the following page to children, using the storyboard and characters.
3. After reading the story, ask open-ended questions:
●● How do you think Willie knows when to go to sleep and when to wake up?
●● What do other animals do in the winter? ●● Why doesn’t Willie need to wake up to eat?
Bancroft, H., & Davie, H. K. (1996). Animals in winter. New York, NY: HarperCollins. ISBN-10: 0064451658. This book depicts how many different animals prepare for the coldest time of the year.
Messner, K., & Neal, C. S. (2011). Over and under the snow. San Francisco, CA: Chronicle Books. ISBN-10: 0811867846. The simple illustrations show many different forest creatures spending the winter both above and below the snow.
Related children’s literature:
121

Willie was a woodchuck. He had a bushy tail. Every toe on each foot had a long sharp nail.
He used his feet to dig a hole. He dug deep down. He dug it in a fencerow, where wheat grew all around.
Every day at sun up, he’d search for plants and bugs. When he was full each night,
he’d sleep in the hole that he had dug.
Willie soon got nice and fat from wheat that he chomped down. He’d lay for hours in the sun by his hole in the ground.
Soon the air was cooler and the leaves turned brown. Then the fall winds came, and the leaves fell down.
Winter was a-coming. When Willie heard the news, he crawled down in his
woodchuck hole to take a little snooze.
B-r-r-r came the winter cold. Whoosh the wind would blow. Willie kept on sleeping and down came the snow.
Down came the winter snow. Soon it was very deep. Down inside his woodchuck hole was Willie, fast asleep.
Down came ice and snow. The sky was dark and gray. Still Willie kept on sleeping day after day.
The first spring warmth came. The trees began to bud. The ice and snow began to melt and dirt turned into mud.
Down in Willie’s woodchuck hole, it was dark and deep. Willie opened up his eyes and woke up from his sleep.
He crawled out of his woodchuck hole.
He crawled outside to see. Looking for those plants and bugs as hungry as can be.
Soon he was back to searching for seeds, plants, or bugs and snoozing in the sun next to the hole that he had dug.
In the months before the winter Willie eats all he can hold and goes to sleep all winter so he doesn’t feel the cold.
By John Griffin
Additional learning experiences: BLOCKS: During self-selected activity time, provide materials for children to build shelters for animals to hibernate in or to take shelter in during the winter.
MANIPULATIVE: During self-selected activity time, provide animal cards for children to sort by animals that hibernate and those that don’t.
NUTRITION: During lunch or snack, ask children to pretend they are animals preparing to hibernate. They need to eat a lot to get fat and grow a thick coat. At naptime, ask them to curl up on their cots and pretend to sleep like animals in hibernation. When it’s time to get up, tell them it’s spring.
OUTSIDE: During self-selected time, encourage children to find places on the play yard that are warmer and/or protected from the cold or wind.
OUTSIDE: Encourage children to find good places to hibernate on the playground.
OUTSIDE: During self-selected activity time, encourage children to look for dormant plants in the play yard.
PRETEND PLAY: Place a “cave” box in an area where children can freely crawl in and out of it to pretend to hibernate during self-selected activity time. The children could paint the cave box to make it look more real.
122

123
Winter 10
Children will: ●● Sing a song about snow ●● Discuss how snow helps animals
and people
You’ll need: ●● Snowy day or pictures of snow ●● Chart paper and marker
Three Little Snowflakes MUSIC: Sing about snow falling
Did you know? Ice in your freezer is like frozen raindrops, sleet, or hail. The frost around the edges of the ice cube tray is like snow, formed directly from water vapor in the air. Snow is an important part of the natural world. It provides moisture for the soil and plants and insulates soil organisms from the cold. This song will help children associate snow with cold and the fact that it falls from the sky.
Teacher preparation: ●● Practice the song with the motions. ●● Title chart paper with “Ways Snow Helps Animals, Plants and
People.”
What to do: 1. During group time on a snowy day, teach children the following
song to the tune of Ten Little Indians:
One little, two little, three little snowflakes (Count on fingers.) fall from the sky like little white snow cakes.
(Wiggle fingers like snow falling.) They cover up your toes, (Touch and wiggle toes.) and are cold on your nose, (Touch nose.) and are prettier than anything people make! (Clap hands.)
2. After practicing the song together several times, talk with the children about how snow helps animals, plants, and people. Write their ideas on the chart paper. Ask open-ended questions:
●● How do you think snowflakes are made? ●● How does snow help plants and animals? ●● How does snow help people?

124
Related children’s literature: Branley, F. M., & Keller, H. (2000). Snow is falling. New York, NY: HarperCollins. (Original work published 1963). ISBN
10: 0064451860. This story illustrates characteristics of snow, explains how snow helps plants and animals, and explores some snow hazards.
Gibbons, G. (2012). It’s snowing! New York, NY: Holiday House. (Original work published 2011). ISBN-10: 0823425452. In this nonfiction picture book, Gibbons shares many facts and tips about snow.
Additional learning experiences: ART: During self-selected activity time, provide materials for children to paint on slick paper using powdered tempera sprinkled on the paper and an ice cube or an icicle for a paintbrush. Discuss what happens.
ART: Provide materials for children to make snow pictures with white chalk on dark paper during self-selected activity time. Allow children to add dimension to the work with glue, plastic foam pieces, and/or cotton balls.
ART: Provide white paper and scissors for children to create snowflakes during self-selected activity time. Provide glitter and glue sticks for children to decorate snowflakes. Hang the snowflakes from the ceiling.
BLOCKS: During self-selected activity time, put large trucks, tractors, and bulldozers in the block area for “snow removal.” Use plastic foam packing for snow.
BLOCKS: During self-selected activity time, place a large plastic tablecloth in the block area. Encourage children to build on it. After the building is completed, make it “snow” by sifting flour or cornstarch over the structure. Discuss places where the “snow” fell. Record the event with photographs and the children’s words. Compare their findings to what happens outside.
MUSIC: Encourage children to dance with white crepe paper streamers to soft, flowing music to simulate snow falling.
OUTSIDE: During outside self-selected activity time, encourage children to brainstorm what they might use to measure the snow depth. Allow them to discover how it’s deeper in some places than others. Make a chart of the children’s findings and/or record their thoughts and ideas. Put out a snow gauge.
SCIENCE: At the science center during self-selected activity time, place several jars with coffee filters or paper towels secured on top with a rubber band. Encourage children to collect snow from several different locations and place the snow on the filters. Make note of each collection site. Challenge children to predict what will happen. Be sure to record their ideas. Discuss what’s left in the coffee filters once the snow melts. Compare the results from the different collection sites. Science notebooks should be available for children to record their ideas.
SCIENCE: Bring tubs of snow inside and let children explore it during self-selected activity time. Have mittens nearby for cold hands. Suggest they let the snow melt in the palms of their hands and discuss what happens.

125
Winter 11
Children will: ●● Discuss ways people use natural
resources in the winter ●● List activities that can only be
done in the winter ●● Pretend to ice skate
You’ll need: ●● Unit blocks (two per child) or
waxed paper and rubber bands ●● Carpeted area ●● Skating music ●● Chart paper and marker
Skaters Away LARGE MOTOR: Experience one way people use natural resources
! Notes from Sherri: Several children in my classroom discovered this activity after they visited a local ice rink. It not only allows the children to experience a winter sport and one way that people use natural resources in the winter, but it also requires large muscle coordination. Just as with real iceskating, the more the children practiced, the better they got!
Did you know? People around the world enjoy a wide variety of winter sports. This activity will help children identify at least one way people use natural resources in the winter.
Teacher preparation: ●● Gather blocks or pieces of waxed paper and rubber bands. ●● Wax unit blocks so they slide easily on the carpet. ●● Select appropriate skating music. ●● Label the chart paper “Things People Like To Do In Winter.”
What to do: 1. During group time talk with children about the kinds of things
people do outside for fun in the winter. On the chart paper write down their responses to open-ended questions.:
●● What kinds of things do you like to do outside in the winter?
●● What do you do in the winter that you can’t do in the summer?
2. Give each child two unit blocks and explain that these are their ice skates and today they are going to go skating. Show them how to “skate” by placing their feet on top of the blocks and sliding the block on the carpet. (Blocks can be paste-waxed prior to the activity to make them glide easier, or waxed paper can be rubber-banded to feet if blocks are not available.) This experience works best if children keep their shoes on rather than trying it in stocking feet.
3. Put on gentle skating music, such as Skater’s Waltz, and encourage children to glide through the room.

126
Related children’s literature: Rylant, C., & Stringer, L. (2008). Snow. Orlando FL: Harcourt Children’s Books. ISBN-10: 0152053034. Rylant’s book
celebrates a child’s delight with snow.
Additional learning experiences: ART: During self-selected activity time, provide magazines for children to cut out pictures of people doing various winter activities. Glue these on paper to make winter collages.
ART: Provide materials for children to make plastic foam “snow” sculptures during self-selected activity time.
ART: Create soap snow sculptures by mixing Ivory Snow laundry detergent with water, creating a thick dough. During self-selected activity time encourage the children to play with and sculpt the snow into different shapes and objects. Props, such as sticks and rocks, can be made available to add to the creations. After the snow sculptures dry, they can be used like bar soap.
ART: Make shaker globes by gluing objects to the lid of a small, clear jar. Add water and glitter. Seal and shake.
BLOCKS: Use the fish from Let’s Go Fishing (SU–12). Place them inside a box with a lid. Cover the lid with white paper and cut a large hole. During self-selected activity time, use the poles and go “ice fishing.”
BLOCKS: Build snowmobiles from large hollow blocks and make goggles with elastic and six pack rings.
FIELD TRIP: Take the children on a real ice skating adventure to a local ice rink.
GROUP: Chart or survey children’s preferences for the various winter activities.
HOME/SCHOOL CONNECTION: Encourage parents to take pictures of children participating in various winter activities. As children bring them in to share, display them and include their ideas about the experience.
LARGE MOTOR/OUTSIDE: Encourage children to organize and set up their own Winter Olympics.
LARGE MOTOR: Provide crumpled newspaper for children to have a pretend snowball fight.
MUSIC: Sing “this is the way we shovel the snow” to the tune of Here We Go Round the Mulberry Bush. Encourage children to make up other verses about things they do in the snow.
NUTRITION: Provide materials for children to create “snow” sculptures for snack with large and small marshmallows, raisins, pretzels, etc.
OUTSIDE: During outside self-selected activity time, put out small snow shovels so children can try shoveling snow.
PRETEND PLAY: Provide small carpet squares for children to use as sleds. Put out winter clothing for dressing up.

127
Winter 12 What’s the Temperature?
SCIENCE: Document the temperature and discuss how it affects people
Children will: ●● Examine thermometers ●● Explore how temperature affects
outdoor clothing choices
You’ll need: ●● Two thermometers (one for
outside and one for inside) ●● Strip of ¼-inch to ½-inch-wide
elastic that is twice as long as the cardboard
●● Sturdy piece of cardboard ●● Pictures of children in clothing
for different temperatures ●● Glue ●● Red marker
! Notes from Sherri: I place one thermometer inside and one outside the door leading to the play yard. As children wait near the door for adults to join them, they naturally focus on the thermometers. With very little teacher direction, children concentrate on the differences between the two thermometers, and with just a little prompting, they begin to develop an idea about the relationship between the thermometer levels and the clothing they’re wearing. Sometimes they have even decided whether or not they need mittens, zipped jackets, hoods or hats, etc. based upon the thermometer readings.
Did you know? Outside temperature is a major weather indicator. This activity will help children become more aware of outside temperature and how the temperature affects them.
Teacher preparation: ●● Draw a thermometer on the cardboard. Color half the elastic
strip red. The red will represent the colored alcohol found in most thermometers. Put the elastic through slits in the top and the bottom of the “thermometer.” Sew or pin the ends together in the back. This will enable the “alcohol” to be moved up and down.
●● Glue the pictures of children in various clothing at the appropriate places on the cardboard thermometer.
●● Place the two real thermometers inside and outside in places where children will notice, read, and study them.
●● Place the cardboard thermometer near the real ones.
What to do: 1. As children discover the thermometers, challenge them to
compare and manipulate the cardboard thermometer.
2. As children show interest in the weather thermometers, discuss their purpose. Compare taking the air’s temperature to taking the children’s temperatures. Encourage children to compare the outside thermometer with the inside one.

128
3. Ask open-ended questions:
●● What makes the temperature change? ●● How do you know what to wear when you want to go outside and play? ●● How does the thermometer help us figure out what to wear? ●● How do you think the temperature affects animals? Plants?
Additional learning experiences: DISPLAY: Display pictures of winter scenes or pictures of animals in winter environments.
GROUP: Record daily temperature and general weather conditions on a chart.
GROUP: Help the children make a chart or bar graph illustrating the number of children who wore hoods, stocking caps, baseball hats, etc., on any given day.
MANIPULATIVE: During self-selected activity time, provide materials for children to sort pictures of children (cut from magazines or catalogs) in different clothing. Discuss why children are wearing the various articles of clothing.
MANIPULATIVE: Put out animal cards and pictures of various winter habitats. During self-selected activity time, encourage children to match the animal with their winter habitat. Discuss differences in summer and winter habitat.
OUTSIDE: Encourage children to notice animal activity patterns as they read the thermometer. The birdfeeder is a good place to notice animal activity levels.
PRETEND PLAY: Set up a weather station in the pretend play area. Include maps, weather forecaster dress-up clothes, pointers, thermometers, etc.
PRETEND PLAY: Put out seasonal clothing in the pretend play area.
SCIENCE: Encourage children to record their weather and temperature observations in their science notebooks.

129
GROUP: Experiment with ways to melt ice Winter13 Me lt the Ice Cube
Children will: ●● Brainstorm ways to melt an
ice cube ●● Predict the fastest way to melt
an ice cube ●● Test predictions ●● Determine the fastest way to
melt ice
You’ll need: ●● Equal sized cubes of ice for each
child in the class ●● Snack-sized zip-close baggies
(one for each ice cube) ●● Science notebooks and pencils ●● Flashlights ●● Chart paper ●● Marker
! Notes from Sherri: This is always a popular experience in my classroom. The children get very excited about making predictions and having an immediate opportunity to test their ideas. I am always amazed at their ideas of where the water inside the bag came from.
Did you know? There are many different heat sources in or near your classroom that will melt an ice cube (outside, by an air vent, under a light bulb, or wrapped in a blanket). This experience will allow children to talk about, predict, and experiment with the fastest way to melt an ice cube.
Teacher preparation: ●● Place one ice cube in each plastic bag. ●● Gather supplies. ●● Title chart paper “How Can We Melt the Ice?”
What to do: 1. Gather interested children together and show them the ice cubes.
2. Brainstorm ways they could try to melt the ice. Write their ideas on the chart paper.
3. Ask children to predict in their science notebooks the way they think that the ice cube will melt the fastest. They could write or draw their ideas.
4. Challenge children to try out their ideas and see which ice cube melts the fastest.
5. When the first ice cube is melted, gather children together to check the results. Ask the children to talk about the various methods they tried.
6. Ask open ended questions:
●● Which method do you think worked the best? Why? ●● Was your prediction accurate? Why or why not? ●● Where did the water come from that is still in your bag?
7. Challenge children to record their results in their science notebooks.

130
Additional learning experiences: ART: Make an ice sculpture. Ask parents to freeze various sized and shaped containers of water. On the day the ice sculpture is to be built, put all of the ice in a small child’s swimming pool. Show children how to attach ice pieces together by sprinkling salt on the ice and spraying with water. Provide spray bottles of colored water to decorate the sculpture when it’s finished.
LARGE MOTOR: Put on slow, calm music and encourage children to pretend to be melting snow people or sculptures. Be sure to discuss why the snow people or sculptures melt.
OUTSIDE: Teach children how to play freeze tag.
OUTSIDE: Gather natural materials and recycled pie plates. Encourage children to create collages in the pie plates with the natural materials. Then cover the creation with water. Let it freeze, and then pop out the creation to create beautiful ice sculptures.

4 Winter
1
Children will: ●● Discuss what energy is and
where it comes from ●● Play a physical game that
requires energy
You’ll need: ●● Chart paper and marker
What Is Energy? GROUP: Explore energy and its source
! Notes from Sherri: Energy use is an abstract concept for young children to grasp. However, attitudes about and habits of energy consumption are formed at a very young age. Relating energy use with children’s own bodies makes energy consumption more personally meaningful, thus allowing children to consider and become aware of other types of energy use.
Did you know? Most everything that moves requires energy. This activity will encourage children to think about energy and its source.
Teacher preparation:
What to do: 1. During group time ask children what they think energy is.
On chart paper, record each of their responses to open-ended questions like these:
●● Where does energy come from? ●● How do you know when you are using energy? ●● What needs energy?
●● What is energy?
2. Play a game like duck, duck, goose or ring around the rosie and discuss how the children feel after playing the game.
3. Have children exercise, then ask them to feel their hearts beat and listen to their breathing.
4. Talk about the energy they used to play and where they got that energy.
Related children’s literature: Bradley, K. B., & Meisel, P. (2002). Energy makes things happen.
New York, NY: HarperCollins. ISBN-10: 0064452131. This simple nonfiction text defines energy, where it comes from, and how it is transferred from one thing to another.
131

132
Additional learning experiences: FIELD TRIP: Visit places that provide energy such as a power plant, service station, or grocery store.
NUTRITION: Discuss children refueling their own energy as they eat snack and/or lunch.
SCIENCE: In small groups, have children stand where the sun shines strongly into the classroom, and then compare how they feel when they stand where the sun isn’t shining.
SCIENCE: Show children how to experiment with static electricity by rubbing a balloon on a child’s hair and sticking the balloon to the wall. Rub some wool on a comb and the comb will pick up small pieces of paper. Provide materials for children to experiment on their own.
SCIENCE: Demonstrate static electricity with a balloon charged by rubbing it on your hair. Hold the charged balloon next to a small, steady stream, or trickle of water. The water will bend toward the balloon.
SCIENCE: Create static electricity cups by placing a small amount of rice cereal in a clear, plastic cup. Cover the top of the cup with clear plastic wrap and secure with a rubber band. During self-selected activity time, encourage interested children to rub the plastic wrap side of the cup on their hair or with a piece of wool. Observe what happens. Make sure science notebooks are nearby to record the results.
WOODWORKING: Provide nonworking appliances, with the cords removed, for children to disassemble during self-selected activity time. Talk about how the appliance once used energy to perform tasks. Encourage children to try to figure out how the appliances worked as they take them apart.

Winter15
B, T, and U READING: Listen to a story about energy
Children will: ●● Listen to a story about how
energy is created and used
You’ll need: ●● Storyboard ●● Related storyboard characters
Did you know? The sun provides much of the natural energy used on our planet. This story illustrates that energy comes from the sun as well as ways people use various forms of energy.
Teacher preparation: ●● Prepare storyboard characters. ●● Practice reading the story while placing the characters on
the storyboard at the appropriate times.
What to do: 1. Read the story on the following page to children, using the
storyboard and characters.
2. After reading the story, ask open-ended questions:
●● What are some other kinds of energy B, T, and U might become?
●● What are some things you could do with brown paper bags from the grocery store?
●● What are some ways that B, T, and U are wasted?
133

Way high in the sky important things are done. Little bits of energy are made inside the sun.
Down from the burning sun warm pieces flew. Three little pieces named B, T, and U.
From the sun to our earth the little pieces hurried. “Will they use us wisely?” They wondered and they worried.
B hit a plant leaf at the end of his fall. Zap! The plant leaf used him to grow a cotton ball.
A farmer picked the cotton and spun it into cloth and sewed it all into a bag very large and soft.
A cloth bag you can use again and again. A shopper bought the cloth bag to carry groceries in.
Those brown paper grocery sacks are all made out of wood. So, use cloth bags and save more trees like everybody should.
T was the next piece. He dropped into the sea and heated up the water there as warm as it could be.
Invisible, so we can’t see he made the water rise. Up into a cloud it went floating in the sky.
Down came the water in sheets of pouring rain. Whoosh! down a river like a roaring train.
A dam held the river on its way back to the sea, and slowing down the water made some electricity.
Zap! Through a power line, T traveled on and on, and into a light socket right there in your home.
Voom! He makes the sweeper go, and the TV too. Are there many other things that he can do?
Switch! He makes the lights come on. But how long will he last? What are some things that we can do so he won’t get used so fast?
U was the last piece. Down from the sun he flew. Right into a field where a corn plant grew.
Changed into the yellow corn in a shuck of green. He waited for the farmer and his corn-picker machine.
The grocer bought the piece of corn and put it on a rack. A shopper took it home with her in a cloth shopping sack.
She turned on her electric stove to make the burner warm. Then she boiled some water to cook the piece of corn.
A small child ate the corn and as he chewed he looked at all the things that made the corn that his mother cooked.
B made the cloth bag to bring home things to eat. T made electricity to cook the corn with heat.
And U made the piece of corn the child ate that day. So he would have the energy to live and learn and play.
By John Griffin
Additional learning experiences: ART: Provide catalogs and magazines for interested children to find pictures of things that use energy, cut them out, and make collages during self-selected activity time.
NUTRITION: Make decaffeinated sun tea with the children. Talk about the changes that the sun helped to make.
READING: After reading the story at group time, make the storyboard and storyboard characters available in a learning center to retell the story or use in other ways during self-selected activity time.
SCIENCE: Place a plant in the sun and another in a dark room. Encourage children to make note of the differences between the plants after a few days and again after a week. Provide science notebooks for children to record their observations.
134

Winter16 Energy Puzzles
MANIPULATIVE: Match energy users with their energy needs
Children will: ●● Match energy users with types
of energy
You’ll need: ●● Related energy puzzles
Did you know? There are many forms of energy: electricity, oil, gas, solar, coal, wind, etc. This activity will help children match energy users with the energy used.
Teacher preparation: ●● Prepare the energy puzzles. ●● Place energy puzzles in manipulative area.
What to do: 1. During self-selected activity time, encourage interested children
to match the energy users to the types of energy used.
2. Be available to discuss their choices and ask open-ended questions:
●● What kinds of energy do you use at your house? ●● What would happen if we ran out of any of these kinds of
energy? ●● Which types of energy do we use at school?
Related children’s literature: Lionni, L. (1974). Alexander and the wind-up mouse. New York, NY:
Dragonfly Books. (Original work published 1969). ISBN-10: 0394829115. This fable about a real mouse and a mechanical mouse creates the opportunity to talk about the different kinds of energy that animate the two mice.
135

Additional learning experiences: BLOCKS: Make small pretend gas tanks from toilet paper rolls and/or milk jugs to use with the cars and trucks during self-selected activity time.
GROUP: Read the electric and water meters at the school. Chart the usage each month.
GROUP: Work with children to find the electrical outlets throughout the classroom. Show them how they are covered with child safety covers. Explain to children why it is important not to put fingers, tools, or toys in electrical outlets or electrical appliances.
HOME/SCHOOL CONNECTION: Encourage children to ask their families what type of energy they use to heat their homes and cook their food. Then create a chart showing the many different ways people accomplish the same thing in their homes.
MUSIC: Sing Row, Row, Row Your Boat and discuss the type of energy a rowboat uses.
OUTSIDE: Make pretend gas tanks from large cardboard boxes with hose attached. Place them outside for use with the tricycles.
SCIENCE: Bring in a selection of windup toys and place in the science area during self-selected activity time. Discuss where they get their energy.
136

Winter17 No Electricity
GROUP: Discover what human life is like without some natural resources
Children will: ●● Spend a day or a portion of a day
without electricity ●● Discuss what life is like without
electricity ●● Suggest things that are fun to do
that require no electricity
You’ll need: ●● Dark, cloudy day or you can
close the blinds ●● Oil lamps or candles ●● Clean bucket of water ●● Dipper ●● Cups
Did you know? Electricity comes from many sources, including nuclear energy, coal, oil, wood, wind, sunlight, hydropower, and geothermal. This activity introduces children to the concept of conservation through the experience of life without electricity.
Teacher preparation: ●● Choose a day or a portion of a day to do without electricity. ●● Place oil lamps and/or candles out of reach of children. ●● Place bucket of clean water, dipper, and cups in area readily
accessible to children.
What to do: 1. As children go through their daily routine, discuss how it is
changed without electricity.
2. Talk about what life would be like without electricity. Ask the children open-ended questions like these:
●● How can we keep warm without electricity? ●● How can we keep food cold and cook food without
electricity? ●● What can you do for fun when there isn’t any electricity? ●● What would happen if we ran out of electricity? ●● How can we keep from wasting electricity?
Related children’s literature: Rylant, C., & Goode, D. (1993). When I was young in the mountains.
London, UK: Puffin. (Original work published 1982). ISBN-10: 0140548750. This beautifully illustrated story of life in early 20th century Appalachia shows what life was like without electricity or running water.
Bang, M. (2004). My light. New York, NY: Blue Sky Press. ISBN10: 043948961X. This is a simple story of how electricity is generated.
137

Additional learning experiences: FIELD TRIP: Visit a wood stove store and talk about whether or not wood stoves are a wise use of our natural resources. Renewable and nonrenewable resources could be discussed. Oil and coal are nonrenewable while wood is a renewable resources — in other words, trees can be replanted.
138

Winter18 Does the Sun Give Us Energy?SCIENCE: Explore the sun’s energy
Children will: ●● Explore energy from the sun
You’ll need: ●● Three pieces of dark
construction paper ●● Book ●● Flower pot ●● Sunny day ●● Science notebooks and pencils
! Notes from Sherri: This activity is based upon a discovery made by the children one day when we were cleaning our classroom. Construction paper had been used as matting for pictures and artwork placed on a bulletin board near a sunny window. When the work was taken down, the children noticed the discoloration of the construction paper that wasn’t covered by a picture or artwork. This lead to a more focused experiment with the children intentionally placing various objects on the construction paper and placing the paper in the sun.
Did you know? The sun gives us free energy every day. This activity will help children become more aware of the sun’s energy.
Teacher preparation: ●● Locate an appropriate sunny window easily accessible to
children. ●● Gather supplies.
What to do: 1. During self-selected activity time, place the three pieces of
paper in a sunny window.
2. Leave the first piece uncovered. Place a book on the second piece so that only part of the construction paper is covered. Place the flowerpot in the center of the third piece of construction paper.
3. Ask children who are interested in the experiment to make predictions about what they think will happen to the construction paper.
4. Ask open-ended questions:
●● What causes you to get a sunburn? ●● What do you think the sun will do to the paper? To the
book? To the flowerpot?
5. Encourage children to record their ideas in their science notebooks or make a poster to record their predictions and the actual results.
139

6. Remove the book and flowerpot in a few days. Compare their observations and their predictions.
7. Ask more open-ended questions:
●● What happened? ●● How do you think the sun makes such a powerful light?
8. Record the results or encourage the children to record the experiment results in their science notebooks.
Related children’s literature: Gibbons, G. (1987). Sun up, sun down. Orlando, FL: Sandpiper. (Original work published 1983). ISBN-10: 015282782X.
This informative picture book helps children find out about the sun and how it keeps our planet alive.
Additional learning experiences: ART: Provide various materials for children to make sun pictures during self-selected activity time. Discuss life without the sun and explain that Earth’s only source of heat is the sun.
ART: Cut out advertisements using warm and cool colors (for example, soup advertisements often use reds and oranges to make you feel warm while toothpaste is usually blues and greens to make you feel cool). During small groups or with interested children, discuss the use of warm and cool colors and how they make people feel. Sort advertisements into warm and cool feelings. Warm and cool color use is an important component to advertising. Compare the warm and cool colors with what happened in the experiment. Provide old magazines for children to create warm and cool collages. Notice colors used to designate hot and cold water on many faucets.
DISPLAY: Display pictures of people using heat from the sun (clothes hanging outside, crops growing, etc.)
GROUP: Discuss how some animals’ coats are darker in winter than in summer, eg., deer, coyote, dogs.
NUTRITION: Set up experiences for children to try drying various fruits in the sun (such as grapes or apples).
OUTSIDE: Fill spray bottles with heavily-colored water and allow children to paint the snow during outside self-selected activity time. Discuss changes in the snow and if one color of water makes the snow melt faster than another color.
OUTSIDE: On a sunny day, feel the temperature difference between a white car and a black or red car.
OUTSIDE: Provide sun sensitive photo paper for children to experiment with making sun photographs during self-selected activity time.
OUTSIDE: Purchase some sun sensitive beads. Take them outside and let children discover how they change colors in the sun. Once they have seen how they change take them back inside. Liberally apply sunblock on the beads and take them outside again. Talk about how they didn’t change. Keep in mind that sunscreen has an expiration date and it doesn’t usually work well beyond that date.
SCIENCE: Set up a control experiment by duplicating the experiment but placing one set of papers in the dark or a place where the sun doesn’t shine.
SCIENCE: Try other sun experiments, such as leaving crayons outside in the sun. Encourage children to brainstorm ways to find out more about the sun.
SCIENCE: Challenge children to find some objects to place on that paper they think the sunlight will pass through.
140

141
Winter19 Saving Energy
GROUP: Discuss energy conservation
Children will:●● Identify ways that children in
various scenarios waste natural resources
●● Discuss ways to use natural resources wisely
You’ll need:●● Group of children
Did you know?We practice conservation so our natural resources can be used by more people over a longer period of time. This activity will help demonstrate some conservation or wise-use practices for children.
Teacher preparation:●● Read through scenarios and prepare to present them to a
group of children.
What to do:1. Gather children at group time and tell them you are going to
play an energy-saving game. You will describe a way that energy is being wasted and they can tell you some ways to practice conservation or wise use.
2. Describe the following situations to the children and encourage them to share their ideas about ways to prevent the energy from being wasted.
●● Chelsey goes into the bathroom to wash her hands. Her mommy calls her to dinner and Chelsey leaves the faucet running.
●● Zachary goes into the living room to watch television. He soon becomes interested in playing with Legos and leaves the room to look for more pieces, but doesn’t turn off the television.
●● Austin drinks a bottle of juice on his way home from school and throws the plastic bottle on the ground.
●● Jacob likes to draw. His mother bought him a new tablet. Jacob makes a few marks on each page and then throws the tablet away and asks his mother for a new one.
●● Ashlyn misses her school bus so she and her mom jump into the car and drive very fast to school.
●● Eleanor opens the window and puts some birdseed out but doesn’t close the window.

3. As children respond to the various scenarios, ask open-ended questions:
●● What are some ways that people waste energy at school? ●● What would happen if we used up all of our natural resources? ●● What can we do to make sure we don’t waste things?
Related children’s literature: Arnosky, J. (2012). Crinkleroot’s guide to giving back to nature. New York, NY: Putnam Juvenile. ISBN-10:
0399255206. Arnosky’s nature guide, Crinkleroot, suggests many ways that children can care for the environment they live in.
Additional learning experiences: GROUP: Relate the term conservation to wildlife and plants. Talk about hunters, woodcutters, and other harvesters in Missouri. How do they practice conservation? This is a time to clarify the difference between wise use and overuse of renewable resources.
142

Winter20 Grocery Shopping
PRETEND PLAY: Experience re-use as a conservation practice
Children will: ●● Pretend to shop in a grocery
store ●● Bag grocery purchases in
cloth bags ●● Discuss reuse of grocery bags
You’ll need: ●● Several cloth shopping bags ●● Empty food containers (cereal
boxes, egg cartons, canned goods)
●● Cash register (this can be made from a box)
●● Telephone ●● Play money ●● Paper ●● Pencils ●● Receipt book
! Notes from Sherri: This experience is always popular with the children. While they enjoy the pretend play, they begin to develop the habit of reuse. It is surprising how many parents comment on their children reminding them to reuse cloth or even paper grocery bags.
Did you know? One way to conserve natural resources is to choose reusable rather than disposable products. Carrying our own reusable grocery bags when we go shopping is a small but effective way to keep both paper (which comes from trees) and plastic (which comes from nonrenewable oil) out of local landfills. This activity will help children practice conservation in their everyday lives.
Teacher preparation: ●● Set up a grocery store in one corner of the classroom. ●● Price grocery items. ●● Put play money in purses and billfolds. ●● Place the cash register and telephone near the checkout area. ●● Place paper and pencils near the phone for messages. ●● Receipt books can be used to provide receipts with purchases. ●● Additional writing materials should be available for making
grocery lists.
What to do: 1. During self-selected activity time, make the grocery store
available for the children. Encourage children to shop and then pack their purchases in cloth shopping bags.
2. As children play discuss the various food-packaging materials and what happens to it once the food is eaten.
143

3. Ask open-ended questions like these:
●● What would happen if everyone used reusable shopping bags at the grocery store? ●● What if no one used reusable shopping bags? ●● How could we encourage people to not use so many paper or plastic bags? ●● Where do you think the food in the grocery store comes from? ●● What happens to the package after we eat the food?
Additional learning experiences: ART: As you use toilet paper rolls, egg cartons, plastic foam packing, etc. in the art area, talk about the original purpose of each.
FIELD TRIP: Visit a grocery store and examine various product packaging.
GROUP: Discuss strategies that children might use to help their parents remember to use their cloth or reusable shopping bags.
HOME/SCHOOL CONNECTION: Decorate white canvas bags with fabric markers drawings for children to give as gifts to the parents.
144

Winter21 Fred’s Forest
READING: Listen to a story illustrating preservation, restoration, and management
Children will: ●● Listen to a story illustrating the
three levels of conservation ●● Discuss wood as a renewable
resource
You’ll need: ●● Storyboard ●● Related storyboard characters
! Notes from Sherri: Trees are one of North America’s most valuable renewable natural resources. Properly managed, forests can be productive sources for firewood and other forest products, as well as wildlife habitat. Forest management can even be directed to favor certain species of wildlife, while still providing products. For example, certain old-growth forest habitats house certain rare and endangered species, while clear-cutting or burning small areas of the forest will encourage regeneration or growth of young trees and brush that will benefit other species. Selective harvest of trees can increase the health of a forest by eliminating disease or insect infestation and opening up small areas of the forest for regeneration of trees.
Did you know? There are three levels of conservation: preservation, restoration, and management. This story will introduce the three levels of conservation to children.
Teacher preparation: ●● Prepare storyboard characters. ●● Practice reading the story while placing the characters on the
storyboard at the appropriate times.
What to do: 1. Read the story on the following page to children, using the
storyboard and characters.
2. After reading the story, ask open-ended questions:
●● What do you think would have happened if Fred hadn’t planted more trees?
●● How could Fred make his firewood last longer? ●● How do you heat your house?
145

Fred had a forest, a home for birds and bees. Oftentimes, from his porch he’d sit and watch the trees.
Cut a tree? “No!” said Fred, “they’re nice to have around. I like to sit and watch them. I’ll never cut one down.”
But winter cold soon changed his mind, with its snow and sleet. “B-r-r-r!” said Fred, “I need a fire. I must have some heat.”
Fred got a chainsaw. He sawed some trees for wood. He burned them in his fireplace and the heat felt good.
Fred said, “I like this heat. No more cold for me.” Fred got his chainsaw and cut down every tree.
He stacked up stacks of firewood that were higher than his head. “I may not have a forest but I’ll be warm, “ he said.
The years went by, Fred’s firewood piles got smaller every day. The ground where once the forest stood began to wash away.
The animals all moved away. Their homes were all cut down. Fred wished he had his forest back. It was nice to have around.
Fred then bought some baby trees. He planted carefully, but Fred soon discovered it takes years to grow a tree.
Fred grew old and years went by, winters, summers, fall. Fred became an old man before his trees grew tall.
Once again he had a forest. The animals had a home. And Fred was very, very proud of the forest he had grown.
When Fred needed firewood for heat in wintertime he’d cut only trees he needed and the forest did just fine.
The ground no longer washed away. Fred’s forest grew and grew. When the trees got crowded Fred would cut down one or two.
Fred’s house was warm in wintertime. He was warm as he could be. Fred had lots of firewood and a forest full of trees.
By John Griffin
Additional learning experiences: BLOCKS: Make trees from twigs and clay for children to use in the block area during self-selected activity time.
FIELD TRIP: Visit a forest.
GROUP: Discuss other forest products such as nuts, lumber, paper, etc.
HOME/SCHOOL CONNECTION: Create a graph comparing the number of children who heat with fireplaces or woodstoves and those who don’t.
READING: Make the storyboard characters available for children to retell the story during self-selected activity time.
146

Winter22 Insulation
SCIENCE: Discover the role of insulation in energy conservation
Children will: ●● Experiment with ways to keep
ice or snow from melting ●● Discuss the concept of insulation
You’ll need: ●● Several paper cups ●● Foil ●● Cotton ●● Cotton cloth ●● Wool fabric ●● Newspaper ●● Cardboard ●● Rubber bands ●● Chart paper and marker ●● Snow or ice cubes
Did you know? Insulation helps keep houses warm in winter and cool in summer. This activity will help children become aware of insulation and its importance in conserving energy.
Teacher preparation: ●● Place a several cups of snow or ice in the Science area. ●● Arrange other materials attractively in the area. ●● Create a chart listing various insulation choices down the
side and time lapses across the top.
What to do: 1. During self-selected activity time, ask children which cup of
snow or ice they think will melt first and why.
2. Challenge children to use the materials provided to keep the snow or ice from melting.
3. Ask if they can suggest other insulation materials that aren’t available. Provide them if possible.
4. Record the melting process every five minutes on the prepared chart.
5. Talk with children about why they think one type of insulation worked better than another. Encourage them to speculate about if they think snow would melt faster than ice cubes.
147

Additional learning experiences: BLOCKS: Put out cotton in the block area for children to insulate their buildings.
FIELD TRIP: Visit a new building being built. Observe insulation being installed.
GROUP: Discuss ways people keep cold air out of their homes — insulation, storm windows, caulking, etc. Ask children to think of some ways they keep cold air out of their homes. Look for ways cold air is kept out of the school.
SCIENCE: Display insulation and caulking in the science area for children to examine. Don’t forget to include science notebooks and hand lenses.
148

Winter23 Winter Fabrics
SCIE NCE: Identify some fabrics from which winter cloth es are made
Children will: ●● Explore textures ●● Match winter fabrics by touch ●● Discuss how winter fabrics help
keep people warm
You’ll need: ●● Two swatches each of several
different winter fabrics (wool, flannel, corduroy, fur, velour, etc.)
●● Box with a lid ●● Scissors ●● Cardboard ●● Marker
Did you know? Different fabrics have different insulating qualities. This activity will help children identify some of the fabrics winter clothes are made from.
Teacher preparation: ●● Make a “feely” box by cutting a hole just the size of a child’s
hand in one end of the box. ●● Place one set of fabric swatches in the “feely” box. ●● Mount the second set of fabric swatches on the piece of
cardboard, writing the name of the fabric underneath the swatch.
●● Put the “feely” box and the fabric matching card in the science area.
What to do: 1. During self-selected activity time encourage children to try to
match the pieces of fabric by touch alone.
2. When observing children’s experimentation, ask open-ended questions like these:
●● Which fabric feels the warmest? ●● Who has on something that feels like this? ●● Why do you wear this fabric this time of year? ●● What would happen if you wore this in the summer?
3. Challenge children to find people in the classroom wearing winter fabrics like those included in the “feely” box.
149

Additional learning experiences: ART: During self-selected activity time, provide various winter fabric scraps, glue, scissors and paper for children to make fabric collages.
ART: Look through summer and winter catalogs and discuss the difference in clothing. During self-selected activity time, provide scissors, glue, paper and catalogs or magazines for children to make a winter clothing collage.
DISPLAY: Display pictures of people in winter clothing and summer clothing.
GROUP: Discuss the differences between animal coats in the summer and the winter.
MANIPULATIVE: Put all of the children’s gloves and mittens in a box and encourage children to match them during self-selected activity time. Further challenge them to try to match them by touch alone.
PRETEND PLAY: Put out dark winter clothing in the dress-up area. Talk about why people wear dark colors in the winter.
150

151
Spring Spring’s longer days, warmer temperatures, and stormy weather stir people
and nature into action. Winter snows melt under high, drying winds that keep Conservation Department fire-fighting units alert for forest fires. Some insects
awake to fly on tattered wings, while others metamorphose from chrysalises or eggs. Migratory birds move to their nesting grounds to court and build nests.
Planting season starts, and flowers and trees begin to bloom. Songbirds lay eggs, young squirrels appear in trees, and larger animals begin bearing young. Tadpoles appear in creeks, ponds, or temporary pools, where toads and frogs lay eggs.
Several spring celebrations, including National Wildlife Week, Arbor Day, and Earth Day, occur. So, too, does the spring equinox, with equal periods of darkness and light. Take these opportunities to arrange a spring celebration with your families. You might include a bird scavenger hunt, an equinox event, a full moon party, or a wildflower festival.
Yield to spring’s many temptations, and take children outside to enjoy the season as much as you can. Colors are vivid in the spring. Challenge children to think of different ways to describe green. Keep a running list of their ideas. Encourage them to slow down and notice the daily changes in their environment on all levels — not just what they see and feel — but also the smells, tastes, and sounds of spring. Breathe in the wonder of spring in Missouri, and take advantage of every opportunity to celebrate rebirth and renewal.
Spring learning experience topics include: ●● Weather and seasonal changes ●● Water cycle ●● Clouds ●● Wind ●● Soil and planting ●● Erosion ●● Insects ●● Birds ●● Mammals

152

Spring 1 Drip and Drop
READING: Listen to a story about the water cycle
Children will: ●● Listen to a story about the
water cycle ●● Discuss the water cycle
You’ll need: ●● Storyboard ●● Related storyboard characters
Did you know? Water evaporates from the earth constantly. It goes into the sky to form clouds. Eventually, it returns to the earth as precipitation. This story will introduce children to the water cycle (hydrologic cycle).
Teacher preparation: ●● Prepare storyboard characters. ●● Practice reading the story while placing the characters on the
storyboard at the appropriate times.
What to do:
Drip and drop were water. Down came the drips and drops. Off onto a plant leaf. Their cloud was puffy white. “Zap!” the lightning flashed. From leaf to leaf he dropped. They lived there high above the ground, And on a very big leaf, through morning, noon, and night. Drip hit an umbrella, that is where he stopped.
and splashed on someone’s nose. The cloud was filled with drips and drops. Drip she fell and landed Soon the sun began to shine. They floated in the air. on someone else’s toes. It shone down everywhere. Thousands, millions, drips and drops, And heated little Drip and Drop, were floating round up there. Drip slipped onto the pavement back up into the air.
and down a little hill, As time went by, more drips and drops right into a puddle Soon their cloud was full again. began to join the crowd. that soon began to fill. The rain fell soft and slow. It wasn’t long before their home And as the sun shone through became a thundercloud. Down, down, wheee! the drops,
Down came Drop. it made a large rainbow. “Boom!” went the thunder! He landed on a windowpane. By John Griffin A loud and scary crash! He landed with a plop!
1. Read the following story to children, using the storyboard and characters.
153

2. After reading the story, ask open-ended questions:
●● What kind of cloud do you think Drip and Drop lived in? ●● What do you think makes thunder? Lightning? Fog? Snow? Hail? ●● Where did the water in the clouds come from? ●● Where do rainbows come from?
Related children’s literature: Polacco, P. (1990). Thunder cake. New York, NY: Philomel Books. ISBN-10: 0399222316. Since so many young
children are afraid of thunderstorms, this is a good book to share as an opportunity to talk about rain and thunder. The cake recipe is tasty to make as a class, too.
Locker, T. (1997). Water dance. Orlando, FL: Harcourt Children’s Books. ISBN-10: 0152012842. Water explains how it dances through the world in this beautiful and poetic story.
Rockwell, A.F., & Lessac, F. (2008). Clouds. New York, NY: HarperCollins. ISBN-10: 0064452204. This simple science text helps children understand clouds and how they influence the weather. Cloud facts and simple cloud experiments are offered in the back of the book.
Additional learning experiences: ART: During self-selected activity time, provide materials for children to create rainbows using oil pastels, tissue paper, watercolors, colored yarn, and/or construction paper.
ART: During self-selected activity time, provide children with construction paper, markers, crayons, paint, colored pencils, glue, and cotton balls. Encourage them to create cloud pictures. Cotton may be used to add texture to the clouds.
ART: During self-selected activity time, provide finger-painting materials, especially dark blue paint, to make cloud paintings. As the children paint, talk about storms and how storms make them feel. When children finish their paintings, provide yellow yarn for them to arrange lightning patterns in the paint.
DISPLAY: Take photographs of the various clouds the children observe while outside. Record and transcribe their ideas about the clouds. Display the photographs, along with their discussions, so children and parents can revisit the experience.
FIELD TRIP: Take children for a walk in the rain. Talk about how rain smells, feels, sounds, and tastes. Discuss how things change colors when they get wet. Record the field trip through photographs and an audio recording of the rain.
HOME/SCHOOL CONNECTION: Talk to parents about studying the clouds with the children. Encourage them to take pictures of interesting clouds and send them to school with their child. Display the pictures and children’s comments about them.
LARGE MOTOR: Make rainbow streamers by attaching strips of colored crepe paper to empty paper towel rolls. Play gentle music and encourage children to make their rainbows dance in the rain.
MUSIC: Teach children the following song to the tune of Three Blind Mice:
Three rain drops. (Hold up three fingers.) Three rain drops. See how they fall. (Make fingers fall like raindrops.) See how they fall. They all fall down from the clouds in the sky. They water the plants so they won’t die. The plants feed the animals who live nearby. Three rain drops. (Hold up three fingers.)
154

MUSIC: Provide children with various rhythm instruments, and encourage them to create rain rhythms, music, and dances. Video-record, audio-record, and photograph their work to share with parents.
MUSIC: Make recordings of rain falling on different surfaces, such as a tin roof, sidewalk, grassy field, etc. Talk about the various differences in sounds.
MUSIC: Provide children with a Chilean rainstick to experiment with during self-selected activity time.
NUTRITION: Serve “cloud” mashed potatoes for lunch or snack. Encourage children to shape their mashed potatoes to look like the various clouds they observed outside during their cloud watch.
OUTSIDE: During self-selected activity time, encourage children to lie on their backs and observe shapes, sizes, and movements of clouds.
OUTSIDE: Place a rain gauge outside for children to measure the rain. One can be made from a tall, clear jar with straight sides and measurements marked with nail polish. Put out two gauges, one under a tree and one in the open. Compare the contents after a hard rain. Use the rain gauge during the winter to measure snowfall.
OUTSIDE: Encourage children to pretend to be raindrops like Drip and Drop. Talk about all of the things on the play yard around which they could dance and skate. Suggest that they pick a good place to land and explore which other raindrops might like to be in the puddle with them. Ask questions about how big their puddle would be and how long it might take to evaporate like Drip and Drop’s puddles did. Check out the puddles on the playground the next time it rains to see if their ideas were accurate.
PRETEND PLAY: During self-selected activity time, put out raincoats, hats, umbrellas, and boots in the dress-up area.
READING: During self-selected activity time, encourage children to act out the story or retell using the storyboard characters.
SCIENCE: During self-selected activity time, place prisms near a window for children to discover how to create rainbows in the classroom. Add flashlights and science notebooks for children to experiment with and record their observations.
SCIENCE: Let children help make a cloud by putting several inches of hot water into a cold jar. Put the lid on and place an ice cube on the lid. As the warm air rises, it is cooled and forms fog, or a little cloud.
SCIENCE: Each day, make a drawing of the clouds. Date each of these and keep charts of the weather so children can make comparisons between types of clouds and weather.
155

Spring2 Hanging Out
PRETEND PLAY: Discover the process of water evaporation
Children will: ●● Wash clothes and hang them to dry ●● Discuss how the clothes get dry
You’ll need: ●● Doll clothes or pretend play clothes ●● Tub of soapy water ●● Tub of clear water ●● Clothesline ●● Clothespins
Additional learning experiences: OUTSIDE: During self-selected time outside, provide house paintbrushes and buckets of water for children to water paint. Encourage them to water paint in the sun and shade. Observe and discuss what happens.
SCIENCE: Encourage children to observe a puddle. As children play in the puddle, encourage them to experiment with natural items that float and sink. Splash, play, and experience the puddle. Explore the children’s ideas about how it was formed, why it formed in that particular place, and what animals might make use of the puddle. Measure and record the puddle’s size. Use photographs to document the changes in the puddle and display along with children’s ideas about the puddle. Be sure to make science notebooks available for children to document their ideas.
156
! Notes from Sherri: This activity is based on an experience the children had when our sensory table had water in it one spring. Discussing things that sink and float, they tested their theories with objects collected from around the classroom. One child dropped in a cloth doll diaper, and the discussion quickly changed from “sink and float” to “wet and dry.” One child suggested hanging the wet diaper outside. After this, the group wanted to wash and dry all of the doll clothes, a process that went on for several days. Some days the clothes dried faster than others, leading to more discussion about the water cycle.
Did you know? Water evaporates from the Earth constantly. This activity will encourage children to notice this phenomenon and begin a discussion of the process.
Teacher preparation: ●● Gather materials. ●● Set up a clothes washing station outside. ●● Hang the clothesline in the area so children can
easily reach the line to hang clothes.
What to do: 1. During self-selected activity time, encourage children
to wash and rinse the clothing, and then hang it.
●● As children are working, ask open-ended questions:
●● What would happen if we didn’t rinse the clothes?
●● What will happen to the clothes on the line? ●● How will the clothes get dry?
2. After the clothing is dry, encourage children to remove it from the line. As they work, talk about what happened to the water in the clothes.

Spring 3 Where Do Animals
Go When it Rains?MANIPULATIVE: Consider where animals find protection from the rain
Children will: ●● Match animals with where they
might go in the rain ●● Discuss animal shelter ●● Compare animal behavior during
a rainstorm with human behavior
You’ll need: ●● Storyboard or table ●● Related storyboard characters
! Notes from Sherri: This learning experience invariably results in discussions about how people and animals seek shelter from the rain. Just as children play outside during soft rain, many animals ignore a gentle rain. Children from rural areas also discuss what livestock do when it rains. The discussion always leads to children being more observant and sharing personal stories.
Did you know? Animals need protection during heavy rains. They hide in caves, under trees or other vegetation, in hollow trees, or logs. This activity will encourage children to think about where and when animals find protection.
Teacher preparation: ●● Prepare storyboard characters. ●● Set up the storyboard and characters for children to
discover and use during self-selected activity time.
What to do: 1. Observe the children as they interact, play, and discuss the
materials.
2. Challenge interested children to match up animals with places where they might find cover when it rains.
3. As the children work ask open-ended questions:
●● Where do you go when it rains? Why? ●● Where do you think these animals go when it rains? ●● How do animals know it is a safe place?
157

Related children’s literature: Muller, G. (2010). Where do they go when it rains? Edinburgh, UK: Floris Books. ISBN-10: 0863157491. Young
twins wonder about where the animals go when they are caught outside in a shower.
Garelick, M., & Wilton, N. (1997). Where does the butterfly go when it rains? New York, NY: Mondo Publishing. ISBN-10: 1572551623. This story explores where various animals go to get out of the rain.
Additional learning experiences: BLOCKS: During self-selected activity time, put out twigs, branches, and plastic animals in the block area. Encourage children to find places for the animals to hide in the rain.
NUTRITION: Serve animal crackers and water for snack. Discuss where the various animals might spend a rainy day and how they get water when it doesn’t rain.
158

Spring 4 What Goes
in the Wind? ART: Create something to use in the wind
Children will: ●● Create something that will move
in the wind ●● Test their creation to see how
well it works in the wind ●● Revisit the creation to make it
work better in the wind ●● Discuss using the wind as an
energy source
You’ll need: ●● Coffee filters ●● Paper napkins ●● Copy paper ●● String ●● Tape ●● Hole punches ●● Crepe paper ●● Tissue paper ●● Stapler ●● Paper clips ●● Markers ●● Glue ●● Glue sticks ●● Plastic foam pieces ●● Straws ●● Toothpicks ●● Craft sticks
! Notes from Sherri: The children invented this activity one year after a field trip to a local wildlife area, where they had great fun flying kites they had been given. Back in our classroom, a group of children tried making their own kites. While no one succeeded in making kites, all created something that responded to the wind. They worked for several days creating, experimenting, adjusting, and theorizing about how they could best harness this natural resource.
Did you know? People use the wind in many different ways. This activity will challenge children to create something to use in the wind.
Teacher preparation: ●● Gather materials and arrange them attractively in an art area
(preferably outside) that children may access during self-selected activity time.
What to do: 1. Challenge interested children to make something that will move
or travel in the wind.
2. As children finish their work, encourage them to try out their creations in the wind and then make necessary adjustments.
3. While they are working and making discoveries, challenge them to think deeper by asking open-ended questions:
●● How will (or does) your creation move in the wind? ●● What could you do to make it move faster (slower)? ●● What causes the wind? ●● How do people use the wind? ●● How is the wind destructive? ●● How does the wind help people? Plants? Animals?
159

Related children’s literature: Ets, M.H. (2004). Gilberto and the wind. Pine Plains, NY: Live Oak Media. (Original work published 1963).
ISBN-10: 1591128374. Gilberto has a fun day seeing all the wind can do.
Bauer, M.D., & Wallace, J. (2003). Wind. New York, NY: Simon and Schuster. ISBN-10: 0689854439. Wind and facts about it are the subject of this picture book.
Asch, F., & Asch, D. (2008). Like a windy day. Orlando, FL: Sandpiper. (Original work published 2002). ISBN-10: 0152064036. A little girl imagines herself as the wind on this windy-day adventure.
Additional learning experiences: ART: During self-selected activity time, encourage children to make wind chimes by tying found items such as sticks, rocks, shells, etc., to a base such as rings from a six-pack, wire coat hanger, or branch. Listen to them in the wind.
ART: During self-selected activity time, provide children with thin paint, straws, and smooth paper. Encourage them to blow-paint by dropping paint on the paper and blowing it using the straw. Compare the air coming through the straw with the wind.
DISPLAY: Display pictures of how the wind helps people and how it can do harm. Discuss storms and tornadoes.
GROUP: Encourage children to compare their various wind creations and how they respond to the wind. Be sure to provide science notebooks for children to record their observations.
LARGE MOTOR: Tie strips of crepe paper to the climber and/or wheel toys or encourage children to run in the wind with crepe paper streamers. Discuss what happens to the crepe paper when the wind blows through it.
MUSIC: Play various kinds of music and provide scarves for children to dance in the wind.
OUTSIDE: Fly a kite on the play yard. Compare different types of kites and kites made from different materials.
OUTSIDE: Provide children with bubble solutions to blow bubbles in the wind.
SCIENCE: Chart the various wind creations and how far they travel in the wind.
160

Spring 5 Shadow Hunt
OUTSIDE: Experiment with making different shadows
Children will: ●● Explore shadows ●● Discuss what makes a shadow
and how shadows change ●● Draw around shadows
You’ll need: ●● Sunny day ●● Chalk ●● Sidewalk
! Notes from Sherri: The best time to do this experience is late morning when the angle of the Earth to the sun causes shadows to be very prominent. The exploration of shadows leads to discussions about the sun and how the angle changes with time of day and season. This leads to further discussion about other things that change when shadows change — weather, animal behavior, seasons, etc.
Did you know? People, plants, and animals make shadows when they come between the sun and the Earth. Shadows change when the position of the sun changes or when the people, plants, or animals move. This activity will encourage children to experiment with making different shadows.
Teacher preparation: ●● Watch for changing shadows.
What to do: 1. As children are playing outside during self-selected activity
time, encourage them to notice their shadows. Ask open-ended questions like these:
●● What makes a shadow? ●● How can you make your shadow change? ●● Where could you hide from your shadow? ●● What happens to your shadow when you go inside? ●● How is your shadow different now than it was in the
winter?
2. Challenge interested children to trace around their shadows on the sidewalk. Check the shadows later in the day to observe changes.
3. Encourage children to explore shadows on the play yard and discover their source.
161

Related children’s literature: Bulla, C. R., & Otani, J. (1994). What makes a shadow? New York, NY: HarperCollins. (Original work published 1962).
ISBN-10: 0060229160. This simple, nonfiction text explains and illustrates where shadows come from.
Swinburne, S. R. (2002). Guess whose shadow? Honesdale, PA: Boyds Mills Press. (Original work published 1999). ISBN-10: 1590780175. This book introduces children to shadow basics, then challenges them to guess the origins of the shadows in 30 full-color photos.
Additional learning experiences: ART: As children draw, challenge them to add shadows to people, plants, and animals in their artwork. Then discuss the time of day or year they are depicting.
DISPLAY: Take pictures of children and their shadows and/or shadows of familiar objects on the play yard. Set up a display where children can match people or objects with their shadows.
GROUP: Play “whose shadow?” Hang a sheet in the classroom with a strong light behind it. Have the children on the unlit side hide their eyes while one child at a time goes between the sheet and the light. The rest of the children guess whose shadow they see.
LARGE MOTOR: During self-selected activity time, let children play in the light of a movie, slide, or overhead projector. Encourage them to experiment with different objects and the shadows they create.
MANIPULATIVE: Make an animal-and-shadow matching game with animals pictures cut from magazines and their shadows or silhouettes cut from black paper. Put these out during self-selected activity time for interested children to match.
OUTSIDE: Play “lose your shadow.” Encourage interested children to find shadows to hide in so they won’t have a shadow or show children how to play shadow tag.
SCIENCE: During self-selected activity time, challenge interested children to find different things that might add color to their shadows (colored cellophane, colored plastic, color viewers, etc.). Discuss how they think colored shadows are made.
SCIENCE: Draw around shadows at different times of the day. Compare and record how the shadow changes over time.
162

Spring 6 What Is Soil?
SCIENCE: Discover how soil is made
Children will: ●● Grind rocks to make soil ●● Discuss how soil is created
in nature
You’ll need: ●● Crumbly rocks (sandstone)
●● Newspaper ●● Hammer
●● Goggles ●● Hand lenses
●● Science notebooks and pencils
Did you know? Soil is one of the Earth’s most important natural resources. It is formed by ground rocks and decayed bits of plants and animal life. This activity will enable children to explore how soil is made.
Teacher preparation: ●● Gather materials and set up the learning center (either inside
or outside) to engage children during self-selected activity time.
●● Experiment with covering the rocks with newspaper and hammering them to know how to best assist the children in their endeavors.
What to do: 1. Equip interested children to experiment with grinding and
hammering the rocks. To protect children’s eyes from flying chips, be sure to fit them with goggles, and cover rocks with newspapers first.
2. Make science notebooks, pencils, and hand lenses available for children to record their observations.
3. As the children work and make discoveries in the area, ask open-ended questions:
●● How does nature pound and grind the rocks? ●● What else goes into making soil? ●● How long does it take in nature to make soil? ●● Why do you think soil is all different colors?
163

Related children’s literature: Tomecek, S., & Woodman, N. (2007). Jump into science: Dirt. Washington, DC: National Geographic
Children’s Books. (Original work published 2002). ISBN-10: 9781426300899. In this playfully illustrated informational picture book, a star-nosed mole leads the reader on an exploration of soil — what it is made from, how it is formed, why it is important, and things that depend upon it.
Siddals, M. M., & Wolff, A. (2010). Compost stew: An A to Z recipe for the earth. Berkeley, CA: Tricycle Press. ISBN-10: 1582463166. This rhyming text conveys the perfect recipe for making compost to enrich garden soil.
Additional learning experiences: SCIENCE: Compare soil fertility. Divide the newly made soil into two batches. To the second batch, add material from a rotting log. Give children seeds to plant in both batches of soil. Compare the results.
164

Spring 7 Where Do All the
Dead Leaves Go?
GROUP: Examine the process of decay
Children will: ●● Predict what will happen to
a select group of items when buried
●● Bury a select group of objects ●● Investigate the process of decay ●● Discover items that decay and
those that do not
You’ll need: ●● Leaves ●● Orange peel ●● Rock ●● Plastic foam cup ●● Soda can ●● Shovel ●● Chart paper and marker ●● Science notebooks and pencils
! Notes from Sherri: This learning experience emerged after a child’s pet died. His family buried their beloved cat in the backyard, but each day the preschooler, curious about what happened to the animal in the ground, asked to dig it up. To help him learn about the process of decay, we conducted this experiment at school. Although I didn’t think of it as a conservation experience at first, I quickly saw that it shows children the important role decomposition plays in nature.
Did you know? When dead plants and animals decay, they become part of the soil and help improve it. This activity will help children explore the process of decay as well as experiment with materials that do not decompose.
Teacher preparation: ●● Make a chart on the piece of chart paper by drawing a picture
of each object down one side and listing predictions, "3 days," "1 week," "2 weeks" and "1 month" across the top.
●● Select a spot on the play yard where children will be able to dig into the ground.
●● Gather items that will be buried in the course of the activity.
What to do: 1. Gather children outside for group time. Show them the items
you have collected for the experiment and encourage the children to predict what they think will happen to the items if they are buried in the ground.
2. Ask them open-ended questions:
●● What do you think will happen to these things when we bury them?
●● Why do some items change more than others? ●● What will happen to those materials that don’t change?
3. Record their predictions on the prepared chart. Provide science notebooks for children to document their thoughts and ideas.
165

4. Brainstorm other items the children might want to include in the experiment.
5. Have children bury the items, marking the locations so they can be dug up again in a few days.
6. After three days, have children dig up the items. Examine the items, and then rebury them. Repeat the process again in a week, then two weeks, then a month.
7. Each time the items are dug up, discuss the changes that have taken place and record the children’s observations on the chart.
Related children’s literature: Tresselt, A., & Sorensen, H. (1992). The gift of the tree. New York, NY: HarperCollins. (Original work published 1972).
ISBN-10: 0688106846. This is the story of the role an oak tree plays in the cycle of nature.
Rosinsky, N. M., & Boyd, S. (2003). Dirt: The scoop on soil. Minneapolis, MN: Picture Window Books. ISBN-10: 1404803319. This simple, informational picture book offers many facts about soil, as well as simple experiments children can do.
Additional learning experiences: DISPLAY: Take before, during, and after pictures of each of the objects. Display these along with the chart so children will have a visual reminder of what the objects looked like throughout the experiment.
GROUP: Discuss the leaves on the ground in the spring and how they are decaying. Decay proceeds slowly when the temperature is cool but with spring’s warmth, decay proceeds more quickly.
OUTSIDE: Fence in a very small area near your school and make a compost pile for your garden.
OUTSIDE: Encourage children to examine and explore leaf litter on the play yard. Talk about the changes in the leaves over time.
SCIENCE: Collect a large bag of packing peanuts that are water-soluble (made of corn starch). Place in the sensory table with a large pitcher of water and big spoons. Have children predict what will happen when the water is stirred into the peanuts (don’t tell them before the experiment that the peanuts are water soluble). Repeat the experiment with non-soluble peanuts. Chart their predictions and the results. This experiment can also be done with the peanuts placed in soil. After they dissolve, discuss which would be better for the soil and why.
166

Spring8
Explore a Log SCIENCE: Discover how decomposed trees contribute to soil
Children will: ●● Explore a rotting log ●● Discover creatures that live in
a rotting log ●● Investigate what happens to
a tree after it dies
You’ll need: ●● Rotting log or tree stump ●● Small child’s wading pool or
large tub ●● Sticks or probes ●● Tweezers or forceps ●● Hand lenses ●● Science notebooks ●● Colored pencils ●● Camera (optional) ●● Tape recorder (optional)
! Notes from Sherri: One early spring we visited a lake near our school. There we found several rotting logs on our travel through the woods. Although we explored the logs where they lay, the children decided to take one back to the classroom for further investigation. The experience lead to much discussion and speculation about what happens to trees over time. We compared the tree’s role in its ecosystem when it was living to the contributions it makes after it died. After thoroughly examining the log, we placed it in the play yard where it could be further explored, allowing the children to really consider what happened to the log over time.
Did you know? Decomposed material is a very important part of soil. This activity will enable children to explore how decomposed trees contribute to soil. It will also provide an opportunity to explore animal habitat in a rotting log.
Teacher preparation: ●● Find a small rotting log and take it to the school. ●● Gather exploration supplies. ●● Set up a learning center by placing the rotting log or
tree stump in the wading pool or tub and arranging the exploration tools attractively in the area for children to access during self-selected activity time.
What to do: 1. Invite interested children to explore the log. Record their
findings through photographs, tape recordings, drawings and charts.
2. Encourage children to handle the decayed material. Have them squeeze the log debris and talk about the water in it. Look for animals that live in the log and talk about their job in making soil. Include hand washing as part of the project.
167

3. As children make discoveries, ask open-ended questions:
●● How did these creatures get here? ●● What else might live in a log? ●● How is this log helping the soil? ●● How do animals help the soil? ●● What do you think is going to happen to the log?
4. Display children’s discussion, photographs of their findings, and their drawings and sketches to encourage further avenues of study and to share the experience with parents.
Related children’s literature: Anthony, J., & Arbo, C. (1999). In a nutshell. Nevada City, CA: Dawn Publications. ISBN-10: 188322098X. This
realistic fiction book traces an oak tree’s life cycle from acorn to decaying tree, which enriches the forest soil and nourishes a newly sprouted acorn.
Pfeffer, W., & Brickman, R. (2007). A log’s life. New York, NY: Aladdin. (Original work published 1997). ISBN-10: 1416934839. This award-winning picture book uses paper sculpture to illustrate the life cycle of an oak tree. The illustrations work especially well with the Explore a Log learning experience.
Additional learning experiences: FIELD TRIP: Explore a rotting log in the woods. Compare the findings on the field trip with those found in the classroom. Be sure to take photographs to record and compare the two experiences.
OUTSIDE: When children begin to lose interest in the activity, place the rotting log in an isolated area of the play yard. Revisit the log periodically throughout the year. Discuss changes in the log over time.
168

Spring 9 Mud Pies
OUTSIDE: Create mud pies and become aware of the different types of soil
Children will: ●● Brainstorm recipes for mud pies ●● Create mud pies ●● Investigate differences between
different mud pies
You’ll need: ●● Shovels ●● Buckets ●● Pie pans and/or plates ●● Stirring sticks ●● Individual hand lenses ●● Water and containers ●● Chart paper and marker ●● A bag of topsoil (if you have
nowhere to dig)
Did you know? All soil is basically made of three types of rock particles — clay, silt, and sand. Clay particles are very fine and light in color. When water is added, clay becomes sticky. Silt particles have the consistency of flour. Sand particles feel gritty. Loam soil is a mixture of sand, silt, and clay. Humus soil is very dark and loose and consists of decayed remains of plants and animals. This activity will help children discover there are different types of soil.
Teacher preparation: ●● Label chart paper “Mud pie Recipes.” ●● Locate area on play yard where children can dig, or dump a
bag of topsoil outside if you have no bare ground. ●● Gather mud-pie making equipment. ●● Set up an outside learning center where children can make
mud pies during self-selected activity time.
What to do: 1. During group time, discuss the children’s various recipes for
mud pies.
2. Record their ideas on the chart paper.
3. During self-selected activity time outside, encourage interested children to experiment with making mud pies and decorating them with various items found in the environment.
4. As they work challenge children’s thinking by asking open-ended questions:
●● How does the soil feel before you add water? After? ●● What does your soil look like through the hand lens? ●● What can you find to add to your mud pie? ●● What makes mud pies look different from one another? ●● Why did this mud pie harden faster than that one?
5. Allow children to leave their mud pies to dry and revisit over several weeks.
169

Related children’s literature: Ray, M. L., & Stringer, L. (1996). Mud. Orlando, FL: Harcourt Children’s Books. ISBN-10: 015256263X.
This book pays homage to the delight of mucking around in the mud.
Additional learning experiences: ART: During self-selected activity time, encourage children to make different colors of paint by mixing water with different colored soils. Invite interested children to try different natural objects to paint with (feathers, sticks, grass, etc.) and on (rocks, leaves, bark, etc.)
FIELD TRIP: Locate an area where clay is easily accessible. Encourage children to dig clay and take it back to the classroom. Run through a manual food grinder to grind small sticks and rocks and uniformly disperse moisture. Knead and shape into desired forms. Allow forms to dry, and then take to a local ceramics shop — or build a kiln and fire on the parking lot. Refer to Good Earth Art: Environment Art for Kids, by MaryAnn F. Kohl and Cindy Gainer (available online), for more details about how to do this.
HOME/SCHOOL CONNECTION: Ask children to bring soil from their backyards. Encourage them to compare these types of soil with the samples taken from the play yard. Provide science notebooks for them to record their ideas.
SCIENCE: Provide different types of soil for children to make mud pies. Notice textures, colors, and smells. Place some mud pies in shady spots and some in the sun. Observe which dry the fastest.
WRITING: Provide materials for each child to contribute a page or recipe to a class mud-pie book.
170

Spring 10 What is Erosion?
GROUP: Experiment with soil erosion
Children will: ●● Examine wind and water erosion ●● Look for signs of erosion on the
play yard ●● Discuss the environmental
consequences of erosion ●● Brainstorm ways to prevent
erosion
You’ll need: ●● Blow dryer ●● Hose or bucket of water ●● Pile of dry sand or soil ●● Science notebooks and pencils
Did you know? Erosion happens when wind and water sweep away soil that has no protective cover of grasses, wildflowers, shrubs, and trees. Erosion causes precious topsoil, which is essential for growing things, to end up at the bottom of hills, and in streams, rivers, and oceans. This activity will help children see how erosion happens.
Teacher preparation: ●● Gather materials and set up the experiment. ●● Try out the experiment to ensure intended results.
What to do: 1. Gather children outside around the soil or sand.
2. Ask children to make a hill in the soil or sand.
3. Pretend a farmer has just plowed the hill. A big storm is coming and a strong wind is blowing. Encourage children to make predictions in their science notebooks about what they think will happen.
4. Ask open-ended questions:
●● What do you think will happen to the soil when the wind blows?
●● What will happen when it rains really hard?
5. Simulate wind with the blow dryer. Note what happens. Try the blow dryer on soil where the grass is growing. Observe the difference.
6. Repeat the experiment using water from a hose or bucket.
7. Stimulate further thinking by asking more open-ended questions:
●● Where is there erosion on our play yard? ●● What will happen to the soil if we don’t fix this? ●● How can we fix it? ●● Why is erosion a problem for people and animals?
171

Related children’s literature: Koontz, R., & Harrad, M. (2002). Erosion: Changing earth’s surface. Minneapolis, MN: Picture Window Books.
ISBN-10: 1404821953. This text describes the many ways that nature changes the surface of the land.
Additional learning experiences: DISPLAY: Take pictures of the experiment and display them along with children’s thoughts and ideas regarding soil erosion. Include pictures of actual soil erosion.
FIELD TRIP: Look for erosion on a walking field trip around the neighborhood.
172

Spring1 1 What Lives in the Soil?
OUTSIDE: Discuss things that live in soil
Children will: ●● Examine soil closely ●● Look for living creatures in soil
You’ll need: ●● Soft earth ●● Hand shovels ●● Tweezers or tongs ●● Individual hand lenses ●● Science notebooks and pencils
Did you know? Soil is the home for many small animals. These animals help the soil by eating bits of decayed plants and animals. This activity will enable children to discover some of the animals that live in soil.
Teacher preparation: ●● Set up a soil-exploration area for use during self-selected
activity time.
What to do: 1. Encourage interested children to carefully explore the soil for
animals that might be living there.
2. Study the soil with hand lenses. Encourage children to record their observations in their science notebooks.
3. As children work, challenge their thinking by asking open-ended questions:
●● How can you tell if an animal has been here? ●● How do you think these animals help the forest? ●● What do you think these animals eat?
Related children’s literature: Pfeffer, W., & Jenkins, S. (2003). Wiggling worms at work. New York,
NY: HarperCollins. ISBN-10: 9780064451994. This simple science text covers an earthworm’s life cycle and includes activities to do with worms.
173

Additional learning experiences: ART: Provide socks and various accessories for children to make soil creatures during self-selected activity time.
OUTSIDE: Look for earthworms on the playground after a hard, soaking rain. Brainstorm with the children about why they might be easier to find after a rain than at other times.
PRETEND PLAY: During self-selected time, provide tubs of soil stocked with plastic worms, insects, snails, centipedes, and other animals that might live in the soil for children to play with and explore.
PRETEND PLAY: Display a slide or overhead transparency of soil. Provide children with antennae, socks, wings, noses, etc., to create shadows of the various animals moving about in the soil.
SCIENCE: Make a worm ranch with the children. Cover the bottom of a large, clear jar with rocks. Layer soil and leaves in the jar until three quarters full. Add worms (red wigglers work well) and a teaspoon of coffee grounds for worm food. Keep soil moist but not wet and cover the outside of the jar with dark paper. Check for worm tunnels every few days. Talk about how the worms help soil by decomposing debris, mixing, aerating, and fertilizing it.
SCIENCE: Prepare a spot to see earthworm tracks. Pour a bucket of water over some soil in the play yard. Make it very muddy, smooth it, and then leave it alone. Come back the next day to search for worm tracks. Challenge children to make different habitats for worms. One might include sand, another clay. One might be wet, another dry. Keep daily records of the worms’ responses to the habitats.
174

Spring12
How Does Your Garden Grow? SCIENCE: Plant some flower seeds and watch them grow
Children will: ●● Plant flower seeds ●● Discuss what will happen to
the flower seeds once they are planted
●● Observe what happens to flower seeds that receive different care
You’ll need: ●● One egg carton with the top
cut off per child ●● Several different kinds of
flower seeds ●● Soil ●● Water
Did you know? Spring rains and melting snow add moisture to the soil and cause seeds to swell. The sun’s warmth helps the seeds to grow into small plants. This activity will give children some insight into what plants need to grow.
●● Science notebooks and pencils
Teacher preparation: ●● Gather materials and arrange them attractively in the science
center for children to access during self-selected activity time.
What to do: 1. Encourage interested children to put soil in several of their egg
carton sections, leaving at least two of the sections empty.
2. Allow children to add seeds to each of the egg carton sections, including the sections with no soil.
3. Provide water for children to water their seeds.
4. Place the egg cartons around the classroom. Be sure to put several in dark areas and some in strong sunlight.
5. Discuss children’s ideas about what will happen with the seeds. Stretch their thinking by asking open-ended questions:
●● What do you think will happen to the seeds? ●● How long do you think we’ll have to wait before anything
happens?
6. Check the seeds daily and record the children’s observations. Place science notebooks near plantings so children can record their daily observations.
7. As children notice changes in their plantings ask more open-ended questions such as:
●● Why did some plants grow better than others? ●● What do plants need to grow?
175

Related children’s literature: Ehlert, L. (1992). Planting a rainbow. Orlando, FL: Sandpiper. (Original work published 1988). ISBN-10:
0152626107. This is a simple story of a parent and child planting bulbs, seeds, and young plants to grow a rainbow of flowers.
Cherry, L. (2003). How Groundhog’s garden grew. New York, NY: Blue Sky Press. ISBN-10: 0439323711. Groundhog learns all about planting a garden and harvesting the food from his friend squirrel.
Cole, H. (1997). Jack’s garden. New York, NY: Greenwillow Books. (Original work published 1995). ISBN-10: 9780688152833. Cole’s story illustrates how nature and Jack work together to create a beautiful flower garden.
Cole, H. (2007). On Meadowview Street. New York, NY: Greenwillow Books. ISBN-10: 0060564814. Caroline discovers a wildflower in her yard and convinces her dad not to mow over it. She stakes out a wildflower preserve that transforms her yard into habitat for wildflowers and wild creatures.
Additional learning experiences: DISPLAY: Cover the bulletin board with brown paper. Place strips of fabric fastener in rows on the paper. Provide pictures of native garden fruits, vegetables, and flowers with fabric fastener attached for children to arrange in the garden.
FIELD TRIP: Take a field trip to a wooded area. Look for different kinds of mosses growing on or near rocks and tree trunks. Discuss various textures and colors. Talk about where the mosses are growing, their habitat. If collected in an unprotected area, samples might be taken to grow a moss garden in the classroom.
OUTSIDE: Allow children to move toy tractors and farm equipment to the outside dirt or sand pile during self-selected activity time.
PRETEND PLAY: Put out gardening gloves, hats, tools, and empty seed packets in the dress-up area for children to use during self-selected activity time.
HOME/SCHOOL CONNECTION: Encourage children to bring soil from home. Put different soil in each of the egg carton sections and record the results planting seeds in the different soils.
SCIENCE: Provide children with materials to experience other types of planting:
●● Count how many seeds sprout, and measure growth. ●● Substitute empty eggshells for the egg cartons. ●● Provide bean seeds, damp paper towels, and re-sealable plastic bags. Encourage children to place
all the materials in the bag, seal, and tape to the window. ●● Have each child bring an old tennis shoe from home and plant a tennis shoe garden. ●● Start a sweet potato vine. ●● Plant a garden in the play yard.
SCIENCE: Provide different liquids, such as vinegar, lemon juice, etc., for children to “water” the plants. Keep a daily record of the observable effects of each liquid on the plants.
176

Spring13 Flower Shop
PRETEND PLAY: Work in a flower shop
Children will: ●● Act out various roles in a flower
shop ●● Discuss flowers and their origins
You’ll need: ●● Artificial flowers ●● Assorted flower pots and vases ●● Pictures or books of flowers and
flower arrangements ●● Cash register ●● Telephone ●● Receipt book ●● Calendar ●● Note pad ●● Pencils
Did you know? Throughout Missouri, flowers are a beautiful part of the spring landscape. There are many different types of flowers — both wild and garden varieties. This activity will expose children to a variety of flowers, as well as how people use them.
Teacher preparation: ●● Gather supplies. ●● Attractively arrange materials to look like a flower shop in
a corner of the classroom, where it can remain for several weeks.
What to do: 1. During self-selected time, encourage interested children to
experiment with flower arranging as they play flower shop.
2. Promote the spontaneous play by modeling various roles (customer, sales clerk, flower arranger, delivery driver, etc.) as you play along with the children.
3. As children play ask open-ended questions:
●● Where do flower shops get their flowers? ●● Which flower do you like best? Why? ●● Where do you think we could find a flower like this? ●● Why do we need flowers?
Related children’s literature: Bunting, E., & Hewitt, K. (2000). Flower garden. New York, NY:
Sandpiper. (Original work published 1994). ISBN-10: 0152023720. A small child and her dad plant a window-box flower garden as a birthday surprise for her mom.
177

Additional learning experiences: ART: Place bulb or seed catalogs, glue or glue sticks, construction paper, and scissors in the art center during self-selected activity time. Encourage children to make flower collages, cards, or other creations.
BLOCKS: Place silk flowers and vegetables in the block area for children to pretend to plant and harvest a garden during self-selected activity time.
FIELD TRIP: Visit a flower shop.
FIELD TRIP: Visit a nature area to observe spring wildflowers in their native habitats. Be sure to take along clipboards, paper, and colored pencils so children can sketch the flowers rather than pick them. Discuss the differences and similarities between wildflowers and those grown in the garden.
HOME/SCHOOL CONNECTION: Encourage families to send in flowers (both wild and those planted) from their yards and neighborhoods. Place them on the science table. Encourage children to count petals then compare shape, size, color, and textures of the petals. Make wildflower field guides available for them to try to identify the flowers.
MANIPULATIVE: Create a matching game using pictures or stickers of flowers native to your area. During self-selected activity time, place the flower matches in the manipulative area. Encourage interested children to place the cards face down and create memory matches or play a card game such as “Old Maid.”
OUTSIDE: Look for wildflowers on the playground. Count and compare petals. Be sure to notice number, size, color, texture, and shape of the petals and leaves of the wildflowers you find.
PRETEND PLAY: Place soil, flowers (artificial or real), gardening tools, and gardening gloves in the sensory table for children to experiment with during self-selected activity time.
SCIENCE: Make a chart of favorite flowers by dividing a poster-sized piece of paper into several sections. Place a picture of a different type of flower on each section. Invite children to sign their names or place their symbol under the flower they like best. Count to see which flower the most friends like best.
178

Spring14 Dandelion Potpourri
GROUP: Appreciate dandelions
Children will: ●● Pick dandelions ●● Lay out dandelions to dry ●● Measure ingredients to create
dandelion potpourri
You’ll need: ●● Dandelions ●● Fragrant spices (cinnamon sticks,
cloves, rosemary, etc.) ●● Dried orange and/or lemon peel ●● Dried reindeer moss (this is a
fixative for the fragrance and can be omitted if unavailable but fragrance will not last)
●● Essential oil (available at most craft stores)
●● Squares of fabric ●● Ribbons ●● Glass or metal bowl ●● Metal spoon
! Notes from Sherri: We created this activity one spring when lots of bright yellow dandelions bloomed in our play yard. The children never tired of picking them. They used the flowers to make cakes and pies, glued them to collages, and took home numerous bouquets. They were so proud of their efforts that I suggested making something more lasting. They decided the dandelions would be beautiful in potpourri.
Did you know? Dandelions are native to Europe and Asia but have become naturalized in the world’s temperate regions. Children delight in the appearance of these yellow flowers in the spring, but grownups often treat them as weeds. This experience will encourage children and grown-ups to appreciate the dandelion’s beauty and usefulness.
Teacher preparation: ●● Select an appropriate place to dry dandelions
for several weeks. ●● Gather supplies.
What to do: 1. As children pick bouquets of dandelions in spring, encourage
them to remove flowers from the stems and spread them out on trays to dry. Depending on the humidity, allow two to three weeks to dry.
2. Once the dandelions have dried, place them in a glass or metal bowl. Allow children to add spices, orange or lemon peel, and any other dried flowers or leaves they have collected.
3. Have children measure approximately one teaspoon dried reindeer moss for every two cups of potpourri. This is a fixative and will hold the fragrance of the potpourri. Add this to the flower and spice mixture and stir.
4. Help children add several drops of the essential oil into the potpourri.
179

5. Provide squares of fabric in which to place potpourri. These can be tied with ribbon. As children work, ask open-ended questions:
●● What else can you do with dandelions? ●● What are dandelions good for? ●● Why do some people dislike dandelions?
Related children’s literature: Anthony, J., & Arbo, C. (1997). The dandelion seed. Nevada City, CA: Dawn Publications. ISBN-10: 188322067X.
This beautifully illustrated book shows the travels and life cycle of a dandelion seed.
ART: During self-selected activity time, show children how to use dandelions and other flowers and leaves to create pictures by rubbing, pressing, and squeezing them on white paper.
Additional learning experiences:
LARGE MOTOR: Encourage children to pretend to be a class dandelion. As a group, pretend to grow, flower, turn to seed, and then scatter with the wind. Finish by growing once again.
OUTSIDE: Encourage children to blow on dandelion seed heads and follow the seeds to see where and how far they go.
WOODWORKING: Provide materials for children to make a simple flower press. Cut small rectangles (4 by 6 inches works well) of 1/8- to ¼-inch wood. Use cardstock or absorbent paper to layer flowers between the two boards and rubber band together. Leave for several days or until flowers are dry. The outside of the flower presses can be decorated using permanent markers and watercolors.
180

Spring15 Seeds, Roots, Plants
READING: Listen to a story about seeds and how they grow
Children will: ●● Listen to a story identifying plant
parts and how clovers grow
You’ll need: ●● Storyboard ●● Related storyboard characters
Did you know? Seeds provide food for animals and develop roots that hold the soil in place. This story will help children realize all seeds are not alike. Different seeds grow different plants, and seeds spread by catching rides on the wind or animals. The story will also demonstrate how the roots and stem of the plant grow from the seed as well as ways seeds travel.
Teacher preparation: ●● Prepare storyboard characters. ●● Practice reading the story while placing the characters on the
storyboard at the appropriate times.
What to do: 1. Read the following story to children, using the storyboard and
characters.
Once there was a clover plant. Eating up the clover seeds, Sun shone from the sky above, On the plant were leaves. every one he found. then rain and morning dew. With the leaves were little stems Jim began to swell and grow. and on the stems were seeds. “Peck, peck,” he ate the seeds. Jim split right in two.
Look! Peck! Search! Peck! Seek! Lots of seeds of similar size The quail saw Jim and pecked him up Up out of the moist damp dirt, crowded on each stem. with his shiny beak. a sprout came out of Jim. The clover plant had made the seeds Down more deeper in the soil, and one seed’s name was Jim. Up, away flew the quail a root grew out of him.
with Jim in his beak. Along came a hungry deer Higher than the trees he flew Up out of the soil he grew eating clover leaves. across a field and creek. and leaves came from his stems. He almost gobbled Jim up, Soon he was a clover plant as he munched on clover seeds. When he landed in a field and flowers grew on him.
he dropped Jim on his back. The green leaves on the clover plant Bump! Bump! Bounce! Bounce! The rain and sun and fertile soil began to turn to brown. Jim rolled into a crack. give Jim the things he needs. As winter came the clover seeds, The flowers growing on his stems fell off onto the ground. Rain and ice and melting snow slowly turned to seeds.
moved the dirt around. By John Griffin Along came a hungry quail By the time that spring arrived, pecking at the ground. Jim was underground.
181

2. After reading the story, ask the children open-ended questions:
●● How do you think seeds know when it’s time to grow? ●● What do seeds need to grow? ●● How do seeds know what kind of plant to become? ●● How does the soil move if there isn’t any ice or snow?
Related children’s literature: Heller, R. (1999). The reason for a flower. London, UK: Puffin. ISBN-10: 0698115597. This nonfiction
story illustrates the various plant parts and the role of flowers.
Additional learning experiences: MANIPULATIVE: Make a matching game of seeds and their plants by placing several different kinds of seeds on poster board and covering with clear contact paper. Write the name of the seed under each type. Use the seed packets (also covered with contact paper) for children to match with the seeds. Place this in the manipulative area during self-selected activity time.
MANIPULATIVE: Prepare the plant puzzle provided in the Storyboard Characters section to use at the storyboard.
OUTSIDE: Encourage children to look for roots, stems, leaves, and flowers in the play yard.
SCIENCE: Display white carnations or Queen Anne’s lace and water with lots of food coloring in the science area during self-selected activity time. As children become interested, ask them what they think will happen when the flowers are placed in the colored water. Record their ideas. Have them place the flowers in the water and observe throughout the day.
SCIENCE: Force buds to bloom early by placing forsythia or pussy willow branches in water.
182

183
Spring1 6 Let’s Go Camping
PRETEND PLAY: Discover the joy of camping
Children will:●● Pretend to camp
●● Experience camping in a safe environment
You’ll need:●● Tent
●● Sleeping bags●● Camping dishes
●● Logs or stumps (optional)●● Binoculars
●● Compasses●● Any other equipment the
children might brainstorm to use while camping
! Notes from Sherri:This is one of the children’s favorite activities. It generally starts when a child's family goes camping. Even children who have never camped develop a healthy attitude and warm feelings about this way of enjoying our natural resources. Some families have even decided to take their children camping as a result of little ones talking about camping in the classroom.
Did you know?Missourians of all ages like to camp. While some enthusiasts camp throughout the colder months of the year, most families enjoy camping from early spring until late fall. This activity will allow children to see camping as a way to enjoy Missouri’s natural resources.
Teacher preparation:●● Attractively arrange a camp site inside the classroom or
outside in the play yard (or both).
What to do:1. During self-selected activity time, encourage interested children
to pretend to camp.
2. Model appropriate camping etiquette and various roles (parent, child, conservation agent, ranger, etc.).
3. As children become more interested in the camping site, brainstorm other items that might be added:
●● Stuffed animals that represent animals native to Missouri●● Stones to place around a pretend campfire
●● Branches to represent trees●● CDs or recordings of bird, frog, insect, or nature sounds
●● Camping rules●● Fishing rods and fish pictures, etc.

184
4. As children engage in play, ask open-ended questions:
●● What do people need to go camping?●● How does camping affect the wildlife in the area?
●● What kinds of animals and plants do you see when you go camping?●● How do you know where it is OK to camp?
●● How do you care for a campsite?●● How do you know what the camping rules are in a particular area?
Related children’s literature:Hundal, N., & Deines, B. (2006). Camping. Markham, Ontario: Fitzhenry and Whiteside. ISBN-10: 1550416863.
This is the story of a family that can’t afford to go on a fancy vacation and decide to try camping instead.
Ruurs, M., & Kiss, A. (2004). When we go camping. Toronto, Ontario: Tundra Books. (Original work published 2001). ISBN-10: 0887766854. A family’s camping adventures are highlighted with illustrations of tracks and animals hidden throughout.
Additional learning experiences:ART: Large animals can be dangerous, especially when startled. One method campers often use to help animals know people are in the area is a noisemaker. These can be made from recycled cans filled with gravel and closed with plastic lids or duct tape. Children can decorate the cans to make them more attractive. This is an excellent opportunity to talk with children about disturbing animals in their homes.
FIELD TRIP: Visit both a natural camping area and a more commercial area. Compare the experiences people would have camping in the two areas. Look for posted rules and regulations regarding area use. Talk with children about following the rules
GROUP: Invite an outdoor skills specialist to demonstrate starting a campfire with flint.
GROUP: Invite someone with an RV to visit. Discuss the difference between RV and tent camping.
GROUP: Brainstorm a list of materials that might be needed in a first aid kit. Help children gather materials and prepare the kit.
HOME/SCHOOL CONNECTION: Scout local campgrounds and arrange for a classroom campout or evening event that families can attend.
MANIPULATIVE: Make long shoelaces or rope available for children to experiment with tying knots. Discuss how important knots are for camping.
NUTRITION: Prepare trail mix from cereal, nuts, pretzels, raisins, seeds, etc. to take on a camping trip. Discuss how campers keep their food fresh without coolers.
OUTSIDE: Safely start a campfire and cook s’mores or hot dogs. Demonstrate how to safely extinguish the fire.
OUTSIDE: Introduce compasses to the children. Locate north and talk about how north is every compass’s constant. Exploring what children know about the North Pole (Santa, reindeer, and elves, perhaps) and the South Pole (penguins, for example) helps them make concrete connections with different directions. Challenge them to find north in several different places, both in and outside the classroom.
WRITING: Provide pencils, papers, compasses, etc., for children to create maps of the campground or a hiking trail.

185
Spring 17 Molly and the Forest Fire
READING: Listen to a story about a forest fire and the consequences of the fire
Children will:●● Listen to a story about how
forest fires affect animals
You’ll need:●● Storyboard
●● Related storyboard characters
Did you know?Fire is a natural ecosystem process, helping to renew forests and grasslands every few years. Good land managers use controlled fire to clear away dead and diseased plant life, release nutrients back to the soil, and create openings for new plants and trees to emerge. Careless fires, however, can burn out of control, hurting wildlife and destroying habitat and people’s homes. This story will help children identify with forest animals and learn to be careful with fire when they camp.
Teacher preparation:●● Prepare storyboard characters.
●● Practice reading the story while placing the characters on the storyboard at the appropriate times.
What to do:1. Read the story on the following page to children, using the
storyboard and characters.
2. After reading the story, ask open-ended questions:
●● Where do you think Molly will go to live now?●● What happened to the other animals?
●● How is fire helpful to people and animals?
Related children’s literature:Donahue, M., & O’Keefe, D. (2002). The fire that saved the forest.
Lanham, MD: Roberts Rinehart Publishers. ISBN-10: 1570984212. After extinguishing fires in their forest, the animals experience a devastating forest fire. They soon discover that the fire is a necessary part of their healthy habitat.
Godkin, C. (2007). Fire!: The renewal of a forest. Markham, Ontario: Fitzhenry & Whiteside. ISBN-10: 1554550823. This informational story takes the reader through old-growth forest habitat, detailing the conditions necessary for a forest fire to occur, and showing the forest’s rebirth after the fire.

186
Molly was a small bird,her home was in a tree.A forest grew around heras far as she could see.
Big trees, little trees,trees with holes insidemade good homes for animals,where they could go and hide.
Molly woke up with the sun.Each day she’d scratch and pickand if she saw a bug or seedshe’d chomp it up real quick.
She flew up to her hole each night,high up in the tree.She was safe from predatorsor things she couldn’t see.
Molly watched the other animalsfrom high up in the tree.Raccoons and deer and fox squirrelsand turkeys she could see.
The forest was their home,like a house for you and me.These critters would not be there,if they didn’t have those trees.
One day a man came hikingto find a good campsite.He started up a campfireto keep him warm that night.
Early in the morningthe camper walked away.He left his campfire burningin a very careless way.
Soon the fire got bigger,it flamed and cracked and popped.The fire made Molly frightened.She chirped and flapped and hopped.
WOOSH, the wind came blowing.It blew the flames about.ROAR, the fire grew bigger,no one to put it out.
Smoke and flames, burning heat,burning trees and ground.Molly had to fly away.She couldn’t stay around.
She spent the night high in a tree,next to a little stream.The smoke and flames had scared herLike a very bad, bad dream.
The next day she went flying.She flew back to her home.The forest floor was blackened ashesand all the brush was gone.
Bugs, seeds, acorns, leaveswere ashes on the ground.Not a single deer or squirrelor critter could be found.
Molly couldn’t stay aroundwhen all her food was gone.Molly had to fly awayand find another home.
The forest soil will wash awaywhenever there’s a rain.And years will pass before the woodswill be the same again.
By John Griffin
Additional learning experiences:ART: During self-selected activity time, put out black chalk and white paper for children to create pictures of a forest following a fire.
BLOCKS: Make trees from twigs and clay. Place these, along with plastic animals, in the block area during self-selected activity time. As children are playing, suggest that the forest has just caught fire and the children need to decide what to do.
DISPLAY: Display pictures of forests before, during, and after fires.
FIELD TRIP: Visit a wildlife or recreational area where campfires are permitted. Build a campfire and roast hot dogs and marshmallows. Let the children help put the fire out properly under close adult supervision.
GROUP: Invite a firefighter, forester, or Smokey Bear to visit your class.
OUTSIDE: During self-selected activity time, provide firewood and buckets in the play yard for children to pretend to build campfires and put them out.
PRETEND PLAY: Put out firefighter dress-up clothes for children to wear during self-selected activity time.
SCIENCE: Display pieces of charred wood and hand lenses during self-selected activity time. Be sure to place science notebooks nearby for children to record their observations.

187
Spring 18 What’s an Insect?
SCIENCE: Examine insects and discover some of their characteristics
Children will:●● Closely examine several different
insects●● Sketch insects in their science
notebooks●● Discuss characteristics that
insects have in common
You’ll need:●● Living, dead, or plastic insects,
such as a grasshopper, cricket, cockroach, caterpillar, butterfly, ladybug, dragonfly, etc. (select common insects, indigenous to your area if possible)
●● Hand lenses●● Tweezers
●● Science notebooks●● Colored pencils
Did you know?Over half of all living things in the world are insects. Insects have six legs, three body parts, a pair of antennae, and are covered with chitin, a light and flexible, waterproof substance. Most insects have wings. Insects are an important part of many food chains. This activity will allow children to identify some of the characteristics of insects.
Teacher preparation:●● Attractively arrange materials in the science center for children
to discover and investigate during self-selected activity time.
What to do:1. Encourage children to examine the insects and discuss their
observations.
2. Make science notebooks and colored pencils available for children to document their observations.
3. As children are working, stimulate thinking and reflection by asking open-ended questions:
●● What do all of these insects have that make them alike?●● What do insects eat?
●● Where do insects live?●● How do insects help people? How do they hurt them?
●● Who or what are the insects’ enemies?
Related children’s literature:Royston, A. (1992). Insects. New York: DK Publishing. ISBN-10:
1564580032. This book explores the parts of an insect and the functions of those parts.
Sill, C., & Sill, J. (2000). About insects: A guide for children. Atlanta, GA: Peachtree Publishers. ISBN-10: 1561452076. This book describes how insects look, what they eat, and where they live, and it introduces readers to commonly seen insects.

188
Additional learning experiences:ART: Provide plastic foam pieces, cut-up egg cartons, construction paper, pipe cleaners, toothpicks, etc., for children to create insects during self-selected activity time.
DISPLAY: Make a display of insect pictures along with children’s comments about what makes an insect an insect.
FIELD TRIP: Take children on a hike to look for insects. Make note of the insects’ habitat.
LARGE MOTOR: Encourage children to study how various insects move and then try moving like them.
LARGE MOTOR/OUTSIDE: During group time, discuss how bees communicate with other hive members through dance. Encourage children to make up dances that will communicate with other children where snack is located or how to get to a secret treasure on the play yard.
OUTSIDE: Encourage children to be quiet and listen for insect sounds.
SCIENCE: Have the children observe grasshoppers or crickets jumping. Challenge children to estimate how far and how high they think the grasshoppers or crickets will jump.
SCIENCE: Provide plastic or rubber insects and spiders for children to examine during self-selected activity time. Encourage discussion about similarities and differences.

189
Spring 19 My Friend Little
CaterpillarMUSIC: Sing about caterpillars and how they change into moths or butterflies
Children will:●● Sing a song using the
appropriate terminology for the metamorphosis of a butterfly and a moth
●● Closely examine a butterfly and a moth
●● Discuss differences and similarities between butterflies and moths
You’ll need:●● Animal cards: butterfly
and moth●● Living, dead, or plastic
butterfly and moth●● Hand lenses
●● Science notebooks●● Colored pencils
! Notes from Sherri:One year, as we observed a polyphemus caterpillar, we saw it wrap a leaf around itself and make the cocoon. After the moth emerged, the children wanted to see what was inside. We cut the cocoon open and discovered the chrysalis-like skin inside. They decided that moths just were shy and didn’t like to change in front of everyone—that’s why they made the cocoon!
Did you know?To become adult insects, butterflies and moths undergo a four-stage process called complete metamorphosis. First, they begin as eggs. Second, they hatch into caterpillars, also known as larvae. After a period of feeding, they form coverings to protect themselves during the third stage, called pupation. At last, they emerge as fully formed adults. This song will introduce children to the process of metamorphosis.
Teacher preparation:●● Attractively arrange the moth and butterfly models and animal
cards and equipment in the science area for use during self-selected activity time.
●● Practice the song and motions.
What to do:1. During group time, teach children the following song to the tune of
Twinkle, Twinkle Little Star:
My friend little caterpillar (Pet thumb.)eats green leaves until they fill her.Then she grows a chrysalis. (Make fist with thumb in middle.)There she sleeps unseen by us.Spring will come and by and byshe’ll become a butterfly. (Put thumbs together and flap hands.)
My friend little caterpillar (Pet thumb.)eats green leaves until they fill her.Then she spins a small cocoon. (Make fist with thumb in middle.)There she sleeps and very soonspring will come and she’ll fly off. (Put thumbs together and flap hands.)She’ll become a fuzzy moth.

190
2. Encourage interested children to examine both the butterfly and the moth during self-selected activity time. Challenge them to record their observations in their science notebooks.
3. As children work in the area, facilitate their observations by asking open-ended questions:
●● How do the moth and the butterfly look the same? Different?●● How do they act alike? Different?
●● How much do you think a caterpillar needs to eat before it forms a chrysalis or cocoon?●● How does the butterfly or moth know when to come out of the chrysalis or cocoon?
●● How does the caterpillar know whether to grow a chrysalis or spin a cocoon?●● Why do you think butterflies and moths are so many different colors?
Related children’s literature:Aston, D. H., & Long, S. (2011). A butterfly is patient. San Francisco, CA: Chronicle Books. ISBN-10: 0811864790.
This beautifully illustrated book is full of butterfly facts.
Additional learning experiences:ART: Provide materials for children to do folded-paper painting during self-selected activity time. Make a crease down the center of a sheet of paper, paint on one side of the crease and fold the paper. Squeeze and rub the paint around, and then open the paper so a symmetrical design appears. Compare their work to the symmetry of a butterfly or moth’s wings.
ART: During self-selected activity time, provide clipboards, colored pencils, watercolors, crayons, and markers for children to make sketches of butterflies and moths they see or capture on the playground.
ART: Provide egg cartons, toilet paper rolls, pipe cleaners, tissue paper, clothespins, etc., for children to create caterpillars, butterflies, and moths during self-selected activity time. Be sure to let them create the designs for themselves rather than providing a model.
LARGE MOTOR: Pantomime the stages of metamorphosis of the butterfly or moth.
OUTSIDE: Look for butterflies and moths on the play yard during self-selected time.
OUTSIDE: Make butterfly nets from wire coat hangers and old panty hose. Place these outside for children to try to catch butterflies and moths during self-selected activity time. Study and sketch the caught specimens, but be sure to release them at the end of the day.
PRETEND PLAY: During self-selected activity time, provide party blowers for children to pretend to eat like a butterfly or moth. Add headband antennae and wings made from coat hangers and panty hose.
SCIENCE: Bring in a caterpillar for children to observe. Encourage children to write about their observations and sketch the caterpillar in their science notebooks. Be sure to have the children set the caterpillar free at the end of the day.
READING: As you read books about the metamorphosis of butterflies and moths, talk about the author’s accurate or inaccurate language used for describing the chrysalis/cocoon.
WRITING: Provide pencils, stiff paper, and crayons for children to write butterfly or moth stories during self-selected activity time. This should be a free-choice experience, allowing children to spend as much time or as little time with it as they feel is necessary. Take their dictation as they finish their work. Bind the pictures, stories, and transcriptions together to create a class book about butterflies and moths.

191
Spring 20 Who Am I?
MUSIC: Sing about the cottontail rabbit and discover some of its unique characteristics
Children will:●● Sing a song with facts about
rabbit habits and habitat●● Practice hopping like a rabbit
You’ll need:●● Picture of rabbit tracks
●● CD player●● Lively music
! Notes from Sherri:The children always enjoy singing this song for their parents. They’re convinced that adults will have no clue about the riddle. The song also sparks discussion about real rabbits compared to cartoon rabbits.
The rabbit moves so fluidly that the children believe it will be easy to reproduce the bunny hop. However, both children and adults find it very difficult to replicate. This invariably leads to a discussion as to why it is so easy for the rabbit and so difficult for people.
Did you know?The rabbit is a very common wild animal. It eats green plants and is prey for many predators. It usually lives in brush rather than holes in the ground. Rabbit tracks show the long footprints of the rabbit’s hind feet in front of the small prints of the front feet. The rabbit touches the ground with his front feet first, then swings its hind feet forward past the front feet before touching the ground. This activity will help children learn about the rabbit and experience how the rabbit moves.
Teacher preparation:●● Gather materials.
●● Select music.●● Practice the “bunny hop.”
What to do:1. Teach children the following song to the tune of Three Blind
Mice:
Long, skinny ears. (Hold up fingers behind head for ears.)A little white tail. (Turn around and wiggle tail.)I live on the ground (Point to ground.)and I hop all around. (Hop two fingers around.)I have big eyes so I can see, (Put fingers around eyes.)coyotes and foxes who’d like to eat me.
(Look around with hand over eyes.)I nibble on green plants that I see. (Pretend to nibble.)Who am I?

192
2. Show children the picture of the rabbit tracks. Point out the unusual nature of the tracks, and discuss how rabbits get their hind feet around and ahead of their front feet.
3. Stimulate discussion by asking open-ended questions like these:
●● Where would be a good place for a rabbit to live?●● What do you think a rabbit would like to eat?
●● Who are the rabbit’s predators?
4. Demonstrate how a rabbit hops. Put on some lively music and encourage children to practice doing the bunny hop. While children are hopping, ask more questions:
●● Why is it so hard for people to get their feet in front of their hands and it looks so easy for rabbits?●● How do rabbits learn to hop like this?
●● How can rabbits hop so fast when it is so difficult for us?
Related children’s literature:Gibbons, G. (2000). Rabbits, rabbits and more rabbits! New York, NY: Holiday House. ISBN-10: 0823416607.
This nonfiction text introduces readers to different kinds of rabbits, their habits, and how to care for domestic rabbits.
Aronsky, J. (1997). Rabbits and raindrops. New York, NY: Putnam Juvenile. ISBN-10: 0399226354. A mother rabbit takes her five babies out of the nest for their first adventure. Their exploration is cut short but a sudden rain shower.
Additional learning experiences:LARGE MOTOR: Have “bunny hop” races.
NUTRITION: Serve “rabbit food” for snack: lettuce, spinach, celery, radishes, cauliflower, and broccoli. Remember, rabbits prefer young tender green plants — not carrots, but carrot tops.
OUTSIDE: Go on a “bunny hop” walk in the play yard.
OUTSIDE: Look for rabbit habitat on the play yard and other outdoor areas the children frequent.

Spring21 Do You Smell My Mother?
GROUP: Sniff out the way mammals use their sense of smell
Children will: ●● Match fragrances ●● Brainstorm ways mammals use
their sense of smell to survive
You’ll need: ●● Empty film canisters, one per
child ●● Enough different fragrances
for half the class. If you have 20 children, you’ll need 10 different fragrances. Cotton balls dabbed with essential oils, such as rosemary, lavender, orange, etc., work well for this.
●● Chart paper and marker
Did you know? Most mammals have a very keen sense of smell. This helps them find mates, identify food, locate places to live, know when enemies are approaching, and identify their young. Unlike most mammals, people have a relatively poor sense of smell. This experience will enable children to relate to one way mammals use their sense of smell.
Teacher preparation: ●● Place a different scented cotton ball in each of two
film canisters, making pairs of smells. For example, two canisters with rosemary oil, two with rose, and so on.
●● Separate the pairs of smells — one group for the “babies” and one for the “mothers.”
●● Title the chart paper “Ways Mammals Use Their Sense Of Smell.”
What to do: 1. During group time, divide children in two groups. Explain
that half of the children will be the “mothers” and half will be the “babies.”
2. Distribute one set of canisters to the “mothers” and one to the “babies.” Challenge the “babies” to find their “mothers” by matching their fragrances. Collect the scent canisters from the "babies" and redistribute them so that each "baby" will have a new scent. Reverse the process by having the “mothers” find their “babies.”
3. Talk with the children about how many animals, especially mammals, have a keen sense of smell. Brainstorm about how animals use their sense of smell. Record their ideas on the chart paper.
4. Ask open-ended questions to further stimulate discussion:
●● How do animals use their sense of smell to survive? ●● How do you think a mother mammal remembers her
baby’s smell?
193

●● Why aren’t smells as important to people as they are to animals? ●● How did you keep track of your smell without getting mixed up by the others?
Related children’s literature: Heller, R. (1999). Animals born alive and well. London, UK: Puffin. ISBN-10: 0698117778. This nonfiction book
introduces children to mammals that give live birth.
Sill, C. (2000). About mammals: A guide for children. Atlanta, GA: Peachtree Publishing. ISBN-10: 1561451746. Lovely illustrations accompany this simple introduction to mammals.
Additional learning experiences: BLOCKS: Put out images or models of mother and baby mammals in the block area. Encourage children to build habitats for them during self-selected activity time.
FIELD TRIP: Visit a farm where baby animals, such as calves, chicks, kittens, puppies, rabbits, pigs, horses, etc., are being born or raised. Talk with the farmer about how the mother and young recognize each other.
MANIPULATIVE: Make a matching game where children match pictures of mother animals with their young. Make this available during self-selected activity time.
NUTRITION: Encourage children to close their eyes while snack or lunch is served. Ask children if they can identify the snack or lunch items by the fragrances.
SCIENCE: Make a smell matching game by putting out film canisters with different scents and pictures for children to match them to. Make this available during self-selected activity time.
194

22 Spring
What Hatches From an Egg? ART: Create an animal that hatches from an egg
Children will: ●● Talk about animals that hatch
from eggs ●● Create an animal that hatches
from an egg
You’ll need: ●● Chart paper and marker ●● Animal cards: animals that hatch
from eggs ●● One large plastic egg per child ●● Various sizes of plastic foam balls ●● Plastic foam packing ●● Pipe cleaners ●● Feathers ●● Pompoms ●● Construction paper scraps ●● Sequins ●● Glue ●● Toothpicks
Did you know? Birds, amphibians, reptiles, fish, insects, and spiders hatch from eggs. The world’s only mammals that hatch from eggs are Australia’s duck-billed platypus and four species of spiny anteater. This activity will help children learn about animals that hatch from eggs.
Teacher preparation: ●● Title the chart paper “Animals That Hatch From Eggs.” ●● Arrange materials attractively and so they are easily
accessible in the art area. ●● Hang or post the animal cards in the art area.
What to do: 1. During group time, talk with children about animals that
hatch from eggs. Use the chart paper to make a list of all of the animals the children can think of.
2. Promote discussion by asking open-ended questions:
●● How do you know which animals hatch from eggs? ●● How does the animal inside the egg know when to
come out? ●● How do animals get out of the shell?
3. Place the children’s list in the art area. Challenge the children to create an animal that hatches from an egg during self-selected activity time.
4. As children select the art area, remind them of the discussion, and point out the animal cards.
5. Encourage children to create some type of animal that hatches from an egg.
6. As children finish, suggest they place their animal in their egg so it can hatch.
195

Related children’s literature: Heller, R. (1981). Chickens aren’t the only ones. London, UK: Puffin. ISBN-10: 0698117786. This nonfiction book
illustrates the many animals that hatch from eggs.
Aston, D. H., & Long, S. (2006). An egg is quiet. San Francisco, CA: Chronicle Books. ISBN-10: 0811864790. Celebrating the egg in all its diversity — from tiny insect eggs to bulky ostrich eggs — this elegantly illustrated book comments on size, shape, color, texture, and even sensibility.
Additional learning experiences: ART: Encourage children to try to make nests using twigs, branches, and mud during self-selected activity time.
FIELD TRIP: Visit a hatchery.
GROUP: Play mother bird. One of the children is the mother bird, the rest are the babies. The babies hide throughout the designated area and peep softly until the mother bird gathers them all back into the nest.
GROUP: During group discussion, stress how parents in the wild care for their young. A baby bird out of the nest will still be cared for by its parents and doesn’t need human assistance. Young wild animals should always be left in the wild because their parents are probably nearby.
MANIPULATIVE: Make a bird-nest matching game by reproducing and laminating various nests and the birds that make them. Place in the manipulative area during self-selected activity time and encourage the children to match the birds to their nests.
MANIPULATIVE: During self-selected activity time, encourage children to sort the animal cards into those that hatch from eggs and those that don’t.
MANIPULATIVE: Make an egg memory game by making pairs of pictures of different kinds of eggs on cards. Place the game in the manipulative area during self-selected activity time.
NUTRITION: Make bird nests for snack from 1/3 cup honey, ½ cup brown sugar, ¾ cup peanut butter, 1 teaspoon vanilla, 3 cups chow mein noodles, and 1 cup coconut. Mix and heat until easily stirred. Use approximately one heaping tablespoon of mixture to form a nest. Use jellybeans, grapes, or puffed rice for eggs. Talk about how different species of birds create different kinds of nests.
NUTRITION: Serve gummy worms for snack. Encourage children to be baby birds and the mother bird that returns to the nest to feed her babies.
OUTSIDE: Help birds with their nest building by draping brightly colored yarn, string, and ribbon over a pinecone and hanging it in a tree. Look for the bright colors in bird nests discovered in the trees on the play yard.
OUTSIDE: Encourage children to look for bird nests on the play yard. Be careful not disturb the nest, eggs, or adults, but observe the progress from a distance.
SCIENCE: Bring in different types of eggshells and display them in the science area.
196

Summer
197
During the long, sunny days of summer, families get outside to enjoy nature. Some like to garden or picnic. Others go swimming or play sports. Those with a taste for outdoor adventure visit Missouri’s rich recreational areas to
fish, canoe, and hike. Summer is also the time when young wildlife grows and develops. Game birds
and songbirds feed on insects, which in turn feed on the state’s abundant plant life. By the end of the summer, most young mammals and birds will leave their parents to live on their own.
Corn crops have been cultivated and are growing. Haymaking is in full swing, and farmers start harvesting their wheat crops in mid-to-late summer.
Celebrate summer with children and families with an outdoor activity. Take children on nature walks, and then create stories to describe all that happened. Be sure to turn the walk into a magical adventure. Visit the same place multiple times throughout the summer so children can track the changes as summer progresses. Challenge them to notice the sights, sounds, smells, textures, and tastes of summer. Play summertime Simon Says — suggest they twirl like a leaf, float like a cloud, dance like a raindrop, or hop like a frog. Plan a summer solstice party where families create fairy houses made from natural items, take a moon walk, hunt for fireflies, or go spider sniffing (hunting spiders with a flashlight at night). Missouri summer days are long, but they pass quickly, so get outside and make the most of them!
Summer learning experience topics include: ●● Spiders ●● Insects ●● Pollution ●● Fish ●● Aquatic life ●● Food chains ●● Predator/prey relationships ●● Rocks and minerals

198

Summer 1 What Has Eight Legs?
SCIENCE: Discover some of the differences between insects and spiders
Children will: ●● Examine spiders and insects ●● Discuss unique spider
characteristics and habits ●● Look for differences and
similarities between spiders and insects
You’ll need: ●● Animal cards: spider and insect ●● Living, dead, or plastic spider ●● Living, dead, or plastic insect ●● Hand lenses ●● Tweezers or forceps ●● Science notebooks ●● Colored pencils ●● Spider and insects books and/
or field guides (See Selected Children's Literature and Field Guides section for suggestions.)
! Notes from Sherri: If you can identify Missouri’s two venomous spiders — the brown recluse and the black widow — you may feel comfortable helping your preschoolers identify nonvenomous spiders they find in the play yard or inside. One winter, my preschoolers discovered a spider in our building. We put it in the bug box, and the spider spent the morning on our science table among magnifying glasses, field guides, science notebooks, and flashlights. The children discussed among themselves how they knew it was a spider rather than an insect. They talked about what it ate, where its web was located, and why it was inside. Toward the end of school, one of the children suggested we release the spider outside. Someone else remarked that it was very cold outside. After much discussion, the children released the spider back into the hallway, where it had chosen to spend the winter.
Did you know? A spider is not an insect but an arachnid. So are mites, ticks, and scorpions. A spider has eight legs instead of six, two body parts instead of three, and no antennae (feelers) or wings. Spiders have poor eyesight and must rely on their sense of touch. All spiders are helpful to people because they eat insects, such as flies, mosquitoes, and gnats. This activity will enable children to discover some of the differences and similarities between spiders and insects.
Teacher preparation: ●● Set up a discovery area in the science center by attractively
arranging the spider, insect, tweezers or forceps, science notebooks, and colored pencils.
●● Enhance the exploration with spider and insect books or field guides.
What to do: 1. As children select the area, suggest they look for similarities
and differences between the spider and insect.
199

2. Ask open-ended questions as the children are working:
●● How do spiders move? ●● What do spiders eat? ●● Where do spiders live? ●● How do spiders help people? ●● How are spiders and insects alike? How are they different?
3. Encourage children to record their observations in their science notebooks.
Related children’s literature: Sill, C., & Sill, J. (2006). About arachnids: A guide for children. Atlanta, GA: Peachtree. (Original work published
2003). ISBN-10: 1561453641. This nonfiction book overviews how arachnids look, what they eat, and how they live.
Additional learning experiences: ART: Provide plastic foam pieces, cut apart egg cartons, pipe cleaners, pompoms, glue, scissors, etc., for children to create spiders or insects during self-selected activity time. Prominently display animal cards and spider and insect books near the art center.
FIELD TRIP: Go spider sniffing at night. Holding a flashlight next to your eyes, scan the tree line. Spiders’ eyes have a reflection that will show in the flashlight that only the person holding the light will be able to see. Follow the reflection to the spider.
MANIPULATIVE: Put out animal cards. Make a chart of “no legs,” “two legs,” “four legs,” “six legs,” and “eight legs.” During self-selected activity time, encourage interested children to sort the animal cards by the number of legs the animal has.
MUSIC: Sing The Itsy Bitsy Spider and do the motions. Also sing The Great Big Spider in a low, loud voice with exaggerated motions and The Teeny Tiny Spider in a high, soft voice with tiny motions.
NUTRITION: Serve large and miniature marshmallows and pretzel sticks for snack. Encourage children to create spiders and insects with them. Discuss the body parts of each as they work.
PRETEND PLAY: Create spider puppets from old gloves to put out during self-selected activity time.
200

Summer 2 Spider Web Toss
LARGE MOTOR: Explore how spiders capture their food
Children will: ●● Explore how spiders capture
food in their webs ●● Fly or toss objects (insects)
into a sticky spider web ●● Discuss spider webs
You’ll need: ●● Clear contact paper cut into
long strips ●● Lightweight objects such as
pom-poms, plastic foam packing, bits of pipe cleaners, tiny plastic insects, etc. (to represent insects)
●● Accurate spider replica (stuffed or plastic)
Did you know? The spider’s web has a sticky surface that holds an insect entangled until the spider comes to kill it. After killing its food, the spider wraps it in a silken sac to be eaten later. This activity will enable children to explore how spiders capture their food.
Teacher preparation: ●● Use the strips of contact paper to make a spider web in a low
corner of the classroom, positioning the contact paper with the sticky side out.
●● Place “insects” in containers near the area and place the spider at one of the corner edges of the web.
What to do: 1. As children approach the area during self-selected activity time,
encourage them to try throwing various “bugs” into the web to see what the spider captures for its lunch.
2. Ask open-ended questions:
●● How do real spiders make their webs sticky? ●● What kinds of insects usually get caught in spider webs? ●● What keeps the spider from sticking to the web? ●● How do spiders make their webs? ●● Why aren’t all spider webs alike?
Related children’s literature: Graham, Margaret Bloom. 1967. Be nice to spiders. NY: HarperCollins.
(Available in library binding only). ISBN-10: 0060220732. Helen the spider is the star of this classic picture book. She illustrates how much spiders help people and animals as she catches insects around the zoo.
201

Additional learning experiences: ART: Put out white chalk and black paper for children to draw spider webs during self-selected activity time. Display pictures of webs in the art area to provide inspiration and reference.
FIELD TRIP: Look for spider webs on a field trip to a natural area. Early morning is a great time to spot webs. Spiders usually make their webs between branches of bushes, trees or other plants. Orb webs can be coated with dark colored, non-lacquer spray paint, and transferred onto white drawing paper. Be sure to tap the web with a stick to see where the spider is before applying the paint. Remind the children that you aren’t trying to harm the spider, just capture the web. The spider can rebuild the web after you leave. Talk about the many different types of spider webs seen on the trip. Be sure to take science notebooks along for children to record and sketch their observations.
MANIPULATIVE: Make a spider lotto game for children to match pictures of spiders with pictures of the type of web they weave. This is especially meaningful when you include pictures of common spiders indigenous to Missouri.
NUTRITION: Make peanut butter play dough (mix 1 cup peanut butter, ¼ cup honey and enough dry milk to prevent stickiness). Encourage children to make play dough insects for lunch and pretend they are spiders looking for a tasty meal.
OUTSIDE: Adopt a spider on or near your play yard. Observe the spider and its habits on a regular basis. Encourage children to record their observations in their science notebooks.
SCIENCE: Prepare a collection of non-venomous spiders to display in the science area for children to examine.
202

Summer3 The Lights Go On
MUSIC: Sing about fireflies and their habits
Children will: ●● Sing a song about fireflies ●● Discuss firefly habits
203
You’ll need: ●● Animal card: firefly
! Notes from Sherri: Fireflies are common throughout Missouri. Their flashing lights add magic to summer nights and our childhood memories of them. Each lightning bug species has a unique flash pattern, making it possible to identify them by this feature alone. Scientists use fireflies’ light organs, which they gather from wild fireflies, in biochemical analyses. Scientists haven’t been able to raise fireflies in captivity.
Did you know? Fireflies, or lightning bugs, are beetles. Their “flashlight” is a special organ they use to attract mates. The female, resting on the ground, flashes her pattern to attract a male of her own species, which answers with a similar flash and flies to her. The following activity will help children learn how fireflies use unique flash patterns to identify other members of its species.
Teacher preparation: ●● Watch for lightning bugs to appear on warm summer
evenings before teaching children the song. ●● Practice singing the song until it is familiar.
What to do: 1. Teach children the following song:
First they’re dark and then they’re light, The light-ning bugs are out to - night, They
Sleep all day, They come out late, Then flash their li - ghts to find a mate.

2. After children have practiced the song a few times, ask open-ended questions:
●● How do fireflies know when to light their lights? ●● What do you think happens to lightning bugs in the winter? ●● Where do lightening bugs go in the daytime?
Related children’s literature: Brinckloe, J. (1986). Fireflies. New York, NY: Aladdin. ISBN-10: 0689710550. A young boy proudly shows off his
newly acquired piece of moonlight — a jar of fireflies— but realizes he must set them free as their lights begin to fade.
Hawes, J., & Alexander, E. (1991). Fireflies in the night. New York, NY: HarperCollins. (Original work published 1963). ISBN-10: 0064451011. A young girl narrates all the information and facts she has gathered about fireflies.
Additional learning experiences: FIELD TRIP: Plan an evening field trip to capture fireflies. Be sure to release the fireflies after children finish observing them.
HOME/SCHOOL CONNECTION: Send a note home to parents describing the unique qualities you have been learning about fireflies. Include the words and music from the song so parents can sing it at home with their children. Encourage parents to share stories about fireflies and warm summer evenings from their own childhoods. Challenge them to take their children adventuring in a local park, nature area, or just the back yard to experience a magical summer evening and then tell their child a bedtime story about the experience.
OUTSIDE: Observe the pattern of firefly blinking and try to fool the fireflies by using a flashlight.
SCIENCE: Place a jar of fireflies in a pan of cold water and another in a pan of warm water. Observe the differences in the amount of light the fireflies produce. Be sure to have science notebooks available for recording observations.
SCIENCE: Capture other beetles and encourage children to compare them to fireflies.
204

Summer4 Ant Café
OUTSIDE: Explore ants and their habits
Children will: ●● Predict foods ants might eat ●● Prepare an experiment to test
their predictions ●● Test their results in different
habitats ●● Discuss ant habits
You’ll need: ●● Animal card: ant ●● White paper plates ●● Apple ●● Sugar ●● Honey ●● Leaves ●● Grass ●● Bread crumbs ●● Any other food children think
ants might eat ●● Chart paper ●● Marker ●● Science notebooks
! Notes from Sherri: This activity involves waiting for ants to arrive at the Ant Café, so it may test children’s patience. To make the experience positive for everyone, present it to younger children during self-selected activity time so they can choose to move in and out of it. You might present this experience as a group activity to older children, but take care to keep waiting to a minimum.
Did you know? There are more ants than any other creature on earth. Ants are very social insects and live in colonies. When an ant discovers a good meal, it hurries back to the colony, leaving a scent trail to the meal. Hundreds of ants are then able to follow the scent trail to the meal. This activity will encourage children to discover ants and their habits.
Teacher preparation: ●● Gather supplies. ●● Survey play yard for most appropriate locations to feed the
ants.
What to do: 1. Display the ant animal card to interested children. Talk with
them about foods that they think an ant might like to eat. Record their ideas on the chart paper.
2. Show the children the foods you gathered, adding any that are available from the children’s list. Encourage them to predict which food will attract more ants and record their predictions in their science notebooks.
3. Ask children to place small amounts of the various foods on different parts of the paper plate.
4. Place the paper plate in the play yard away from the building.
5. Prepare several paper plates and experiment with different locations to see if habitat affects the number of ants feeding at the “cafe.” For example, place one plate in the grass and another on a hard-packed dirt area.
205

6. Record the children’s observations about the ants that come to dine at the “cafe” on the chart paper.
7. Be sure to discuss the accuracy of their predictions.
8. Take pictures to help children revisit the experience in the classroom. Encourage children to use their science notebooks to further document the experience.
9. As children observe the ants, ask open-ended questions:
●● Which food do you think the ants will like best? ●● How do the ants know where the food is? ●● Why do the ants stay in a line? ●● What would happen if you rubbed your finger across the line (without harming the ants)? ●● What do ants eat when people aren’t around? ●● Why did more ants come to one paper plate than another?
Related children’s literature: Dorros, A. (2000). Ant cities. New York, NY: HarperCollins. (Original work published 1987). ISBN-10: 0064450791.
This nonfiction book describes ants and their habits.
Hoose, P.M., Hoose, H., & Tilley, D. (1998). Hey little ant. Berkeley, CA: Tricycle Press. ISBN-10: 1883672546. This song, a conversation between an ant and a boy, leaves it up to the reader whether or not the ant should be squished. The story can start a conversation about killing insects.
Additional learning experiences: GROUP: Invite a professional entomologist or a young 4-H entomologist to bring an insect collection to class.
OUTSIDE: Go on an insect scavenger hunt. Ask children to find a place where an insect has lived, something an insect has nibbled on, signs of where an insect has been, etc.
OUTSIDE: Look for ants on the play yard. Being careful not to disturb them, follow the ant trails to see where they lead.
206

5 Summer
Roly-Poly Paradise SCIENCE: Explore some of the habits of a roly-poly
Children will: ●● Closely examine roly -poly
or pill bugs ●● Record observations in a
science notebook
You’ll need: ●● Animal card: pill bug ●● Pill bugs (these can be found
in leaf litter or near damp, rotting logs)
●● Containers ●● Hand lenses ●● Science notebooks
! Notes from Sherri: A large log lies next to our sandbox, and the children often turn it over to see what lives underneath. They always find roly-polies and earthworms. The children are amazed to find in their research that roly-polies are also crustaceans, just like crayfish. They immediately tried to find similarities between the two kinds of creatures. They are always careful to return the log to the original location and position when they are finished exploring, so the habitat is restored.
Did you know? The roly-poly, or pill bug, is one of the most common land-dwelling crustaceans. This small armadillo-like creature has seven pairs of legs (unlike insects) and rolls into a ball, like a hard, black pill when frightened. This experience will allow children to explore some of the roly-poly’s habits.
Teacher preparation: ●● Locate roly-polies. ●● Gather materials.
What to do: 1. During self-selected activity time, make pill bugs available for
interested children to investigate.
2. Encourage children to use the hand lenses and spend some time observing the pill bugs. Make science notebooks available for children to record their observations.
3. As the children observe the roly-polies, ask open ended questions:
●● What does a roly-poly need to live? ●● How does a roly-poly move? ●● How do you know a roly-poly isn’t an insect? ●● Why do you think the roly-poly makes a ball? ●● How does it know when to unroll?
4. Before the end of the day challenge children to find suitable homes for their pill bugs and carefully release them from their containers to their new homes.
207

Additional learning experiences: ART: Sketch roly-polies.
FIELD TRIP: Go on a roly-poly expedition looking for places where pill bugs live.
SCIENCE: Set up experiments to determine roly-poly habitat preference. For example, place the roly-poly in a container with dry soil at one end and wet soil at the other. Observe where the roly-poly goes. Other experiments might include preferences for light versus dark, open areas versus enclosed spaces, etc.
208

Summer6
Trash Pickup FIELD TRIP: Explore the effects of littering on familiar places and wildlife
Children will: ●● Safely pick up litter ●● Discuss consequences of
littering a familiar place
You’ll need: ●● Littered area ●● Grocery bags (one per child) ●● Disposable or washable
work gloves
! Notes from Sherri: Tires, when placed in a landfill, never decompose. However, tires can be recycled in a number of ways. One is to turn old tires into wildlife habitat. For example, tires cut in half and sunk into a pond or lake create instant nesting habitat for catfish.
Did you know? Littering is more than just dropping trash along walkways, roadsides, and into streams. Littering wastes the natural resources, many of which are limited. Litter also affects our environment — it makes the outdoors unpleasant for people and unsafe for wildlife. This activity will help children learn to avoid littering and to clean up and dispose of litter properly (even recycling appropriate items) when they encounter it.
Teacher preparation: ●● Scout a local space where the children can safely pick up litter.
What to do: 1. Give each child a grocery bag and explain that you’re going on a
litter walk.
2. Explain the boundaries of the area to be cleaned, and challenge children to pick up all the litter they find. Make sure the children wear gloves.
3. Talk with children about litter that may be unsanitary or unsafe to pick up, especially with bare hands. This might include such things as dirty diapers, cigarette butts, or broken glass.
4. As children finish collecting trash, discuss changes in the area. Be sure to talk about how cleaning up the area improved it. Ask children open-ended questions:
●● Where did all this trash come from? ●● Why do we need to wear gloves when picking up litter? ●● What shall we do with the trash we collected? ●● What would happen if no one ever picked up the trash? ●● How can we make sure this doesn’t become littered again? ●● How does this litter affect habitat for creatures and plants that
live here?
209

Additional learning experiences: BLOCKS: During self-selected activity time, add dump trucks and cranes to sort and haul trash. Use real trash or plastic foam pieces to represent trash.
DISPLAY: Let children help make a beautiful outdoor scene, then tack litter all over it. Discuss how the trash affects both the people and wildlife that live in the area.
FIELD TRIP: Visit a recycling plant and/or landfill.
GROUP: Encourage children to clean up their own messes after routine activities, such as art, snack, washing hands, blowing noses, etc.
GROUP: To model responsible use of paper, write on both sides and encourage children to do the same. Place recycling bins for paper, plastic, and cans prominently in classroom.
HOME/SCHOOL CONNECTION: During self-selected activity time, provide paper bags, markers, crayons, glue, construction paper, etc. for children to decorate litterbags for trash collection at home or in the car.
PRETEND PLAY: During self-selected activity time, provide bins with signs designating paper, aluminum, and plastic. Challenge children to sort clean trash into the proper bin. Include an aluminum-can crusher for children to compact trash.
PRETEND PLAY: Put out coveralls and heavy gloves so children can dress up like garbage collectors and pick up trash. Make a garbage truck from a large box. Invite children to drive around and collect the garbage during self-selected activity time.
SCIENCE: Collect a large bag of cornstarch (water-soluble) packing peanuts. Provide a large bowl of water and give out spoons. Have children predict what will happen when the peanuts are stirred into the water (don’t tell them before the experiment that the peanuts are water soluble). Repeat the experiment with non-soluble peanuts. Chart their predictions and the results. This experiment can also be done with the peanuts placed in dirt. After they dissolve, discuss which would be better to use and why.
210

7 Summer
What Is Air? SCIENCE: Become more aware of air
Children will: ●● Move objects using air ●● Discuss air
You’ll need: ●● Straws ●● Feathers ●● Ping pong balls ●● Rocks ●● Shells ●● Leaves ●● Anything the children think they
might be able to move with air ●● Science notebooks
Did you know? All living things are immersed in air. You can’t see or touch air, but you know it’s there. This experience will help children become more aware of air.
Teacher preparation: ●● Gather materials together in a place where children have
room to move along the floor or ground.
What to do: 1. During self-selected activity time, make clean straws available to
children visiting the area. Challenge them to blow through the straws and try to move the various objects you have placed in the area.
2. Make science notebooks available for children to record their observations and discoveries.
3. As children are working ask open-ended questions:
●● How are the objects moving? ●● How do you know air is there when you can’t see or feel it? ●● Where does air come from? ●● How does air move things? ●● How do you know it is air moving the object?
Related children’s literature: Dorros, A. (2000). Feel the wind. New York, NY: HarperCollins.
(Original work published 1989). ISBN-10: 0064450953. This informational picture book illustrates what air is, what causes wind, and how people use the wind.
211

Additional learning experiences: ART: During self-selected activity time, add strong food coloring to a bubble solution. Have children use straws to blow bubbles onto absorbent paper to make bubble prints. Discuss how air makes bubbles and what happens to the air when the bubbles pop.
OUTSIDE: Go outside on a windy day and feel the air. Watch for signs of air, such as blowing leaves, moving clouds, etc.
OUTSIDE: Look for natural objects that move in the air. Challenge interested children to a race. Discuss which objects move best in the wind and why that might be the case.
212

Summer 8 What’s in the Air?
SCIENCE: Detect things in the air
Children will: ●● Discover hidden particles in
the air ●● Discuss air and particles people
and animals breathe ●● Talk about where particles in
the air come from
You’ll need: ●● Index cards ●● Petroleum jelly ●● Plastic knives or craft sticks ●● Marker ●● Chart paper ●● Hand lenses ●● Science notebooks
Did you know? Although air pollution is generally thought to be primarily in the cities or near roadways, particles of dust, pollution, etc. can be found in the air everywhere. This activity will help children detect things in the air.
Teacher preparation: ●● Gather materials. ●● Consider where in the environment (both inside and outside)
to place treated index cards that might produce the most dramatic results.
What to do: 1. During group time, talk with children about the experiment.
Discuss the kinds of things that might be in the air. Decide, as a group, how many cards should be prepared for the experiment and where the cards should be placed in the environment.
2. During self-selected activity time, place the cards, petroleum jelly, and plastic knives or craft sticks in the science area. Encourage children to spread a thin layer of petroleum jelly on the cards.
3. Allow children to place the cards throughout the environment, both indoors and outdoors. Teachers should also prepare a few cards to position in places that might produce the most dramatic results.
4. Draw columns on the chart paper to correspond with the number of cards placed in the environment. At the top of each column, describe where each card was placed.
5. After several hours, check the cards and discuss the material found on them. Be sure to provide hand lenses so children can see the fine particles collected. As the children are exploring ask open-ended questions:
●● Where did this material come from? ●● Why do some of the cards have more material on them
than others? ●● What happens when we breathe these particles?
213

●● What happens when animals breathe them? ●● Why can’t we see this when we breathe it?
6. Challenge the children to record their findings in their science notebooks.
7. Record their observations on the chart and discuss their findings. The discussion can be recorded and transcribed to aid in assessing understanding and determining future study.
Additional learning experiences: FIELD TRIP: On a dry day, gather leaves from a roadside ditch (this should be done with close adult supervision). Rub leaves with a damp, white tissue and examine the tissues. Compare leaves taken from several different ditches with those taken from a park or the play yard. Mark samples according to location to help provide a clearer understanding of the results of the experiment.
GROUP: Discuss other forms of pollution, such as noise, land, water, etc.
PRETEND PLAY: Experiment with placing oil and water in the sensory table or a large tub. Add approximately one-half cup cooking oil to the water. Allow children to play in the water as usual, with various plastic animals. During cleanup, encourage children to wash the animals. Talk about the way the water felt with the oil added and discuss the difficulty in cleaning up the mess. Relate this to water pollution.
SCIENCE: Repeat the experiment in other places the children frequent. Compare the results.
214

FIELD TRIP: Observe aquatic life in its natural habitat
9Summer
Aquatic Life
Children will: ●● Brainstorm safety rules for use in
an outdoor water habitat ●● Safely explore an outdoor water
habitat ●● Discover animals and evidence
of animals in and around an outdoor water habitat
●● Sketch findings from discoveries
You’ll need: ●● Chart paper and marker ●● Butterfly or aquarium nets ●● Several 3 lb. coffee cans ●● Several nuts and bolts ●● Several 2–3 ft. flat sticks ●● Paper milk cartons (for viewers) ●● Plastic wrap ●● Duct tape ●● Buckets ●● Dishpan ●● Clipboards ●● Paper ●● Colored pencils ●● Hand lenses ●● Garbage bag ●● Camera (optional) ●● Pond, lake, stream, or creek ●● Plant and animal cards: species
that may be at the field trip site — frog, toad, snake, deer, raccoon, turkey, duck, insects, spiders, fish, crayfish, etc.
! Notes from Sherri: Visiting a body of water on a routine basis allows children to explore ecosystem interdependence and observe seasonal habitat changes. I have found that visiting the same place often over the course of a year also helps the children feel responsible for the area and its inhabitants. Although this field trip requires extra adult supervision, it is well worth the effort.
Did you know? Wildlife is often hard to see in nature. However, a careful observer can often spot evidence of wildlife in or around a body of water. This activity will enable children to see aquatic life in its natural habitat.
Teacher preparation: ●● Write “Field Trip Rules” at the top of the chart paper. ●● Prepare the nets, sieves, and viewers before going on the field
trip. Sieves can be made from the cans and sticks. Punch holes in the bottom of the cans, and bolt one stick or handle to the side of each. To make the viewers, remove and cover the bottoms of milk cartons with plastic wrap. Plastic wrap should be secured with duct tape.
●● Scout an appropriate site for the field trip, becoming familiar with discoveries children might make there. If visiting a public site, learn the area’s rules.
●● Recruit extra adults to provide adequate supervision. ●● Consider rules that might need to be suggested to the
children as they make up the rules for the trip.
What to do: 1. Prior to leaving on the field trip, talk with children about what
they might see in and near the pond or stream. Brainstorm a short list of rules and cautions for the children to follow while on the field trip. Record their rules on the chart paper so they can be displayed and referred to throughout the field trip.
215

2. During the field trip, use the nets and sieves to collect samples from the water. Place samples in the tub, along with pond or stream water, for children to observe with their viewers and hand lenses.
3. Walk around the area looking for other animal signs, such as tracks, nibbled plants, smashed down grass, scat, etc.
4. As children explore the aquatic life in the area, provide clipboards, paper, and colored pencils for them to sketch the things they observe. Adults should sketch along with the children, providing role models (not art models) to help children focus.
5. As children sketch, ask open-ended questions:
●● What do these animals and plants need to survive? ●● What do you notice about these animals that helps them in their habitats? ●● How can you tell where an animal has been?
6. If children notice trash in the area, use the garbage bag to collect and properly dispose of it.
7. Consider taking pictures of aquatic life collected, tracks, and other evidence of wildlife, so children may revisit the experience back in the classroom.
8. Be sure to release all collected aquatic life samples before leaving the area.
Related children’s literature: Fredericks, A.D., & Dirubbio, J. (2005). Near one cattail: Turtles, logs, and leaping frogs. Nevada City, CA: Dawn
Publications. ISBN-10: 1584690712. The many creatures that can be found in a wetland are brought to life in this striking picture book.
Heinz, B.J., & Marstall, B. (2005). Butternut hollow pond. Minneapolis, MN: First Avenue Editions. (Original work published 2000). ISBN-10: 0822559935. Life around the pond is explored throughout the day and night.
Additional learning experiences: ART: During self-selected activity time, encourage children to make aquatic-life pictures by first drawing and coloring fish and other aquatic life with crayons, then painting a blue watercolor wash over the drawing.
LARGE MOTOR: Challenge children to move like various animals that live in water.
MANIPULATIVE: Put out two shallow boxes, one brown and one blue, and the animal cards during self-selected activity time. Have children place land animal cards in the brown (soil) box and aquatic animal cards in the blue (water) box.
PRETEND PLAY: During self-selected activity, time provide sticks, mud, leaves, and water in the sensory tale or large tub for children to try building beaver dams.
SCIENCE: Prepare an underwater “feely” box using smooth rocks, fish scales, plastic worms, muscle shells, etc. for children to use during self-selected activity time.
SCIENCE: Bring water samples from a creek, stream, pond, or lake into the classroom for children to explore. Look for living creatures. Talk about the color of the water as well as the creatures living in it. Make sure science notebooks and hand lenses are available.
WRITING: Use the children’s sketches and photographs to create a class book about the experience. Include a pocket and card so the book can be checked out and shared at home. Make a recording of children reading their entries and check it out as a recorded book.
216

Summer10 Joe’s Choice
READING: Explore the meaning of “conservation”
Children will: ●● Listen to a story illustrating the
three levels of conservation
You’ll need: ●● Storyboard ●● Related storyboard characters
Did you know? Conservation means using natural resources wisely. There are three levels of conservation: preservation, restoration, and management. All three are conservation practices, but the situation determines which practice should be used. This activity will introduce the idea of conservation to the children and demonstrate the three levels of conservation.
Teacher preparation: ●● Prepare storyboard characters. ●● Practice reading the story while placing the characters on
the storyboard at the appropriate times.
What to do: 1. Read the following story to children, using the storyboard and
characters. You should be able to identify stanzas that deal with restoration, preservation, and management.
Joe caught a bunch of fish Again his lake was fished out. So Joe began to fish again from his fishing lake. He said “What can I do? but he only kept a few. He took them home for dinner I fished until there’s no more fish. He’d let the smaller fishes go and he made a big fish cake. Boo-hoo-hoo!” and just keep one or two.
He ate the cake, YUM!, it was good. So, once again he bought some fish. The smaller fish, they grew and grew. And catching fish was fun. But, before he did he thought, The bigger ones, Joe ate. So he went to catch some more, “I’ll put these fish into my lake Joe’s lake was full of fish just as fast as he could run. and then I’ll sit and watch.” and the fishing there was great.
By John Griffin But the fishing lake was fished out. Joe sat and watched his lake He’d caught every single one. to see how his fish would do. No more fish to catch and eat. But every time the fish jumped, What can be done? Joe’s stomach jumped too!
Joe then bought some fish. “I like to watch the fish,” said Joe He put them in his lake. “but I like to eat them too. Then he went and caught the fish How can I catch a fish and made another cake. and leave the lake a few?”
217

2. After reading the story, ask open-ended questions:
●● What would have happened to the lake if Joe hadn’t practiced conservation? ●● What else could Joe have done to solve his fishing problem? ●● What else might Joe eat that lives in his lake? ●● What animals might eat the fish that Joe likes to eat? What do the fish eat?
Additional learning experiences: OUTSIDE: Provide shovels and a dirt area for children to dig for fishing worms during self-selected activity time.
READING: Place storyboard characters near storyboard during self-selected activity time and encourage interested children to retell the story or create their own.
WRITING: Provide blank books and colored pencils for children to write and illustrate their own fishing stories.
218

Summer11 Fishing Permits
ART: Explore the need for fishing permits and the role of conservation agents
Children will: ●● Create a fishing permit ●● Discuss conservation agents and
what they do ●● Talk about why people need
fishing permits
You’ll need: ●● Washable stamp pad ●● Crayons or markers ●● Index cards ●● Pencils ●● Photo of each child (optional) ●● Scissors ●● Glue sticks ●● Actual fishing permit
! Notes from Sherri: Inviting a conservation agent or game warden to visit your school or center is a great way to introduce this learning experience. This activity came about after two agents visited our program. They talked with the children about their job and let them look through their telescopes and binoculars. They showed the children their vehicles and even parked at opposite ends of the parking lot and talked back and forth on radios. Following the visit from the agents, the children suggested we create fishing permits. They spent a great deal of self-selected time playing agent. They checked fishing permits, wrote tickets for littering, measured fish that children had caught (there is a length limit at our local conservation area lake), created and used telescopes and binoculars to watch one another, and talked back and forth on the radio. One child even recognized one of the agents and showed his fishing permit when the agent checked his family while they were fishing.
Did you know? Everyone in Missouri between the ages of 16 and 64 who fishes in state or federal water must have a fishing permit. These permits help the Missouri Department of Conservation keep track of the number of people fishing. The revenue from these permits helps pay for the management of our aquatic resources. This activity will help children to be aware of the need for fishing permits as well as introduce them to the role of conservation agents or game wardens.
Teacher preparation: ●● Obtain or borrow a fishing permit. ●● Take and print photos of children if using them. ●● Attractively arrange materials in an accessible area of the
classroom for children to use during self-selected activity time.
What to do: 1. As children show an interest in the area, show the actual fishing
permit. Talk with them about the need for fishing permits and about the information included on them.
219

2. Encourage children to create their own fishing permits. Brainstorm with them about what they might include on their permit. Possibilities might include their picture, a drawing of themselves, their fingerprint, their name, address, etc.
3. Talk with children about the job of conservation agents or game wardens. They are like police officers that protect wildlife. Conservation agents check fishing permits and enforce hunting and fishing regulations.
4. As children work, ask open-ended questions:
●● Why do people need fishing permits? ●● What needs to be on your fishing permit? ●● What do conservation agents have to do with fishing permits? ●● What else do conservation agents do beside check on people who are fishing?
Additional learning experiences: ART: Repeat this activity for hunting permits during deer, turkey, quail, squirrel or other hunting seasons.
FIELD TRIP: Visit a conservation agent at a state lake or wildlife area.
PRETEND PLAY: Put out conservation agent or game warden dress-up clothes, such as hats, shirts with a patches on the sleeves, badges, ticket books, pencils, binoculars, radios, etc. Provide billfolds and purses to keep the fishing permits in. Encourage interested children to use these during self-selected activity time.
220

Summer12 Let’s Go Fishing
PRETEND PLAY: Experience pretend fishing
Children will: ●● Experience fishing using poles,
magnets and paper fish ●● Discuss fishing
You’ll need: ●● Sturdy sticks or dowel rods (no
more than 3 feet long) ●● Heavy string (yarn does not work
well for this learning experience) ●● Magnets ●● Paper clips ●● Rulers ●● Laminated fish, turtles, crayfish,
snakes, frogs, and trash ●● Child size personal floatation
devices (optional) ●● Blocks for boat dock ●● Cardboard box boats ●● Blue plastic or cloth table cloth
! Notes from Sherri: This activity is a favorite in my classroom. It always provides an excellent opportunity to consider and apply the three levels of conservation. Generally when I make the activity available, the first children in the area catch all of the fish. This causes a problem for the remaining children who want to fish. Usually a class meeting is called where the children discuss how to manage the problem. They always discuss putting the activity away (preservation), limiting the number of fish each child can catch (management), and making more fish or throwing the fish back (restoration). It is conservation ethic directly applied to their experience!
Did you know? Fishing is a sport enjoyed by many people throughout Missouri. There are many different kinds of fish and other wildlife in creeks, streams, lakes, and ponds that are fun to catch. However, the Wildlife Code of Missouri determines which of these and how many of each may be kept by people fishing. This activity will help children explore some of the rules and the reasons for the rules concerning fishing. The activity will also give them a taste of the fun they can have while fishing.
Teacher preparation: ●● Make fishing poles by attaching a strong magnet to an arm’s
length of string and then tying it to a stick. ●● Place a paper clip on the end or mouth of each fish, turtle,
crayfish, snake, etc. ●● Use blocks or box boats and table cloth to create a fishing
hole in an area of the classroom or outside. ●● Arrange floatation devices, fishing poles and fish in the area.
What to do: 1. During self-selected activity time, encourage children to
experiment with fishing. Encourage children to wear the life jackets to emphasize water safety while fishing.
221

2. As children catch fish ask open-ended questions:
●● What happens when all of the fish are caught? ●● How can we make sure there are enough fish for everyone to catch some? ●● What should you do when you catch something other than fish? ●● What could you use the rulers for? ●● What happens if you fall in the water?
Related children’s literature: Prosek, J. ( 2004). A good day’s fishing. New York, NY: Simon & Schuster Books for Young Readers.
ISBN-10: 0689853270. A young boy goes through his tackle box describing what kind of fish each lure is designed to attract. The illustrations depict many fish that are native to Missouri.
Wells, E., & Dale, C. (2007). Wishing I was fishing. Edina, MN: Beaver’s Pond Press. ISBN-10: 1592981682. Experience a young boy’s anticipation of his first fishing trip of the year with his father in this realistic story.
Additional learning experiences: FIELD TRIP: Take children fishing at a lake.
HOME/SCHOOL CONNECTION: Encourage families to take advantage of the many fishing areas across Missouri. Make parents aware of local areas where they can take their young fishing partners fishing. Encourage them to spend a day fishing with their young explorers. Be sure to include the rules for each area. Possibly even arrange for families in the program to spend some time fishing together.
LARGE MOTOR: Show children how to play “fish and worms.” Half the children are “fish” and half are “worms.” The “fish” chase the “worms,” trying to catch their lunch.
NUTRITION: Serve sardines for snack as a tasting experience. Talk about what kind of fish they are and where they live. Try other kinds of fish to compare the tastes.
MANIPULATIVE: During self-selected activity time, put out a tackle box containing different kinds of fishing tackle (with hooks removed) for children to sort and classify.
PRETEND PLAY: During self-selected activity time place empty containers from cornmeal, oil, butter, and flour, as well as skillets, pots, and pans in the pretend play area for children to pretend to cook fish as they catch them.
PRETEND PLAY: In Missouri frogging is as popular as fishing. Set up a frogging experience for children during self-selected activity time. Cut out and laminate pictures of frogs. Attach a small strip magnet. Make frog gigs by hammering a nail into one end of a 1- to 1½-inch dowel rod. Use blocks to build docks and don’t forget the boats and life jackets. Be sure to include materials for cooking the frog legs as well.
OUTSIDE: Place a flat bottom boat, oars, and flotation devices on the play yard for children to pretend to fish and participate in various water sports.
OUTSIDE: During self-selected activity time place small fishing rods and reels and hula-hoops in the play yard. Encourage interested children to practice casting into the hula-hoop ponds.
SCIENCE: Bring some live fish into the classroom — for a short time — for the children to observe. Be sure to have sketch boards and science notebooks available for children to record their observations.
222

1 2 3 4 5 I caught a fish a- live. 6 7 8 9 10, (Count on fingers) (Pretend to catch a fish) (Count on fingers)
let him go a- gain. Why did I let him go? Be - cause he was too little (Pretend to let him go)
you know. If you keep them when they’re small, You’ll soon have none at all. (Shake finger at each other.)
I
Summer 13 Fish Song
MUSIC: Sing about the need for returning small fish to the water
Children will: ●● Sing a song releasing small fish
so they can grow bigger
You’ll need: ●● Group of children
Did you know? Good management of fish depends on the people who fish. When a fish is caught that is too small, it should be released so it can grow larger. This activity will help children become aware of what happens when little fish are not released back into their habitat.
Teacher preparation: ●● Practice singing the song with the motions.
What to do: 1. Teach children the song below with the motions.
2. After singing the song ask open-ended questions:
●● What happens when you don’t let the little fish go? ●● What are some other things people can do to make sure
the fish population is good for fishing?
223

Additional learning experiences: ART: During self-selected activity time, encourage children to use real fish to make fish prints on fabric. Use acrylic paints and fresh but dead, fish. Dry the fish thoroughly and paint one side with acrylic paint. Place fabric over the painted fish and press on fabric to make a beautiful fish print.
FIELD TRIP: Visit a fish hatchery.
MANIPULATIVE: Make a fish “memory” game using two copies of pictures of various fish indigenous to Missouri. Make available in the manipulative area during self-selected activity time.
NUTRITION: Serve goldfish-shaped crackers for snack. Allow children to serve themselves, taking as many crackers as they want. Talk about the levels of conservation, and encourage children to brainstorm a solution so everyone gets their share of crackers.
224

Summer 14 Frogs and Toads
READING: Hear about the life cycle of frogs and toads
Children will: ●● Listen to a story about the life
cycle of frogs and toads ●● Discuss the life cycle and habitats
of toads and frogs
You’ll need: ●● Storyboard ●● Related storyboard characters
! Notes from Sherri: Frogs and toads are amphibians easily observed throughout Missouri. This song works well after a frog or toad has been discovered in the play yard or someone has brought one in to share.
Did you know? All amphibians hatch from eggs and go through a metamorphosis. This story illustrates that process while clarifying some of the differences between frogs and toads. In addition, children will also hear more about predator and prey relationships and some ways frogs and toads avoid predators.
Teacher preparation: ●● Prepare storyboard characters. ●● Practice reading the story while placing the characters on the
storyboard at the appropriate times.
What to do: 1. Read the story on the following page to children, using the
storyboard and characters.
2. After sharing the story, ask open-ended questions:
●● Where do you think you might find frog or toad eggs? ●● What do tadpoles need to grow into frogs or toads? ●● What would have happened to the animals that ate
the eggs and tadpoles if there hadn’t been any eggs or tadpoles?
225

In a very shallow pond where you could walk and wade, in among the weeds and grass were gobs of gooey eggs.
Small black eggs in slimy jelly made in long thin lines, other eggs in big huge hunks wrapped up in globs of slime.
Along came a snapping turtle he ate a slimy batch. But many eggs were left untouched soon they began to hatch.
From the eggs came tadpoles. They wiggled when they swam. Along came a hungry fish and ate a bunch of them.
But more were left and as time passed, they began to grow. Soon they started sprouting arms, legs, and feet, and toes.
The tadpoles’ tails began to shrink. They used their legs to swim. Along came a hungry heron. He ate some more of them.
They swam up from the bottom to sunlight shinning there. They poked their heads out of the pond and started breathing air.
Up out of the water they crawled toward the shore. Along came a hungry snake and gobbled up some more.
They jumped out of the water. They hopped and jumped on logs. The tadpoles from the farm pond had changed to toads and frogs.
Out flashed their sticky tongues. They gobbled bugs and flies and whatever they could swallow if it happened to crawl by.
Some had skin smooth and sleek, their hops were strong and long. They could jump into the water, if they thought something was wrong.
They were better swimmers. They would sunbathe on a log. They were big and quick and strong, we always call them frogs.
Then there were the others. They were fat and short. Their skin was rough and covered with many bumpy warts.
They were small and stocky. Their hops were short and slowed. They weren’t good at swimming. They are known as toads.
Along came a coyote looking for a meal. He jumped into the toads and frogs. He gave a hungry squeal.
The frogs were fast. They jumped away as fast as they could go. But the coyote snapped a toad right up. The toad was much too slow.
Breakfast for the coyote. He started to bite down. Bleck! The toad, it tasted bad. He spit it on the ground.
The warts that cover toad skin make them horrible to eat. The coyote had to go and search for better tasting meat.
By John Griffin
226

Related children’s literature: Arnosky, J. (2002). All about frogs. New York, NY: Scholastic Reference. ISBN-10: 0590481649. This reference
book illustrates differences between frogs and toads and provides information about life cycles, calls, and predators.
Kalman, B., & Everts, T. (1994). Frogs and toads. New York, NY: Crabtree Publishing. ISBN-10: 086505715X. This nonfiction picture book shows the differences and similarities between frogs and toads.
Additional learning experiences: ART: Provide green and brown finger paint during self-selected activity time. Add a small amount of sand to the brown. Discuss differences in texture and how this relates to frog and toad skin.
ART: During self-selected activity time, offer colored chalk for children to create pond, lake and stream art. Provide scissors for them to cut out frogs and toads from their dry finger paintings (see above) and glue onto their chalk background. These could lead to a discussion of habitat and the needs of frogs and toads for survival. Children could then be challenged to include other elements in their habitat artwork.
LARGE MOTOR: Encourage children to act out metamorphosis of a frog or toad. Begin as an egg, develop into a tadpole and finally become a frog or toad. Some of the children can pretend to be predators at various points during development with tadpoles, frogs and toads trying to escape.
LARGE MOTOR: During self-selected activity time, play leapfrog. Discuss how far children can hop. Compare their leg lengths with the distance of their hops.
MANIPULATIVE: Laminate pictures of Missouri frogs and toads. Place in the manipulative area during self-selected time and encourage children to sort them by type.
MUSIC: Teach children the following song to the tune of Frere Jacques:
Frogs and toads. Frogs and toads. Toads and frogs. Toads and frogs. Frogs have long legs. (Place hands far apart.) Toads have short legs. (Place hands close together.) Frogs go jump. (Make hands jump high.) Toads go hop. (Hop hands just a little.)
MUSIC: Listen to Ribbit Ribbit (Syrigos, Jan. 1996. Critter rock. Jefferson City, MO: Missouri Department of Conservation) and move to the music.
NUTRITION: Make green finger Jell-O and Cocoa Krispie treats. Cut with a frog cookie cutter and serve for snack. As the children are eating, discuss the differences between the frog and toad skin.
READING: During self-selected activity time, encourage interested children to act out or retell the story using the storyboard characters.
SCIENCE: Bring in a frog and a toad and place them in the science area for children to observe during self-selected activity time. Make science notebooks available for children to record their observations. Encourage children to design a habitat for each. How would they be alike? Different? Be sure to return the frog and toad back to their original habitat after children finish observing them.
227

228

Five Four green speckled frogs, sitting on a big old log, eat - ing some Three Two (Hold up five fingers) One
most de - lic - ious bugs, YUM! YUM! I jumped in with a swish, he got eaten (Rub tummy) (Jump with one finger)
by a fish. Now there are 4 green speckled frogs RIBBIT! RIBBIT! (Hold up four fingers) 3
2 1 no
Summer 15 Five Green
Speckled Frogs MUSIC: Sing about a food chain
Children will: ●● Sing a song about a food chain
You’ll need: ●● A group of children
Did you know? Animals must get their food by feeding on other plants and animals. This song will introduce children to the idea of the food chain.
Teacher preparation: ●● Practice singing the song.
What to do: 1. Teach children the following song:
229

2. After singing the song with the children discuss what happened to the bugs and frogs in the song. Ask open-ended questions like these:
●● What do you think happened to the fish? ●● What could the fish eat if there weren’t any frogs? ●● What might eat the fish? ●● What do the bugs eat?
Related children’s literature: Kapchinske, P., & Rogers, S. (2011). Hey diddle diddle: A food chain tale. Mount Pleasant, SC: Sylvan Dell
Publishing. ISBN-10: 1607181401. This book provides a catchy rhyme about several different food chains in one ecosystem. Further activities and online resources are also included to challenge and stretch young readers’ thinking.
Additional learning experiences: NUTRITION: Make peanut butter play dough by mixing 1 cup peanut butter with ¼ cup honey and adding enough dry milk to keep it from being sticky. Serve for snack and encourage children to create various creatures and then pretend they are the predators devouring their meal.
SCIENCE: Bring a frog or turtle for children to observe. Encourage them to catch bugs or worms to feed it.
230

Summer 16 You Can’t Find Me!
OUTSIDE: Experience the concept of camouflage and discover its importance
Children will: ●● Pretend to be animals looking for
camouflaged food in the grass ●● Discuss how camouflage helps
animals hide from their predators
You’ll need: ●● Small strips of natural colored
yarn, thin ribbon, or colored toothpicks (an equal number of pieces each color selected)
●● Chart paper and marker
Did you know? One of the many ways animals protect themselves from predators is with camouflage. This activity will allow children to explore the concept of animal camouflage and its importance.
Teacher preparation: ●● Scatter pieces of yarn, ribbon or colored toothpicks in grassy
area. ●● Create a graph on the chart paper to illustrate the number of
each color found by the children.
What to do: 1. Take children outside and explain that they are going to be
hungry birds looking for a tasty worm or caterpillar represented by the material selected (yarn, ribbon, or toothpicks).
2. Encourage children to find as many “worms” or “caterpillars” as possible within a specified time.
3. Give children several minutes, and then have them bring their “lunches.” Encourage children to sort their lunch into colors and count the number of each color they found. Then fill in the graph.
4. Talk about the number of worms and caterpillars caught. Refer to the graph and ask open-ended questions like these:
●● Which worms or caterpillars were the easiest to find? Why? ●● Which worms or caterpillars were the hardest to find? Why? ●● How do you think color helps animals? ●● How does the animal’s covering help it survive?
231

Related children’s literature: Schwartz, D.M., Schy, Y., & Kuhn, D. (2007). Where in the wild? Camouflaged creatures concealed … and revealed.
Berkley, CA: Tricycle Press. ISBN-10: 1582462070. This clever “I spy” book shows close-up photos of camouflaged animals and features verse descriptions. Foldout pages reveal the animals.
Walsh, E.S. (2003). Dot & Jabber and the big bug mystery. Orlando, FL: Harcourt Children’s Books. ISBN-10: 0152165185. Dot and Jabber are two mouse detectives who try to solve the mystery of where the creatures in their meadow are hiding.
Additional learning experiences: ART: During self-selected activity time, put out paint and paper of the same color.
FIELD TRIP: Take children on a hike in a natural area. Hide several of the animal cards along the trail. Challenge children to discover the animals. Discuss which animals were easiest to find, which were most difficult to find and why.
MANIPULATIVE: Cover three boxes and place a feather on the end of one, a scrap of fur on another, and a scrap of smooth, scale-like material on the third. During self-selected activity time, encourage interested children to sort the animal cards by skin type. Discuss how the skin type helps camouflage the animal in its habitat.
OUTSIDE: Teach the children to play hide and seek. As they become experienced with the game, talk about which places are the best to hide in and why. Remember that it is difficult for young children to remain hidden until they are found. Remaining hidden is one of the ways that camouflage keeps animals from being detected.
232

Summer 17 Foxy Predators
LARGE MOTOR: Play a game to find out the relationship between predator and prey
Children will: ●● Pretend to be a predator looking
for a meal or prey trying to keep from being eaten
●● Discuss the relationship between predator and prey
You’ll need: ●● Brown construction paper
(rabbit) ●● Red construction paper (fox) ●● Scissors ●● Stapler
! Notes from Sherri: Predator/prey relationships are an important part of nature. Prey animals serve as food for predators, which help keep prey populations healthy. Without predators to limit their numbers, prey populations will exceed their food sources and eventually starve to death. Without prey, predators, too, would eventually starve. The delicate balance between the two is vital to a healthy ecosystem.
To help children gain a sense of this balance, discuss what happens to the fox if he can’t find any rabbits, as well as what happens to the rabbits if there aren’t any foxes.
Did you know? Animals that eat and hunt other animals are called predators. The animals they hunt are called prey. In this activity, children will explore the relationship between predators and prey.
Teacher preparation: ●● Scout an outdoor area appropriate for playing this game. ●● Create headbands for children by cutting long strips of red
and brown construction paper. (Two pieces may need to be attached together to go around child’s head.)
●● Cut fox and rabbit ears and attach them to the appropriate colored headband.
What to do: 1. Gather children together and explain that you are going to play
a hunting game. (This game works best in a large, outdoor space with lots of hiding places.) The foxes, or predators, are very hungry and are going hunting for their prey, the rabbits. But the rabbits don’t want to be eaten.
2. Give the rabbit headbands to the rabbits and the fox headbands to the foxes.
3. The foxes should cover their eyes and slowly count to ten while the rabbits go and hide.
233

4. After reaching ten, the foxes search for and try to sneak up on the rabbits. Once tagged, the prey have been eaten and should sit on the ground and wait until all the prey have been eaten or until you announce the game is over.
5. After playing the game once, discuss what happened. Ask open-ended questions:
●● How can the prey keep from being eaten? ●● What can the fox do to make sure it gets some food? ●● What happens to foxes that don’t catch any rabbits? ●● What would happen if there weren’t any foxes? Rabbits?
Additional learning experiences: GROUP: Encourage children to talk about other predator and prey relationships. Be sure to stress the need for both in the food chain. Discuss the proportional numbers of predator and prey types in the wild. Many prey animals must be present for few predator animals to survive.
GROUP: Demonstrate how each link of the food chain is dependent on the others by making a paper chain with pictures of the food chain on it. For example, the first chain could be a corn plant, followed by a grasshopper, frog, and finally, a person on the last link. Remove the link in the middle and talk about what happens to the others in the food chain.
MANIPULATIVE: Make a matching game with the animal cards where children match predators with their prey. Place the game in the manipulative area during self-selected activity time.
NUTRITION: Discuss the source of various food items eaten during lunch or snack.
OUTSIDE: Try playing the game with varying numbers of rabbits and foxes. Play once with fewer rabbits than foxes. Discuss what happens. Play another time with many more rabbits. Again, discuss how the game changes. Be sure to brainstorm what the children think happens to the animals when the numbers change.
234

HNU
Summer
18 arvest Time TRITION: Cook up some biscuits and identify
products made from wheat
Children will: ●● Discuss the relationship between
wheat and flour ●● Measure ingredients to make
biscuits
You’ll need: ●● Several ripe wheat plants (entire
plant, including roots and grain) ●● Hand lenses or magnifying
glasses ●● 2 cups flour ●● 4 teaspoons baking powder ●● ½ teaspoon salt ●● ½ teaspoon cream of tartar ●● 2 teaspoons sugar ●● ½ cup butter or margarine ●● 2/3 cup milk ●● Large bowl ●● Measuring cups and spoons ●● Cookie sheet ●● Biscuit cutter ●● Large spoon for stirring ●● Oven for baking the biscuits
Notes from Sherri: !This activity works best during wheat-harvest time, when children may have the chance to visit a local wheat field. Your nearest MU Extension office can help you find a local wheat grower, who may be open to having your class visit his or her farm.
Did you know? Wheat is a form of domestic grass. It is an important food for animals and people. The wheat harvest in Missouri generally occurs in June. This activity will help children identify food products made from wheat and enable them to see and taste it in its raw form.
Teacher preparation: ●● Gather materials. ●● Disinfect table for cooking purposes. ●● Wash hands and encourage children who want to participate
to wash their hands.
What to do: 1. Place wheat plant and hand lenses in science area during self-
selected activity time. Encourage interested children to examine the plant and discuss where it came from.
2. Encourage children to help make biscuits with the above ingredients. Let them sift and mix the ingredients, knead the dough, cut out the biscuits, and place them on the cookie sheet.
3. As children work, encourage them to taste the raw wheat grains and flour. Discuss the difference in taste, texture, color, etc., between the grains and the milled flour.
4. As they are working, ask open-ended questions:
●● How do you think wheat is made into flour? ●● What else do farmers use wheat for? ●● What are some other ways people use flour?
5. Bake biscuits on an ungreased cookie sheet for 10 to 12 minutes at 450F. The recipe makes 10 to 12 medium biscuits.
6. Serve biscuits for snack. Talk about the process of change the wheat underwent, from wheat plant to biscuit.
235

Related children’s literature: Watterson, C., & Sorrentino, M. (2011). An edible alphabet: 26 reasons to love the farm. Berkeley, CA:
Tricycle Press. ISBN-10: 1582464219. This fact-filled, colorful book takes the reader on a delightful A-to-Z tour of the modern farm.
Additional learning experiences: BLOCKS: Put out toy tractors and various pieces of farm equipment during self-selected activity time.
DISPLAY: Display pictures of the wheat, from seed to plant to flour to products.
FIELD TRIP: Visit a farm where wheat is being harvested.
MANIPULATIVE: Provide a bowl and pestle for children to try grinding the wheat into flour. Experiment with other grinding utensils, such as rocks, large sticks, etc.
NUTRITION: Use farm-animal cookie cutters to cut out biscuits. Talk about why the farmer has each animal and how each animal helps people.
NUTRITION: Make biscuits using whole-wheat flour and compare the results. Be sure to discuss nutritional value as well as texture, color, taste and smell.
NUTRITION: Provide honey with the biscuits and discuss where honey comes from.
PRETEND PLAY: Place farmer dress-up clothes (overalls, caps, and bandannas) in the dress-up area during self-selected activity time.
PRETEND PLAY: Place wheat, soybeans or corn in the sensory table for children to explore. Talk about where the grain came from. Be sure to feed it to the birds or local wildlife after children are finished exploring it.
READING: Select one of the many versions of The Little Red Hen to read and act out.
236

Summer 19 Rock Collection
FIELD TRIP: Explore rocks
Children will: ●● Create a rock
collection ●● Discuss reasons to
collect particular rocks
You’ll need: ●● Egg cartons (one
per child) ●● Cotton batting ●● Outdoor area with
interesting rocks ●● Hand lenses ●● Science notebooks ●● Colored pencils ●● Camera (optional)
! Notes from Sherri: Children love rocks, which are easy and inexpensive to collect and fun to explore. This activity occurs almost yearly in my classroom. It is generally initiated when one of the children collects rocks on the playground, brings in a collection from a family outing, or buys some polished stones. One of the children’s favorite field trips is to our local state university. They always collect a number of rock specimens in the piles of discarded rocks behind the geology building. Along with that trip, we often visit the local bead shop and create rock jewelry. This outing gives us a chance to discuss all the various ways people use rocks.
Did you know? The earth’s crust is made up of rocks and rock material. We dig it, tunnel through it, and build on it. All plants, animals, and people live on it. This experience will encourage children to begin or continue their exploration of rocks.
Teacher preparation: ●● Scout an appropriate site for rock collection. ●● If the collection site is a public area, review the rules. ●● Label egg cartons with the location where the rocks will be collected.
What to do: 1. Provide each child with an egg carton and cotton batting. Suggest that each
section be lined with cotton batting to protect the rock specimens. This will provide children with space to collect and display at least twelve rocks.
2. Talk with children about examining their rocks and making wise choices. They should be responsible for carrying and keeping track of their own collection.
3. As children take a break or finish their collections, encourage them to examine their rocks with the hand lenses and compare their finds with others’.
4. Use science notebooks for recording data and sketches. Model collecting, examining, writing, and sketching for the children, but accept anything they identify as writing or drawing.
5. As children work, ask open-ended questions:
●● What are some of the colors you find in the rocks you collected? ●● Which rocks look like each other or like rocks your friends found? ●● Where do you think rocks come from? ●● What do you plan to do with your collection?
237

6. Take pictures to identify and record key features of the collection site. It will also provide a basis of comparing other sites you visit.
Related children’s literature: Baylor, B., & Parnall, P. (1985). Everybody needs a rock. New York, NY: Aladdin. (Original work published 1974).
ISBN-10: 0689710518. This is a great book to read before going on a rock-hunting expedition. A young child lists the rules for finding just the perfect rock.
Aston, D.H., & Long, S. (2012). A rock is lively. San Francisco, CA: Chronicle Books. ISBN-10: 1452106452. This beautifully illustrated picture book shows many different types of rocks and their unique properties. Easy words describe the rocks for the youngest readers.
Additional learning experiences: ART: During self-selected activity time, encourage interested children to create granite paper using glitter crayons. Use hand lenses to examine the various colors in several different pieces of granite. Encourage children to select three or four glitter crayons that match the colors in the granite rocks. Sit on a rough concrete surface and make a rubbing of the concrete beginning with the lightest color. Completely cover the paper. Move the paper slightly as each color is added from lightest to darkest. Try placing the granite on top of the paper when finished and see how well the rock matches the paper.
FIELD TRIP: Visit an art and/or anthropology museum and explore how people use rocks in art and tool making.
HOME/SCHOOL CONNECTION: Encourage families to collect rocks from trips and outings with their children. Set up a special display area in the classroom where children can share their finds, along with pictures and notes about the addition.
MANIPULATIVE: During self-selected activity time, encourage children to sort rocks by size, color, shape, or texture. Introduce a variety of descriptive words, such as rough, sharp, crumbly, bumpy, smooth, shiny, speckled, striped, multicolored, flat, etc., as the children work with their rocks.
MANIPULATIVE: Provide semiprecious gemstones purchased in a rock or nature shop for children to touch, explore, and sort during self-selected activity time. Children can match them with pictures on a poster or in a book.
MANIPULATIVE: Collect double pictures of various types of rocks and minerals to make a memory game for children to play during self-selected activity time.
OUTSIDE: Encourage children to explore the play yard after a hard rain to see if any new rocks have been exposed.
PRETEND PLAY: Place boots, goggles, maps, small rock hammers, notebooks, pencils, gloves, compasses, backpacks, rock and mineral field guides, and canteens or water bottles in the pretend play area for children to pretend to be rock hounds during self-selected activity time.
SCIENCE: During self-selected activity time, add a balance scale to the science area for children to weigh and compare their specimens.
SCIENCE: Place a “feely” box in the science area for children to use during self-selected activity time. Place rocks of several different textures (smooth, rough, sharp, pitted, etc.) in the box for children to identify texture through touch alone.
238

Summer 20 What Is a Mineral?
SCIENCE: Explore minerals and mine for gold
Children will: ●● Mine for minerals in the sand box ●● Discuss how minerals become
useful manufactured items ●● Talk about ways people use
minerals
You’ll need: ●● Gold chain ●● Copper penny ●● Copper pipe ●● Silver coin ●● 3 cans spray paint: gold, silver,
copper ●● Gravel ●● Sandbox ●● Sifters ●● Shovels ●● Hand lenses ●● Science notebooks and pencils
or metallic colored pencils
Did you know? Minerals are naturally occurring substances that are neither animal nor plant. Minerals are made of many particles. Most minerals consist of these particles in a regular order, forming crystals. Rocks are made up of one or more different minerals. Gold, silver, and copper are all considered minerals. This activity will expose children to minerals, how they are mined, and how people use them.
Teacher preparation: ●● Paint gravel with gold, silver, and copper spray paint. ●● Bury the gold, silver, and copper nuggets throughout the
sandbox. ●● Inside, arrange an attractive display of the gold, silver, and
copper items in the science area, placing the arrangement where children can handle and examine the specimens.
●● If available, add actual samples of gold, copper, and silver.
What to do: 1. Provide sifters and shovels for children to mine for minerals
during self-selected activity time. Compare this to how minerals are obtained.
2. During self-selected activity time, encourage interested children to examine the items and talk about them.
3. Make science notebooks available for recording their observations.
4. Discuss how the minerals mined on the playground change into items like those in the science area. Ask open-ended questions:
●● How did this mineral get into this shape? ●● How do people use this mineral? ●● What would happen if people used up all of the minerals?
239

Additional learning experiences: GROUP: Label objects around the room made from minerals.
PRETEND PLAY: During self-selected activity time, put out mining clothes for children to wear and pretend to mine for minerals. Clothing might include coveralls and hardhats or bike helmets with flashlights duct-taped to the top.
SCIENCE: During self-selected activity time, make a crystal garden with interested children. Mix ¼ cup salt, ¼ cup bluing, and ¼ cup ammonia in a jar, and pour over 6 charcoal briquettes placed in a pie plate. Repeat the solution every two days. Make science notebooks and hand lenses available for children to record their observations.
240

Summer 21 Concrete Hand Prints
OUTSIDE: Explore how people use rocks and minerals
Children will: ●● Make concrete ●● Create a concrete impression
of their hand ●● Talk about how people use
concrete and how concrete changes the land
You'll need: ●● Heavy paper plates (large
enough for a child’s hand) ●● Sand ●● Cement ●● Water ●● Paper towels ●● Bucket
Did you know? Concrete is made up of water and different kinds of rocks and minerals. This activity will show children one way people use rocks and minerals.
Teacher preparation: ●● Gather materials. ●● Select an appropriate area for mixing concrete.
What to do: 1. During self-selected activity time, encourage interested
children to fill a paper plate with wet sand.
2. After filling the plate with sand, guide children to press one hand into the sand, making a handprint. If sand is too dry to retain print, mix water with sand and try again.
3. In a bucket, mix four parts sand, and one part cement. Add water until the mixture is the consistency of thick cake batter.
4. Encourage children to fill their hand imprints with concrete.
5. After the concrete dries, children can paint or decorate their concrete hands.
6. As children work, ask open-ended questions:
●● What are some ways that people use concrete? ●● Which minerals do you think it takes to make concrete? ●● What is the purpose of a concrete truck? ●● How does concrete change the land?
Related children's literature: Barton, B. (1981). Building a house. New York, NY: Greenwillow
Books. ISBN-10: 0688842917. In this simple picture book, Barton demonstrates all of the steps that go into building a house.
241

Additional learning experiences: BLOCKS: During self-selected activity time, put toy concrete trucks in the block area for the children to pretend to mix and pour concrete. Provide large pieces of gravel for children to try building various stone structures.
FIELD TRIP: Visit to a rock quarry.
FIELD TRIP: Visit a site where workers are pouring concrete. As you are traveling to the site, look for rocks and stone used in architecture in your town.
PRETEND PLAY: During self-selected activity time, put out coveralls in the dress-up area for children to pretend to be concrete truck drivers hauling concrete.
PRETEND PLAY: Place pea gravel in a sensory table or large tub for children to pour, dump, feel, and experiment with during self-selected activity time.
SCIENCE: Set up a rock display, using a special table covering, unbreakable mirrors, baskets for displaying rocks, etc. Be sure to include several hand lenses, flashlights, and balance scales so children can explore and investigate the rocks during self-selected activity time. Place science notebooks and colored pencils in the area for children to write about and sketch rocks.
242

Summer 22 The Quest for Shiny Rocks
SCIENCE: Experiment with ways to make rocks shiny
Children will: ●● Attempt to shine rocks using
various solutions ●● Discuss how rocks get shiny
You'll need: ●● Smooth, round, beautiful rocks
(collect these along and in streams or river beds or purchase some at a local garden shop)
●● Toothpaste (gel and paste) ●● Baby oil ●● Petroleum jelly ●● Paste wax ●● Baking soda ●● Vinegar ●● Old toothbrushes ●● Two tubs of water ●● Paper towels ●● Recording device (optional) ●● Camera (optional)
! Notes from Sherri: One summer the children were particularly intrigued by how rocks got shiny. It takes about a month to tumble rocks in a rock tumbler so, although we had started the tumbler, the children were still seeking answers. They asked everyone they knew until finally someone told them that she heard that toothpaste cleaned rocks. They tried both gel and paste but this small suggestion started them thinking. The toothpaste cleaned the rocks but didn’t make them shiny. They knew about the chemical reaction of baking soda and vinegar from past experiments. They thought this might have some effect on the rocks. They still weren’t shiny enough. From here, they tried petroleum jelly and baby oil. Although they made the rocks shiny, they weren’t pleasant to touch. Wax was their next suggestion and provided the most satisfactory results for this particular group of children. That summer, they spent a great deal of time polishing rocks. It was a soothing, successful activity that they requested again and again. The children may have different ideas and experiences about how to make rocks shiny. Be sure to support their theory testing by gathering the materials for them to test their hypotheses.
Did you know? Rocks and pebbles roll along streambeds, becoming smooth and round after many, many years. However, their full beauty doesn’t appear until they have been polished or varnished. Children will enjoy experimenting with various solutions to make their rock collections shiny.
Teacher preparation: ●● Cut paper towels into small squares. ●● Arrange rocks, water, paper towels and toothbrushes
attractively in the science area.
What to do: 1. During group time, talk with children about how they think
rocks become shiny. Record their conversation. Brainstorm materials they think might make rocks shiny.
243

2. Suggest that children try out various solutions on the rocks. Each day or two provide a different solution for shining the rocks. One day the children might try paste toothpaste, the next day baby oil, etc.
3. Take pictures of the rocks each day after children have finished shining them.
4. As children try the various polishes, brainstorm other ideas for polishing the rocks. Provide other materials as they are suggested.
5. As the children work, ask open-ended questions:
●● What happens when you use this solution on the rocks? ●● What happens if you rub harder? ●● Which shining solution do you think works best? ●● How do you think jewelry stores keep gemstones shiny? ●● Where could we find out how to make rocks shiny?
6. Transcribe the recordings from each of your discussions to help decide further areas of exploration and study.
Additional learning experiences: ART: During self-selected activity time, provide spray bottles of water for children to keep rocks wet (shiny). Set out watercolors, brushes, and paper for children to paint rock portraits.
DISPLAY: Display the pictures and transcriptions of children’s discussions to encourage revisiting and reflecting on the experience.
NUTRITION: Make finger Jell-O in various gemstone colors. Create Rice Krispies rocks by molding Rice Krispies treats into rock shapes. Cocoa Krispies can be substituted for half or all of the Rice Krispies to illustrate different colorings in rocks. Serve these for snack. Be sure to discuss the various gemstones represented and, if possible, put up a poster of gemstones or talk about the birthstones of the children in your group.
SCIENCE: Encourage children to help prepare and set up a rock tumbler, a machine with a rotating drum. Pebbles are placed inside the tumbler. In addition to the pebbles, grinding powder and water are added. Because the process is very noisy, it needs to be done in an isolated spot. It also takes several weeks to polish the pebbles. Tumbled rocks can be used for sorting, making jewelry, or just admiring.
244

Family Invitation Caleandnda r
of Activities
245
Making home/school connections Encourage families to support nature learning at home. Send home the letter and the monthly calendars on the following
pages. Include the dates for the month, and add other special events such as field trips, parent meetings, etc. If you have a
lending library, you might make titles available for families to check out to support classroom learning and suggested activities.

246

Dear Family,
Young children are naturally curious about the
world around them.
Please join us in helping your child discover and
explore nature in your yard or neighb
orhood.
Each month you will receive a calendar page of
quick, easy activities you can do with your child.
Some activities are merely questions, some
recommend books to share, some suggest
stories to make up, and others suggest singing
familiar childhood tunes together.
Spend some time with your child, ask questions,
and listen carefully to his or her responses.
You will be surprised what young children can
teach us! Thank you for helping inspire a sense
of wonder in your child. Feel free to send
interesting finds to school and share
your
questions with us. We loo f
k forward to all o
the discoveries we will make together this year!
Inspire your child’s sense of wonder
247

248

SundayFind a flower and count the petals.
Find a spec i al spot outside and sit quietly t ogetherand snuggle.
Read a bookabout trees.
Sit under a tree and share afavorite book.
Paint a pictureof a tree.
Monday Write your name in the dirt with a stick.
Play hide andseek outside.
F i nd the tallesttree in yourneighborhood.
Find a plant in yourne i ghborhood the samehe i ght as you.
Look for some tree roots.
Tuesday Explore a crack in the sidewalk.
Go on an ou tside adventure and tell the story ofthe adventure at bed t ime.
S li ce an apple inh alf sideways and fi nd the star.
Make a tree bark rubbing.
E a t an apple andtalk about where it came from.
WednesdayTake a walk around yourneighborhoodand noticepeople-madethings.
Sing The Itsy Bitsy Spider.
Look for squirrels.
P l ay with somemaple tree seeds(helicopters).
Count all of thered cars on yourw ay home.
ThursdayServe corn for dinner and talkabout where itcame from.
Play with your shadow.
W h y does fall have twonames—falland autumn?
Find a tree you can reach all the way around.
Celebrate thefall equinox.
Friday Go o u ts i de, close your eyes, andname all thatyou hear.
Hug a tree.
Find a tree with rough bark.
Go out s ide,smell the air,and describe thesmel l s with colors.
Look for evidenceof animals in yourneighborhood.
Saturday Go on a picnic.
Stay up and look for the moon.
Make up a story about a tree.
Make your name with sticks.
Pretend to be a squirrel.
September
249

October
250
Sunday Find 10 different leaves.
Look for fall wildflowers.
Invent an outside game together to play in the leaves.
Explore a tiny square of land in your neighborhood.
Read with a flashlight together.
Monday Describe sounds that make you think of fall.
Collect some seeds and plant them.
Find a leaf that has been nibbled on. Make up a story about what did the nibbling.
Lie in the grass and read a book about fall.
Talk about how you know it is fall.
Tuesday Wonder about something beautiful.
Find two different yellow leaves.
Rake some leaves and sing “This is the way we rake the leaves” to the tune of Mulberry Bush.
Pile up some leaves and jump in them.
Look and listen for migrating waterfowl.
Wednesday Twirl like leaves falling from trees.
Read a book about insects.
Write your name with chalk on the sidewalk.
Find as many red leaves as you can and count them.
Find a bug and make up a story about it.
Thursday Find leaves the same size as your hand.
Make a leafy crown to wear.
Look for leaves that have the same shape.
Look for a place where an animal has been.
Roast some pumpkin seeds then take them on a picnic in your yard or neighborhood.
Friday Describe how the air smells.
Find a tree with nuts or seeds on it.
Play Simon says outside.
Go outside and find two shades of orange.
How are apples and pumpkins alike? Different?
Saturday Collect leaves then sort them.
Pile leaves all over yo u rself, then lie still and listen.
Make a leaf collage.
Play I spy outside.
Pretend to be a bat.

November Sunday
Watch the sun set and wonderabout the colors.
Explore a new outdoor place.
Read a book with nature facts.
Make a list of ways to thankthe trees.
Draw aroundyour shadowin the morning and again in the even i ng.
Monday Share a story about your day.
Look for animal signs in your neighborhood.
Collect and count nuts.
Look for bird nests in the trees.
Look for birds out s ide.
Tuesday Find something that fl oats in apuddle.
Tell a story about a past outdooradventure.
Look for alphabet letters in nature.
Sing a song fromyour childhood.
Notice and talk about tree si lhoue ttes.
Wednesday Look for round orcircular things innature.
Make up a silly song aboutbeing outside.
Find a plant as tall as your knee.
List what you are thankful for.
Pretend to be preparing tohibernate when you eat dinner.
Thursday Look at the cloudsand des c ribe what you see.
Talk about how the weathermakes you feel.
Go outside andsing If You’re Happy and You Know It.
Thank a tree.
Look for an evergreen tree(one that stays green year round).
Friday Pretend to be an in s ect in your yard.
Make a list of ways your familyenjoys theoutdoors.
Fi n d a tree that takes two people to reach around.
E xp ress g r atitude to someone you care about.
Look for f ro st in the early morn i ng.
Saturday Wonder aboutwhat happensto leaves after they fall.
Stay up to look at the stars.
Wonder aboutwhat happens tothe stars during the day.
Find a place where you can feel the sun.
Share a story about a natureadventure.
251

December Sunday
Read a book about birds together.
Create a blanket cave to hibernate in.
Go on a winter picnic.
Go outside and hop like a bird on the ground.
Make a bird using recycled materials from around your house.
Monday Look for birds in your yard or neighborhood.
Look for insects in your yard. Wonder about what happened to them.
Read a book about winter.
Move like a winter tree blowing in the wind.
Make up a story about a bird.
Tuesday Look outside for something naturally shiny.
Go outside and move like a bird flying.
Go outside and look for things that are bumpy.
Name the colors of winter.
Why do some birds leave for winter and some stay?
WednesdayWhat makes the weather change?
Name some animals that stay active all winter.
Make a list of words to describe the moon.
Celebrate the winter solstice.
Pretend to be a bird you saw at the feeder.
Thursday Look for squares in nature.
Take paper and pencil outside and sketch a bird.
Go outside and draw a winter tree.
Look for animal signs in your yard/ neighborhood. How do you know an animal made them?
Look for triangles in nature.
Friday Go on a flashlight adventure.
Wonder together about the length of days and nights.
Sing Jingle Bells.
Use some of your easel paintings to wrap holiday gifts.
Look at a bird field guide.
Saturday Go on an adventure through your neighborhood.
Go through your toys and donate some to charity.
Hang a bird feeder and keep it stocked with seeds.
Paint a bird picture.
Go on a birding expedition in your neighborhood.
252

January Sunday
Read a book about animals in winter.
Spend time outside doing a winter sport.
Go outside and play freeze tag.
F i nd a warm placein your yard to snuggle together.
Explore a frozen puddle.
Monday Run races thentalk about theenergy it took torun them.
Ma k e tracks in the snow.
Go on a treasure hunt to findthings in your home that useenergy.
Read a sto ry about an an i mal that lives inMisso u ri.
What makes ice?
Tuesday W hy does it snow?
How do you know when it is winter?
Ma k e a list ofwinter sports.
Ma k e rubbings of several different shoe soles.C ompa re them.
Ma k e a list ofwin t er smells.
Wednesday Talk about where the food you have for dinner camefrom.
Use recycledmateri als to create a winter m a sterpiece.
Sing Row, Row, Row Y our B oat.
Name someclothes you only wear in w i nter.
Invent ani ce game.
Thursday Go outside and move like snow falling.
Talk about how you heat your house.
Wonder about the st a tic electricity inyour hair.
Put a pan of wateroutside and t a lk about what youthink w ill happen to it.
Go outside in thedark and l i sten, then go i n side and draw p i ctures of what youh e ard.
Friday Go outside, breathe deeply, then name all ofthe smells.
Look for animal hideou ts in your yard orneighbor ho od.
Color a picture of the sun.
Cut out pictures of people in winter from magazines and catalogs.
C o mpa r e night sounds to daysounds.
Saturday Go for ahike in your neighbor ho od and talk about w i nter changes.
Go on a fl ashlight adventure outside in the dark.
Go play in thepark. Where did y u get theenergy?
Shovel snow together.
Make tracks in the snow and hide. Then challenge someone to follow the clues to fi nd you.
253

February Sunday
Jump, drag your feet, run, and hop in the snow. Compare the tracks from each movement.
Play outside in the cold then talk about how your nose and fingers look and feel.
Go outside and invent a winter game.
Go for an adventure to a new place, then tell a story about it.
Examine a tree branch up close.
Monday Go outside and look for your shadow.
Name some animals who hunt at night. Imitate some night animal sounds.
Make up a story about an animal waking up after a long winter sleep.
Draw an animal you recently read about.
Tell a story about a Missouri animal in the winter.
Tuesday What makes a shadow?
What happens to the snow?
Why do some animals sleep all day and hunt all night?
Wonder about how food gets to the grocery store.
Brainstorm all of the things you could do with a used egg carton.
Wednesday Go for a winter picnic with hot chocolate and marshmallows.
Make a list of your favorite things about winter.
Use one of your paintings to make a card for someone you love.
Call a loved one and look at the moon together.
Decorate a paper grocery bag to make a litter bag for your car.
ThursdayBring in an icicle, predict what will happen, then watch.
Try to see your breath outside. Why can you see it?
Go outside and stretch like an animal waking up after a long sleep.
Read a factual book about a Missouri animal.
Find something multicolored out the window on your way home.
Friday Read a book about snow.
Bring some snow inside and watch it melt.
Make a list of words to describe winter.
Watch a bird at a bird feeder, then imitate its movements.
Color a picture of the moon.
Saturday Draw a map of a favorite place.
Make a valentine for the birds.
Look for heart shapes in nature.
Spend time in the yard or neighborhood and notice how it is changing.
Draw a picture of yourself outside in winter.
254

March Sunday
Make a drawing of the clouds.
Blow bubbles in the wind.
Look for leprechauns.
Make something that will move in the wind.
Plant some flowers.
Monday How dohibernating animals knowwhen to wake up?
Go ou tside, feel the wind, and singa loud song.
Brainstorm ways the wind helpspeople, plants,and animals.
Look for tracks in the mud.
Ma k e a list ofthings that youcan do outside in the spring that you can’t do inw i nter.
Tuesday Make sounds like someone walkingin the mud.
Describe green.
Draw a picture of spring.
What makesthe wind?
Make up a funny song aboutspring.
Wednesday Name someanimals that like the mud.
How do you knowwhen it is spring?
Find five di fferentshades of green.
Make a list ofwords that describe the color of the g r ass.
Go outside andde s cribe wh a tspring sounds like.
Thursday Where does watercome from?
Go on an adventure andlook for signs of spring.
Go outside and describe w h at spri ng smells li k e.
Share a springstory.
Look for placesin your yard orneighborhood where an animal might hide from the rain.
Friday Draw a windy picture.
Read a book about something green.
Make up a story aboutleprechauns inyour yard.
Celebrate the spring equinox.
W r ite your name in the mud.
Saturday Explore leaf litter and draw whatyou fi nd.
Dance in the wi n d.
Look for four-leaf clovers.
Explore the soil in your backyard—smell, touch, and look at it carefully.
Hop aroundoutside likea rabbit.
255

April Sunday
Look for signs of rabbits in your neighborhood.
Wash some clothes and hang them outside to dry.
Explore your backyard or neighborhood in the rain.
Play float and sink with natural items in a puddle.
Have a mud pie party.
Monday Play with an umbrella outside even if it isn’t raining.
Look for a rainbow of colors in your yard or neighborhood.
Splash in some puddles.
Look for worms in your yard or neighborhood.
Read a story about spring weather.
Tuesday Make sounds like the rain.
Wonder about where water in the faucet comes from.
How could you make a colored shadow?
Hop around your yard or neighborhood like a frog.
Dig up some soil and take it to school.
Wednesday Notice the shapes in the clouds.
Find yellow in your yard or neighborhood.
Count the dandelions in your yard or neighborhood.
Draw circles, squares, and triangles in the mud.
Talk about the flowers you see as you drive home.
Thursday Read a spring story and act it out.
Sing You Are My Sunshine.
Paint a picture with thin mud.
Cut out pictures from a seed catalog and make a collage.
Describe how spring sounds.
Friday Find a tree that has buds.
Read a book about rabbits and talk about if it could be factual.
Look for spring wildflowers.
How do birds know when to fly back north?
Visit a pond or lake in the evening and listen for spring peepers.
Saturday Play in the mud.
Identify all of the plants in your yard or neighborhood a rabbit would eat.
Find two different wildflowers that are the same color.
Find two different flowers and compare the flower petals.
Go for a bird-listening walk.
256

257
May Sunday
Look outsidefor insects, then draw one.
Go on a springpicnic.
Use naturalmaterials to builda house for fairies.
Find some tra cks in the mud and make up a story about whathappened.
Visit the park and climb a tree.
Monday Make up wordsto describe the clouds.
Read a book about bu tterfl ies.
Paint with water on the concrete or sidewalk.
Read a frog story. Talk about if it could be factual.
Wonder aboutwhere the watergoes when it rains.
Tuesday Where do insects spend the night?
Compare theshapes of the petals on two or more wildflowers.
Wonder abouthow baby birds learn to sing the right song.
Move aroundyour yard or neighborhoodlike a turt l e.
Make a list of animals that hatch from eggs.
Wednesday Use naturalmaterials tomake a boat to fl oat in a pudd l e.
Look for signs of in s ects in your neighborhood.
Make up a story about fairiescaring for plants and animals inyour yard or neighborhood.
Play shadow tag.
Find places in your yard or neighborhoodwhe re a f rog might hide.
Thursday Look for ca t erpillars.
Sing I’m Bringing Home a Baby Bumblebee.
Read a buggy s to ry and act it out.
Make a list of the wild creaturesthat might livein your yard orneighborhood.
Pretend to be a butterfly and fl utter aroundoutside.
Friday Count the legs on an insect.
Paint a rainbow.
Find the warmest and the coolest place in your ya r d.
Stay up late to chase fireflies.
Find a new leaf and describe how it feels.
Saturday Stroll around the neighborhoodand talk about the changessince winter.
Whisper a sto ry by t h e light of the moon.
Go outside anddraw around your shadow, thentry to lose your shadow.
Go to the park and look forbird ne s ts.
Go for a walk and fi nd a wildflowerwith more than four petals.

June Sunday
Find a special hiding place in your yard or neighborhood.
Read a book about spiders.
Recycle newspapers together.
Visit a creek or stream and go wading.
Take some fresh strawberries on a picnic and talk about where they came from.
Monday Count the clouds in the sky.
Roll up in a ball like a roly poly and roll around outside.
Where do spidersgo in the rain?
Make a list of creatures that live in the water.
Crawl around outside like a spider. Find places to hide from predators.
Tuesday Wiggle like a worm.
Pick all of the dandelions you can find and count them.
Look for ants in your yard or neighborhood.
Draw a spider. Count the legs on your drawing.
Wonder if fish notice the weather.
WednesdayMake a list of creatures that eat worms.
What do spiders eat?
How do you know when it’s summer?
Make up a spider story.
Share a fishing story.
ThursdayLook for spiders in your yard or neighborhood.
Make up a silly worm song.
Explore an insect field guide.
Celebrate the summer solstice.
Sing The Itsy Bitsy Spider.
Friday Dig for worms.
Explore the grass in the early morning dew.
Read a summer story. Talk about if it could be factual.
Wonder about what eats spiders.
Listen for summer sounds and imitate them.
Saturday Play lightning bug tag with flashlights in the dark.
Go for a walk and pick up litter.
Draw a picture of yourself in summer.
Stay up late and play with your moon shadow.
Explore your yard or neighborhood on your hands and knees.
258

JulySunday
Draw a picture of a f r og or toad.
Vis i t a pond orlake and look for wildlife.
Look for holesin your yard orneighborhood and wonder about them.
Paint a p i ctureof your favori te animal.
E at fresh peachesand examine the pits.
Monday Look for something speckled.
What do frogs eat?
Make a list offavorite ou t door summer activities.
Make up a sillysong about f r ogs.
P r etend to be a f ur ry c r eature l ook ing for food.
Tuesday What is apr edator?
Hide a stuffed animal in t he grass and sneakup on it like you’re a predator.
Lie in the grass and listen. Name the summer sounds you hear.
N a me fivenonliv ing things in your neighborhood.
How do animals know where to get water?
WednesdayTalk about the weather.
Describe summer.
Eat gummyworms like a frog. Wonder about where frogs fi nd worms.
What eats frogs?
F i nd places inyour yard orneighborhood where frogsmi ght hide.
Thursday F ind five living things in your yard orneighborhood.
Play leap frog.
Find a soft leaf.
Go ou tside and playMother may I?
Paint a picture of a frog or toad in its habitat.
Friday Read a story about food.
Look for toads in the evening.
H o w do animals know when tosleep?
Read a factualbook about frogs.
Move around your yard orneighborhood like a frog.
Saturday W a tch the sunset, then paint it.
Make up asummer p r edator/ prey game andplay it ou tside.
Pick up sticks and put them in a pile then count them.
Go outside andplay shadow tag.
Stay up late and look at the stars, then make up a story about them.
259

August Sunday
Wander down your street or road and look for treasure.
Go exploring in your neighborhood and look for wayspeople use rocks.
Go for a walk andfind a big rock. Explore what is under it.
Visit a pond or lake and skip or throw rocks in the water.
Make a breakfast together and talk about where the food came from.
Monday Why do some trees grow fruit and some trees grow nuts?
Find 10 small rocks.
Think of words that rhyme with rock.
Write your name with rocks.
Wonder about where rocks come from.
Tuesday Make or find a hideout outside. Hide and make up a story about using the hideout.
Why are rocks different sizes, textures, and colors?
Arrange your rocks in circles.
What is air? How do you know it’s there?
Arrange your rocks by size.
WednesdayFind a prickly plant or leaf.
Make up a song about rocks.
Draw a picture of yourself doing something outside in summer.
Make up a game to play with rocks.
Read a book about the moon.
ThursdayWhat happens to the moon during the day?
Count your rocks.
Wonder about where rocks come from.
Find two rocks that are the same color.
Line up your rocks in a straight line, then measure how many hands long the line is.
FridayMake up a tag game to play outside in the evening.
Use your favorite rock to play hopscotch.
Read a book about rocks.
Pretend to be a rock, then talk about what you discovered.
Look for the moon during the day and wonder why it is visible.
SaturdayStart a rock collection.
Look for summer wildflowers. Name all of the colors you see.
Paint or draw a picture on a rock and give it to someone you love.
Glue some rocks together to create a rock sculpture.
Go to a park and play. Wonder about the air you feel when you swing and when you run.
260

Selected Childrens Literature
and Field Guides A wide collection of literature and field guides
enhances classroom learning and helps you strengthen home/school connections with families.
261

262

Selected Children’s Literature The following list of children’s literature is arranged by theme or topic. Both fiction and nonfiction books have been included, and selections were based on quality, realistic portrayal of animals in their natural habitat, accurate and factual information, and relevance to concepts children might construct from this topic.
Air and Water Asch, F. (1995). Water. New York, NY: HarperCollins. (Original work published 1948).
Berger, M. A., & Mirocha, P. (1994). Oil spill! New York, NY: HarperCollins.
Branley, F. M., & O’Brien, J. (2006). Air is all around you. New York, NY: HarperCollins. (Original work published 1986).
Cole, J., & Degen, B. (2004). The magic school bus at the waterworks. New York, NY: Scholastic. (Original work published 1986).
Dorros, A. (2000). Follow the water from brook to ocean. New York, NY: HarperCollins. (Original work published 1991).
Amphibians and Reptiles Arnosky, J. (2009). Slither and crawl: Eye to eye with reptiles. New York, NY: Sterling.
Berger, M. A., & Lloyd, M. (2000). Look out for turtles! New York, NY: HarperCollins. (Original work published 1992).
Berkes, M. (2000). Marsh music. Brookfield, CT: Millbrook Press.
French, V., & Bartlett, A. (2003). Growing frogs: Read and wonder. Sommerville, MA: Candlewick Press.
George, W. T., & George, L. B. (1989). Box turtle at long pond. New York, NY: Greenwillow Books.
Gibbons, G. (1994). Frogs. New York, NY: Holiday House. (Original work published 1993).
Hawes, J., & Fraser, A. (2000). Why frogs are wet. New York, NY: HarperCollins. (Original work published 1975).
Heller, R. (1995). How to hide a meadow frog and other amphibians. New York, NY: Grosset and Dunlap. (Original work published 1986).
Kalan, R., & Barton, B. (1989). Jump, frog, jump! New York, NY: Greenwillow Books. (Original work published 1986).
Lauber, P., & Keller, H. (2002). Snakes are hunters. New York, NY: HarperCollins. (Original work published 1988).
Mazer, A., Johnson, S., & Fancher, L. (1994). The salamander room. New York, NY: Dragonfly Books. (Original work published 1991).
Pallotta, J. (1990). The frog alphabet book. Watertown, MA: Charlesbridge.
Pfeffer, W., & Keller, H. (1994). From tadpole to frog. New York, NY: HarperCollins.
Animals in General Aronsky, J. (2002). Field trips: Bug hunting, animal tracking, bird watching, shore walking. New York, NY: HarperCollins.
Barrett, J., & Barrett, R. (1988). Animals should definitely not wear clothing. New York, NY: Atheneum Books for Young Readers. (Original work published 1970).
Holzwarth, W., & Erlbruch, W. (2007). The story of the little mole that went in search of whodunit. New York, NY: Harry N. Abrams. (Original work published 1993).
Jenkins, S., & Page, R. (2003). What do you do with a tail like this? New York, NY: Houghton Mifflin Company.
Nail, J. D. (1996). Whose tracks are these? A clue book of familiar forest animals. New York, NY: Roberts Rinehart.
Ryder, J., & Wolff, A. (2000). Each living thing. Orlando, FL: Harcourt Children’s Books. 263

Ryder, J., & Cherry, L. (1988). The snail's spell. London, UK: Puffin.
Yee, W. H. (2003). Tracks in the snow. New York, NY: Henry Holt and Company.
Birds Arnosky, J. (2011). Thunder birds: Nature’s flying predators. New York, NY: Sterling.
Cherry, L. (2001). Flute’s journey: The life of a wood thrush. Orlando, FL: Harcourt School Publishers. (Original work published 1997).
Ehlert, L. (1996). Feathers for lunch. Orlando, FL: Sandpiper. (Original work published 1990).
Gibbons, G. (2001). Ducks! New York, NY: Holiday House.
Gibbons, G. (2006). Owls. New York, NY: Holiday House.
Jenkins, P. B., & Rockwell, L. (1995). A nest full of eggs. New York, NY: HarperCollins.
Johnston, T., & Ray, D. K. (2000). The barn owls. Watertown, MA: Charlesbridge.
Mazzola Jr., F. (1997). Counting is for the birds. Watertown, MA: Charlesbridge.
Sayer, A. P., & Jenkins, S. (2007). Vulture view. New York, NY: Henry Holt and Company.
Yolen, J., & Schoenherr, J. (1987). Owl moon. New York, NY: Philomel.
Camping Baylor, B., & Parnall, P. (1997). The other way to listen. New York, NY: Aladdin. (Original work published 1978).
Bunting, E., & Cocca-Leffler, M. (2003). I don’t want to go to camp. Honesdale, PA: Boyds Mills Press. (Original work published 1996).
George, K. O., Kiesler, K. (2001). Toasting marshmallows: Camping poems. New York, NY: Clarion Books.
Huneck, S. (2001). Sally goes to the mountains. New York, NY: Harry N. Abrams, Inc.
Van Dusen, C. (2003). A camping spree with Mr. Magee. San Francisco, CA: Chronicle Books.
Williams, V. B. (1984). Three days on a river in a red canoe. New York, NY: Greenwillow Books.
Wolff, A. (2006). Stella & Roy go camping. San Francisco, CA: Yosemite Conservancy. (Original work published 1999).
Clouds Birmingham, J. (2007). Cloudland. New York, NY: Red Fox.
de Paola, T. (1975). The cloud book. New York, NY: Holiday House.
Locker, T. (2000). Cloud dance. Orlando, FL: Harcourt Children’s Books.
Rau, D. M., & Shea, D. (2005). Fluffy, flat, and wet: A book about clouds. Minneapolis, MN: Picture Window Books.
Shaw, C. G. (1988). It looked like spilt milk. New York, NY: HarperCollins. (Original work published 1947).
Sherman, J., & Wesley, O. (2003). Shapes in the sky: A book about clouds. Minneapolis, MN: Picture Window Books.
Energy Berger, M. A., & Croll, C. (2001). Switch on, switch off. New York, NY: HarperCollins. (Original work published 1989).
Cole, J., & Degen, B. (1999). The magic school bus and the electric field trip. Logan, IA: Perfection Learning. (Original work published 1997).
264

Fish Kalan, R., & Crews, D. (1992). Blue sea. New York, NY: Greenwillow Books. (Original work published 1979).
Lionni, L. (1973). Swimmy. New York, NY: Dragonfly Books. (Original work published 1963).
Pfeffer, W., & Keller, H. (1996). What’s it like to be a fish? New York, NY: HarperCollins. (Original work published 1973).
Food Chains Facklam, M., & Long, S. (1999). Bugs for lunch. Watertown, MA: Charlesbridge.
Hutchings, P. (1971). Rosie's walk. Logan, IA: Perfection Learning.
Jenkins, S. (2001). What do you do when something wants to eat you? Orlando, FL: Sandpiper. (Original work published 1997).
Lauber, P., & Keller, H. (1994). Who eats what? Food chains and food webs. New York, NY: HarperCollins.
Habitat Dunphy, M. (2007). Here is the wetland. Berkeley, CA: Web of Life Children’s Books. (Original work published 1997).
Falwell, C. (2008). Scoot! New York, NY: Greenwillow Books.
Fleming, D. (1995). In the tall, tall grass. New York, NY: Square Fish. (Original work published 1991).
Fleming, D. (1998). In the small, small pond. New York, NY: Henry Holt and Company. (Original work published 1993).
Fraser, M. A. (1998). Where are the night animals? New York, NY: HarperCollins
George, L. B. (1998). In the woods: Who’s been here? New York, NY: Greenwillow Books. (Original work published 1995).
George, L. B. (1996). Around the pond: Who’s been here? New York, NY: Greenwillow Books.
George, L. B. (2006). In the garden: Who’s been here? New York, NY: Greenwillow Books.
Gibbons, G. (1996). Caves and caverns. Orlando, FL: Sandpiper. (Original work published 1993).
Gibbons, G. (1998). Marshes & swamps. New York, NY: Holiday House.
Kitchen, B. (1995). And so they build. Cambridge, MA: Candlewick Press.
O’Connor, J., & Glasser, R. P. (2009). Fancy Nancy: Explorer extraordinaire! New York, NY: HarperCollins.
Silver, D. M., & Wynne, P. (1997). One small square: Swamp. New York, NY: McGraw-Hill.
Silver, D. M., & Wynne, P. (1997. One small square: Pond. New York, NY: McGraw-Hill.
Silver, D. M., & Wynne, P. (1997). One small square: Backyard. New York, NY: McGraw-Hill.
Silver, D. M., & Wynne, P. (1997). One small square: Woods. New York, NY: McGraw-Hill.
Harvest and Seeds Beskow, E. (1997). Pelle's new suit. Edinburgh, UK: Floris Books. (Original work published 1912).
Carle, E. (1991). The tiny seed. New York, NY: Simon & Schuster Books for Young Readers. (Original work published 1970).
dePaola, T. (1982). Charlie needs a cloak. New York, NY: Aladdin Books. (Original work published 1973).
Ehlert, L. (2002). Market day. Orlando, FL: Sandpiper Press. (Original work published 2000).
265

Gibbons, G. (1987). The milk makers. New York, NY: Aladdin. (Original work published 1985).
Gibbons, G. (2000). Apples. New York, NY: Holiday House.
Gibbons, G. (2007). The vegetables we eat. New York, NY: Holiday House.
Hall, Z., & Halpern, S. (1999). It's pumpkin time! New York, NY: Scholastic Paperbacks.
Jordan, H. J., & Krupinski, L. (2000). How a seed grows. New York, NY: HarperCollins. (Original work published 1992).
Maestro, B., & Maestro, G. (2000). How do apples grow? New York, NY: HarperCollins. (Original work published 1992).
Pfeffer, W., & Hale, J. G. (2004). From seed to pumpkin. Logan, IA: Perfection Learning.
Rockwell, A., & Rockwell, L. (2011). Apples and pumpkins. New York, NY: Aladdin. (Original work published 1988).
Slawson, M. B. (1998). Apple picking time. New York, NY: Dragonfly Books. (Original work published 1994).
Insects Arnosky, J. (2012). Creep and flutter: The secret world of insects and spiders. New York, NY: Sterling Children’s Books.
Allen, J., & Humphries, T. (2004). Are you a dragonfly? London, UK: Kingfisher.
Berger, M. A., & Lloyd, M. (1998). Chirping crickets. New York, NY: HarperCollins.
Bunting, E., & Shed, G. (1999). Butterfly house. New York, NY: Scholastic Press.
Cassie, B., & Pallota, J. (1995). The butterfly alphabet book. Watertown, MA: Charlesbridge.
Cole, J., & Degen, B. (1998). The magic school bus: Inside a beehive. New York, NY: Scholastic, Inc. (Original work published 1996).
Ehlert, L. (2001). Waiting for wings. Orlando, FL: Harcourt Children’s Books.
French, V., & Voake, C. (2009). Caterpillar caterpillar. Cambridge, MA: Candlewick Press. (Original work published 1993).
Gibbons, G. (1991). Monarch butterfly. New York, NY: Holiday House. (Original work published 1989).
Heiligman, D., & Weissman, B. (1996). From caterpillar to butterfly. New York, NY: HarperCollins.
Heller, R. (1992). How to hide a butterfly and other insects. New York, NY: Gross & Dunlap. (Original work published 1985).
Himmelman, J. (1998). A ladybug’s life. New York, NY: Children’s Press.
Himmelman, J., & Stewart, M. (1998). A luna moth’s life. New York, NY: Children’s Press.
Jenkins, S. (2012). The beetle book. Boston, MA: Houghton Mifflin Books for Children.
Lionni, L. (1995). Inch by inch. New York, NY: HarperCollins. (Original work published 1960).
Martin Jr., B., & Ehlert, L. (2011). Ten little caterpillars. La Jolla, CA: Beach Lane Books.
Pallotta, J., & Masiello, R. (1987). The icky bug alphabet book. Watertown, MA: Charlesbridge.
Parker, N. W., & Wright, J. R. (1988). Bugs. New York, NY: Greenwillow Books. (Original work published 1987).
Rinehart, S. C., & Hovemann, A. C. (2004). Eliza and the dragonfly. Nevada City, CA: Dawn Publications.
Ryder, J., & Cherry, L. (1996). Where butterflies grow. London, UK: Puffin. (Original work published 1989).
Sturges, P., & Vojtech, A. (1997). Ten flashing fireflies. New York, NY: North-South Books. (Original work published 1995).
Zoehfeld, K. W., & Buchs, T. (1996). Ladybug at orchard avenue: Smithsonian’s backyard. Norwalk, CT: Soundprints.
266

Land Use Baker, J. (2004). Home. New York, NY: Greenwillow Books.
Burton, V. L. (1978). The little house. Orlando, FL: Sandpiper. (Original work published 1942).
Cooney, B. (1982). Miss Rumphius. New York, NY: Viking Juvenile.
McLerran, A. (2004). Roxaboxen. New York, NY: HarperCollins Publishers. (Original work published 1991).
Fleming, D. (2000). Where once there was a wood. New York, NY: Square Fish. (Original work published 1991).
McCloskey, R. (1948). Blueberries for Sal. New York, NY: Viking Press.
Peet, B. (1981). Farewell to shady glade. Orlando, FL: Sandpiper. (Original work published 1966).
Yolen, J. (1995). Letting swift river go. London, UK: Little, Brown Books for Young Readers. (Original work published 1992).
Mammals Arnosky, J. (2008). Wild tracks! A guide to nature’s footprints. New York, NY: Sterling.
Aronsky, J. (1999). Otters under water. London, UK: Puffin.
Banks, K., & Hallensleben, G. (2007). Fox. New York, NY: Farrar, Straus and Giroux. (Original work published 1998).
Gibbons, G. (2000). Bats. New York, NY: Holiday House. (Original work published 1999).
Pallotta, J. (1990). The furry alphabet book. Watertown, MA Charlesbridge.
Sherro, V., & Davis, A. (2000). Chipmunk at hollow tree lane: Smithsonian’s backyard. Norfolk, CT: Soundprint. (Original work published 1994).
Plants and Flowers Bunting, E. (1999). Sunflower house. Orlando, FL: Sandpiper. (Original work published 1996).
Ehlert, L. (1987). Growing vegetable soup. Orlando, FL: Harcourt Children’s Books.
Gibbons, G. (1993). From seed to plant. New York, NY: Holiday House. (Original work published 1991).
Krauss, R., & Johnson, C. (2004). The carrot seed. New York, NY: HarperCollins. (Original work published 1945).
Krauss, R., & Oxenbury, H. (2007). The growing story. New York, NY: HarperCollins. (Original work published 1947).
Pallotta, J., & Evans, L. (1989). The flower alphabet book. Watertown, MA: Charlesbridge Publishing.
Samson, S. M., & Neel, P. (1994). Fairy dusters and blazing stars: Exploring wildflowers with children. Lanham, MD: Roberts Rinehart Publishers.
Stewart, S. , & Small, D. (1997). The gardener. New York, NY: Farrar, Straus and Giroux.
Rocks Brandenberg, A. (1990). Fossils tell of long ago. New York, NY: HarperCollins. (Original work published 1972).
Branley, F., & Lloyd, M. (2005). Earthquakes. New York, NY: HarperCollins. (Original work published 1990).
Christian, P., & Lember, B. H. (2000). If you find a rock. New York, NY: Harcourt Children’s Books.
Cole, J., & Degen, B. (1989). The magic school bus: Inside the earth. New York, NY: Scholastic Press. (Original work published 1987).
267

Gans, R., & Keller, H. (1997). Let’s go rock collecting. New York, NY: HarperCollins.
Hiscock, B. (1999). The big rock. New York, NY: Aladdin. (Original work published 1988).
Hurst, C. O., Stevenson, J. (2001). Rocks in his head. New York, NY: Greenwillow Books.
Lionni, L. (1995). On my beach there are many pebbles. New York, NY: HarperCollins. (Original work published 1961).
Murphy, S., & Smith, C. B. (2000). Dave’s down-to-earth rock shop. New York, NY: HarperCollins.
Rosinsky, N. M. (2002). Rocks: Hard, soft, smooth, and rough. Minneapolis, MN: Picture Window Books.
Tomecek, S., & Poling, K. (2010). Jump into science: Rocks and minerals. Washington, DC: National Geographic Children’s Books.
Seasons Beskow, E., M. (2008). Around the year. Edinburgh, UK: Floris Books. (Original work published 1927).
Branley, F. M., & Maestro, G. (2005). Sunshine makes the seasons. New York, NY: HarperCollins. (Original work published 1985).
Burton, V. L. (1974). Katy and the big snow. Orlando, FL: Sandpiper. (Original work published 1971).
Ehlert, L. (1995). Snowballs. Orlando, FL: Harcourt Children’s Books.
Gibbons, G. (1995). The reasons for seasons. New York, NY: Holiday House.
Gomi, T. (2000). Spring is here. Boston, MA: Houghton Mifflin Company. (Original work published 1989).
Keats, E. J. (1962). The snowy day. New York, NY: Viking Juvenile.
Maass, R. (1992). When autumn comes. New York, NY: Square Fish. (Original work published 1990).
Provensen, A., & Provensen, M. (2001). The year at maple hill farm. New York, NY: Aladdin. (Original work published 1978).
Rylant, C., & Kastner, J. (2000). In November. Orlando, FL: Harcourt Children’s Books.
Sams II, Carl R., & Stoick, J. (1999). Stranger in the woods: A photographic fantasy. Milford, MI: Carl R. Sams II Photography.
Tudor, Tasha. (2001). Around the year. New York, NY: Simon & Schuster Books for Young Readers. (Original work published 1957).
Updike, J., & Hyman, T. S. (1999). A child’s calendar. New York, NY: Holiday House.
Yee, W. H. (2012). Summer days and nights. New York, NY: Henry Holt and Company.
Soil Bailey, J., & Lilly, M. (2006). Cracking up: A story about erosion. Minneapolis, MN: Picture Window Books.
Glaser, L., & Krupinski, L. (1994). Wonderful worms. Brookfield, CT: Millbrook Press. (Original work published 1992).
Fredericks, A. D., & DiRubbio, J. (2001). Under one rock: Bugs, slugs and other ughs. Nevada City, CA: Dawn Publications.
Himmelman, J. (2000). An earthworm’s life. New York, NY: Scholastic.
268

Spiders Berger, M. A., & Schindler, S. D. (2003). Spinning spiders. New York, NY: HarperCollins.
Gibbons, G. (1993). Spiders. New York, NY: Holiday House.
Trees and Forests Brenner, B., & Leonard, T. (2004). One small place in a tree. New York, NY: HarperCollins.
Gerber, C., & Evans, L. (2009). Winter trees. Watertown, MA: Charlesbridge.
Lauber, P., Keller, H. (1994). Be a friend to trees. New York, NY: HarperCollins.
Maestro, Betsy. 1994. Why do leaves change colors? New York, NY: HarperCollins.
Udry, J. M., & Simont, M. (1987). A tree is nice. New York, NY: HarperCollins. (Original work published 1956).
Weather Branley, F. M., & Maestro, G. (1990). Tornado alert. New York, NY: HarperCollins. (Original work published 1988).
Branley, F. M., & Hale, J. G. (1997). Down comes the rain. New York, NY: HarperCollins.
Branley, F. M., & Kelley, T. (1999). Flash, crash, rumble and roll. New York, NY: HarperCollins. (Original work published 1964).
DeWitt, L., & Croll, C. (1993). What will the weather be? Logan, IA: Perfection Learning.
Gibbons, G. (1990). Weather words and what they mean. New York, NY: Holiday House.
Hutchins, P. (1993). The wind blew. New York, NY: Aladdin. (Original work published 1974).
Kalan, R., & Crews, D. (1991). Rain. New York, NY: Greenwillow Books. (Original work published 1978).
Shulevitz, U. (1998). Snow. New York, NY: Farrar, Straus and Giroux.
Tresselt, A., & Duvoisin, R. (1988). White snow, bright snow. New York, NY: HarperCollins. (Original work published 1947).
Tresselt, A., & Duvoisin, R. (1988). Hide and seek fog. New York, NY: HarperCollins. (Original work published 1965).
Zolotow, C., & Graham, M. B. (1989). The storm book. New York, NY: HarperCollins.
269

Field Guides Denison, E. (2008). Missouri wildflowers (6th ed.). Jefferson City, MO: Missouri Department of Conservation.
(Original work published 1978).
Eaton, E. R., & Kaufman, K. (2007). Kaufman: Field guide to insects of North America. New York, NY: Houghton Mifflin Company.
Eder, T., & Sheldon, I. (2002). Animal tracks of Missouri and Arkansas. Auburn, WA: Lone Pine Publishing.
Halfpenny, J. C., & Telander, T. (2006). Scats and Tracks of the Midwest: A field guide to the signs of seventy wildlife species. Guilford, CT: Falcon Publishing.
Heitzman, J. R., Heitzman, J. E., Love, K., Larsen, L., & Rathert, J. (Eds). (1987). Butterflies and moths of Missouri. Jefferson City, MO: Missouri Department of Conservation.
Johnson, T. R., & Love, K. (Eds.) (2000). The amphibians and reptiles of Missouri (2nd rev. ed.). Jefferson City, MO: Missouri Department of Conservation.
Kurz, D. (1997). Shrubs and woody vines of Missouri (2nd ed.). Jefferson City, MO: Missouri Department of Conservation.
Kurz, D. (2003). Trees of Missouri. Jefferson City, MO: Missouri Department of Conservation.
Kurz, D. (2012). Ozark wildflowers (2nd ed.). Guilford, CT: Falcon Publishing.
Levi, H. W., Levi, L. R., & Strekalovsky, N. (2001). Spiders and their kin (Rev. ed.). New York, NY: St. Martin’s Press.
Miller, J., & Buchanan, S. (2010). Show-me herps. Jefferson City, MO: Missouri Department of Conservation.
Reinke, M. (2006). Show-me bugs. Jefferson City, MO: Missouri Department of Conservation.
Schwartz, C. W., & Schwartz, E. R. (2002). The wild mammals of Missouri (2nd rev. ed.). Columbia, MO: University of Missouri Press.
Roedel, M., & Kennedy, G. (2006). Compact guide to Missouri birds. Auburn, WA: Lone Pine Publishing.
Tekiela, S. (2006). Trees of Missouri field guide. Cambridge, MN: Adventure Publications.
Wright, A. B., & Peterson, R. T. (Ed.). (1998). Peterson first guide to caterpillars (2nd ed.). New York, NY: Houghton Mifflin Company.
270
Related Documents


