Windows Movie Maker Lesson 3 – Creating a movie 1 | Page

Welcome message from author
This document is posted to help you gain knowledge. Please leave a comment to let me know what you think about it! Share it to your friends and learn new things together.
Transcript
Windows Movie MakerLesson 3 – Creating a movie
1 | P a g e
Lesson objectives:
In this lesson, you will learn how to:
Trim and Split video clips.
Import and adjust music and photos
Use transitions, titles and credits
Add visual effects to photos and videos
2 | P a g e

1. How to trim and Split video clips.
Sometimes, when you use a video in your movie, you don’t want to use all
of it. You may want to hide unwanted part of your movie.
To do that, you have two ways:
Split: dividing the video into parts, and delete the unwanted ones.
Trim: cropping the video by choosing the start time and the end time of the
part you want.
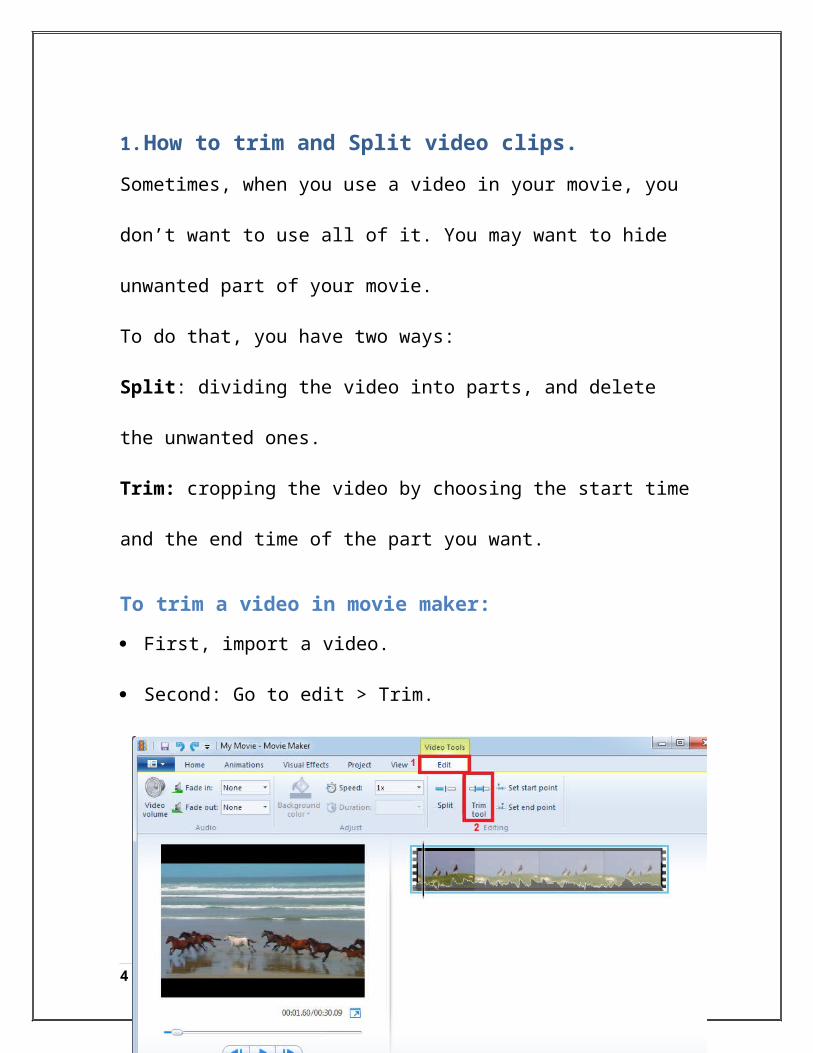
To trim a video in movie maker:
First, import a video.
Second: Go to edit > Trim.
3 | P a g e
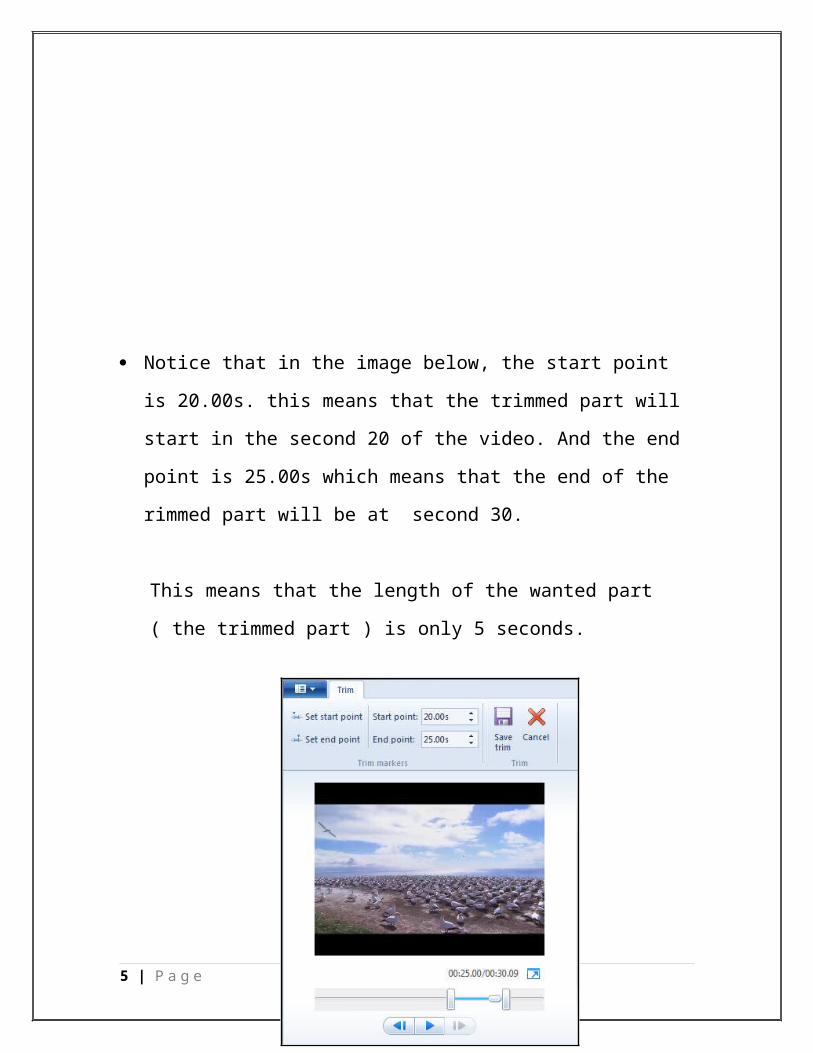
Notice that in the image below, the start point is 20.00s. this means that
the trimmed part will start in the second 20 of the video. And the end
point is 25.00s which means that the end of the rimmed part will be at
second 30.
This means that the length of the wanted part ( the trimmed part ) is only
5 seconds.
Save the trimmed part.
4 | P a g e
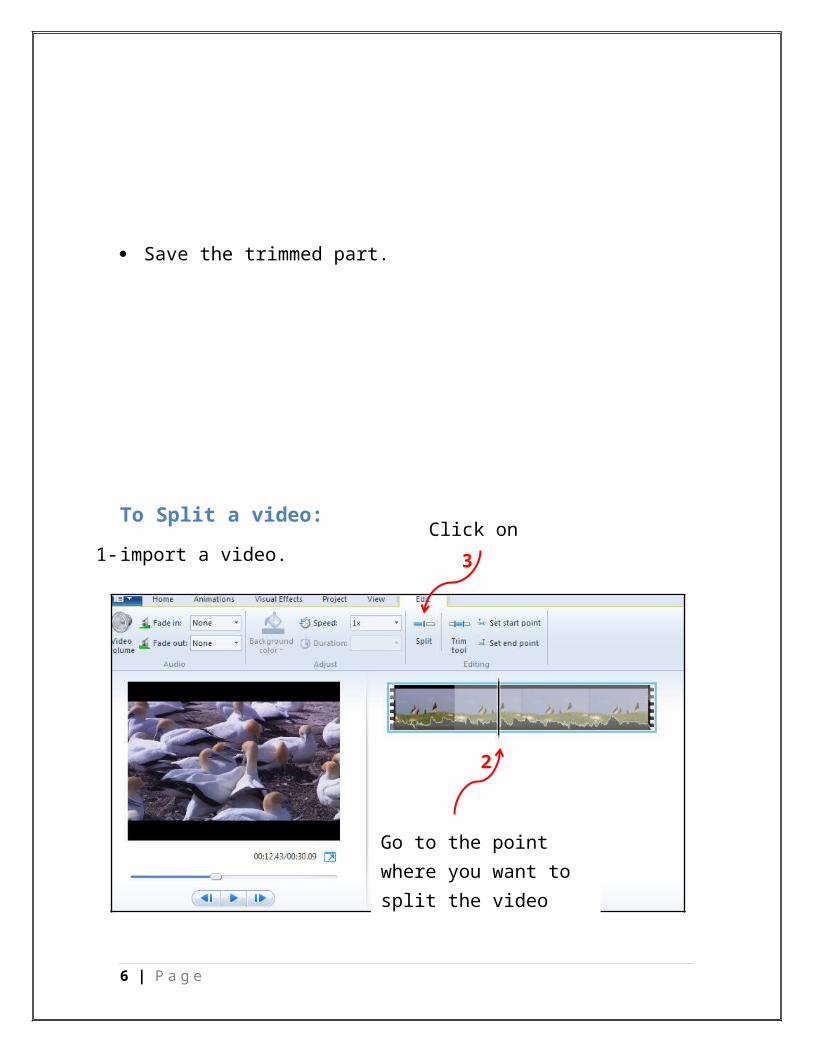
To Split a video:
1- import a video.
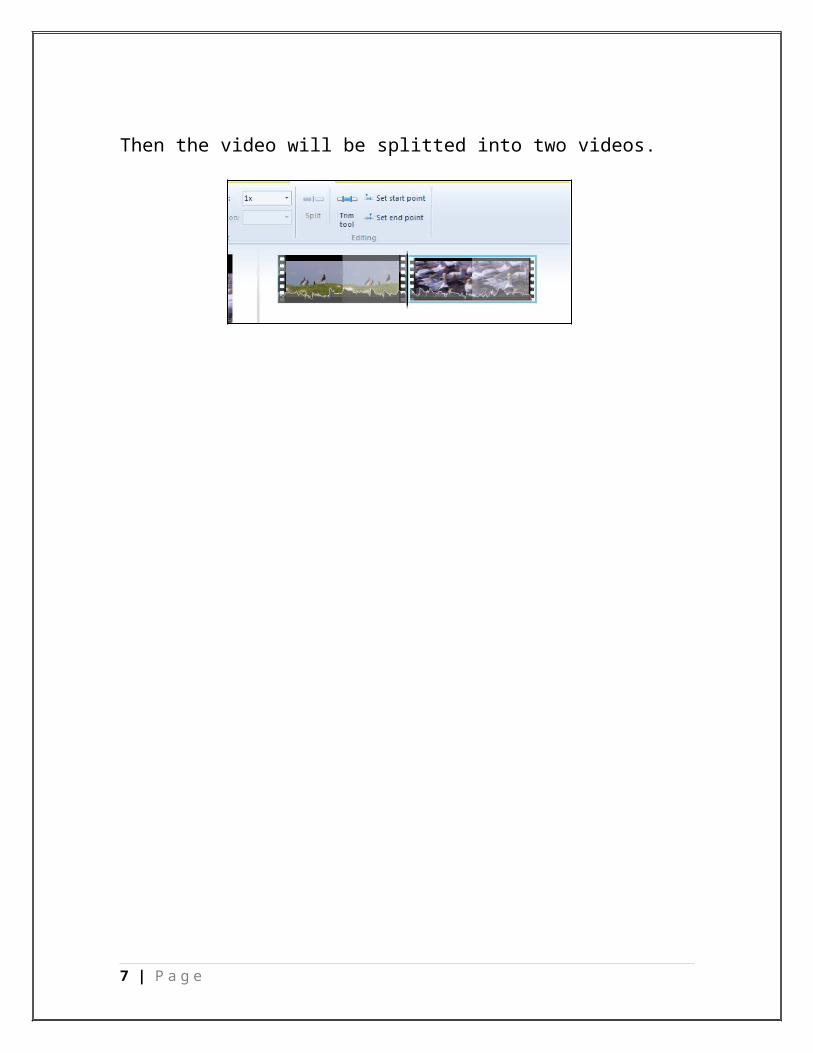
Then the video will be splitted into two videos.
5 | P a g e
Go to the point where you want to split the video
2
3Click on split
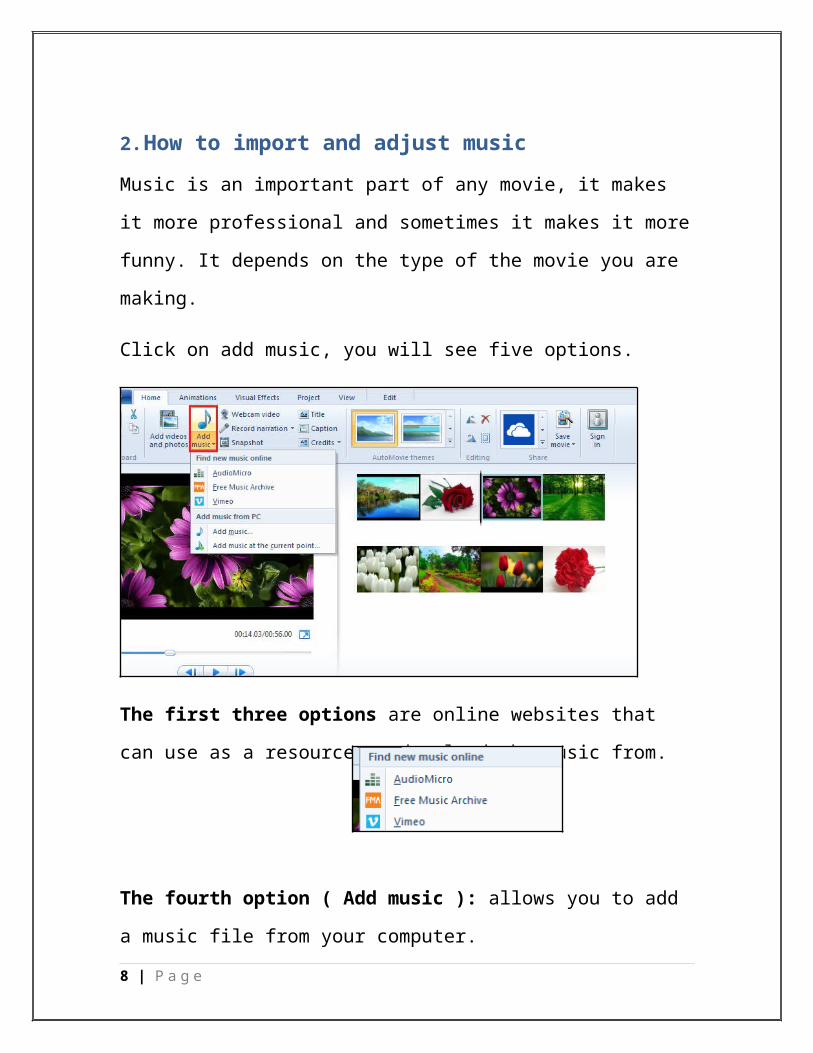
2. How to import and adjust music
Music is an important part of any movie, it makes it more professional and
sometimes it makes it more funny. It depends on the type of the movie you
are making.
Click on add music, you will see five options.
The first three options are online websites that can use as a resource to
download the music from.
The fourth option ( Add music ): allows you to add a music file from your
computer.
6 | P a g e
The fifth option ( add music at the current point ): If you are selecting a
point in the middle of the movie, and used the fifth option, the music will be
added at the point (or frame) you are selecting.
7 | P a g e
Click on the music in the workspace, then you will see the music properties
8 | P a g e
Fade in: allows you to choose the speed of the music start.
Fade out: allows you to choose the speed of the music end.
In which point of the music you want to stop playing it.
The point of the music when you want to start ( for example, you don’t want to play the first 10 seconds of the music, so you will write in start point 10 ).
The time of the movie when you want to start playing the music.

3. How to make the music fit with the images?
In the image below, it is obvious that the display time of the images is more
than the play time of the music.
This means that the music will stop playing and the images will keep
displaying.
To make the time of music and images fit with each other, then the duration
time of the images will be adjusted to make it fit with the music duration.
9 | P a g e

4. How to use transitions, titles and credits
Transitions are the movements that you can add between your clips and
images in the movie. They can help the flow between clips. In transitions
you can add fades, wipes and other animated movements to help bridge the
gap between videos and images.
Example of transition:
To add a transition to your movie, go to animation, and you will see
different types of transitions.
As it is shown in the image above. We chose the Diagonal transition
And the point we have selected is between the red flower and the purple
flower
10 | P a g e

Titles are pages that you can add before a specific page to identify what is
the coming picture or video about. For example, you can add a title before
the images of flowers come, and write in the title “flowers”.
Example of a title:
you can add a title from Home > Title.
11 | P a g e
Text effects:
The way the text appears
Here where you edit the text of the
title
Here where you write the title
The title slide appeared

Credits are texts that are used to present information about the production of
the movie, and it comes at the end of the movie.
There are five types of credits:
5. How to add visual effects to photos and videos
Movie maker allows you to apply visual effects on both photos and videos.
END
12 | P a g e
Information about the location of the movie creation
Information about the director of the movie
Information about the soundtrack
Information about the stars of the movie
Blank credit
Related Documents