Copyright © 2017 Wolters Kluwer • All Rights Reserved Copyright © 2014 Wolters Kluwer • All Rights Reserved Module 15—Sickle Scalers Section 3 Technique Practice—Anterior Teeth

Welcome message from author
This document is posted to help you gain knowledge. Please leave a comment to let me know what you think about it! Share it to your friends and learn new things together.
Transcript

Copyright © 2017 Wolters Kluwer • All Rights ReservedCopyright © 2014 Wolters Kluwer • All Rights Reserved
Module 15—Sickle Scalers
Section 3Technique Practice—Anterior Teeth
Copyright © 2017 Wolters Kluwer • All Rights Reserved
Anterior Teeth
Use of Anterior Sickle Scaler
2

Copyright © 2017 Wolters Kluwer • All Rights Reserved
Topics
-Calculus removal concepts-Establishing 70- to 80-degree angulation-Application of cutting edges-Step-by-step use on anterior teeth-Adaptation for proximal surfaces and adjacent to papillary gingiva
3
Copyright © 2017 Wolters Kluwer • All Rights Reserved4
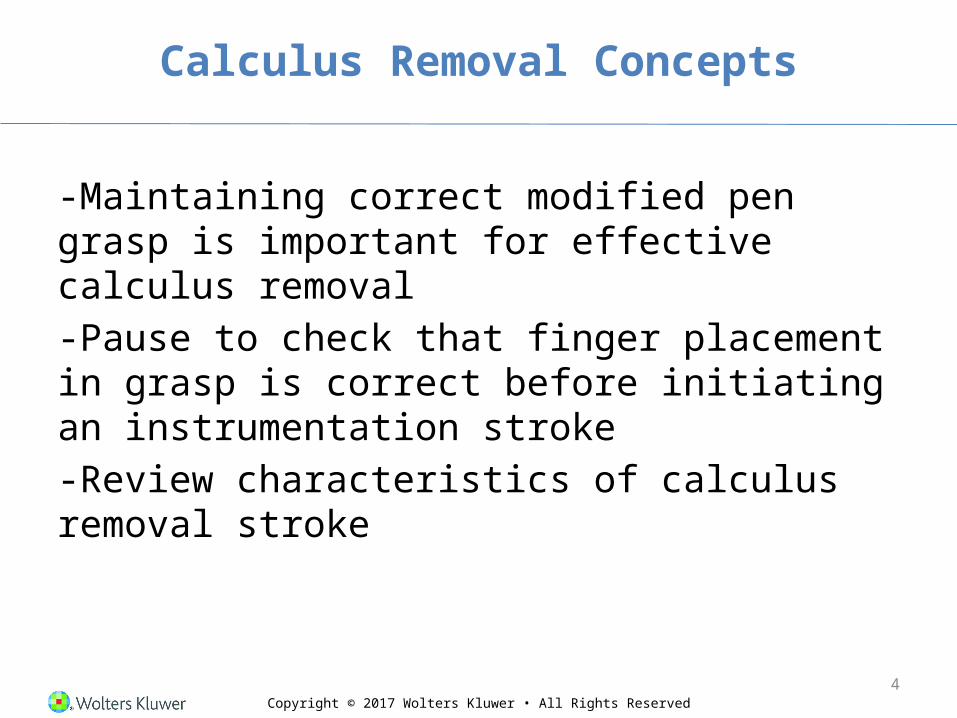
Calculus Removal Concepts
-Maintaining correct modified pen grasp is important for effective calculus removal-Pause to check that finger placement in grasp is correct before initiating an instrumentation stroke-Review characteristics of calculus removal stroke

Copyright © 2017 Wolters Kluwer • All Rights Reserved
Calculus Removal Steps
-Stabilization-Adaptation-Angulation-Lateral pressure-Controlled, short strokes-Various stroke directions-Number of strokes
5

Copyright © 2017 Wolters Kluwer • All Rights Reserved
Establishing Angulation
6
Copyright © 2017 Wolters Kluwer • All Rights Reserved
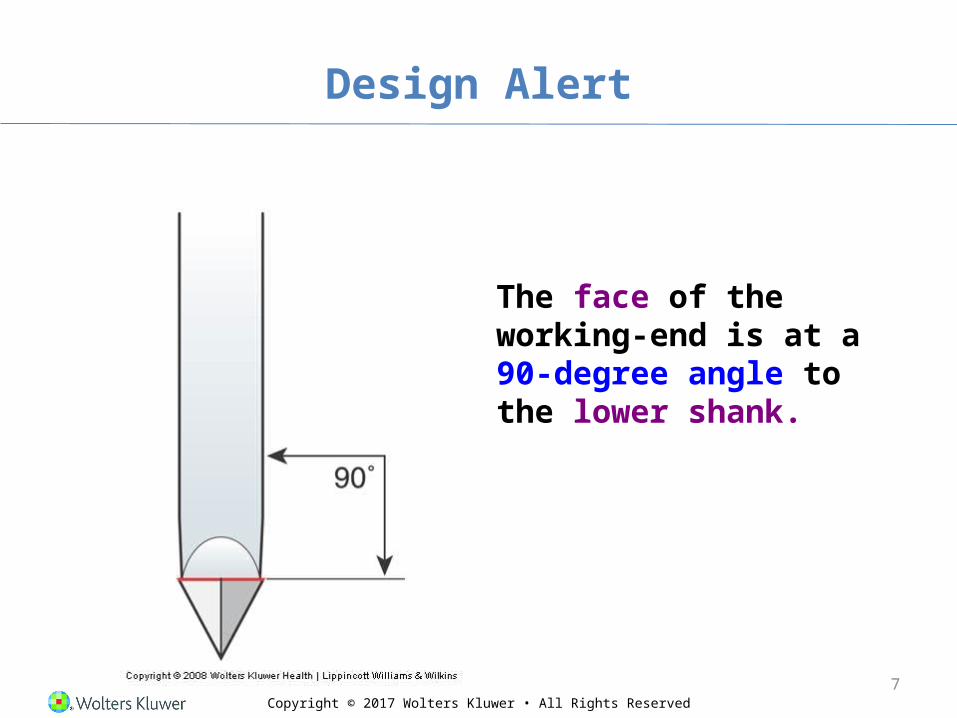
Design Alert
The face of the working-end is at a 90-degree angle to the lower shank.
7
Copyright © 2017 Wolters Kluwer • All Rights Reserved
Impact of Design
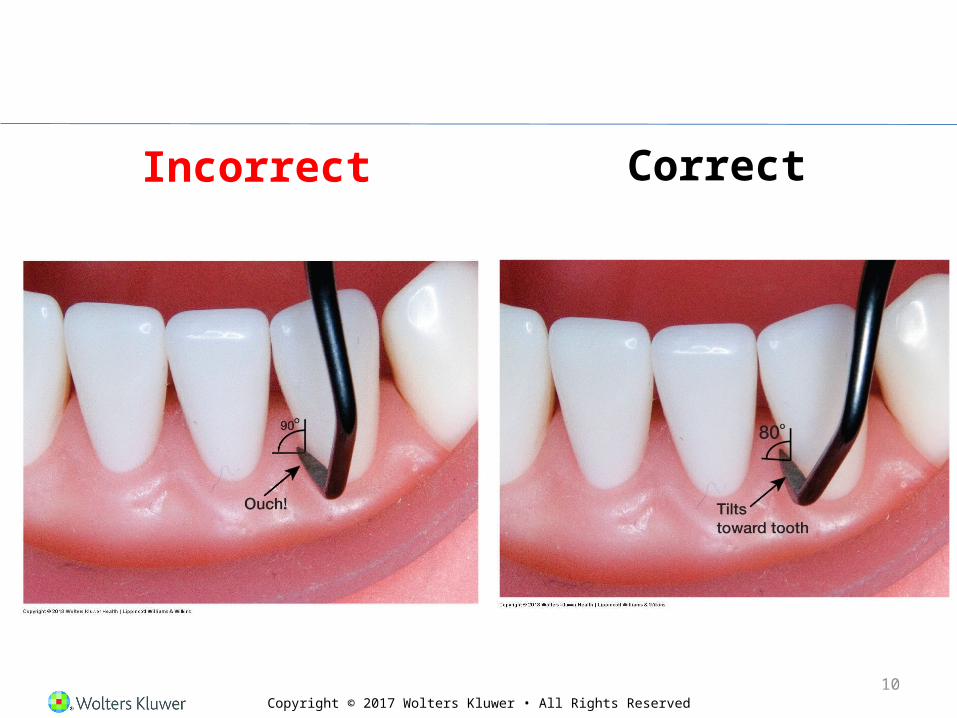
Positioning the lower shank parallel to the tooth surface creates an incorrect face-to-tooth angulation of 90 degrees.
8
Copyright © 2017 Wolters Kluwer • All Rights Reserved
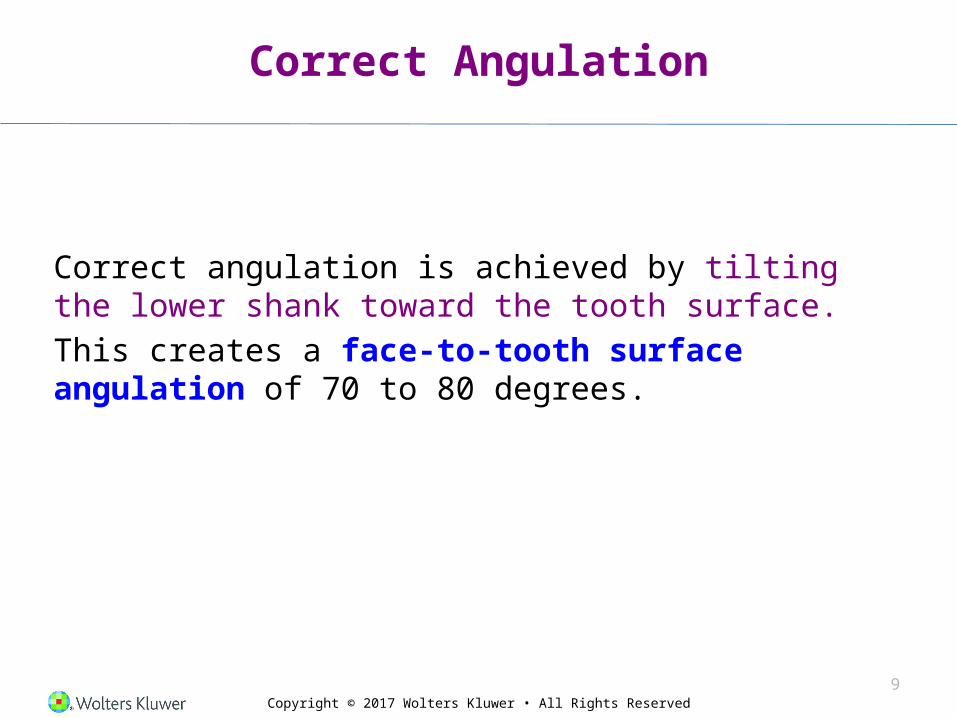
Correct Angulation
Correct angulation is achieved by tilting the lower shank toward the tooth surface. This creates a face-to-tooth surface angulation of 70 to 80 degrees.
9
Copyright © 2017 Wolters Kluwer • All Rights Reserved
Incorrect Correct
10
Copyright © 2017 Wolters Kluwer • All Rights Reserved
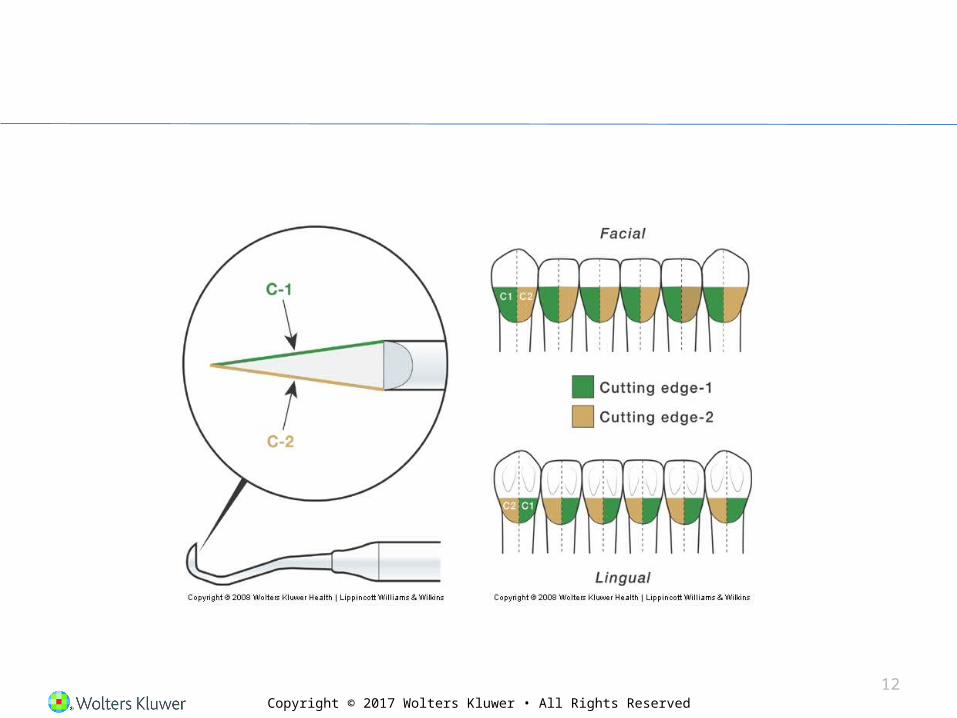
Application of Cutting Edges
Anterior Sickle Scaler
11
Copyright © 2017 Wolters Kluwer • All Rights Reserved12
Copyright © 2017 Wolters Kluwer • All Rights Reserved
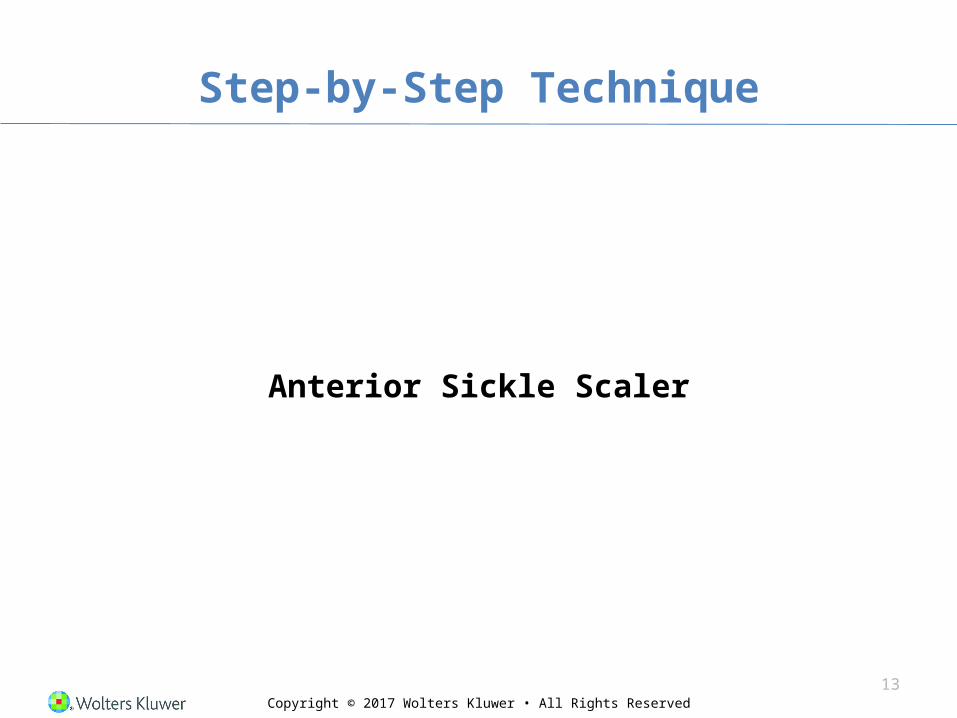
Step-by-Step Technique
Anterior Sickle Scaler
13

Copyright © 2017 Wolters Kluwer • All Rights Reserved
Always One Step at a Time
Remember: “Me, My patient, My light, My mirror, My grasp, My finger rest, My adaptation”
14
Copyright © 2017 Wolters Kluwer • All Rights Reserved
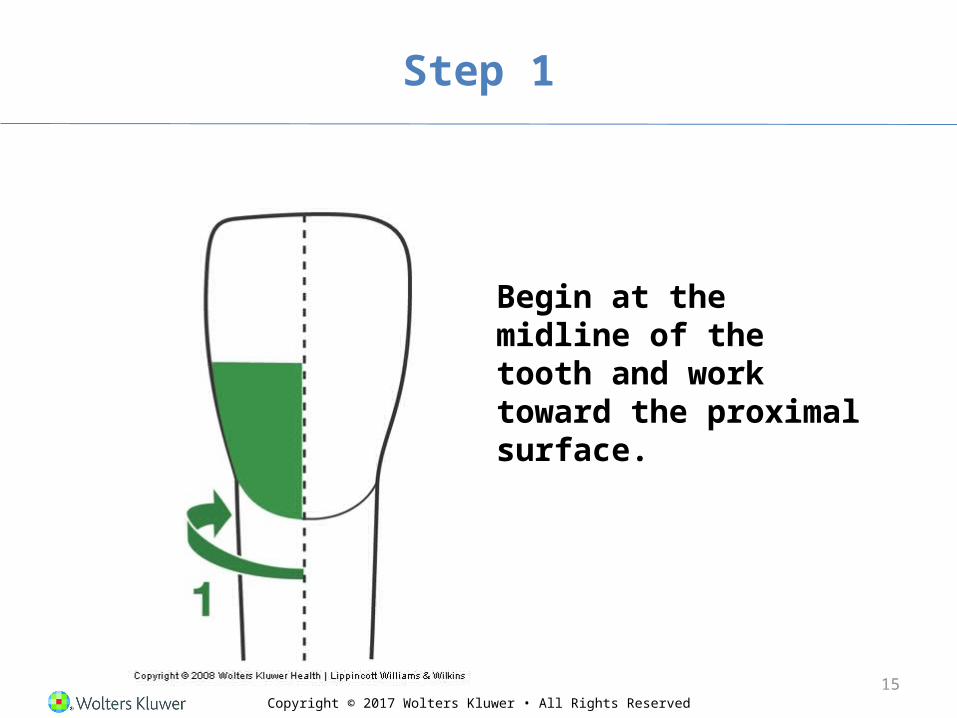
Step 1
Begin at the midline of the tooth and work toward the proximal surface.
15

Copyright © 2017 Wolters Kluwer • All Rights Reserved
Step 2
Position the tip-third of the working-end near the midline of the tooth.Tilt the lower shank toward the tooth surface to establish correct angulation.
16
Copyright © 2017 Wolters Kluwer • All Rights Reserved
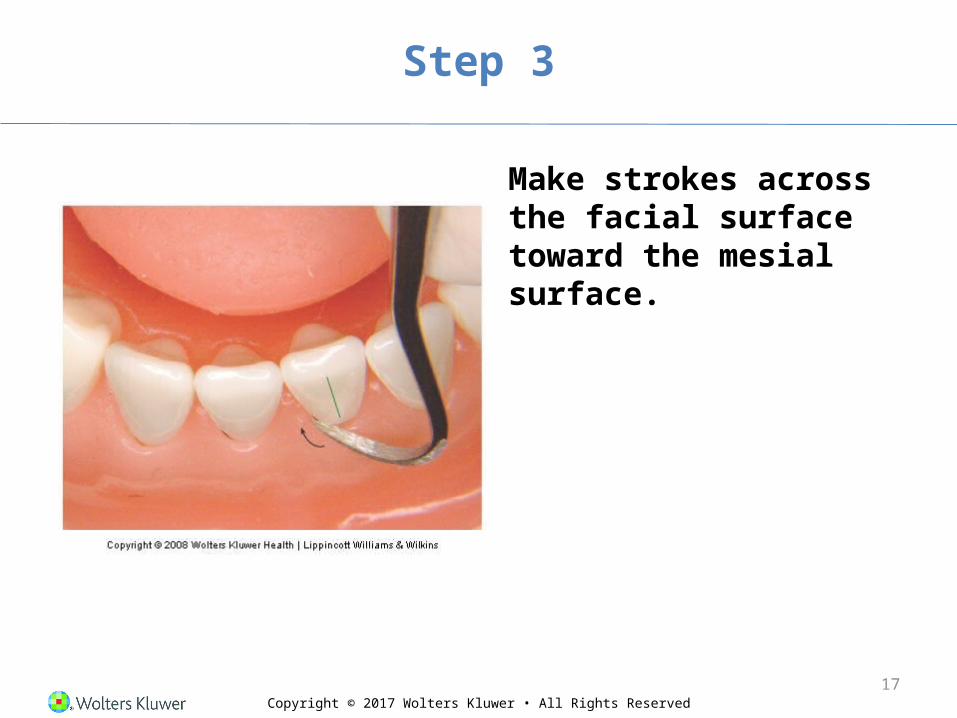
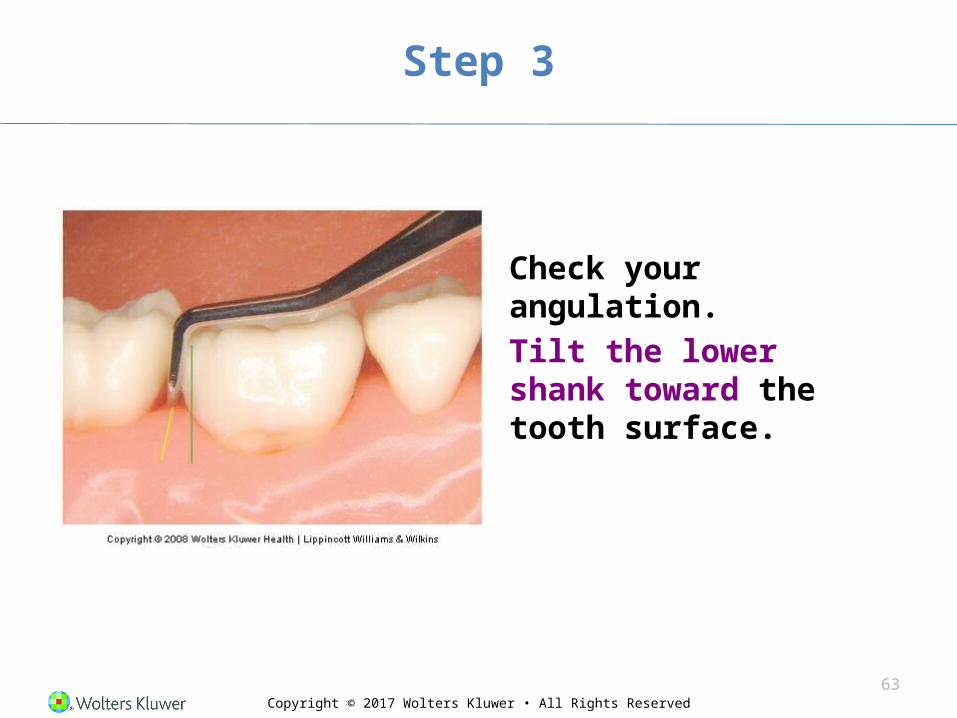
Step 3
Make strokes across the facial surface toward the mesial surface.
17
Copyright © 2017 Wolters Kluwer • All Rights Reserved
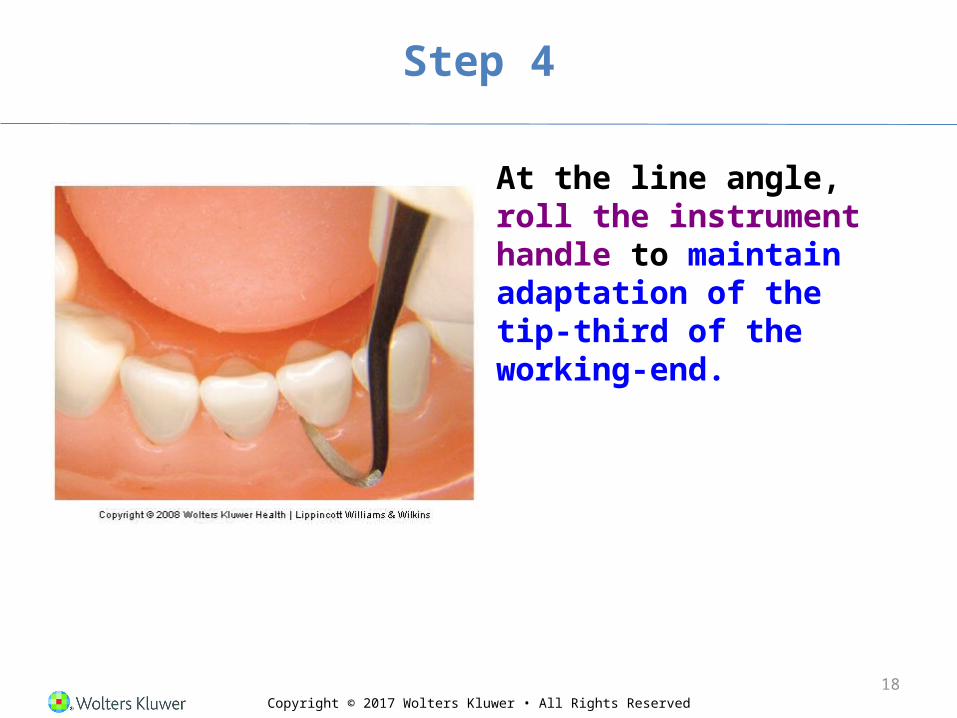
Step 4
At the line angle, roll the instrument handle to maintain adaptation of the tip-third of the working-end.
18
Copyright © 2017 Wolters Kluwer • All Rights Reserved
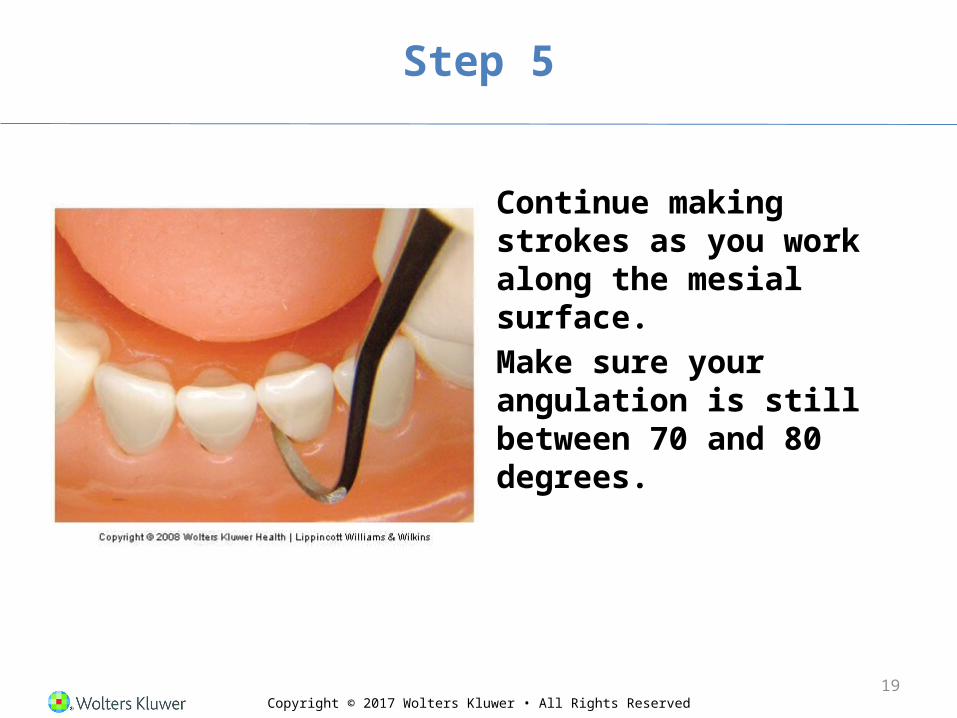
Step 5
Continue making strokes as you work along the mesial surface.Make sure your angulation is still between 70 and 80 degrees.
19
Copyright © 2017 Wolters Kluwer • All Rights Reserved
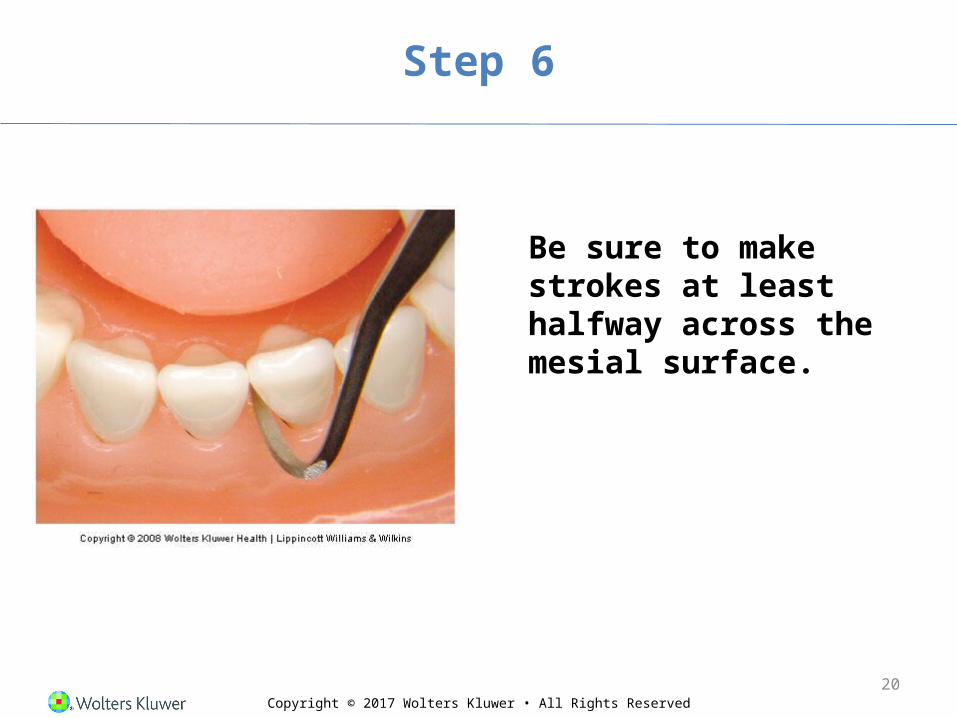
Step 6
Be sure to make strokes at least halfway across the mesial surface.
20
Copyright © 2017 Wolters Kluwer • All Rights Reserved21
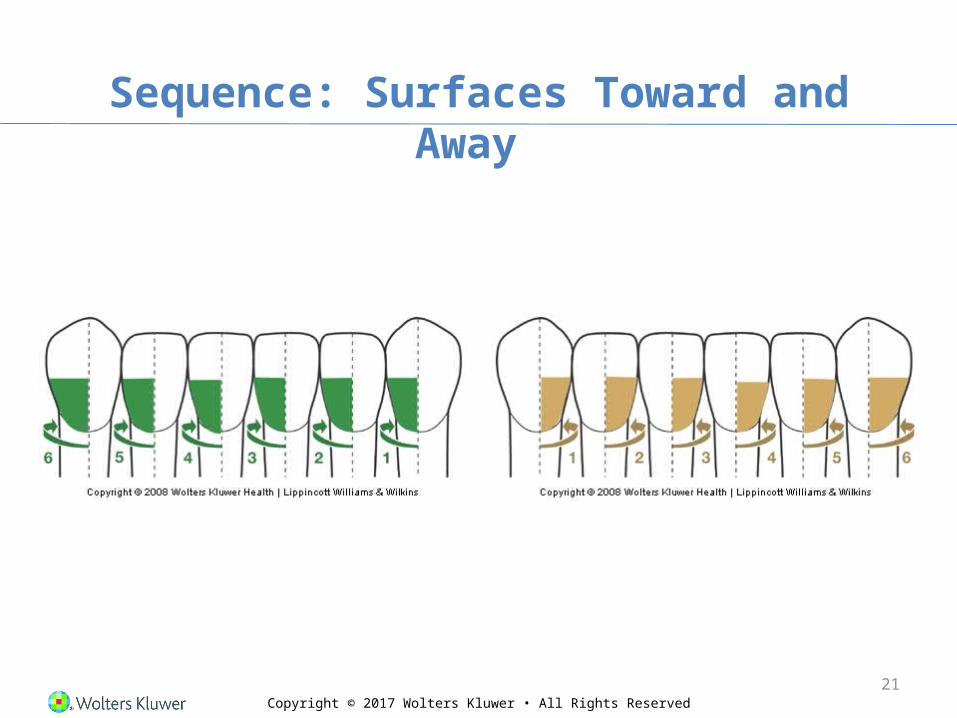
Sequence: Surfaces Toward and Away

Copyright © 2017 Wolters Kluwer • All Rights ReservedCopyright © 2014 Wolters Kluwer • All Rights Reserved
Module 15—Sickle Scalers
Section 4Maintaining Adaptation to Proximal
Surfaces

Copyright © 2017 Wolters Kluwer • All Rights Reserved23
Adaptation to Proximal Surfaces: Incorrect
Copyright © 2017 Wolters Kluwer • All Rights Reserved24
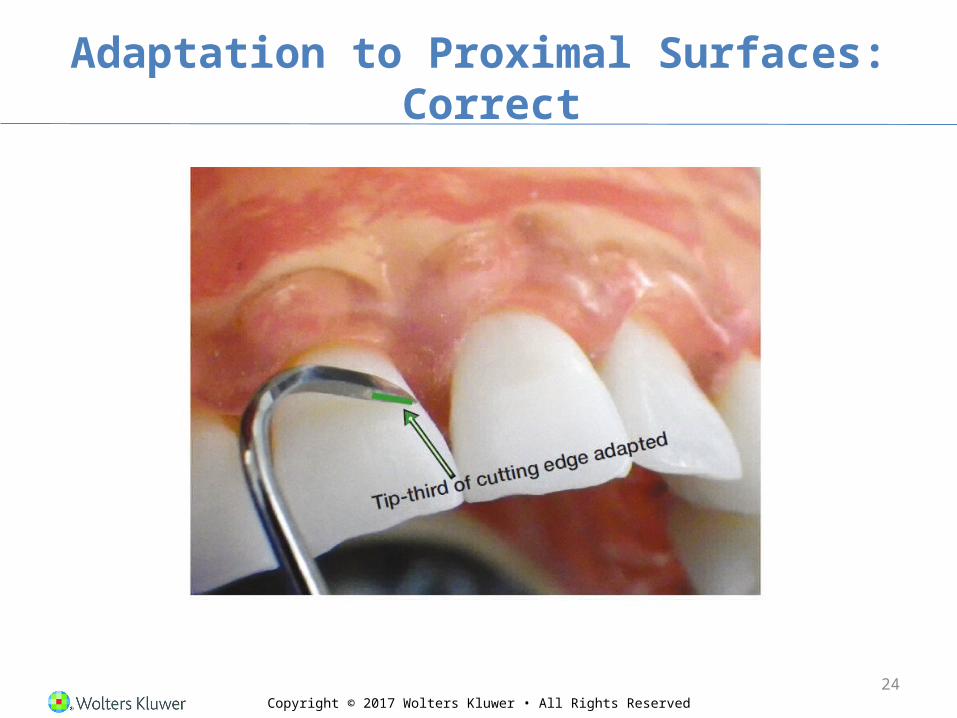
Adaptation to Proximal Surfaces: Correct
Copyright © 2017 Wolters Kluwer • All Rights Reserved25
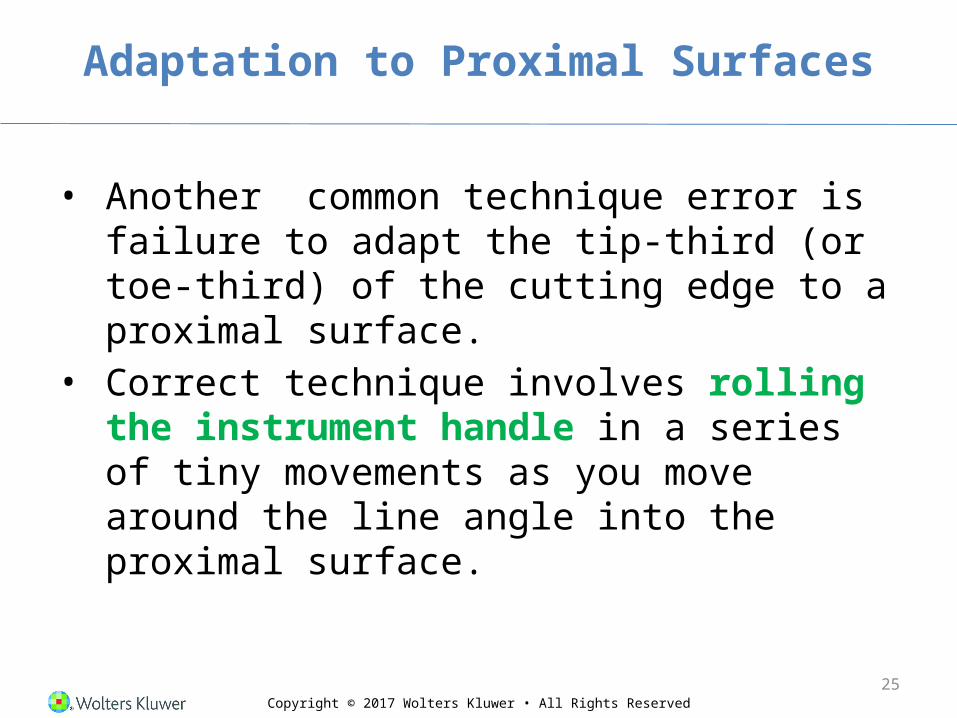
Adaptation to Proximal Surfaces
• Another common technique error is failure to adapt the tip-third (or toe-third) of the cutting edge to a proximal surface.
• Correct technique involves rolling the instrument handle in a series of tiny movements as you move around the line angle into the proximal surface.

Copyright © 2017 Wolters Kluwer • All Rights Reserved
Adaptation Adjacent to Papillary Gingiva
26
Copyright © 2017 Wolters Kluwer • All Rights Reserved
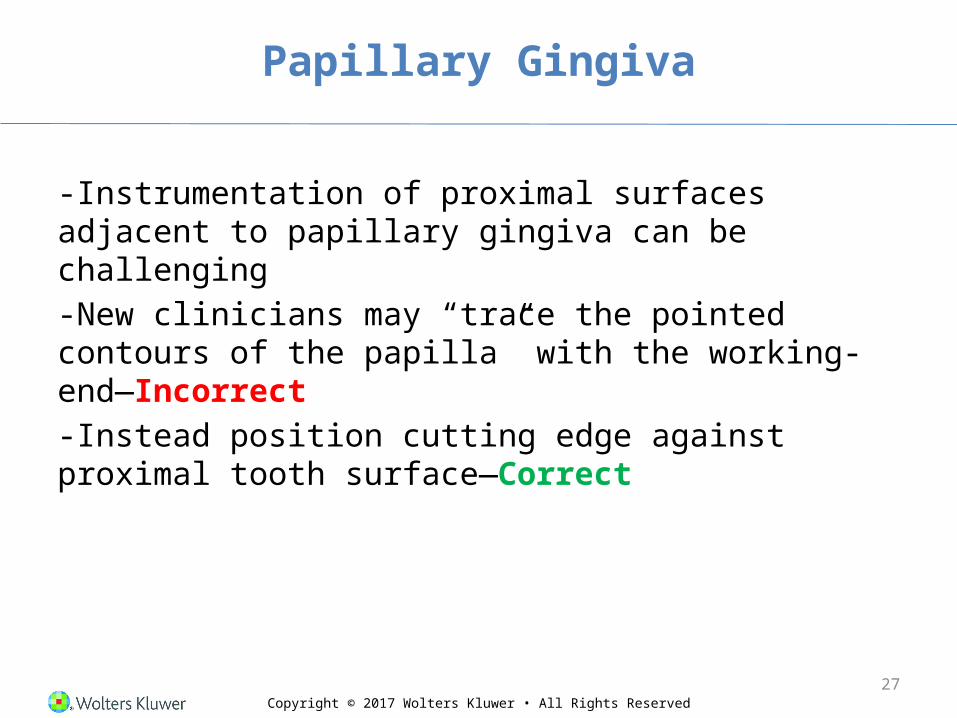
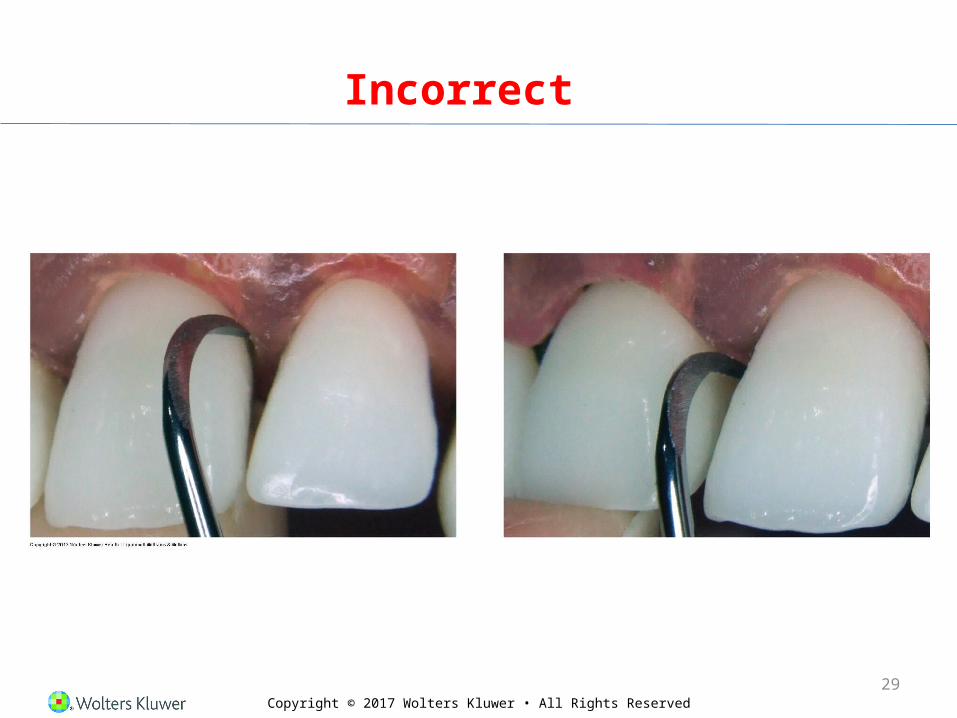
Papillary Gingiva
-Instrumentation of proximal surfaces adjacent to papillary gingiva can be challenging-New clinicians may “trace the pointed contours of the papilla” with the working-end—Incorrect-Instead position cutting edge against proximal tooth surface—Correct
27
Copyright © 2017 Wolters Kluwer • All Rights Reserved28
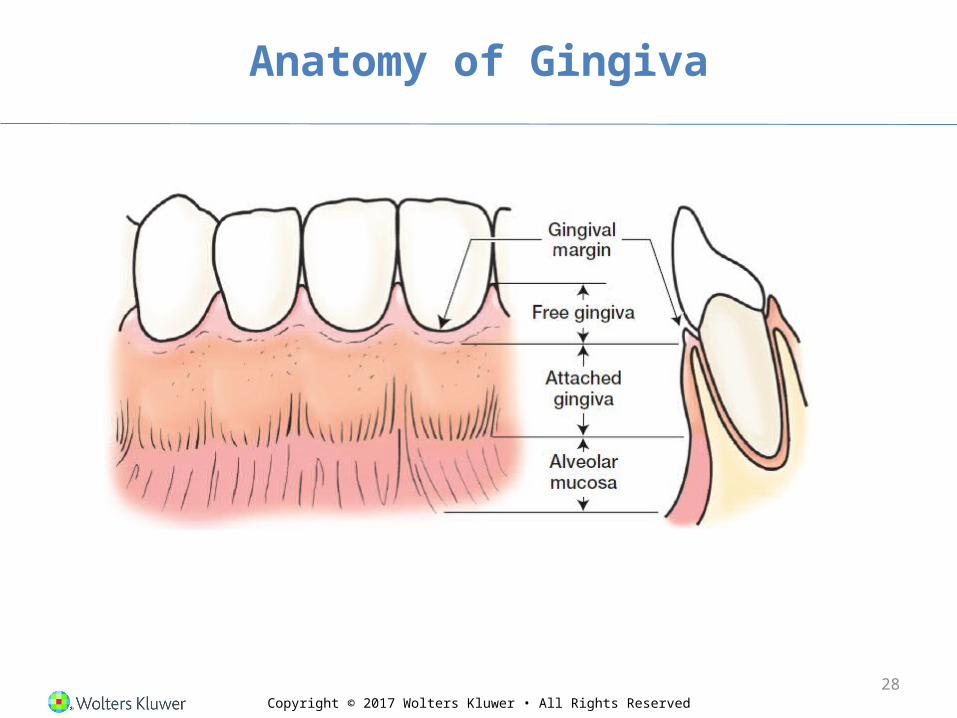
Anatomy of Gingiva
Copyright © 2017 Wolters Kluwer • All Rights Reserved
Incorrect
29
Copyright © 2017 Wolters Kluwer • All Rights Reserved
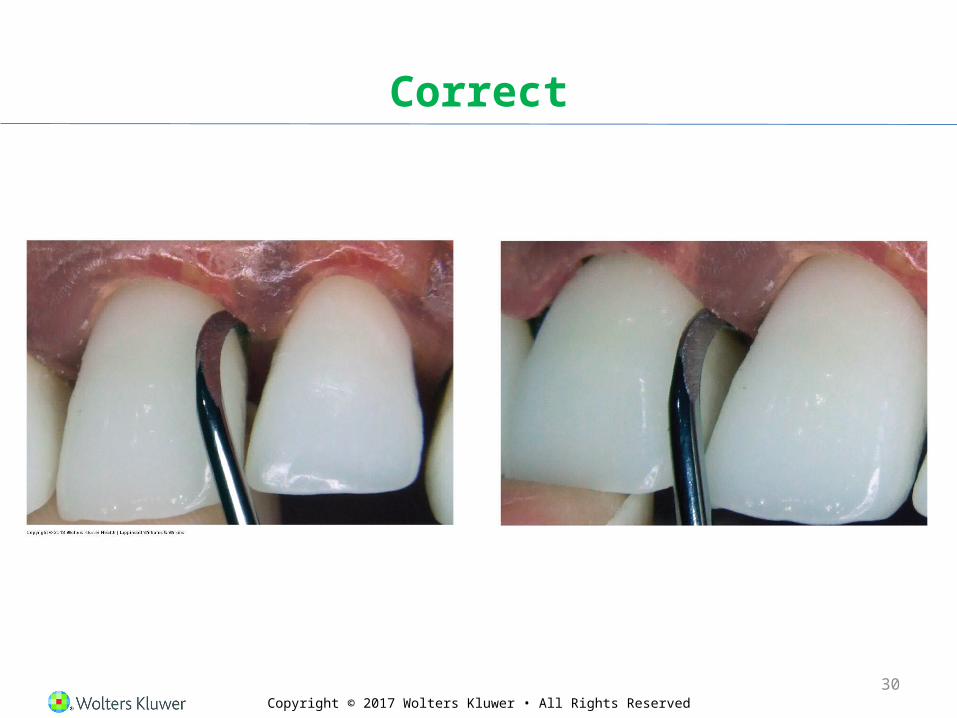
Correct
30

Copyright © 2017 Wolters Kluwer • All Rights Reserved
Recap
• Calculus removal strokes with sickle scalers are short, controlled strokes using an angulation between 70 and 80 degrees.
• Strokes are limited to removal of medium- to large-sized deposits on enamel surfaces.
31
Copyright © 2017 Wolters Kluwer • All Rights ReservedCopyright © 2014 Wolters Kluwer • All Rights Reserved
Module 15—Sickle Scalers
Section 5Technique Practice—Posterior Teeth

Copyright © 2017 Wolters Kluwer • All Rights Reserved
Posterior Sextants
Use of a Posterior Sickle Scaler
33

Copyright © 2017 Wolters Kluwer • All Rights Reserved
Topics
-Choosing the correct working-end-Establishing angulation-Step-by-step use of a posterior sickle scaler
34

Copyright © 2017 Wolters Kluwer • All Rights Reserved
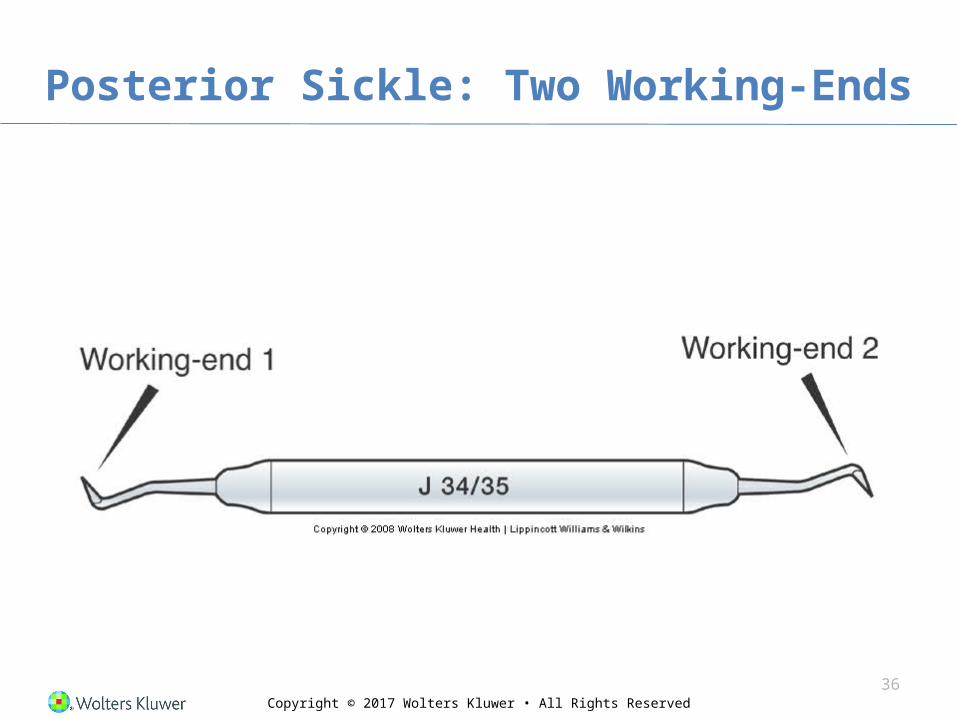
Choosing the Correct Working-End
Double-Ended Posterior Instrument
35
Copyright © 2017 Wolters Kluwer • All Rights Reserved
Posterior Sickle: Two Working-Ends
36
Copyright © 2017 Wolters Kluwer • All Rights Reserved
Methods
There are two methods that can be used to pick the correct working-end for use on a tooth surface.It does not matter which method you use.Use the one that is easiest for you!
37
Copyright © 2017 Wolters Kluwer • All Rights Reserved
Method 1
Lower Shank as Visual Clue
38
Copyright © 2017 Wolters Kluwer • All Rights Reserved
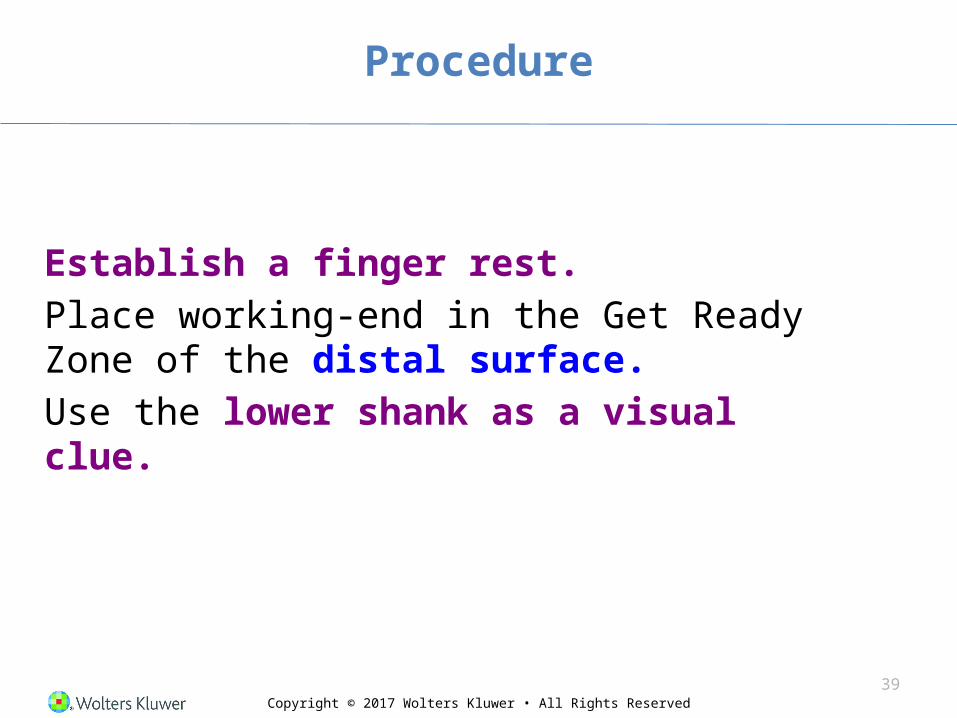
Procedure
Establish a finger rest.Place working-end in the Get Ready Zone of the distal surface. Use the lower shank as a visual clue.
39
Copyright © 2017 Wolters Kluwer • All Rights Reserved
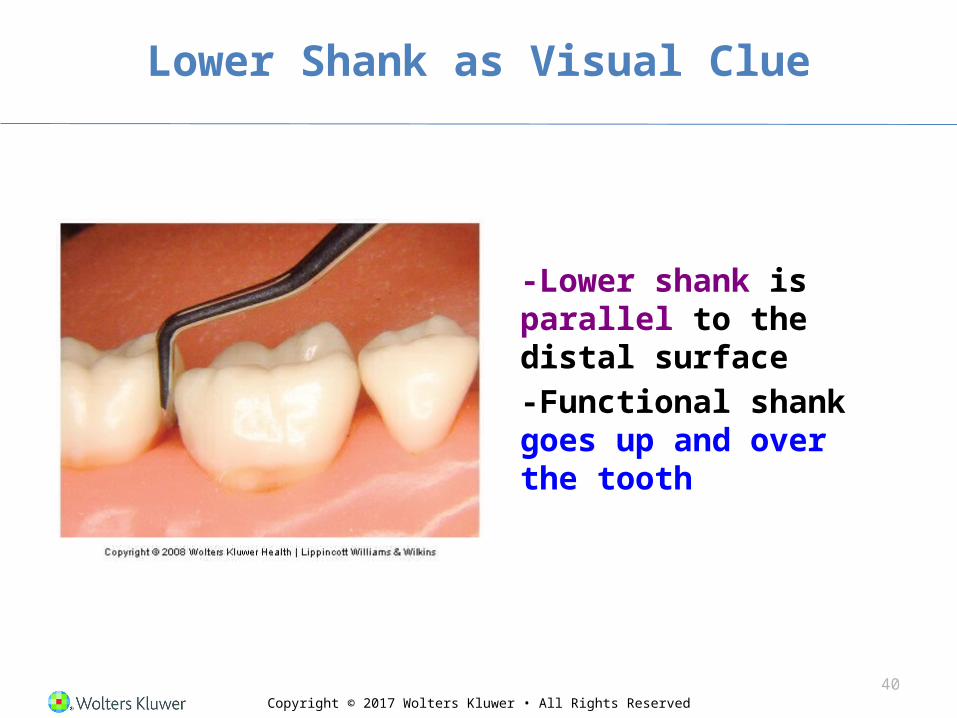
Lower Shank as Visual Clue
-Lower shank is parallel to the distal surface-Functional shank goes up and over the tooth
40
Copyright © 2017 Wolters Kluwer • All Rights Reserved
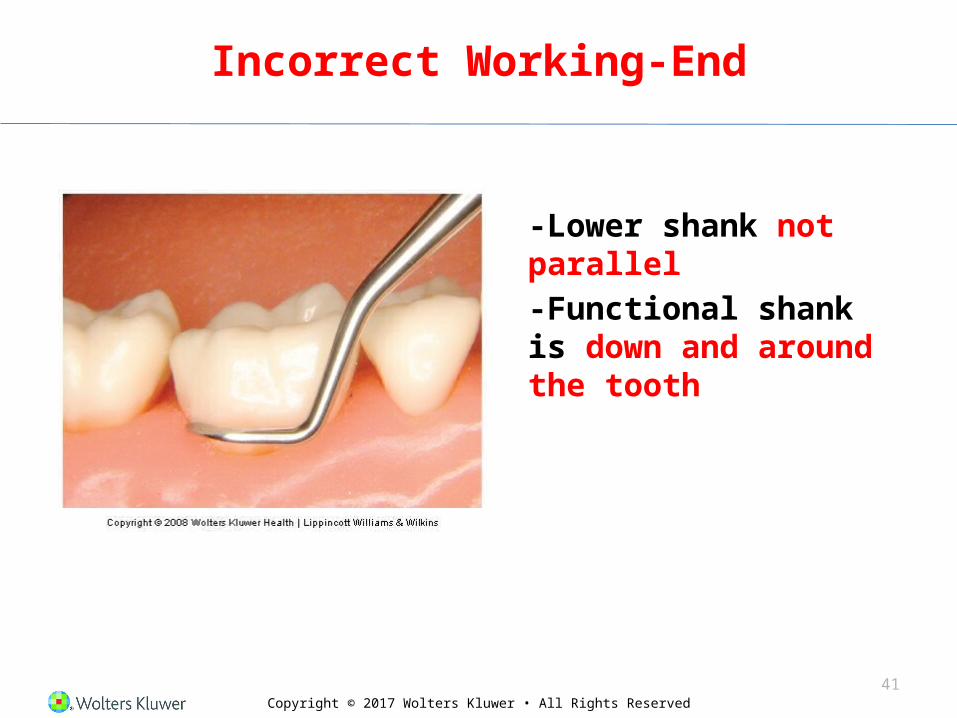
Incorrect Working-End
-Lower shank not parallel-Functional shank is down and around the tooth
41

Copyright © 2017 Wolters Kluwer • All Rights Reserved
Memory Aid
Think: “Posterior = Parallel”Functional shank up and over
42
Copyright © 2017 Wolters Kluwer • All Rights Reserved
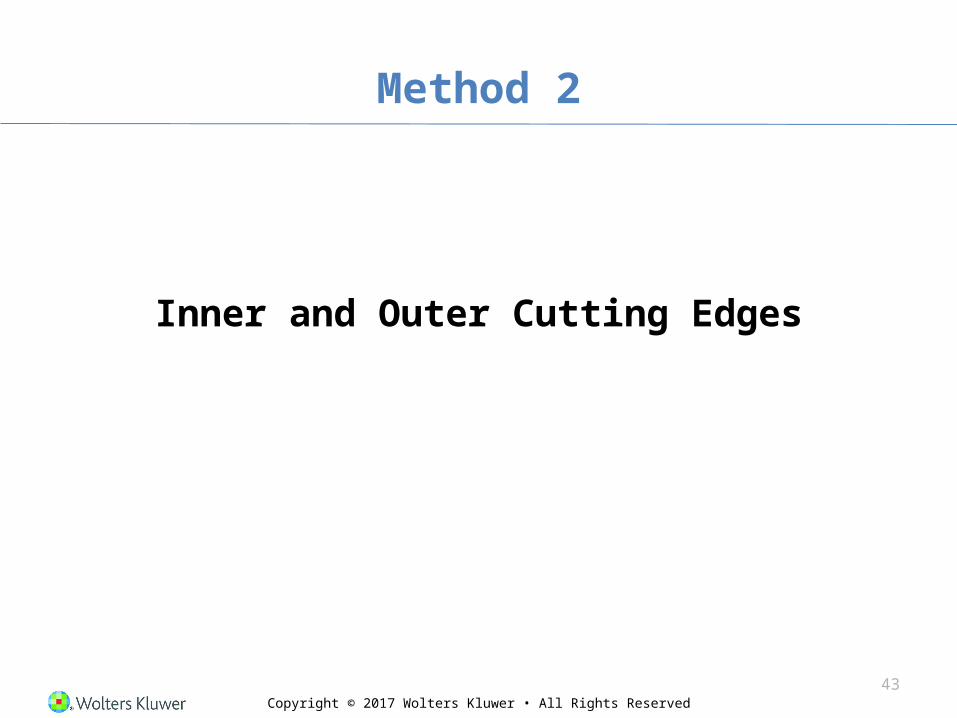
Method 2
Inner and Outer Cutting Edges
43

Copyright © 2017 Wolters Kluwer • All Rights Reserved
Procedure
Hold the instrument so that you are looking down at the face.Determine which cutting edge is closer to the handle.
44
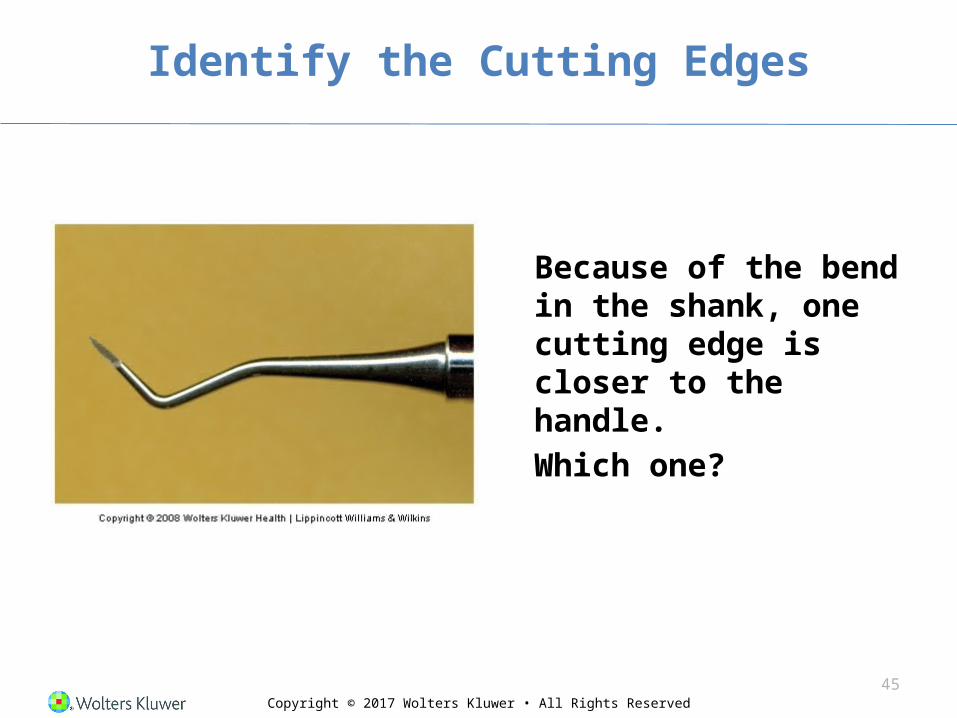
Copyright © 2017 Wolters Kluwer • All Rights Reserved
Identify the Cutting Edges
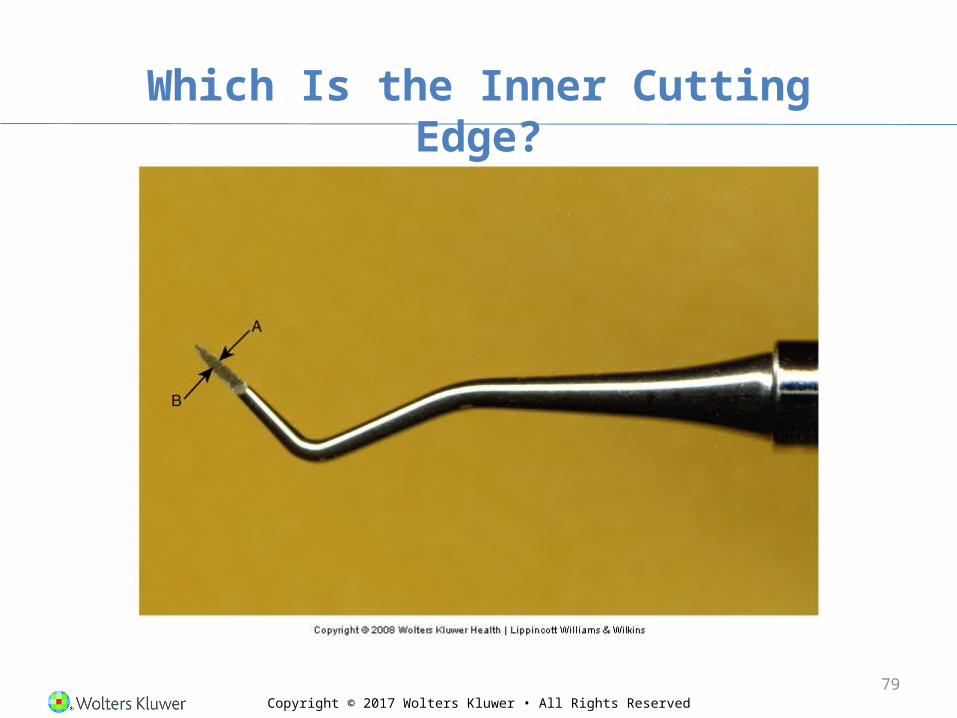
Because of the bend in the shank, one cutting edge is closer to the handle.Which one?
45
Copyright © 2017 Wolters Kluwer • All Rights Reserved
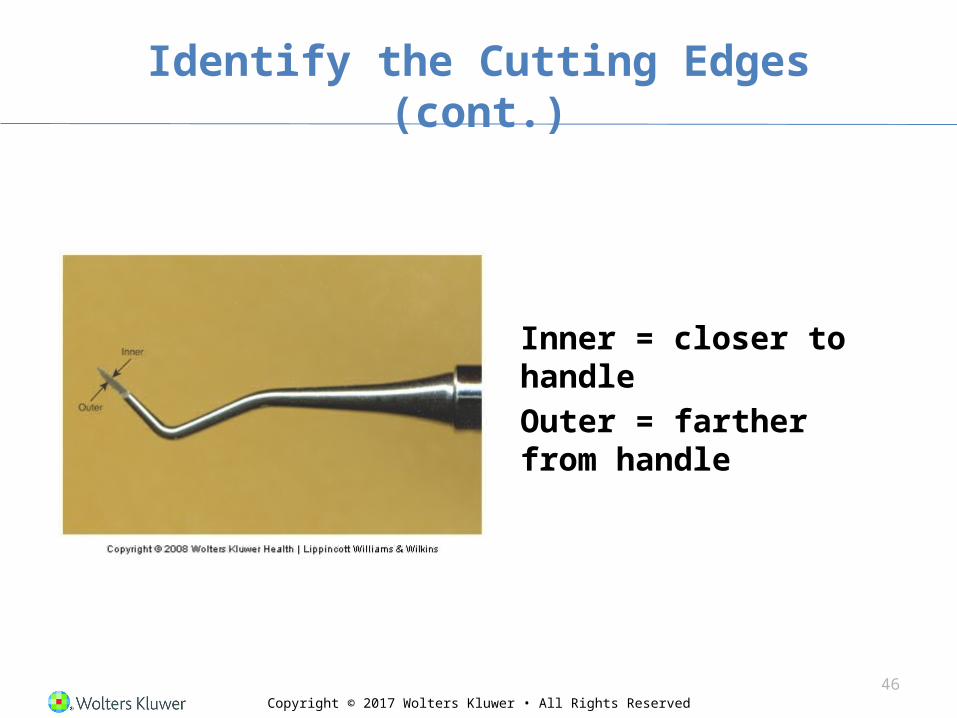
Identify the Cutting Edges (cont.)
Inner = closer to handleOuter = farther from handle
46
Copyright © 2017 Wolters Kluwer • All Rights Reserved
Cutting Edge Use
Inner cutting edges: used on distal surfacesOuter cutting edges: used on facial, lingual, and mesial surfaces
47
Copyright © 2017 Wolters Kluwer • All Rights Reserved
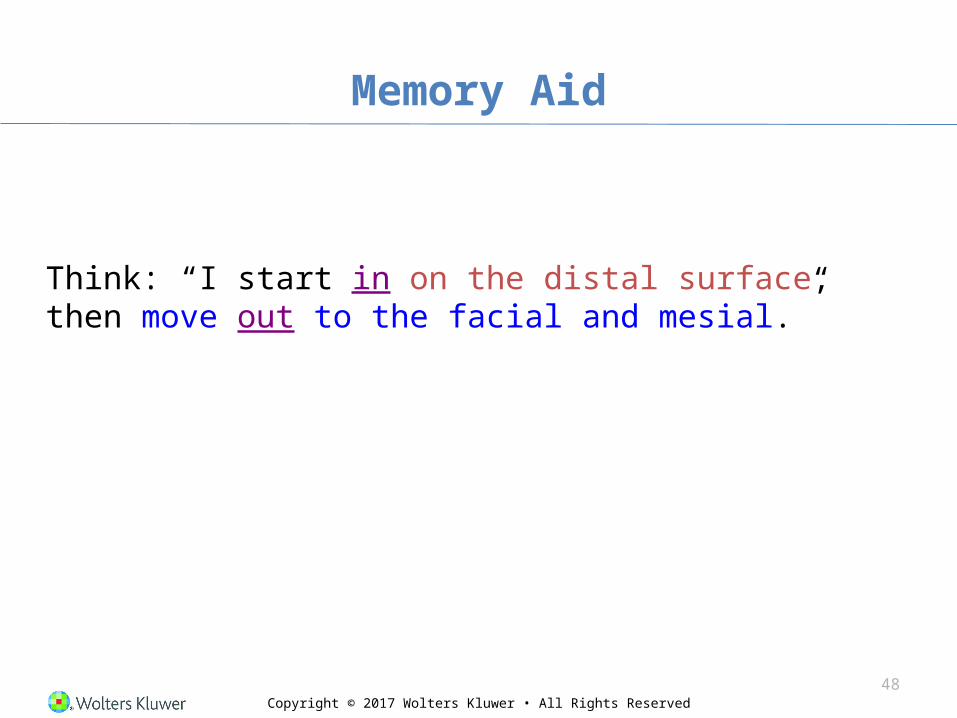
Memory Aid
Think: “I start in on the distal surface, then move out to the facial and mesial.”
48
Copyright © 2017 Wolters Kluwer • All Rights Reserved
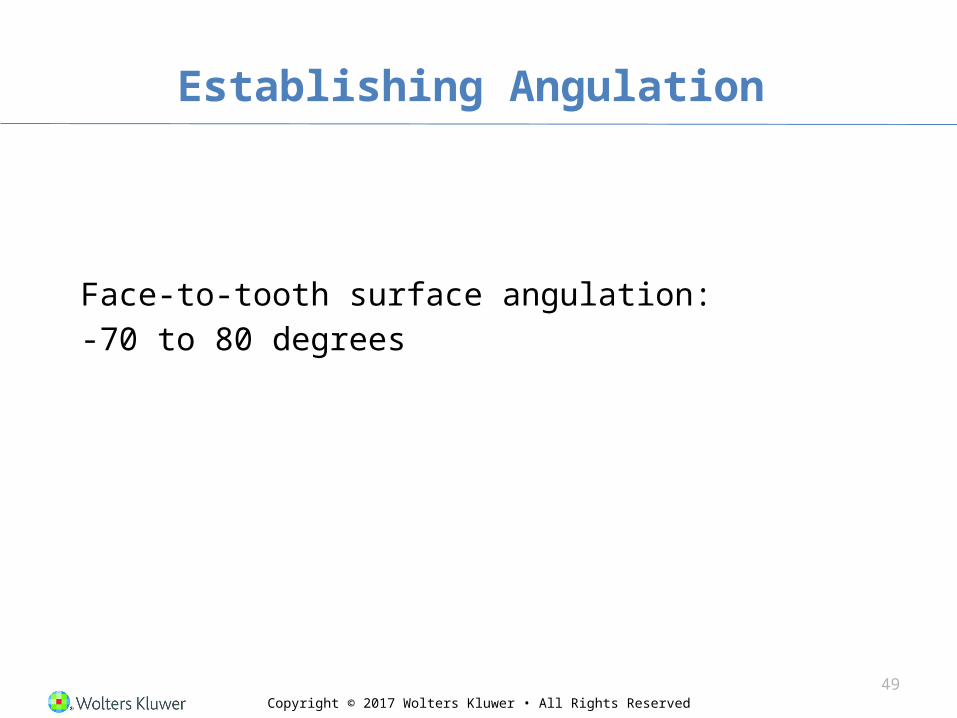
Establishing Angulation
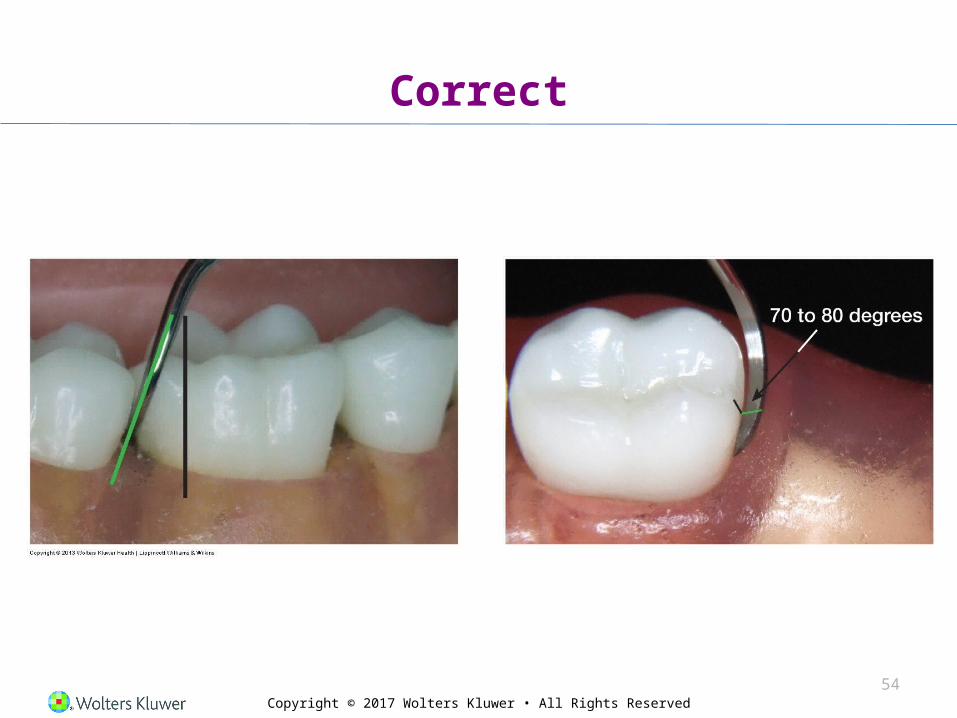
Face-to-tooth surface angulation:-70 to 80 degrees
49
Copyright © 2017 Wolters Kluwer • All Rights Reserved
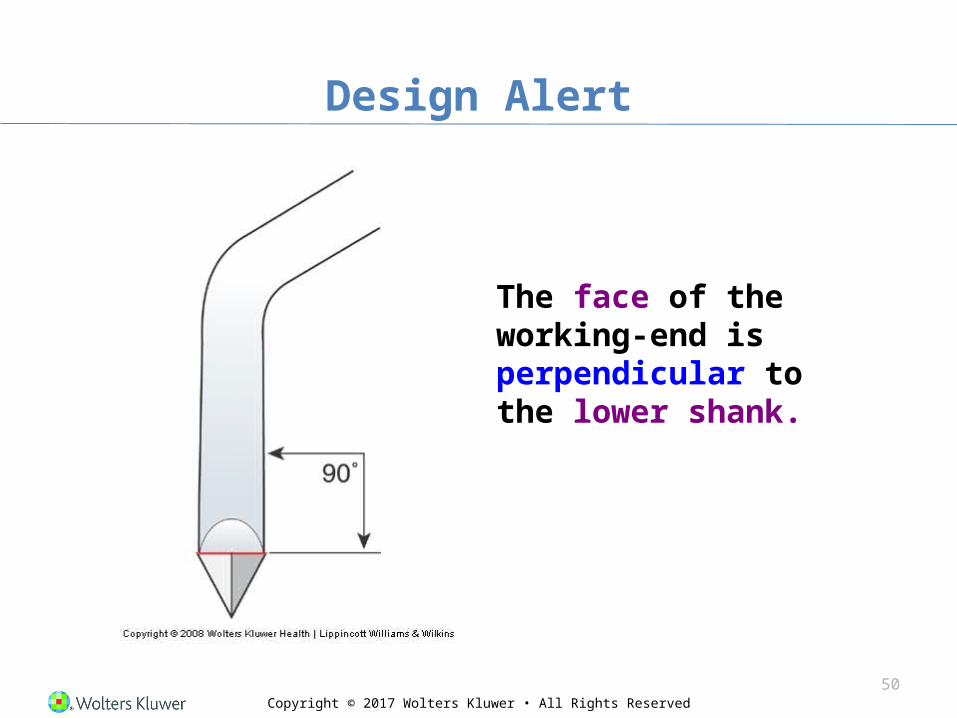
Design Alert
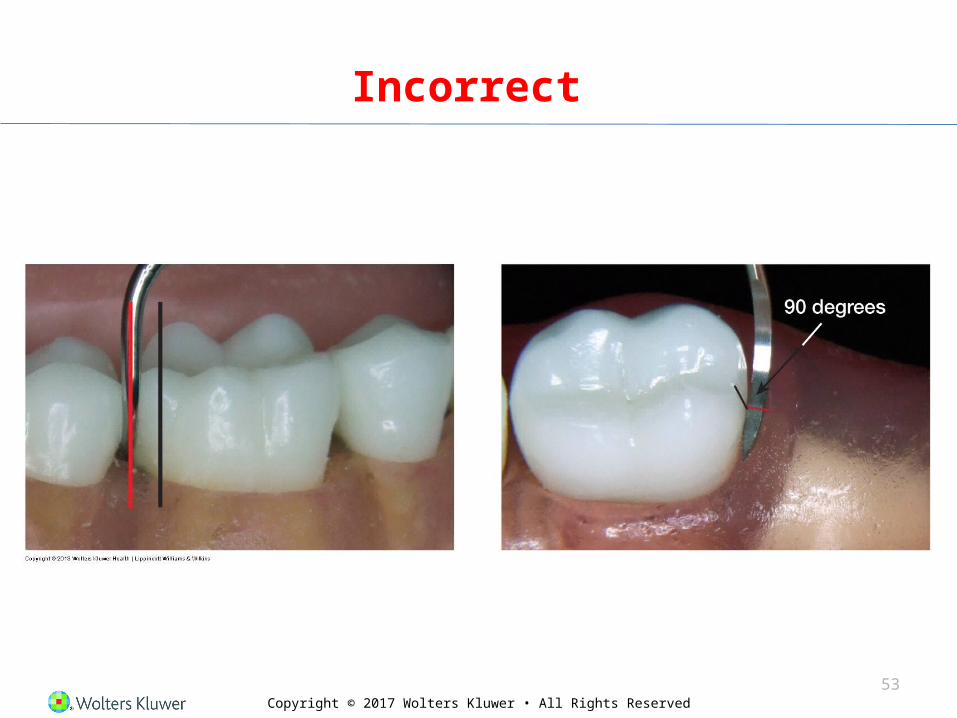
The face of the working-end is perpendicular to the lower shank.
50
Copyright © 2017 Wolters Kluwer • All Rights Reserved
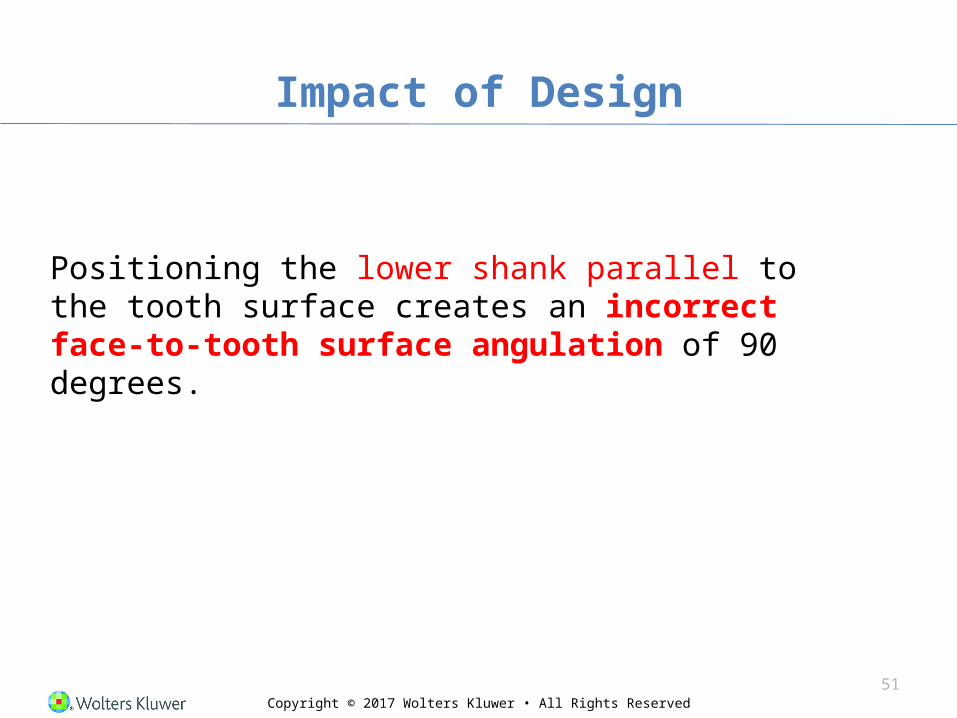
Impact of Design
Positioning the lower shank parallel to the tooth surface creates an incorrect face-to-tooth surface angulation of 90 degrees.
51

Copyright © 2017 Wolters Kluwer • All Rights Reserved
Correct Angulation
Correct angulation is achieved by tilting the lower shank toward the tooth surface.
52
Copyright © 2017 Wolters Kluwer • All Rights Reserved
Incorrect
53
Copyright © 2017 Wolters Kluwer • All Rights Reserved
Correct
54
Copyright © 2017 Wolters Kluwer • All Rights Reserved
Application of Cutting Edges
Posterior Sickle Scaler
55
Copyright © 2017 Wolters Kluwer • All Rights Reserved
Working-End Application
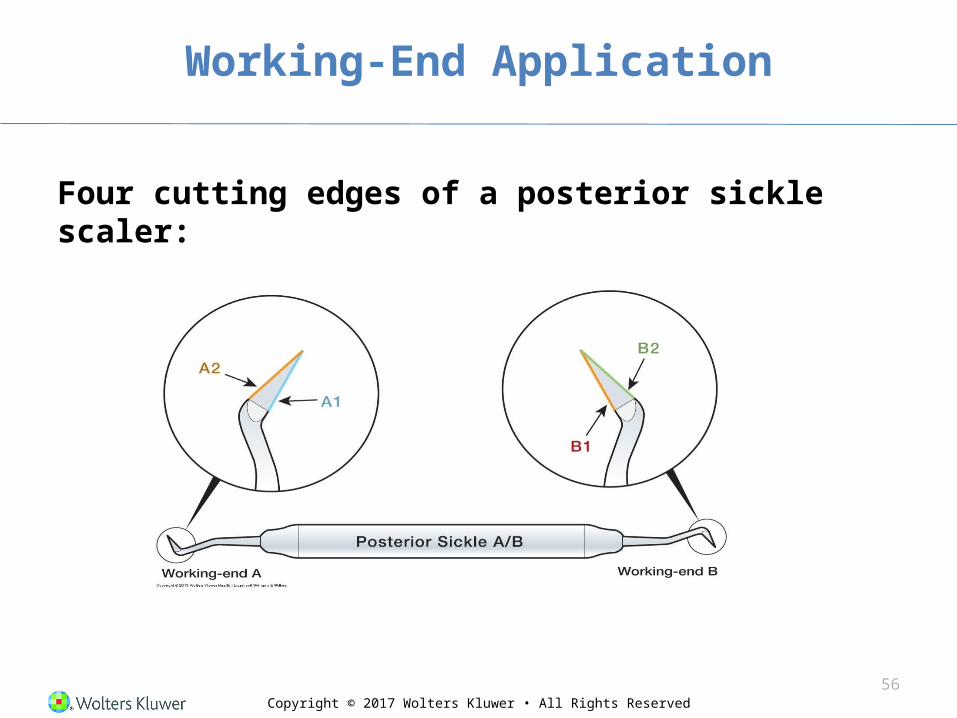
Four cutting edges of a posterior sickle scaler:
56

Copyright © 2017 Wolters Kluwer • All Rights Reserved
Working-End Application (cont.)
How cutting edges are applied to mandibular molar and mandibular right posterior sextant:
57
Copyright © 2017 Wolters Kluwer • All Rights Reserved
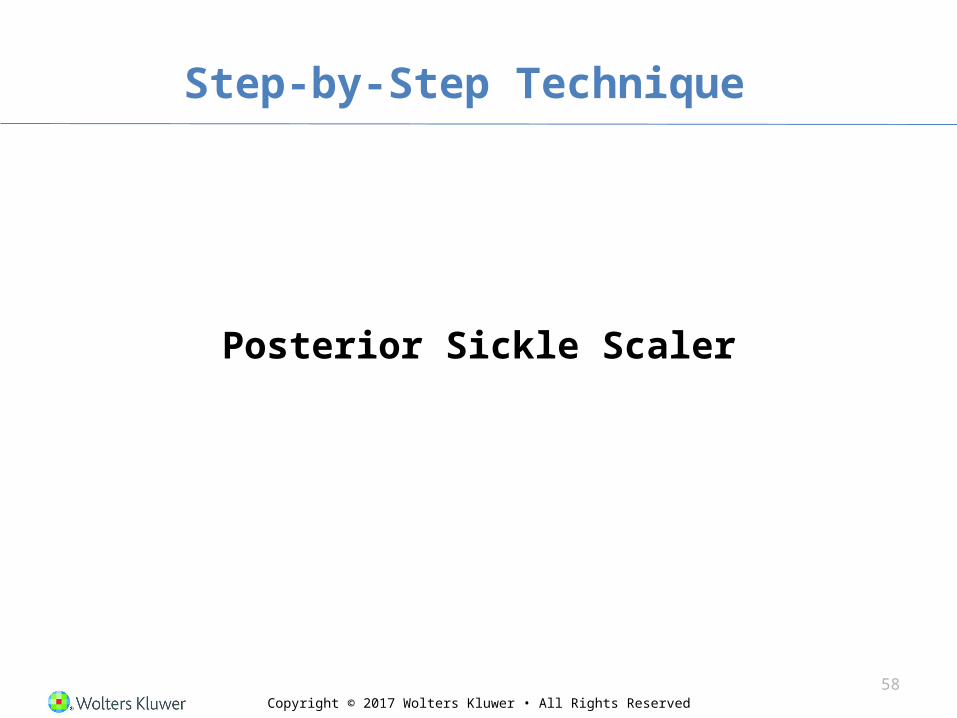
Step-by-Step Technique
Posterior Sickle Scaler
58
Copyright © 2017 Wolters Kluwer • All Rights Reserved
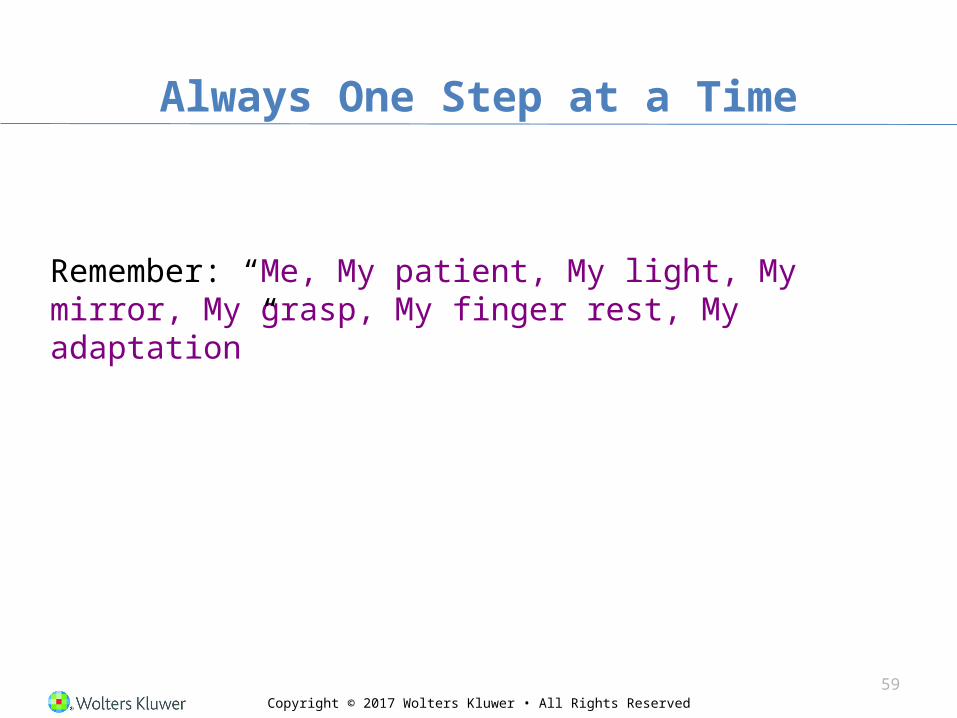
Always One Step at a Time
Remember: “Me, My patient, My light, My mirror, My grasp, My finger rest, My adaptation”
59
Copyright © 2017 Wolters Kluwer • All Rights Reserved
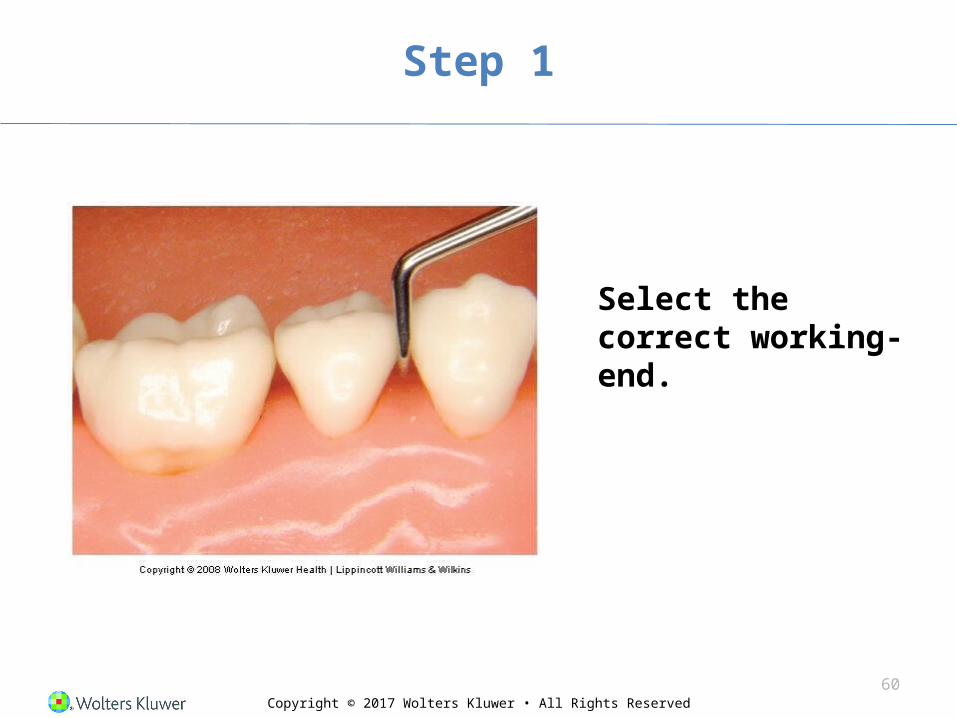
Step 1
Select the correct working-end.
60
Copyright © 2017 Wolters Kluwer • All Rights Reserved
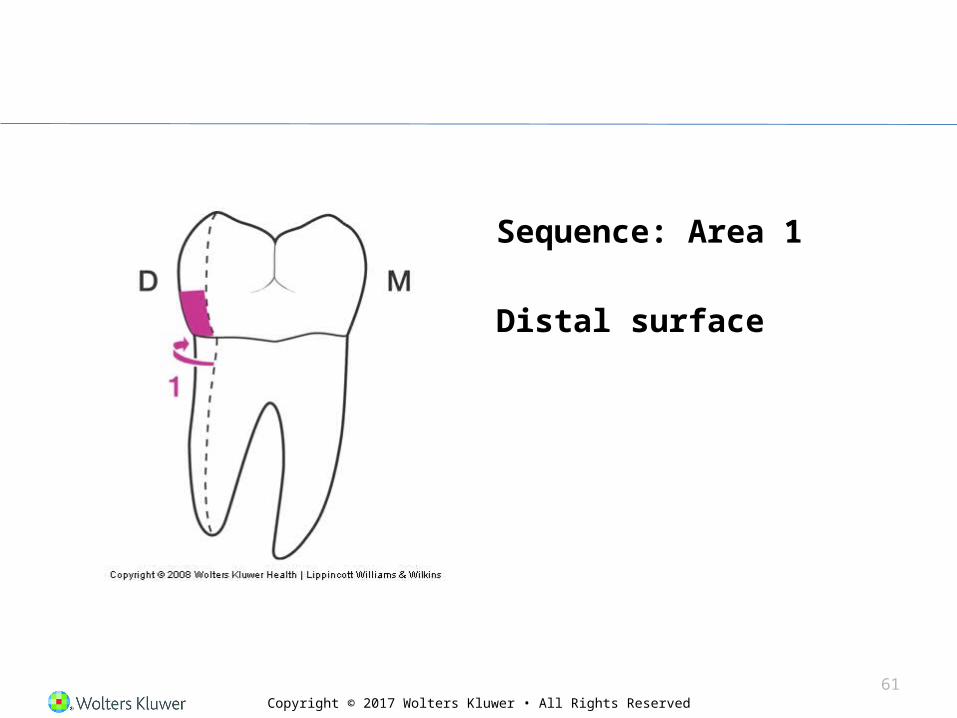
Sequence: Area 1
Distal surface
61

Copyright © 2017 Wolters Kluwer • All Rights Reserved
Step 2
Position the tip-third of the working-end at the distofacial line angle.Work back toward the distal surface.
62
Copyright © 2017 Wolters Kluwer • All Rights Reserved
Step 3
Check your angulation.Tilt the lower shank toward the tooth surface.
63
Copyright © 2017 Wolters Kluwer • All Rights Reserved
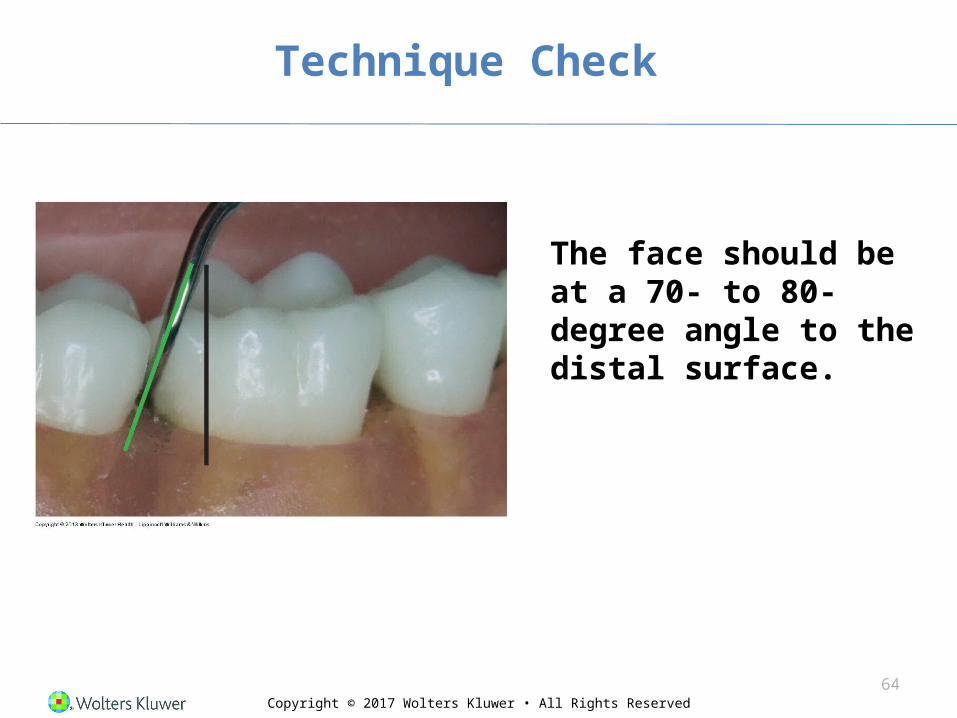
Technique Check
The face should be at a 70- to 80-degree angle to the distal surface.
64
Copyright © 2017 Wolters Kluwer • All Rights Reserved
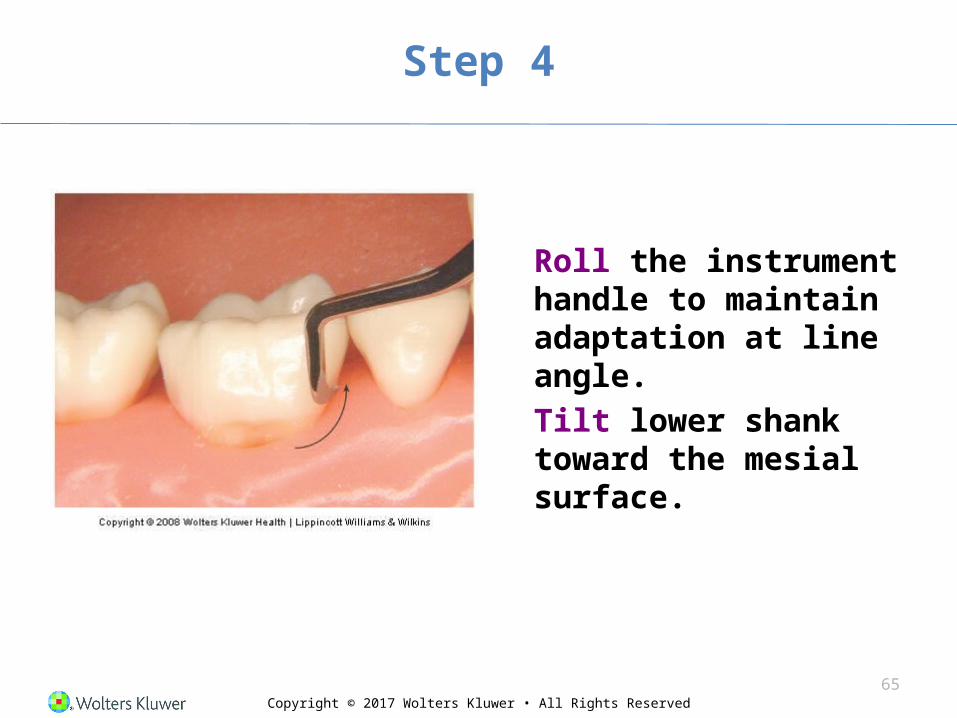
Step 4
Roll the instrument handle to maintain adaptation at line angle.Tilt lower shank toward the mesial surface.
65
Copyright © 2017 Wolters Kluwer • All Rights Reserved
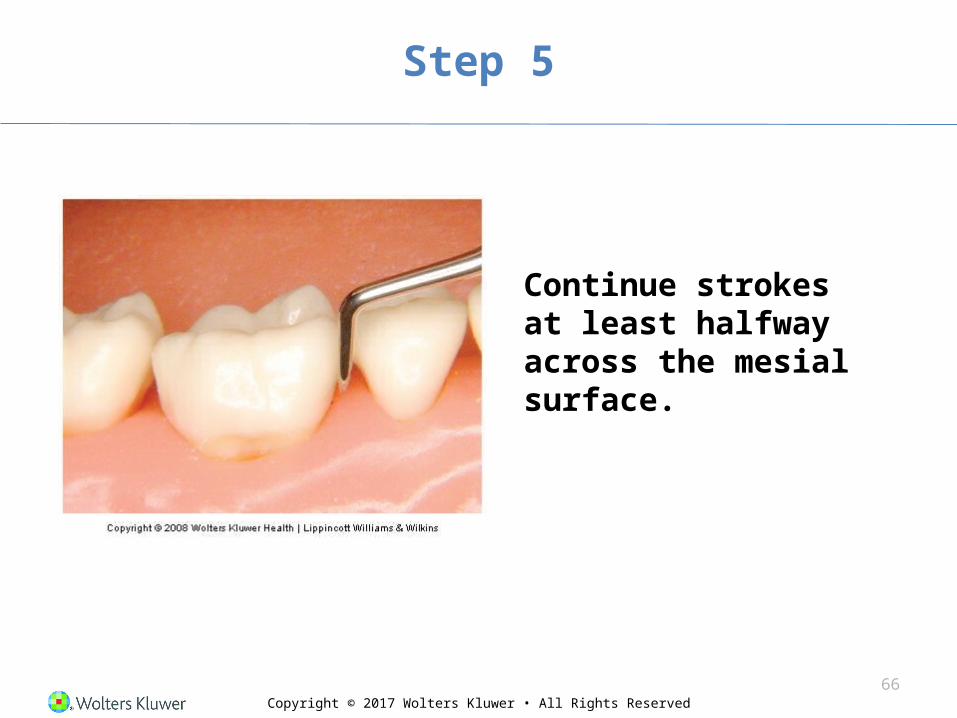
Step 5
Continue strokes at least halfway across the mesial surface.
66
Copyright © 2017 Wolters Kluwer • All Rights Reserved
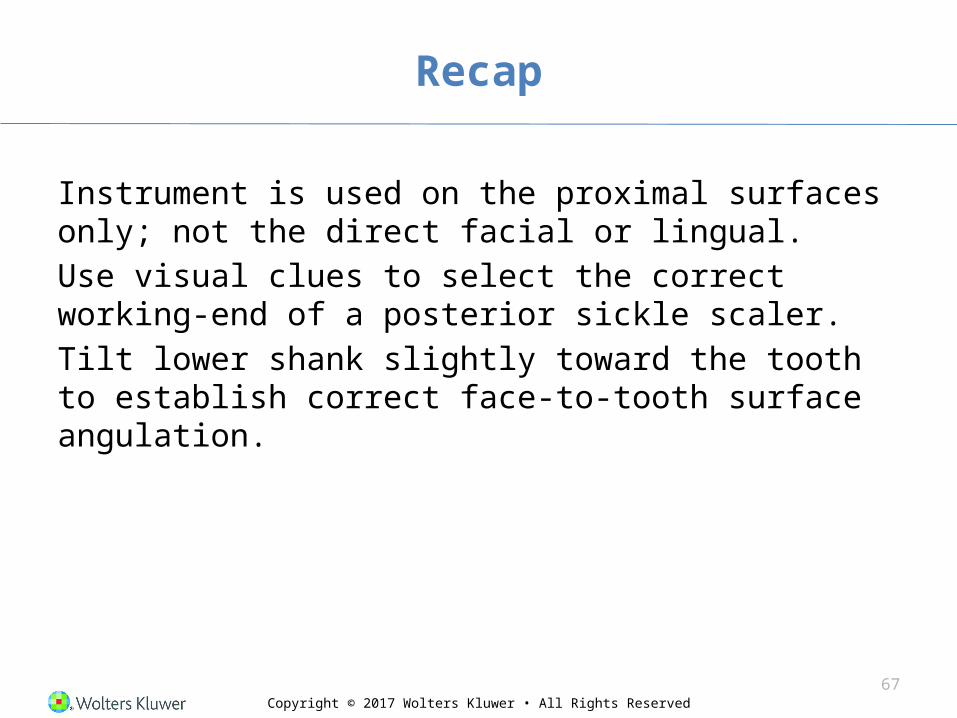
Recap
Instrument is used on the proximal surfaces only; not the direct facial or lingual.Use visual clues to select the correct working-end of a posterior sickle scaler.Tilt lower shank slightly toward the tooth to establish correct face-to-tooth surface angulation.
67

Copyright © 2017 Wolters Kluwer • All Rights ReservedCopyright © 2014 Wolters Kluwer • All Rights Reserved
Module 15—Sickle Scalers
Section 5Skill Application
Copyright © 2017 Wolters Kluwer • All Rights Reserved
Practical Focus
Sickle Scalers
69

Copyright © 2017 Wolters Kluwer • All Rights Reserved
Topics
Select the correct adaptation of cutting edge.Select the correct working-end.Determine the correct angulation.
70
Copyright © 2017 Wolters Kluwer • All Rights Reserved
Correct Adaptation of Cutting Edge
71
Copyright © 2017 Wolters Kluwer • All Rights Reserved72
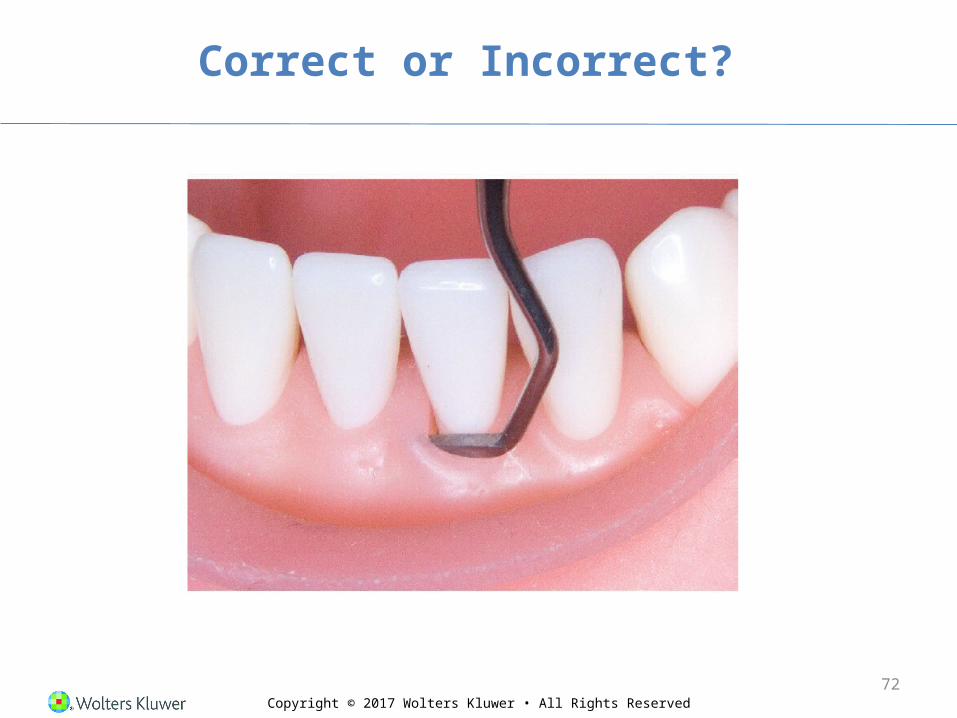
Correct or Incorrect?
Copyright © 2017 Wolters Kluwer • All Rights Reserved73
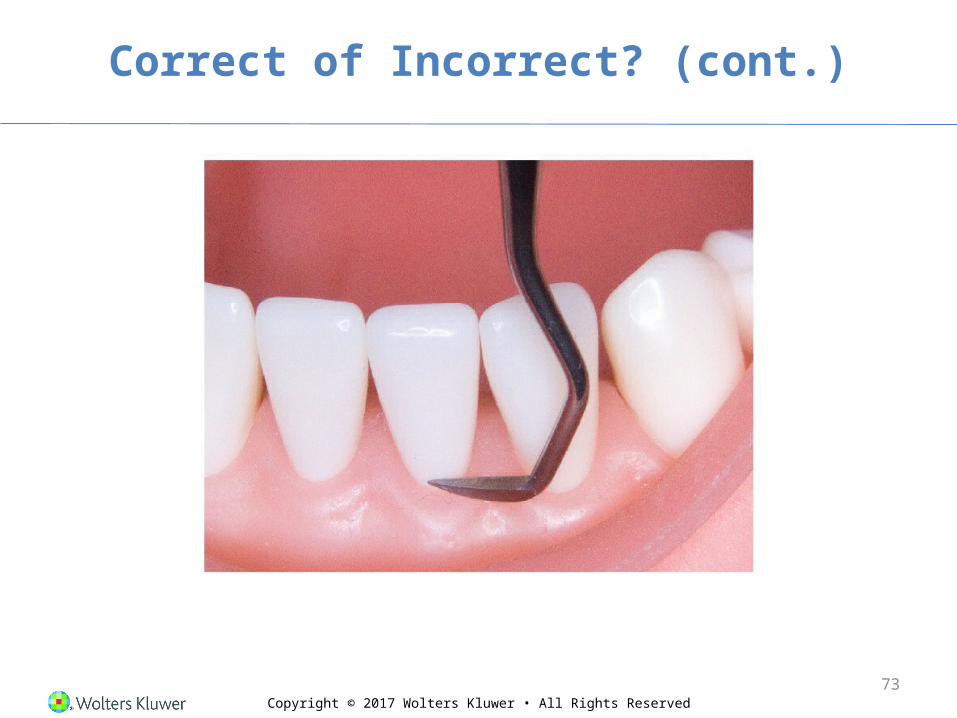
Correct of Incorrect? (cont.)

Copyright © 2017 Wolters Kluwer • All Rights Reserved
Correct Working-End Selection
74

Copyright © 2017 Wolters Kluwer • All Rights Reserved
Method 1
Lower Shank as Visual Clue
75
Copyright © 2017 Wolters Kluwer • All Rights Reserved
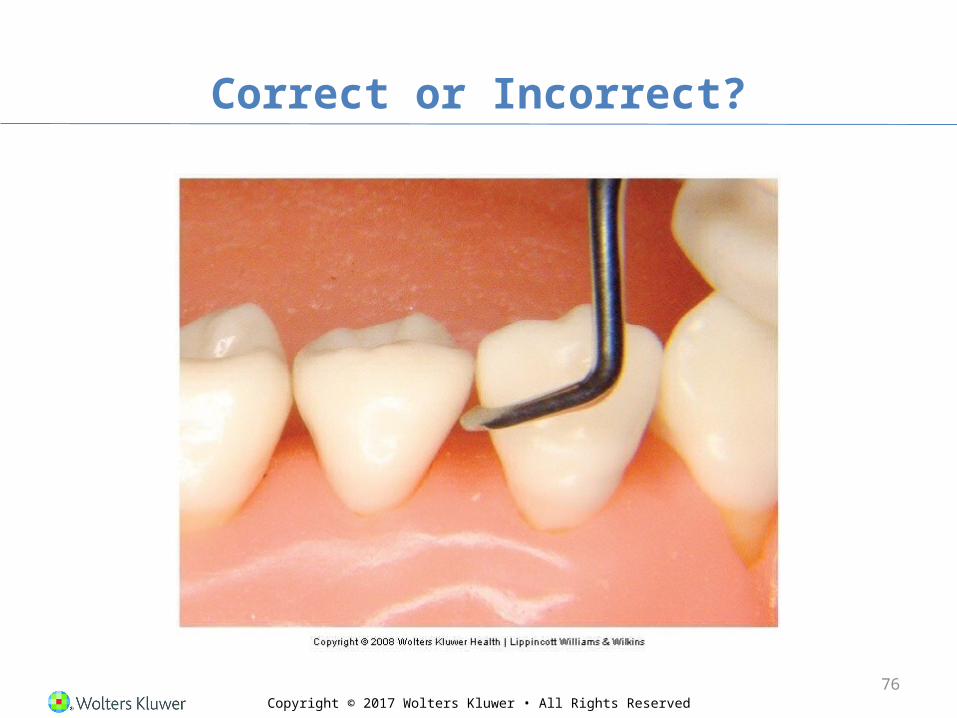
Correct or Incorrect?
76
Copyright © 2017 Wolters Kluwer • All Rights Reserved
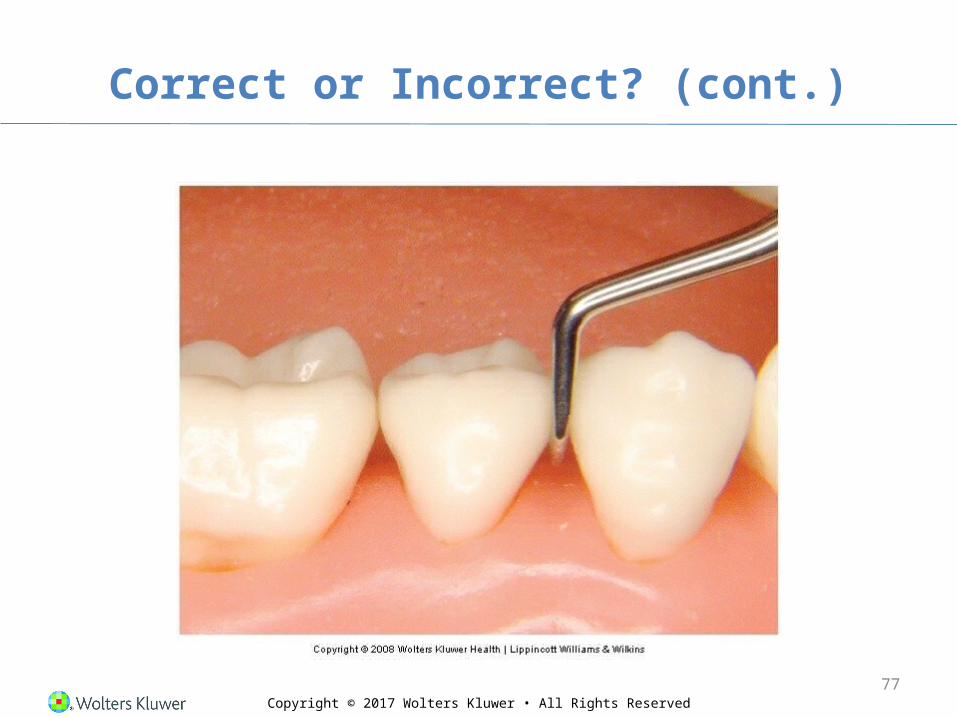
Correct or Incorrect? (cont.)
77

Copyright © 2017 Wolters Kluwer • All Rights Reserved
Method 2
Inner or Outer Cutting Edge
78
Copyright © 2017 Wolters Kluwer • All Rights Reserved
Which Is the Inner Cutting Edge?
79
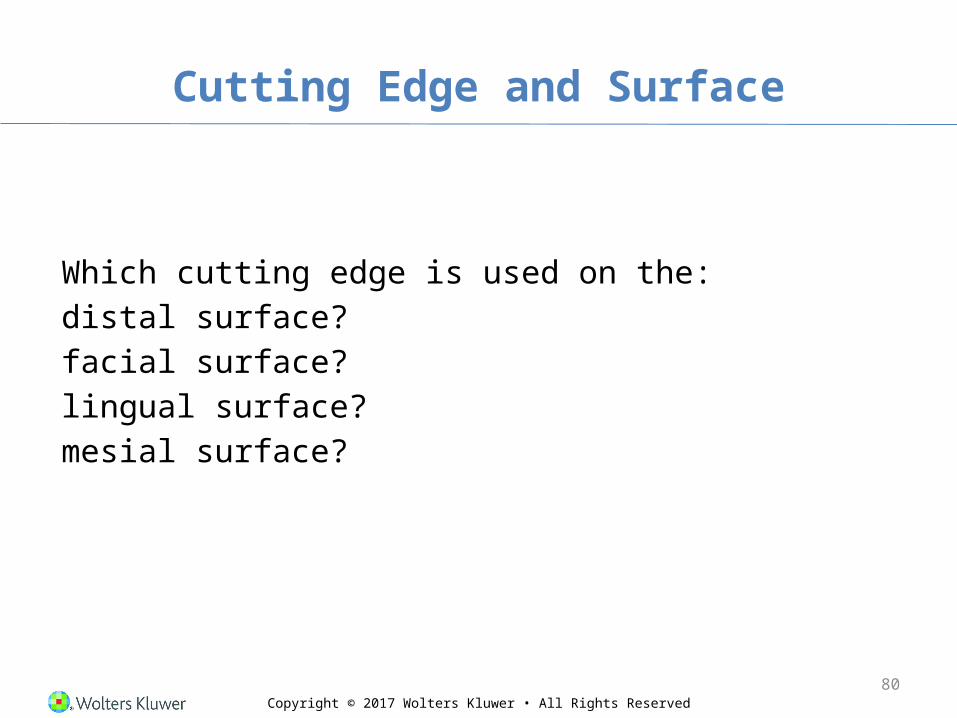
Copyright © 2017 Wolters Kluwer • All Rights Reserved
Cutting Edge and Surface
Which cutting edge is used on the:distal surface?facial surface?lingual surface?mesial surface?
80

Copyright © 2017 Wolters Kluwer • All Rights Reserved
Correct Angulation
81
Copyright © 2017 Wolters Kluwer • All Rights Reserved
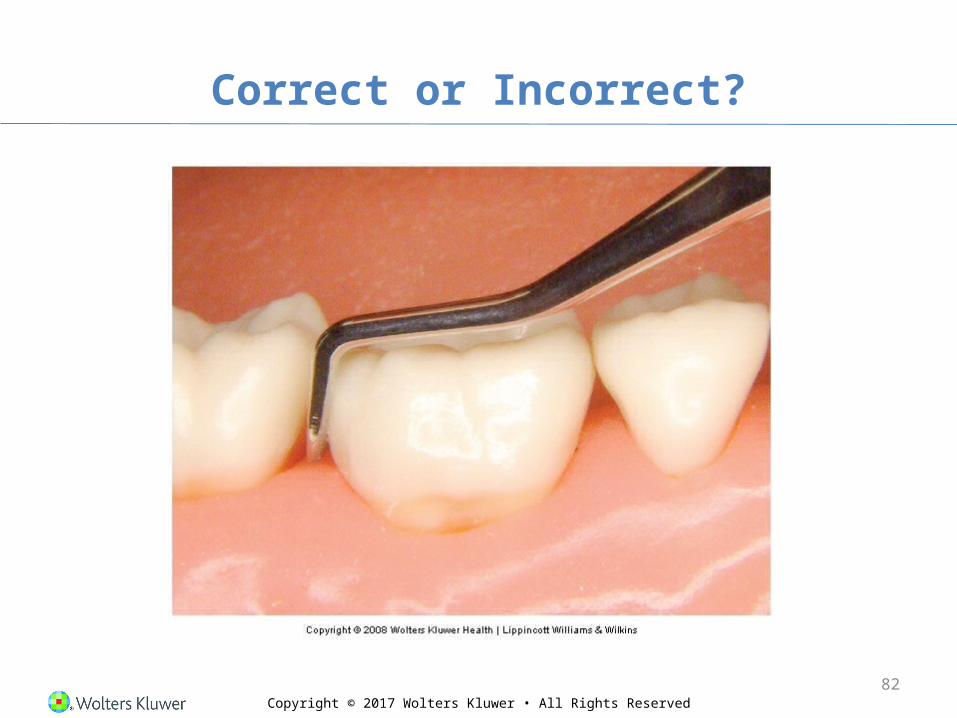
Correct or Incorrect?
82
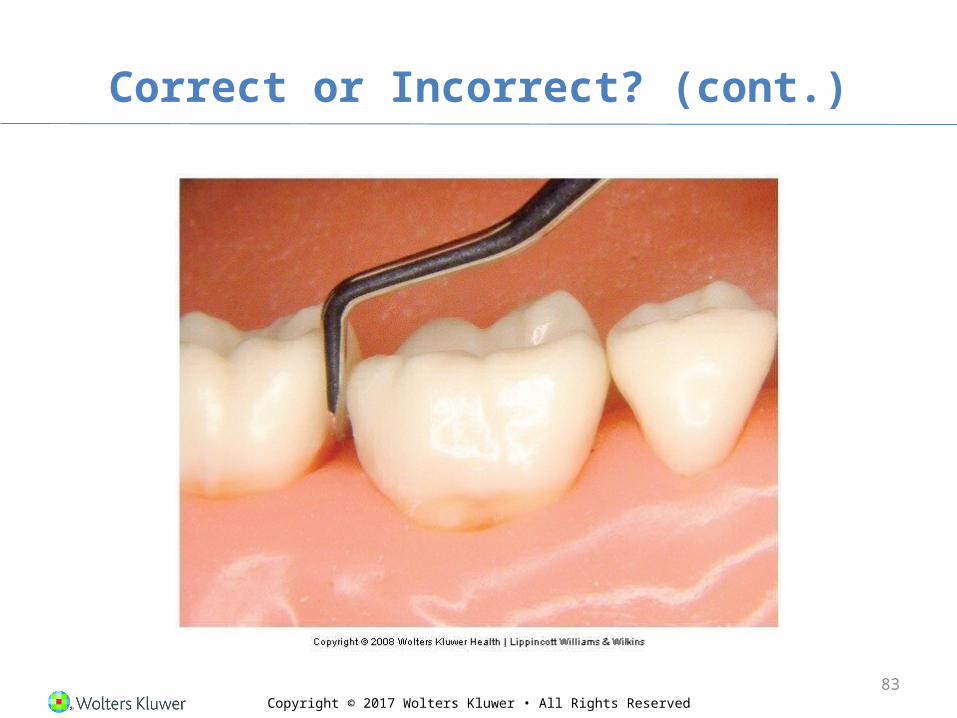
Copyright © 2017 Wolters Kluwer • All Rights Reserved
Correct or Incorrect? (cont.)
83
Related Documents