Modeler Help

Welcome message from author
This document is posted to help you gain knowledge. Please leave a comment to let me know what you think about it! Share it to your friends and learn new things together.
Transcript

Modeler Help

Outline
• Introduction
• Surface of Revolution
• Hierarchical Modeling
• Blinn-Phong Shader
• Custom Shader(s)

Scene View – contains your model and lights
Move the camera by dragging the mouse while holding down:
LMB – rotate the viewRMB or Ctrl+LMB – zoom Middle Button or Shift+LMB - pan
Objects in the Scene
Controls of the object selected in the Scene.
Currently the Scene itself is selected.

Menu Options
Shading Mode:Try this out on the sphere, or the surface of revolution
Quality:Determines the number of subdivisions and polygons to use
Show Light/Camera Markers:Draws the XYZ Axes in the view and markers for the lights
Load Revolution Curve File:Select a .apts file to use as a profile curve for Surface of Revolution
Load Texture File:Loads another texture to use instead of checkers
Save Image:Saves a snapshot of your scene view

Surface of Revolution
• Write OpenGL code to draw a surface by rotating a profile curve
• You need to calculate the following for each vertex:• Texture Coordinates (UV)• Normal• Position
• Put your code in void drawRevolution(std::vector<Point2d> *pts, int divisions, double
scale) in modelerdraw.cpp• Divisions determines the number of slices• The skeleton UI calls void drawRevolution(double scale). This implementation is a
naïve and incorrect one, but illustrates how curve files can be changed into geometry.
• You should replace the code that draws the revolution incorrectly with a call to your method.
Curve Editor
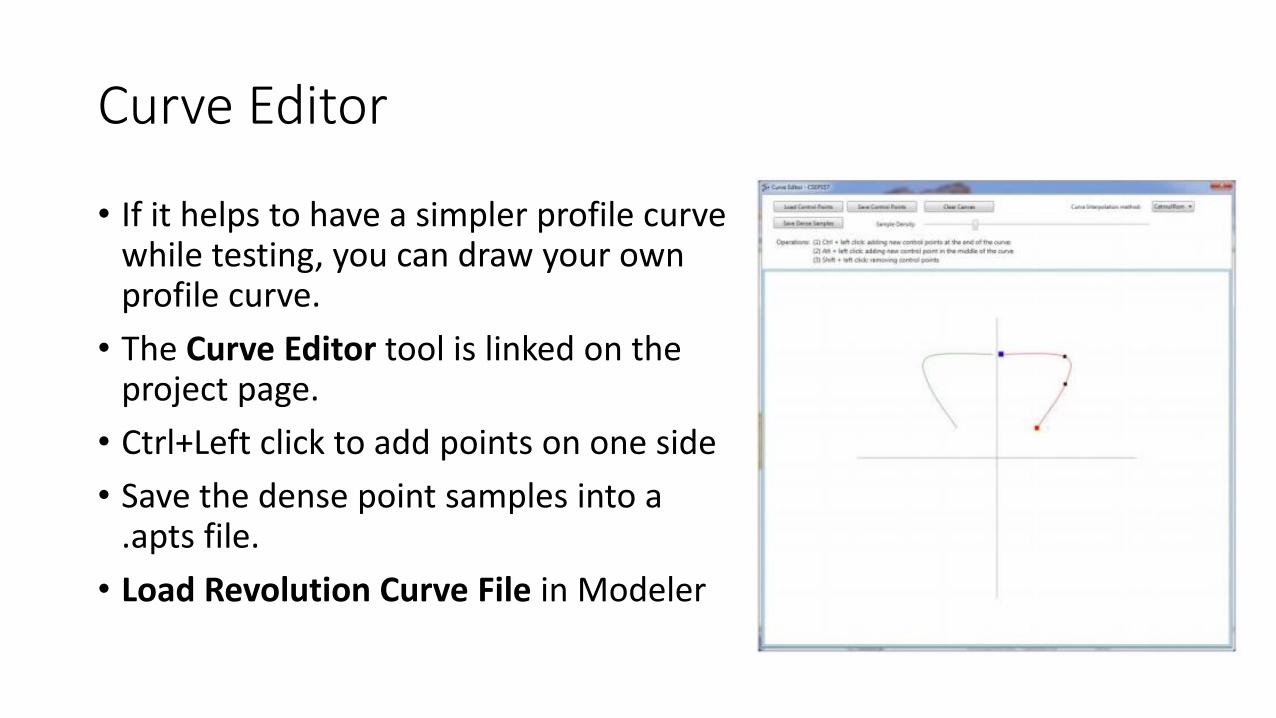
• If it helps to have a simpler profile curve while testing, you can draw your own profile curve.
• The Curve Editor tool is linked on the project page.
• Ctrl+Left click to add points on one side
• Save the dense point samples into a .apts file.
• Load Revolution Curve File in Modeler
Slicing it into Triangle Bands
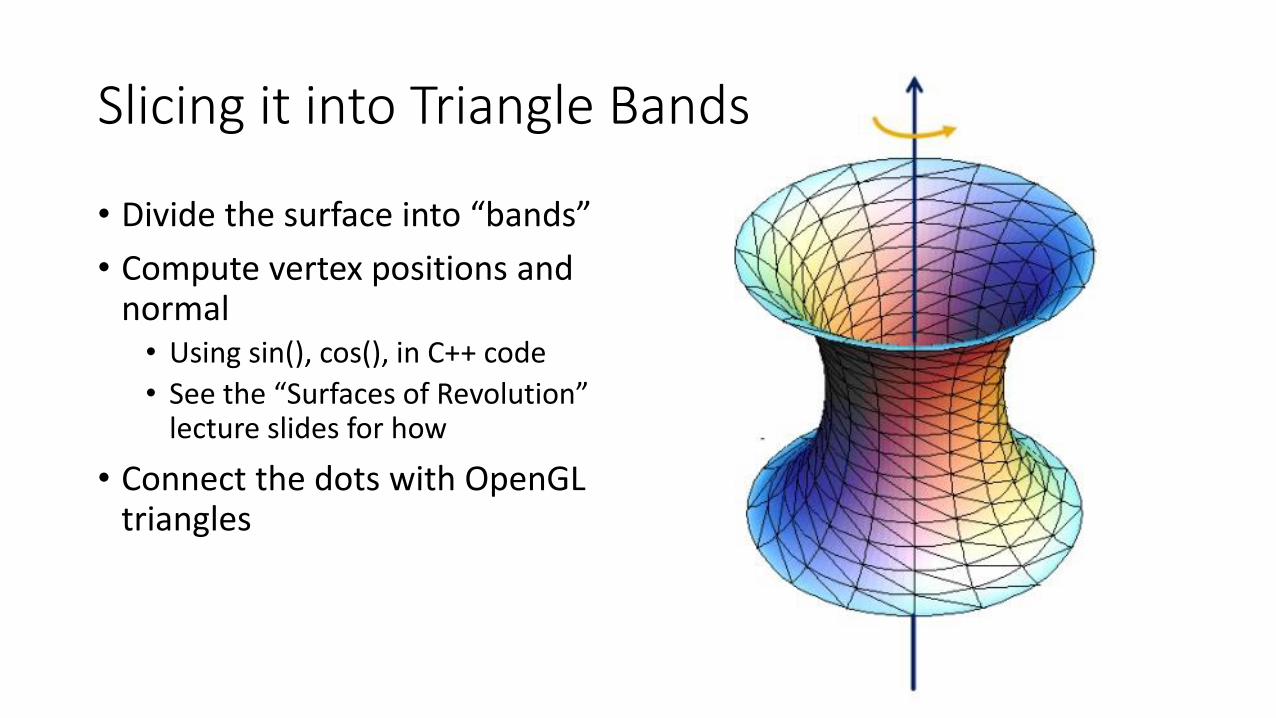
• Divide the surface into “bands”
• Compute vertex positions and normal• Using sin(), cos(), in C++ code
• See the “Surfaces of Revolution” lecture slides for how
• Connect the dots with OpenGL triangles
Drawing the Triangles
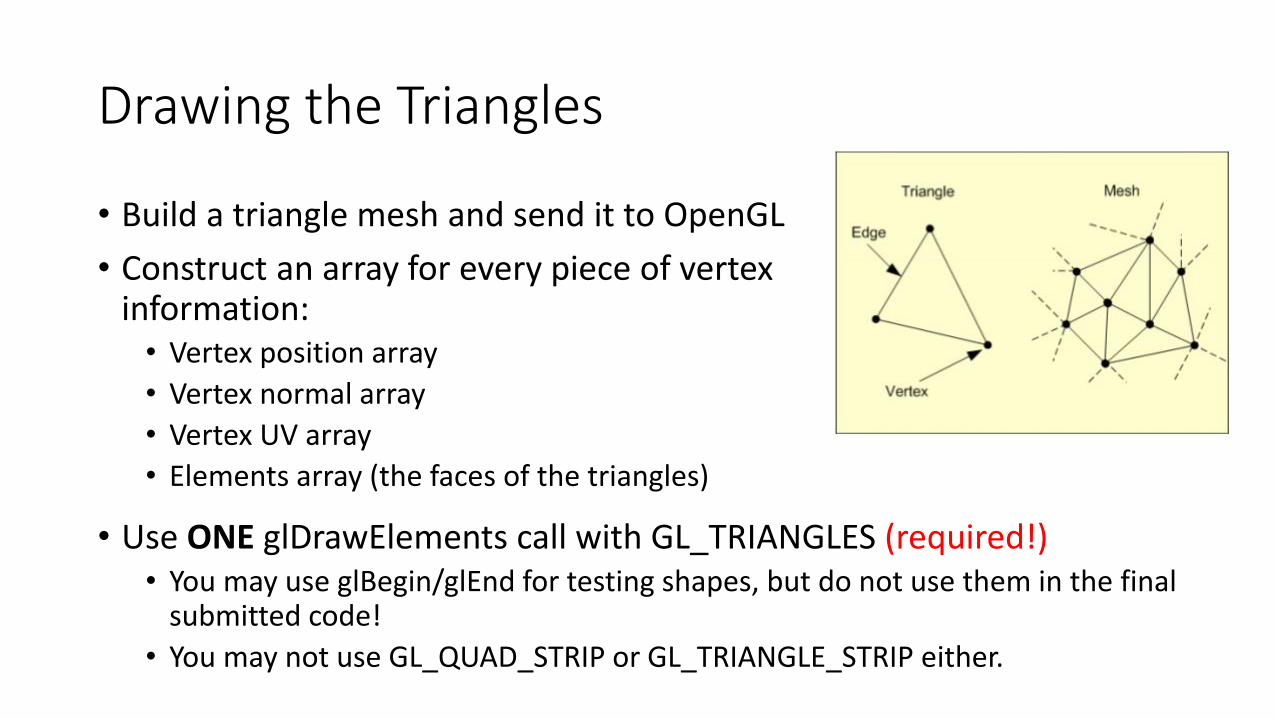
• Build a triangle mesh and send it to OpenGL
• Construct an array for every piece of vertex information:• Vertex position array
• Vertex normal array
• Vertex UV array
• Elements array (the faces of the triangles)
• Use ONE glDrawElements call with GL_TRIANGLES (required!)• You may use glBegin/glEnd for testing shapes, but do not use them in the final
submitted code!
• You may not use GL_QUAD_STRIP or GL_TRIANGLE_STRIP either.

Example (copy this code!)
Notice the data supplied into the arrays are always in the same order.If the vertices positions are supplied as {V1, V2, V3, V4},the normal must also be {N1, N2, N3, N4}, and the texture coordinates {T1, T2, T3, T4}
Triangle 1 is defined as V1,V0,V2. Triangle 2 is defined as V1,V2,V3.

Building the Faces
• Order Matters!!
• Depending on the order the faces are constructed, OpenGL will decide which face is the “front” and which is the “back”.
• Backfaces are not drawn by default (they are “culled”).

Texture Mapping
• To compute the UV Texture Coordinates, the basic idea is to remap the arclength (curve distance) and longitude to the range 0-1.• i.e. longitude for a vertex on the surface can be from 0-360
degrees. The u coordinate can be from 0-1.• See the lecture slides on “Texture Mapping” for a more
detailed explanation
• Each vertex for your surface of revolution must have:• Vertex Position• Vertex Normal• Texture Coordinate Pair
u
v
{1, 0}
{0, 1}
{0, 0}
{1, 1}

Hierarchical Modeling
• You must make a character with:• 2 levels of branching (see project page)
• Something drawn at each level
• You will be using this model for your animator animation!
• Meaningful controls• The more controls you add the better. It will make it easier to animate
• You will need to create your own model class

Creating your own model
• Create a new class that inherits from “Model”• See sample.cpp and sample.h for an
example of this.
• Override the draw method to draw your model• You can use drawBox, drawCylinder in
Modelerdraw.cpp as references
• You will need to add properties to control it

Creating your own model
• You will need to then add it as a member of scene.cpp• Scene has a method draw() that draws the floor, and a
shape depending on the “Model Shape:” property of the Scene.
• Add your own radio button to the end of the list and a case in this switch to call your model’s draw method
• Make sure to add your model’s properties to the scene’s properties by doing properties.add(mymodel.getProperties())
• Make sure to also add any textures and shaders to Scene::Load() to load them whenever the Load Textures and Shaders button is clicked• If they are specific to your model, you can add shaders and
textures as members of your model class, override the load method of your model, and have scene call your model’s load.

OpenGL is a state machine
• glEnable()/glDisable() changes state
• Once you change something, it stays that way until you change it to something new
• OpenGL’s state includes: • Current color
• Transformation matrices
• Drawing modes
• Light sources

OpenGL’s transformation matrix
• Just two of them: projection and modelview. We’ll modify modelview.
• Matrix applied to all vertices and normals
• These functions multiply transformations: glRotated(), glTranslated(), glScaled() Applies transformations in REVERSE order from the order in which they are called.
• Transformations are cumulative. Since they’re all “squashed” into one matrix, you can’t “undo” a transformation.

Transformations: Going “back”
• How do we get back to an earlier transformation matrix? We can “remember” it
• OpenGL maintains a stack of matrices.
• To store the current matrix, call glPushMatrix().
• To restore the last matrix you stored, call glPopMatrix().

Hierarchical Modeling in OpenGL

Hierarchical Modeling in OpenGL

Hierarchical Modeling in OpenGL

Hierarchical Modeling in OpenGL

Hierarchical Modeling in OpenGL

Hierarchical Modeling in OpenGL

A pop for every push
• Make sure there’s a glPopMatrix() for every glPushMatrix()!
• You can divide your draw() function into a series of nested methods, each with a push at the beginning and a pop at the end.
• Your model must have two levels of branching like in this diagram.• Circles are objects• Arrows are transformations
• Call glPushMatrix() after drawing green, so you can draw orange after drawing red• Do the same for orange
• You must draw something at each level.

Multiple-Joint Slider
• Needs to control multiple aspects of your model.• Example: Rotate multiple joints at once
• Don’t get too complicated!• Wait for Animator in four weeks!

Blinn-Phong Shader
• We provide a directional light shader in OpenGL Shading Language (GLSL). You must extend it to support point lights.
• Files to Edit:• shader.frag – your fragment shader
• shader.vert – your vertex shader

Compare with the Sample Solution
• Modeler_solution.exe loads shader.frag and shader.vert as the “student shader”
• In order to test your Blinn-Phong Point light shader, run the solution from the same folder as your shader.frag, and shader.vert• Then under “Shader To Use:” you can switch between
your student shader and the solution shader to check the differences.
• You can also use the “Shader Difference” shader, which highlights any differences between the two. You should end up seeing all black.• (There may be some random color pixels scattered
around, those are due to floating point errors)

GLSL Variables
• gl_LightSource[i].position.xyz – the position of light source I
• gl_FrontLightProduct[i] – object that stores the product of a light’s properties with the current surface’s material properties:• Example: gl_FrontLightProduct[i].diffuse == gl_FrontMaterial.diffuse *
gl_LightSource[i].diffuse

Custom Shader
• Anything you want! (ask us first)
• You are required to do 3 whistles worth, but after that you can earn extra credit.
• Shader_textured.frag and shader_textured.vert are the provided shaders, but they include using a texture to modulate the diffuse color. You may use these as reference to help on some of the options that require texture mapping.
• Shader Resources:• http://www.lighthouse3d.com/tutorials/• Unity manual on normal mapping• Shadertoy has fragment shaders that run on a flat plane only (no vertices other than
the 4 for the plane)

Tips
• Start simple when you draw. Draw a few triangles first to make sure it shows up. Then draw a band of triangles.
• When doing glDrawElements, know that each drawcall you do is a hit on performance. So usually we try to have as few drawcalls as possible. If you have more than one drawcall for your surface of revolution, we will deduct points.
• You will need to add your model into the animator project 4, so try not to make changes to too many other files. Otherwise you might need to make those changes again to project 4.
• Make sure to check out the GLSL Shader Tutorials from the Modeler page. Core GLSL is more architecture (has an explanation of the pipeline and shading stages), and GLSL 1.2 is what we're using (has toon shader tutorial etc).

Tips
• If you have additional shaders, make sure to call shader.Load() from the Scene's Load() method. The "Reload Textures and Shaders" button will call the Scene's Load() method, which calls the .load() of texture and shader.
• Your modeler is the artifact. This means by the due date for the binary, you need to have your hierachical model done. Special instructions are available for submitting your modeler as an artifact by the artifact due date.
• Make sure to check your Pointlight shader using the solution's "ShaderDifference". Put your "shader.frag" and "shader.vert" into the same folder as the solution.
• You can check your texture mapping in the skeleton by using the "none" shaderwith texture enabled. (or you can add the reference textured shader)
• Shaders are hard to debug as there is no “print” statement in GLSL. You must use colors to identify what went wrong, and think about why they might appear that way.
Related Documents