Model A15/79 Total Residual Chlorine Monitor (Stripping Type) Home Office European Office Analytical Technology, Inc. ATI (UK) Limited 6 Iron Bridge Drive Unit 1 & 2 Gatehead Business Park Collegeville, PA 19426 Delph New Road, Delph Saddleworth OL3 5DE Ph: (800) 959-0299 Ph: 0800-018-4020 (610) 917-0991 + 44 (0) 1457-873-318 Fax: (610) 917-0992 Fax: + 44 (0) 1457-874-468 Email: [email protected] Email: [email protected]

Welcome message from author
This document is posted to help you gain knowledge. Please leave a comment to let me know what you think about it! Share it to your friends and learn new things together.
Transcript

Model A15/79
Total Residual Chlorine Monitor (Stripping Type)
Home Office European Office Analytical Technology, Inc. ATI (UK) Limited 6 Iron Bridge Drive Unit 1 & 2 Gatehead Business Park Collegeville, PA 19426 Delph New Road, Delph Saddleworth OL3 5DE Ph: (800) 959-0299 Ph: 0800-018-4020 (610) 917-0991 + 44 (0) 1457-873-318 Fax: (610) 917-0992 Fax: + 44 (0) 1457-874-468 Email: [email protected] Email: [email protected]

PRODUCT WARRANTY Analytical Technology, Inc. (Manufacturer) warrants to the Customer that if any part(s) of the Manufacturer's products proves to be defective in materials or workmanship within the earlier of 18 months of the date of shipment or 12 months of the date of start-up, such defective parts will be repaired or replaced free of charge. Inspection and repairs to products thought to be defective within the warranty period will be completed at the Manufacturer's facilities in Collegeville, PA. Products on which warranty repairs are required shall be shipped freight prepaid to the Manufacturer. The product(s) will be returned freight prepaid and allowed if it is determined by the manufacturer that the part(s) failed due to defective materials or workmanship. This warranty does not cover consumable items, batteries, or wear items subject to periodic replacement including lamps and fuses. Gas sensors, except oxygen sensors, are covered by this warranty, but are subject to inspection for evidence of extended exposure to excessive gas concentrations. Should inspection indicate that sensors have been expended rather than failed prematurely, the warranty shall not apply. The Manufacturer assumes no liability for consequential damages of any kind, and the buyer by acceptance of this equipment will assume all liability for the consequences of its use or misuse by the Customer, his employees, or others. A defect within the meaning of this warranty is any part of any piece of a Manufacturer's product which shall, when such part is capable of being renewed, repaired, or replaced, operate to condemn such piece of equipment. This warranty is in lieu of all other warranties (including without limiting the generality of the foregoing warranties of merchantability and fitness for a particular purpose), guarantees, obligations or liabilities expressed or implied by the Manufacturer or its representatives and by statute or rule of law. This warranty is void if the Manufacturer's product(s) has been subject to misuse or abuse, or has not been operated or stored in accordance with instructions, or if the serial number has been removed. Analytical Technology, Inc. makes no other warranty expressed or implied except as stated above.
ATI Model A15/79 Total Residual Chlorine Monitor
3
O&M Manual Rev-Q, 9/12
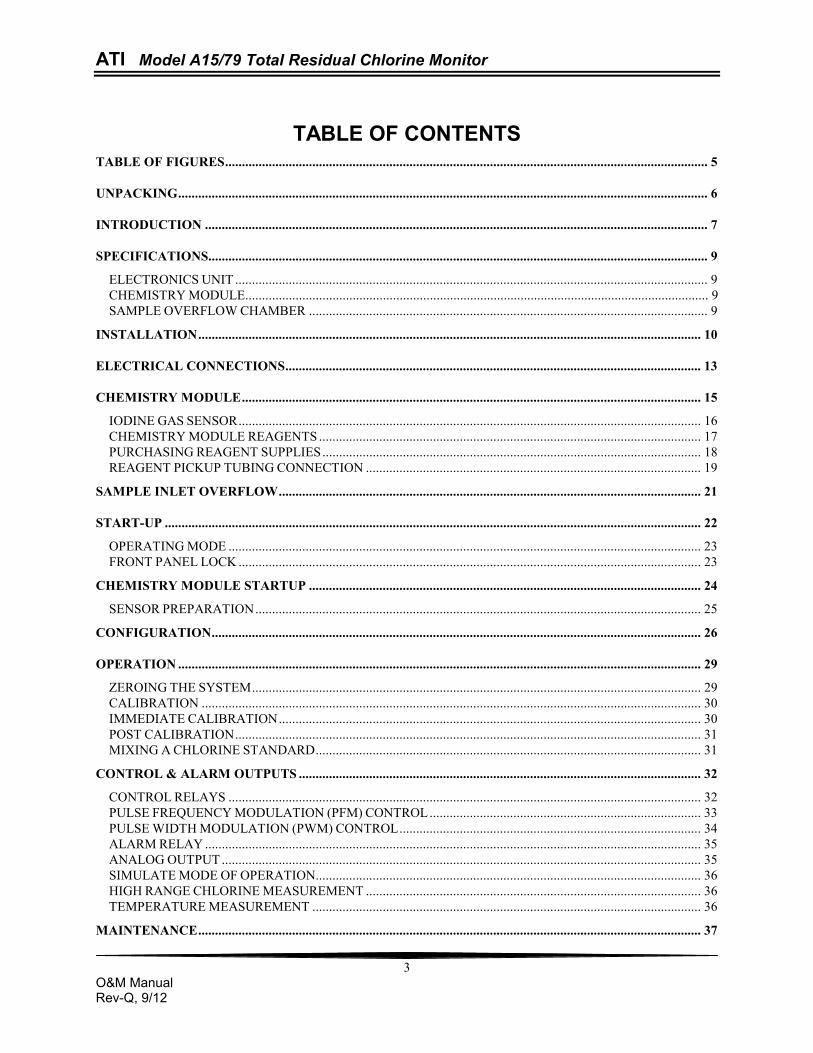
TABLE OF CONTENTS
TABLE OF FIGURES ................................................................................................................................................ 5
UNPACKING .............................................................................................................................................................. 6
INTRODUCTION ...................................................................................................................................................... 7
SPECIFICATIONS..................................................................................................................................................... 9 ELECTRONICS UNIT ............................................................................................................................................. 9 CHEMISTRY MODULE.......................................................................................................................................... 9 SAMPLE OVERFLOW CHAMBER ....................................................................................................................... 9
INSTALLATION ...................................................................................................................................................... 10
ELECTRICAL CONNECTIONS ............................................................................................................................ 13
CHEMISTRY MODULE ......................................................................................................................................... 15 IODINE GAS SENSOR .......................................................................................................................................... 16 CHEMISTRY MODULE REAGENTS .................................................................................................................. 17 PURCHASING REAGENT SUPPLIES ................................................................................................................. 18 REAGENT PICKUP TUBING CONNECTION .................................................................................................... 19
SAMPLE INLET OVERFLOW .............................................................................................................................. 21
START-UP ................................................................................................................................................................ 22 OPERATING MODE ............................................................................................................................................. 23 FRONT PANEL LOCK .......................................................................................................................................... 23
CHEMISTRY MODULE STARTUP ..................................................................................................................... 24 SENSOR PREPARATION ..................................................................................................................................... 25
CONFIGURATION .................................................................................................................................................. 26
OPERATION ............................................................................................................................................................ 29 ZEROING THE SYSTEM ...................................................................................................................................... 29 CALIBRATION ..................................................................................................................................................... 30 IMMEDIATE CALIBRATION .............................................................................................................................. 30 POST CALIBRATION ........................................................................................................................................... 31 MIXING A CHLORINE STANDARD ................................................................................................................... 31
CONTROL & ALARM OUTPUTS ........................................................................................................................ 32 CONTROL RELAYS ............................................................................................................................................. 32 PULSE FREQUENCY MODULATION (PFM) CONTROL ................................................................................. 33 PULSE WIDTH MODULATION (PWM) CONTROL .......................................................................................... 34 ALARM RELAY .................................................................................................................................................... 35 ANALOG OUTPUT ............................................................................................................................................... 35 SIMULATE MODE OF OPERATION................................................................................................................... 36 HIGH RANGE CHLORINE MEASUREMENT .................................................................................................... 36 TEMPERATURE MEASUREMENT .................................................................................................................... 36
MAINTENANCE ...................................................................................................................................................... 37

ATI Model A15/79 Total Residual Chlorine Monitor
4
O&M Manual Rev-Q, 9/12
SENSOR MEMBRANE REPLACEMENT ............................................................................................................ 37 SENSOR ELECTRODE CLEANING .................................................................................................................... 37 PUMP TUBING REPLACEMENT ........................................................................................................................ 38 REACTOR MAINTENANCE ................................................................................................................................ 39 AIR FILTER REPLACEMENT.............................................................................................................................. 39
TROUBLESHOOTING ........................................................................................................................................... 40 SENSOR ELECTRICAL TEST .............................................................................................................................. 41 MONITOR RESET ................................................................................................................................................. 41
SPARE PARTS LIST - MODEL A15/79 ................................................................................................................ 42

ATI Model A15/79 Total Residual Chlorine Monitor
5
O&M Manual Rev-Q, 9/12
TABLE OF FIGURES
Figure 1 - Typical Residual Chlorine Monitoring System .............................................................................. 8 Figure 2 - Panel Mount Monitor Dimensions & installation ......................................................................... 10 Figure 3 - Nema 4X Wall Mount Dimensions & Installation ........................................................................ 11 Figure 4 - Chemistry Module Dimensions ................................................................................................... 12 Figure 5 - Electrical Connections ................................................................................................................ 13 Figure 6 - Chemsitry Module Connection ................................................................................................... 14 Figure 7 - Chemistry Module Layout ........................................................................................................... 15 Figure 8 - Reagent Bottle Mounting Bracket ............................................................................................... 18 Figure 9 - Reagent Pickup Tubing Assermbly ............................................................................................ 19 Figure 10 - Solution Feed Assembly ........................................................................................................... 20 Figure 11 - Sample Inlet Overflow Arrangement ........................................................................................ 21 Figure 12 - Sensor Exploded View ............................................................................................................. 25 Figure 13 - Pump Head Assembly Exploded View ..................................................................................... 38

ATI Model A15/79 Total Residual Chlorine Monitor
6
O&M Manual Rev-Q, 9/12
UNPACKING When you receive your A15/79 Residual Chlorine Monitor, open the shipping packages and inspect the contents to be sure that all items have been received. The following items should be included: Quantity 1 - Model A15/79 Chlorine Monitor Electronics (panel mount or NEMA 4X) Quantity 1 - # 00-1060 Chlorine Monitor Chemistry Module Quantity 1 - # 03-0029, 20 ft. sensor interconnect cable Quantity 1 - # 00-0977 Gas Phase Iodine Sensor Quantity 1 - #05-0052 Sensor Membrane, package of 10 Quantity 1 - #09-0026 Sensor Electrolyte, 120 cc. Quantity 1 - #05-0041 A15/79S Spare Parts Kit Quantity 2 - #47-0022 Reagent Bottle Wall Bracket (unless 00-1261 SS plate is ordered) Quantity 1 - #09-0031 KI Reagent In addition to the standard items listed above, any additional spare parts, junction boxes, cable, or spare sensors that were ordered separately will be included. Compare the contents of the shipping container with the packing list. The items listed above are the standard components that are included with every standard A15/79 chlorine monitor. Any other items will be listed separately on the packing list. Check the contents of the shipping container carefully to insure that nothing is overlooked. Should you find anything missing from the shipment, immediately contact the ATI sales department by phone, fax.., or email using the information shown on the first page of this manual.

ATI Model A15/79 Total Residual Chlorine Monitor
7
O&M Manual Rev-Q, 9/12
INTRODUCTION
The Model A15/79 is an on-line monitoring system designed for the continuous measurement of total residual chlorine in water. The full scale operating range of the system may be selected by the user for 0-2.000 PPM or 0-20.00 PPM, and the sensing system will operate on water streams with temperatures from 0 to 40°C. The Monitor is designed for use on any water or wastewater stream where residual chlorine measurement is required. The only limitation is that solids content of the sample be low enough as to not plug the chemistry system. Chlorine measurement is made in the A15/79 system using the EPA recommended method for total residual chlorine. A small amount of sample is pumped out of the inlet overflow chamber and mixed with pH 4 buffer and potassium iodide solution. All chemical forms of chlorine in the water will react with iodide from the reagent addition and release an equal amount of iodine (I2). The reacted sample then flows to an air stripping chamber where iodine, which is a gas, is stripped from the sample using a controlled air flow. An iodine gas sensor located in the flow block next to the air stripping chamber measures the concentration of released iodine, and is connected to an electronic module with converts sensor signals to a direct concentration display. The measured chlorine concentration is displayed on a backlit liquid crystal display on the front of the instrument. Depending on the full scale operating range selected, the unit will display chlorine with a resolution of either 0.01 PPM (10 PPB) or 0.001 (1 PPB). A 4-20 mA output is provided for recording or data logging. The output can be programmed for a variety of ranges as is described later in this manual, with a minimum range of 0-0.1 PPM and a maximum range of 0-20 PPM. Alarm contacts are also standard in the electronic package and may be used either for simple control schemes or for signaling operators of abnormal operating conditions. The standard model A15/79 system includes three main components, a wall mounted NEMA 4X electronics unit, a chemistry module housed in a wall-mount enclosure, and a sample inlet overflow chamber with standoff bracket. The electronics is also available in a panel mount version if preferred for a particular application. For connection of the chemistry module to the electronics, a 20' sensor cable is supplied, and the cable length can be increased to 100' maximum. Figure 1 on the following page shows a typical installation of this monitoring system. For convenience in installation, a special stainless steel mounting panel is available. This panel provides mounting locations for the monitor, chemistry module, and overflow chamber. In addition, it contains a shelf at the bottom for locating the reagent containers used in normal operation. The drawing in Figure 1 provides mounting hole dimensions for the optional stainless steel mounting panel. While the monitor is suitable for outdoor mounting, the chemistry module should have additional protection if mounted outdoors. It is best to mount the chemistry module and reagents inside a general purpose enclosure to keep wind driven rain off of the pumps located on the bottom of the chemistry module. Do not put the chemistry module in a sealed enclosure. Sample leakage from the overflow chamber must have a place to drain in case of an overflow or sample line break.

ATI Model A15/79 Total Residual Chlorine Monitor
8
O&M Manual Rev-Q, 9/12
Figure 1 - Typical Residual Chlorine Monitoring System

ATI Model A15/79 Total Residual Chlorine Monitor
9
O&M Manual Rev-Q, 9/12
SPECIFICATIONS ELECTRONICS UNIT ELECTRONIC MONITOR Range: 0-2.000 or 0-20.00 PPM Repeatability: ± 0.01 PPM Linearity: 0.1% of F.S. Response Time: 90% in 5 Minutes Display: 16 character alphanumeric backlit LCD Temperature Compensation: Automatic from 0-50° C with 100 ohm Pt. RTD Control Relays: Two SPDT relays, 5A @ 220 VAC resistive. Programmable deadband and time delay. Control Mode: On/Off, pulse width modulation, pulse frequency modulation Alarm Relay: Independent SPDT relay, 5A @ 220 VAC resistive. Programmable for actuation on high/low values or system failure. Analog Output: Isolated 4-20 mA, 600 ohm maximum load. Programmable output span. Output may be inverted. Operating Conditions: 0-50° C., 0-95% R.H. non-condensing. Power: 110/220 VAC ±10%, 50/60 Hz. Enclosure: Panel mount standard, NEMA 4X wall mount optional. CHEMISTRY MODULE Sensor: Membraned I2 Gas Sensor Sensor Cable: 20 feet standard, 100 feet maximum Sample Pump: Internal Tubing Pump, 5 cc./min. Reagent Pump: Internal Tubing Pump, 0.06 cc/min. (uses 2 tubes) Air Supply: Diaphragm air pump with rotameter flow control Air Stripping Chamber: Cast Acrylic Temperature Limits: 0-40° C. Power: 120 VAC, 60 Hz., 220 VAC, 50 Hz. Optional Enclosure: NEMA 1 SAMPLE OVERFLOW CHAMBER Material: Clear Acrylic Recommended Sample Rate: 7-30 GPH (0.45 – 1.9 LPM) Sample Inlet: ¼” I.D. Hose Barb (1/8” FNPT) Sample Drain: ½” I.D. Hose Barb (3/8” FNPT) Mounting Bracket: Aluminum

ATI Model A15/79 Total Residual Chlorine Monitor
10
O&M Manual Rev-Q, 9/12
INSTALLATION The main installation requirements of ATI's total chlorine monitor are mechanical installation, connection of power to the electronics, connection of sample and drain lines to the constant head flowcell, and connection of reagents to the reagent pump. Figure 2 provides details on the mechanical installation of the standard panel mounted electronic monitor. Dimensions on the panel cutout are included, and the panel cutout must be made accurately as the cutout tolerance is small. Panel mounting brackets are included with the monitor and are attached as shown in Figure 2.
6.10"155mm
5.46"139mm
.34"8.6mm
3.54"90mm
3.78"96mm
SIDE VIEWFRONT VIEW
3.78"96mm
MOUNTING BRACKETS(TYPICAL 2 PLACES)
MOUNTING BRACKET INSTALLATIONPANEL CUTOUT
3.60"91.4mm
3.60"91.4mm
Figure 2 - Panel Mount Monitor Dimensions & installation

ATI Model A15/79 Total Residual Chlorine Monitor
11
O&M Manual Rev-Q, 9/12
The NEMA 4X wall mount enclosure is a Molded Plastic ABS unit that bolts directly to a wall or other flat surface. The enclosure is supplied with special mounting brackets for convenience in mounting the enclosure. A hinged door on the front of the enclosure provides access to operating controls, and a hinge on the back section for convenience in wiring the unit.
Figure 3 - Nema 4X Wall Mount Dimensions & Installation

ATI Model A15/79 Total Residual Chlorine Monitor
12
O&M Manual Rev-Q, 9/12
The chemistry module consists of an ABS enclosure housing sample and reagent pumps plus the air supply and reactor system used to measure chlorine concentration. The chemistry module is designed for wall mounting in a protected location. Although the enclosure is suitable for outdoor use, it is best to provide an additional enclosure around this module if mounted outdoors. Dimensions of this unit are shown in Figure 4. NOTE: The chemistry module internal compartment must be accessible for wiring and service.
The enclosure is hinged on the right side, and clearance must be allowed for the front section of the enclosure to swing open to the right. Allow a minimum of 6” (150 mm) clearance on the right side of the chemistry module for proper access to the internal compartment.
Figure 4 - Chemistry Module Dimensions
CAUTION: Chemistry modules should be installed in a protected environment. Indoor
installation is preferable. If outdoor installation is required, protection against freezing is required. Never install outdoors in an environment where ambient temperatures will exceed 40° C. Potassium iodide reagent tends to oxidize at high temperature, causing zero drift problems.

ATI Model A15/79 Total Residual Chlorine Monitor
13
O&M Manual Rev-Q, 9/12
ELECTRICAL CONNECTIONS AC power must be connected to both the monitor and the chemistry module. Refer to Figure 5 below for the proper connections. A power cord is supplied with each unit for AC connection and a 6- conductor interconnect cable (20 ft.) is supplied for connection of the chemistry module to the monitor. Note that the terminal blocks at the rear of the monitor unplug for wiring convenience. Figure 6 provides the interconnection wiring diagram between the chemistry module and the monitor. The chemistry module can be located up to 100 feet from the monitor provided that connection is made with a single length of #31-0037 cable. Cable must be ordered separately. Note also that the AC power for the monitor can be connected off of separate terminals in the chemistry module if desired. This allows the monitor to operate through the fused line in the chemistry system.
TB1 TB2 1 - AC POWER - NEUTRAL 14 - MA OUTPUT - (+) 2 - AC POWER - 110V - HOT 15 - MA OUTPUT - (+) 3 - AC POWER - 220V - HOT 16 - MA OUTPUT - (-) 4 - AC - GROUND 17 - SENSOR - WHITE 5 - RELAY A - NORMALLY OPEN 18 - SENSOR - BROWN OR ORANGE 6 - RELAY A - COMMON 19 – SENSOR - BLUE 7 - RELAY A - NORMALLY CLOSED 20 - UNUSED 8 - RELAY B - NORMALLY OPEN 21 - UNUSED 9 - RELAY B - COMMON 22 - UNUSED 10 - RELAY B - NORMALLY CLOSED 23 – SENSOR – RED 11 - ALARM RELAY C/D - NORMALLY OPEN 24 – SENSOR – BLACK 12 - ALARM RELAY C/D - COMMON 25 – SENSOR – GREEN 13 - ALARM RELAY C/D - NORMALLY CLOSED
Figure 5 - Electrical Connections

ATI Model A15/79 Total Residual Chlorine Monitor
14
O&M Manual Rev-Q, 9/12
To wire the chemistry module, you need to open the center compartment of the assembly. On the left side of the enclosure is a slot for releasing the latch. Slide a small screwdriver into the slot and push the screwdriver handle toward the side of the enclosure. The latch will snap open and you can release the catch, allowing the front part of the chemistry module to swing open on the right hand hinge. If you wish, you can completely remove the front section by unplugging the pump terminal block, the upper terminal block marked “to sensor”, and disconnecting the tube from the top of the air pump. With these items disconnected, you can open the right hand latch and remove the entire front of the chemistry module.
Figure 6 - Chemsitry Module Connection

ATI Model A15/79 Total Residual Chlorine Monitor
15
O&M Manual Rev-Q, 9/12
CHEMISTRY MODULE
The chemistry module is the heart of the chlorine monitor. Inside this module are the pumps, air supply, air control instruments, and sensor element required to make an accurate chlorine measurement. All items are housed in a protective enclosure, with the main components mounted on the front panel inside the clear cover. The front section of the enclosure is hinged in two places, with the clear cover able to swing in either direction. The center compartment is allowed to swing open on the right hand hinge only (open left release latch). Opening the center compartment allows access to the terminal circuit board, air pump, and sample and reagent pump wiring. Chlorine measurement in the chemistry module is done by pumping a small amount of sample out of the inlet overflow chamber, mixing the sample with buffer and KI solution to convert chlorine to iodine, and then air stripping the I2 for measurement in the gas phase. Figure 8 and Figure 9 provide a view of the chemistry module components.
Figure 7 - Chemistry Module Layout

ATI Model A15/79 Total Residual Chlorine Monitor
16
O&M Manual Rev-Q, 9/12
In operation, sample flows to the inlet chamber of the overflow assembly. Most of the sample overflows to waste. A small amount of sample (5 cc/min.) is pumped out of the inlet chamber. Both acetic acid buffer and potassium iodide solution are supplied by the second pump and mixed with the sample in the mixing “T”, converting the chlorine in solution to molecular iodine gas as follows.
HOCl + 2 KI → I2 + KCl + KOH The reacted sample then moves to the air stripping chamber. In the stripping chamber, air is injected into the incoming sample at a controlled rate. Iodine gas is stripped from the sample into this air stream and carried through a passage in the top of the reactor past the sensor that is inserted into a separate chamber in the side of the reactor. A special iodine gas sensor located in this flow chamber measures the iodine concentration, providing a signal to the A15/79 electronics module. Air for the stripping process is provided by an air pump located on the circuit board in the rear compartment of the chemistry module. Air from this pump is first filtered and then pumped through a rotameter with flow indicator. The rotameter is used to adjust the flow of stripping air to the rate required for the measurement, and should always be set to 400 cc/min. A check valve in the outlet of the air supply line prevents sample from flowing back into the air supply system. Reacted sample from the stripping chamber flows through a liquid trap and into a drain chamber which is directly below the sensor. The stripping air and the reacted sample both exit through a tube at the bottom of the reactor and are directed into the drain side of the inlet overflow assembly as shown in Figure 10. IODINE GAS SENSOR The A15/79 Total Chlorine Monitor uses a special iodine gas sensor designed to operate continuously in a wet gas stream. The sensor is a membraned sensor that allows iodine gas to pass through the membrane and come in contact with a catalytic electrode. On the electrode surface, the iodine is reduced to iodide, generating a current within the sensor that is linearly proportional to gas concentration. In continuous operation, the membrane isolating the sensing electrodes from the air stream can become coated or fouled by a small amount of carry-over from the stripping chamber. The sensor has been designed so that the membrane can be easily replaced when required. Membrane replacement will normally be necessary every 2 - 3 months, depending on the application and the chlorine concentration being measured. An electrolyte contained in the sensor must be replaced at the same time the membrane is replaced. The sensor is shipped with a protective membrane installed but no electrolyte in the sensor. You MUST change the membrane and fill the sensor with electrolyte prior to operation of the system. A package of 10 membranes and a 120 cc bottle of electrolyte are supplied with the system.

ATI Model A15/79 Total Residual Chlorine Monitor
17
O&M Manual Rev-Q, 9/12
CHEMISTRY MODULE REAGENTS The chlorine monitor uses an acetate buffer solution and a potassium iodide solution. For acetate buffer, the system uses standard white vinegar available in most supermarkets. Buffer solution can also be mixed by diluting glacial acetic acid to a 5% solution. KI solution is mixed on-site using the premeasured potassium iodide powder supplied by ATI. The contents of one KI powder pack is dissolved in one gallon of distilled water to provide the necessary KI solution for the monitor. CAUTION: Use care when handling reagents for use with this analyzer. Always
wear eye protection. The buffer and KI solutions are generally not hazardous to skin, but could cause some irritation to people with especially sensitive skin. Use of rubber gloves will avoid this possibility.
Two reagent bottle mounting bracket are supplied so that the buffer and KI solution can be located conveniently below the chemistry module. The brackets are designed for wall mounting, and will hold one gallon plastic containers. When mounting these brackets, be sure to leave enough room between the bottom of the chemistry module and the top of the bracket so that the bottles can be lifted from the brackets. Note that these brackets are not supplied when the stainless steel mounting panel containing the reagent shelf is ordered with the analyzer.

ATI Model A15/79 Total Residual Chlorine Monitor
18
O&M Manual Rev-Q, 9/12
Figure 8 - Reagent Bottle Mounting Bracket
PURCHASING REAGENT SUPPLIES As mentioned previously, common white vinegar is used for the acetate buffer. Premeasured packages of KI reagent for mixing in gallon bottles of distilled water are available from ATI (part number 09-0031). Contact ATI at 800-959-0299 or email [email protected] for details.

ATI Model A15/79 Total Residual Chlorine Monitor
19
O&M Manual Rev-Q, 9/12
REAGENT PICKUP TUBING CONNECTION A special rubber stopper with a ceramic support tube is supplied for each of the reagent bottles. If necessary, adjust the ceramic tube so that it does not hit the bottom of the solution bottles. A length of pickup tubing is also supplied for each of these pickup assemblies with a small filter attached to one end of the tubing. After the KI and vinegar solutions are ready, feed the end of the tubing opposite the filter up through the ceramic tube. Then insert the tube assembly into the solution and press the rubber stopper in place. When assembled, the reagent delivery system should conform to Figure 10. After the reagent bottles have been placed into the brackets or on the mounting panel shelf, attach the other end of the pickup tubing to the connectors on the reagent pump. The reagent pump has two small barb connectors on the right side. Press the pickup tube carefully onto each of these barbs, being careful not to pull on the pump tubing. The tubing from the reagent bottles can be shortened if there is an excess once mounting is complete.
Figure 9 - Reagent Pickup Tubing Assermbly

ATI Model A15/79 Total Residual Chlorine Monitor
20
O&M Manual Rev-Q, 9/12
Figure 10 - Solution Feed Assembly

ATI Model A15/79 Total Residual Chlorine Monitor
21
O&M Manual Rev-Q, 9/12
SAMPLE INLET OVERFLOW The water sample supplied to the monitor is connected to a special overflow chamber. This is done to insure that the sample flowrate to the monitor is sufficient to insure that fresh sample is always available at the sample pickup point. Most of the sample flowing to this assembly will simply go directly to the drain. Figure 11 shows the sample overflow assembly on its aluminum mounting bracket. The bracket is supplied to hold the inlet assembly under the sample pump, and to allow waste from the chemistry module to flow back into the drain chamber. The overflow assembly should be mounted close to the chemistry module (as shown in Figure 11) to minimize system response time. Mounting further from the chemistry module will increase the sample transport time, thereby increasing the monitor response time. Once mounted, the sample pickup tube should be placed into the inlet chamber and the chemistry module drain tube should be placed into the drain chamber as shown.
Figure 11 - Sample Inlet Overflow Arrangement

ATI Model A15/79 Total Residual Chlorine Monitor
22
O&M Manual Rev-Q, 9/12
START-UP Prior to operation, recheck electrical connections to be sure that everything is in accordance with Figure 5 & Figure 6 on pages 11 & 12. If everything is in order, power may be applied to the instrument. When power is turned on, the display will come up with a program and version number, which will remain on the display for a few seconds. The display will then change to a display of residual chlorine concentration and an indication of the status of control relays. This is the main operating display, and should look like the display below: D1 X.XXPPM oA oB MAIN DISPLAY The X.XX portion will be numbers. The initial values could be almost anything, depending on whether the sensor has been connected and what the condition of the sensor is. The values are not important at this point. The next portion of the display indicates control relay status. The letters A and B refer to control relay A and control relay B as marked on the back of the monitor. An open square (o) indicates a deactivated relay while a solid square (n) indicates an activated relay. More information on the control relays is provided in a later section of this manual. Beyond the main display, a series of alternate displays are available to the operator. These displays may be selected by pressing the MODE key on the front panel. It is a good idea to step through the displays to become familiar with each one. Many of these alternate displays serve as a starting point for programming functions described later in this manual. The alternate display sequence is as follows: D2 X.XX PPM Cl2 DISPLAY WITHOUT RELAY INDICATION
D3 TEMP: 20.0° C TEMPERATURE DISPLAY
D4 SA X.XXPPM O oL RELAY A SETPOINT AND FUNCTION
D5 SB X.XXPPM O oH RELAY B SETPOINT AND FUNCTION
D6 AL X.XX/X.XX PPM ALARM RELAY SETPOINTS
D7 O1 4.0mA/ 0.00PP ANALOG OUTPUT INDICATION
D8 O2 12.0mA/ 25.0°C ANALOG OUTPUT # 2 INDICATION
D9 CONFIGURATION CONFIGURATION MENU
D10 Cl2/A15 R2.10 PROGRAM AND RELEASE NUMBER

ATI Model A15/79 Total Residual Chlorine Monitor
23
O&M Manual Rev-Q, 9/12
OPERATING MODE The A15/79 is provided with 3 programmable modes of operation. The default mode is AUTO. In this mode of operation, the display indicates both chlorine concentration and alarm status as described above. The second mode of operation is MEAS. (Measure Only). In this mode, the display indicates only residual chlorine, and the control relays are deactivated. This would be the mode to use if relays are not being used for alarm or control functions. The third mode is SIM. (Simulate), which allows the analog output and relay outputs to be cycled manually. In the SIM mode, the UP and DOWN keys can be used to adjust the chlorine value shown on the display to any value desired. The analog output will track this changing value, and alarm relays will activate if the display value is set above the alarm setpoint. This mode would normally only be used for control system troubleshooting. The mode of operation is selected by using the programming keys on the front panel. Select the mode of operation as follows: 1. With the display in normal mode as shown above, press the CAL key once. The display will read
"CAL MODE: AUTO". 2. Use the UP or DOWN key to select the desired mode of operation. Then press ENTER. If the mode
is changed, the message "UPDATE" will flash on the display briefly and the unit will return to the normal operating display.
FRONT PANEL LOCK The key switches on the front panel of the monitor can be used for both changing the display and for calibrations and setpoint adjustments. When the monitor is shipped from ATI, all functions are accessible. However, the adjustment and calibration functions can be locked in order to prevent unauthorized adjustments to the instrument. When the front panel is locked, the MODE key will still allow the display to be stepped through the alternate displays but will not allow settings to be altered. To lock (or unlock) the keyboard, press the MODE key until “CONFIGURATION" is displayed. Press the CAL key once and the display will change to "KB UNLOCKED". Use the UP key to select "KB LOCKED" and press ENTER. The UPDATE message will appear briefly and the "LCD CONTRAST" message will appear. Press the MODE key 3 times to return to the main display.

ATI Model A15/79 Total Residual Chlorine Monitor
24
O&M Manual Rev-Q, 9/12
CHEMISTRY MODULE STARTUP Prior to operating the chemistry module, connect inlet sample and drain tubing to the hose barbs provided on inlet overflow assembly. Recheck to be sure that the sample pickup tube from the sample pump and the drain tube from the stripping chamber are inserted into the proper chambers of the overflow assembly. The sample pickup tube must be completely submerged in the inlet chamber.
A 3-way valve on the inlet to the sample pump is supplied so that distilled water or a captured sample can be fed into the unit through a separate sample line. A 1/8” I.D. hose barb on the front of the valve is provided for connection of a pickup tube for distilled water or other sample. A length of silicon tubing is supplied for this purpose. Once sample and drain connections are made, carefully turn on the sample flow so that sample is overflowing into the drain chamber. The rate of sample flow is not critical. However, the flow must not be so high that the drain cannot carry the excess away without overflowing the entire assembly. The drain chamber should remain almost empty during normal operation, with sample flowing freely out of the drain. Once the sensor is in place, the sample pump pickup tube is located properly, and the reagent bottles are connected to the reagent pump, plug the AC power cord into any AC outlet. The two peristaltic pumps on the bottom of the module will start to turn and the rotameter on the panel should begin to indicate the air flowrate going to the bottom of the reactor. Use the air flow control valve to adjust the rotameter to 400 cc. per minute. Note that this air flow adjustment should not be made until sample has entered the stripping chamber. Observe the drain tubing and adjust the air flow after you see water draining from the reactor. It is recommended that you start up the system with a bottle of distilled water connected to the second inlet port as mentioned above. Connect tubing to the 1/8” barb fitting and turn the 3-way valve so that the handle is down. This will close off the normal inlet and open the alternate inlet so that distilled water can be pumped into the system. The monitor needs to be zeroed initially, so it is best to start the system with water containing no chlorine. The system will take some time to get sample into the reactor chamber and to begin to deliver reagents into the system. It is best to allow the system to run undisturbed for 30 minutes after initial startup. Note that the electronics module should also be powered up at this time. The sensor will not stabilize unless the power to the monitor is turned on. After about 2 minutes of operation, you should see an occasional small air bubble in the vertical tube section right after the “T” fitting where reagent is injected. This indicates that the reagent pump is running but reagent has not yet reached the mixing tee. When reagents have been drawn up through the delivery tube, these bubbles will stop, indicating that reagents are now being mixed. After the chemistry module has been running for 30 minutes on distilled water, the sensor should be stable at zero. The LCD display on the electronic module may not be reading exactly zero, but the value should normally be less than 0.1 PPM and the value should be stable. If the system is not yet completely stable, the value may be decreasing very slowly. Wait to zero and calibrate the unit until the value stabilizes. Note that the zero value may vary by ± 0.002 PPM (2 PPB) both up and down once it reaches stability. This is the normal zero stability. At this point, the system is ready for zeroing and calibration as described in the operating section. However, you may want to first go through the configuration of the electronics to set the analog output range and configure any alarms you may wish to use. The next section covers the various configuration settings.

ATI Model A15/79 Total Residual Chlorine Monitor
25
O&M Manual Rev-Q, 9/12
SENSOR PREPARATION The iodine gas sensor is shipped with a protective membrane but with no electrolyte inside. A new membrane and electrolyte must be installed in the sensor prior to operation. In addition, the membrane and internal electrolyte need replacement on 2-3 month schedule. Iodine sensors are three part assemblies as shown in Figure 12 below. Replacement membranes are supplied in boxes of 10 precut disks. The following procedure must be followed exactly to insure proper sensor operation.
Figure 12 - Sensor Exploded View
1. Unscrew the electrolyte chamber from the body of the sensor. Discard the electrolyte inside. 2. Unscrew the membrane cap from the end of the electrolyte chamber and push out and discard the old
membrane. 3. From the container of spare membranes, carefully remove a white disc and place it in the membrane
cap. Handle membranes only with clean hands. Place the membrane into the cap and carefully push it down so that it lies flat on the face of the cap.
4. Check the end of the electrolyte chamber to be sure the o-ring is seated properly. Then screw the
membrane cap back onto the electrolyte chamber. Pour a small amount of electrolyte into the chamber until the level is about ¼” from the top.
5. Slowly screw the electrolyte chamber back onto the sensor body. A small amount of electrolyte will
run out of the top of the chamber, so it is best to do this over a sink. 6. Wipe excess electrolyte from the sides of the sensor, insert it into the flow chamber on the side of the
reactor, and plug the sensor cable into the back. CAUTION: The electrolyte used in this sensor will not harm your skin, but should be rinsed off
after the sensor is assembled. Do not get electrolyte in your eyes as it will cause stinging. If eye contact occurs, flush with large amounts of water. Electrolyte can cause discoloration of clothing, so avoid getting the liquid on your garments.

ATI Model A15/79 Total Residual Chlorine Monitor
26
O&M Manual Rev-Q, 9/12
CONFIGURATION
The electronics for the chlorine system are designed to be as flexible as possible. A number of
programming functions are provided in the CONFIGURATION menu and are protected by an access number, which must be entered to allow changes in these settings. Some settings are for factory use only, while others are used for customer selection of certain operating parameters. The access number protecting the configuration is user adjustable. When shipped from the factory, the default access number of “0” is stored in the unit. To enter the configuration menu, press the MODE key until the display reads CONFIGURATION and then press CAL. The display will read "KB UNLOCKED (OR LOCKED)". Press ENTER twice and the display will read "ACCESS NR.: 0". Press the ENTER key and the first menu item will appear on the display. If a new access number has been programmed into the unit, press the UP or DOWN keys until that access number is displayed and then presses ENTER. 1. INPUT SOURCE: Cl2 Factory setting. No adjustment should be made. Press ENTER to go to the
next display. 2. JUMPER X10: OFF Factory setting. No adjustment should be made. Press ENTER to go to the
next display. 3. RANGE: 20.00 (OR 2.000) PPM This routine allows programming of the operating range of the
instrument. Use the UP key to select either 2.000 OR 20.00 to select the full scale operating range. Then press ENTER. The default value is 20.00.
4. AUTORANGING: OFF Factory setting. No adjustment should be made. Press ENTER to go to the
next display. If operating in the low range, turning Autoranging on allows the operator to read values if they exceed 2.000 PPM.
5. LARGE S RT: 2.0s This routine allows for electronic damping of the analog output signals. This
monitor contains a 2-stage response time filter. This allows the instrument to change rapidly in response to a large pH change while changing only slowly when the pH variations are small. The “LARGE S RT” refers to the response time to a large pH variation, usually above 1 pH unit. The default setting is 2 seconds. This value can be increased to as much as 20 seconds by using the UP arrow.
6. SMALL S RT: 10.0s This routine allows for electronic damping of small changes in the input signal.
This eliminates rapid changes in the display due to minor variations in the pH value. The default setting is 10 seconds. This value can be increased to as much as 20 seconds by using the up arrow.
7. CAL POL.: -400 mv. Factory setting. No adjustment should be made. Press ENTER to go to the next display. 8. MODE OF CAL: IMM. This routine allows the operator to select the method to be used when calibrating the monitor. The default is IMM., which stands for "Immediate Calibration". Press the UP key to toggle to POST, which stands for "Delayed Calibration". The difference between immediate and delayed calibration methods are described in detail in the Calibration section of this manual. While immediate calibration is the default, delayed calibration is often a more useful calibration method 6. CAL TC: 2.00%/°C Factory setting. No adjustment should be made. Press ENTER to go to the
next display.

ATI Model A15/79 Total Residual Chlorine Monitor
27
O&M Manual Rev-Q, 9/12
7. CAL OUT1: PPM/ °C: This routine allows analog output #1 to be assigned as a chlorine output or as
a temperature output. The factory default setting is PPM, which indicates that the output is proportional to parts per million. Select °C if a temperature output is desired.
8. CAL OUT1: 4-20 mA This routine allows programming of the analog output signal. Either a 4-20 or
0-20 mA output may be selected by using the UP key. The default is 4-20 mA. If a zero based voltage output is required, the 0-20 mA output may be used in conjunction with a shunt resistor across the connection terminals on the back of the instrument. Once a selection is made, press ENTER.
9. CAL P1: 0.00 This routine allows selection of the low end of the analog output range. The default is
0.00 and should normally be left unchanged. However, the output can be adjusted to a non-zero based range (such as 1-5 PPM) if desired. If a non-zero based output is desired, use the UP key to set the new 4 mA output value. When selection is made, press ENTER.
10. CAL P2: 20.00 This routine allows selection of the full scale analog output range. The default is
20.00 PPM (or 2.000 PPM if the low range is selected in #3 above). Use the UP or DOWN keys to set the concentration to be represented by a 20 mA output value. When selection is made, press ENTER.
11. CAL OUT2: PPM/ °C: This routine allows analog output #2 to be assigned as a chlorine output or as
a temperature output. The factory default setting is °C, which indicates that the output is proportional to temperature. Select PPM if a chlorine output is desired.
12. CAL OUT2: 4-20 mA This routine allows programming of the analog output signal. Either a 4-20 or
0-20 mA output may be selected by using the UP key. The default is 4-20 mA. If a zero based voltage output is required, the 0-20 mA output may be used in conjunction with a shunt resistor across the connection terminals on the back of the instrument. Once a selection is made, press ENTER.
13. CAL P1: 0.0 This routine allows selection of the low end of the analog output range for output 2.
The default is 0.0 and should normally be left unchanged. However, the output can be adjusted to a non-zero based range (such as 5-45° C) if desired. If a non-zero based output is desired, use the UP key to set the new 4 mA output value. When selection is made, press ENTER.
14. CAL P2: 50.0 This routine allows selection of the full scale analog output range for output 2. The
default is 50.0° C. Use the UP or DOWN keys to set the concentration to be represented by a 20 mA output value. When selection is made, press ENTER.
15. SET A ACT: ON/OFF This routine allows selection of the mode of operation for relay A. The default
is simple on/off operation. This relay can also be configured for pulse frequency (PFM) or pulse width (PWM) modulation for control of chemical feed equipment.
16. SET A F.: LO (OR HI) This routine allows the function of setpoint A to be defined as either low or
high. When LO is selected, relay A acts like a low alarm, with the relay activating when the measured concentration is below the setpoint. When HI is selected, the relay acts like a high alarm, activating when chlorine is above the setpoint. Setpoints are programmed in another routine described later in this manual.
17. SET B ACT: ON/OFF This routine allows selection of the mode of operation for relay A. The default
is simple on/off operation. This relay can also be configured for pulse frequency (PFM) or pulse width (PWM) modulation for control of chemical feed equipment.
ATI Model A15/79 Total Residual Chlorine Monitor
28
O&M Manual Rev-Q, 9/12
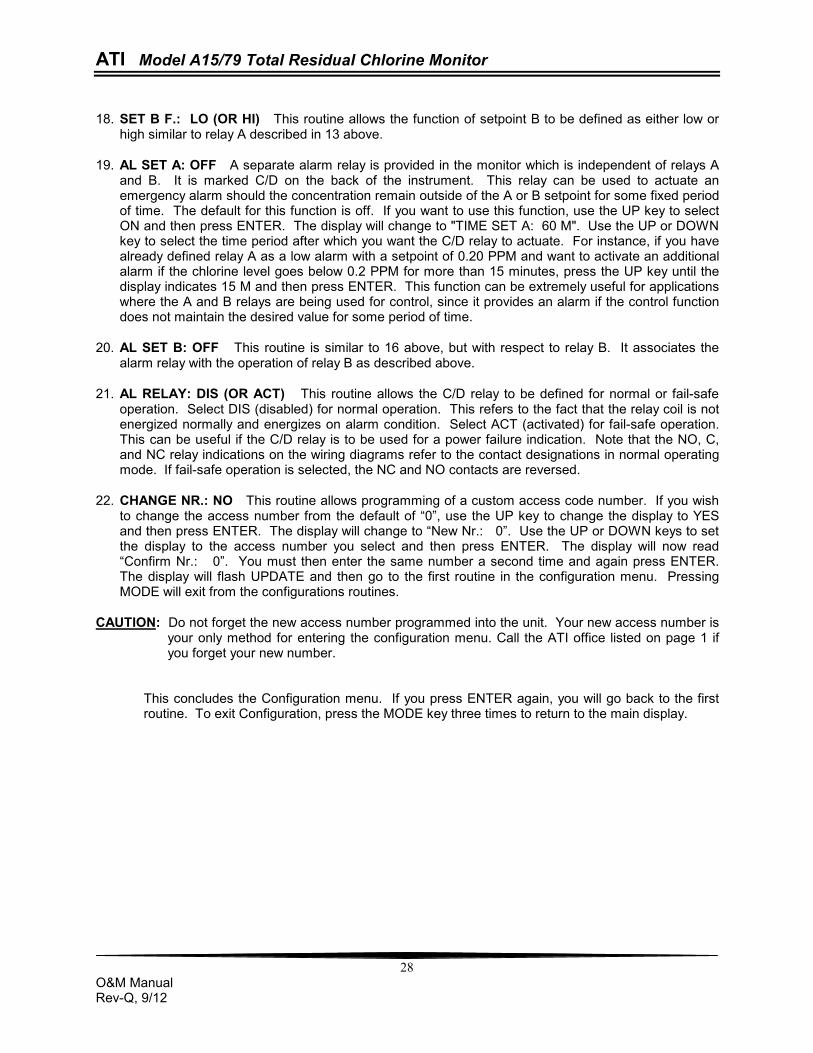
18. SET B F.: LO (OR HI) This routine allows the function of setpoint B to be defined as either low or
high similar to relay A described in 13 above. 19. AL SET A: OFF A separate alarm relay is provided in the monitor which is independent of relays A
and B. It is marked C/D on the back of the instrument. This relay can be used to actuate an emergency alarm should the concentration remain outside of the A or B setpoint for some fixed period of time. The default for this function is off. If you want to use this function, use the UP key to select ON and then press ENTER. The display will change to "TIME SET A: 60 M". Use the UP or DOWN key to select the time period after which you want the C/D relay to actuate. For instance, if you have already defined relay A as a low alarm with a setpoint of 0.20 PPM and want to activate an additional alarm if the chlorine level goes below 0.2 PPM for more than 15 minutes, press the UP key until the display indicates 15 M and then press ENTER. This function can be extremely useful for applications where the A and B relays are being used for control, since it provides an alarm if the control function does not maintain the desired value for some period of time.
20. AL SET B: OFF This routine is similar to 16 above, but with respect to relay B. It associates the
alarm relay with the operation of relay B as described above. 21. AL RELAY: DIS (OR ACT) This routine allows the C/D relay to be defined for normal or fail-safe
operation. Select DIS (disabled) for normal operation. This refers to the fact that the relay coil is not energized normally and energizes on alarm condition. Select ACT (activated) for fail-safe operation. This can be useful if the C/D relay is to be used for a power failure indication. Note that the NO, C, and NC relay indications on the wiring diagrams refer to the contact designations in normal operating mode. If fail-safe operation is selected, the NC and NO contacts are reversed.
22. CHANGE NR.: NO This routine allows programming of a custom access code number. If you wish
to change the access number from the default of “0”, use the UP key to change the display to YES and then press ENTER. The display will change to “New Nr.: 0”. Use the UP or DOWN keys to set the display to the access number you select and then press ENTER. The display will now read “Confirm Nr.: 0”. You must then enter the same number a second time and again press ENTER. The display will flash UPDATE and then go to the first routine in the configuration menu. Pressing MODE will exit from the configurations routines.
CAUTION: Do not forget the new access number programmed into the unit. Your new access number is
your only method for entering the configuration menu. Call the ATI office listed on page 1 if you forget your new number.
This concludes the Configuration menu. If you press ENTER again, you will go back to the first routine. To exit Configuration, press the MODE key three times to return to the main display.

ATI Model A15/79 Total Residual Chlorine Monitor
29
O&M Manual Rev-Q, 9/12
OPERATION As previously discussed in the start-up section of this manual, the sensor must be given time to stabilize. Power should be turned on at least 30 minutes before trying to zero the system. The sensor must be connected to the powered monitor for the sensor to stabilize. The chemistry module does not have to be operating at this time, but a better zero will result if the entire system is running. Establishing a stable zero is critical to the proper operation of the monitor. The only procedure required before zeroing is the selection of the operating range as described in item 3 of the CONFIGURATION section. The keyboard must be UNLOCKED to complete the zeroing procedure described below. ZEROING THE SYSTEM
Chlorine monitors can be zeroed easily by connecting distilled water to the inlet tubing. A 1/8” hose barb is provided for convenience in feeding distilled water (or other unchlorinated water) into the system. Using a length of 1/8” I.D. flexible tubing, place one end on the hose barb and the other end into a bottle of distilled water. Adjust the 3-way valve so that the OFF indicator is pointed down. This position isolates the sample pump from the normal sample flow and opens the distilled water inlet.
Reagent solutions should be connected to the inlet tubing prior to zeroing the unit. Note that it takes
approximately 15 minutes for reagents to get to the mixing “T” from the pickup tubing in bottles located in the brackets below the chemistry module. Special chemical resistant tubing is supplied, and no other tubing should be used for this purpose. This tubing has a very small internal diameter to keep reagent transport time to a minimum. Larger diameter pickup tubing will result in a long delay in reagent delivery when the unit is first started up and should not be used. A filter on the bottom of the reagent pickup tubing provides protection against plugging.
To zero the system, proceed as follows. The unit should have been powered for at least an hour by
this time.
1. Connect distilled water as described above and the system to run for 30 minutes. 2. With the main operating display showing on the LCD, press the Mode key once. The display should
indicate "XX.XX PPM Cl2". Press the CAL key once and the display will read "ZERO: XX nA" (the value of XX will depend on the last zero). Press the CAL key again and the display will change to "CAL ZERO: XX nA" with XX value indicating the zero current of the sensor.
4. Observe the display to determine that the zero current is no longer declining. The value may be
changing somewhat but should be varying about a point and not moving either up or down. Press the ENTER key to store the offset value.
NOTE: If the zero current of the sensor is too large, the microprocessor will not accept the offset
value and will flash the message "NO UPDATE". Should this occur, carefully inspect the sensor for a tear in the membrane. It will probably be necessary to rebuild the sensor as described on page 23. Should the offset remain high, contact the service dept. at ATI for assistance.
5. Press the MODE key to return to the PPM display. The unit should now be reading zero PPM.
Depending on the range of operation, the display may vary slightly around zero, both plus and minus. This is normal and should not cause concern.
ATI Model A15/79 Total Residual Chlorine Monitor
30
O&M Manual Rev-Q, 9/12
CALIBRATION Calibration of the Chlorine Monitor should be done by adjusting the value on the display to the value determined in the laboratory on the same sample. A sample should be collected from the inlet line feeding the monitor and quickly analyzed for chlorine. When calibrating, it is best to have a reasonably high concentration of chlorine in the system. The higher the value, the smaller will be the calibration errors caused by errors in the laboratory analytical procedure. It is generally preferable to calibrate at values above 0.5 PPM to reduce calibration errors. If the chlorine residual value in the sample tends to change rapidly, it is sometimes easiest to collect about 1 gallon of sample and then feed this sample into the analyzer through the same inlet tube used for the zero water. The advantage of this procedure is that the chlorine value should be stable in the sample. A small amount of that sample can be analyzed in the lab to determine the value for adjusting the monitor. Series A15 chlorine monitors provide two alternate modes of calibration, "Immediate" and "Post". Refer to configuration item 8 on page 24. The selection of the calibration method to be used must be made in the configuration section of the program. If the chlorine value is relatively stable in the system, the immediate method may be used. However, if the value is subject to variations over a 15 minute time period, the "Post" or delayed calibration method is best. The "Post" calibration method is always best if there will be a delay in the time between collection of the calibration sample and the completion of the lab test unless a fixed sample is being fed as described in the previous paragraph. The "Post" or delayed calibration method allows the user to enter the chlorine value into memory at the time a calibration sample is taken. When the lab analysis is complete, the calibration adjustment is then done on the value that was displayed at the time the sample was taken. It does not matter if the value has changed by the time the lab measurement is complete. When the original value is adjusted to the lab result, the current reading will be adjusted by the same percentage. IMMEDIATE CALIBRATION To calibrate the monitor using the "Immediate" procedure, proceed as follows: 1. With the display indicating PPM Cl2 (second display shown on page 20), press the CAL key once and
then press the ENTER key once. The display reads "SENS: XX.X%". The value of XX.X% can vary from 20% to 250%, depending on the amount of amplifier gain required to calibrate the monitor. When the UP key is used to increase the display value, the value of XX.X will go down, indicating that the sensor output is declining, or that the sensitivity of the sensor is falling.
2. Press the CAL key and the display will change to "IMMEDIATE CAL" and will change to "CAL Cl2:
X.XX PPM" after a few seconds. The value of X.XX will be the value being measured at that time. 3. Collect a sample from the flowcell inlet line and measure the chlorine concentration using the chosen
laboratory method. 4. Use the UP or DOWN keys to adjust the display to the value measured. Once adjusted, press the
ENTER key to return to normal operation.

ATI Model A15/79 Total Residual Chlorine Monitor
31
O&M Manual Rev-Q, 9/12
POST CALIBRATION To calibrate the monitor using the "Post" procedure, proceed as follows: 1. With the display indicating PPM Cl2 (second display shown on page 20), press the CAL key once and
then press the ENTER key once. The display reads "SENS: XX.X%". The value of XX.X% can vary from 20% to 250%, depending on the amount of amplifier gain required to calibrate the monitor. When the UP key is used to increase the display value, the value of XX.X will go down, indicating that the sensor output is declining, or that the sensitivity of the sensor is falling.
2. Press the CAL key and the display will change to "SAMPLE VAL. REC." and will change to "CAL Cl2:
X.XX PPM" after a few seconds. The value of X.XX will be the value being measured at that time. Press the ENTER key and the value on the display will be recorded. The message "SAMPLE V. UPDATE" will appear briefly, and then the display will revert to the PPM Cl2 display.
3. Collect a sample from the flowcell inlet line and measure the chlorine concentration using the chosen
laboratory method. Record the lab value on paper for later entry into the monitor. 4. When the lab test is complete, go back to the monitor and use the MODE key to return to the PPM
Cl2 display as described in step 1 above. Press the CAL key once and then the ENTER key. With "SENS: XX.X% on the display, press the CAL key. The display will change to "SAMPLE VAL. ADJ." and after a few seconds will change to "CAL Cl2: X.XX PPM". The value of X.XX will be the value that was recorded in step 2 above.
5. Use the UP or DOWN keys to adjust this value to the laboratory test result, and then press ENTER.
The display will briefly flash the "UPDATE" message and then will revert to the normal chlorine display. Calibration is complete, and the current value will be automatically adjusted by the same percentage as the original stored value.
MIXING A CHLORINE STANDARD While calibration against a lab analysis is preferred, it is possible to mix a chlorine standard that can be used for calibration. The advantage is that a stable sample can be fed to the analyzer for an extended period of time to insure stability of the measurement at the time of calibration. The following procedure will produce a standard of about 1 PPM. The actual value is not all that important as long as the final value is verified using a laboratory test such as DPD (photometric method) or amperometric titration. In a 1 gallon bottle of distilled water, add about 0.2 grams of ammonium chloride (or another ammonia salt). Mix thoroughly to insure that the ammonia is completely dissolved. Add to this bottle 2 drops of household bleach (do not use bleach containing detergents or other cleaners). Mix thoroughly and then measure the total residual chlorine in the resulting sample. If the sample is between 0.5 and 2.0 PPM, use this sample for calibration. If the concentration is low, add another drop of bleach and measure again. If the concentration is high, dump out some of the sample and dilute with distilled water until the measured value is 0.5 – 2.0 PPM. This sample will be stable for a few hours, which is sufficient time to perform an analyzer calibration.

ATI Model A15/79 Total Residual Chlorine Monitor
32
O&M Manual Rev-Q, 9/12
CONTROL & ALARM OUTPUTS The A15/79 Total Chlorine Monitor is equipped with three relay outputs. Two of these outputs are designated control relays and the third is designated as an alarm relay. These output relays may be used in a variety of ways, and the function of each relay is programmable by the operator. Relay output wiring is made at the rear of the monitor as shown in the diagram on page 11. CONTROL RELAYS The relays designated control relays may be used for either alarm functions or control functions. Each of the two relays is SPDT with a 220 VAC 5A resistive contact rating. Control relays can be used in one of 3 different output modes, on/off, pulse width modulation, and pulse frequency modulation. The on/off mode of operation is standard and is the mode used for simple control or for alarm purposes. To program control relays, proceed as follows: 1. Press the MODE key until SA appears on the left side of the display. The full display will indicate "SA
XX.XXPPM O oL" This refers to setpoint A and indicates the current setting for control relay A. XX.XX is the current setpoint, O indicates ON/OFF operation, o(or n) indicates the current status of the relay, and L(or H) indicates a low or high alarm function. The function of this relay as a low or high alarm is programmed as described in item 19 in the CONFIGURATION section.
2. Press the CAL key once and the display will read "CAL SA S: X.XX". The value of X.XX is the
setpoint for that relay. Use the UP and DOWN keys to adjust the value to the desired setpoint. Then press the ENTER key.
3. The display will now read "CAL SA I: 0.00". I is the setpoint hysteresis or deadband for that relay.
Use the UP and DOWN keys to adjust the deadband to the desired value. A value of at least 0.03 is recommended to avoid relay cycling at the actuation point. The maximum setting is 1.00 PPM. When the value is set, press the ENTER key.
4. The display will now read "CAL SA D: 0.0s". D is the delay time for relay actuation. Use the UP and
DOWN keys to select the desired delay time in seconds. The maximum delay time is 25 seconds. When the selection is made, press the ENTER key.
5. The steps outlined in 1-4 above should be repeated for SB to program the operation of relay B. NOTE: Alarm relays may be activated or deactivated manually by placing the monitor into SIM
mode as described on page 21 under OPERATING MODE. Once alarm setpoints have been programmed, the proper relay function can be verified by simulating values either above or below alarm setpoints.

ATI Model A15/79 Total Residual Chlorine Monitor
33
O&M Manual Rev-Q, 9/12
PULSE FREQUENCY MODULATION (PFM) CONTROL Relays A and B in the electronic monitor can be used for direct control of certain kinds of metering pumps using a pulse frequency control mode. In pulse frequency control, the relay will briefly close at a frequency linearly proportional to the deviation of the measured value from your setpoint. This type of output is used when controlling a chemical metering pump that has a pulse frequency input from an unpowered relay. To use PFM control, the relay must be configured for PFM control in steps 18 or 20 of the configuration menu. For chemical feed control, you will normally want to set the alarm relays to low in steps 19 and 21. To set up a control system using PFM control, you must program a setpoint, a proportional band, and a frequency range. The setpoint is the maximum value that you would want to maintain. When the measured value reaches the setpoint, the output frequency will stop. To set the setpoint, press the MODE key until the display reads “SA X.XX PPM F oL”. Then press the CAL key once. The display will read “CAL SA S: X.XX”. Use the UP and DOWN keys to select the desired setpoint. Then press ENTER. The next setting is the proportional band setting. After pressing ENTER in the previous section, the display will indicate “CAL SA BP: X.XX”. The proportional band is the amount of deviation from the setpoint required for the frequency output to reach maximum pulses per minute. Use the UP and DOWN keys to select the proportional band and then press ENTER. The final setting is the maximum pulse frequency required to control the pump. You should check your chemical feed pump manual to determine what overall frequency is recommended. The monitor can be adjusted for full scale frequency outputs from 0-120 pulses per minute. When you press ENTER in the previous step, the display will change to “CAL SA f: 100 i/m” This is the default setting of 0-100 pulses per minute. Left at this value, the relay will pulse at 100 times per minute when the measured value at maximum deviation from the setpoint and will not pulse at all when the measured value reaches the setpoint. Enter the value you want for the maximum pulses per minute and press ENTER. The display will flash UPDATE and the relay will begin to operate in accordance with the programming entered. As an example, assume that you want to use relay A to control a metering pump feeding sodium hypochlorite. You would like to maintain a chlorine value between 0.6 and 1.0 PPM and your metering pump input is 0-60 pulses per minute. Programming would then be as follows. 1. In the configuration menu, step 18, select PFM. 2. In the configuration menu, step 20, select LO 3. Go to the A relay display (display D4, page 20) and press CAL. 4. Adjust the setpoint value to 1.00 and press ENTER. 5. Adjust the proportional band value to 0.40 and press ENTER 6. Adjust the frequency to 60 and press ENTER. With the programming just entered, relay A will pulse 60 times per minute when the measured chlorine value is below 0.60 PPM. When the value reaches 0.80 PPM, the relay will be pulsing 30 times per minute. When the value reaches 1.00 PPM, the relay will stop pulsing. You can verify the operation of the relay by placing the monitor into simulate (SIM) mode of operation. By manually increasing or decreasing the displayed value, you will hear the change in the relay pulses. Note that the “o” symbol indicating the relay condition will pulse each time the relay closes.
ATI Model A15/79 Total Residual Chlorine Monitor
34
O&M Manual Rev-Q, 9/12
PULSE WIDTH MODULATION (PWM) CONTROL Relays A and B can also be used for control of chemical feed systems using a pulse width control mode. In pulse width control, the relay will close for a variable time period that is linearly proportional to the deviation of the measured value from your setpoint. This type of output is not as common as PFM, but can be used when controlling a solenoid feed valve or for running a pump for variable time periods. To use PWM control, the relay must be configured for PWM control in steps 18 or 20 of the configuration menu. For chemical feed control, you will normally want to set the alarm relays to low in steps 19 and 21. To set up a control system using PWM control, you must program a setpoint, a proportional band, and a frequency range. The setpoint is the maximum value that you would want to maintain. When the measured value reaches the setpoint, the output duration will be at a minimum. To set the setpoint, press the MODE key until the display reads “SA X.XX PPM W oL”. Then press the CAL key once. The display will read “CAL SA S: X.XX”. Use the UP and DOWN keys to select the desired setpoint. Then press ENTER. The next setting is the proportional band setting. After pressing ENTER in the previous section, the display will indicate “CAL SA BP: X.XX”. The proportional band is the amount of deviation from the setpoint required for the duration of the relay closure to reach a maximum. Use the UP and DOWN keys to select the proportional band and then press ENTER. The final setting is the maximum pulse duration (time) required to control the feed device. This duration will be dependent on the type of equipment you are trying to control. The monitor can be adjusted for pulse durations of 0-99.0 seconds. When you press ENTER in the previous step, the display will change to “CAL SA T: 20.0 s” This is the default setting of 0-20 seconds. Left at this value, the relay will close for 20 seconds when the measured value at maximum deviation from the setpoint and will not close at all when the measured value reaches the setpoint. Enter the value you want for the maximum pulses per minute and press ENTER. The display will flash UPDATE and the relay will begin to operate in accordance with the programming entered. As an example, assume that you want to use relay B to control a solenoid valve feeding sodium hypochlorite into a tank. You would like to maintain a chlorine value between 0.6 and 1.0 PPM and your variation in feed time is estimated at 0-15 seconds. Programming would then be as follows. 7. In the configuration menu, step 20, select PWM. 8. In the configuration menu, step 21, select LO 9. Go to the B relay display (display D5, page 20) and press CAL. 10. Adjust the setpoint value to 1.00 and press ENTER. 11. Adjust the proportional band value to 0.40 and press ENTER 12. Adjust the time to 15.0 and press ENTER. With the programming just entered, relay B will close for 15 seconds when the measured chlorine value is below 0.60 PPM. When the value reaches 0.80 PPM, the relay will close for 7.5 seconds (out of a 15 second cycle time). When the value reaches 1.00 PPM, the relay will stop remain open. You can verify the operation of the relay by placing the monitor into simulate (SIM) mode of operation. By manually increasing or decreasing the displayed value, you will hear the change in the relay pulses. Note that the “o” symbol indicating the relay condition will change from open to closed indicating the state of the relay.

ATI Model A15/79 Total Residual Chlorine Monitor
35
O&M Manual Rev-Q, 9/12
ALARM RELAY The A15/79 contains a third relay designated as an alarm relay. This relay may be used to warn of various conditions that might indicate operational problems. The relay will activate on either high or low concentration conditions, or on failure of the control relays to maintain proper control. In addition, this relay may be programmed for either normal or fail-safe operation. As with the control relays, this relay is SPDT rated 220 VAC, 5A resistive. Associating the operation of the alarm relay with control relays A and B, and selecting normal or fail-safe operation is done in the CONFIGURATION menu as described in item 23 on page 26. To use the relay as an indication of either low or high chlorine concentration, program the setpoints as follows: 1. Press the MODE key until the display show AL at the left side. The numbers shown to the right of AL
are the current set points for that relay. Note that there are two of them. This relay will activate if the chlorine concentration goes below the low setpoint or above the high setpoint.
2. Press the CAL key and the display will read "CAL AL L: X.XX". Use the UP and DOWN keys to adjust
the X.XX value to the desired low alarm setpoint. Then press ENTER. 3. The display will now read "CAL AL H: X.XX". Again, use the UP and DOWN keys to select the high
setpoint, and then press ENTER. 4. The display will now read "CAL AL D: 0.0s". D represents the alarm delay. Use the UP or DOWN
keys to set the alarm delay value between zero and 25 seconds. Then press ENTER. ANALOG OUTPUT Two programmable isolated analog output signals are provided for interface with recorders, data loggers, or controllers (units with software revision R2.15 and above). Each analog output may be programmed for either 0-20 mA or 4-20 mA output. For chlorine, the output signal will be linearly proportional to the measured chlorine concentration, and may be scaled over ranges of 0-0.1 to 0-20.00 PPM. Also, the output may be spanned for non-zero based ranges as well. Both the zero and full scale output values are programmable so that an output of 1-10 PPM could be set if desired. For temperature, the output is factory set to 0-50° C, but may be programmed smaller ranges (i.e. 5-40° C) if desired. If a zero based voltage output is required, this can easily be accommodated by selecting a 0-20 mA output and placing a shunt resistor across the output. For instance, a 50 ohm resistor will convert the output to 0-1 VDC while a 250 ohm resistor will provide 0-5 VDC. This will allow the output to accommodate systems with zero based voltage inputs. Programming the analog outputs is done in the CONFIGURATION menu as described in items 10 through 17 on page 25. Connection of the output is made to the terminals shown in Figure 5.
CAUTION: The 4-20 mA outputs from this monitor are powered by the monitor. DO NOT connect a 24 VDC transmitter supply to this output. If this is done, the output circuit will be damaged and factory service will be required.

ATI Model A15/79 Total Residual Chlorine Monitor
36
O&M Manual Rev-Q, 9/12
SIMULATE MODE OF OPERATION As previously noted, A15/79 monitors contain a mode of operation called “SIM” or simulate. This mode of operation allows the user to adjust the chlorine value manually in order to check devices wired to either the mA output or the alarm contacts. To enter simulate mode, press the MODE key until the main display is on the LCD. Press CAL once and then use the UP key to change the display to SIM. Press ENTER and the display will flash UPDATE and the display will then read “0.000 SIM oA oB”. Pressing the UP arrow will increase the chlorine value on the display. The 4-20 mA output will increase as the chlorine value increases. Any recorders or remote reading devices that are connected to the 4-20 mA output should respond to the increasing values. You can adjust the value to any number desired. If the value you set on the display is above an alarm setpoint, the relay for that setpoint should activate, as should any alarm or control devices wired to that relay. Using the simulate mode of operation can be very useful in verifying operation of control or recording systems that use this equipment. Be sure to return the monitor to AUTO mode of operation when all simulation work is complete. HIGH RANGE CHLORINE MEASUREMENT Series A15 chlorine monitors are capable of measuring chlorine over ranges as high as 0-200 PPM. Monitors are normally configured to measure over display ranges of either 0-2.000 or 0-20.00. This can be changed to a selection of 0-20.00 or 0-200.0 by the addition of a jumper to the terminal blocks at the back of the monitor and by changing one setting in the configuration setup. To set up a unit for high range use, install a piece of jumper wire between terminals 20 and 22. See Figure 6 for the location of these terminals. Also note that KI solution strength will have to be increased to allow measurement of 200 PPM. Contact ATI for details. After installation of the jumper, you must change a configuration setting. Refer to the Configuration section of this manual. Step 2 of the configuration menu controls the high range operation. Change the configuration to “Jumper X10 ON”. No other configuration changes are needed unless the output scaling needs to be changed. TEMPERATURE MEASUREMENT A temperature element is located in the overflow chamber of the reactor module to measure the temperature of the sample after stripping. No adjustments are required for this part of the system. However, it is important to note that the measured temperature is often quite different than the temperature of the water at the overflow chamber below the monitor. Some sample heating or cooling can occur in the sample handling system. The temperature measurement is used to compensate the measurement and must reflect the stripped sample temperature. Do not try to adjust the displayed temperature to the sample temperature at the overflow. It is not designed to provide this measurement. There are 2 white wires coming from the sensing element that are connected to the PCB on the terminals labeled “RTD wiring”. If disconnected make sure the jumper is in place after reassembly.

ATI Model A15/79 Total Residual Chlorine Monitor
37
O&M Manual Rev-Q, 9/12
MAINTENANCE The A15/79 Chlorine Monitor will generally provide unattended operation over long periods of time. For reliable operation, maintenance on the system must be done on a regular schedule. Keep in mind that preventive maintenance on a regular schedule is much less troublesome than emergency maintenance that always seems to come at the wrong time. SENSOR MEMBRANE REPLACEMENT The iodine gas sensor used in the A15/79 should be serviced every 3 months or more frequently if operating experience indicates a shorter interval. The primary service required is membrane and electrolyte replacement. The procedure for this service is described on page 23. SENSOR ELECTRODE CLEANING Over an extended operating period, chlorine sensors can slowly accumulate deposits on the surface of the measuring electrode. Typically, this type of buildup occurs over years of operation, but can sometimes occur more quickly. Electrode poisoning is sometimes indicated by highly unstable measurements. The measuring electrode can be “acid cleaned” using nitric acid solutions.
CAUTION: This acid cleaning procedure involves the use of highly corrosive acid solutions. It should only be done by trained personnel using protective eyewear and gloves. If there is any doubt about your ability to safely accomplish this procedure, return the sensor to ATI for factory cleaning.
To acid clean the electrode assembly, remove the electrolyte chamber from the sensor so that both electrodes are exposed. Then follow the procedure below. 1. Fill a small beaker with 50% nitric acid solution to a level just high enough so that the gold tip of the
sensor can be submerged without any contact with the silver coil. 2. Allow the sensor to soak in this acid solution for 5 minutes. Then remove the sensor body and rinse
thoroughly with distilled water. 3. Fill a beaker with distilled water to a level sufficient to submerge both the tip and the silver coil. Do not
allow the connector at the back of the sensor to be submerged or get wet. Allow the electrodes to soak in the distilled water for 15 minutes.
4. Put a new membrane and fresh electrolyte in the electrolyte chamber and reassemble the sensor.
Connect to the chlorine monitor electronics and allow the sensor to stabilize for at least 24 hours. The sensor can be placed in the flowcell with chlorinated water running through it during stabilization. However, the readings will not be useful for 24 hours.

ATI Model A15/79 Total Residual Chlorine Monitor
38
O&M Manual Rev-Q, 9/12
PUMP TUBING REPLACEMENT Peristaltic pump tubing MUST be changed every 6 months. One set of replacement tubing is supplied with the unit and additional tube sets are available in packages of 5 (see spare parts list). If tubing wear or leakage is noted in less than 6 months, tubing should also be replaced immediately. It is unlikely that reagent feed tubing will require more frequent replacement, but grit in the incoming sample can cause wear on the sample tubing, shortening the replacement interval. Prior to replacing reagent tubing, disconnect the reagent pickup lines from the connectors at the inlet of the two pump tubes. Allow the system to run for 15 minutes to purge the inside the tubing with the clean water. Allow the pump to run for 2-3 minutes to pump out the entire sample. Replacement of pump tubing is very simple with the quick loading pump heads used in this system. Follow the procedure below for both the sample and reagent pump heads. Turn off power to the chemistry module prior to replacing pump tubes.
Figure 13 - Pump Head Assembly Exploded View

ATI Model A15/79 Total Residual Chlorine Monitor
39
O&M Manual Rev-Q, 9/12
REACTOR MAINTENANCE The maintenance on the reactor is simply to keep it clean. The reactor is made of a kynar and will not accumulate materials easily, but periodic cleaning is recommended. It is possible that buildup could occur in either the sparging chamber or the drain chamber. Pouring a small amount of dilute bleach solution through the drain chamber will clean out biological materials that might accumulate. A cap at the top of the reactor can be removed to allow cleaner to be poured into the drain chamber. A removable clean-out plug is located at the bottom of the overflow chamber. To clean out the reactor, disconnect power to the chemistry module to stop sample flow and then remove the plug at the bottom of the chamber. The plug can be removed by hand. When removing the plug, use paper cup or other receptacle to catch the water trapped in the overflow chamber. To flush the chamber, simply pour tap water or cleaning solution into the top of the reactor. Use your paper cup to collect the waste as it is discharged from the bottom. If desired, the plug can be put back temporarily and the chamber filled with bleach. However, be sure to rinse this out thoroughly prior to restarting the system. CAUTION: The water trapped in the overflow chamber when the plug is removed is acidic. Wear
protective gloves and do not get water in eyes or on clothing. If eye contact occurs, flush with large amounts of water and get medical attention. Contact with clothing can cause damage to fibers and/or permanent staining.
Change the o-ring in the reactor cap and sensor chamber yearly or if any damage is observed. If insertion of the sensor into the flow chamber becomes difficult, use silicon grease to lubricate the o-ring that holds the sensor in place. Use only enough grease to provide surface lubrication. Excess grease could foul the sensor membrane. AIR FILTER REPLACEMENT The air pump that supplies stripping air to the reactor assembly contains a small inlet filter. Over time, this filter will accumulate dirt and dust removed from the air used by the pump. This filter should be replaced once a year. Remove the panel of the reactor assembly to access the back of the panel. On the inlet of the air pump, you will see a porous plastic filter connected with a short piece of silicon tubing. Remove the old filter and discard. Replace with a new filter element. One spare filter is supplied with the unit, and additional filters are listed on the spare parts list.

ATI Model A15/79 Total Residual Chlorine Monitor
40
O&M Manual Rev-Q, 9/12
TROUBLESHOOTING If you experience problems during the operation of a chlorine monitor, refer to the information below to isolate the source of the problem. During calibration, monitor indicates “Sensitivity < 12.5%” and calibration does not update. 1. Check sensor membrane for fouling. Replace membrane and electrolyte, allow to stabilize, and
recheck. The procedure on page 23 must be followed when replacing the membrane. 2. Check the “zero offset” entered into the monitor. You can view this value by going to display D2 and
pressing CAL once. The display will read “zero: X.X nA”. Normally, the zero offset is less than 10 nA. If a large offset is present, rezero the system in accordance with this manual.
3. Check to see that the acetate buffer and the KI reagents are being delivered by the reagent pump. To
test this, turn the sample inlet valve to the distilled water position but do not connect tubing to this hose barb. Allow the sample pump to draw in air instead of liquid. Disconnect the buffer and KI outlet tubes from the reagent pump where they come together in a Y fitting. Allow the system to run and observe the oulet from the two reagent tubes. A small drop of reagent should slowly grow at the end of each tube if a continuous flow of reagent is being delivered. If one or both of the tubes does not show good flow, replace the reagent pump tube. It is usually best to replace these tubes in sets.
4. Check monitor configuration menu, step 6, to verify that the polarity is set to –400mv. With a digital
voltmeter (DVM), measure the voltage between terminals 17 and 18 on the back of the monitor to verify that the millivolt value is actually 400 mv.
Monitor values are unstable or the LCD is indicating negative values. 1. Check the “zero offset” entered into the monitor. You can view this value by going to display D2 and
pressing CAL once. The display will read “zero: X.X nA”. Normally, the zero offset is less than 5 nA. If a large offset is present, rezero the system in accordance with this manual.
2. Check reagent delivery as described in step 3 above. 3. Check the membrane condition. A membrane that is not stretched smoothly across the tip of the
sensor will cause unstable measurements. If necessary, change membrane and electrolyte. 4. Perform an electrical check on the sensor. This procedure can be found on the next page of this
manual. 5. Acid clean the sensor electrodes in accordance with the procedure on the previous page. Monitor display does not come on or 4-20 mA output signal is inoperable. 1. Check to see that you have AC power on the terminals at the back of the monitor. Check all terminals
for tight connections. 2. If 4-20 mA signal is incorrect, check resistance of the load on the output to verify it is under 600 ohms. 3. Most electronic component problems are not repairable in the field. Contact ATI service department
to arrange for factory repairs if electronics do not function.

ATI Model A15/79 Total Residual Chlorine Monitor
41
O&M Manual Rev-Q, 9/12
Sensor tip very wet due to condensation in sensor chamber. 1. Check heater on back of reactor. There is a small power resistor used to slightly warm a portion of
the reactor block to minimize condensation on the sensor. Open the center section of the chemistry module and locate the small black resistor connected to the upper left corner of the reactor from the back. There are two wire leads connected to it they are attached to the PCB where it is designated “HEATER”. Place your finger on the black surface and see if it is warm to the touch. If not, replace it.
SENSOR ELECTRICAL TEST Iodine gas sensors can be tested with a digital voltmeter (DVM) to determine if a major sensor problem exists. Follow the steps below to verify sensor integrity. 1. Disconnect the five sensor wires from the back of the chlorine monitor. Those wires are color coded
white, brown, red, black, and green. Note that the brown wire may be replaced with an orange wire in some cables.
2. Remove the electrolyte chamber from the sensor and dry the electrodes with a paper towel. 3. Connect a DVM between the white and brown (or orange) wires. Reading resistance, you should find
an open circuit value of infinite resistance. There must be no measurable resistance at all between these wires. Any resistance at all indicates either water in the cable connector or the breakdown in an electrode seal.
4. If you suspect that water has gotten into a cable connection on a flow type sensor or into the plug
connection of a submersible sensor, disconnect the cable and allow the parts of the sensor to sit in a warm place for 24 hours. If water in the connector is the problem, it should dry out sufficiently to allow normal sensor operation. However, step 3 above will have to be repeated after drying to see if the problem is gone.
MONITOR RESET The electronic unit can be reset to factory defaults if you wish to quickly get the monitor back to its original operating configurations. To do this, go to step 1 of the configuration menu (page 24). Use the UP arrow to change to ClO2. Then press ENTER. Press mode once and then go back into step one of the configuration menu and press the DOWN key to return to Cl2. Press ENTER and the unit will be reset to the factory defaults for chlorine. You can then continue through the configuration menu if you need to reset any range, output, alarm, or other configurations.

ATI Model A15/79 Total Residual Chlorine Monitor
42
O&M Manual Rev-Q, 9/12
SPARE PARTS LIST - MODEL A15/79
PART NO. DESCRIPTION 00-0041 Complete chlorine monitor electronics, panel mount 03-0181 NEMA 4X case assembly, (ABS) 00-0977 Gas phase Iodide sensor 03-0029 25 ft. Sensor cable 45-0090 Air Stripping chamber 03-0249 Air Stripping chamber cap w/o-ring 42-0024 Air Stripping chamber cap o-ring 42-0003 Sensor Chamber O-Ring 36-0009 Air pump 44-0119 Air Intake Filter (sold as each specify quantity) 55-0014 Rotometer with valve 03-0212 A15/79 Sample Pump Assembly, 120 VAC 03-0213 A15/79 Reagent Pump Assembly, 120 VAC 03-0234 A15/79 Sample Pump Assembly, 220 VAC 03-0235 A15/79 Reagent Pump Assembly, 220 VAC 05-0044 A15/79 Sample pump tubing (pkg. of 5, precut) 05-0045 A15/79 Reagent pump tubing (pkg. of 10) 05-0052 Total Sensor Membranes (10/pk) 09-0026 Total Chlorine Electrolyte 09-0031 KI Reagent 02-0081 A10/79 Total Cl2 Sensor Body 45-0107 Sensor Membrane Cap 45-0108 Sensor Membrane Chamber 31-0037 6 conductor cable (for interconnection of monitor to junction box) 23-0002 Fuse, 2 Amp Slow-Blow 03-0189 Reagent Feed Assembly 45-0153 3-Way Inlet Selector Valve 54-0007 Tube Holder – 1 channel (Sample Pump) 54-0008 Tube Holder – 2 channel (Reagent Pump) 54-0009 Pressure Plate 44-0164 Male Luer Adapter 44-0114 Tube Connector 00-1340 Reagent Pickup Spare Filter Assy 00-1381 Reactor heater assembly, 115VAC 00-1342 Reactor heater assembly, 230VAC 00-1343 Temperature Sensing Assy
Related Documents