Microscopy for Beekeepers Chris Cardew 31 st January 2015

Microscopy for beekeepers
Jul 18, 2015
Welcome message from author
This document is posted to help you gain knowledge. Please leave a comment to let me know what you think about it! Share it to your friends and learn new things together.
Transcript
Microscopy for Beekeepers
Chris Cardew 31st January 2015

Content
• What is microscopy?
• Types of microscope– How to set up the light microscope.
– How to make slides
• What to look at– Pollen
– Bee biology
– Bee parasites
• Where next
What is Microscopy
• Microscopy is the technical field of using microscopes to view objects and areas of objects that cannot be seen with the naked eye
• There are three well-known branches of microscopy: optical (light), electron, and scanning probe microscopy.

Types of microscope
• Optical or Light Microscopy
– Dissecting x40 times magnification
– Compound up to x 1000 times
• Electron Beam
– Scanning electron microscope
• Up to x 250,000
– Transmission electron microscopy
• Up to x 1,000 higher magnification than light

Dissecting Microscope
• Low magnification observation of a sample.
• Using light reflected from the surface of an object rather than transmitted through it.
• Produces a three-dimensional visualization of the sample being examined
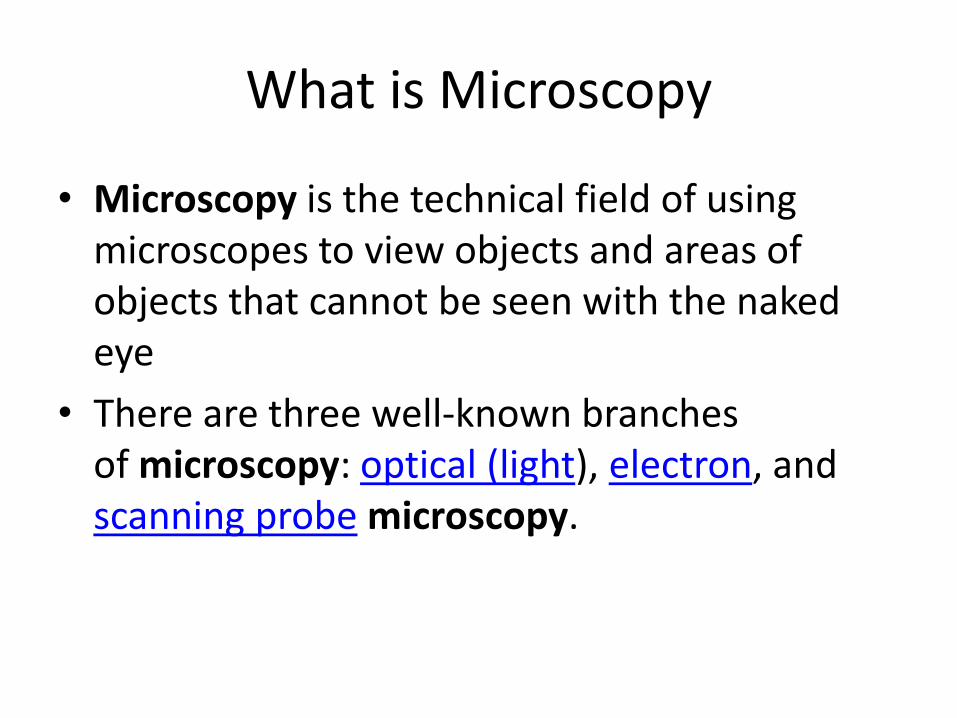
Compound Microscope
• Viewing small cells, or thin sections of organs or tissues placed on a glass mounting slide.
• The specimens are thin enough that light can pass through them from below.
• Magnifications of compound microscopes are generally range from 40x to 1000x
• One objective lens (the lens above the specimen) used at a time
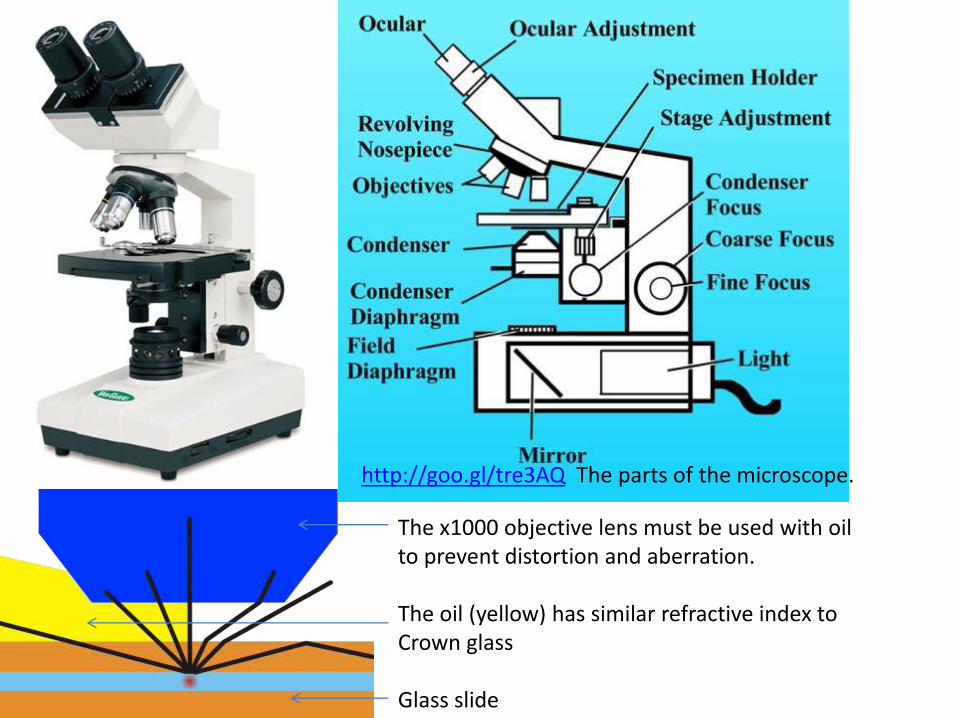
The x1000 objective lens must be used with oil to prevent distortion and aberration.
The oil (yellow) has similar refractive index to Crown glass
Glass slide
http://goo.gl/tre3AQ The parts of the microscope.
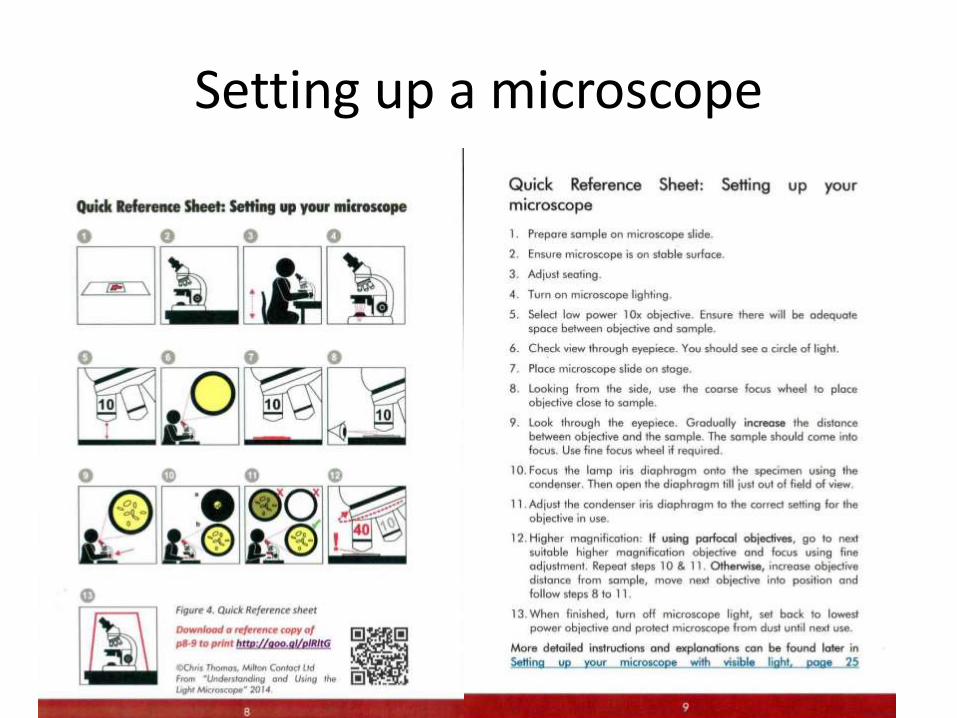
Setting up a microscope
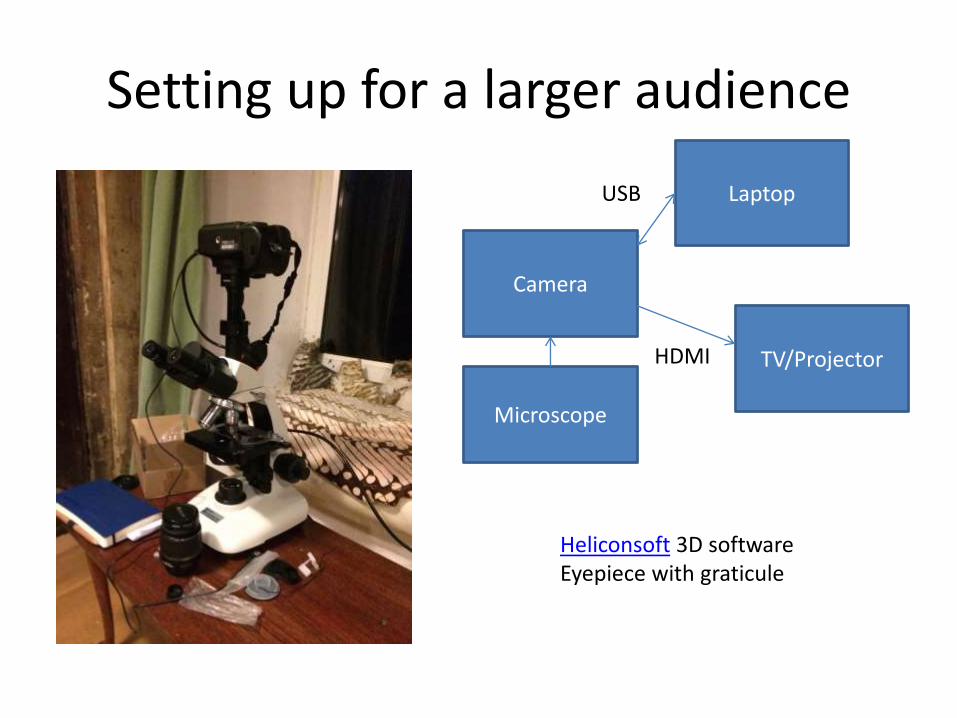
Setting up for a larger audience
Camera
Microscope
Laptop
TV/Projector
USB
HDMI
Heliconsoft 3D softwareEyepiece with graticule

What to look at and why?
• Pollen– Monitor the flowers that bees visit
– Identify honey
– Make reference slides and photographs
• Bee biology
• Compare to other insects e.g wasp, bumblebee, solitary bees
• Bee parasites– Tracheal mite, Varroa
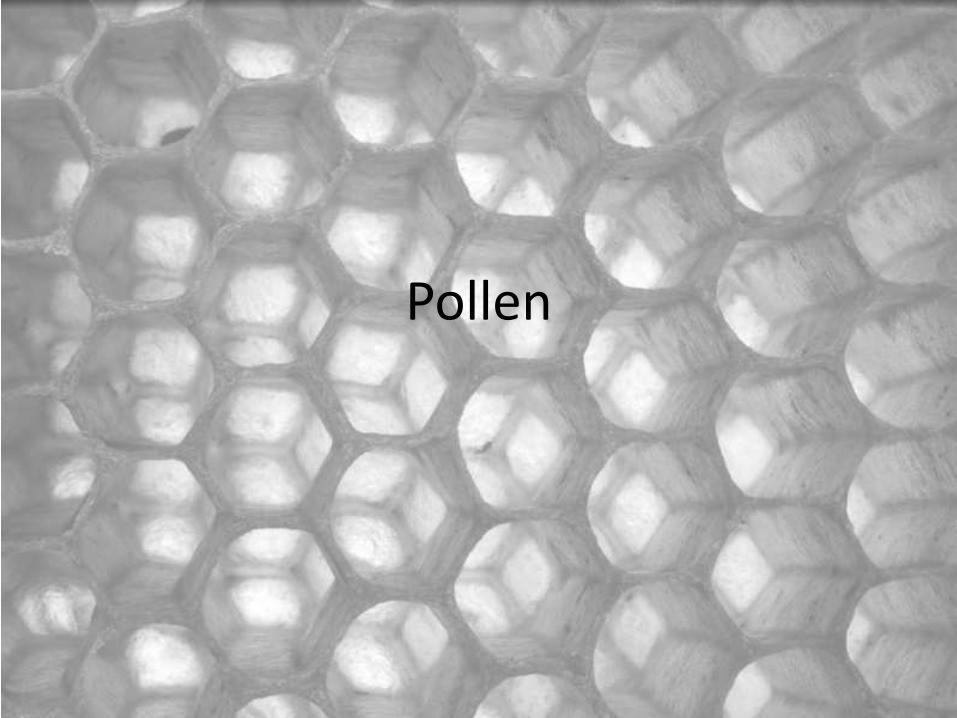
Pollen

Identifying Pollen - flower
• Pollen from the flower anther– Pick the flower with anther
– Add gelatine to a slide, brush the anther onto the gelatine.
– (Take a blob of gelatine on some tweezers and brush it over the flower anther then place the blob onto a slide)
– Place a cover slip over the pollen.
– Place the slide on a heating plate
– The gelatine will spread out under the cover slip
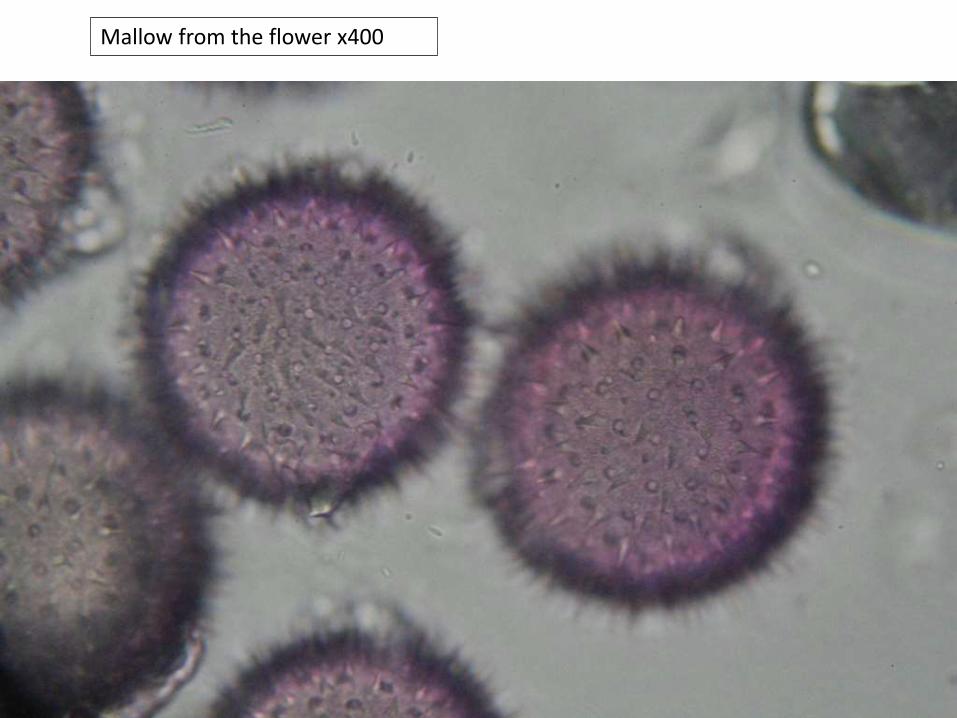
Mallow from the flower x400

Mallow 100um diameter (0.1mm)
Pollen drawings by Dorothy Hodges
Forget me not one of the smallest pollen grains
One micrometre (1 um) is 1/1000th of a millimetre (1mm)
One millimetre
10 mallow pollen grains

Hazel pollen(26th Jan 2015)
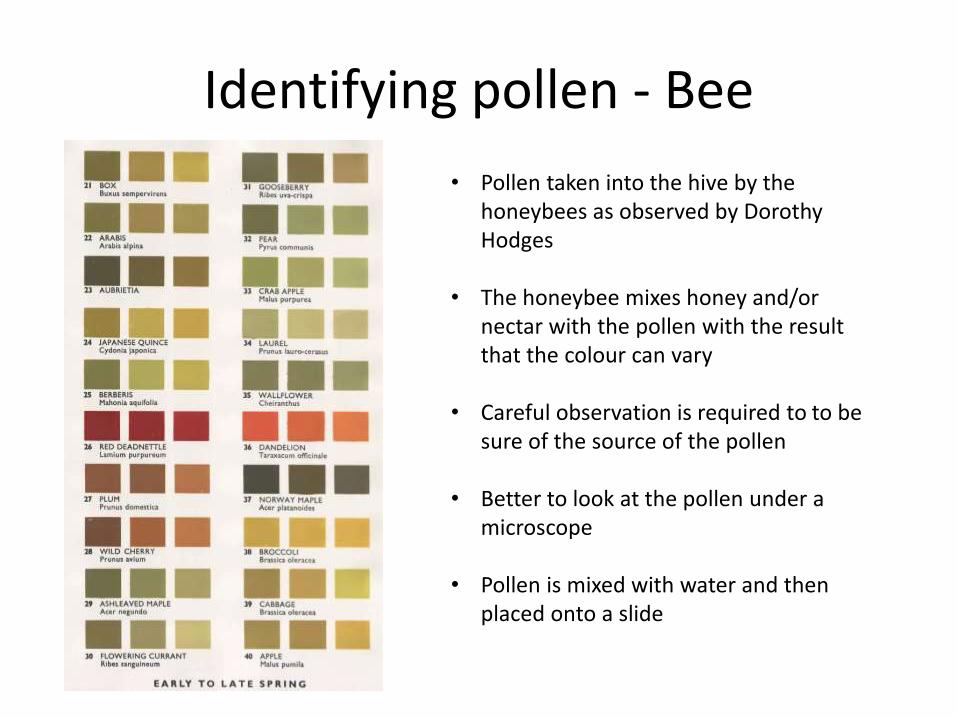
Identifying pollen - Bee
• Pollen taken into the hive by the honeybees as observed by Dorothy Hodges
• The honeybee mixes honey and/or nectar with the pollen with the result that the colour can vary
• Careful observation is required to to be sure of the source of the pollen
• Better to look at the pollen under a microscope
• Pollen is mixed with water and then placed onto a slide
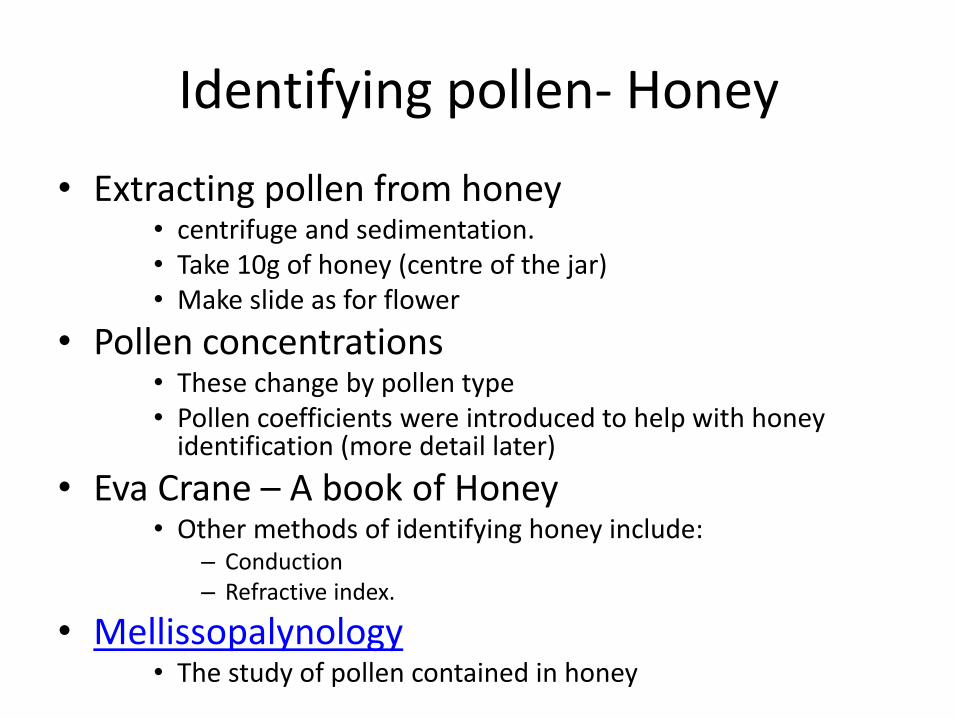
Identifying pollen- Honey
• Extracting pollen from honey • centrifuge and sedimentation.• Take 10g of honey (centre of the jar)• Make slide as for flower
• Pollen concentrations• These change by pollen type• Pollen coefficients were introduced to help with honey
identification (more detail later)
• Eva Crane – A book of Honey• Other methods of identifying honey include:
– Conduction– Refractive index.
• Mellissopalynology• The study of pollen contained in honey
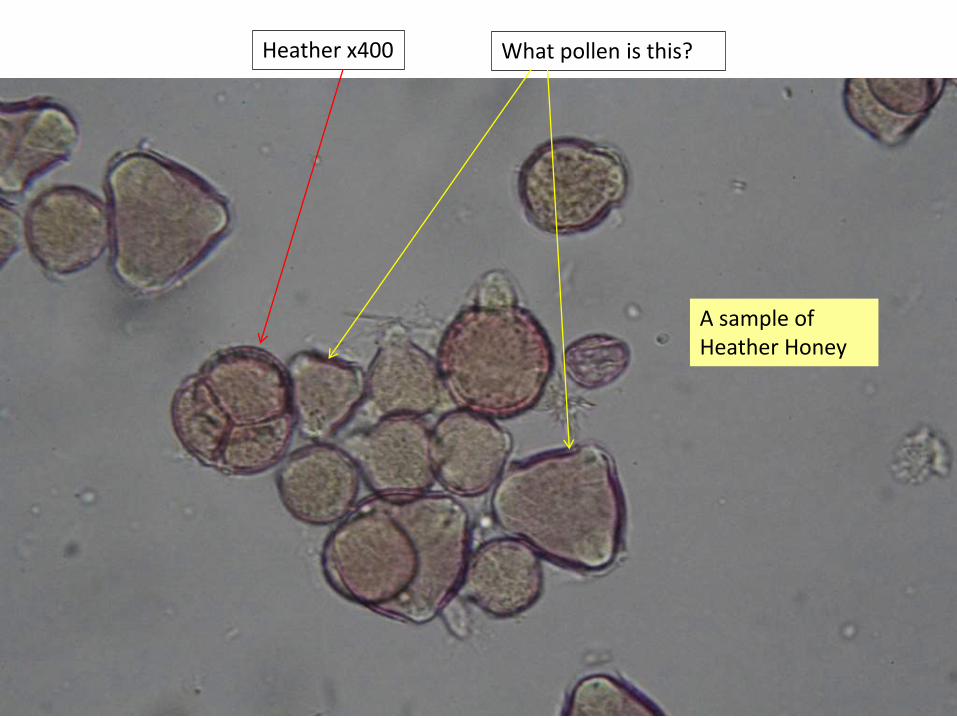
Heather x400 What pollen is this?
A sample of Heather Honey

Heather (x1000)
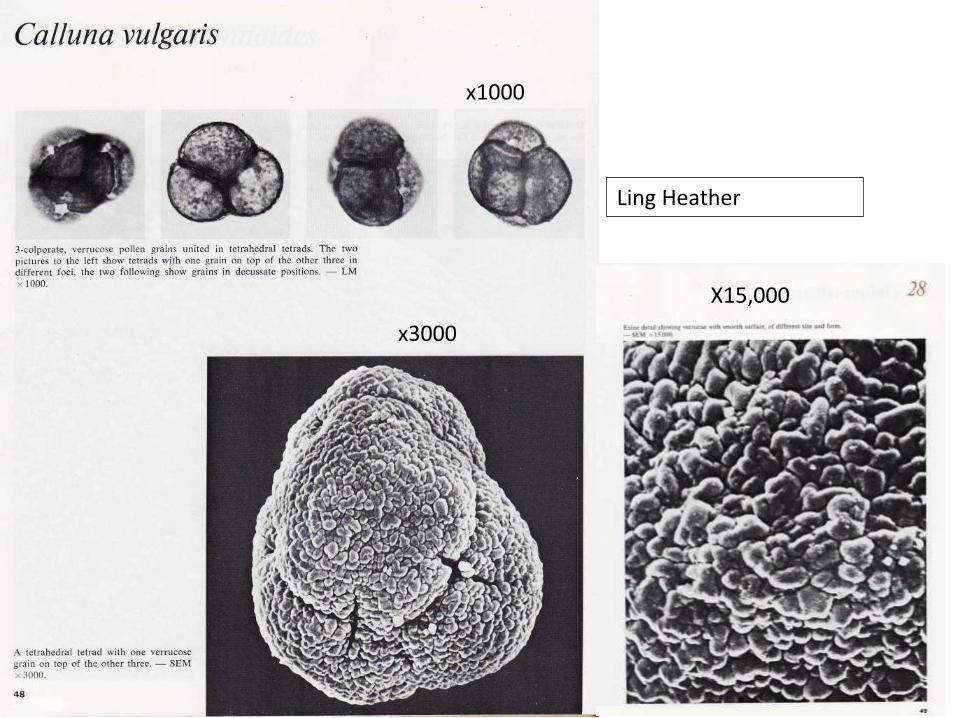
Ling Heather
x1000
x3000
X15,000

Honey Identification
• Rex Sawyer method:
– Take 10g of honey
– Mix with 250g of water
– Either place in centrifuge or sediment out
– Place a drop of the sediment on a slide
– Pollen count must be in the region of 200
– Calculate % of pollen types
– Using pollen coefficient calculate % honey
Taken from ‘Honey Identification by Rex Sawyer’

Honey Identification
Plant source Pollen % PC Pollen coefficient (1000 grains per 10g honey)
Relative Quantities of honey Pollen/PC
Percentage composition of honey
Rubus 36 50 0.72 22.2
Castenea 26 1000 0.026 0.8
Tilia (Lime) 21 10 2.1 64.7
Trifolium 9 50 0.18 5.5
Ligustrum 3 25 0.12 3.7
Others 5 50 0.1 3.1
TOTALS 100 - 3.246 100
This was a honey sample claimed as Lime Honey and justified by the above calculation
Taken from ‘Honey Identification by Rex Sawyer’
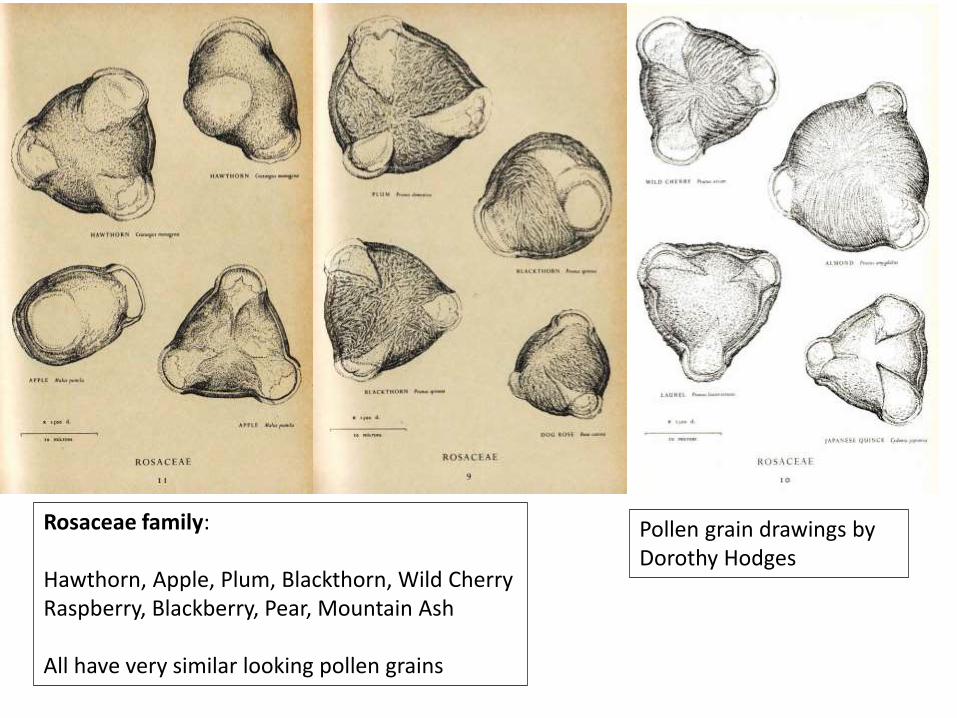
Rosaceae family:
Hawthorn, Apple, Plum, Blackthorn, Wild CherryRaspberry, Blackberry, Pear, Mountain Ash
All have very similar looking pollen grains
Pollen grain drawings byDorothy Hodges

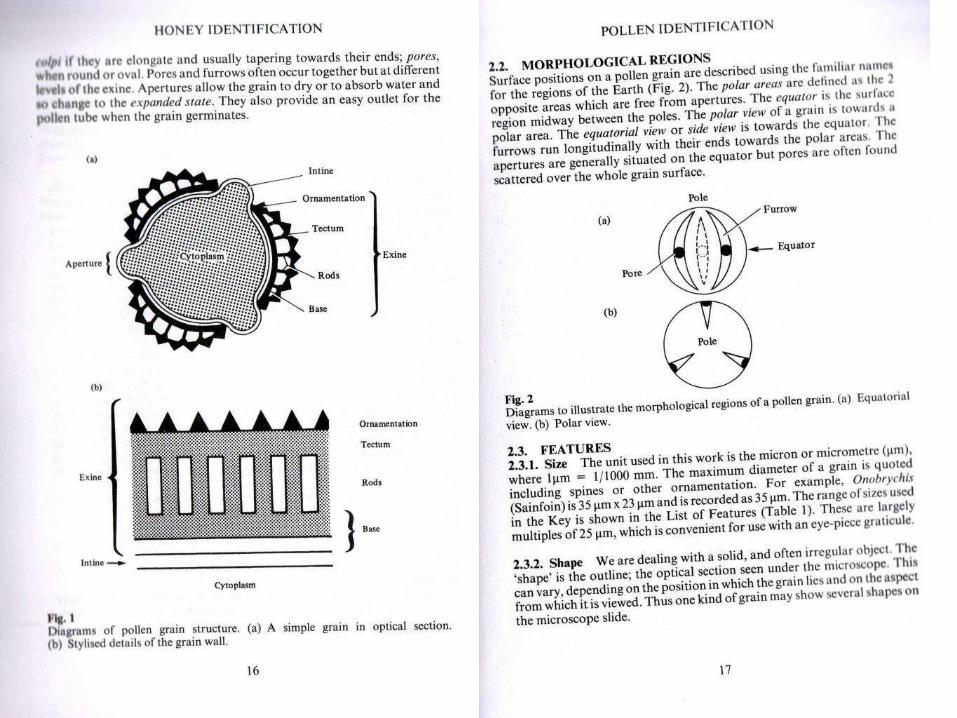
Using calibrated graticule accurate measurements can be taken

Honey identification
• Summary
– Identify the pollen grains in the honey sample
– Calculate the % pollen in the sample
– Calculate the % honey using the pollen coefficient
– Use technology to accurately measure the pollen grains to help with identification.
– Make reference slides directly from the flowers to compare with the pollen in the honey
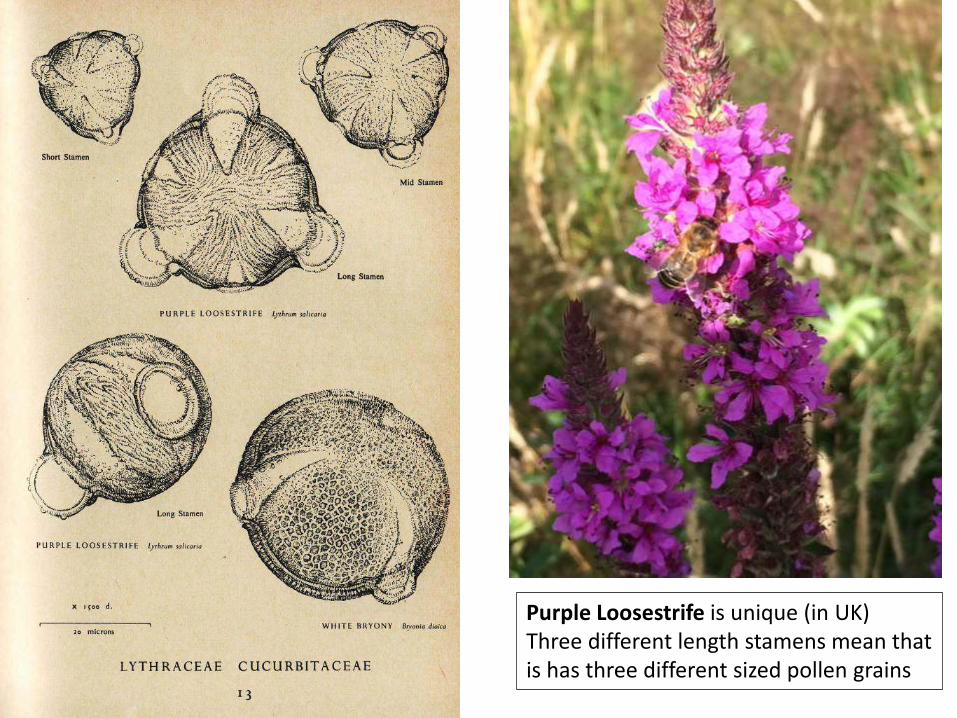
Purple Loosestrife is unique (in UK)Three different length stamens mean that is has three different sized pollen grains
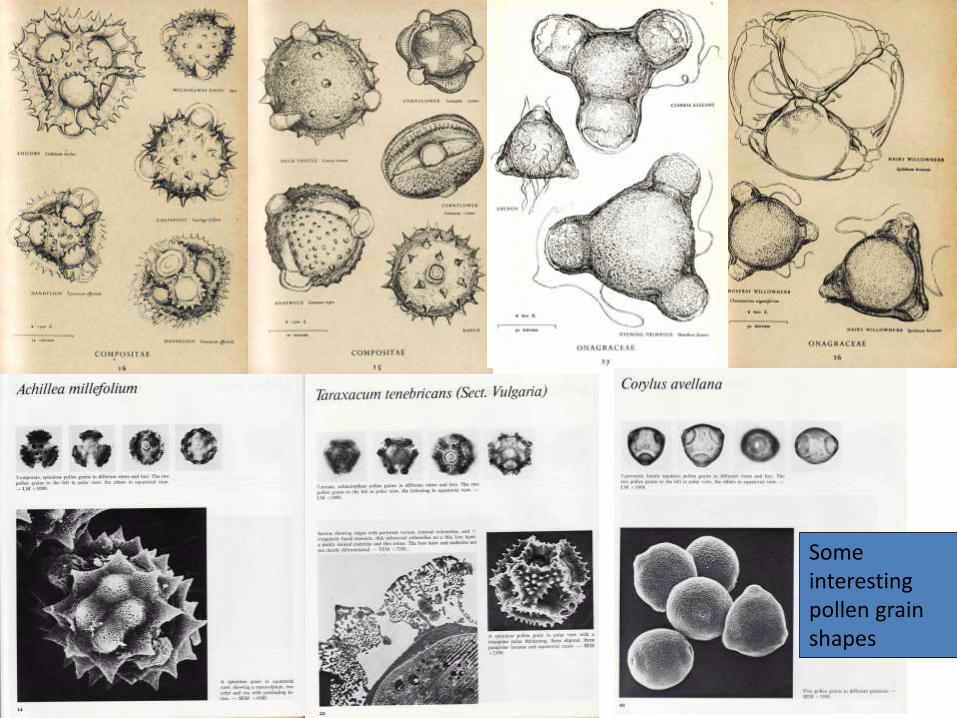
Some interesting pollen grain shapes

Gathering nuts in May
Pollen grains are the same size to a bee as nuts , small fruit and seeds are to humans
Bee Biology
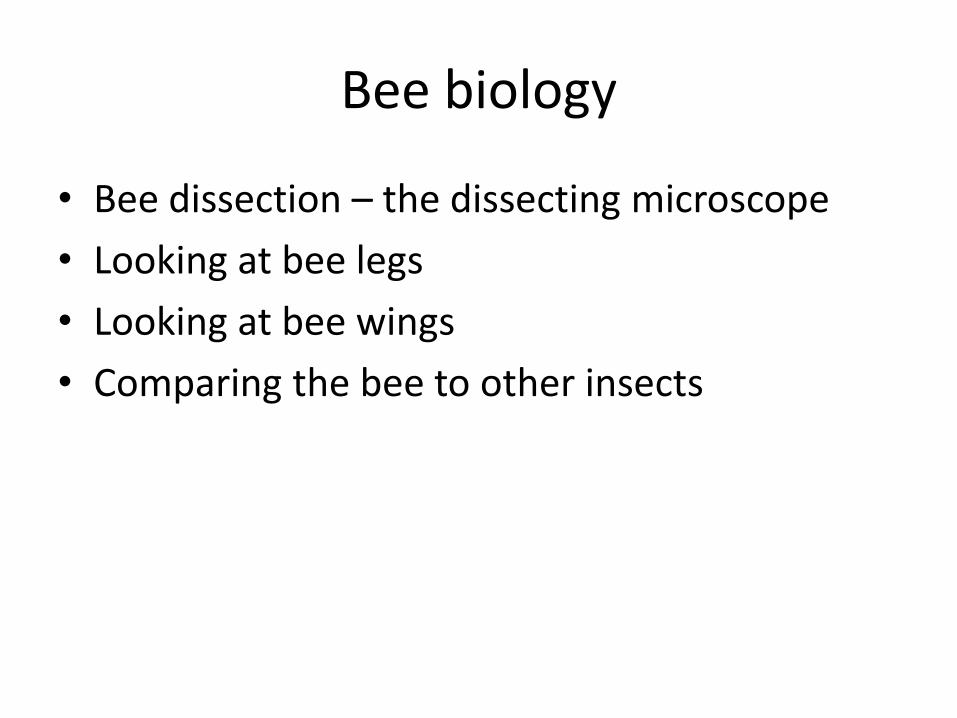
Bee biology
• Bee dissection – the dissecting microscope
• Looking at bee legs
• Looking at bee wings
• Comparing the bee to other insects

Chemicals for slide preparation
• Numount• Final mounting of bee parts onto a slide
• Glycerine Jelly• Mounting of pollen and other very small parts onto a slide
• Sodium Hydroxide• Softening of bee parts for slide mounting e.g. leg
• Acetic Acid• Decalcification of bee parts for slide mounting
• Isopropyl Alcohol (IPA)• Preservation (fixing) of bee parts
• Toluene• Dehydrating and clearing of bee parts (process with IPA)


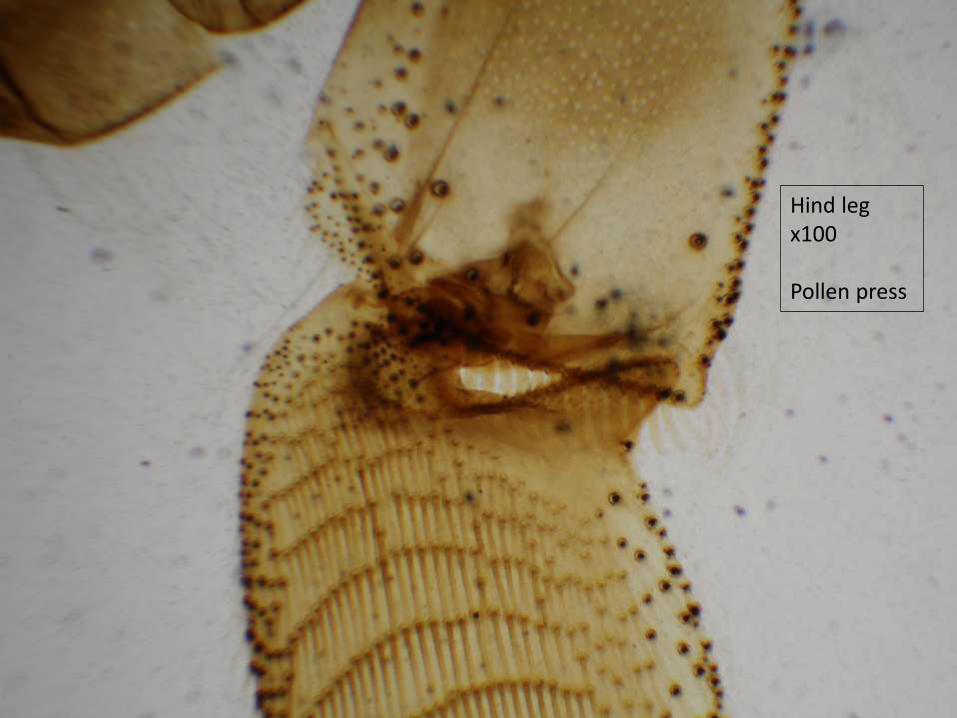
Hind leg x100
Pollen press
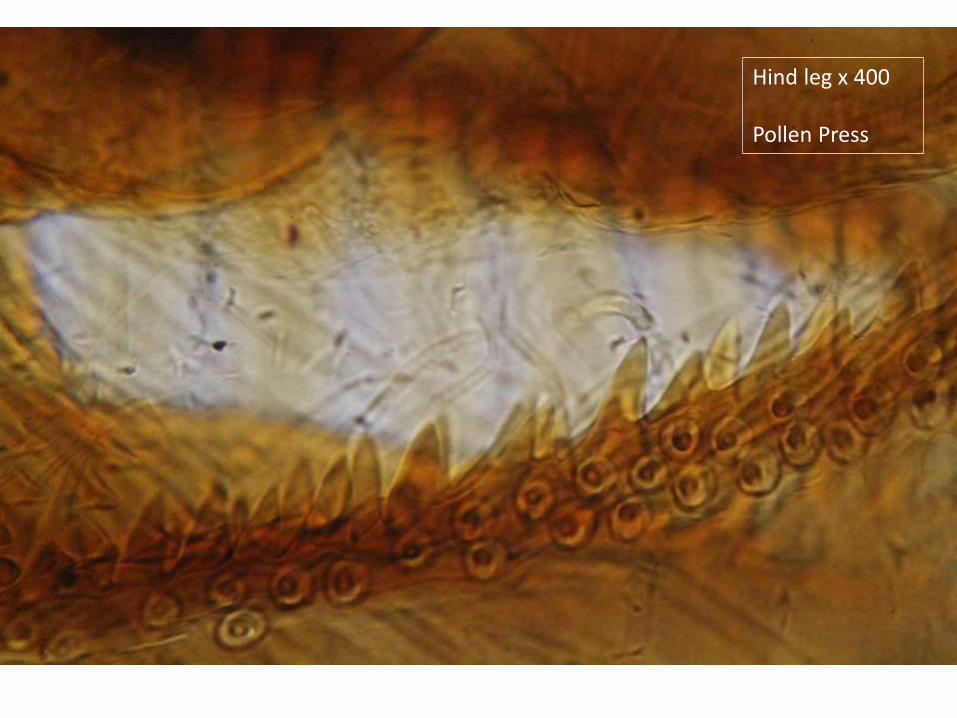
Hind leg x 400
Pollen Press
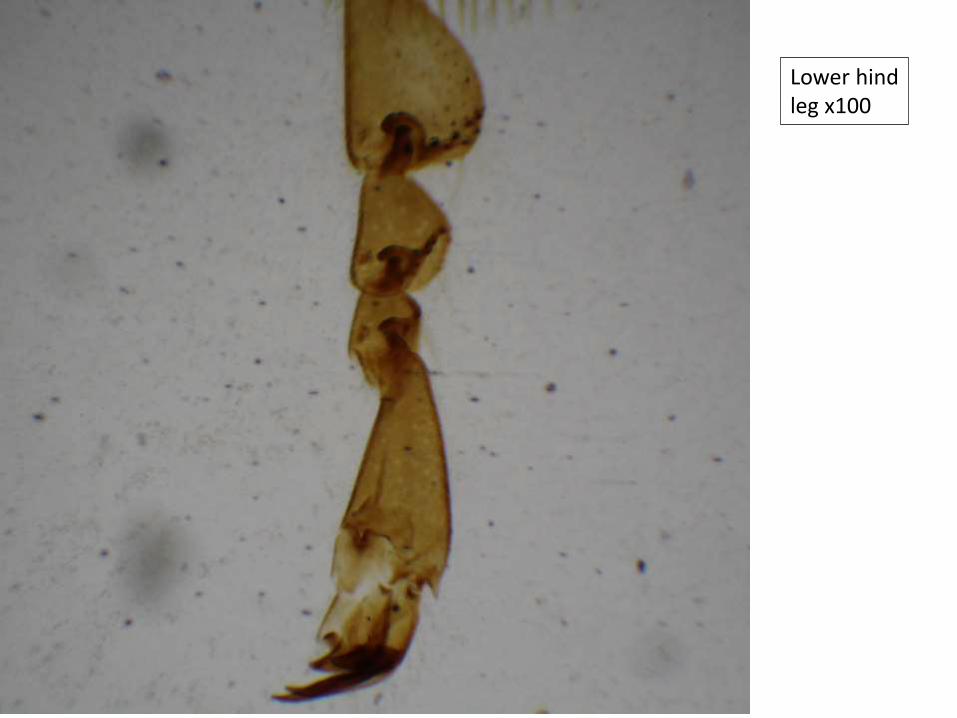
Lower hind leg x100

Hamuli
Fore leg foot
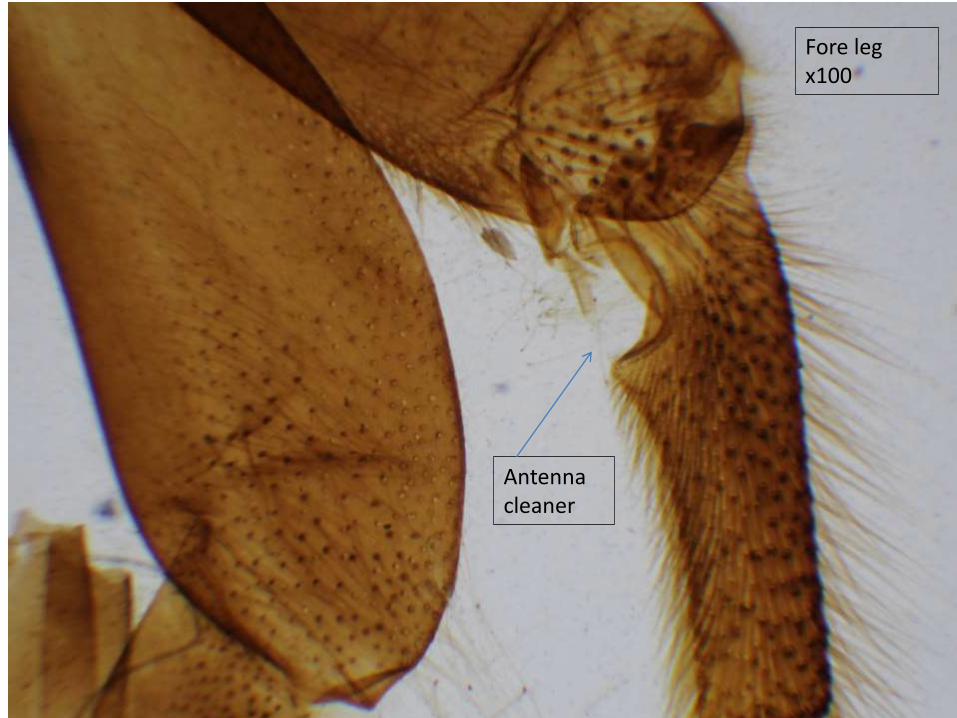
Fore leg x100
Antenna cleaner

Fore leg x400
Antenna Cleaner

Honeybee worker tongue x 100
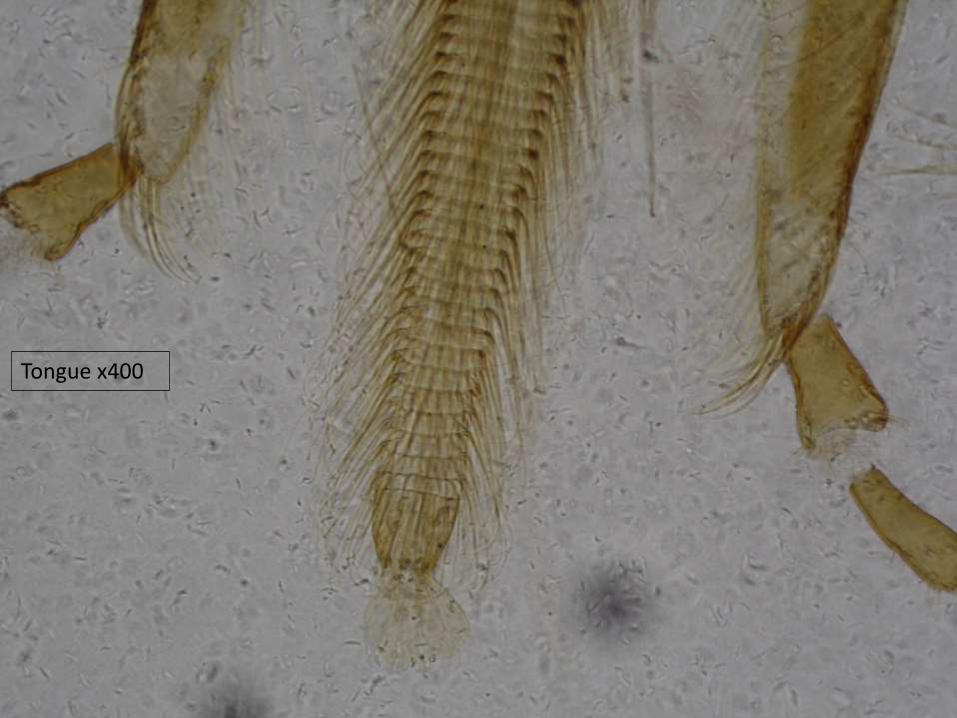
Tongue x400
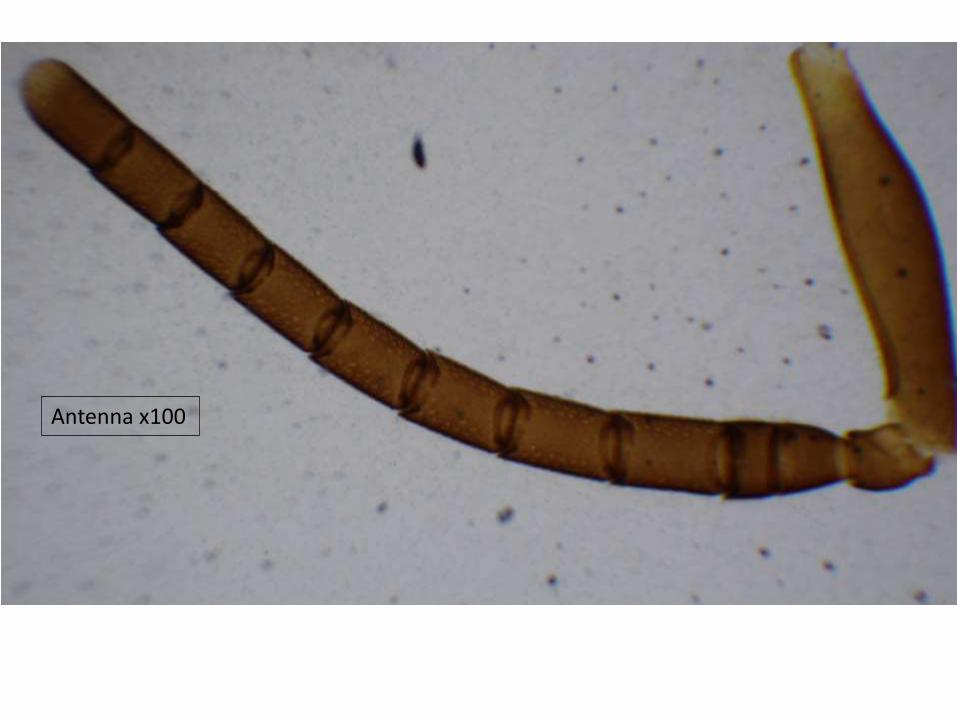
Antenna x100

Antenna x400

Two different focus points of the antenna (x600).
Using 3D software will enhance the final image
Bee Parasites
Bee disease and parasites
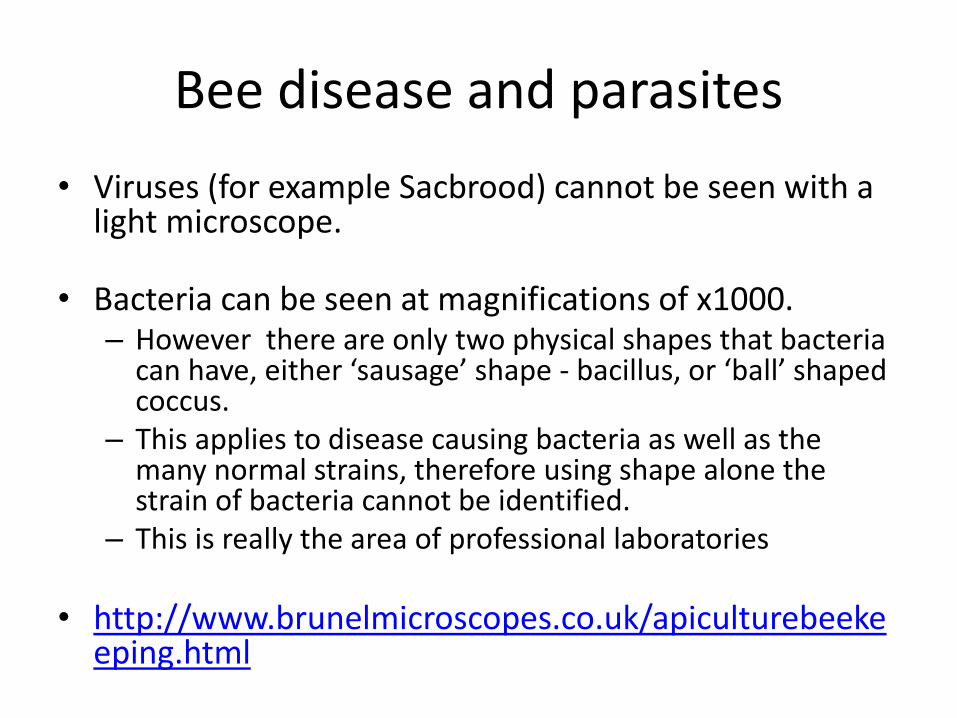
• Viruses (for example Sacbrood) cannot be seen with a light microscope.
• Bacteria can be seen at magnifications of x1000. – However there are only two physical shapes that bacteria
can have, either ‘sausage’ shape - bacillus, or ‘ball’ shaped coccus.
– This applies to disease causing bacteria as well as the many normal strains, therefore using shape alone the strain of bacteria cannot be identified.
– This is really the area of professional laboratories
• http://www.brunelmicroscopes.co.uk/apiculturebeekeeping.html
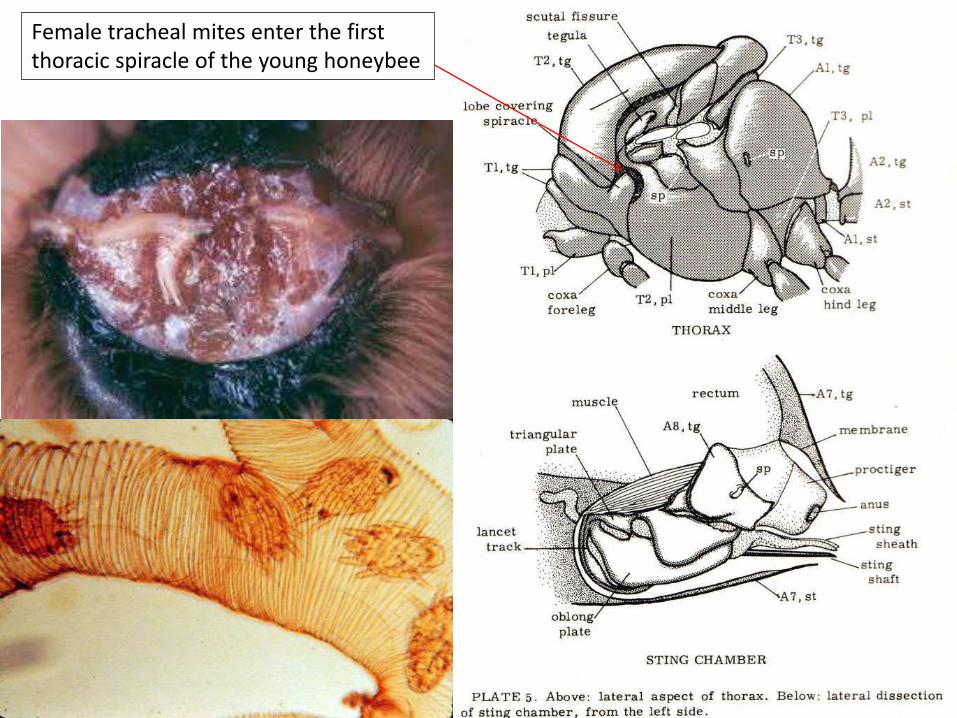
Female tracheal mites enter the first thoracic spiracle of the young honeybee
Why bother?
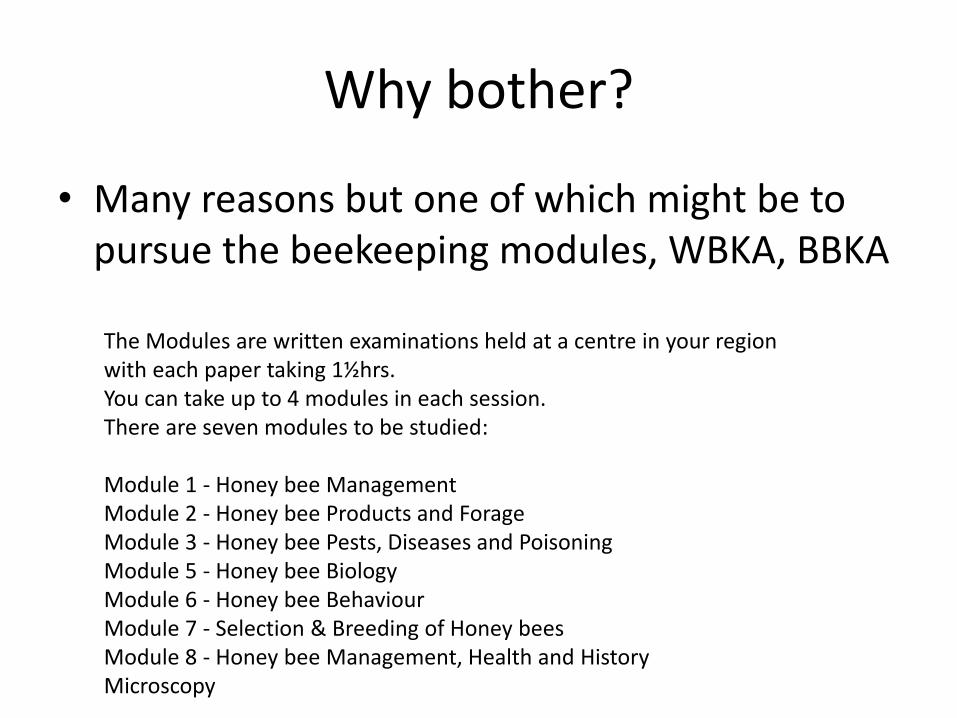
• Many reasons but one of which might be to pursue the beekeeping modules, WBKA, BBKA
The Modules are written examinations held at a centre in your region with each paper taking 1½hrs. You can take up to 4 modules in each session. There are seven modules to be studied:
Module 1 - Honey bee ManagementModule 2 - Honey bee Products and ForageModule 3 - Honey bee Pests, Diseases and PoisoningModule 5 - Honey bee BiologyModule 6 - Honey bee BehaviourModule 7 - Selection & Breeding of Honey beesModule 8 - Honey bee Management, Health and HistoryMicroscopy
Where next
• Series of seminars in the autumn. – Microscopy– Bee disease– Bee biology– Husbandry– Product presentation– ???
• Interest groups; – pollen – bee biology– looking at wasps and bumblebees

References
• Honey Identification• Rex Sawyer. Northern Books
• Pollen Loads of the Honey Bee• Dorothy Hodges
• Anatomy and Dissection of the Honeybee• Harry Arthur Dade
• Bee• Rose Lynn Fisher. Princeton Architectural Press
• A Book of Honey• Eva Crane

Any Questions?


Related Documents