BLOCK PRINTING Member Guide Pub. No. 4H156 Arts and Communication WISCONSIN 4-H PUBLICATION HEAD HEART HANDS HEALTH “An EEO/AA employer, University of Wisconsin- Extension provides equal opportunities in employment and programming, including Title IX and American with Disabilities (ADA) requirements.” © 2004 by the Board of Regents of the University of Wisconsin System. Developed by the Wisconsin 4-H Office, 431 Lowell Hall, 610 Langdon St., Madison, WI 53703. The 4-H name and emblem are federally protected under Title 18 US Code 707. Created by Jane Graff, former Extension Related Art Specialist, and Kenneth Kuemmerlein, former Extension Art Education Specialist. Updated by Wayne Brabender, Wisconsin 4-H Distance Learning Specialist. Layout and design revised by Dana Kopydlowski, 4-H Youth Development Graphic Artist, August 2004. To order multiple copies of this publication, call toll free: 1-877-WIS-PUBS (947-7827). To see more Cooperative Extension Information, visit our web site: http:// cecommerce.uwex.edu.

Welcome message from author
This document is posted to help you gain knowledge. Please leave a comment to let me know what you think about it! Share it to your friends and learn new things together.
Transcript

BLOCK PRINTINGMember Guide Pub. No. 4H156
Arts and Communication
WISCONSIN 4-H PUBLICATIONHEAD HEART HANDS HEALTH
“An EEO/AA employer,University of Wisconsin-Extension provides equal
opportunities in employment and programming, including Title IX andAmerican with Disabilities (ADA) requirements.”
© 2004 by the Board of Regents of the University of Wisconsin System.Developed by the Wisconsin 4-H Office, 431 Lowell Hall, 610 LangdonSt., Madison, WI 53703. The 4-H name and emblem are federallyprotected under Title 18 US Code 707.
Created by Jane Graff, former Extension Related Art Specialist, andKenneth Kuemmerlein, former Extension Art Education Specialist.Updated by Wayne Brabender, Wisconsin 4-H Distance Learning Specialist.Layout and design revised by Dana Kopydlowski,4-H Youth Development Graphic Artist, August 2004.
To order multiple copies of this publication, call toll free:1-877-WIS-PUBS (947-7827). To see more CooperativeExtension Information, visit our web site: http://cecommerce.uwex.edu.
Pub. No. 4H156, Pg.WISCONSIN 4-H
Contents
Introduction
MaterialsBlocks and Other ObjectsCutting ToolsPrinting Inks, Thinners and SolventsOther EquipmentPrinting SurfaceOther SuppliesMixing Colors
Printing TechniquesInking the BlockPrinting the Block
Design ExperimentsFound Objects and Vegetables ExperimentCardboard ExperimentLinoleum Experiment
Designing a Repeat Pattern
Block Printing on Ready-Made ItemsPrinting Designs on Textile Products
Advanced Design Experiments
References
............................................................2
.................................................................2
................................................4
................................................5
....................................8
......................8
...............................9
............................................................10
1 Pub. No. 4H156, Pg.WISCONSIN 4-H
2. From this drawing, a design is painted with a brush on theblock with areas of strong black and white pattern.
3. The design is cut into the linoleum block.
There are a few important suggestions to follow in develop-ing the black and white design. Make sure that the edges ofblack areas show the desired quality of edge.
If the edge is to be straight, take care to move the brushalong to give a controlled straight edge. Should the edge becurved, determine what kind of curved edge is desired, i.e.,graceful or irregular, deep or shallow, well rounded orflattened. Other edges may be angular or sharp pointed.
The brush should be controlled to give the edge or combina-tion desired. This procedure often requires a painstakingeffort to achieve the desired design. This is one importantaspect of designing which merits careful attention.
The completed block is then trial printed to determine howthe design can be arranged in a suitable repeat pattern, or inrepeat combinations with other similar designs.
Another important technique in the process of designing isadding white-line detailing within the broad black areas. It ispossible to do this detailing directly on the block withlinoleum tools.
An alternate design approach, which may appeal to some, isto use cut paper shapes. Arrange in a pleasing design on thelinoleum block and trace. The dark areas can be filled in witha felt-tipped pen or brush. The block is then cut away in theusual manner.
REFERENCESPrint Making Without a Press, Janet Doub Erickson and
Adelaid Sproul, Reinhold Publishing Corporation, 430Park Avenue, New York, NY, 1966.
Block Printing on Textiles, Janet Doub Erickson, Watson-Guptill Publications, New York, NY 10036, 1961.
Simple Printmaking, Cyril Kent and Mary Cooper, Watson-Guptill Publications, 165 West 46th Street, New York, NY10036, 1966.
Introducing Linocuts, Jane Elam, Watson-Guptill Publica-tions, 165 West 46th Street, New York, NY 10036, 1969.
And don’t forget to check the Internet for web sites onprintmaking. Here are some samples:David Bull’s World of Woodblock Printmaking: http://
www.woodblock.com/. Contains information aboutsupplies and tools, techniques, processes, and muchmore about Japanese woodblock printmaking.
Handbook of Japanese Printmaking Technique: http://www.woodblock.com/encyclopedia/index.html.
Jean’s Printmaking: http://www.jeaneger.com/. Includes abeginner’s guide to woodcuts.
Library of Books on Woodblock Printmaking: http://www.woodblock.com/encyclopedia/entries/011_03/011_03.html.
Wisconsin 4-H Web Site art project page: http://www.uwex.edu/ces/4h/onlinpro/art.html. Good ideas ongeneral 4-H arts and communication activities.
10
Pub. No. 4H156, Pg.WISCONSIN 4-H
INTRODUCTIONBlock printing is the process of using an object to make aninked impression upon a plain surface. It is one of the oldestand most enjoyable of all the crafts and has given color andpattern to paper, cloth, and other surfaces for nearly 4,000years.
Today the process is essentially the same. As it is simple andinexpensive, it is ideal for the beginner. Yet its possibilitiescan be numerous and complex enough to challenge the mostexperienced.
If you are a beginner, the suggestions on the following pageswill help you get started. After you begin working, you willfind that ideas come more easily. One idea often leads toanother.
MATERIALS
Blocks and Other ObjectsProbably the simplest and most direct adventure in textileprinting is with the use of many commonplace objects whichcan be found in any kitchen or basement, a junk box ordrawer. Kitchen utensils, scrap wood blocks, jar lids, corks, apotato masher, pieces of cork or buttons are only a few of themany things which can be “found” for printing. A crosssection of an onion, green pepper or carrot also makesinteresting prints. Try printing with a carrot, potato or eraserfrom which you have cut notches or other simple shapes.Any object which has a surface flat enough to receive a layerof printer’s ink rolled on with a brayer (rubber roller) orpressed into a stamp pad is printable.
Various textures and shapes can be made by printing from astring, pieces of cardboard or inner tube, wire screen orfabrics. Sometimes you may prefer to glue these materialsfirst to a heavy piece of cardboard or scrap of wood for easierhandling. Another method is to design freely on a non-porous surface, such as, glass or cardboard with a tube ofairplane model glue. When dry, this can be rolled with ink andprinted, which will give various shapes and textures.
Perhaps the most common material used today for blockprinting is the linoleum block. These blocks are made ofheavy-gauge linoleum glued to 3/4" plywood, are easily cutand come in many sizes. They may be purchased from an artsupply store or ordered from one of many craft suppliers.More economical is the heavy-gauge linoleum which comesin sheets and is also available from the same sources. Tomake it more easily handled, simply glue it to a wood blockand put it under pressure until the glue dries.
Cutting ToolsUse a sharp paring knife or single-edged razor blade forcutting materials as vegetables, cork, erasers and cardboard.For linoleum, a special set of tools is required. This setcontains a handle into which any one of four different-sizedgouges can be screwed. One gouge is a knife-shaped blade.The others are either in the shape of a “V” or “U.”
The small “U” makes fine lines. When you combine theselines in various ways, they make up areas of fine textures.Delicate designs can be made from lines made from this onetool.
The larger “U” tools make deeper or wider lines which youcan vary by using firm pressure, then light, then firm in thesame stroke.
The shallow “U” makes bolder lines and is used to dig outlarge areas of linoleum.
When gouges become dull, sharpen them with aCarborundum stone.
Linoleum cutters can be used on wood. However, if you planto do much work with wood block, purchase a separate set ofwoodworking tools for this purpose. (See Image 1.)
Printing Inks, Thinners and Solvents
For fabricUse oil-base printer’s ink or special block printing inks forprinting on fabric. These can be obtained in many colors fromprint shops as well as art supply shops. Both types of inkhave a stiff, creamy consistency in contrast to commonwriting inks.
As these inks are only moderately colorfast, fabrics printedwith them should be washed by hand and allowed to drip dry.Do not wring or scrub as abrasion will cause ink to come off.The most colorfast colors seem to be those mixed with somewhite. The white acts as a binder and keeps the color frombleeding or rubbing off.
Image 1: This cutting tool is with a set of three blades.
2Pub. No. 4H156, Pg.WISCONSIN 4-H
planned to fit in narrow vertical repeats or single units, suchas, initial letters. Random patterns scattered over the surfaceare other possibilities.
To print, make a cardboard pattern and insert inside the frontsection of the tie. This will protect the lining and insure a flatprinting pad. Blockprinting ink or textile inks can be used.During printing, the block repeat can extend partially beyondthe edges of the tie so that the design plan shows completerepeat on surface. Select printing colors which harmonizewith the color of the tie. Closely related colors of slightlydarker or lighter tone than the material will provide a qualitytie.
Canvas or denim cloth tote bags can be made from simplepatterns. The pattern is laid out on cloth with tailor’s chalk.The block design is cut and imprinted on the cloth accordingto the repeat plan. Depending on the size of bag and the finaldesired design, any of the basic print materials can be used.Potatoes, erasers, linoleum or “found” objects can beselected, based on the experience and ability of the indi-vidual. You may wish to blockprint designs on ready-madetote bags. Again, insert a cardboard pad to insure a goodprinting surface. Create the designs within the side surfacesor panels of the tote bag.
Additional cloth projects for blockprinting might be napkins,table placemats, tablecloths, luncheon or picnic spreadcloths, table runners or scarves. Team insignias for baseball,soccer or basketball T-shirts can also be blockprinted.
ADVANCED DESIGN EXPERIMENTSDesigns for blockprinting can be created directly on alinoleum block. The block should first be painted with a thincoat of white rubber or alkyd-base house paint. This pro-vides a waterproof background for direct designing. Uponthis linoleum surface, a design can be developed, using a finepointed brush and black poster paint or a felt-tipped pen.
Paint or draw directly on the surface of the block. If a part ofthe design is not satisfactory, a damp sponge can be used towipe off any area for correction.
Designing should begin with a pleasing arrangement of blackshapes arranged upon the white linoleum block. Theseshapes can be large or small, narrow or broad, pointed orrounded or of other contrasting types. Many interestingdesigns can be made from combinations of such shapes.They may be abstract or geometrical. The character andinterest of such designs are derived from their appearance asshapes and not as representing any image, symbol or object.
In some instances, it may be helpful to practice designs ofthis type on white paper before working on the linoleumblock. An excellent design on white paper can be traced ontothe block and filled in with black poster paint.
Some designers, after working with abstract shapes, mayprefer combinations of shapes which suggest images,symbols or representative objects. The quality of an excellentdesign is not determined by what is represented, but by howinteresting the black shapes are arranged on the whitebackground.
There are three stages to follow in preparing a design whichrepresents an object.
1. A carefully studied line drawing is made of a selectedobject. Objects should be chosen based on personalinterest and what is available to observe. Ideas fordesigning come from our environment, which includes thefollowing things:
Plant forms – leaves, stems, flowers, buds, seeds androots
Animal forms (See Image 8.)
Marine forms – fish and shells
Bird forms
Insect forms
Inanimate forms – rocks, crystals and atmosphericelements
Human-made forms – tools and utensils
Human forms
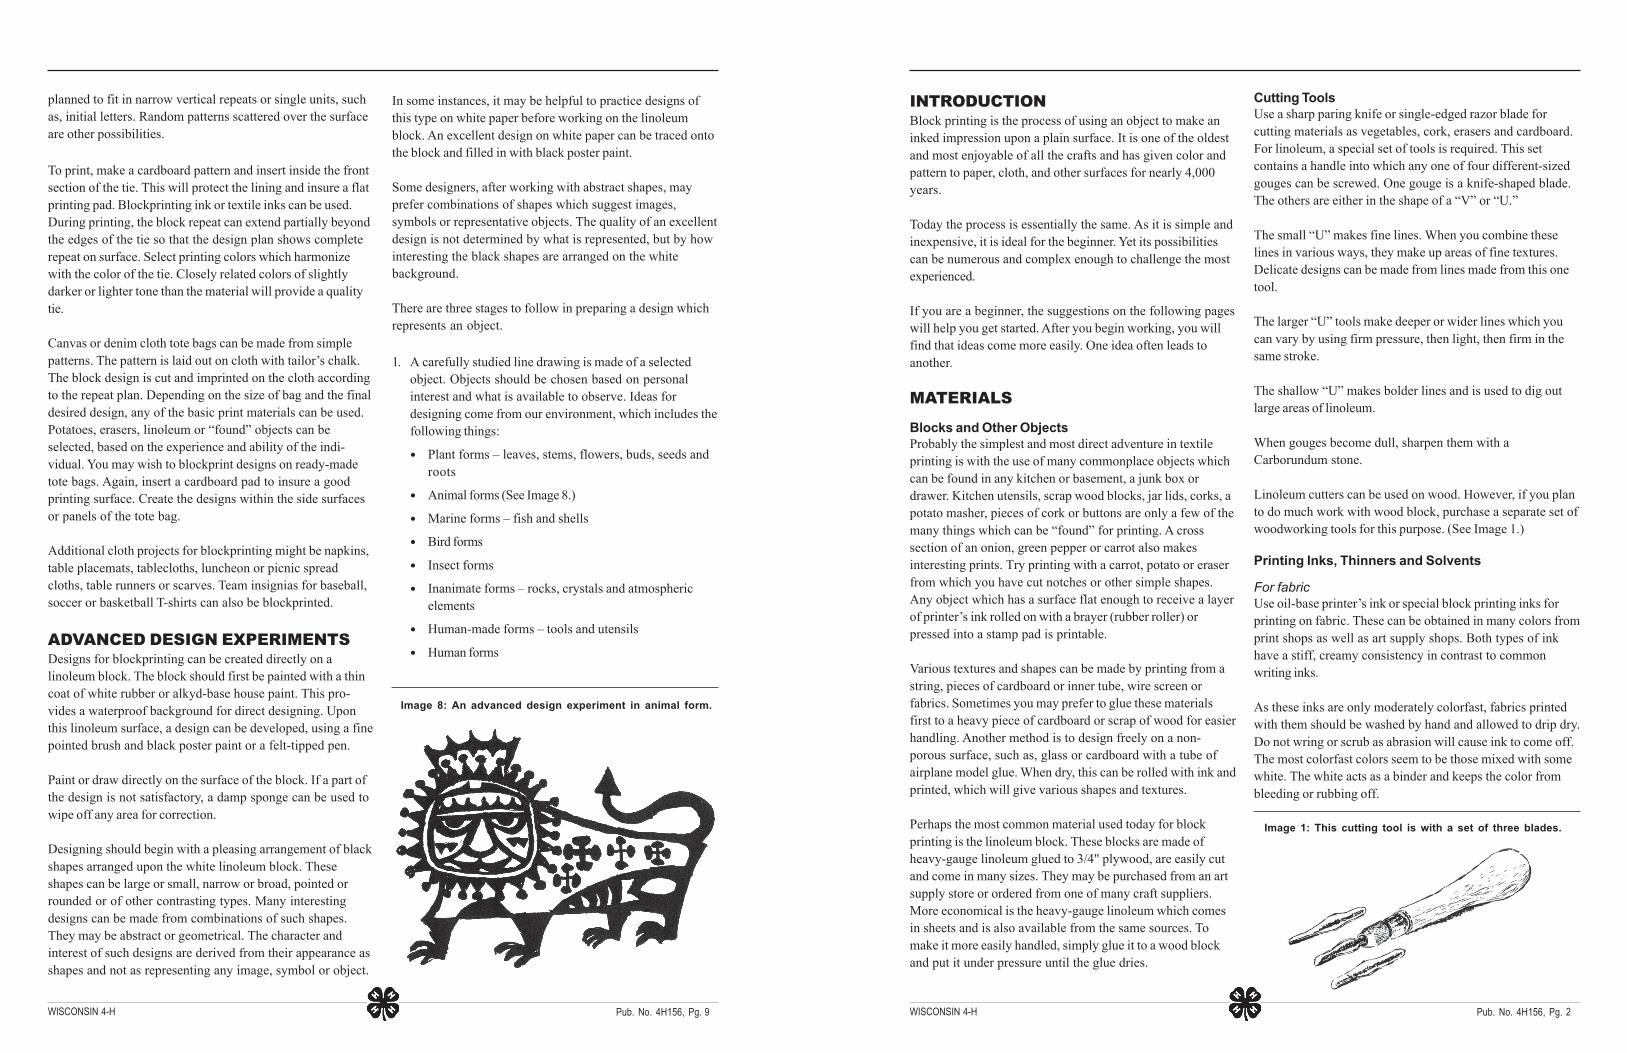
Image 8: An advanced design experiment in animal form.
9
Pub. No. 4H156, Pg.WISCONSIN 4-H
No special setting process is necessary, but oil-base inksmay take from two to three days to dry thoroughly. Whendry, press fabric well on the wrong side. Set iron temperatureaccording to the type of fabric used.
If a thinner is needed, use a few drops of boiled linseed oil orturpentine. For cleaning your equipment, use paint thinner orturpentine.
For paperAlthough oil-base inks are excellent for paper, you may prefera water-base block printing ink. Water is used for thinningand clean-up. As the water-base ink tends to dry rapidly, youmay have difficulty obtaining good prints. Ink stamp padsavailable at stationery stores work well with small blocks,erasers and sponges. A stamp pad can also be made fromthree or four layers of cloth or felt placed in a shallow tray orjar lid. Tempera paint, applied with a brush, works well forvegetables.
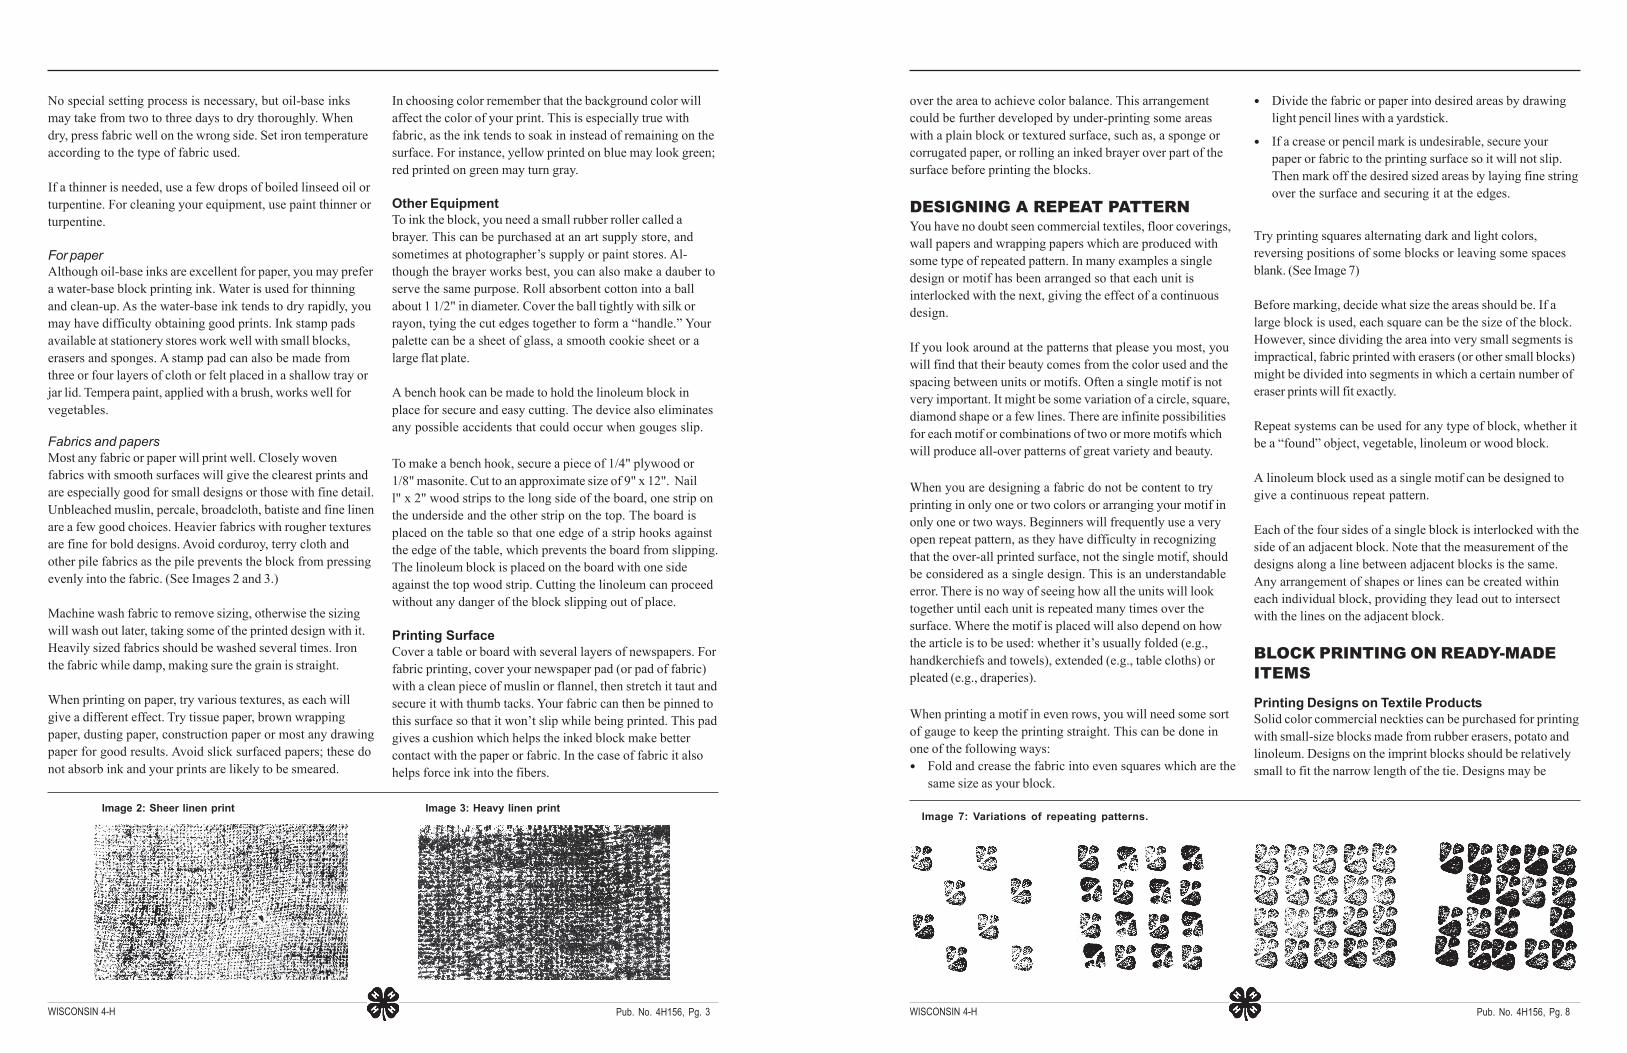
Fabrics and papersMost any fabric or paper will print well. Closely wovenfabrics with smooth surfaces will give the clearest prints andare especially good for small designs or those with fine detail.Unbleached muslin, percale, broadcloth, batiste and fine linenare a few good choices. Heavier fabrics with rougher texturesare fine for bold designs. Avoid corduroy, terry cloth andother pile fabrics as the pile prevents the block from pressingevenly into the fabric. (See Images 2 and 3.)
Machine wash fabric to remove sizing, otherwise the sizingwill wash out later, taking some of the printed design with it.Heavily sized fabrics should be washed several times. Ironthe fabric while damp, making sure the grain is straight.
When printing on paper, try various textures, as each willgive a different effect. Try tissue paper, brown wrappingpaper, dusting paper, construction paper or most any drawingpaper for good results. Avoid slick surfaced papers; these donot absorb ink and your prints are likely to be smeared.
In choosing color remember that the background color willaffect the color of your print. This is especially true withfabric, as the ink tends to soak in instead of remaining on thesurface. For instance, yellow printed on blue may look green;red printed on green may turn gray.
Other EquipmentTo ink the block, you need a small rubber roller called abrayer. This can be purchased at an art supply store, andsometimes at photographer’s supply or paint stores. Al-though the brayer works best, you can also make a dauber toserve the same purpose. Roll absorbent cotton into a ballabout 1 1/2" in diameter. Cover the ball tightly with silk orrayon, tying the cut edges together to form a “handle.” Yourpalette can be a sheet of glass, a smooth cookie sheet or alarge flat plate.
A bench hook can be made to hold the linoleum block inplace for secure and easy cutting. The device also eliminatesany possible accidents that could occur when gouges slip.
To make a bench hook, secure a piece of 1/4" plywood or1/8" masonite. Cut to an approximate size of 9" x 12". Naill" x 2" wood strips to the long side of the board, one strip onthe underside and the other strip on the top. The board isplaced on the table so that one edge of a strip hooks againstthe edge of the table, which prevents the board from slipping.The linoleum block is placed on the board with one sideagainst the top wood strip. Cutting the linoleum can proceedwithout any danger of the block slipping out of place.
Printing SurfaceCover a table or board with several layers of newspapers. Forfabric printing, cover your newspaper pad (or pad of fabric)with a clean piece of muslin or flannel, then stretch it taut andsecure it with thumb tacks. Your fabric can then be pinned tothis surface so that it won’t slip while being printed. This padgives a cushion which helps the inked block make bettercontact with the paper or fabric. In the case of fabric it alsohelps force ink into the fibers.
Image 2: Sheer linen print Image 3: Heavy linen print
3 Pub. No. 4H156, Pg.WISCONSIN 4-H
over the area to achieve color balance. This arrangementcould be further developed by under-printing some areaswith a plain block or textured surface, such as, a sponge orcorrugated paper, or rolling an inked brayer over part of thesurface before printing the blocks.
DESIGNING A REPEAT PATTERNYou have no doubt seen commercial textiles, floor coverings,wall papers and wrapping papers which are produced withsome type of repeated pattern. In many examples a singledesign or motif has been arranged so that each unit isinterlocked with the next, giving the effect of a continuousdesign.
If you look around at the patterns that please you most, youwill find that their beauty comes from the color used and thespacing between units or motifs. Often a single motif is notvery important. It might be some variation of a circle, square,diamond shape or a few lines. There are infinite possibilitiesfor each motif or combinations of two or more motifs whichwill produce all-over patterns of great variety and beauty.
When you are designing a fabric do not be content to tryprinting in only one or two colors or arranging your motif inonly one or two ways. Beginners will frequently use a veryopen repeat pattern, as they have difficulty in recognizingthat the over-all printed surface, not the single motif, shouldbe considered as a single design. This is an understandableerror. There is no way of seeing how all the units will looktogether until each unit is repeated many times over thesurface. Where the motif is placed will also depend on howthe article is to be used: whether it’s usually folded (e.g.,handkerchiefs and towels), extended (e.g., table cloths) orpleated (e.g., draperies).
When printing a motif in even rows, you will need some sortof gauge to keep the printing straight. This can be done inone of the following ways:
Fold and crease the fabric into even squares which are thesame size as your block.
Divide the fabric or paper into desired areas by drawinglight pencil lines with a yardstick.
If a crease or pencil mark is undesirable, secure yourpaper or fabric to the printing surface so it will not slip.Then mark off the desired sized areas by laying fine stringover the surface and securing it at the edges.
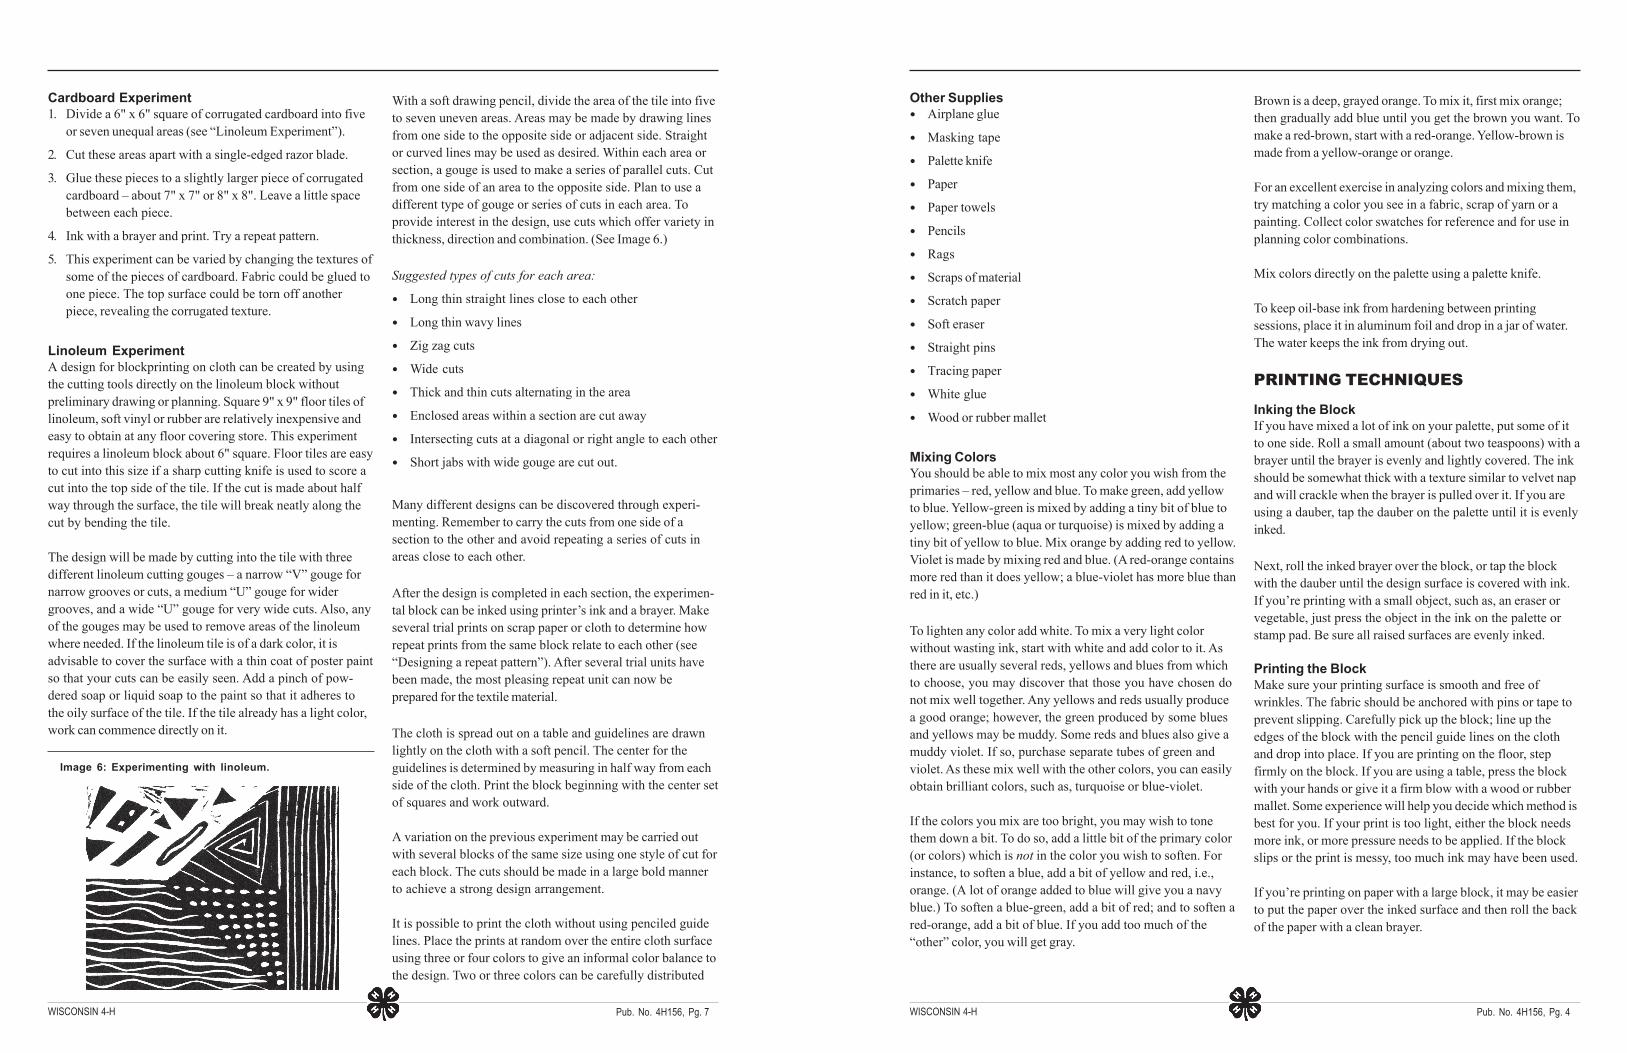
Try printing squares alternating dark and light colors,reversing positions of some blocks or leaving some spacesblank. (See Image 7)
Before marking, decide what size the areas should be. If alarge block is used, each square can be the size of the block.However, since dividing the area into very small segments isimpractical, fabric printed with erasers (or other small blocks)might be divided into segments in which a certain number oferaser prints will fit exactly.
Repeat systems can be used for any type of block, whether itbe a “found” object, vegetable, linoleum or wood block.
A linoleum block used as a single motif can be designed togive a continuous repeat pattern.
Each of the four sides of a single block is interlocked with theside of an adjacent block. Note that the measurement of thedesigns along a line between adjacent blocks is the same.Any arrangement of shapes or lines can be created withineach individual block, providing they lead out to intersectwith the lines on the adjacent block.
BLOCK PRINTING ON READY-MADEITEMS
Printing Designs on Textile ProductsSolid color commercial neckties can be purchased for printingwith small-size blocks made from rubber erasers, potato andlinoleum. Designs on the imprint blocks should be relativelysmall to fit the narrow length of the tie. Designs may be
Image 7: Variations of repeating patterns.
8
Pub. No. 4H156, Pg.WISCONSIN 4-H
Other SuppliesAirplane glue
Masking tape
Palette knife
Paper
Paper towels
Pencils
Rags
Scraps of material
Scratch paper
Soft eraser
Straight pins
Tracing paper
White glue
Wood or rubber mallet
Mixing ColorsYou should be able to mix most any color you wish from theprimaries – red, yellow and blue. To make green, add yellowto blue. Yellow-green is mixed by adding a tiny bit of blue toyellow; green-blue (aqua or turquoise) is mixed by adding atiny bit of yellow to blue. Mix orange by adding red to yellow.Violet is made by mixing red and blue. (A red-orange containsmore red than it does yellow; a blue-violet has more blue thanred in it, etc.)
To lighten any color add white. To mix a very light colorwithout wasting ink, start with white and add color to it. Asthere are usually several reds, yellows and blues from whichto choose, you may discover that those you have chosen donot mix well together. Any yellows and reds usually producea good orange; however, the green produced by some bluesand yellows may be muddy. Some reds and blues also give amuddy violet. If so, purchase separate tubes of green andviolet. As these mix well with the other colors, you can easilyobtain brilliant colors, such as, turquoise or blue-violet.
If the colors you mix are too bright, you may wish to tonethem down a bit. To do so, add a little bit of the primary color(or colors) which is not in the color you wish to soften. Forinstance, to soften a blue, add a bit of yellow and red, i.e.,orange. (A lot of orange added to blue will give you a navyblue.) To soften a blue-green, add a bit of red; and to soften ared-orange, add a bit of blue. If you add too much of the“other” color, you will get gray.
Brown is a deep, grayed orange. To mix it, first mix orange;then gradually add blue until you get the brown you want. Tomake a red-brown, start with a red-orange. Yellow-brown ismade from a yellow-orange or orange.
For an excellent exercise in analyzing colors and mixing them,try matching a color you see in a fabric, scrap of yarn or apainting. Collect color swatches for reference and for use inplanning color combinations.
Mix colors directly on the palette using a palette knife.
To keep oil-base ink from hardening between printingsessions, place it in aluminum foil and drop in a jar of water.The water keeps the ink from drying out.
PRINTING TECHNIQUES
Inking the BlockIf you have mixed a lot of ink on your palette, put some of itto one side. Roll a small amount (about two teaspoons) with abrayer until the brayer is evenly and lightly covered. The inkshould be somewhat thick with a texture similar to velvet napand will crackle when the brayer is pulled over it. If you areusing a dauber, tap the dauber on the palette until it is evenlyinked.
Next, roll the inked brayer over the block, or tap the blockwith the dauber until the design surface is covered with ink.If you’re printing with a small object, such as, an eraser orvegetable, just press the object in the ink on the palette orstamp pad. Be sure all raised surfaces are evenly inked.
Printing the BlockMake sure your printing surface is smooth and free ofwrinkles. The fabric should be anchored with pins or tape toprevent slipping. Carefully pick up the block; line up theedges of the block with the pencil guide lines on the clothand drop into place. If you are printing on the floor, stepfirmly on the block. If you are using a table, press the blockwith your hands or give it a firm blow with a wood or rubbermallet. Some experience will help you decide which method isbest for you. If your print is too light, either the block needsmore ink, or more pressure needs to be applied. If the blockslips or the print is messy, too much ink may have been used.
If you’re printing on paper with a large block, it may be easierto put the paper over the inked surface and then roll the backof the paper with a clean brayer.
4Pub. No. 4H156, Pg.WISCONSIN 4-H
Cardboard Experiment1. Divide a 6" x 6" square of corrugated cardboard into five
or seven unequal areas (see “Linoleum Experiment”).
2. Cut these areas apart with a single-edged razor blade.
3. Glue these pieces to a slightly larger piece of corrugatedcardboard – about 7" x 7" or 8" x 8". Leave a little spacebetween each piece.
4. Ink with a brayer and print. Try a repeat pattern.
5. This experiment can be varied by changing the textures ofsome of the pieces of cardboard. Fabric could be glued toone piece. The top surface could be torn off anotherpiece, revealing the corrugated texture.
Linoleum ExperimentA design for blockprinting on cloth can be created by usingthe cutting tools directly on the linoleum block withoutpreliminary drawing or planning. Square 9" x 9" floor tiles oflinoleum, soft vinyl or rubber are relatively inexpensive andeasy to obtain at any floor covering store. This experimentrequires a linoleum block about 6" square. Floor tiles are easyto cut into this size if a sharp cutting knife is used to score acut into the top side of the tile. If the cut is made about halfway through the surface, the tile will break neatly along thecut by bending the tile.
The design will be made by cutting into the tile with threedifferent linoleum cutting gouges – a narrow “V” gouge fornarrow grooves or cuts, a medium “U” gouge for widergrooves, and a wide “U” gouge for very wide cuts. Also, anyof the gouges may be used to remove areas of the linoleumwhere needed. If the linoleum tile is of a dark color, it isadvisable to cover the surface with a thin coat of poster paintso that your cuts can be easily seen. Add a pinch of pow-dered soap or liquid soap to the paint so that it adheres tothe oily surface of the tile. If the tile already has a light color,work can commence directly on it.
With a soft drawing pencil, divide the area of the tile into fiveto seven uneven areas. Areas may be made by drawing linesfrom one side to the opposite side or adjacent side. Straightor curved lines may be used as desired. Within each area orsection, a gouge is used to make a series of parallel cuts. Cutfrom one side of an area to the opposite side. Plan to use adifferent type of gouge or series of cuts in each area. Toprovide interest in the design, use cuts which offer variety inthickness, direction and combination. (See Image 6.)
Suggested types of cuts for each area:
Long thin straight lines close to each other
Long thin wavy lines
Zig zag cuts
Wide cuts
Thick and thin cuts alternating in the area
Enclosed areas within a section are cut away
Intersecting cuts at a diagonal or right angle to each other
Short jabs with wide gouge are cut out.
Many different designs can be discovered through experi-menting. Remember to carry the cuts from one side of asection to the other and avoid repeating a series of cuts inareas close to each other.
After the design is completed in each section, the experimen-tal block can be inked using printer’s ink and a brayer. Makeseveral trial prints on scrap paper or cloth to determine howrepeat prints from the same block relate to each other (see“Designing a repeat pattern”). After several trial units havebeen made, the most pleasing repeat unit can now beprepared for the textile material.
The cloth is spread out on a table and guidelines are drawnlightly on the cloth with a soft pencil. The center for theguidelines is determined by measuring in half way from eachside of the cloth. Print the block beginning with the center setof squares and work outward.
A variation on the previous experiment may be carried outwith several blocks of the same size using one style of cut foreach block. The cuts should be made in a large bold mannerto achieve a strong design arrangement.
It is possible to print the cloth without using penciled guidelines. Place the prints at random over the entire cloth surfaceusing three or four colors to give an informal color balance tothe design. Two or three colors can be carefully distributed
Image 6: Experimenting with linoleum.
7
Pub. No. 4H156, Pg.WISCONSIN 4-H
Be careful not to let either the block or the fabric or paper slipwhile you are printing. Then carefully lift the block from thematerial, re-ink the brayer, re-ink the block and you’re readyfor the next print.
DESIGN EXPERIMENTSAlthough these are experiments, results can be transferredinto many useful articles including garments, wallhangings,tote bags, book covers or a cover for the notebook in whichyou keep your design ideas.
Found Objects and Vegetables ExperimentPurpose: To become familiar with the printing process anddiscover the possibilities of different materials which can beused to make prints.
Procedures: Following the printing procedures previouslydescribed, make some trial prints on paper or fabric with acork, sponge, buttons, wire screening and other foundobjects.
Print with cross sections of carrots, peppers and othervegetables. Cut vegetables with a sharp knife and be sure thecut surfaces are flat and even. These objects can easily beinked by pressing into a stamp pad or using tempera paintapplied with a brush. (See Image 4.)
Roll ink across string with a brayer. Then place the string onthe surface to be printed, cover it with paper and press withyour hands or roll a clean brayer across the covered string.
Wrap inked string around a brayer, then roll the brayer over apiece of cloth or paper.
Make some prints by combining two or more objects, suchas, vegetables and sponge, or string and cork.
Potato PrintsCut a potato in half. If very moist, blot the end with a piece ofpaper towel. Using a brush, apply a light color of poster paintto the cut surface of the potato. Make a series of prints inthis light color on paper or fabric. Place the prints closetogether in even rows.
Remove ink from the potato. Then, using a knife, cut a fewlines into the surface. Re-ink in a dark color and print over thetop of the first prints.
Note: As some inks dry rapidly, the overprint can be madewithin a few minutes. Be sure the surface is dry enough sothat the potato will not pick up the first color while thesecond is being printed.
Try this experiment several times by using other types ofrepeat patterns discussed earlier. Use the plain potato andthe cut one together, separately, and in two or more colors formore variations.
Eraser PrintsSoap erasers cut most easily but other types will do. Thesecan be saved along with a collection of found objects andused in many ways at a later time.
Cut a few lines into an eraser with a razor blade or knife. Varythe width of the lines and the spaces between them – somewide, some narrow. Slant the blade so that you have a “V”shape cut. The material to be removed comes out easily andneatly.
Print this motif in several ways and in a variety of colorcombinations, following some of the suggestions under“Repeat patterns.”
Experiment with different lines and shapes and kinds oferasers.
For fast printing of a design that you like, transfer it to a largelinoleum block by printing directly on the block with youreraser. When ink has dried, cut printed areas away with alinoleum gouge.
Image 4: This print is from the cross section of a pepper.
5 Pub. No. 4H156, Pg.WISCONSIN 4-H
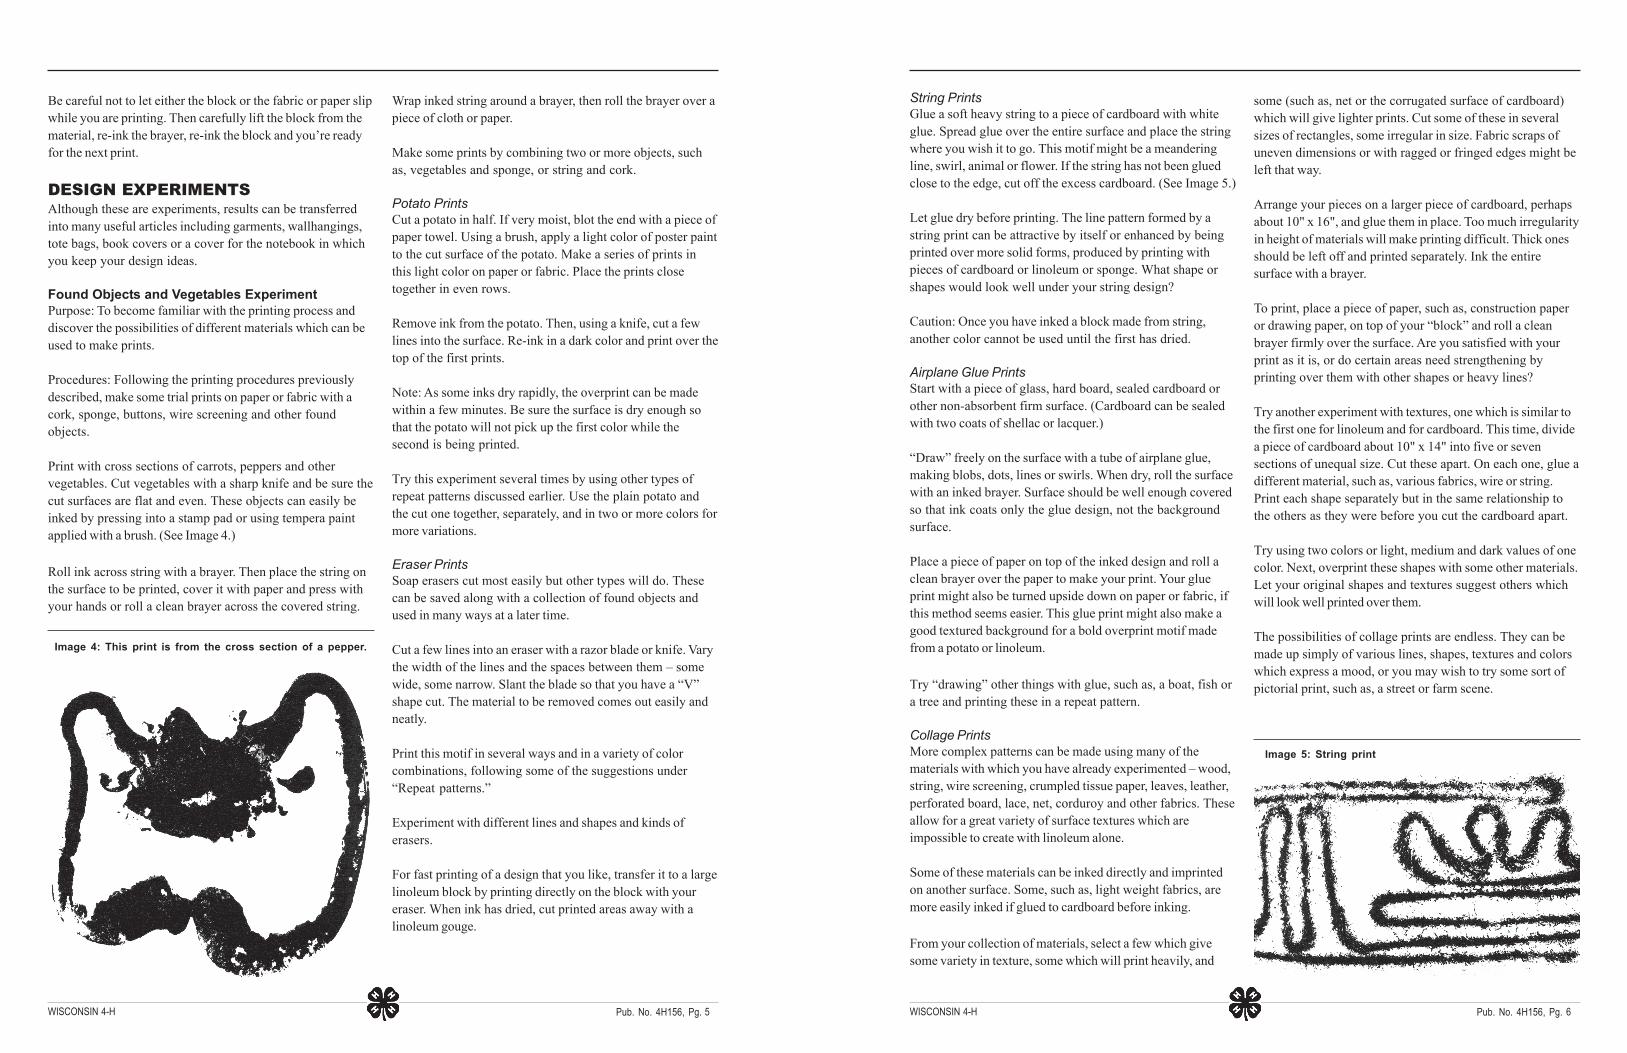
String PrintsGlue a soft heavy string to a piece of cardboard with whiteglue. Spread glue over the entire surface and place the stringwhere you wish it to go. This motif might be a meanderingline, swirl, animal or flower. If the string has not been gluedclose to the edge, cut off the excess cardboard. (See Image 5.)
Let glue dry before printing. The line pattern formed by astring print can be attractive by itself or enhanced by beingprinted over more solid forms, produced by printing withpieces of cardboard or linoleum or sponge. What shape orshapes would look well under your string design?
Caution: Once you have inked a block made from string,another color cannot be used until the first has dried.
Airplane Glue PrintsStart with a piece of glass, hard board, sealed cardboard orother non-absorbent firm surface. (Cardboard can be sealedwith two coats of shellac or lacquer.)
“Draw” freely on the surface with a tube of airplane glue,making blobs, dots, lines or swirls. When dry, roll the surfacewith an inked brayer. Surface should be well enough coveredso that ink coats only the glue design, not the backgroundsurface.
Place a piece of paper on top of the inked design and roll aclean brayer over the paper to make your print. Your glueprint might also be turned upside down on paper or fabric, ifthis method seems easier. This glue print might also make agood textured background for a bold overprint motif madefrom a potato or linoleum.
Try “drawing” other things with glue, such as, a boat, fish ora tree and printing these in a repeat pattern.
Collage PrintsMore complex patterns can be made using many of thematerials with which you have already experimented – wood,string, wire screening, crumpled tissue paper, leaves, leather,perforated board, lace, net, corduroy and other fabrics. Theseallow for a great variety of surface textures which areimpossible to create with linoleum alone.
Some of these materials can be inked directly and imprintedon another surface. Some, such as, light weight fabrics, aremore easily inked if glued to cardboard before inking.
From your collection of materials, select a few which givesome variety in texture, some which will print heavily, and
some (such as, net or the corrugated surface of cardboard)which will give lighter prints. Cut some of these in severalsizes of rectangles, some irregular in size. Fabric scraps ofuneven dimensions or with ragged or fringed edges might beleft that way.
Arrange your pieces on a larger piece of cardboard, perhapsabout 10" x 16", and glue them in place. Too much irregularityin height of materials will make printing difficult. Thick onesshould be left off and printed separately. Ink the entiresurface with a brayer.
To print, place a piece of paper, such as, construction paperor drawing paper, on top of your “block” and roll a cleanbrayer firmly over the surface. Are you satisfied with yourprint as it is, or do certain areas need strengthening byprinting over them with other shapes or heavy lines?
Try another experiment with textures, one which is similar tothe first one for linoleum and for cardboard. This time, dividea piece of cardboard about 10" x 14" into five or sevensections of unequal size. Cut these apart. On each one, glue adifferent material, such as, various fabrics, wire or string.Print each shape separately but in the same relationship tothe others as they were before you cut the cardboard apart.
Try using two colors or light, medium and dark values of onecolor. Next, overprint these shapes with some other materials.Let your original shapes and textures suggest others whichwill look well printed over them.
The possibilities of collage prints are endless. They can bemade up simply of various lines, shapes, textures and colorswhich express a mood, or you may wish to try some sort ofpictorial print, such as, a street or farm scene.
Image 5: String print
6
Related Documents