Please note that ø recommends you set up your laptop by using the simple O2 Mobile Web application which is available from www.o2.co.uk/mobileweb. These manual instructions are intended for advanced users or IT Managers who wish to create manual settings. Manual set up of Microsoft ® Windows ® based PCs with ø Mobile Web This document is a generic description of how to configure Microsoft Windows based computers to use ø Mobile Web. The operating systems covered are: • Windows 98 and 98 SE • Windows 2000 and XP Contents Introduction, notes and basic settings 2 Service Settings 2 Windows 98 and Windows 98SE 4 Step 1: Do you have everything that you need? 4 Step 2. Installing the Modem 4 Step 3. Configuring the Modem 5 Step 4. Dial-up Networking Set-up 6 Windows 2000/XP 8 Step 1: Do you have everything that you need? 8 Step 2: Installing the Modem 8 Step 3. Configuring the Modem 9 Step 4: Dial-up Networking Set-up 10 Microsoft and Windows are either registered trademarks or trademarks of Microsoft Corporation in the United States and/or other countries.

Welcome message from author
This document is posted to help you gain knowledge. Please leave a comment to let me know what you think about it! Share it to your friends and learn new things together.
Transcript
Please note that ø recommends you set up your laptop by using
the simple O2 Mobile Web application which is available from
www.o2.co.uk/mobileweb. These manual instructions are intended for
advanced users or IT Managers who wish to create manual settings.
Manual set up of Microsoft®
Windows® based PCs withø Mobile WebThis document is a generic description of how to configure Microsoft Windows
based computers to use ø Mobile Web. The operating systems covered are:
• Windows 98 and 98 SE
• Windows 2000 and XP
ContentsIntroduction, notes and basic settings 2
Service Settings 2
WWiinnddoowwss 9988 aanndd WWiinnddoowwss 9988SSEE 44
Step 1: Do you have everything that you need? 4
Step 2. Installing the Modem 4
Step 3. Configuring the Modem 5
Step 4. Dial-up Networking Set-up 6
WWiinnddoowwss 22000000//XXPP 88
Step 1: Do you have everything that you need? 8
Step 2: Installing the Modem 8
Step 3. Configuring the Modem 9
Step 4: Dial-up Networking Set-up 10
Microsoft and Windows are either registered trademarks or trademarks of Microsoft Corporation in the United States and/or other countries.
Introduction, notes and basic settingsThis document is a generic description of how to configure
Microsoft Windows based computers to use ø Mobile Web.
The operating systems covered are:
• Windows 98 and 98 SE
• Windows 2000 and XP
The procedure outlined in this document is not guaranteed to
work with all GPRS devices or system configurations. The process
has been tested with recently (from 2002) released mobile phones
and has generally been found to work.
In this document we have used the Nokia 6310 phone for
illustrative purposes.
For other operating systems, the settings below are the minimum
settings required to facilitate connection.
Page 2 not for customer use
Service settings
GPRS access settings
APN mobile.o2.co.uk
Primary DNS 193.113.200.200
Secondary DNS 193.113.200.201
Username username
Password password
Homepage www.o2.co.uk for PCs,
pda.o2.co.uk for handheld
PC/PDAs
GSM access settings
Dial number +447712932932
Primary DNS 193.113.200.200
Secondary DNS 193.113.200.201
Username username
Password password
Homepage www.o2.co.uk for PCs,
pda.o2.co.uk for handheld
PC/PDAs

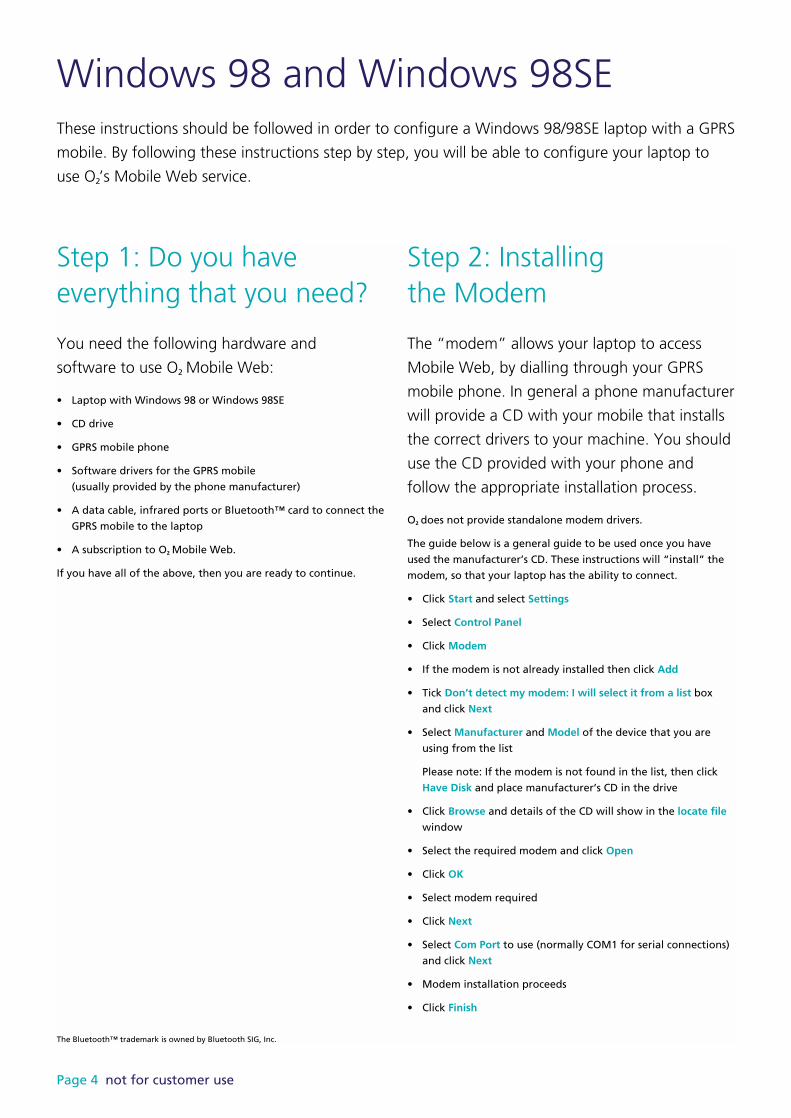
Step 1: Do you haveeverything that you need?
You need the following hardware and
software to use ø Mobile Web:
• Laptop with Windows 98 or Windows 98SE
• CD drive
• GPRS mobile phone
• Software drivers for the GPRS mobile
(usually provided by the phone manufacturer)
• A data cable, infrared ports or Bluetooth™ card to connect the
GPRS mobile to the laptop
• A subscription to ø Mobile Web.
If you have all of the above, then you are ready to continue.
Step 2: Installingthe Modem
The “modem” allows your laptop to access
Mobile Web, by dialling through your GPRS
mobile phone. In general a phone manufacturer
will provide a CD with your mobile that installs
the correct drivers to your machine. You should
use the CD provided with your phone and
follow the appropriate installation process.
ø does not provide standalone modem drivers.
The guide below is a general guide to be used once you have
used the manufacturer’s CD. These instructions will “install” the
modem, so that your laptop has the ability to connect.
• Click Start and select Settings
• Select Control Panel
• Click Modem
• If the modem is not already installed then click Add
• Tick Don’t detect my modem: I will select it from a list box
and click Next
• Select Manufacturer and Model of the device that you are
using from the list
Please note: If the modem is not found in the list, then click
Have Disk and place manufacturer’s CD in the drive
• Click Browse and details of the CD will show in the locate file
window
• Select the required modem and click Open
• Click OK
• Select modem required
• Click Next
• Select Com Port to use (normally COM1 for serial connections)
and click Next
• Modem installation proceeds
• Click Finish
Windows 98 and Windows 98SEThese instructions should be followed in order to configure a Windows 98/98SE laptop with a GPRS
mobile. By following these instructions step by step, you will be able to configure your laptop to
use ø’s Mobile Web service.
Page 4 not for customer use
The Bluetooth™ trademark is owned by Bluetooth SIG, Inc.

• Select Control Panel
• Select Modems
• Highlight the modem that you wish to use from the list.
This should be the modem that you have installed.
• Click Properties
• Choose 57600 in the Maximum Port Speed drop-down menu
• Click Connection tab
• Click Advanced
• Exactly enter the following into the Extra Settings field:
AT+CGDCONT=1,"IP", "MOBILE.O2.CO.UK" – all in upper case
• Click OK
This now completes the Modem configuration process.
Step 3: Configuring the Modem
Once you have installed the modem, you need to configure it, to ensure that it knows exactly what
to do. This is necessary so that your laptop can control your GPRS mobile effectively, and the way
that it opens or closes your Mobile Web connection.
not for customer use Page 5

Page 6 not for customer use
• Double click My Computer
• Double click Dial-up Networking
• Double click Make New Connection
• Enter O2 Mobile Web for the connection
• Select a device from the drop-down list (e.g. Nokia 6310 Cable)
• Click Next
• Enter the relevant number into Telephone Number field
*99# for most GPRS phones
*99***1# for Siemens S45
• Click Next
• Click Finish
The connection has been created and now
needs its properties to be set-up correctly.
• Right click on the newly created dial-up connection
• Select Properties
Step 4: Dial-up Networking Set-up

not for customer use Page 7
• Un-tick Use area code and Dialling Properties
• Confirm correct modem is selected in Connect using
drop-down box
• Select Server Types tab
• Tick Log on to network
• Un-tick Enable software compression
• Un-tick Require encrypted password
• Un-tick Require data encryption
• Un-tick Record a log file for this connection
• Un-tick NetBEUI
• Un-tick IPX/SPX compatible
• Tick TCP/IP
• Click TCP/IP Settings.
• Select Server assigned IP address
• Select Specify name server address
Primary DNS: 193.113.200.200
Secondary DNS: 193.113.200.201
• Un-tick Use IP header compression
• Click OK
• Click OK
• Double click on the newly created dial up connection
• Enter username in the User name field
• Enter password in the Password field
• Click Connect
• You will connect to ø Mobile Web

Page 8 not for customer use
Step 1: Do you haveeverything that you need?
You need the following hardware and software
in order to successfully use Mobile Web:
• Laptop with Windows 2000/XP (with full administrator rights)
• CD drive
• GPRS mobile phone
• Software drivers for the GPRS mobile (usually provided by the
phone manufacturer)
• A data cable, infrared ports or Bluetooth card to connect the
GPRS mobile to the laptop
• A subscription to ø Mobile Web
Windows 2000 users: If you wish to use your GPRS phone with
the Infrared port of your laptop, you *must* install the Microsoft
patch for IrCOMM. The patch can be found at
http://www.microsoft.com/windows2000/downloads/security/q252
795/default.asp
Users who have installed Service Pack 3 (SP3) do not need to
complete the above step.
Step 2: Installingthe Modem
The “modem” allows your laptop to access
Mobile Web, by dialling through your GPRS
mobile phone. In general a phone manufacturer
will provide a CD with your mobile that installs
the correct drivers to your machine. You should
use the CD provided with your phone and
follow the appropriate installation process.ø does not provide standalone modem drivers.
The guide below is a general guide to be used once you haveused the manufacturer’s CD. These instructions will “install” themodem, so that your laptop has the ability to connect.
• Click Start
• Select Control Panel
• Click on Phone and Modem Options
• Click on Modems tab
• If the modem is not already installed in the window then clickAdd
• The Add Hardware Wizard appears.
• Tick Don’t detect my modem; I will select it from a list box andclick Next
• Select Manufacturer and Model of the device that you areusing from the list.
Please note: If the modem is not found in the list, then clickHave Disk and place manufacturer’s CD in the drive. Press Esckey if CD auto-runs (exception: the Motorola T260 uses its ownhardware Wizard to install. You will need to install from the CD).
• Locate the necessary folder containing the modem drivers(manufacturer dependant)
• Click Browse and details of the CD will show in the locate filewindow
• Select the required modem and click Open
• Click OK
• Select modem required
• Click Next
• Select Com Port to use (normally COM1 for serial connections)and click Next
• Modem installation proceeds
• Click Finish
This now completes the modem installation process.
Windows 2000/XPThese instructions should be followed in order to configure a Windows 2000/XP laptop with a
GPRS mobile. By following these instructions step by step, you will be able to configure your laptop
to use ø’s Mobile Web service.
not for customer use Page 9
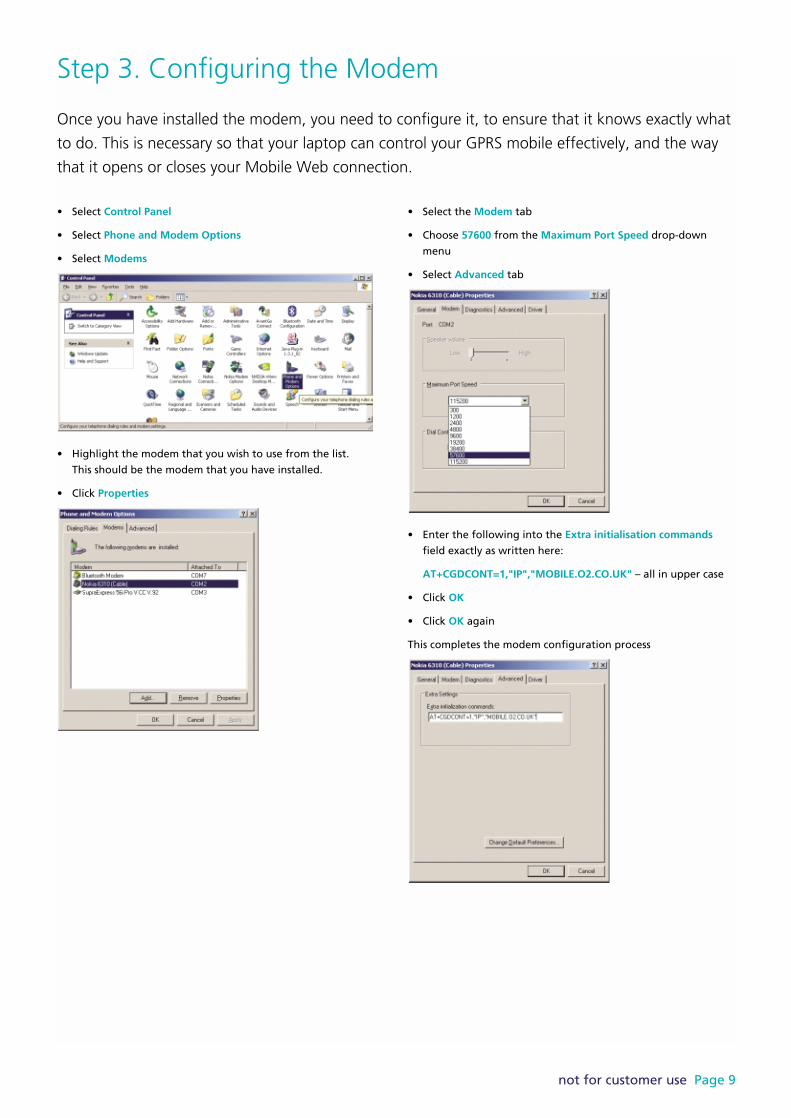
Step 3. Configuring the Modem
Once you have installed the modem, you need to configure it, to ensure that it knows exactly what
to do. This is necessary so that your laptop can control your GPRS mobile effectively, and the way
that it opens or closes your Mobile Web connection.
• Select Control Panel
• Select Phone and Modem Options
• Select Modems
• Highlight the modem that you wish to use from the list.
This should be the modem that you have installed.
• Click Properties
• Select the Modem tab
• Choose 57600 from the Maximum Port Speed drop-down
menu
• Select Advanced tab
• Enter the following into the Extra initialisation commands
field exactly as written here:
AT+CGDCONT=1,"IP","MOBILE.O2.CO.UK" – all in upper case
• Click OK
• Click OK again
This completes the modem configuration process

Page 10 not for customer use
Step 4: Dial-up Networking Set-up
Before setting up Dial-up Networking please ensure that the necessary modem has been installed
and correctly configured.
• Select Control Panel
• Select Network Connections
• Select Create a new connection
• This will start the New Connection Wizard
• Select Next
• Select Connect to the Internet
• Select Next
• Select Set up my connection manually
• Select Next
• Select Connect using a dial-up modem
• Select Next

not for customer use Page 11
• Select your GPRS modem
• Select Next
• Enter O2 Mobile Web as the connection name
• Select Next
• Enter the relevant telephone number:
*99# for most GPRS handsets
*99***1# for Siemens handsets
• Select Next
• In the User name field enter username
• In the Password field enter password
• In the Confirm password field enter password
• Select Next
• The Connection Wizard has been completed.
The connection has been created and now
needs its properties to be set-up correctly.
• To set up connection properties, right click over the new
connection you have made and select Properties

• Select Configure.
NOTE: Please make sure that the right modem is ticked.
• Un-tick Use dialling rules.
• Select Options
• Select 57600 as the Maximum speed (bps)
• Tick Enable hardware flow control
• Un-tick Enable modem error control
• Un-tick Enable modem compression
• Un-tick Enable modem speaker
• Select OK
• The only thing that you need to check in this window is that
Display progress while connecting is ticked
• Select Networking tab
• Select Properties
Enter the following settings:
Primary DNS server: 193.113.200.200
Secondary DNS server: 193.113.200.201
• Click OK
• This concludes setting up the connection properties.
• Click OK
• Double click on the newly created settings to connect to the
Internet.
260 Bath Road www.o2.co.ukSlough Berkshire SL1 4DX
United Kingdom
O2 (UK) Limited Registered Office as above Registered in England no. 1743099
All trademarks acknowledged. CTS 1244.1. January 2003.
Related Documents