Level-2 Instructor Workshop OVERVIEW Overview created by: Rob Hurd, Cappy Capper, Betsy Alison, Guy Fleming & Kim Hapgood US Sailing Master Instructor Trainers

Level-2 Instructor Workshop OVERVIEW Overview created by: Rob Hurd, Cappy Capper, Betsy Alison, Guy Fleming & Kim Hapgood US Sailing Master Instructor.
Dec 16, 2015
Welcome message from author
This document is posted to help you gain knowledge. Please leave a comment to let me know what you think about it! Share it to your friends and learn new things together.
Transcript

Level-2 Instructor Workshop
OVERVIEWOverview created by:
Rob Hurd, Cappy Capper, Betsy Alison, Guy Fleming & Kim HapgoodUS Sailing Master Instructor Trainers

Version. 4. 2013
The New Course Progression• December 2012 National Faculty Meeting, the
level-1 working party came up with several new safety topics to add to the progression.
• Their plan was to add that content to level-2 since there was really no more room in a jammed packed level-1 course.
• Level-2 working party was not sure that would enhance the racing portion of the course

Version. 4. 2013
The New Course Progression• Solution:– Take the new topics, add in the non-racing
portions of old level-2, and create a new course, which is now entitled Level-2 Instructor in the same 2-day format
– Take the racing portions from old level-2 and create a new one-day level-3 coach workshop

Version. 4. 2013
Level-2 Instructor Workshop scheduleDay 1 (9.5 hrs)8:30 – 9:00 Arrival & Registration9:00 – 10:00 Team Building & Course Philosophy 10:00 – 11:30 Sail Theory & Controls11:30 – 12:30 Program Planning, Lesson Plans, and Curriculum Development12:30 – 1:30 Lunch1:30 – 4:30 Running an effective class (Land Drills, Water Drills, Evaluating students)4:30 – 5:30 Communication Skills5:30 – 6:00 Debrief of day Day 2 (7.5 hrs)8:30 – 9:00 Review of Day 19:00 – 1:00 Safety Procedures – Best Practices (Classroom and OTW)1:00 – 2:00 Lunch2:00- 3:00 Advanced Instructor Knowledge3:00 – 4:00 Debrief of Workshop

Version. 4. 2013
Level 2 Instructor WorkshopCertification Qualification Components (16 Hrs) • Show up and Participate • Pass On- Line Tests – (Guide and Situational Dilemmas)
• Current First Aid/CPR & US Sailing Member• CDC Online Concussion Awareness Training

Version. 4. 2013
Level 2 Instructor Workshop Syllabus1. Team Building and Course Philosophy (1 hr)• Instructor Creditability • Continuing Education (US Sailing Track)• Resources (websites/apps/books)
2. Sail Theory and Controls: Basic (90 min)• Chapter 3 Intermediate Book Sail Shape and Controls• Chapter 4 “ How Sailing works• Chapter 5 “ Body Position and Balance • Level 2 Manual pgs 68-74 (5/12/2009) Trapezing (demo)• Level 2 Manual pgs 75-84 (5/12/2009) Spinnaker Skills (demo)

Version. 4. 2013
Level 2 Syllabus (cont.)3. Program Planning and Lesson Plan, and Curriculum Development: Season
plan (1 Hr)
4. Teaching Techniques & sequence of learning: Skill development (3 Hrs)– Running an effective class
• Land Drill • On the water (practical application)• How to evaluate the students performance
5. Communication Skills: Discussion (1hr)• Parents • Peers • Students• Employers

Version. 4. 2013
Level2 Syllabus (Day 2)6. Safety Procedures- Best Practices: Classroom and OTW (4 hrs)• Emergency Action Plan (level 2 manual pg 88-91)• BPSR Ch. 9 – Rescues 62-64• BPSR Ch. 9 Capsize Recovery 65-76• BPSR Ch. 10 Towing 85-90• US Sailing Supplement – Entrapment
7. Advanced Instructor Knowledge (1 hr)• Ch. 2 Intermediate Book pgs 8-15 Wind, Weather, Tides, and Current• Ch 10 “ pgs 53-56 Navigation and Rules of the Road (Compass/GPS L2M
pg 94-98)• Ch. 11 “ Pgs 57-59 Maintenance (L2M pgs 98-104)• Knots

Version. 4. 2013
Spinnakers & Traps
• Since these sections are to be taught in the same time block and all require demos, it is important to address all three topics at the same time.
• Make sure that all instructors have read the relevant sections in the Instructor Workbook (3-17-13 Version 2): Sail Theory and Controls Part 2 Sections A-E; Spinnakers Section J; Trapezing Section I) and Chapters 3, 4, 5 in “Learn Sailing Right! Intermediate.
• Chalk Talk: 30 Minutes total (for Sail Theory and Controls; for Spinnakers; for Trapping)

Version. 4. 2013
Sail Theory and Controls• Cover basics on assessing sail shape, basic sail
controls and what they do.
• Touch on the fundamentals of how sails and underwater foils work.
• Briefly discuss how weight placement affects boat balance.

Version. 4. 2013
Spinnakers
• Explain how both a spinnaker and pole are set up. Go over the basics of launching the spinnaker and how to fly it.
• Cover steps in jibing a spinnaker, and how to douse it.
• Explain what to do if a boat capsizes with a spinnaker up.

Version. 4. 2013
Trapping
• First, explain about the trapeze harness, hook and spreader bar, and how a harness should fit.
• Cover why you use a trapeze, and the basics of hooking up and unhooking from the trapeze ring and use of the adjuster system.
• Go over the fundamental steps in “going out”, adjusting while on the wire to maintain balance, and “coming in”.

Version. 4. 2013
Sail Control, Spinnakers and Trapping
• Demonstrations: 60 minutes total shared between Sail Trim, Spinnaker, and Trapping
• Note: It is important to carry out these demonstrations in a controlled way in order to be able to conduct instruction in “stop time” manner. You will want to be able to point out specific things with regard to the trimming and adjusting of the sails; the various parts of spinnaker launch and douse procedure; and all aspects of the fundamentals of trapezing.
Version. 4. 2013
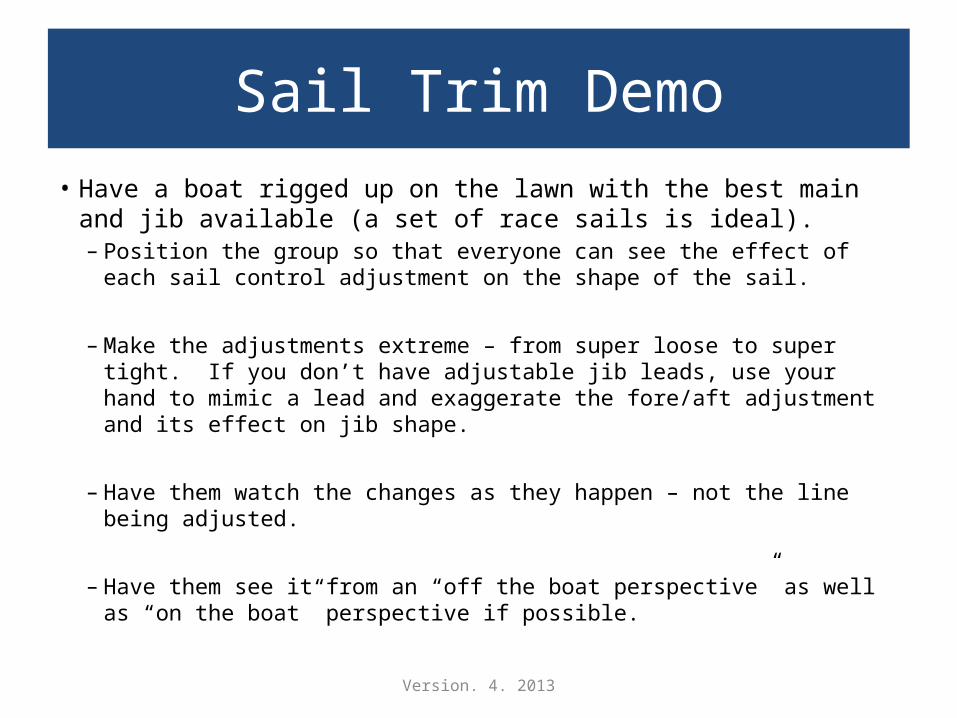
Sail Trim Demo• Have a boat rigged up on the lawn with the best main and jib
available (a set of race sails is ideal). – Position the group so that everyone can see the effect of each sail control
adjustment on the shape of the sail.
– Make the adjustments extreme – from super loose to super tight. If you don’t have adjustable jib leads, use your hand to mimic a lead and exaggerate the fore/aft adjustment and its effect on jib shape.
– Have them watch the changes as they happen – not the line being adjusted.
– Have them see it from an “off the boat perspective” as well as “on the boat” perspective if possible.

Version. 4. 2013
Spinnaker Demo• Use the same boat on the lawn with jib up and mainsail down and rolled.
– Review the procedure and demonstrate the actual set up of the spinnaker: attach corners with appropriate knots, properly lead all sheets and explain guy hook/twing.
– Demonstrate putting up pole, the motions of jibing pole (without spinnaker up), and take down of pole.
– Show how the topping lift works with regard to pole set up and ball park setting. – MARK any control lines appropriate. – Demonstrate a proper setting of the spinnaker and how to fly it (show common errors
i.e. pole too high/low; too much curl; over trimming). – Show examples of Cause and Effect – If this, then…. – Show jibing procedure and take down.
** If you can only demonstrate rigging of the spinnaker on land due to lack of dollies, or no ability to put sailors on a boat on land, try to set up the practical demonstration of set – jibe – douse and flying techniques with the boat in the water, tied up so that it faces downwind in a stable fashion. Two sailors can then man the boat and demonstrate the steps above while you instruct the group.

Version. 4. 2013
Trapping DemoSet the boat up either on shore secured to a dolly with mast secured to a fixed point opposite the trapping side OR tie the boat up along a dock with the mast secured to a post or cleat on the opposite side of the dock to stabilize it when sailors practice trapping.• Demonstrate connecting to and unhooking the trapeze ring from the harness hook.• Have sailors repeatedly practice hooking up and unhooking from the trap wire while inside
the boat, then practice trapping off of the centerboard trunk.• Walk through the procedure of 1. Getting out on the trapeze, 2. Adjusting while on the wire,
3. Coming in off the wire (Follow the steps outlined in the Instructor Workbook). • Have sailors practice hooking up, getting out, adjusting and coming in on the actual boat.
***If you are demonstrating on land, you MUST have a spotter behind the sailor who is going out on the trap. If boat is tied to the dock, it is preferable to have the sailor go out on the trapeze over the water as opposed to over the dock. If you do not have a boat that has a trapeze set up, you can tie a line with a trap ring to a tree, high railing, post or secure structure and demonstrate the procedure.
NOTE: Make sure you test out your set up prior to using it in the class.

Version. 4. 2013
Water Drills(Part of the 3 hour session of Running an Effective Class)
Use at least 2 hours of this session to either:
• Run and effective practice session which might incorporate some spinnaker based drills in its format.OR
• If the class is small enough, have students run the sessions drills which should incorporate some spinnaker based drills if possible.
Note: If you have boats with traps, have enough harnesses, enough wind and skilled sailors, you may try to add in some trapeze skills drills, however, it is not necessary to do so in order to teach how to run an effective practice session! Make efficient use of your time.

• Four (4) hours of the new Level 2 is devoted to covering Safety Procedures (specifically their best practices).
• Intended to be both theoretical discussion in the classroom / land drills and practical experience out OTW.
Dinghy Entrapment

Version. 4. 2013
US Sailing Website: Resources, Safety• RYA Report on Dinghy Entrapments• Orange Bowl Trapeze Safety Clinic • Scuttlebutt Article on the Pros and Cons of Ball &
Socket v Hook style trapeze harness connection points
• Results of US Sailing led capsize and entrapment research Fall 2012 in LIS
Safety, Rescue and Support Boat Handling Ch 4 pgs 60 - 74
Resources
Version. 4. 2013
• Preparing for the unexpected• Important for both Instructors and Sailors to
be aware of the issues and how to respond• Both Instructors and Sailors need to prepare
for and practice recovery from the turtled / entrapped position – it is not enough to simply talk about it
Key Points for Discussion

Version. 4. 2013
Starts w/properly identifying sailor skill levels and making sure sailors have the fundamental skills needed before beginning training on trapeze: • Eyes out of the boat watching• Understand and be familiar w/available
equipment (knives/bolt cutters) • Know what additional resources are available
(additional hands to help w/capsize recovery/FA)• Call for help immediately – know the EAP• Practice, practice, practice OTW
Key Points for Discussion: Instructors

Version. 4. 2013
Must know their equipment (harness and boat familiarization – esp. lines), practice on land and OTW in a controlled environment (tied at the dock) before going out on open water.• Important to teach sailors to stay calm – comes
w/practice and familiarization• Importance of skipper/crew communication• Use of whistle for attracting attention• Teaching sailors good housekeeping in the boat
(tidy lines/working shock cord)
Key Points for Discussion: Sailors

Towing – Level 2 Manual Pages 37 through 46
Safety, Rescue & Support Boat Handling

Version. 4. 2013
• This section is to be taught prior to the on-water session that deals with entrapment, capsize recovery, towing in day to day situations, regattas, prior to or during storms and other crisis situation.
• Build your lesson plan to include the section of the book and what type of drills, exercises you will be conducting on-the-water.
Towing

Version. 4. 2013
• Proper set up for towing • Bridles• Bowline on a bite• Lineman’s Loop
• Towing Concepts • Observer• Speed & Length of Tow• Towing Powerboats• Towing Sailboats• Towing a string of Boats
TowingInformation on Pages 37-46

Version. 4. 2013
• Pick up a Tow• Approach• Adding boats to the tow line• Maneuvering with a tow
• Tow methods• Towing options:
» Single Line» Daisy Chain» Herringbone» towing alongside
• Securing » Bowline to Bowline» Emergency Release Knot» Rolling Hitch
• Boat Specific
Towing

Version. 4. 2013
• Boat Specific» Lasers» Small sloops like 420s $ Flying Juniors» Prams – Optimist» Small Keelboats like Sonars and J-22s
• Tow Communication• Hand Singles• Sound Singles• Rescue boat to rescue boat• Rescue boat to shore
Towing

Version. 4. 2013
Safety Boat Assisted Capsize Recovery
Homework--Candidates Read the section on capsized and Turtled recoveries in Basic Power Boating Safety and Rescue --Pgs 66-74
• Chalk Talk--15 Minutes• Land Drill--15 Minutes• Water Drill--30 Minutes

Version. 4. 2013
Chalk Talk Points:• Cover Perpendicular Position and Head on
Position--Discuss the advantage of being able to observe the skipper and crew
• Cover Centerboard Push and Mast Tip Recovery--Discuss when to turn off the engine.
• Cover Turtled Recovery
Safety Boat Assisted Capsize Recovery

Version. 4. 2013
Land Drill Points:• Staging--Have a boat rigged on the lawn with half the
class on the mast side and half on the centerboard side.
• Do a walk through of the Mast Tip and Centerboard Push recoveries.
• Mast Tip--Key Points:• Where the sailors are in relation to the safety boat. • Winds Strength: In high winds do not let go of the shroud.
Safety Boat Assisted Capsize Recovery

Version. 4. 2013
Centerboard Push--Key Points• If the sailors are tired, this may be an easier
way to scoop them.
Safety Boat Assisted Capsize Recovery

Version. 4. 2013
Water Drill:• Set Up--It would be ideal to have two chase boats and one
capsizeable dinghy. Alternatively, you could stage the class on a dock and have part of the class in a chase boat.
• Manned or unmanned?--These Instructor Candidates are practicing. Have the boat unmanned. Also, to save time, Have a buoy on the ball so the boat does not turtle. The important aspect of the drill is to provide for repetition. If you want to cover turtling at the end, (and your area is not too shallow) you can untie the buoy for the last drill.
Safety Boat Assisted Capsize Recovery

Version. 4. 2013
Water Drill Prep (20 Min):• Rig at least one Capsize-able Dinghy (More if you can spare)• Buoy--Tie buoy to the top of the mast to prevent turtling until
you wish to cover that topic. • Tow Lines--For after the drill is done• Area--You may be able to do this fairly close to the facility and
you may be able to work off of a dock. • Safety Boats--At least one, (two is preferred)
Safety Boat Assisted Capsize Recovery

Version. 4. 2013
Running a water drill ( 1 hr 30 minutes):• Sail or tow your sailboat out to the working area. • This will be an unmanned sailboat for the purpose of this drill.
• If you are in a confined area, you may wish to tether the boat to a dock or anchor it so it does not drift. (When possible, allow for drift)
• If you have two boats, have one set up on the mast side and the other set up on the centerboard side. Alternate between the two methods and then switch positions.
Safety Boat Assisted Capsize Recovery

Version. 4. 2013
Concluding the Drill:• You can switch into towing on the way in.
Safety Boat Assisted Capsize Recovery
• For instructors working w/sailors
• For instructors working w/staff
Team Building

Version. 4. 2013
Introduced at Level 1, important for instructors on a number of levels:• Breaking the ice between new sailors/instructors,
sailors/sailors and instructors and peers• Team building essential to group learning• Important to establish bonds between members in
the group for reasons including trust, constructive communication and sharing in the teaching and learning environment.
Team Building

Version. 4. 2013
Beyond Name Games• Important to progress beyond basic name
games (though they remain important)• Instructors should look at activities and games
that focus on:– Communication skills– Challenges that involve participation of everyone
Team Building
Version. 4. 2013
Sail Theory & Controls by Betsy
In the discussion on Spinnakers and Traps Betsy talked about
sail trim. In the interest of time, we will not repeat that
topic at this time

Version. 4. 2013
• Lesson Plans and Curriculum Review• Developing a Lesson Plan
» Structured Format» Program Flexibility
Program Planning

Version. 4. 2013
Weather____________________________________Date_______________
____Anderson____Jane____Ross____Jimmy____Joey____Spencer____Dayna____Sandy____________________________________
Daily Goal______________________________
Plan: List Method (Chalk Talk, Land Drill, Water Drill etc. and Equipment Needed
Plan For Tomorrow________________________

Version. 4. 2013
Elements of a Lesson Plan
• Date and Weather Conditions• Class List and Attendance• Goal For the Day• Desired Student Outcomes• Time Frames--• Equipment Needed• NotesNB: Candidates still create a lesson plan between day 1 and day 2 to be reviewed at the start of day 2

Version. 4. 2013
Curriculum Review
• How Did the Student Outcomes Compare With The Goals Set in the Pre-Season?

Version. 4. 2013
Program Planning: Conclusion
• Are There Better Methods to Teach the Skills Needed to Reach the Desired Outcomes? (Land Drills, Water Drills, Video)
• Did the Program Flow In Terms of Skill Progression ?
• Does the Program Have the Right Equipment to Teach the Desired Skills?

Communication skills are essential to effective teaching.The L2 Course presents the opportunity to re-visit with the course candidates some of the experiences they had during their first season of teaching: •Who did they find themselves communicating with in their jobs?•What were key elements of the communication that was successful, as well as when things went pear shaped.•What were challenges OTW and off?
Communication Skills

Version. 4. 2013
Split the CC’s into two groups.• ½ the group thinks of an example of a experience
where their communication w/their students was successful, and one example where their was miscommunication
• ½ the group thinks of an example of where their communication with an individual other than a student (co-worker, boss, parent, official) was successful, and one example where their was miscommunication
Team BuildingCommunication Skills

Version. 4. 2013
What were the key elements of successful communication?
• importance of non-verbal cues• importance of not just what you say, but how it is said• good communication involves not just the sending of
the message, but listening skills• value of the content of the message – effective– appropriate for the situation– consistent
Team BuildingCommunication Skills

Version. 4. 2013
What were key elements where there was miscommunication?
• failure to actively listen• non-verbal cues confuse the message• not considering the nature of the relationship
with the other party• message was inconsistent
Team BuildingCommunication Skills

Version. 4. 2013
Fundamental purpose of the exercise is to challenge the CC’s to think about their communication skills.
• minimize miscommunication• improve on the effectiveness of their
communication in teaching and relationships
Team BuildingCommunication Skills

Version. 4. 2013
Advanced Instructor Knowledge(aka Seamanship)
•Marlinspike Seamanship•Tying a Boat to the Dock•Chart Reading•Aids To Navigation•Maintenance

Version. 4. 2013
Advanced Instructor Knowledge(aka Seamanship)
• Marlinspike SeamanshipTrucker’s HitchRolling HitchWhipping a Line
• MaintenancePreventative--RinsingSail Care

Version. 4. 2013
Advanced Instructor Knowledge(aka Seamanship)
• Tying a Boat To the Dock (Spring Lines and Fenders)
• Basic Chart ReadingAids to NavigationDepth

Version. 4. 2013
Topics covered in Level-3 Topics
• Teaching Rules• Race management• Regatta Etiquette• Strategy & Tactics• Tuning (more advanced)• Drills• Managing your team• Logistics
Related Documents