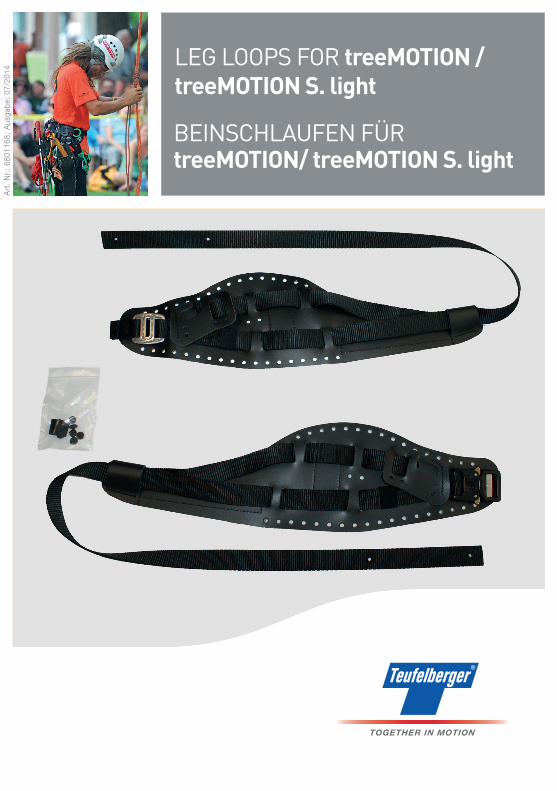
Art. Nr.: 6801168; Ausgabe: 07/2014 LEG LOOPS FOR treeMOTION / treeMOTION S. light BEINSCHLAUFEN FÜR treeMOTION/ treeMOTION S. light

Welcome message from author
This document is posted to help you gain knowledge. Please leave a comment to let me know what you think about it! Share it to your friends and learn new things together.
Transcript
Art
. N
r.: 6
8011
68;
Aus
gabe
: 07
/201
4 LEG LOOPS FOR treeMOTION / treeMOTION S. light
BEINSCHLAUFEN FÜR treeMOTION/ treeMOTION S. light

2
ENGLISH
CAUTIONThis spare part may be replaced only by a duly qualified person or under the supervision of such duly qualified person. During such replacement, be sure to follow the present In-structions for Use!
Such replacement can also be performed by the harness manufacturer for a given fee. If you opt for this possibility, please send your harness to the address indicated above! If you are uncer-tain as to whether you have the necessary knowledge and experience, please be sure to consult with a duly qualified person or with the harness manufacturer.
TEUFELBERGER is not responsible for any direct, indirect, or incidental consequences/damage occurring during or after the use of the product and resulting from any improper use, especially caused by incorrect assembly of the equipment.
For such replacement, it is imperative that you use only the spare part approved by the manu-facturer and provided together with this Product Information document. It must only be used for the purpose set forth below. Before using the harness again, be sure to verify that the spare part has been replaced correctly. If you lack the experience, skills, and knowledge that are necessary for performing this job, please consult with a duly qualified person or with the harness manu-facturer.
left leg loop right leg loop

3
The following pictures show a treeMOTION. Separate pictures for the treeMOTION s.light will be shown only where technically necessary. At first, change only one leg loop. This way, you will still be able to use the second original leg loop as a reference. Only after having verified that the replaced leg loop is positioned correctly, you may proceed to changing the second leg loop.
INSTALLATION INSTRUCTION
Picture 1
1. Remove the leg loop‘s rubber connections to the waist belt and thread the new rubber connec-tions into the waist belt.
Picture 2
2. Remove the used webbing of the leg loop and, while doing so, make sure to not damage any other parts of the harness.
Picture 3
3. Remove the leg padding from the used leg loop.
Picture 4
4. Fasten the leg padding to the new leg loop.
Picture 6 6. Pull the webbing through the elastic loop.
Picture 5
5. Pass the webbing of the leg loop through the fa-stening ring.

4
Picture 10
10. Pass the webbing through the elastic loop again. Make sure that all components are located in their correct positions, are not twisted, and that the buckle is functioning correctly.
Picture 7 a: treeMOTION
7 a. Pass the webbing through the slot of the snap buckle located closest to the leg loop.
Picture 8a: treeMOTION
8 a. Pass the webbing through the other buckle slot.
Picture 9
9. Verify that the buckle functions properly before you proceed. If in doubt, check chapter 2.5 and 2.6 of the treeMOTION / treeMOTION s.light User Instructions.
INSTALLATION INSTRUCTION
Picture 7 b: treeMOTION s.light
7 b. Pass the webbing through the slot of the snap buckle located closest to the leg loop. Be sure to thread the webbing through both buckles.
Picture 8b: treeMOTION s.light
8 b. Pass the webbing through the other buckle slot. Be sure to thread the webbing through both buckles.

5
Picture 11
11. Insert the lower rivet part through the folded up strap and connect it to the upper rivet part.
Picture 16
16. Also thread the second rubber connection of the hip part into the leg loop.
Picture 12
12. Place the strap on a solid sur-face and use a hammer to drive the rivet into place.
Picture 13
13. Thread the rubber connection of the hip part into the leg loop.
Picture 14
14. Thread the rubber connection through the cord stopper.
Picture 15
15. Knot the ends of the rubber connection together.
INSTALLATION INSTRUCTION

6
When using the harness, please be sure to observe the Manufacturer Information regarding our treeMOTION / treeMOTION s.light product. Any and all information concerning transport, storage, and cleaning shall also apply to the harness with exchanged leg loop.
Please keep in mind that replacing the leg loop will not prolong the service life of the harness as counted from the date of its manufacture. The leg loop is only one of the harness components – after replacing it, the product can be used throughout its full service life provided that all other components of the harness are in a proper condition. To evaluate the condition, please observe the treeMOTION / treeMOTION s.light Product Information document or consult a person compe-tent to make such evaluations.
The person responsible for the replacement will record the replacement of the leg loop on the re-levant form appended to the treeMOTION / treeMOTION s.light User‘s Guide and will confirm his/her entry by documenting the date of the entry and affixing his/her signature.
CAUTION
Use of the products can be dangerous. Our products are to be used only for their intended purpose. The customer must ensure that the user is familiar with the proper application and the necessary safety procedures. Be aware that every product can cause harm if it is used improper-ly or overstressed. Subject to technical changes as well as written and print errors.
INSTALLATION INSTRUCTION
Picture 17
17. Thread the rubber connection through the cord stopper and fa-sten the rope end with a knot.
Picture 18
18. Check once more that the leg loop has been positioned correctly.

7
DEUTSCH
ACHTUNGDas Ersatzteil darf nur von einer sachkundigen Person oder unter deren Aufsicht ge-tauscht werden. Beachten Sie dabei diese Gebrauchsanleitung!
Der Austausch kann auch gegen Entgelt vom Gurthersteller durchgeführt werden. Schicken Sie dazu den Gurt an die oben angegebene Adresse! Wenn Sie unsicher sind, ob Sie über das nötige Wissen und die Erfahrung verfügen, konsultieren Sie unbedingt eine sachkundige Person oder den Gurthersteller.
TEUFELBERGER ist nicht verantwortlich für direkte, indirekte oder zufällige Folgen / Schäden, die während oder nach der Verwendung des Produktes auftreten und die aus unsachgemäßer Ver-wendung, insbesondere durch einen fehlerhaften Zusammenbau resultieren.
Für den Austausch darf ausschließlich das vom Hersteller zugelassene Ersatzteil verwendet wer-den, welches dieser Herstellerinformation beiliegt. Es darf nur für den unten beschriebenen Ver-wendungszweck verwendet werden. Kontrollieren Sie unbedingt vor neuerlichem Gebrauch des Gurtes, ob das Ersatzteil korrekt ausgetauscht worden ist. Sollten Sie dazu nicht über die nötige Erfahrung, Fähigkeiten und Wissen verfügen, konsultieren Sie eine sachkundige Person oder den Gurthersteller.
linke Beinschlaufe
rechte Beinschlaufe

8
Die folgende Beschreibung erklärt einen treeMOTION. Nur wenn technisch nötig, wer-den eigene Punkte für treeMOTION s.light angeführt. Tauschen Sie zuerst nur eine Bein-schlaufe, somit haben Sie noch die zweite Original-Beinschlaufe zur Kontrolle. Erst nach einer Überprüfung, ob die gewechselte Beinschlaufe richtig positioniert ist, tauschen Sie die zweite Beinschlaufe.
MONTAGEANLEITUNG
1. Entfernen Sie die Gummiverbindungen der Beinschlaufe zum Hüftgurt und fädeln Sie die neuen Gum-miverbindungen in den Hüftgurt.
2. Entfernen Sie das gebrauchte Gurtband der Beinschlaufe und geben Sie dabei acht, keine anderen Teile des Gurtes zu beschädigen.
3. Entfernen Sie den Beinpolster von der gebrauchten Beinschlaufe.
4. Befestigen Sie den Beinpolster an der neuen Beinschlaufe.
6. Ziehen Sie das Gurtband durch die elastische Schlaufe.
5. Fädeln Sie das Gurtband der Beinschlaufe durch den Befestigungsring.
10. Fädeln Sie das Gurtband wieder durch die elastische Schlaufe. Stellen Sie sicher, dass alle Teile am kor-rekten Platz positioniert, nicht verdreht sind und die Schnalle richtig funktioniert.
7a. treeMOTION: Fädeln Sie das Gurtband durch den der Beinschlaufe am nächstliegenden Schlitz der Steckschnalle.
8a. treeMOTION: Fädeln Sie das Gurtband durch den anderen Schnallen-Schlitz.
11. Stecken Sie das Nietenunterteil durch den zusammengelegten Gurt und verbinden Sie ihn mit dem Nie-tenoberteil.
9. Vergewissern Sie sich, dass die Schnalle korrekt funktioniert bevor Sie fortfahren. Bei Zweifeln kontrollieren Sie Kapitel 2.5 und 2.6 der treeMOTION / treeMOTION s.light Anleitung.
12. Legen Sie den Gurt auf eine feste Unterlage und schlagen Sie die Niete mittels eines Hammers zusam-men.
13. Fädeln Sie die Gummiverbin-dung des Hüftteiles in die Beinschlaufe.
14. Fädeln Sie die Gummiverbin-dung durch den Kordelstopper.
15. Verknoten Sie die Enden der Gummiverbindung.
16. Fädeln Sie die zweite Gummiverbindung des Hüftteiles ebenfalls in die Beinschlaufe.
17. Fädeln Sie die Gummiverbindung durch den Kordelstopper und verknoten das Seilende.
18. Kontrollieren Sie nochmals die korrekte Positionierung der Beinschlaufe.
(Bilder, siehe Seite 3 - 6)
8b. treeMOTION s.light: Fädeln Sie das Gurtband durch den anderen Schnallen-Schlitz.
7b. treeMOTION s.light: Fädeln Sie das Gurtband durch den der Beinschlaufe am nächstliegenden Schlitz der Steckschnalle. Achten Sie darauf, das Gurtband durch beide Schnallen zu führen! Das gilt auch für das Durchfädeln durch den zweiten Schlitz (siehe. 8b.)

9
MONTAGEANLEITUNG
Bei der Verwendung des Gurtes ist die Herstellerinformation zum treeMOTION / treeMOTION s.light zu beachten. Alle Aussagen zu Transport, Lagerung und Reinigung gelten auch für den Gurt mit ausgewechselter Beinschlaufe.
Bitte beachten Sie, dass die Lebensdauer des Gurtes ab Herstelldatum durch den Austausch der Beinschlaufe nicht verlängert wird. Die Beinschlaufe ist nur ein Bestandteil des Gurtes – durch den Tausch kann die Lebensdauer unter der Bedingung voll genutzt werden, dass alle anderen Bestandteile des Gurtes in entsprechender Verfassung sind. Zur Beurteilung des Zustandes be-achten Sie bitte die Herstellerinformation zum treeMOTION / treeMOTION s.light oder kontaktie-ren Sie eine sachkundige Person.
Der für den Umbau Verantwortliche vermerkt im Aufzeichnungsblatt, welches der Bedienungs-anleitung zum treeMOTION / treeMOTION s.light beigefügt ist, den Tausch der Beinschlaufe und bestätigt dies mit Datum und seiner Unterschrift.
WARNUNG
Die Verwendung der Produkte kann gefährlich sein. Unsere Produkte dürfen nur für den Einsatz verwendet werden, für den sie bestimmt sind. Der Kunde muss dafür sorgen, dass die Verwen-der mit der korrekten anwendung und den notwendigen Sicherheitsvorkehrungen vertraut sind. Bedenken Sie, dass jedes Produkt schaden verursachen kann, wenn es falsch verwendet oder überlastet wird. Technische Änderungen sowie Satz- und Druckfehler vorbehalten.
10
ESPANOL
ATENCIÓN:La pieza de recambio sólo puede cambiarla un experto u otra persona bajo la vigilancia de éste. ¡Obsérvense para ello las presentes instrucciones de uso!
La sustitución sólo puede realizarla el fabricante del arnés contra pago. ¡Envíe para ello el arnés a la dirección indicada arriba! Es imprescindiblemente necesario que consulte a un experto o al fabricante del arnés si no está usted seguro de disponer de los conocimientos y de la experiencia necesarios.
TEUFELBERGER no asume ningún tipo de responsabilidad por consecuencias /daños directos, indirectos o casuales que surjan durante el uso del producto y que resulten de una utilización ina-decuada y, en especial, de un montaje defectuoso.
Para el cambio tiene que utilizarse exclusivamente la pieza de recambio autorizada por el fabri-cante que acompaña a la presente información del fabricante. Sólo puede utilizarse para la finali-dad de uso descrita más adelante. Es imprescindiblemente necesario que controle si la pieza de recambio se ha sustituido correctamente antes de volver a utilizar el arnés. Consulte a un experto o al fabricante del arnés si usted no dispone de la experiencia, de la aptitud ni de los conocimien-tos necesarios.
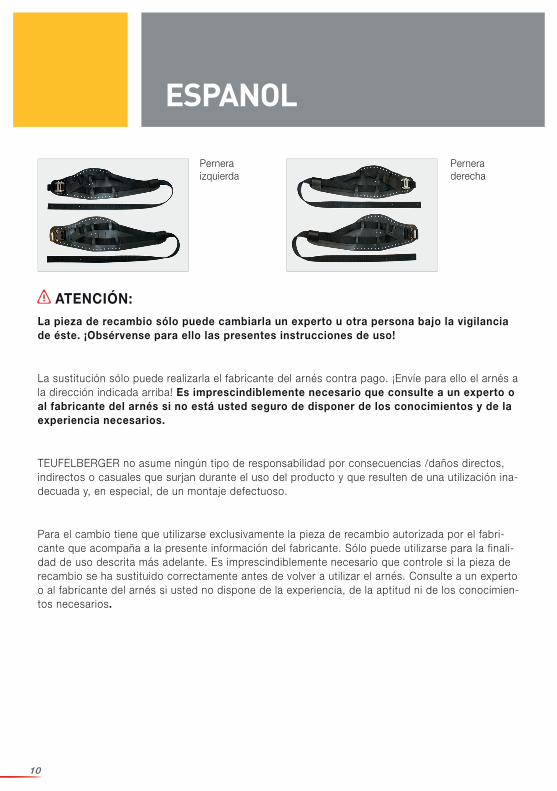
Pernera izquierda
Pernera derecha

11
En la siguiente descripción se explica un modelo treeMOTION. Sobre treeMOTION s.light sólo se exponen puntos propios si ello es necesario desde el punto de vista técnico.Cambie usted primero una pernera para disponer de la segunda pernera original como control. No cambie la segunda pernera hasta no haber comprobado que la pernera sustituida está col-ocada correctamente.
INSTRUCCIONES DE MONTAJE
1. Quite los enlaces de goma que sujetan las perneras al cinturón y ponga los nuevos enlaces de goma en el cinturón.
2. Quite la cinta usada de la pernera prestando atención a no dañar ninguna otra parte del arnés.
3. Quite el acolchado de la pernera usada.
4. Fije el acolchado en la nueva pernera.
6. Pase la cinta del arnés por la presilla elástica.
5. Pase la cinta de la pernera por el anillo de fijación.
10. Vuelva a pasar la cinta por la presilla elástica. Asegúrese de que todas las partes están colocadas en el sitio correcto, que no están torcidas y que la hebilla funciona correctamente.
7a. treeMOTION: Introduzca la cinta por la ranura de la hebilla de cierre rápido que quede más cerca de la pernera.
7b. treeMOTION s.light: Introduzca la cinta por la ranura de la hebilla de cierre rápido que quede más cerca de la pernera. ¡Preste atención a que la cinta del arnés pase por las dos hebillas! Ello es también de aplica-ción para el paso por la segunda ranura (véase 8b.).
11. Pase la parte inferior del remache por la cinta doblada y únala con la parte superior del remache.
9. Asegúrese de que la hebilla funciona correctamente antes de proseguir. Si tiene dudas controle los capítulos 2.5 y 2.6 de las instrucciones de treeMOTION / treeMOTION s.light.
12. Ponga la cinta sobre una base sólida y aplaste el remache con un martillo.
16. Pase el segundo enlace de goma del cinturón también por la pernera.
13. Pase el enlace de goma del cinturón por la pernera.
14. Pase el enlace de goma por el tope para cordones.
17. Pase el enlace de goma por el tope para cordones y anude la punta.
15. Anude las puntas del enlace de goma.
18. Vuelva a controlar que la pernera está colocada correctamente.
(Illustración, consulte la págine 3 - 6)
8a. treeMOTION: Pase la cinta por la otra ranura de la hebilla.
8b. treeMOTION s.light: Pase la cinta por la otra ranura de la hebilla.

12
Hay que observar la información del fabricante sobre treeMOTION / TREEmotion s.light al utilizar el arnés. Todas las indicaciones sobre el transporte, el almacenamiento y la limpieza tienen tam-bién vigencia para el arnés después de haber cambiado la pernera.
Por favor, tenga en cuenta que la vida útil del arnés a partir de la fecha de fabricación no se prolonga por el cambio de pernera. La pernera es sólo un componente del arnés y con su susti-tución puede aprovecharse completamente la vida útil prevista para éste siempre y cuando todos los demás componentes del arnés estén en estado correcto. Por favor, observe la información del fabricante sobre treeMOTION / treeMOTION s.light para evaluar el estado o póngase en con-tacto con un especialista.
El responsable de la modificación tiene que anotar en la hoja de registros anexa a las instrucci-ones de uso de treeMOTION / treeMOTION s.light el cambio de pernera y confirmarlo poniendo la fecha y firmando.
¡ATENCIÓN!
La utilización de los productos puede resultar peligrosa. Nuestros productos sólo pueden utili-zarse para la finalidad de uso para la que están determinados. El cliente tiene que encargarse de que los usuarios estén familiarizados con la utilización correcta y con las medidas de seguridad necesarias. Tenga en cuenta que cada producto puede ocasionar daños si se utiliza mal o se sobrecarga. A reserva de cambios técnicos así como de errores de composición y de impresión.
INSTRUCCIONES DE MONTAJE

13
FRANCAIS
ATTENTION :La pièce de rechange ne doit être mise en place que par une personne compétente ou sous la surveillance d’une personne compétente. Observez le présent mode d’emploi lors du remplacement de la pièce !
Le remplacement peut également être effectué par le fabricant du harnais contre rémunérati-on. A cette fin, envoyez le harnais à l’adresse ci-dessus. Si vous n’êtes pas sûr de disposer du savoir-faire et de l’expérience nécessaires, consultez impérativement une personne compétente ou le fabricant du harnais.
TEUFELBERGER n’est pas responsable des conséquences / dommages directs, indirects ou aléa-toires survenant pendant ou après l’utilisation du produit et résultant d’une utilisation inappropriée et notamment d’un assemblage incorrect.
Seule la pièce de rechange autorisée par le fabricant et jointe aux présentes indications du fabri-cant peut être utilisée pour le remplacement. Cette pièce ne doit être employée que pour l’utilisa-tion décrite ci-dessous. Avant toute nouvelle utilisation du harnais, contrôlez impérativement si la pièce de rechange a été correctement mise en place. Si vous ne disposez pas de l’expérience, du savoir-faire et des connaissances nécessaires à cette fin, consultez une personne compétente ou le fabricant du harnais.
Tour de cuisse gauche
Tour de cuisse droit
14
Les descriptions suivantes représentent un treeMOTION. Des descriptions propres au treeMOTION s.light ne seront représentées que si cela s‘avère techniquement nécessaire. Commencez par ne remplacer qu’un seul tour de cuisse pour garder le deuxième tour de cuisse original comme modèle. Ne procédez au remplacement du deuxième tour de cuisse qu’après avoir vérifié le bon positionnement du tour de cuisse remplacé en premier.
INSTRUCTIONS D’AS-SEMBLAGE
1. Retirez les liens en caoutchouc entre le tour de cuisse et la sangle de la taille et enfilez les nouveaux liens en caoutchouc dans la sangle de la taille.
2. Retirez la sangle usagée du tour de cuisse en veillant à n’endommager aucune autre partie du harnais.
3. Retirez le rembourrage du tour de cuisse usagé.
4. Fixez le rembourrage au nouveau tour de cuisse.
6. Tirez la sangle à travers la boucle élastique.
5. Enfilez la sangle du tour de cuisse à travers l’anneau de fixation.
10. Renfilez la sangle à travers la boucle élastique. Assurez-vous que chaque pièce est positionnée au bon endroit sans être tordue et que la boucle fonctionne correctement.
7a. treeMOTION: Enfilez la sangle à travers la fente de la boucle enfichable qui se trouve le plus proche du tour de cuisse.
8a. treeMOTION: Enfilez la sangle à travers l’autre fente de la boucle.
11. Enfilez la partie inférieure du rivet à travers la sangle pliée et assemblez-la avec la partie supérieure du rivet.
9. Assurez-vous du bon fonctionnement de la boucle avant de poursuivre. En cas de doutes, consultez les chapitres 2.5 et 2.6 du mode d’emploi du treeMOTION /treeMOTION s.light.
12. Positionnez la sangle sur un support solide et assemblez le rivet en frappant avec un marteau.
16. Enfilez le deuxième lien en caoutchouc de la sangle de la taille dans le tour de cuisse.
13. Enfilez le lien en caoutchouc de la sangle de la taille dans le tour de cuisse.
14. Enfilez le lien en caoutchouc à travers l’arrêt pour cordon.
17. Enfilez le lien en caoutchouc à travers l’arrêt pour cordon et nouez son extrémité.
15. Nouez les extrémités du lien en caoutchouc.
18. Contrôlez encore une fois le positionnement correct du tour de cuisse.
(Photos, voir page 3 - 6)
7b. treeMOTION s.light: Enfilez la sangle à travers la fente de la boucle enfichable qui se trouve le plus pro-che du tour de cuisse. Veillez à faire passer la sangle dans les deux boucles! Cela vaut également pour l‘enfi-lage dans la deuxième fente (voir au point 8b).
8b. treeMOTION s.light: Enfilez la sangle à travers l’autre fente de la boucle.

15
INSTRUCTIONS D’ASSEMBLAGE
Observez impérativement les indications du fabricant concernant le treeMOTION / treeMOTION s.light lors de l’utilisation du harnais. Toutes les indications concernant le transport, le stockage et le nettoyage s’appliquent également au harnais dont un tour de cuisse a été remplacé.
Veuillez observer que le remplacement du tour de cuisse ne prolonge pas la durée de vie du har-nais à compter de sa date de production. Le tour de cuisse n’est qu’un composant du harnais parmi d’autres - son remplacement permet de profiter pleinement de la durée de vie du harnais à condition que tous les autres composants du harnais soient en bon état. Pour juger de l’état du harnais, veuillez observer les indications du fabricant concernant le treeMOTION / treeMOTION s.light ou consulter une personne compétente.
Le responsable du réassemblage marquera le remplacement du tour de cuisse dans la fiche de contrôle jointe au mode d’emploi du treeMOTION / treeMOTION s.light et le confirmera par l’ap-position de la date et de sa signature.
ATTENTION
L‘utilisation de ces produits peut être dangereuse. Nos produits doivent uniquement être utilisés pour les applications pour lesquelles ils ont été conçus. Le client doit s‘assurer que les utili-saeurs sont formés sur l‘application conforme et les mesures de sécurité nécessaires. Veuillez considérer que les produits peuvent entraîner des dommages en cas d‘utilisation erronée ou de surcharge. Sous réserves de modifications ainsi que d‘erreurs de rédaction et d‘impression.

16
ITALIANO
ATTENZIONE:Questo pezzo di ricambio dovrà essere sostituito solo da una persona esperta oppure so-tta la sua sorveglianza. In questo caso bisogna rispettare le presenti istruzioni d’uso!
Si potrà far sostituire il pezzo anche da parte del produttore, corrispondendo l’apposito compen-so. In questo caso bisognerà inviare l’imbracatura all’indirizzo sopra indicato! Se non siete sicuri di disporre delle conoscenze e dell’esperienza necessarie, dovrete assolutamente con-sultare una persona esperta oppure il produttore dell’imbracatura.
La ditta TEUFELBERGER non è responsabile in nessun caso per gli effetti / per i danni diretti, in-diretti o accidentali sopravvenuti durante o dopo l’uso del prodotto e dovuti ad un impiego impro-prio, in particolare ad un assemblaggio errato.
Per la sostituzione dovrete utilizzare esclusivamente il pezzo di ricambio autorizzato da parte del produttore, che troverete in allegato a questa informazione da parte del produttore. Esso dovrà essere utilizzato solo per lo scopo descritto in basso. Prima di un ulteriore utilizzo dell’imbracatura bisogna verificare assolutamente se il pezzo di ricambio è stato sostituito correttamente. Qualora non doveste disporre dell’esperienza necessaria, delle capacità e delle conoscenze necessarie, si consiglia di consultare una persona esperta oppure il produttore dell’imbracatura.
Cosciale sinistro
Cosciale destro

17
La seguente descrizione si riferisce al modello treeMOTION. Solo se richiesto dal punto di vista tecnico, sono indicate delle specificazioni separate per il modello treeMOTION s.light Sostituire in un primo momento solo un cosciale per poter controllare lo stato originale sul secondo cosciale. Il secondo cosciale va sostituito solo dopo aver verificato il posizionamen-to corretto del cosciale sostituito.
ISTRUZIONI DI MONTAGGIO
1. Togliere i raccordi di gomma che collegano il cosciale con la cintura e infilare i nuovi raccordi di gomma nella cintura.
2. Togliere il nastro usato della cintura del cosciale facendo attenzione a non danneggiare gli altri elementi della cintura.
3. Togliere la parte imbottita dal cosciale usato.
4. Fissare la parte imbottita sul cosciale nuovo.
6. Far passare il nastro attraverso la fettuccia elastica.
5. Infilare il nastro del cosciale attraverso l’annello di fissaggio.
10. Infilare ancora il nastro attraverso la fettuccia elastica. Assicuratevi che tutti gli elementi siano posizionati correttamente, che non siano storti e che la fibbia funzioni correttamente.
7a. treeMOTION: Infilare il nastro attraverso la fessura della fibbia più vicina al cosciale.
8a. treeMOTION: Infilare il nastro attaverso l’altra fessura della fibbia.
11. Infilare la parte inferiore del ribattino attraverso la cintura piegata e collegare con la parte superiore del ribattino.
9. Assicuratevi del funzionamento corretto della fibbia prima di proseguire. In caso di dubbio consultare i capi-toli 2.5 e 2.6 delle istruzioni treeMOTION / treeMOTION s.light.
12. Appoggiare la cintura su un supporto solido e chiudere il ribattino colpendolo con un martello.
16. Infilare anche il secondo raccordo di gomma della cinghia dell’anca nel cosciale.
13. Infilare il raccordo di gomma della cinghia dell’anca nel cosciale.
14. Infilare il raccordo di gomma attraverso il fermo.
17. Infilare il raccordo di gomma attraverso il fermo e annodare l’estremità della corda.
15. Annodare le estremità del raccordo di gomma.
18. Controllare un’altra volta il posizionamento corretto del cosciale.
(Fotografia, vedere pagine 3 - 6)
7b. treeMOTION s.light: Infilare il nastro attraverso la fessura della fibbia più vicina al cosciale. Badare a far passare il nastro della cintura attraverso tutte e due le fibbie! Ciò vale anche per il passaggio attraverso la se-conda fessura (vedasi punto 8b).
8a. treeMOTION s.light: Infilare il nastro attaverso l’altra fessura della fibbia.

18
Utilizzando l’imbracatura bisogna rispettare le relative istruzioni riguardanti treeMOTION / tree-MOTION s.light previste da parte del produttore. Tutte le indicazioni relative al trasporto, all’im-magazzinaggio e alla pulizia valgono anche per l’imbracatura con il cosciale sostituito.
Siete pregati di tener presente che la durata di vita dell’imbracatura dalla data di produzione non viene prolungata dalla sostituzione del cosciale. Il cosciale è solo un singolo elemento dell’im-bracatura – con la sostituzione di questo elemento la durata di vita potrà essere pienamente sfruttata a condizione che tutti gli altri elementi dell’imbracatura si trovano in un buon stato di conservazione. Per giudicare lo stato rimandiamo all’informazione del produttore riguardante treeMOTION / treeMOTION s.light oppure consultate una persona esperta.
La persona responsabile dell’operazione deve annotare nella scheda di registrazione allegata alle istruzioni sull’uso di treeMOTION /treeMOTION s.light di aver sostituito il cosciale confermandolo con l’apposizione della data e della propria firma.
ATTENZIONE
L’utilizzo dei prodotti potrebbe comportare qualche pericolo. I nostri prodotti dovranno essere impiegati esclusivamente per gli scopi per i quali sono destinati. Il cliente dovrà provvedere a che le persone che usano il prodotto siano familiari con l’utilizzo corretto e con i provvedimenti di si-curezza necessari. Tenete presente che ogni prodotto potrà arrecare dei danni se viene utilizzato in modo errato oppure se viene esposto a carichi eccessivi.
ISTRUZIONI DI MONTAGGIO

19
NEDERLANDS
LET OP:Dit reserveonderdeel mag uitsluitend door een vakkundige of onder diens toezicht verva-ngen worden. Houdt U daarbij aan deze gebruikershandleiding!
Tegen betaling kan de vervanging ook door de fabrikant van de gordel uitgevoerd worden. Stuur dan de gordel aan het boven aangegeven adres! Wanneer U onzeker bent of U over de nodige kennis en ervaring beschikt, dient U per sé een vakkundige of de fabrikant te consul-teren.
TEUFELBERGER is niet verantwoordelijk voor directe, indirecte of toevallige gevolgen / schade, die gedurende of na het gebruik van dit product optreden en die het gevolg zijn van onjuist gebru-ik, in het bijzonder van een foutieve montage.
Voor de vervanging mag uitsluitend het door de fabrikant toegelaten reserveonderdeel gebruikt worden, dat aan deze fabrikanteninformatie toegevoegd is. Het mag uitsluitend voor de hierna beschreven doeleinden gebruikt worden. Controleer per sé voor het opnieuw gebruiken van de gordel of het reserveonderdeel correct vervangen werd. Wanneer U daartoe niet over de nodige ervaring, vaardigheden en kennis beschikt raadpleegt U dan een deskundige of de fabrikant van de gordel.
linker beenlus rechter beenlus

20
De volgende beschrijving verklaart een treeMOTION. Uitsluitend wanneer dit technisch noodzakelijk is worden eigen punten voor de treeMOTION s.light aangegeven. Vervang eerst slechts één beenlus, dan heeft U nog de tweede originele beenlus ter controle. Pas na een controle of de vervangen beenlus in de juiste positie is vervangt U de tweede beenlus.
MONTAGE- HANDLEIDING
1. Verwijder de rubberbanden van de beenlus met de heupgordel en rijg de nieuwe rubberbanden door de heupgordel.
2. Verwijder de gebruikte gordelband van de beenlus en let erop andere onderdelen niet te beschadigen.
3. Verwijder het beenkussen van de gebruikte beenlus.
4. Bevestig het beenkussen aan de nieuwe beenlus.
6. Trek de gordelband door de elastische lus.
5. Rijg de gordelband van de beenlus door de bevestigingsring.
10. Rijg de gordelband weer door de elastische lus. Zorg ervoor dat alle onderdeel op de juiste plaats zitten, niet verdraaid zijn en de sluiting correct functioneert.
7a. treeMOTION: Rijg de gordelband door spleet van de klemsluiting,die het dichtst bij de beenlus is.
8a. treeMOTION: Rijg de gordelband door de andere spleet van de klem- sluiting.
11. Steek het onderste deel van de klinknagel door de dubbelgevouwen gordel en verbind deze met het bo venste deel van de klinknagel.
9. Stel zeker dat de sluiting goed functioneert vóór U doorgaat. In geval van twijfel deel 2.5 en 2.6 van de treeMOTION / treeMOTION s.light handleiding controleren.
12. Leg de gordel op een vaste ondergrond en sla de klinknagel met een hamer in elkaar.
16. Rijg de tweede rubberveter van het heupdeel eveneens door de beenlus.
13. Rijg de rubberveter van het heupdeel door de beenlus.
14. Rijg de rubberveter door de koordstopper.
17. Rijg de rubberveter door de koordstopper en leg een knoop in het eind van de veter.
15. Leg een knoop in de einden van de rubberveters.
18. Controleer nogmaals de correcte positie van der beenlus.
(Beelden, zie pagina 3 - 6)
7b. treeMOTION s.light: Rijg de gordelband door spleet van de klemsluiting,die het dichtst bij de beenlus is. Let er op dat de gordelband door beide gespen geleid wordt! Dat geldt ook voor het doorrijgen door de tweede sleuf (zie 8b.).
8b. treeMOTION s.light: Rijg de gordelband door de andere spleet van de klem- sluiting.

21
MONTAGE- HANDLEIDING
Bij het gebruik van de gordel dient U zich aan de fabrikanteninformatie van de treeMOTION / treeMOTION s.light te houden. Alle aanwijzingen m.b.t. transport, opslag en reiniging gelden ook voor de gordel met vervangen beenlus.
Let er op dat de levensduur van de gordel vanaf de fabricagedatum door de vervanging van de beenlus niet verlengd wordt. De beenlus is slechts één onderdeel van de gordel – door de verva-nging kan de levensduur ten volle benut worden onder de voorwaarde dat alle andere onderde-len van de gordel in overeenkomstige conditie zijn. Ter beoordeling van de conditie let U op de fabrikanteninformatie van de treeMOTION / treeMOTION s.light of neemt U met een deskundige contact op.
De voor de ombouw verantwoordelijke persoon noteert de vervanging van de beenlus in het protocol, dat aan de handleiding van de treeMOTION / treeMOTION s.light toegevoegd werd, en bevestigt dit met datum en handtekening.
LET OP!
Het gebruik van de producten kan gevaarlijk zijn. Onze producten mogen uitsluitend voor de do-eleinden gebruikt worden waarvoor ze bestemd zijn. De klant moet ervoor zorgen dat de gebru-ikers met het correcte gebruik en de noodzakelijke veiligheidsvoorzieningen vertrouwd zijn. Be-denk dat elk product schade berokkenen kan wanneer het verkeerd gebruikt of overbelast wordt. Technische veranderingen evenals druk- en zetfouten voorbehouden.

22
NOTES

23
NOTES
TEUFELBERGER Fiber Rope GmbHVogelweiderstraße 50, 4600 Wels, AustriaT +43 7242 413-0F +43 7242 413-169E [email protected]
www.teufelberger.com
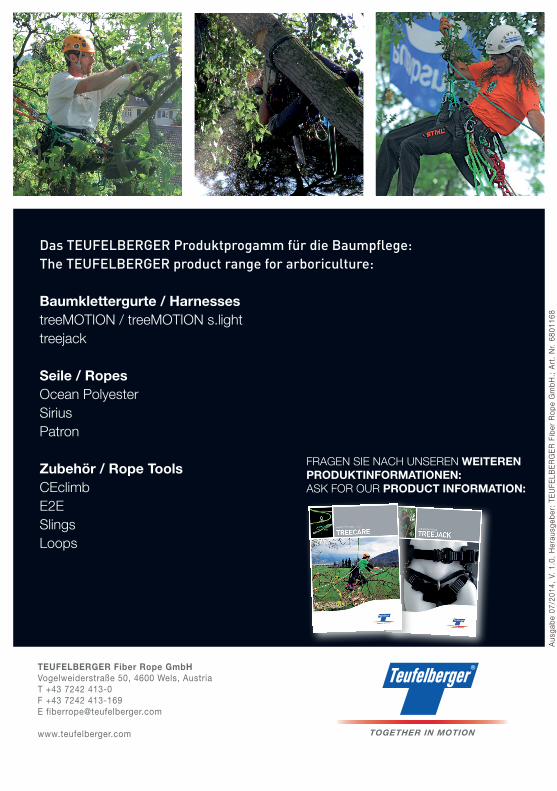
Das TEUFELBERGER Produktprogamm für die Baumpflege: The TEUFELBERGER product range for arboriculture:
Baumklettergurte / HarnessestreeMOTION / treeMOTION s.lighttreejack Seile / RopesOcean PolyesterSiriusPatron Zubehör / Rope ToolsCEclimbE2ESlingsLoops
FRAGEN SIE NACH UNSEREN WEITEREN PRODUKTINFORMATIONEN: ASK FOR OUR PRODUCT INFORMATION:
Aus
gabe
07/
2014
, V.
1.0
, H
erau
sgeb
er:
TEU
FELB
ER
GE
R F
iber
Rop
e G
mbH
.; A
rt.
Nr.
6801
168
Related Documents