LED Pinwheels SLQ Wiki Fabrication Lab 2022/03/16 20:20

Welcome message from author
This document is posted to help you gain knowledge. Please leave a comment to let me know what you think about it! Share it to your friends and learn new things together.
Transcript
LED Pinwheels
SLQ Wiki Fabrication Lab 2022/03/16 20:20

SLQ Wiki ii/iv LED Pinwheels
2022/03/16 20:20 LED Pinwheels

SLQ Wiki iii/iv LED Pinwheels
2022/03/16 20:20 LED Pinwheels
Table of ContentsLED Pinwheels 1 ......................................................................................................................................
Summary 1 ........................................................................................................................................ Materials 1 .................................................................................................................................... Tools 2 ..........................................................................................................................................
Before you Start 2 ............................................................................................................................ Instructions 4 ....................................................................................................................................
PART 1: Making a Spinner from Recycled Cans 4 ......................................................................... Step 1 : Preparing the material for the pinwheel 4 ....................................................................... Step 2: Marking out the Pinwheel 9 .............................................................................................. Step 3: Trimming the material for joining 13 ................................................................................ Step 4: Joining the halves 15 ........................................................................................................ Step 5: Attaching the hubs 20 ...................................................................................................... Step 6: Folding the Pinwheel 30 ................................................................................................... PART 2 : Making a Spinner from Polypropylene 39 ....................................................................... Step 1: Attaching the hubs 39 ...................................................................................................... Step 2 41 ...................................................................................................................................... Step 3 : Folding the Spinner 42 .................................................................................................... PART 3: Aligning the Spinner and Motor 43 .................................................................................. Step 1: Mounting the motor 43 ..................................................................................................... Step 2 44 ...................................................................................................................................... Step 3 45 ...................................................................................................................................... Step 4 46 ...................................................................................................................................... PART 4: The Joule Thief 48 ............................................................................................................ Step 1: Winding the toroid 48 ....................................................................................................... Step 2: Assemble the Joule Thief circuit 51 .................................................................................. Step 3 52 ...................................................................................................................................... Step 4 54 ...................................................................................................................................... Step 5 55 ...................................................................................................................................... Step 6 58 ...................................................................................................................................... PART 5: Installing the Joule Thief Circuit 59 .................................................................................. Step 1: Attaching the Joule Thief circuit 59 .................................................................................. Step 2: Attaching the Enclosure 60 .............................................................................................. Step 3: Attaching the spinner 61 .................................................................................................. References 62 ...............................................................................................................................
Production notes 62 .........................................................................................................................

SLQ Wiki iv/iv LED Pinwheels
2022/03/16 20:20 LED Pinwheels
SLQ Wiki 1/62 LED Pinwheels
2022/03/16 20:20 LED Pinwheels
LED PinwheelsExternal
Summary
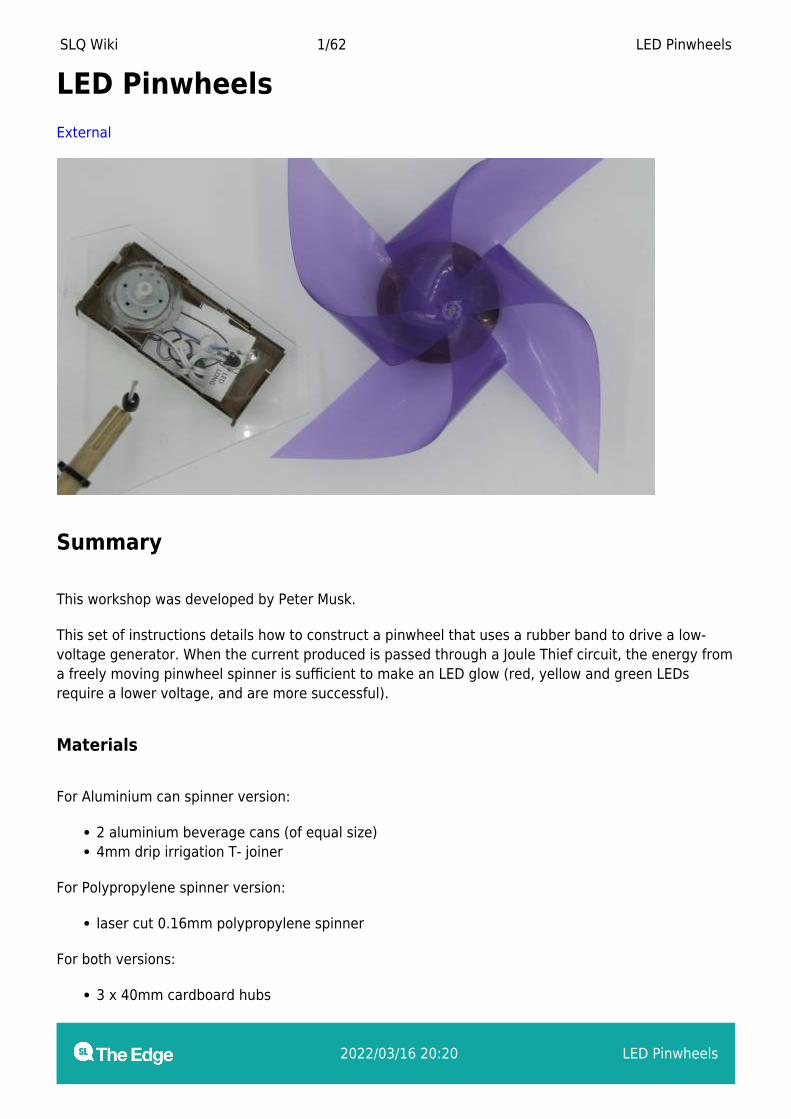
This workshop was developed by Peter Musk.
This set of instructions details how to construct a pinwheel that uses a rubber band to drive a low-voltage generator. When the current produced is passed through a Joule Thief circuit, the energy froma freely moving pinwheel spinner is sufficient to make an LED glow (red, yellow and green LEDsrequire a lower voltage, and are more successful).
Materials
For Aluminium can spinner version:
2 aluminium beverage cans (of equal size)4mm drip irrigation T- joiner
For Polypropylene spinner version:
laser cut 0.16mm polypropylene spinner
For both versions:
3 x 40mm cardboard hubs
SLQ Wiki 2/62 LED Pinwheels
2022/03/16 20:20 LED Pinwheels
1 x Acrylic hub kit, which contains1 x 30mm acrylic spoked hub1 x 10mm acrylic pinwheel cap1 x 10mm etched motor shaft outer hub1 x 5mm motor shaft inner hub
100 - 150mm straight 2mm wire axle (galvanized is OK)4mm rigid poly irrigation riser tube30 - 40cm (approx) x 1cm diameter bamboo garden stake handle1 x plastic or metal clothing press stud (in two parts)1 x size 19 rubber band1 x Mabuchi 300-EA low rpm electric motorJoule Thief circuit parts kit:
1 x wound toroid (10 - 13mm diameter)1 x NPN transistor (2N3904 or equivalent)1 x 1k resistor1 LED (red, yellow or green)Joule thief circuit template (paper on polypropylene) with laser cut mounting holes
Joule Thief box (laser cut 3mm white cardboard)
Tools
For aluminium can spinner version:
Clear plastic right angle set squareFelt-tipped marking pen (fine)Sharp screw or nail
For both versions:
Craft knifeScissorsHot glue gun and glueWire assembly standWire strippersSide cuttersSmall pliersRulerSource of briskly flowing air (eg:fan, hair drier, ventilation outlet)Battery drill with 2mm bit (if needed to create holes in handles)Pencil sharpener
Before you Start
Consider safety aspects before you begin. This activity is not suitable for children younger than 12without close adult supervision.

SLQ Wiki 3/62 LED Pinwheels
2022/03/16 20:20 LED Pinwheels
Hot glue, sharp knives and small pieces are used.
SLQ Wiki 4/62 LED Pinwheels
2022/03/16 20:20 LED Pinwheels
Instructions
PART 1: Making a Spinner from Recycled Cans
When cut, aluminium cans have sharp edges, andparticipants need to be warned not to slide hands or fingersalong them. This version may be unsuitable for the lessdexterous
Step 1 : Preparing the material for the pinwheel
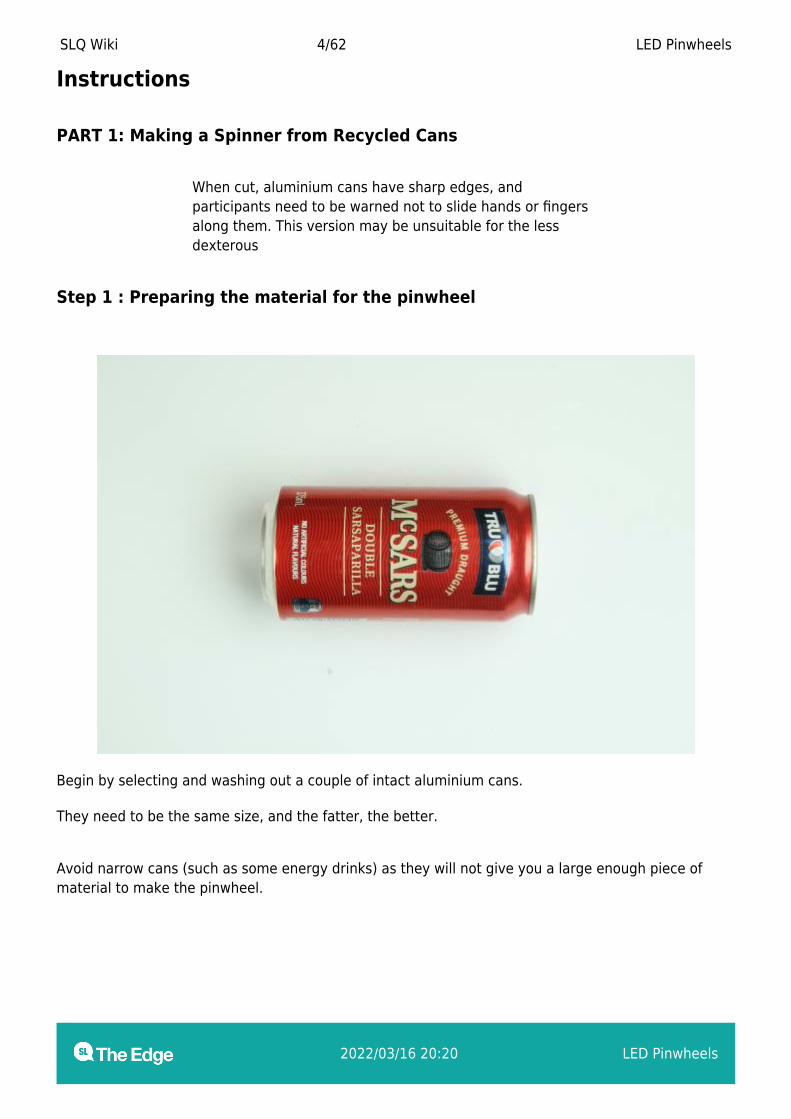
Begin by selecting and washing out a couple of intact aluminium cans.
They need to be the same size, and the fatter, the better.
Avoid narrow cans (such as some energy drinks) as they will not give you a large enough piece ofmaterial to make the pinwheel.
SLQ Wiki 5/62 LED Pinwheels
2022/03/16 20:20 LED Pinwheels
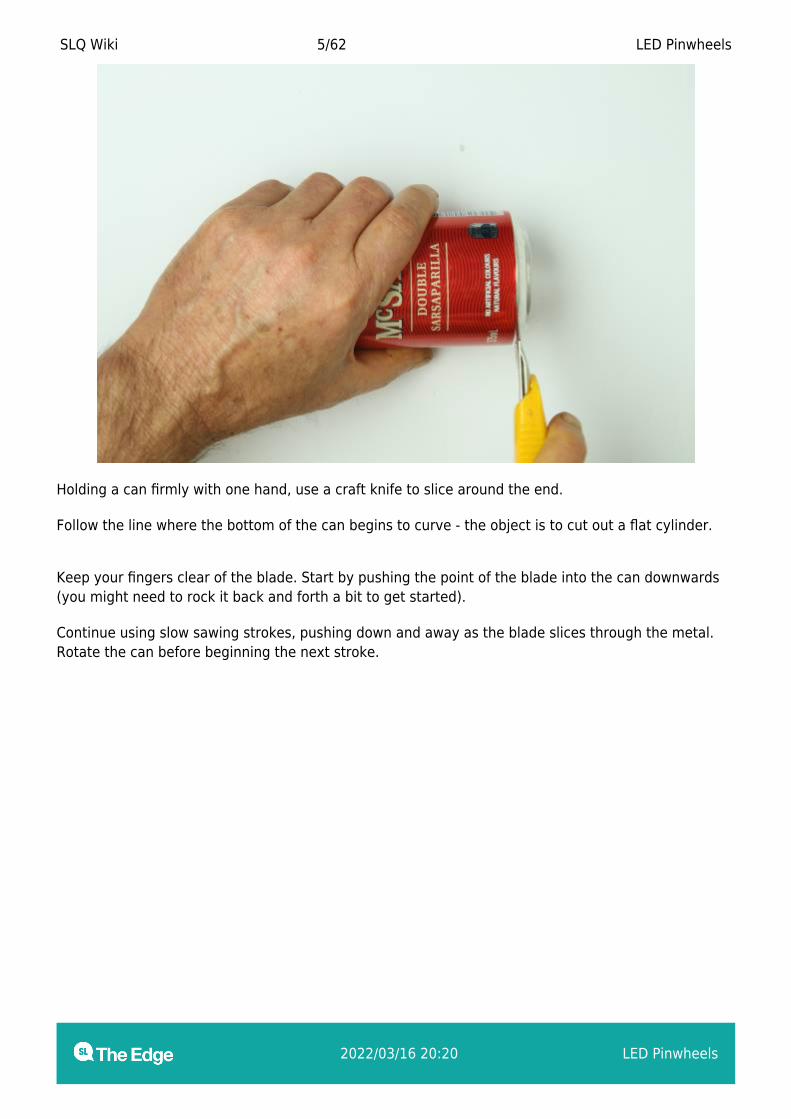
Holding a can firmly with one hand, use a craft knife to slice around the end.
Follow the line where the bottom of the can begins to curve - the object is to cut out a flat cylinder.
Keep your fingers clear of the blade. Start by pushing the point of the blade into the can downwards(you might need to rock it back and forth a bit to get started).
Continue using slow sawing strokes, pushing down and away as the blade slices through the metal.Rotate the can before beginning the next stroke.
SLQ Wiki 6/62 LED Pinwheels
2022/03/16 20:20 LED Pinwheels
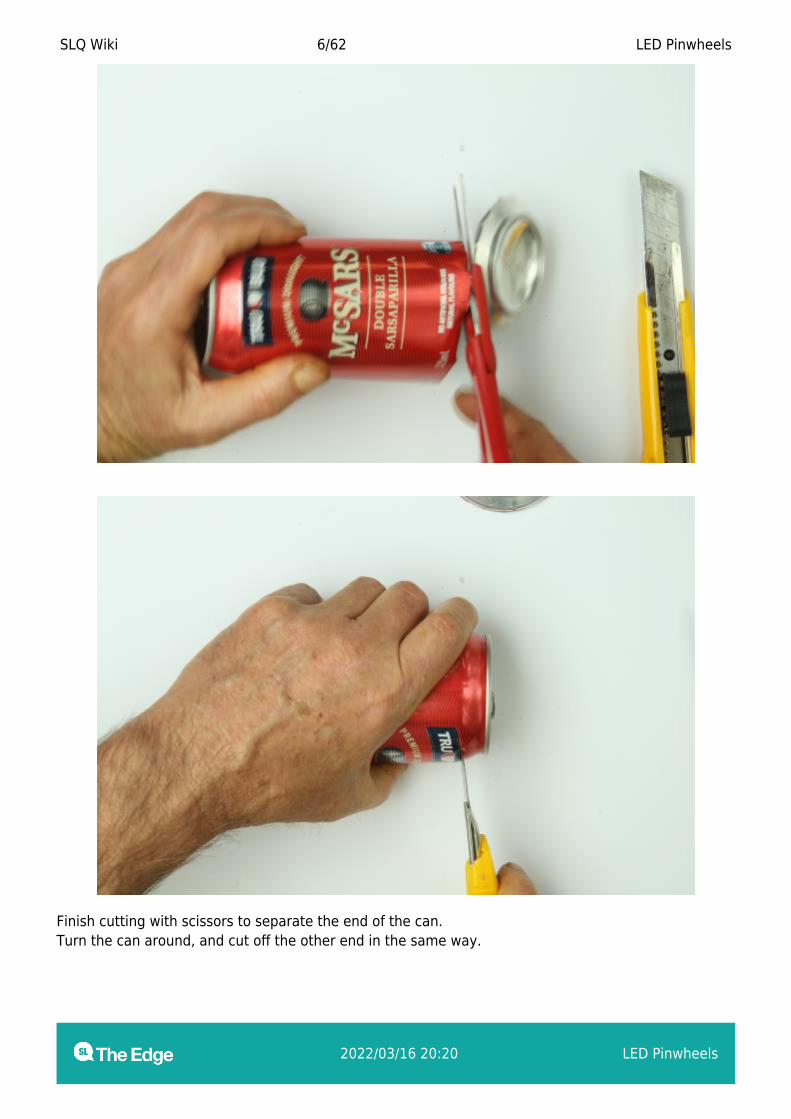
Finish cutting with scissors to separate the end of the can.Turn the can around, and cut off the other end in the same way.
SLQ Wiki 7/62 LED Pinwheels
2022/03/16 20:20 LED Pinwheels
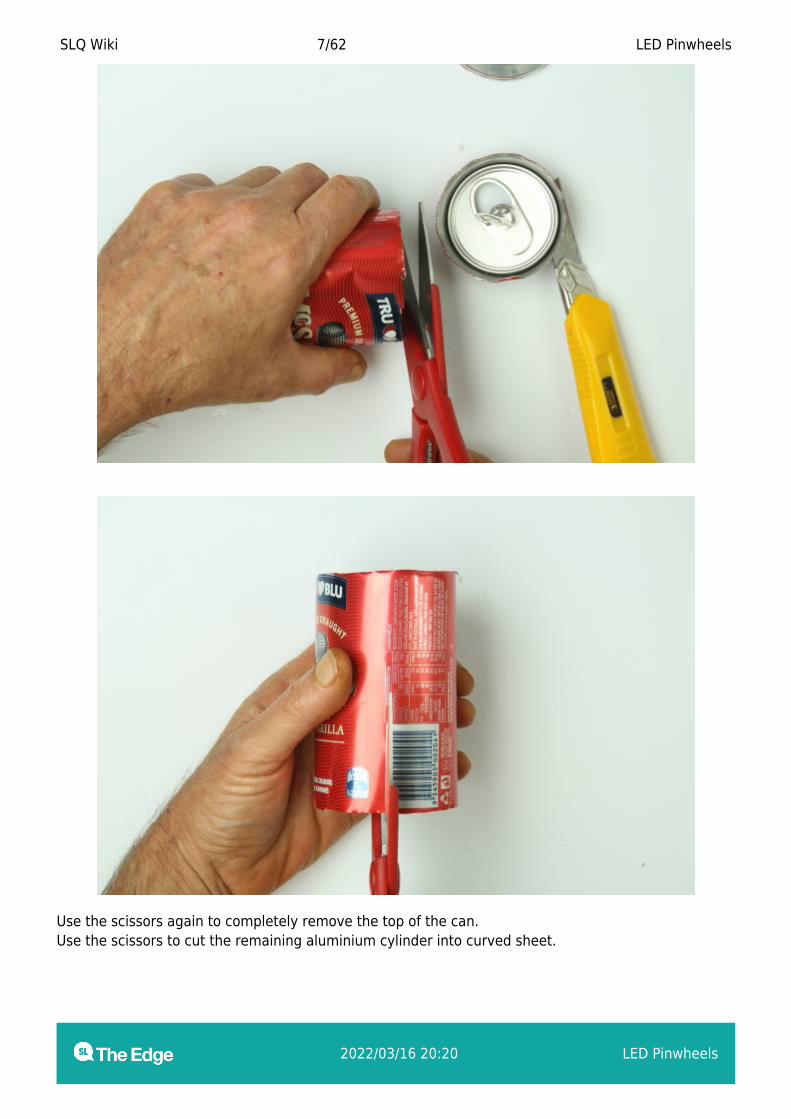
Use the scissors again to completely remove the top of the can.Use the scissors to cut the remaining aluminium cylinder into curved sheet.
SLQ Wiki 8/62 LED Pinwheels
2022/03/16 20:20 LED Pinwheels
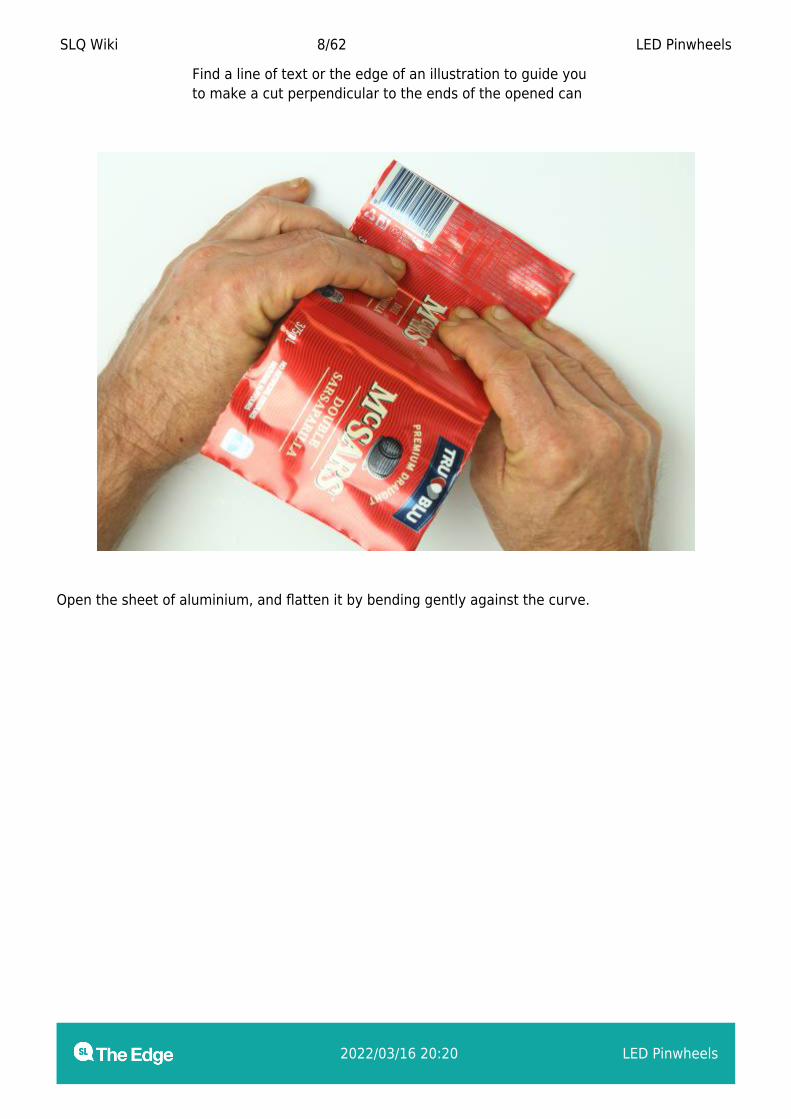
Find a line of text or the edge of an illustration to guide youto make a cut perpendicular to the ends of the opened can
Open the sheet of aluminium, and flatten it by bending gently against the curve.
SLQ Wiki 9/62 LED Pinwheels
2022/03/16 20:20 LED Pinwheels
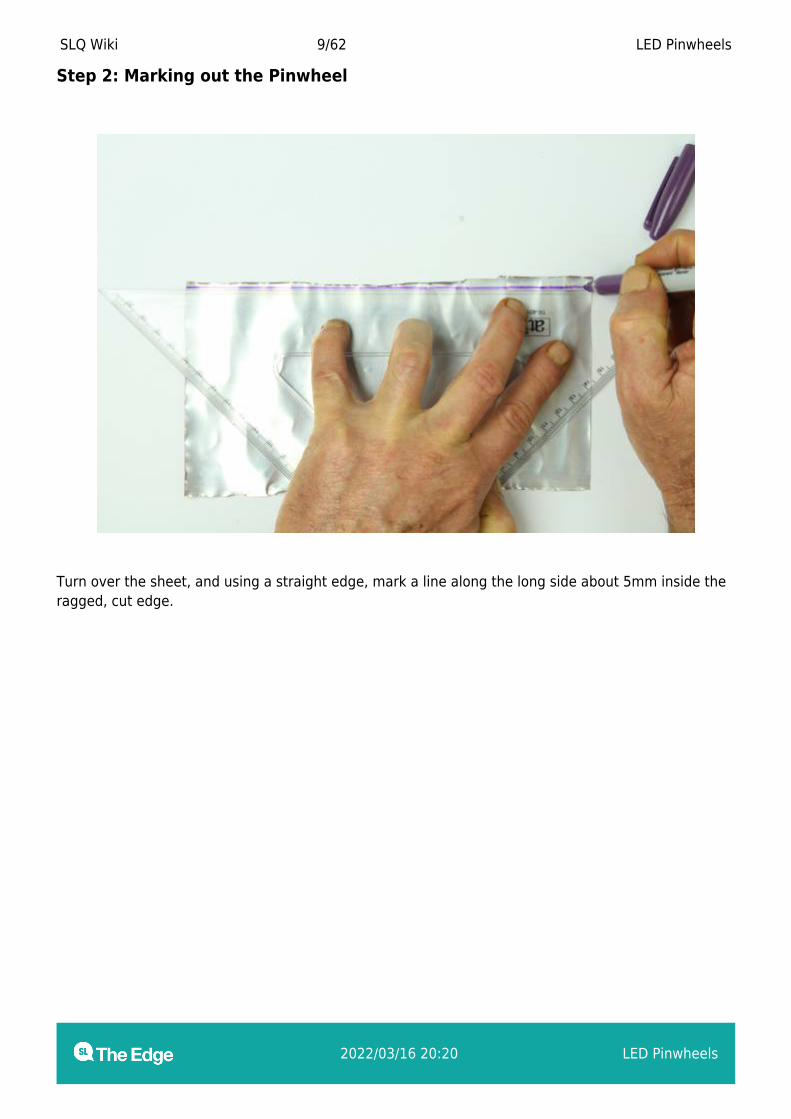
Step 2: Marking out the Pinwheel
Turn over the sheet, and using a straight edge, mark a line along the long side about 5mm inside theragged, cut edge.
SLQ Wiki 10/62 LED Pinwheels
2022/03/16 20:20 LED Pinwheels
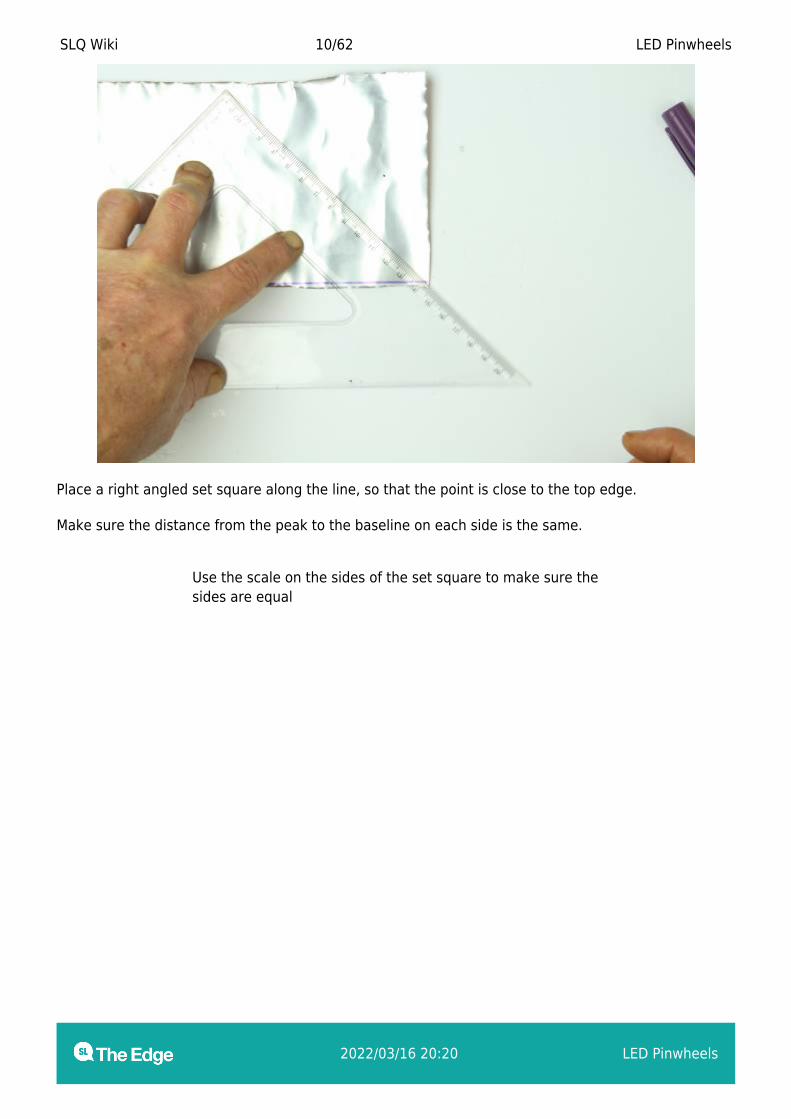
Place a right angled set square along the line, so that the point is close to the top edge.
Make sure the distance from the peak to the baseline on each side is the same.
Use the scale on the sides of the set square to make sure thesides are equal

SLQ Wiki 11/62 LED Pinwheels
2022/03/16 20:20 LED Pinwheels
Draw a line around the set square using a marker
Check to see the line is complete, and touch up where necessary
SLQ Wiki 12/62 LED Pinwheels
2022/03/16 20:20 LED Pinwheels
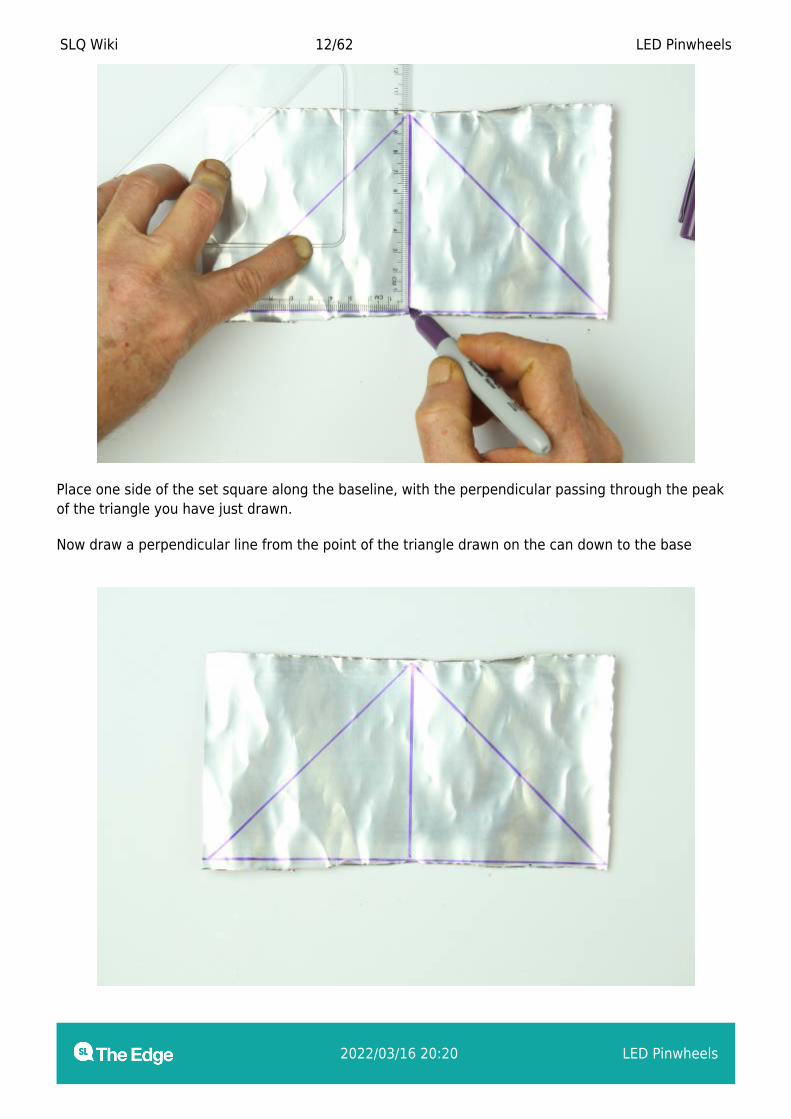
Place one side of the set square along the baseline, with the perpendicular passing through the peakof the triangle you have just drawn.
Now draw a perpendicular line from the point of the triangle drawn on the can down to the base
SLQ Wiki 13/62 LED Pinwheels
2022/03/16 20:20 LED Pinwheels
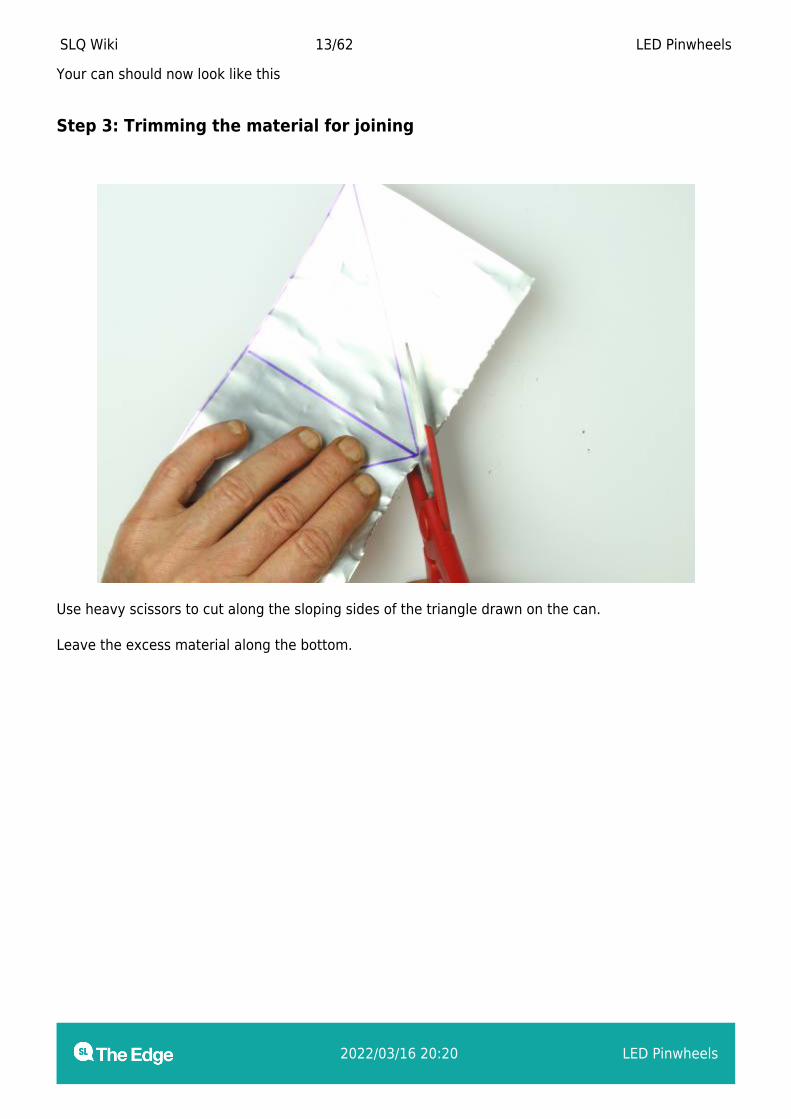
Your can should now look like this
Step 3: Trimming the material for joining
Use heavy scissors to cut along the sloping sides of the triangle drawn on the can.
Leave the excess material along the bottom.
SLQ Wiki 14/62 LED Pinwheels
2022/03/16 20:20 LED Pinwheels
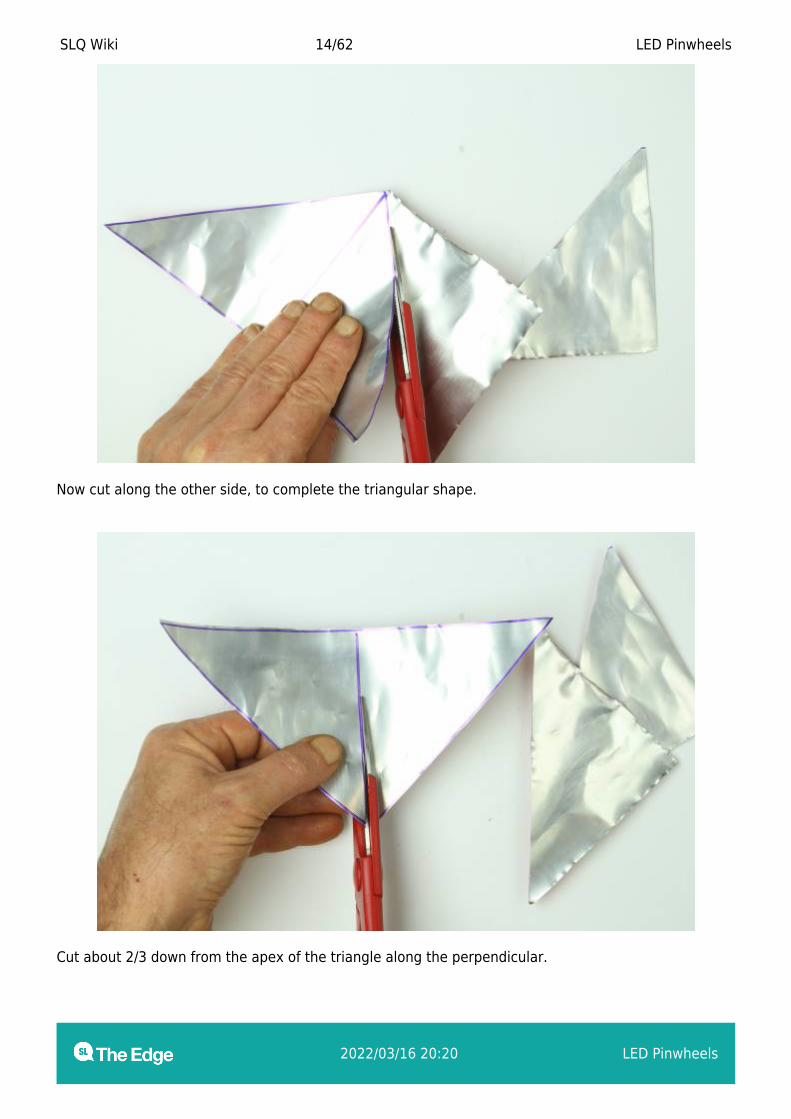
Now cut along the other side, to complete the triangular shape.
Cut about 2/3 down from the apex of the triangle along the perpendicular.
SLQ Wiki 15/62 LED Pinwheels
2022/03/16 20:20 LED Pinwheels
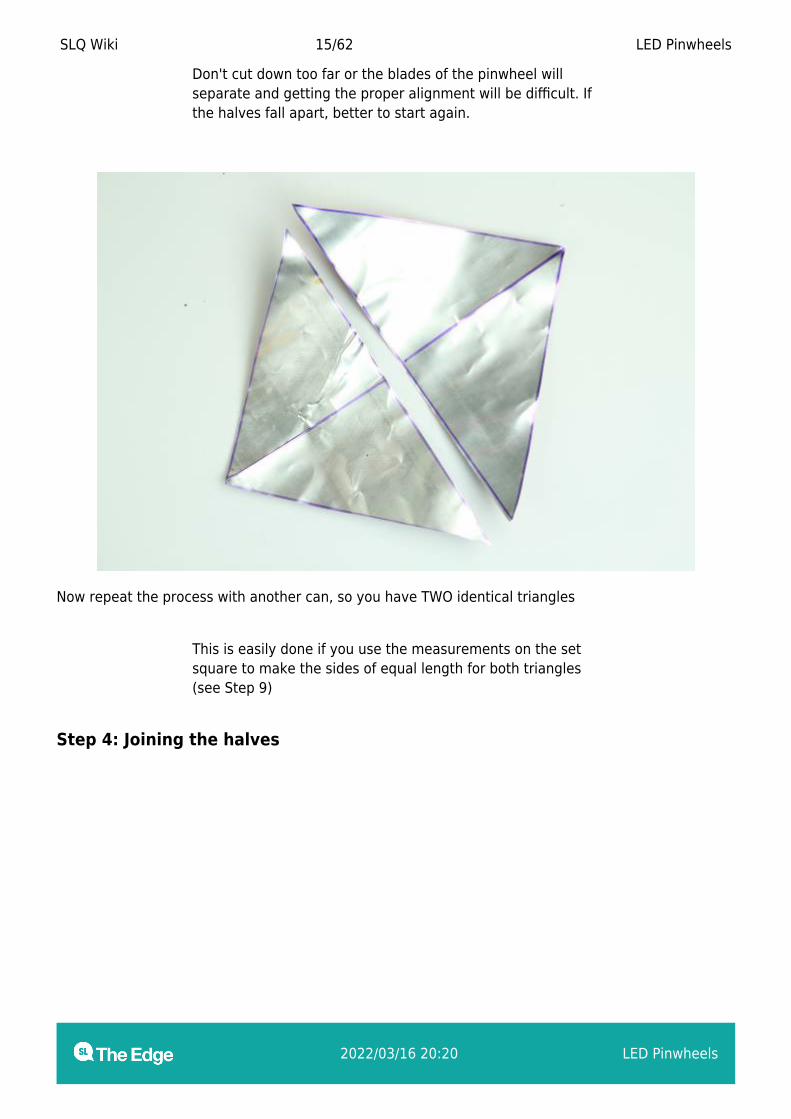
Don't cut down too far or the blades of the pinwheel willseparate and getting the proper alignment will be difficult. Ifthe halves fall apart, better to start again.
Now repeat the process with another can, so you have TWO identical triangles
This is easily done if you use the measurements on the setsquare to make the sides of equal length for both triangles(see Step 9)
Step 4: Joining the halves
SLQ Wiki 16/62 LED Pinwheels
2022/03/16 20:20 LED Pinwheels
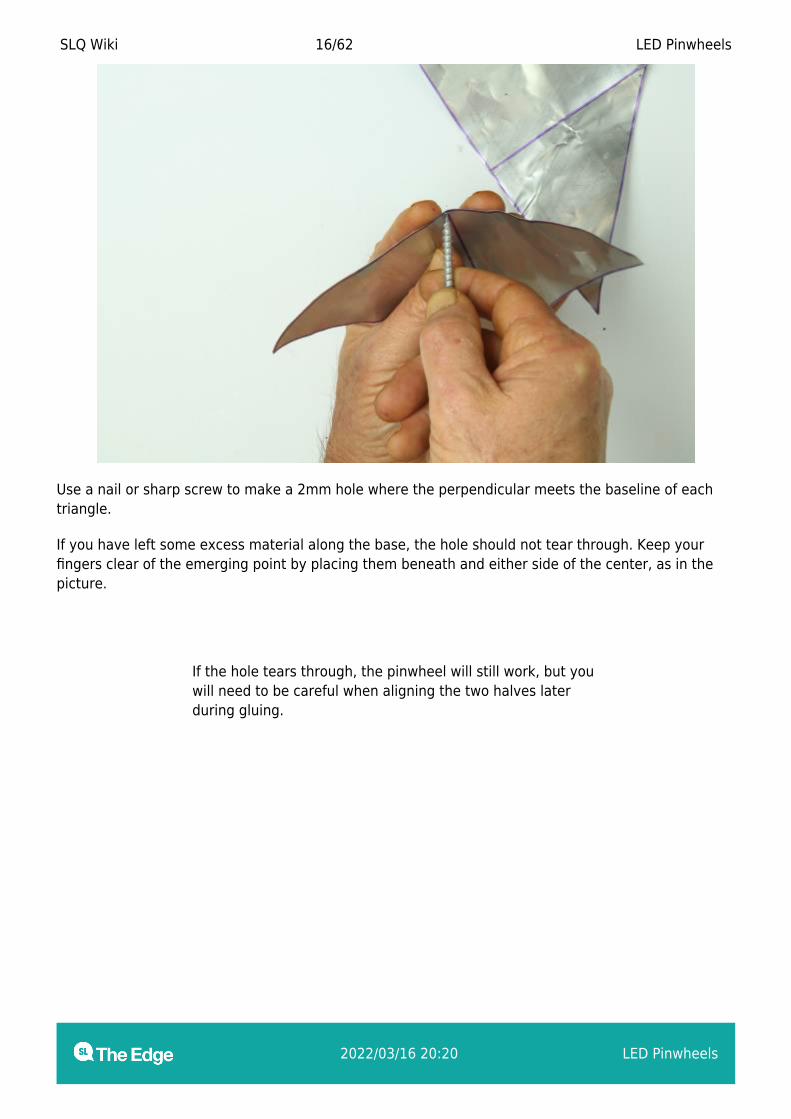
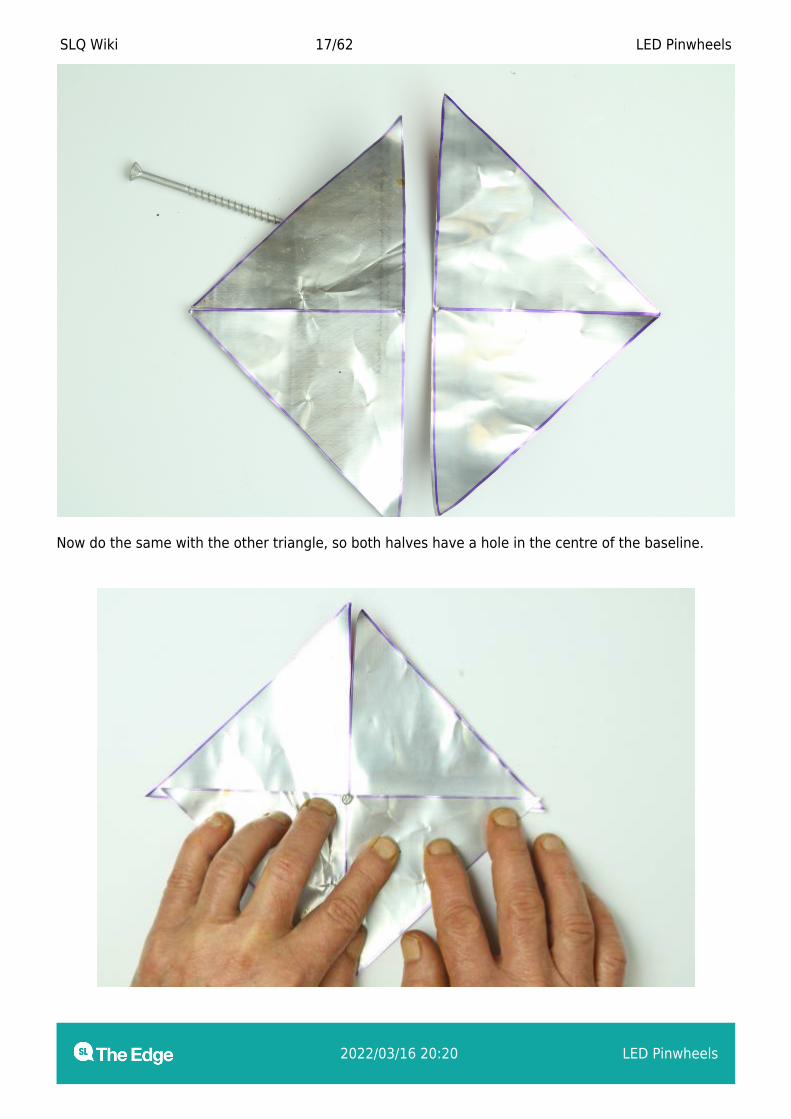
Use a nail or sharp screw to make a 2mm hole where the perpendicular meets the baseline of eachtriangle.
If you have left some excess material along the base, the hole should not tear through. Keep yourfingers clear of the emerging point by placing them beneath and either side of the center, as in thepicture.
If the hole tears through, the pinwheel will still work, but youwill need to be careful when aligning the two halves laterduring gluing.
SLQ Wiki 17/62 LED Pinwheels
2022/03/16 20:20 LED Pinwheels
Now do the same with the other triangle, so both halves have a hole in the centre of the baseline.
SLQ Wiki 18/62 LED Pinwheels
2022/03/16 20:20 LED Pinwheels
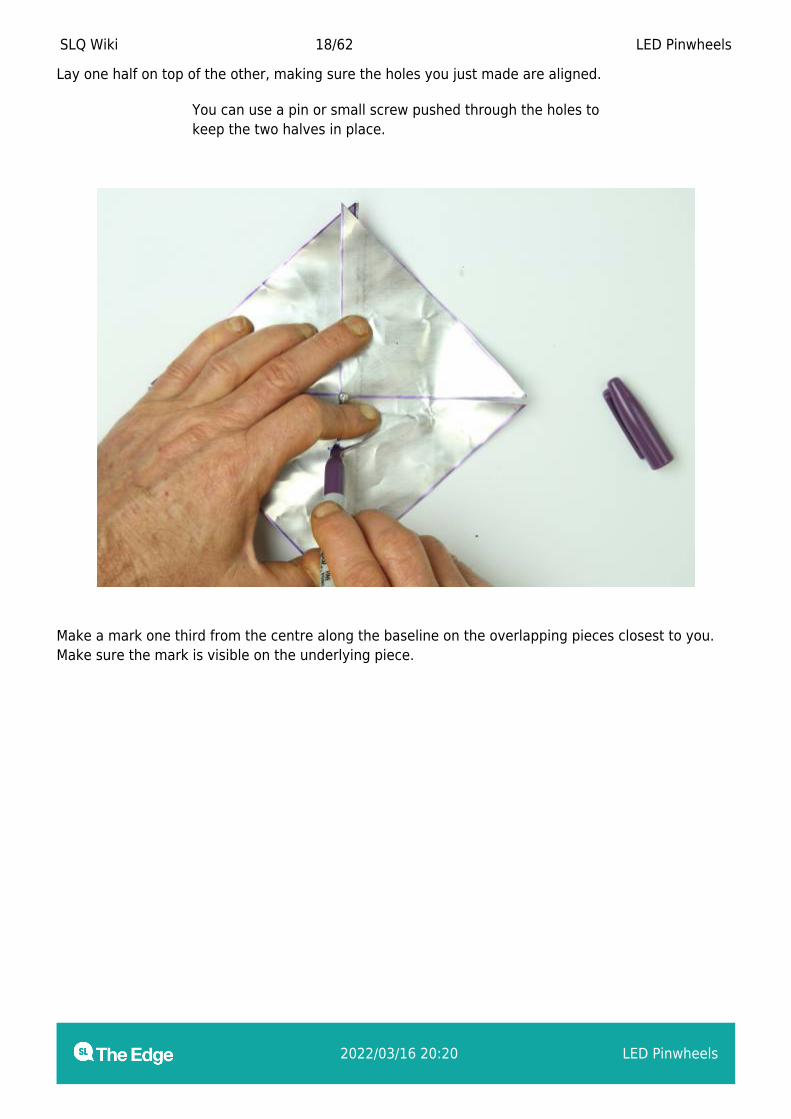
Lay one half on top of the other, making sure the holes you just made are aligned.
You can use a pin or small screw pushed through the holes tokeep the two halves in place.
Make a mark one third from the centre along the baseline on the overlapping pieces closest to you.Make sure the mark is visible on the underlying piece.
SLQ Wiki 19/62 LED Pinwheels
2022/03/16 20:20 LED Pinwheels
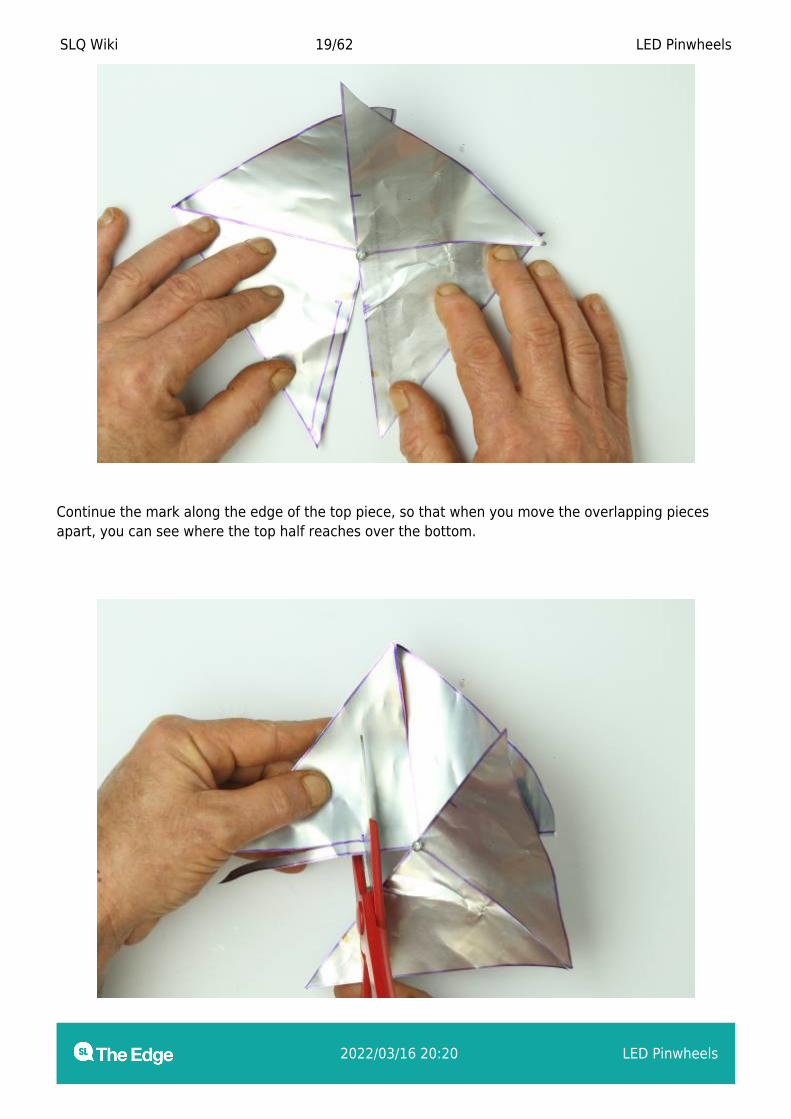
Continue the mark along the edge of the top piece, so that when you move the overlapping piecesapart, you can see where the top half reaches over the bottom.
SLQ Wiki 20/62 LED Pinwheels
2022/03/16 20:20 LED Pinwheels
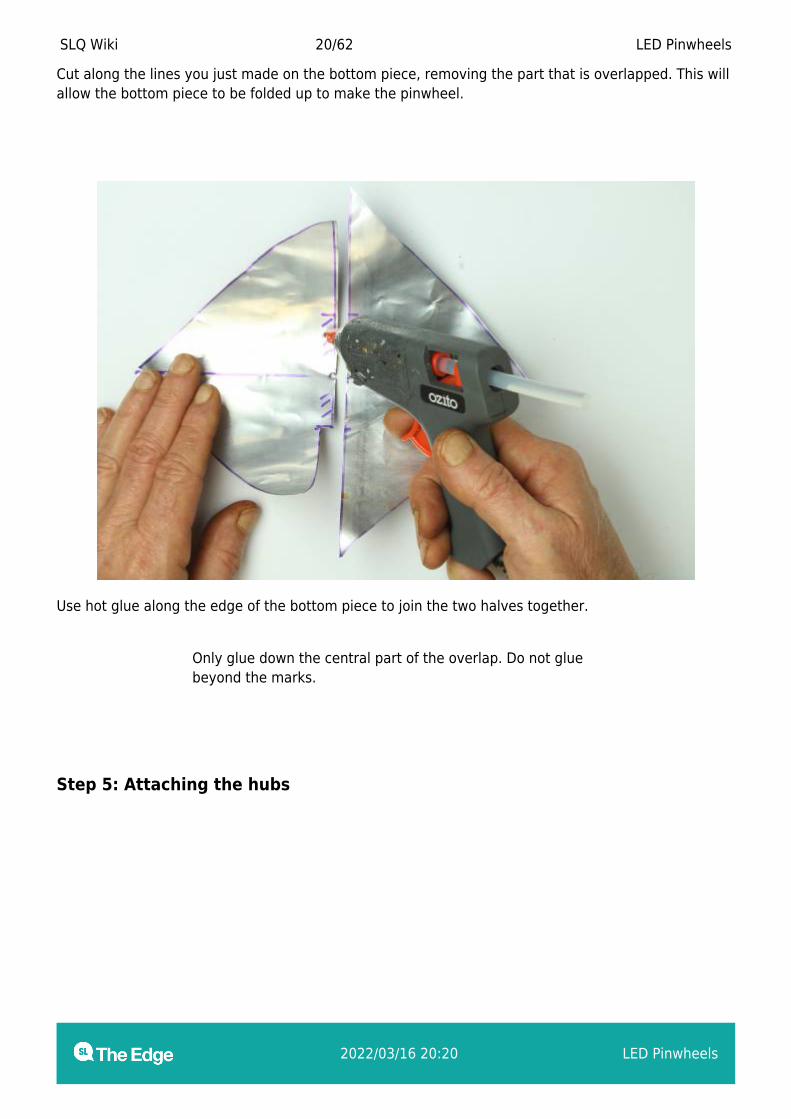
Cut along the lines you just made on the bottom piece, removing the part that is overlapped. This willallow the bottom piece to be folded up to make the pinwheel.
Use hot glue along the edge of the bottom piece to join the two halves together.
Only glue down the central part of the overlap. Do not gluebeyond the marks.
Step 5: Attaching the hubs
SLQ Wiki 21/62 LED Pinwheels
2022/03/16 20:20 LED Pinwheels
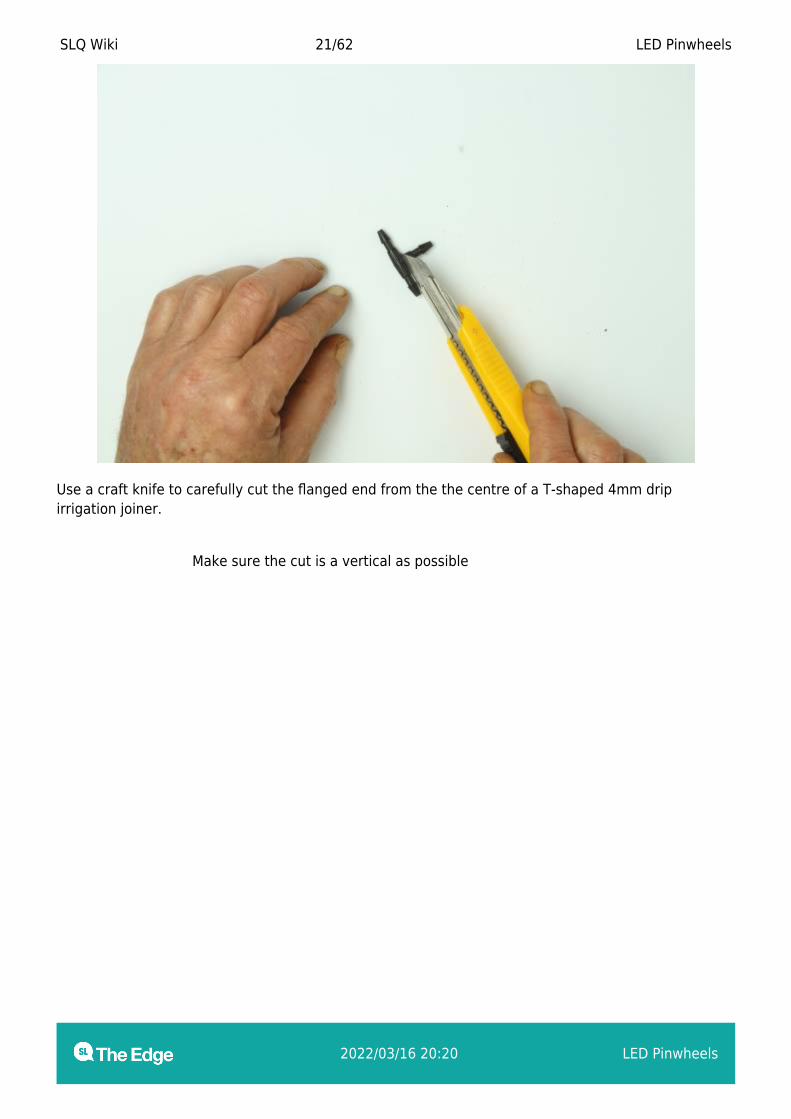
Use a craft knife to carefully cut the flanged end from the the centre of a T-shaped 4mm dripirrigation joiner.
Make sure the cut is a vertical as possible
SLQ Wiki 22/62 LED Pinwheels
2022/03/16 20:20 LED Pinwheels
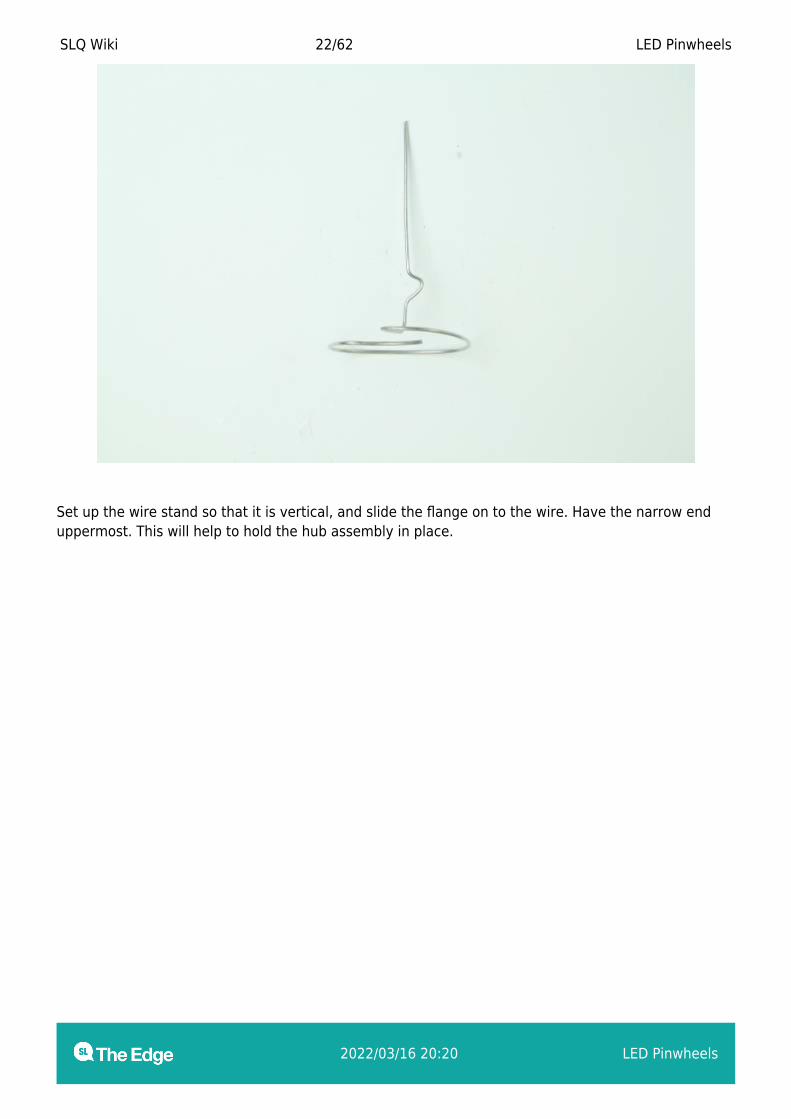
Set up the wire stand so that it is vertical, and slide the flange on to the wire. Have the narrow enduppermost. This will help to hold the hub assembly in place.
SLQ Wiki 23/62 LED Pinwheels
2022/03/16 20:20 LED Pinwheels
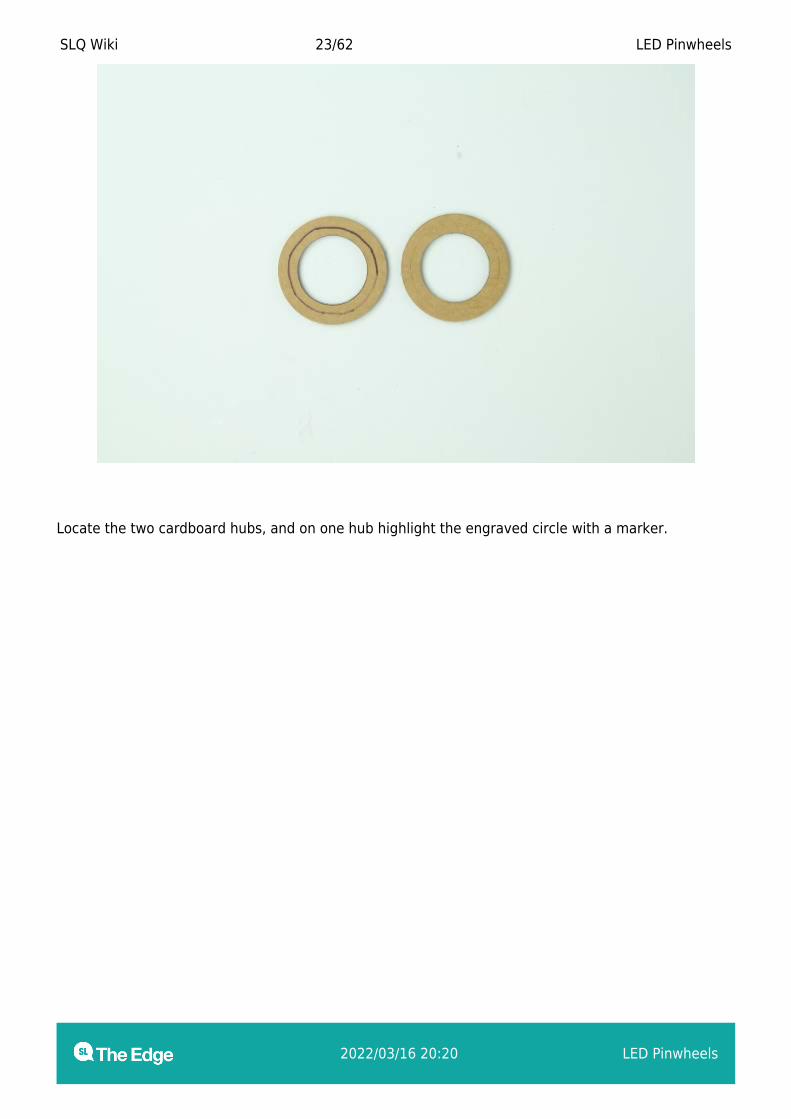
Locate the two cardboard hubs, and on one hub highlight the engraved circle with a marker.
SLQ Wiki 24/62 LED Pinwheels
2022/03/16 20:20 LED Pinwheels
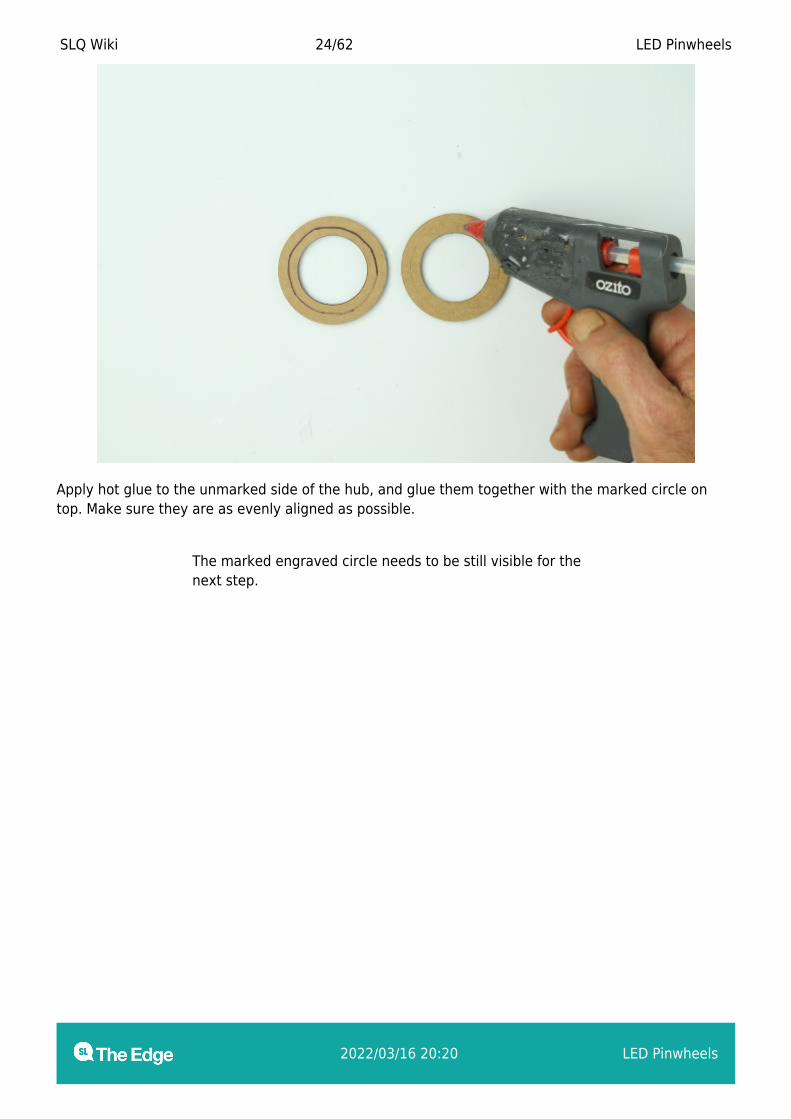
Apply hot glue to the unmarked side of the hub, and glue them together with the marked circle ontop. Make sure they are as evenly aligned as possible.
The marked engraved circle needs to be still visible for thenext step.

SLQ Wiki 25/62 LED Pinwheels
2022/03/16 20:20 LED Pinwheels
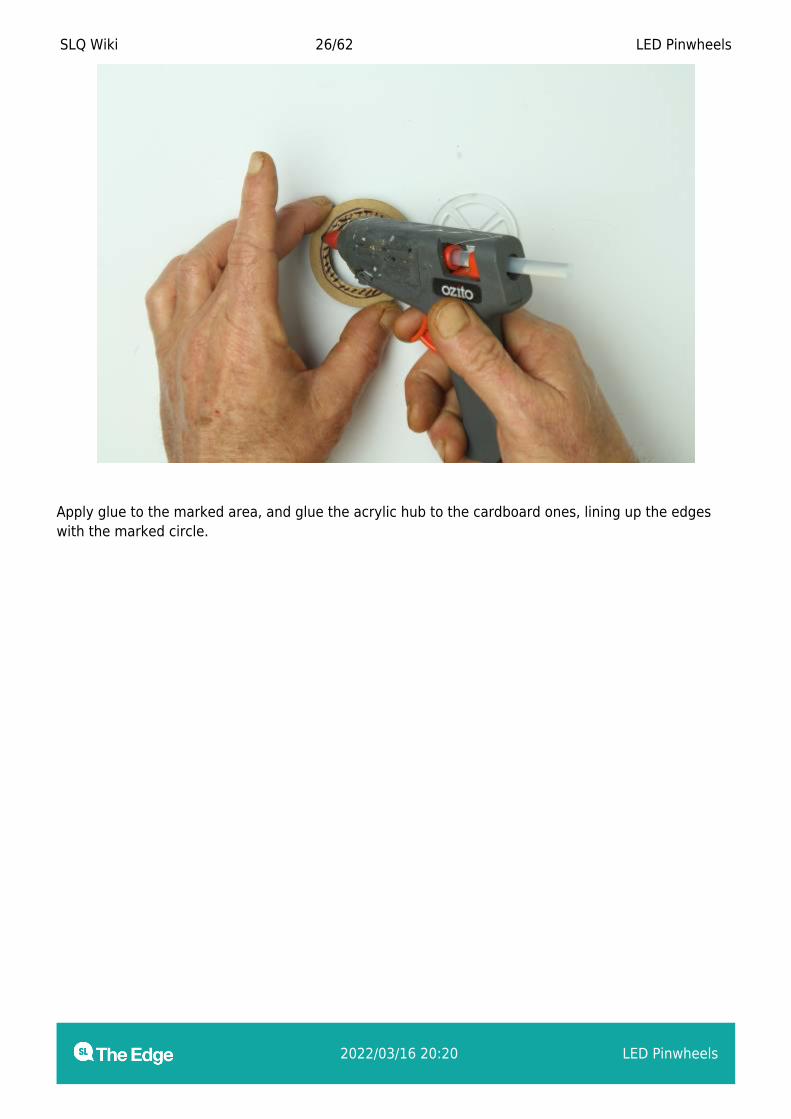
Locate the acrylic hub, which will be the same size as the engraved circle.
SLQ Wiki 26/62 LED Pinwheels
2022/03/16 20:20 LED Pinwheels
Apply glue to the marked area, and glue the acrylic hub to the cardboard ones, lining up the edgeswith the marked circle.
SLQ Wiki 27/62 LED Pinwheels
2022/03/16 20:20 LED Pinwheels
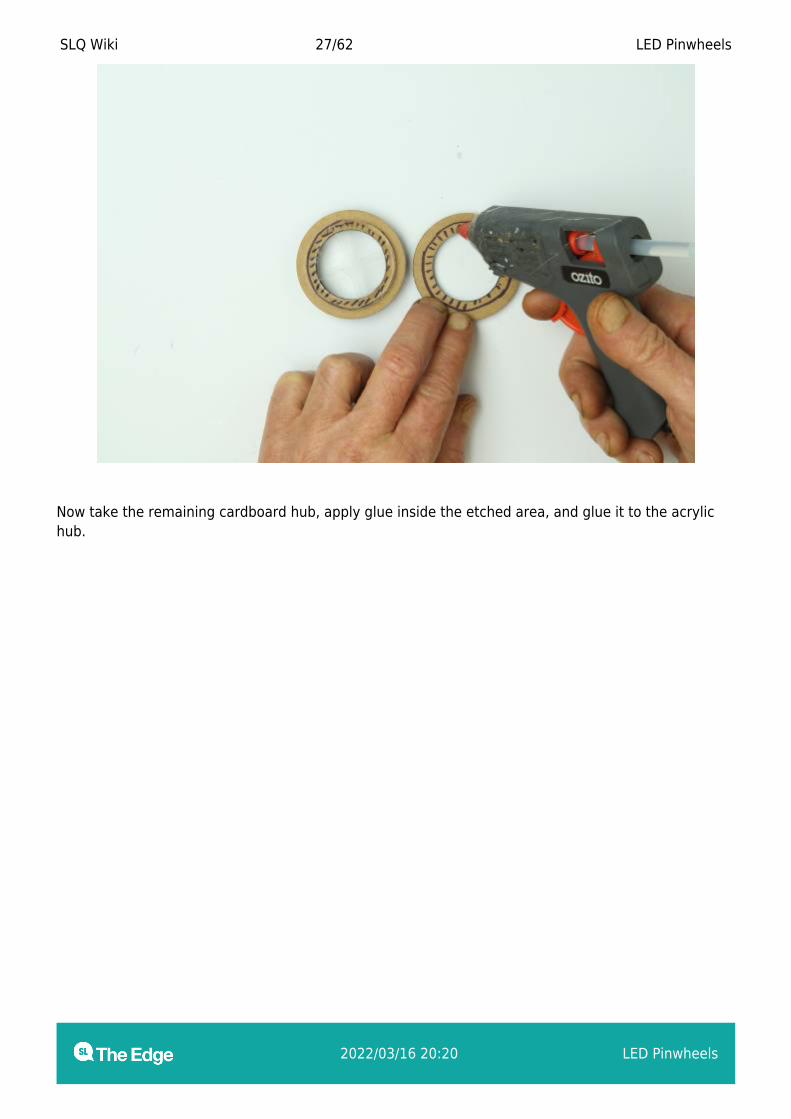
Now take the remaining cardboard hub, apply glue inside the etched area, and glue it to the acrylichub.

SLQ Wiki 28/62 LED Pinwheels
2022/03/16 20:20 LED Pinwheels
Thread the sandwich of hubs onto the wire assembly stand, with the double hub uppermost.
You must have the doubled cardboard hubs on top so thatthe pinwheel can align correctly with the motor
SLQ Wiki 29/62 LED Pinwheels
2022/03/16 20:20 LED Pinwheels
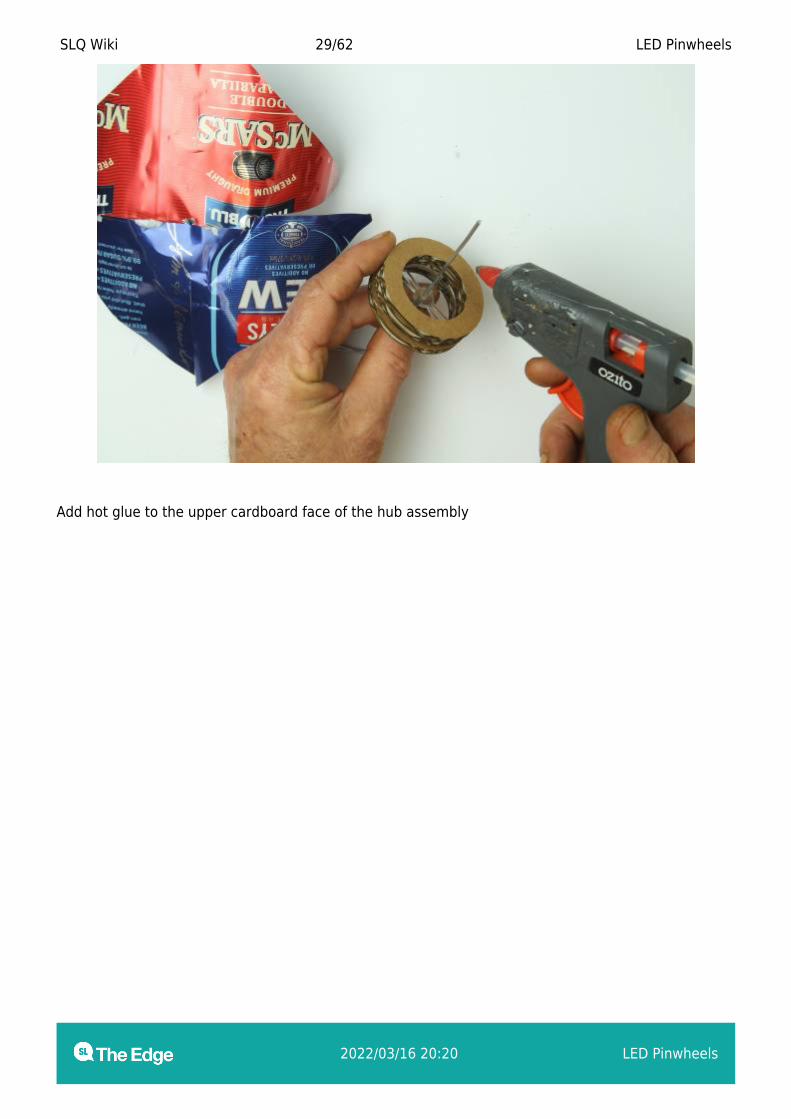
Add hot glue to the upper cardboard face of the hub assembly
SLQ Wiki 30/62 LED Pinwheels
2022/03/16 20:20 LED Pinwheels
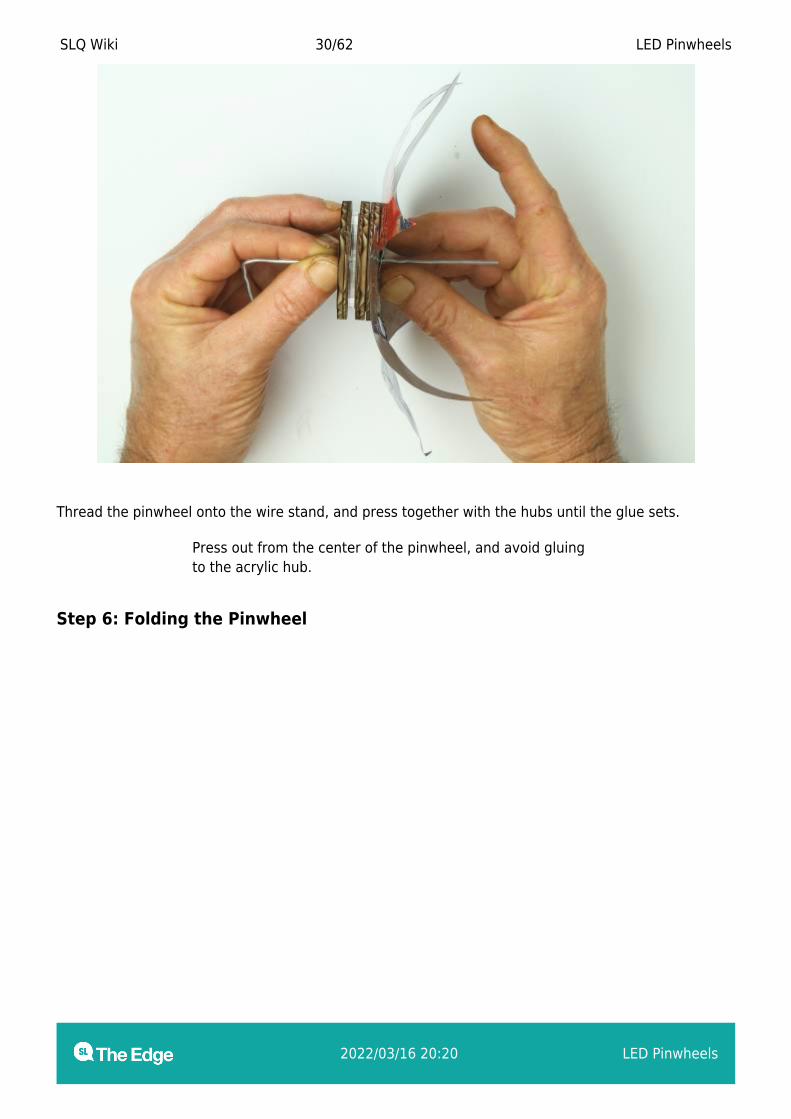
Thread the pinwheel onto the wire stand, and press together with the hubs until the glue sets.
Press out from the center of the pinwheel, and avoid gluingto the acrylic hub.
Step 6: Folding the Pinwheel
SLQ Wiki 31/62 LED Pinwheels
2022/03/16 20:20 LED Pinwheels
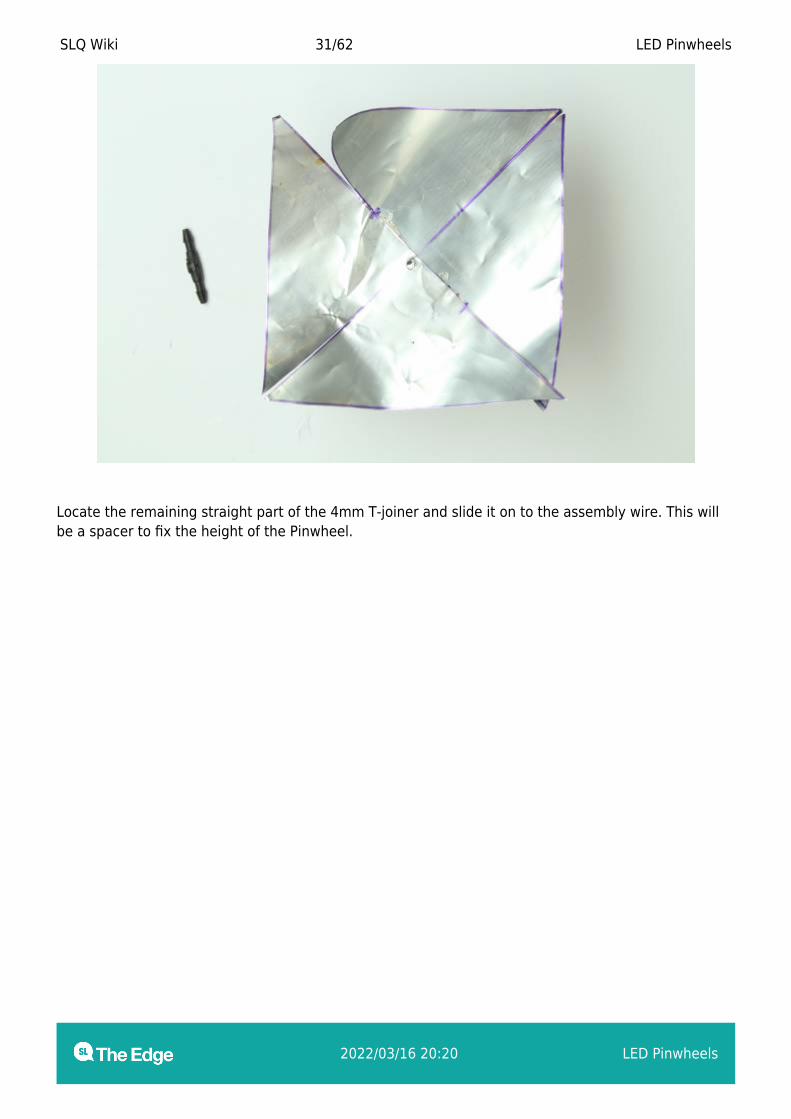
Locate the remaining straight part of the 4mm T-joiner and slide it on to the assembly wire. This willbe a spacer to fix the height of the Pinwheel.
SLQ Wiki 32/62 LED Pinwheels
2022/03/16 20:20 LED Pinwheels
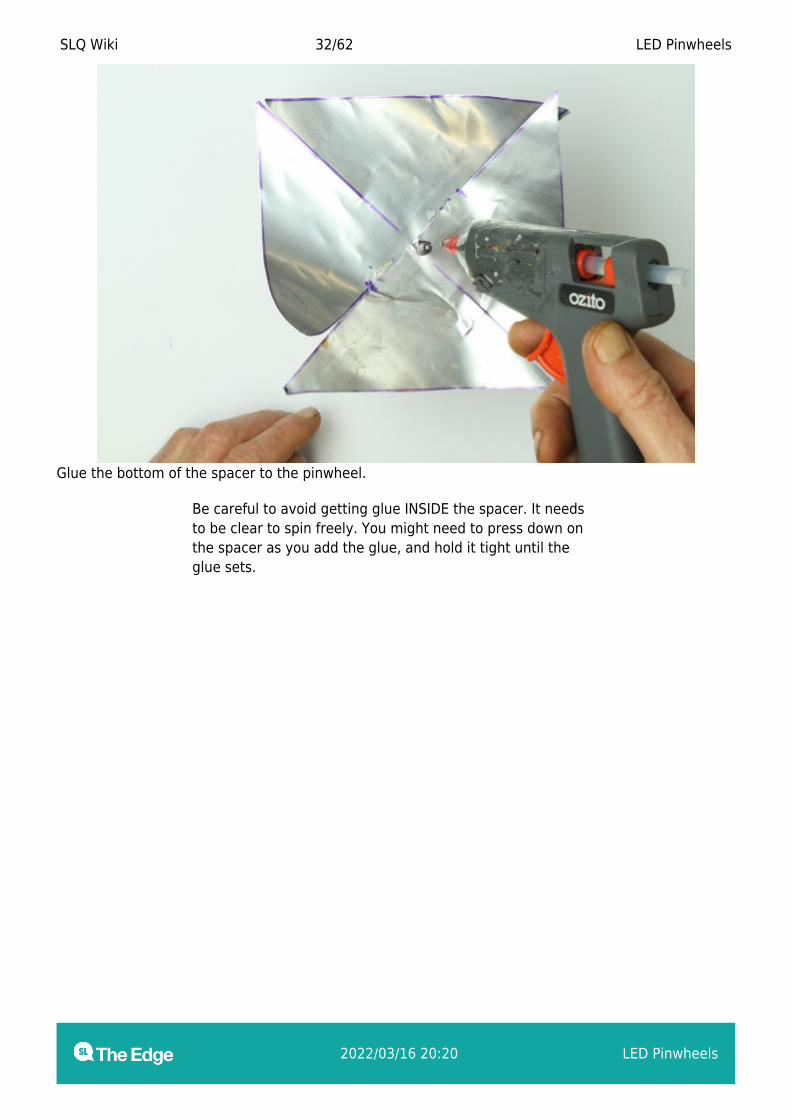
Glue the bottom of the spacer to the pinwheel.
Be careful to avoid getting glue INSIDE the spacer. It needsto be clear to spin freely. You might need to press down onthe spacer as you add the glue, and hold it tight until theglue sets.
SLQ Wiki 33/62 LED Pinwheels
2022/03/16 20:20 LED Pinwheels
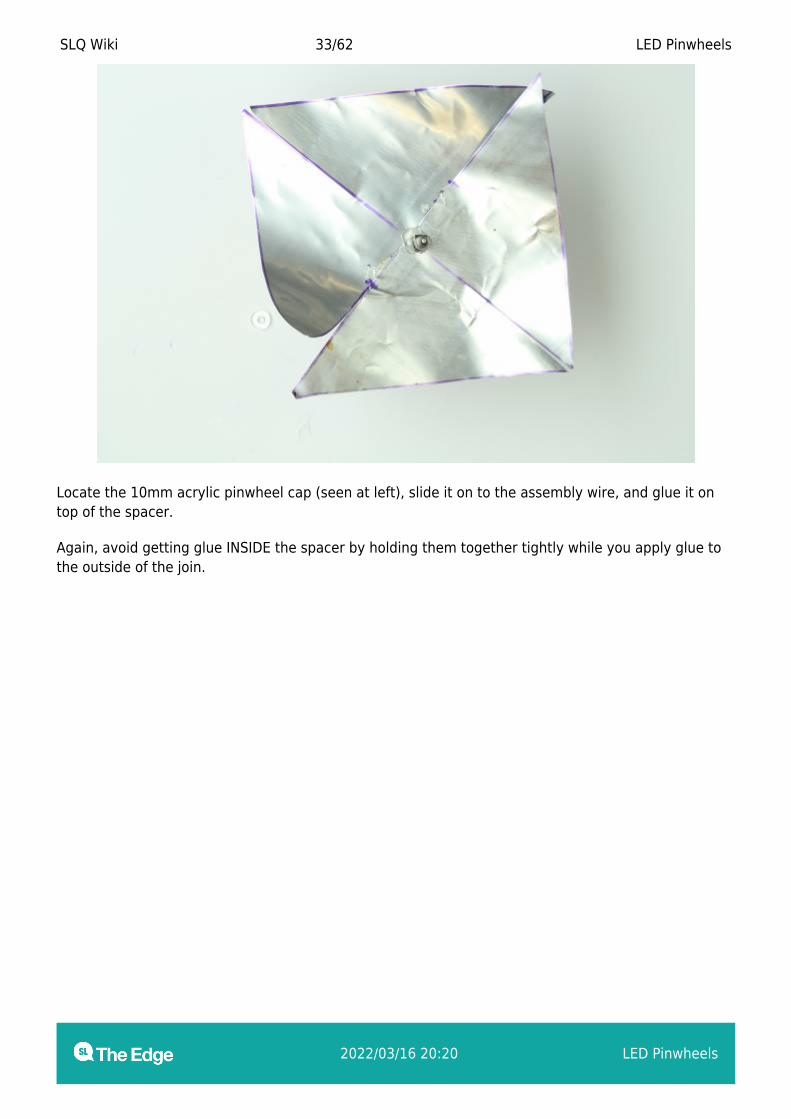
Locate the 10mm acrylic pinwheel cap (seen at left), slide it on to the assembly wire, and glue it ontop of the spacer.
Again, avoid getting glue INSIDE the spacer by holding them together tightly while you apply glue tothe outside of the join.
SLQ Wiki 34/62 LED Pinwheels
2022/03/16 20:20 LED Pinwheels
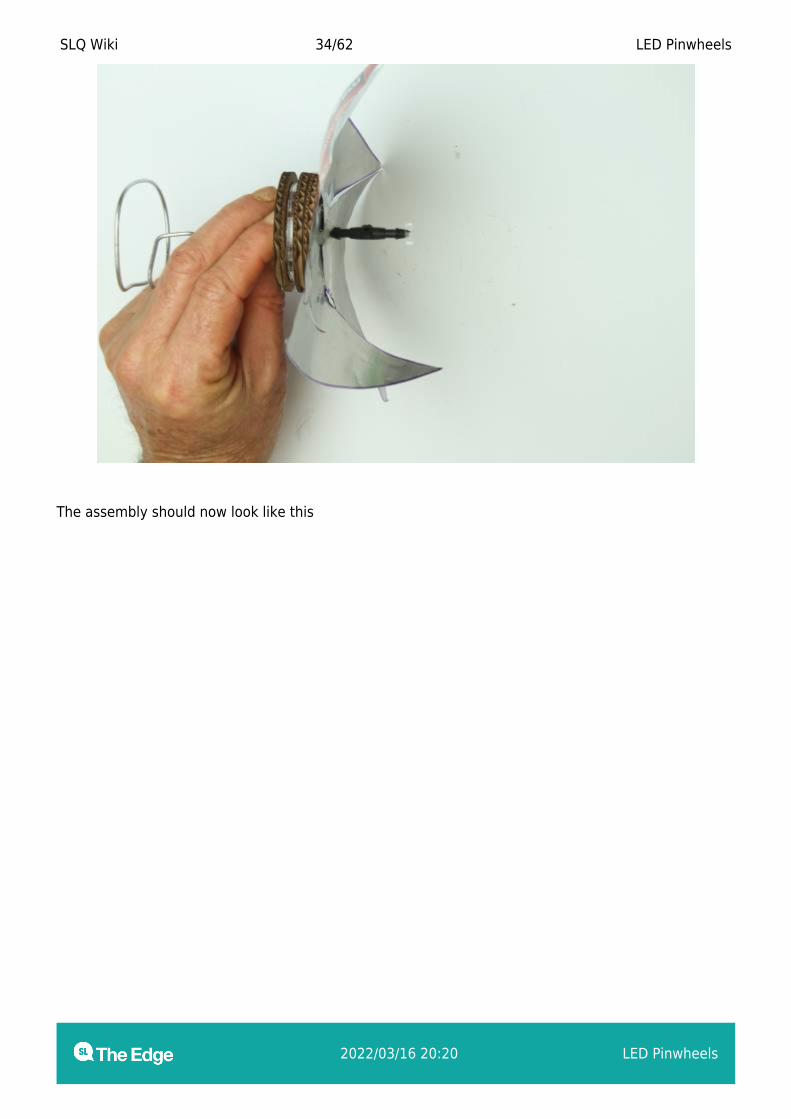
The assembly should now look like this
SLQ Wiki 35/62 LED Pinwheels
2022/03/16 20:20 LED Pinwheels
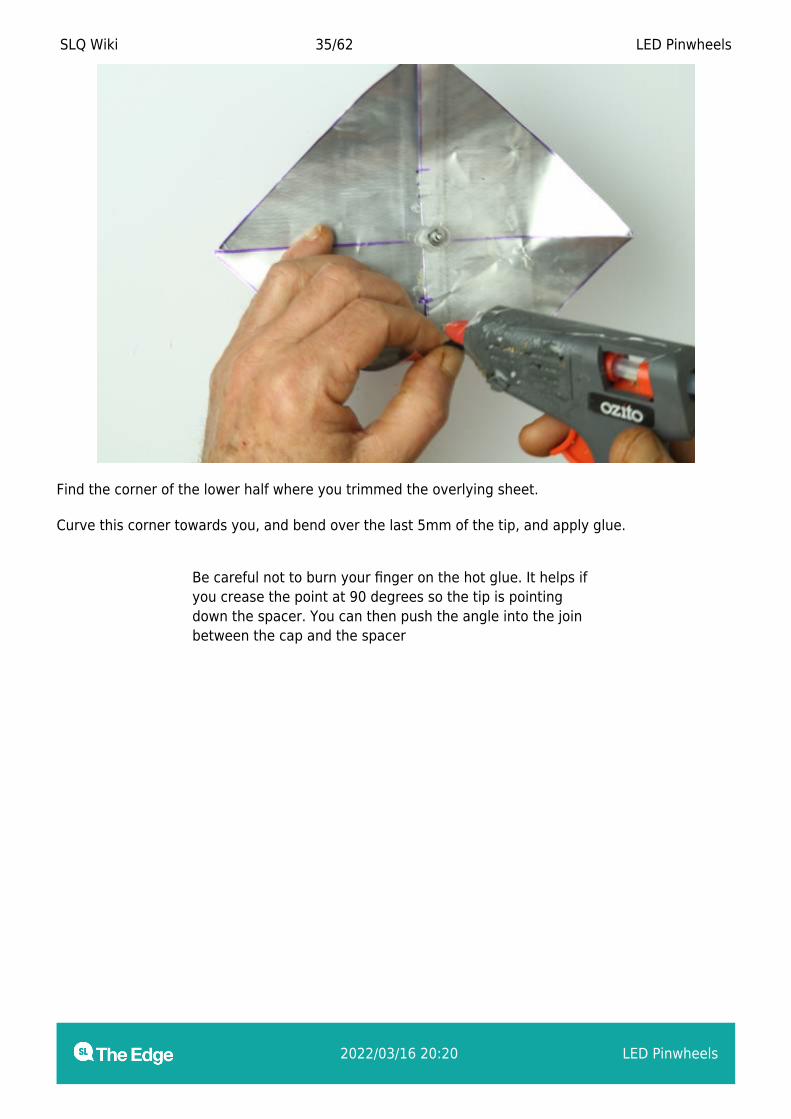
Find the corner of the lower half where you trimmed the overlying sheet.
Curve this corner towards you, and bend over the last 5mm of the tip, and apply glue.
Be careful not to burn your finger on the hot glue. It helps ifyou crease the point at 90 degrees so the tip is pointingdown the spacer. You can then push the angle into the joinbetween the cap and the spacer

SLQ Wiki 36/62 LED Pinwheels
2022/03/16 20:20 LED Pinwheels
Push the tip in place against the spacer, and underneath the cap.
SLQ Wiki 37/62 LED Pinwheels
2022/03/16 20:20 LED Pinwheels
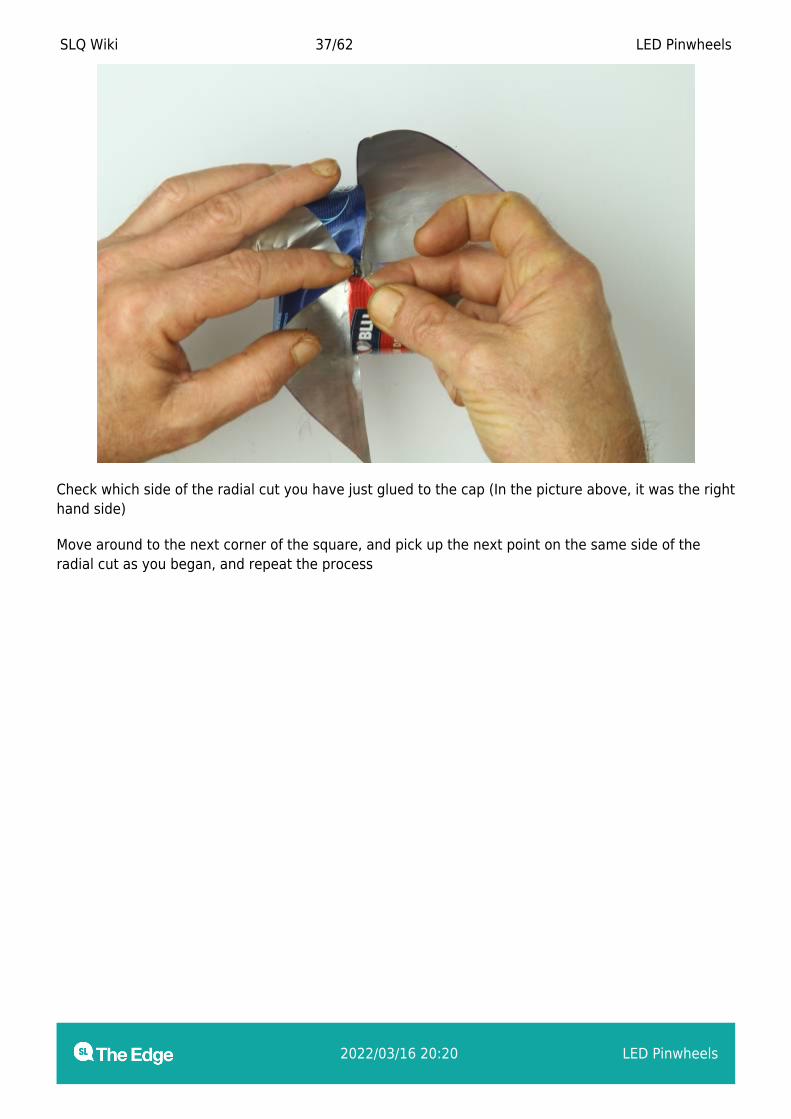
Check which side of the radial cut you have just glued to the cap (In the picture above, it was the righthand side)
Move around to the next corner of the square, and pick up the next point on the same side of theradial cut as you began, and repeat the process
SLQ Wiki 38/62 LED Pinwheels
2022/03/16 20:20 LED Pinwheels
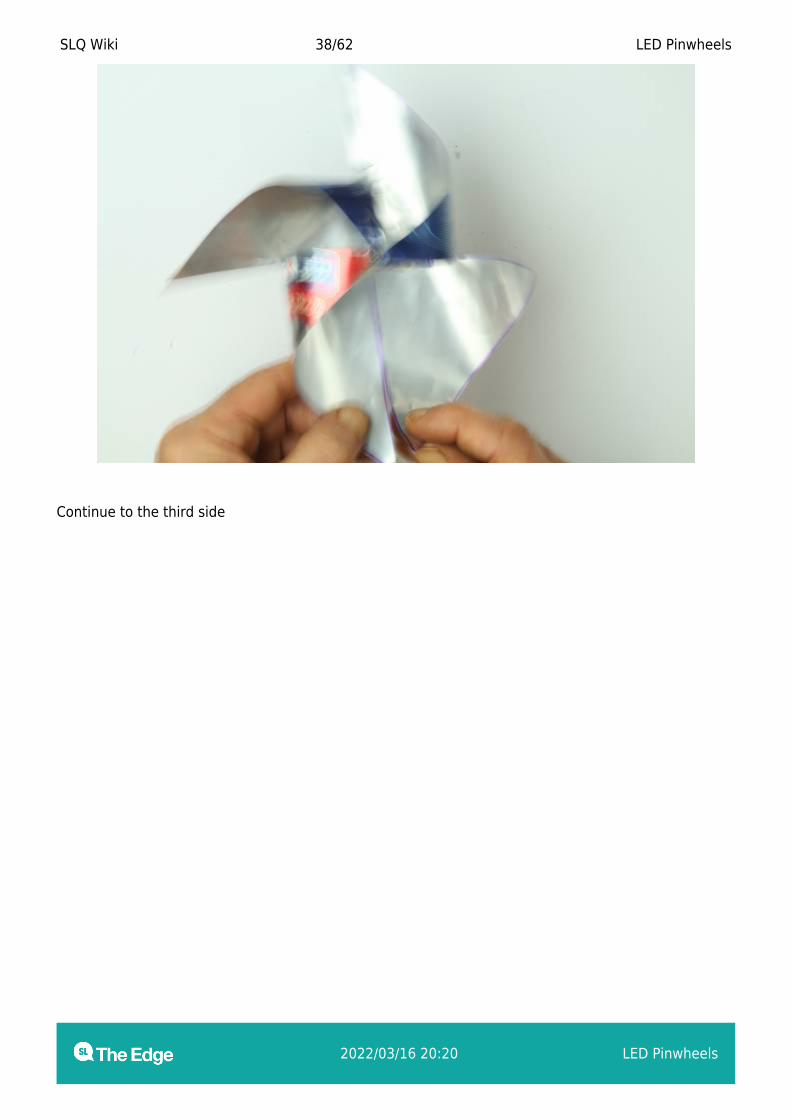
Continue to the third side
SLQ Wiki 39/62 LED Pinwheels
2022/03/16 20:20 LED Pinwheels
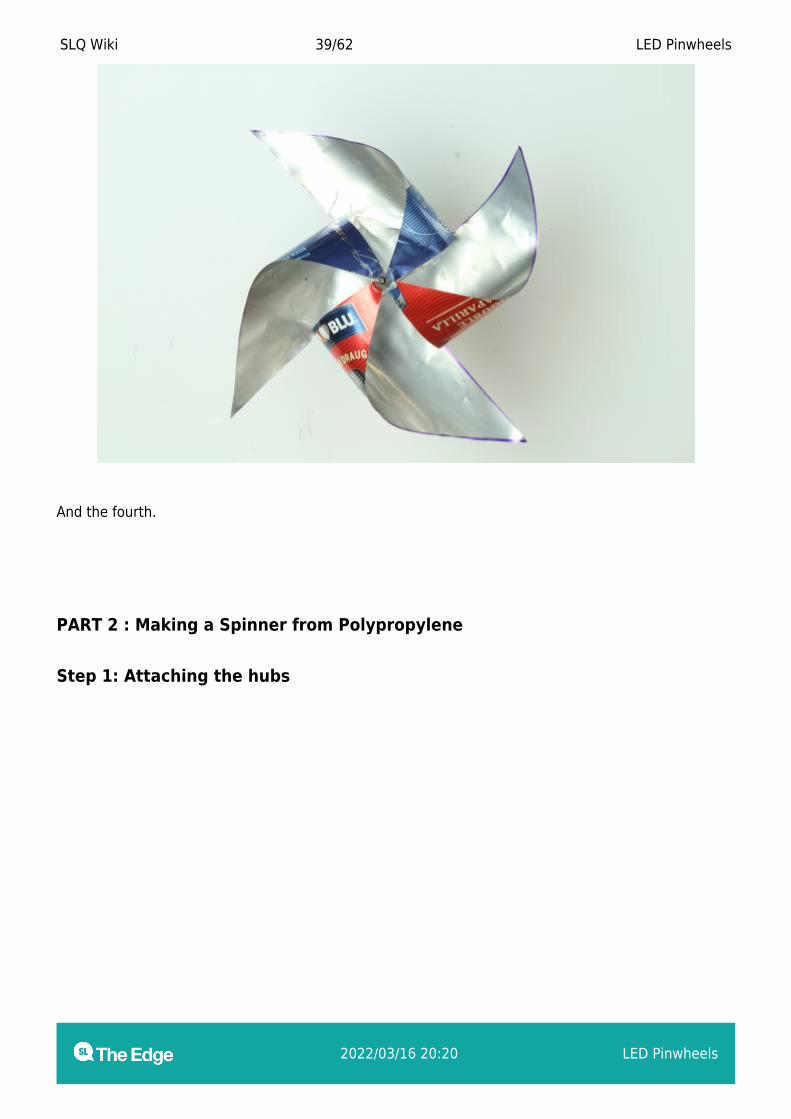
And the fourth.
PART 2 : Making a Spinner from Polypropylene
Step 1: Attaching the hubs

SLQ Wiki 40/62 LED Pinwheels
2022/03/16 20:20 LED Pinwheels
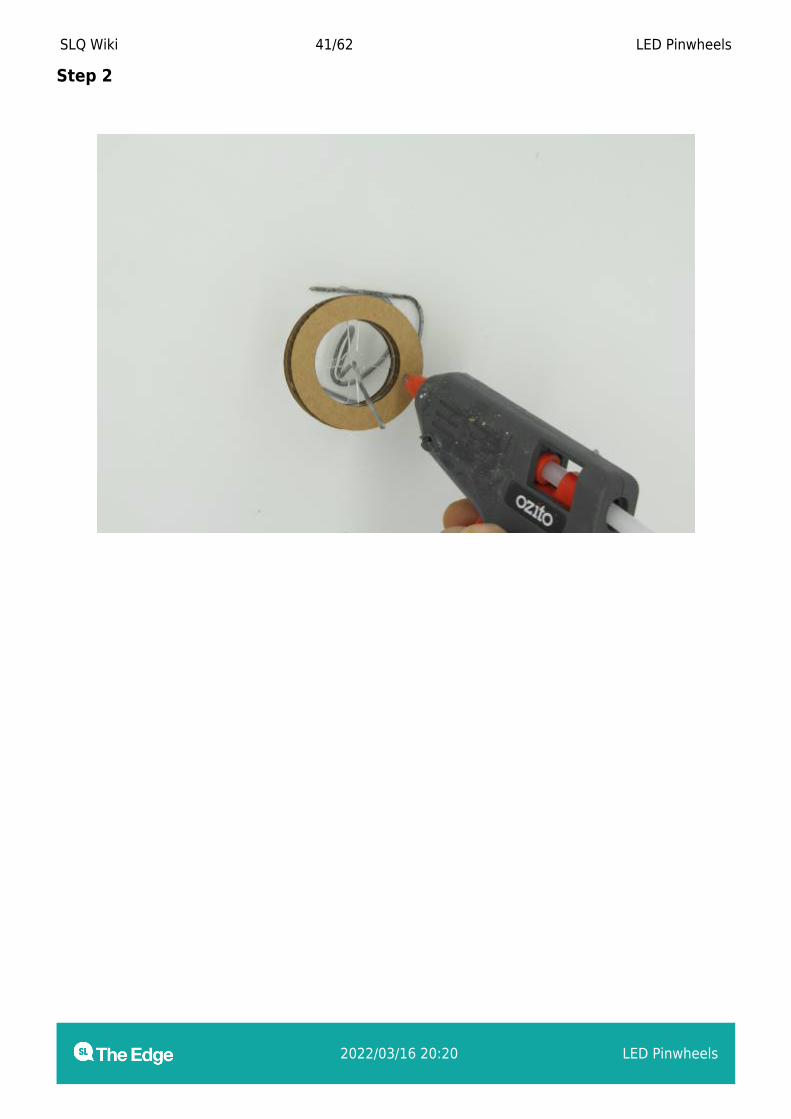
Glue two of the cardboard hubs together, making sure the guide mark is on the outside.
Now, glue the acrylic hub to the joined pair, using the guide mark to align to the centre.
Finally, glue the last cardboard hub on to the other side of the acrylic hub, as shown. The double hubsare necessary to achieve the correct alignment between the acrylic hub and the motor later inconstruction, so they glue on to the spinner.
SLQ Wiki 41/62 LED Pinwheels
2022/03/16 20:20 LED Pinwheels
Step 2
SLQ Wiki 42/62 LED Pinwheels
2022/03/16 20:20 LED Pinwheels
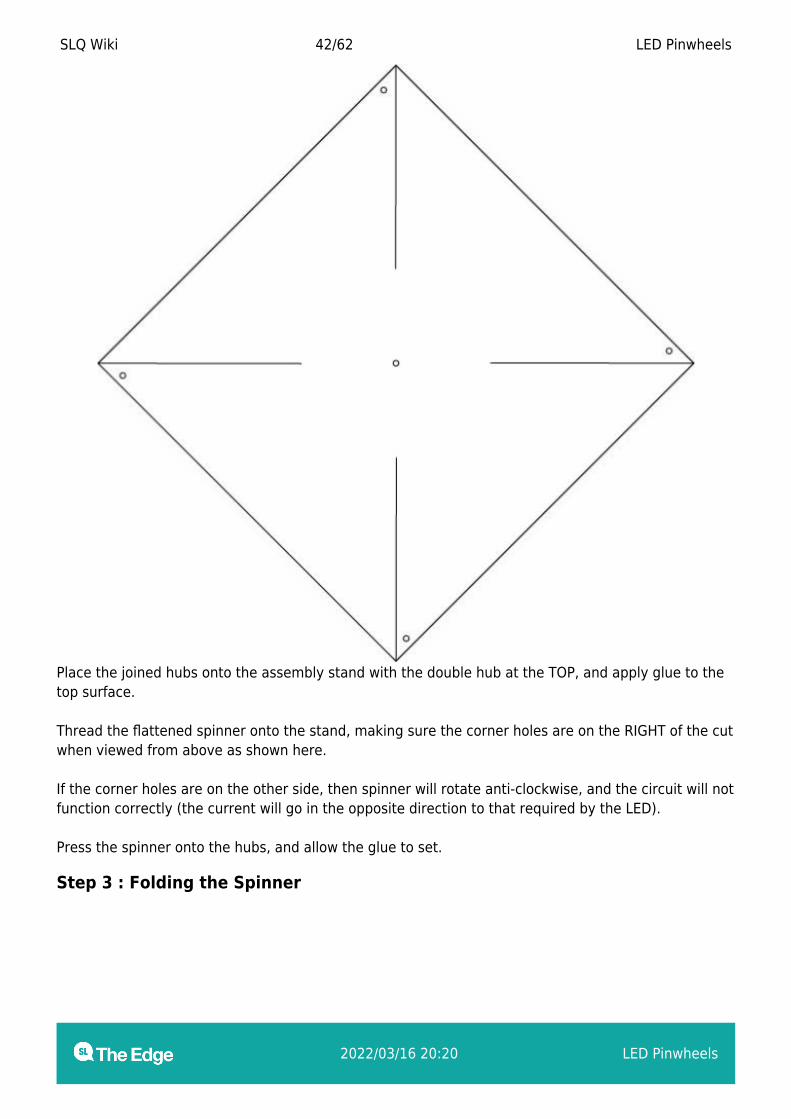
Place the joined hubs onto the assembly stand with the double hub at the TOP, and apply glue to thetop surface.
Thread the flattened spinner onto the stand, making sure the corner holes are on the RIGHT of the cutwhen viewed from above as shown here.
If the corner holes are on the other side, then spinner will rotate anti-clockwise, and the circuit will notfunction correctly (the current will go in the opposite direction to that required by the LED).
Press the spinner onto the hubs, and allow the glue to set.
Step 3 : Folding the Spinner
SLQ Wiki 43/62 LED Pinwheels
2022/03/16 20:20 LED Pinwheels
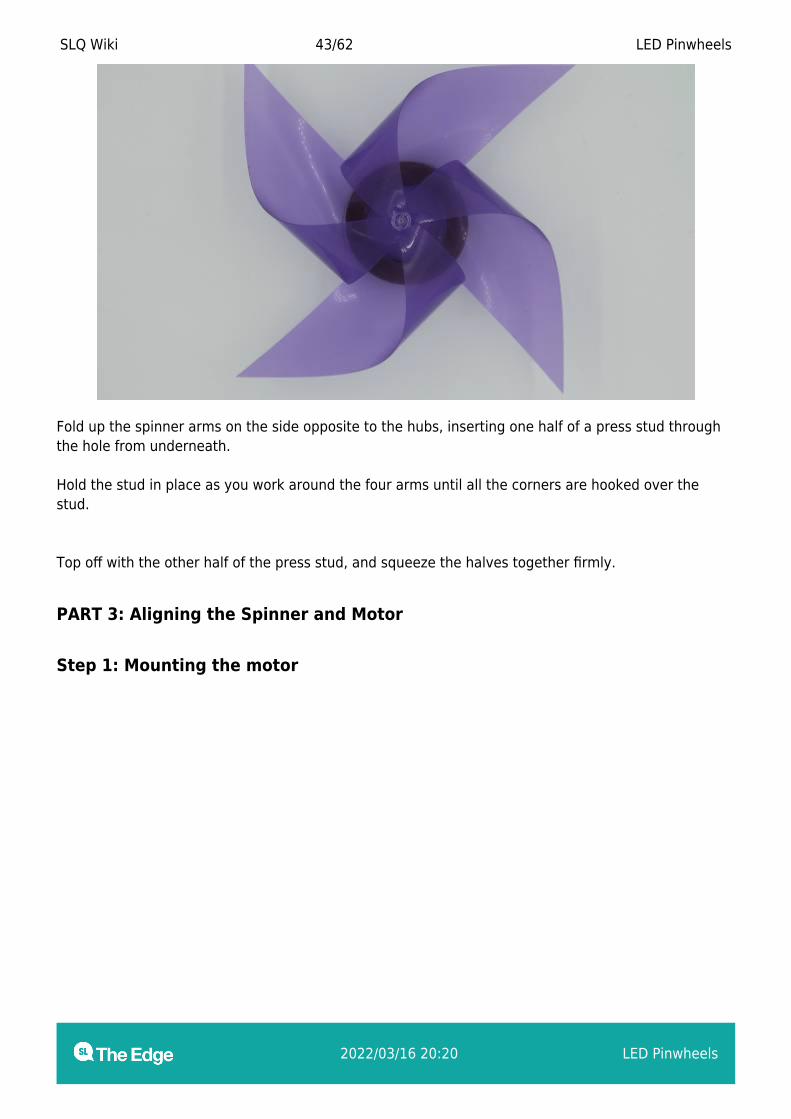
Fold up the spinner arms on the side opposite to the hubs, inserting one half of a press stud throughthe hole from underneath.
Hold the stud in place as you work around the four arms until all the corners are hooked over thestud.
Top off with the other half of the press stud, and squeeze the halves together firmly.
PART 3: Aligning the Spinner and Motor
Step 1: Mounting the motor
SLQ Wiki 44/62 LED Pinwheels
2022/03/16 20:20 LED Pinwheels
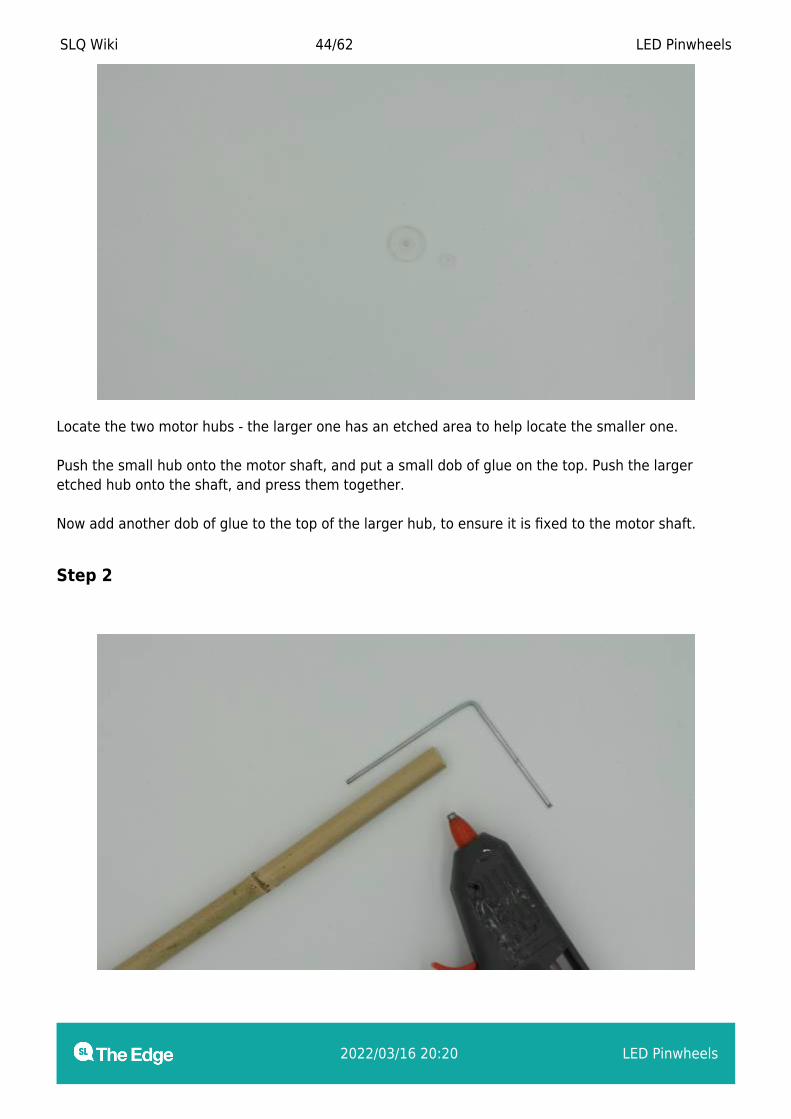
Locate the two motor hubs - the larger one has an etched area to help locate the smaller one.
Push the small hub onto the motor shaft, and put a small dob of glue on the top. Push the largeretched hub onto the shaft, and press them together.
Now add another dob of glue to the top of the larger hub, to ensure it is fixed to the motor shaft.
Step 2
SLQ Wiki 45/62 LED Pinwheels
2022/03/16 20:20 LED Pinwheels
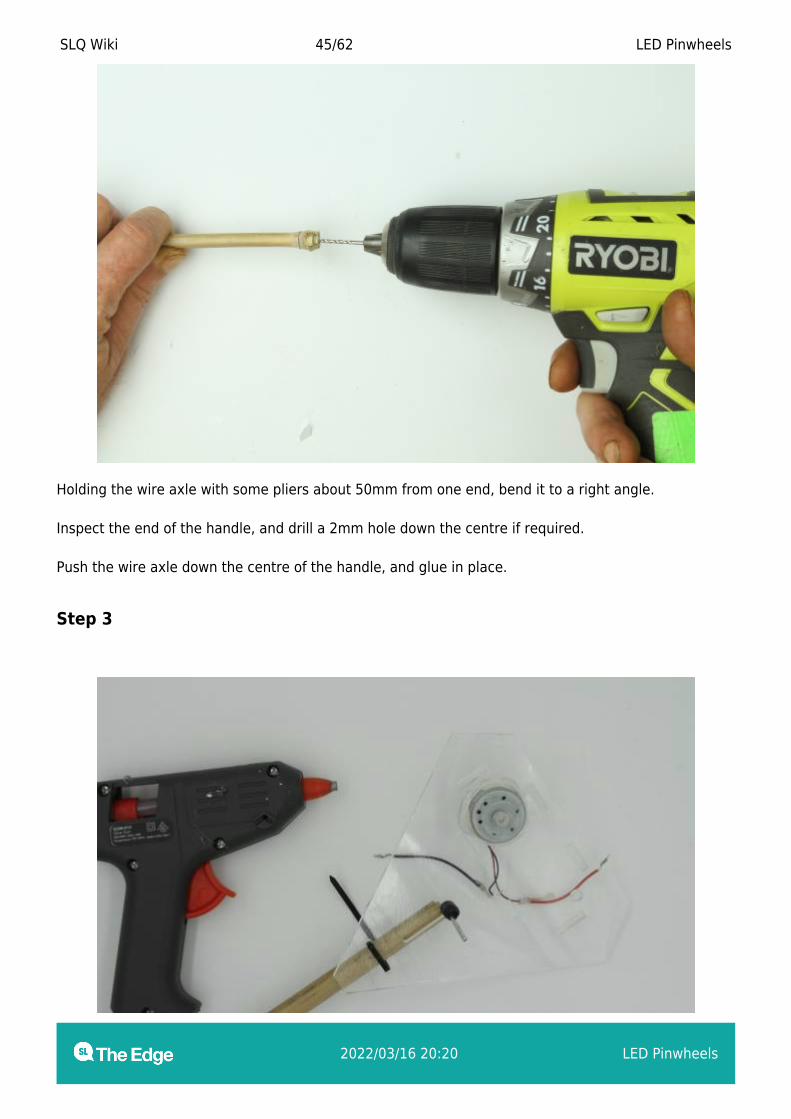
Holding the wire axle with some pliers about 50mm from one end, bend it to a right angle.
Inspect the end of the handle, and drill a 2mm hole down the centre if required.
Push the wire axle down the centre of the handle, and glue in place.
Step 3
SLQ Wiki 46/62 LED Pinwheels
2022/03/16 20:20 LED Pinwheels
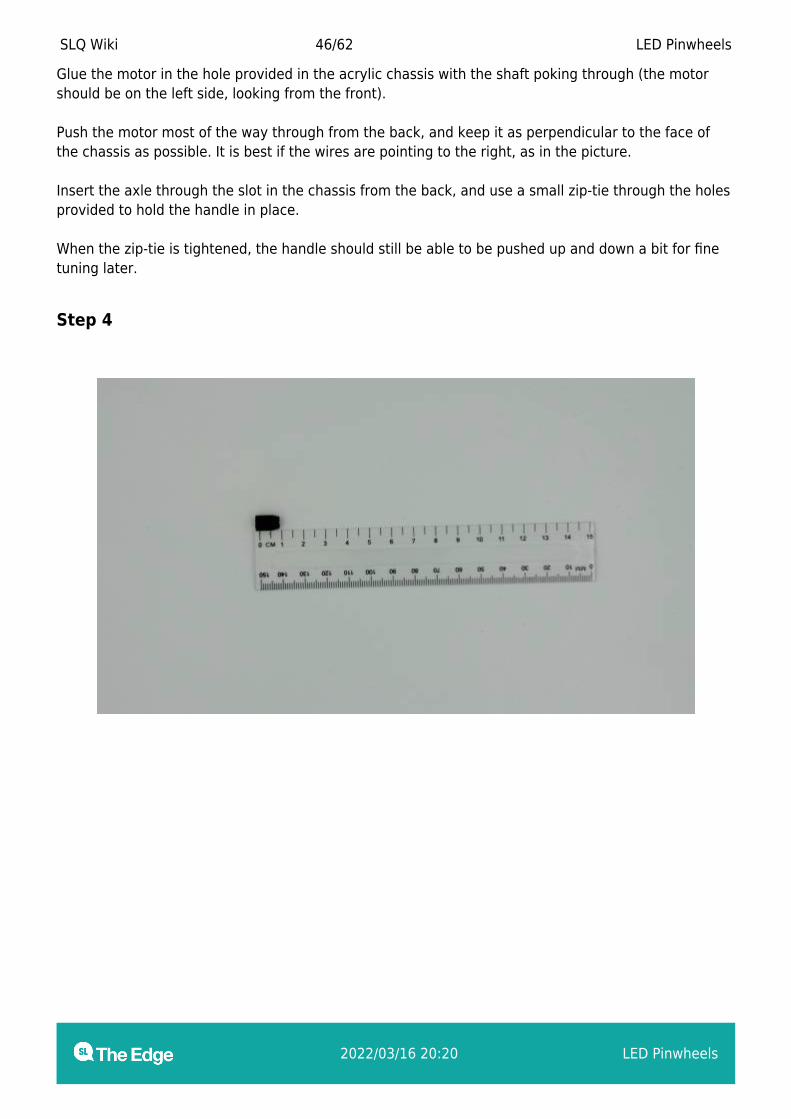
Glue the motor in the hole provided in the acrylic chassis with the shaft poking through (the motorshould be on the left side, looking from the front).
Push the motor most of the way through from the back, and keep it as perpendicular to the face ofthe chassis as possible. It is best if the wires are pointing to the right, as in the picture.
Insert the axle through the slot in the chassis from the back, and use a small zip-tie through the holesprovided to hold the handle in place.
When the zip-tie is tightened, the handle should still be able to be pushed up and down a bit for finetuning later.
Step 4
SLQ Wiki 47/62 LED Pinwheels
2022/03/16 20:20 LED Pinwheels
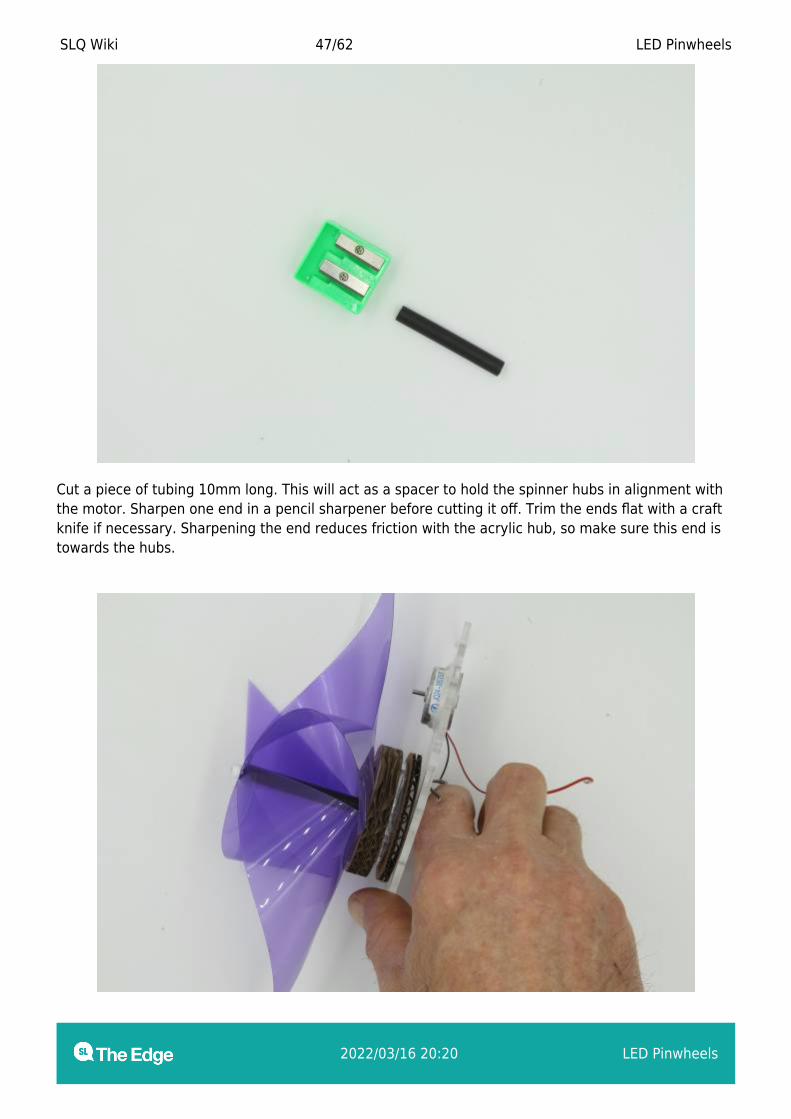
Cut a piece of tubing 10mm long. This will act as a spacer to hold the spinner hubs in alignment withthe motor. Sharpen one end in a pencil sharpener before cutting it off. Trim the ends flat with a craftknife if necessary. Sharpening the end reduces friction with the acrylic hub, so make sure this end istowards the hubs.
SLQ Wiki 48/62 LED Pinwheels
2022/03/16 20:20 LED Pinwheels
Slide the spinner onto the axle, and check that the acrylic spinner hub aligns with the motor. Trim thespacer if necessary.
PART 4: The Joule Thief
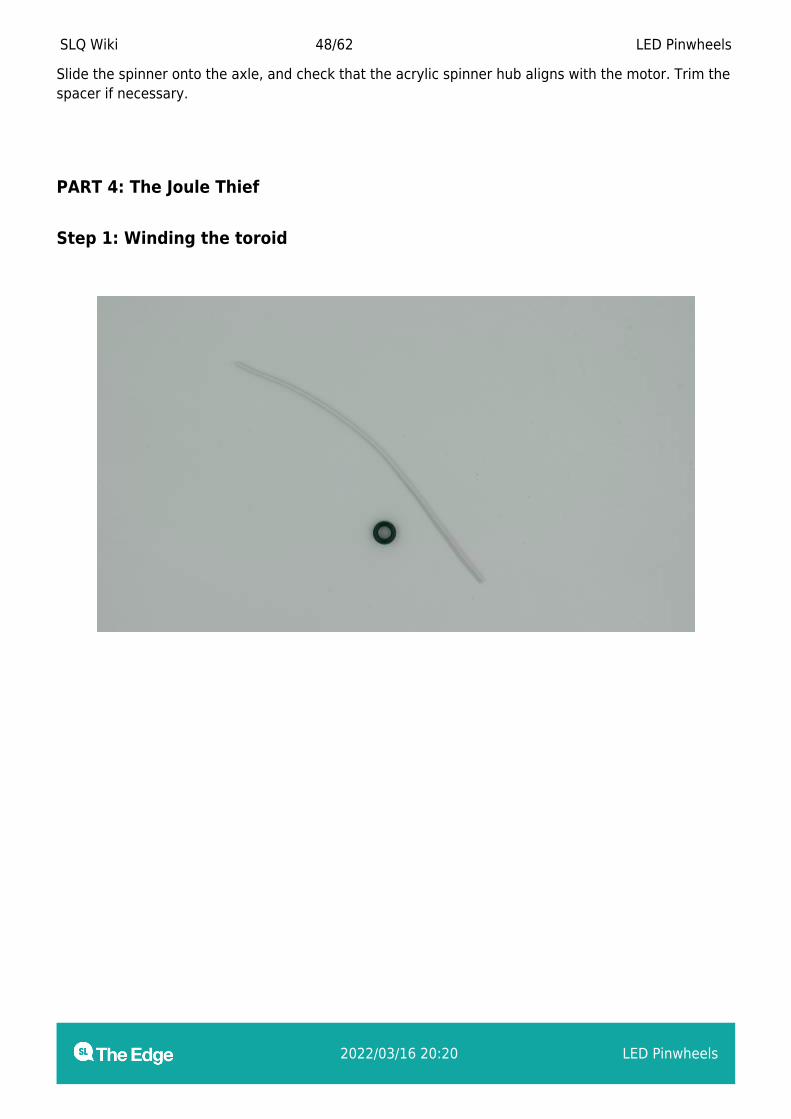
Step 1: Winding the toroid

SLQ Wiki 49/62 LED Pinwheels
2022/03/16 20:20 LED Pinwheels
Using about 150mm of double wire (this depends on the size of your toroid), thread through the toroidtaking care to avoid crossing over the strands. 5 or 6 loops are sufficient.

SLQ Wiki 50/62 LED Pinwheels
2022/03/16 20:20 LED Pinwheels
The toroid now has two pairs of wires emerging from either end of the winding.
SLQ Wiki 51/62 LED Pinwheels
2022/03/16 20:20 LED Pinwheels
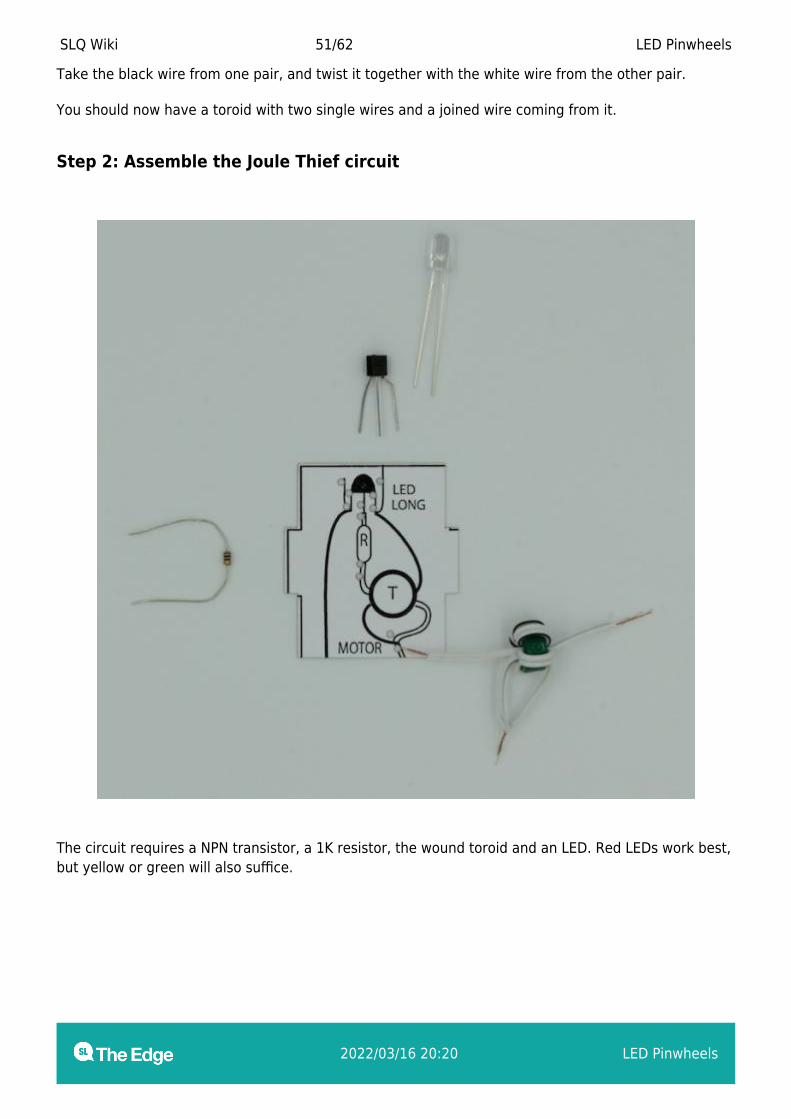
Take the black wire from one pair, and twist it together with the white wire from the other pair.
You should now have a toroid with two single wires and a joined wire coming from it.
Step 2: Assemble the Joule Thief circuit
The circuit requires a NPN transistor, a 1K resistor, the wound toroid and an LED. Red LEDs work best,but yellow or green will also suffice.
SLQ Wiki 52/62 LED Pinwheels
2022/03/16 20:20 LED Pinwheels
Step 3
SLQ Wiki 53/62 LED Pinwheels
2022/03/16 20:20 LED Pinwheels
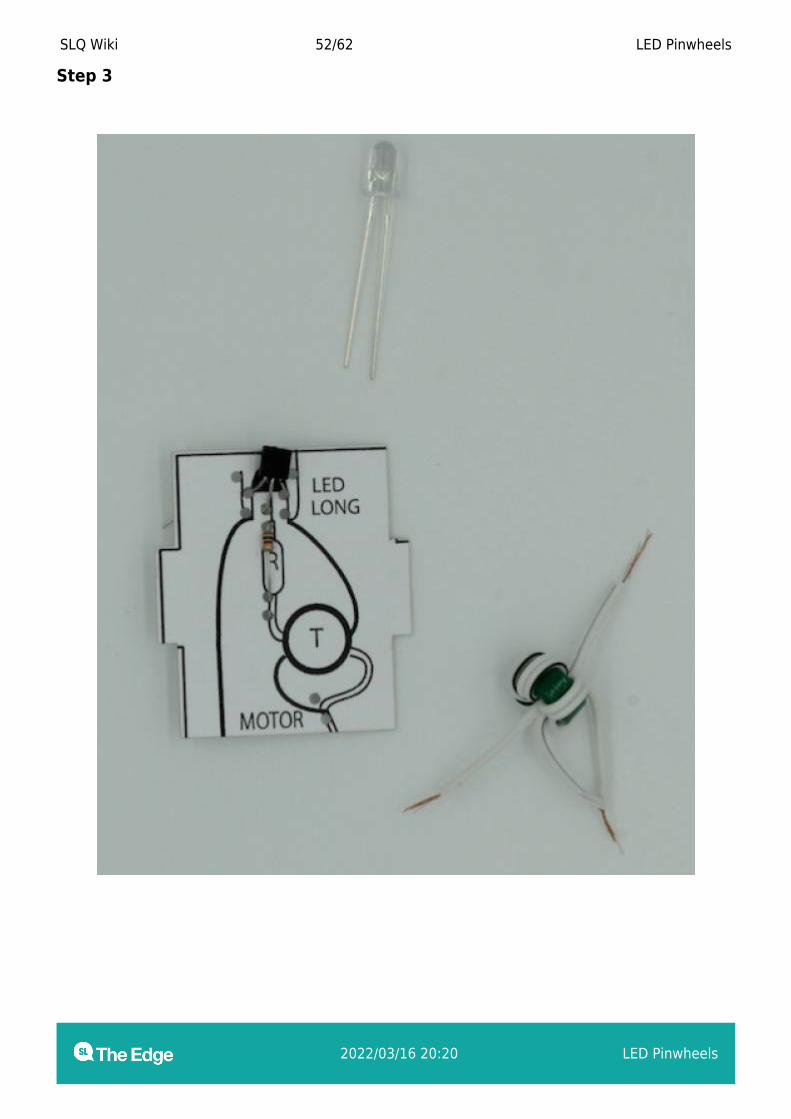
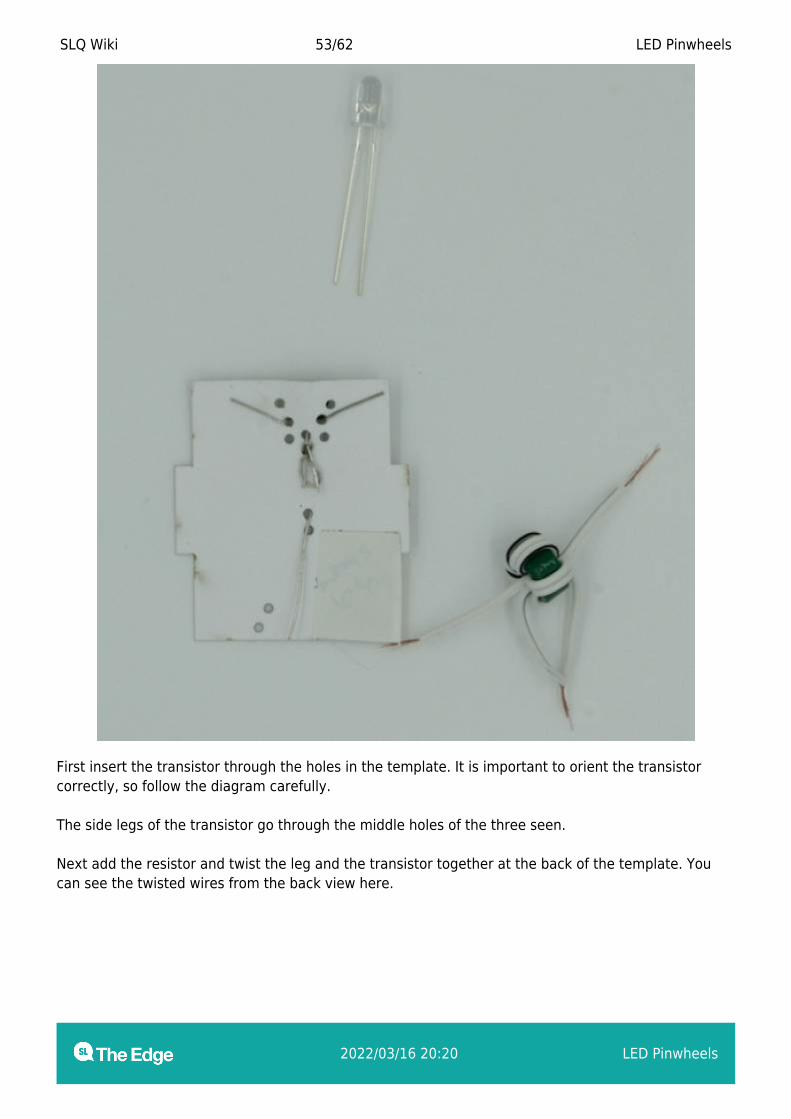
First insert the transistor through the holes in the template. It is important to orient the transistorcorrectly, so follow the diagram carefully.
The side legs of the transistor go through the middle holes of the three seen.
Next add the resistor and twist the leg and the transistor together at the back of the template. Youcan see the twisted wires from the back view here.
SLQ Wiki 54/62 LED Pinwheels
2022/03/16 20:20 LED Pinwheels
Step 4
SLQ Wiki 55/62 LED Pinwheels
2022/03/16 20:20 LED Pinwheels
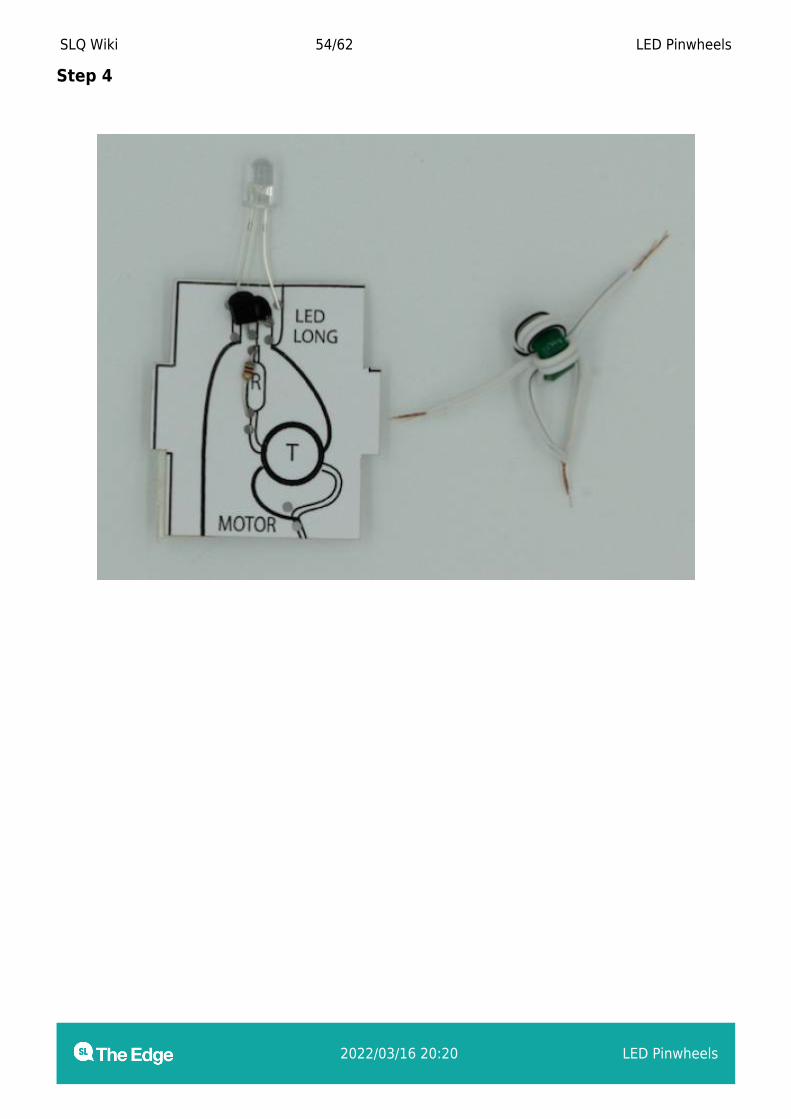
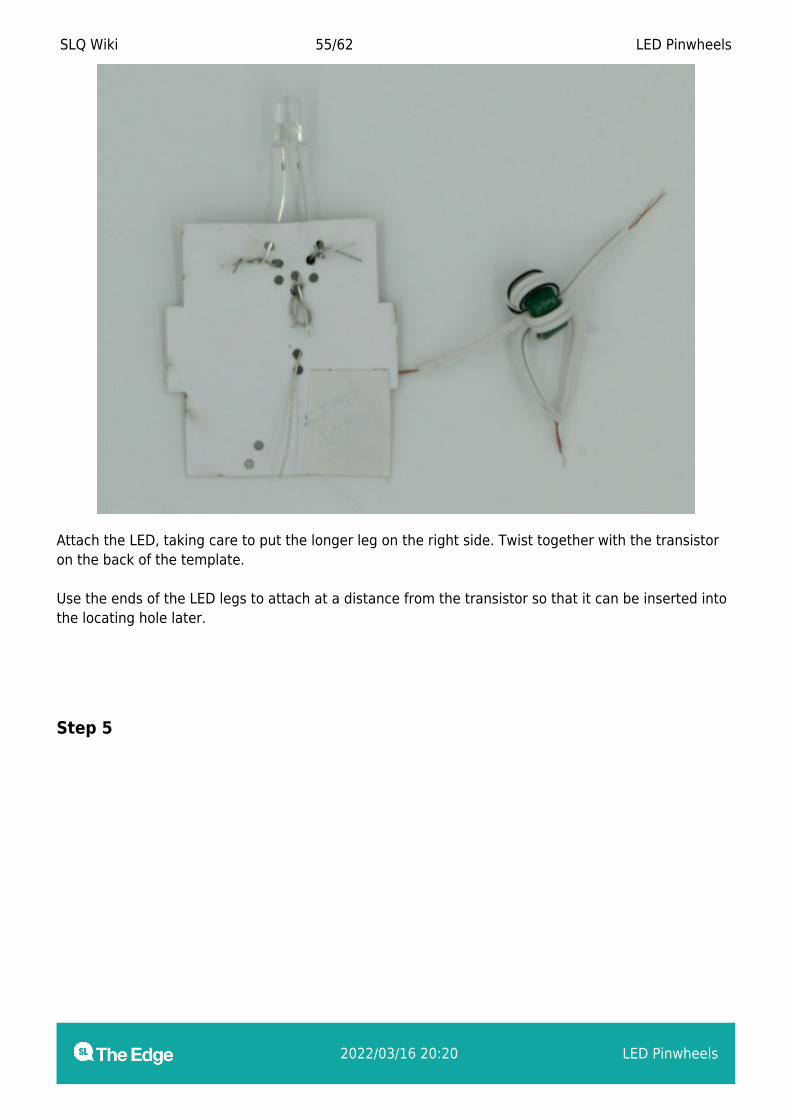
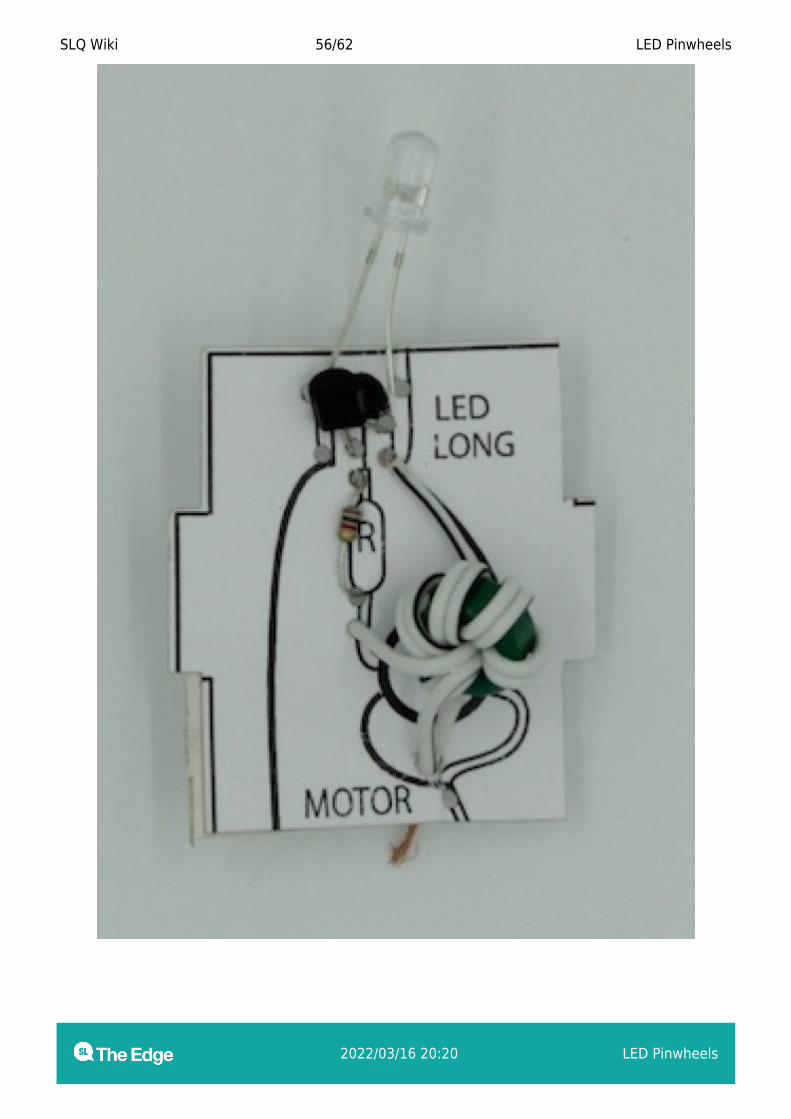
Attach the LED, taking care to put the longer leg on the right side. Twist together with the transistoron the back of the template.
Use the ends of the LED legs to attach at a distance from the transistor so that it can be inserted intothe locating hole later.
Step 5
SLQ Wiki 56/62 LED Pinwheels
2022/03/16 20:20 LED Pinwheels
SLQ Wiki 57/62 LED Pinwheels
2022/03/16 20:20 LED Pinwheels
SLQ Wiki 58/62 LED Pinwheels
2022/03/16 20:20 LED Pinwheels
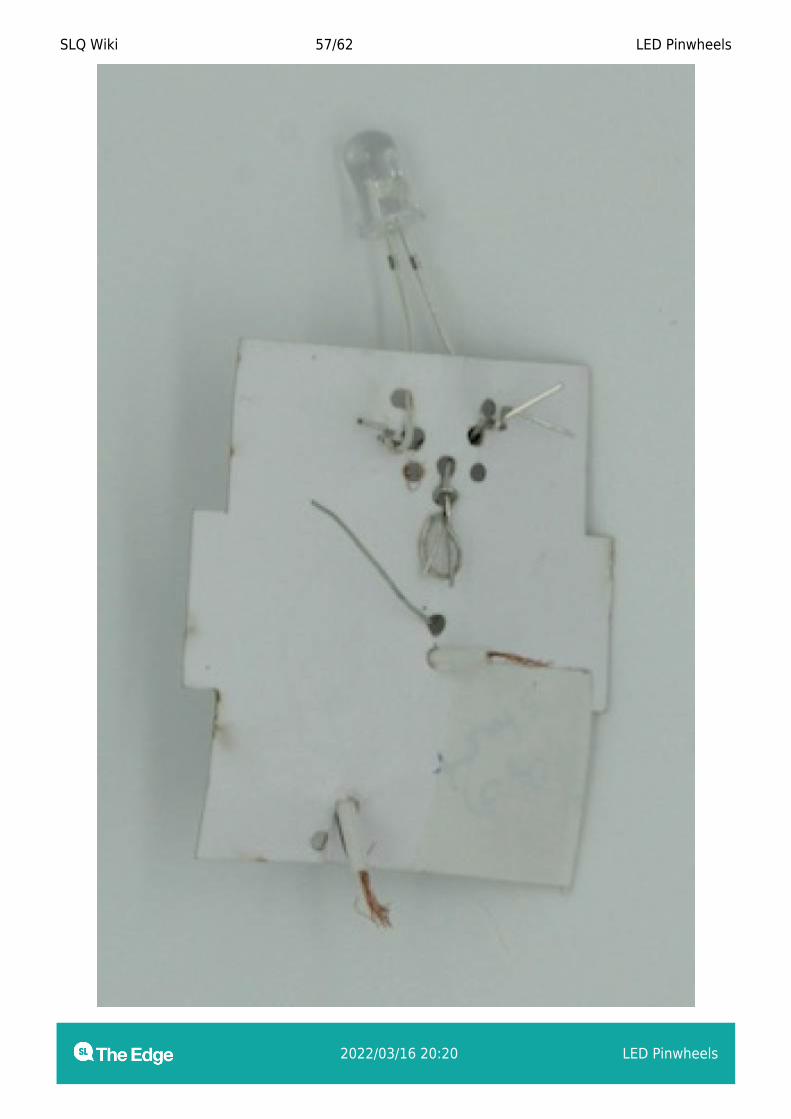
Finally , attach the toroid by pushing wires through the holes in the template and twisting together onthe back.
Step 6
SLQ Wiki 59/62 LED Pinwheels
2022/03/16 20:20 LED Pinwheels
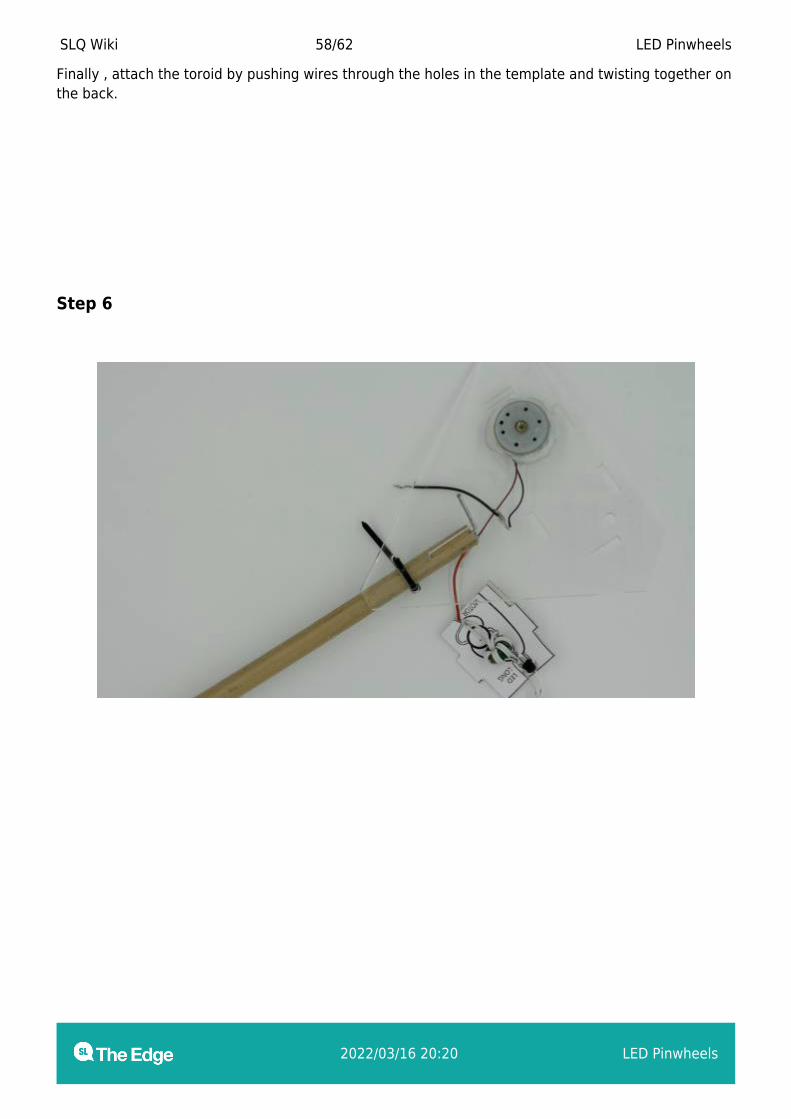
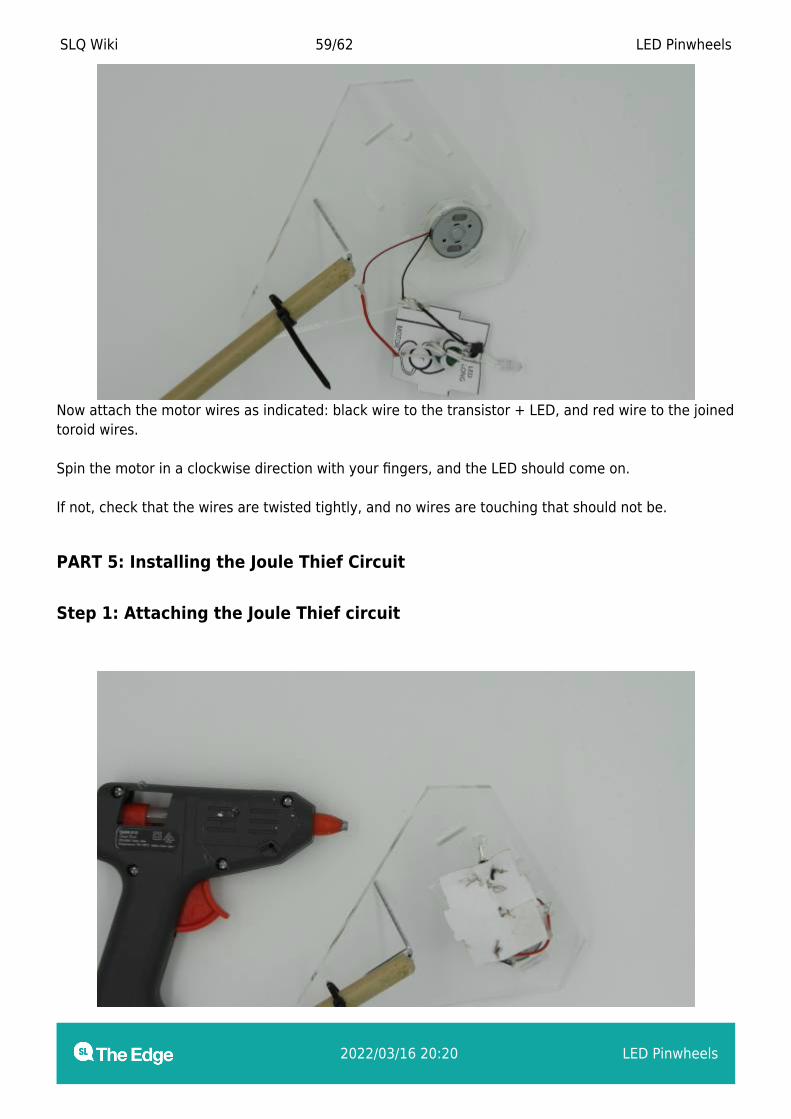
Now attach the motor wires as indicated: black wire to the transistor + LED, and red wire to the joinedtoroid wires.
Spin the motor in a clockwise direction with your fingers, and the LED should come on.
If not, check that the wires are twisted tightly, and no wires are touching that should not be.
PART 5: Installing the Joule Thief Circuit
Step 1: Attaching the Joule Thief circuit
SLQ Wiki 60/62 LED Pinwheels
2022/03/16 20:20 LED Pinwheels
From the back of the chassis, insert the LED into the hole provided, and glue it in place.
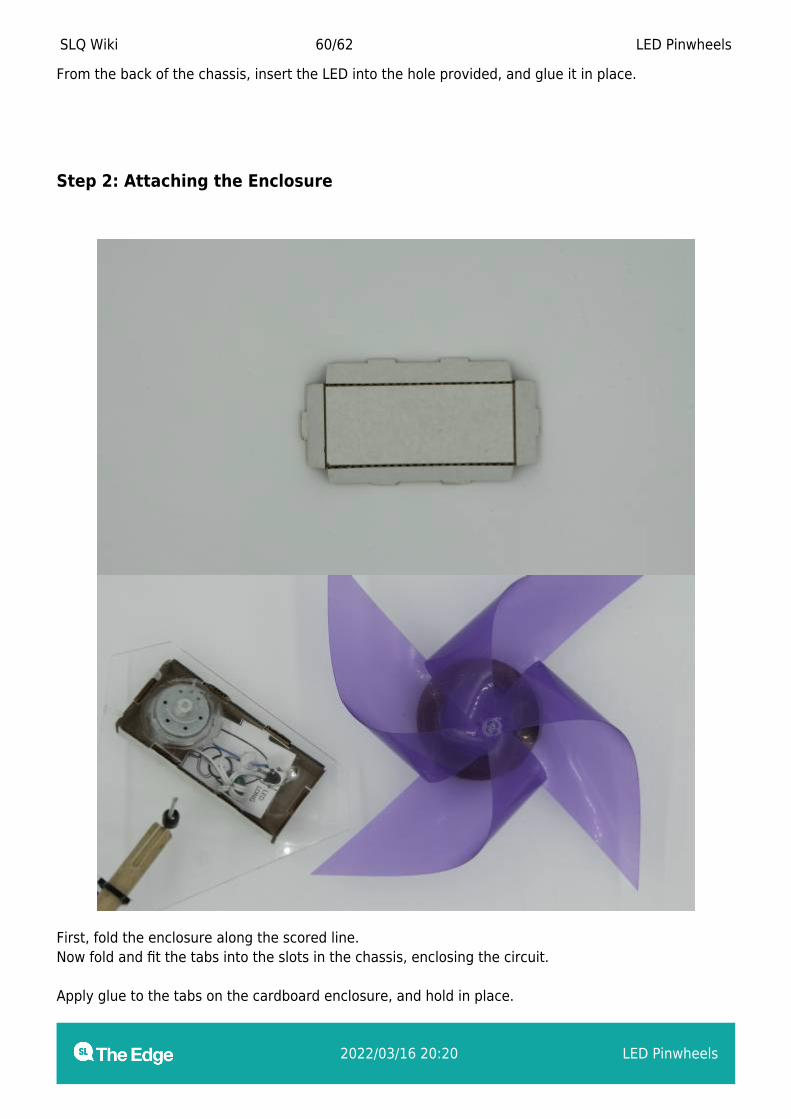
Step 2: Attaching the Enclosure
First, fold the enclosure along the scored line.Now fold and fit the tabs into the slots in the chassis, enclosing the circuit.
Apply glue to the tabs on the cardboard enclosure, and hold in place.
SLQ Wiki 61/62 LED Pinwheels
2022/03/16 20:20 LED Pinwheels
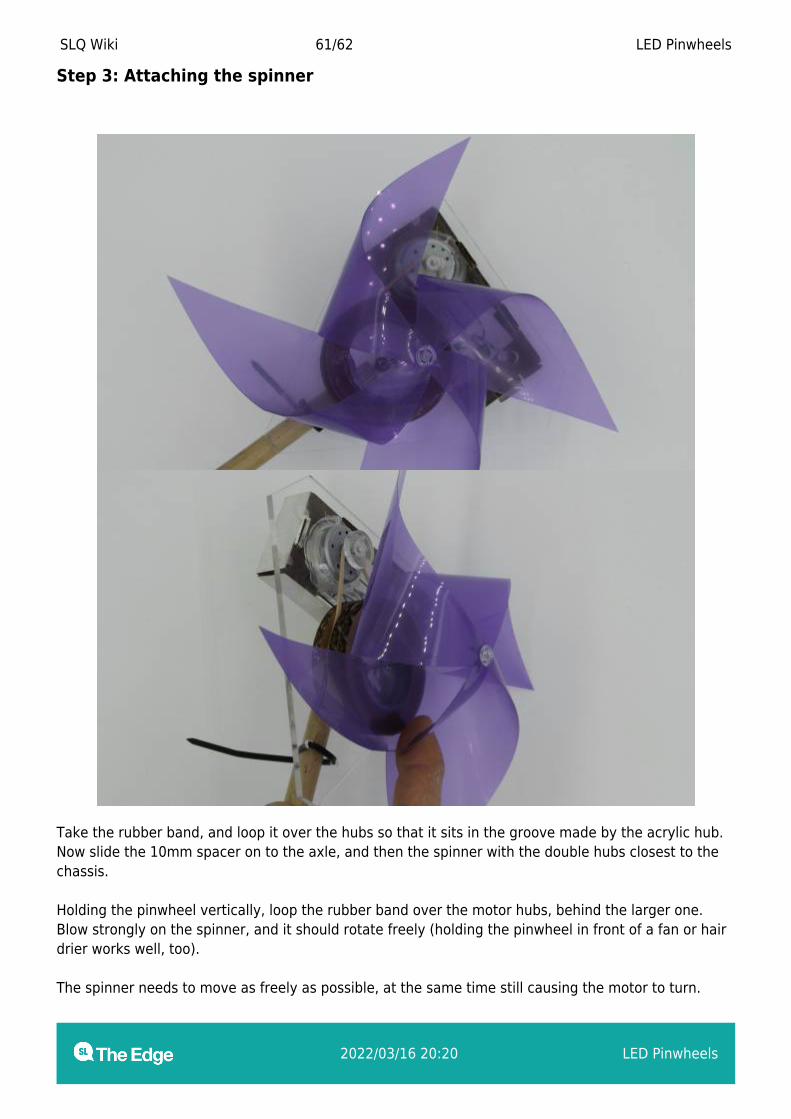
Step 3: Attaching the spinner
Take the rubber band, and loop it over the hubs so that it sits in the groove made by the acrylic hub.Now slide the 10mm spacer on to the axle, and then the spinner with the double hubs closest to thechassis.
Holding the pinwheel vertically, loop the rubber band over the motor hubs, behind the larger one.Blow strongly on the spinner, and it should rotate freely (holding the pinwheel in front of a fan or hairdrier works well, too).
The spinner needs to move as freely as possible, at the same time still causing the motor to turn.
SLQ Wiki 62/62 LED Pinwheels
2022/03/16 20:20 LED Pinwheels
Slide the chassis up or down the handle until this point is achieved. Now glue the handle in place byapplying a line of hot glue to either side of the handle where it touches the chassis.
When the spinner rotates freely in a breeze, the LED will glow.
Red LEDs work best, because they require the lowestvoltage. Yellow, then green are the next best. Superbrightsand flashing LEDs will probably not work at all.
References
led_pinwheel_workshop_instructions.pdf
This is a pdf powerpoint for facilitators to use during a workshop
http://www.talkingelectronics.com/te_interactive_index.html
Has a very good theoretical explanation of how the Joule Thief circuit works (find it under Joule Thief inthe left hand table of contents)
Production notes
The design files for Pinwheel parts are here:
pinwheel_parts_designs.zip, and the cutfiles in Corel format are here:
pinwheel_parts_cutfiles.zip.
The design files for the Pinwheel Joule Thief are here:
pinwheel_joule_thief_designs.zip, and the cutfiles for the box are here:
pinwheel_joule_thief_box_cutfiles.zip
Related Documents