Learning PHP 5 By David Sklar Ripped by: Lilmeanman

Welcome message from author
This document is posted to help you gain knowledge. Please leave a comment to let me know what you think about it! Share it to your friends and learn new things together.
Transcript
Learning PHP 5 By David Sklar
Ripped by: Lilmeanman

Dedication To Jacob, who can look forward to so much learning.
Preface Boring web sites are static. Interesting web sites are dynamic. That is, their content changes. A giant static HTML page listing the names, pictures, descriptions, and prices of all 1,000 products a company has for sale is hard to use and takes forever to load. A dynamic web product catalog that lets you search and filter those products so you see only the six items that meet your price and category criteria is more useful, faster, and much more likely to close a sale.
The PHP programming language makes it easy to build dynamic web sites. Whatever interactive excitement you want to create—such as a product catalog, a blog, a photo album, or an event calendar—PHP is up to the task. And after reading this book, you'll be up to the task of building that dynamic web site, too.
Who This Book Is For This book is for:
• A hobbyist who wants to create an interactive web site for himself, his family, or a nonprofit organization. • A web site builder who wants to use the PHP setup provided by an ISP or hosting provider. • A small business owner who wants to put her company on the Web. • A page designer who wants to communicate better with her developer co-workers. • A JavaScript whiz who wants to build server-side programs that complement her client-side code. • A blogger or HTML jockey who wants to easily add dynamic features to her site. • A Perl, ASP, or ColdFusion programmer who wants to get up to speed with PHP. • Anybody who wants a straightforward, jargon-free introduction to one of the most popular programming languages
for building an interactive web site.
PHP's gentle learning curve and approachable syntax make it an ideal "gateway" language for the nontechnical web professional. Learning PHP 5 is aimed at both this interested, intelligent, but not necessarily technical individual as well as at programmers familiar with another language who want to learn PHP.
Aside from basic computer literacy (knowing how to type, moving files around, surfing the Web), the only assumption that this book makes about you is that you're acquainted with HTML. You don't need to be an HTML master, but you should be comfortable with the HTML tags that populate a basic web page such as <html>, <head>, <body>, <p>, <a>, and <br>. If you're not familiar with HTML, read HTML & XHTML: The Definitive Guide, Fifth Edition, by Bill Kennedy and Chuck Musciano (O'Reilly).
Contents of This Book This book is designed so that you start at the beginning and work through the chapters in order. For the most part, each chapter depends on material in the previous chapters. Chapter 2, through Chapter 12 and Appendix B, each end with exercises that test your understanding of the content in the chapter.
Chapter 1, provides some general background on PHP and how it interacts with your web browser and a web server. It also shows some PHP programs and what they do to give you an idea of what PHP programs look like. Especially if you're new to programming or building dynamic web sites, it is important to read Chapter 1.
The next four chapters give you a grounding in the fundamentals of PHP. Before you can write great literature, you need to learn a little grammar and some vocabulary. That's what these chapters are for. (Don't worry—you'll learn enough PHP grammar and vocabulary right away to start writing some short programs, if not great literature.) Chapter 2 shows you how to work with different kinds of data such as pieces of text and numbers. This is important because the web pages that your PHP programs generate are just big pieces of text. Chapter 3, describes the PHP commands with which your programs can make decisions. These decisions are at the heart of the "dynamic" in "dynamic web site." The concepts in Chapter 3 are what you use, for example, to display only items in a product catalog that fall between two prices a user enters in a web form.
Chapter 4, introduces arrays, which are collections of a bunch of individual numbers or pieces of text. Many frequent activities in PHP programs, such as processing submitted web form parameters or examining information pulled out of a database, involve using arrays. As you write more complicated programs, you'll find yourself wanting to repeat similar tasks. Functions, discussed in Chapter 5, help you reuse pieces of your programs.
The three chapters after that cover three essential tasks in building a dynamic web site: dealing with forms, databases, and users. Chapter 6, supplies the details on working with web forms. These are the primary way that users interact with your web site. Chapter 7, discusses databases. A database holds the information that your web site displays, such as a product catalog or event calendar. This chapter shows you how to make your PHP programs talk to a database. With the techniques in Chapter 8, your web site can do user-specific things such as display sensitive information to authorized people only or tell someone how many new message board posts have been created since she last logged in.
Then, the next three chapters examine three other areas you're likely to encounter when building your web site. Chapter 9, highlights the steps you need to take, for example, to display a monthly calendar or to allow users to input a date or time from a web form. Chapter 10, describes the PHP commands for interacting with files on your own computer or elsewhere on the Internet. Chapter 11, supplies the basics for dealing with XML documents in your PHP programs, whether you need to generate one for another program to consume or you've been provided with one to use in your own program.
Chapter 12 and Chapter 13 each stand on their own. Chapter 12, furnishes some approaches for understanding the error messages that the PHP interpreter generates and hunting down problems in your programs. While it partially depends on earlier material, it may be worthwhile to skip ahead and peruse Chapter 12 as you're working through the book.
Chapter 13 serves a taste of many additional capabilities of PHP, such as generating images, running code written in other languages, and making Flash movies. After you've gotten comfortable with the core PHP concepts explained in Chapter 1 through Chapter 12, visit Chapter 13 for lots of new things to learn.
The three appendixes provide supplementary material. To run PHP programs, you need to have a copy of the PHP interpreter installed on your computer (or have an account with a web-hosting provider that supports PHP). Appendix A, helps you get up and running, whether you are using Windows, OS X, or Linux.
Many text-processing tasks in PHP, such as validating submitted form parameters or parsing an HTML document, are made easier by using regular expressions, a powerful but initially inscrutable pattern matching syntax. Appendix B, explains the basics of regular expressions so that you can use them in your programs if you choose.
Last, Appendix C, contains the answers to all the exercises in the book. No peeking until you try the exercises!
Other Resources The online annotated PHP Manual (http://www.php.net/manual) is a great resource for exploring PHP's extensive function library. Plenty of user-contributed comments offer helpful advice and sample code, too. Additionally, there are many PHP mailing lists covering installation, programming, extending PHP, and various other topics. You can learn about and subscribe to these mailing lists at http://www.php.net/mailing-lists.php. A read-only web interface to the mailing lists is at http://news.php.net. Also worth exploring is the PHP Presentation System archive at http://talks.php.net. This is a collection of presentations about PHP that have been delivered at various conferences.
After you're comfortable with the material in this book, the following books about PHP are good next steps:
• Programming PHP, by Rasmus Lerdorf and Kevin Tatroe (O'Reilly). A more detailed and technical look at how to write PHP programs. Includes information on generating graphics and PDFs.
• PHP Cookbook, by David Sklar and Adam Trachtenberg (O'Reilly). A comprehensive collection of common PHP programming problems and their solutions.
• Essential PHP Tools, by David Sklar (Apress). Examples and explanations about many popular PHP add-on libraries and modules including HTML_QuickForm, SOAP, and the Smarty templating system.
• Upgrading to PHP 5, by Adam Trachtenberg (O'Reilly). A comprehensive look at the new features of PHP 5, including coverage of features for XML handling and object-oriented programming.
These books are helpful for learning about databases, SQL, and MySQL:
• Web Database Applications with PHP & MySQL, by David Lane and Hugh E. Williams (O'Reilly). How to make PHP and MySQL sing in harmony to make a robust dynamic web site.
• SQL in a Nutshell, by Kevin E. Kline (O'Reilly). The essentials you need to know to write SQL queries. Covers the SQL dialects used by Microsoft SQL Server, MySQL, Oracle, and PostgreSQL.
• MySQL Cookbook, by Paul DuBois (O'Reilly). A comprehensive collection of common MySQL tasks. • MySQL Reference Manual (http://dev.mysql.com/doc/mysql). The ultimate source for information about MySQL's
features and SQL dialect.
These books are helpful for learning about HTML and HTTP:
• HTML & XHTML: The Definitive Guide, by Bill Kennedy and Chuck Musciano (O'Reilly). If you've got a question about HTML, this book answers it.
• Dynamic HTML: The Definitive Reference, by Danny Goodman (O'Reilly). Full of useful information you need if you're using JavaScript or Dynamic HTML as part of the web pages your PHP programs output.
• HTTP Developer's Handbook, by Chris Shiflett (Sams Publishing). With this book, you'll better understand how your web browser and a web server communicate with each other.
These books are helpful for learning about security and cryptography:
• Web Security, Privacy & Commerce, by Simson Garfinkel (O'Reilly). A readable and complete overview of the various aspects of web-related security and privacy.
• Practical Unix & Internet Security, by Simson Garfinkel, Alan Schwartz, and Gene Spafford (O'Reilly). A classic exploration of all facets of computer security.
• Applied Cryptography, by Bruce Schneier (John Wiley & Sons). The nitty gritty on how different cryptographic algorithms work and why.
These books are helpful for learning about supplementary topics that this book touches on like XML processing and regular expressions:
• Learning XML, by Erik T. Ray (O'Reilly). Where to go for more in-depth information on XML than Chapter 11. • Learning XSLT, by Michael Fitzgerald (O'Reilly). Your guide to XML stylesheets and XSL transformations. • Mastering Regular Expressions, by Jeffrey E.F. Friedl (O'Reilly). After you've digested Appendix B, turn to this
book for everything you ever wanted to know about regular expressions.
Conventions Used in This Book The following programming and typesetting conventions are used in this book.
Programming Conventions
The code examples in this book are designed to work with PHP 5.0.0. They were tested with PHP 5.0.0RC2, which was the most up-to-date version of PHP 5 available at the time of publication. Almost all of the code in the book works with PHP 4.3 as well. The PHP 5-specific features discussed in the book are as follows:
• Chapter 7: the mysqli functions • Chapter 10: the file_put_contents( ) function • Chapter 11: the SimpleXML module • Chapter 12: the E_STRICT error-reporting level • Chapter 13: some new features related to classes and objects, the advanced XML processing functions, the bundled
SQLite database, and the Perl extension
Typographical Conventions
The following typographical conventions are used in this book:
Italic
Indicates new terms, example URLs, example email addresses, filenames, file extensions, pathnames, and directories.
Constant width
Indicates commands, options, switches, variables, attributes, keys, functions, types, classes, namespaces, methods, modules, properties, parameters, values, objects, events, event handlers, XML tags, HTML tags, macros, the contents of files, or the output from commands.
Constant width italic
Shows text that should be replaced with user-supplied values.
This icon signifies a tip, suggestion, or general note.
This icon indicates a warning or caution.
Using Code Examples Typing some of the example programs in the book yourself is instructive when you are getting started. However, if your fingers get weary, you can download all of the code examples from http://www.oreilly.com/catalog/learnphp5.
This book is here to help you get your job done. In general, you may use the code in this book in your programs and documentation. You do not need to contact the publisher for permission unless you're reproducing a significant portion of the code. For example, writing a program that uses several chunks of code from this book does not require permission. Selling or distributing a CD-ROM of examples from O'Reilly books does require permission. Answering a question by citing this book and quoting example code does not require permission. Incorporating a significant amount of example code from this book into your product's documentation does require permission.
We appreciate, but do not require, attribution. An attribution usually includes the title, author, publisher, and ISBN. For example: "Learning PHP 5 by David Sklar Copyright 2004 O'Reilly Media, Inc., 0-596-00560-1." If you feel your use of code examples falls outside fair use or the permission given above, feel free to contact the publisher at [email protected].
Comments and Questions Please address comments and questions concerning this book to the publisher:
O'Reilly Media, Inc. 1005 Gravenstein Highway North Sebastopol, CA 95472 (800) 998-9938 (in the United States or Canada) (707) 829-0515 (international or local) (707) 829-0104 (fax)
There is a web page for this book, where we list errata, examples, and any additional information. You can access this page at:
http://www.oreilly.com/catalog/learnphp5
To comment or ask technical questions about this book, send email to:
Or you can contact the author directly via his web site:
http://www.sklar.com
For more information about our books, conferences, Resource Centers, and the O'Reilly Network, see our web site at:

http://www.oreilly.com
Acknowledgments This book is the end result of the hard work of many people. Thank you to:
• The many programmers, testers, documentation writers, bug fixers, and other folks whose time, talent, and devotion have made PHP the first-class development platform that it is today. Without them, I'd have nothing to write about.
• The Apple WWPM Hardware Placement Lab for the loan of an iBook, and to Adam Trachtenberg, George Schlossnagle, and Jeremy Zawodny for advice on some code examples.
• My diligent reviewers: Griffin Cherry, Florence Leroy, Mark Oglia, and Stewart Ugelow. They caught plenty of mistakes, turned confusing explanations into clear ones, and otherwise made this book far better than it would have been without them.
• Robert Romano, who turned my blocky diagrams and rustic pencil sketches into high-quality figures and illustrations.
• Tatiana Diaz, who funneled all of my random questions to the right people, kept me on schedule, and ultimately made sure that whatever needed to get done, was done.
• Nat Torkington, whose editorial guidance and helpful suggestions improved every part of the book. Without Nat's feedback, this book would be twice as long and half as readable as it is.
For a better fate than wisdom, thank you also to Susannah, with whom I enjoy ignoring the syntax of things.
Chapter 1. Orientation and First Steps There are lots of great reasons to write computer programs in PHP. Maybe you want to learn PHP because you need to put together a small web site for yourself that has some interactive elements. Perhaps PHP is being used where you work and you have to get up to speed. This chapter provides context for how PHP fits into the puzzle of web site construction: what it can do and why it's so good at what it does. You'll also get your first look at the PHP language and see it in action.
1.1 PHP's Place in the Web World PHP is a programming language that's used mostly for building web sites. Instead of a PHP program running on a desktop computer for the use of one person, it typically runs on a web server and is accessed by lots of people using web browsers on their own computers. This section explains how PHP fits into the interaction between a web browser and a web server.
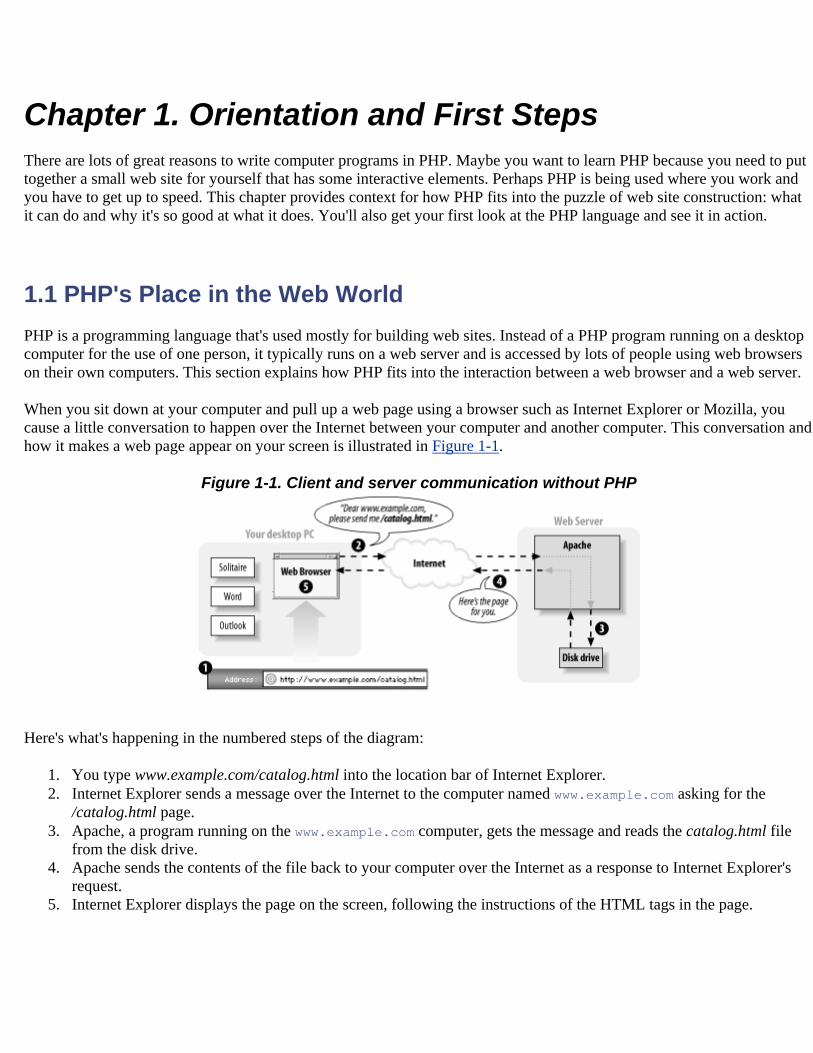
When you sit down at your computer and pull up a web page using a browser such as Internet Explorer or Mozilla, you cause a little conversation to happen over the Internet between your computer and another computer. This conversation and how it makes a web page appear on your screen is illustrated in Figure 1-1.
Figure 1-1. Client and server communication without PHP
Here's what's happening in the numbered steps of the diagram:
1. You type www.example.com/catalog.html into the location bar of Internet Explorer. 2. Internet Explorer sends a message over the Internet to the computer named www.example.com asking for the
/catalog.html page. 3. Apache, a program running on the www.example.com computer, gets the message and reads the catalog.html file
from the disk drive. 4. Apache sends the contents of the file back to your computer over the Internet as a response to Internet Explorer's
request. 5. Internet Explorer displays the page on the screen, following the instructions of the HTML tags in the page.

Every time a browser asks for http://www.example.com/catalog.html, the web server sends back the contents of the same catalog.html file. The only time the response from the web server changes is if someone edits the file on the server.
When PHP is involved, however, the server does more work for its half of the conversation. Figure 1-2 shows what happens when a web browser asks for a page that is generated by PHP.
Figure 1-2. Client and server communication with PHP
Here's what's happening in the numbered steps of the PHP-enabled conversation:
1. You type www.example.com/catalog/yak.php into the location bar of Internet Explorer. 2. Internet Explorer sends a message over the Internet to the computer named www.example.com asking for the
/catalog/yak.php page. 3. Apache, a program running on the www.example.com computer, gets the message and asks the PHP interpreter,
another program running on the www.example.com computer, "What does /catalog/yak.php look like?" 4. The PHP interpreter reads the file /usr/local/www/catalog/yak.php from the disk drive. 5. The PHP interpreter runs the commands in yak.php, possibly exchanging data with a database program such as
MySQL. 6. The PHP interpreter takes the yak.php program output and sends it back to Apache as an answer to "What does
/catalog/yak.php look like?" 7. Apache sends the page contents it got from the PHP interpreter back to your computer over the Internet in response
to Internet Explorer's request. 8. Internet Explorer displays the page on the screen, following the instructions of the HTML tags in the page.
"PHP" is a programming language. Something in the web server reads your PHP programs, which are instructions written in this programming language, and figures out what to do. The "PHP interpreter" follows your instructions. Programmers often say "PHP" when they mean either the programming language or the interpreter. In this book, I mean the language when I say "PHP." When I say "PHP interpreter," I mean the thing that follows the commands in the PHP programs you write and that generates web pages.
If PHP (the programming language) is like English (the human language), then the PHP interpreter is like an English-speaking person. The English language defines various words and combinations that, when read or heard by an English-speaking person, translate into various meanings that cause the person to do things such as feel embarrassed, go to the store
to buy some milk, or put on pants. The programs you write in PHP (the programming language) cause the PHP interpreter to do things such as talk to a database, generate a personalized web page, or display an image.
This book is concerned with the details of writing those programs — i.e., what happens in Step 5 of Figure 1-2 (although Appendix A contains details on configuring and installing the PHP interpreter on your own web server).
PHP is called a server-side language because, as Figure 1-2 illustrates, it runs on a web server. Languages and technologies such as JavaScript and Flash, in contrast, are called client-side because they run on a web client (like a desktop PC). The instructions in a PHP program cause the PHP interpreter on a web server to output a web page. The instructions in a JavaScript program cause Internet Explorer, while running on your desktop PC, to do something such as pop up a new window. Once the web server has sent the generated web page to the client (Step 7 in the Figure 1-2), PHP is out of the picture. If the page content contains some JavaScript, then that JavaScript runs on the client but is totally disconnected from the PHP program that generated the page.
A plain HTML web page is like the "sorry you found a cockroach in your soup" form letter you might get after dispatching an angry complaint to a bug-infested airline. When your letter arrives at airline headquarters, the overburdened secretary in the customer service department pulls the "cockroach reply letter" out of the filing cabinet, makes a copy, and puts the copy in the mail back to you. Every similar request gets the exact same response.
In contrast, a dynamic page that PHP generates is like a postal letter you write to a friend across the globe. You can put whatever you like down on the page — doodles, diagrams, haikus, and tender stories of how unbearably cute your new baby is when she spatters mashed carrots all over the kitchen. The content of your letter is tailored to the specific person to whom it's being sent. Once you put that letter in the mailbox, however, you can't change it any more. It wings its way across the globe and is read by your friend. You don't have any way to modify the letter as your friend is reading it.
Now imagine you're writing a letter to an arts-and-crafts-inspired friend. Along with the doodles and stories you include instructions such as "cut out the little picture of the frog at the top of the page and paste it over the tiny rabbit at the bottom of the page," and "read the last paragraph on the page before any other paragraph." As your friend reads the letter, she also performs actions the letter instructs her to take. These actions are like JavaScript in a web page. They're set down when the letter is written and don't change after that. But when the reader of the letter follows the instructions, the letter itself can change. Similarly, a web browser obeys any JavaScript commands in a page and pops up windows, changes form menu options, or refreshes the page to a new URL.
1.2 What's So Great About PHP? You may be attracted to PHP because it's free, because it's easy to learn, or because your boss told you that you need to start working on a PHP project next week. Since you're going to use PHP, you need to know a little bit about what makes it special. The next time someone asks you "What's so great about PHP?", use this section as the basis for your answer.
1.2.1 PHP Is Free (as in Money)
You don't have to pay anyone to use PHP. Whether you run the PHP interpreter on a beat-up 10-year-old PC in your basement or in a room full of million-dollar "enterprise-class" servers, there are no licensing fees, support fees, maintenance fees, upgrade fees, or any other kind of charge.
Most Linux distributions come with PHP already installed. If yours doesn't, or you are using another operating system such as Windows, you can download PHP from http://www.php.net/. Appendix A has detailed instructions on how to install PHP.
1.2.2 PHP Is Free (as in Speech)
As an open source project, PHP makes its innards available for anyone to inspect. If it doesn't do what you want, or you're just curious about why a feature works the way it does, you can poke around in the guts of the PHP interpreter (written in the C programming language) to see what's what. Even if you don't have the technical expertise to do that, you can get someone who does to do the investigating for you. Most people can't fix their own cars, but it's nice to be able to take your car to a mechanic who can pop open the hood and fix it.
1.2.3 PHP Is Cross-Platform
You can use PHP with a web server computer that runs Windows, Mac OS X, Linux, Solaris, and many other versions of Unix. Plus, if you switch web server operating systems, you generally don't have to change any of your PHP programs. Just copy them from your Windows server to your Unix server, and they will still work.
While Apache is the most popular web server program used with PHP, you can also use Microsoft Internet Information Server and any other web server that supports the CGI standard. PHP also works with a large number of databases including MySQL, Oracle, Microsoft SQL Server, Sybase, and PostgreSQL. In addition, it supports the ODBC standard for database interaction.
If all the acronyms in the last paragraph freak you out, don't worry. It boils down to this: whatever system you're using, PHP probably runs on it just fine and works with whatever database you are already using.
1.2.4 PHP Is Widely Used
As of March 2004, PHP is installed on more than 15 million different web sites, from countless tiny personal home pages to giants like Yahoo!. There are many books, magazines, and web sites devoted to teaching PHP and exploring what you can do with it. There are companies that provide support and training for PHP. In short, if you are a PHP user, you are not alone.
1.2.5 PHP Hides Its Complexity
You can build powerful e-commerce engines in PHP that handle millions of customers. You can also build a small site that automatically maintains links to a changing list of articles or press releases. When you're using PHP for a simpler project, it doesn't get in your way with concerns that are only relevant in a massive system. When you need advanced features such as caching, custom libraries, or dynamic image generation, they are available. If you don't need them, you don't have to worry about them. You can just focus on the basics of handling user input and displaying output.
1.2.6 PHP Is Built for Web Programming
Unlike most other programming languages, PHP was created from the ground up for generating web pages. This means that common web programming tasks, such as accessing form submissions and talking to a database, are often easier in PHP. PHP comes with the capability to format HTML, manipulate dates and times, and manage web cookies — tasks that are often available only as add-on libraries in other programming languages.
1.3 PHP in Action Ready for your first taste of PHP? This section contains a few program listings and explanations of what they do. If you don't understand everything going on in each listing, don't worry! That's what the rest of the book is for. Read these listings to get a sense of what PHP programs look like and an outline of how they work. Don't sweat the details yet.
When given a program to run, the PHP interpreter pays attention only to the parts of the program between PHP start and end tags. Whatever's outside those tags is printed with no modification. This makes it easy to embed small bits of PHP in pages that mostly contain HTML. The PHP interpreter runs the commands between <?php (the PHP start tag) and ?> (the PHP end tag). PHP pages typically live in files whose names end in .php. Example 1-1 shows a page with one PHP command.
Example 1-1. Hello, World! <html> <head><title>PHP says hello</title></head> <body> <b> <?php print "Hello, World!"; ?> </b> </body> </html>
The output of Example 1-1 is:
<html> <head><title>PHP says hello</title></head> <body> <b> Hello, World! </b> </body> </html>
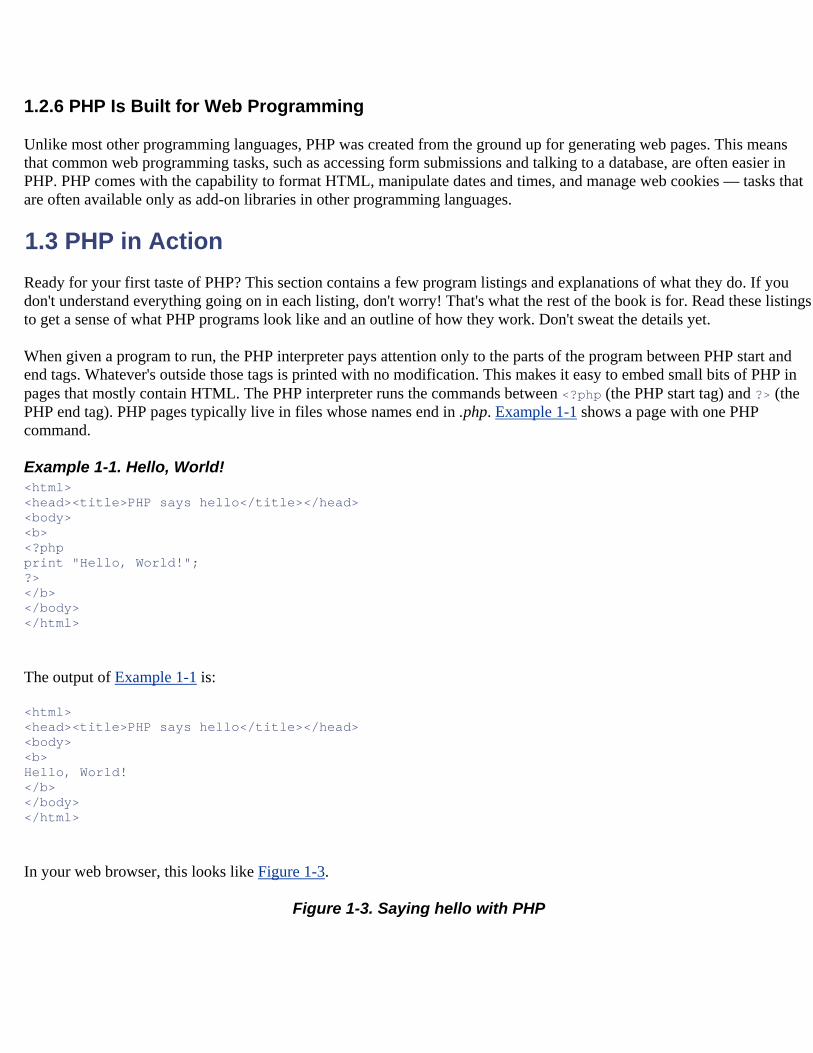
In your web browser, this looks like Figure 1-3.
Figure 1-3. Saying hello with PHP
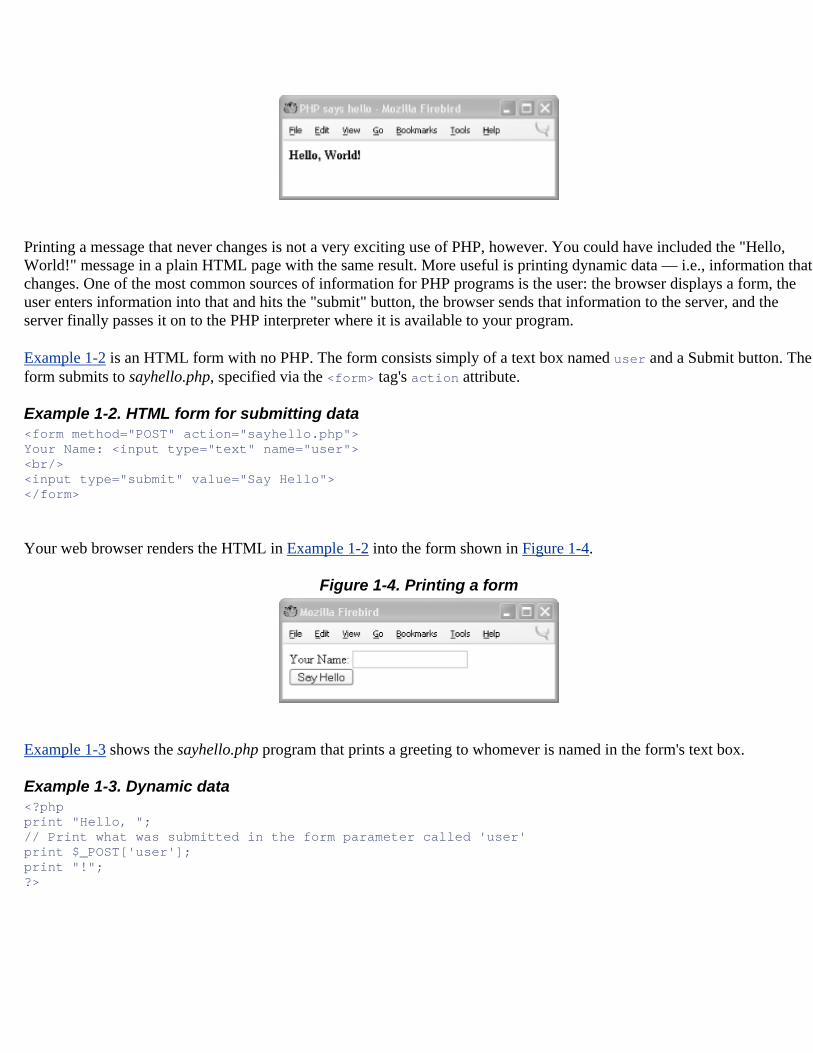
Printing a message that never changes is not a very exciting use of PHP, however. You could have included the "Hello, World!" message in a plain HTML page with the same result. More useful is printing dynamic data — i.e., information that changes. One of the most common sources of information for PHP programs is the user: the browser displays a form, the user enters information into that and hits the "submit" button, the browser sends that information to the server, and the server finally passes it on to the PHP interpreter where it is available to your program.
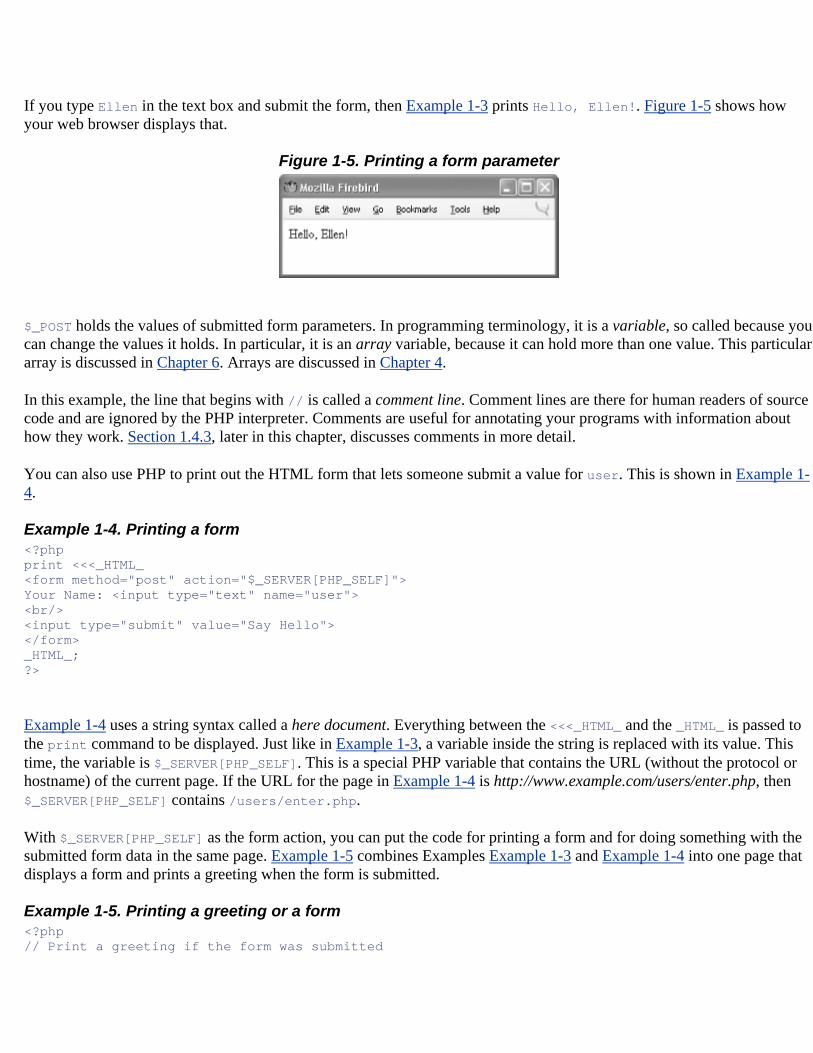
Example 1-2 is an HTML form with no PHP. The form consists simply of a text box named user and a Submit button. The form submits to sayhello.php, specified via the <form> tag's action attribute.
Example 1-2. HTML form for submitting data <form method="POST" action="sayhello.php"> Your Name: <input type="text" name="user"> <br/> <input type="submit" value="Say Hello"> </form>
Your web browser renders the HTML in Example 1-2 into the form shown in Figure 1-4.
Figure 1-4. Printing a form
Example 1-3 shows the sayhello.php program that prints a greeting to whomever is named in the form's text box.
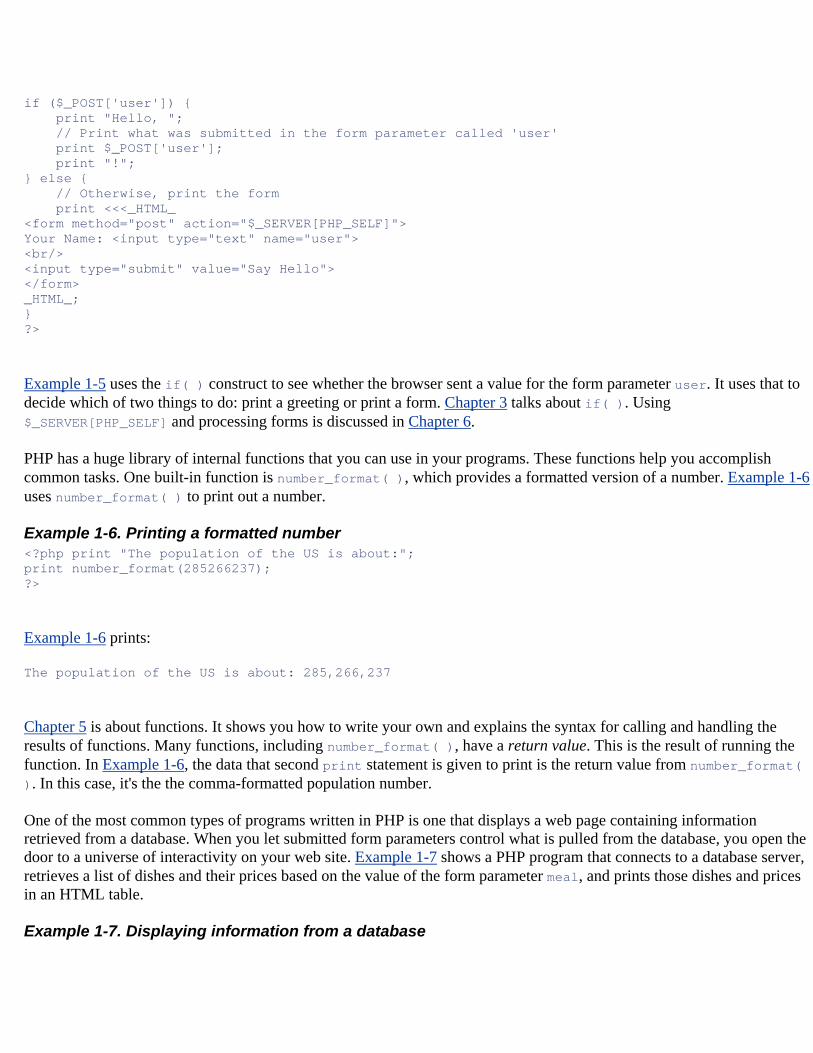
Example 1-3. Dynamic data <?php print "Hello, "; // Print what was submitted in the form parameter called 'user' print $_POST['user']; print "!"; ?>
If you type Ellen in the text box and submit the form, then Example 1-3 prints Hello, Ellen!. Figure 1-5 shows how your web browser displays that.
Figure 1-5. Printing a form parameter
$_POST holds the values of submitted form parameters. In programming terminology, it is a variable, so called because you can change the values it holds. In particular, it is an array variable, because it can hold more than one value. This particular array is discussed in Chapter 6. Arrays are discussed in Chapter 4.
In this example, the line that begins with // is called a comment line. Comment lines are there for human readers of source code and are ignored by the PHP interpreter. Comments are useful for annotating your programs with information about how they work. Section 1.4.3, later in this chapter, discusses comments in more detail.
You can also use PHP to print out the HTML form that lets someone submit a value for user. This is shown in Example 1-4.
Example 1-4. Printing a form <?php print <<<_HTML_ <form method="post" action="$_SERVER[PHP_SELF]"> Your Name: <input type="text" name="user"> <br/> <input type="submit" value="Say Hello"> </form> _HTML_; ?>
Example 1-4 uses a string syntax called a here document. Everything between the <<<_HTML_ and the _HTML_ is passed to the print command to be displayed. Just like in Example 1-3, a variable inside the string is replaced with its value. This time, the variable is $_SERVER[PHP_SELF]. This is a special PHP variable that contains the URL (without the protocol or hostname) of the current page. If the URL for the page in Example 1-4 is http://www.example.com/users/enter.php, then $_SERVER[PHP_SELF] contains /users/enter.php.
With $_SERVER[PHP_SELF] as the form action, you can put the code for printing a form and for doing something with the submitted form data in the same page. Example 1-5 combines Examples Example 1-3 and Example 1-4 into one page that displays a form and prints a greeting when the form is submitted.
Example 1-5. Printing a greeting or a form <?php // Print a greeting if the form was submitted
if ($_POST['user']) { print "Hello, "; // Print what was submitted in the form parameter called 'user' print $_POST['user']; print "!"; } else { // Otherwise, print the form print <<<_HTML_ <form method="post" action="$_SERVER[PHP_SELF]"> Your Name: <input type="text" name="user"> <br/> <input type="submit" value="Say Hello"> </form> _HTML_; } ?>
Example 1-5 uses the if( ) construct to see whether the browser sent a value for the form parameter user. It uses that to decide which of two things to do: print a greeting or print a form. Chapter 3 talks about if( ). Using $_SERVER[PHP_SELF] and processing forms is discussed in Chapter 6.
PHP has a huge library of internal functions that you can use in your programs. These functions help you accomplish common tasks. One built-in function is number_format( ), which provides a formatted version of a number. Example 1-6 uses number_format( ) to print out a number.
Example 1-6. Printing a formatted number <?php print "The population of the US is about:"; print number_format(285266237); ?>
Example 1-6 prints:
The population of the US is about: 285,266,237
Chapter 5 is about functions. It shows you how to write your own and explains the syntax for calling and handling the results of functions. Many functions, including number_format( ), have a return value. This is the result of running the function. In Example 1-6, the data that second print statement is given to print is the return value from number_format( ). In this case, it's the the comma-formatted population number.
One of the most common types of programs written in PHP is one that displays a web page containing information retrieved from a database. When you let submitted form parameters control what is pulled from the database, you open the door to a universe of interactivity on your web site. Example 1-7 shows a PHP program that connects to a database server, retrieves a list of dishes and their prices based on the value of the form parameter meal, and prints those dishes and prices in an HTML table.
Example 1-7. Displaying information from a database
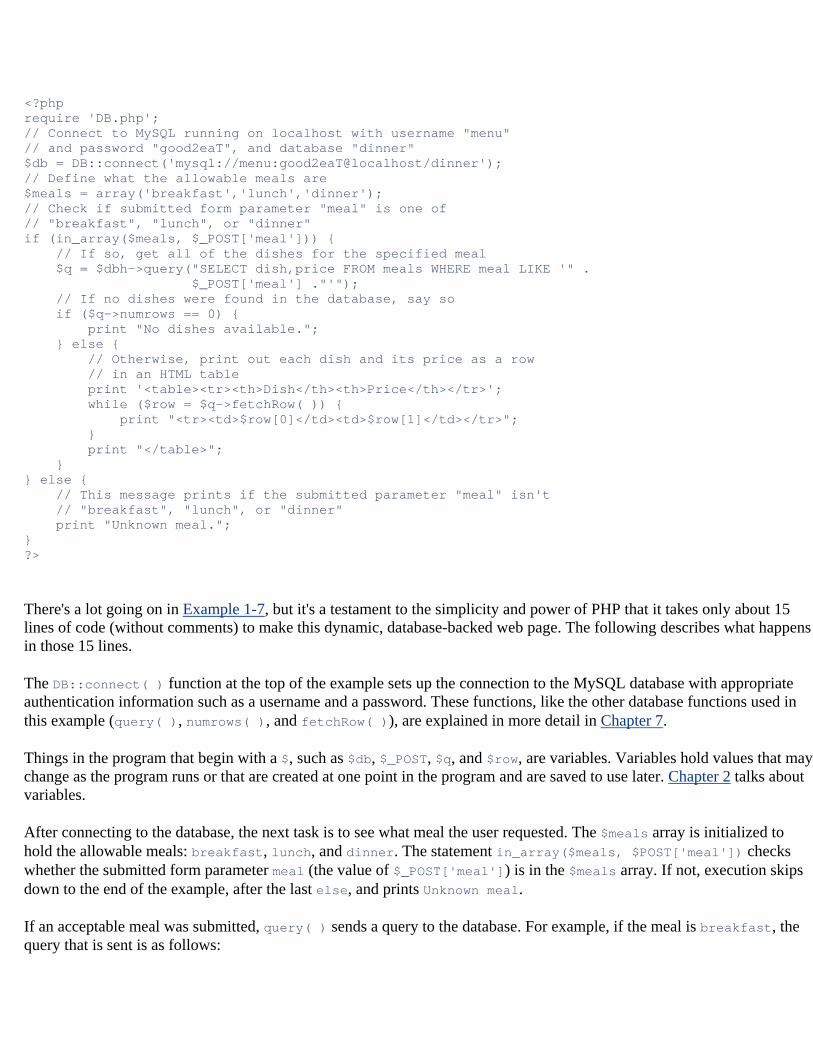
<?php require 'DB.php'; // Connect to MySQL running on localhost with username "menu" // and password "good2eaT", and database "dinner" $db = DB::connect('mysql://menu:good2eaT@localhost/dinner'); // Define what the allowable meals are $meals = array('breakfast','lunch','dinner'); // Check if submitted form parameter "meal" is one of // "breakfast", "lunch", or "dinner" if (in_array($meals, $_POST['meal'])) { // If so, get all of the dishes for the specified meal $q = $dbh->query("SELECT dish,price FROM meals WHERE meal LIKE '" . $_POST['meal'] ."'"); // If no dishes were found in the database, say so if ($q->numrows == 0) { print "No dishes available."; } else { // Otherwise, print out each dish and its price as a row // in an HTML table print '<table><tr><th>Dish</th><th>Price</th></tr>'; while ($row = $q->fetchRow( )) { print "<tr><td>$row[0]</td><td>$row[1]</td></tr>"; } print "</table>"; } } else { // This message prints if the submitted parameter "meal" isn't // "breakfast", "lunch", or "dinner" print "Unknown meal."; } ?>
There's a lot going on in Example 1-7, but it's a testament to the simplicity and power of PHP that it takes only about 15 lines of code (without comments) to make this dynamic, database-backed web page. The following describes what happens in those 15 lines.
The DB::connect( ) function at the top of the example sets up the connection to the MySQL database with appropriate authentication information such as a username and a password. These functions, like the other database functions used in this example (query( ), numrows( ), and fetchRow( )), are explained in more detail in Chapter 7.
Things in the program that begin with a $, such as $db, $_POST, $q, and $row, are variables. Variables hold values that may change as the program runs or that are created at one point in the program and are saved to use later. Chapter 2 talks about variables.
After connecting to the database, the next task is to see what meal the user requested. The $meals array is initialized to hold the allowable meals: breakfast, lunch, and dinner. The statement in_array($meals, $POST['meal']) checks whether the submitted form parameter meal (the value of $_POST['meal']) is in the $meals array. If not, execution skips down to the end of the example, after the last else, and prints Unknown meal.
If an acceptable meal was submitted, query( ) sends a query to the database. For example, if the meal is breakfast, the query that is sent is as follows:
SELECT dish,price FROM meals WHERE meal LIKE 'breakfast'
Queries to MySQL and most other databases are written in a language called Structured Query Language (SQL). Appendix B provides the basics of SQL. The query( ) function returns an identifier that we can use to get further information about the query.
The numrows( ) function uses that identifier to see how many matching meals the query found in the database. If there are no applicable meals, the program prints No dishes available. Otherwise, it displays information about the matching meals.
The program prints the beginning of the HTML table. Then, it uses the fetchRow( ) function to retrieve each dish that the query found. The print statement uses elements of the array returned by fetchRow( ) to display one table row per dish.
1.4 Basic Rules of PHP Programs This section lays out some ground rules about the structure of PHP programs. More foundational than the basics such as "how do I print something" or "how do I add two numbers", these proto-basics are the equivalent of someone telling you that you should read pages in this book from top to bottom and left to right, or that what's important on the page are the black squiggles, not the large white areas.
If you've had a little experience with PHP already or you're the kind of person that prefers playing with all the buttons on your new DVD player before going back and reading in the manual about how the buttons actually work, feel free to skip ahead to Chapter 2 now and flip back here later. If you forge ahead to write some PHP programs of your own, and they're behaving unexpectedly or the PHP interpreter complains of "parse errors" when it tries to run your program, revisit this section for a refresher.
1.4.1 Start and End Tags
Each of the examples you've already seen in this chapter uses <?php as the PHP start tag and ?> as the PHP end tag. The PHP interpreter ignores anything outside of those tags. Text before the start tag or after the end tag is printed with no interference from the PHP interpreter.
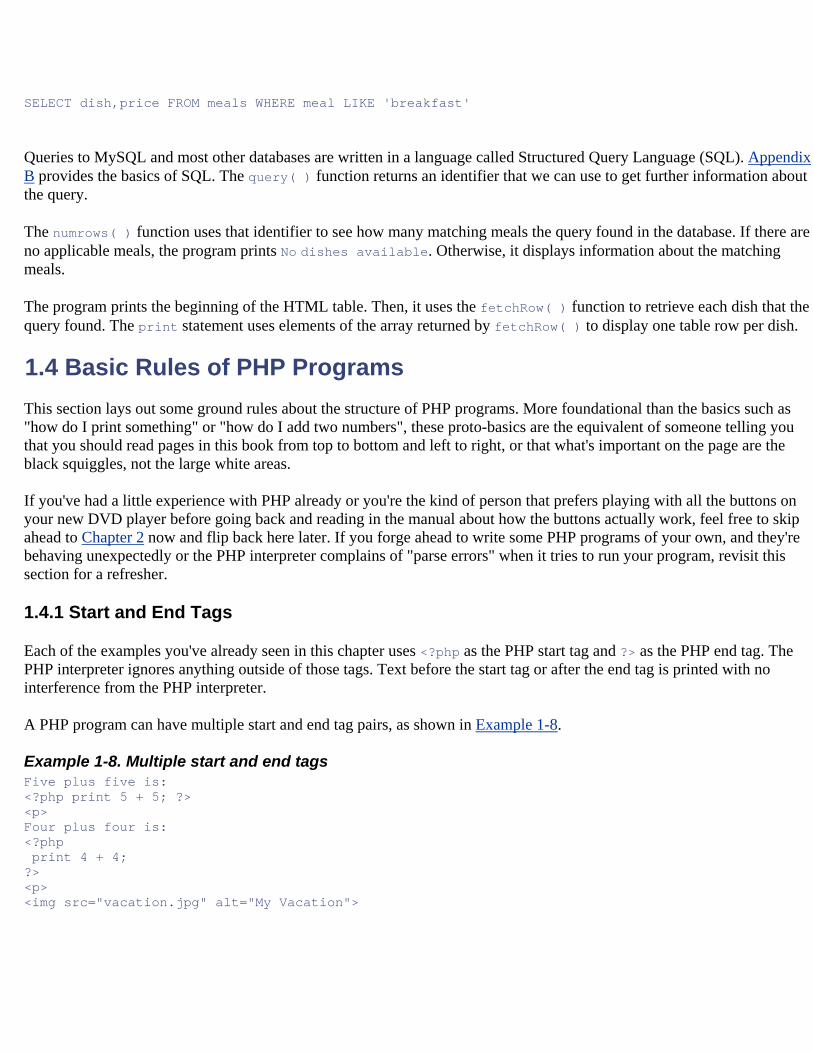
A PHP program can have multiple start and end tag pairs, as shown in Example 1-8.
Example 1-8. Multiple start and end tags Five plus five is: <?php print 5 + 5; ?> <p> Four plus four is: <?php print 4 + 4; ?> <p> <img src="vacation.jpg" alt="My Vacation">
The PHP source code inside each set of <?php ?> tags is processed by the PHP interpreter, and the rest of the page is printed as is. Example 1-8 prints:
Five plus five is: 10<p> Four plus four is: 8<p> <img src="vacation.jpg" alt="My Vacation">
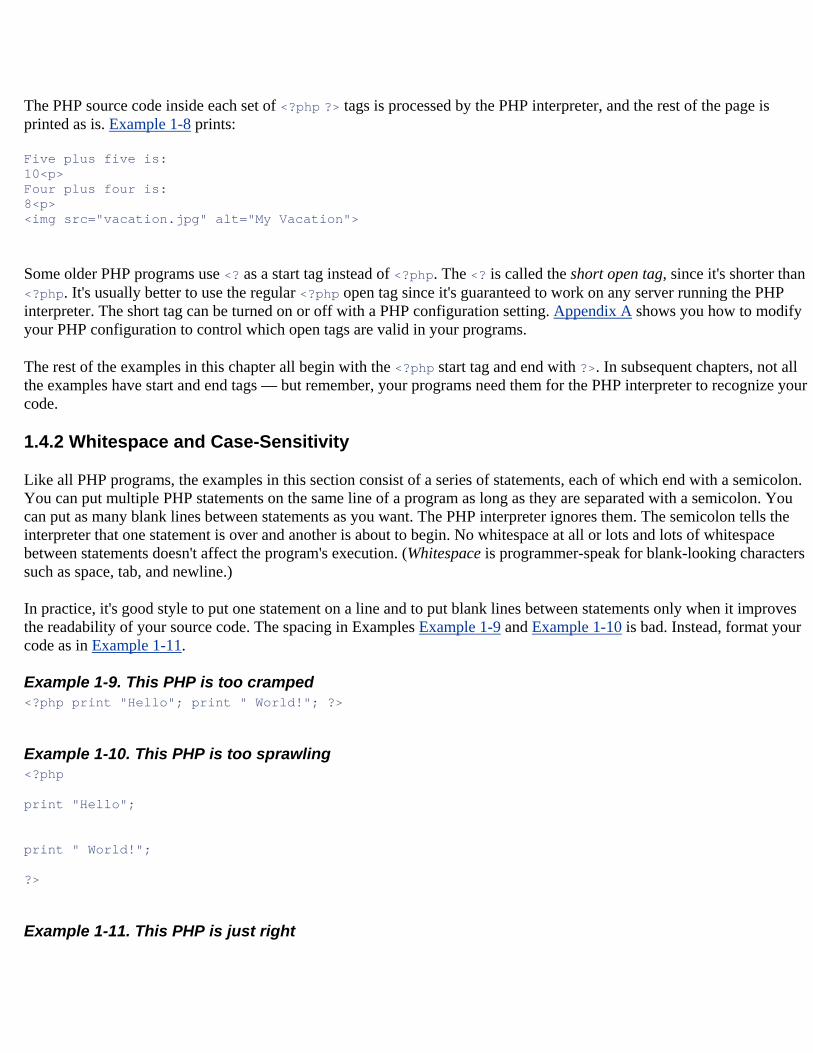
Some older PHP programs use <? as a start tag instead of <?php. The <? is called the short open tag, since it's shorter than <?php. It's usually better to use the regular <?php open tag since it's guaranteed to work on any server running the PHP interpreter. The short tag can be turned on or off with a PHP configuration setting. Appendix A shows you how to modify your PHP configuration to control which open tags are valid in your programs.
The rest of the examples in this chapter all begin with the <?php start tag and end with ?>. In subsequent chapters, not all the examples have start and end tags — but remember, your programs need them for the PHP interpreter to recognize your code.
1.4.2 Whitespace and Case-Sensitivity
Like all PHP programs, the examples in this section consist of a series of statements, each of which end with a semicolon. You can put multiple PHP statements on the same line of a program as long as they are separated with a semicolon. You can put as many blank lines between statements as you want. The PHP interpreter ignores them. The semicolon tells the interpreter that one statement is over and another is about to begin. No whitespace at all or lots and lots of whitespace between statements doesn't affect the program's execution. (Whitespace is programmer-speak for blank-looking characters such as space, tab, and newline.)
In practice, it's good style to put one statement on a line and to put blank lines between statements only when it improves the readability of your source code. The spacing in Examples Example 1-9 and Example 1-10 is bad. Instead, format your code as in Example 1-11.
Example 1-9. This PHP is too cramped <?php print "Hello"; print " World!"; ?>
Example 1-10. This PHP is too sprawling <?php print "Hello"; print " World!"; ?>
Example 1-11. This PHP is just right
<?php print "Hello"; print " World!"; ?>
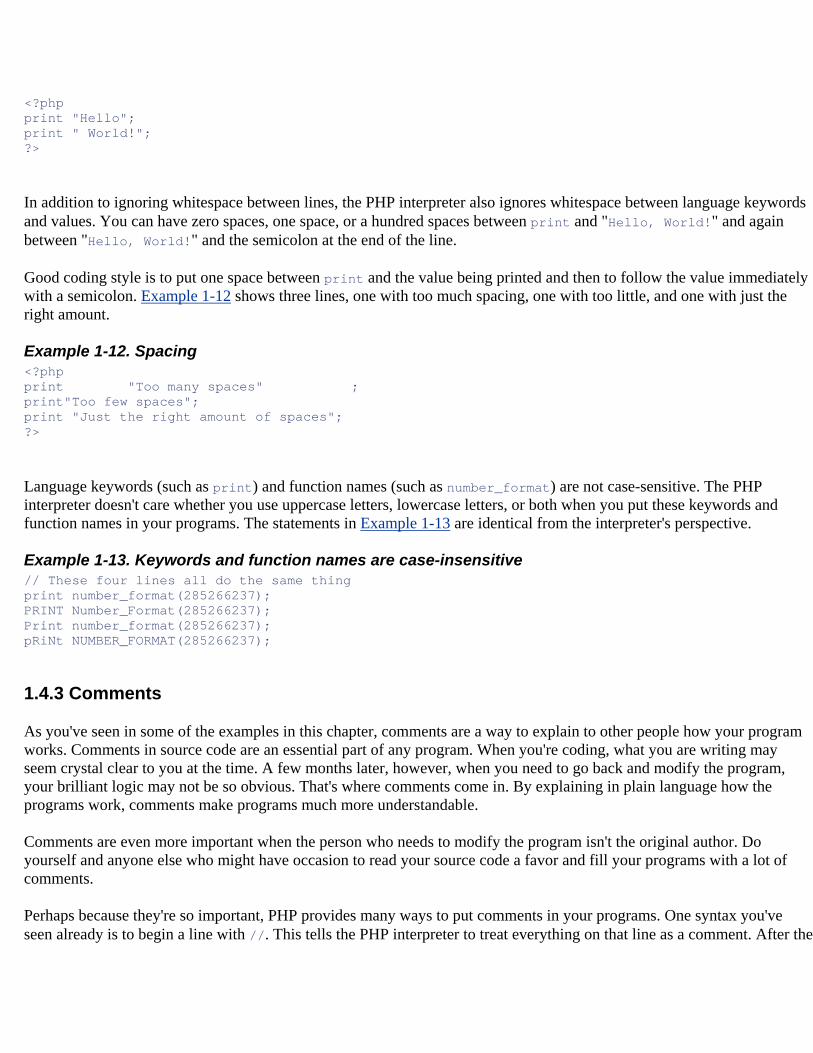
In addition to ignoring whitespace between lines, the PHP interpreter also ignores whitespace between language keywords and values. You can have zero spaces, one space, or a hundred spaces between print and "Hello, World!" and again between "Hello, World!" and the semicolon at the end of the line.
Good coding style is to put one space between print and the value being printed and then to follow the value immediately with a semicolon. Example 1-12 shows three lines, one with too much spacing, one with too little, and one with just the right amount.
Example 1-12. Spacing <?php print "Too many spaces" ; print"Too few spaces"; print "Just the right amount of spaces"; ?>
Language keywords (such as print) and function names (such as number_format) are not case-sensitive. The PHP interpreter doesn't care whether you use uppercase letters, lowercase letters, or both when you put these keywords and function names in your programs. The statements in Example 1-13 are identical from the interpreter's perspective.
Example 1-13. Keywords and function names are case-insensitive // These four lines all do the same thing print number_format(285266237); PRINT Number_Format(285266237); Print number_format(285266237); pRiNt NUMBER_FORMAT(285266237);
1.4.3 Comments
As you've seen in some of the examples in this chapter, comments are a way to explain to other people how your program works. Comments in source code are an essential part of any program. When you're coding, what you are writing may seem crystal clear to you at the time. A few months later, however, when you need to go back and modify the program, your brilliant logic may not be so obvious. That's where comments come in. By explaining in plain language how the programs work, comments make programs much more understandable.
Comments are even more important when the person who needs to modify the program isn't the original author. Do yourself and anyone else who might have occasion to read your source code a favor and fill your programs with a lot of comments.
Perhaps because they're so important, PHP provides many ways to put comments in your programs. One syntax you've seen already is to begin a line with //. This tells the PHP interpreter to treat everything on that line as a comment. After the
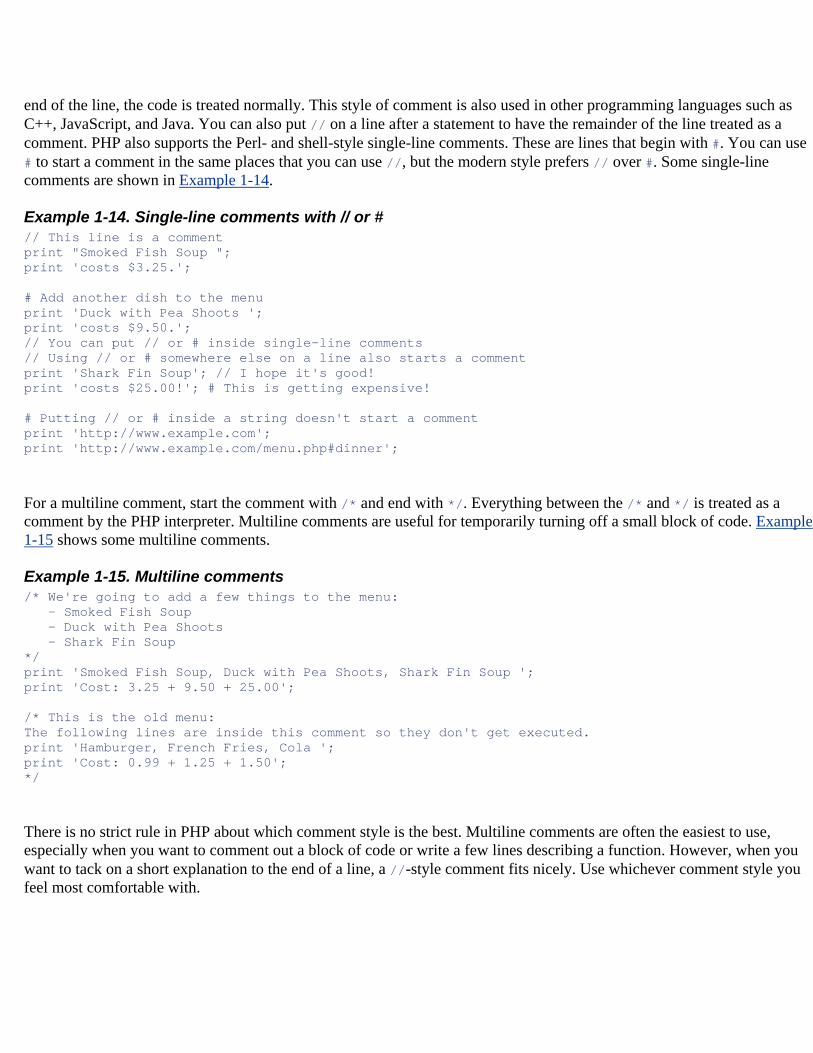
end of the line, the code is treated normally. This style of comment is also used in other programming languages such as C++, JavaScript, and Java. You can also put // on a line after a statement to have the remainder of the line treated as a comment. PHP also supports the Perl- and shell-style single-line comments. These are lines that begin with #. You can use # to start a comment in the same places that you can use //, but the modern style prefers // over #. Some single-line comments are shown in Example 1-14.
Example 1-14. Single-line comments with // or # // This line is a comment print "Smoked Fish Soup "; print 'costs $3.25.'; # Add another dish to the menu print 'Duck with Pea Shoots '; print 'costs $9.50.'; // You can put // or # inside single-line comments // Using // or # somewhere else on a line also starts a comment print 'Shark Fin Soup'; // I hope it's good! print 'costs $25.00!'; # This is getting expensive! # Putting // or # inside a string doesn't start a comment print 'http://www.example.com'; print 'http://www.example.com/menu.php#dinner';
For a multiline comment, start the comment with /* and end with */. Everything between the /* and */ is treated as a comment by the PHP interpreter. Multiline comments are useful for temporarily turning off a small block of code. Example 1-15 shows some multiline comments.
Example 1-15. Multiline comments /* We're going to add a few things to the menu: - Smoked Fish Soup - Duck with Pea Shoots - Shark Fin Soup */ print 'Smoked Fish Soup, Duck with Pea Shoots, Shark Fin Soup '; print 'Cost: 3.25 + 9.50 + 25.00'; /* This is the old menu: The following lines are inside this comment so they don't get executed. print 'Hamburger, French Fries, Cola '; print 'Cost: 0.99 + 1.25 + 1.50'; */
There is no strict rule in PHP about which comment style is the best. Multiline comments are often the easiest to use, especially when you want to comment out a block of code or write a few lines describing a function. However, when you want to tack on a short explanation to the end of a line, a //-style comment fits nicely. Use whichever comment style you feel most comfortable with.
1.5 Chapter Summary Chapter 1 covers:
• PHP's usage by a web server to create a response or document to send back to the browser. • PHP as a server-side language, meaning it runs on the web server. This is in contrast to a client-side language such
as JavaScript. • What you sign up for when you decide to use PHP: it's free (in terms of money and speech), cross-platform,
popular, and designed for web programming. • How PHP programs that print information, process forms, and talk to a database appear. • Some basics of the structure of PHP programs, such as the PHP start and end tags (<?php and ?>), whitespace,
case-sensitivity, and comments.
Chapter 2. Working with Text and Numbers PHP can work with different types of data. In this chapter, you'll learn about individual values such as numbers and single pieces of text. You'll learn how to put text and numbers in your programs, as well as some of the limitations the PHP interpreter puts on those values and some common tricks for manipulating them.
Most PHP programs spend a lot of time handling text because they spend a lot of time generating HTML and working with information in a database. HTML is just a specially formatted kind of text, and information in a database, such as a username, a product description, or an address is a piece of text, too. Slicing and dicing text easily means you can build dynamic web pages easily.
In Chapter 1, you saw variables in action, but this chapter teaches you more about them. A variable is a named container that holds a value. The value that a variable holds can change as a program runs. When you access data submitted from a form or exchange data with a database, you use variables. In real life, a variable is something such as your checking account balance. As time goes on, the value that the phrase "checking account balance" refers to fluctuates. In a PHP program, a variable might hold the value of a submitted form parameter. Each time the program runs, the value of the submitted form parameter can be different. But whatever the value, you can always refer to it by the same name. This chapter also explains in more detail what variables are: how you create them and do things such as change their values or print them.
2.1 Text When they're used in computer programs, pieces of text are called strings. This is because they consist of individual characters, strung together. Strings can contain letters, numbers, punctuation, spaces, tabs, or any other characters. Some examples of strings are I would like 1 bowl of soup, and "Is it too hot?" he asked, and There's no spoon!. A string can even contain the contents of a binary file such as an image or a sound. The only limit to the length of a string in a PHP program is the amount of memory your computer has.
2.1.1 Defining Text Strings
There are a few ways to indicate a string in a PHP program. The simplest is to surround the string with single quotes:
print 'I would like a bowl of soup.'; print 'chicken'; print '06520'; print '"I am eating dinner," he growled.';
Since the string consists of everything inside the single quotes, that's what is printed:
I would like a bowl of soup.chicken06520"I am eating dinner," he growled.
The output of those four print statements appears all on one line. No linebreaks are added by print.[1]
[1] You may also see echo used in some PHP programs to print text. It works just like print.
The single quotes aren't part of the string. They are delimiters, which tell the PHP interpreter where the start and end of the string is. If you want to include a single quote inside a string surrounded with single quotes, put a backslash (\) before the single quote inside the string:
print 'We\'ll each have a bowl of soup.';
The \' sequence is turned into ' inside the string, so what is printed is:
We'll each have a bowl of soup.
The backslash tells the PHP interpreter to treat the following character as a literal single quote instead of the single quote that means "end of string." This is called escaping, and the backslash is called the escape character. An escape character tells the system to do something special with the character that comes after it. Inside a single-quoted string, a single quote usually means "end of string." Preceding the single quote with a backslash changes its meaning to a literal single quote character.
Curly Quotes and Text Editors Word processors often automatically turn straight quotes like ' and " into curly quotes like , , , and . The PHP interpreter only understands straight quotes as string delimiters. If you're writing PHP programs in a word processor or text editor that puts curly quotes in your programs, you have two choices: tell your word processor to stop it or use a different one. A program such as emacs, vi, BBEdit, or Windows Notepad leaves your quotes alone.
The escape character can itself be escaped. To include a literal backslash character in a string, put a back slash before it:
print 'Use a \\ to escape in a string';
This prints:
Use a \ to escape in a string
The first backslash is the escape character: it tells the PHP interpreter that something different is going on with the next character. This affects the second backslash: instead of the special action ("treat the next character literally"), a literal backslash is included in the string.
Note that these are backslashes that go from top left to bottom right, not forward slashes that go from bottom left to top right. Remember that two forward slashes ( //) indicate a comment.

You can include whitespace such as newlines in single-quoted strings:
print '<ul> <li>Beef Chow-Fun</li> <li>Sauteed Pea Shoots</li> <li>Soy Sauce Noodles</li> </ul>';
This puts the HTML on multiple lines:
<ul> <li>Beef Chow-Fun</li> <li>Sauteed Pea Shoots</li> <li>Soy Sauce Noodles</li> </ul>
Since the single quote that marks the end of the string is immediately after the </ul>, there is no newline at the end of the string.
The only characters that get special treatment inside single-quoted strings are backslash and single quote. Everything else is treated literally.
You can also delimit strings with double quotes. Double-quoted strings are similar to single-quoted strings, but they have more special characters. These special characters are listed in Table 2-1.
Table 2-1. Special characters in double-quoted strings
Character Meaning
\n Newline (ASCII 10)
\r Carriage return (ASCII 13)
\t Tab (ASCII 9)
\\ \
\$ $
\" "
\0 .. \777 Octal (base 8) number
\x0 .. \xFF Hexadecimal (base 16) number
The biggest difference between single-quoted and double-quoted strings is that when you include variable names inside a double-quoted string, the value of the variable is substituted into the string, which doesn't happen with single-quoted
strings. For example, if the variable $user held the value Bill, then 'Hi $user' is just that: Hi $user. However, "Hi $user" is Hi Bill. I get into this in more detail later in this chapter in Section 2.3.
As mentioned in Section 1.3, you can also define strings with the here document syntax. A here document begins with <<< and a delimiter word. It ends with the same word at the beginning of a line. Example 2-1 shows a here document.
Example 2-1. Here document <<<HTMLBLOCK <html> <head><title>Menu</title></head> <body bgcolor="#fffed9"> <h1>Dinner</h1> <ul> <li> Beef Chow-Fun <li> Sauteed Pea Shoots <li> Soy Sauce Noodles </ul> </body> </html> HTMLBLOCK
In Example 2-1, the delimiter word is HTMLBLOCK. Here document delimiters can contain letters, numbers, and the underscore character. The first character of the delimiter must be a letter or the underscore. It's a good idea to make all the letters in your here document delimiters uppercase to visually set off the here document. The delimiter that ends the here document must be alone on its line. The delimiter can't be indented and no whitespace, comments, or other characters are allowed after it. The only exception to this is that a semicolon is allowed immediately after the delimiter to end a statement. In that case, nothing can be on the same line after the semicolon. The code in Example 2-2 follows these rules to print a here document.
Example 2-2. Printing a here document print <<<HTMLBLOCK <html> <head><title>Menu</title></head> <body bgcolor="#fffed9"> <h1>Dinner</h1> <ul> <li> Beef Chow-Fun <li> Sauteed Pea Shoots <li> Soy Sauce Noodles </ul> </body> </html> HTMLBLOCK;
Here documents obey the same escape-character and variable substitution rules as double-quoted strings. These make them especially useful when you want to define or print a string that contains a lot of text or HTML with some variables mixed in. Later on in the chapter, Example 2-22 demonstrates this.

To combine two strings, use a . (period), the string concatenation operator. Here are some combined strings:
print 'bread' . 'fruit'; print "It's a beautiful day " . 'in the neighborhood.'; print "The price is: " . '$3.95'; print 'Inky' . 'Pinky' . 'Blinky' . 'Clyde';
The combined strings print as:
breadfruit It's a beautiful day in the neighborhood. The price is: $3.95 InkyPinkyBlinkyClyde
2.1.2 Manipulating Text
PHP has a number of built-in functions that are useful when working with strings. This section introduces the functions that are most helpful for two common tasks: validation and formatting. The "Strings" chapter of the PHP online manual, at http://www.php.net/strings, has information on other built-in string handling functions.
2.1.2.1 Validating strings
Validation is the process of checking that input coming from an external source conforms to an expected format or meaning. It's making sure that a user really entered a ZIP Code in the "ZIP Code" box of a form or a reasonable email address in the appropriate place. Chapter 6 delves into all the aspects of form handling, but since submitted form data is provided to your PHP programs as strings, this section discusses how to validate those strings.
The trim( ) function removes whitespace from the beginning and end of a string. Combined with strlen( ), which tells you the length of a string, you can find out the length of a submitted value while ignoring any leading or trailing spaces. Example 2-3 shows you how. (Chapter 3 discusses in more detail the if( ) statement used in Example 2-3.)
Example 2-3. Checking the length of a trimmed string // $_POST['zipcode'] holds the value of the submitted form parameter // "zipcode" $zipcode = trim($_POST['zipcode']); // Now $zipcode holds that value, with any leading or trailing spaces // removed $zip_length = strlen($zipcode); // Complain if the ZIP code is not 5 characters long if ($zip_length != 5) { print "Please enter a ZIP code that is 5 characters long."; }
Using trim( ) protects against someone who types a ZIP Code of 732 followed by two spaces. Sometimes the extra spaces are accidental and sometimes they are malicious. Whatever the reason, throw them away when appropriate to make sure that you're getting the string length you care about.
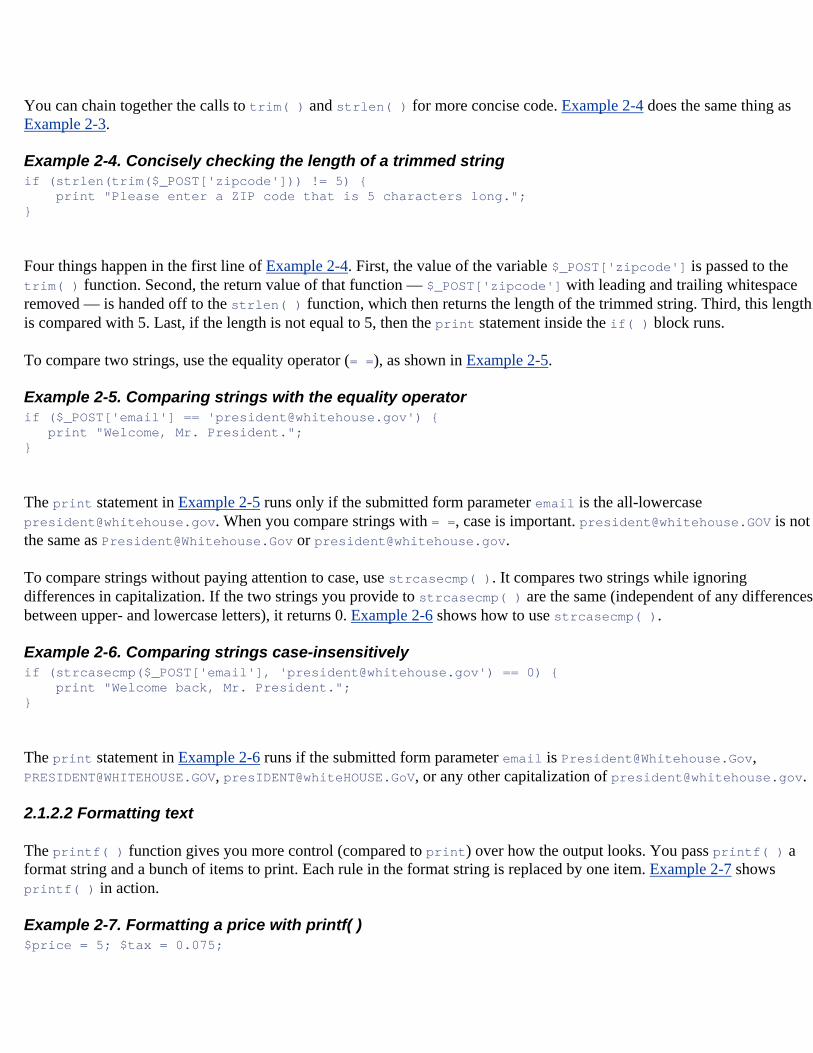
You can chain together the calls to trim( ) and strlen( ) for more concise code. Example 2-4 does the same thing as Example 2-3.
Example 2-4. Concisely checking the length of a trimmed string if (strlen(trim($_POST['zipcode'])) != 5) { print "Please enter a ZIP code that is 5 characters long."; }
Four things happen in the first line of Example 2-4. First, the value of the variable $_POST['zipcode'] is passed to the trim( ) function. Second, the return value of that function — $_POST['zipcode'] with leading and trailing whitespace removed — is handed off to the strlen( ) function, which then returns the length of the trimmed string. Third, this length is compared with 5. Last, if the length is not equal to 5, then the print statement inside the if( ) block runs.
To compare two strings, use the equality operator (= =), as shown in Example 2-5.
Example 2-5. Comparing strings with the equality operator if ($_POST['email'] == '[email protected]') { print "Welcome, Mr. President."; }
The print statement in Example 2-5 runs only if the submitted form parameter email is the all-lowercase [email protected]. When you compare strings with = =, case is important. [email protected] is not the same as [email protected] or [email protected].
To compare strings without paying attention to case, use strcasecmp( ). It compares two strings while ignoring differences in capitalization. If the two strings you provide to strcasecmp( ) are the same (independent of any differences between upper- and lowercase letters), it returns 0. Example 2-6 shows how to use strcasecmp( ).
Example 2-6. Comparing strings case-insensitively if (strcasecmp($_POST['email'], '[email protected]') == 0) { print "Welcome back, Mr. President."; }
The print statement in Example 2-6 runs if the submitted form parameter email is [email protected], [email protected], [email protected], or any other capitalization of [email protected].
2.1.2.2 Formatting text
The printf( ) function gives you more control (compared to print) over how the output looks. You pass printf( ) a format string and a bunch of items to print. Each rule in the format string is replaced by one item. Example 2-7 shows printf( ) in action.
Example 2-7. Formatting a price with printf( ) $price = 5; $tax = 0.075;
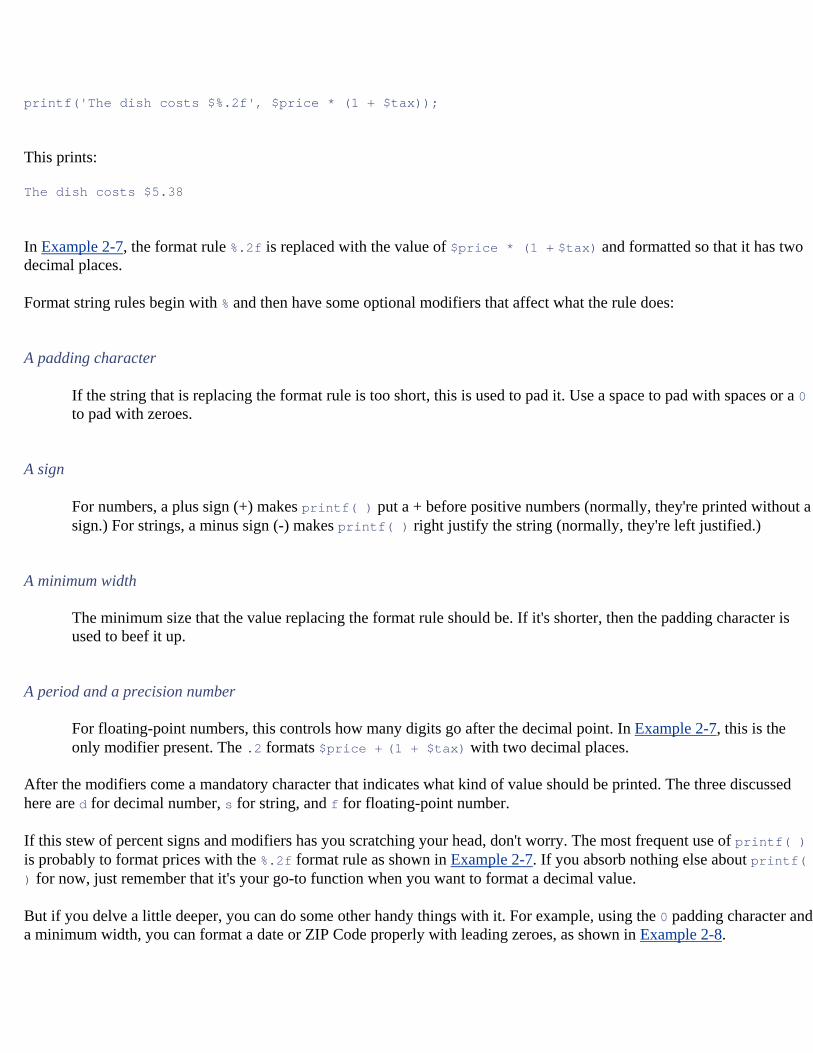
printf('The dish costs $%.2f', $price * (1 + $tax));
This prints:
The dish costs $5.38
In Example 2-7, the format rule %.2f is replaced with the value of $price * (1 + $tax) and formatted so that it has two decimal places.
Format string rules begin with % and then have some optional modifiers that affect what the rule does:
A padding character
If the string that is replacing the format rule is too short, this is used to pad it. Use a space to pad with spaces or a 0 to pad with zeroes.
A sign
For numbers, a plus sign (+) makes printf( ) put a + before positive numbers (normally, they're printed without a sign.) For strings, a minus sign (-) makes printf( ) right justify the string (normally, they're left justified.)
A minimum width
The minimum size that the value replacing the format rule should be. If it's shorter, then the padding character is used to beef it up.
A period and a precision number
For floating-point numbers, this controls how many digits go after the decimal point. In Example 2-7, this is the only modifier present. The .2 formats $price + (1 + $tax) with two decimal places.
After the modifiers come a mandatory character that indicates what kind of value should be printed. The three discussed here are d for decimal number, s for string, and f for floating-point number.
If this stew of percent signs and modifiers has you scratching your head, don't worry. The most frequent use of printf( ) is probably to format prices with the %.2f format rule as shown in Example 2-7. If you absorb nothing else about printf( ) for now, just remember that it's your go-to function when you want to format a decimal value.
But if you delve a little deeper, you can do some other handy things with it. For example, using the 0 padding character and a minimum width, you can format a date or ZIP Code properly with leading zeroes, as shown in Example 2-8.
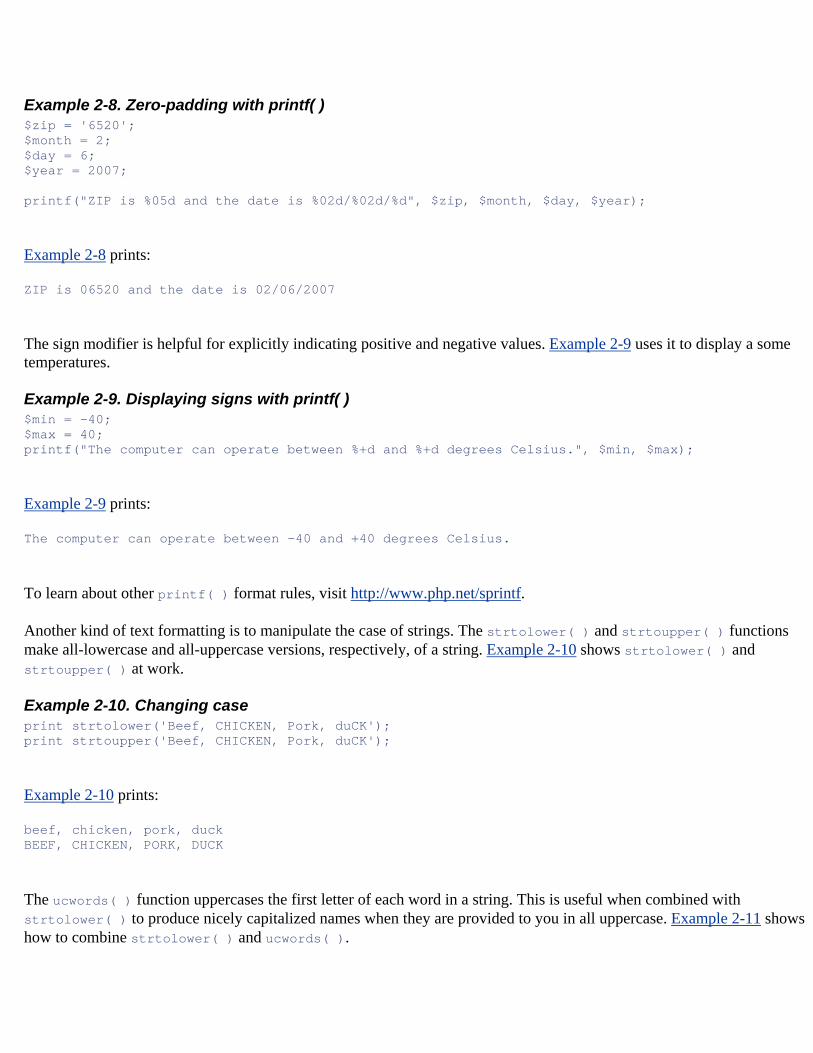
Example 2-8. Zero-padding with printf( ) $zip = '6520'; $month = 2; $day = 6; $year = 2007; printf("ZIP is %05d and the date is %02d/%02d/%d", $zip, $month, $day, $year);
Example 2-8 prints:
ZIP is 06520 and the date is 02/06/2007
The sign modifier is helpful for explicitly indicating positive and negative values. Example 2-9 uses it to display a some temperatures.
Example 2-9. Displaying signs with printf( ) $min = -40; $max = 40; printf("The computer can operate between %+d and %+d degrees Celsius.", $min, $max);
Example 2-9 prints:
The computer can operate between -40 and +40 degrees Celsius.
To learn about other printf( ) format rules, visit http://www.php.net/sprintf.
Another kind of text formatting is to manipulate the case of strings. The strtolower( ) and strtoupper( ) functions make all-lowercase and all-uppercase versions, respectively, of a string. Example 2-10 shows strtolower( ) and strtoupper( ) at work.
Example 2-10. Changing case print strtolower('Beef, CHICKEN, Pork, duCK'); print strtoupper('Beef, CHICKEN, Pork, duCK');
Example 2-10 prints:
beef, chicken, pork, duck BEEF, CHICKEN, PORK, DUCK
The ucwords( ) function uppercases the first letter of each word in a string. This is useful when combined with strtolower( ) to produce nicely capitalized names when they are provided to you in all uppercase. Example 2-11 shows how to combine strtolower( ) and ucwords( ).
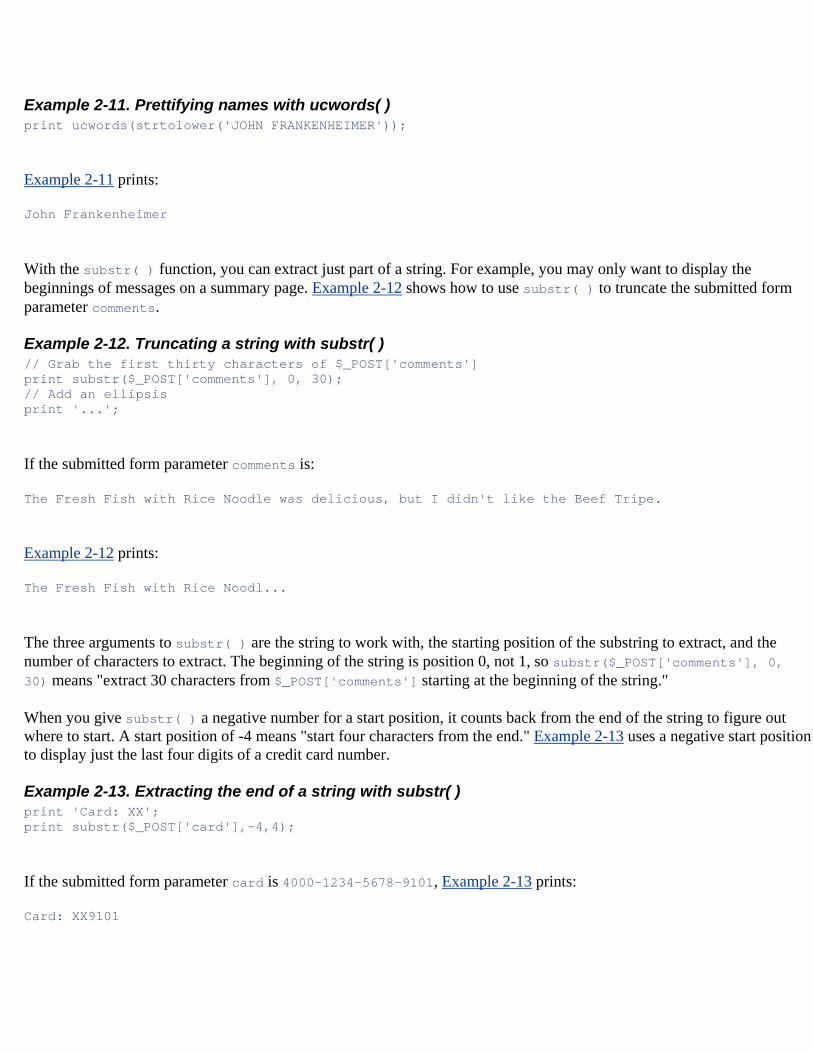
Example 2-11. Prettifying names with ucwords( ) print ucwords(strtolower('JOHN FRANKENHEIMER'));
Example 2-11 prints:
John Frankenheimer
With the substr( ) function, you can extract just part of a string. For example, you may only want to display the beginnings of messages on a summary page. Example 2-12 shows how to use substr( ) to truncate the submitted form parameter comments.
Example 2-12. Truncating a string with substr( ) // Grab the first thirty characters of $_POST['comments'] print substr($_POST['comments'], 0, 30); // Add an ellipsis print '...';
If the submitted form parameter comments is:
The Fresh Fish with Rice Noodle was delicious, but I didn't like the Beef Tripe.
Example 2-12 prints:
The Fresh Fish with Rice Noodl...
The three arguments to substr( ) are the string to work with, the starting position of the substring to extract, and the number of characters to extract. The beginning of the string is position 0, not 1, so substr($_POST['comments'], 0, 30) means "extract 30 characters from $_POST['comments'] starting at the beginning of the string."
When you give substr( ) a negative number for a start position, it counts back from the end of the string to figure out where to start. A start position of -4 means "start four characters from the end." Example 2-13 uses a negative start position to display just the last four digits of a credit card number.
Example 2-13. Extracting the end of a string with substr( ) print 'Card: XX'; print substr($_POST['card'],-4,4);
If the submitted form parameter card is 4000-1234-5678-9101, Example 2-13 prints:
Card: XX9101
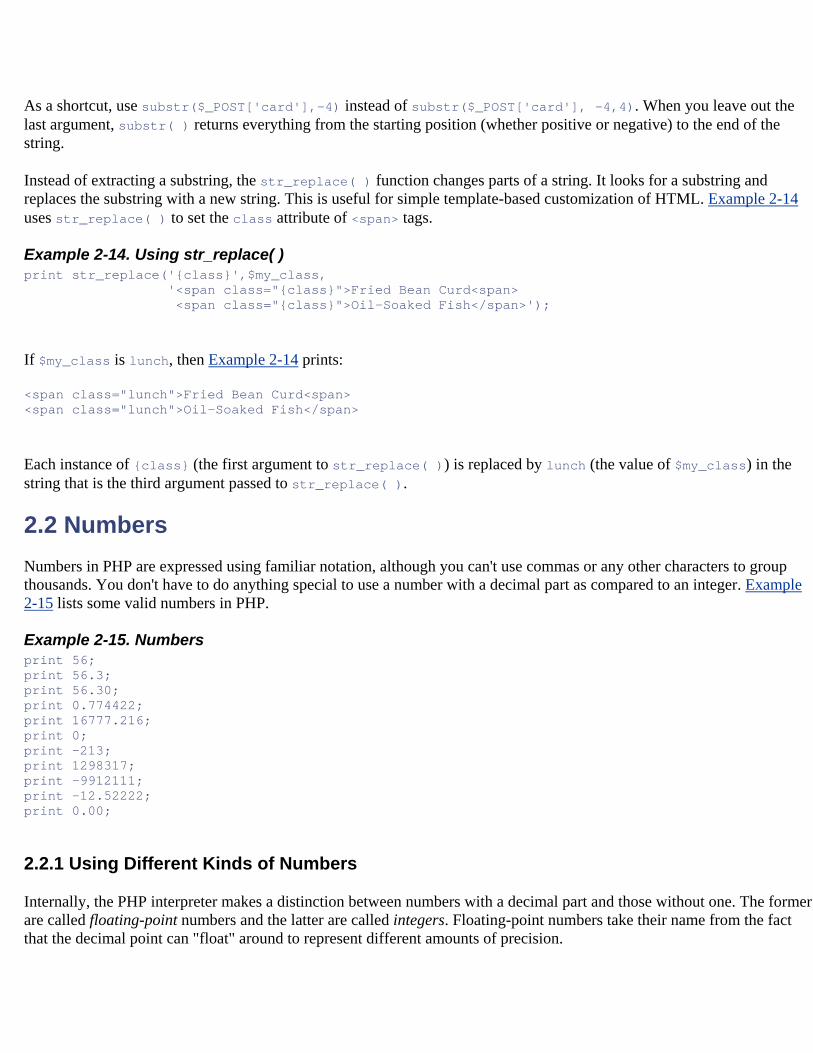
As a shortcut, use substr($_POST['card'],-4) instead of substr($_POST['card'], -4,4). When you leave out the last argument, substr( ) returns everything from the starting position (whether positive or negative) to the end of the string.
Instead of extracting a substring, the str_replace( ) function changes parts of a string. It looks for a substring and replaces the substring with a new string. This is useful for simple template-based customization of HTML. Example 2-14 uses str_replace( ) to set the class attribute of <span> tags.
Example 2-14. Using str_replace( ) print str_replace('{class}',$my_class, '<span class="{class}">Fried Bean Curd<span> <span class="{class}">Oil-Soaked Fish</span>');
If $my_class is lunch, then Example 2-14 prints:
<span class="lunch">Fried Bean Curd<span> <span class="lunch">Oil-Soaked Fish</span>
Each instance of {class} (the first argument to str_replace( )) is replaced by lunch (the value of $my_class) in the string that is the third argument passed to str_replace( ).
2.2 Numbers Numbers in PHP are expressed using familiar notation, although you can't use commas or any other characters to group thousands. You don't have to do anything special to use a number with a decimal part as compared to an integer. Example 2-15 lists some valid numbers in PHP.
Example 2-15. Numbers print 56; print 56.3; print 56.30; print 0.774422; print 16777.216; print 0; print -213; print 1298317; print -9912111; print -12.52222; print 0.00;
2.2.1 Using Different Kinds of Numbers
Internally, the PHP interpreter makes a distinction between numbers with a decimal part and those without one. The former are called floating-point numbers and the latter are called integers. Floating-point numbers take their name from the fact that the decimal point can "float" around to represent different amounts of precision.
The PHP interpreter uses the math facilities of your operating system to represent numbers so the largest and smallest numbers you can use, as well as the number of decimal places you can have in a floating-point number, vary on different systems.
One distinction between the PHP interpreter's internal representation of integers and floating-point numbers is the exactness of how they're stored. The integer 47 is stored as exactly 47. The floating-point number 46.3 could be stored as 46.2999999. This affects the correct technique of how to compare numbers. Section 3.3 explains comparisons and shows how to properly compare floating-point numbers.
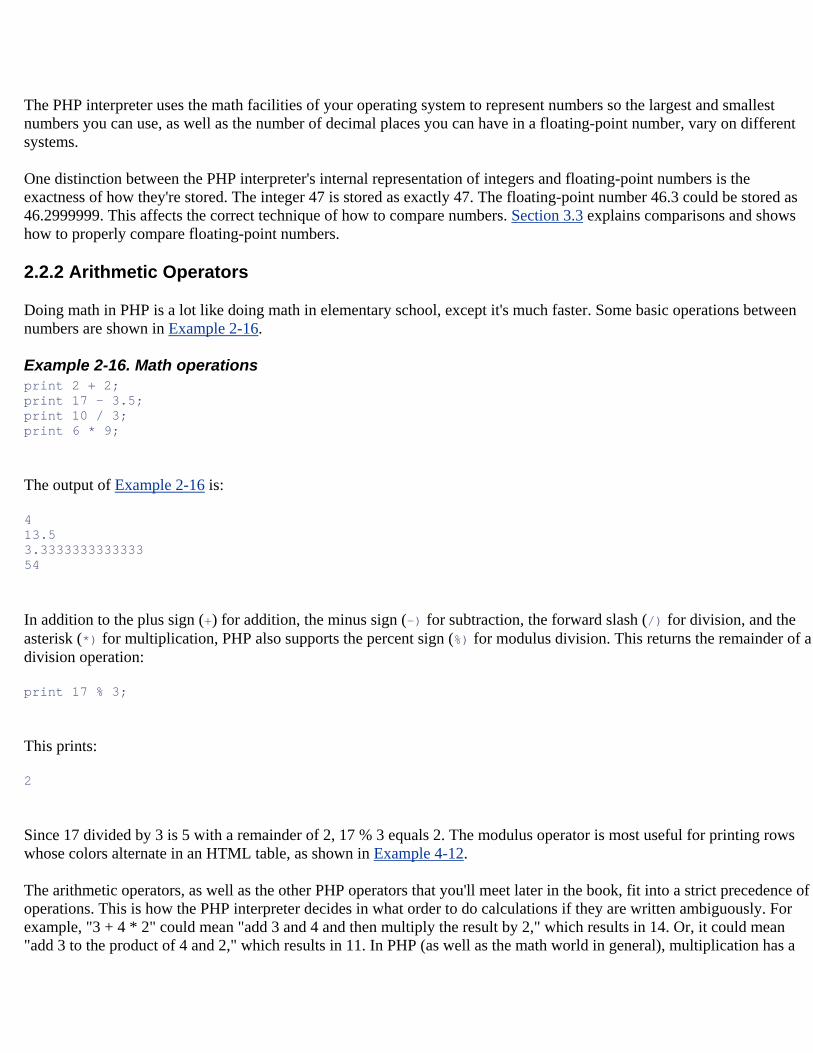
2.2.2 Arithmetic Operators
Doing math in PHP is a lot like doing math in elementary school, except it's much faster. Some basic operations between numbers are shown in Example 2-16.
Example 2-16. Math operations print 2 + 2; print 17 - 3.5; print 10 / 3; print 6 * 9;
The output of Example 2-16 is:
4 13.5 3.3333333333333 54
In addition to the plus sign (+) for addition, the minus sign (-) for subtraction, the forward slash (/) for division, and the asterisk (*) for multiplication, PHP also supports the percent sign (%) for modulus division. This returns the remainder of a division operation:
print 17 % 3;
This prints:
2
Since 17 divided by 3 is 5 with a remainder of 2, 17 % 3 equals 2. The modulus operator is most useful for printing rows whose colors alternate in an HTML table, as shown in Example 4-12.
The arithmetic operators, as well as the other PHP operators that you'll meet later in the book, fit into a strict precedence of operations. This is how the PHP interpreter decides in what order to do calculations if they are written ambiguously. For example, "3 + 4 * 2" could mean "add 3 and 4 and then multiply the result by 2," which results in 14. Or, it could mean "add 3 to the product of 4 and 2," which results in 11. In PHP (as well as the math world in general), multiplication has a

higher precedence than addition, so the second interpretation is correct. First, the PHP interpreter multiplies 4 and 2, and then it adds 3 to the result.
The precedence table of all PHP operators is part of the online PHP Manual at http://www.php.net/language.operators#language.operators.precedence. You can avoid memorizing or repeatedly referring to this table, however, with a healthy dose of parentheses. Grouping operations inside parentheses unambiguously tells the PHP interpreter to do what's inside the parentheses first. The expression "(3 + 4) * 2" means "add 3 and 4 and then multiply the result by 2." The expression "3 + (4 * 2)" means "multiply 4 and 2 and then add 3 to the result."
Like other modern programming languages, you don't have to do anything special to ensure that the results of your calculations are properly represented as integers or floating-point numbers. Dividing one integer by another produces a floating-point result if the two integers don't divide evenly. Similarly, if you do something to an integer that makes it larger than the maximum allowable integer or smaller than the minimum possible integer, the PHP interpreter converts the result into a floating-point number so you get the proper result for your calculation.
2.3 Variables Variables hold the data that your program manipulates while it runs, such as information about a user that you've loaded from a database or entries that have been typed into an HTML form. In PHP, variables are denoted by $ followed by the variable's name. To assign a value to a variable, use an equals sign (=). This is known as the assignment operator.
$plates = 5; $dinner = 'Beef Chow-Fun'; $cost_of_dinner = 8.95; $cost_of_lunch = $cost_of_dinner;
Assignment works with here documents as well:
$page_header = <<<HTML_HEADER <html> <head><title>Menu</title></head> <body bgcolor="#fffed9"> <h1>Dinner</h1> HTML_HEADER; $page_footer = <<<HTML_FOOTER </body> </html> HTML_FOOTER;
Variable names must begin with letter or an underscore. The rest of the characters in the variable name may be letters, numbers, or an underscore. Table 2-2 lists some acceptable variable names.
Table 2-2. Acceptable variable names
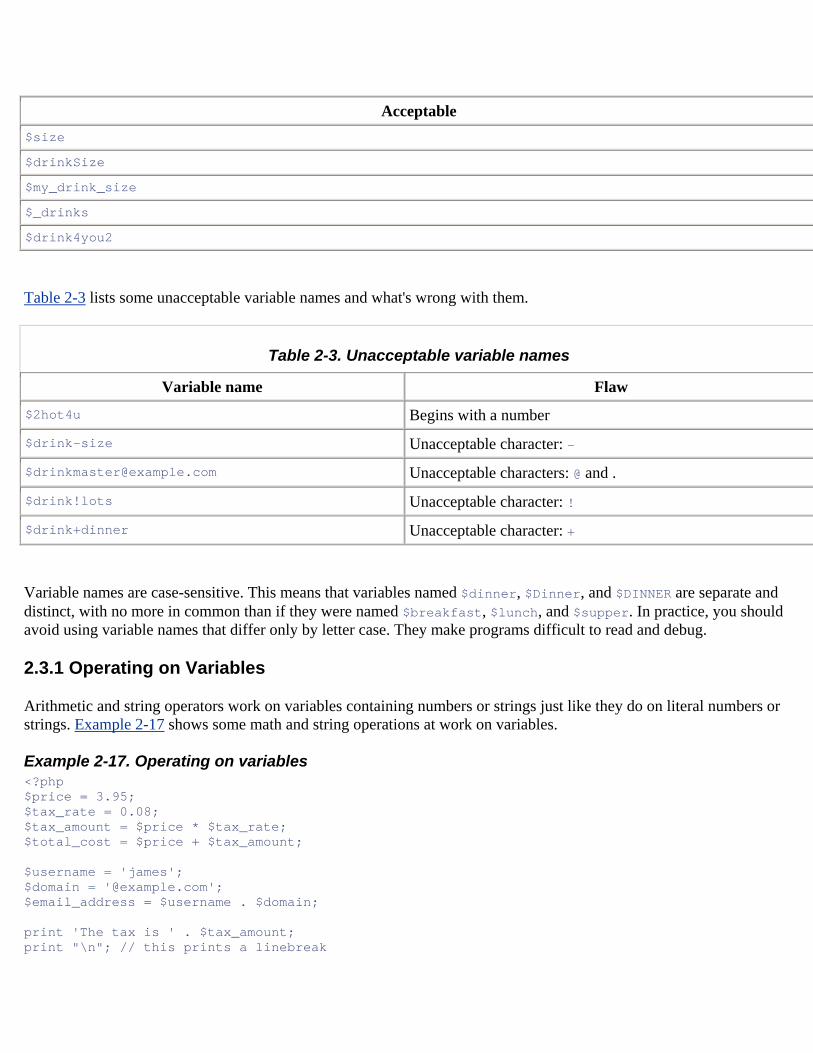
Acceptable $size $drinkSize $my_drink_size $_drinks $drink4you2
Table 2-3 lists some unacceptable variable names and what's wrong with them.
Table 2-3. Unacceptable variable names
Variable name Flaw
$2hot4u Begins with a number
$drink-size Unacceptable character: -
[email protected] Unacceptable characters: @ and .
$drink!lots Unacceptable character: !
$drink+dinner Unacceptable character: +
Variable names are case-sensitive. This means that variables named $dinner, $Dinner, and $DINNER are separate and distinct, with no more in common than if they were named $breakfast, $lunch, and $supper. In practice, you should avoid using variable names that differ only by letter case. They make programs difficult to read and debug.
2.3.1 Operating on Variables
Arithmetic and string operators work on variables containing numbers or strings just like they do on literal numbers or strings. Example 2-17 shows some math and string operations at work on variables.
Example 2-17. Operating on variables <?php $price = 3.95; $tax_rate = 0.08; $tax_amount = $price * $tax_rate; $total_cost = $price + $tax_amount; $username = 'james'; $domain = '@example.com'; $email_address = $username . $domain; print 'The tax is ' . $tax_amount; print "\n"; // this prints a linebreak
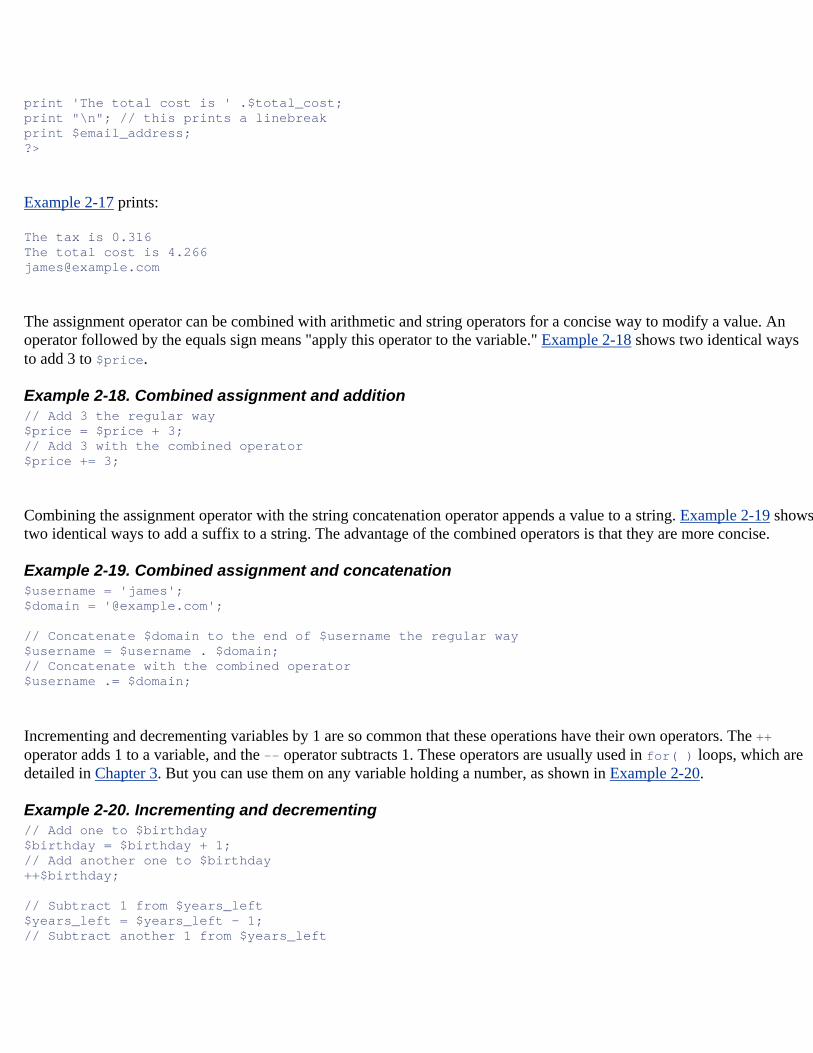
print 'The total cost is ' .$total_cost; print "\n"; // this prints a linebreak print $email_address; ?>
Example 2-17 prints:
The tax is 0.316 The total cost is 4.266 [email protected]
The assignment operator can be combined with arithmetic and string operators for a concise way to modify a value. An operator followed by the equals sign means "apply this operator to the variable." Example 2-18 shows two identical ways to add 3 to $price.
Example 2-18. Combined assignment and addition // Add 3 the regular way $price = $price + 3; // Add 3 with the combined operator $price += 3;
Combining the assignment operator with the string concatenation operator appends a value to a string. Example 2-19 shows two identical ways to add a suffix to a string. The advantage of the combined operators is that they are more concise.
Example 2-19. Combined assignment and concatenation $username = 'james'; $domain = '@example.com'; // Concatenate $domain to the end of $username the regular way $username = $username . $domain; // Concatenate with the combined operator $username .= $domain;
Incrementing and decrementing variables by 1 are so common that these operations have their own operators. The ++ operator adds 1 to a variable, and the -- operator subtracts 1. These operators are usually used in for( ) loops, which are detailed in Chapter 3. But you can use them on any variable holding a number, as shown in Example 2-20.
Example 2-20. Incrementing and decrementing // Add one to $birthday $birthday = $birthday + 1; // Add another one to $birthday ++$birthday; // Subtract 1 from $years_left $years_left = $years_left - 1; // Subtract another 1 from $years_left
--$years_left;
2.3.2 Putting Variables Inside Strings
Frequently, you print the values of variables combined with other text, such as when you display an HTML table with calculated values in the cells or a user profile page that shows a particular user's information in a standardized HTML template. Double-quoted strings and here documents have a property that makes this easy: you can interpolate variables into them. This means that if the string contains a variable name, the variable name is replaced by the value of the variable. In Example 2-21, the value of $email is interpolated into the printed string.
Example 2-21. Variable interpolation $email = '[email protected]'; print "Send replies to: $email";
Example 2-21 prints:
Send replies to: [email protected]
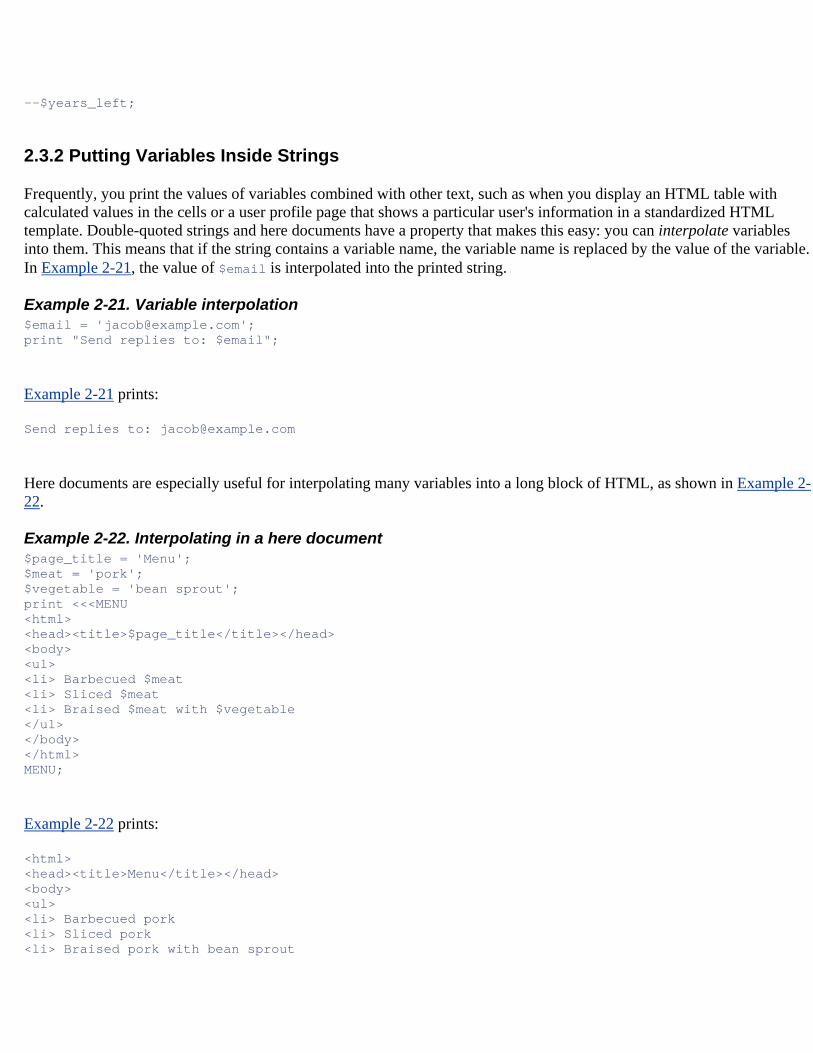
Here documents are especially useful for interpolating many variables into a long block of HTML, as shown in Example 2-22.
Example 2-22. Interpolating in a here document $page_title = 'Menu'; $meat = 'pork'; $vegetable = 'bean sprout'; print <<<MENU <html> <head><title>$page_title</title></head> <body> <ul> <li> Barbecued $meat <li> Sliced $meat <li> Braised $meat with $vegetable </ul> </body> </html> MENU;
Example 2-22 prints:
<html> <head><title>Menu</title></head> <body> <ul> <li> Barbecued pork <li> Sliced pork <li> Braised pork with bean sprout
</ul> </body>
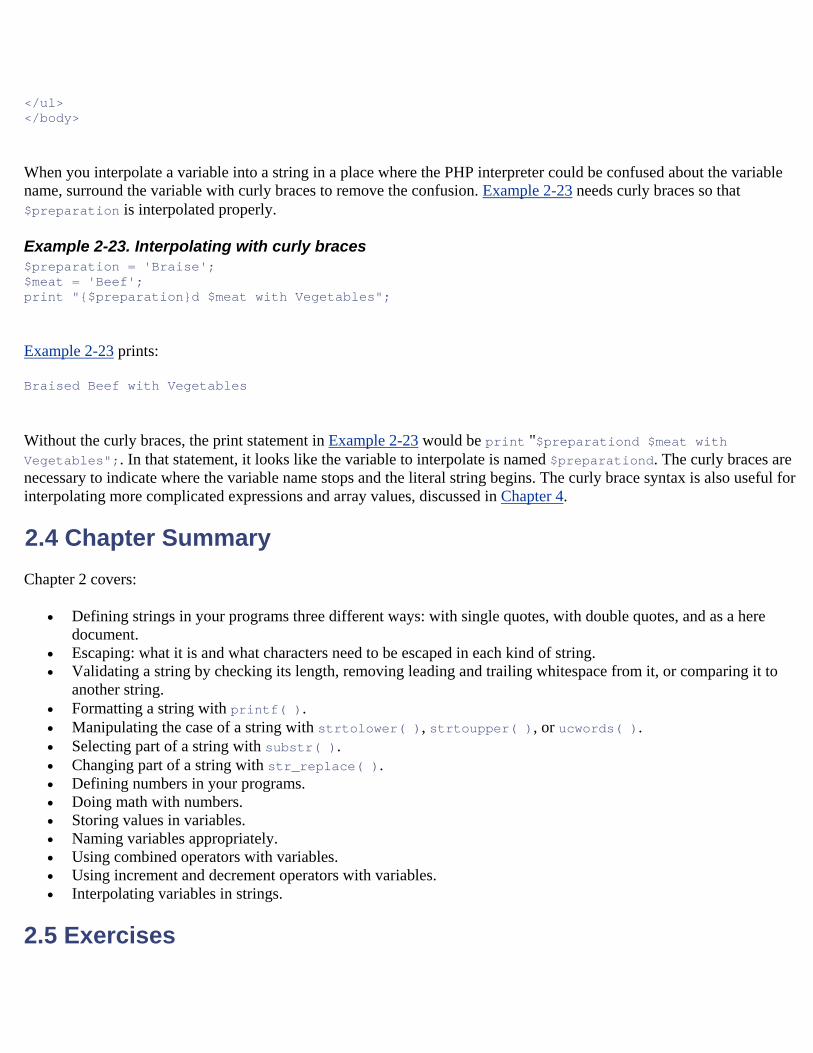
When you interpolate a variable into a string in a place where the PHP interpreter could be confused about the variable name, surround the variable with curly braces to remove the confusion. Example 2-23 needs curly braces so that $preparation is interpolated properly.
Example 2-23. Interpolating with curly braces $preparation = 'Braise'; $meat = 'Beef'; print "{$preparation}d $meat with Vegetables";
Example 2-23 prints:
Braised Beef with Vegetables
Without the curly braces, the print statement in Example 2-23 would be print "$preparationd $meat with Vegetables";. In that statement, it looks like the variable to interpolate is named $preparationd. The curly braces are necessary to indicate where the variable name stops and the literal string begins. The curly brace syntax is also useful for interpolating more complicated expressions and array values, discussed in Chapter 4.
2.4 Chapter Summary Chapter 2 covers:
• Defining strings in your programs three different ways: with single quotes, with double quotes, and as a here document.
• Escaping: what it is and what characters need to be escaped in each kind of string. • Validating a string by checking its length, removing leading and trailing whitespace from it, or comparing it to
another string. • Formatting a string with printf( ). • Manipulating the case of a string with strtolower( ), strtoupper( ), or ucwords( ). • Selecting part of a string with substr( ). • Changing part of a string with str_replace( ). • Defining numbers in your programs. • Doing math with numbers. • Storing values in variables. • Naming variables appropriately. • Using combined operators with variables. • Using increment and decrement operators with variables. • Interpolating variables in strings.
2.5 Exercises
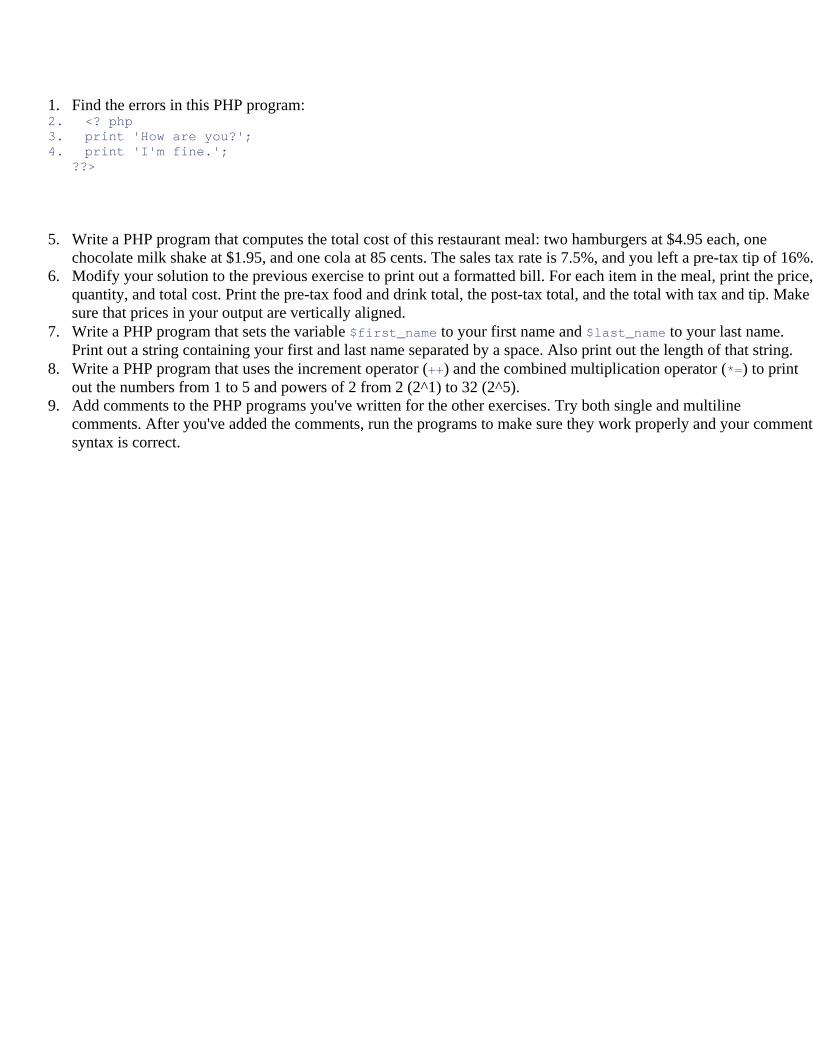
1. Find the errors in this PHP program: 2. <? php 3. print 'How are you?'; 4. print 'I'm fine.';
??>
5. Write a PHP program that computes the total cost of this restaurant meal: two hamburgers at $4.95 each, one chocolate milk shake at $1.95, and one cola at 85 cents. The sales tax rate is 7.5%, and you left a pre-tax tip of 16%.
6. Modify your solution to the previous exercise to print out a formatted bill. For each item in the meal, print the price, quantity, and total cost. Print the pre-tax food and drink total, the post-tax total, and the total with tax and tip. Make sure that prices in your output are vertically aligned.
7. Write a PHP program that sets the variable $first_name to your first name and $last_name to your last name. Print out a string containing your first and last name separated by a space. Also print out the length of that string.
8. Write a PHP program that uses the increment operator (++) and the combined multiplication operator (*=) to print out the numbers from 1 to 5 and powers of 2 from 2 (2^1) to 32 (2^5).
9. Add comments to the PHP programs you've written for the other exercises. Try both single and multiline comments. After you've added the comments, run the programs to make sure they work properly and your comment syntax is correct.
Chapter 3. Making Decisions and Repeating Yourself Chapter 2 covered the basics of how to represent data in PHP programs. A program full of data is only half complete, though. The other piece of the puzzle is using that data to control how the program runs, taking actions such as:
• If an administrative user is logged in, print a special menu. • Print a different page header if it's after three o'clock. • Notify a user if new messages have been posted since she last logged in.
All of these actions have something in common: they make decisions about whether a certain logical condition involving data is true or false. In the first action, the logical condition is "Is an administrative user logged in?" If the condition is true (yes, an administrative user is logged in), then a special menu is printed. The same kind of thing happens in the next example. If the condition "is it after three o'clock?" is true, then a different page header is printed. Likewise, if "Have new messages been posted since the user last logged in?" is true, then the user is notified.
When making decisions, the PHP interpreter boils down an expression into true or false. Section 3.1 explains how the interpreter decides which expressions and values are true and which are false.
Those true and false values are used by language constructs such as if( ) to decide whether to run certain statements in a program. The ins and outs of if( ) are detailed later in this chapter in Section 3.2. Use if( ) and similar constructs any time the outcome of a program depends on some changing conditions.
While true and false are the cornerstones of decision making, usually you want to ask more complicated questions, such as "is this user at least 21 years old?" or "does this user have a monthly subscription to the web site or enough money in their account to buy a daily pass?" Section 3.3, later in this chapter, explains PHP's comparison and logical operators. These help you express whatever kind of decision you need to make in a program, such as seeing whether numbers or strings are greater than or less than each other. You can also chain together decisions into a larger decision that depends on its pieces.
Decision making is also used in programs when you want to repeatedly execute certain statements — you need a way to indicate when the repetition should stop. Frequently, this is determined by a simple counter, such as "repeat 10 times." This is like asking the question "Have I repeated 10 times yet?" If so, then the program continues. If not, the action is repeated again. Determining when to stop can be more complicated, too — for example, "show another math question to a student until 6 questions have been answered correctly." Section 3.4, later in this chapter, introduces PHP's while( ) and for( ) constructs, with which you can implement these kinds of loops.
3.1 Understanding true and false Every expression in a PHP program has a truth value: true or false. Sometimes that truth value is important because you use it in a calculation, but sometimes you ignore it. Understanding how expressions evaluate to true or to false is an important part of understanding PHP.
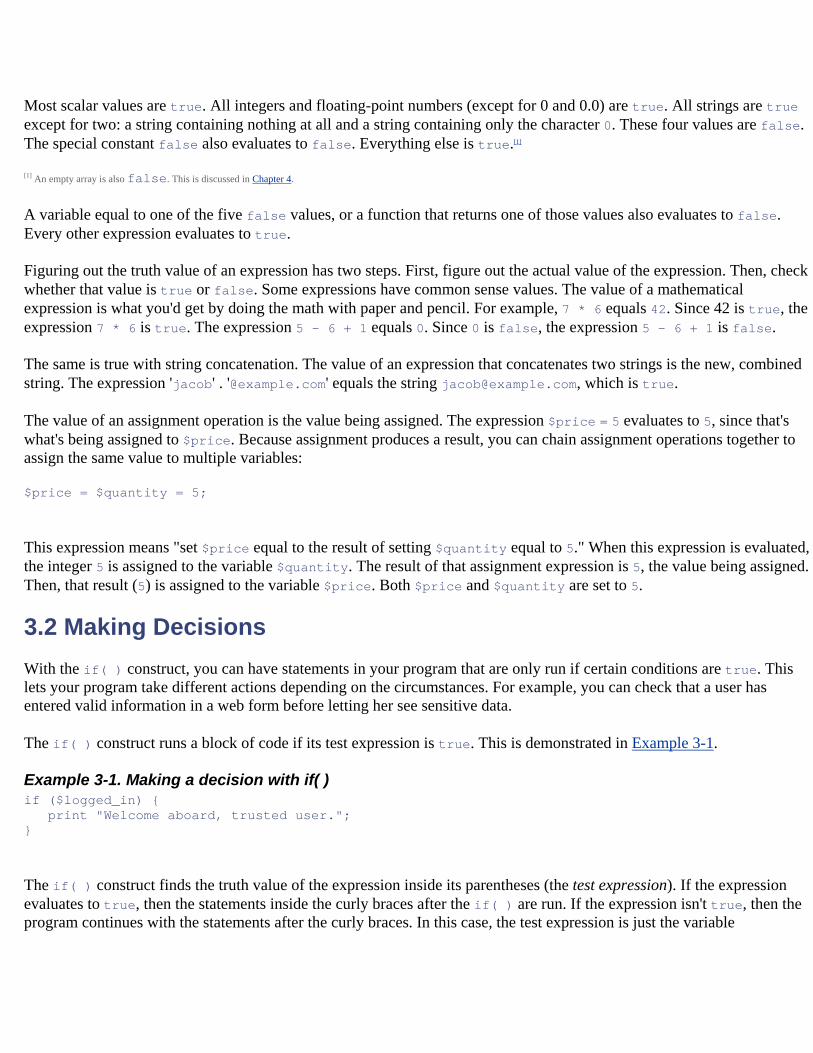
Most scalar values are true. All integers and floating-point numbers (except for 0 and 0.0) are true. All strings are true except for two: a string containing nothing at all and a string containing only the character 0. These four values are false. The special constant false also evaluates to false. Everything else is true.[1]
[1] An empty array is also false. This is discussed in Chapter 4.
A variable equal to one of the five false values, or a function that returns one of those values also evaluates to false. Every other expression evaluates to true.
Figuring out the truth value of an expression has two steps. First, figure out the actual value of the expression. Then, check whether that value is true or false. Some expressions have common sense values. The value of a mathematical expression is what you'd get by doing the math with paper and pencil. For example, 7 * 6 equals 42. Since 42 is true, the expression 7 * 6 is true. The expression 5 - 6 + 1 equals 0. Since 0 is false, the expression 5 - 6 + 1 is false.
The same is true with string concatenation. The value of an expression that concatenates two strings is the new, combined string. The expression 'jacob' . '@example.com' equals the string [email protected], which is true.
The value of an assignment operation is the value being assigned. The expression $price = 5 evaluates to 5, since that's what's being assigned to $price. Because assignment produces a result, you can chain assignment operations together to assign the same value to multiple variables:
$price = $quantity = 5;
This expression means "set $price equal to the result of setting $quantity equal to 5." When this expression is evaluated, the integer 5 is assigned to the variable $quantity. The result of that assignment expression is 5, the value being assigned. Then, that result (5) is assigned to the variable $price. Both $price and $quantity are set to 5.
3.2 Making Decisions With the if( ) construct, you can have statements in your program that are only run if certain conditions are true. This lets your program take different actions depending on the circumstances. For example, you can check that a user has entered valid information in a web form before letting her see sensitive data.
The if( ) construct runs a block of code if its test expression is true. This is demonstrated in Example 3-1.
Example 3-1. Making a decision with if( ) if ($logged_in) { print "Welcome aboard, trusted user."; }
The if( ) construct finds the truth value of the expression inside its parentheses (the test expression). If the expression evaluates to true, then the statements inside the curly braces after the if( ) are run. If the expression isn't true, then the program continues with the statements after the curly braces. In this case, the test expression is just the variable
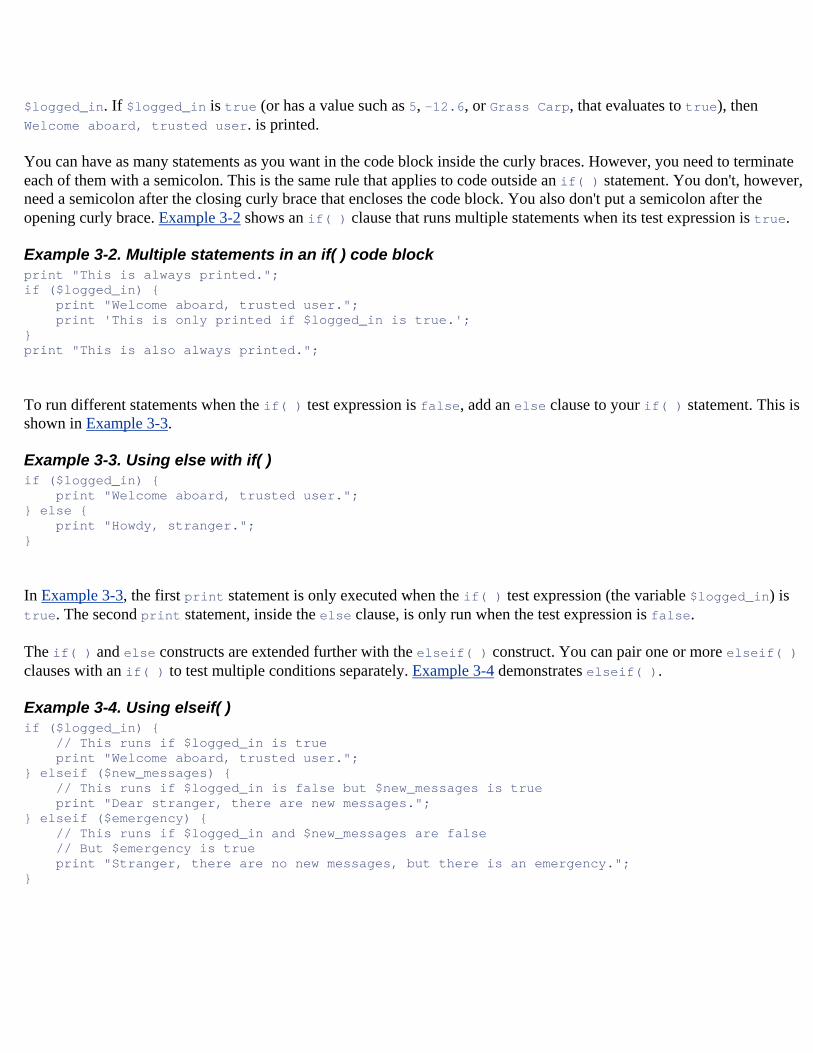
$logged_in. If $logged_in is true (or has a value such as 5, -12.6, or Grass Carp, that evaluates to true), then Welcome aboard, trusted user. is printed.
You can have as many statements as you want in the code block inside the curly braces. However, you need to terminate each of them with a semicolon. This is the same rule that applies to code outside an if( ) statement. You don't, however, need a semicolon after the closing curly brace that encloses the code block. You also don't put a semicolon after the opening curly brace. Example 3-2 shows an if( ) clause that runs multiple statements when its test expression is true.
Example 3-2. Multiple statements in an if( ) code block print "This is always printed."; if ($logged_in) { print "Welcome aboard, trusted user."; print 'This is only printed if $logged_in is true.'; } print "This is also always printed.";
To run different statements when the if( ) test expression is false, add an else clause to your if( ) statement. This is shown in Example 3-3.
Example 3-3. Using else with if( ) if ($logged_in) { print "Welcome aboard, trusted user."; } else { print "Howdy, stranger."; }
In Example 3-3, the first print statement is only executed when the if( ) test expression (the variable $logged_in) is true. The second print statement, inside the else clause, is only run when the test expression is false.
The if( ) and else constructs are extended further with the elseif( ) construct. You can pair one or more elseif( ) clauses with an if( ) to test multiple conditions separately. Example 3-4 demonstrates elseif( ).
Example 3-4. Using elseif( ) if ($logged_in) { // This runs if $logged_in is true print "Welcome aboard, trusted user."; } elseif ($new_messages) { // This runs if $logged_in is false but $new_messages is true print "Dear stranger, there are new messages."; } elseif ($emergency) { // This runs if $logged_in and $new_messages are false // But $emergency is true print "Stranger, there are no new messages, but there is an emergency."; }
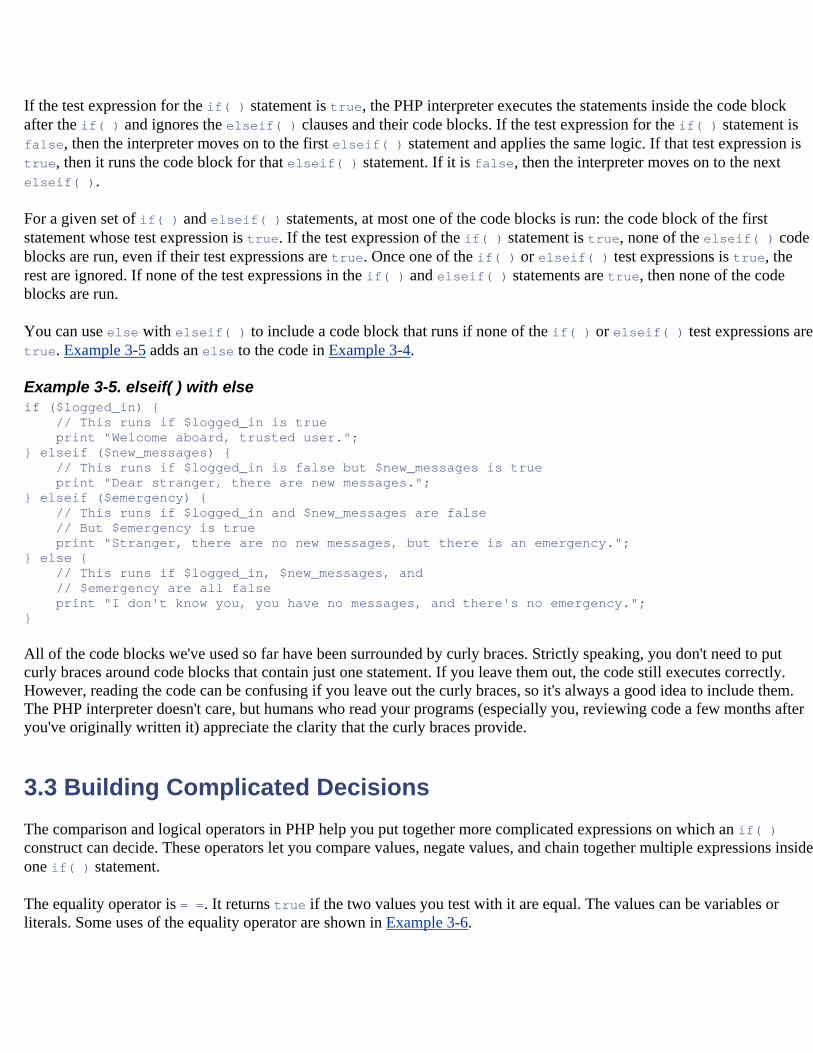
If the test expression for the if( ) statement is true, the PHP interpreter executes the statements inside the code block after the if( ) and ignores the elseif( ) clauses and their code blocks. If the test expression for the if( ) statement is false, then the interpreter moves on to the first elseif( ) statement and applies the same logic. If that test expression is true, then it runs the code block for that elseif( ) statement. If it is false, then the interpreter moves on to the next elseif( ).
For a given set of if( ) and elseif( ) statements, at most one of the code blocks is run: the code block of the first statement whose test expression is true. If the test expression of the if( ) statement is true, none of the elseif( ) code blocks are run, even if their test expressions are true. Once one of the if( ) or elseif( ) test expressions is true, the rest are ignored. If none of the test expressions in the if( ) and elseif( ) statements are true, then none of the code blocks are run.
You can use else with elseif( ) to include a code block that runs if none of the if( ) or elseif( ) test expressions are true. Example 3-5 adds an else to the code in Example 3-4.
Example 3-5. elseif( ) with else if ($logged_in) { // This runs if $logged_in is true print "Welcome aboard, trusted user."; } elseif ($new_messages) { // This runs if $logged_in is false but $new_messages is true print "Dear stranger, there are new messages."; } elseif ($emergency) { // This runs if $logged_in and $new_messages are false // But $emergency is true print "Stranger, there are no new messages, but there is an emergency."; } else { // This runs if $logged_in, $new_messages, and // $emergency are all false print "I don't know you, you have no messages, and there's no emergency."; } All of the code blocks we've used so far have been surrounded by curly braces. Strictly speaking, you don't need to put curly braces around code blocks that contain just one statement. If you leave them out, the code still executes correctly. However, reading the code can be confusing if you leave out the curly braces, so it's always a good idea to include them. The PHP interpreter doesn't care, but humans who read your programs (especially you, reviewing code a few months after you've originally written it) appreciate the clarity that the curly braces provide.
3.3 Building Complicated Decisions The comparison and logical operators in PHP help you put together more complicated expressions on which an if( ) construct can decide. These operators let you compare values, negate values, and chain together multiple expressions inside one if( ) statement.
The equality operator is = =. It returns true if the two values you test with it are equal. The values can be variables or literals. Some uses of the equality operator are shown in Example 3-6.
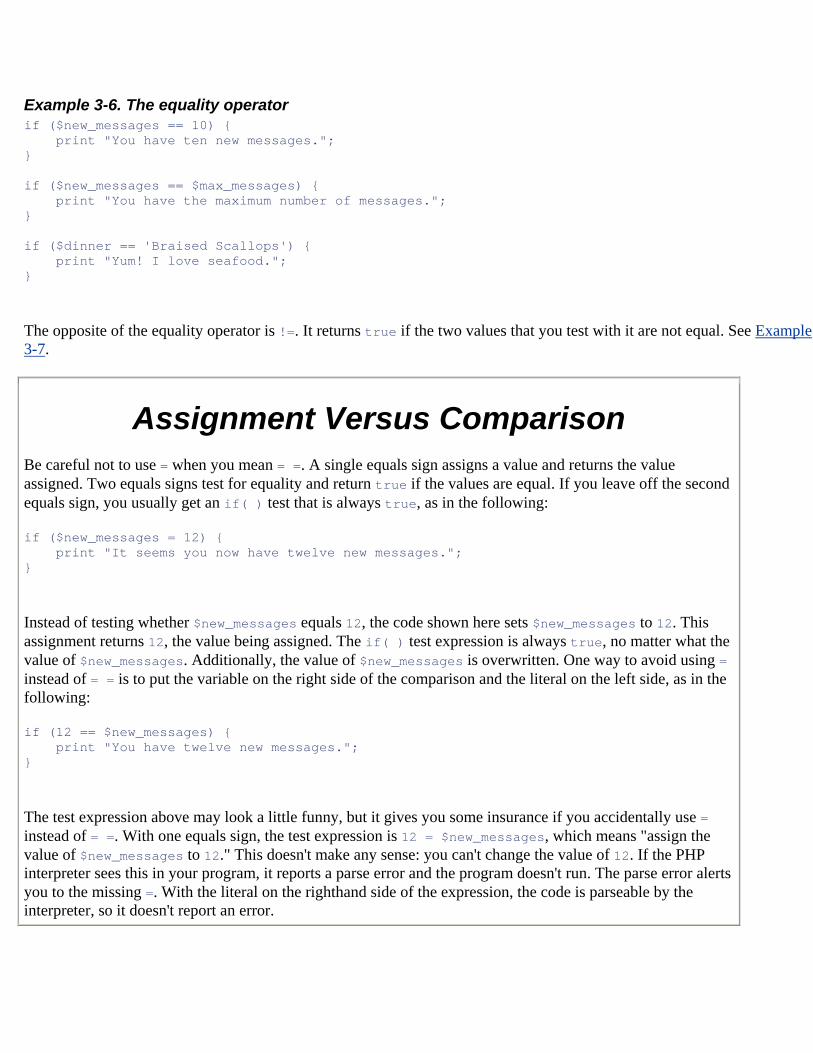
Example 3-6. The equality operator if ($new_messages == 10) { print "You have ten new messages."; } if ($new_messages == $max_messages) { print "You have the maximum number of messages."; } if ($dinner == 'Braised Scallops') { print "Yum! I love seafood."; }
The opposite of the equality operator is !=. It returns true if the two values that you test with it are not equal. See Example 3-7.
Assignment Versus Comparison Be careful not to use = when you mean = =. A single equals sign assigns a value and returns the value assigned. Two equals signs test for equality and return true if the values are equal. If you leave off the second equals sign, you usually get an if( ) test that is always true, as in the following:
if ($new_messages = 12) { print "It seems you now have twelve new messages."; }
Instead of testing whether $new_messages equals 12, the code shown here sets $new_messages to 12. This assignment returns 12, the value being assigned. The if( ) test expression is always true, no matter what the value of $new_messages. Additionally, the value of $new_messages is overwritten. One way to avoid using = instead of = = is to put the variable on the right side of the comparison and the literal on the left side, as in the following:
if (12 == $new_messages) { print "You have twelve new messages."; }
The test expression above may look a little funny, but it gives you some insurance if you accidentally use = instead of = =. With one equals sign, the test expression is 12 = $new_messages, which means "assign the value of $new_messages to 12." This doesn't make any sense: you can't change the value of 12. If the PHP interpreter sees this in your program, it reports a parse error and the program doesn't run. The parse error alerts you to the missing =. With the literal on the righthand side of the expression, the code is parseable by the interpreter, so it doesn't report an error.
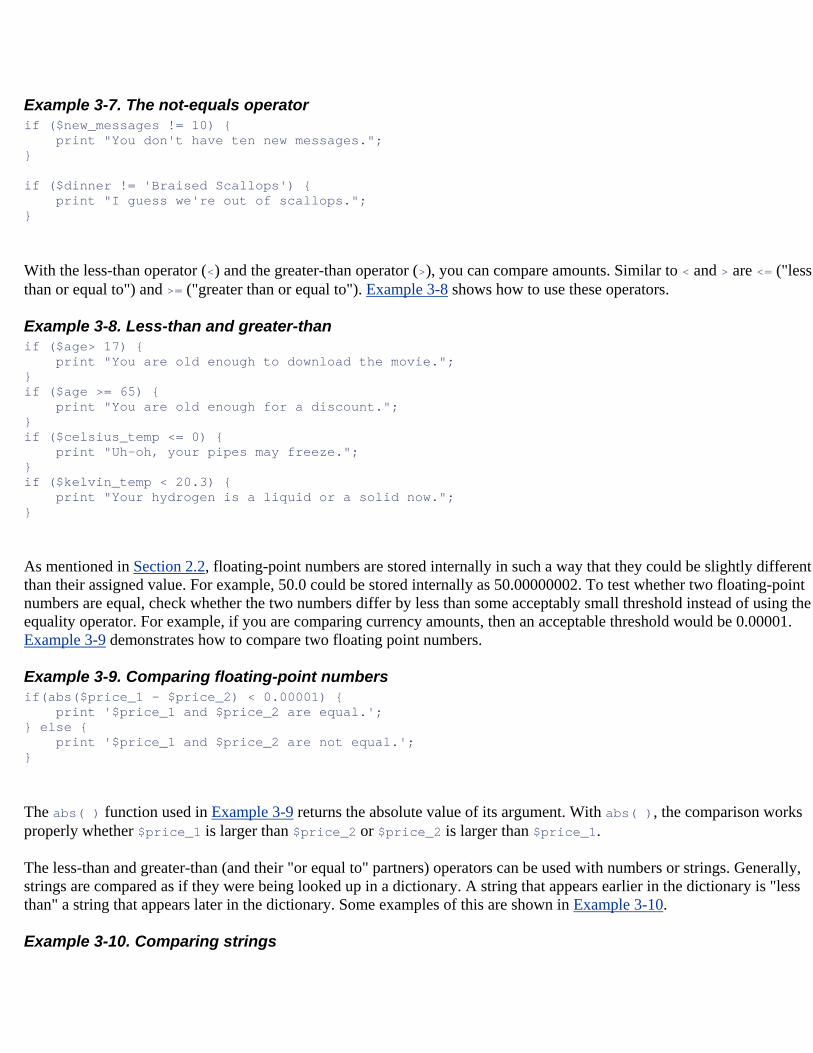
Example 3-7. The not-equals operator if ($new_messages != 10) { print "You don't have ten new messages."; } if ($dinner != 'Braised Scallops') { print "I guess we're out of scallops."; }
With the less-than operator (<) and the greater-than operator (>), you can compare amounts. Similar to < and > are <= ("less than or equal to") and >= ("greater than or equal to"). Example 3-8 shows how to use these operators.
Example 3-8. Less-than and greater-than if ($age> 17) { print "You are old enough to download the movie."; } if ($age >= 65) { print "You are old enough for a discount."; } if ($celsius_temp <= 0) { print "Uh-oh, your pipes may freeze."; } if ($kelvin_temp < 20.3) { print "Your hydrogen is a liquid or a solid now."; }
As mentioned in Section 2.2, floating-point numbers are stored internally in such a way that they could be slightly different than their assigned value. For example, 50.0 could be stored internally as 50.00000002. To test whether two floating-point numbers are equal, check whether the two numbers differ by less than some acceptably small threshold instead of using the equality operator. For example, if you are comparing currency amounts, then an acceptable threshold would be 0.00001. Example 3-9 demonstrates how to compare two floating point numbers.
Example 3-9. Comparing floating-point numbers if(abs($price_1 - $price_2) < 0.00001) { print '$price_1 and $price_2 are equal.'; } else { print '$price_1 and $price_2 are not equal.'; }
The abs( ) function used in Example 3-9 returns the absolute value of its argument. With abs( ), the comparison works properly whether $price_1 is larger than $price_2 or $price_2 is larger than $price_1.
The less-than and greater-than (and their "or equal to" partners) operators can be used with numbers or strings. Generally, strings are compared as if they were being looked up in a dictionary. A string that appears earlier in the dictionary is "less than" a string that appears later in the dictionary. Some examples of this are shown in Example 3-10.
Example 3-10. Comparing strings
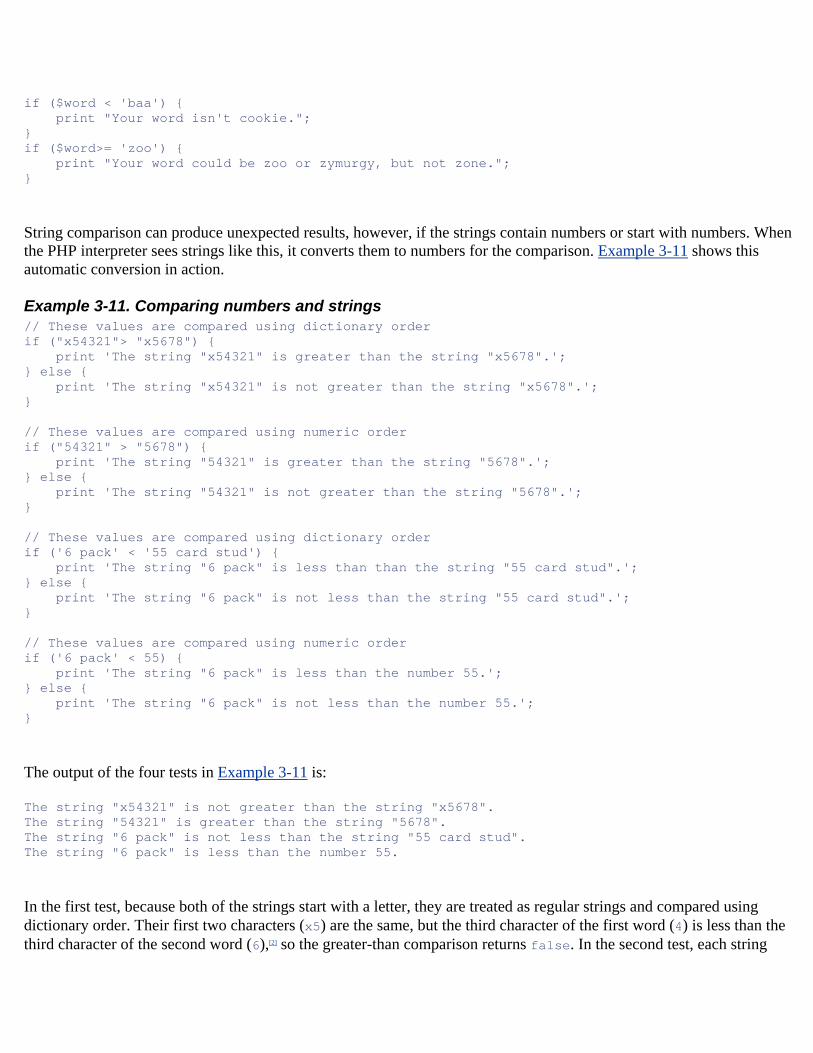
if ($word < 'baa') { print "Your word isn't cookie."; } if ($word>= 'zoo') { print "Your word could be zoo or zymurgy, but not zone."; }
String comparison can produce unexpected results, however, if the strings contain numbers or start with numbers. When the PHP interpreter sees strings like this, it converts them to numbers for the comparison. Example 3-11 shows this automatic conversion in action.
Example 3-11. Comparing numbers and strings // These values are compared using dictionary order if ("x54321"> "x5678") { print 'The string "x54321" is greater than the string "x5678".'; } else { print 'The string "x54321" is not greater than the string "x5678".'; } // These values are compared using numeric order if ("54321" > "5678") { print 'The string "54321" is greater than the string "5678".'; } else { print 'The string "54321" is not greater than the string "5678".'; } // These values are compared using dictionary order if ('6 pack' < '55 card stud') { print 'The string "6 pack" is less than than the string "55 card stud".'; } else { print 'The string "6 pack" is not less than the string "55 card stud".'; } // These values are compared using numeric order if ('6 pack' < 55) { print 'The string "6 pack" is less than the number 55.'; } else { print 'The string "6 pack" is not less than the number 55.'; }
The output of the four tests in Example 3-11 is:
The string "x54321" is not greater than the string "x5678". The string "54321" is greater than the string "5678". The string "6 pack" is not less than the string "55 card stud". The string "6 pack" is less than the number 55.
In the first test, because both of the strings start with a letter, they are treated as regular strings and compared using dictionary order. Their first two characters (x5) are the same, but the third character of the first word (4) is less than the third character of the second word (6),[2] so the greater-than comparison returns false. In the second test, each string
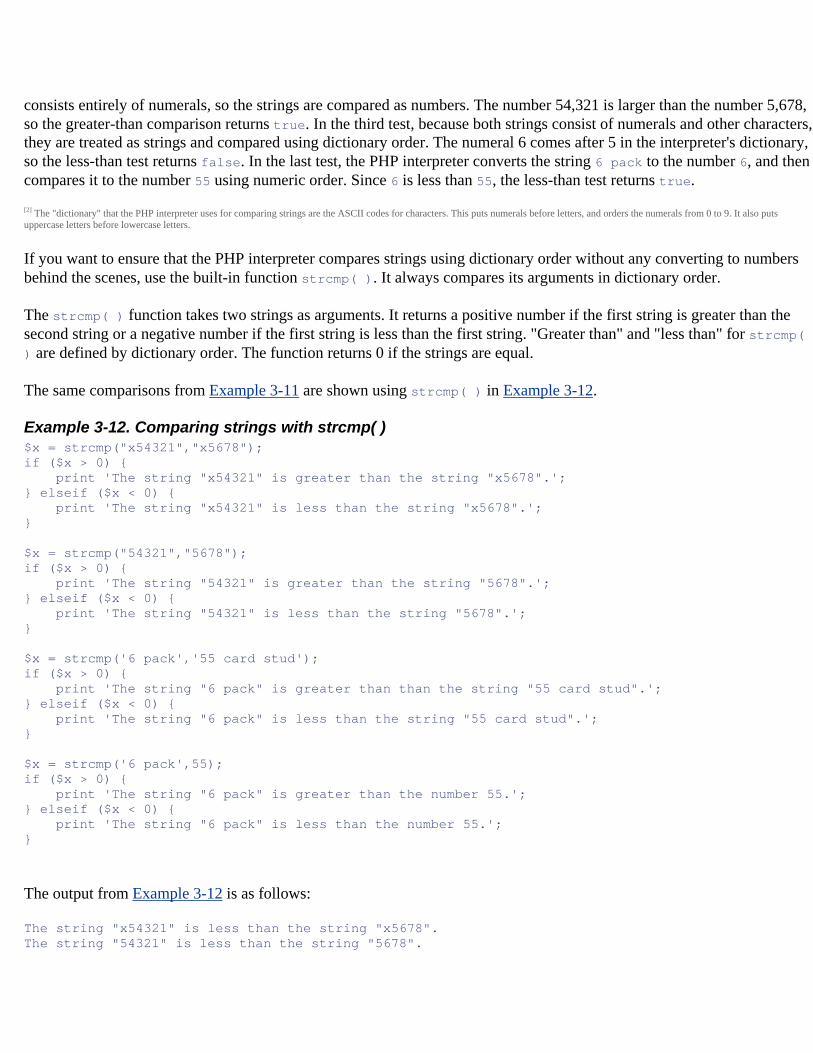
consists entirely of numerals, so the strings are compared as numbers. The number 54,321 is larger than the number 5,678, so the greater-than comparison returns true. In the third test, because both strings consist of numerals and other characters, they are treated as strings and compared using dictionary order. The numeral 6 comes after 5 in the interpreter's dictionary, so the less-than test returns false. In the last test, the PHP interpreter converts the string 6 pack to the number 6, and then compares it to the number 55 using numeric order. Since 6 is less than 55, the less-than test returns true.
[2] The "dictionary" that the PHP interpreter uses for comparing strings are the ASCII codes for characters. This puts numerals before letters, and orders the numerals from 0 to 9. It also puts uppercase letters before lowercase letters.
If you want to ensure that the PHP interpreter compares strings using dictionary order without any converting to numbers behind the scenes, use the built-in function strcmp( ). It always compares its arguments in dictionary order.
The strcmp( ) function takes two strings as arguments. It returns a positive number if the first string is greater than the second string or a negative number if the first string is less than the first string. "Greater than" and "less than" for strcmp( ) are defined by dictionary order. The function returns 0 if the strings are equal.
The same comparisons from Example 3-11 are shown using strcmp( ) in Example 3-12.
Example 3-12. Comparing strings with strcmp( ) $x = strcmp("x54321","x5678"); if ($x > 0) { print 'The string "x54321" is greater than the string "x5678".'; } elseif ($x < 0) { print 'The string "x54321" is less than the string "x5678".'; } $x = strcmp("54321","5678"); if ($x > 0) { print 'The string "54321" is greater than the string "5678".'; } elseif ($x < 0) { print 'The string "54321" is less than the string "5678".'; } $x = strcmp('6 pack','55 card stud'); if ($x > 0) { print 'The string "6 pack" is greater than than the string "55 card stud".'; } elseif ($x < 0) { print 'The string "6 pack" is less than the string "55 card stud".'; } $x = strcmp('6 pack',55); if ($x > 0) { print 'The string "6 pack" is greater than the number 55.'; } elseif ($x < 0) { print 'The string "6 pack" is less than the number 55.'; }
The output from Example 3-12 is as follows:
The string "x54321" is less than the string "x5678". The string "54321" is less than the string "5678".
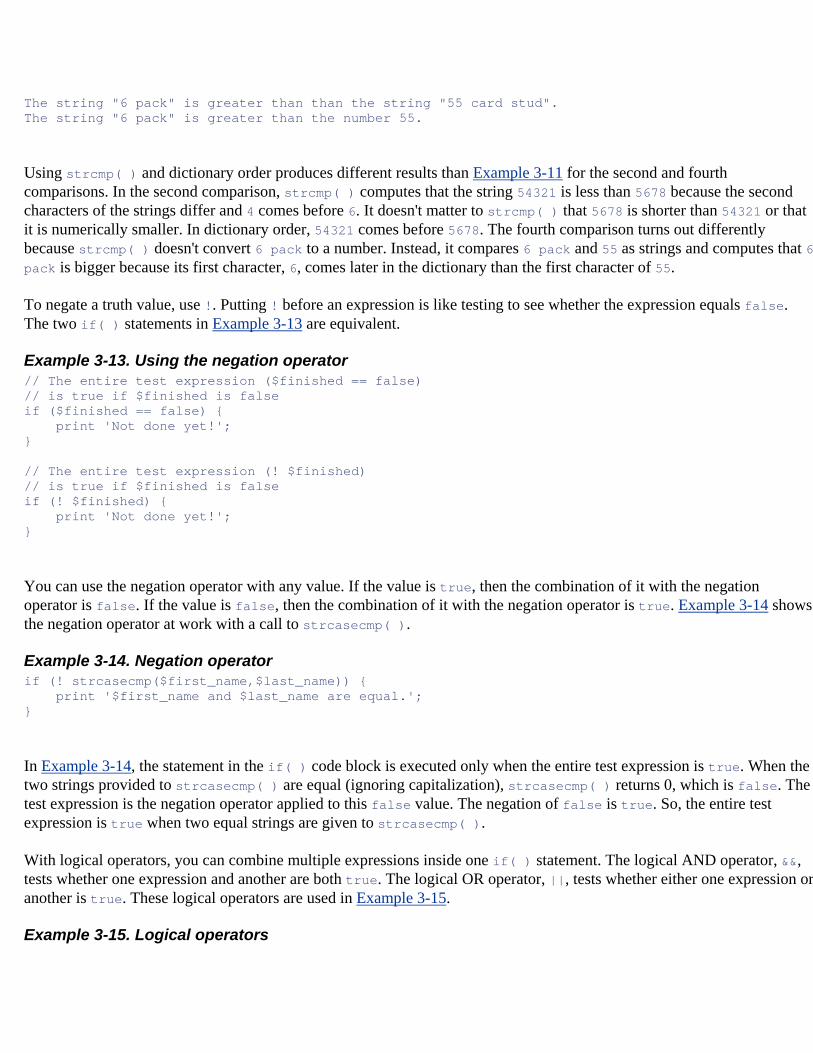
The string "6 pack" is greater than than the string "55 card stud". The string "6 pack" is greater than the number 55.
Using strcmp( ) and dictionary order produces different results than Example 3-11 for the second and fourth comparisons. In the second comparison, strcmp( ) computes that the string 54321 is less than 5678 because the second characters of the strings differ and 4 comes before 6. It doesn't matter to strcmp( ) that 5678 is shorter than 54321 or that it is numerically smaller. In dictionary order, 54321 comes before 5678. The fourth comparison turns out differently because strcmp( ) doesn't convert 6 pack to a number. Instead, it compares 6 pack and 55 as strings and computes that 6 pack is bigger because its first character, 6, comes later in the dictionary than the first character of 55.
To negate a truth value, use !. Putting ! before an expression is like testing to see whether the expression equals false. The two if( ) statements in Example 3-13 are equivalent.
Example 3-13. Using the negation operator // The entire test expression ($finished == false) // is true if $finished is false if ($finished == false) { print 'Not done yet!'; } // The entire test expression (! $finished) // is true if $finished is false if (! $finished) { print 'Not done yet!'; }
You can use the negation operator with any value. If the value is true, then the combination of it with the negation operator is false. If the value is false, then the combination of it with the negation operator is true. Example 3-14 shows the negation operator at work with a call to strcasecmp( ).
Example 3-14. Negation operator if (! strcasecmp($first_name,$last_name)) { print '$first_name and $last_name are equal.'; }
In Example 3-14, the statement in the if( ) code block is executed only when the entire test expression is true. When the two strings provided to strcasecmp( ) are equal (ignoring capitalization), strcasecmp( ) returns 0, which is false. The test expression is the negation operator applied to this false value. The negation of false is true. So, the entire test expression is true when two equal strings are given to strcasecmp( ).
With logical operators, you can combine multiple expressions inside one if( ) statement. The logical AND operator, &&, tests whether one expression and another are both true. The logical OR operator, ||, tests whether either one expression or another is true. These logical operators are used in Example 3-15.
Example 3-15. Logical operators
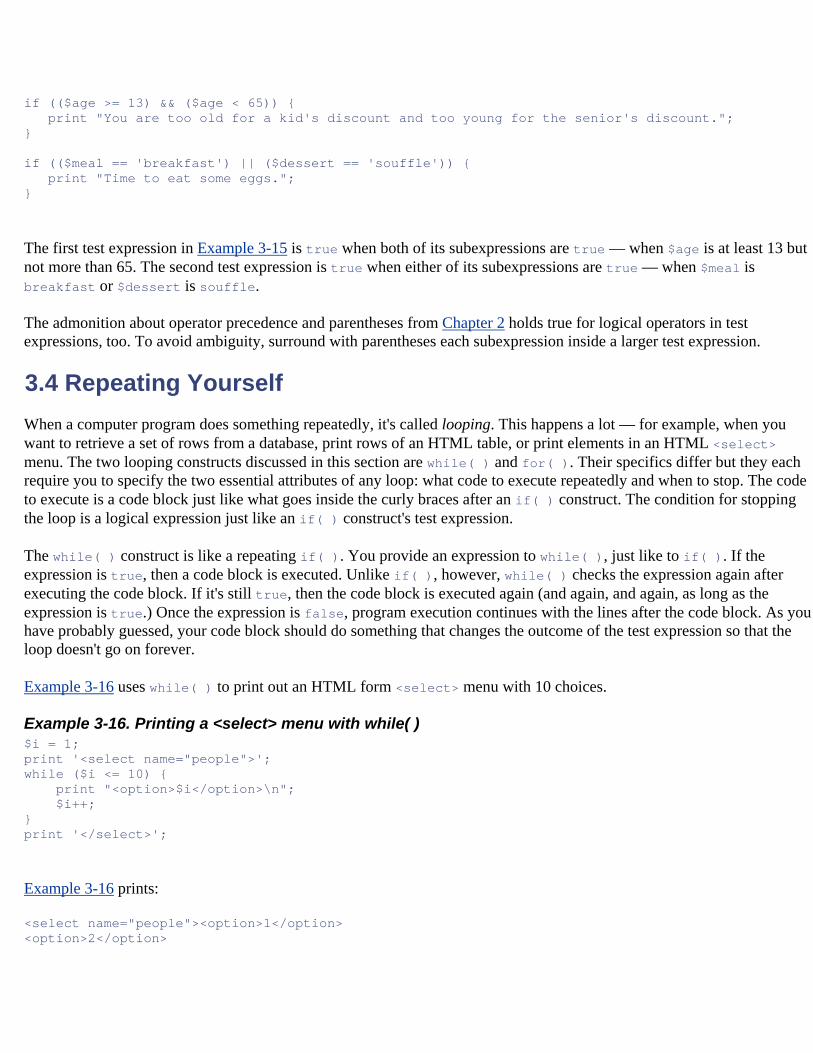
if (($age >= 13) && ($age < 65)) { print "You are too old for a kid's discount and too young for the senior's discount."; } if (($meal == 'breakfast') || ($dessert == 'souffle')) { print "Time to eat some eggs."; }
The first test expression in Example 3-15 is true when both of its subexpressions are true — when $age is at least 13 but not more than 65. The second test expression is true when either of its subexpressions are true — when $meal is breakfast or $dessert is souffle.
The admonition about operator precedence and parentheses from Chapter 2 holds true for logical operators in test expressions, too. To avoid ambiguity, surround with parentheses each subexpression inside a larger test expression.
3.4 Repeating Yourself When a computer program does something repeatedly, it's called looping. This happens a lot — for example, when you want to retrieve a set of rows from a database, print rows of an HTML table, or print elements in an HTML <select> menu. The two looping constructs discussed in this section are while( ) and for( ). Their specifics differ but they each require you to specify the two essential attributes of any loop: what code to execute repeatedly and when to stop. The code to execute is a code block just like what goes inside the curly braces after an if( ) construct. The condition for stopping the loop is a logical expression just like an if( ) construct's test expression.
The while( ) construct is like a repeating if( ). You provide an expression to while( ), just like to if( ). If the expression is true, then a code block is executed. Unlike if( ), however, while( ) checks the expression again after executing the code block. If it's still true, then the code block is executed again (and again, and again, as long as the expression is true.) Once the expression is false, program execution continues with the lines after the code block. As you have probably guessed, your code block should do something that changes the outcome of the test expression so that the loop doesn't go on forever.
Example 3-16 uses while( ) to print out an HTML form <select> menu with 10 choices.
Example 3-16. Printing a <select> menu with while( ) $i = 1; print '<select name="people">'; while ($i <= 10) { print "<option>$i</option>\n"; $i++; } print '</select>';
Example 3-16 prints:
<select name="people"><option>1</option> <option>2</option>
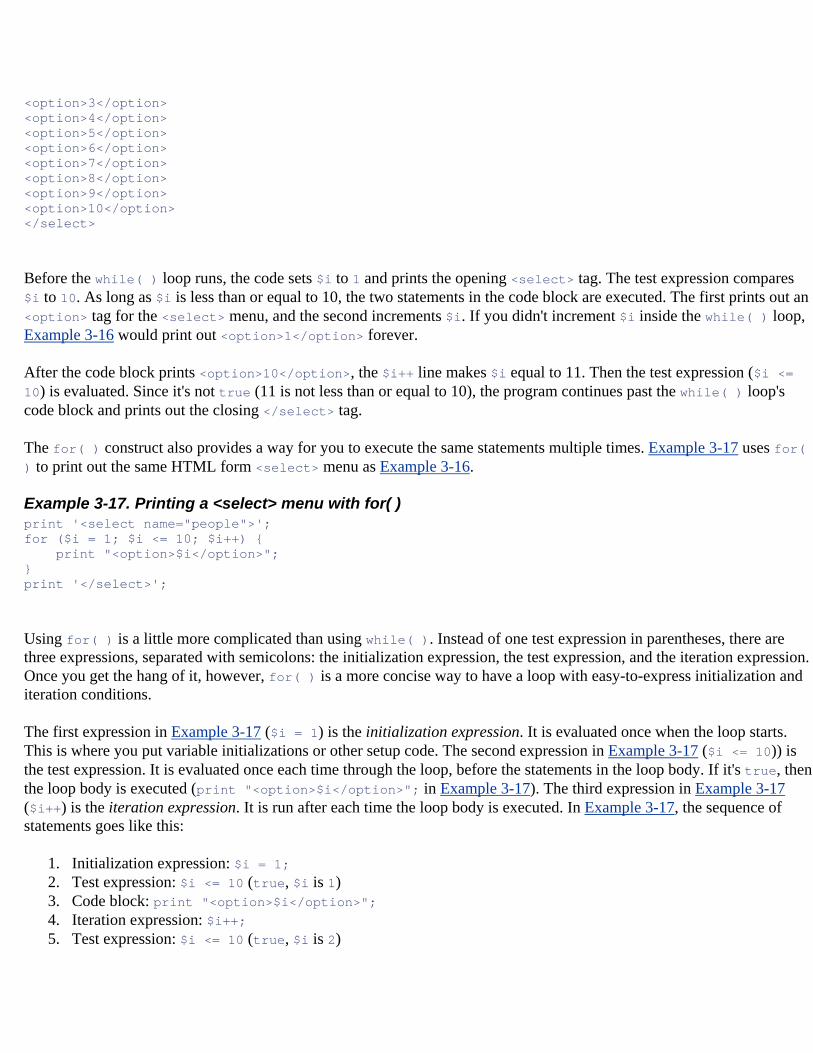
<option>3</option> <option>4</option> <option>5</option> <option>6</option> <option>7</option> <option>8</option> <option>9</option> <option>10</option> </select>
Before the while( ) loop runs, the code sets $i to 1 and prints the opening <select> tag. The test expression compares $i to 10. As long as $i is less than or equal to 10, the two statements in the code block are executed. The first prints out an <option> tag for the <select> menu, and the second increments $i. If you didn't increment $i inside the while( ) loop, Example 3-16 would print out <option>1</option> forever.
After the code block prints <option>10</option>, the $i++ line makes $i equal to 11. Then the test expression ($i <= 10) is evaluated. Since it's not true (11 is not less than or equal to 10), the program continues past the while( ) loop's code block and prints out the closing </select> tag.
The for( ) construct also provides a way for you to execute the same statements multiple times. Example 3-17 uses for( ) to print out the same HTML form <select> menu as Example 3-16.
Example 3-17. Printing a <select> menu with for( ) print '<select name="people">'; for ($i = 1; $i <= 10; $i++) { print "<option>$i</option>"; } print '</select>';
Using for( ) is a little more complicated than using while( ). Instead of one test expression in parentheses, there are three expressions, separated with semicolons: the initialization expression, the test expression, and the iteration expression. Once you get the hang of it, however, for( ) is a more concise way to have a loop with easy-to-express initialization and iteration conditions.
The first expression in Example 3-17 ($i = 1) is the initialization expression. It is evaluated once when the loop starts. This is where you put variable initializations or other setup code. The second expression in Example 3-17 ($i <= 10)) is the test expression. It is evaluated once each time through the loop, before the statements in the loop body. If it's true, then the loop body is executed (print "<option>$i</option>"; in Example 3-17). The third expression in Example 3-17 ($i++) is the iteration expression. It is run after each time the loop body is executed. In Example 3-17, the sequence of statements goes like this:
1. Initialization expression: $i = 1; 2. Test expression: $i <= 10 (true, $i is 1) 3. Code block: print "<option>$i</option>"; 4. Iteration expression: $i++; 5. Test expression: $i <= 10 (true, $i is 2)
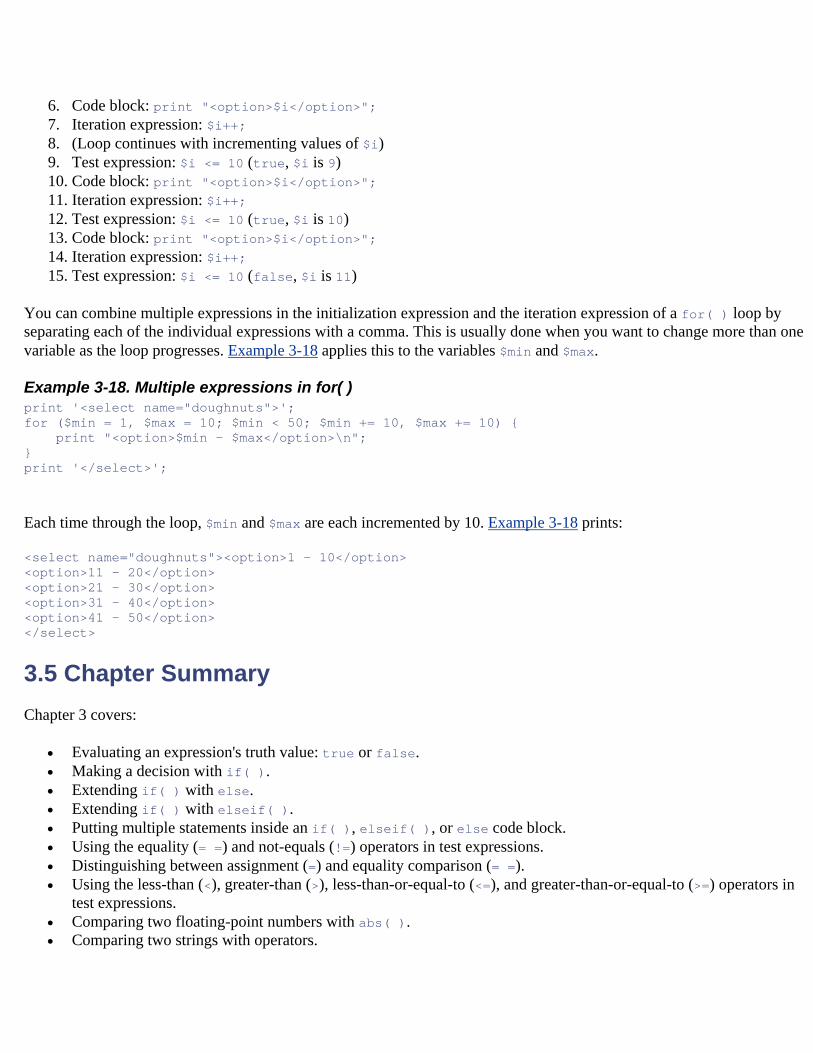
6. Code block: print "<option>$i</option>"; 7. Iteration expression: $i++; 8. (Loop continues with incrementing values of $i) 9. Test expression: $i <= 10 (true, $i is 9) 10. Code block: print "<option>$i</option>"; 11. Iteration expression: $i++; 12. Test expression: $i <= 10 (true, $i is 10) 13. Code block: print "<option>$i</option>"; 14. Iteration expression: $i++; 15. Test expression: $i <= 10 (false, $i is 11)
You can combine multiple expressions in the initialization expression and the iteration expression of a for( ) loop by separating each of the individual expressions with a comma. This is usually done when you want to change more than one variable as the loop progresses. Example 3-18 applies this to the variables $min and $max.
Example 3-18. Multiple expressions in for( ) print '<select name="doughnuts">'; for ($min = 1, $max = 10; $min < 50; $min += 10, $max += 10) { print "<option>$min - $max</option>\n"; } print '</select>';
Each time through the loop, $min and $max are each incremented by 10. Example 3-18 prints:
<select name="doughnuts"><option>1 - 10</option> <option>11 - 20</option> <option>21 - 30</option> <option>31 - 40</option> <option>41 - 50</option> </select>
3.5 Chapter Summary Chapter 3 covers:
• Evaluating an expression's truth value: true or false. • Making a decision with if( ). • Extending if( ) with else. • Extending if( ) with elseif( ). • Putting multiple statements inside an if( ), elseif( ), or else code block. • Using the equality (= =) and not-equals (!=) operators in test expressions. • Distinguishing between assignment (=) and equality comparison (= =). • Using the less-than (<), greater-than (>), less-than-or-equal-to (<=), and greater-than-or-equal-to (>=) operators in
test expressions. • Comparing two floating-point numbers with abs( ). • Comparing two strings with operators.
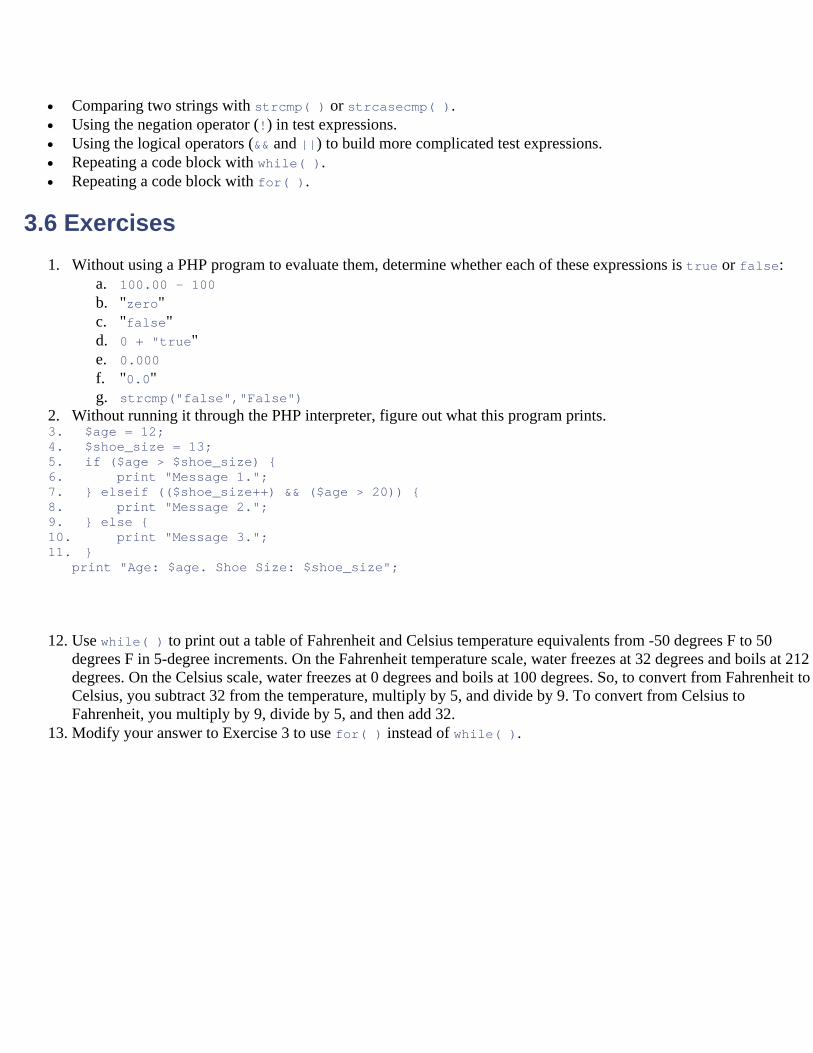
• Comparing two strings with strcmp( ) or strcasecmp( ). • Using the negation operator (!) in test expressions. • Using the logical operators (&& and ||) to build more complicated test expressions. • Repeating a code block with while( ). • Repeating a code block with for( ).
3.6 Exercises 1. Without using a PHP program to evaluate them, determine whether each of these expressions is true or false:
a. 100.00 - 100 b. "zero" c. "false" d. 0 + "true" e. 0.000 f. "0.0" g. strcmp("false","False")
2. Without running it through the PHP interpreter, figure out what this program prints. 3. $age = 12; 4. $shoe_size = 13; 5. if ($age > $shoe_size) { 6. print "Message 1."; 7. } elseif (($shoe_size++) && ($age > 20)) { 8. print "Message 2."; 9. } else { 10. print "Message 3."; 11. }
print "Age: $age. Shoe Size: $shoe_size";
12. Use while( ) to print out a table of Fahrenheit and Celsius temperature equivalents from -50 degrees F to 50 degrees F in 5-degree increments. On the Fahrenheit temperature scale, water freezes at 32 degrees and boils at 212 degrees. On the Celsius scale, water freezes at 0 degrees and boils at 100 degrees. So, to convert from Fahrenheit to Celsius, you subtract 32 from the temperature, multiply by 5, and divide by 9. To convert from Celsius to Fahrenheit, you multiply by 9, divide by 5, and then add 32.
13. Modify your answer to Exercise 3 to use for( ) instead of while( ).
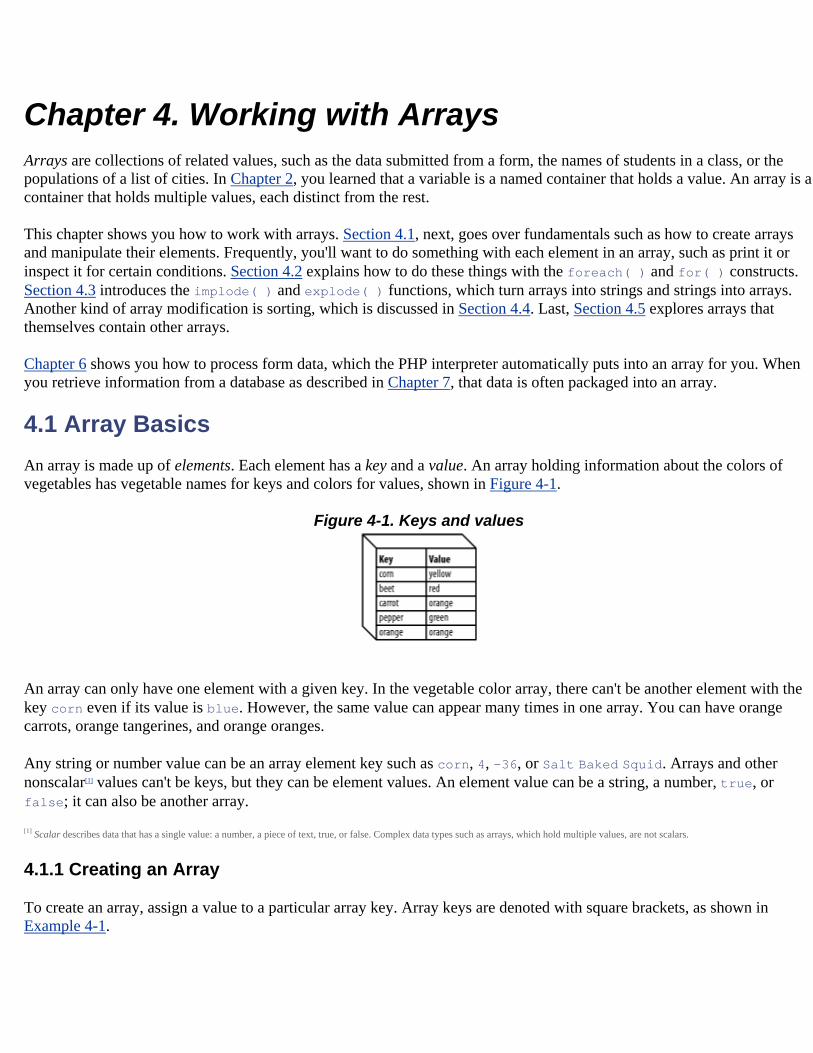
Chapter 4. Working with Arrays Arrays are collections of related values, such as the data submitted from a form, the names of students in a class, or the populations of a list of cities. In Chapter 2, you learned that a variable is a named container that holds a value. An array is a container that holds multiple values, each distinct from the rest.
This chapter shows you how to work with arrays. Section 4.1, next, goes over fundamentals such as how to create arrays and manipulate their elements. Frequently, you'll want to do something with each element in an array, such as print it or inspect it for certain conditions. Section 4.2 explains how to do these things with the foreach( ) and for( ) constructs. Section 4.3 introduces the implode( ) and explode( ) functions, which turn arrays into strings and strings into arrays. Another kind of array modification is sorting, which is discussed in Section 4.4. Last, Section 4.5 explores arrays that themselves contain other arrays.
Chapter 6 shows you how to process form data, which the PHP interpreter automatically puts into an array for you. When you retrieve information from a database as described in Chapter 7, that data is often packaged into an array.
4.1 Array Basics An array is made up of elements. Each element has a key and a value. An array holding information about the colors of vegetables has vegetable names for keys and colors for values, shown in Figure 4-1.
Figure 4-1. Keys and values
An array can only have one element with a given key. In the vegetable color array, there can't be another element with the key corn even if its value is blue. However, the same value can appear many times in one array. You can have orange carrots, orange tangerines, and orange oranges.
Any string or number value can be an array element key such as corn, 4, -36, or Salt Baked Squid. Arrays and other nonscalar[1] values can't be keys, but they can be element values. An element value can be a string, a number, true, or false; it can also be another array.
[1] Scalar describes data that has a single value: a number, a piece of text, true, or false. Complex data types such as arrays, which hold multiple values, are not scalars.
4.1.1 Creating an Array
To create an array, assign a value to a particular array key. Array keys are denoted with square brackets, as shown in Example 4-1.
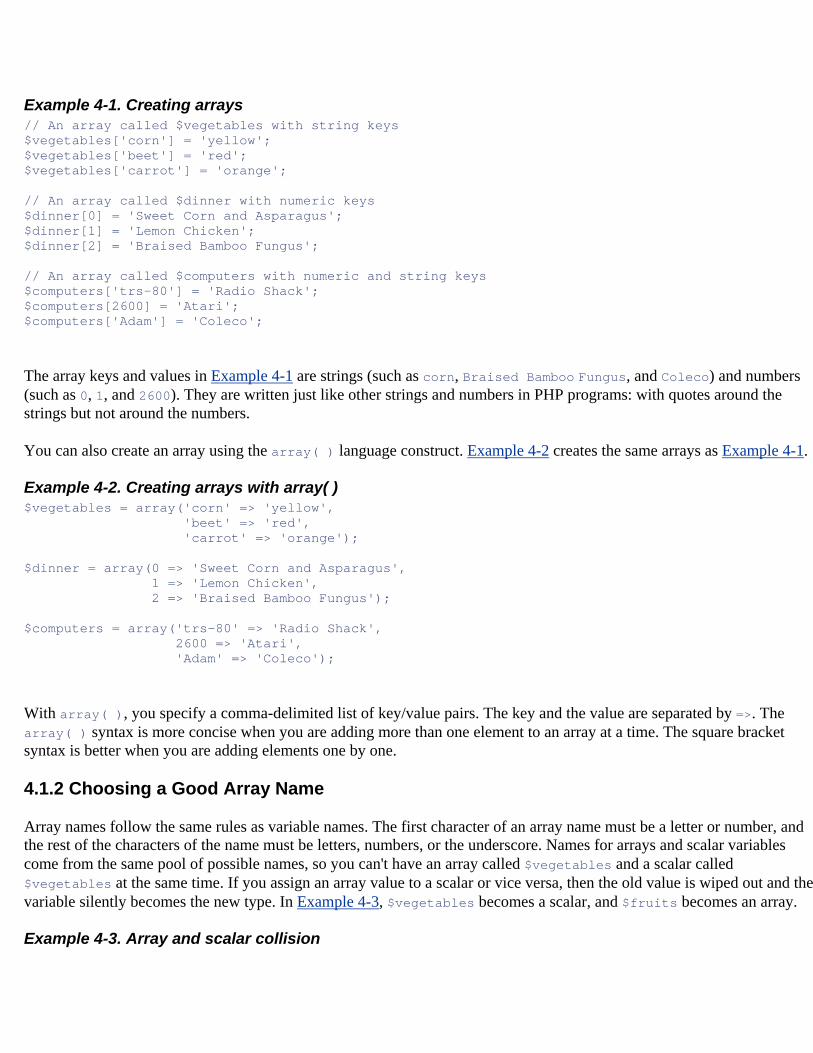
Example 4-1. Creating arrays // An array called $vegetables with string keys $vegetables['corn'] = 'yellow'; $vegetables['beet'] = 'red'; $vegetables['carrot'] = 'orange'; // An array called $dinner with numeric keys $dinner[0] = 'Sweet Corn and Asparagus'; $dinner[1] = 'Lemon Chicken'; $dinner[2] = 'Braised Bamboo Fungus'; // An array called $computers with numeric and string keys $computers['trs-80'] = 'Radio Shack'; $computers[2600] = 'Atari'; $computers['Adam'] = 'Coleco';
The array keys and values in Example 4-1 are strings (such as corn, Braised Bamboo Fungus, and Coleco) and numbers (such as 0, 1, and 2600). They are written just like other strings and numbers in PHP programs: with quotes around the strings but not around the numbers.
You can also create an array using the array( ) language construct. Example 4-2 creates the same arrays as Example 4-1.
Example 4-2. Creating arrays with array( ) $vegetables = array('corn' => 'yellow', 'beet' => 'red', 'carrot' => 'orange'); $dinner = array(0 => 'Sweet Corn and Asparagus', 1 => 'Lemon Chicken', 2 => 'Braised Bamboo Fungus'); $computers = array('trs-80' => 'Radio Shack', 2600 => 'Atari', 'Adam' => 'Coleco');
With array( ), you specify a comma-delimited list of key/value pairs. The key and the value are separated by =>. The array( ) syntax is more concise when you are adding more than one element to an array at a time. The square bracket syntax is better when you are adding elements one by one.
4.1.2 Choosing a Good Array Name
Array names follow the same rules as variable names. The first character of an array name must be a letter or number, and the rest of the characters of the name must be letters, numbers, or the underscore. Names for arrays and scalar variables come from the same pool of possible names, so you can't have an array called $vegetables and a scalar called $vegetables at the same time. If you assign an array value to a scalar or vice versa, then the old value is wiped out and the variable silently becomes the new type. In Example 4-3, $vegetables becomes a scalar, and $fruits becomes an array.
Example 4-3. Array and scalar collision
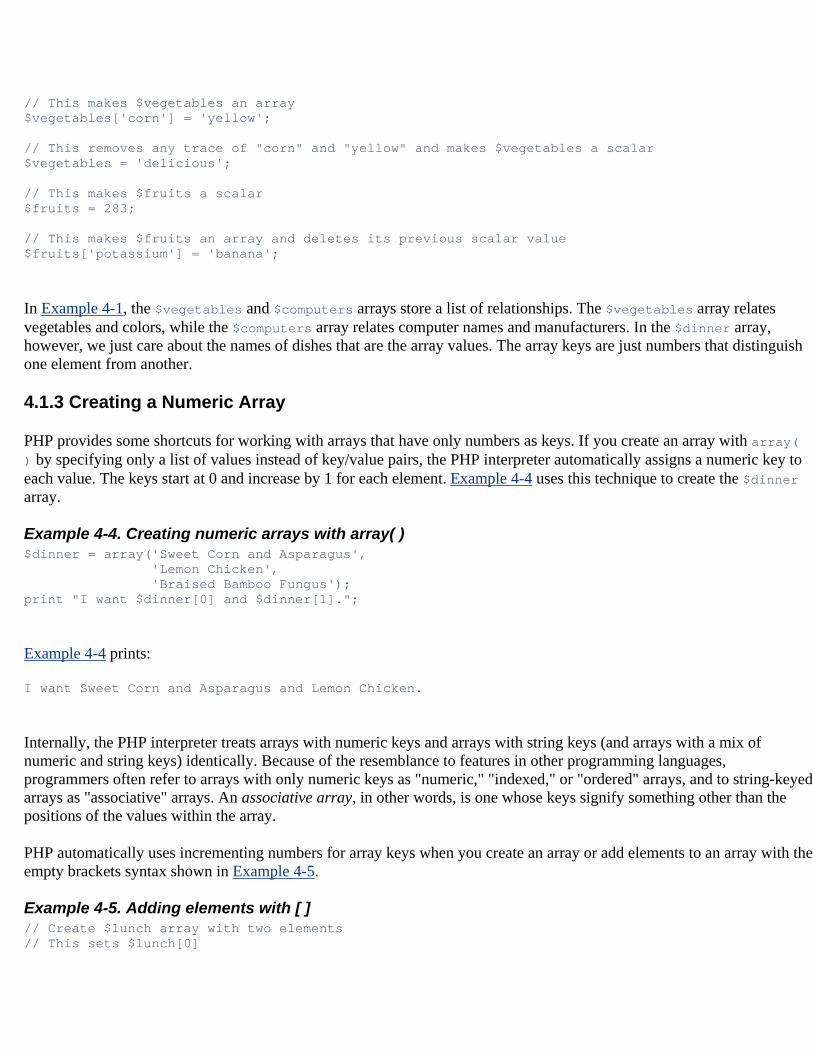
// This makes $vegetables an array $vegetables['corn'] = 'yellow'; // This removes any trace of "corn" and "yellow" and makes $vegetables a scalar $vegetables = 'delicious'; // This makes $fruits a scalar $fruits = 283; // This makes $fruits an array and deletes its previous scalar value $fruits['potassium'] = 'banana';
In Example 4-1, the $vegetables and $computers arrays store a list of relationships. The $vegetables array relates vegetables and colors, while the $computers array relates computer names and manufacturers. In the $dinner array, however, we just care about the names of dishes that are the array values. The array keys are just numbers that distinguish one element from another.
4.1.3 Creating a Numeric Array
PHP provides some shortcuts for working with arrays that have only numbers as keys. If you create an array with array( ) by specifying only a list of values instead of key/value pairs, the PHP interpreter automatically assigns a numeric key to each value. The keys start at 0 and increase by 1 for each element. Example 4-4 uses this technique to create the $dinner array.
Example 4-4. Creating numeric arrays with array( ) $dinner = array('Sweet Corn and Asparagus', 'Lemon Chicken', 'Braised Bamboo Fungus'); print "I want $dinner[0] and $dinner[1].";
Example 4-4 prints:
I want Sweet Corn and Asparagus and Lemon Chicken.
Internally, the PHP interpreter treats arrays with numeric keys and arrays with string keys (and arrays with a mix of numeric and string keys) identically. Because of the resemblance to features in other programming languages, programmers often refer to arrays with only numeric keys as "numeric," "indexed," or "ordered" arrays, and to string-keyed arrays as "associative" arrays. An associative array, in other words, is one whose keys signify something other than the positions of the values within the array.
PHP automatically uses incrementing numbers for array keys when you create an array or add elements to an array with the empty brackets syntax shown in Example 4-5.
Example 4-5. Adding elements with [ ] // Create $lunch array with two elements // This sets $lunch[0]

$lunch[] = 'Dried Mushrooms in Brown Sauce'; // This sets $lunch[1] $lunch[] = 'Pineapple and Yu Fungus'; // Create $dinner with three elements $dinner = array('Sweet Corn and Asparagus', 'Lemon Chicken', 'Braised Bamboo Fungus'); // Add an element to the end of $dinner // This sets $dinner[3] $dinner[] = 'Flank Skin with Spiced Flavor';
The empty brackets add an element to the array. The element has a numeric key that's one more than the biggest numeric key already in the array. If the array doesn't exist yet, the empty brackets add an element with a key of 0.
Making the first element have key 0, not key 1, is the exact opposite of how normal humans (in contrast to computer programmers) think, so it bears repeating. The first element of an array with numeric keys is element 0, not element 1.
4.1.4 Finding the Size of an Array
The count( ) function tells you the number of elements in an array. Example 4-6 demonstrates count( ).
Example 4-6. Finding the size of an array $dinner = array('Sweet Corn and Asparagus', 'Lemon Chicken', 'Braised Bamboo Fungus'); $dishes = count($dinner); print "There are $dishes things for dinner.";
Example 4-6 prints:
There are 3 things for dinner.
When you pass it an empty array (that is, an array with no elements in it), count( ) returns 0. An empty array also evaluates to false in an if( ) test expression.
4.2 Looping Through Arrays One of the most common things to do with an array is to consider each element in the array individually and process it somehow. This may involve incorporating it into a row of an HTML table or adding its value to a running total.
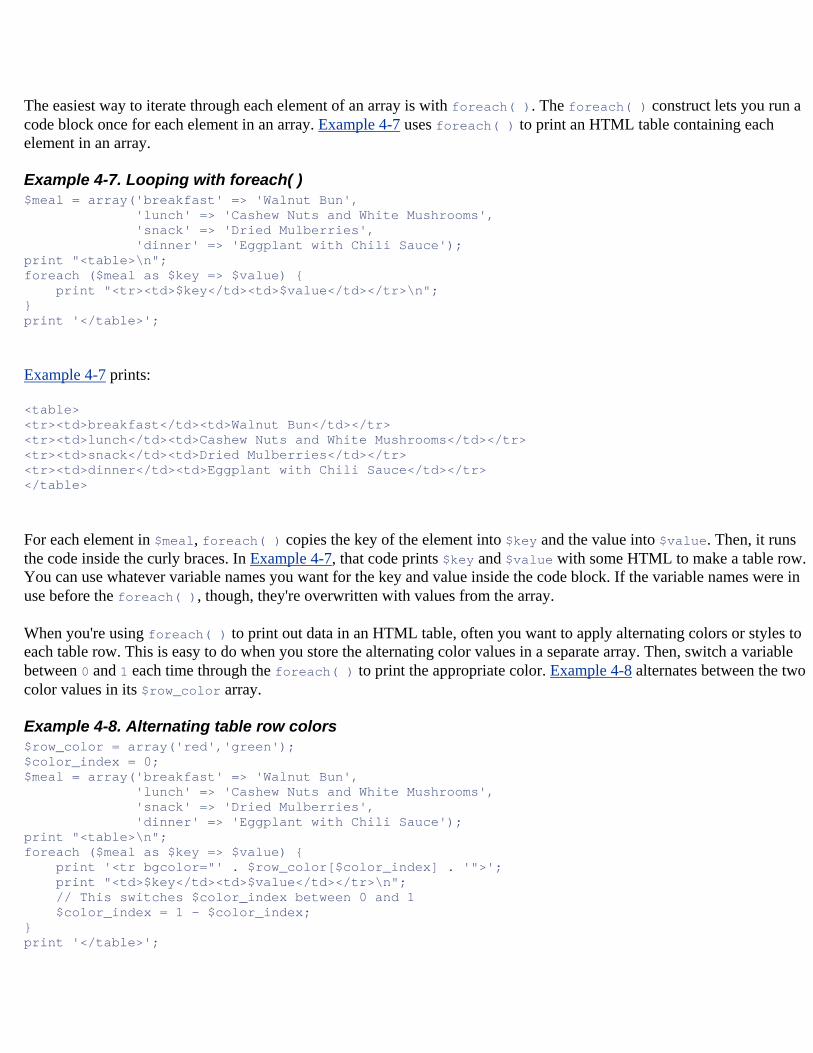
The easiest way to iterate through each element of an array is with foreach( ). The foreach( ) construct lets you run a code block once for each element in an array. Example 4-7 uses foreach( ) to print an HTML table containing each element in an array.
Example 4-7. Looping with foreach( ) $meal = array('breakfast' => 'Walnut Bun', 'lunch' => 'Cashew Nuts and White Mushrooms', 'snack' => 'Dried Mulberries', 'dinner' => 'Eggplant with Chili Sauce'); print "<table>\n"; foreach ($meal as $key => $value) { print "<tr><td>$key</td><td>$value</td></tr>\n"; } print '</table>';
Example 4-7 prints:
<table> <tr><td>breakfast</td><td>Walnut Bun</td></tr> <tr><td>lunch</td><td>Cashew Nuts and White Mushrooms</td></tr> <tr><td>snack</td><td>Dried Mulberries</td></tr> <tr><td>dinner</td><td>Eggplant with Chili Sauce</td></tr> </table>
For each element in $meal, foreach( ) copies the key of the element into $key and the value into $value. Then, it runs the code inside the curly braces. In Example 4-7, that code prints $key and $value with some HTML to make a table row. You can use whatever variable names you want for the key and value inside the code block. If the variable names were in use before the foreach( ), though, they're overwritten with values from the array.
When you're using foreach( ) to print out data in an HTML table, often you want to apply alternating colors or styles to each table row. This is easy to do when you store the alternating color values in a separate array. Then, switch a variable between 0 and 1 each time through the foreach( ) to print the appropriate color. Example 4-8 alternates between the two color values in its $row_color array.
Example 4-8. Alternating table row colors $row_color = array('red','green'); $color_index = 0; $meal = array('breakfast' => 'Walnut Bun', 'lunch' => 'Cashew Nuts and White Mushrooms', 'snack' => 'Dried Mulberries', 'dinner' => 'Eggplant with Chili Sauce'); print "<table>\n"; foreach ($meal as $key => $value) { print '<tr bgcolor="' . $row_color[$color_index] . '">'; print "<td>$key</td><td>$value</td></tr>\n"; // This switches $color_index between 0 and 1 $color_index = 1 - $color_index; } print '</table>';
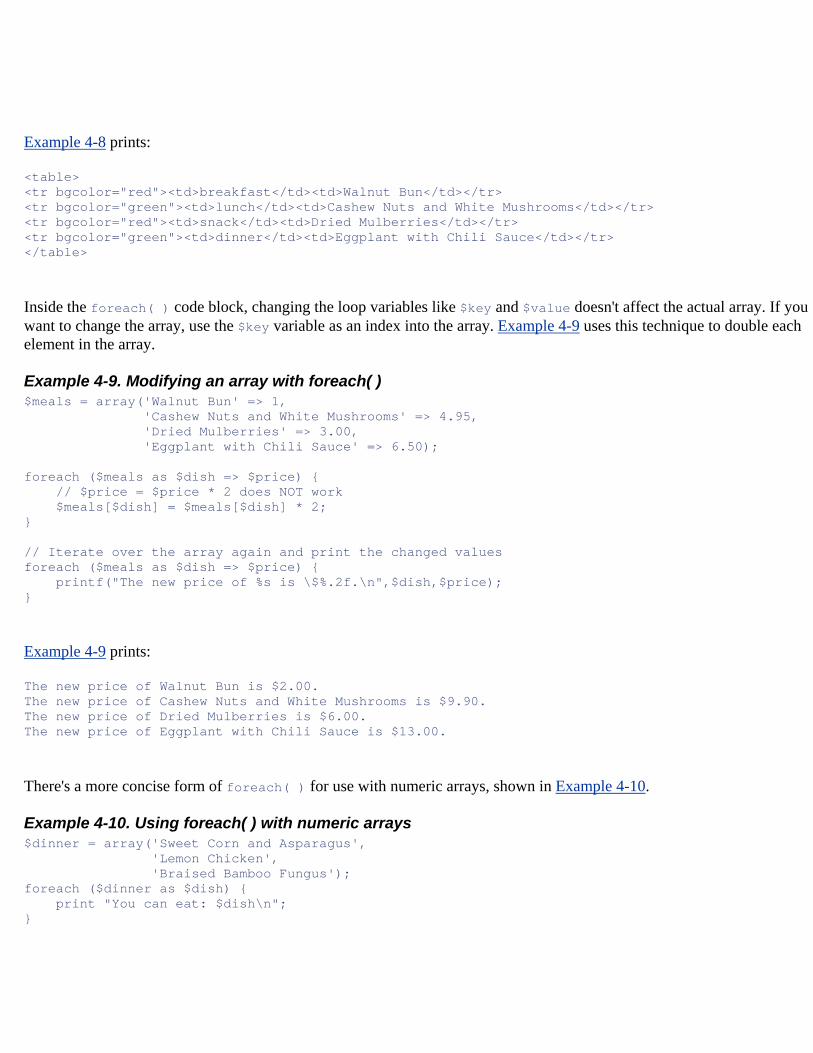
Example 4-8 prints:
<table> <tr bgcolor="red"><td>breakfast</td><td>Walnut Bun</td></tr> <tr bgcolor="green"><td>lunch</td><td>Cashew Nuts and White Mushrooms</td></tr> <tr bgcolor="red"><td>snack</td><td>Dried Mulberries</td></tr> <tr bgcolor="green"><td>dinner</td><td>Eggplant with Chili Sauce</td></tr> </table>
Inside the foreach( ) code block, changing the loop variables like $key and $value doesn't affect the actual array. If you want to change the array, use the $key variable as an index into the array. Example 4-9 uses this technique to double each element in the array.
Example 4-9. Modifying an array with foreach( ) $meals = array('Walnut Bun' => 1, 'Cashew Nuts and White Mushrooms' => 4.95, 'Dried Mulberries' => 3.00, 'Eggplant with Chili Sauce' => 6.50); foreach ($meals as $dish => $price) { // $price = $price * 2 does NOT work $meals[$dish] = $meals[$dish] * 2; } // Iterate over the array again and print the changed values foreach ($meals as $dish => $price) { printf("The new price of %s is \$%.2f.\n",$dish,$price); }
Example 4-9 prints:
The new price of Walnut Bun is $2.00. The new price of Cashew Nuts and White Mushrooms is $9.90. The new price of Dried Mulberries is $6.00. The new price of Eggplant with Chili Sauce is $13.00.
There's a more concise form of foreach( ) for use with numeric arrays, shown in Example 4-10.
Example 4-10. Using foreach( ) with numeric arrays $dinner = array('Sweet Corn and Asparagus', 'Lemon Chicken', 'Braised Bamboo Fungus'); foreach ($dinner as $dish) { print "You can eat: $dish\n"; }
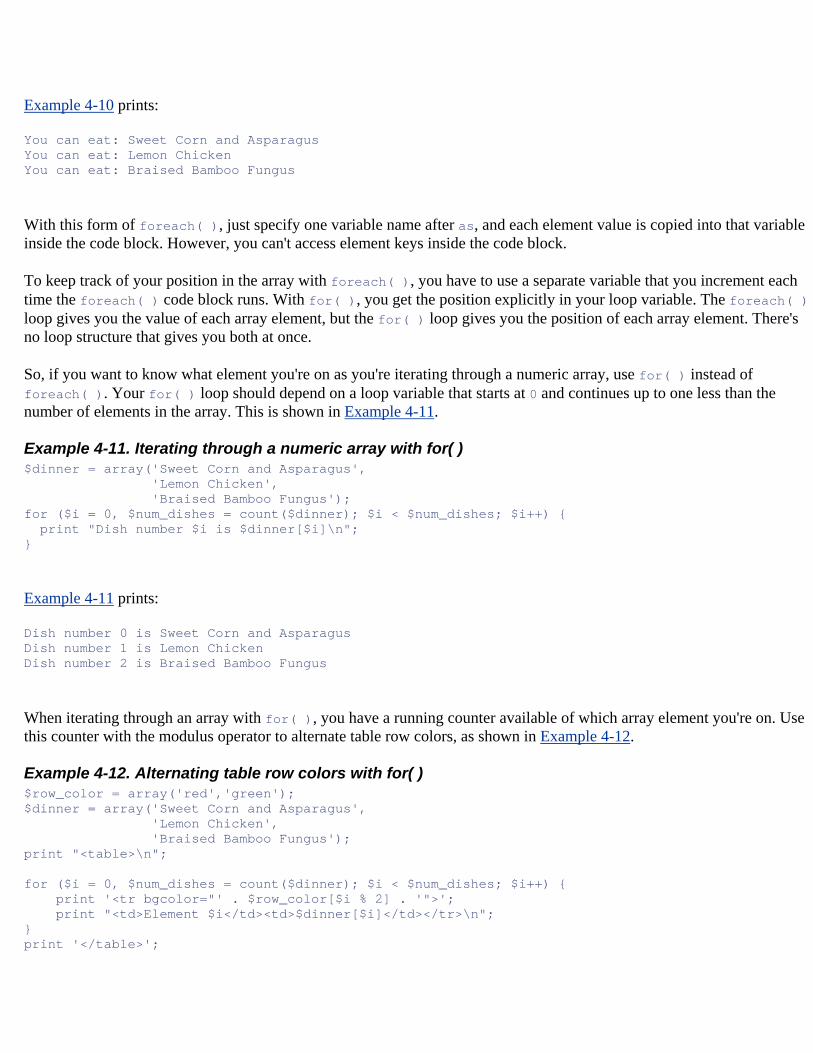
Example 4-10 prints:
You can eat: Sweet Corn and Asparagus You can eat: Lemon Chicken You can eat: Braised Bamboo Fungus
With this form of foreach( ), just specify one variable name after as, and each element value is copied into that variable inside the code block. However, you can't access element keys inside the code block.
To keep track of your position in the array with foreach( ), you have to use a separate variable that you increment each time the foreach( ) code block runs. With for( ), you get the position explicitly in your loop variable. The foreach( ) loop gives you the value of each array element, but the for( ) loop gives you the position of each array element. There's no loop structure that gives you both at once.
So, if you want to know what element you're on as you're iterating through a numeric array, use for( ) instead of foreach( ). Your for( ) loop should depend on a loop variable that starts at 0 and continues up to one less than the number of elements in the array. This is shown in Example 4-11.
Example 4-11. Iterating through a numeric array with for( ) $dinner = array('Sweet Corn and Asparagus', 'Lemon Chicken', 'Braised Bamboo Fungus'); for ($i = 0, $num_dishes = count($dinner); $i < $num_dishes; $i++) { print "Dish number $i is $dinner[$i]\n"; }
Example 4-11 prints:
Dish number 0 is Sweet Corn and Asparagus Dish number 1 is Lemon Chicken Dish number 2 is Braised Bamboo Fungus
When iterating through an array with for( ), you have a running counter available of which array element you're on. Use this counter with the modulus operator to alternate table row colors, as shown in Example 4-12.
Example 4-12. Alternating table row colors with for( ) $row_color = array('red','green'); $dinner = array('Sweet Corn and Asparagus', 'Lemon Chicken', 'Braised Bamboo Fungus'); print "<table>\n"; for ($i = 0, $num_dishes = count($dinner); $i < $num_dishes; $i++) { print '<tr bgcolor="' . $row_color[$i % 2] . '">'; print "<td>Element $i</td><td>$dinner[$i]</td></tr>\n"; } print '</table>';
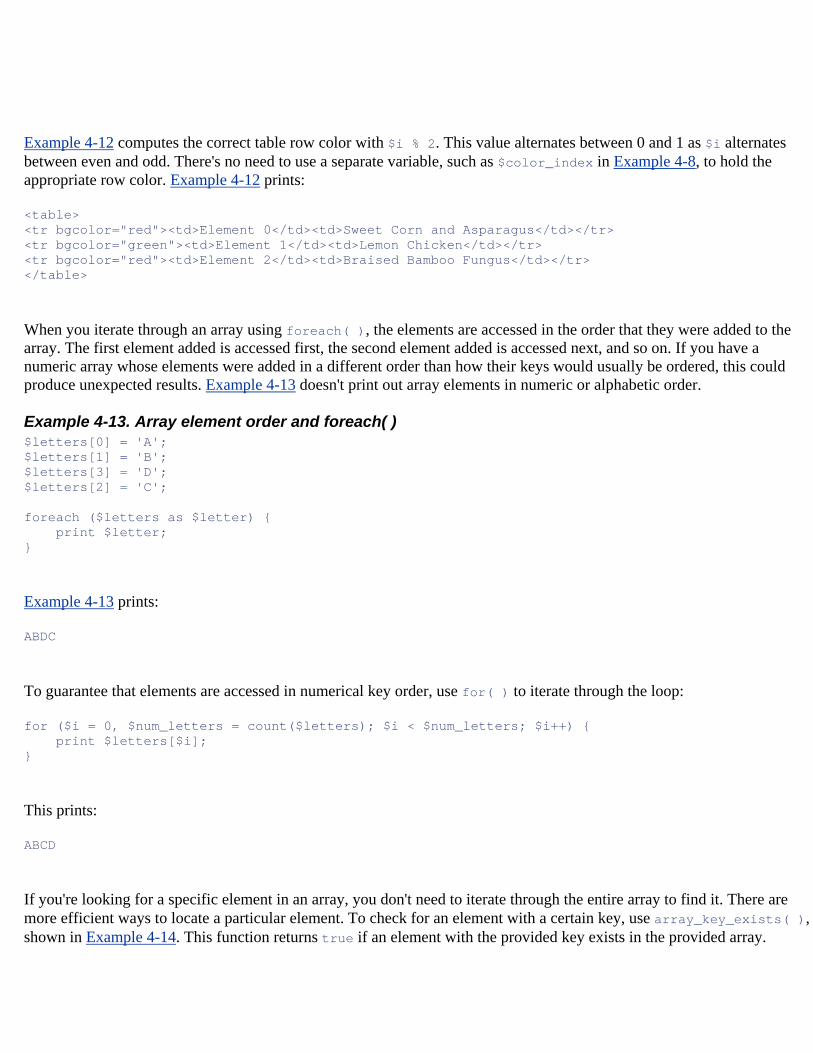
Example 4-12 computes the correct table row color with $i % 2. This value alternates between 0 and 1 as $i alternates between even and odd. There's no need to use a separate variable, such as $color_index in Example 4-8, to hold the appropriate row color. Example 4-12 prints:
<table> <tr bgcolor="red"><td>Element 0</td><td>Sweet Corn and Asparagus</td></tr> <tr bgcolor="green"><td>Element 1</td><td>Lemon Chicken</td></tr> <tr bgcolor="red"><td>Element 2</td><td>Braised Bamboo Fungus</td></tr> </table>
When you iterate through an array using foreach( ), the elements are accessed in the order that they were added to the array. The first element added is accessed first, the second element added is accessed next, and so on. If you have a numeric array whose elements were added in a different order than how their keys would usually be ordered, this could produce unexpected results. Example 4-13 doesn't print out array elements in numeric or alphabetic order.
Example 4-13. Array element order and foreach( ) $letters[0] = 'A'; $letters[1] = 'B'; $letters[3] = 'D'; $letters[2] = 'C'; foreach ($letters as $letter) { print $letter; }
Example 4-13 prints:
ABDC
To guarantee that elements are accessed in numerical key order, use for( ) to iterate through the loop:
for ($i = 0, $num_letters = count($letters); $i < $num_letters; $i++) { print $letters[$i]; }
This prints:
ABCD
If you're looking for a specific element in an array, you don't need to iterate through the entire array to find it. There are more efficient ways to locate a particular element. To check for an element with a certain key, use array_key_exists( ), shown in Example 4-14. This function returns true if an element with the provided key exists in the provided array.
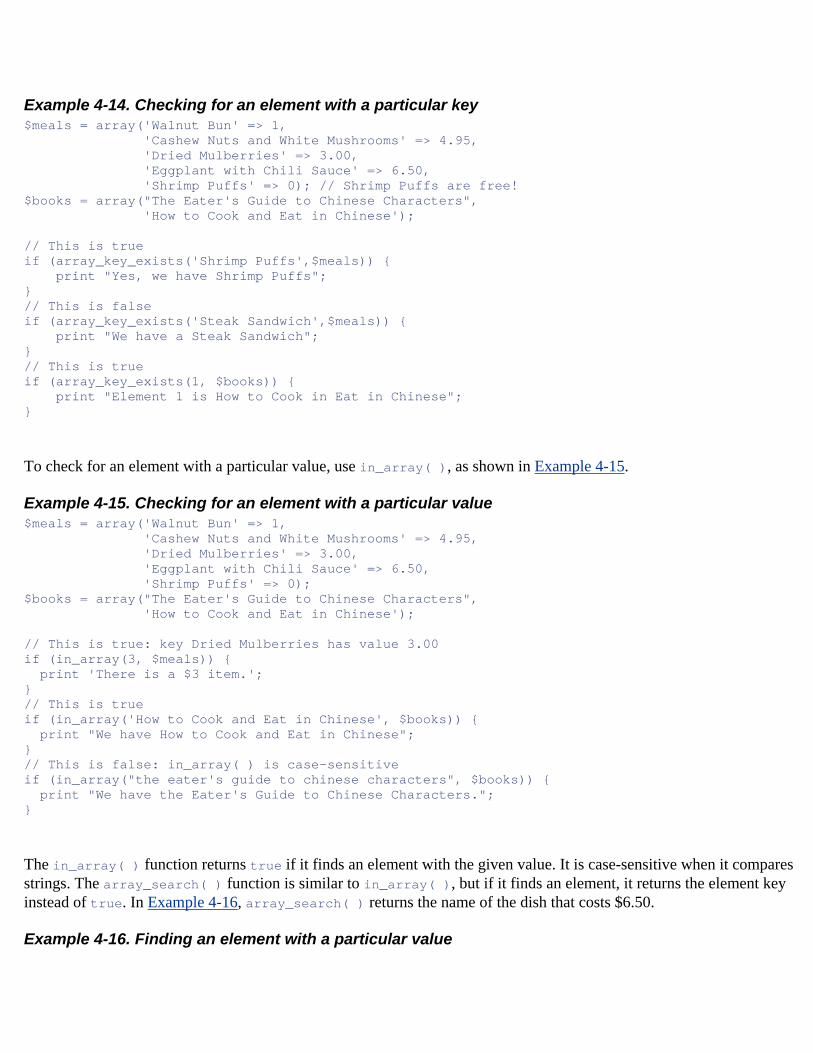
Example 4-14. Checking for an element with a particular key $meals = array('Walnut Bun' => 1, 'Cashew Nuts and White Mushrooms' => 4.95, 'Dried Mulberries' => 3.00, 'Eggplant with Chili Sauce' => 6.50, 'Shrimp Puffs' => 0); // Shrimp Puffs are free! $books = array("The Eater's Guide to Chinese Characters", 'How to Cook and Eat in Chinese'); // This is true if (array_key_exists('Shrimp Puffs',$meals)) { print "Yes, we have Shrimp Puffs"; } // This is false if (array_key_exists('Steak Sandwich',$meals)) { print "We have a Steak Sandwich"; } // This is true if (array_key_exists(1, $books)) { print "Element 1 is How to Cook in Eat in Chinese"; }
To check for an element with a particular value, use in_array( ), as shown in Example 4-15.
Example 4-15. Checking for an element with a particular value $meals = array('Walnut Bun' => 1, 'Cashew Nuts and White Mushrooms' => 4.95, 'Dried Mulberries' => 3.00, 'Eggplant with Chili Sauce' => 6.50, 'Shrimp Puffs' => 0); $books = array("The Eater's Guide to Chinese Characters", 'How to Cook and Eat in Chinese'); // This is true: key Dried Mulberries has value 3.00 if (in_array(3, $meals)) { print 'There is a $3 item.'; } // This is true if (in_array('How to Cook and Eat in Chinese', $books)) { print "We have How to Cook and Eat in Chinese"; } // This is false: in_array( ) is case-sensitive if (in_array("the eater's guide to chinese characters", $books)) { print "We have the Eater's Guide to Chinese Characters."; }
The in_array( ) function returns true if it finds an element with the given value. It is case-sensitive when it compares strings. The array_search( ) function is similar to in_array( ), but if it finds an element, it returns the element key instead of true. In Example 4-16, array_search( ) returns the name of the dish that costs $6.50.
Example 4-16. Finding an element with a particular value
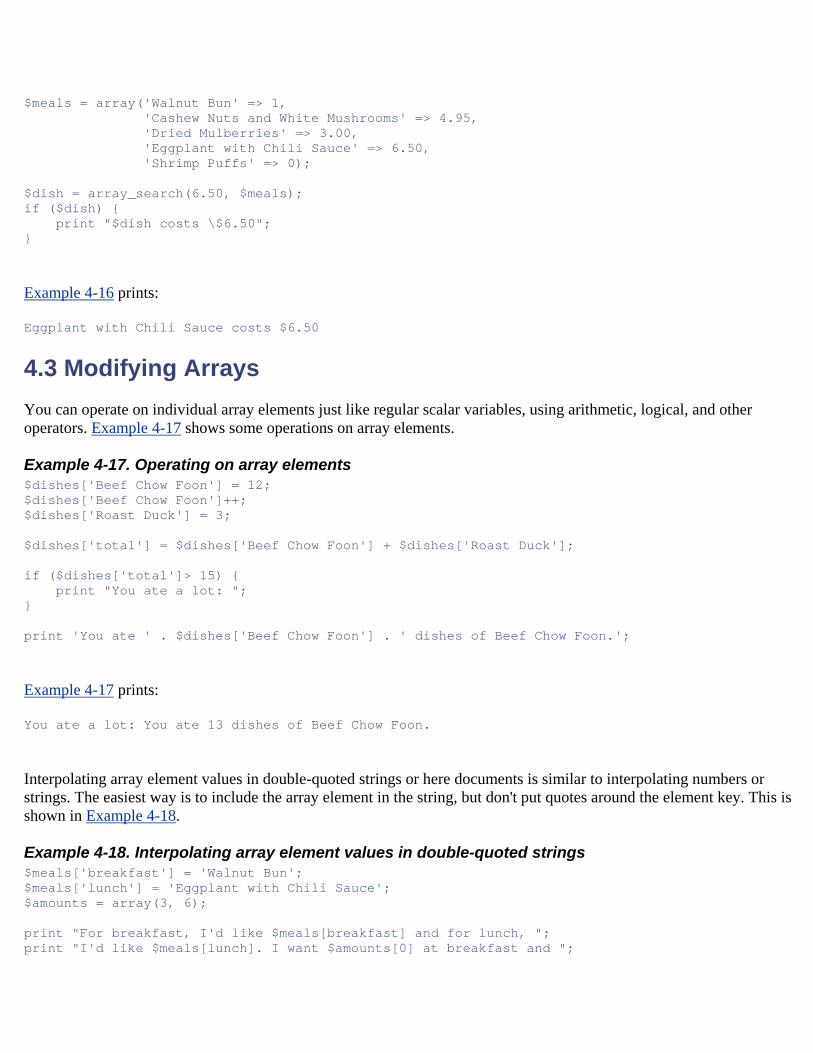
$meals = array('Walnut Bun' => 1, 'Cashew Nuts and White Mushrooms' => 4.95, 'Dried Mulberries' => 3.00, 'Eggplant with Chili Sauce' => 6.50, 'Shrimp Puffs' => 0); $dish = array_search(6.50, $meals); if ($dish) { print "$dish costs \$6.50"; }
Example 4-16 prints:
Eggplant with Chili Sauce costs $6.50
4.3 Modifying Arrays You can operate on individual array elements just like regular scalar variables, using arithmetic, logical, and other operators. Example 4-17 shows some operations on array elements.
Example 4-17. Operating on array elements $dishes['Beef Chow Foon'] = 12; $dishes['Beef Chow Foon']++; $dishes['Roast Duck'] = 3; $dishes['total'] = $dishes['Beef Chow Foon'] + $dishes['Roast Duck']; if ($dishes['total']> 15) { print "You ate a lot: "; } print 'You ate ' . $dishes['Beef Chow Foon'] . ' dishes of Beef Chow Foon.';
Example 4-17 prints:
You ate a lot: You ate 13 dishes of Beef Chow Foon.
Interpolating array element values in double-quoted strings or here documents is similar to interpolating numbers or strings. The easiest way is to include the array element in the string, but don't put quotes around the element key. This is shown in Example 4-18.
Example 4-18. Interpolating array element values in double-quoted strings $meals['breakfast'] = 'Walnut Bun'; $meals['lunch'] = 'Eggplant with Chili Sauce'; $amounts = array(3, 6); print "For breakfast, I'd like $meals[breakfast] and for lunch, "; print "I'd like $meals[lunch]. I want $amounts[0] at breakfast and ";
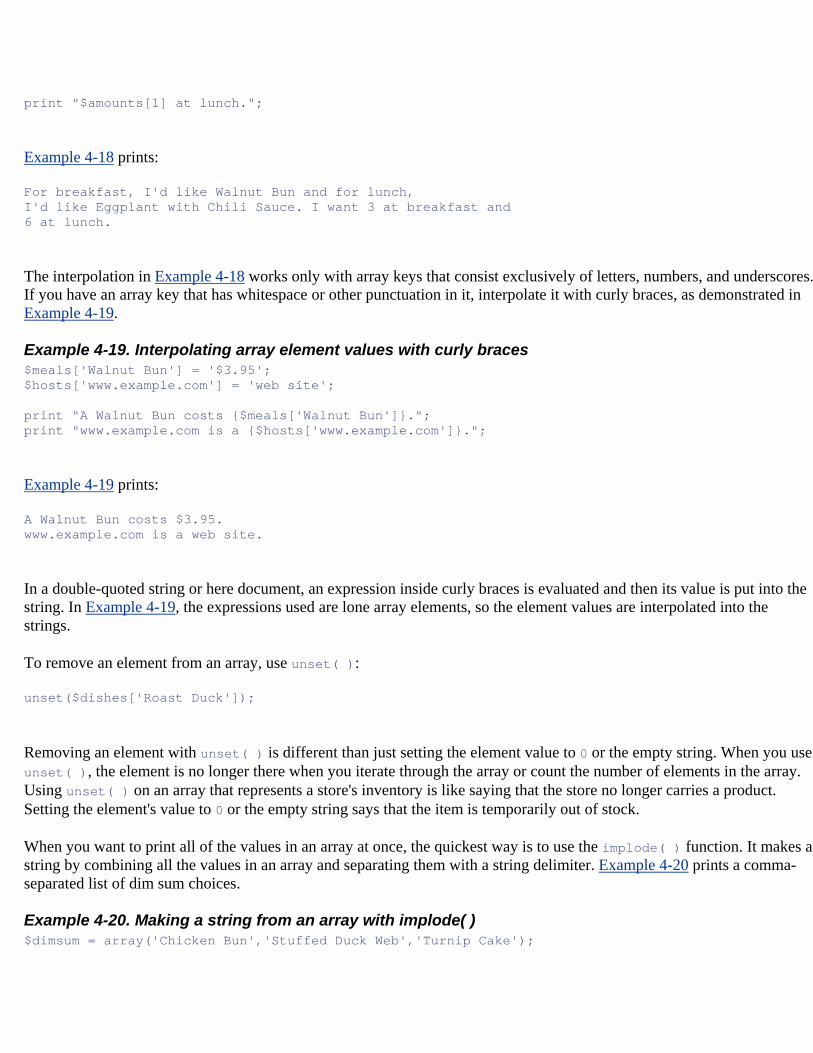
print "$amounts[1] at lunch.";
Example 4-18 prints:
For breakfast, I'd like Walnut Bun and for lunch, I'd like Eggplant with Chili Sauce. I want 3 at breakfast and 6 at lunch.
The interpolation in Example 4-18 works only with array keys that consist exclusively of letters, numbers, and underscores. If you have an array key that has whitespace or other punctuation in it, interpolate it with curly braces, as demonstrated in Example 4-19.
Example 4-19. Interpolating array element values with curly braces $meals['Walnut Bun'] = '$3.95'; $hosts['www.example.com'] = 'web site'; print "A Walnut Bun costs {$meals['Walnut Bun']}."; print "www.example.com is a {$hosts['www.example.com']}.";
Example 4-19 prints:
A Walnut Bun costs $3.95. www.example.com is a web site.
In a double-quoted string or here document, an expression inside curly braces is evaluated and then its value is put into the string. In Example 4-19, the expressions used are lone array elements, so the element values are interpolated into the strings.
To remove an element from an array, use unset( ):
unset($dishes['Roast Duck']);
Removing an element with unset( ) is different than just setting the element value to 0 or the empty string. When you use unset( ), the element is no longer there when you iterate through the array or count the number of elements in the array. Using unset( ) on an array that represents a store's inventory is like saying that the store no longer carries a product. Setting the element's value to 0 or the empty string says that the item is temporarily out of stock.
When you want to print all of the values in an array at once, the quickest way is to use the implode( ) function. It makes a string by combining all the values in an array and separating them with a string delimiter. Example 4-20 prints a comma-separated list of dim sum choices.
Example 4-20. Making a string from an array with implode( ) $dimsum = array('Chicken Bun','Stuffed Duck Web','Turnip Cake');
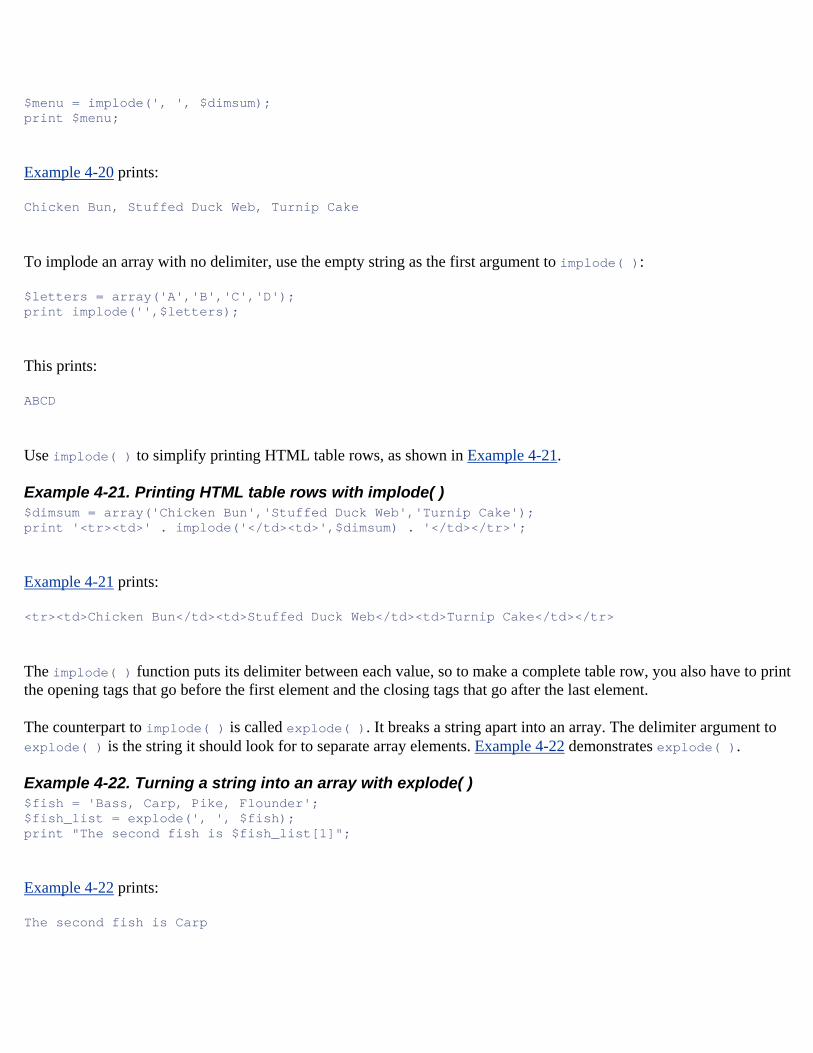
$menu = implode(', ', $dimsum); print $menu;
Example 4-20 prints:
Chicken Bun, Stuffed Duck Web, Turnip Cake
To implode an array with no delimiter, use the empty string as the first argument to implode( ):
$letters = array('A','B','C','D'); print implode('',$letters);
This prints:
ABCD
Use implode( ) to simplify printing HTML table rows, as shown in Example 4-21.
Example 4-21. Printing HTML table rows with implode( ) $dimsum = array('Chicken Bun','Stuffed Duck Web','Turnip Cake'); print '<tr><td>' . implode('</td><td>',$dimsum) . '</td></tr>';
Example 4-21 prints:
<tr><td>Chicken Bun</td><td>Stuffed Duck Web</td><td>Turnip Cake</td></tr>
The implode( ) function puts its delimiter between each value, so to make a complete table row, you also have to print the opening tags that go before the first element and the closing tags that go after the last element.
The counterpart to implode( ) is called explode( ). It breaks a string apart into an array. The delimiter argument to explode( ) is the string it should look for to separate array elements. Example 4-22 demonstrates explode( ).
Example 4-22. Turning a string into an array with explode( ) $fish = 'Bass, Carp, Pike, Flounder'; $fish_list = explode(', ', $fish); print "The second fish is $fish_list[1]";
Example 4-22 prints:
The second fish is Carp
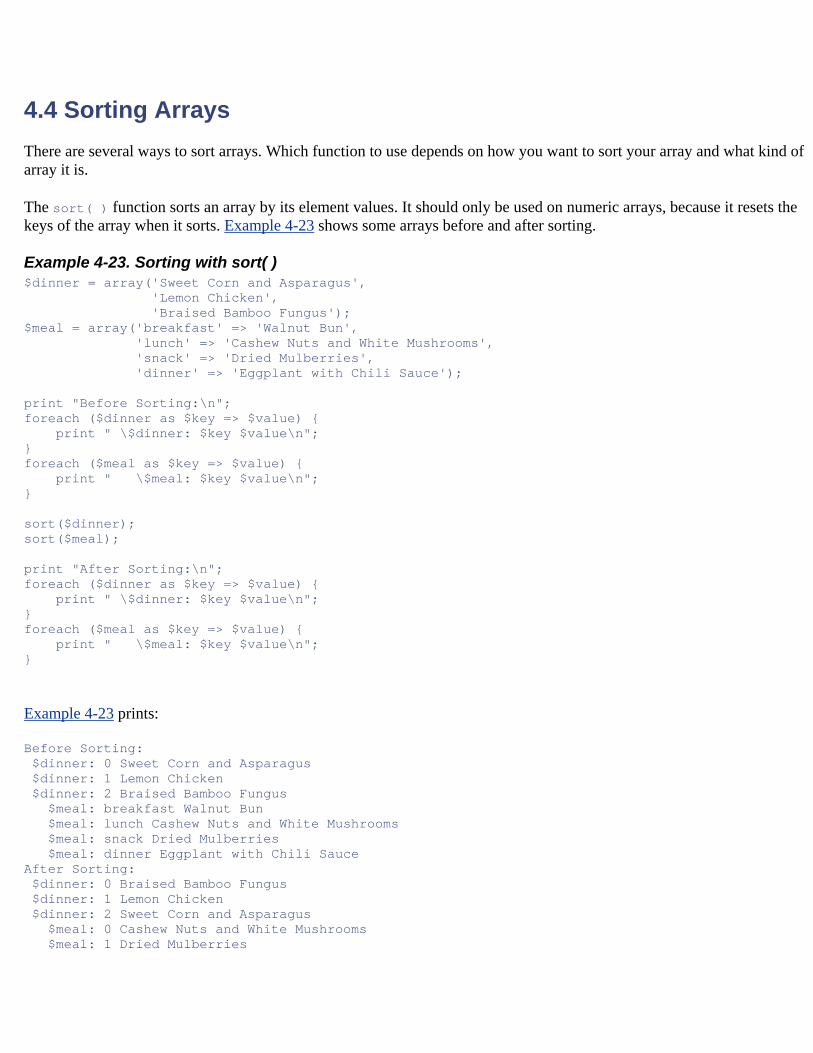
4.4 Sorting Arrays There are several ways to sort arrays. Which function to use depends on how you want to sort your array and what kind of array it is.
The sort( ) function sorts an array by its element values. It should only be used on numeric arrays, because it resets the keys of the array when it sorts. Example 4-23 shows some arrays before and after sorting.
Example 4-23. Sorting with sort( ) $dinner = array('Sweet Corn and Asparagus', 'Lemon Chicken', 'Braised Bamboo Fungus'); $meal = array('breakfast' => 'Walnut Bun', 'lunch' => 'Cashew Nuts and White Mushrooms', 'snack' => 'Dried Mulberries', 'dinner' => 'Eggplant with Chili Sauce'); print "Before Sorting:\n"; foreach ($dinner as $key => $value) { print " \$dinner: $key $value\n"; } foreach ($meal as $key => $value) { print " \$meal: $key $value\n"; } sort($dinner); sort($meal); print "After Sorting:\n"; foreach ($dinner as $key => $value) { print " \$dinner: $key $value\n"; } foreach ($meal as $key => $value) { print " \$meal: $key $value\n"; }
Example 4-23 prints:
Before Sorting: $dinner: 0 Sweet Corn and Asparagus $dinner: 1 Lemon Chicken $dinner: 2 Braised Bamboo Fungus $meal: breakfast Walnut Bun $meal: lunch Cashew Nuts and White Mushrooms $meal: snack Dried Mulberries $meal: dinner Eggplant with Chili Sauce After Sorting: $dinner: 0 Braised Bamboo Fungus $dinner: 1 Lemon Chicken $dinner: 2 Sweet Corn and Asparagus $meal: 0 Cashew Nuts and White Mushrooms $meal: 1 Dried Mulberries
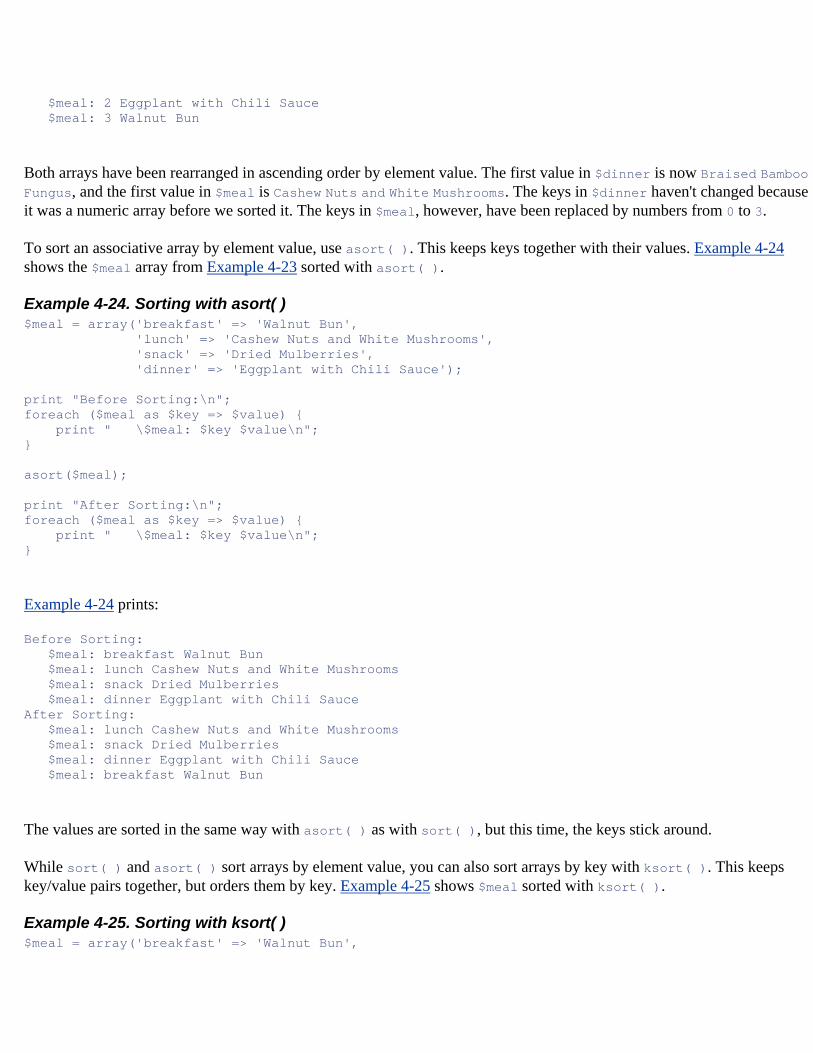
$meal: 2 Eggplant with Chili Sauce $meal: 3 Walnut Bun
Both arrays have been rearranged in ascending order by element value. The first value in $dinner is now Braised Bamboo Fungus, and the first value in $meal is Cashew Nuts and White Mushrooms. The keys in $dinner haven't changed because it was a numeric array before we sorted it. The keys in $meal, however, have been replaced by numbers from 0 to 3.
To sort an associative array by element value, use asort( ). This keeps keys together with their values. Example 4-24 shows the $meal array from Example 4-23 sorted with asort( ).
Example 4-24. Sorting with asort( ) $meal = array('breakfast' => 'Walnut Bun', 'lunch' => 'Cashew Nuts and White Mushrooms', 'snack' => 'Dried Mulberries', 'dinner' => 'Eggplant with Chili Sauce'); print "Before Sorting:\n"; foreach ($meal as $key => $value) { print " \$meal: $key $value\n"; } asort($meal); print "After Sorting:\n"; foreach ($meal as $key => $value) { print " \$meal: $key $value\n"; }
Example 4-24 prints:
Before Sorting: $meal: breakfast Walnut Bun $meal: lunch Cashew Nuts and White Mushrooms $meal: snack Dried Mulberries $meal: dinner Eggplant with Chili Sauce After Sorting: $meal: lunch Cashew Nuts and White Mushrooms $meal: snack Dried Mulberries $meal: dinner Eggplant with Chili Sauce $meal: breakfast Walnut Bun
The values are sorted in the same way with asort( ) as with sort( ), but this time, the keys stick around.
While sort( ) and asort( ) sort arrays by element value, you can also sort arrays by key with ksort( ). This keeps key/value pairs together, but orders them by key. Example 4-25 shows $meal sorted with ksort( ).
Example 4-25. Sorting with ksort( ) $meal = array('breakfast' => 'Walnut Bun',
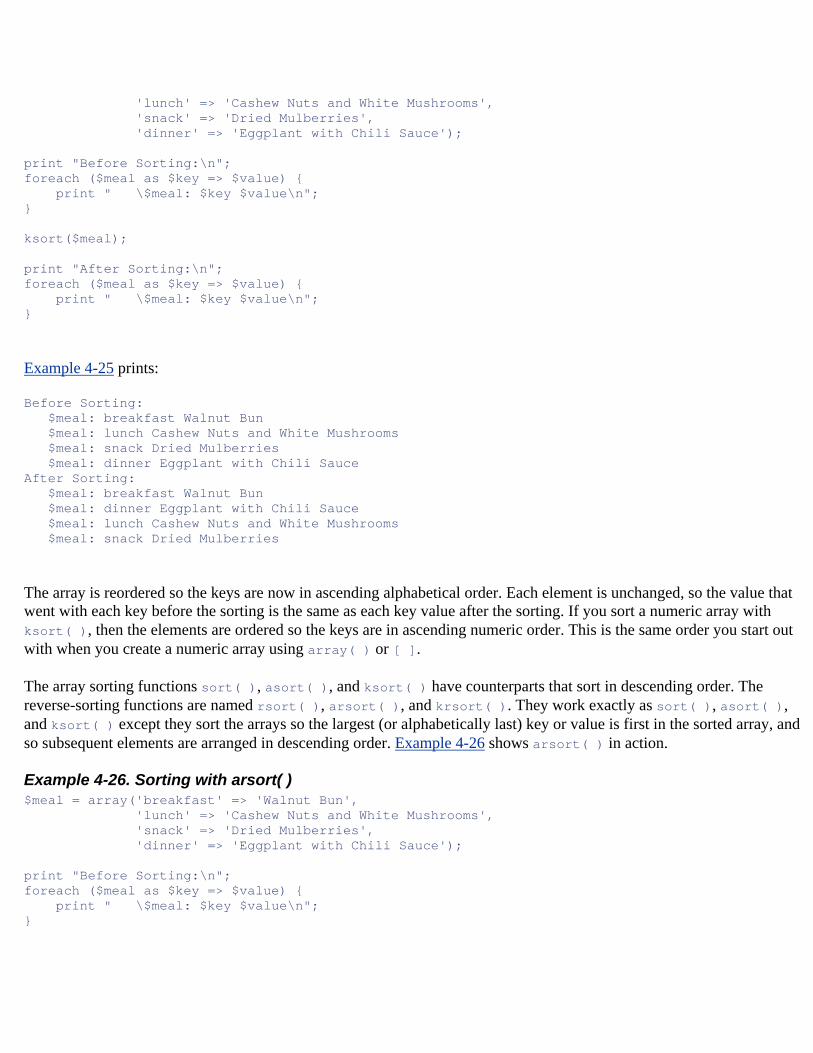
'lunch' => 'Cashew Nuts and White Mushrooms', 'snack' => 'Dried Mulberries', 'dinner' => 'Eggplant with Chili Sauce'); print "Before Sorting:\n"; foreach ($meal as $key => $value) { print " \$meal: $key $value\n"; } ksort($meal); print "After Sorting:\n"; foreach ($meal as $key => $value) { print " \$meal: $key $value\n"; }
Example 4-25 prints:
Before Sorting: $meal: breakfast Walnut Bun $meal: lunch Cashew Nuts and White Mushrooms $meal: snack Dried Mulberries $meal: dinner Eggplant with Chili Sauce After Sorting: $meal: breakfast Walnut Bun $meal: dinner Eggplant with Chili Sauce $meal: lunch Cashew Nuts and White Mushrooms $meal: snack Dried Mulberries
The array is reordered so the keys are now in ascending alphabetical order. Each element is unchanged, so the value that went with each key before the sorting is the same as each key value after the sorting. If you sort a numeric array with ksort( ), then the elements are ordered so the keys are in ascending numeric order. This is the same order you start out with when you create a numeric array using array( ) or [ ].
The array sorting functions sort( ), asort( ), and ksort( ) have counterparts that sort in descending order. The reverse-sorting functions are named rsort( ), arsort( ), and krsort( ). They work exactly as sort( ), asort( ), and ksort( ) except they sort the arrays so the largest (or alphabetically last) key or value is first in the sorted array, and so subsequent elements are arranged in descending order. Example 4-26 shows arsort( ) in action.
Example 4-26. Sorting with arsort( ) $meal = array('breakfast' => 'Walnut Bun', 'lunch' => 'Cashew Nuts and White Mushrooms', 'snack' => 'Dried Mulberries', 'dinner' => 'Eggplant with Chili Sauce'); print "Before Sorting:\n"; foreach ($meal as $key => $value) { print " \$meal: $key $value\n"; }
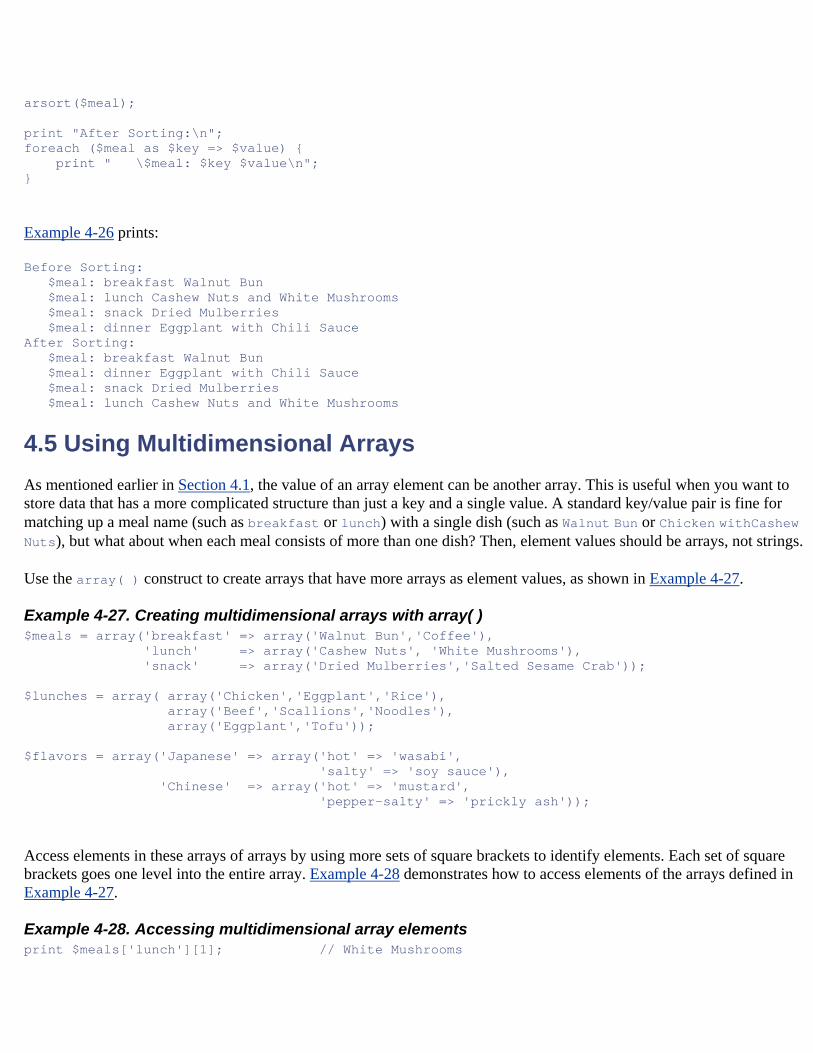
arsort($meal); print "After Sorting:\n"; foreach ($meal as $key => $value) { print " \$meal: $key $value\n"; }
Example 4-26 prints:
Before Sorting: $meal: breakfast Walnut Bun $meal: lunch Cashew Nuts and White Mushrooms $meal: snack Dried Mulberries $meal: dinner Eggplant with Chili Sauce After Sorting: $meal: breakfast Walnut Bun $meal: dinner Eggplant with Chili Sauce $meal: snack Dried Mulberries $meal: lunch Cashew Nuts and White Mushrooms
4.5 Using Multidimensional Arrays As mentioned earlier in Section 4.1, the value of an array element can be another array. This is useful when you want to store data that has a more complicated structure than just a key and a single value. A standard key/value pair is fine for matching up a meal name (such as breakfast or lunch) with a single dish (such as Walnut Bun or Chicken withCashew Nuts), but what about when each meal consists of more than one dish? Then, element values should be arrays, not strings.
Use the array( ) construct to create arrays that have more arrays as element values, as shown in Example 4-27.
Example 4-27. Creating multidimensional arrays with array( ) $meals = array('breakfast' => array('Walnut Bun','Coffee'), 'lunch' => array('Cashew Nuts', 'White Mushrooms'), 'snack' => array('Dried Mulberries','Salted Sesame Crab')); $lunches = array( array('Chicken','Eggplant','Rice'), array('Beef','Scallions','Noodles'), array('Eggplant','Tofu')); $flavors = array('Japanese' => array('hot' => 'wasabi', 'salty' => 'soy sauce'), 'Chinese' => array('hot' => 'mustard', 'pepper-salty' => 'prickly ash'));
Access elements in these arrays of arrays by using more sets of square brackets to identify elements. Each set of square brackets goes one level into the entire array. Example 4-28 demonstrates how to access elements of the arrays defined in Example 4-27.
Example 4-28. Accessing multidimensional array elements print $meals['lunch'][1]; // White Mushrooms
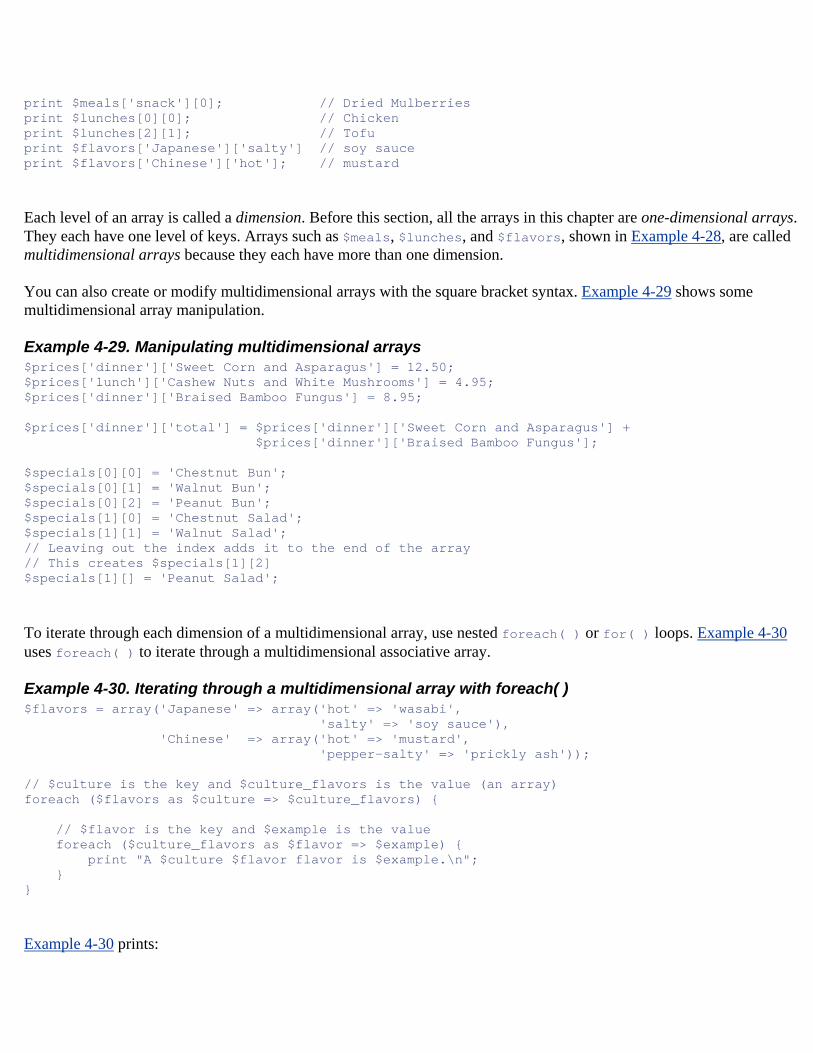
print $meals['snack'][0]; // Dried Mulberries print $lunches[0][0]; // Chicken print $lunches[2][1]; // Tofu print $flavors['Japanese']['salty'] // soy sauce print $flavors['Chinese']['hot']; // mustard
Each level of an array is called a dimension. Before this section, all the arrays in this chapter are one-dimensional arrays. They each have one level of keys. Arrays such as $meals, $lunches, and $flavors, shown in Example 4-28, are called multidimensional arrays because they each have more than one dimension.
You can also create or modify multidimensional arrays with the square bracket syntax. Example 4-29 shows some multidimensional array manipulation.
Example 4-29. Manipulating multidimensional arrays $prices['dinner']['Sweet Corn and Asparagus'] = 12.50; $prices['lunch']['Cashew Nuts and White Mushrooms'] = 4.95; $prices['dinner']['Braised Bamboo Fungus'] = 8.95; $prices['dinner']['total'] = $prices['dinner']['Sweet Corn and Asparagus'] + $prices['dinner']['Braised Bamboo Fungus']; $specials[0][0] = 'Chestnut Bun'; $specials[0][1] = 'Walnut Bun'; $specials[0][2] = 'Peanut Bun'; $specials[1][0] = 'Chestnut Salad'; $specials[1][1] = 'Walnut Salad'; // Leaving out the index adds it to the end of the array // This creates $specials[1][2] $specials[1][] = 'Peanut Salad';
To iterate through each dimension of a multidimensional array, use nested foreach( ) or for( ) loops. Example 4-30 uses foreach( ) to iterate through a multidimensional associative array.
Example 4-30. Iterating through a multidimensional array with foreach( ) $flavors = array('Japanese' => array('hot' => 'wasabi', 'salty' => 'soy sauce'), 'Chinese' => array('hot' => 'mustard', 'pepper-salty' => 'prickly ash')); // $culture is the key and $culture_flavors is the value (an array) foreach ($flavors as $culture => $culture_flavors) { // $flavor is the key and $example is the value foreach ($culture_flavors as $flavor => $example) { print "A $culture $flavor flavor is $example.\n"; } }
Example 4-30 prints:
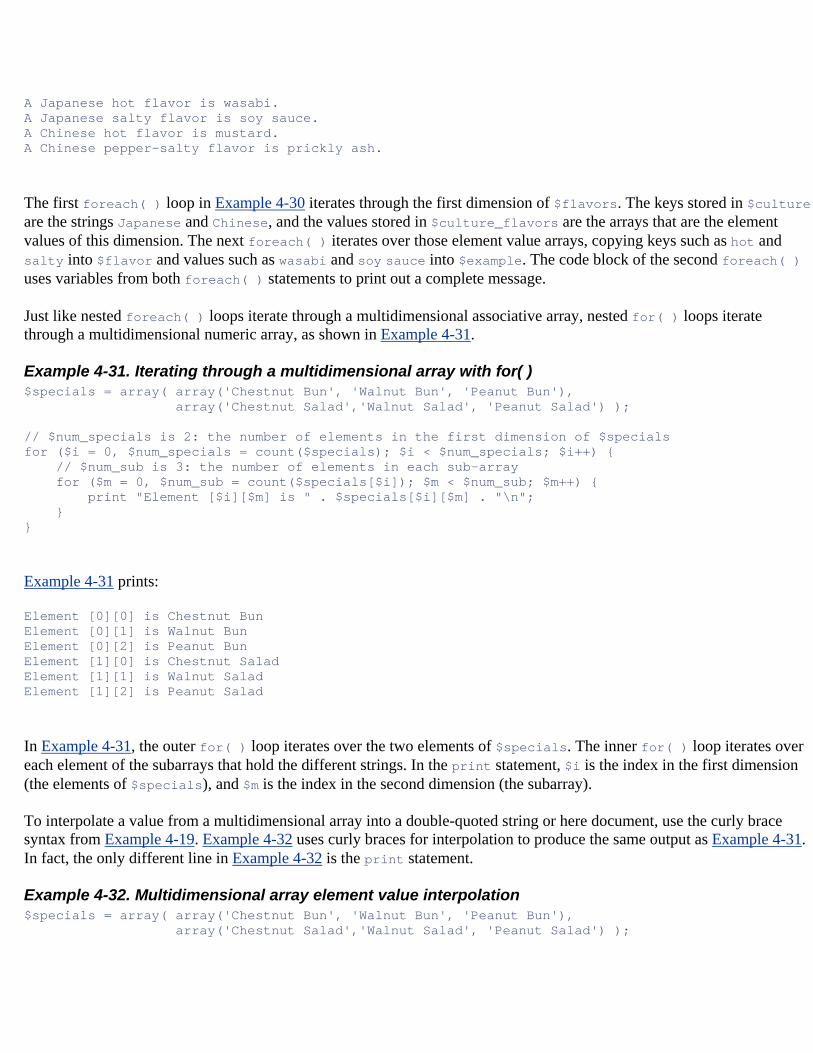
A Japanese hot flavor is wasabi. A Japanese salty flavor is soy sauce. A Chinese hot flavor is mustard. A Chinese pepper-salty flavor is prickly ash.
The first foreach( ) loop in Example 4-30 iterates through the first dimension of $flavors. The keys stored in $cultureare the strings Japanese and Chinese, and the values stored in $culture_flavors are the arrays that are the element values of this dimension. The next foreach( ) iterates over those element value arrays, copying keys such as hot and salty into $flavor and values such as wasabi and soy sauce into $example. The code block of the second foreach( ) uses variables from both foreach( ) statements to print out a complete message.
Just like nested foreach( ) loops iterate through a multidimensional associative array, nested for( ) loops iterate through a multidimensional numeric array, as shown in Example 4-31.
Example 4-31. Iterating through a multidimensional array with for( ) $specials = array( array('Chestnut Bun', 'Walnut Bun', 'Peanut Bun'), array('Chestnut Salad','Walnut Salad', 'Peanut Salad') ); // $num_specials is 2: the number of elements in the first dimension of $specials for ($i = 0, $num_specials = count($specials); $i < $num_specials; $i++) { // $num_sub is 3: the number of elements in each sub-array for ($m = 0, $num_sub = count($specials[$i]); $m < $num_sub; $m++) { print "Element [$i][$m] is " . $specials[$i][$m] . "\n"; } }
Example 4-31 prints:
Element [0][0] is Chestnut Bun Element [0][1] is Walnut Bun Element [0][2] is Peanut Bun Element [1][0] is Chestnut Salad Element [1][1] is Walnut Salad Element [1][2] is Peanut Salad
In Example 4-31, the outer for( ) loop iterates over the two elements of $specials. The inner for( ) loop iterates over each element of the subarrays that hold the different strings. In the print statement, $i is the index in the first dimension (the elements of $specials), and $m is the index in the second dimension (the subarray).
To interpolate a value from a multidimensional array into a double-quoted string or here document, use the curly brace syntax from Example 4-19. Example 4-32 uses curly braces for interpolation to produce the same output as Example 4-31. In fact, the only different line in Example 4-32 is the print statement.
Example 4-32. Multidimensional array element value interpolation $specials = array( array('Chestnut Bun', 'Walnut Bun', 'Peanut Bun'), array('Chestnut Salad','Walnut Salad', 'Peanut Salad') );
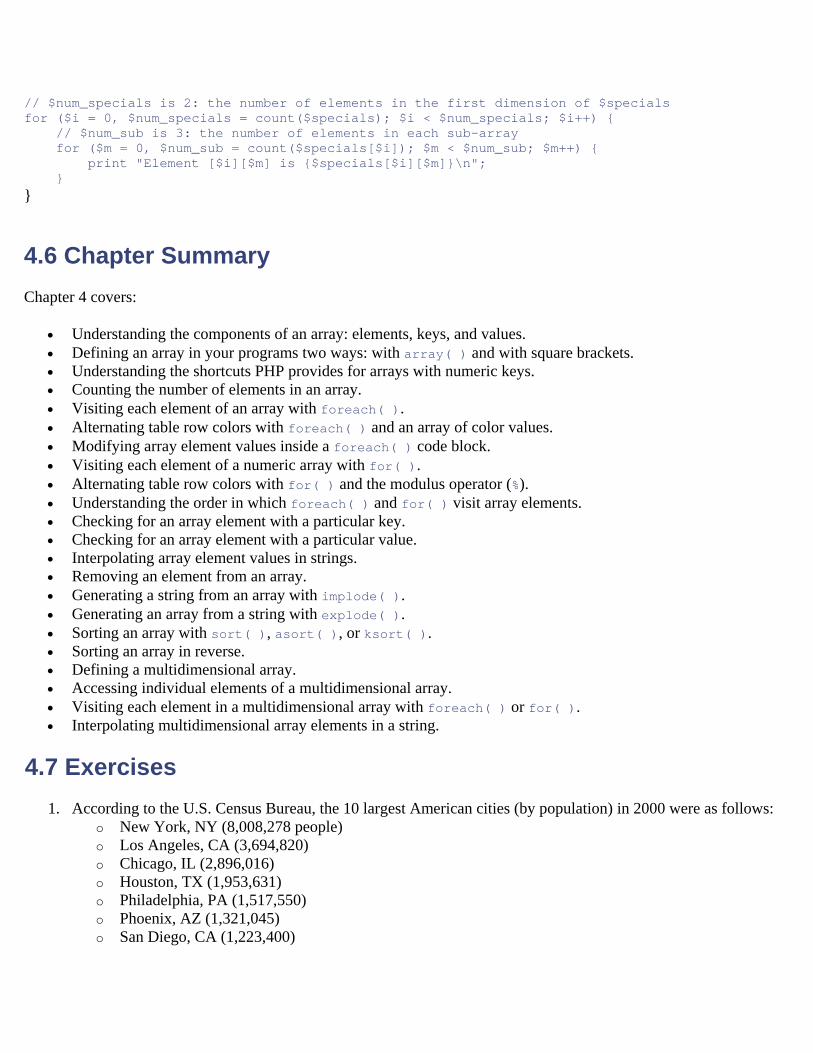
// $num_specials is 2: the number of elements in the first dimension of $specials for ($i = 0, $num_specials = count($specials); $i < $num_specials; $i++) { // $num_sub is 3: the number of elements in each sub-array for ($m = 0, $num_sub = count($specials[$i]); $m < $num_sub; $m++) { print "Element [$i][$m] is {$specials[$i][$m]}\n"; } }
4.6 Chapter Summary Chapter 4 covers:
• Understanding the components of an array: elements, keys, and values. • Defining an array in your programs two ways: with array( ) and with square brackets. • Understanding the shortcuts PHP provides for arrays with numeric keys. • Counting the number of elements in an array. • Visiting each element of an array with foreach( ). • Alternating table row colors with foreach( ) and an array of color values. • Modifying array element values inside a foreach( ) code block. • Visiting each element of a numeric array with for( ). • Alternating table row colors with for( ) and the modulus operator (%). • Understanding the order in which foreach( ) and for( ) visit array elements. • Checking for an array element with a particular key. • Checking for an array element with a particular value. • Interpolating array element values in strings. • Removing an element from an array. • Generating a string from an array with implode( ). • Generating an array from a string with explode( ). • Sorting an array with sort( ), asort( ), or ksort( ). • Sorting an array in reverse. • Defining a multidimensional array. • Accessing individual elements of a multidimensional array. • Visiting each element in a multidimensional array with foreach( ) or for( ). • Interpolating multidimensional array elements in a string.
4.7 Exercises 1. According to the U.S. Census Bureau, the 10 largest American cities (by population) in 2000 were as follows:
o New York, NY (8,008,278 people) o Los Angeles, CA (3,694,820) o Chicago, IL (2,896,016) o Houston, TX (1,953,631) o Philadelphia, PA (1,517,550) o Phoenix, AZ (1,321,045) o San Diego, CA (1,223,400)
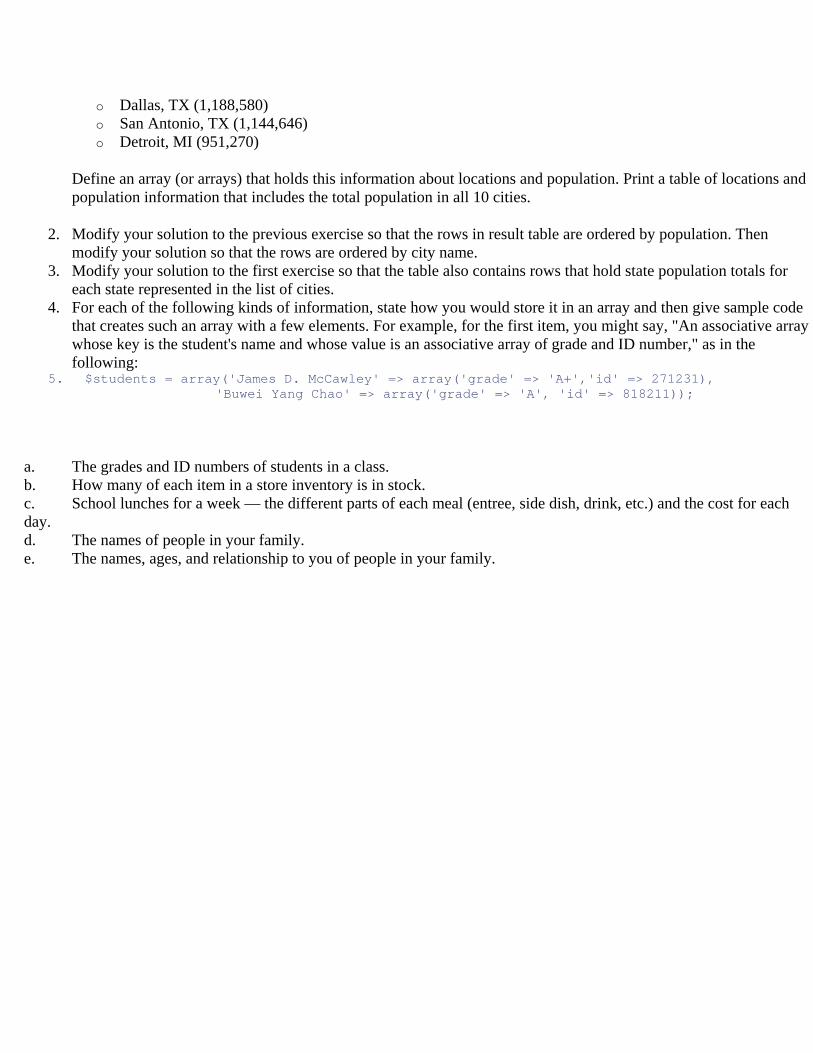
o Dallas, TX (1,188,580) o San Antonio, TX (1,144,646) o Detroit, MI (951,270)
Define an array (or arrays) that holds this information about locations and population. Print a table of locations and population information that includes the total population in all 10 cities.
2. Modify your solution to the previous exercise so that the rows in result table are ordered by population. Then modify your solution so that the rows are ordered by city name.
3. Modify your solution to the first exercise so that the table also contains rows that hold state population totals for each state represented in the list of cities.
4. For each of the following kinds of information, state how you would store it in an array and then give sample code that creates such an array with a few elements. For example, for the first item, you might say, "An associative array whose key is the student's name and whose value is an associative array of grade and ID number," as in the following:
5. $students = array('James D. McCawley' => array('grade' => 'A+','id' => 271231), 'Buwei Yang Chao' => array('grade' => 'A', 'id' => 818211));
a. The grades and ID numbers of students in a class. b. How many of each item in a store inventory is in stock. c. School lunches for a week — the different parts of each meal (entree, side dish, drink, etc.) and the cost for each day. d. The names of people in your family. e. The names, ages, and relationship to you of people in your family.
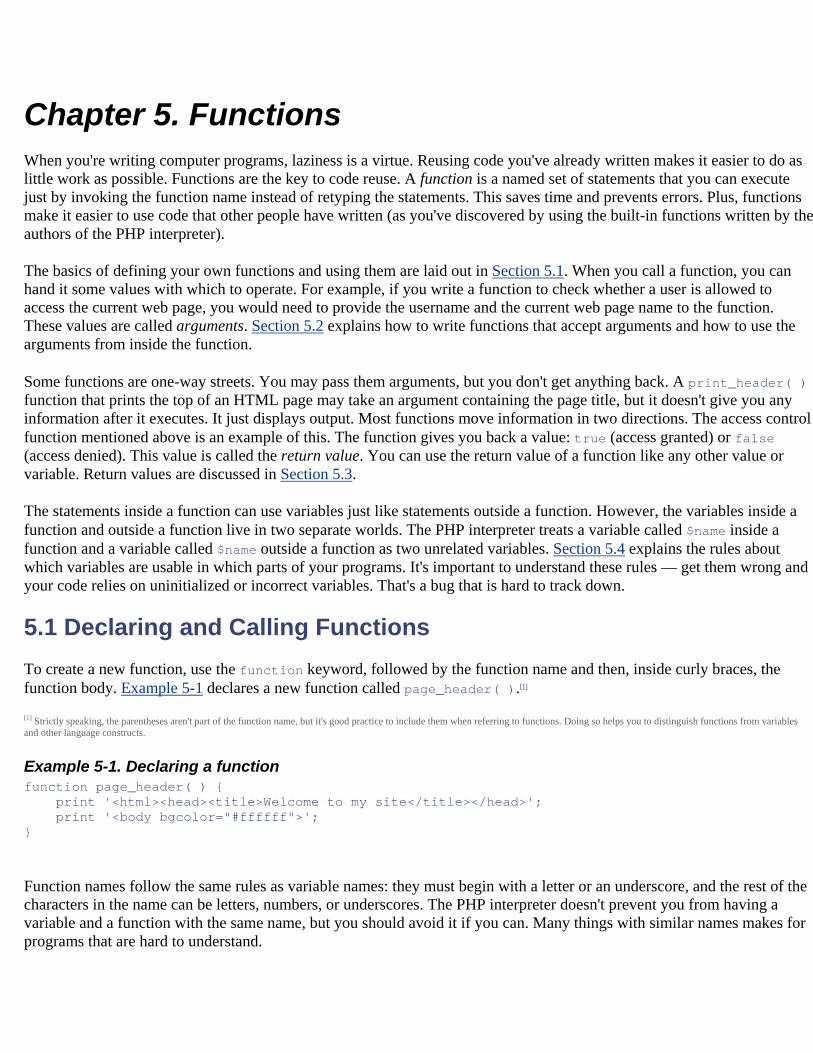
Chapter 5. Functions When you're writing computer programs, laziness is a virtue. Reusing code you've already written makes it easier to do as little work as possible. Functions are the key to code reuse. A function is a named set of statements that you can execute just by invoking the function name instead of retyping the statements. This saves time and prevents errors. Plus, functions make it easier to use code that other people have written (as you've discovered by using the built-in functions written by the authors of the PHP interpreter).
The basics of defining your own functions and using them are laid out in Section 5.1. When you call a function, you can hand it some values with which to operate. For example, if you write a function to check whether a user is allowed to access the current web page, you would need to provide the username and the current web page name to the function. These values are called arguments. Section 5.2 explains how to write functions that accept arguments and how to use the arguments from inside the function.
Some functions are one-way streets. You may pass them arguments, but you don't get anything back. A print_header( ) function that prints the top of an HTML page may take an argument containing the page title, but it doesn't give you any information after it executes. It just displays output. Most functions move information in two directions. The access control function mentioned above is an example of this. The function gives you back a value: true (access granted) or false (access denied). This value is called the return value. You can use the return value of a function like any other value or variable. Return values are discussed in Section 5.3.
The statements inside a function can use variables just like statements outside a function. However, the variables inside a function and outside a function live in two separate worlds. The PHP interpreter treats a variable called $name inside a function and a variable called $name outside a function as two unrelated variables. Section 5.4 explains the rules about which variables are usable in which parts of your programs. It's important to understand these rules — get them wrong and your code relies on uninitialized or incorrect variables. That's a bug that is hard to track down.
5.1 Declaring and Calling Functions To create a new function, use the function keyword, followed by the function name and then, inside curly braces, the function body. Example 5-1 declares a new function called page_header( ).[1]
[1] Strictly speaking, the parentheses aren't part of the function name, but it's good practice to include them when referring to functions. Doing so helps you to distinguish functions from variables and other language constructs.
Example 5-1. Declaring a function function page_header( ) { print '<html><head><title>Welcome to my site</title></head>'; print '<body bgcolor="#ffffff">'; }
Function names follow the same rules as variable names: they must begin with a letter or an underscore, and the rest of the characters in the name can be letters, numbers, or underscores. The PHP interpreter doesn't prevent you from having a variable and a function with the same name, but you should avoid it if you can. Many things with similar names makes for programs that are hard to understand.
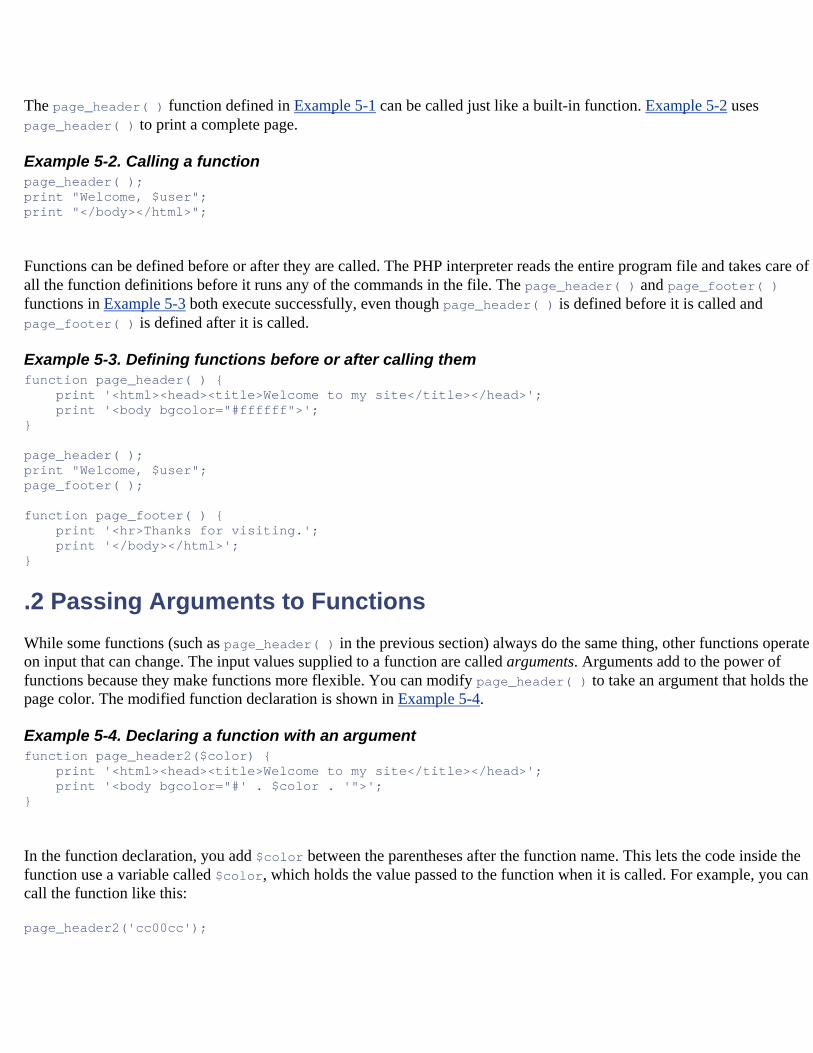
The page_header( ) function defined in Example 5-1 can be called just like a built-in function. Example 5-2 uses page_header( ) to print a complete page.
Example 5-2. Calling a function page_header( ); print "Welcome, $user"; print "</body></html>";
Functions can be defined before or after they are called. The PHP interpreter reads the entire program file and takes care of all the function definitions before it runs any of the commands in the file. The page_header( ) and page_footer( ) functions in Example 5-3 both execute successfully, even though page_header( ) is defined before it is called and page_footer( ) is defined after it is called.
Example 5-3. Defining functions before or after calling them function page_header( ) { print '<html><head><title>Welcome to my site</title></head>'; print '<body bgcolor="#ffffff">'; } page_header( ); print "Welcome, $user"; page_footer( ); function page_footer( ) { print '<hr>Thanks for visiting.'; print '</body></html>'; }
.2 Passing Arguments to Functions While some functions (such as page_header( ) in the previous section) always do the same thing, other functions operate on input that can change. The input values supplied to a function are called arguments. Arguments add to the power of functions because they make functions more flexible. You can modify page_header( ) to take an argument that holds the page color. The modified function declaration is shown in Example 5-4.
Example 5-4. Declaring a function with an argument function page_header2($color) { print '<html><head><title>Welcome to my site</title></head>'; print '<body bgcolor="#' . $color . '">'; }
In the function declaration, you add $color between the parentheses after the function name. This lets the code inside the function use a variable called $color, which holds the value passed to the function when it is called. For example, you can call the function like this:
page_header2('cc00cc');
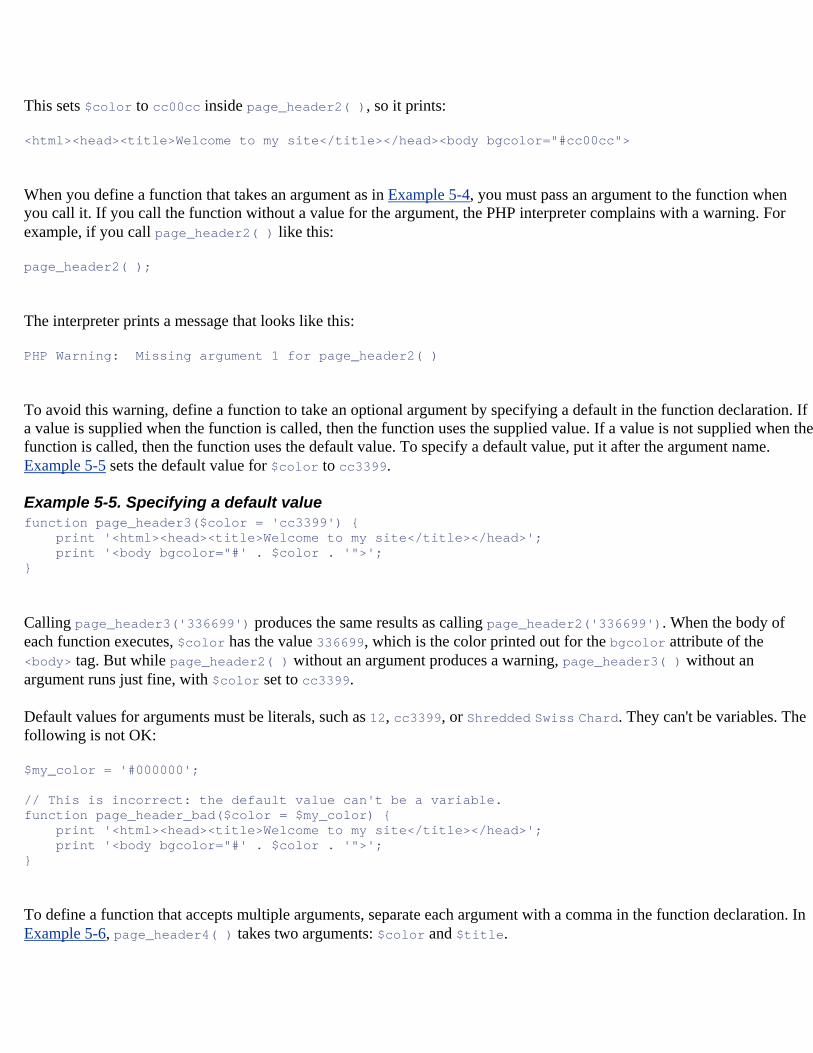
This sets $color to cc00cc inside page_header2( ), so it prints:
<html><head><title>Welcome to my site</title></head><body bgcolor="#cc00cc">
When you define a function that takes an argument as in Example 5-4, you must pass an argument to the function when you call it. If you call the function without a value for the argument, the PHP interpreter complains with a warning. For example, if you call page_header2( ) like this:
page_header2( );
The interpreter prints a message that looks like this:
PHP Warning: Missing argument 1 for page_header2( )
To avoid this warning, define a function to take an optional argument by specifying a default in the function declaration. If a value is supplied when the function is called, then the function uses the supplied value. If a value is not supplied when the function is called, then the function uses the default value. To specify a default value, put it after the argument name. Example 5-5 sets the default value for $color to cc3399.
Example 5-5. Specifying a default value function page_header3($color = 'cc3399') { print '<html><head><title>Welcome to my site</title></head>'; print '<body bgcolor="#' . $color . '">'; }
Calling page_header3('336699') produces the same results as calling page_header2('336699'). When the body of each function executes, $color has the value 336699, which is the color printed out for the bgcolor attribute of the <body> tag. But while page_header2( ) without an argument produces a warning, page_header3( ) without an argument runs just fine, with $color set to cc3399.
Default values for arguments must be literals, such as 12, cc3399, or Shredded Swiss Chard. They can't be variables. The following is not OK:
$my_color = '#000000'; // This is incorrect: the default value can't be a variable. function page_header_bad($color = $my_color) { print '<html><head><title>Welcome to my site</title></head>'; print '<body bgcolor="#' . $color . '">'; }
To define a function that accepts multiple arguments, separate each argument with a comma in the function declaration. In Example 5-6, page_header4( ) takes two arguments: $color and $title.
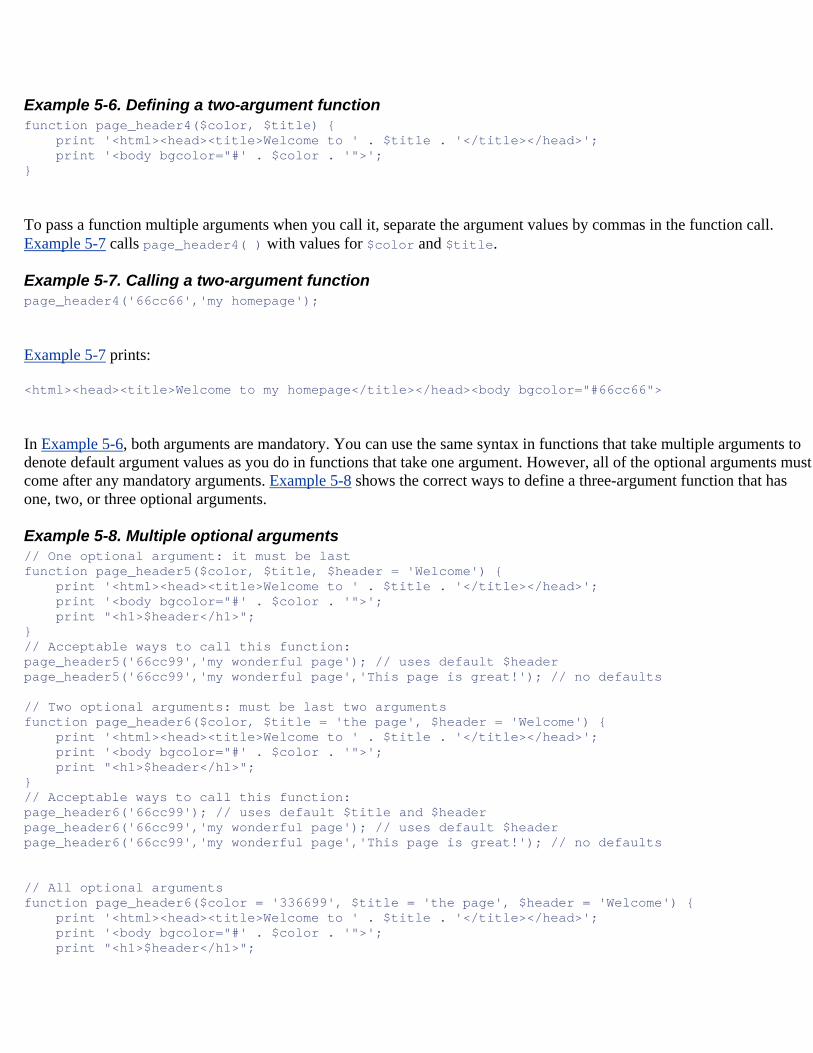
Example 5-6. Defining a two-argument function function page_header4($color, $title) { print '<html><head><title>Welcome to ' . $title . '</title></head>'; print '<body bgcolor="#' . $color . '">'; }
To pass a function multiple arguments when you call it, separate the argument values by commas in the function call. Example 5-7 calls page_header4( ) with values for $color and $title.
Example 5-7. Calling a two-argument function page_header4('66cc66','my homepage');
Example 5-7 prints:
<html><head><title>Welcome to my homepage</title></head><body bgcolor="#66cc66">
In Example 5-6, both arguments are mandatory. You can use the same syntax in functions that take multiple arguments to denote default argument values as you do in functions that take one argument. However, all of the optional arguments must come after any mandatory arguments. Example 5-8 shows the correct ways to define a three-argument function that has one, two, or three optional arguments.
Example 5-8. Multiple optional arguments // One optional argument: it must be last function page_header5($color, $title, $header = 'Welcome') { print '<html><head><title>Welcome to ' . $title . '</title></head>'; print '<body bgcolor="#' . $color . '">'; print "<h1>$header</h1>"; } // Acceptable ways to call this function: page_header5('66cc99','my wonderful page'); // uses default $header page_header5('66cc99','my wonderful page','This page is great!'); // no defaults // Two optional arguments: must be last two arguments function page_header6($color, $title = 'the page', $header = 'Welcome') { print '<html><head><title>Welcome to ' . $title . '</title></head>'; print '<body bgcolor="#' . $color . '">'; print "<h1>$header</h1>"; } // Acceptable ways to call this function: page_header6('66cc99'); // uses default $title and $header page_header6('66cc99','my wonderful page'); // uses default $header page_header6('66cc99','my wonderful page','This page is great!'); // no defaults // All optional arguments function page_header6($color = '336699', $title = 'the page', $header = 'Welcome') { print '<html><head><title>Welcome to ' . $title . '</title></head>'; print '<body bgcolor="#' . $color . '">'; print "<h1>$header</h1>";
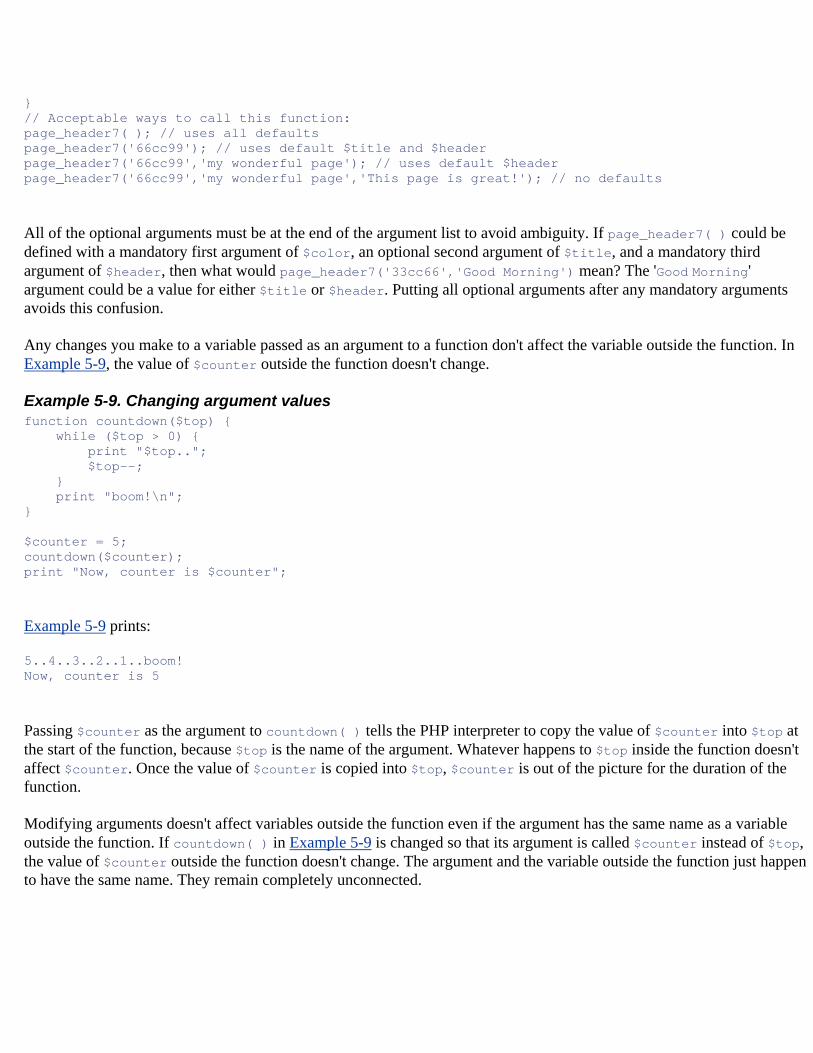
} // Acceptable ways to call this function: page_header7( ); // uses all defaults page_header7('66cc99'); // uses default $title and $header page_header7('66cc99','my wonderful page'); // uses default $header page_header7('66cc99','my wonderful page','This page is great!'); // no defaults
All of the optional arguments must be at the end of the argument list to avoid ambiguity. If page_header7( ) could be defined with a mandatory first argument of $color, an optional second argument of $title, and a mandatory third argument of $header, then what would page_header7('33cc66','Good Morning') mean? The 'Good Morning' argument could be a value for either $title or $header. Putting all optional arguments after any mandatory arguments avoids this confusion.
Any changes you make to a variable passed as an argument to a function don't affect the variable outside the function. In Example 5-9, the value of $counter outside the function doesn't change.
Example 5-9. Changing argument values function countdown($top) { while ($top > 0) { print "$top.."; $top--; } print "boom!\n"; } $counter = 5; countdown($counter); print "Now, counter is $counter";
Example 5-9 prints:
5..4..3..2..1..boom! Now, counter is 5
Passing $counter as the argument to countdown( ) tells the PHP interpreter to copy the value of $counter into $top at the start of the function, because $top is the name of the argument. Whatever happens to $top inside the function doesn't affect $counter. Once the value of $counter is copied into $top, $counter is out of the picture for the duration of the function.
Modifying arguments doesn't affect variables outside the function even if the argument has the same name as a variable outside the function. If countdown( ) in Example 5-9 is changed so that its argument is called $counter instead of $top, the value of $counter outside the function doesn't change. The argument and the variable outside the function just happen to have the same name. They remain completely unconnected.
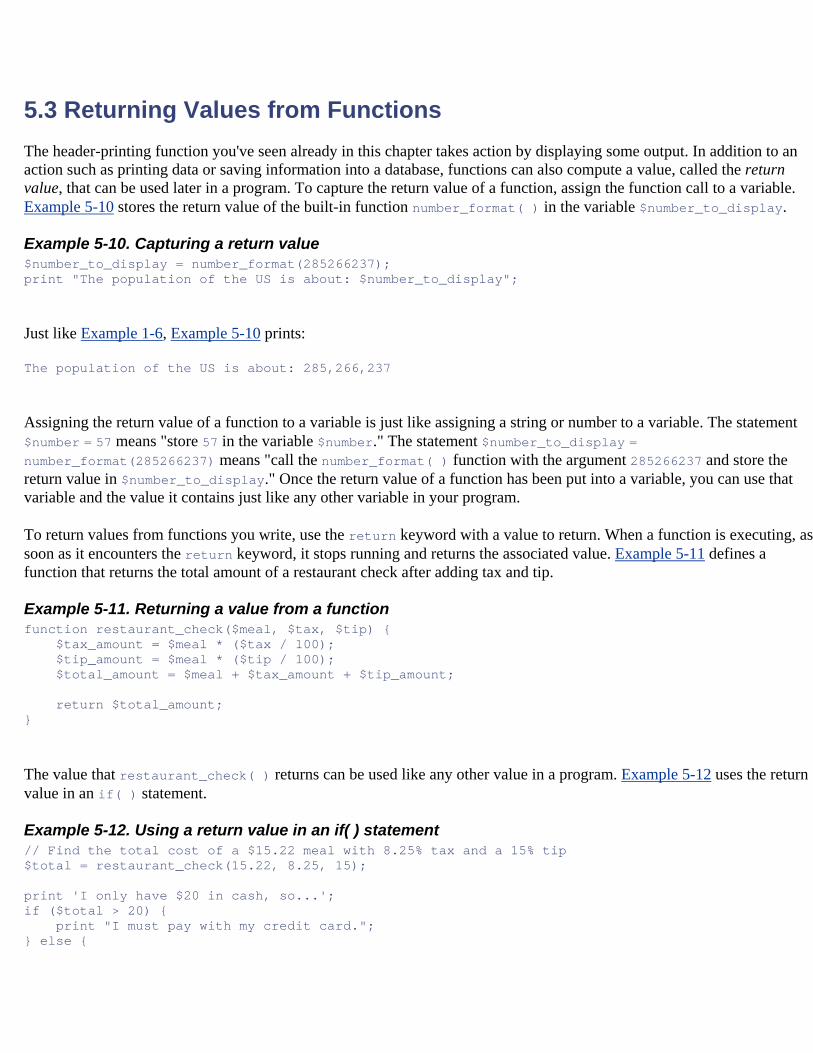
5.3 Returning Values from Functions The header-printing function you've seen already in this chapter takes action by displaying some output. In addition to an action such as printing data or saving information into a database, functions can also compute a value, called the return value, that can be used later in a program. To capture the return value of a function, assign the function call to a variable. Example 5-10 stores the return value of the built-in function number_format( ) in the variable $number_to_display.
Example 5-10. Capturing a return value $number_to_display = number_format(285266237); print "The population of the US is about: $number_to_display";
Just like Example 1-6, Example 5-10 prints:
The population of the US is about: 285,266,237
Assigning the return value of a function to a variable is just like assigning a string or number to a variable. The statement $number = 57 means "store 57 in the variable $number." The statement $number_to_display = number_format(285266237) means "call the number_format( ) function with the argument 285266237 and store the return value in $number_to_display." Once the return value of a function has been put into a variable, you can use that variable and the value it contains just like any other variable in your program.
To return values from functions you write, use the return keyword with a value to return. When a function is executing, as soon as it encounters the return keyword, it stops running and returns the associated value. Example 5-11 defines a function that returns the total amount of a restaurant check after adding tax and tip.
Example 5-11. Returning a value from a function function restaurant_check($meal, $tax, $tip) { $tax_amount = $meal * ($tax / 100); $tip_amount = $meal * ($tip / 100); $total_amount = $meal + $tax_amount + $tip_amount; return $total_amount; }
The value that restaurant_check( ) returns can be used like any other value in a program. Example 5-12 uses the return value in an if( ) statement.
Example 5-12. Using a return value in an if( ) statement // Find the total cost of a $15.22 meal with 8.25% tax and a 15% tip $total = restaurant_check(15.22, 8.25, 15); print 'I only have $20 in cash, so...'; if ($total > 20) { print "I must pay with my credit card."; } else {
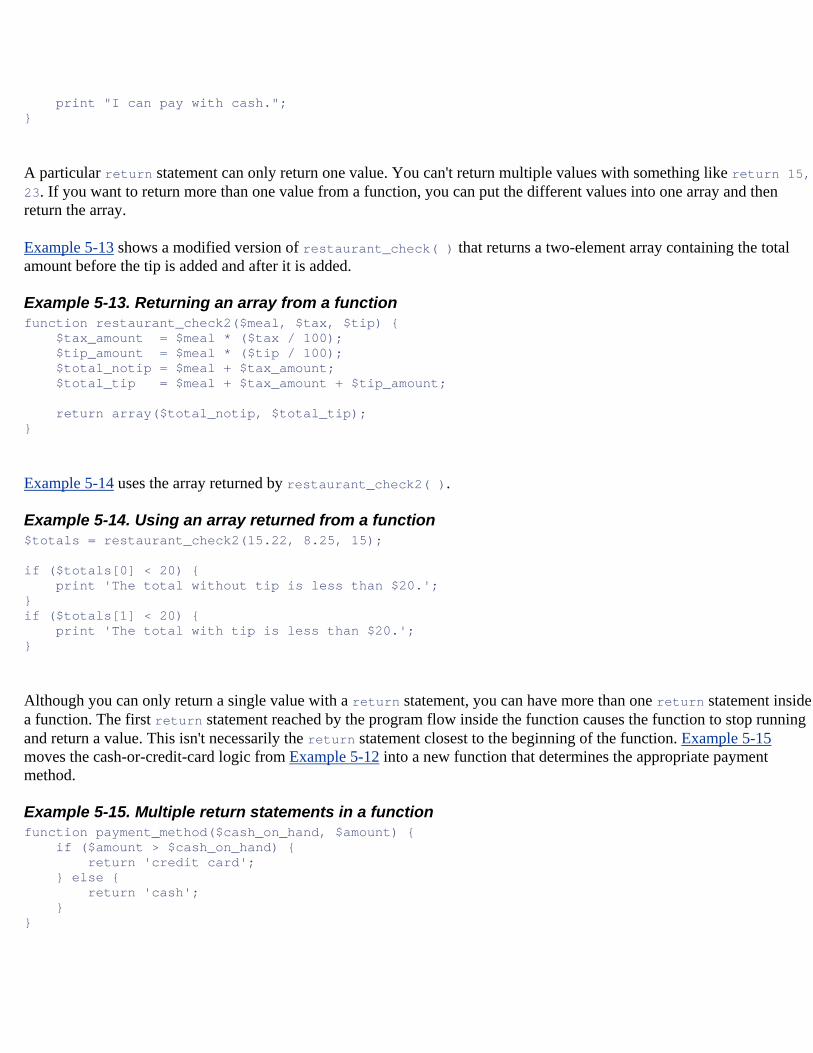
print "I can pay with cash."; }
A particular return statement can only return one value. You can't return multiple values with something like return 15, 23. If you want to return more than one value from a function, you can put the different values into one array and then return the array.
Example 5-13 shows a modified version of restaurant_check( ) that returns a two-element array containing the total amount before the tip is added and after it is added.
Example 5-13. Returning an array from a function function restaurant_check2($meal, $tax, $tip) { $tax_amount = $meal * ($tax / 100); $tip_amount = $meal * ($tip / 100); $total_notip = $meal + $tax_amount; $total_tip = $meal + $tax_amount + $tip_amount; return array($total_notip, $total_tip); }
Example 5-14 uses the array returned by restaurant_check2( ).
Example 5-14. Using an array returned from a function $totals = restaurant_check2(15.22, 8.25, 15); if ($totals[0] < 20) { print 'The total without tip is less than $20.'; } if ($totals[1] < 20) { print 'The total with tip is less than $20.'; }
Although you can only return a single value with a return statement, you can have more than one return statement inside a function. The first return statement reached by the program flow inside the function causes the function to stop running and return a value. This isn't necessarily the return statement closest to the beginning of the function. Example 5-15 moves the cash-or-credit-card logic from Example 5-12 into a new function that determines the appropriate payment method.
Example 5-15. Multiple return statements in a function function payment_method($cash_on_hand, $amount) { if ($amount > $cash_on_hand) { return 'credit card'; } else { return 'cash'; } }
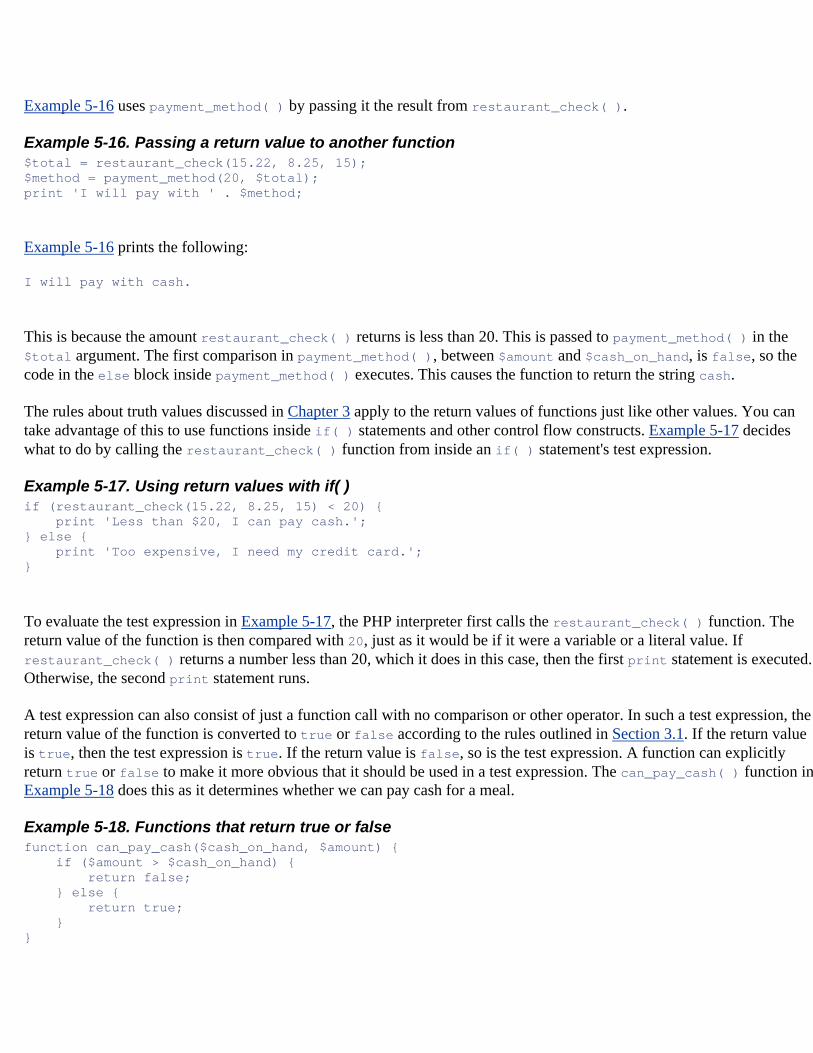
Example 5-16 uses payment_method( ) by passing it the result from restaurant_check( ).
Example 5-16. Passing a return value to another function $total = restaurant_check(15.22, 8.25, 15); $method = payment_method(20, $total); print 'I will pay with ' . $method;
Example 5-16 prints the following:
I will pay with cash.
This is because the amount restaurant_check( ) returns is less than 20. This is passed to payment_method( ) in the $total argument. The first comparison in payment_method( ), between $amount and $cash_on_hand, is false, so the code in the else block inside payment_method( ) executes. This causes the function to return the string cash.
The rules about truth values discussed in Chapter 3 apply to the return values of functions just like other values. You can take advantage of this to use functions inside if( ) statements and other control flow constructs. Example 5-17 decides what to do by calling the restaurant_check( ) function from inside an if( ) statement's test expression.
Example 5-17. Using return values with if( ) if (restaurant_check(15.22, 8.25, 15) < 20) { print 'Less than $20, I can pay cash.'; } else { print 'Too expensive, I need my credit card.'; }
To evaluate the test expression in Example 5-17, the PHP interpreter first calls the restaurant_check( ) function. The return value of the function is then compared with 20, just as it would be if it were a variable or a literal value. If restaurant_check( ) returns a number less than 20, which it does in this case, then the first print statement is executed. Otherwise, the second print statement runs.
A test expression can also consist of just a function call with no comparison or other operator. In such a test expression, the return value of the function is converted to true or false according to the rules outlined in Section 3.1. If the return value is true, then the test expression is true. If the return value is false, so is the test expression. A function can explicitly return true or false to make it more obvious that it should be used in a test expression. The can_pay_cash( ) function in Example 5-18 does this as it determines whether we can pay cash for a meal.
Example 5-18. Functions that return true or false function can_pay_cash($cash_on_hand, $amount) { if ($amount > $cash_on_hand) { return false; } else { return true; } }
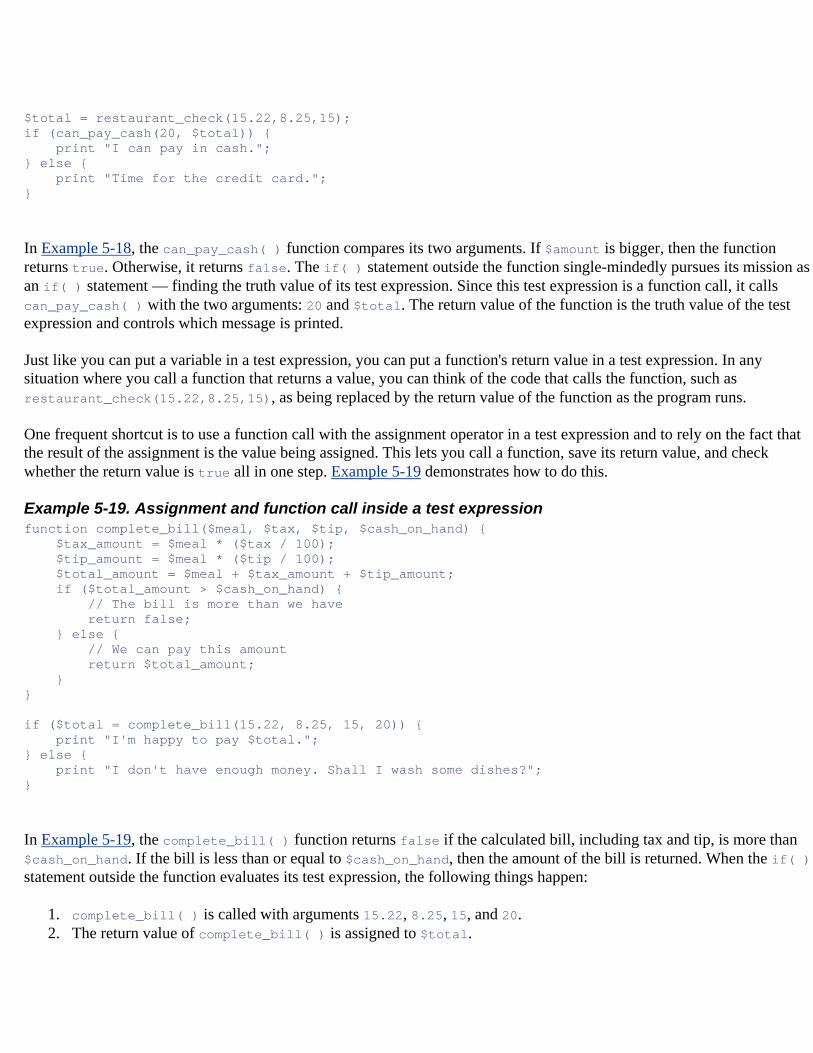
$total = restaurant_check(15.22,8.25,15); if (can_pay_cash(20, $total)) { print "I can pay in cash."; } else { print "Time for the credit card."; }
In Example 5-18, the can_pay_cash( ) function compares its two arguments. If $amount is bigger, then the function returns true. Otherwise, it returns false. The if( ) statement outside the function single-mindedly pursues its mission as an if( ) statement — finding the truth value of its test expression. Since this test expression is a function call, it calls can_pay_cash( ) with the two arguments: 20 and $total. The return value of the function is the truth value of the test expression and controls which message is printed.
Just like you can put a variable in a test expression, you can put a function's return value in a test expression. In any situation where you call a function that returns a value, you can think of the code that calls the function, such as restaurant_check(15.22,8.25,15), as being replaced by the return value of the function as the program runs.
One frequent shortcut is to use a function call with the assignment operator in a test expression and to rely on the fact that the result of the assignment is the value being assigned. This lets you call a function, save its return value, and check whether the return value is true all in one step. Example 5-19 demonstrates how to do this.
Example 5-19. Assignment and function call inside a test expression function complete_bill($meal, $tax, $tip, $cash_on_hand) { $tax_amount = $meal * ($tax / 100); $tip_amount = $meal * ($tip / 100); $total_amount = $meal + $tax_amount + $tip_amount; if ($total_amount > $cash_on_hand) { // The bill is more than we have return false; } else { // We can pay this amount return $total_amount; } } if ($total = complete_bill(15.22, 8.25, 15, 20)) { print "I'm happy to pay $total."; } else { print "I don't have enough money. Shall I wash some dishes?"; }
In Example 5-19, the complete_bill( ) function returns false if the calculated bill, including tax and tip, is more than $cash_on_hand. If the bill is less than or equal to $cash_on_hand, then the amount of the bill is returned. When the if( )statement outside the function evaluates its test expression, the following things happen:
1. complete_bill( ) is called with arguments 15.22, 8.25, 15, and 20. 2. The return value of complete_bill( ) is assigned to $total.
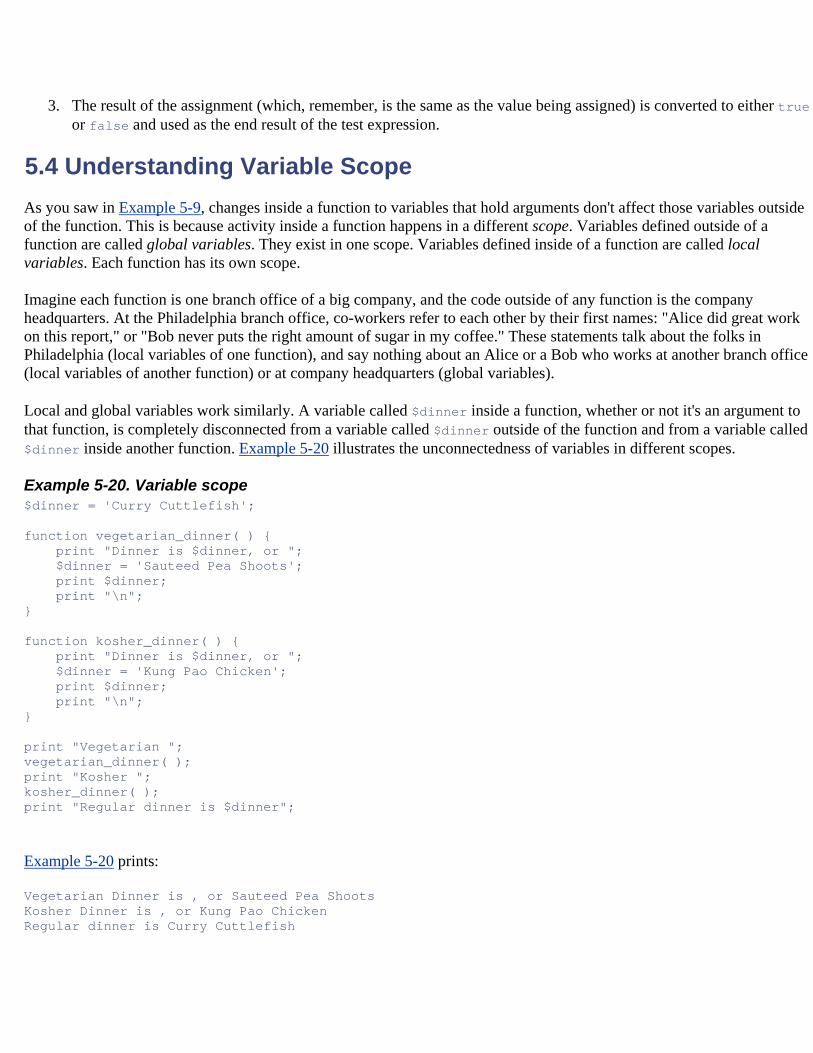
3. The result of the assignment (which, remember, is the same as the value being assigned) is converted to either true or false and used as the end result of the test expression.
5.4 Understanding Variable Scope As you saw in Example 5-9, changes inside a function to variables that hold arguments don't affect those variables outside of the function. This is because activity inside a function happens in a different scope. Variables defined outside of a function are called global variables. They exist in one scope. Variables defined inside of a function are called local variables. Each function has its own scope.
Imagine each function is one branch office of a big company, and the code outside of any function is the company headquarters. At the Philadelphia branch office, co-workers refer to each other by their first names: "Alice did great work on this report," or "Bob never puts the right amount of sugar in my coffee." These statements talk about the folks in Philadelphia (local variables of one function), and say nothing about an Alice or a Bob who works at another branch office (local variables of another function) or at company headquarters (global variables).
Local and global variables work similarly. A variable called $dinner inside a function, whether or not it's an argument to that function, is completely disconnected from a variable called $dinner outside of the function and from a variable called $dinner inside another function. Example 5-20 illustrates the unconnectedness of variables in different scopes.
Example 5-20. Variable scope $dinner = 'Curry Cuttlefish'; function vegetarian_dinner( ) { print "Dinner is $dinner, or "; $dinner = 'Sauteed Pea Shoots'; print $dinner; print "\n"; } function kosher_dinner( ) { print "Dinner is $dinner, or "; $dinner = 'Kung Pao Chicken'; print $dinner; print "\n"; } print "Vegetarian "; vegetarian_dinner( ); print "Kosher "; kosher_dinner( ); print "Regular dinner is $dinner";
Example 5-20 prints:
Vegetarian Dinner is , or Sauteed Pea Shoots Kosher Dinner is , or Kung Pao Chicken Regular dinner is Curry Cuttlefish
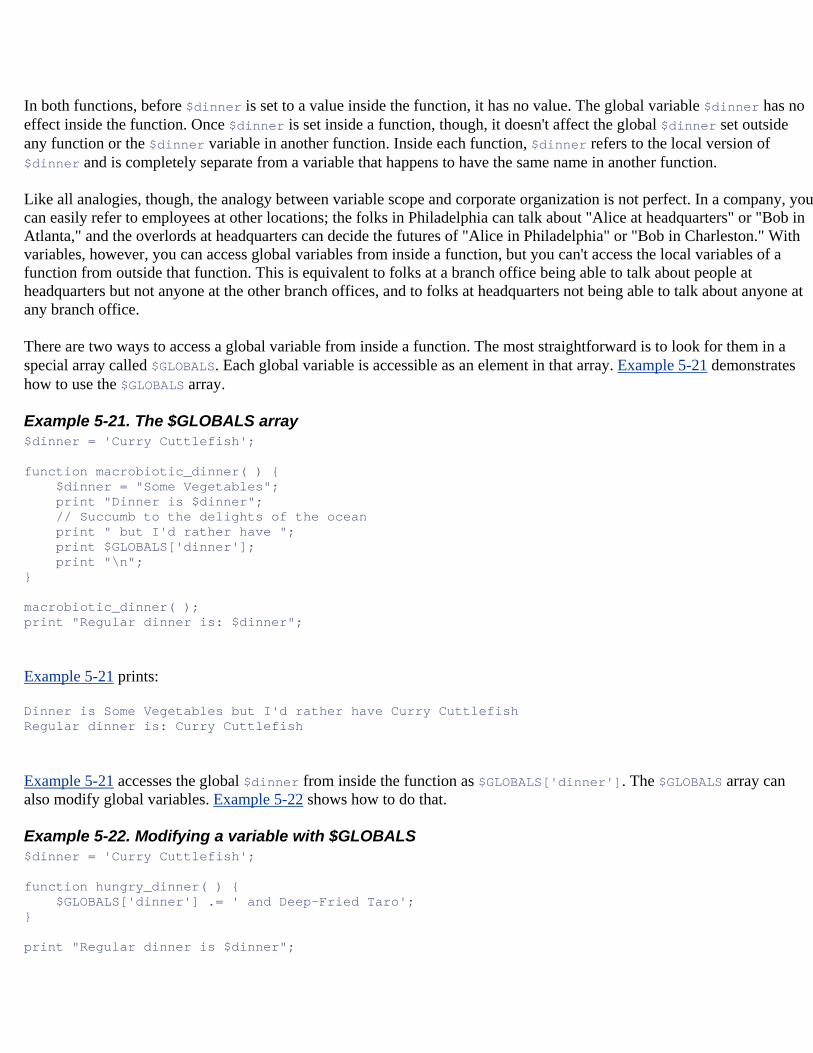
In both functions, before $dinner is set to a value inside the function, it has no value. The global variable $dinner has no effect inside the function. Once $dinner is set inside a function, though, it doesn't affect the global $dinner set outside any function or the $dinner variable in another function. Inside each function, $dinner refers to the local version of $dinner and is completely separate from a variable that happens to have the same name in another function.
Like all analogies, though, the analogy between variable scope and corporate organization is not perfect. In a company, you can easily refer to employees at other locations; the folks in Philadelphia can talk about "Alice at headquarters" or "Bob in Atlanta," and the overlords at headquarters can decide the futures of "Alice in Philadelphia" or "Bob in Charleston." With variables, however, you can access global variables from inside a function, but you can't access the local variables of a function from outside that function. This is equivalent to folks at a branch office being able to talk about people at headquarters but not anyone at the other branch offices, and to folks at headquarters not being able to talk about anyone at any branch office.
There are two ways to access a global variable from inside a function. The most straightforward is to look for them in a special array called $GLOBALS. Each global variable is accessible as an element in that array. Example 5-21 demonstrates how to use the $GLOBALS array.
Example 5-21. The $GLOBALS array $dinner = 'Curry Cuttlefish'; function macrobiotic_dinner( ) { $dinner = "Some Vegetables"; print "Dinner is $dinner"; // Succumb to the delights of the ocean print " but I'd rather have "; print $GLOBALS['dinner']; print "\n"; } macrobiotic_dinner( ); print "Regular dinner is: $dinner";
Example 5-21 prints:
Dinner is Some Vegetables but I'd rather have Curry Cuttlefish Regular dinner is: Curry Cuttlefish
Example 5-21 accesses the global $dinner from inside the function as $GLOBALS['dinner']. The $GLOBALS array can also modify global variables. Example 5-22 shows how to do that.
Example 5-22. Modifying a variable with $GLOBALS $dinner = 'Curry Cuttlefish'; function hungry_dinner( ) { $GLOBALS['dinner'] .= ' and Deep-Fried Taro'; } print "Regular dinner is $dinner";
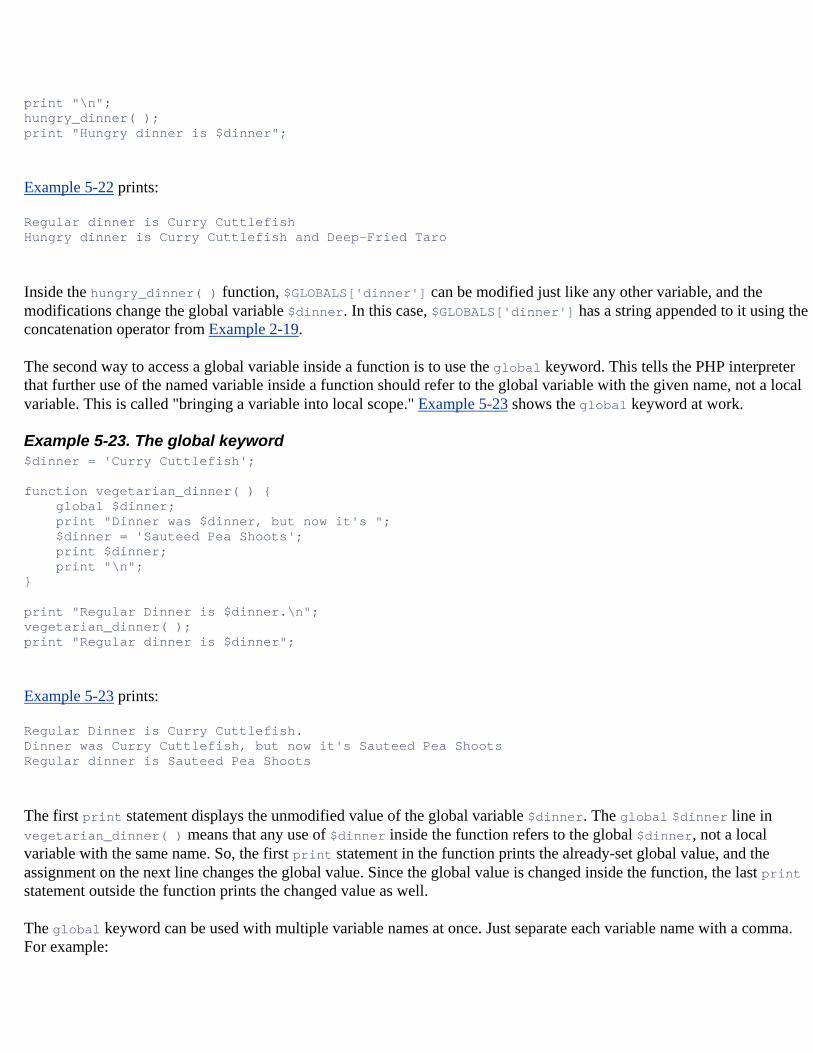
print "\n"; hungry_dinner( ); print "Hungry dinner is $dinner";
Example 5-22 prints:
Regular dinner is Curry Cuttlefish Hungry dinner is Curry Cuttlefish and Deep-Fried Taro
Inside the hungry_dinner( ) function, $GLOBALS['dinner'] can be modified just like any other variable, and the modifications change the global variable $dinner. In this case, $GLOBALS['dinner'] has a string appended to it using the concatenation operator from Example 2-19.
The second way to access a global variable inside a function is to use the global keyword. This tells the PHP interpreter that further use of the named variable inside a function should refer to the global variable with the given name, not a local variable. This is called "bringing a variable into local scope." Example 5-23 shows the global keyword at work.
Example 5-23. The global keyword $dinner = 'Curry Cuttlefish'; function vegetarian_dinner( ) { global $dinner; print "Dinner was $dinner, but now it's "; $dinner = 'Sauteed Pea Shoots'; print $dinner; print "\n"; } print "Regular Dinner is $dinner.\n"; vegetarian_dinner( ); print "Regular dinner is $dinner";
Example 5-23 prints:
Regular Dinner is Curry Cuttlefish. Dinner was Curry Cuttlefish, but now it's Sauteed Pea Shoots Regular dinner is Sauteed Pea Shoots
The first print statement displays the unmodified value of the global variable $dinner. The global $dinner line in vegetarian_dinner( ) means that any use of $dinner inside the function refers to the global $dinner, not a local variable with the same name. So, the first print statement in the function prints the already-set global value, and the assignment on the next line changes the global value. Since the global value is changed inside the function, the last print statement outside the function prints the changed value as well.
The global keyword can be used with multiple variable names at once. Just separate each variable name with a comma. For example:
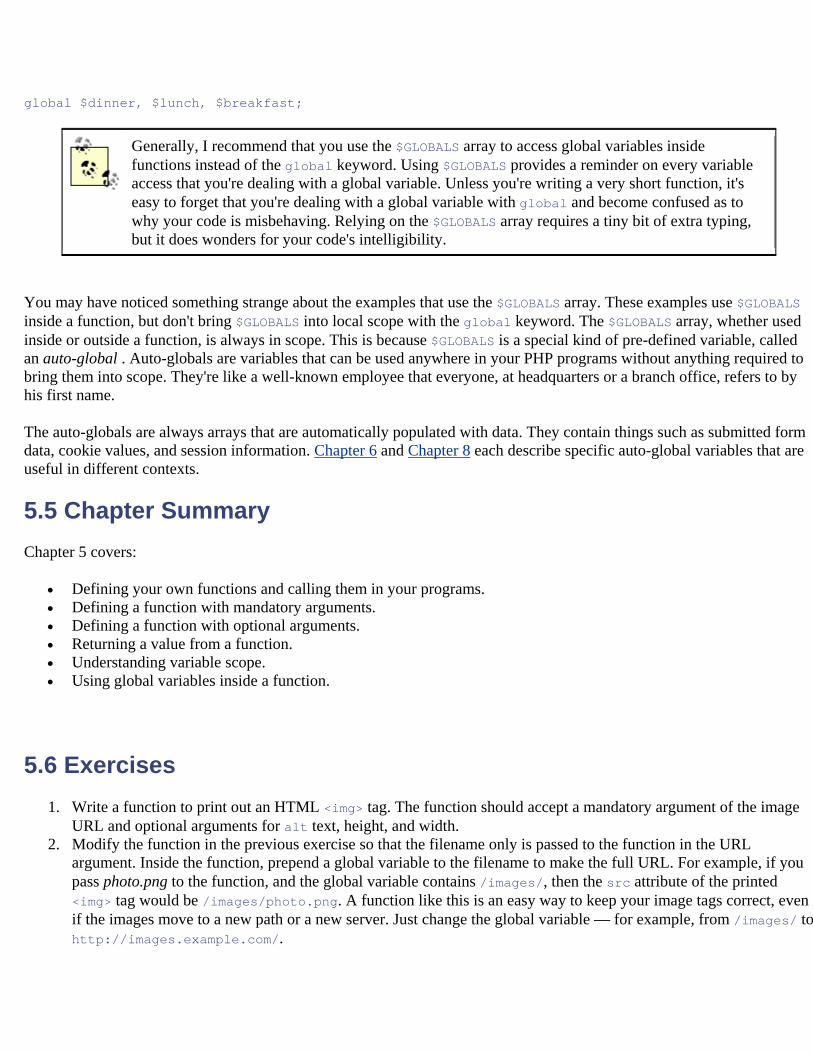
global $dinner, $lunch, $breakfast;
Generally, I recommend that you use the $GLOBALS array to access global variables inside functions instead of the global keyword. Using $GLOBALS provides a reminder on every variable access that you're dealing with a global variable. Unless you're writing a very short function, it's easy to forget that you're dealing with a global variable with global and become confused as to why your code is misbehaving. Relying on the $GLOBALS array requires a tiny bit of extra typing, but it does wonders for your code's intelligibility.
You may have noticed something strange about the examples that use the $GLOBALS array. These examples use $GLOBALS inside a function, but don't bring $GLOBALS into local scope with the global keyword. The $GLOBALS array, whether used inside or outside a function, is always in scope. This is because $GLOBALS is a special kind of pre-defined variable, called an auto-global . Auto-globals are variables that can be used anywhere in your PHP programs without anything required to bring them into scope. They're like a well-known employee that everyone, at headquarters or a branch office, refers to by his first name.
The auto-globals are always arrays that are automatically populated with data. They contain things such as submitted form data, cookie values, and session information. Chapter 6 and Chapter 8 each describe specific auto-global variables that are useful in different contexts.
5.5 Chapter Summary Chapter 5 covers:
• Defining your own functions and calling them in your programs. • Defining a function with mandatory arguments. • Defining a function with optional arguments. • Returning a value from a function. • Understanding variable scope. • Using global variables inside a function.
5.6 Exercises 1. Write a function to print out an HTML <img> tag. The function should accept a mandatory argument of the image
URL and optional arguments for alt text, height, and width. 2. Modify the function in the previous exercise so that the filename only is passed to the function in the URL
argument. Inside the function, prepend a global variable to the filename to make the full URL. For example, if you pass photo.png to the function, and the global variable contains /images/, then the src attribute of the printed <img> tag would be /images/photo.png. A function like this is an easy way to keep your image tags correct, even if the images move to a new path or a new server. Just change the global variable — for example, from /images/ to http://images.example.com/.
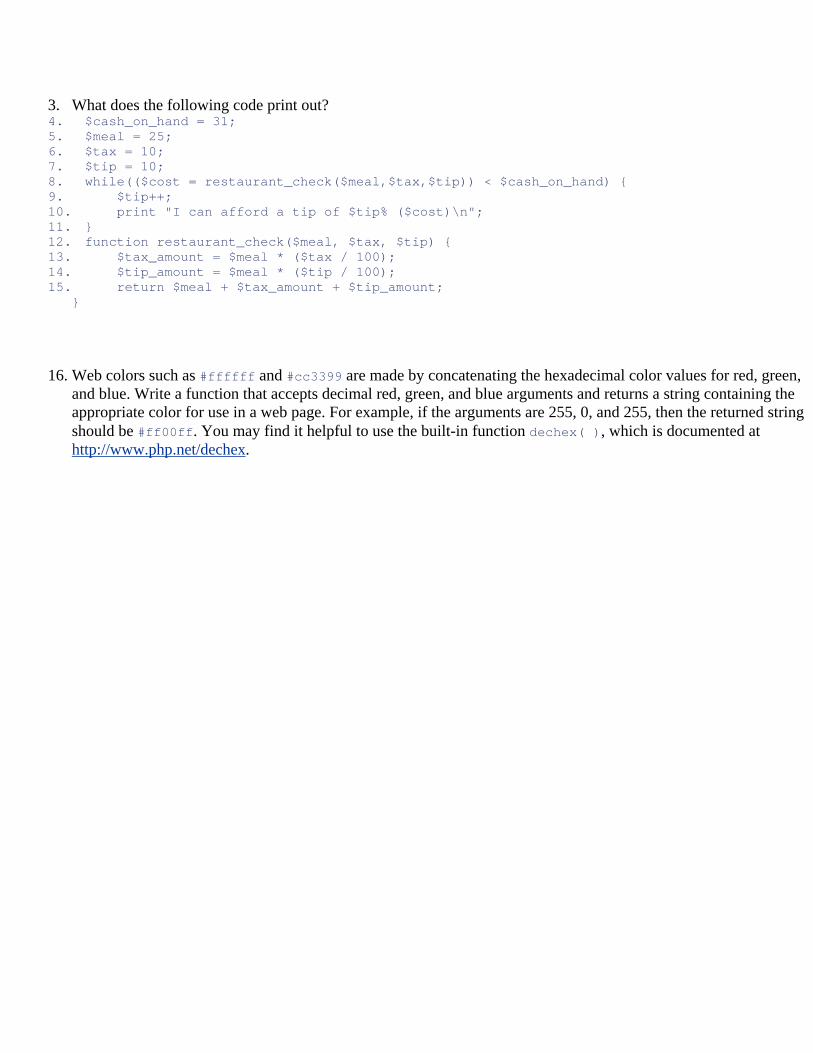
3. What does the following code print out? 4. $cash_on_hand = 31; 5. $meal = 25; 6. $tax = 10; 7. $tip = 10; 8. while(($cost = restaurant_check($meal,$tax,$tip)) < $cash_on_hand) { 9. $tip++; 10. print "I can afford a tip of $tip% ($cost)\n"; 11. } 12. function restaurant_check($meal, $tax, $tip) { 13. $tax_amount = $meal * ($tax / 100); 14. $tip_amount = $meal * ($tip / 100); 15. return $meal + $tax_amount + $tip_amount;
}
16. Web colors such as #ffffff and #cc3399 are made by concatenating the hexadecimal color values for red, green, and blue. Write a function that accepts decimal red, green, and blue arguments and returns a string containing the appropriate color for use in a web page. For example, if the arguments are 255, 0, and 255, then the returned string should be #ff00ff. You may find it helpful to use the built-in function dechex( ), which is documented at http://www.php.net/dechex.
Chapter 6. Making Web Forms Form processing is an essential component of almost any web application. Forms are how users communicate with your server: signing up for a new account, searching a forum for all the posts about a particular subject, retrieving a lost password, finding a nearby restaurant or shoemaker, or buying a book.
Using a form in a PHP program is a two-step activity. Step one is to display the form. This involves constructing HTML that has tags for the appropriate user-interface elements in it, such as text boxes, checkboxes, and buttons. If you're not familiar with the HTML required to create forms, the "Forms" chapter in HTML & XHTML: The Definitive Guide, by Chuck Musciano and Bill Kennedy (O'Reilly) is a good place to start.
When a user sees a page with a form in it, she inputs the information into the form and then clicks a button or hits Enter to send the form information back to your server. Processing that submitted form information is step two of the operation.
Example 6-1 is a page that says "Hello" to a user. If a name is submitted, then the page displays a greeting. If a name is not submitted, then the page displays a form with which a user can submit her name.
Example 6-1. Saying "Hello" if (array_key_exists('my_name',$_POST)) { print "Hello, ". $_POST['my_name']; } else { print<<<_HTML_ <form method="post" action="$_SERVER[PHP_SELF]"> Your name: <input type="text" name="my_name"> <br/> <input type="submit" value="Say Hello"> </form> _HTML_; }
Remember the client and server communication picture from Chapter 1? Figure 6-1 shows the client and server communication necessary to display and process the form in Example 6-1. The first request and response pair causes the browser to display the form. In the second request and response pair, the server processes the submitted form data and the browser displays the results.
Figure 6-1. Displaying and processing a simple form
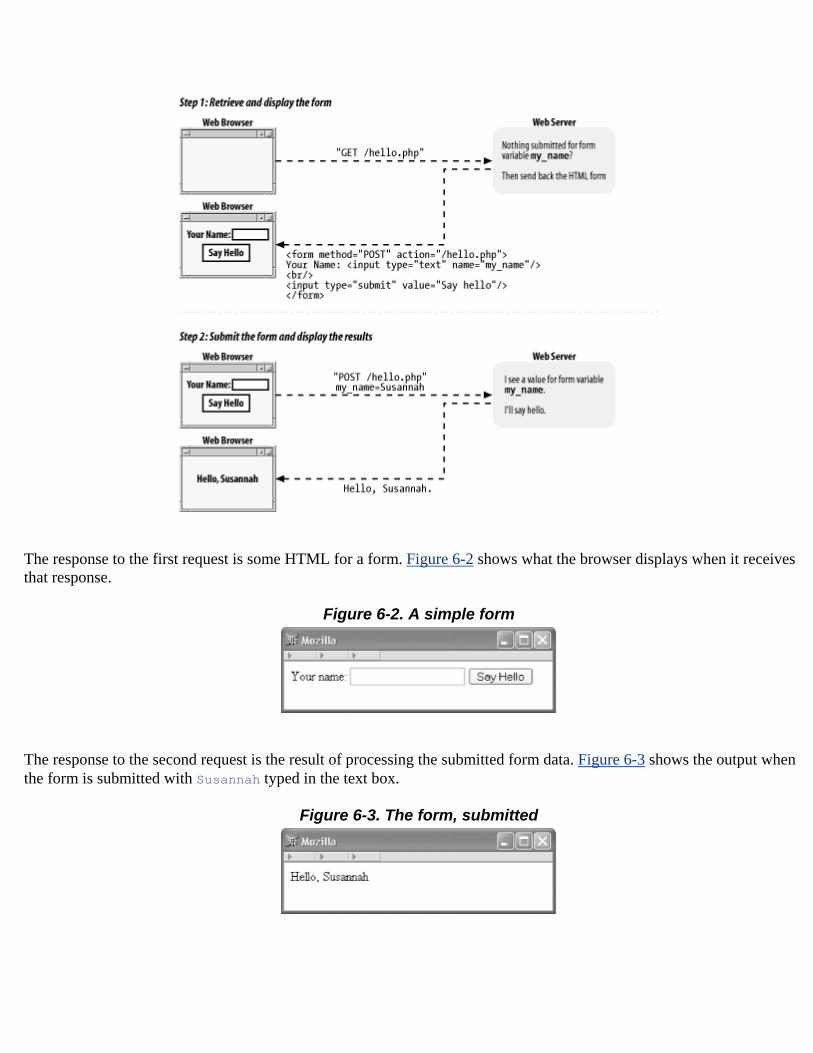
The response to the first request is some HTML for a form. Figure 6-2 shows what the browser displays when it receives that response.
Figure 6-2. A simple form
The response to the second request is the result of processing the submitted form data. Figure 6-3 shows the output when the form is submitted with Susannah typed in the text box.
Figure 6-3. The form, submitted
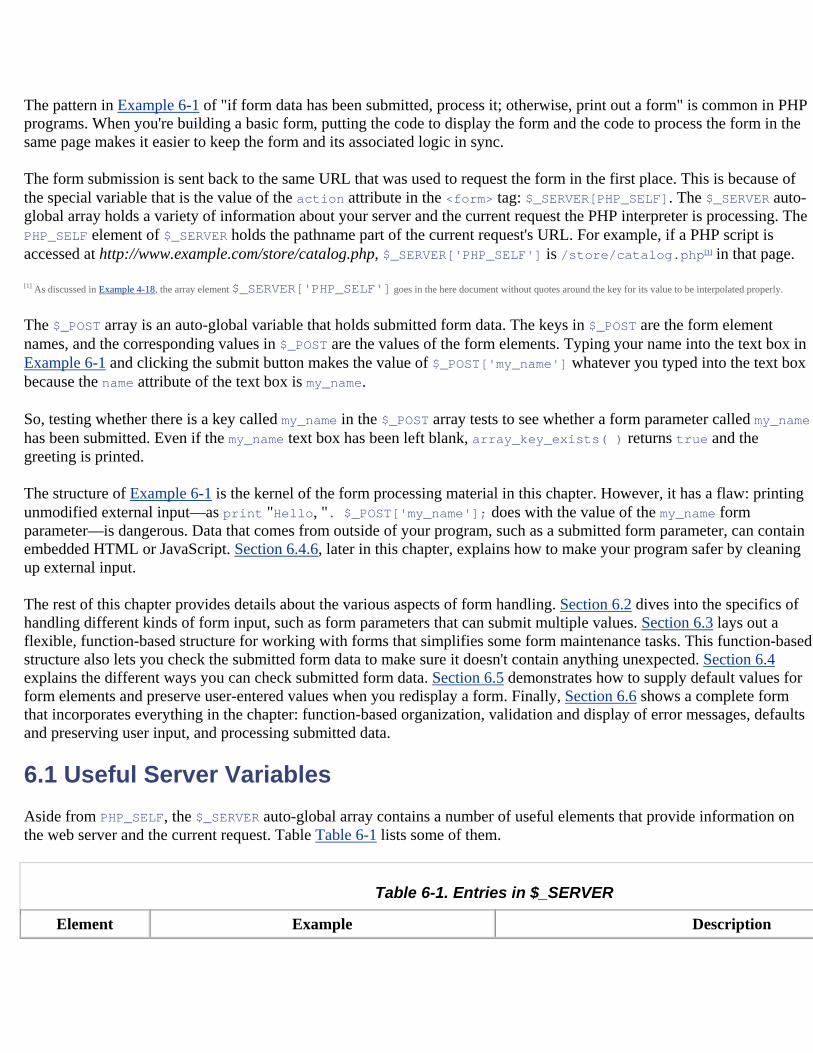
The pattern in Example 6-1 of "if form data has been submitted, process it; otherwise, print out a form" is common in PHP programs. When you're building a basic form, putting the code to display the form and the code to process the form in the same page makes it easier to keep the form and its associated logic in sync.
The form submission is sent back to the same URL that was used to request the form in the first place. This is because of the special variable that is the value of the action attribute in the <form> tag: $_SERVER[PHP_SELF]. The $_SERVER auto-global array holds a variety of information about your server and the current request the PHP interpreter is processing. The PHP_SELF element of $_SERVER holds the pathname part of the current request's URL. For example, if a PHP script is accessed at http://www.example.com/store/catalog.php, $_SERVER['PHP_SELF'] is /store/catalog.php[1] in that page.
[1] As discussed in Example 4-18, the array element $_SERVER['PHP_SELF'] goes in the here document without quotes around the key for its value to be interpolated properly.
The $_POST array is an auto-global variable that holds submitted form data. The keys in $_POST are the form element names, and the corresponding values in $_POST are the values of the form elements. Typing your name into the text box in Example 6-1 and clicking the submit button makes the value of $_POST['my_name'] whatever you typed into the text box because the name attribute of the text box is my_name.
So, testing whether there is a key called my_name in the $_POST array tests to see whether a form parameter called my_namehas been submitted. Even if the my_name text box has been left blank, array_key_exists( ) returns true and the greeting is printed.
The structure of Example 6-1 is the kernel of the form processing material in this chapter. However, it has a flaw: printing unmodified external input—as print "Hello, ". $_POST['my_name']; does with the value of the my_name form parameter—is dangerous. Data that comes from outside of your program, such as a submitted form parameter, can contain embedded HTML or JavaScript. Section 6.4.6, later in this chapter, explains how to make your program safer by cleaning up external input.
The rest of this chapter provides details about the various aspects of form handling. Section 6.2 dives into the specifics of handling different kinds of form input, such as form parameters that can submit multiple values. Section 6.3 lays out a flexible, function-based structure for working with forms that simplifies some form maintenance tasks. This function-based structure also lets you check the submitted form data to make sure it doesn't contain anything unexpected. Section 6.4 explains the different ways you can check submitted form data. Section 6.5 demonstrates how to supply default values for form elements and preserve user-entered values when you redisplay a form. Finally, Section 6.6 shows a complete form that incorporates everything in the chapter: function-based organization, validation and display of error messages, defaults and preserving user input, and processing submitted data.
6.1 Useful Server Variables Aside from PHP_SELF, the $_SERVER auto-global array contains a number of useful elements that provide information on the web server and the current request. Table Table 6-1 lists some of them.
Table 6-1. Entries in $_SERVER
Element Example Description
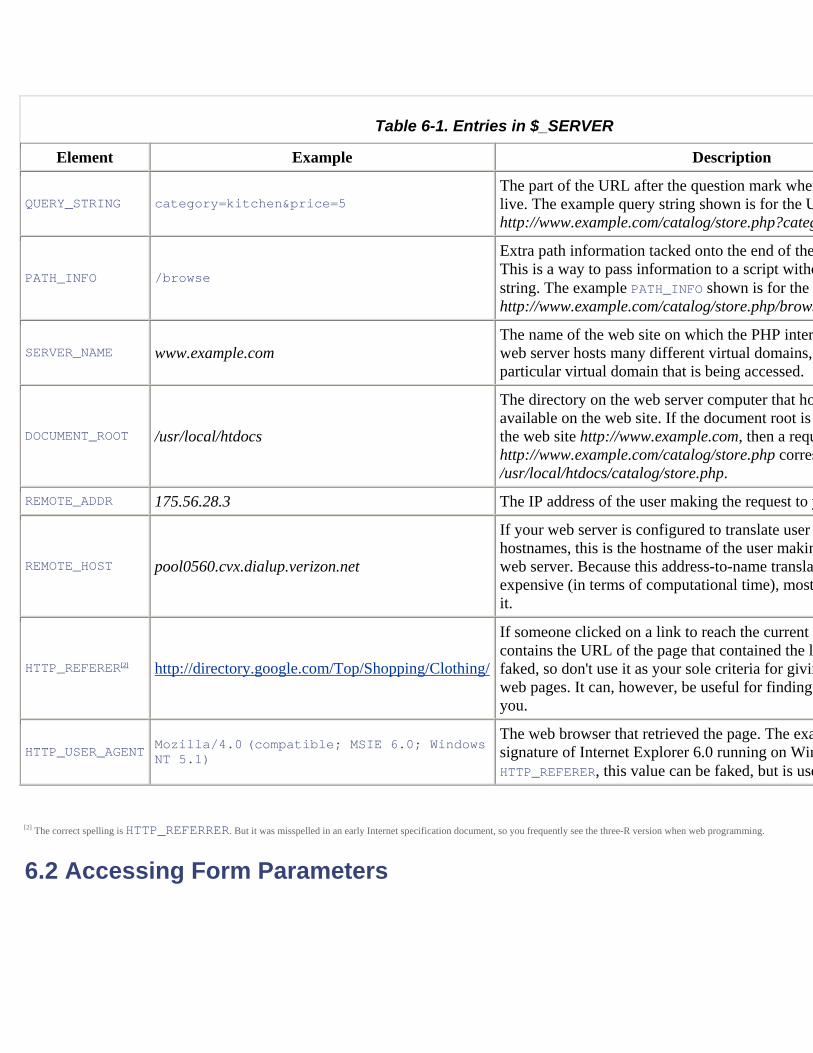
Table 6-1. Entries in $_SERVER
Element Example Description
QUERY_STRING category=kitchen&price=5 The part of the URL after the question mark wherlive. The example query string shown is for the Uhttp://www.example.com/catalog/store.php?categ
PATH_INFO /browse Extra path information tacked onto the end of theThis is a way to pass information to a script withostring. The example PATH_INFO shown is for the Uhttp://www.example.com/catalog/store.php/brows
SERVER_NAME www.example.com The name of the web site on which the PHP interpweb server hosts many different virtual domains, particular virtual domain that is being accessed.
DOCUMENT_ROOT /usr/local/htdocs
The directory on the web server computer that hoavailable on the web site. If the document root is the web site http://www.example.com, then a requhttp://www.example.com/catalog/store.php corres/usr/local/htdocs/catalog/store.php.
REMOTE_ADDR 175.56.28.3 The IP address of the user making the request to y
REMOTE_HOST pool0560.cvx.dialup.verizon.net
If your web server is configured to translate user hostnames, this is the hostname of the user makinweb server. Because this address-to-name translatexpensive (in terms of computational time), mostit.
HTTP_REFERER[2] http://directory.google.com/Top/Shopping/Clothing/
If someone clicked on a link to reach the current Ucontains the URL of the page that contained the lifaked, so don't use it as your sole criteria for givinweb pages. It can, however, be useful for finding you.
HTTP_USER_AGENT Mozilla/4.0 (compatible; MSIE 6.0; Windows NT 5.1)
The web browser that retrieved the page. The exasignature of Internet Explorer 6.0 running on WinHTTP_REFERER, this value can be faked, but is use
[2] The correct spelling is HTTP_REFERRER. But it was misspelled in an early Internet specification document, so you frequently see the three-R version when web programming.
6.2 Accessing Form Parameters
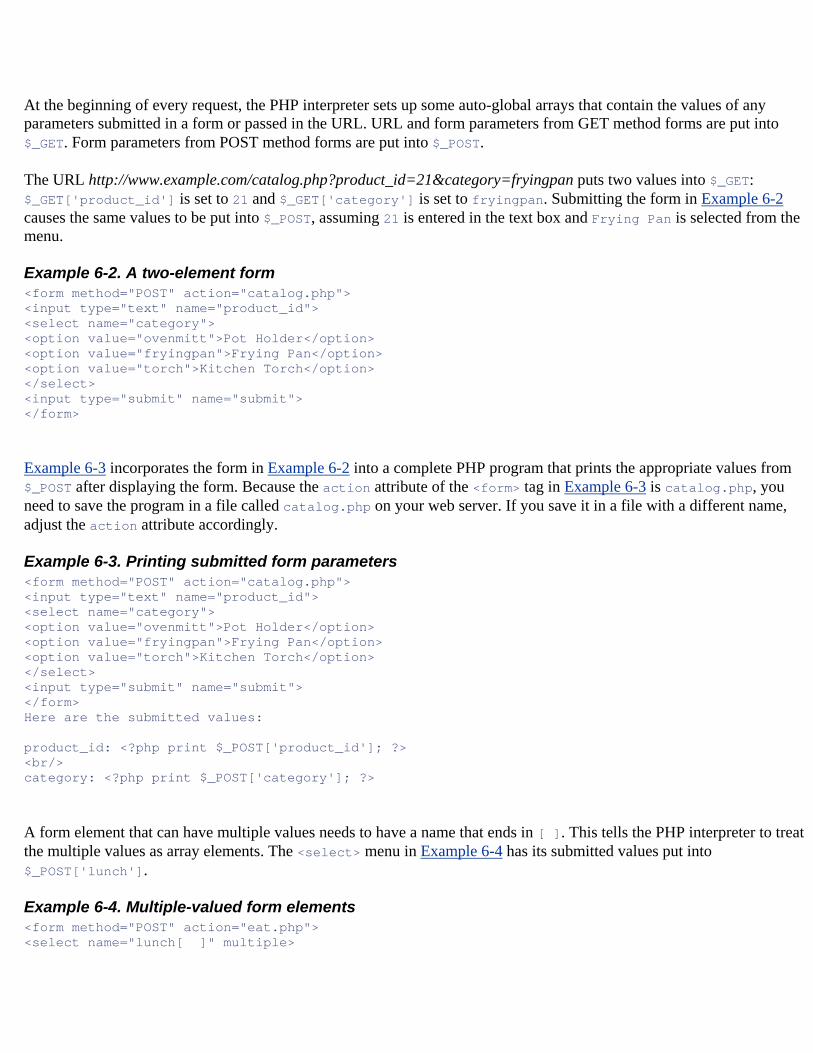
At the beginning of every request, the PHP interpreter sets up some auto-global arrays that contain the values of any parameters submitted in a form or passed in the URL. URL and form parameters from GET method forms are put into $_GET. Form parameters from POST method forms are put into $_POST.
The URL http://www.example.com/catalog.php?product_id=21&category=fryingpan puts two values into $_GET: $_GET['product_id'] is set to 21 and $_GET['category'] is set to fryingpan. Submitting the form in Example 6-2 causes the same values to be put into $_POST, assuming 21 is entered in the text box and Frying Pan is selected from the menu.
Example 6-2. A two-element form <form method="POST" action="catalog.php"> <input type="text" name="product_id"> <select name="category"> <option value="ovenmitt">Pot Holder</option> <option value="fryingpan">Frying Pan</option> <option value="torch">Kitchen Torch</option> </select> <input type="submit" name="submit"> </form>
Example 6-3 incorporates the form in Example 6-2 into a complete PHP program that prints the appropriate values from $_POST after displaying the form. Because the action attribute of the <form> tag in Example 6-3 is catalog.php, you need to save the program in a file called catalog.php on your web server. If you save it in a file with a different name, adjust the action attribute accordingly.
Example 6-3. Printing submitted form parameters <form method="POST" action="catalog.php"> <input type="text" name="product_id"> <select name="category"> <option value="ovenmitt">Pot Holder</option> <option value="fryingpan">Frying Pan</option> <option value="torch">Kitchen Torch</option> </select> <input type="submit" name="submit"> </form> Here are the submitted values: product_id: <?php print $_POST['product_id']; ?> <br/> category: <?php print $_POST['category']; ?>
A form element that can have multiple values needs to have a name that ends in [ ]. This tells the PHP interpreter to treat the multiple values as array elements. The <select> menu in Example 6-4 has its submitted values put into $_POST['lunch'].
Example 6-4. Multiple-valued form elements <form method="POST" action="eat.php"> <select name="lunch[ ]" multiple>
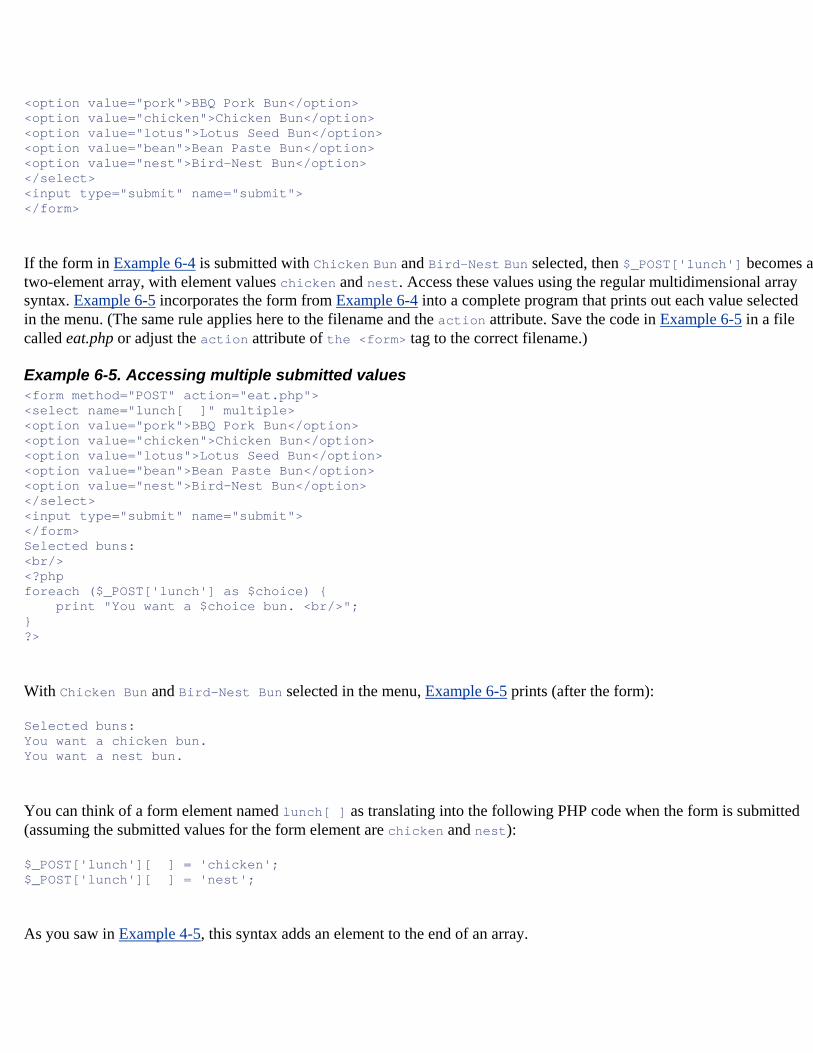
<option value="pork">BBQ Pork Bun</option> <option value="chicken">Chicken Bun</option> <option value="lotus">Lotus Seed Bun</option> <option value="bean">Bean Paste Bun</option> <option value="nest">Bird-Nest Bun</option> </select> <input type="submit" name="submit"> </form>
If the form in Example 6-4 is submitted with Chicken Bun and Bird-Nest Bun selected, then $_POST['lunch'] becomes a two-element array, with element values chicken and nest. Access these values using the regular multidimensional array syntax. Example 6-5 incorporates the form from Example 6-4 into a complete program that prints out each value selected in the menu. (The same rule applies here to the filename and the action attribute. Save the code in Example 6-5 in a file called eat.php or adjust the action attribute of the <form> tag to the correct filename.)
Example 6-5. Accessing multiple submitted values <form method="POST" action="eat.php"> <select name="lunch[ ]" multiple> <option value="pork">BBQ Pork Bun</option> <option value="chicken">Chicken Bun</option> <option value="lotus">Lotus Seed Bun</option> <option value="bean">Bean Paste Bun</option> <option value="nest">Bird-Nest Bun</option> </select> <input type="submit" name="submit"> </form> Selected buns: <br/> <?php foreach ($_POST['lunch'] as $choice) { print "You want a $choice bun. <br/>"; } ?>
With Chicken Bun and Bird-Nest Bun selected in the menu, Example 6-5 prints (after the form):
Selected buns: You want a chicken bun. You want a nest bun.
You can think of a form element named lunch[ ] as translating into the following PHP code when the form is submitted (assuming the submitted values for the form element are chicken and nest):
$_POST['lunch'][ ] = 'chicken'; $_POST['lunch'][ ] = 'nest';
As you saw in Example 4-5, this syntax adds an element to the end of an array.
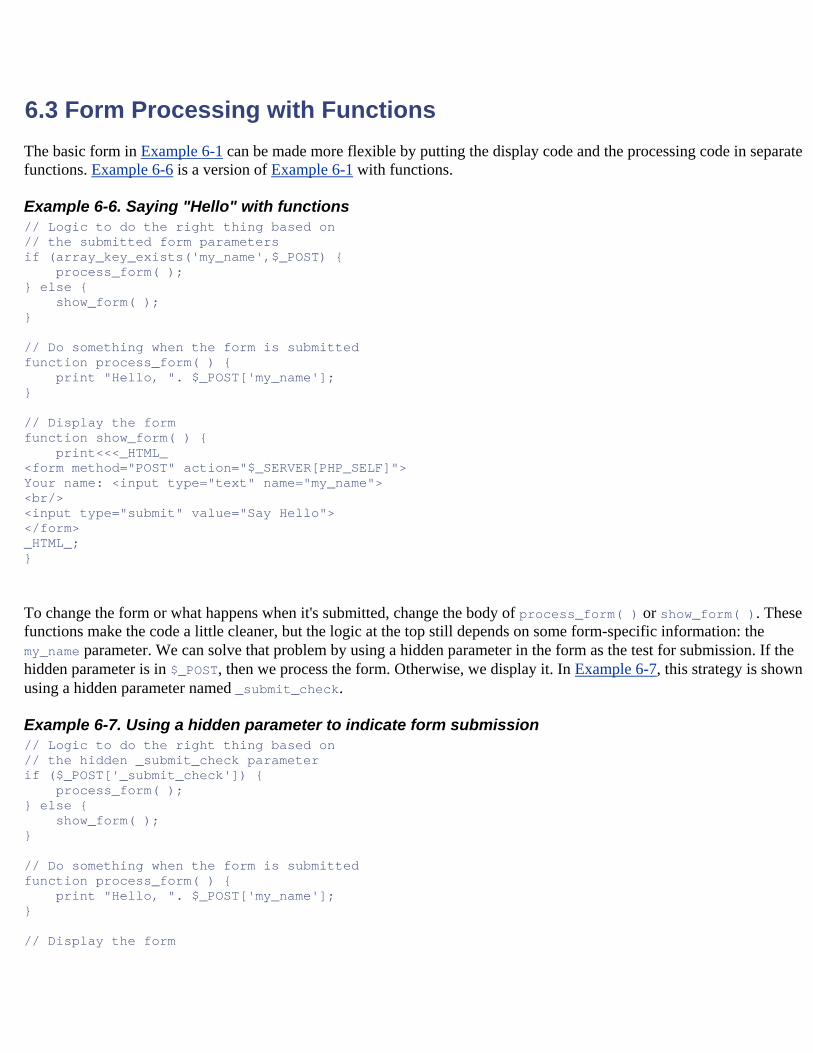
6.3 Form Processing with Functions The basic form in Example 6-1 can be made more flexible by putting the display code and the processing code in separate functions. Example 6-6 is a version of Example 6-1 with functions.
Example 6-6. Saying "Hello" with functions // Logic to do the right thing based on // the submitted form parameters if (array_key_exists('my_name',$_POST) { process_form( ); } else { show_form( ); } // Do something when the form is submitted function process_form( ) { print "Hello, ". $_POST['my_name']; } // Display the form function show_form( ) { print<<<_HTML_ <form method="POST" action="$_SERVER[PHP_SELF]"> Your name: <input type="text" name="my_name"> <br/> <input type="submit" value="Say Hello"> </form> _HTML_; }
To change the form or what happens when it's submitted, change the body of process_form( ) or show_form( ). These functions make the code a little cleaner, but the logic at the top still depends on some form-specific information: the my_name parameter. We can solve that problem by using a hidden parameter in the form as the test for submission. If the hidden parameter is in $_POST, then we process the form. Otherwise, we display it. In Example 6-7, this strategy is shown using a hidden parameter named _submit_check.
Example 6-7. Using a hidden parameter to indicate form submission // Logic to do the right thing based on // the hidden _submit_check parameter if ($_POST['_submit_check']) { process_form( ); } else { show_form( ); } // Do something when the form is submitted function process_form( ) { print "Hello, ". $_POST['my_name']; } // Display the form
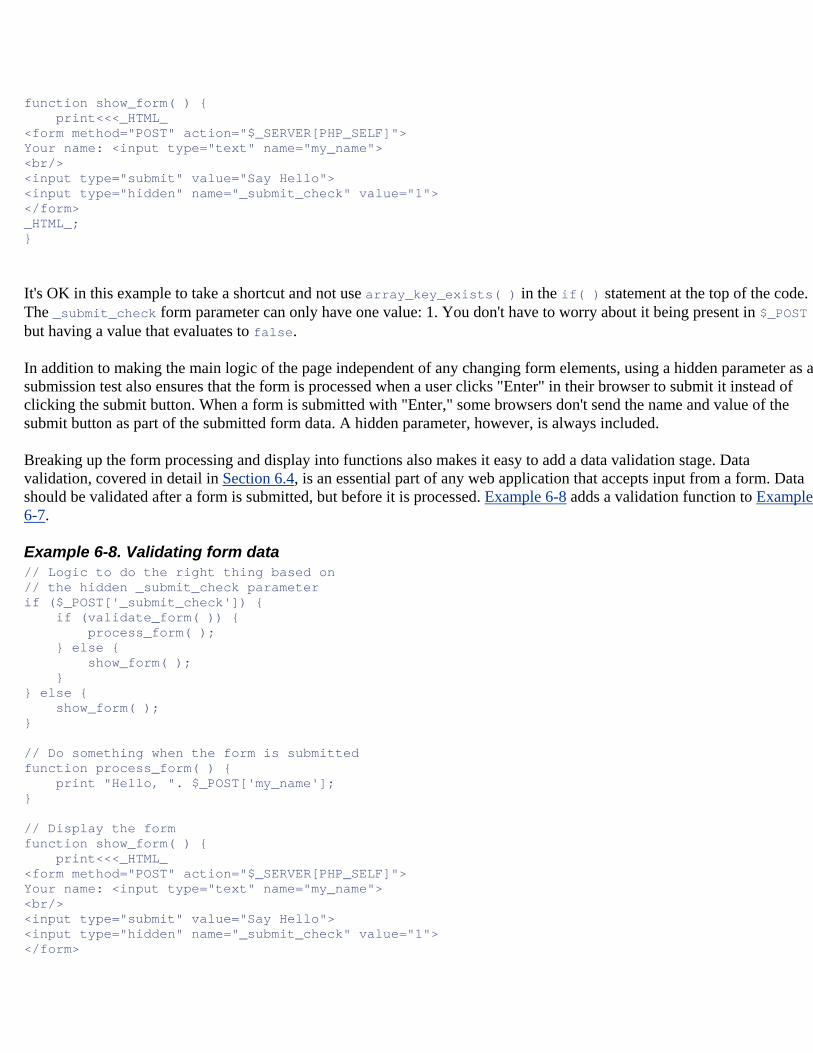
function show_form( ) { print<<<_HTML_ <form method="POST" action="$_SERVER[PHP_SELF]"> Your name: <input type="text" name="my_name"> <br/> <input type="submit" value="Say Hello"> <input type="hidden" name="_submit_check" value="1"> </form> _HTML_; }
It's OK in this example to take a shortcut and not use array_key_exists( ) in the if( ) statement at the top of the code. The _submit_check form parameter can only have one value: 1. You don't have to worry about it being present in $_POST but having a value that evaluates to false.
In addition to making the main logic of the page independent of any changing form elements, using a hidden parameter as a submission test also ensures that the form is processed when a user clicks "Enter" in their browser to submit it instead of clicking the submit button. When a form is submitted with "Enter," some browsers don't send the name and value of the submit button as part of the submitted form data. A hidden parameter, however, is always included.
Breaking up the form processing and display into functions also makes it easy to add a data validation stage. Data validation, covered in detail in Section 6.4, is an essential part of any web application that accepts input from a form. Data should be validated after a form is submitted, but before it is processed. Example 6-8 adds a validation function to Example 6-7.
Example 6-8. Validating form data // Logic to do the right thing based on // the hidden _submit_check parameter if ($_POST['_submit_check']) { if (validate_form( )) { process_form( ); } else { show_form( ); } } else { show_form( ); } // Do something when the form is submitted function process_form( ) { print "Hello, ". $_POST['my_name']; } // Display the form function show_form( ) { print<<<_HTML_ <form method="POST" action="$_SERVER[PHP_SELF]"> Your name: <input type="text" name="my_name"> <br/> <input type="submit" value="Say Hello"> <input type="hidden" name="_submit_check" value="1"> </form>
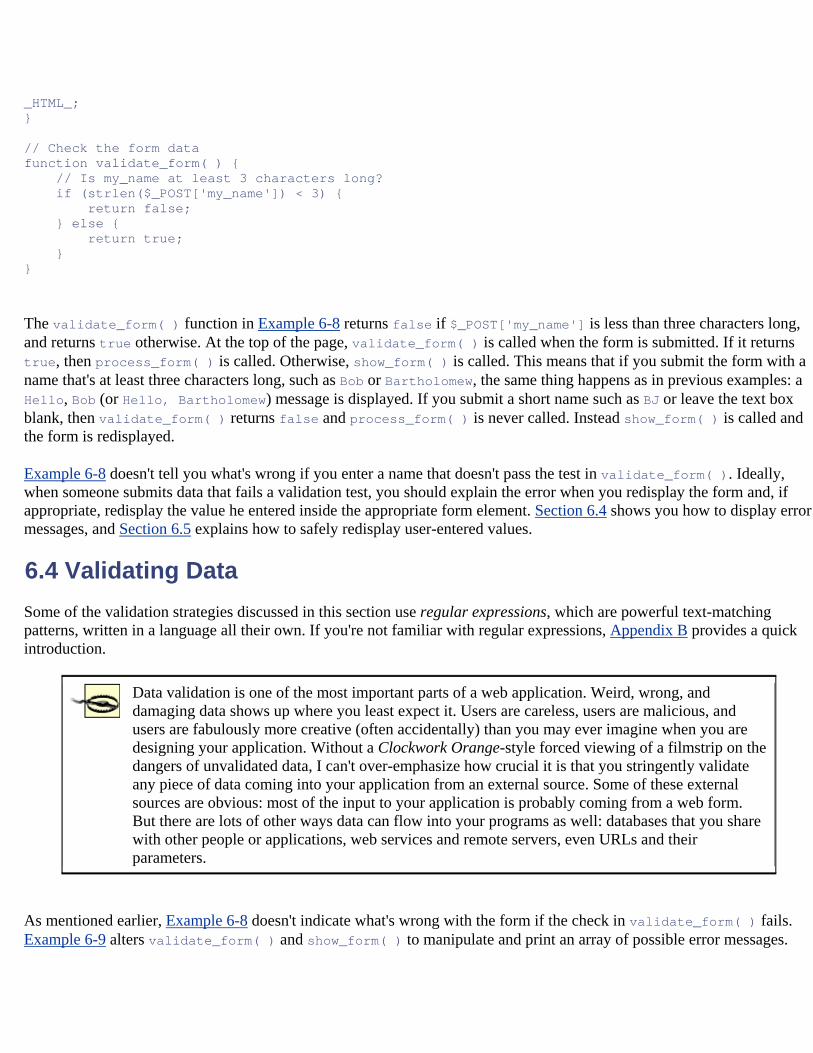
_HTML_; } // Check the form data function validate_form( ) { // Is my_name at least 3 characters long? if (strlen($_POST['my_name']) < 3) { return false; } else { return true; } }
The validate_form( ) function in Example 6-8 returns false if $_POST['my_name'] is less than three characters long, and returns true otherwise. At the top of the page, validate_form( ) is called when the form is submitted. If it returns true, then process_form( ) is called. Otherwise, show_form( ) is called. This means that if you submit the form with a name that's at least three characters long, such as Bob or Bartholomew, the same thing happens as in previous examples: a Hello, Bob (or Hello, Bartholomew) message is displayed. If you submit a short name such as BJ or leave the text box blank, then validate_form( ) returns false and process_form( ) is never called. Instead show_form( ) is called and the form is redisplayed.
Example 6-8 doesn't tell you what's wrong if you enter a name that doesn't pass the test in validate_form( ). Ideally, when someone submits data that fails a validation test, you should explain the error when you redisplay the form and, if appropriate, redisplay the value he entered inside the appropriate form element. Section 6.4 shows you how to display error messages, and Section 6.5 explains how to safely redisplay user-entered values.
6.4 Validating Data Some of the validation strategies discussed in this section use regular expressions, which are powerful text-matching patterns, written in a language all their own. If you're not familiar with regular expressions, Appendix B provides a quick introduction.
Data validation is one of the most important parts of a web application. Weird, wrong, and damaging data shows up where you least expect it. Users are careless, users are malicious, and users are fabulously more creative (often accidentally) than you may ever imagine when you are designing your application. Without a Clockwork Orange-style forced viewing of a filmstrip on the dangers of unvalidated data, I can't over-emphasize how crucial it is that you stringently validate any piece of data coming into your application from an external source. Some of these external sources are obvious: most of the input to your application is probably coming from a web form. But there are lots of other ways data can flow into your programs as well: databases that you share with other people or applications, web services and remote servers, even URLs and their parameters.
As mentioned earlier, Example 6-8 doesn't indicate what's wrong with the form if the check in validate_form( ) fails. Example 6-9 alters validate_form( ) and show_form( ) to manipulate and print an array of possible error messages.
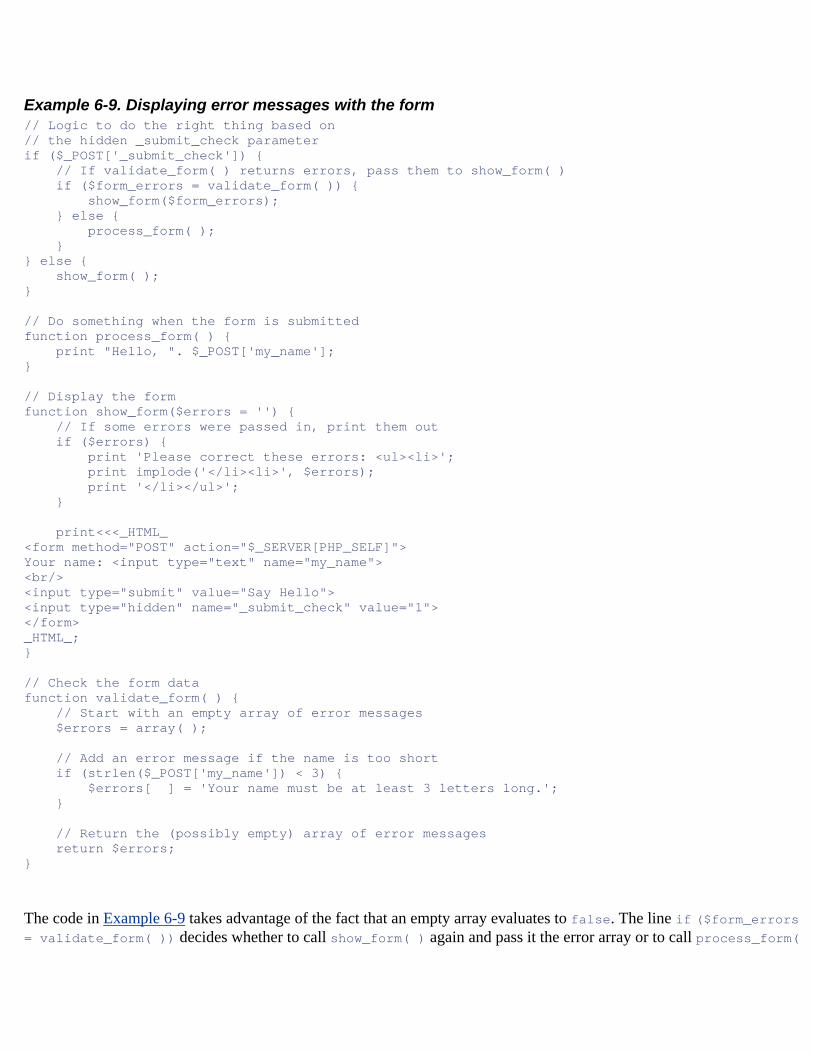
Example 6-9. Displaying error messages with the form // Logic to do the right thing based on // the hidden _submit_check parameter if ($_POST['_submit_check']) { // If validate_form( ) returns errors, pass them to show_form( ) if ($form_errors = validate_form( )) { show_form($form_errors); } else { process_form( ); } } else { show_form( ); } // Do something when the form is submitted function process_form( ) { print "Hello, ". $_POST['my_name']; } // Display the form function show_form($errors = '') { // If some errors were passed in, print them out if ($errors) { print 'Please correct these errors: <ul><li>'; print implode('</li><li>', $errors); print '</li></ul>'; } print<<<_HTML_ <form method="POST" action="$_SERVER[PHP_SELF]"> Your name: <input type="text" name="my_name"> <br/> <input type="submit" value="Say Hello"> <input type="hidden" name="_submit_check" value="1"> </form> _HTML_; } // Check the form data function validate_form( ) { // Start with an empty array of error messages $errors = array( ); // Add an error message if the name is too short if (strlen($_POST['my_name']) < 3) { $errors[ ] = 'Your name must be at least 3 letters long.'; } // Return the (possibly empty) array of error messages return $errors; }
The code in Example 6-9 takes advantage of the fact that an empty array evaluates to false. The line if ($form_errors = validate_form( )) decides whether to call show_form( ) again and pass it the error array or to call process_form(
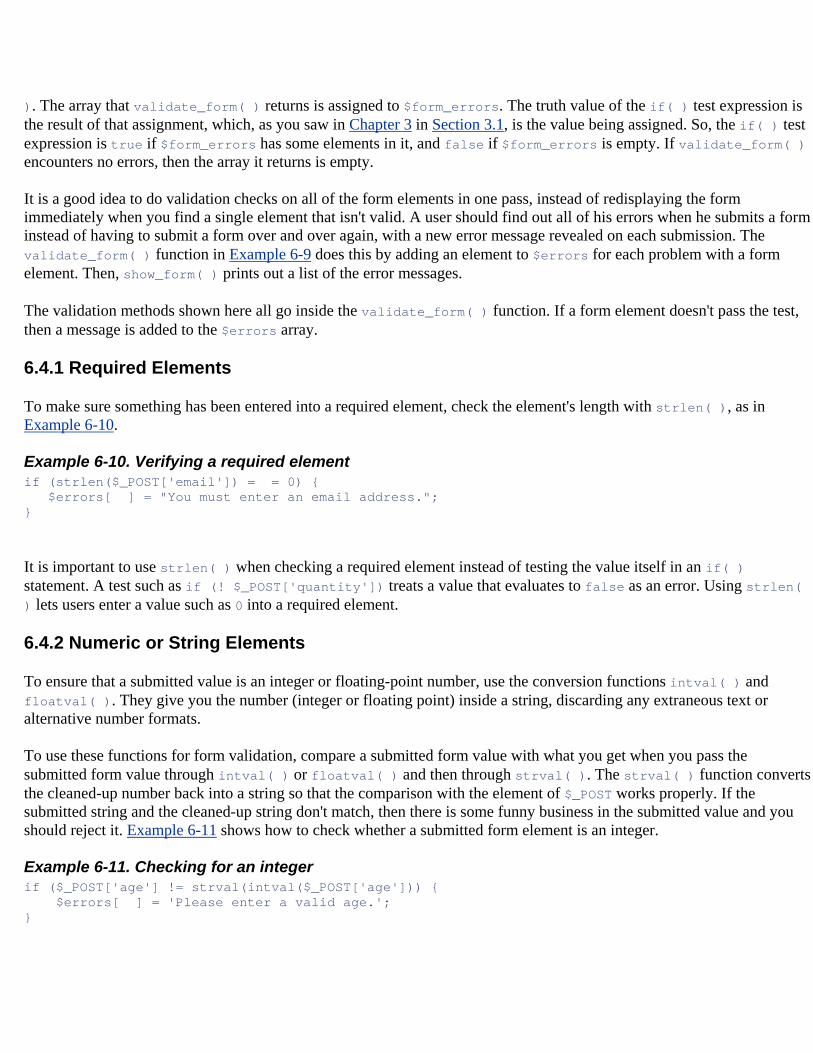
). The array that validate_form( ) returns is assigned to $form_errors. The truth value of the if( ) test expression is the result of that assignment, which, as you saw in Chapter 3 in Section 3.1, is the value being assigned. So, the if( ) test expression is true if $form_errors has some elements in it, and false if $form_errors is empty. If validate_form( ) encounters no errors, then the array it returns is empty.
It is a good idea to do validation checks on all of the form elements in one pass, instead of redisplaying the form immediately when you find a single element that isn't valid. A user should find out all of his errors when he submits a form instead of having to submit a form over and over again, with a new error message revealed on each submission. The validate_form( ) function in Example 6-9 does this by adding an element to $errors for each problem with a form element. Then, show_form( ) prints out a list of the error messages.
The validation methods shown here all go inside the validate_form( ) function. If a form element doesn't pass the test, then a message is added to the $errors array.
6.4.1 Required Elements
To make sure something has been entered into a required element, check the element's length with strlen( ), as in Example 6-10.
Example 6-10. Verifying a required element if (strlen($_POST['email']) = = 0) { $errors[ ] = "You must enter an email address."; }
It is important to use strlen( ) when checking a required element instead of testing the value itself in an if( ) statement. A test such as if (! $_POST['quantity']) treats a value that evaluates to false as an error. Using strlen( ) lets users enter a value such as 0 into a required element.
6.4.2 Numeric or String Elements
To ensure that a submitted value is an integer or floating-point number, use the conversion functions intval( ) and floatval( ). They give you the number (integer or floating point) inside a string, discarding any extraneous text or alternative number formats.
To use these functions for form validation, compare a submitted form value with what you get when you pass the submitted form value through intval( ) or floatval( ) and then through strval( ). The strval( ) function converts the cleaned-up number back into a string so that the comparison with the element of $_POST works properly. If the submitted string and the cleaned-up string don't match, then there is some funny business in the submitted value and you should reject it. Example 6-11 shows how to check whether a submitted form element is an integer.
Example 6-11. Checking for an integer if ($_POST['age'] != strval(intval($_POST['age'])) { $errors[ ] = 'Please enter a valid age.'; }
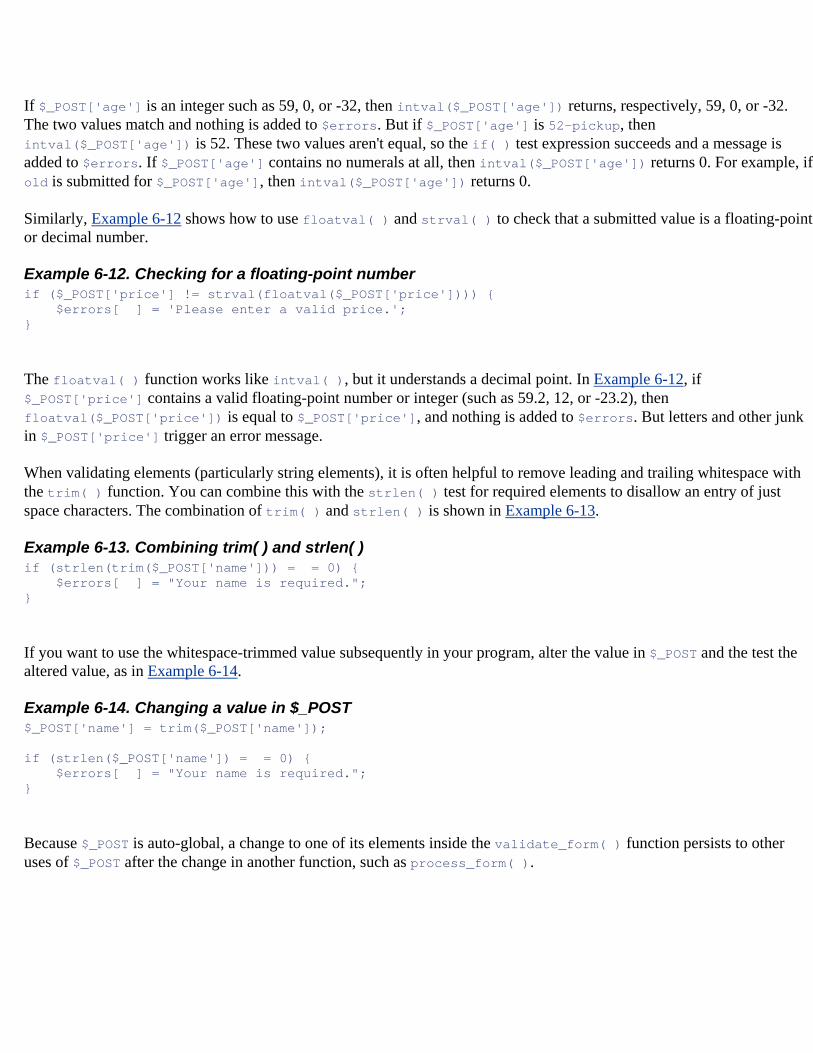
If $_POST['age'] is an integer such as 59, 0, or -32, then intval($_POST['age']) returns, respectively, 59, 0, or -32. The two values match and nothing is added to $errors. But if $_POST['age'] is 52-pickup, then intval($_POST['age']) is 52. These two values aren't equal, so the if( ) test expression succeeds and a message is added to $errors. If $_POST['age'] contains no numerals at all, then intval($_POST['age']) returns 0. For example, if old is submitted for $_POST['age'], then intval($_POST['age']) returns 0.
Similarly, Example 6-12 shows how to use floatval( ) and strval( ) to check that a submitted value is a floating-point or decimal number.
Example 6-12. Checking for a floating-point number if ($_POST['price'] != strval(floatval($_POST['price']))) { $errors[ ] = 'Please enter a valid price.'; }
The floatval( ) function works like intval( ), but it understands a decimal point. In Example 6-12, if $_POST['price'] contains a valid floating-point number or integer (such as 59.2, 12, or -23.2), then floatval($_POST['price']) is equal to $_POST['price'], and nothing is added to $errors. But letters and other junk in $_POST['price'] trigger an error message.
When validating elements (particularly string elements), it is often helpful to remove leading and trailing whitespace with the trim( ) function. You can combine this with the strlen( ) test for required elements to disallow an entry of just space characters. The combination of trim( ) and strlen( ) is shown in Example 6-13.
Example 6-13. Combining trim( ) and strlen( ) if (strlen(trim($_POST['name'])) = = 0) { $errors[ ] = "Your name is required."; }
If you want to use the whitespace-trimmed value subsequently in your program, alter the value in $_POST and the test the altered value, as in Example 6-14.
Example 6-14. Changing a value in $_POST $_POST['name'] = trim($_POST['name']); if (strlen($_POST['name']) = = 0) { $errors[ ] = "Your name is required."; }
Because $_POST is auto-global, a change to one of its elements inside the validate_form( ) function persists to other uses of $_POST after the change in another function, such as process_form( ).
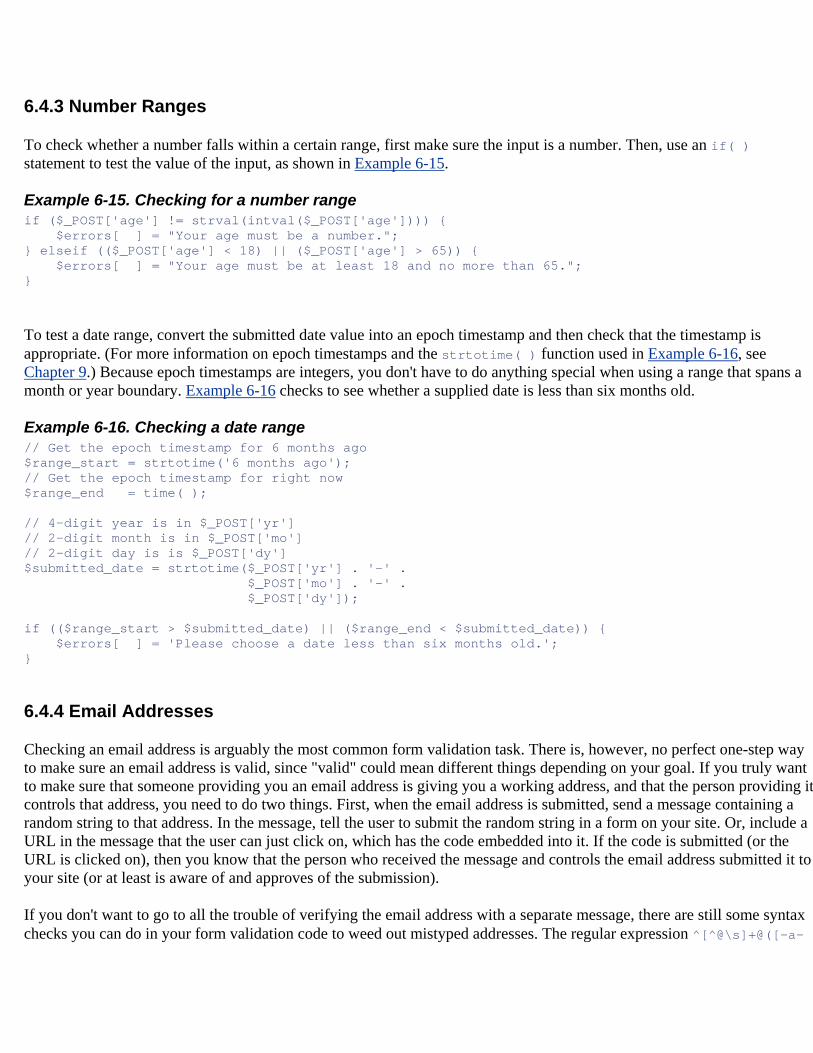
6.4.3 Number Ranges
To check whether a number falls within a certain range, first make sure the input is a number. Then, use an if( ) statement to test the value of the input, as shown in Example 6-15.
Example 6-15. Checking for a number range if ($_POST['age'] != strval(intval($_POST['age']))) { $errors[ ] = "Your age must be a number."; } elseif (($_POST['age'] < 18) || ($_POST['age'] > 65)) { $errors[ ] = "Your age must be at least 18 and no more than 65."; }
To test a date range, convert the submitted date value into an epoch timestamp and then check that the timestamp is appropriate. (For more information on epoch timestamps and the strtotime( ) function used in Example 6-16, see Chapter 9.) Because epoch timestamps are integers, you don't have to do anything special when using a range that spans a month or year boundary. Example 6-16 checks to see whether a supplied date is less than six months old.
Example 6-16. Checking a date range // Get the epoch timestamp for 6 months ago $range_start = strtotime('6 months ago'); // Get the epoch timestamp for right now $range_end = time( ); // 4-digit year is in $_POST['yr'] // 2-digit month is in $_POST['mo'] // 2-digit day is is $_POST['dy'] $submitted_date = strtotime($_POST['yr'] . '-' . $_POST['mo'] . '-' . $_POST['dy']); if (($range_start > $submitted_date) || ($range_end < $submitted_date)) { $errors[ ] = 'Please choose a date less than six months old.'; }
6.4.4 Email Addresses
Checking an email address is arguably the most common form validation task. There is, however, no perfect one-step way to make sure an email address is valid, since "valid" could mean different things depending on your goal. If you truly want to make sure that someone providing you an email address is giving you a working address, and that the person providing it controls that address, you need to do two things. First, when the email address is submitted, send a message containing a random string to that address. In the message, tell the user to submit the random string in a form on your site. Or, include a URL in the message that the user can just click on, which has the code embedded into it. If the code is submitted (or the URL is clicked on), then you know that the person who received the message and controls the email address submitted it to your site (or at least is aware of and approves of the submission).
If you don't want to go to all the trouble of verifying the email address with a separate message, there are still some syntax checks you can do in your form validation code to weed out mistyped addresses. The regular expression ^[^@\s]+@([-a-
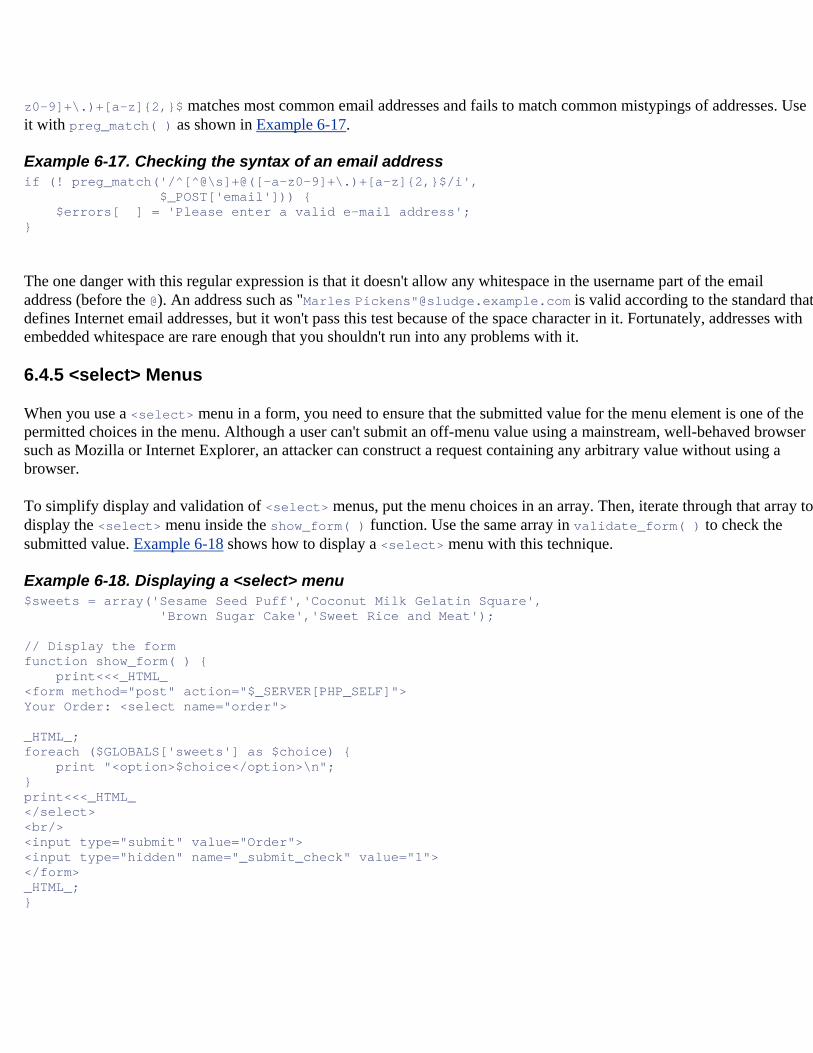
z0-9]+\.)+[a-z]{2,}$ matches most common email addresses and fails to match common mistypings of addresses. Use it with preg_match( ) as shown in Example 6-17.
Example 6-17. Checking the syntax of an email address if (! preg_match('/^[^@\s]+@([-a-z0-9]+\.)+[a-z]{2,}$/i', $_POST['email'])) { $errors[ ] = 'Please enter a valid e-mail address'; }
The one danger with this regular expression is that it doesn't allow any whitespace in the username part of the email address (before the @). An address such as "Marles Pickens"@sludge.example.com is valid according to the standard that defines Internet email addresses, but it won't pass this test because of the space character in it. Fortunately, addresses with embedded whitespace are rare enough that you shouldn't run into any problems with it.
6.4.5 <select> Menus
When you use a <select> menu in a form, you need to ensure that the submitted value for the menu element is one of the permitted choices in the menu. Although a user can't submit an off-menu value using a mainstream, well-behaved browser such as Mozilla or Internet Explorer, an attacker can construct a request containing any arbitrary value without using a browser.
To simplify display and validation of <select> menus, put the menu choices in an array. Then, iterate through that array to display the <select> menu inside the show_form( ) function. Use the same array in validate_form( ) to check the submitted value. Example 6-18 shows how to display a <select> menu with this technique.
Example 6-18. Displaying a <select> menu $sweets = array('Sesame Seed Puff','Coconut Milk Gelatin Square', 'Brown Sugar Cake','Sweet Rice and Meat'); // Display the form function show_form( ) { print<<<_HTML_ <form method="post" action="$_SERVER[PHP_SELF]"> Your Order: <select name="order"> _HTML_; foreach ($GLOBALS['sweets'] as $choice) { print "<option>$choice</option>\n"; } print<<<_HTML_ </select> <br/> <input type="submit" value="Order"> <input type="hidden" name="_submit_check" value="1"> </form> _HTML_; }
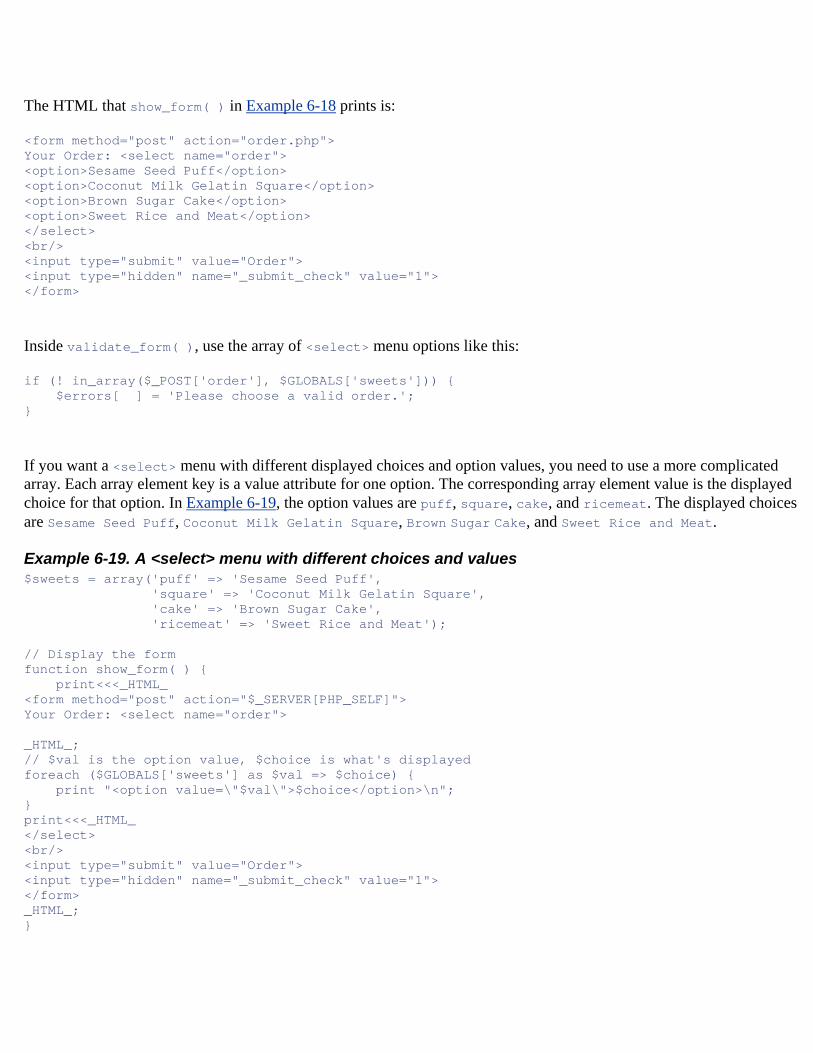
The HTML that show_form( ) in Example 6-18 prints is:
<form method="post" action="order.php"> Your Order: <select name="order"> <option>Sesame Seed Puff</option> <option>Coconut Milk Gelatin Square</option> <option>Brown Sugar Cake</option> <option>Sweet Rice and Meat</option> </select> <br/> <input type="submit" value="Order"> <input type="hidden" name="_submit_check" value="1"> </form>
Inside validate_form( ), use the array of <select> menu options like this:
if (! in_array($_POST['order'], $GLOBALS['sweets'])) { $errors[ ] = 'Please choose a valid order.'; }
If you want a <select> menu with different displayed choices and option values, you need to use a more complicated array. Each array element key is a value attribute for one option. The corresponding array element value is the displayed choice for that option. In Example 6-19, the option values are puff, square, cake, and ricemeat. The displayed choices are Sesame Seed Puff, Coconut Milk Gelatin Square, Brown Sugar Cake, and Sweet Rice and Meat.
Example 6-19. A <select> menu with different choices and values $sweets = array('puff' => 'Sesame Seed Puff', 'square' => 'Coconut Milk Gelatin Square', 'cake' => 'Brown Sugar Cake', 'ricemeat' => 'Sweet Rice and Meat'); // Display the form function show_form( ) { print<<<_HTML_ <form method="post" action="$_SERVER[PHP_SELF]"> Your Order: <select name="order"> _HTML_; // $val is the option value, $choice is what's displayed foreach ($GLOBALS['sweets'] as $val => $choice) { print "<option value=\"$val\">$choice</option>\n"; } print<<<_HTML_ </select> <br/> <input type="submit" value="Order"> <input type="hidden" name="_submit_check" value="1"> </form> _HTML_; }
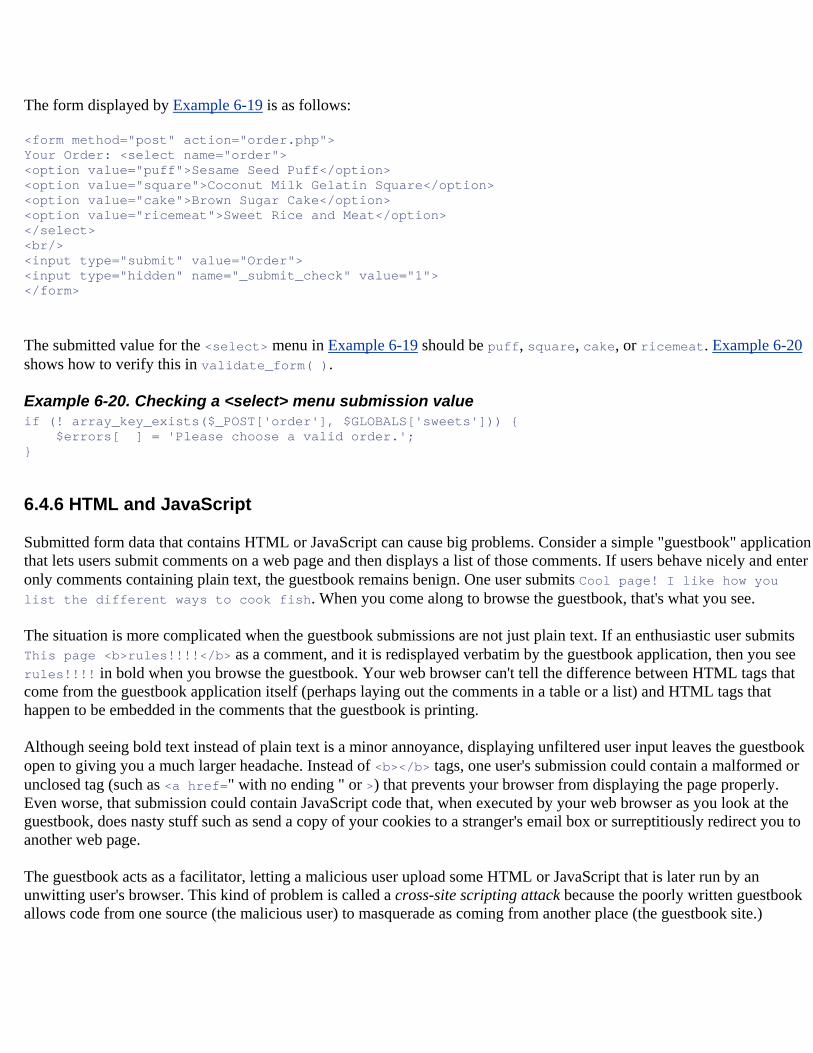
The form displayed by Example 6-19 is as follows:
<form method="post" action="order.php"> Your Order: <select name="order"> <option value="puff">Sesame Seed Puff</option> <option value="square">Coconut Milk Gelatin Square</option> <option value="cake">Brown Sugar Cake</option> <option value="ricemeat">Sweet Rice and Meat</option> </select> <br/> <input type="submit" value="Order"> <input type="hidden" name="_submit_check" value="1"> </form>
The submitted value for the <select> menu in Example 6-19 should be puff, square, cake, or ricemeat. Example 6-20 shows how to verify this in validate_form( ).
Example 6-20. Checking a <select> menu submission value if (! array_key_exists($_POST['order'], $GLOBALS['sweets'])) { $errors[ ] = 'Please choose a valid order.'; }
6.4.6 HTML and JavaScript
Submitted form data that contains HTML or JavaScript can cause big problems. Consider a simple "guestbook" application that lets users submit comments on a web page and then displays a list of those comments. If users behave nicely and enter only comments containing plain text, the guestbook remains benign. One user submits Cool page! I like how you list the different ways to cook fish. When you come along to browse the guestbook, that's what you see.
The situation is more complicated when the guestbook submissions are not just plain text. If an enthusiastic user submits This page <b>rules!!!!</b> as a comment, and it is redisplayed verbatim by the guestbook application, then you see rules!!!! in bold when you browse the guestbook. Your web browser can't tell the difference between HTML tags that come from the guestbook application itself (perhaps laying out the comments in a table or a list) and HTML tags that happen to be embedded in the comments that the guestbook is printing.
Although seeing bold text instead of plain text is a minor annoyance, displaying unfiltered user input leaves the guestbook open to giving you a much larger headache. Instead of <b></b> tags, one user's submission could contain a malformed or unclosed tag (such as <a href=" with no ending " or >) that prevents your browser from displaying the page properly. Even worse, that submission could contain JavaScript code that, when executed by your web browser as you look at the guestbook, does nasty stuff such as send a copy of your cookies to a stranger's email box or surreptitiously redirect you to another web page.
The guestbook acts as a facilitator, letting a malicious user upload some HTML or JavaScript that is later run by an unwitting user's browser. This kind of problem is called a cross-site scripting attack because the poorly written guestbook allows code from one source (the malicious user) to masquerade as coming from another place (the guestbook site.)
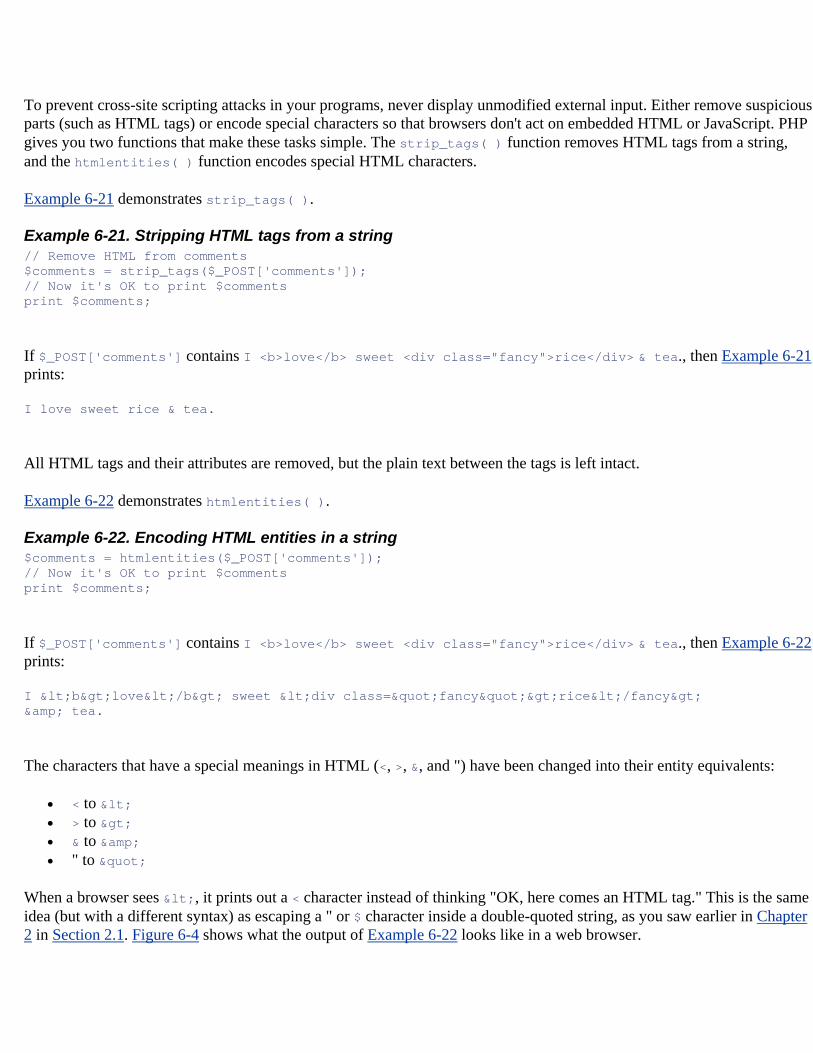
To prevent cross-site scripting attacks in your programs, never display unmodified external input. Either remove suspicious parts (such as HTML tags) or encode special characters so that browsers don't act on embedded HTML or JavaScript. PHP gives you two functions that make these tasks simple. The strip_tags( ) function removes HTML tags from a string, and the htmlentities( ) function encodes special HTML characters.
Example 6-21 demonstrates strip_tags( ).
Example 6-21. Stripping HTML tags from a string // Remove HTML from comments $comments = strip_tags($_POST['comments']); // Now it's OK to print $comments print $comments;
If $_POST['comments'] contains I <b>love</b> sweet <div class="fancy">rice</div> & tea., then Example 6-21prints:
I love sweet rice & tea.
All HTML tags and their attributes are removed, but the plain text between the tags is left intact.
Example 6-22 demonstrates htmlentities( ).
Example 6-22. Encoding HTML entities in a string $comments = htmlentities($_POST['comments']); // Now it's OK to print $comments print $comments;
If $_POST['comments'] contains I <b>love</b> sweet <div class="fancy">rice</div> & tea., then Example 6-22prints:
I <b>love</b> sweet <div class="fancy">rice</fancy> & tea.
The characters that have a special meanings in HTML (<, >, &, and ") have been changed into their entity equivalents:
• < to < • > to > • & to & • " to "
When a browser sees <, it prints out a < character instead of thinking "OK, here comes an HTML tag." This is the same idea (but with a different syntax) as escaping a " or $ character inside a double-quoted string, as you saw earlier in Chapter 2 in Section 2.1. Figure 6-4 shows what the output of Example 6-22 looks like in a web browser.
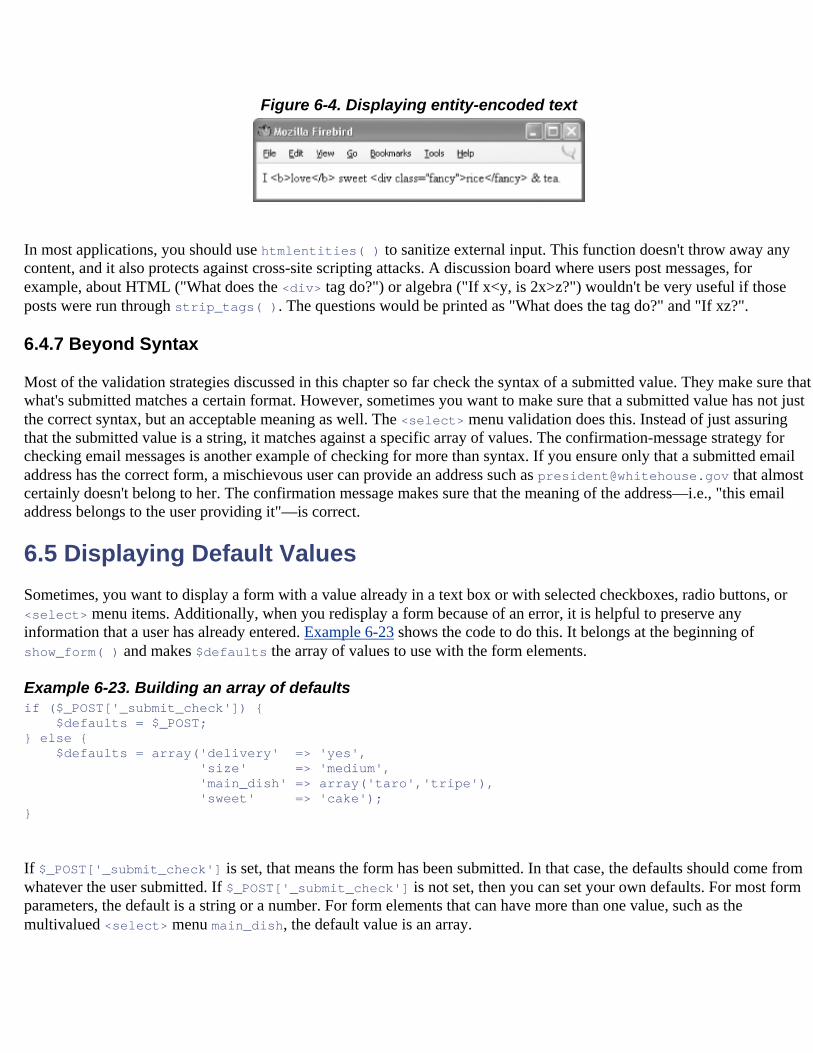
Figure 6-4. Displaying entity-encoded text
In most applications, you should use htmlentities( ) to sanitize external input. This function doesn't throw away any content, and it also protects against cross-site scripting attacks. A discussion board where users post messages, for example, about HTML ("What does the <div> tag do?") or algebra ("If x<y, is 2x>z?") wouldn't be very useful if those posts were run through strip_tags( ). The questions would be printed as "What does the tag do?" and "If xz?".
6.4.7 Beyond Syntax
Most of the validation strategies discussed in this chapter so far check the syntax of a submitted value. They make sure that what's submitted matches a certain format. However, sometimes you want to make sure that a submitted value has not just the correct syntax, but an acceptable meaning as well. The <select> menu validation does this. Instead of just assuring that the submitted value is a string, it matches against a specific array of values. The confirmation-message strategy for checking email messages is another example of checking for more than syntax. If you ensure only that a submitted email address has the correct form, a mischievous user can provide an address such as [email protected] that almost certainly doesn't belong to her. The confirmation message makes sure that the meaning of the address—i.e., "this email address belongs to the user providing it"—is correct.
6.5 Displaying Default Values Sometimes, you want to display a form with a value already in a text box or with selected checkboxes, radio buttons, or <select> menu items. Additionally, when you redisplay a form because of an error, it is helpful to preserve any information that a user has already entered. Example 6-23 shows the code to do this. It belongs at the beginning of show_form( ) and makes $defaults the array of values to use with the form elements.
Example 6-23. Building an array of defaults if ($_POST['_submit_check']) { $defaults = $_POST; } else { $defaults = array('delivery' => 'yes', 'size' => 'medium', 'main_dish' => array('taro','tripe'), 'sweet' => 'cake'); }
If $_POST['_submit_check'] is set, that means the form has been submitted. In that case, the defaults should come from whatever the user submitted. If $_POST['_submit_check'] is not set, then you can set your own defaults. For most form parameters, the default is a string or a number. For form elements that can have more than one value, such as the multivalued <select> menu main_dish, the default value is an array.
After setting the defaults, provide the appropriate value from $defaults when printing out the HTML tag for the form element. Remember to encode the defaults with htmlentities( ) when necessary in order to prevent cross-site scripting attacks. Because of the structure of the HTML tags, you need to treat text boxes, <select> menus, text areas, and checkboxes/radio buttons differently.
For text boxes, set the value attribute of the <input> tag to the appropriate element of $defaults. Example 6-24 shows how to do this.
Example 6-24. Setting a default value in a text box print '<input type="text" name="my_name" value="' . htmlentities($defaults['my_name']). '">';
For multiline text areas, put the entity-encoded value between the <textarea> and </textarea> tags, as shown in Example 6-25.
Example 6-25. Setting a default value in a multiline text area print '<textarea name="comments">'; print htmlentities($defaults['comments']); print '</textarea>';
For <select> menus, add a check to the loop that prints out the <option> tags that prints a selected="selected" attribute when appropriate. Example 6-26 contains the code to do this for a single-valued <select> menu.
Example 6-26. Setting a default value in a <select> menu $sweets = array('puff' => 'Sesame Seed Puff', 'square' => 'Coconut Milk Gelatin Square', 'cake' => 'Brown Sugar Cake', 'ricemeat' => 'Sweet Rice and Meat'); print '<select name="sweet">'; // $val is the option value, $choice is what's displayed foreach ($sweets as $option => $label) { print '<option value="' .$option .'"'; if ($option = = $defaults['sweet']) { print ' selected="selected"'; } print "> $label</option>\n"; } print '</select>';
To set defaults for a multivalued <select> menu, you need to convert the array of defaults into an associative array in which each key is a choice that should be selected. Then, print the selected="selected" attribute for the options found in that associative array. Example 6-27 demonstrates how to do this.
Example 6-27. Setting defaults in a multivalued <select> menu $main_dishes = array('cuke' => 'Braised Sea Cucumber',
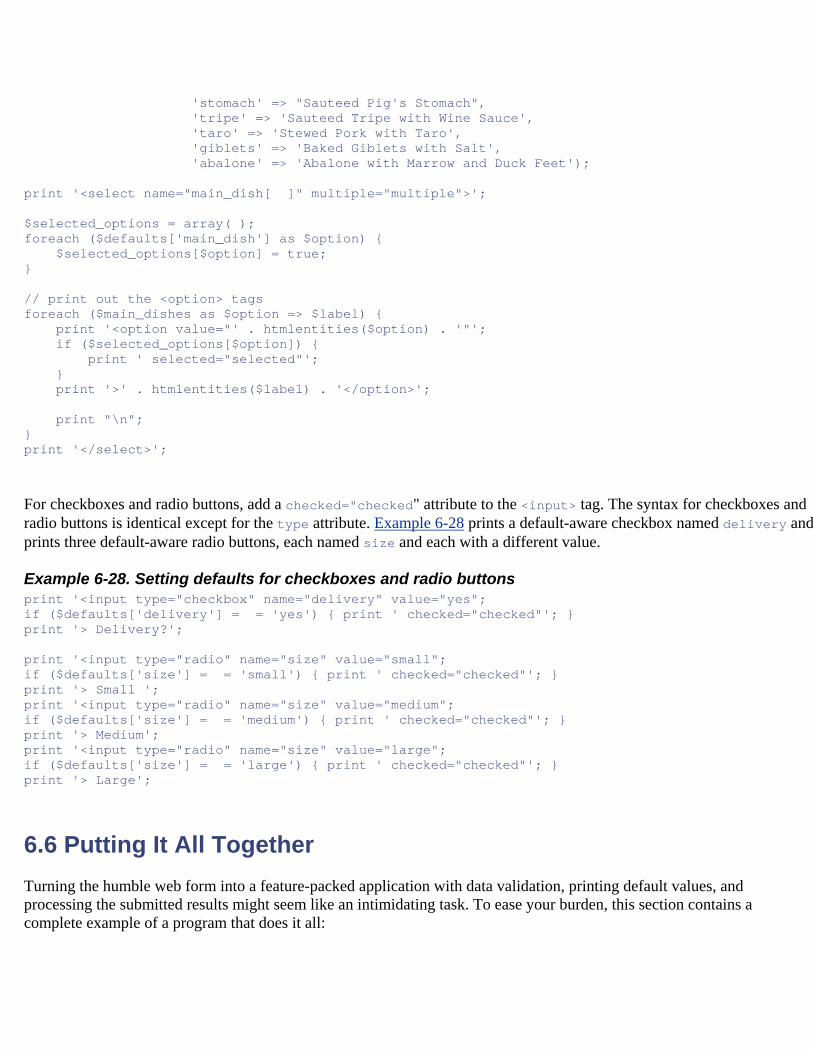
'stomach' => "Sauteed Pig's Stomach", 'tripe' => 'Sauteed Tripe with Wine Sauce', 'taro' => 'Stewed Pork with Taro', 'giblets' => 'Baked Giblets with Salt', 'abalone' => 'Abalone with Marrow and Duck Feet'); print '<select name="main_dish[ ]" multiple="multiple">'; $selected_options = array( ); foreach ($defaults['main_dish'] as $option) { $selected_options[$option] = true; } // print out the <option> tags foreach ($main_dishes as $option => $label) { print '<option value="' . htmlentities($option) . '"'; if ($selected_options[$option]) { print ' selected="selected"'; } print '>' . htmlentities($label) . '</option>'; print "\n"; } print '</select>';
For checkboxes and radio buttons, add a checked="checked" attribute to the <input> tag. The syntax for checkboxes and radio buttons is identical except for the type attribute. Example 6-28 prints a default-aware checkbox named delivery and prints three default-aware radio buttons, each named size and each with a different value.
Example 6-28. Setting defaults for checkboxes and radio buttons print '<input type="checkbox" name="delivery" value="yes"; if ($defaults['delivery'] = = 'yes') { print ' checked="checked"'; } print '> Delivery?'; print '<input type="radio" name="size" value="small"; if ($defaults['size'] = = 'small') { print ' checked="checked"'; } print '> Small '; print '<input type="radio" name="size" value="medium"; if ($defaults['size'] = = 'medium') { print ' checked="checked"'; } print '> Medium'; print '<input type="radio" name="size" value="large"; if ($defaults['size'] = = 'large') { print ' checked="checked"'; } print '> Large';
6.6 Putting It All Together Turning the humble web form into a feature-packed application with data validation, printing default values, and processing the submitted results might seem like an intimidating task. To ease your burden, this section contains a complete example of a program that does it all:
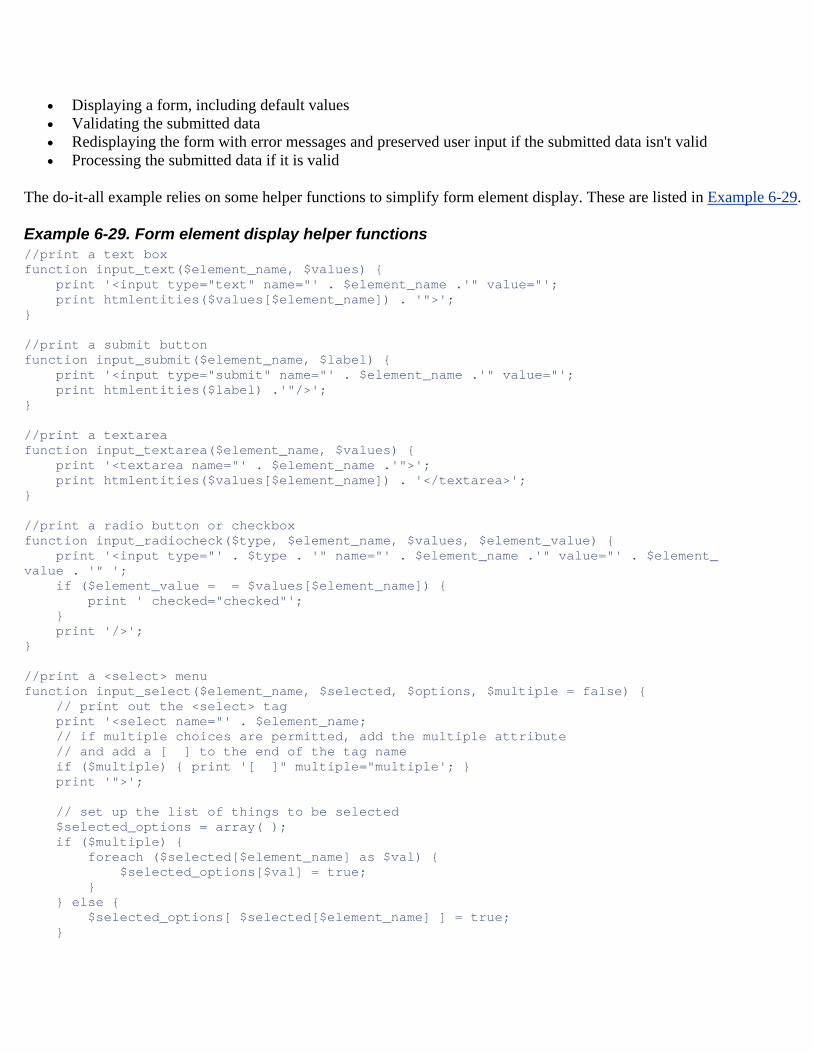
• Displaying a form, including default values • Validating the submitted data • Redisplaying the form with error messages and preserved user input if the submitted data isn't valid • Processing the submitted data if it is valid
The do-it-all example relies on some helper functions to simplify form element display. These are listed in Example 6-29.
Example 6-29. Form element display helper functions //print a text box function input_text($element_name, $values) { print '<input type="text" name="' . $element_name .'" value="'; print htmlentities($values[$element_name]) . '">'; } //print a submit button function input_submit($element_name, $label) { print '<input type="submit" name="' . $element_name .'" value="'; print htmlentities($label) .'"/>'; } //print a textarea function input_textarea($element_name, $values) { print '<textarea name="' . $element_name .'">'; print htmlentities($values[$element_name]) . '</textarea>'; } //print a radio button or checkbox function input_radiocheck($type, $element_name, $values, $element_value) { print '<input type="' . $type . '" name="' . $element_name .'" value="' . $element_ value . '" '; if ($element_value = = $values[$element_name]) { print ' checked="checked"'; } print '/>'; } //print a <select> menu function input_select($element_name, $selected, $options, $multiple = false) { // print out the <select> tag print '<select name="' . $element_name; // if multiple choices are permitted, add the multiple attribute // and add a [ ] to the end of the tag name if ($multiple) { print '[ ]" multiple="multiple'; } print '">'; // set up the list of things to be selected $selected_options = array( ); if ($multiple) { foreach ($selected[$element_name] as $val) { $selected_options[$val] = true; } } else { $selected_options[ $selected[$element_name] ] = true; }
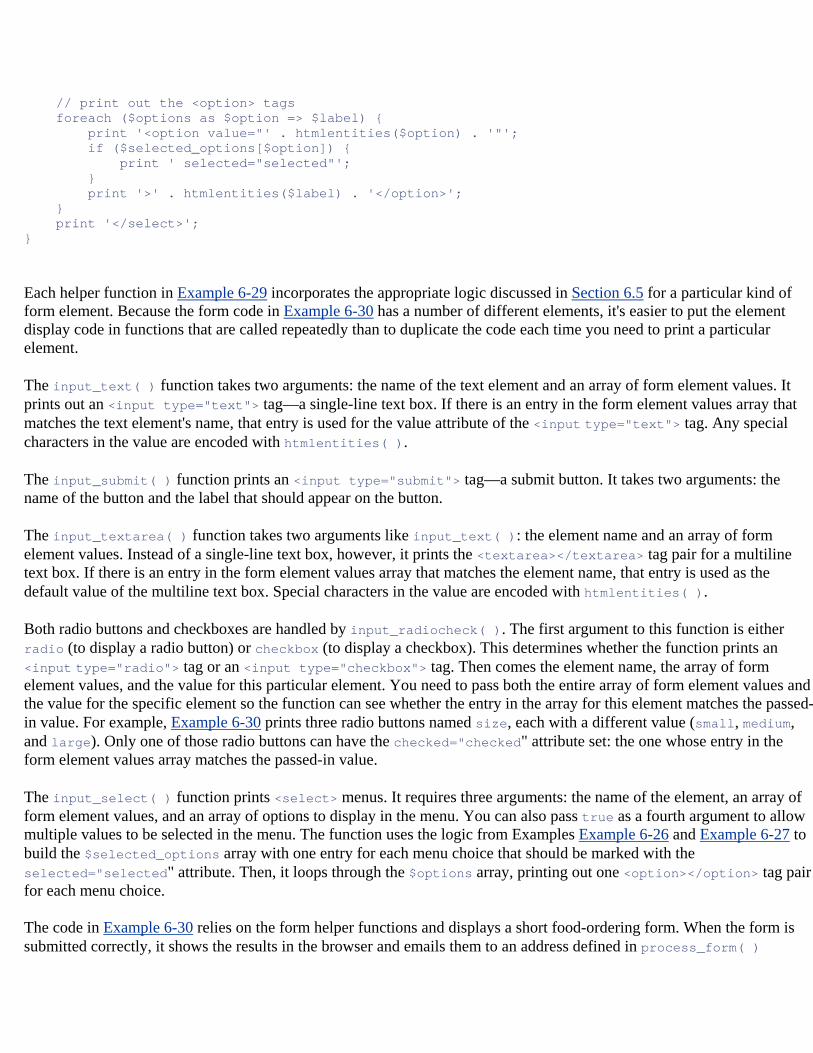
// print out the <option> tags foreach ($options as $option => $label) { print '<option value="' . htmlentities($option) . '"'; if ($selected_options[$option]) { print ' selected="selected"'; } print '>' . htmlentities($label) . '</option>'; } print '</select>'; }
Each helper function in Example 6-29 incorporates the appropriate logic discussed in Section 6.5 for a particular kind of form element. Because the form code in Example 6-30 has a number of different elements, it's easier to put the element display code in functions that are called repeatedly than to duplicate the code each time you need to print a particular element.
The input_text( ) function takes two arguments: the name of the text element and an array of form element values. It prints out an <input type="text"> tag—a single-line text box. If there is an entry in the form element values array that matches the text element's name, that entry is used for the value attribute of the <input type="text"> tag. Any special characters in the value are encoded with htmlentities( ).
The input_submit( ) function prints an <input type="submit"> tag—a submit button. It takes two arguments: the name of the button and the label that should appear on the button.
The input_textarea( ) function takes two arguments like input_text( ): the element name and an array of form element values. Instead of a single-line text box, however, it prints the <textarea></textarea> tag pair for a multiline text box. If there is an entry in the form element values array that matches the element name, that entry is used as the default value of the multiline text box. Special characters in the value are encoded with htmlentities( ).
Both radio buttons and checkboxes are handled by input_radiocheck( ). The first argument to this function is either radio (to display a radio button) or checkbox (to display a checkbox). This determines whether the function prints an <input type="radio"> tag or an <input type="checkbox"> tag. Then comes the element name, the array of form element values, and the value for this particular element. You need to pass both the entire array of form element values and the value for the specific element so the function can see whether the entry in the array for this element matches the passed-in value. For example, Example 6-30 prints three radio buttons named size, each with a different value (small, medium, and large). Only one of those radio buttons can have the checked="checked" attribute set: the one whose entry in the form element values array matches the passed-in value.
The input_select( ) function prints <select> menus. It requires three arguments: the name of the element, an array of form element values, and an array of options to display in the menu. You can also pass true as a fourth argument to allow multiple values to be selected in the menu. The function uses the logic from Examples Example 6-26 and Example 6-27 to build the $selected_options array with one entry for each menu choice that should be marked with the selected="selected" attribute. Then, it loops through the $options array, printing out one <option></option> tag pair for each menu choice.
The code in Example 6-30 relies on the form helper functions and displays a short food-ordering form. When the form is submitted correctly, it shows the results in the browser and emails them to an address defined in process_form( )

(presumably to the chef, so he can start preparing your order). Because the code jumps in and out of PHP mode, it includes the <?php start tag at the beginning of the example and the ?> closing tag at the end to make things clearer.
Example 6-30. A complete form: display with defaults, validation, and processing <?php // don't forget to include the code for the form // helper functions defined in Example 6-29 // // setup the arrays of choices in the select menus // these are needed in display_form( ), validate_form( ), // and process_form( ), so they are declared in the global scope $sweets = array('puff' => 'Sesame Seed Puff', 'square' => 'Coconut Milk Gelatin Square', 'cake' => 'Brown Sugar Cake', 'ricemeat' => 'Sweet Rice and Meat'); $main_dishes = array('cuke' => 'Braised Sea Cucumber', 'stomach' => "Sauteed Pig's Stomach", 'tripe' => 'Sauteed Tripe with Wine Sauce', 'taro' => 'Stewed Pork with Taro', 'giblets' => 'Baked Giblets with Salt', 'abalone' => 'Abalone with Marrow and Duck Feet'); // The main page logic: // - If the form is submitted, validate and then process or redisplay // - If it's not submitted, display if ($_POST['_submit_check']) { // If validate_form( ) returns errors, pass them to show_form( ) if ($form_errors = validate_form( )) { show_form($form_errors); } else { // The submitted data is valid, so process it process_form( ); } } else { // The form wasn't submitted, so display show_form( ); } function show_form($errors = '') { // If the form is submitted, get defaults from submitted parameters if ($_POST['_submit_check']) { $defaults = $_POST; } else { // Otherwise, set our own defaults: medium size and yes to delivery $defaults = array('delivery' => 'yes', 'size' => 'medium'); } // If errors were passed in, put them in $error_text (with HTML markup) if ($errors) { $error_text = '<tr><td>You need to correct the following errors:'; $error_text .= '</td><td><ul><li>'; $error_text .= implode('</li><li>',$errors); $error_text .= '</li></ul></td></tr>'; } else {
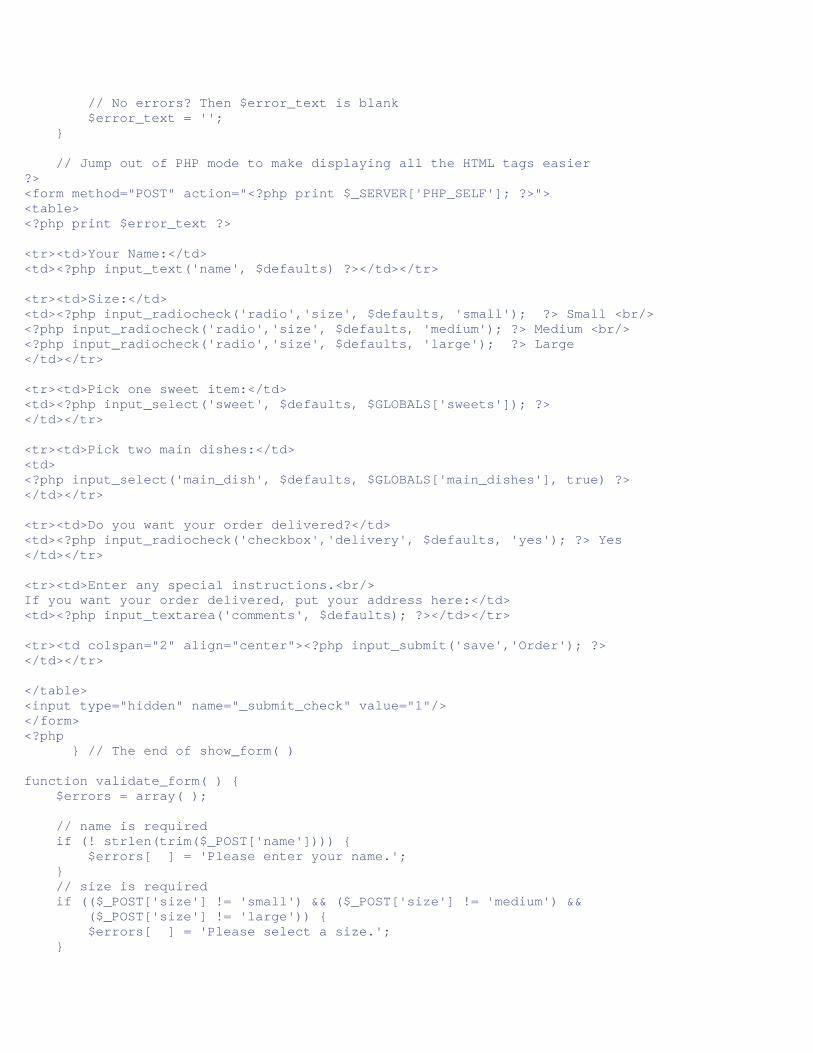
// No errors? Then $error_text is blank $error_text = ''; } // Jump out of PHP mode to make displaying all the HTML tags easier ?> <form method="POST" action="<?php print $_SERVER['PHP_SELF']; ?>"> <table> <?php print $error_text ?> <tr><td>Your Name:</td> <td><?php input_text('name', $defaults) ?></td></tr> <tr><td>Size:</td> <td><?php input_radiocheck('radio','size', $defaults, 'small'); ?> Small <br/> <?php input_radiocheck('radio','size', $defaults, 'medium'); ?> Medium <br/> <?php input_radiocheck('radio','size', $defaults, 'large'); ?> Large </td></tr> <tr><td>Pick one sweet item:</td> <td><?php input_select('sweet', $defaults, $GLOBALS['sweets']); ?> </td></tr> <tr><td>Pick two main dishes:</td> <td> <?php input_select('main_dish', $defaults, $GLOBALS['main_dishes'], true) ?> </td></tr> <tr><td>Do you want your order delivered?</td> <td><?php input_radiocheck('checkbox','delivery', $defaults, 'yes'); ?> Yes </td></tr> <tr><td>Enter any special instructions.<br/> If you want your order delivered, put your address here:</td> <td><?php input_textarea('comments', $defaults); ?></td></tr> <tr><td colspan="2" align="center"><?php input_submit('save','Order'); ?> </td></tr> </table> <input type="hidden" name="_submit_check" value="1"/> </form> <?php } // The end of show_form( ) function validate_form( ) { $errors = array( ); // name is required if (! strlen(trim($_POST['name']))) { $errors[ ] = 'Please enter your name.'; } // size is required if (($_POST['size'] != 'small') && ($_POST['size'] != 'medium') && ($_POST['size'] != 'large')) { $errors[ ] = 'Please select a size.'; }
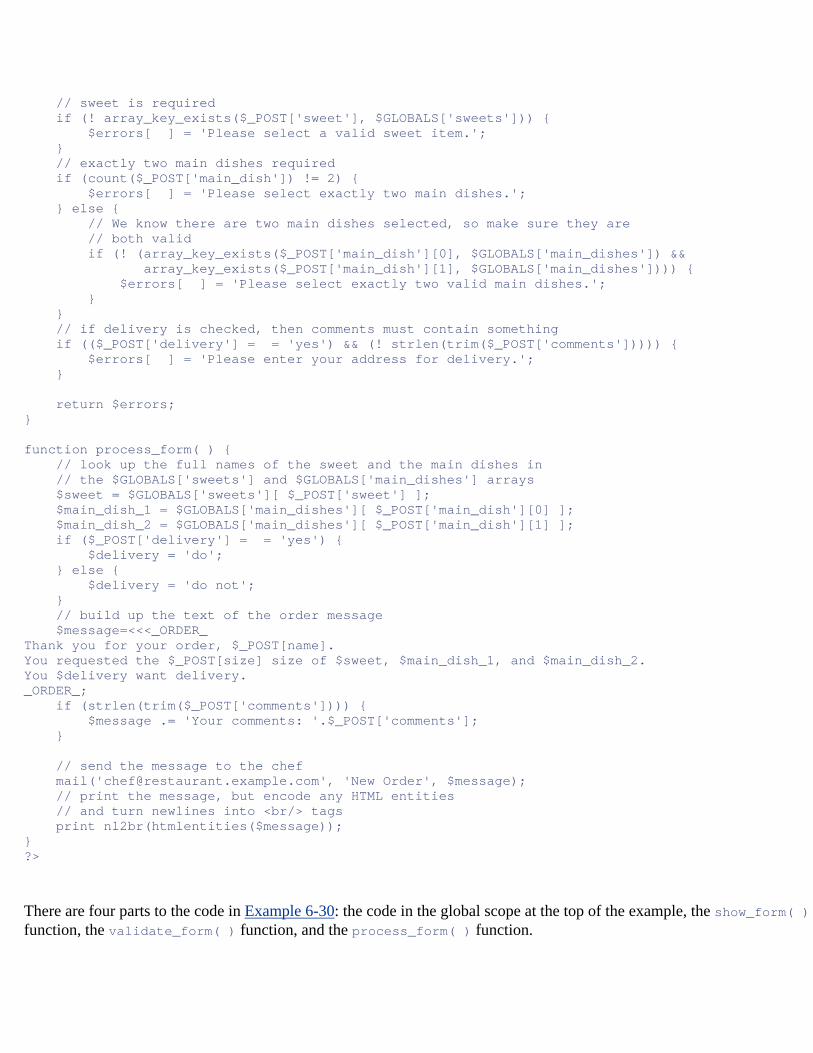
// sweet is required if (! array_key_exists($_POST['sweet'], $GLOBALS['sweets'])) { $errors[ ] = 'Please select a valid sweet item.'; } // exactly two main dishes required if (count($_POST['main_dish']) != 2) { $errors[ ] = 'Please select exactly two main dishes.'; } else { // We know there are two main dishes selected, so make sure they are // both valid if (! (array_key_exists($_POST['main_dish'][0], $GLOBALS['main_dishes']) && array_key_exists($_POST['main_dish'][1], $GLOBALS['main_dishes']))) { $errors[ ] = 'Please select exactly two valid main dishes.'; } } // if delivery is checked, then comments must contain something if (($_POST['delivery'] = = 'yes') && (! strlen(trim($_POST['comments'])))) { $errors[ ] = 'Please enter your address for delivery.'; } return $errors; } function process_form( ) { // look up the full names of the sweet and the main dishes in // the $GLOBALS['sweets'] and $GLOBALS['main_dishes'] arrays $sweet = $GLOBALS['sweets'][ $_POST['sweet'] ]; $main_dish_1 = $GLOBALS['main_dishes'][ $_POST['main_dish'][0] ]; $main_dish_2 = $GLOBALS['main_dishes'][ $_POST['main_dish'][1] ]; if ($_POST['delivery'] = = 'yes') { $delivery = 'do'; } else { $delivery = 'do not'; } // build up the text of the order message $message=<<<_ORDER_ Thank you for your order, $_POST[name]. You requested the $_POST[size] size of $sweet, $main_dish_1, and $main_dish_2. You $delivery want delivery. _ORDER_; if (strlen(trim($_POST['comments']))) { $message .= 'Your comments: '.$_POST['comments']; } // send the message to the chef mail('[email protected]', 'New Order', $message); // print the message, but encode any HTML entities // and turn newlines into <br/> tags print nl2br(htmlentities($message)); } ?>
There are four parts to the code in Example 6-30: the code in the global scope at the top of the example, the show_form( )function, the validate_form( ) function, and the process_form( ) function.
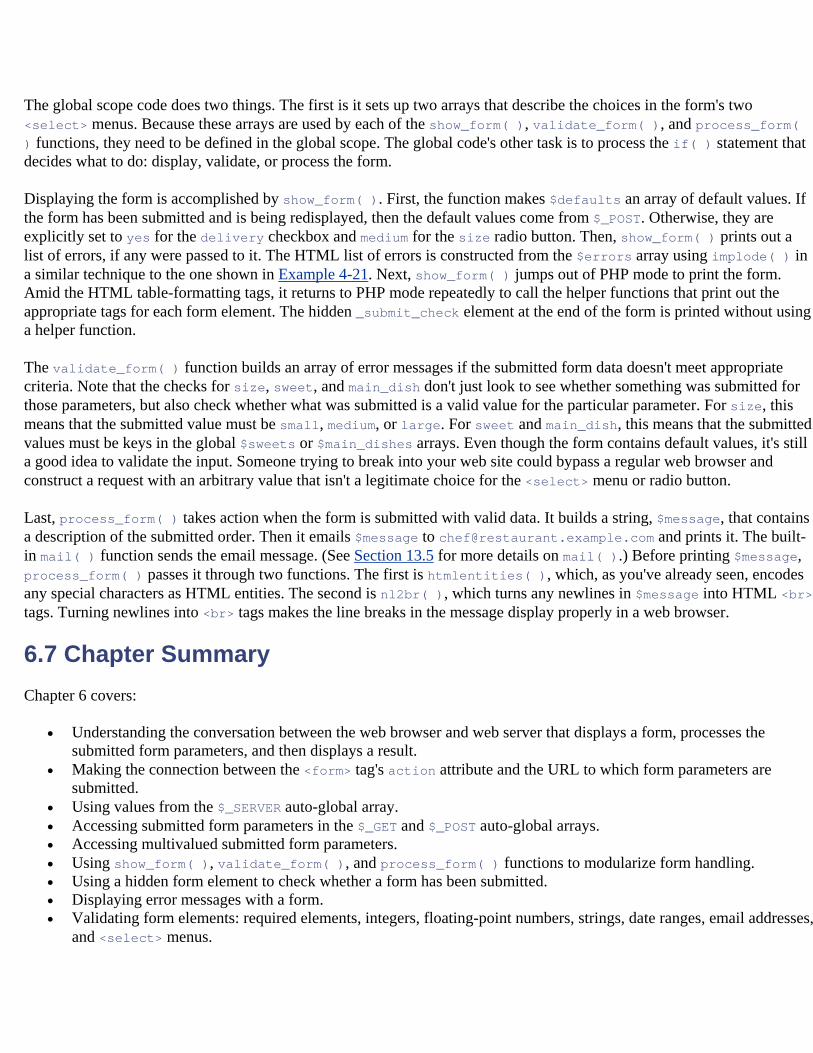
The global scope code does two things. The first is it sets up two arrays that describe the choices in the form's two <select> menus. Because these arrays are used by each of the show_form( ), validate_form( ), and process_form( ) functions, they need to be defined in the global scope. The global code's other task is to process the if( ) statement that decides what to do: display, validate, or process the form.
Displaying the form is accomplished by show_form( ). First, the function makes $defaults an array of default values. If the form has been submitted and is being redisplayed, then the default values come from $_POST. Otherwise, they are explicitly set to yes for the delivery checkbox and medium for the size radio button. Then, show_form( ) prints out a list of errors, if any were passed to it. The HTML list of errors is constructed from the $errors array using implode( ) in a similar technique to the one shown in Example 4-21. Next, show_form( ) jumps out of PHP mode to print the form. Amid the HTML table-formatting tags, it returns to PHP mode repeatedly to call the helper functions that print out the appropriate tags for each form element. The hidden _submit_check element at the end of the form is printed without using a helper function.
The validate_form( ) function builds an array of error messages if the submitted form data doesn't meet appropriate criteria. Note that the checks for size, sweet, and main_dish don't just look to see whether something was submitted for those parameters, but also check whether what was submitted is a valid value for the particular parameter. For size, this means that the submitted value must be small, medium, or large. For sweet and main_dish, this means that the submitted values must be keys in the global $sweets or $main_dishes arrays. Even though the form contains default values, it's still a good idea to validate the input. Someone trying to break into your web site could bypass a regular web browser and construct a request with an arbitrary value that isn't a legitimate choice for the <select> menu or radio button.
Last, process_form( ) takes action when the form is submitted with valid data. It builds a string, $message, that contains a description of the submitted order. Then it emails $message to [email protected] and prints it. The built-in mail( ) function sends the email message. (See Section 13.5 for more details on mail( ).) Before printing $message, process_form( ) passes it through two functions. The first is htmlentities( ), which, as you've already seen, encodes any special characters as HTML entities. The second is nl2br( ), which turns any newlines in $message into HTML <br>tags. Turning newlines into <br> tags makes the line breaks in the message display properly in a web browser.
6.7 Chapter Summary Chapter 6 covers:
• Understanding the conversation between the web browser and web server that displays a form, processes the submitted form parameters, and then displays a result.
• Making the connection between the <form> tag's action attribute and the URL to which form parameters are submitted.
• Using values from the $_SERVER auto-global array. • Accessing submitted form parameters in the $_GET and $_POST auto-global arrays. • Accessing multivalued submitted form parameters. • Using show_form( ), validate_form( ), and process_form( ) functions to modularize form handling. • Using a hidden form element to check whether a form has been submitted. • Displaying error messages with a form. • Validating form elements: required elements, integers, floating-point numbers, strings, date ranges, email addresses,
and <select> menus.
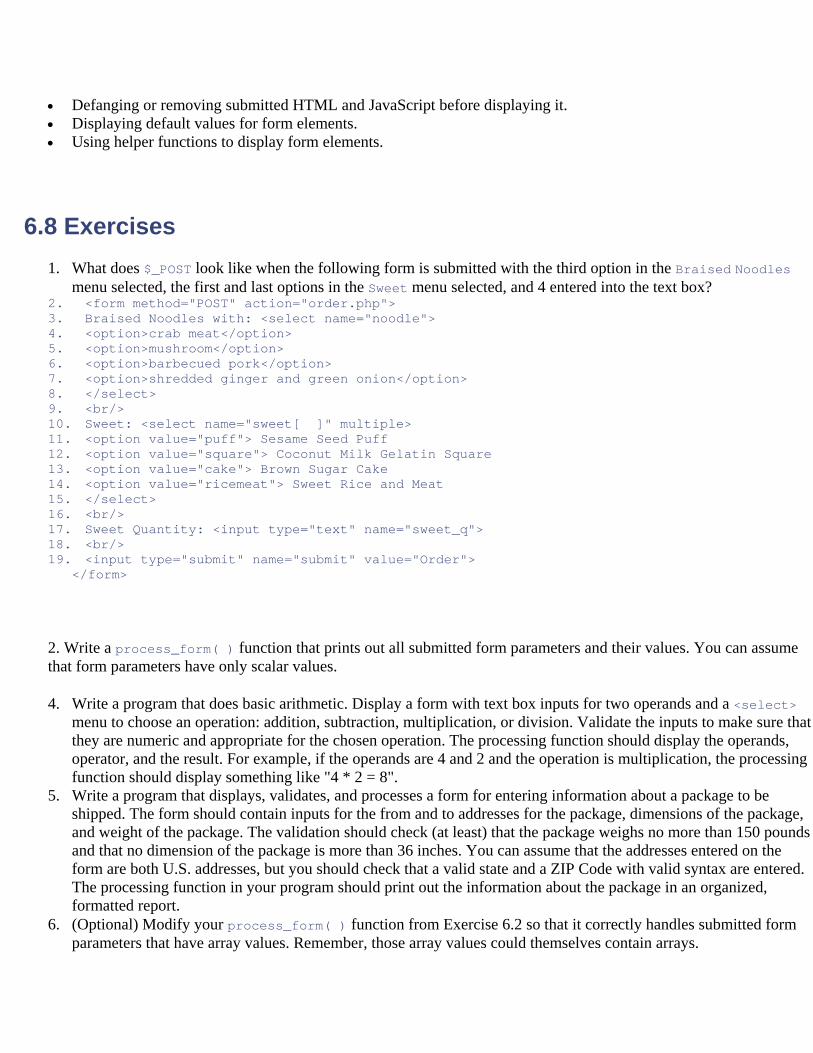
• Defanging or removing submitted HTML and JavaScript before displaying it. • Displaying default values for form elements. • Using helper functions to display form elements.
6.8 Exercises 1. What does $_POST look like when the following form is submitted with the third option in the Braised Noodles
menu selected, the first and last options in the Sweet menu selected, and 4 entered into the text box? 2. <form method="POST" action="order.php"> 3. Braised Noodles with: <select name="noodle"> 4. <option>crab meat</option> 5. <option>mushroom</option> 6. <option>barbecued pork</option> 7. <option>shredded ginger and green onion</option> 8. </select> 9. <br/> 10. Sweet: <select name="sweet[ ]" multiple> 11. <option value="puff"> Sesame Seed Puff 12. <option value="square"> Coconut Milk Gelatin Square 13. <option value="cake"> Brown Sugar Cake 14. <option value="ricemeat"> Sweet Rice and Meat 15. </select> 16. <br/> 17. Sweet Quantity: <input type="text" name="sweet_q"> 18. <br/> 19. <input type="submit" name="submit" value="Order">
</form>
2. Write a process_form( ) function that prints out all submitted form parameters and their values. You can assume that form parameters have only scalar values.
4. Write a program that does basic arithmetic. Display a form with text box inputs for two operands and a <select> menu to choose an operation: addition, subtraction, multiplication, or division. Validate the inputs to make sure that they are numeric and appropriate for the chosen operation. The processing function should display the operands, operator, and the result. For example, if the operands are 4 and 2 and the operation is multiplication, the processing function should display something like "4 * 2 = 8".
5. Write a program that displays, validates, and processes a form for entering information about a package to be shipped. The form should contain inputs for the from and to addresses for the package, dimensions of the package, and weight of the package. The validation should check (at least) that the package weighs no more than 150 pounds and that no dimension of the package is more than 36 inches. You can assume that the addresses entered on the form are both U.S. addresses, but you should check that a valid state and a ZIP Code with valid syntax are entered. The processing function in your program should print out the information about the package in an organized, formatted report.
6. (Optional) Modify your process_form( ) function from Exercise 6.2 so that it correctly handles submitted form parameters that have array values. Remember, those array values could themselves contain arrays.
Chapter 7. Storing Information with Databases The HTML and CSS that give your web site its pretty face reside in individual files on your web server. So does the PHP code that processes forms and performs other dynamic wizardry. There's a third kind of information necessary to a web application, though: data. And while you can store data such as user lists and product information in individual files, most people find it easier to use databases, which are the focus of this chapter.
Lots of information falls under the broad umbrella of "data":
• Who your users are, such as their names and email addresses. • What your users do, such as message board posts and profile information. • The "stuff" that your site is about, such as a list of record albums, a product catalog, or what's for dinner.
There are three big reasons why this kind of data belongs in a database instead of in files: convenience, simultaneous access, and security. A database program makes it much easier to search for and manipulate individual pieces of information. With a database program, you can do things such as change the email address for user Duck29 to [email protected] in one step. If you put usernames and email addresses in a file, changing an email address would be much more complicated: read the old file, search through each line until you find the one for Duck29, change the line, and write the file back out. If, at same time, one request updates Duck29's email address and another updates the record for user Piggy56, one update could be lost, or (worse) the data file corrupted. Database software manages the intricacies of simultaneous access for you.
In addition to searchability, database programs usually provide you with a different set of access control options compared to files. It is an exacting process to set things up properly so that your PHP programs can create, edit, and delete files on your web server without opening the door to malicious attackers who could abuse that setup to alter your PHP scripts and data files. A database program makes it easier to arrange the appropriate levels of access to your information. It can be configured so that your PHP programs can read and change some information, but only read other information. However the database access control is set up, it doesn't affect how files on the web server are accessed. Just because your PHP program can change values in the database doesn't give an attacker an opportunity to change your PHP programs and HTML files themselves.
The word database is used in a few different ways when talking about web applications. A database can be a pile of structured information, a program (such as MySQL or Oracle) that manages that structured information, or the computer on which that program runs. In this book, I use "database" to mean the pile of structured information. The software that manages the information is a database program, and the computer that the database program runs on is a database server.
Most of this chapter uses the PEAR DB database program abstraction layer. This is an add-on to PHP that simplifies communication between your PHP program and your database program. PEAR (PHP Extension and Application Repository) is a collection of useful modules and libraries for PHP. The DB module is one of the most popular PEAR modules and is bundled with recent versions of PHP. If your PHP installation doesn't have DB installed (Section 7.2, later in this chapter, shows you how to check), see Section A.3 for instructions on how to install it.
When DB isn't available, you need to rely on other PHP functions to talk to your database program. The appropriate set of functions varies with each database program. Some of the more exotic features of your database program may only be
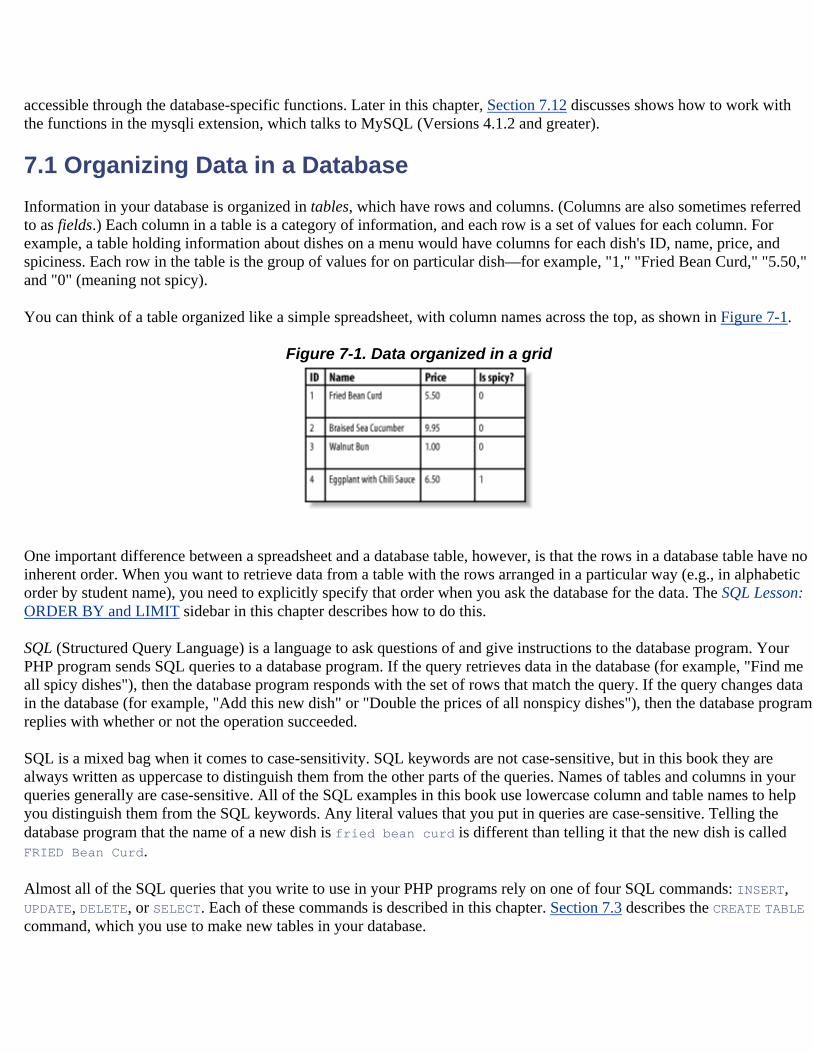
accessible through the database-specific functions. Later in this chapter, Section 7.12 discusses shows how to work with the functions in the mysqli extension, which talks to MySQL (Versions 4.1.2 and greater).
7.1 Organizing Data in a Database Information in your database is organized in tables, which have rows and columns. (Columns are also sometimes referred to as fields.) Each column in a table is a category of information, and each row is a set of values for each column. For example, a table holding information about dishes on a menu would have columns for each dish's ID, name, price, and spiciness. Each row in the table is the group of values for on particular dish—for example, "1," "Fried Bean Curd," "5.50," and "0" (meaning not spicy).
You can think of a table organized like a simple spreadsheet, with column names across the top, as shown in Figure 7-1.
Figure 7-1. Data organized in a grid
One important difference between a spreadsheet and a database table, however, is that the rows in a database table have no inherent order. When you want to retrieve data from a table with the rows arranged in a particular way (e.g., in alphabetic order by student name), you need to explicitly specify that order when you ask the database for the data. The SQL Lesson: ORDER BY and LIMIT sidebar in this chapter describes how to do this.
SQL (Structured Query Language) is a language to ask questions of and give instructions to the database program. Your PHP program sends SQL queries to a database program. If the query retrieves data in the database (for example, "Find me all spicy dishes"), then the database program responds with the set of rows that match the query. If the query changes data in the database (for example, "Add this new dish" or "Double the prices of all nonspicy dishes"), then the database program replies with whether or not the operation succeeded.
SQL is a mixed bag when it comes to case-sensitivity. SQL keywords are not case-sensitive, but in this book they are always written as uppercase to distinguish them from the other parts of the queries. Names of tables and columns in your queries generally are case-sensitive. All of the SQL examples in this book use lowercase column and table names to help you distinguish them from the SQL keywords. Any literal values that you put in queries are case-sensitive. Telling the database program that the name of a new dish is fried bean curd is different than telling it that the new dish is called FRIED Bean Curd.
Almost all of the SQL queries that you write to use in your PHP programs rely on one of four SQL commands: INSERT, UPDATE, DELETE, or SELECT. Each of these commands is described in this chapter. Section 7.3 describes the CREATE TABLE command, which you use to make new tables in your database.
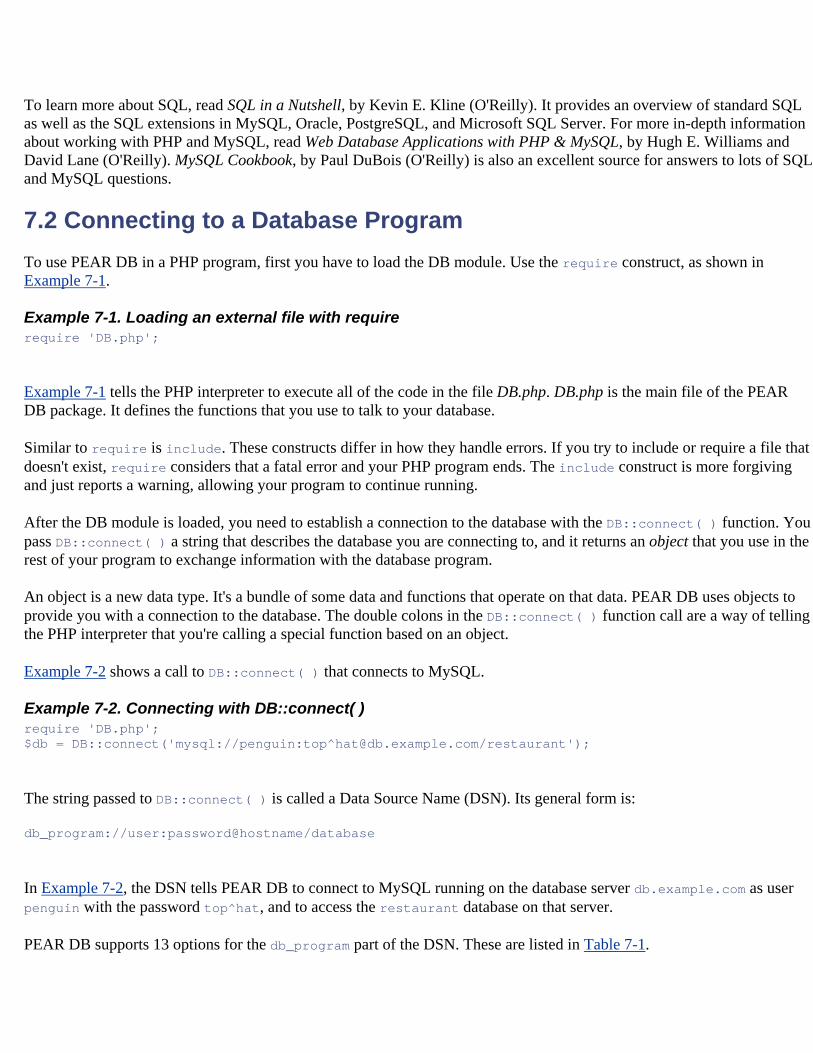
To learn more about SQL, read SQL in a Nutshell, by Kevin E. Kline (O'Reilly). It provides an overview of standard SQL as well as the SQL extensions in MySQL, Oracle, PostgreSQL, and Microsoft SQL Server. For more in-depth information about working with PHP and MySQL, read Web Database Applications with PHP & MySQL, by Hugh E. Williams and David Lane (O'Reilly). MySQL Cookbook, by Paul DuBois (O'Reilly) is also an excellent source for answers to lots of SQL and MySQL questions.
7.2 Connecting to a Database Program To use PEAR DB in a PHP program, first you have to load the DB module. Use the require construct, as shown in Example 7-1.
Example 7-1. Loading an external file with require require 'DB.php';
Example 7-1 tells the PHP interpreter to execute all of the code in the file DB.php. DB.php is the main file of the PEAR DB package. It defines the functions that you use to talk to your database.
Similar to require is include. These constructs differ in how they handle errors. If you try to include or require a file that doesn't exist, require considers that a fatal error and your PHP program ends. The include construct is more forgiving and just reports a warning, allowing your program to continue running.
After the DB module is loaded, you need to establish a connection to the database with the DB::connect( ) function. You pass DB::connect( ) a string that describes the database you are connecting to, and it returns an object that you use in the rest of your program to exchange information with the database program.
An object is a new data type. It's a bundle of some data and functions that operate on that data. PEAR DB uses objects to provide you with a connection to the database. The double colons in the DB::connect( ) function call are a way of telling the PHP interpreter that you're calling a special function based on an object.
Example 7-2 shows a call to DB::connect( ) that connects to MySQL.
Example 7-2. Connecting with DB::connect( ) require 'DB.php'; $db = DB::connect('mysql://penguin:top^[email protected]/restaurant');
The string passed to DB::connect( ) is called a Data Source Name (DSN). Its general form is:
db_program://user:password@hostname/database
In Example 7-2, the DSN tells PEAR DB to connect to MySQL running on the database server db.example.com as user penguin with the password top^hat, and to access the restaurant database on that server.
PEAR DB supports 13 options for the db_program part of the DSN. These are listed in Table 7-1.
Table 7-1. PEAR DB db_program options
db_program Database program
dbase dBase
fbsql FrontBase
ibase InterBase
ifx Informix
msql Mini SQL
mssql Microsoft SQL Server
mysql MySQL (versions <= 4.0)
mysqli MySQL (versions >= 4.1.2)
oci8 Oracle (Versions 7, 8, and 9)
odbc ODBC
pgsql PostgreSQL
sqlite SQLite
sybase Sybase
When your database program is running on the same computer as your web server, specify localhost as the hostname part of the DSN, as shown in Example 7-3.
Example 7-3. Connecting to localhost $db = DB::connect('mysql://penguin:top^hat@localhost/restaurant');
If all goes well with DB::connect( ), it returns an object that you use to interact with the database. If there is a problem connecting, it returns a different kind of object that contains information about what went wrong. The DB::isError( ) function checks whether the object contains error information. Use it to make sure that the connection was made before going forward in your program. Example 7-4 uses DB::isError( ) to verify that DB::connect( ) succeeded.
Example 7-4. Checking for connection errors require 'DB.php'; $db = DB::connect('mysql://penguin:top^[email protected]/restaurant'); if (DB::isError($db)) { die("Can't connect: " . $db->getMessage( )); }
The DB::isError( ) function returns true if the object passed to it contains error information. The die( ) function prints out a message and then causes the script to quit. In this case, the message is the string Can't connect: followed by the results of the $db->getMessage( ) call. The getMessage( ) function returns more information about the error.
Earlier, I said that an object is a bundle of data and functions that operate on that data. A -> after an object tells the PHP interpreter that you want to call one of those functions in the object. Once you have called DB::connect, you use the functions in the object to interact with the database. The code $db->getMessage( ) means "call the getMessage( ) function inside the $db object." In this case, the $db object holds error information and the getMessage( ) function prints out some of that information.
For example, if top^hat is the wrong password for user penguin, Example 7-4 prints:
Can't connect: DB Error: connect failed
7.3 Creating a Table Before you can put any data into or retrieve any data from a database table, you must create the table. This is usually a one-time operation. You tell the database program to create a new table once. Your PHP program that uses the table may read from or write to that table every time it runs. But it doesn't have to re-create the table each time. If a database table is like a spreadsheet, then creating a table is like making a new spreadsheet file. After you create the file, you open it many times to read or change it.
The SQL command to create a table is CREATE TABLE. You provide the name of the table and the names and types of all the columns in the table. Example 7-5 shows the SQL command to create the dishes table pictured in Figure 7-1.
Example 7-5. Creating the dishes table CREATE TABLE dishes ( dish_id INT, dish_name VARCHAR(255), price DECIMAL(4,2), is_spicy INT )
Example 7-5 creates a table called dishes with four columns. The dishes table looks like the one pictured in Figure 7-1. The columns in the table are dish_id, dish_name, price, and is_spicy. The dish_id and is_spicy columns are integers. The price column is a decimal number. The dish_name column is a string.
After the literal CREATE TABLE comes the name of the table. Then, between the parentheses, is a comma-separated list of the columns in the table. The phrase that defines each column has two parts: the column name and the column type. In Example 7-5, the column names are dish_id, dish_name, price, and is_spicy. The column types are INT, VARCHAR(255), DECIMAL(4,2), and INT.
Some column types include length or formatting information in the parentheses. For example, VARCHAR(255) means "a variable length character column that is at most 255 characters long." The type DECIMAL(4,2) means "a decimal number
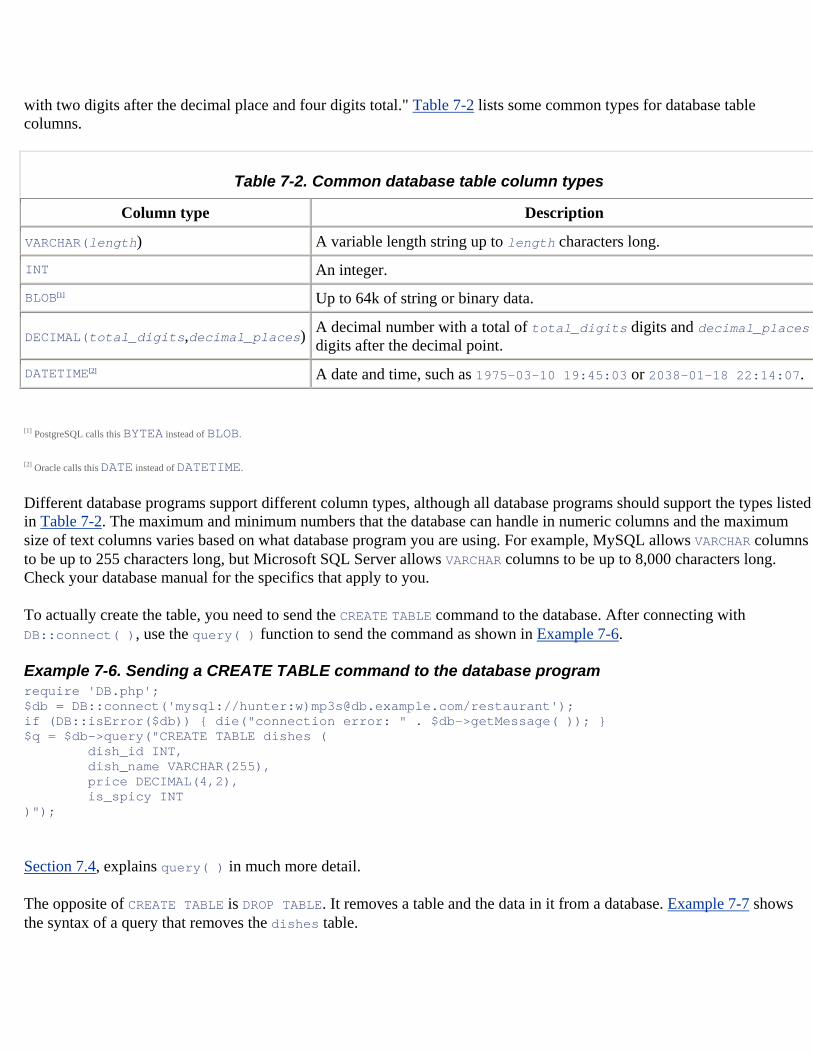
with two digits after the decimal place and four digits total." Table 7-2 lists some common types for database table columns.
Table 7-2. Common database table column types
Column type Description
VARCHAR(length) A variable length string up to length characters long.
INT An integer.
BLOB[1] Up to 64k of string or binary data.
DECIMAL(total_digits,decimal_places) A decimal number with a total of total_digits digits and decimal_places digits after the decimal point.
DATETIME[2] A date and time, such as 1975-03-10 19:45:03 or 2038-01-18 22:14:07.
[1] PostgreSQL calls this BYTEA instead of BLOB.
[2] Oracle calls this DATE instead of DATETIME.
Different database programs support different column types, although all database programs should support the types listed in Table 7-2. The maximum and minimum numbers that the database can handle in numeric columns and the maximum size of text columns varies based on what database program you are using. For example, MySQL allows VARCHAR columns to be up to 255 characters long, but Microsoft SQL Server allows VARCHAR columns to be up to 8,000 characters long. Check your database manual for the specifics that apply to you.
To actually create the table, you need to send the CREATE TABLE command to the database. After connecting with DB::connect( ), use the query( ) function to send the command as shown in Example 7-6.
Example 7-6. Sending a CREATE TABLE command to the database program require 'DB.php'; $db = DB::connect('mysql://hunter:w)[email protected]/restaurant'); if (DB::isError($db)) { die("connection error: " . $db->getMessage( )); } $q = $db->query("CREATE TABLE dishes ( dish_id INT, dish_name VARCHAR(255), price DECIMAL(4,2), is_spicy INT )");
Section 7.4, explains query( ) in much more detail.
The opposite of CREATE TABLE is DROP TABLE. It removes a table and the data in it from a database. Example 7-7 shows the syntax of a query that removes the dishes table.
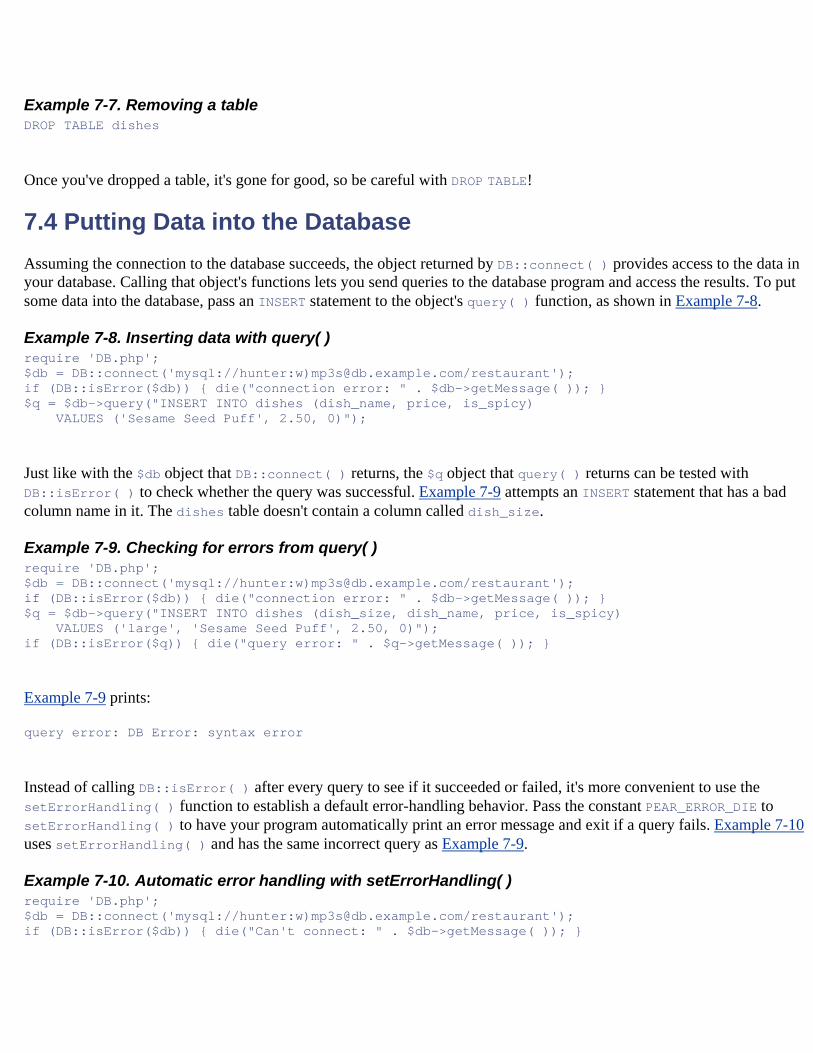
Example 7-7. Removing a table DROP TABLE dishes
Once you've dropped a table, it's gone for good, so be careful with DROP TABLE!
7.4 Putting Data into the Database Assuming the connection to the database succeeds, the object returned by DB::connect( ) provides access to the data in your database. Calling that object's functions lets you send queries to the database program and access the results. To put some data into the database, pass an INSERT statement to the object's query( ) function, as shown in Example 7-8.
Example 7-8. Inserting data with query( ) require 'DB.php'; $db = DB::connect('mysql://hunter:w)[email protected]/restaurant'); if (DB::isError($db)) { die("connection error: " . $db->getMessage( )); } $q = $db->query("INSERT INTO dishes (dish_name, price, is_spicy) VALUES ('Sesame Seed Puff', 2.50, 0)");
Just like with the $db object that DB::connect( ) returns, the $q object that query( ) returns can be tested with DB::isError( ) to check whether the query was successful. Example 7-9 attempts an INSERT statement that has a bad column name in it. The dishes table doesn't contain a column called dish_size.
Example 7-9. Checking for errors from query( ) require 'DB.php'; $db = DB::connect('mysql://hunter:w)[email protected]/restaurant'); if (DB::isError($db)) { die("connection error: " . $db->getMessage( )); } $q = $db->query("INSERT INTO dishes (dish_size, dish_name, price, is_spicy) VALUES ('large', 'Sesame Seed Puff', 2.50, 0)"); if (DB::isError($q)) { die("query error: " . $q->getMessage( )); }
Example 7-9 prints:
query error: DB Error: syntax error
Instead of calling DB::isError( ) after every query to see if it succeeded or failed, it's more convenient to use the setErrorHandling( ) function to establish a default error-handling behavior. Pass the constant PEAR_ERROR_DIE to setErrorHandling( ) to have your program automatically print an error message and exit if a query fails. Example 7-10 uses setErrorHandling( ) and has the same incorrect query as Example 7-9.
Example 7-10. Automatic error handling with setErrorHandling( ) require 'DB.php'; $db = DB::connect('mysql://hunter:w)[email protected]/restaurant'); if (DB::isError($db)) { die("Can't connect: " . $db->getMessage( )); }
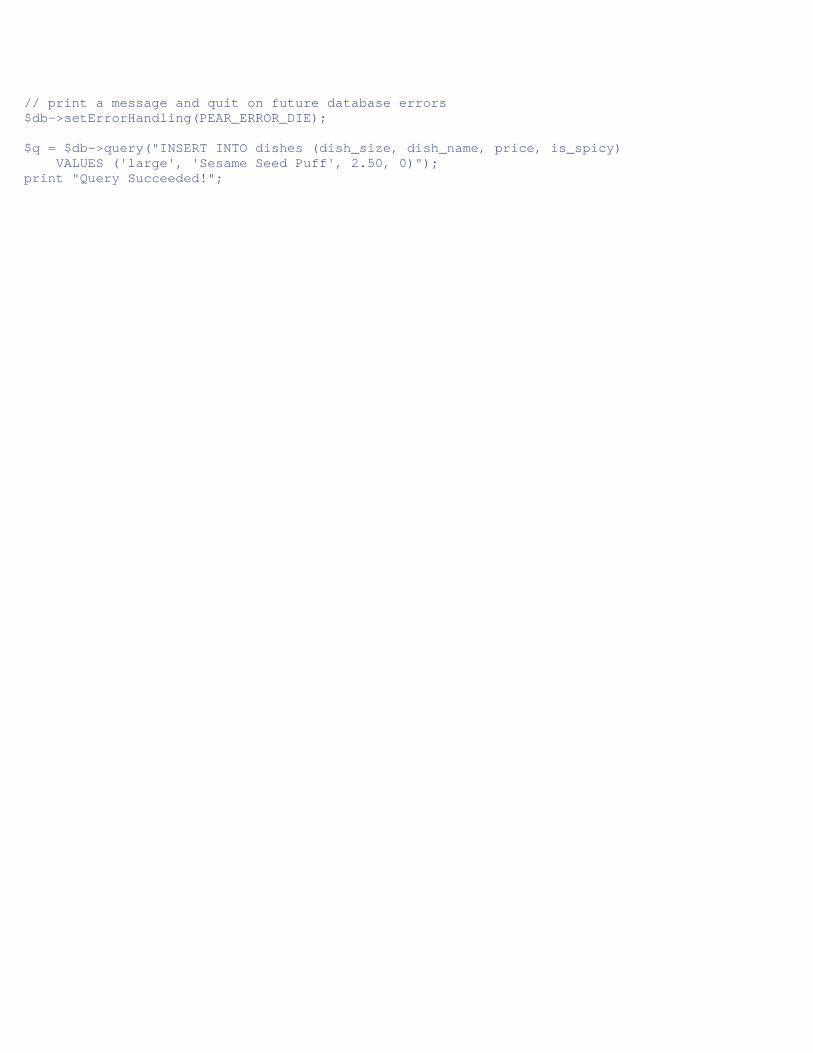
// print a message and quit on future database errors $db->setErrorHandling(PEAR_ERROR_DIE); $q = $db->query("INSERT INTO dishes (dish_size, dish_name, price, is_spicy) VALUES ('large', 'Sesame Seed Puff', 2.50, 0)"); print "Query Succeeded!";
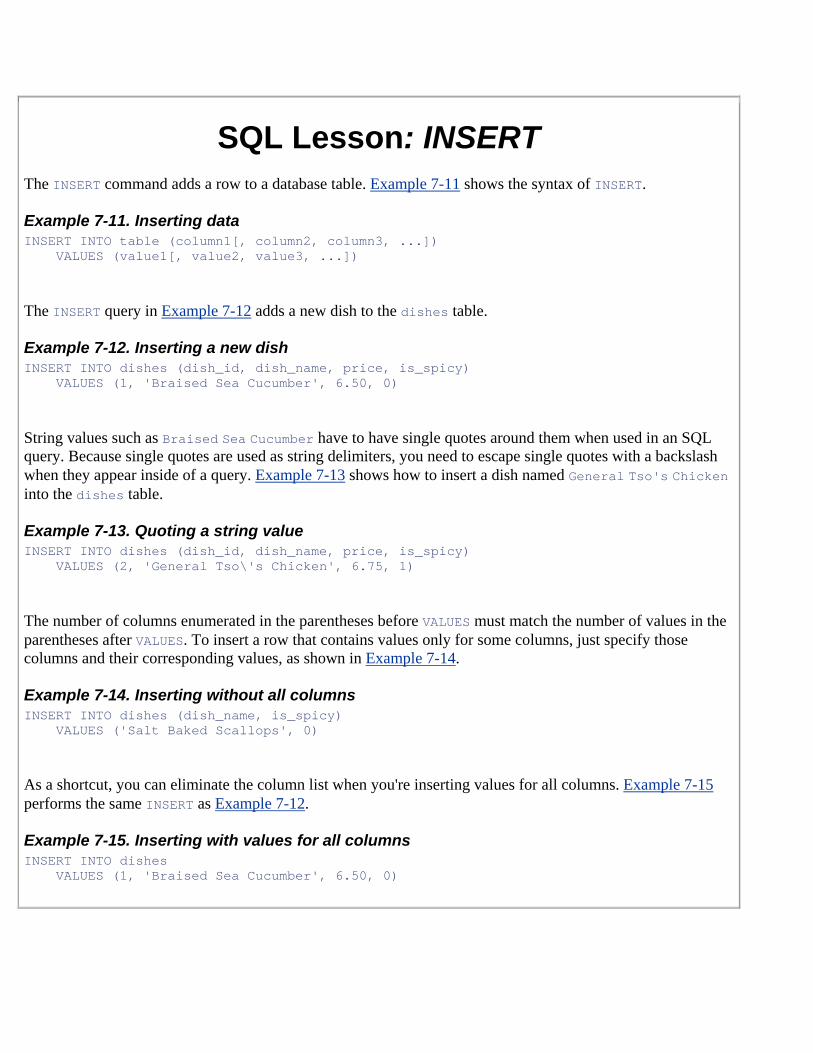
SQL Lesson: INSERT The INSERT command adds a row to a database table. Example 7-11 shows the syntax of INSERT.
Example 7-11. Inserting data INSERT INTO table (column1[, column2, column3, ...]) VALUES (value1[, value2, value3, ...])
The INSERT query in Example 7-12 adds a new dish to the dishes table.
Example 7-12. Inserting a new dish INSERT INTO dishes (dish_id, dish_name, price, is_spicy) VALUES (1, 'Braised Sea Cucumber', 6.50, 0)
String values such as Braised Sea Cucumber have to have single quotes around them when used in an SQL query. Because single quotes are used as string delimiters, you need to escape single quotes with a backslash when they appear inside of a query. Example 7-13 shows how to insert a dish named General Tso's Chicken into the dishes table.
Example 7-13. Quoting a string value INSERT INTO dishes (dish_id, dish_name, price, is_spicy) VALUES (2, 'General Tso\'s Chicken', 6.75, 1)
The number of columns enumerated in the parentheses before VALUES must match the number of values in the parentheses after VALUES. To insert a row that contains values only for some columns, just specify those columns and their corresponding values, as shown in Example 7-14.
Example 7-14. Inserting without all columns INSERT INTO dishes (dish_name, is_spicy) VALUES ('Salt Baked Scallops', 0)
As a shortcut, you can eliminate the column list when you're inserting values for all columns. Example 7-15 performs the same INSERT as Example 7-12.
Example 7-15. Inserting with values for all columns INSERT INTO dishes VALUES (1, 'Braised Sea Cucumber', 6.50, 0)
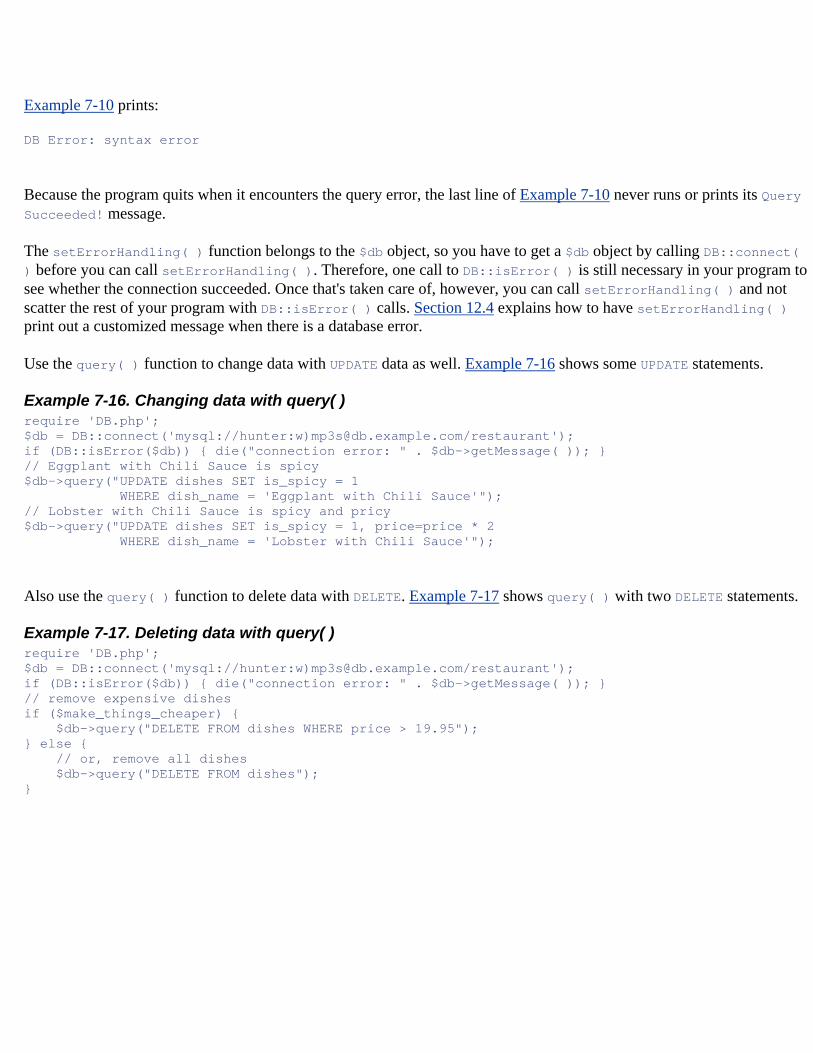
Example 7-10 prints:
DB Error: syntax error
Because the program quits when it encounters the query error, the last line of Example 7-10 never runs or prints its Query Succeeded! message.
The setErrorHandling( ) function belongs to the $db object, so you have to get a $db object by calling DB::connect( ) before you can call setErrorHandling( ). Therefore, one call to DB::isError( ) is still necessary in your program to see whether the connection succeeded. Once that's taken care of, however, you can call setErrorHandling( ) and not scatter the rest of your program with DB::isError( ) calls. Section 12.4 explains how to have setErrorHandling( ) print out a customized message when there is a database error.
Use the query( ) function to change data with UPDATE data as well. Example 7-16 shows some UPDATE statements.
Example 7-16. Changing data with query( ) require 'DB.php'; $db = DB::connect('mysql://hunter:w)[email protected]/restaurant'); if (DB::isError($db)) { die("connection error: " . $db->getMessage( )); } // Eggplant with Chili Sauce is spicy $db->query("UPDATE dishes SET is_spicy = 1 WHERE dish_name = 'Eggplant with Chili Sauce'"); // Lobster with Chili Sauce is spicy and pricy $db->query("UPDATE dishes SET is_spicy = 1, price=price * 2 WHERE dish_name = 'Lobster with Chili Sauce'");
Also use the query( ) function to delete data with DELETE. Example 7-17 shows query( ) with two DELETE statements.
Example 7-17. Deleting data with query( ) require 'DB.php'; $db = DB::connect('mysql://hunter:w)[email protected]/restaurant'); if (DB::isError($db)) { die("connection error: " . $db->getMessage( )); } // remove expensive dishes if ($make_things_cheaper) { $db->query("DELETE FROM dishes WHERE price > 19.95"); } else { // or, remove all dishes $db->query("DELETE FROM dishes"); }
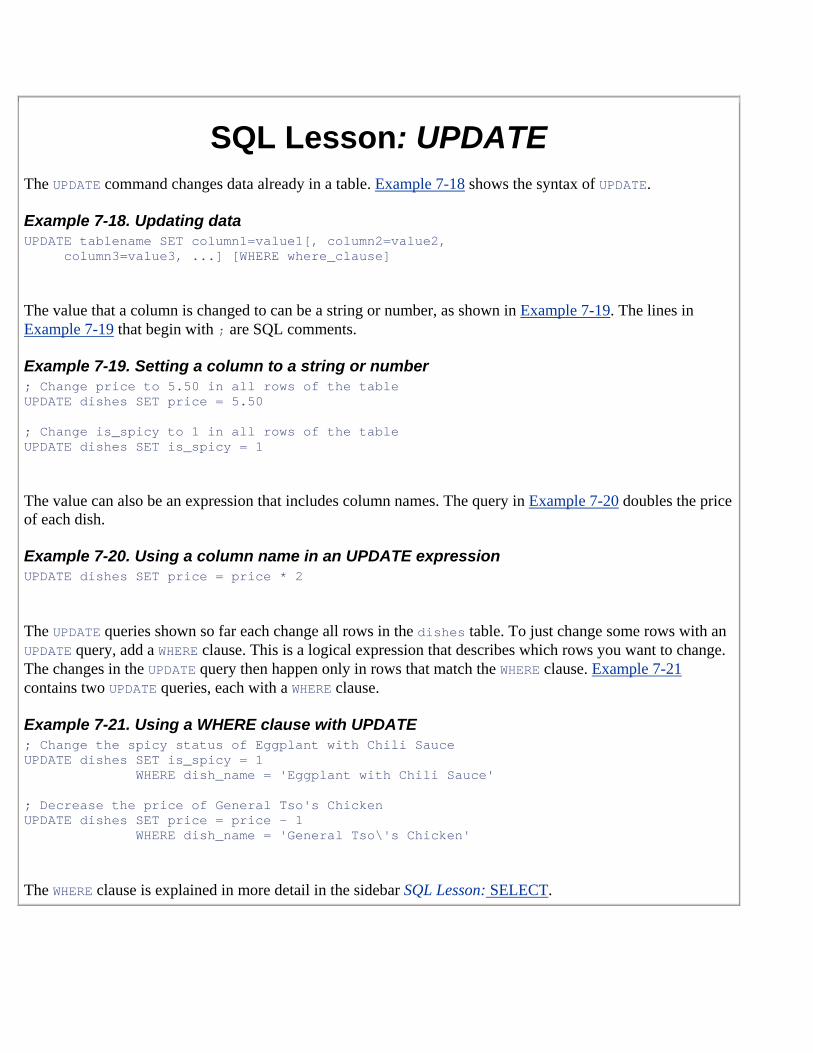
SQL Lesson: UPDATE The UPDATE command changes data already in a table. Example 7-18 shows the syntax of UPDATE.
Example 7-18. Updating data UPDATE tablename SET column1=value1[, column2=value2, column3=value3, ...] [WHERE where_clause]
The value that a column is changed to can be a string or number, as shown in Example 7-19. The lines in Example 7-19 that begin with ; are SQL comments.
Example 7-19. Setting a column to a string or number ; Change price to 5.50 in all rows of the table UPDATE dishes SET price = 5.50 ; Change is_spicy to 1 in all rows of the table UPDATE dishes SET is_spicy = 1
The value can also be an expression that includes column names. The query in Example 7-20 doubles the price of each dish.
Example 7-20. Using a column name in an UPDATE expression UPDATE dishes SET price = price * 2
The UPDATE queries shown so far each change all rows in the dishes table. To just change some rows with an UPDATE query, add a WHERE clause. This is a logical expression that describes which rows you want to change. The changes in the UPDATE query then happen only in rows that match the WHERE clause. Example 7-21 contains two UPDATE queries, each with a WHERE clause.
Example 7-21. Using a WHERE clause with UPDATE ; Change the spicy status of Eggplant with Chili Sauce UPDATE dishes SET is_spicy = 1 WHERE dish_name = 'Eggplant with Chili Sauce' ; Decrease the price of General Tso's Chicken UPDATE dishes SET price = price - 1 WHERE dish_name = 'General Tso\'s Chicken'
The WHERE clause is explained in more detail in the sidebar SQL Lesson: SELECT.
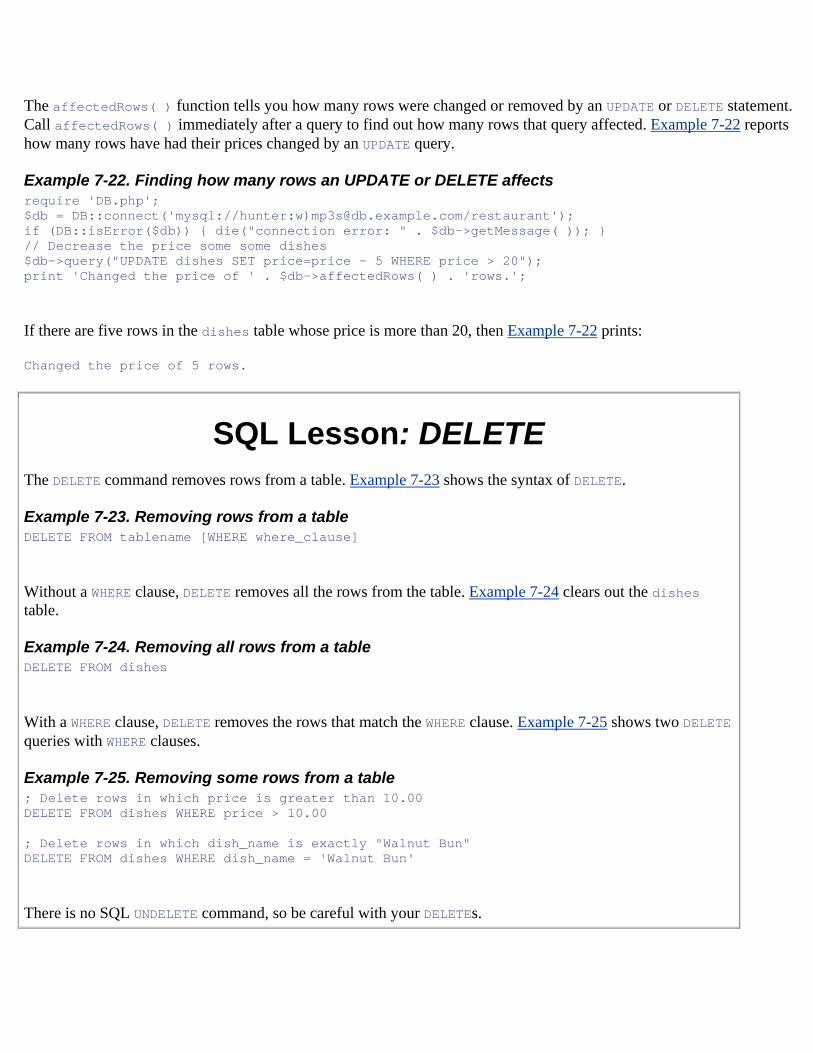
The affectedRows( ) function tells you how many rows were changed or removed by an UPDATE or DELETE statement. Call affectedRows( ) immediately after a query to find out how many rows that query affected. Example 7-22 reports how many rows have had their prices changed by an UPDATE query.
Example 7-22. Finding how many rows an UPDATE or DELETE affects require 'DB.php'; $db = DB::connect('mysql://hunter:w)[email protected]/restaurant'); if (DB::isError($db)) { die("connection error: " . $db->getMessage( )); } // Decrease the price some some dishes $db->query("UPDATE dishes SET price=price - 5 WHERE price > 20"); print 'Changed the price of ' . $db->affectedRows( ) . 'rows.';
If there are five rows in the dishes table whose price is more than 20, then Example 7-22 prints:
Changed the price of 5 rows.
SQL Lesson: DELETE The DELETE command removes rows from a table. Example 7-23 shows the syntax of DELETE.
Example 7-23. Removing rows from a table DELETE FROM tablename [WHERE where_clause]
Without a WHERE clause, DELETE removes all the rows from the table. Example 7-24 clears out the dishes table.
Example 7-24. Removing all rows from a table DELETE FROM dishes
With a WHERE clause, DELETE removes the rows that match the WHERE clause. Example 7-25 shows two DELETE queries with WHERE clauses.
Example 7-25. Removing some rows from a table ; Delete rows in which price is greater than 10.00 DELETE FROM dishes WHERE price > 10.00 ; Delete rows in which dish_name is exactly "Walnut Bun" DELETE FROM dishes WHERE dish_name = 'Walnut Bun'
There is no SQL UNDELETE command, so be careful with your DELETEs.
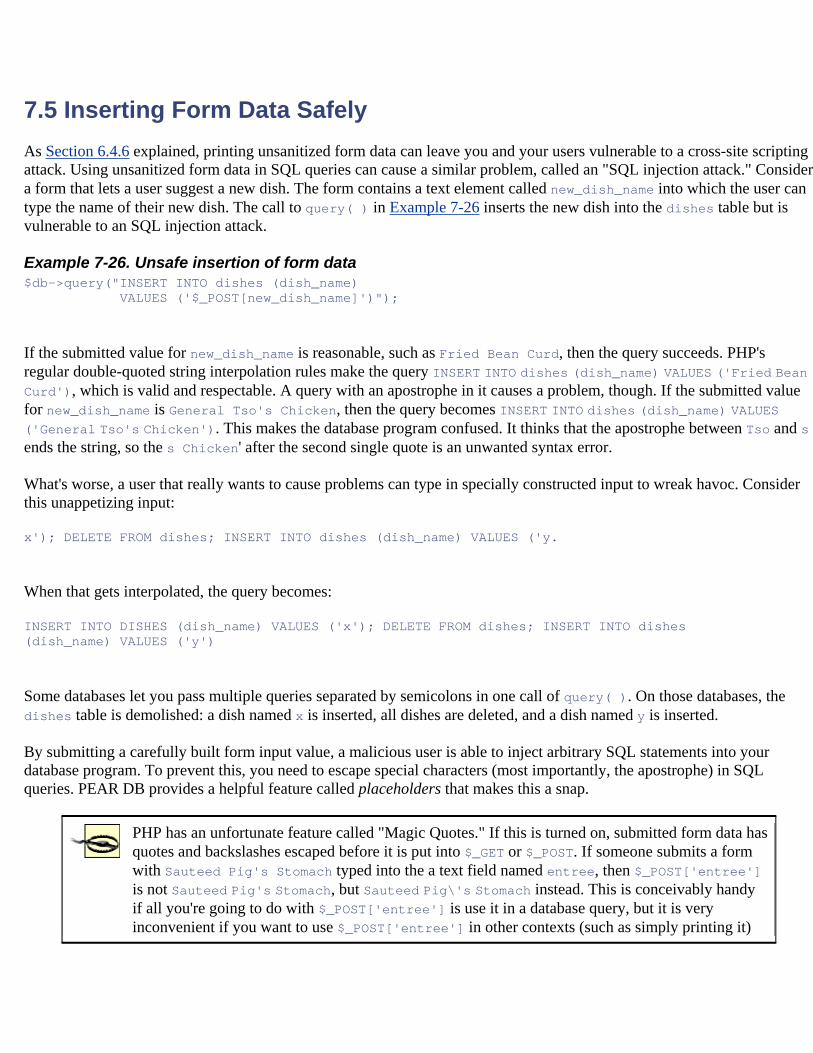
7.5 Inserting Form Data Safely As Section 6.4.6 explained, printing unsanitized form data can leave you and your users vulnerable to a cross-site scripting attack. Using unsanitized form data in SQL queries can cause a similar problem, called an "SQL injection attack." Consider a form that lets a user suggest a new dish. The form contains a text element called new_dish_name into which the user can type the name of their new dish. The call to query( ) in Example 7-26 inserts the new dish into the dishes table but is vulnerable to an SQL injection attack.
Example 7-26. Unsafe insertion of form data $db->query("INSERT INTO dishes (dish_name) VALUES ('$_POST[new_dish_name]')");
If the submitted value for new_dish_name is reasonable, such as Fried Bean Curd, then the query succeeds. PHP's regular double-quoted string interpolation rules make the query INSERT INTO dishes (dish_name) VALUES ('Fried Bean Curd'), which is valid and respectable. A query with an apostrophe in it causes a problem, though. If the submitted value for new_dish_name is General Tso's Chicken, then the query becomes INSERT INTO dishes (dish_name) VALUES ('General Tso's Chicken'). This makes the database program confused. It thinks that the apostrophe between Tso and s ends the string, so the s Chicken' after the second single quote is an unwanted syntax error.
What's worse, a user that really wants to cause problems can type in specially constructed input to wreak havoc. Consider this unappetizing input:
x'); DELETE FROM dishes; INSERT INTO dishes (dish_name) VALUES ('y.
When that gets interpolated, the query becomes:
INSERT INTO DISHES (dish_name) VALUES ('x'); DELETE FROM dishes; INSERT INTO dishes (dish_name) VALUES ('y')
Some databases let you pass multiple queries separated by semicolons in one call of query( ). On those databases, the dishes table is demolished: a dish named x is inserted, all dishes are deleted, and a dish named y is inserted.
By submitting a carefully built form input value, a malicious user is able to inject arbitrary SQL statements into your database program. To prevent this, you need to escape special characters (most importantly, the apostrophe) in SQL queries. PEAR DB provides a helpful feature called placeholders that makes this a snap.
PHP has an unfortunate feature called "Magic Quotes." If this is turned on, submitted form data has quotes and backslashes escaped before it is put into $_GET or $_POST. If someone submits a form with Sauteed Pig's Stomach typed into the a text field named entree, then $_POST['entree'] is not Sauteed Pig's Stomach, but Sauteed Pig\'s Stomach instead. This is conceivably handy if all you're going to do with $_POST['entree'] is use it in a database query, but it is very inconvenient if you want to use $_POST['entree'] in other contexts (such as simply printing it)
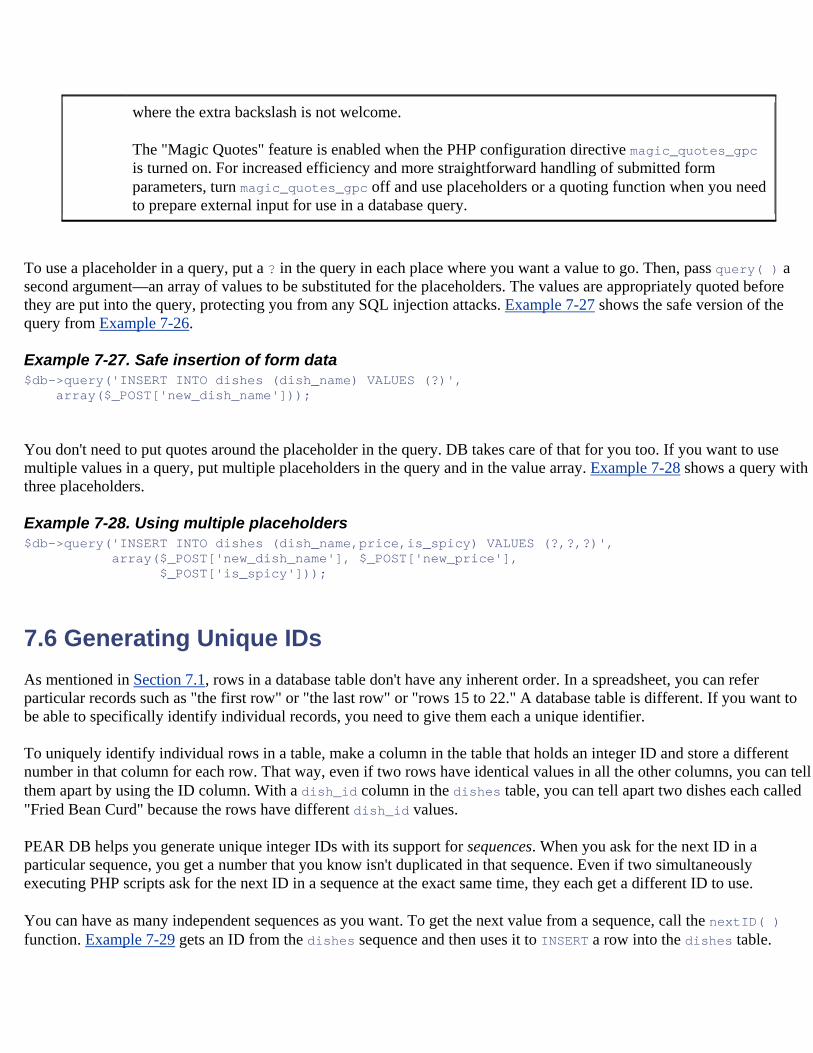
where the extra backslash is not welcome.
The "Magic Quotes" feature is enabled when the PHP configuration directive magic_quotes_gpc is turned on. For increased efficiency and more straightforward handling of submitted form parameters, turn magic_quotes_gpc off and use placeholders or a quoting function when you need to prepare external input for use in a database query.
To use a placeholder in a query, put a ? in the query in each place where you want a value to go. Then, pass query( ) a second argument—an array of values to be substituted for the placeholders. The values are appropriately quoted before they are put into the query, protecting you from any SQL injection attacks. Example 7-27 shows the safe version of the query from Example 7-26.
Example 7-27. Safe insertion of form data $db->query('INSERT INTO dishes (dish_name) VALUES (?)', array($_POST['new_dish_name']));
You don't need to put quotes around the placeholder in the query. DB takes care of that for you too. If you want to use multiple values in a query, put multiple placeholders in the query and in the value array. Example 7-28 shows a query with three placeholders.
Example 7-28. Using multiple placeholders $db->query('INSERT INTO dishes (dish_name,price,is_spicy) VALUES (?,?,?)', array($_POST['new_dish_name'], $_POST['new_price'], $_POST['is_spicy']));
7.6 Generating Unique IDs As mentioned in Section 7.1, rows in a database table don't have any inherent order. In a spreadsheet, you can refer particular records such as "the first row" or "the last row" or "rows 15 to 22." A database table is different. If you want to be able to specifically identify individual records, you need to give them each a unique identifier.
To uniquely identify individual rows in a table, make a column in the table that holds an integer ID and store a different number in that column for each row. That way, even if two rows have identical values in all the other columns, you can tell them apart by using the ID column. With a dish_id column in the dishes table, you can tell apart two dishes each called "Fried Bean Curd" because the rows have different dish_id values.
PEAR DB helps you generate unique integer IDs with its support for sequences. When you ask for the next ID in a particular sequence, you get a number that you know isn't duplicated in that sequence. Even if two simultaneously executing PHP scripts ask for the next ID in a sequence at the exact same time, they each get a different ID to use.
You can have as many independent sequences as you want. To get the next value from a sequence, call the nextID( ) function. Example 7-29 gets an ID from the dishes sequence and then uses it to INSERT a row into the dishes table.
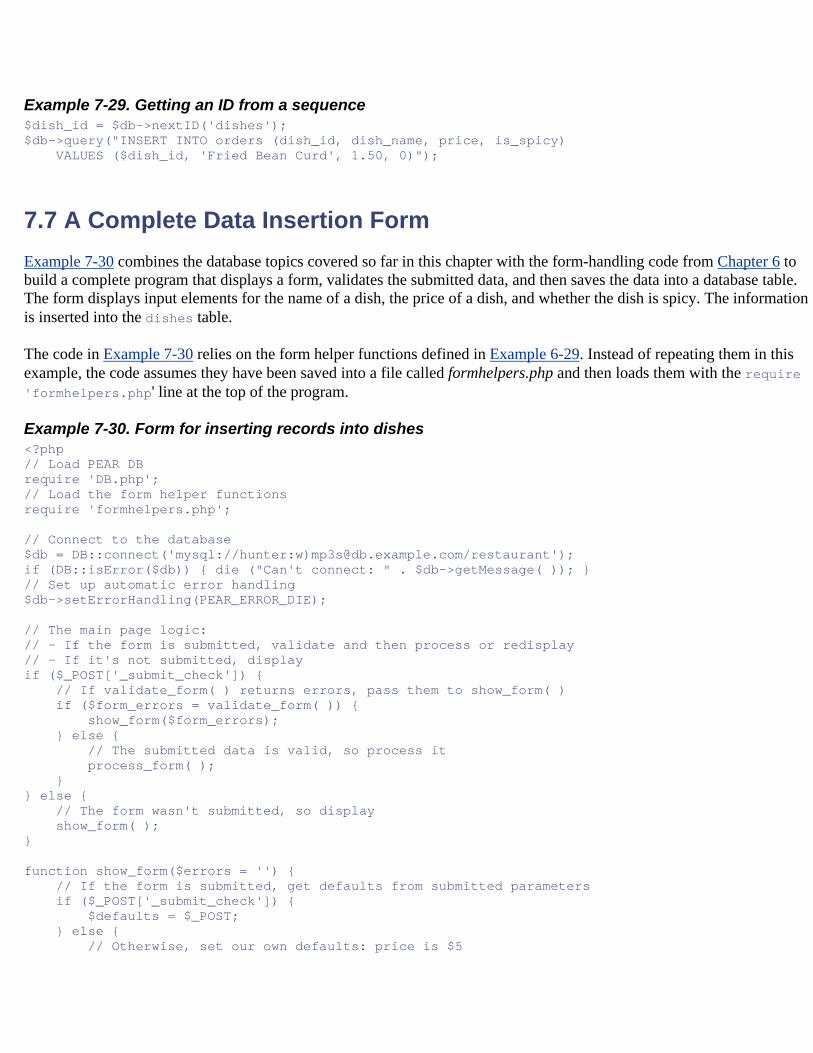
Example 7-29. Getting an ID from a sequence $dish_id = $db->nextID('dishes'); $db->query("INSERT INTO orders (dish_id, dish_name, price, is_spicy) VALUES ($dish_id, 'Fried Bean Curd', 1.50, 0)");
7.7 A Complete Data Insertion Form Example 7-30 combines the database topics covered so far in this chapter with the form-handling code from Chapter 6 to build a complete program that displays a form, validates the submitted data, and then saves the data into a database table. The form displays input elements for the name of a dish, the price of a dish, and whether the dish is spicy. The information is inserted into the dishes table.
The code in Example 7-30 relies on the form helper functions defined in Example 6-29. Instead of repeating them in this example, the code assumes they have been saved into a file called formhelpers.php and then loads them with the require 'formhelpers.php' line at the top of the program.
Example 7-30. Form for inserting records into dishes <?php // Load PEAR DB require 'DB.php'; // Load the form helper functions require 'formhelpers.php'; // Connect to the database $db = DB::connect('mysql://hunter:w)[email protected]/restaurant'); if (DB::isError($db)) { die ("Can't connect: " . $db->getMessage( )); } // Set up automatic error handling $db->setErrorHandling(PEAR_ERROR_DIE); // The main page logic: // - If the form is submitted, validate and then process or redisplay // - If it's not submitted, display if ($_POST['_submit_check']) { // If validate_form( ) returns errors, pass them to show_form( ) if ($form_errors = validate_form( )) { show_form($form_errors); } else { // The submitted data is valid, so process it process_form( ); } } else { // The form wasn't submitted, so display show_form( ); } function show_form($errors = '') { // If the form is submitted, get defaults from submitted parameters if ($_POST['_submit_check']) { $defaults = $_POST; } else { // Otherwise, set our own defaults: price is $5
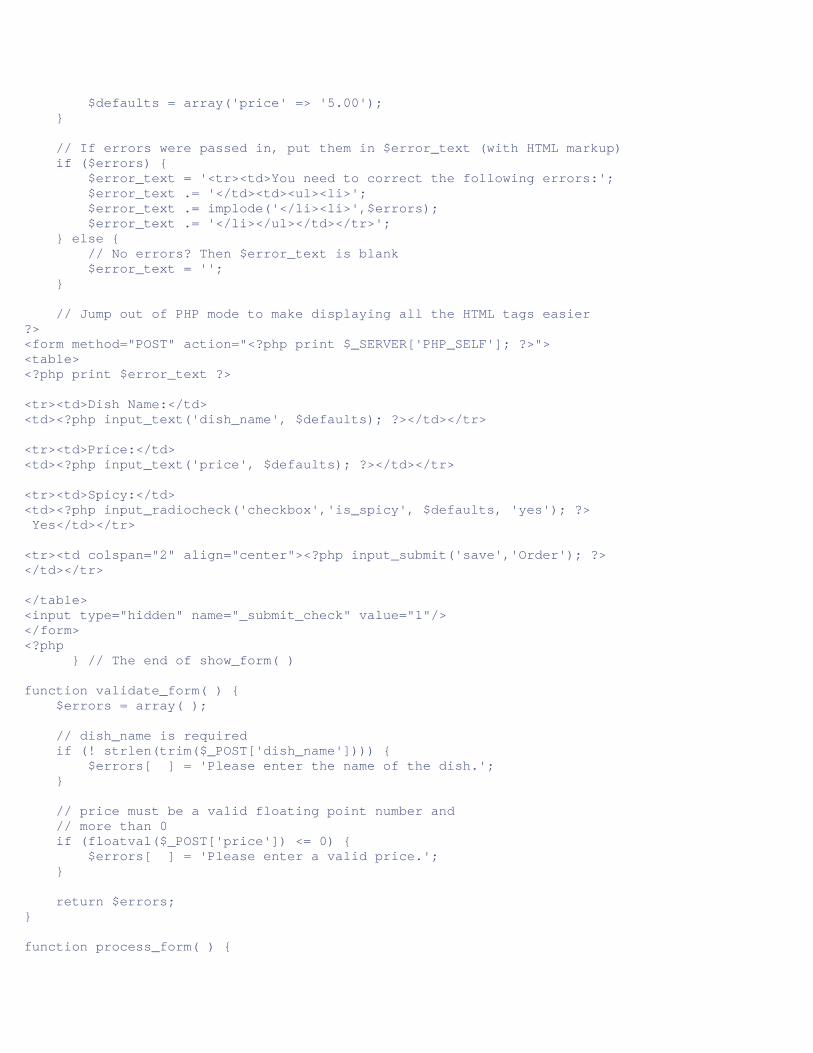
$defaults = array('price' => '5.00'); } // If errors were passed in, put them in $error_text (with HTML markup) if ($errors) { $error_text = '<tr><td>You need to correct the following errors:'; $error_text .= '</td><td><ul><li>'; $error_text .= implode('</li><li>',$errors); $error_text .= '</li></ul></td></tr>'; } else { // No errors? Then $error_text is blank $error_text = ''; } // Jump out of PHP mode to make displaying all the HTML tags easier ?> <form method="POST" action="<?php print $_SERVER['PHP_SELF']; ?>"> <table> <?php print $error_text ?> <tr><td>Dish Name:</td> <td><?php input_text('dish_name', $defaults); ?></td></tr> <tr><td>Price:</td> <td><?php input_text('price', $defaults); ?></td></tr> <tr><td>Spicy:</td> <td><?php input_radiocheck('checkbox','is_spicy', $defaults, 'yes'); ?> Yes</td></tr> <tr><td colspan="2" align="center"><?php input_submit('save','Order'); ?> </td></tr> </table> <input type="hidden" name="_submit_check" value="1"/> </form> <?php } // The end of show_form( ) function validate_form( ) { $errors = array( ); // dish_name is required if (! strlen(trim($_POST['dish_name']))) { $errors[ ] = 'Please enter the name of the dish.'; } // price must be a valid floating point number and // more than 0 if (floatval($_POST['price']) <= 0) { $errors[ ] = 'Please enter a valid price.'; } return $errors; } function process_form( ) {
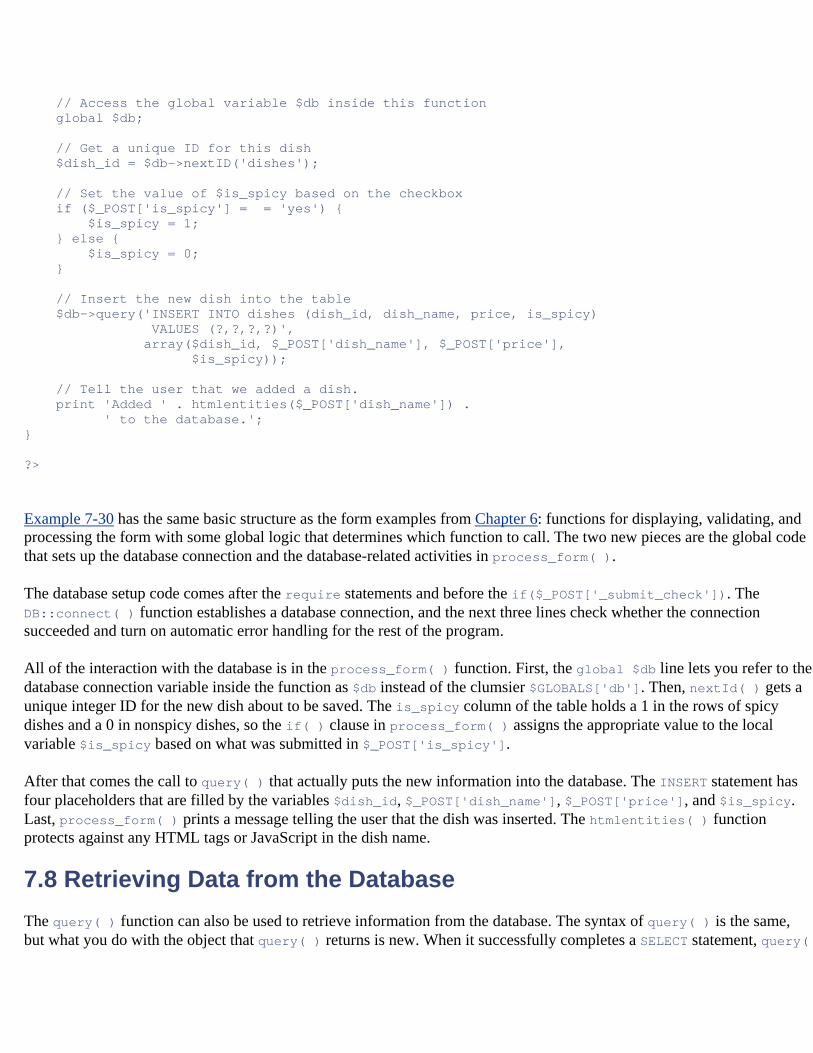
// Access the global variable $db inside this function global $db; // Get a unique ID for this dish $dish_id = $db->nextID('dishes'); // Set the value of $is_spicy based on the checkbox if ($_POST['is_spicy'] = = 'yes') { $is_spicy = 1; } else { $is_spicy = 0; } // Insert the new dish into the table $db->query('INSERT INTO dishes (dish_id, dish_name, price, is_spicy) VALUES (?,?,?,?)', array($dish_id, $_POST['dish_name'], $_POST['price'], $is_spicy)); // Tell the user that we added a dish. print 'Added ' . htmlentities($_POST['dish_name']) . ' to the database.'; } ?>
Example 7-30 has the same basic structure as the form examples from Chapter 6: functions for displaying, validating, and processing the form with some global logic that determines which function to call. The two new pieces are the global code that sets up the database connection and the database-related activities in process_form( ).
The database setup code comes after the require statements and before the if($_POST['_submit_check']). The DB::connect( ) function establishes a database connection, and the next three lines check whether the connection succeeded and turn on automatic error handling for the rest of the program.
All of the interaction with the database is in the process_form( ) function. First, the global $db line lets you refer to the database connection variable inside the function as $db instead of the clumsier $GLOBALS['db']. Then, nextId( ) gets a unique integer ID for the new dish about to be saved. The is_spicy column of the table holds a 1 in the rows of spicy dishes and a 0 in nonspicy dishes, so the if( ) clause in process_form( ) assigns the appropriate value to the local variable $is_spicy based on what was submitted in $_POST['is_spicy'].
After that comes the call to query( ) that actually puts the new information into the database. The INSERT statement has four placeholders that are filled by the variables $dish_id, $_POST['dish_name'], $_POST['price'], and $is_spicy. Last, process_form( ) prints a message telling the user that the dish was inserted. The htmlentities( ) function protects against any HTML tags or JavaScript in the dish name.
7.8 Retrieving Data from the Database The query( ) function can also be used to retrieve information from the database. The syntax of query( ) is the same, but what you do with the object that query( ) returns is new. When it successfully completes a SELECT statement, query(
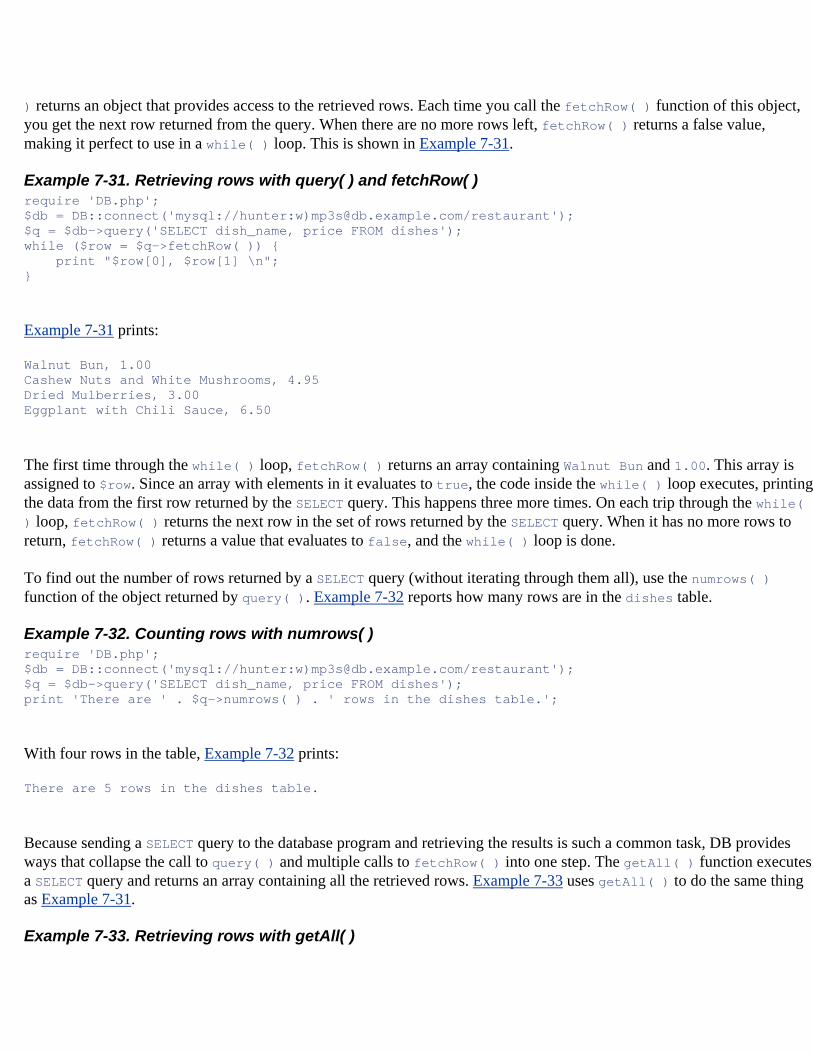
) returns an object that provides access to the retrieved rows. Each time you call the fetchRow( ) function of this object, you get the next row returned from the query. When there are no more rows left, fetchRow( ) returns a false value, making it perfect to use in a while( ) loop. This is shown in Example 7-31.
Example 7-31. Retrieving rows with query( ) and fetchRow( ) require 'DB.php'; $db = DB::connect('mysql://hunter:w)[email protected]/restaurant'); $q = $db->query('SELECT dish_name, price FROM dishes'); while ($row = $q->fetchRow( )) { print "$row[0], $row[1] \n"; }
Example 7-31 prints:
Walnut Bun, 1.00 Cashew Nuts and White Mushrooms, 4.95 Dried Mulberries, 3.00 Eggplant with Chili Sauce, 6.50
The first time through the while( ) loop, fetchRow( ) returns an array containing Walnut Bun and 1.00. This array is assigned to $row. Since an array with elements in it evaluates to true, the code inside the while( ) loop executes, printing the data from the first row returned by the SELECT query. This happens three more times. On each trip through the while( ) loop, fetchRow( ) returns the next row in the set of rows returned by the SELECT query. When it has no more rows to return, fetchRow( ) returns a value that evaluates to false, and the while( ) loop is done.
To find out the number of rows returned by a SELECT query (without iterating through them all), use the numrows( ) function of the object returned by query( ). Example 7-32 reports how many rows are in the dishes table.
Example 7-32. Counting rows with numrows( ) require 'DB.php'; $db = DB::connect('mysql://hunter:w)[email protected]/restaurant'); $q = $db->query('SELECT dish_name, price FROM dishes'); print 'There are ' . $q->numrows( ) . ' rows in the dishes table.';
With four rows in the table, Example 7-32 prints:
There are 5 rows in the dishes table.
Because sending a SELECT query to the database program and retrieving the results is such a common task, DB provides ways that collapse the call to query( ) and multiple calls to fetchRow( ) into one step. The getAll( ) function executes a SELECT query and returns an array containing all the retrieved rows. Example 7-33 uses getAll( ) to do the same thing as Example 7-31.
Example 7-33. Retrieving rows with getAll( )
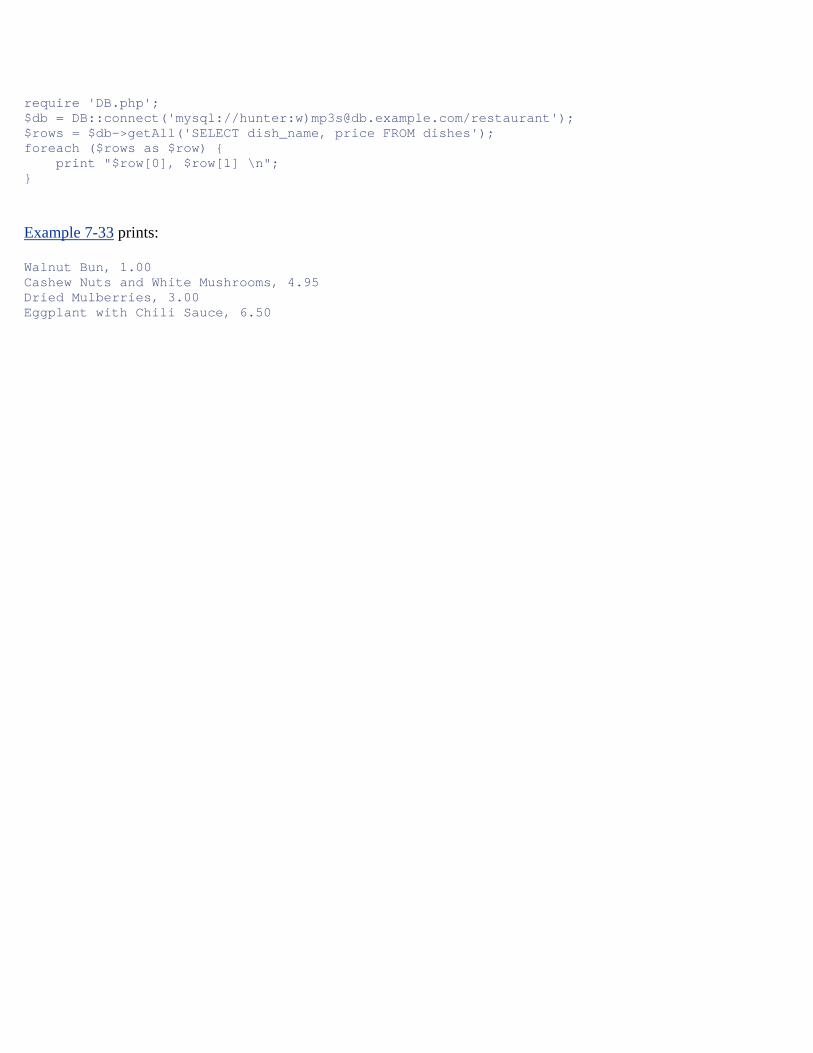
require 'DB.php'; $db = DB::connect('mysql://hunter:w)[email protected]/restaurant'); $rows = $db->getAll('SELECT dish_name, price FROM dishes'); foreach ($rows as $row) { print "$row[0], $row[1] \n"; }
Example 7-33 prints:
Walnut Bun, 1.00 Cashew Nuts and White Mushrooms, 4.95 Dried Mulberries, 3.00 Eggplant with Chili Sauce, 6.50
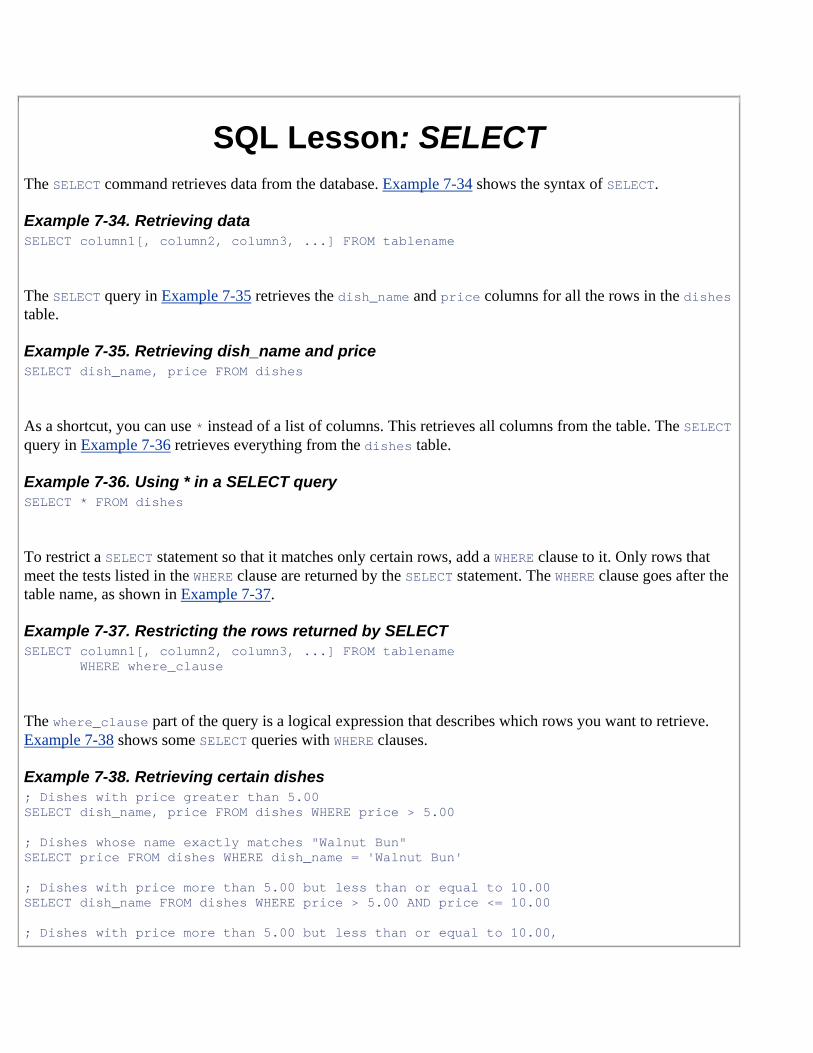
SQL Lesson: SELECT The SELECT command retrieves data from the database. Example 7-34 shows the syntax of SELECT.
Example 7-34. Retrieving data SELECT column1[, column2, column3, ...] FROM tablename
The SELECT query in Example 7-35 retrieves the dish_name and price columns for all the rows in the dishes table.
Example 7-35. Retrieving dish_name and price SELECT dish_name, price FROM dishes
As a shortcut, you can use * instead of a list of columns. This retrieves all columns from the table. The SELECT query in Example 7-36 retrieves everything from the dishes table.
Example 7-36. Using * in a SELECT query SELECT * FROM dishes
To restrict a SELECT statement so that it matches only certain rows, add a WHERE clause to it. Only rows that meet the tests listed in the WHERE clause are returned by the SELECT statement. The WHERE clause goes after the table name, as shown in Example 7-37.
Example 7-37. Restricting the rows returned by SELECT SELECT column1[, column2, column3, ...] FROM tablename WHERE where_clause
The where_clause part of the query is a logical expression that describes which rows you want to retrieve. Example 7-38 shows some SELECT queries with WHERE clauses.
Example 7-38. Retrieving certain dishes ; Dishes with price greater than 5.00 SELECT dish_name, price FROM dishes WHERE price > 5.00 ; Dishes whose name exactly matches "Walnut Bun" SELECT price FROM dishes WHERE dish_name = 'Walnut Bun' ; Dishes with price more than 5.00 but less than or equal to 10.00 SELECT dish_name FROM dishes WHERE price > 5.00 AND price <= 10.00 ; Dishes with price more than 5.00 but less than or equal to 10.00,
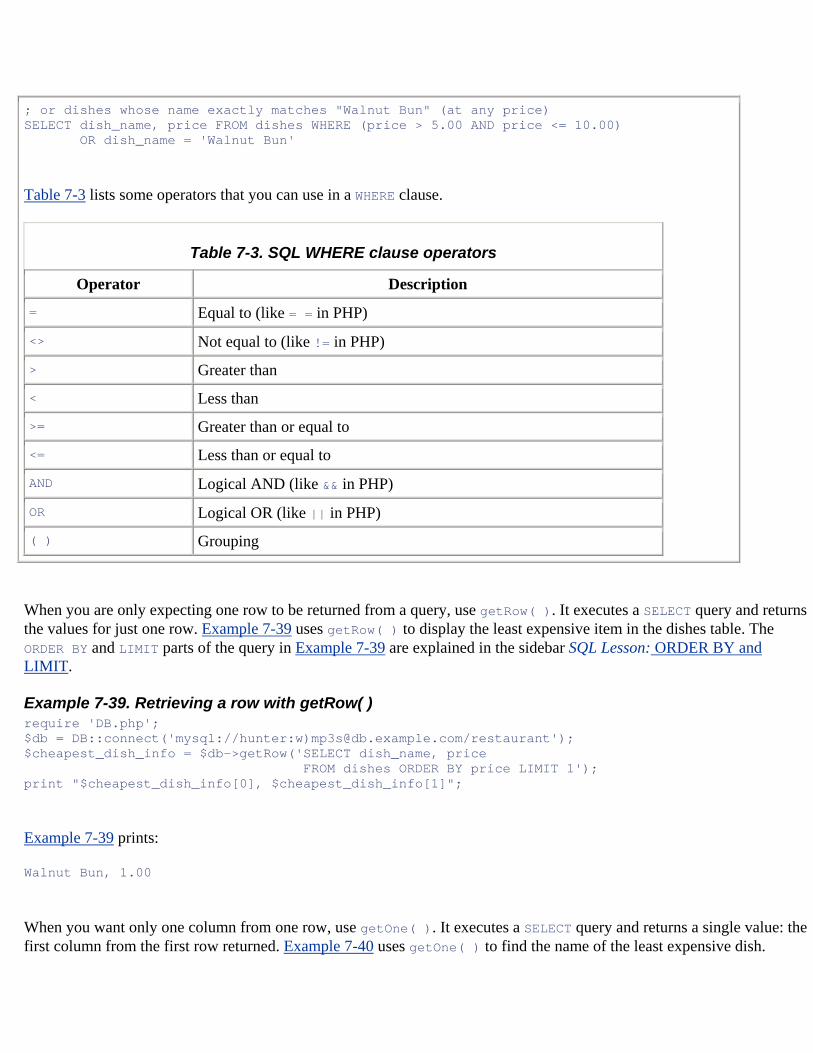
; or dishes whose name exactly matches "Walnut Bun" (at any price) SELECT dish_name, price FROM dishes WHERE (price > 5.00 AND price <= 10.00) OR dish_name = 'Walnut Bun'
Table 7-3 lists some operators that you can use in a WHERE clause.
Table 7-3. SQL WHERE clause operators
Operator Description
= Equal to (like = = in PHP)
<> Not equal to (like != in PHP)
> Greater than
< Less than
>= Greater than or equal to
<= Less than or equal to
AND Logical AND (like && in PHP)
OR Logical OR (like || in PHP)
( ) Grouping
When you are only expecting one row to be returned from a query, use getRow( ). It executes a SELECT query and returns the values for just one row. Example 7-39 uses getRow( ) to display the least expensive item in the dishes table. The ORDER BY and LIMIT parts of the query in Example 7-39 are explained in the sidebar SQL Lesson: ORDER BY and LIMIT.
Example 7-39. Retrieving a row with getRow( ) require 'DB.php'; $db = DB::connect('mysql://hunter:w)[email protected]/restaurant'); $cheapest_dish_info = $db->getRow('SELECT dish_name, price FROM dishes ORDER BY price LIMIT 1'); print "$cheapest_dish_info[0], $cheapest_dish_info[1]";
Example 7-39 prints:
Walnut Bun, 1.00
When you want only one column from one row, use getOne( ). It executes a SELECT query and returns a single value: the first column from the first row returned. Example 7-40 uses getOne( ) to find the name of the least expensive dish.
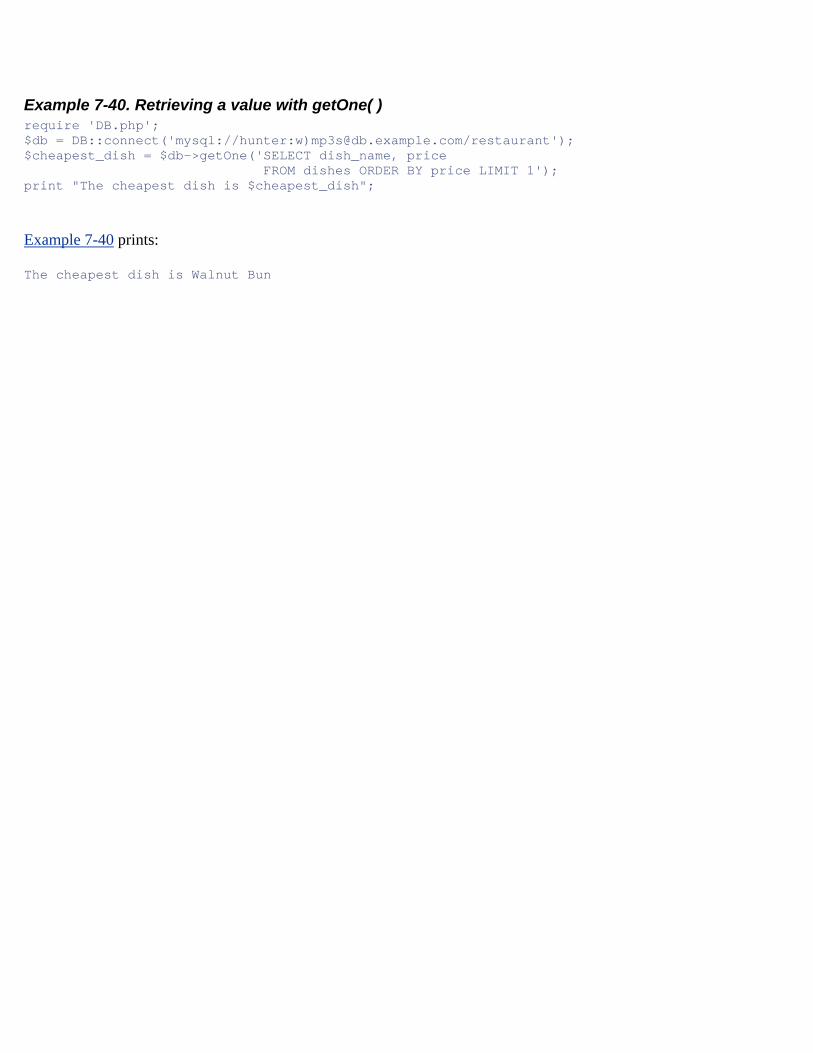
Example 7-40. Retrieving a value with getOne( ) require 'DB.php'; $db = DB::connect('mysql://hunter:w)[email protected]/restaurant'); $cheapest_dish = $db->getOne('SELECT dish_name, price FROM dishes ORDER BY price LIMIT 1'); print "The cheapest dish is $cheapest_dish";
Example 7-40 prints:
The cheapest dish is Walnut Bun
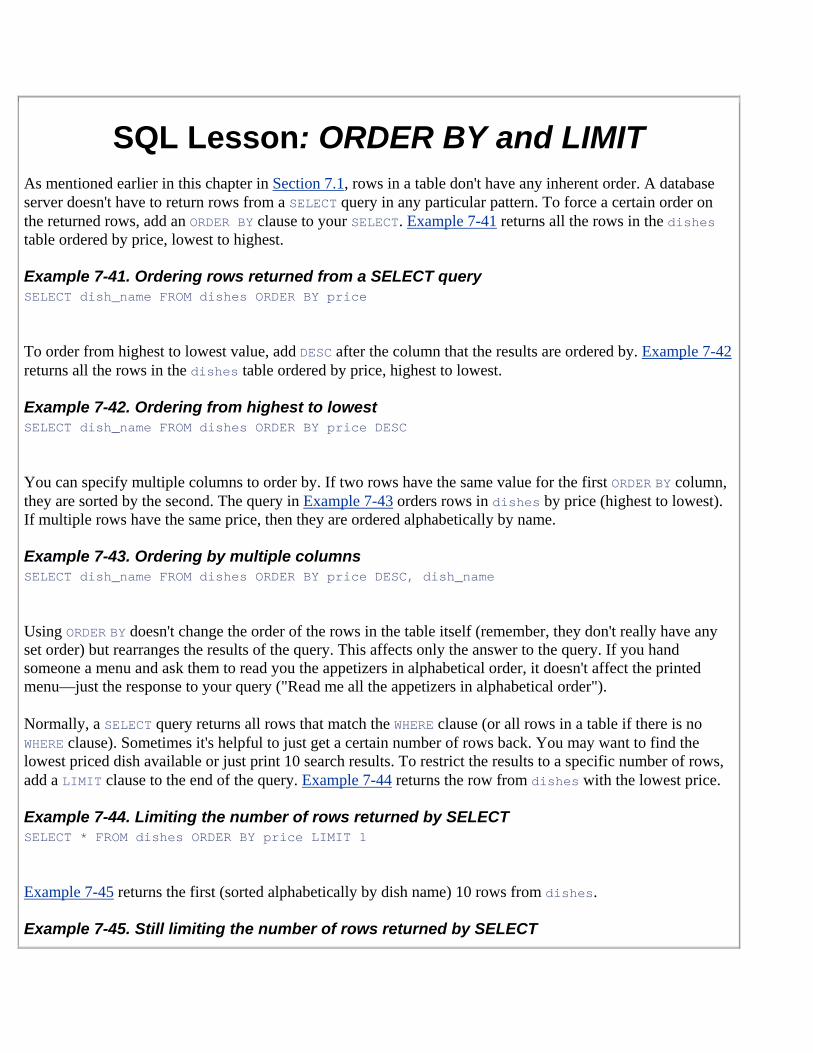
SQL Lesson: ORDER BY and LIMIT As mentioned earlier in this chapter in Section 7.1, rows in a table don't have any inherent order. A database server doesn't have to return rows from a SELECT query in any particular pattern. To force a certain order on the returned rows, add an ORDER BY clause to your SELECT. Example 7-41 returns all the rows in the dishes table ordered by price, lowest to highest.
Example 7-41. Ordering rows returned from a SELECT query SELECT dish_name FROM dishes ORDER BY price
To order from highest to lowest value, add DESC after the column that the results are ordered by. Example 7-42 returns all the rows in the dishes table ordered by price, highest to lowest.
Example 7-42. Ordering from highest to lowest SELECT dish_name FROM dishes ORDER BY price DESC
You can specify multiple columns to order by. If two rows have the same value for the first ORDER BY column, they are sorted by the second. The query in Example 7-43 orders rows in dishes by price (highest to lowest). If multiple rows have the same price, then they are ordered alphabetically by name.
Example 7-43. Ordering by multiple columns SELECT dish_name FROM dishes ORDER BY price DESC, dish_name
Using ORDER BY doesn't change the order of the rows in the table itself (remember, they don't really have any set order) but rearranges the results of the query. This affects only the answer to the query. If you hand someone a menu and ask them to read you the appetizers in alphabetical order, it doesn't affect the printed menu—just the response to your query ("Read me all the appetizers in alphabetical order").
Normally, a SELECT query returns all rows that match the WHERE clause (or all rows in a table if there is no WHERE clause). Sometimes it's helpful to just get a certain number of rows back. You may want to find the lowest priced dish available or just print 10 search results. To restrict the results to a specific number of rows, add a LIMIT clause to the end of the query. Example 7-44 returns the row from dishes with the lowest price.
Example 7-44. Limiting the number of rows returned by SELECT SELECT * FROM dishes ORDER BY price LIMIT 1
Example 7-45 returns the first (sorted alphabetically by dish name) 10 rows from dishes.
Example 7-45. Still limiting the number of rows returned by SELECT
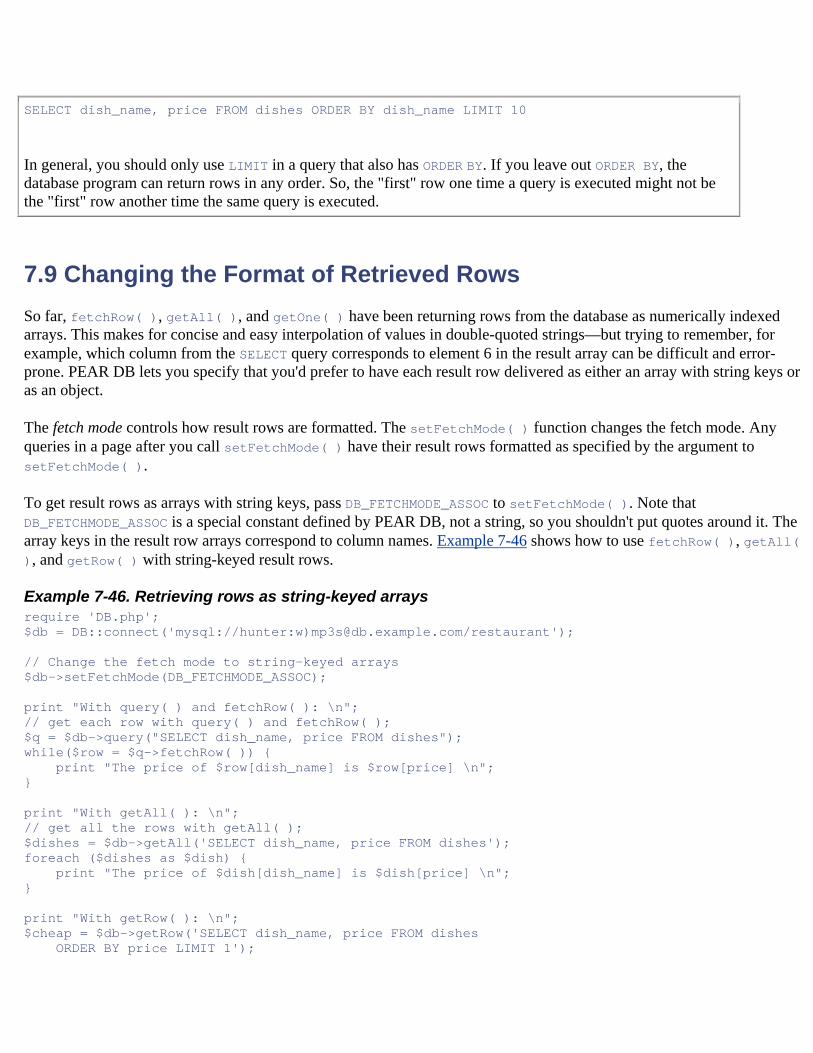
SELECT dish_name, price FROM dishes ORDER BY dish_name LIMIT 10
In general, you should only use LIMIT in a query that also has ORDER BY. If you leave out ORDER BY, the database program can return rows in any order. So, the "first" row one time a query is executed might not be the "first" row another time the same query is executed.
7.9 Changing the Format of Retrieved Rows So far, fetchRow( ), getAll( ), and getOne( ) have been returning rows from the database as numerically indexed arrays. This makes for concise and easy interpolation of values in double-quoted strings—but trying to remember, for example, which column from the SELECT query corresponds to element 6 in the result array can be difficult and error-prone. PEAR DB lets you specify that you'd prefer to have each result row delivered as either an array with string keys or as an object.
The fetch mode controls how result rows are formatted. The setFetchMode( ) function changes the fetch mode. Any queries in a page after you call setFetchMode( ) have their result rows formatted as specified by the argument to setFetchMode( ).
To get result rows as arrays with string keys, pass DB_FETCHMODE_ASSOC to setFetchMode( ). Note that DB_FETCHMODE_ASSOC is a special constant defined by PEAR DB, not a string, so you shouldn't put quotes around it. The array keys in the result row arrays correspond to column names. Example 7-46 shows how to use fetchRow( ), getAll( ), and getRow( ) with string-keyed result rows.
Example 7-46. Retrieving rows as string-keyed arrays require 'DB.php'; $db = DB::connect('mysql://hunter:w)[email protected]/restaurant'); // Change the fetch mode to string-keyed arrays $db->setFetchMode(DB_FETCHMODE_ASSOC); print "With query( ) and fetchRow( ): \n"; // get each row with query( ) and fetchRow( ); $q = $db->query("SELECT dish_name, price FROM dishes"); while($row = $q->fetchRow( )) { print "The price of $row[dish_name] is $row[price] \n"; } print "With getAll( ): \n"; // get all the rows with getAll( ); $dishes = $db->getAll('SELECT dish_name, price FROM dishes'); foreach ($dishes as $dish) { print "The price of $dish[dish_name] is $dish[price] \n"; } print "With getRow( ): \n"; $cheap = $db->getRow('SELECT dish_name, price FROM dishes ORDER BY price LIMIT 1');
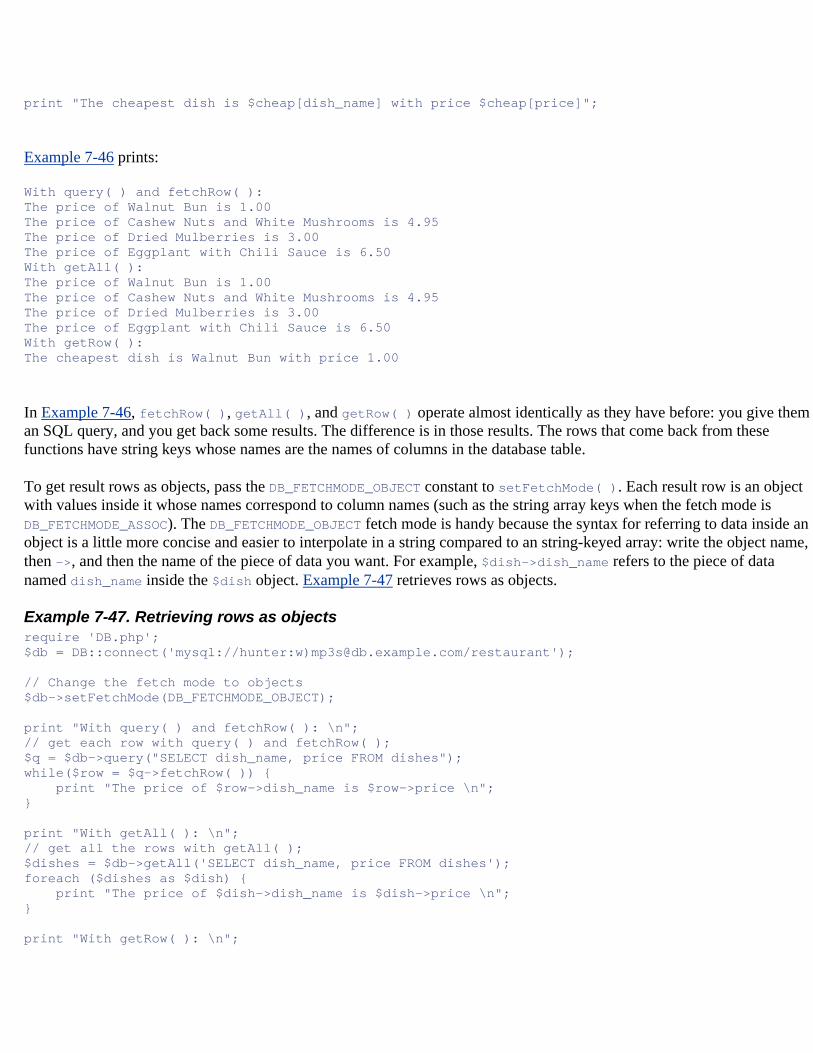
print "The cheapest dish is $cheap[dish_name] with price $cheap[price]";
Example 7-46 prints:
With query( ) and fetchRow( ): The price of Walnut Bun is 1.00 The price of Cashew Nuts and White Mushrooms is 4.95 The price of Dried Mulberries is 3.00 The price of Eggplant with Chili Sauce is 6.50 With getAll( ): The price of Walnut Bun is 1.00 The price of Cashew Nuts and White Mushrooms is 4.95 The price of Dried Mulberries is 3.00 The price of Eggplant with Chili Sauce is 6.50 With getRow( ): The cheapest dish is Walnut Bun with price 1.00
In Example 7-46, fetchRow( ), getAll( ), and getRow( ) operate almost identically as they have before: you give them an SQL query, and you get back some results. The difference is in those results. The rows that come back from these functions have string keys whose names are the names of columns in the database table.
To get result rows as objects, pass the DB_FETCHMODE_OBJECT constant to setFetchMode( ). Each result row is an object with values inside it whose names correspond to column names (such as the string array keys when the fetch mode is DB_FETCHMODE_ASSOC). The DB_FETCHMODE_OBJECT fetch mode is handy because the syntax for referring to data inside an object is a little more concise and easier to interpolate in a string compared to an string-keyed array: write the object name, then ->, and then the name of the piece of data you want. For example, $dish->dish_name refers to the piece of data named dish_name inside the $dish object. Example 7-47 retrieves rows as objects.
Example 7-47. Retrieving rows as objects require 'DB.php'; $db = DB::connect('mysql://hunter:w)[email protected]/restaurant'); // Change the fetch mode to objects $db->setFetchMode(DB_FETCHMODE_OBJECT); print "With query( ) and fetchRow( ): \n"; // get each row with query( ) and fetchRow( ); $q = $db->query("SELECT dish_name, price FROM dishes"); while($row = $q->fetchRow( )) { print "The price of $row->dish_name is $row->price \n"; } print "With getAll( ): \n"; // get all the rows with getAll( ); $dishes = $db->getAll('SELECT dish_name, price FROM dishes'); foreach ($dishes as $dish) { print "The price of $dish->dish_name is $dish->price \n"; } print "With getRow( ): \n";
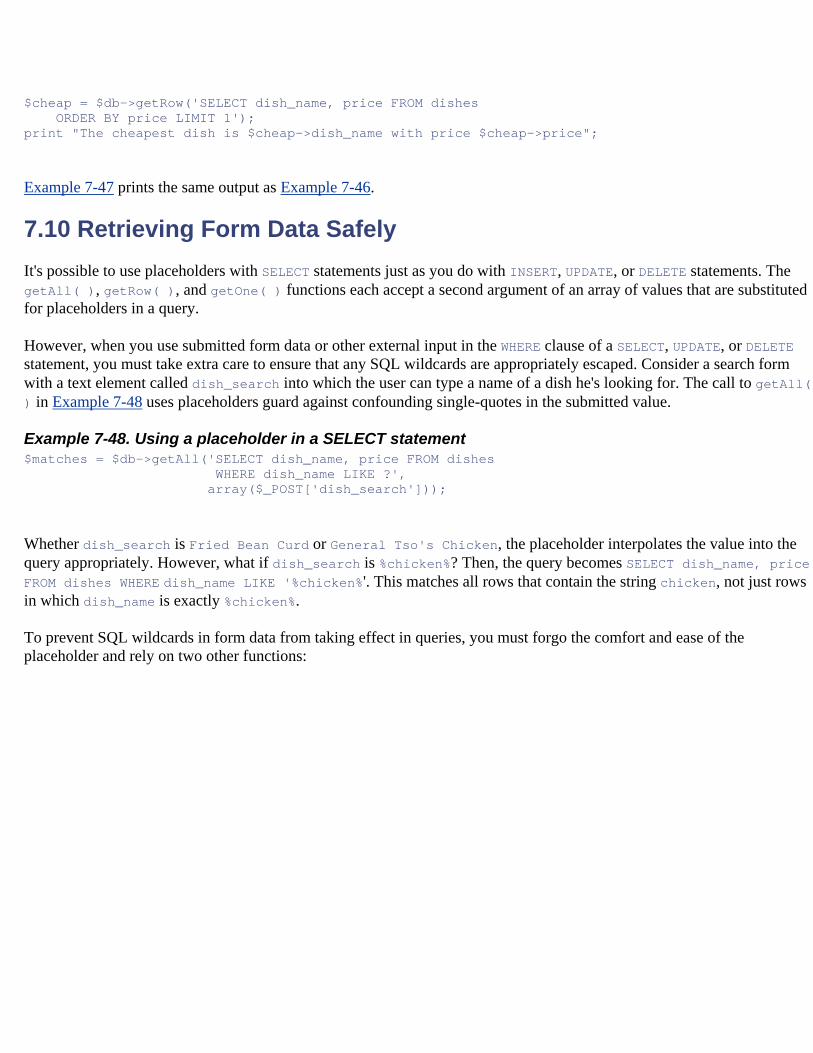
$cheap = $db->getRow('SELECT dish_name, price FROM dishes ORDER BY price LIMIT 1'); print "The cheapest dish is $cheap->dish_name with price $cheap->price";
Example 7-47 prints the same output as Example 7-46.
7.10 Retrieving Form Data Safely It's possible to use placeholders with SELECT statements just as you do with INSERT, UPDATE, or DELETE statements. The getAll( ), getRow( ), and getOne( ) functions each accept a second argument of an array of values that are substituted for placeholders in a query.
However, when you use submitted form data or other external input in the WHERE clause of a SELECT, UPDATE, or DELETE statement, you must take extra care to ensure that any SQL wildcards are appropriately escaped. Consider a search form with a text element called dish_search into which the user can type a name of a dish he's looking for. The call to getAll( ) in Example 7-48 uses placeholders guard against confounding single-quotes in the submitted value.
Example 7-48. Using a placeholder in a SELECT statement $matches = $db->getAll('SELECT dish_name, price FROM dishes WHERE dish_name LIKE ?', array($_POST['dish_search']));
Whether dish_search is Fried Bean Curd or General Tso's Chicken, the placeholder interpolates the value into the query appropriately. However, what if dish_search is %chicken%? Then, the query becomes SELECT dish_name, price FROM dishes WHERE dish_name LIKE '%chicken%'. This matches all rows that contain the string chicken, not just rows in which dish_name is exactly %chicken%.
To prevent SQL wildcards in form data from taking effect in queries, you must forgo the comfort and ease of the placeholder and rely on two other functions:
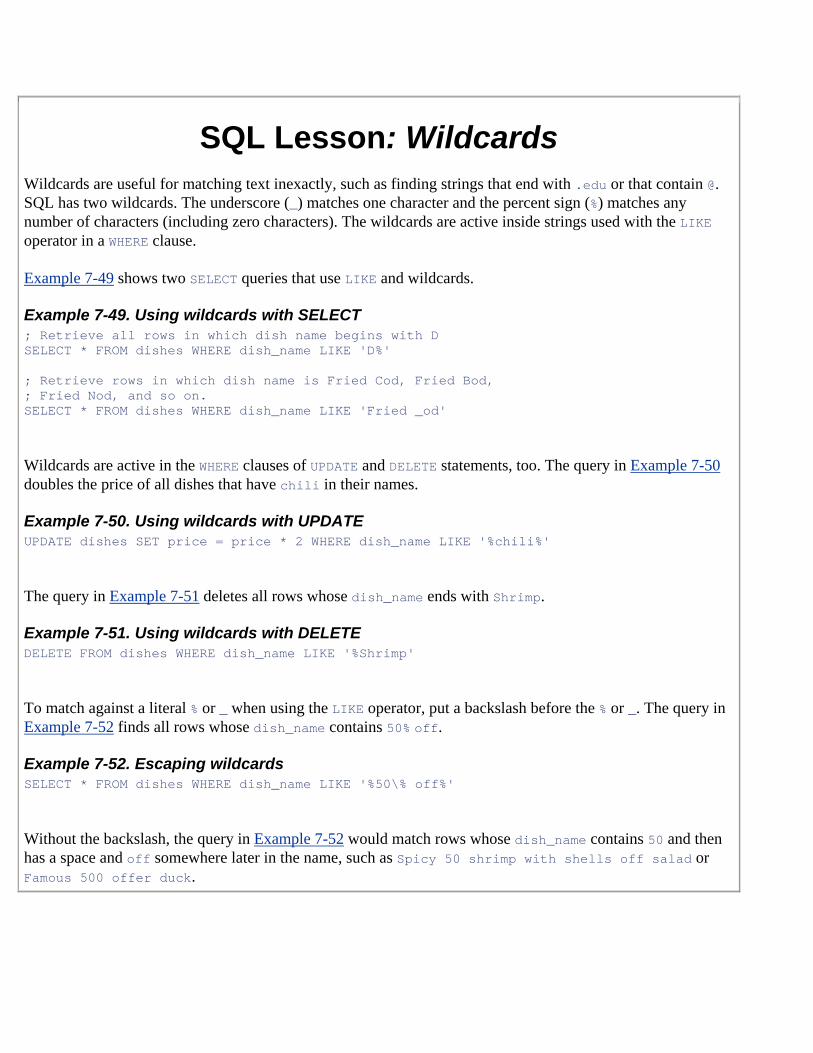
SQL Lesson: Wildcards Wildcards are useful for matching text inexactly, such as finding strings that end with .edu or that contain @. SQL has two wildcards. The underscore (_) matches one character and the percent sign (%) matches any number of characters (including zero characters). The wildcards are active inside strings used with the LIKE operator in a WHERE clause.
Example 7-49 shows two SELECT queries that use LIKE and wildcards.
Example 7-49. Using wildcards with SELECT ; Retrieve all rows in which dish name begins with D SELECT * FROM dishes WHERE dish_name LIKE 'D%' ; Retrieve rows in which dish name is Fried Cod, Fried Bod, ; Fried Nod, and so on. SELECT * FROM dishes WHERE dish_name LIKE 'Fried _od'
Wildcards are active in the WHERE clauses of UPDATE and DELETE statements, too. The query in Example 7-50 doubles the price of all dishes that have chili in their names.
Example 7-50. Using wildcards with UPDATE UPDATE dishes SET price = price * 2 WHERE dish_name LIKE '%chili%'
The query in Example 7-51 deletes all rows whose dish_name ends with Shrimp.
Example 7-51. Using wildcards with DELETE DELETE FROM dishes WHERE dish_name LIKE '%Shrimp'
To match against a literal % or _ when using the LIKE operator, put a backslash before the % or _. The query in Example 7-52 finds all rows whose dish_name contains 50% off.
Example 7-52. Escaping wildcards SELECT * FROM dishes WHERE dish_name LIKE '%50\% off%'
Without the backslash, the query in Example 7-52 would match rows whose dish_name contains 50 and then has a space and off somewhere later in the name, such as Spicy 50 shrimp with shells off salad or Famous 500 offer duck.
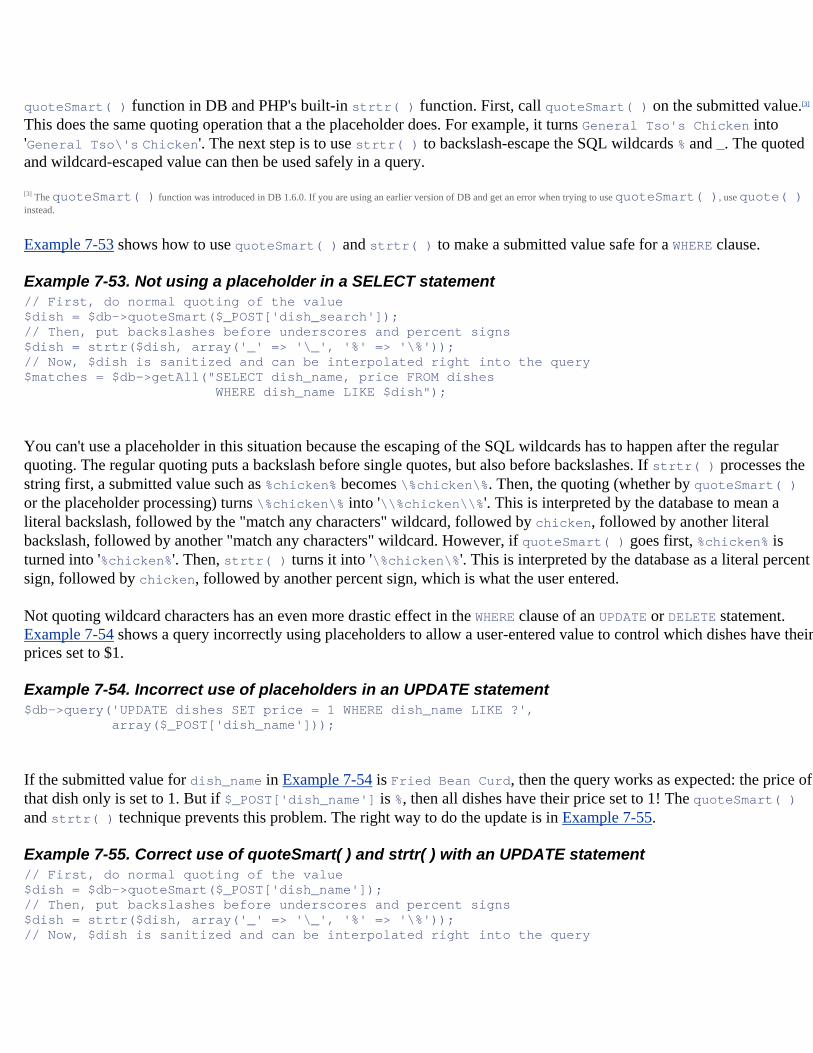
quoteSmart( ) function in DB and PHP's built-in strtr( ) function. First, call quoteSmart( ) on the submitted value.[3] This does the same quoting operation that a the placeholder does. For example, it turns General Tso's Chicken into 'General Tso\'s Chicken'. The next step is to use strtr( ) to backslash-escape the SQL wildcards % and _. The quoted and wildcard-escaped value can then be used safely in a query.
[3] The quoteSmart( ) function was introduced in DB 1.6.0. If you are using an earlier version of DB and get an error when trying to use quoteSmart( ), use quote( ) instead.
Example 7-53 shows how to use quoteSmart( ) and strtr( ) to make a submitted value safe for a WHERE clause.
Example 7-53. Not using a placeholder in a SELECT statement // First, do normal quoting of the value $dish = $db->quoteSmart($_POST['dish_search']); // Then, put backslashes before underscores and percent signs $dish = strtr($dish, array('_' => '\_', '%' => '\%')); // Now, $dish is sanitized and can be interpolated right into the query $matches = $db->getAll("SELECT dish_name, price FROM dishes WHERE dish_name LIKE $dish");
You can't use a placeholder in this situation because the escaping of the SQL wildcards has to happen after the regular quoting. The regular quoting puts a backslash before single quotes, but also before backslashes. If strtr( ) processes the string first, a submitted value such as %chicken% becomes \%chicken\%. Then, the quoting (whether by quoteSmart( ) or the placeholder processing) turns \%chicken\% into '\\%chicken\\%'. This is interpreted by the database to mean a literal backslash, followed by the "match any characters" wildcard, followed by chicken, followed by another literal backslash, followed by another "match any characters" wildcard. However, if quoteSmart( ) goes first, %chicken% is turned into '%chicken%'. Then, strtr( ) turns it into '\%chicken\%'. This is interpreted by the database as a literal percent sign, followed by chicken, followed by another percent sign, which is what the user entered.
Not quoting wildcard characters has an even more drastic effect in the WHERE clause of an UPDATE or DELETE statement. Example 7-54 shows a query incorrectly using placeholders to allow a user-entered value to control which dishes have their prices set to $1.
Example 7-54. Incorrect use of placeholders in an UPDATE statement $db->query('UPDATE dishes SET price = 1 WHERE dish_name LIKE ?', array($_POST['dish_name']));
If the submitted value for dish_name in Example 7-54 is Fried Bean Curd, then the query works as expected: the price of that dish only is set to 1. But if $_POST['dish_name'] is %, then all dishes have their price set to 1! The quoteSmart( ) and strtr( ) technique prevents this problem. The right way to do the update is in Example 7-55.
Example 7-55. Correct use of quoteSmart( ) and strtr( ) with an UPDATE statement // First, do normal quoting of the value $dish = $db->quoteSmart($_POST['dish_name']); // Then, put backslashes before underscores and percent signs $dish = strtr($dish, array('_' => '\_', '%' => '\%')); // Now, $dish is sanitized and can be interpolated right into the query
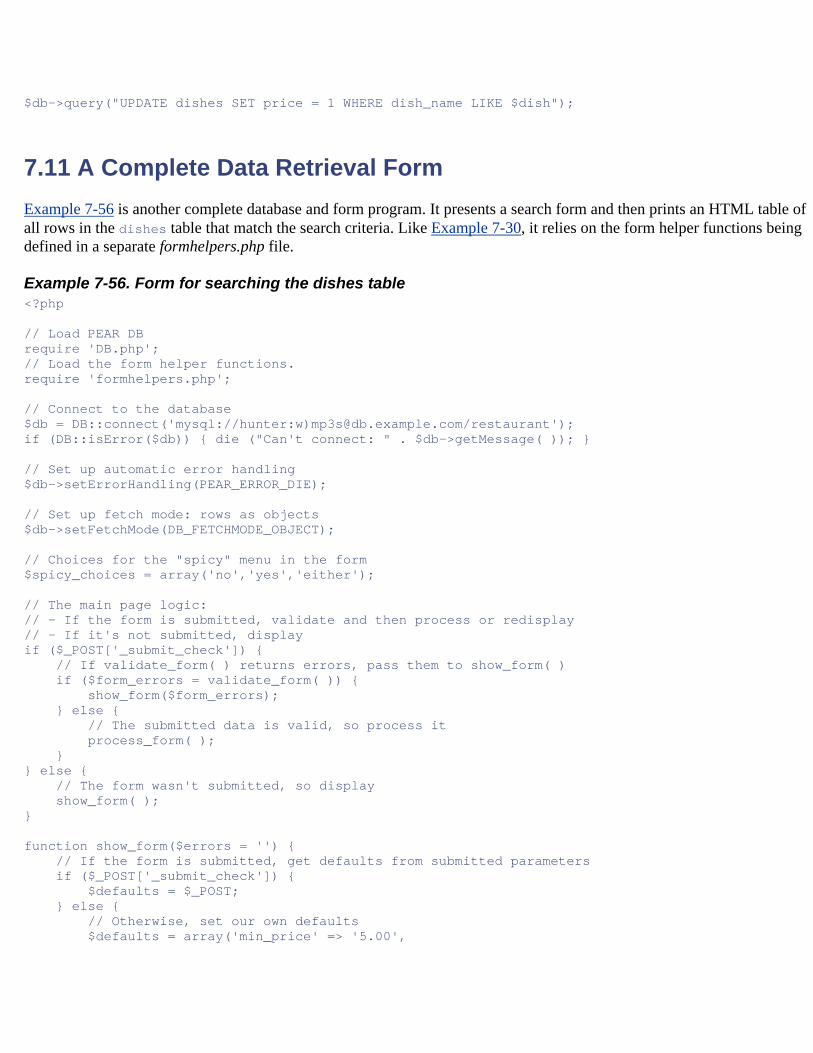
$db->query("UPDATE dishes SET price = 1 WHERE dish_name LIKE $dish");
7.11 A Complete Data Retrieval Form Example 7-56 is another complete database and form program. It presents a search form and then prints an HTML table of all rows in the dishes table that match the search criteria. Like Example 7-30, it relies on the form helper functions being defined in a separate formhelpers.php file.
Example 7-56. Form for searching the dishes table <?php // Load PEAR DB require 'DB.php'; // Load the form helper functions. require 'formhelpers.php'; // Connect to the database $db = DB::connect('mysql://hunter:w)[email protected]/restaurant'); if (DB::isError($db)) { die ("Can't connect: " . $db->getMessage( )); } // Set up automatic error handling $db->setErrorHandling(PEAR_ERROR_DIE); // Set up fetch mode: rows as objects $db->setFetchMode(DB_FETCHMODE_OBJECT); // Choices for the "spicy" menu in the form $spicy_choices = array('no','yes','either'); // The main page logic: // - If the form is submitted, validate and then process or redisplay // - If it's not submitted, display if ($_POST['_submit_check']) { // If validate_form( ) returns errors, pass them to show_form( ) if ($form_errors = validate_form( )) { show_form($form_errors); } else { // The submitted data is valid, so process it process_form( ); } } else { // The form wasn't submitted, so display show_form( ); } function show_form($errors = '') { // If the form is submitted, get defaults from submitted parameters if ($_POST['_submit_check']) { $defaults = $_POST; } else { // Otherwise, set our own defaults $defaults = array('min_price' => '5.00',
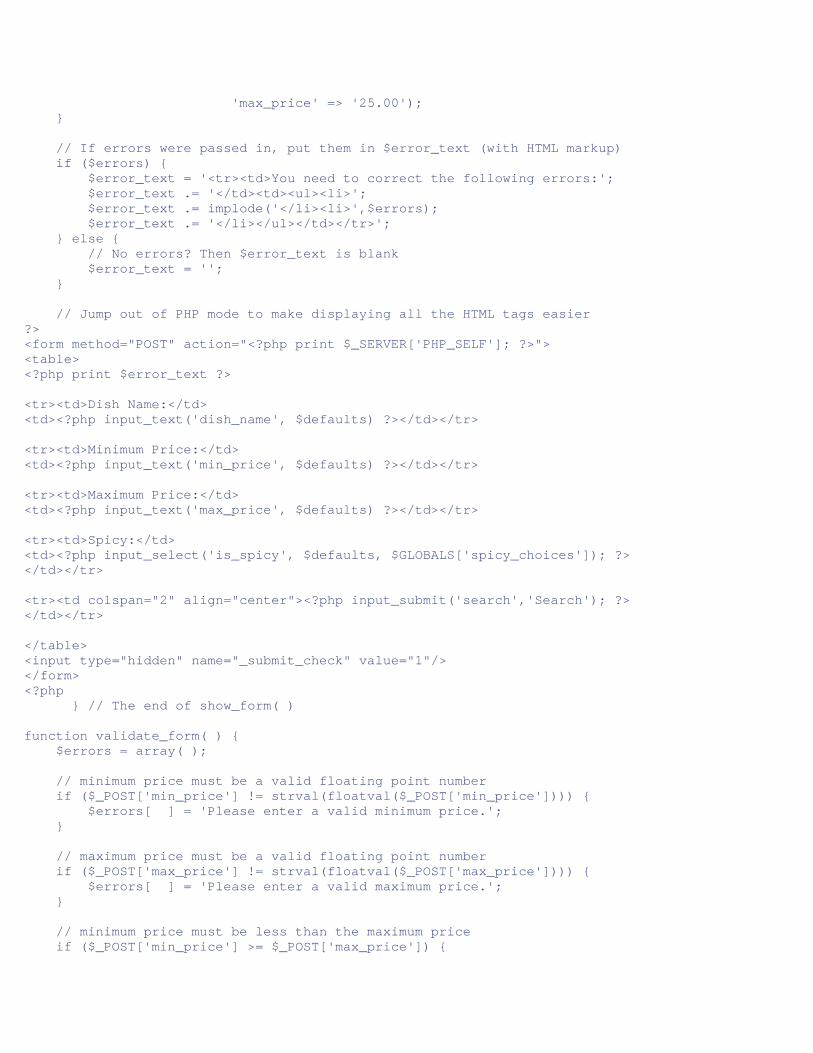
'max_price' => '25.00'); } // If errors were passed in, put them in $error_text (with HTML markup) if ($errors) { $error_text = '<tr><td>You need to correct the following errors:'; $error_text .= '</td><td><ul><li>'; $error_text .= implode('</li><li>',$errors); $error_text .= '</li></ul></td></tr>'; } else { // No errors? Then $error_text is blank $error_text = ''; } // Jump out of PHP mode to make displaying all the HTML tags easier ?> <form method="POST" action="<?php print $_SERVER['PHP_SELF']; ?>"> <table> <?php print $error_text ?> <tr><td>Dish Name:</td> <td><?php input_text('dish_name', $defaults) ?></td></tr> <tr><td>Minimum Price:</td> <td><?php input_text('min_price', $defaults) ?></td></tr> <tr><td>Maximum Price:</td> <td><?php input_text('max_price', $defaults) ?></td></tr> <tr><td>Spicy:</td> <td><?php input_select('is_spicy', $defaults, $GLOBALS['spicy_choices']); ?> </td></tr> <tr><td colspan="2" align="center"><?php input_submit('search','Search'); ?> </td></tr> </table> <input type="hidden" name="_submit_check" value="1"/> </form> <?php } // The end of show_form( ) function validate_form( ) { $errors = array( ); // minimum price must be a valid floating point number if ($_POST['min_price'] != strval(floatval($_POST['min_price']))) { $errors[ ] = 'Please enter a valid minimum price.'; } // maximum price must be a valid floating point number if ($_POST['max_price'] != strval(floatval($_POST['max_price']))) { $errors[ ] = 'Please enter a valid maximum price.'; } // minimum price must be less than the maximum price if ($_POST['min_price'] >= $_POST['max_price']) {
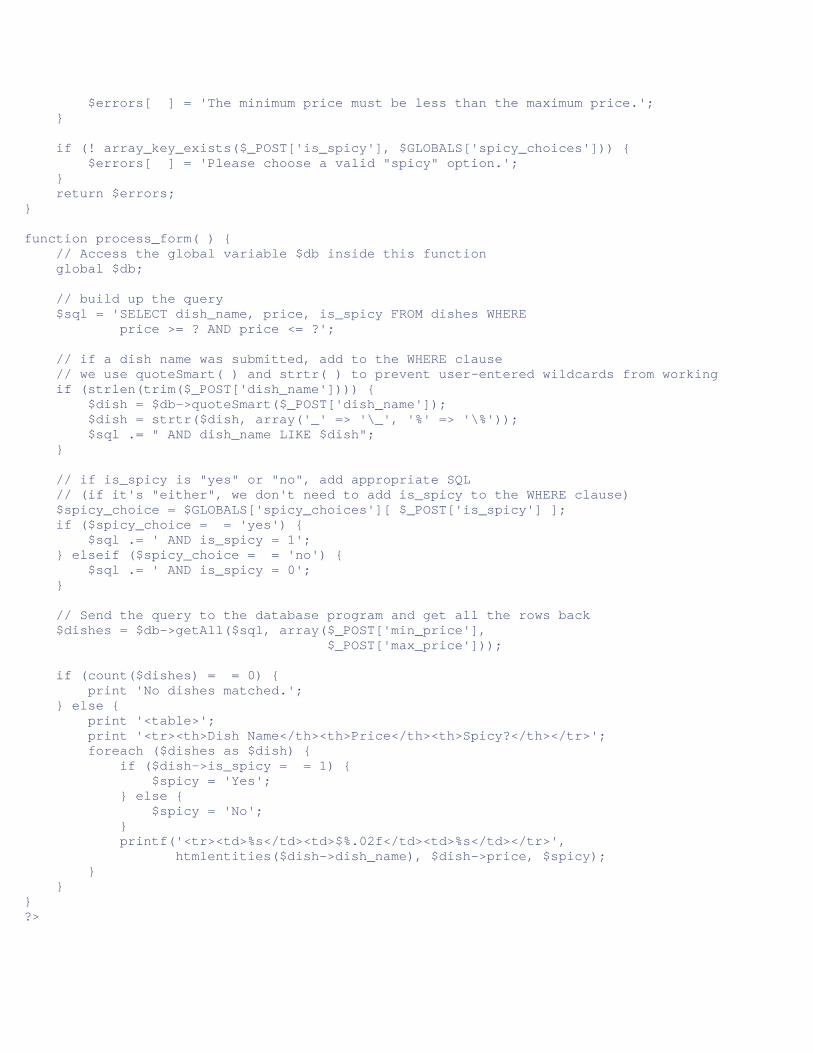
$errors[ ] = 'The minimum price must be less than the maximum price.'; } if (! array_key_exists($_POST['is_spicy'], $GLOBALS['spicy_choices'])) { $errors[ ] = 'Please choose a valid "spicy" option.'; } return $errors; } function process_form( ) { // Access the global variable $db inside this function global $db; // build up the query $sql = 'SELECT dish_name, price, is_spicy FROM dishes WHERE price >= ? AND price <= ?'; // if a dish name was submitted, add to the WHERE clause // we use quoteSmart( ) and strtr( ) to prevent user-entered wildcards from working if (strlen(trim($_POST['dish_name']))) { $dish = $db->quoteSmart($_POST['dish_name']); $dish = strtr($dish, array('_' => '\_', '%' => '\%')); $sql .= " AND dish_name LIKE $dish"; } // if is_spicy is "yes" or "no", add appropriate SQL // (if it's "either", we don't need to add is_spicy to the WHERE clause) $spicy_choice = $GLOBALS['spicy_choices'][ $_POST['is_spicy'] ]; if ($spicy_choice = = 'yes') { $sql .= ' AND is_spicy = 1'; } elseif ($spicy_choice = = 'no') { $sql .= ' AND is_spicy = 0'; } // Send the query to the database program and get all the rows back $dishes = $db->getAll($sql, array($_POST['min_price'], $_POST['max_price'])); if (count($dishes) = = 0) { print 'No dishes matched.'; } else { print '<table>'; print '<tr><th>Dish Name</th><th>Price</th><th>Spicy?</th></tr>'; foreach ($dishes as $dish) { if ($dish->is_spicy = = 1) { $spicy = 'Yes'; } else { $spicy = 'No'; } printf('<tr><td>%s</td><td>$%.02f</td><td>%s</td></tr>', htmlentities($dish->dish_name), $dish->price, $spicy); } } } ?>
Example 7-56 is a lot like Example 7-30: the standard display/validate/process form structure with global code for database setup and database interaction inside process_form( ). There are a few differences, however.
Example 7-56 has an additional line in its database setup code: a call to setFetchMode( ). Since process_form( ) is going to retrieve information from the database, the fetch mode is important.
The process_form( ) function builds up a SELECT statement, sends it to the database with getAll( ), and prints the results in an HTML table. Up to four factors go into the WHERE clause of the SELECT statement. The first two are the minimum and maximum price. These are always in the query, so they get placeholders in $sql, the variable that holds the SQL statement.
Next comes the dish name. That's optional, but if it's submitted, it goes into the query. A placeholder isn't good enough for the dish_name column, though, because the submitted form data could contain SQL wildcards. Instead, quoteSmart( ) and strtr( ) prepare a sanitized version of the dish name, and it's added directly onto the WHERE clause.
The last possible column in the WHERE clause is is_spicy. If the submitted choice is yes, then AND is_spicy = 1 goes into the query so that only spicy dishes are retrieved. If the submitted choice is no, then AND is_spicy = 0 goes into the query so that only nonspicy dishes are found. If the submitted choice is either, then there's no need to have is_spicy in the query—rows should be picked regardless of their spiciness.
After the full query is constructed in $sql, it's sent to the database program with getAll( ). The second argument to getAll( ) is an array containing the minimum and maximum price values so that they can be substituted for the placeholders. The array of rows that getAll( ) returns is stored in $dishes.
The last step in process_form( ) is printing some results. If there's nothing in $dishes, No dishes matched is displayed. Otherwise, a foreach( ) loop iterates through dishes and prints out an HTML table row for each dish, using printf( ) to format the price properly and htmlentities( ) to encode any special characters in the dish name. An if( ) clause turns the database-friendly is_spicy values of 1 or 0 to the human-friendly values of Yes or No.
7.12 MySQL Without PEAR DB PEAR DB smooths over a lot of the rough edges of database access in a PHP program, but there are two reasons why it's not always the right choice: PEAR DB might not be available on some systems, and a program that uses the built-in PHP functions tailored to a particular database is faster than one that uses PEAR DB. Programmers who don't anticipate switching or using more than one database program often pick those built-in functions.
The basic model of database access with the built-in functions is the same as with PEAR DB. You call a function that connects to the database. It returns a variable that represents the connection. You use that connection variable with other functions to send queries to the database program and retrieve the results.
The differences are in the details. The applicable functions and how they work differ from database to database. In general, you have to retrieve results one row at a time instead of the convenience that getAll( ) offers, and there is no unified error handling.
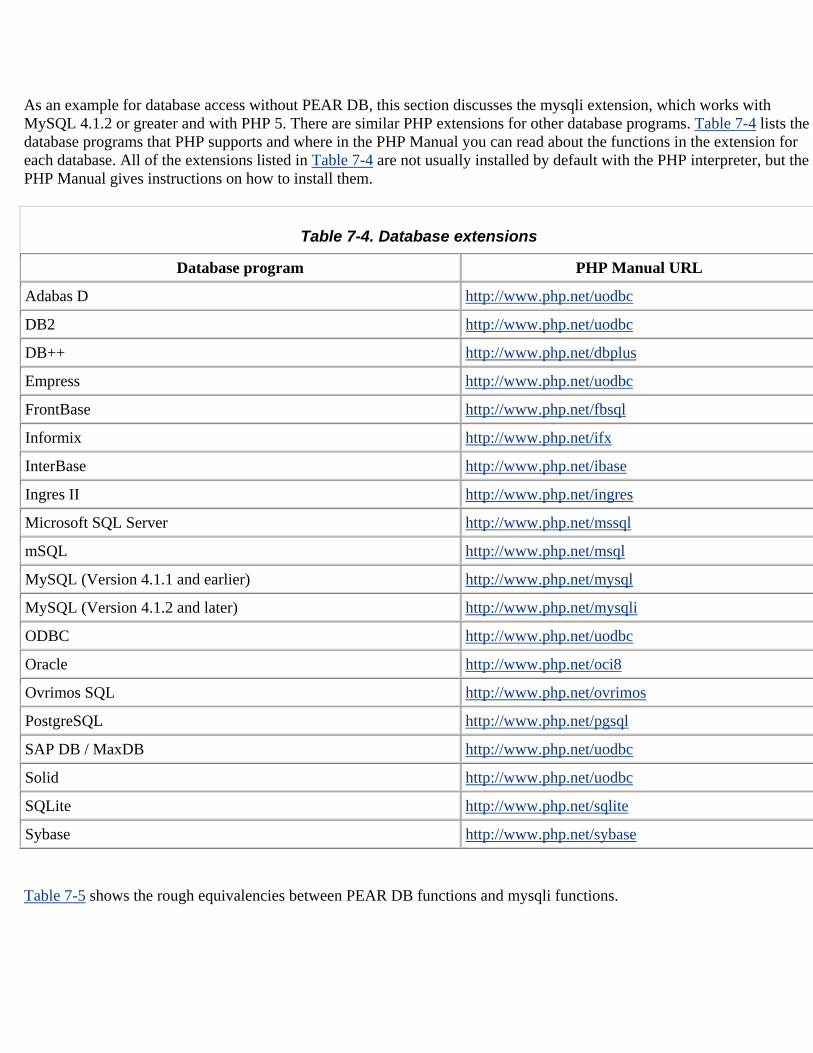
As an example for database access without PEAR DB, this section discusses the mysqli extension, which works with MySQL 4.1.2 or greater and with PHP 5. There are similar PHP extensions for other database programs. Table 7-4 lists the database programs that PHP supports and where in the PHP Manual you can read about the functions in the extension for each database. All of the extensions listed in Table 7-4 are not usually installed by default with the PHP interpreter, but the PHP Manual gives instructions on how to install them.
Table 7-4. Database extensions
Database program PHP Manual URL
Adabas D http://www.php.net/uodbc
DB2 http://www.php.net/uodbc
DB++ http://www.php.net/dbplus
Empress http://www.php.net/uodbc
FrontBase http://www.php.net/fbsql
Informix http://www.php.net/ifx
InterBase http://www.php.net/ibase
Ingres II http://www.php.net/ingres
Microsoft SQL Server http://www.php.net/mssql
mSQL http://www.php.net/msql
MySQL (Version 4.1.1 and earlier) http://www.php.net/mysql
MySQL (Version 4.1.2 and later) http://www.php.net/mysqli
ODBC http://www.php.net/uodbc
Oracle http://www.php.net/oci8
Ovrimos SQL http://www.php.net/ovrimos
PostgreSQL http://www.php.net/pgsql
SAP DB / MaxDB http://www.php.net/uodbc
Solid http://www.php.net/uodbc
SQLite http://www.php.net/sqlite
Sybase http://www.php.net/sybase
Table 7-5 shows the rough equivalencies between PEAR DB functions and mysqli functions.
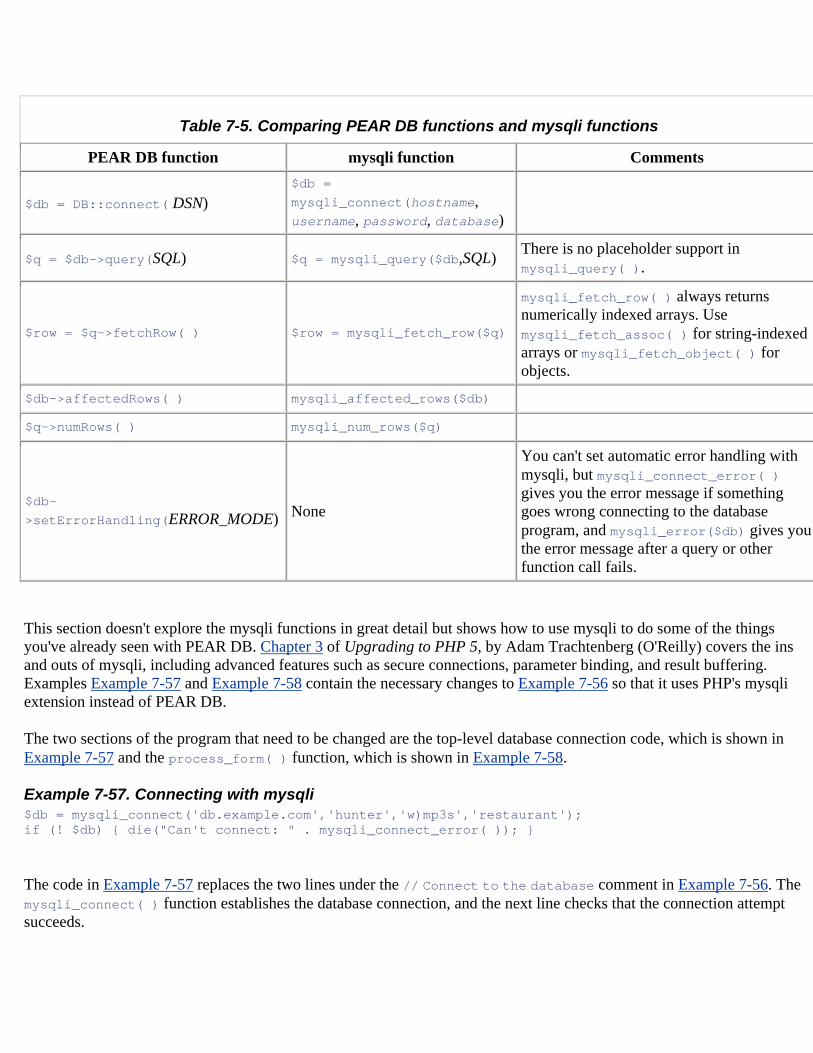
Table 7-5. Comparing PEAR DB functions and mysqli functions
PEAR DB function mysqli function Comments
$db = DB::connect( DSN) $db = mysqli_connect(hostname, username, password, database)
$q = $db->query(SQL) $q = mysqli_query($db,SQL) There is no placeholder support in mysqli_query( ).
$row = $q->fetchRow( ) $row = mysqli_fetch_row($q)
mysqli_fetch_row( ) always returns numerically indexed arrays. Use mysqli_fetch_assoc( ) for string-indexed arrays or mysqli_fetch_object( ) for objects.
$db->affectedRows( ) mysqli_affected_rows($db)
$q->numRows( ) mysqli_num_rows($q)
$db->setErrorHandling(ERROR_MODE) None
You can't set automatic error handling with mysqli, but mysqli_connect_error( ) gives you the error message if something goes wrong connecting to the database program, and mysqli_error($db) gives you the error message after a query or other function call fails.
This section doesn't explore the mysqli functions in great detail but shows how to use mysqli to do some of the things you've already seen with PEAR DB. Chapter 3 of Upgrading to PHP 5, by Adam Trachtenberg (O'Reilly) covers the ins and outs of mysqli, including advanced features such as secure connections, parameter binding, and result buffering. Examples Example 7-57 and Example 7-58 contain the necessary changes to Example 7-56 so that it uses PHP's mysqli extension instead of PEAR DB.
The two sections of the program that need to be changed are the top-level database connection code, which is shown in Example 7-57 and the process_form( ) function, which is shown in Example 7-58.
Example 7-57. Connecting with mysqli $db = mysqli_connect('db.example.com','hunter','w)mp3s','restaurant'); if (! $db) { die("Can't connect: " . mysqli_connect_error( )); }
The code in Example 7-57 replaces the two lines under the // Connect to the database comment in Example 7-56. The mysqli_connect( ) function establishes the database connection, and the next line checks that the connection attempt succeeds.
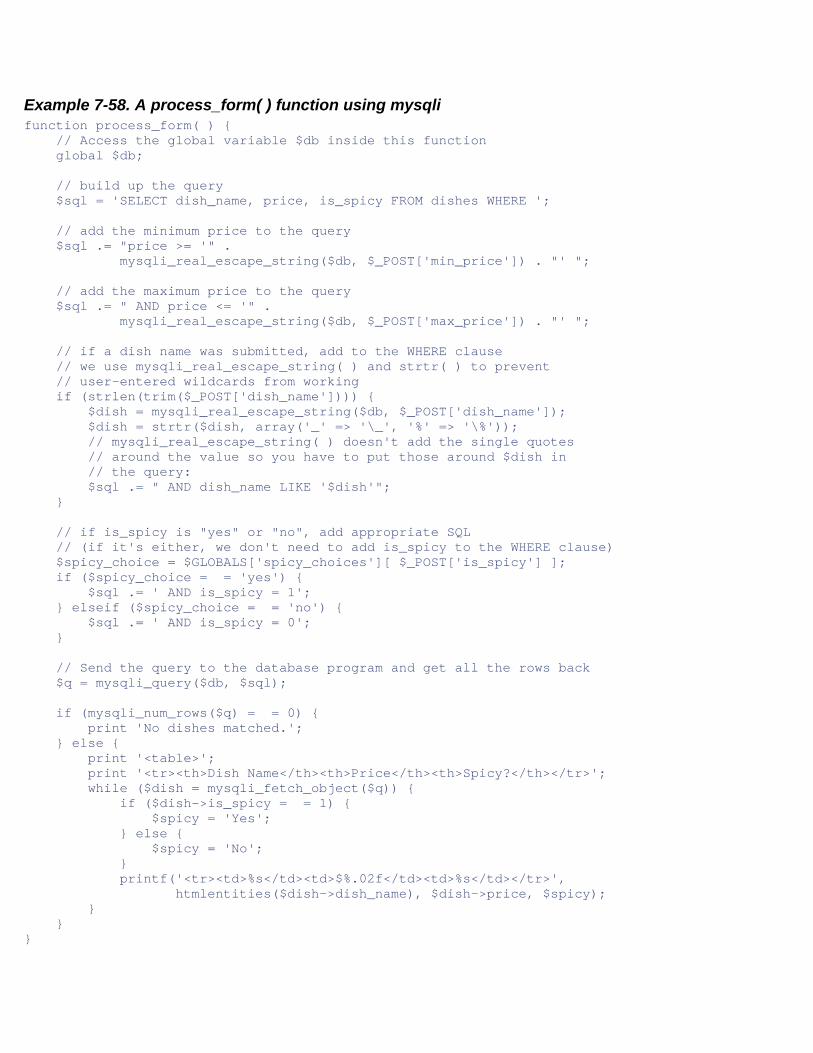
Example 7-58. A process_form( ) function using mysqli function process_form( ) { // Access the global variable $db inside this function global $db; // build up the query $sql = 'SELECT dish_name, price, is_spicy FROM dishes WHERE '; // add the minimum price to the query $sql .= "price >= '" . mysqli_real_escape_string($db, $_POST['min_price']) . "' "; // add the maximum price to the query $sql .= " AND price <= '" . mysqli_real_escape_string($db, $_POST['max_price']) . "' "; // if a dish name was submitted, add to the WHERE clause // we use mysqli_real_escape_string( ) and strtr( ) to prevent // user-entered wildcards from working if (strlen(trim($_POST['dish_name']))) { $dish = mysqli_real_escape_string($db, $_POST['dish_name']); $dish = strtr($dish, array('_' => '\_', '%' => '\%')); // mysqli_real_escape_string( ) doesn't add the single quotes // around the value so you have to put those around $dish in // the query: $sql .= " AND dish_name LIKE '$dish'"; } // if is_spicy is "yes" or "no", add appropriate SQL // (if it's either, we don't need to add is_spicy to the WHERE clause) $spicy_choice = $GLOBALS['spicy_choices'][ $_POST['is_spicy'] ]; if ($spicy_choice = = 'yes') { $sql .= ' AND is_spicy = 1'; } elseif ($spicy_choice = = 'no') { $sql .= ' AND is_spicy = 0'; } // Send the query to the database program and get all the rows back $q = mysqli_query($db, $sql); if (mysqli_num_rows($q) = = 0) { print 'No dishes matched.'; } else { print '<table>'; print '<tr><th>Dish Name</th><th>Price</th><th>Spicy?</th></tr>'; while ($dish = mysqli_fetch_object($q)) { if ($dish->is_spicy = = 1) { $spicy = 'Yes'; } else { $spicy = 'No'; } printf('<tr><td>%s</td><td>$%.02f</td><td>%s</td></tr>', htmlentities($dish->dish_name), $dish->price, $spicy); } } }
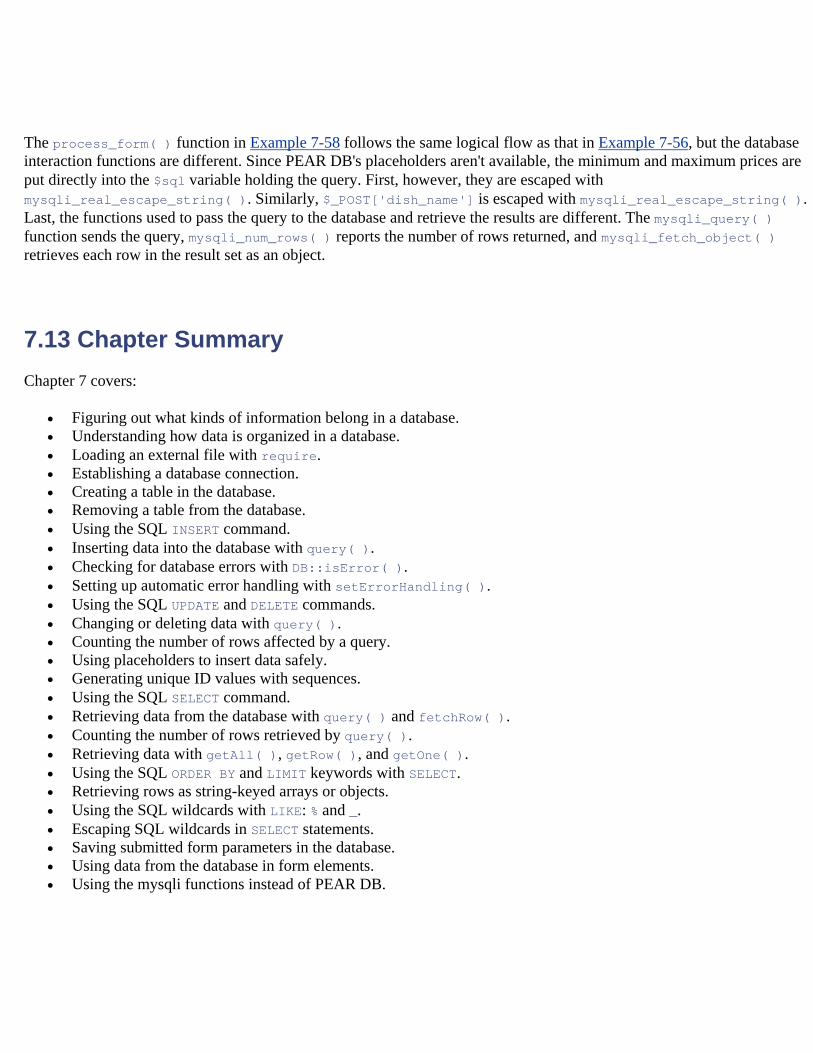
The process_form( ) function in Example 7-58 follows the same logical flow as that in Example 7-56, but the database interaction functions are different. Since PEAR DB's placeholders aren't available, the minimum and maximum prices are put directly into the $sql variable holding the query. First, however, they are escaped with mysqli_real_escape_string( ). Similarly, $_POST['dish_name'] is escaped with mysqli_real_escape_string( ). Last, the functions used to pass the query to the database and retrieve the results are different. The mysqli_query( ) function sends the query, mysqli_num_rows( ) reports the number of rows returned, and mysqli_fetch_object( ) retrieves each row in the result set as an object.
7.13 Chapter Summary Chapter 7 covers:
• Figuring out what kinds of information belong in a database. • Understanding how data is organized in a database. • Loading an external file with require. • Establishing a database connection. • Creating a table in the database. • Removing a table from the database. • Using the SQL INSERT command. • Inserting data into the database with query( ). • Checking for database errors with DB::isError( ). • Setting up automatic error handling with setErrorHandling( ). • Using the SQL UPDATE and DELETE commands. • Changing or deleting data with query( ). • Counting the number of rows affected by a query. • Using placeholders to insert data safely. • Generating unique ID values with sequences. • Using the SQL SELECT command. • Retrieving data from the database with query( ) and fetchRow( ). • Counting the number of rows retrieved by query( ). • Retrieving data with getAll( ), getRow( ), and getOne( ). • Using the SQL ORDER BY and LIMIT keywords with SELECT. • Retrieving rows as string-keyed arrays or objects. • Using the SQL wildcards with LIKE: % and _. • Escaping SQL wildcards in SELECT statements. • Saving submitted form parameters in the database. • Using data from the database in form elements. • Using the mysqli functions instead of PEAR DB.
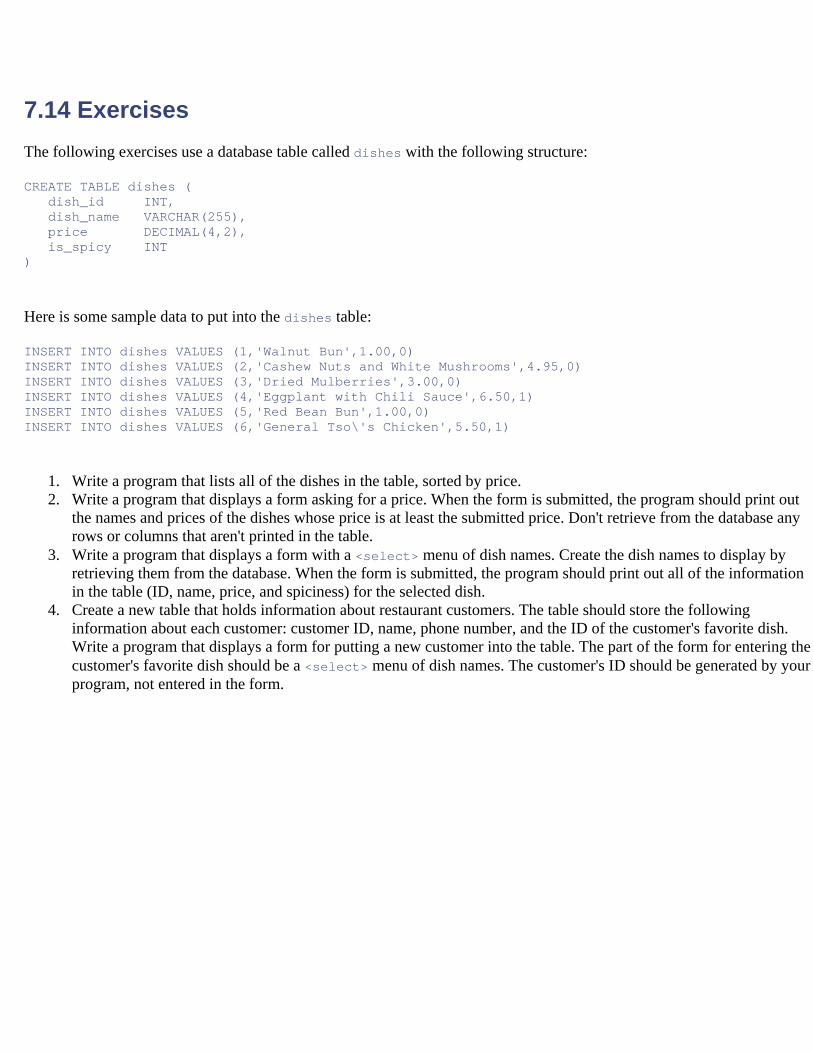
7.14 Exercises The following exercises use a database table called dishes with the following structure:
CREATE TABLE dishes ( dish_id INT, dish_name VARCHAR(255), price DECIMAL(4,2), is_spicy INT )
Here is some sample data to put into the dishes table:
INSERT INTO dishes VALUES (1,'Walnut Bun',1.00,0) INSERT INTO dishes VALUES (2,'Cashew Nuts and White Mushrooms',4.95,0) INSERT INTO dishes VALUES (3,'Dried Mulberries',3.00,0) INSERT INTO dishes VALUES (4,'Eggplant with Chili Sauce',6.50,1) INSERT INTO dishes VALUES (5,'Red Bean Bun',1.00,0) INSERT INTO dishes VALUES (6,'General Tso\'s Chicken',5.50,1)
1. Write a program that lists all of the dishes in the table, sorted by price. 2. Write a program that displays a form asking for a price. When the form is submitted, the program should print out
the names and prices of the dishes whose price is at least the submitted price. Don't retrieve from the database any rows or columns that aren't printed in the table.
3. Write a program that displays a form with a <select> menu of dish names. Create the dish names to display by retrieving them from the database. When the form is submitted, the program should print out all of the information in the table (ID, name, price, and spiciness) for the selected dish.
4. Create a new table that holds information about restaurant customers. The table should store the following information about each customer: customer ID, name, phone number, and the ID of the customer's favorite dish. Write a program that displays a form for putting a new customer into the table. The part of the form for entering the customer's favorite dish should be a <select> menu of dish names. The customer's ID should be generated by your program, not entered in the form.
Chapter 8. Remembering Users with Cookies and Sessions A web server is a lot like a clerk at a busy deli full of pushy customers. The customers at the deli shout requests: "I want a half pound of corned beef!" and "Give me a pound of pastrami, sliced thin!" The clerk scurries around slicing and wrapping to satisfy the requests. Web clients electronically shout requests ("Give me /catalog/yak.php!" or "Here's a form submission for you!"), and the server, with the PHP interpreter's help, electronically scurries around constructing responses to satisfy the requests.
The clerk has an advantage that the web server doesn't, though: a memory. She naturally ties together all the requests that come from a particular customer. The PHP interpreter and the web server can't do that without some extra steps. That's where cookies come in.
A cookie identifies a particular web client to the web server and to the PHP interpreter. Each time a web client makes a request, it sends the cookie along with the request. The interpreter reads the cookie and figures out that a particular request is coming from the same web client that made previous requests, which were accompanied by the same cookie.
If deli customers were faced with a memory-deprived clerk, they'd have to adopt the same strategy. Their requests for service would look like this:
"I'm customer 56 and I want a half-pound of corned beef." "I'm customer 29 and I want three knishes." "I'm customer 56 and I want two pounds of pastrami." "I'm customer 77 and I'm returning this rye bread -- it's stale." "I'm customer 29 and I want a salami."
The "I'm customer so-and-so" part of the requests is the cookie. It gives the clerk what she needs to be able to link a particular customer's requests together.
A cookie has a name (such as "customer") and a value (such as "77" or "ronald"). Section 8.1, next, shows you how to work with individual cookies in your programs: setting them, reading them, and deleting them.
One cookie is best at keeping track of one piece of information. Often, you need to keep track of more about a user (such as the contents of their shopping cart). Using multiple cookies for this is cumbersome. PHP's session capabilities solve this problem.
A session uses a cookie to distinguish users from each other and makes it easy to keep a temporary pile of data for each user on the server. This data persists across requests. On one request, you can add a variable to a user's session (such as putting something into the shopping cart). On a subsequent request, you can retrieve what's in the session (such as on the order checkout page when you need to list everything in the cart). Later in this chapter, Section 8.2 describes how to get started with sessions, and Section 8.3 provides the details on working with sessions.
8.1 Working with Cookies
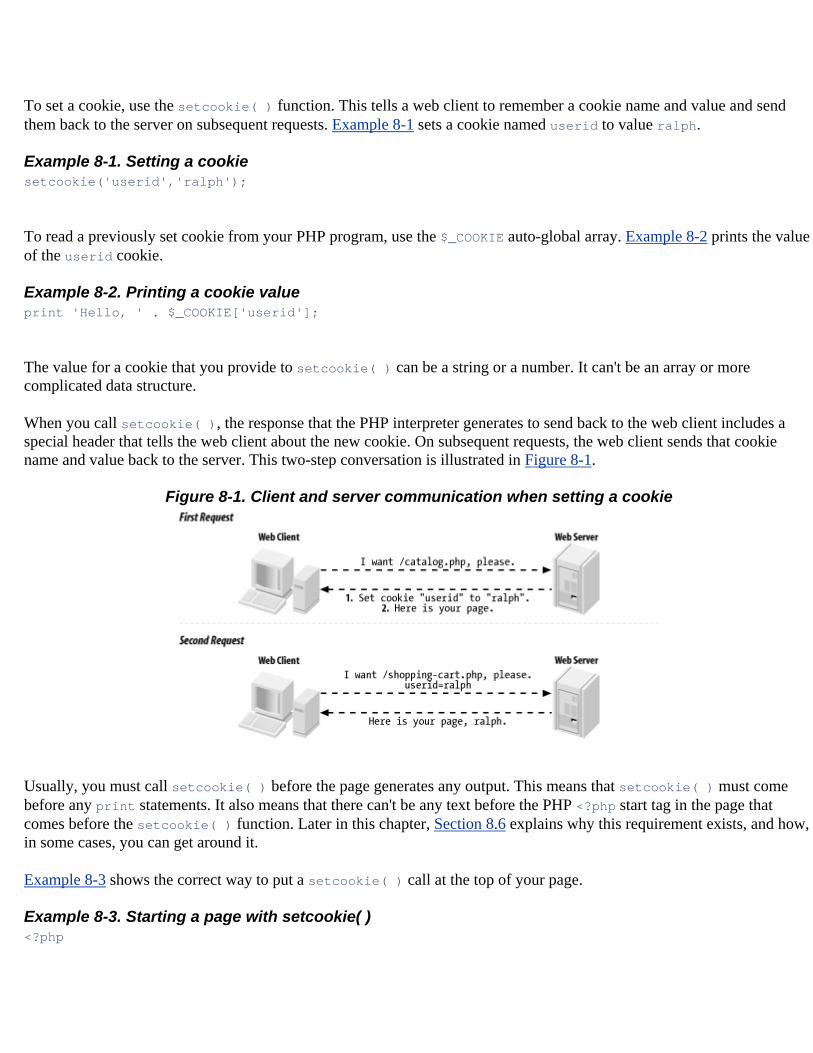
To set a cookie, use the setcookie( ) function. This tells a web client to remember a cookie name and value and send them back to the server on subsequent requests. Example 8-1 sets a cookie named userid to value ralph.
Example 8-1. Setting a cookie setcookie('userid','ralph');
To read a previously set cookie from your PHP program, use the $_COOKIE auto-global array. Example 8-2 prints the value of the userid cookie.
Example 8-2. Printing a cookie value print 'Hello, ' . $_COOKIE['userid'];
The value for a cookie that you provide to setcookie( ) can be a string or a number. It can't be an array or more complicated data structure.
When you call setcookie( ), the response that the PHP interpreter generates to send back to the web client includes a special header that tells the web client about the new cookie. On subsequent requests, the web client sends that cookie name and value back to the server. This two-step conversation is illustrated in Figure 8-1.
Figure 8-1. Client and server communication when setting a cookie
Usually, you must call setcookie( ) before the page generates any output. This means that setcookie( ) must come before any print statements. It also means that there can't be any text before the PHP <?php start tag in the page that comes before the setcookie( ) function. Later in this chapter, Section 8.6 explains why this requirement exists, and how, in some cases, you can get around it.
Example 8-3 shows the correct way to put a setcookie( ) call at the top of your page.
Example 8-3. Starting a page with setcookie( ) <?php
setcookie('userid','ralph'); ?> <html><head><title>Page with cookies</title><head> <body> This page sets a cookie properly, because the PHP block with setcookie( ) in it comes before all of the HTML. </body></html>
Cookies show up in $_COOKIE only when the web client sends them along with the request. This means that a name and value do not appear in $_COOKIE immediately after you call setcookie( ). Only after that cookie-setting response is digested by the web client does the client know about the cookie. And only after the client sends the cookie back on a subsequent request does it appear in $_COOKIE.
The default lifetime for a cookie is the lifetime of the web client. When you quit Internet Explorer or Mozilla, the cookie is deleted. To make a cookie live longer (or shorter), use the third argument to setcookie( ). This is an optional cookie expiration time. Example 8-4 shows some cookies with different expiration times.
Example 8-4. Setting cookie expiration // The cookie expires one hour from now setcookie('short-userid','ralph',time( ) + 60*60); // The cookie expires one day from now setcookie('longer-userid','ralph',time( ) + 60*60*24); // The cookie expires at noon on October 1, 2006 setcookie('much-longer-userid','ralph',mktime(12,0,0,10,1,2006));
The cookie expiration time needs to be given to setcookie( ) expressed as the number of seconds elapsed since midnight on January 1, 1970. (As crazily arbitrary as that sounds, there are some good reasons for expressing time values that way, which are explained in Chapter 9.)
Two functions make coming up with appropriate expiration times easier: time( ) and mktime( ). The time( ) function returns the current number of elapsed seconds since January 1, 1970. So if you want the cookie expiration time to be a certain number of seconds from now, add that value to what time( ) returns. There are 60 seconds in a minute and 60 minutes in an hour, so 60*60 is the number of seconds in an hour. That makes time( ) + 60*60 equal to the "elapsed seconds" value for an hour from now. Similarly, 60*60*24 is the number of seconds in a day, so time( ) + 60*60*24 is the "elapsed seconds" value for a day from now.
The mktime( ) function computes an appropriate "elapsed seconds" value for a given date and time. The arguments to mktime( ) are hour, minute, second, month, day, and year. So, mktime(12,0,0,10,1,2006) returns the correct value for noon (hour: 12, minute: 0, second: 0), on October 1, 2006 (month: 10, day: 1, year: 2006).
Setting a cookie with a specific expiration time makes the cookie last even if the web client exits and restarts.
Aside from expiration time, there are two other cookie parameters that are helpful to adjust: the path and the domain. Each of these affect with what requests the web client sends back the cookie.
Normally, cookies are only sent back with requests for pages in the same directory (or below) as the page that set the cookie. A cookie set by http://www.example.com/buy.php is sent back with all requests to www.example.com, because buy.php is in the top-level directory of the web server. A cookie set by http://www.example.com/catalog/list.php is sent back with other requests in the catalog directory, such as http://www.example.com/catalog/search.php. It is also sent back with requests for pages in subdirectories of catalog, such as http://www.example.com/catalog/detailed/search.php. But it is not sent back with requests for pages above or outside the catalog directory such as http://www.example.com/sell.php or http://www.example.com/users/profile.php.
The part of the URL after the hostname (such as /buy.php, /catalog/list.php, or /users/profile.php) is called the path. To tell the web client to match against a different path when determining whether to send a cookie to the server, provide that path as the fourth argument to setcookie( ). The most flexible path to provide is /, which means "send this cookie back with all requests to the server." Example 8-5 sets a cookie with the path set to /.
Example 8-5. Setting the cookie path setcookie('short-userid','ralph',0,'/');
In Example 8-5, the expiration time argument to setcookie( ) is 0. This tells setcookie( ) to use the default expiration time (when the web client exits) for the cookie. When you specify a path to setcookie( ), you have to fill in something for the expiration time argument. It can be a specific time value (such as time( ) + 60*60), or it can be 0 to use the default expiration time.
Setting the path to something other than / is a good idea if you are on a shared server and all of your pages are under a specific directory. For example, if your web space is under http://students.example.edu/~alice/, then you should set the cookie path to /~alice/, as shown in Example 8-6.
Example 8-6. Setting the cookie path to a specific directory setcookie('short-userid','ralph',0,'/~alice/');
With a cookie path of /~alice/, the short-userid cookie is sent with a request to http://students.example.edu/~alice/search.php, but not with requests to other students' web pages such as http://students.example.edu/~bob/sneaky.php or http://students.example.edu/~charlie/search.php.
The last argument that affects which requests the web client decides to send a particular cookie with is the domain. The default behavior is to send cookies only with requests to the same host that set the cookie. If http://www.example.com/login.php set a cookie, then that cookie is sent back with other requests to www.example.com—not with requests to shop.example.com, www.yahoo.com, or www.example.org.
You can alter this behavior slightly. A fifth argument to setcookie( ) tells the web client to send the cookie with requests that have a hostname whose end matches the argument. The most common use of this feature is to set the cookie domain to something like .example.com. (The period at the beginning is important.) This tells the web client that the cookie should accompany future requests to the servers www.example.com, shop.example.com, testing.development.example.com, and any other server name that ends in .example.com. Example 8-7 shows how to set a cookie like this.
Example 8-7. Setting the cookie domain
setcookie('short-userid','ralph',0,'/','.example.com');
The cookie in Example 8-7 expires when the web client exits and is sent with requests in any directory (because the path is /) on any server that ends with .example.com.
The path that you provide to setcookie( ) must match the end of the name of your server. If your PHP programs are hosted on the server students.example.edu, you can't supply .yahoo.com as a cookie path and have the cookie you set sent back to all servers in the yahoo.com domain. You can, however, specify .example.edu as a cookie domain to have your cookie sent with all requests to any server in the example.edu domain.
To delete a cookie, call setcookie( ) with the name of the cookie you want to delete and the empty string as the cookie value, as shown in Example 8-8.
Example 8-8. Deleting a cookie setcookie('short-userid','');
If you've set a cookie with nondefault values for an expiration time, path, or domain, you must provide those same values again when you delete the cookie for the cookie to be deleted properly.
Most of the time, any cookies you set are fine with the default values for expiration time, path, or domain. But understanding how these values can be changed helps you understand how PHP's sessions behavior can be customized.
8.2 Activating Sessions Sessions use a cookie called PHPSESSID. When you start a session on a page, the PHP interpreter checks for the presence of this cookie and sets it if it doesn't exist. The value of the PHPSESSID cookie is a random alphanumeric string. Each web client gets a different session ID. The session ID in the PHPSESSID cookie identifies that web client uniquely to the server. That lets the interpreter maintain separate piles of data for each web client.
The conversation between the web client and the server when starting up a session is illustrated in Figure 8-2.
Figure 8-2. Client and server communication when starting a session
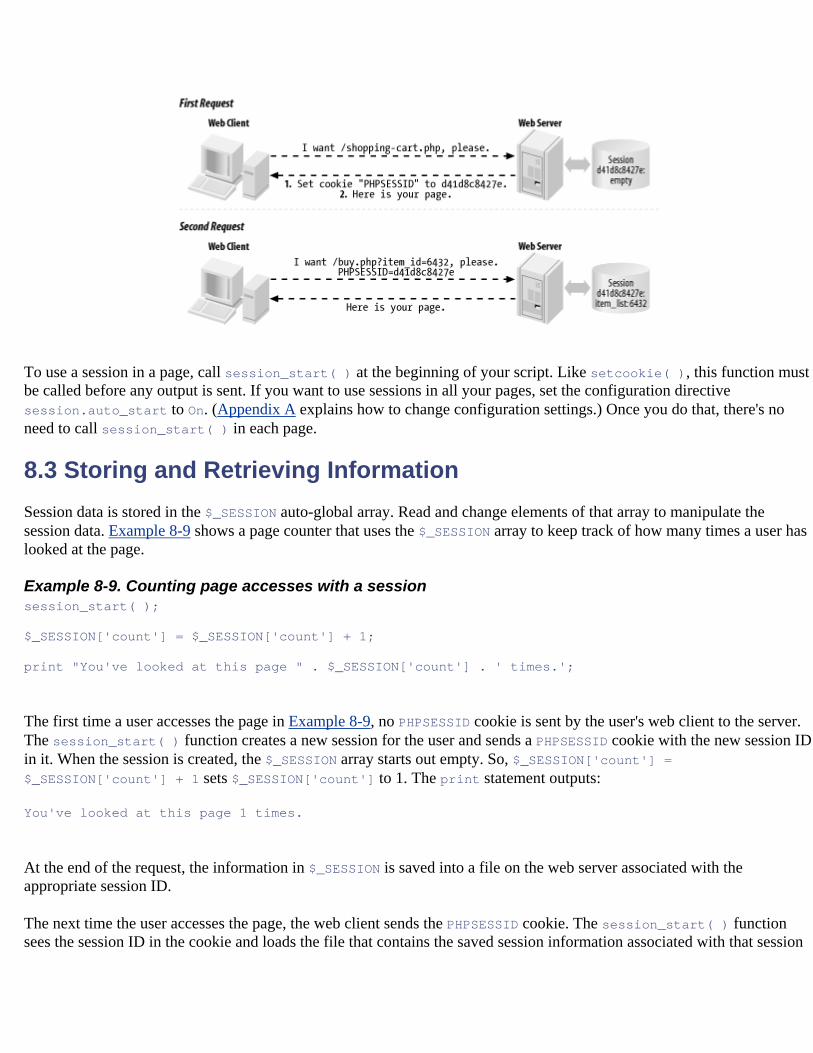
To use a session in a page, call session_start( ) at the beginning of your script. Like setcookie( ), this function must be called before any output is sent. If you want to use sessions in all your pages, set the configuration directive session.auto_start to On. (Appendix A explains how to change configuration settings.) Once you do that, there's no need to call session_start( ) in each page.
8.3 Storing and Retrieving Information Session data is stored in the $_SESSION auto-global array. Read and change elements of that array to manipulate the session data. Example 8-9 shows a page counter that uses the $_SESSION array to keep track of how many times a user has looked at the page.
Example 8-9. Counting page accesses with a session session_start( ); $_SESSION['count'] = $_SESSION['count'] + 1; print "You've looked at this page " . $_SESSION['count'] . ' times.';
The first time a user accesses the page in Example 8-9, no PHPSESSID cookie is sent by the user's web client to the server. The session_start( ) function creates a new session for the user and sends a PHPSESSID cookie with the new session ID in it. When the session is created, the $_SESSION array starts out empty. So, $_SESSION['count'] = $_SESSION['count'] + 1 sets $_SESSION['count'] to 1. The print statement outputs:
You've looked at this page 1 times.
At the end of the request, the information in $_SESSION is saved into a file on the web server associated with the appropriate session ID.
The next time the user accesses the page, the web client sends the PHPSESSID cookie. The session_start( ) function sees the session ID in the cookie and loads the file that contains the saved session information associated with that session
ID. In this case, that saved information just says that $_SESSION['count'] is 1. Next, $_SESSION['count'] is incremented to 2 and You've looked at this page 2 times. is printed. Again, at the end of the request, the contents of $_SESSION (now with $_SESSION['count'] equal to 2) are saved to a file.
The PHP interpreter keeps track of the contents of $_SESSION separately for each session ID. When your program is running, $_SESSION contains the saved data for one session only—the active session corresponding to the ID that was sent in the PHPSESSID cookie. Each user's PHPSESSID cookie has a different value.
As long as you call session_start( ) at the top of a page (or if session.auto_start is on), you have access to a user's session data in your page. The $_SESSION array is a way of sharing information between pages.
Example 8-10 is a complete program that displays a form in which a user picks a dish and a quantity. That dish and quantity are added to the session variable order.
Example 8-10. Saving form data in a session <?php require 'formhelpers.php'; session_start( ); $main_dishes = array('cuke' => 'Braised Sea Cucumber', 'stomach' => "Sauteed Pig's Stomach", 'tripe' => 'Sauteed Tripe with Wine Sauce', 'taro' => 'Stewed Pork with Taro', 'giblets' => 'Baked Giblets with Salt', 'abalone' => 'Abalone with Marrow and Duck Feet'); if ($_POST['_submit_check']) { if ($form_errors = validate_form( )) { show_form($form_errors); } else { process_form( ); } } else { show_form( ); } function show_form($errors = '') { print '<form method="POST" action="'.$_SERVER['PHP_SELF'].'">'; if ($errors) { print '<ul><li>'; print implode('</li><li>',$errors); print '</li></ul>'; } // Since we're not supplying any defaults of our own, it's OK // to pass $_POST as the defaults array to input_select and // input_text so that any user-entered values are preserved print 'Dish: '; input_select('dish', $_POST, $GLOBALS['main_dishes']); print '<br/>'; print 'Quantity: ';

input_text('quantity', $_POST); print '<br/>'; input_submit('submit','Order'); print '<input type="hidden" name="_submit_check" value="1"/>'; print '</form>'; } function validate_form( ) { $errors = array( ); // The dish selected in the menu must be valid if (! array_key_exists($_POST['dish'], $GLOBALS['main_dishes'])) { $errors[ ] = 'Please select a valid dish.'; } if ((! is_numeric($_POST['quantity'])) || (intval($_POST['quantity']) <= 0)) { $errors[ ] = 'Please enter a quantity.'; } return $errors; } function process_form( ) { $_SESSION['order'][ ] = array('dish' => $_POST['dish'], 'quantity' => $_POST['quantity']); print 'Thank you for your order.'; } ?>
The form-handling code in Example 8-10 is mostly familiar. As in Examples Example 7-30 and Example 7-56, the form element printing helper functions are loaded from the formhelpers.php file. The show_form( ), validate_form( ), and process_form( ) functions display, validate, and process the form data.
Where Example 8-10 takes advantage of sessions, however, is in process_form( ). Each time the form is submitted with valid data, an element is added to the $_SESSION['order'] array. Session data isn't restricted to strings and numbers such as cookies. You can treat $_SESSION like any other array. The syntax $_SESSION['order'][ ] says "treat $_SESSION['order'] as an array and add a new element onto its end." In this case, what's being added on to the end of $_SESSION['order'] is a two-element array containing information about the dish and quantity that were submitted in the form.
The program in Example 8-11 prints a list of dishes that have been ordered by accessing the information that's been stored in the session by Example 8-10.
Example 8-11. Printing session data <?php session_start( ); $main_dishes = array('cuke' => 'Braised Sea Cucumber', 'stomach' => "Sauteed Pig's Stomach",
'tripe' => 'Sauteed Tripe with Wine Sauce', 'taro' => 'Stewed Pork with Taro', 'giblets' => 'Baked Giblets with Salt', 'abalone' => 'Abalone with Marrow and Duck Feet'); if (count($_SESSION['order']) > 0) { print '<ul>'; foreach ($_SESSION['order'] as $order) { $dish_name = $main_dishes[ $order['dish'] ]; print "<li> $order[quantity] of $dish_name </li>"; } print "</ul>"; } else { print "You haven't ordered anything."; } ?>
Example 8-11 has access to the data stored in the session by Example 8-10. It treats $_SESSION['order'] as an array: if there are elements in the array (because count( ) returns a positive number), then it iterates through the array with foreach( ) and prints out a list element for each dish that has been ordered.
8.4 Configuring Sessions Sessions work great with no additional tweaking. Turn them on with the session_start( ) function or the session.auto_start configuration directive, and the $_SESSION array is there for your enjoyment. However, if you're more particular about how you want sessions to function, there are a few helpful settings that can be changed.
Session data sticks around as long as the session is accessed at least once every 24 minutes. This is fine for most applications. Sessions aren't meant to be a permanent data store for user information—that's what the database is for. Sessions are for keeping track of recent user activity to make their browsing experience smoother.
Some situations may need a shorter session length, however. If you're developing a financial application, you may want to allow only 5 or 10 minutes of idle time to reduce the chance that an unattended computer can be used by an unauthorized person. If your application doesn't work with very critical data and you have easily distracted users, you may want to set the session length to longer than 24 minutes.
The session.gc_maxlifetime configuration directive controls how much idle time is allowed between requests to keep a session active. It's default value is 1,440—there are 1,440 seconds in 24 minutes. You can change session.gc_maxlifetime in your server configuration or by calling the ini_set( ) function from your program. If you use ini_set( ), you must call it before session_start( ). Example 8-12 shows how to use ini_set( ) to change the allowable session idle time to 10 minutes.
Example 8-12. Changing allowable session idle time <?php ini_set('session.gc_maxlifetime',600'); // 600 seconds = = ten minutes session_start( ); ?>
Expired sessions don't actually get wiped out instantly after 24 minutes elapses. Here's how it really works: at the beginning of any request that uses sessions (because the page calls session_start( ) or session.auto_start is on), there is a 1% chance that the PHP interpreter scans through all of the sessions on the server and deletes any that are expired. "A 1% chance" sounds awfully unpredictable for a computer program. It is. But that randomness makes things more efficient. On a busy site, searching for expired sessions to destroy at the beginning of every request would consume too much server power.
You're not stuck with that 1% chance if you'd like expired sessions to be removed more promptly. The session.gc_probability configuration directive is the percent chance that the "erase old sessions" routine runs at the start of a request. To have that happen on every request, set it to 100. Like with session.gc_maxlifetime, if you use ini_set( ) to change the value of session.gc_probability, you need to do it before session_start( ). Example 8-13 shows how to change session.gc_probability with ini_set( ).
Example 8-13. Changing the expired session cleanup probability <?php ini_set('session.gc_probability',100); // 100% : clean up on every request session_start( ); ?>
If you are activating sessions with the session.auto_start configuration directive and you want to change the value of session.gc_maxlifetime or session.gc_probability, you can't use ini_set( ) to change those values—you have to do it in your server configuration.
8.5 Login and User Identification A session establishes an anonymous relationship with a particular user. Requiring a user to log in to your web site lets them tell you who they are. The login process typically requires a user to provide you with two pieces of information: one that identifies them (a username or an email address) and one that proves that they are who they say they are (a secret password).
Once a user is logged in, they can access private data, submit message board posts with their name attached, or do anything else that the general public isn't allowed to do.
Adding user login on top of sessions has five parts:
• Displaying a form asking for username and password • Checking the form submission • Adding the username to the session (if the submitted password is correct) • Looking for the username in the session to do user-specific tasks • Removing the username from the session when the user logs out
The first three steps are handled in the context of regular form processing. The validate_form( ) function gets the responsibility of checking to make sure that the supplied username and password are acceptable. The process_form( ) function adds the username to the session. Example 8-14 displays a login form and adds the username to the session if the login is successful.
Example 8-14. Displaying a login form <?php require 'formhelpers.php'; // This is identical to the input_text( ) function in formhelpers.php but // prints a password box (in which asterisks obscure what's entered) // instead of a plain text field function input_password($field_name, $values) { print '<input type="password" name="' . $field_name .'" value="'; print htmlentities($values[$field_name]) . '">'; } session_start( ); if ($_POST['_submit_check']) { if ($form_errors = validate_form( )) { show_form($form_errors); } else { process_form( ); } } else { show_form( ); } function show_form($errors = '') { print '<form method="POST" action="'.$_SERVER['PHP_SELF'].'">'; if ($errors) { print '<ul><li>'; print implode('</li><li>',$errors); print '</li></ul>'; } print 'Username: '; input_text('username', $_POST); print '<br/>'; print 'Password: '; input_password('password', $_POST); print '<br/>'; input_submit('submit','Log In'); print '<input type="hidden" name="_submit_check" value="1"/>'; print '</form>'; } function validate_form( ) { $errors = array( ); // Some sample usernames and passwords $users = array('alice' => 'dog123', 'bob' => 'my^pwd', 'charlie' => '**fun**'); // Make sure user name is valid if (! array_key_exists($_POST['username'], $users)) {
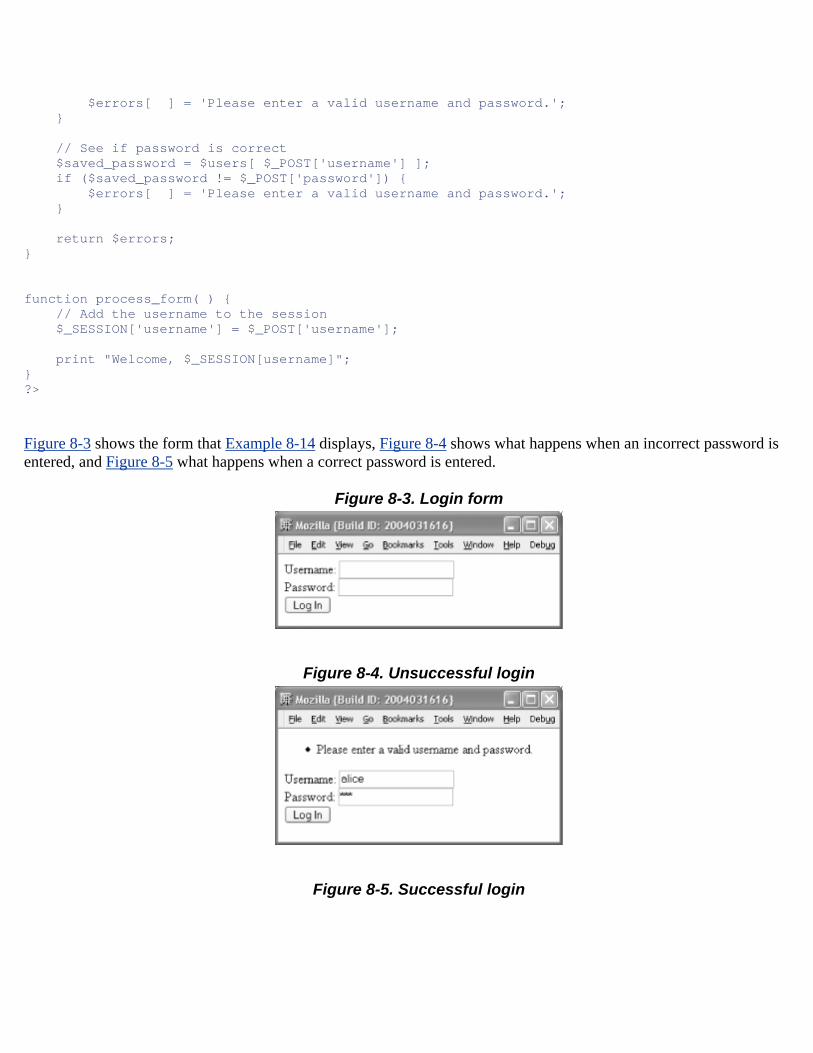
$errors[ ] = 'Please enter a valid username and password.'; } // See if password is correct $saved_password = $users[ $_POST['username'] ]; if ($saved_password != $_POST['password']) { $errors[ ] = 'Please enter a valid username and password.'; } return $errors; } function process_form( ) { // Add the username to the session $_SESSION['username'] = $_POST['username']; print "Welcome, $_SESSION[username]"; } ?>
Figure 8-3 shows the form that Example 8-14 displays, Figure 8-4 shows what happens when an incorrect password is entered, and Figure 8-5 what happens when a correct password is entered.
Figure 8-3. Login form
Figure 8-4. Unsuccessful login
Figure 8-5. Successful login
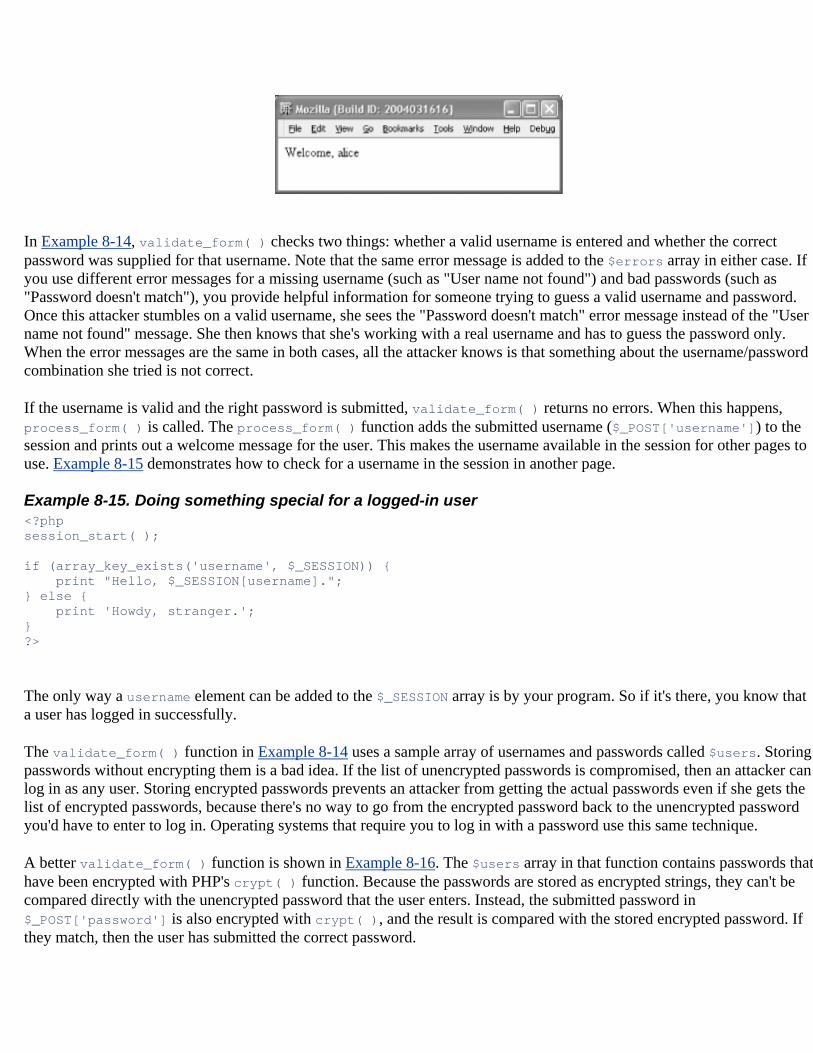
In Example 8-14, validate_form( ) checks two things: whether a valid username is entered and whether the correct password was supplied for that username. Note that the same error message is added to the $errors array in either case. If you use different error messages for a missing username (such as "User name not found") and bad passwords (such as "Password doesn't match"), you provide helpful information for someone trying to guess a valid username and password. Once this attacker stumbles on a valid username, she sees the "Password doesn't match" error message instead of the "User name not found" message. She then knows that she's working with a real username and has to guess the password only. When the error messages are the same in both cases, all the attacker knows is that something about the username/password combination she tried is not correct.
If the username is valid and the right password is submitted, validate_form( ) returns no errors. When this happens, process_form( ) is called. The process_form( ) function adds the submitted username ($_POST['username']) to the session and prints out a welcome message for the user. This makes the username available in the session for other pages to use. Example 8-15 demonstrates how to check for a username in the session in another page.
Example 8-15. Doing something special for a logged-in user <?php session_start( ); if (array_key_exists('username', $_SESSION)) { print "Hello, $_SESSION[username]."; } else { print 'Howdy, stranger.'; } ?>
The only way a username element can be added to the $_SESSION array is by your program. So if it's there, you know that a user has logged in successfully.
The validate_form( ) function in Example 8-14 uses a sample array of usernames and passwords called $users. Storing passwords without encrypting them is a bad idea. If the list of unencrypted passwords is compromised, then an attacker can log in as any user. Storing encrypted passwords prevents an attacker from getting the actual passwords even if she gets the list of encrypted passwords, because there's no way to go from the encrypted password back to the unencrypted password you'd have to enter to log in. Operating systems that require you to log in with a password use this same technique.
A better validate_form( ) function is shown in Example 8-16. The $users array in that function contains passwords that have been encrypted with PHP's crypt( ) function. Because the passwords are stored as encrypted strings, they can't be compared directly with the unencrypted password that the user enters. Instead, the submitted password in $_POST['password'] is also encrypted with crypt( ), and the result is compared with the stored encrypted password. If they match, then the user has submitted the correct password.
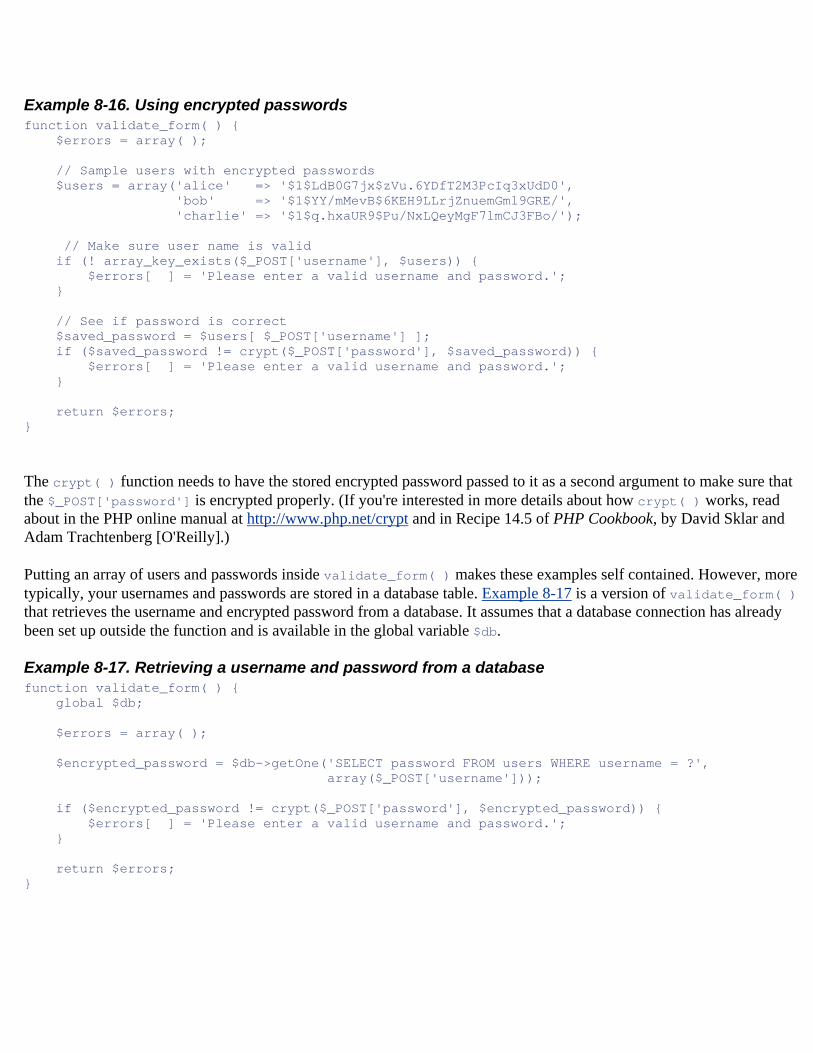
Example 8-16. Using encrypted passwords function validate_form( ) { $errors = array( ); // Sample users with encrypted passwords $users = array('alice' => '$1$LdB0G7jx$zVu.6YDfT2M3PcIq3xUdD0', 'bob' => '$1$YY/mMevB$6KEH9LLrjZnuemGml9GRE/', 'charlie' => '$1$q.hxaUR9$Pu/NxLQeyMgF7lmCJ3FBo/'); // Make sure user name is valid if (! array_key_exists($_POST['username'], $users)) { $errors[ ] = 'Please enter a valid username and password.'; } // See if password is correct $saved_password = $users[ $_POST['username'] ]; if ($saved_password != crypt($_POST['password'], $saved_password)) { $errors[ ] = 'Please enter a valid username and password.'; } return $errors; }
The crypt( ) function needs to have the stored encrypted password passed to it as a second argument to make sure that the $_POST['password'] is encrypted properly. (If you're interested in more details about how crypt( ) works, read about in the PHP online manual at http://www.php.net/crypt and in Recipe 14.5 of PHP Cookbook, by David Sklar and Adam Trachtenberg [O'Reilly].)
Putting an array of users and passwords inside validate_form( ) makes these examples self contained. However, more typically, your usernames and passwords are stored in a database table. Example 8-17 is a version of validate_form( ) that retrieves the username and encrypted password from a database. It assumes that a database connection has already been set up outside the function and is available in the global variable $db.
Example 8-17. Retrieving a username and password from a database function validate_form( ) { global $db; $errors = array( ); $encrypted_password = $db->getOne('SELECT password FROM users WHERE username = ?', array($_POST['username'])); if ($encrypted_password != crypt($_POST['password'], $encrypted_password)) { $errors[ ] = 'Please enter a valid username and password.'; } return $errors; }
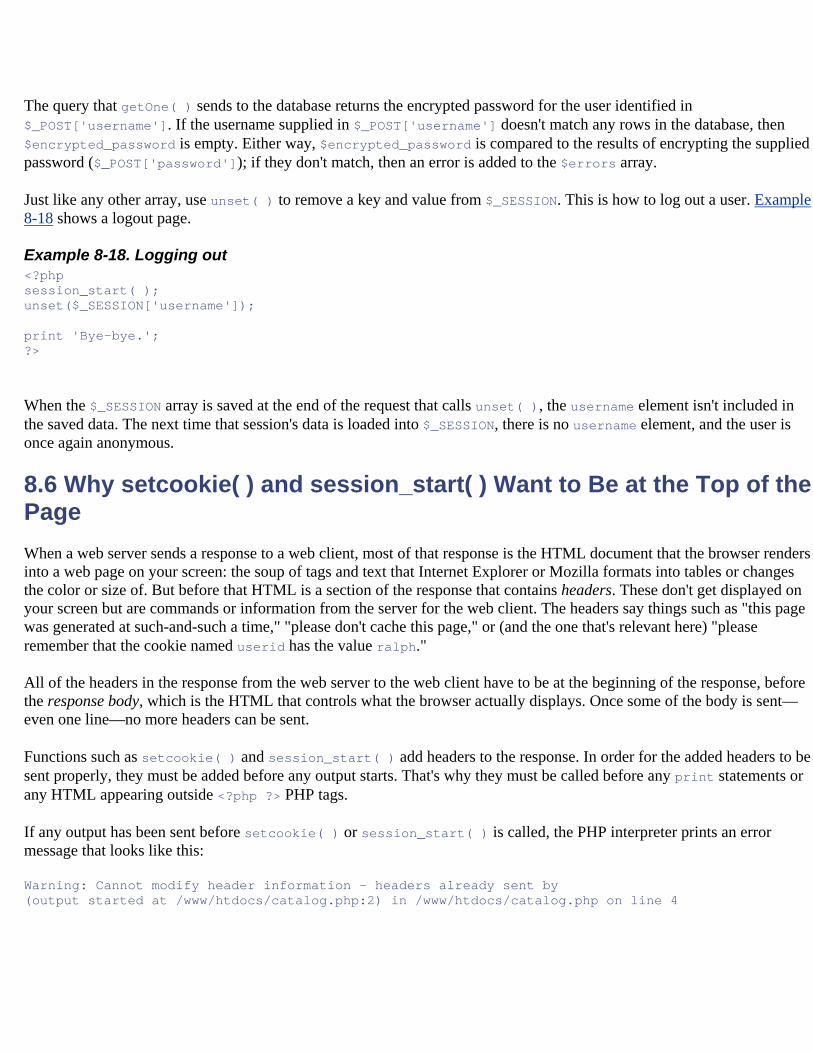
The query that getOne( ) sends to the database returns the encrypted password for the user identified in $_POST['username']. If the username supplied in $_POST['username'] doesn't match any rows in the database, then $encrypted_password is empty. Either way, $encrypted_password is compared to the results of encrypting the supplied password ($_POST['password']); if they don't match, then an error is added to the $errors array.
Just like any other array, use unset( ) to remove a key and value from $_SESSION. This is how to log out a user. Example 8-18 shows a logout page.
Example 8-18. Logging out <?php session_start( ); unset($_SESSION['username']); print 'Bye-bye.'; ?>
When the $_SESSION array is saved at the end of the request that calls unset( ), the username element isn't included in the saved data. The next time that session's data is loaded into $_SESSION, there is no username element, and the user is once again anonymous.
8.6 Why setcookie( ) and session_start( ) Want to Be at the Top of the Page When a web server sends a response to a web client, most of that response is the HTML document that the browser renders into a web page on your screen: the soup of tags and text that Internet Explorer or Mozilla formats into tables or changes the color or size of. But before that HTML is a section of the response that contains headers. These don't get displayed on your screen but are commands or information from the server for the web client. The headers say things such as "this page was generated at such-and-such a time," "please don't cache this page," or (and the one that's relevant here) "please remember that the cookie named userid has the value ralph."
All of the headers in the response from the web server to the web client have to be at the beginning of the response, before the response body, which is the HTML that controls what the browser actually displays. Once some of the body is sent—even one line—no more headers can be sent.
Functions such as setcookie( ) and session_start( ) add headers to the response. In order for the added headers to be sent properly, they must be added before any output starts. That's why they must be called before any print statements or any HTML appearing outside <?php ?> PHP tags.
If any output has been sent before setcookie( ) or session_start( ) is called, the PHP interpreter prints an error message that looks like this:
Warning: Cannot modify header information - headers already sent by (output started at /www/htdocs/catalog.php:2) in /www/htdocs/catalog.php on line 4
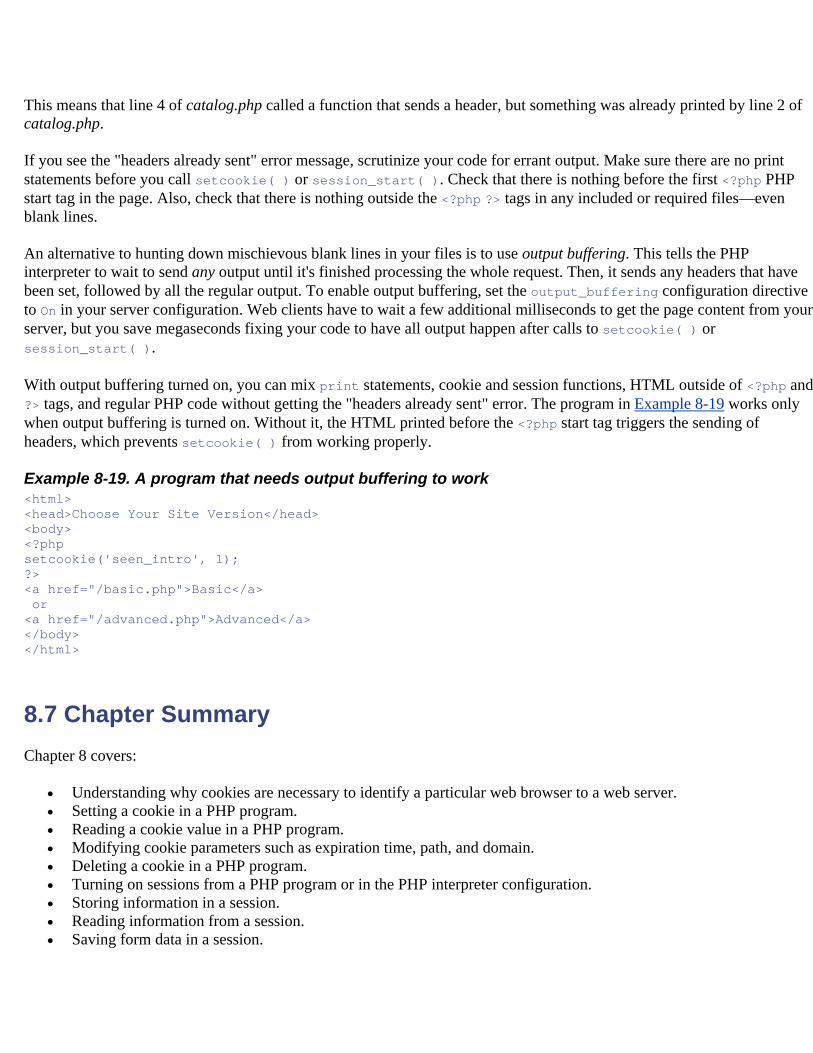
This means that line 4 of catalog.php called a function that sends a header, but something was already printed by line 2 of catalog.php.
If you see the "headers already sent" error message, scrutinize your code for errant output. Make sure there are no print statements before you call setcookie( ) or session_start( ). Check that there is nothing before the first <?php PHP start tag in the page. Also, check that there is nothing outside the <?php ?> tags in any included or required files—even blank lines.
An alternative to hunting down mischievous blank lines in your files is to use output buffering. This tells the PHP interpreter to wait to send any output until it's finished processing the whole request. Then, it sends any headers that have been set, followed by all the regular output. To enable output buffering, set the output_buffering configuration directive to On in your server configuration. Web clients have to wait a few additional milliseconds to get the page content from your server, but you save megaseconds fixing your code to have all output happen after calls to setcookie( ) or session_start( ).
With output buffering turned on, you can mix print statements, cookie and session functions, HTML outside of <?php and ?> tags, and regular PHP code without getting the "headers already sent" error. The program in Example 8-19 works only when output buffering is turned on. Without it, the HTML printed before the <?php start tag triggers the sending of headers, which prevents setcookie( ) from working properly.
Example 8-19. A program that needs output buffering to work <html> <head>Choose Your Site Version</head> <body> <?php setcookie('seen_intro', 1); ?> <a href="/basic.php">Basic</a> or <a href="/advanced.php">Advanced</a> </body> </html>
8.7 Chapter Summary Chapter 8 covers:
• Understanding why cookies are necessary to identify a particular web browser to a web server. • Setting a cookie in a PHP program. • Reading a cookie value in a PHP program. • Modifying cookie parameters such as expiration time, path, and domain. • Deleting a cookie in a PHP program. • Turning on sessions from a PHP program or in the PHP interpreter configuration. • Storing information in a session. • Reading information from a session. • Saving form data in a session.
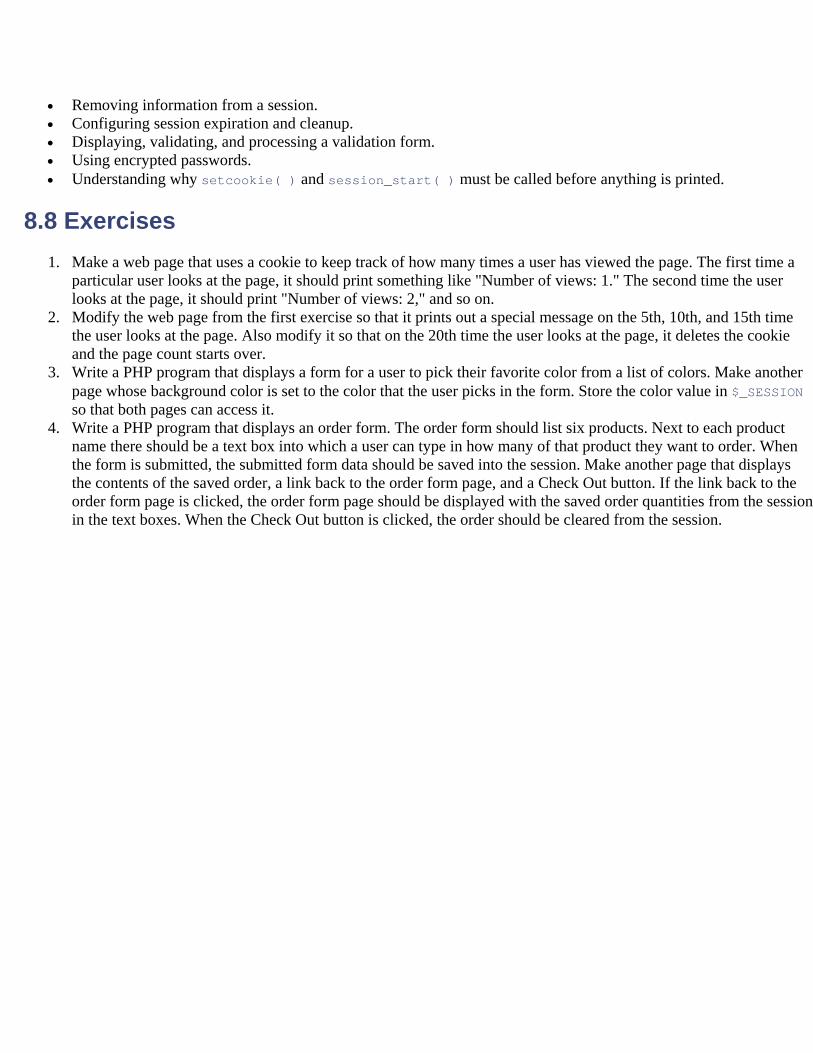
• Removing information from a session. • Configuring session expiration and cleanup. • Displaying, validating, and processing a validation form. • Using encrypted passwords. • Understanding why setcookie( ) and session_start( ) must be called before anything is printed.
8.8 Exercises 1. Make a web page that uses a cookie to keep track of how many times a user has viewed the page. The first time a
particular user looks at the page, it should print something like "Number of views: 1." The second time the user looks at the page, it should print "Number of views: 2," and so on.
2. Modify the web page from the first exercise so that it prints out a special message on the 5th, 10th, and 15th time the user looks at the page. Also modify it so that on the 20th time the user looks at the page, it deletes the cookie and the page count starts over.
3. Write a PHP program that displays a form for a user to pick their favorite color from a list of colors. Make another page whose background color is set to the color that the user picks in the form. Store the color value in $_SESSION so that both pages can access it.
4. Write a PHP program that displays an order form. The order form should list six products. Next to each product name there should be a text box into which a user can type in how many of that product they want to order. When the form is submitted, the submitted form data should be saved into the session. Make another page that displays the contents of the saved order, a link back to the order form page, and a Check Out button. If the link back to the order form page is clicked, the order form page should be displayed with the saved order quantities from the session in the text boxes. When the Check Out button is clicked, the order should be cleared from the session.

Chapter 9. Handling Dates and Times Dates and times are all over the place in a web application. In a shopping cart, you need to handle shipping dates of products. In a forum, you need to keep track of when messages are posted. In all sorts of applications, you need to keep track of the last time a user logged in so that you can tell them things such as "fifteen new messages were posted since you last logged in."
Handling dates and times properly in your programs is more complicated than handing strings or numbers. A date or a time is not a single value but a collection of values—month, day, and year, for example, or hour, minute, and second. Because of this, doing math with them can be tricky. Instead of just adding or subtracting entire dates and times, you have to consider their component parts and what the allowable values for each part are. Hours go up to 12 (or 24), minutes and seconds go up to 59, and not all months have the same number of days.
A programming convention that simplifies date and time calculation is to treat a particular time and date as a single value: the number of seconds that have elapsed since midnight on January 1, 1970. This value is called an epoch timestamp. The choice of January 1, 1970 is mostly arbitrary. But, as is the way with conventions, since lots of other people are doing it, you've got to do it, too. Fortunately, PHP provides plenty of functions for you to deal with epoch timestamps.
In this book, the phrase time parts (or date parts or time and date parts) means an array or group of time and date components such as day, month, year, hour, minute, and second. Formatted time string (or formatted date string, etc.) means a string that contains some particular grouping of time and date parts—for example "Wednesday, October 20, 2004" or "3:54 p.m."
9.1 Displaying the Date or Time The simplest display of date or time is telling your users what time it is. Use the date( ) or strftime( ) function as shown in Example 9-1.
Example 9-1. What time is it? print 'strftime( ) says: '; print strftime('%c'); print "\n"; print 'date( ) says:'; print date('r');
At noon on October 20, 2004, Example 9-1 prints:
strftime( ) says: Wed Oct 20 12:00:00 2004 date( ) says: Wed, 20 Oct 2004 12:00:00 -0400
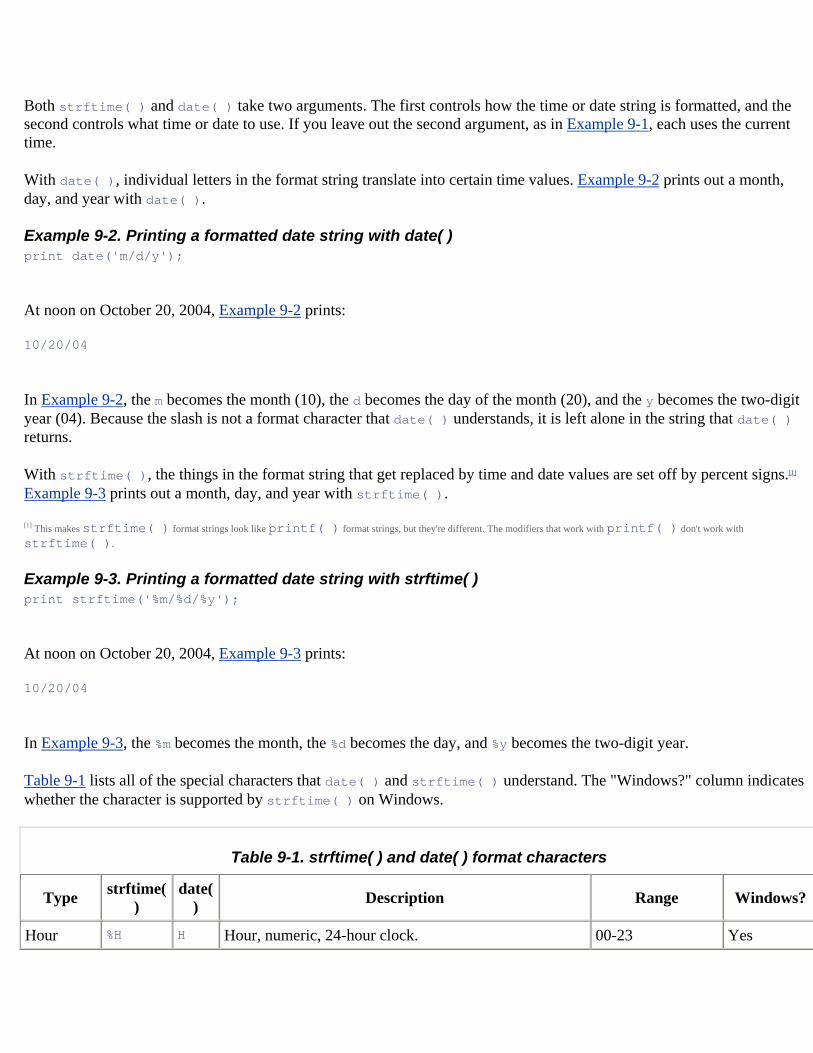
Both strftime( ) and date( ) take two arguments. The first controls how the time or date string is formatted, and the second controls what time or date to use. If you leave out the second argument, as in Example 9-1, each uses the current time.
With date( ), individual letters in the format string translate into certain time values. Example 9-2 prints out a month, day, and year with date( ).
Example 9-2. Printing a formatted date string with date( ) print date('m/d/y');
At noon on October 20, 2004, Example 9-2 prints:
10/20/04
In Example 9-2, the m becomes the month (10), the d becomes the day of the month (20), and the y becomes the two-digit year (04). Because the slash is not a format character that date( ) understands, it is left alone in the string that date( ) returns.
With strftime( ), the things in the format string that get replaced by time and date values are set off by percent signs.[1] Example 9-3 prints out a month, day, and year with strftime( ).
[1] This makes strftime( ) format strings look like printf( ) format strings, but they're different. The modifiers that work with printf( ) don't work with strftime( ).
Example 9-3. Printing a formatted date string with strftime( ) print strftime('%m/%d/%y');
At noon on October 20, 2004, Example 9-3 prints:
10/20/04
In Example 9-3, the %m becomes the month, the %d becomes the day, and %y becomes the two-digit year.
Table 9-1 lists all of the special characters that date( ) and strftime( ) understand. The "Windows?" column indicates whether the character is supported by strftime( ) on Windows.
Table 9-1. strftime( ) and date( ) format characters
Type strftime( )
date( ) Description Range Windows?
Hour %H H Hour, numeric, 24-hour clock. 00-23 Yes
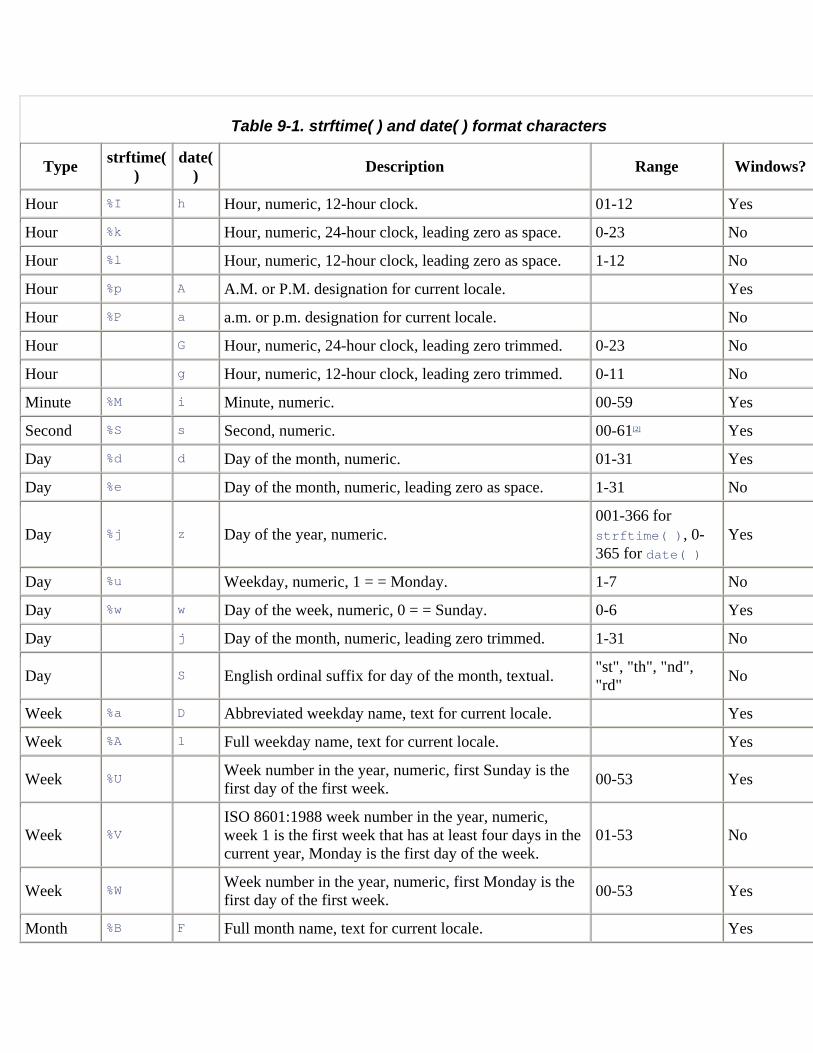
Table 9-1. strftime( ) and date( ) format characters
Type strftime( )
date( ) Description Range Windows?
Hour %I h Hour, numeric, 12-hour clock. 01-12 Yes
Hour %k Hour, numeric, 24-hour clock, leading zero as space. 0-23 No
Hour %l Hour, numeric, 12-hour clock, leading zero as space. 1-12 No
Hour %p A A.M. or P.M. designation for current locale. Yes
Hour %P a a.m. or p.m. designation for current locale. No
Hour G Hour, numeric, 24-hour clock, leading zero trimmed. 0-23 No
Hour g Hour, numeric, 12-hour clock, leading zero trimmed. 0-11 No
Minute %M i Minute, numeric. 00-59 Yes
Second %S s Second, numeric. 00-61[2] Yes
Day %d d Day of the month, numeric. 01-31 Yes
Day %e Day of the month, numeric, leading zero as space. 1-31 No
Day %j z Day of the year, numeric. 001-366 for strftime( ), 0-365 for date( )
Yes
Day %u Weekday, numeric, 1 = = Monday. 1-7 No
Day %w w Day of the week, numeric, 0 = = Sunday. 0-6 Yes
Day j Day of the month, numeric, leading zero trimmed. 1-31 No
Day S English ordinal suffix for day of the month, textual. "st", "th", "nd", "rd" No
Week %a D Abbreviated weekday name, text for current locale. Yes
Week %A l Full weekday name, text for current locale. Yes
Week %U Week number in the year, numeric, first Sunday is the first day of the first week. 00-53 Yes
Week %V ISO 8601:1988 week number in the year, numeric, week 1 is the first week that has at least four days in the current year, Monday is the first day of the week.
01-53 No
Week %W Week number in the year, numeric, first Monday is the first day of the first week. 00-53 Yes
Month %B F Full month name, text for current locale. Yes
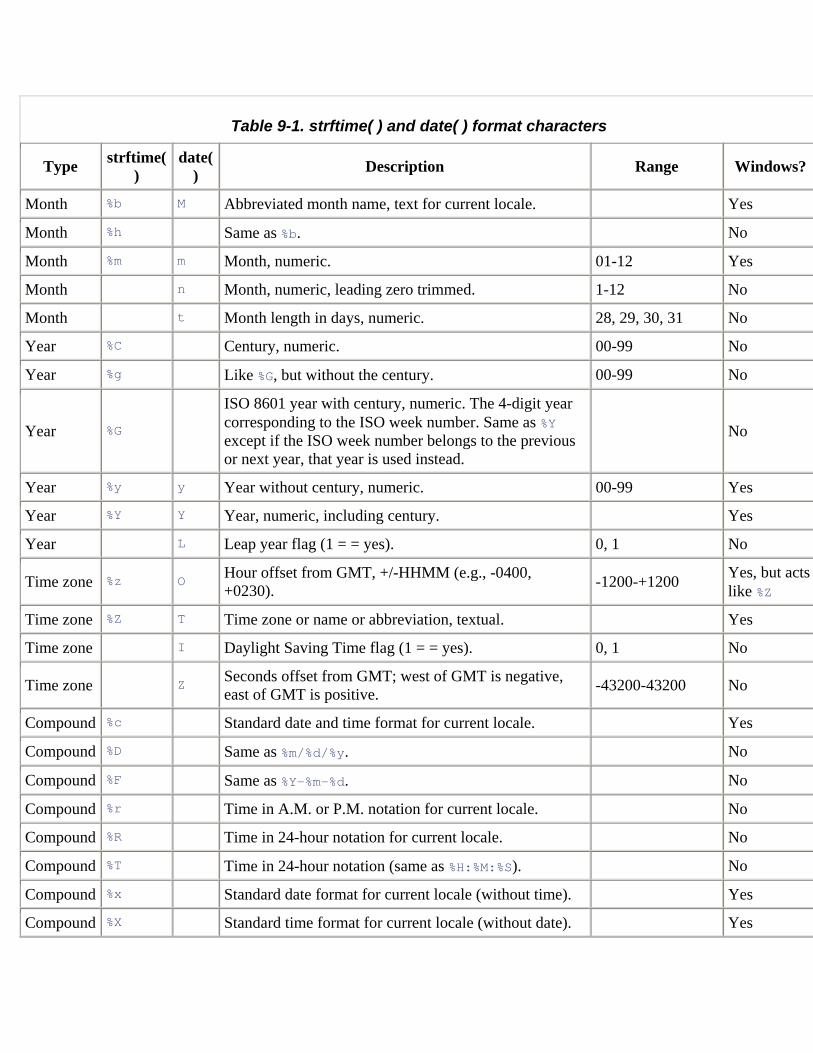
Table 9-1. strftime( ) and date( ) format characters
Type strftime( )
date( ) Description Range Windows?
Month %b M Abbreviated month name, text for current locale. Yes
Month %h Same as %b. No
Month %m m Month, numeric. 01-12 Yes
Month n Month, numeric, leading zero trimmed. 1-12 No
Month t Month length in days, numeric. 28, 29, 30, 31 No
Year %C Century, numeric. 00-99 No
Year %g Like %G, but without the century. 00-99 No
Year %G
ISO 8601 year with century, numeric. The 4-digit year corresponding to the ISO week number. Same as %Y except if the ISO week number belongs to the previous or next year, that year is used instead.
No
Year %y y Year without century, numeric. 00-99 Yes
Year %Y Y Year, numeric, including century. Yes
Year L Leap year flag (1 = = yes). 0, 1 No
Time zone %z O Hour offset from GMT, +/-HHMM (e.g., -0400, +0230). -1200-+1200 Yes, but acts
like %Z
Time zone %Z T Time zone or name or abbreviation, textual. Yes
Time zone I Daylight Saving Time flag (1 = = yes). 0, 1 No
Time zone Z Seconds offset from GMT; west of GMT is negative, east of GMT is positive. -43200-43200 No
Compound %c Standard date and time format for current locale. Yes
Compound %D Same as %m/%d/%y. No
Compound %F Same as %Y-%m-%d. No
Compound %r Time in A.M. or P.M. notation for current locale. No
Compound %R Time in 24-hour notation for current locale. No
Compound %T Time in 24-hour notation (same as %H:%M:%S). No
Compound %x Standard date format for current locale (without time). Yes
Compound %X Standard time format for current locale (without date). Yes
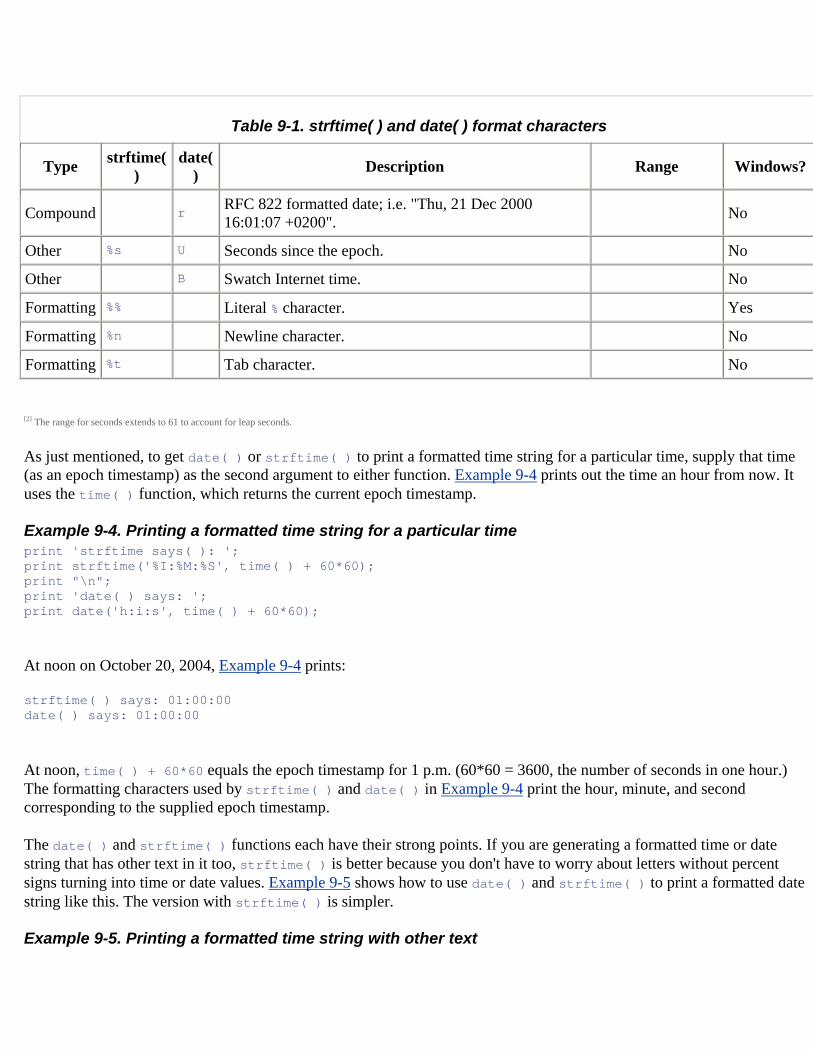
Table 9-1. strftime( ) and date( ) format characters
Type strftime( )
date( ) Description Range Windows?
Compound r RFC 822 formatted date; i.e. "Thu, 21 Dec 2000 16:01:07 +0200". No
Other %s U Seconds since the epoch. No
Other B Swatch Internet time. No
Formatting %% Literal % character. Yes
Formatting %n Newline character. No
Formatting %t Tab character. No
[2] The range for seconds extends to 61 to account for leap seconds.
As just mentioned, to get date( ) or strftime( ) to print a formatted time string for a particular time, supply that time (as an epoch timestamp) as the second argument to either function. Example 9-4 prints out the time an hour from now. It uses the time( ) function, which returns the current epoch timestamp.
Example 9-4. Printing a formatted time string for a particular time print 'strftime says( ): '; print strftime('%I:%M:%S', time( ) + 60*60); print "\n"; print 'date( ) says: '; print date('h:i:s', time( ) + 60*60);
At noon on October 20, 2004, Example 9-4 prints:
strftime( ) says: 01:00:00 date( ) says: 01:00:00
At noon, time( ) + 60*60 equals the epoch timestamp for 1 p.m. (60*60 = 3600, the number of seconds in one hour.) The formatting characters used by strftime( ) and date( ) in Example 9-4 print the hour, minute, and second corresponding to the supplied epoch timestamp.
The date( ) and strftime( ) functions each have their strong points. If you are generating a formatted time or date string that has other text in it too, strftime( ) is better because you don't have to worry about letters without percent signs turning into time or date values. Example 9-5 shows how to use date( ) and strftime( ) to print a formatted date string like this. The version with strftime( ) is simpler.
Example 9-5. Printing a formatted time string with other text
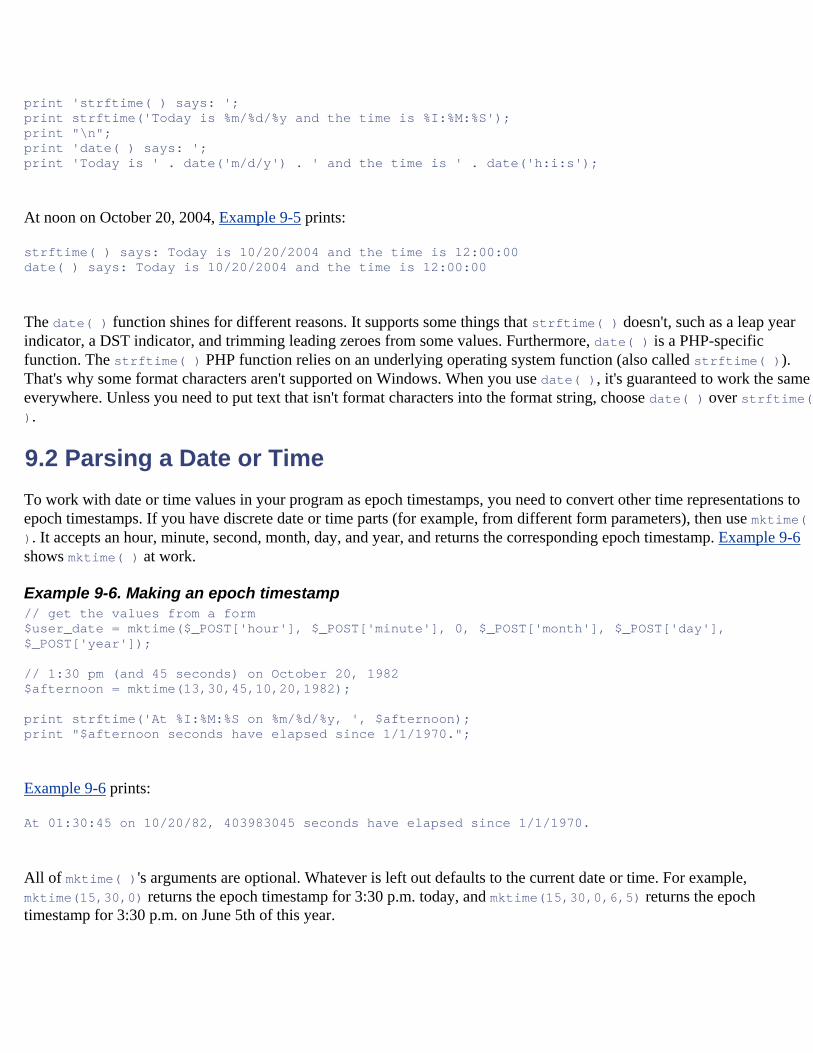
print 'strftime( ) says: '; print strftime('Today is %m/%d/%y and the time is %I:%M:%S'); print "\n"; print 'date( ) says: '; print 'Today is ' . date('m/d/y') . ' and the time is ' . date('h:i:s');
At noon on October 20, 2004, Example 9-5 prints:
strftime( ) says: Today is 10/20/2004 and the time is 12:00:00 date( ) says: Today is 10/20/2004 and the time is 12:00:00
The date( ) function shines for different reasons. It supports some things that strftime( ) doesn't, such as a leap year indicator, a DST indicator, and trimming leading zeroes from some values. Furthermore, date( ) is a PHP-specific function. The strftime( ) PHP function relies on an underlying operating system function (also called strftime( )). That's why some format characters aren't supported on Windows. When you use date( ), it's guaranteed to work the same everywhere. Unless you need to put text that isn't format characters into the format string, choose date( ) over strftime( ).
9.2 Parsing a Date or Time To work with date or time values in your program as epoch timestamps, you need to convert other time representations to epoch timestamps. If you have discrete date or time parts (for example, from different form parameters), then use mktime( ). It accepts an hour, minute, second, month, day, and year, and returns the corresponding epoch timestamp. Example 9-6 shows mktime( ) at work.
Example 9-6. Making an epoch timestamp // get the values from a form $user_date = mktime($_POST['hour'], $_POST['minute'], 0, $_POST['month'], $_POST['day'], $_POST['year']); // 1:30 pm (and 45 seconds) on October 20, 1982 $afternoon = mktime(13,30,45,10,20,1982); print strftime('At %I:%M:%S on %m/%d/%y, ', $afternoon); print "$afternoon seconds have elapsed since 1/1/1970.";
Example 9-6 prints:
At 01:30:45 on 10/20/82, 403983045 seconds have elapsed since 1/1/1970.
All of mktime( )'s arguments are optional. Whatever is left out defaults to the current date or time. For example, mktime(15,30,0) returns the epoch timestamp for 3:30 p.m. today, and mktime(15,30,0,6,5) returns the epoch timestamp for 3:30 p.m. on June 5th of this year.
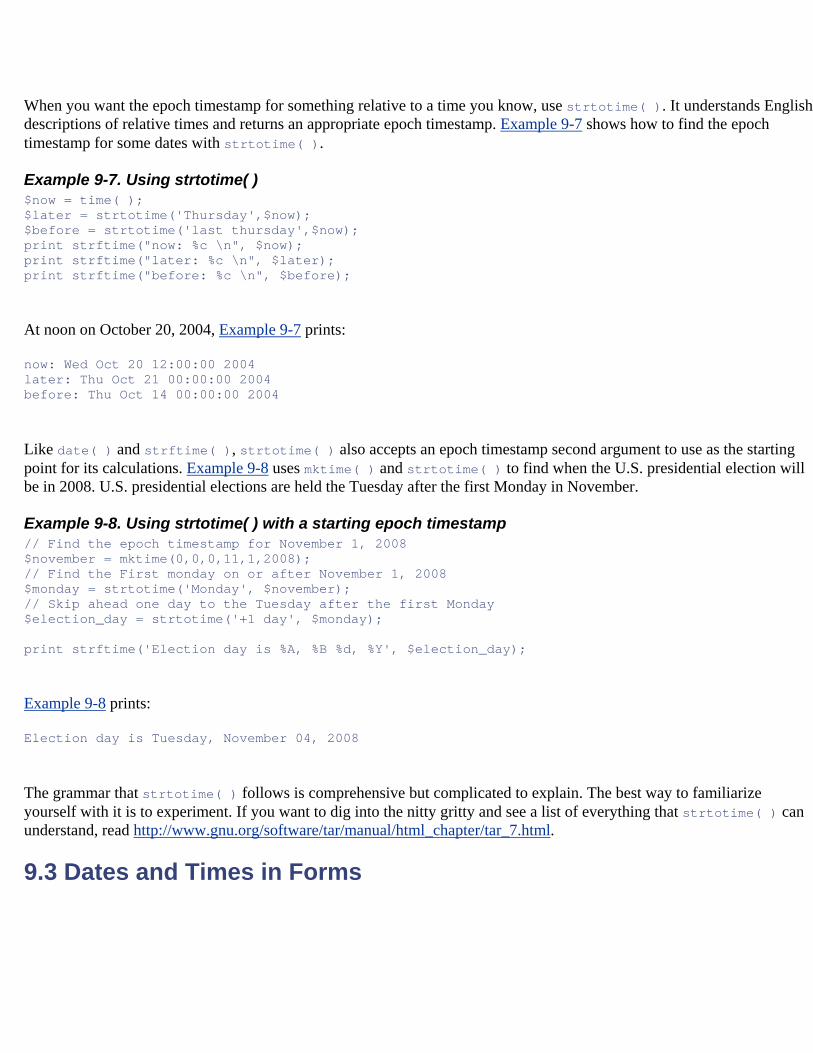
When you want the epoch timestamp for something relative to a time you know, use strtotime( ). It understands English descriptions of relative times and returns an appropriate epoch timestamp. Example 9-7 shows how to find the epoch timestamp for some dates with strtotime( ).
Example 9-7. Using strtotime( ) $now = time( ); $later = strtotime('Thursday',$now); $before = strtotime('last thursday',$now); print strftime("now: %c \n", $now); print strftime("later: %c \n", $later); print strftime("before: %c \n", $before);
At noon on October 20, 2004, Example 9-7 prints:
now: Wed Oct 20 12:00:00 2004 later: Thu Oct 21 00:00:00 2004 before: Thu Oct 14 00:00:00 2004
Like date( ) and strftime( ), strtotime( ) also accepts an epoch timestamp second argument to use as the starting point for its calculations. Example 9-8 uses mktime( ) and strtotime( ) to find when the U.S. presidential election will be in 2008. U.S. presidential elections are held the Tuesday after the first Monday in November.
Example 9-8. Using strtotime( ) with a starting epoch timestamp // Find the epoch timestamp for November 1, 2008 $november = mktime(0,0,0,11,1,2008); // Find the First monday on or after November 1, 2008 $monday = strtotime('Monday', $november); // Skip ahead one day to the Tuesday after the first Monday $election_day = strtotime('+1 day', $monday); print strftime('Election day is %A, %B %d, %Y', $election_day);
Example 9-8 prints:
Election day is Tuesday, November 04, 2008
The grammar that strtotime( ) follows is comprehensive but complicated to explain. The best way to familiarize yourself with it is to experiment. If you want to dig into the nitty gritty and see a list of everything that strtotime( ) can understand, read http://www.gnu.org/software/tar/manual/html_chapter/tar_7.html.
9.3 Dates and Times in Forms
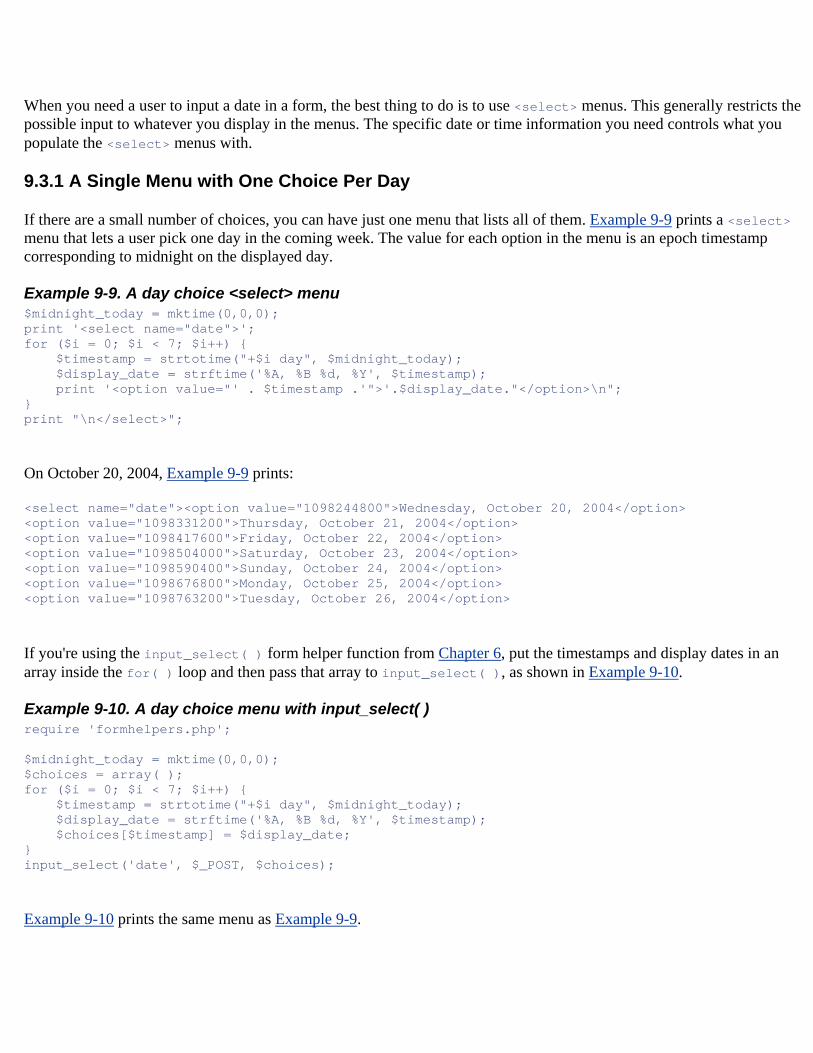
When you need a user to input a date in a form, the best thing to do is to use <select> menus. This generally restricts the possible input to whatever you display in the menus. The specific date or time information you need controls what you populate the <select> menus with.
9.3.1 A Single Menu with One Choice Per Day
If there are a small number of choices, you can have just one menu that lists all of them. Example 9-9 prints a <select> menu that lets a user pick one day in the coming week. The value for each option in the menu is an epoch timestamp corresponding to midnight on the displayed day.
Example 9-9. A day choice <select> menu $midnight_today = mktime(0,0,0); print '<select name="date">'; for ($i = 0; $i < 7; $i++) { $timestamp = strtotime("+$i day", $midnight_today); $display_date = strftime('%A, %B %d, %Y', $timestamp); print '<option value="' . $timestamp .'">'.$display_date."</option>\n"; } print "\n</select>";
On October 20, 2004, Example 9-9 prints:
<select name="date"><option value="1098244800">Wednesday, October 20, 2004</option> <option value="1098331200">Thursday, October 21, 2004</option> <option value="1098417600">Friday, October 22, 2004</option> <option value="1098504000">Saturday, October 23, 2004</option> <option value="1098590400">Sunday, October 24, 2004</option> <option value="1098676800">Monday, October 25, 2004</option> <option value="1098763200">Tuesday, October 26, 2004</option>
If you're using the input_select( ) form helper function from Chapter 6, put the timestamps and display dates in an array inside the for( ) loop and then pass that array to input_select( ), as shown in Example 9-10.
Example 9-10. A day choice menu with input_select( ) require 'formhelpers.php'; $midnight_today = mktime(0,0,0); $choices = array( ); for ($i = 0; $i < 7; $i++) { $timestamp = strtotime("+$i day", $midnight_today); $display_date = strftime('%A, %B %d, %Y', $timestamp); $choices[$timestamp] = $display_date; } input_select('date', $_POST, $choices);
Example 9-10 prints the same menu as Example 9-9.
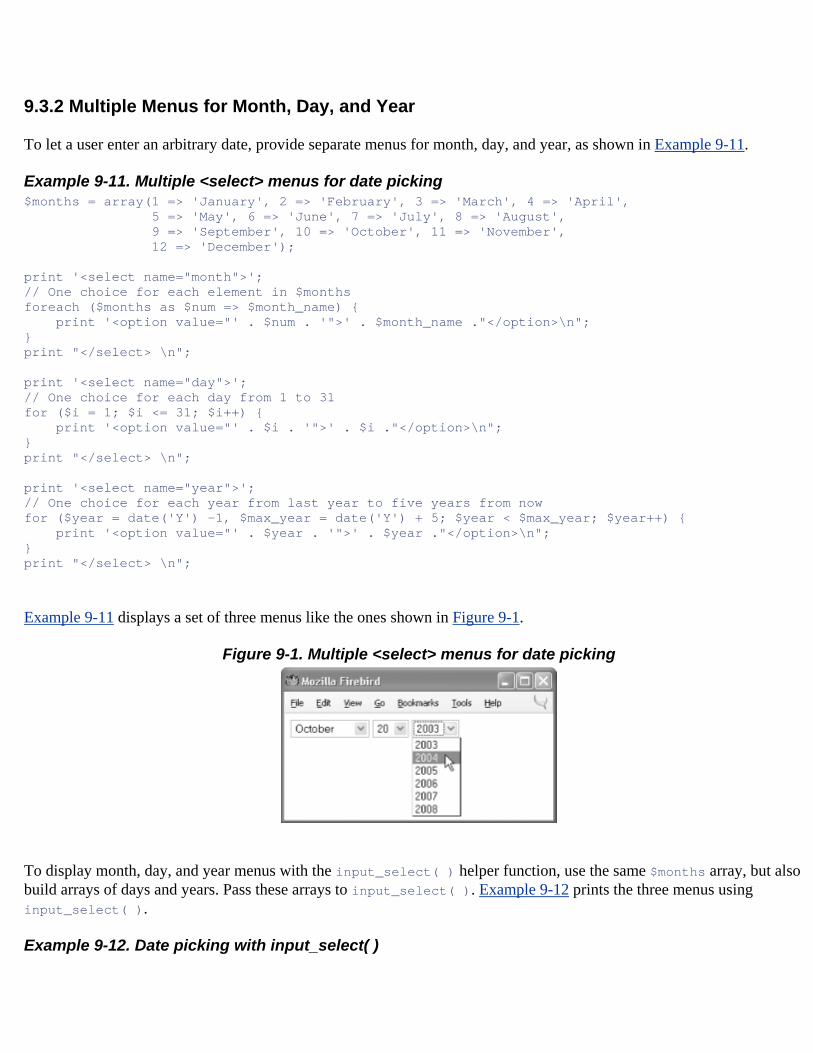
9.3.2 Multiple Menus for Month, Day, and Year
To let a user enter an arbitrary date, provide separate menus for month, day, and year, as shown in Example 9-11.
Example 9-11. Multiple <select> menus for date picking $months = array(1 => 'January', 2 => 'February', 3 => 'March', 4 => 'April', 5 => 'May', 6 => 'June', 7 => 'July', 8 => 'August', 9 => 'September', 10 => 'October', 11 => 'November', 12 => 'December'); print '<select name="month">'; // One choice for each element in $months foreach ($months as $num => $month_name) { print '<option value="' . $num . '">' . $month_name ."</option>\n"; } print "</select> \n"; print '<select name="day">'; // One choice for each day from 1 to 31 for ($i = 1; $i <= 31; $i++) { print '<option value="' . $i . '">' . $i ."</option>\n"; } print "</select> \n"; print '<select name="year">'; // One choice for each year from last year to five years from now for ($year = date('Y') -1, $max_year = date('Y') + 5; $year < $max_year; $year++) { print '<option value="' . $year . '">' . $year ."</option>\n"; } print "</select> \n";
Example 9-11 displays a set of three menus like the ones shown in Figure 9-1.
Figure 9-1. Multiple <select> menus for date picking
To display month, day, and year menus with the input_select( ) helper function, use the same $months array, but also build arrays of days and years. Pass these arrays to input_select( ). Example 9-12 prints the three menus using input_select( ).
Example 9-12. Date picking with input_select( )
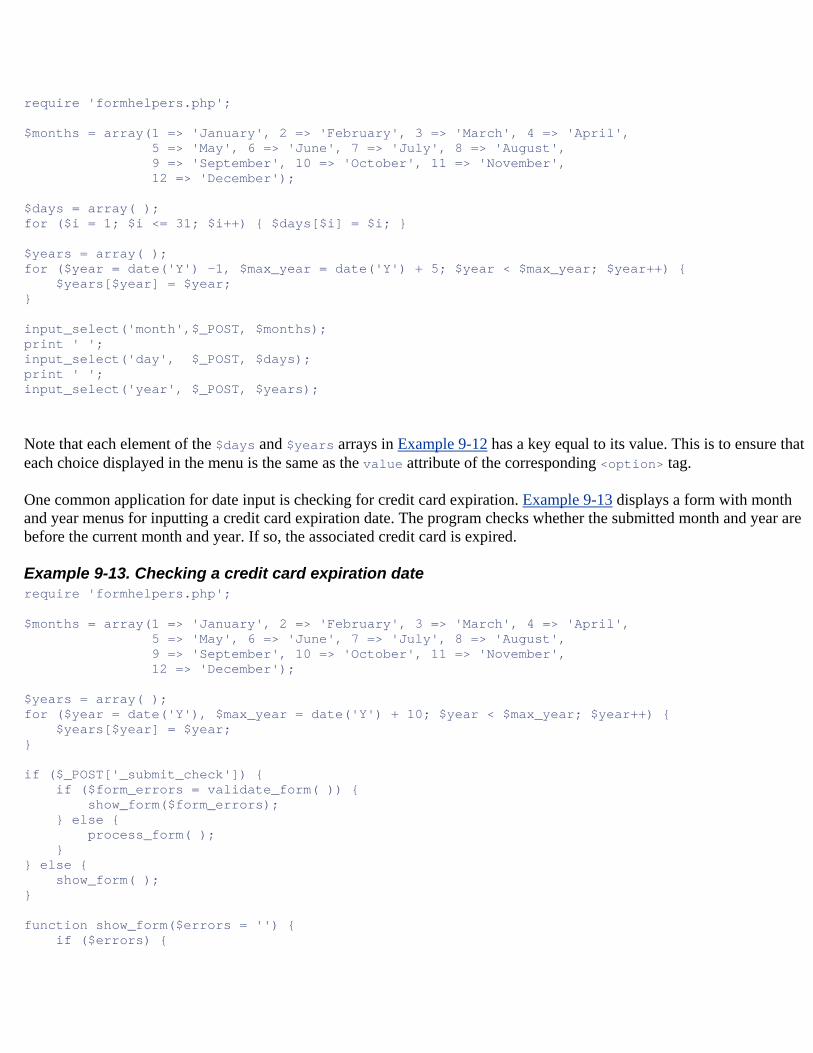
require 'formhelpers.php'; $months = array(1 => 'January', 2 => 'February', 3 => 'March', 4 => 'April', 5 => 'May', 6 => 'June', 7 => 'July', 8 => 'August', 9 => 'September', 10 => 'October', 11 => 'November', 12 => 'December'); $days = array( ); for ($i = 1; $i <= 31; $i++) { $days[$i] = $i; } $years = array( ); for ($year = date('Y') -1, $max_year = date('Y') + 5; $year < $max_year; $year++) { $years[$year] = $year; } input_select('month',$_POST, $months); print ' '; input_select('day', $_POST, $days); print ' '; input_select('year', $_POST, $years);
Note that each element of the $days and $years arrays in Example 9-12 has a key equal to its value. This is to ensure that each choice displayed in the menu is the same as the value attribute of the corresponding <option> tag.
One common application for date input is checking for credit card expiration. Example 9-13 displays a form with month and year menus for inputting a credit card expiration date. The program checks whether the submitted month and year are before the current month and year. If so, the associated credit card is expired.
Example 9-13. Checking a credit card expiration date require 'formhelpers.php'; $months = array(1 => 'January', 2 => 'February', 3 => 'March', 4 => 'April', 5 => 'May', 6 => 'June', 7 => 'July', 8 => 'August', 9 => 'September', 10 => 'October', 11 => 'November', 12 => 'December'); $years = array( ); for ($year = date('Y'), $max_year = date('Y') + 10; $year < $max_year; $year++) { $years[$year] = $year; } if ($_POST['_submit_check']) { if ($form_errors = validate_form( )) { show_form($form_errors); } else { process_form( ); } } else { show_form( ); } function show_form($errors = '') { if ($errors) {
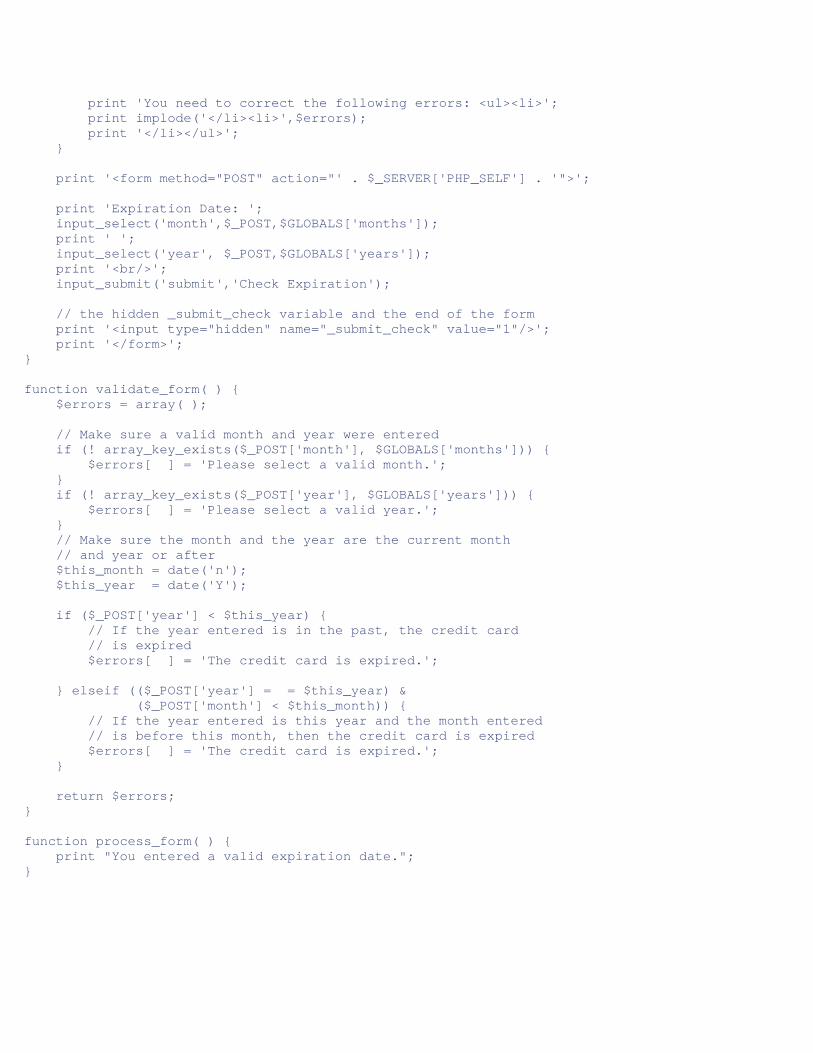
print 'You need to correct the following errors: <ul><li>'; print implode('</li><li>',$errors); print '</li></ul>'; } print '<form method="POST" action="' . $_SERVER['PHP_SELF'] . '">'; print 'Expiration Date: '; input_select('month',$_POST,$GLOBALS['months']); print ' '; input_select('year', $_POST,$GLOBALS['years']); print '<br/>'; input_submit('submit','Check Expiration'); // the hidden _submit_check variable and the end of the form print '<input type="hidden" name="_submit_check" value="1"/>'; print '</form>'; } function validate_form( ) { $errors = array( ); // Make sure a valid month and year were entered if (! array_key_exists($_POST['month'], $GLOBALS['months'])) { $errors[ ] = 'Please select a valid month.'; } if (! array_key_exists($_POST['year'], $GLOBALS['years'])) { $errors[ ] = 'Please select a valid year.'; } // Make sure the month and the year are the current month // and year or after $this_month = date('n'); $this_year = date('Y'); if ($_POST['year'] < $this_year) { // If the year entered is in the past, the credit card // is expired $errors[ ] = 'The credit card is expired.'; } elseif (($_POST['year'] = = $this_year) & ($_POST['month'] < $this_month)) { // If the year entered is this year and the month entered // is before this month, then the credit card is expired $errors[ ] = 'The credit card is expired.'; } return $errors; } function process_form( ) { print "You entered a valid expiration date."; }
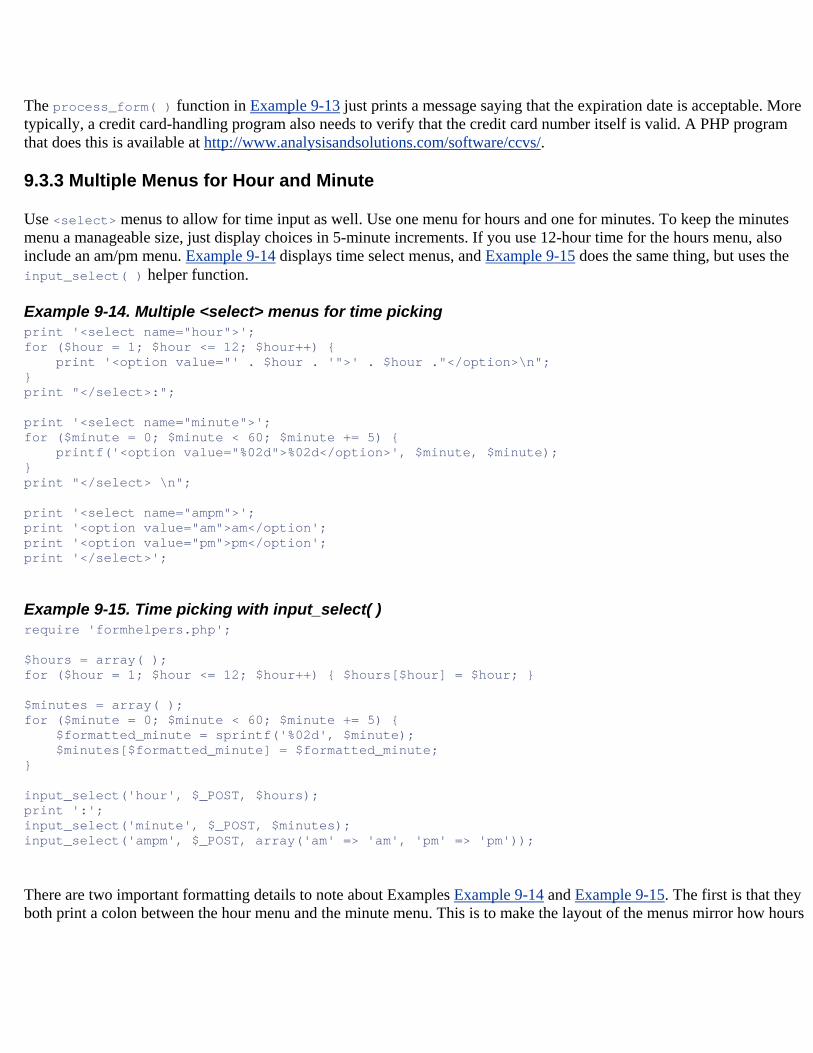
The process_form( ) function in Example 9-13 just prints a message saying that the expiration date is acceptable. More typically, a credit card-handling program also needs to verify that the credit card number itself is valid. A PHP program that does this is available at http://www.analysisandsolutions.com/software/ccvs/.
9.3.3 Multiple Menus for Hour and Minute
Use <select> menus to allow for time input as well. Use one menu for hours and one for minutes. To keep the minutes menu a manageable size, just display choices in 5-minute increments. If you use 12-hour time for the hours menu, also include an am/pm menu. Example 9-14 displays time select menus, and Example 9-15 does the same thing, but uses the input_select( ) helper function.
Example 9-14. Multiple <select> menus for time picking print '<select name="hour">'; for ($hour = 1; $hour <= 12; $hour++) { print '<option value="' . $hour . '">' . $hour ."</option>\n"; } print "</select>:"; print '<select name="minute">'; for ($minute = 0; $minute < 60; $minute += 5) { printf('<option value="%02d">%02d</option>', $minute, $minute); } print "</select> \n"; print '<select name="ampm">'; print '<option value="am">am</option'; print '<option value="pm">pm</option'; print '</select>';
Example 9-15. Time picking with input_select( ) require 'formhelpers.php'; $hours = array( ); for ($hour = 1; $hour <= 12; $hour++) { $hours[$hour] = $hour; } $minutes = array( ); for ($minute = 0; $minute < 60; $minute += 5) { $formatted_minute = sprintf('%02d', $minute); $minutes[$formatted_minute] = $formatted_minute; } input_select('hour', $_POST, $hours); print ':'; input_select('minute', $_POST, $minutes); input_select('ampm', $_POST, array('am' => 'am', 'pm' => 'pm'));
There are two important formatting details to note about Examples Example 9-14 and Example 9-15. The first is that they both print a colon between the hour menu and the minute menu. This is to make the layout of the menus mirror how hours
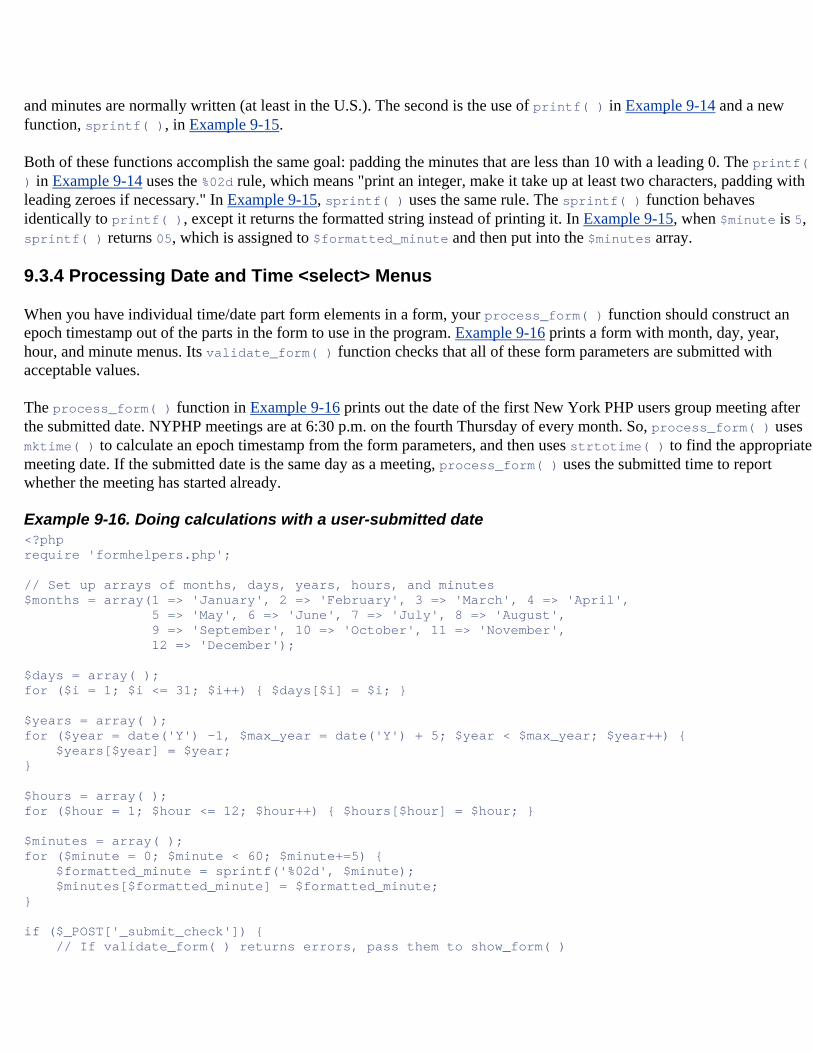
and minutes are normally written (at least in the U.S.). The second is the use of printf( ) in Example 9-14 and a new function, sprintf( ), in Example 9-15.
Both of these functions accomplish the same goal: padding the minutes that are less than 10 with a leading 0. The printf( ) in Example 9-14 uses the %02d rule, which means "print an integer, make it take up at least two characters, padding with leading zeroes if necessary." In Example 9-15, sprintf( ) uses the same rule. The sprintf( ) function behaves identically to printf( ), except it returns the formatted string instead of printing it. In Example 9-15, when $minute is 5, sprintf( ) returns 05, which is assigned to $formatted_minute and then put into the $minutes array.
9.3.4 Processing Date and Time <select> Menus
When you have individual time/date part form elements in a form, your process_form( ) function should construct an epoch timestamp out of the parts in the form to use in the program. Example 9-16 prints a form with month, day, year, hour, and minute menus. Its validate_form( ) function checks that all of these form parameters are submitted with acceptable values.
The process_form( ) function in Example 9-16 prints out the date of the first New York PHP users group meeting after the submitted date. NYPHP meetings are at 6:30 p.m. on the fourth Thursday of every month. So, process_form( ) uses mktime( ) to calculate an epoch timestamp from the form parameters, and then uses strtotime( ) to find the appropriate meeting date. If the submitted date is the same day as a meeting, process_form( ) uses the submitted time to report whether the meeting has started already.
Example 9-16. Doing calculations with a user-submitted date <?php require 'formhelpers.php'; // Set up arrays of months, days, years, hours, and minutes $months = array(1 => 'January', 2 => 'February', 3 => 'March', 4 => 'April', 5 => 'May', 6 => 'June', 7 => 'July', 8 => 'August', 9 => 'September', 10 => 'October', 11 => 'November', 12 => 'December'); $days = array( ); for ($i = 1; $i <= 31; $i++) { $days[$i] = $i; } $years = array( ); for ($year = date('Y') -1, $max_year = date('Y') + 5; $year < $max_year; $year++) { $years[$year] = $year; } $hours = array( ); for ($hour = 1; $hour <= 12; $hour++) { $hours[$hour] = $hour; } $minutes = array( ); for ($minute = 0; $minute < 60; $minute+=5) { $formatted_minute = sprintf('%02d', $minute); $minutes[$formatted_minute] = $formatted_minute; } if ($_POST['_submit_check']) { // If validate_form( ) returns errors, pass them to show_form( )
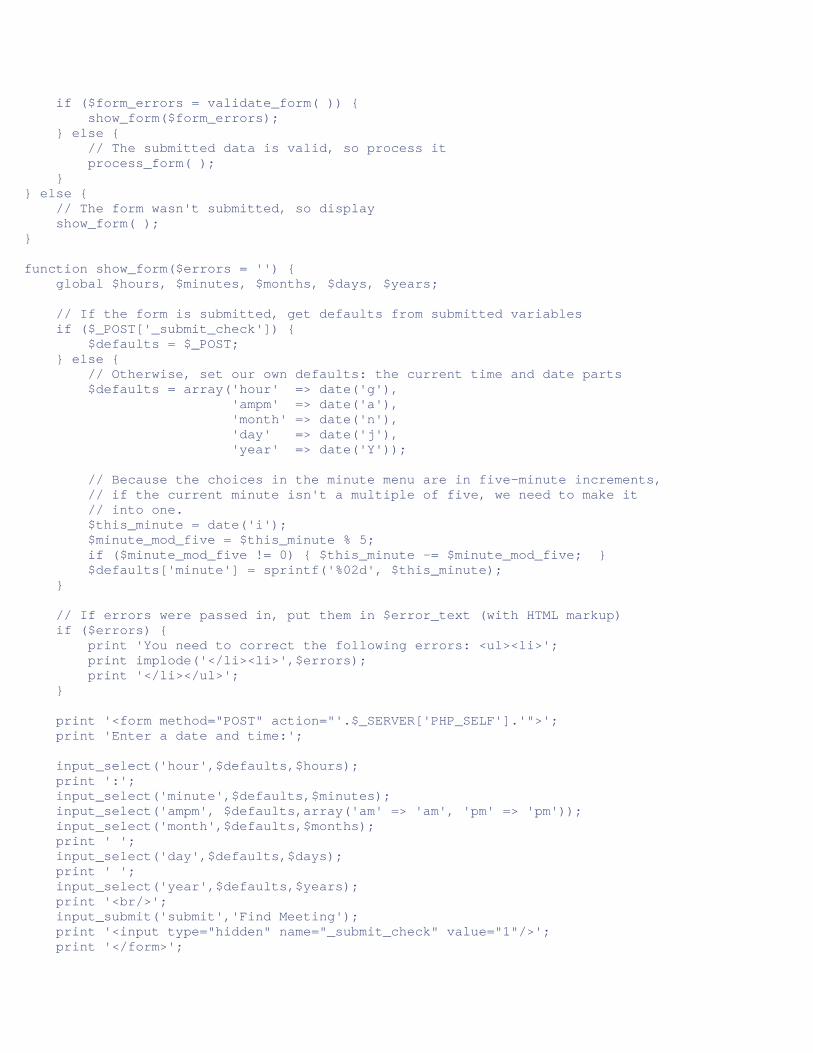
if ($form_errors = validate_form( )) { show_form($form_errors); } else { // The submitted data is valid, so process it process_form( ); } } else { // The form wasn't submitted, so display show_form( ); } function show_form($errors = '') { global $hours, $minutes, $months, $days, $years; // If the form is submitted, get defaults from submitted variables if ($_POST['_submit_check']) { $defaults = $_POST; } else { // Otherwise, set our own defaults: the current time and date parts $defaults = array('hour' => date('g'), 'ampm' => date('a'), 'month' => date('n'), 'day' => date('j'), 'year' => date('Y')); // Because the choices in the minute menu are in five-minute increments, // if the current minute isn't a multiple of five, we need to make it // into one. $this_minute = date('i'); $minute_mod_five = $this_minute % 5; if ($minute_mod_five != 0) { $this_minute -= $minute_mod_five; } $defaults['minute'] = sprintf('%02d', $this_minute); } // If errors were passed in, put them in $error_text (with HTML markup) if ($errors) { print 'You need to correct the following errors: <ul><li>'; print implode('</li><li>',$errors); print '</li></ul>'; } print '<form method="POST" action="'.$_SERVER['PHP_SELF'].'">'; print 'Enter a date and time:'; input_select('hour',$defaults,$hours); print ':'; input_select('minute',$defaults,$minutes); input_select('ampm', $defaults,array('am' => 'am', 'pm' => 'pm')); input_select('month',$defaults,$months); print ' '; input_select('day',$defaults,$days); print ' '; input_select('year',$defaults,$years); print '<br/>'; input_submit('submit','Find Meeting'); print '<input type="hidden" name="_submit_check" value="1"/>'; print '</form>';
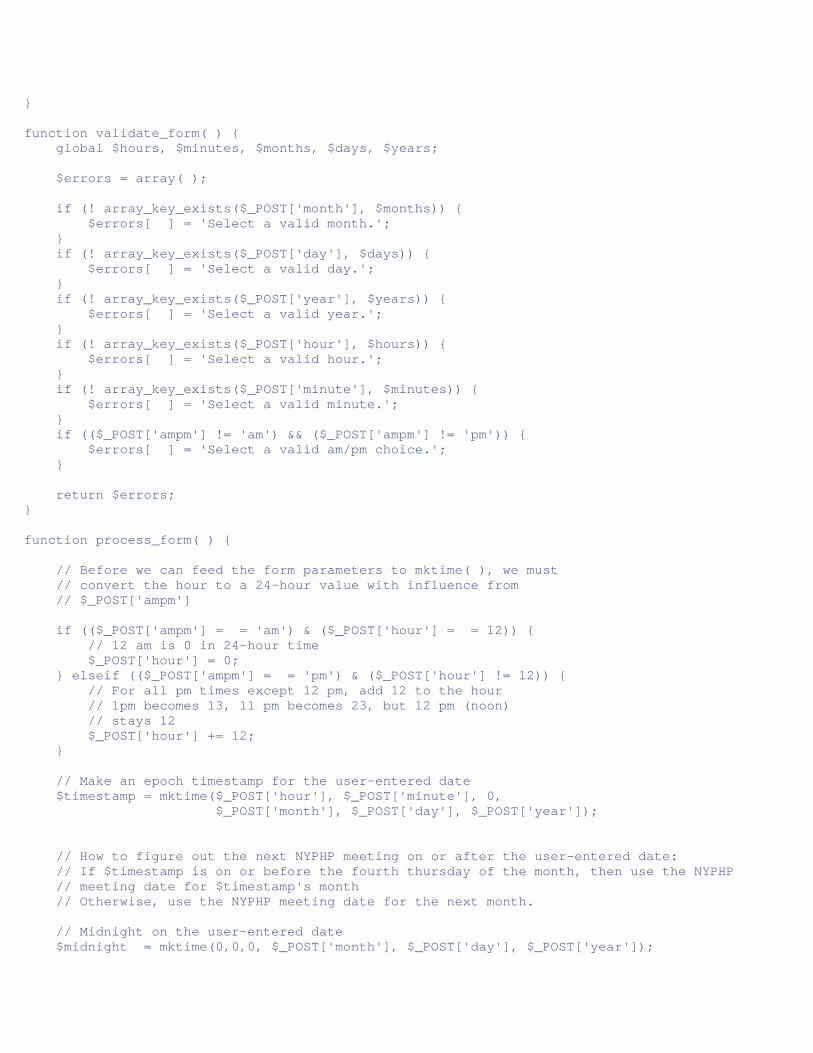
} function validate_form( ) { global $hours, $minutes, $months, $days, $years; $errors = array( ); if (! array_key_exists($_POST['month'], $months)) { $errors[ ] = 'Select a valid month.'; } if (! array_key_exists($_POST['day'], $days)) { $errors[ ] = 'Select a valid day.'; } if (! array_key_exists($_POST['year'], $years)) { $errors[ ] = 'Select a valid year.'; } if (! array_key_exists($_POST['hour'], $hours)) { $errors[ ] = 'Select a valid hour.'; } if (! array_key_exists($_POST['minute'], $minutes)) { $errors[ ] = 'Select a valid minute.'; } if (($_POST['ampm'] != 'am') && ($_POST['ampm'] != 'pm')) { $errors[ ] = 'Select a valid am/pm choice.'; } return $errors; } function process_form( ) { // Before we can feed the form parameters to mktime( ), we must // convert the hour to a 24-hour value with influence from // $_POST['ampm'] if (($_POST['ampm'] = = 'am') & ($_POST['hour'] = = 12)) { // 12 am is 0 in 24-hour time $_POST['hour'] = 0; } elseif (($_POST['ampm'] = = 'pm') & ($_POST['hour'] != 12)) { // For all pm times except 12 pm, add 12 to the hour // 1pm becomes 13, 11 pm becomes 23, but 12 pm (noon) // stays 12 $_POST['hour'] += 12; } // Make an epoch timestamp for the user-entered date $timestamp = mktime($_POST['hour'], $_POST['minute'], 0, $_POST['month'], $_POST['day'], $_POST['year']); // How to figure out the next NYPHP meeting on or after the user-entered date: // If $timestamp is on or before the fourth thursday of the month, then use the NYPHP // meeting date for $timestamp's month // Otherwise, use the NYPHP meeting date for the next month. // Midnight on the user-entered date $midnight = mktime(0,0,0, $_POST['month'], $_POST['day'], $_POST['year']);
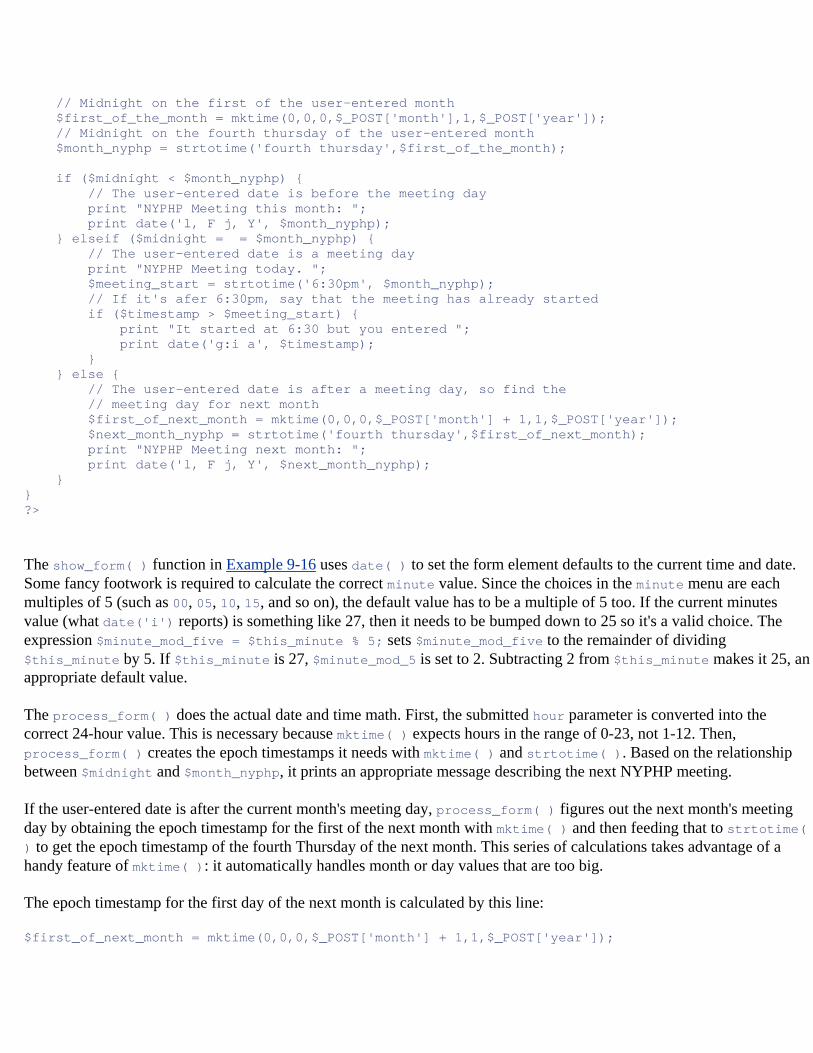
// Midnight on the first of the user-entered month $first_of_the_month = mktime(0,0,0,$_POST['month'],1,$_POST['year']); // Midnight on the fourth thursday of the user-entered month $month_nyphp = strtotime('fourth thursday',$first_of_the_month); if ($midnight < $month_nyphp) { // The user-entered date is before the meeting day print "NYPHP Meeting this month: "; print date('l, F j, Y', $month_nyphp); } elseif ($midnight = = $month_nyphp) { // The user-entered date is a meeting day print "NYPHP Meeting today. "; $meeting_start = strtotime('6:30pm', $month_nyphp); // If it's afer 6:30pm, say that the meeting has already started if ($timestamp > $meeting_start) { print "It started at 6:30 but you entered "; print date('g:i a', $timestamp); } } else { // The user-entered date is after a meeting day, so find the // meeting day for next month $first_of_next_month = mktime(0,0,0,$_POST['month'] + 1,1,$_POST['year']); $next_month_nyphp = strtotime('fourth thursday',$first_of_next_month); print "NYPHP Meeting next month: "; print date('l, F j, Y', $next_month_nyphp); } } ?>
The show_form( ) function in Example 9-16 uses date( ) to set the form element defaults to the current time and date. Some fancy footwork is required to calculate the correct minute value. Since the choices in the minute menu are each multiples of 5 (such as 00, 05, 10, 15, and so on), the default value has to be a multiple of 5 too. If the current minutes value (what date('i') reports) is something like 27, then it needs to be bumped down to 25 so it's a valid choice. The expression $minute_mod_five = $this_minute % 5; sets $minute_mod_five to the remainder of dividing $this_minute by 5. If $this_minute is 27, $minute_mod_5 is set to 2. Subtracting 2 from $this_minute makes it 25, an appropriate default value.
The process_form( ) does the actual date and time math. First, the submitted hour parameter is converted into the correct 24-hour value. This is necessary because mktime( ) expects hours in the range of 0-23, not 1-12. Then, process_form( ) creates the epoch timestamps it needs with mktime( ) and strtotime( ). Based on the relationship between $midnight and $month_nyphp, it prints an appropriate message describing the next NYPHP meeting.
If the user-entered date is after the current month's meeting day, process_form( ) figures out the next month's meeting day by obtaining the epoch timestamp for the first of the next month with mktime( ) and then feeding that to strtotime( ) to get the epoch timestamp of the fourth Thursday of the next month. This series of calculations takes advantage of a handy feature of mktime( ): it automatically handles month or day values that are too big.
The epoch timestamp for the first day of the next month is calculated by this line:
$first_of_next_month = mktime(0,0,0,$_POST['month'] + 1,1,$_POST['year']);
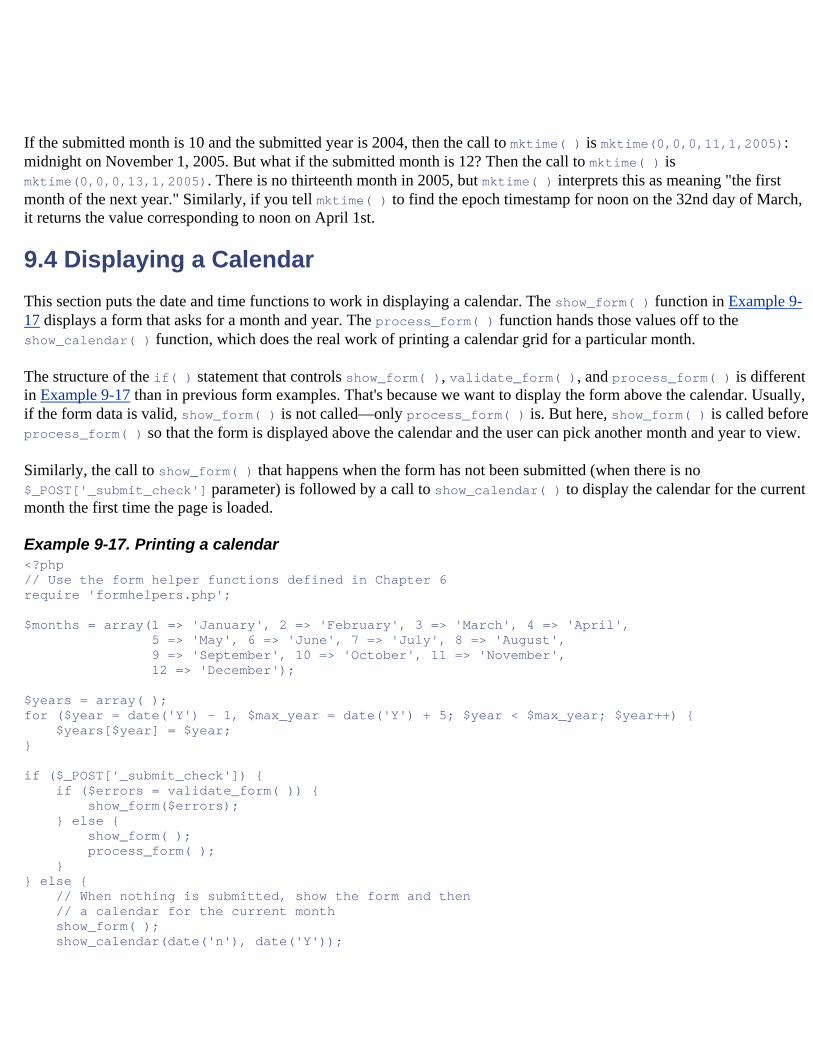
If the submitted month is 10 and the submitted year is 2004, then the call to mktime( ) is mktime(0,0,0,11,1,2005): midnight on November 1, 2005. But what if the submitted month is 12? Then the call to mktime( ) is mktime(0,0,0,13,1,2005). There is no thirteenth month in 2005, but mktime( ) interprets this as meaning "the first month of the next year." Similarly, if you tell mktime( ) to find the epoch timestamp for noon on the 32nd day of March, it returns the value corresponding to noon on April 1st.
9.4 Displaying a Calendar This section puts the date and time functions to work in displaying a calendar. The show_form( ) function in Example 9-17 displays a form that asks for a month and year. The process_form( ) function hands those values off to the show_calendar( ) function, which does the real work of printing a calendar grid for a particular month.
The structure of the if( ) statement that controls show_form( ), validate_form( ), and process_form( ) is different in Example 9-17 than in previous form examples. That's because we want to display the form above the calendar. Usually, if the form data is valid, show_form( ) is not called—only process_form( ) is. But here, show_form( ) is called before process_form( ) so that the form is displayed above the calendar and the user can pick another month and year to view.
Similarly, the call to show_form( ) that happens when the form has not been submitted (when there is no $_POST['_submit_check'] parameter) is followed by a call to show_calendar( ) to display the calendar for the current month the first time the page is loaded.
Example 9-17. Printing a calendar <?php // Use the form helper functions defined in Chapter 6 require 'formhelpers.php'; $months = array(1 => 'January', 2 => 'February', 3 => 'March', 4 => 'April', 5 => 'May', 6 => 'June', 7 => 'July', 8 => 'August', 9 => 'September', 10 => 'October', 11 => 'November', 12 => 'December'); $years = array( ); for ($year = date('Y') - 1, $max_year = date('Y') + 5; $year < $max_year; $year++) { $years[$year] = $year; } if ($_POST['_submit_check']) { if ($errors = validate_form( )) { show_form($errors); } else { show_form( ); process_form( ); } } else { // When nothing is submitted, show the form and then // a calendar for the current month show_form( ); show_calendar(date('n'), date('Y'));
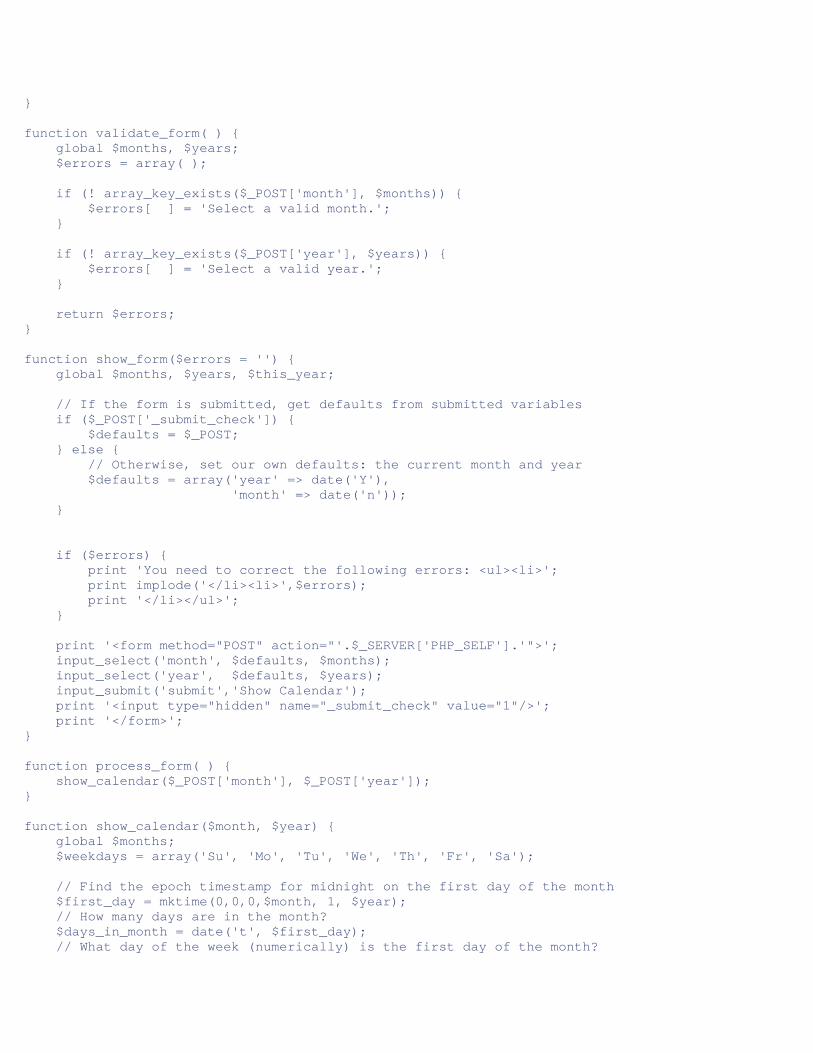
} function validate_form( ) { global $months, $years; $errors = array( ); if (! array_key_exists($_POST['month'], $months)) { $errors[ ] = 'Select a valid month.'; } if (! array_key_exists($_POST['year'], $years)) { $errors[ ] = 'Select a valid year.'; } return $errors; } function show_form($errors = '') { global $months, $years, $this_year; // If the form is submitted, get defaults from submitted variables if ($_POST['_submit_check']) { $defaults = $_POST; } else { // Otherwise, set our own defaults: the current month and year $defaults = array('year' => date('Y'), 'month' => date('n')); } if ($errors) { print 'You need to correct the following errors: <ul><li>'; print implode('</li><li>',$errors); print '</li></ul>'; } print '<form method="POST" action="'.$_SERVER['PHP_SELF'].'">'; input_select('month', $defaults, $months); input_select('year', $defaults, $years); input_submit('submit','Show Calendar'); print '<input type="hidden" name="_submit_check" value="1"/>'; print '</form>'; } function process_form( ) { show_calendar($_POST['month'], $_POST['year']); } function show_calendar($month, $year) { global $months; $weekdays = array('Su', 'Mo', 'Tu', 'We', 'Th', 'Fr', 'Sa'); // Find the epoch timestamp for midnight on the first day of the month $first_day = mktime(0,0,0,$month, 1, $year); // How many days are in the month? $days_in_month = date('t', $first_day); // What day of the week (numerically) is the first day of the month?
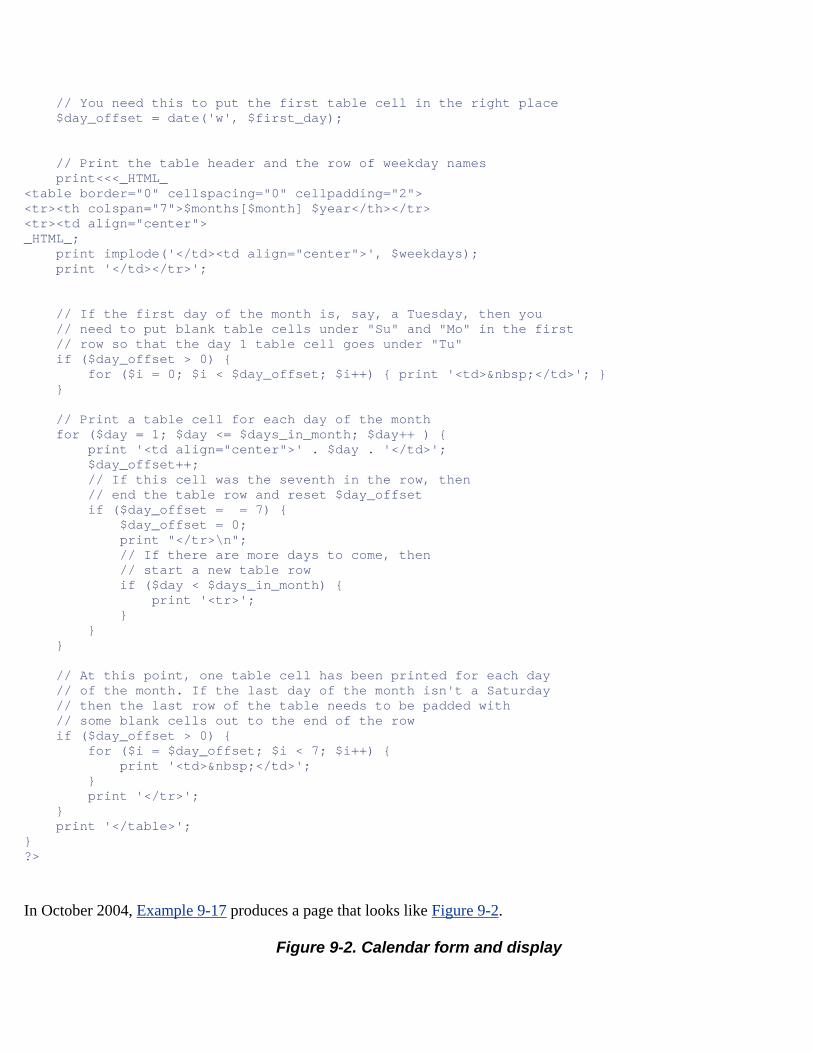
// You need this to put the first table cell in the right place $day_offset = date('w', $first_day); // Print the table header and the row of weekday names print<<<_HTML_ <table border="0" cellspacing="0" cellpadding="2"> <tr><th colspan="7">$months[$month] $year</th></tr> <tr><td align="center"> _HTML_; print implode('</td><td align="center">', $weekdays); print '</td></tr>'; // If the first day of the month is, say, a Tuesday, then you // need to put blank table cells under "Su" and "Mo" in the first // row so that the day 1 table cell goes under "Tu" if ($day_offset > 0) { for ($i = 0; $i < $day_offset; $i++) { print '<td> </td>'; } } // Print a table cell for each day of the month for ($day = 1; $day <= $days_in_month; $day++ ) { print '<td align="center">' . $day . '</td>'; $day_offset++; // If this cell was the seventh in the row, then // end the table row and reset $day_offset if ($day_offset = = 7) { $day_offset = 0; print "</tr>\n"; // If there are more days to come, then // start a new table row if ($day < $days_in_month) { print '<tr>'; } } } // At this point, one table cell has been printed for each day // of the month. If the last day of the month isn't a Saturday // then the last row of the table needs to be padded with // some blank cells out to the end of the row if ($day_offset > 0) { for ($i = $day_offset; $i < 7; $i++) { print '<td> </td>'; } print '</tr>'; } print '</table>'; } ?>
In October 2004, Example 9-17 produces a page that looks like Figure 9-2.
Figure 9-2. Calendar form and display
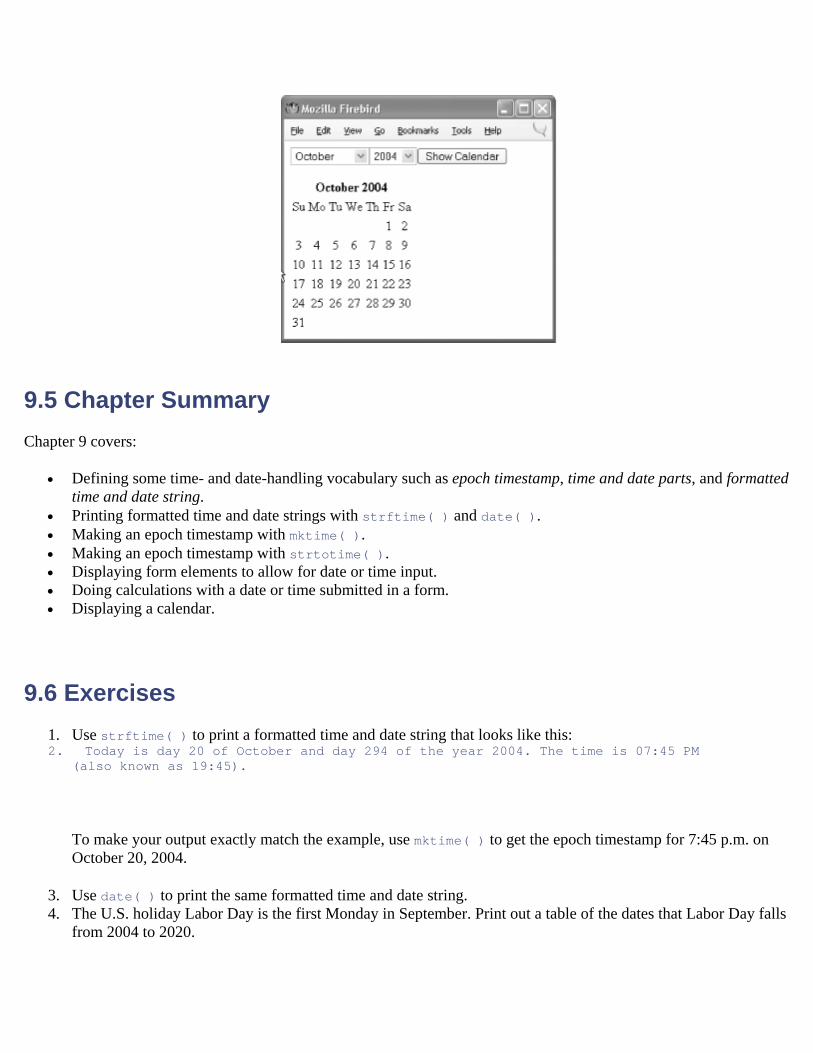
9.5 Chapter Summary Chapter 9 covers:
• Defining some time- and date-handling vocabulary such as epoch timestamp, time and date parts, and formatted time and date string.
• Printing formatted time and date strings with strftime( ) and date( ). • Making an epoch timestamp with mktime( ). • Making an epoch timestamp with strtotime( ). • Displaying form elements to allow for date or time input. • Doing calculations with a date or time submitted in a form. • Displaying a calendar.
9.6 Exercises 1. Use strftime( ) to print a formatted time and date string that looks like this: 2. Today is day 20 of October and day 294 of the year 2004. The time is 07:45 PM
(also known as 19:45).
To make your output exactly match the example, use mktime( ) to get the epoch timestamp for 7:45 p.m. on October 20, 2004.
3. Use date( ) to print the same formatted time and date string. 4. The U.S. holiday Labor Day is the first Monday in September. Print out a table of the dates that Labor Day falls
from 2004 to 2020.
5. Write a PHP program that displays a form in which users select a day, month, and year in the future. Print out a list of all the Tuesdays between the current date and the date the user submits in the form.
Chapter 10. Working with Files The data storage destination of choice for a web application is a database. That doesn't mean that you're completely off the hook from dealing with regular old files, though. Plain text files are still a handy, universal way to exchange some kinds of information.
You can do some easy customization of your web site by storing HTML templates in text files. When it's time to generate a specialized page, load the text file, substitute real data for the template elements, and print it. Example 10-1 shows you how to do this.
Files are also good for importing or exporting tabular data between your program and a spreadsheet. In your PHP programs, you can easily read and write the CSV ("comma-separated value") files with which spreadsheet programs work.
Working with files in PHP also means working with remote web pages. A great thing about file handling in PHP is you can open a remote file on another computer as easily as you can open a file that sits on your web server. Most file-handling functions in PHP understand URLs as well as local filenames. However, for this feature to work, the allow_url_fopen configuration directive must be enabled. It is enabled by default, but if you're having problems loading a remote file, check this setting.
10.1 Understanding File Permissions To read or write a file with any of the functions you'll learn about in this chapter, the PHP interpreter must have permission from the operating system to do so. Every program that runs on a computer, including the PHP interpreter, runs with the privileges of a particular user account. Most of the user accounts correspond to people. When you log in to your computer and start up your word processor, that word processor runs with the privileges that correspond to your account: it can read files that you are allowed to see and write files that you are allowed to change.
Some user accounts on a computer, however, aren't for people, but for system processes such as web servers. When the PHP intepreter runs inside of a web server, it has the privileges that the web server's "account" has. So if the web server is allowed to read a certain file or directory, then the PHP interpreter (and therefore your PHP program) can read that file or directory. If the web server is allowed to change a certain file or write new files in a particular directory, then so can the PHP interpreter and your PHP program.
Usually, the privileges extended to a web server's account are more limited than the privileges that go along with a real person's account. The web server (and the PHP interpreter) need to be able to read all of the PHP program files that make up your web site, but they shouldn't be able to change them. If a bug in the web server or an insecure PHP program lets an attacker break in, the PHP program files should be protected against being changed by that attacker.
In practice, what this means is that your PHP programs shouldn't have too much trouble reading most files that you need to read. (Of course, if you try to read another user's private files, you may run into a problem—but that's as it should be!) However, the files that your PHP program can change and the directories into which your program can write new files are limited. If you need to create lots of new files in your PHP programs, work with your system administrator to make a special directory that you can write to but that doesn't compromise system security. Section 10.5, later in this chapter, shows you how to determine what files and directories your programs are allowed to read and write.
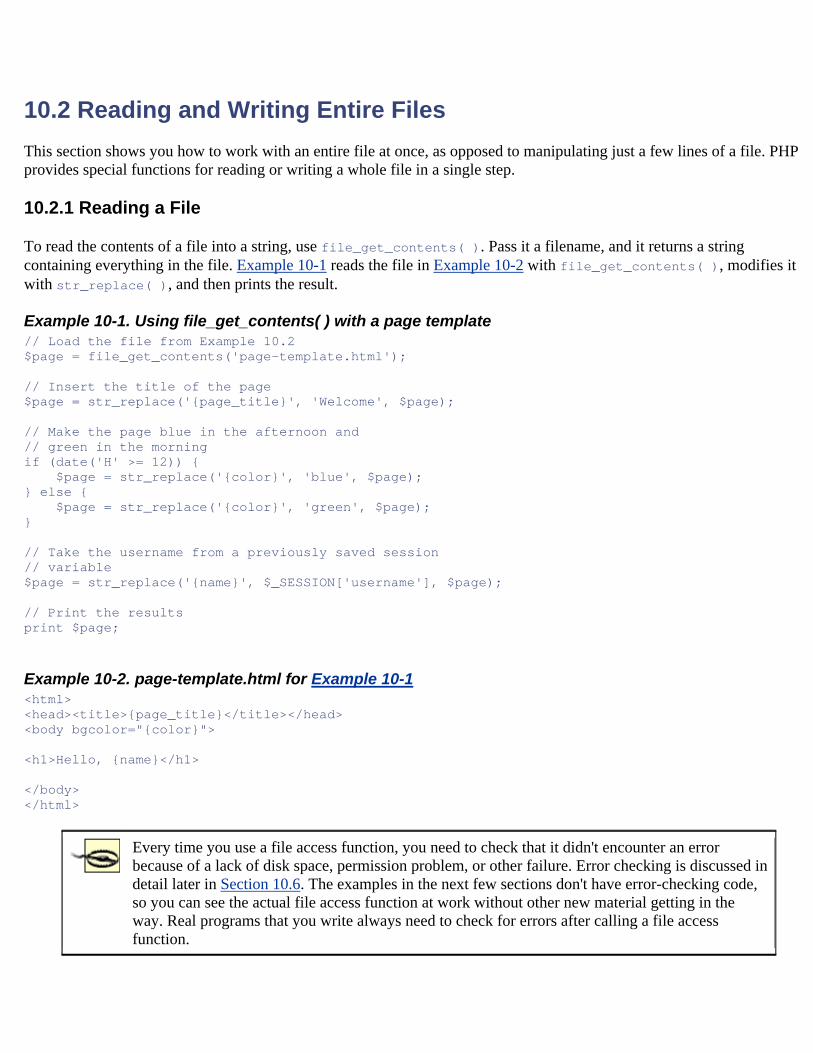
10.2 Reading and Writing Entire Files This section shows you how to work with an entire file at once, as opposed to manipulating just a few lines of a file. PHP provides special functions for reading or writing a whole file in a single step.
10.2.1 Reading a File
To read the contents of a file into a string, use file_get_contents( ). Pass it a filename, and it returns a string containing everything in the file. Example 10-1 reads the file in Example 10-2 with file_get_contents( ), modifies it with str_replace( ), and then prints the result.
Example 10-1. Using file_get_contents( ) with a page template // Load the file from Example 10.2 $page = file_get_contents('page-template.html'); // Insert the title of the page $page = str_replace('{page_title}', 'Welcome', $page); // Make the page blue in the afternoon and // green in the morning if (date('H' >= 12)) { $page = str_replace('{color}', 'blue', $page); } else { $page = str_replace('{color}', 'green', $page); } // Take the username from a previously saved session // variable $page = str_replace('{name}', $_SESSION['username'], $page); // Print the results print $page;
Example 10-2. page-template.html for Example 10-1 <html> <head><title>{page_title}</title></head> <body bgcolor="{color}"> <h1>Hello, {name}</h1> </body> </html>
Every time you use a file access function, you need to check that it didn't encounter an error because of a lack of disk space, permission problem, or other failure. Error checking is discussed in detail later in Section 10.6. The examples in the next few sections don't have error-checking code, so you can see the actual file access function at work without other new material getting in the way. Real programs that you write always need to check for errors after calling a file access function.
With $_SESSION['username'] set to Jacob, Example 10-1 prints:
<html> <head><title>Welcome</title></head> <body bgcolor="green"> <h1>Hello, Jacob</h1> </body> </html>
A local file and a remote file look the same to file_get_contents( ). If you pass a URL to file_get_contents( ), it reads the web page at that URL. Example 10-3 retrieves a weather report from the U.S. National Weather Service. It uses strpos( ) and substr( ) to scoop out and print just the part of the page that contains the forecast for the upcoming week.
Example 10-3. Retrieving a remote page with file_get_contents( ) $zip = 98052; $weather_page = file_get_contents('http://www.srh.noaa.gov/zipcity.php?inputstring=' . $zip); // Just keep everything after the "Detailed Forecast" image alt text $page = strstr($weather_page,'Detailed Forecast'); // Find where the forecast <table> starts $table_start = strpos($page, '<table'); // Find where the <table> ends // Need to add 8 to advance past the </table> tag $table_end = strpos($page, '</table>') + 8; // And print a slice of $page that holds the table print substr($page, $table_start, $table_end - $table_start);
Obviously, what the weather is going to be in the coming days varies constantly, but Example 10-3 prints something like:
<table cellspacing="0" cellpadding="3" border="0" width="326"> <tr> <td><a name="contents"></a> <b>Today</b>. Numerous showers developing by noon. A chance of afternoon thunderstorms. Highs in the mid 50s. Southwest wind 10 to 15 mph. <br><br> <b>Tonight</b>. Numerous showers and chance of thunderstorms in the evening. Then mostly cloudy. Lows near 40. Southwest wind near 10 mph. <br><br> <b>Friday</b>. Partly cloudy. A chance of afternoon showers. Highs in the mid to upper 50s. South wind near 10 mph shifting to the west in the afternoon. <br><br> <b>Friday night</b>. Partly cloudy. A chance of evening showers. Lows in the upper 30s. Light wind. <br><br> <b>Saturday</b>. Partly cloudy. A chance of afternoon showers. Highs in the mid 50s. Southwest wind near 10 mph in the morning becoming
light. <br><br> <b>Saturday night</b>. Partly cloudy. A chance of evening showers. Lows in the mid 30s. <br><br> <b>Sunday</b>. Partly sunny. Highs in the upper 50s. <br><br> <b>Sunday night</b>. Partly cloudy. Lows in the upper 30s. <br><br> <b>Monday</b>. Partly sunny. Highs in the lower 60s. <br><br> <b>Monday night</b>. Partly cloudy. Lows in the lower 40s. <br><br> <b>Tuesday</b>. Mostly cloudy. A chance of rain. Highs in the lower 60s. <br><br> <b>Tuesday night</b>. Mostly cloudy. A chance of rain. Lows in the lower 40s. <br><br> <b>Wednesday</b>. Mostly cloudy. A chance of rain. Highs in the upper 50s. <br>&& temperature / precipitation gold bar 54 40 56 / 50 50 40 enumclaw 55 39 56 / 60 60 40 north bend 56 40 57 / 60 60 40 <br><br> </td> </tr> </table>
Retrieving a remote URL and slicing out a chunk of it for your use is called screen scraping. It's a popular and easy way to incorporate remote data sources into your programs. There are two things to be concerned with, though, when you engage in scraping.
First, screen scraping can be fragile. The slightest changes in page structure can break your carefully tuned string parsing. If the National Weather Service decides to change the HTML around their Short Term Forecast, then Example 10-3 might no longer parse the page correctly. (Perhaps this has already happened since this paragraph was written!)
The second issue with screen scraping is its propriety. The National Weather Service explicitly puts its information in the public domain, but most web sites don't. Before you scrape another site and incorporate its content into your own, be sure that you have permission to do so.
For in-depth screen scraping, consider using regular expressions. With the pattern-matching power of a regular expression, you can flexibly carve up a retrieved web page. Regular expressions are helpful for screen-scraping tasks such as extracting all the links from a page or pulling the content out of individual HTML table cells; you will learn about them in Appendix B.
10.2.2 Writing a File
The counterpart to reading the contents of a file into a string is writing a string to a file. And the counterpart to file_get_contents( ) is file_put_contents( ). Example 10-4 extends Example 10-3 by saving the short term weather forecast in a local file in addition to printing it.
Example 10-4. Saving a file with file_put_contents( ) $zip = 98052; $weather_page = file_get_contents('http://www.srh.noaa.gov/zipcity.php?inputstring=' . $zip);
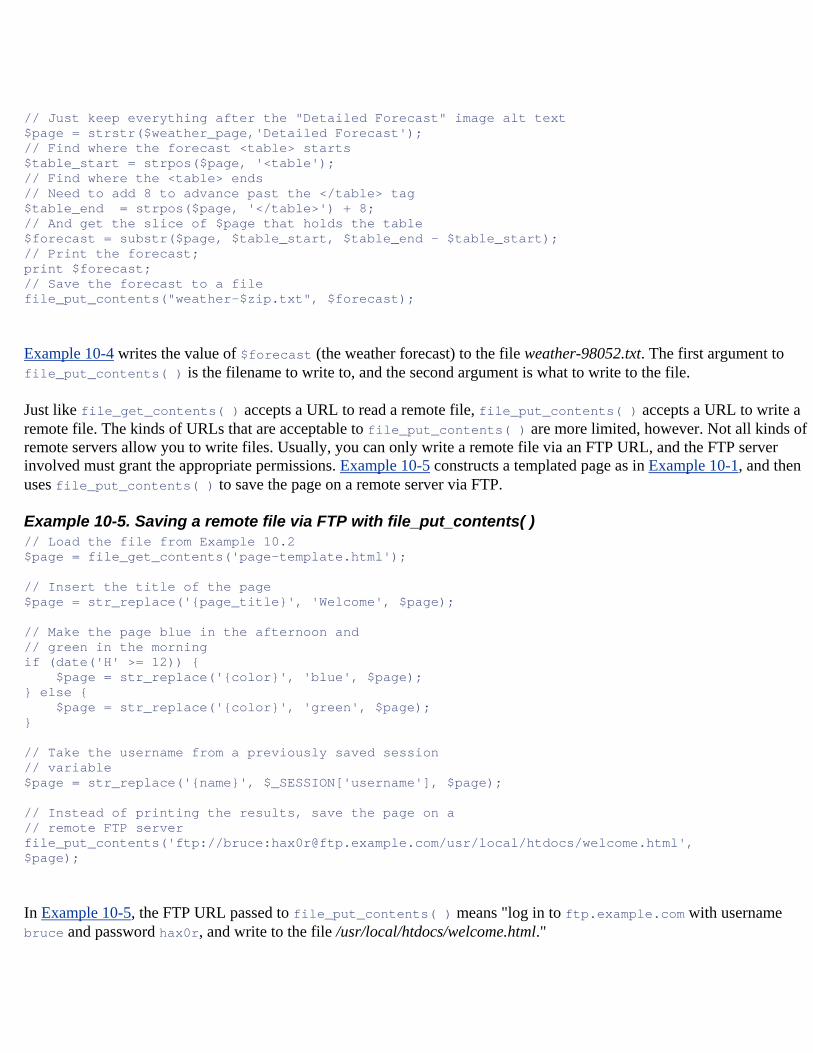
// Just keep everything after the "Detailed Forecast" image alt text $page = strstr($weather_page,'Detailed Forecast'); // Find where the forecast <table> starts $table_start = strpos($page, '<table'); // Find where the <table> ends // Need to add 8 to advance past the </table> tag $table_end = strpos($page, '</table>') + 8; // And get the slice of $page that holds the table $forecast = substr($page, $table_start, $table_end - $table_start); // Print the forecast; print $forecast; // Save the forecast to a file file_put_contents("weather-$zip.txt", $forecast);
Example 10-4 writes the value of $forecast (the weather forecast) to the file weather-98052.txt. The first argument to file_put_contents( ) is the filename to write to, and the second argument is what to write to the file.
Just like file_get_contents( ) accepts a URL to read a remote file, file_put_contents( ) accepts a URL to write a remote file. The kinds of URLs that are acceptable to file_put_contents( ) are more limited, however. Not all kinds of remote servers allow you to write files. Usually, you can only write a remote file via an FTP URL, and the FTP server involved must grant the appropriate permissions. Example 10-5 constructs a templated page as in Example 10-1, and then uses file_put_contents( ) to save the page on a remote server via FTP.
Example 10-5. Saving a remote file via FTP with file_put_contents( ) // Load the file from Example 10.2 $page = file_get_contents('page-template.html'); // Insert the title of the page $page = str_replace('{page_title}', 'Welcome', $page); // Make the page blue in the afternoon and // green in the morning if (date('H' >= 12)) { $page = str_replace('{color}', 'blue', $page); } else { $page = str_replace('{color}', 'green', $page); } // Take the username from a previously saved session // variable $page = str_replace('{name}', $_SESSION['username'], $page); // Instead of printing the results, save the page on a // remote FTP server file_put_contents('ftp://bruce:[email protected]/usr/local/htdocs/welcome.html', $page);
In Example 10-5, the FTP URL passed to file_put_contents( ) means "log in to ftp.example.com with username bruce and password hax0r, and write to the file /usr/local/htdocs/welcome.html."

10.3 Reading and Writing Parts of Files The file_get_contents( ) and file_put_contents( ) functions are fine when you want to work with an entire file at once. But when it's time for precision work, use other functions to deal with a file a line at a time. Example 10-6 reads a file in which each line contains a name and an email address and then prints an HTML-formatted list of that information.
Example 10-6. Reading a file a line at a time $fh = fopen('people.txt','rb'); for ($line = fgets($fh); ! feof($fh); $line = fgets($fh)) { $line = trim($line); $info = explode('|', $line); print '<li><a href="mailto:' . $info[0] . '">' . $info[1] ."</li>\n"; } fclose($fh);
If people.txt contains what's listed in Example 10-7, then Example 10-6 prints:
<li><a href="mailto:[email protected]">Alice Liddell</li> <li><a href="mailto:[email protected]">Bandersnatch Gardner</li> <li><a href="mailto:[email protected]">Charlie Tenniel</li> <li><a href="mailto:[email protected]">Lewis Humbert</li>
Example 10-7. people.txt for Example 10-6 [email protected]|Alice Liddell [email protected]|Bandersnatch Gardner [email protected]|Charlie Tenniel [email protected]|Lewis Humbert
The four file access functions in Example 10-6 are fopen( ), fgets( ) , feof( ), and fclose( ). The fopen( ) function opens a connection to the file and returns a variable that's used for subsequent access to the file in the program. (This is very similar to the database connection variable returned by DB::connect( ) that you saw in Chapter 7.) The fgets( ) function reads a line from the file and returns it as a string. The PHP interpreter keeps a bookmark of where its current position in the file is. The bookmark starts at the beginning of the file, so the first time that fgets( ) is called, the first line of the file is read. After that line is read, the bookmark is updated to the beginning of the next line. The feof( ) function returns true if the bookmark is past the end of the file. ("eof" stands for "end of file.") Last, the fclose( ) function closes the connection to the file.
The for( ) loop in Example 10-6 may look a little funny, but its structure ensures that fgets( ) and feof( ) play nice together. When the for( ) loop starts, the initialization expression runs. This reads the first line from the file and stores it in $line. Then the test expression runs: ! feof($fh). This is true when feof($fh) returns false—in other words, when the bookmark is not past the end of the file. Next the loop body runs, doing some things with $line. After the loop body is done, the iteration expression runs and stores the next line of the file in $line.
Everything moves along line by line in the for( ) loop until the last line of the file has been read by the iteration expression. The code block runs one more time, and the <li><a href="mailto:[email protected]">Lewis
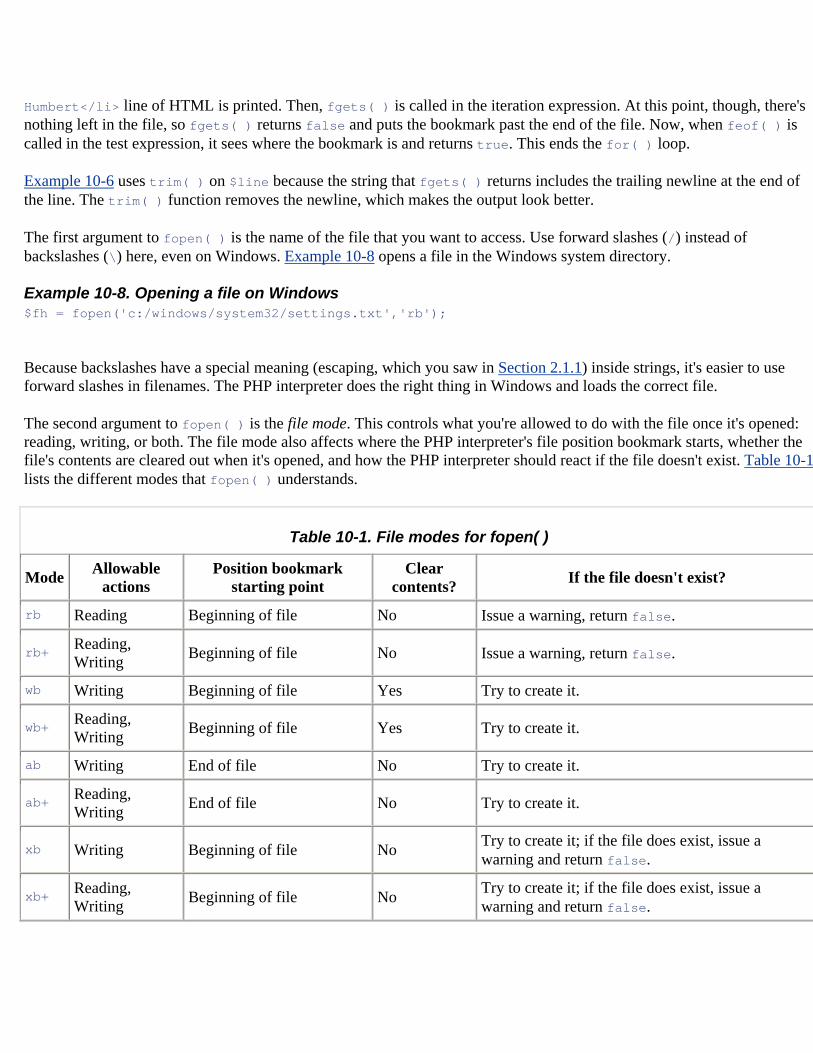
Humbert</li> line of HTML is printed. Then, fgets( ) is called in the iteration expression. At this point, though, there's nothing left in the file, so fgets( ) returns false and puts the bookmark past the end of the file. Now, when feof( ) is called in the test expression, it sees where the bookmark is and returns true. This ends the for( ) loop.
Example 10-6 uses trim( ) on $line because the string that fgets( ) returns includes the trailing newline at the end of the line. The trim( ) function removes the newline, which makes the output look better.
The first argument to fopen( ) is the name of the file that you want to access. Use forward slashes (/) instead of backslashes (\) here, even on Windows. Example 10-8 opens a file in the Windows system directory.
Example 10-8. Opening a file on Windows $fh = fopen('c:/windows/system32/settings.txt','rb');
Because backslashes have a special meaning (escaping, which you saw in Section 2.1.1) inside strings, it's easier to use forward slashes in filenames. The PHP interpreter does the right thing in Windows and loads the correct file.
The second argument to fopen( ) is the file mode. This controls what you're allowed to do with the file once it's opened: reading, writing, or both. The file mode also affects where the PHP interpreter's file position bookmark starts, whether the file's contents are cleared out when it's opened, and how the PHP interpreter should react if the file doesn't exist. Table 10-1lists the different modes that fopen( ) understands.
Table 10-1. File modes for fopen( )
Mode Allowable actions
Position bookmark starting point
Clear contents? If the file doesn't exist?
rb Reading Beginning of file No Issue a warning, return false.
rb+ Reading, Writing Beginning of file No Issue a warning, return false.
wb Writing Beginning of file Yes Try to create it.
wb+ Reading, Writing Beginning of file Yes Try to create it.
ab Writing End of file No Try to create it.
ab+ Reading, Writing End of file No Try to create it.
xb Writing Beginning of file No Try to create it; if the file does exist, issue a warning and return false.
xb+ Reading, Writing Beginning of file No Try to create it; if the file does exist, issue a
warning and return false.
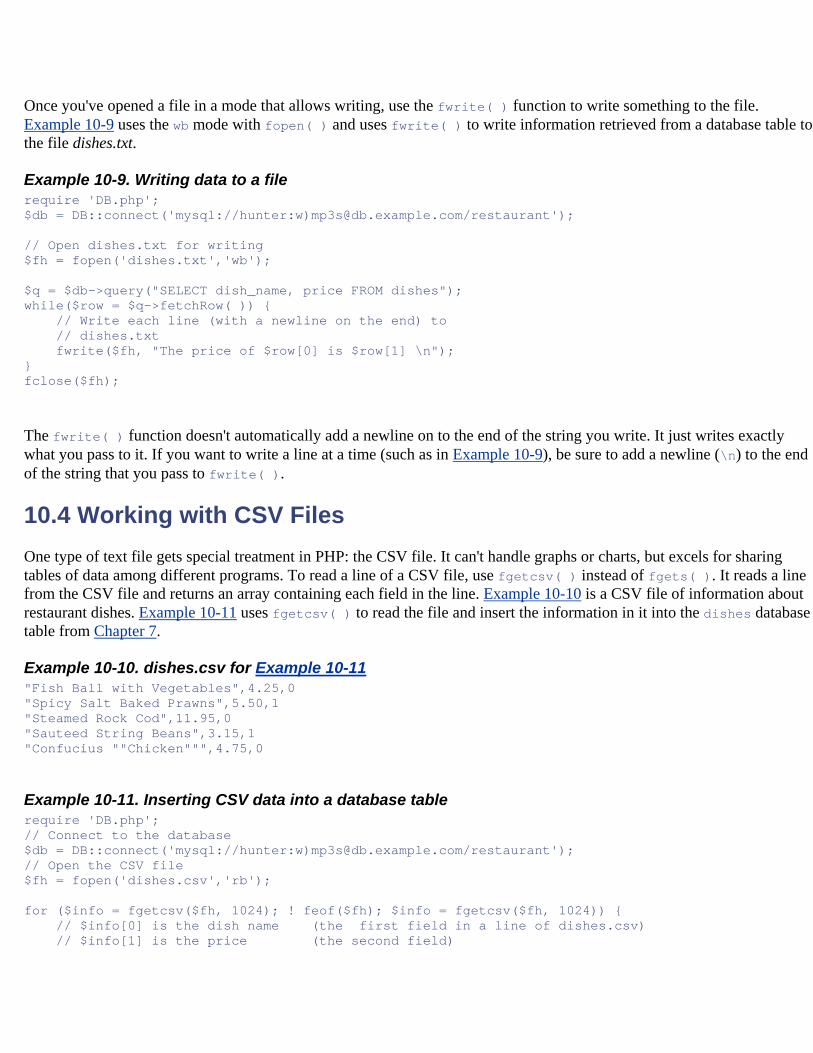
Once you've opened a file in a mode that allows writing, use the fwrite( ) function to write something to the file. Example 10-9 uses the wb mode with fopen( ) and uses fwrite( ) to write information retrieved from a database table to the file dishes.txt.
Example 10-9. Writing data to a file require 'DB.php'; $db = DB::connect('mysql://hunter:w)[email protected]/restaurant'); // Open dishes.txt for writing $fh = fopen('dishes.txt','wb'); $q = $db->query("SELECT dish_name, price FROM dishes"); while($row = $q->fetchRow( )) { // Write each line (with a newline on the end) to // dishes.txt fwrite($fh, "The price of $row[0] is $row[1] \n"); } fclose($fh);
The fwrite( ) function doesn't automatically add a newline on to the end of the string you write. It just writes exactly what you pass to it. If you want to write a line at a time (such as in Example 10-9), be sure to add a newline (\n) to the end of the string that you pass to fwrite( ).
10.4 Working with CSV Files One type of text file gets special treatment in PHP: the CSV file. It can't handle graphs or charts, but excels for sharing tables of data among different programs. To read a line of a CSV file, use fgetcsv( ) instead of fgets( ). It reads a line from the CSV file and returns an array containing each field in the line. Example 10-10 is a CSV file of information about restaurant dishes. Example 10-11 uses fgetcsv( ) to read the file and insert the information in it into the dishes database table from Chapter 7.
Example 10-10. dishes.csv for Example 10-11 "Fish Ball with Vegetables",4.25,0 "Spicy Salt Baked Prawns",5.50,1 "Steamed Rock Cod",11.95,0 "Sauteed String Beans",3.15,1 "Confucius ""Chicken""",4.75,0
Example 10-11. Inserting CSV data into a database table require 'DB.php'; // Connect to the database $db = DB::connect('mysql://hunter:w)[email protected]/restaurant'); // Open the CSV file $fh = fopen('dishes.csv','rb'); for ($info = fgetcsv($fh, 1024); ! feof($fh); $info = fgetcsv($fh, 1024)) { // $info[0] is the dish name (the first field in a line of dishes.csv) // $info[1] is the price (the second field)
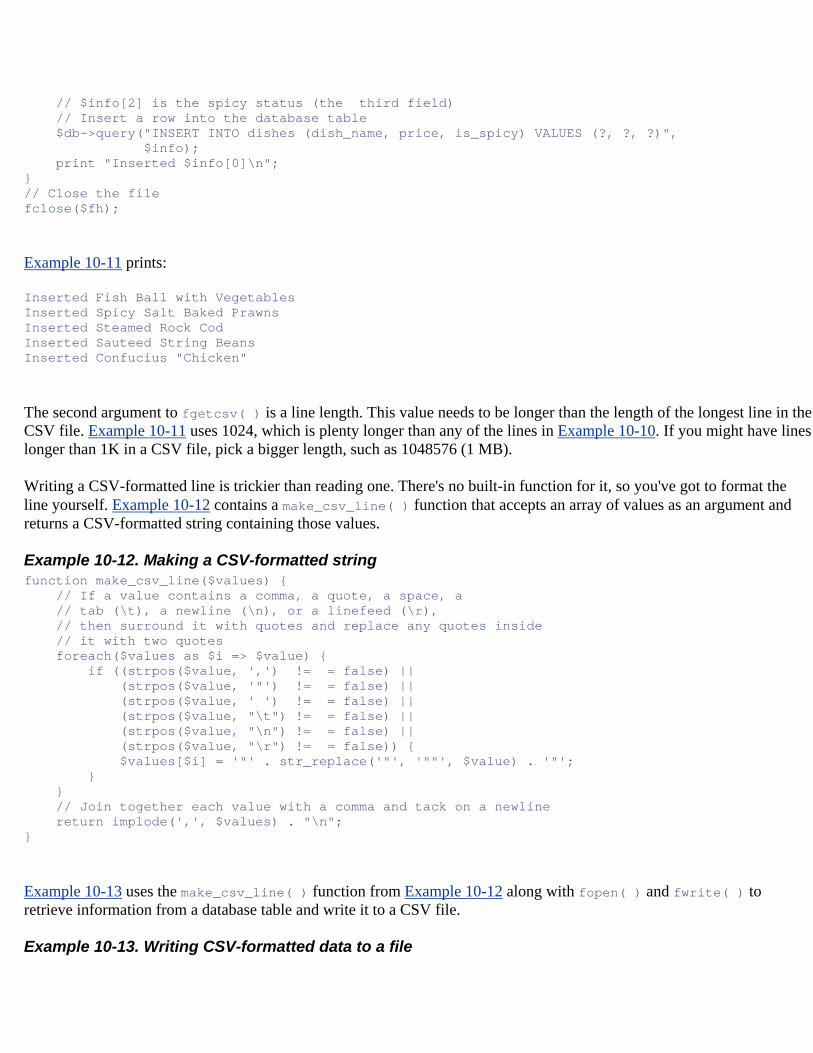
// $info[2] is the spicy status (the third field) // Insert a row into the database table $db->query("INSERT INTO dishes (dish_name, price, is_spicy) VALUES (?, ?, ?)", $info); print "Inserted $info[0]\n"; } // Close the file fclose($fh);
Example 10-11 prints:
Inserted Fish Ball with Vegetables Inserted Spicy Salt Baked Prawns Inserted Steamed Rock Cod Inserted Sauteed String Beans Inserted Confucius "Chicken"
The second argument to fgetcsv( ) is a line length. This value needs to be longer than the length of the longest line in the CSV file. Example 10-11 uses 1024, which is plenty longer than any of the lines in Example 10-10. If you might have lines longer than 1K in a CSV file, pick a bigger length, such as 1048576 (1 MB).
Writing a CSV-formatted line is trickier than reading one. There's no built-in function for it, so you've got to format the line yourself. Example 10-12 contains a make_csv_line( ) function that accepts an array of values as an argument and returns a CSV-formatted string containing those values.
Example 10-12. Making a CSV-formatted string function make_csv_line($values) { // If a value contains a comma, a quote, a space, a // tab (\t), a newline (\n), or a linefeed (\r), // then surround it with quotes and replace any quotes inside // it with two quotes foreach($values as $i => $value) { if ((strpos($value, ',') != = false) || (strpos($value, '"') != = false) || (strpos($value, ' ') != = false) || (strpos($value, "\t") != = false) || (strpos($value, "\n") != = false) || (strpos($value, "\r") != = false)) { $values[$i] = '"' . str_replace('"', '""', $value) . '"'; } } // Join together each value with a comma and tack on a newline return implode(',', $values) . "\n"; }
Example 10-13 uses the make_csv_line( ) function from Example 10-12 along with fopen( ) and fwrite( ) to retrieve information from a database table and write it to a CSV file.
Example 10-13. Writing CSV-formatted data to a file
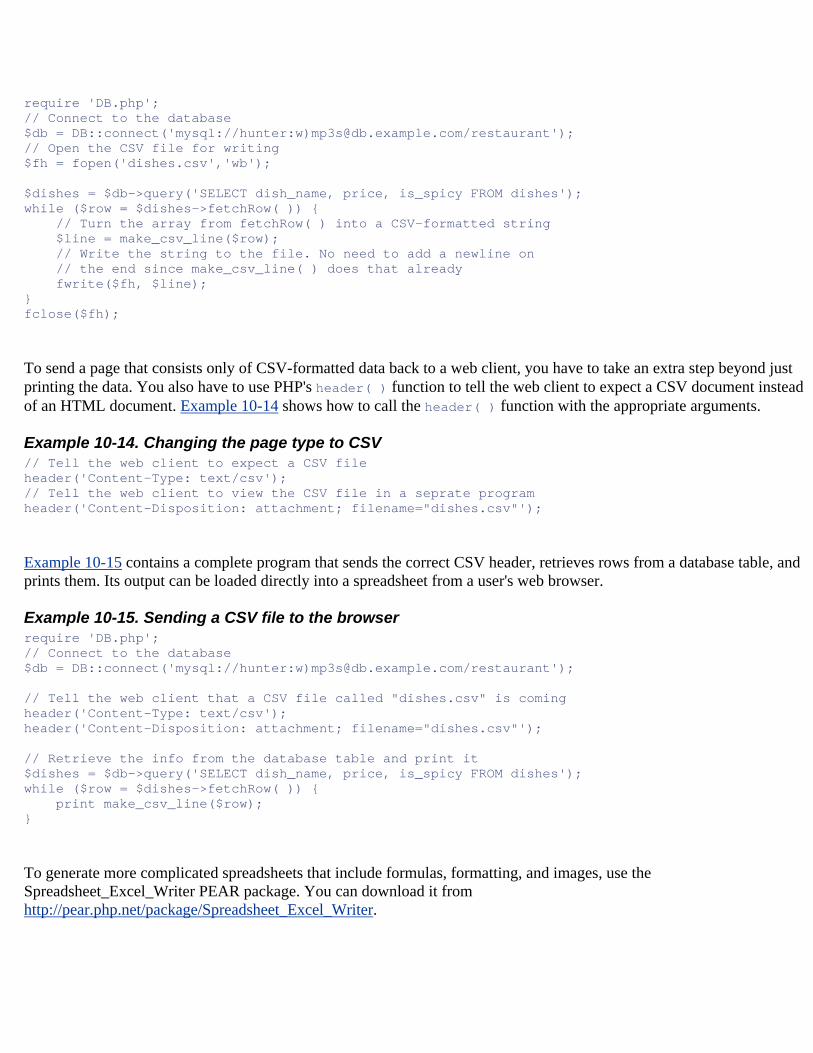
require 'DB.php'; // Connect to the database $db = DB::connect('mysql://hunter:w)[email protected]/restaurant'); // Open the CSV file for writing $fh = fopen('dishes.csv','wb'); $dishes = $db->query('SELECT dish_name, price, is_spicy FROM dishes'); while ($row = $dishes->fetchRow( )) { // Turn the array from fetchRow( ) into a CSV-formatted string $line = make_csv_line($row); // Write the string to the file. No need to add a newline on // the end since make_csv_line( ) does that already fwrite($fh, $line); } fclose($fh);
To send a page that consists only of CSV-formatted data back to a web client, you have to take an extra step beyond just printing the data. You also have to use PHP's header( ) function to tell the web client to expect a CSV document instead of an HTML document. Example 10-14 shows how to call the header( ) function with the appropriate arguments.
Example 10-14. Changing the page type to CSV // Tell the web client to expect a CSV file header('Content-Type: text/csv'); // Tell the web client to view the CSV file in a seprate program header('Content-Disposition: attachment; filename="dishes.csv"');
Example 10-15 contains a complete program that sends the correct CSV header, retrieves rows from a database table, and prints them. Its output can be loaded directly into a spreadsheet from a user's web browser.
Example 10-15. Sending a CSV file to the browser require 'DB.php'; // Connect to the database $db = DB::connect('mysql://hunter:w)[email protected]/restaurant'); // Tell the web client that a CSV file called "dishes.csv" is coming header('Content-Type: text/csv'); header('Content-Disposition: attachment; filename="dishes.csv"'); // Retrieve the info from the database table and print it $dishes = $db->query('SELECT dish_name, price, is_spicy FROM dishes'); while ($row = $dishes->fetchRow( )) { print make_csv_line($row); }
To generate more complicated spreadsheets that include formulas, formatting, and images, use the Spreadsheet_Excel_Writer PEAR package. You can download it from http://pear.php.net/package/Spreadsheet_Excel_Writer.
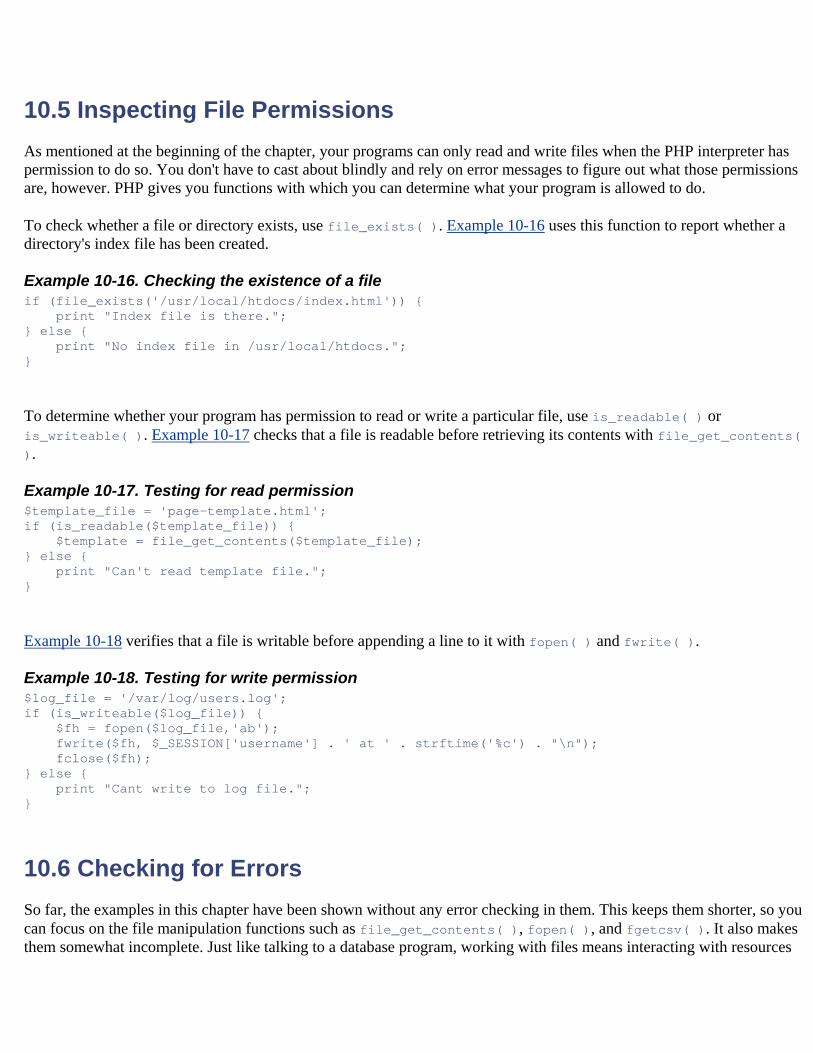
10.5 Inspecting File Permissions As mentioned at the beginning of the chapter, your programs can only read and write files when the PHP interpreter has permission to do so. You don't have to cast about blindly and rely on error messages to figure out what those permissions are, however. PHP gives you functions with which you can determine what your program is allowed to do.
To check whether a file or directory exists, use file_exists( ). Example 10-16 uses this function to report whether a directory's index file has been created.
Example 10-16. Checking the existence of a file if (file_exists('/usr/local/htdocs/index.html')) { print "Index file is there."; } else { print "No index file in /usr/local/htdocs."; }
To determine whether your program has permission to read or write a particular file, use is_readable( ) or is_writeable( ). Example 10-17 checks that a file is readable before retrieving its contents with file_get_contents( ).
Example 10-17. Testing for read permission $template_file = 'page-template.html'; if (is_readable($template_file)) { $template = file_get_contents($template_file); } else { print "Can't read template file."; }
Example 10-18 verifies that a file is writable before appending a line to it with fopen( ) and fwrite( ).
Example 10-18. Testing for write permission $log_file = '/var/log/users.log'; if (is_writeable($log_file)) { $fh = fopen($log_file,'ab'); fwrite($fh, $_SESSION['username'] . ' at ' . strftime('%c') . "\n"); fclose($fh); } else { print "Cant write to log file."; }
10.6 Checking for Errors So far, the examples in this chapter have been shown without any error checking in them. This keeps them shorter, so you can focus on the file manipulation functions such as file_get_contents( ), fopen( ), and fgetcsv( ). It also makes them somewhat incomplete. Just like talking to a database program, working with files means interacting with resources
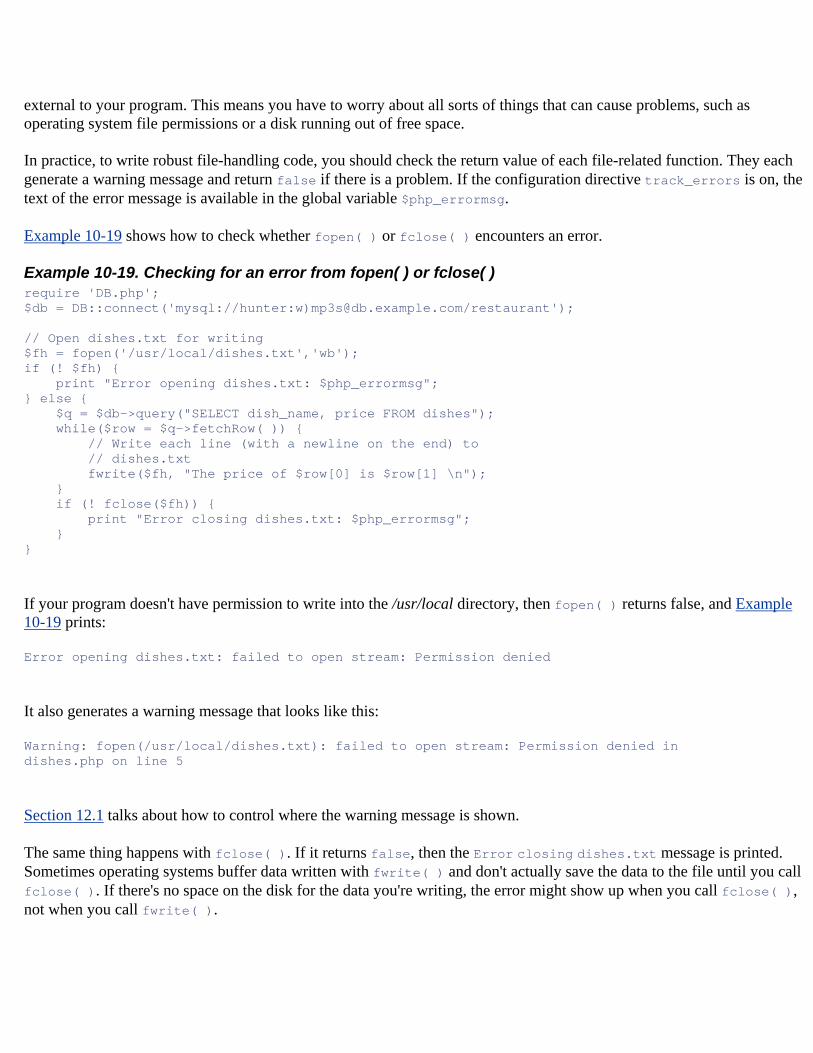
external to your program. This means you have to worry about all sorts of things that can cause problems, such as operating system file permissions or a disk running out of free space.
In practice, to write robust file-handling code, you should check the return value of each file-related function. They each generate a warning message and return false if there is a problem. If the configuration directive track_errors is on, the text of the error message is available in the global variable $php_errormsg.
Example 10-19 shows how to check whether fopen( ) or fclose( ) encounters an error.
Example 10-19. Checking for an error from fopen( ) or fclose( ) require 'DB.php'; $db = DB::connect('mysql://hunter:w)[email protected]/restaurant'); // Open dishes.txt for writing $fh = fopen('/usr/local/dishes.txt','wb'); if (! $fh) { print "Error opening dishes.txt: $php_errormsg"; } else { $q = $db->query("SELECT dish_name, price FROM dishes"); while($row = $q->fetchRow( )) { // Write each line (with a newline on the end) to // dishes.txt fwrite($fh, "The price of $row[0] is $row[1] \n"); } if (! fclose($fh)) { print "Error closing dishes.txt: $php_errormsg"; } }
If your program doesn't have permission to write into the /usr/local directory, then fopen( ) returns false, and Example 10-19 prints:
Error opening dishes.txt: failed to open stream: Permission denied
It also generates a warning message that looks like this:
Warning: fopen(/usr/local/dishes.txt): failed to open stream: Permission denied in dishes.php on line 5
Section 12.1 talks about how to control where the warning message is shown.
The same thing happens with fclose( ). If it returns false, then the Error closing dishes.txt message is printed. Sometimes operating systems buffer data written with fwrite( ) and don't actually save the data to the file until you call fclose( ). If there's no space on the disk for the data you're writing, the error might show up when you call fclose( ), not when you call fwrite( ).
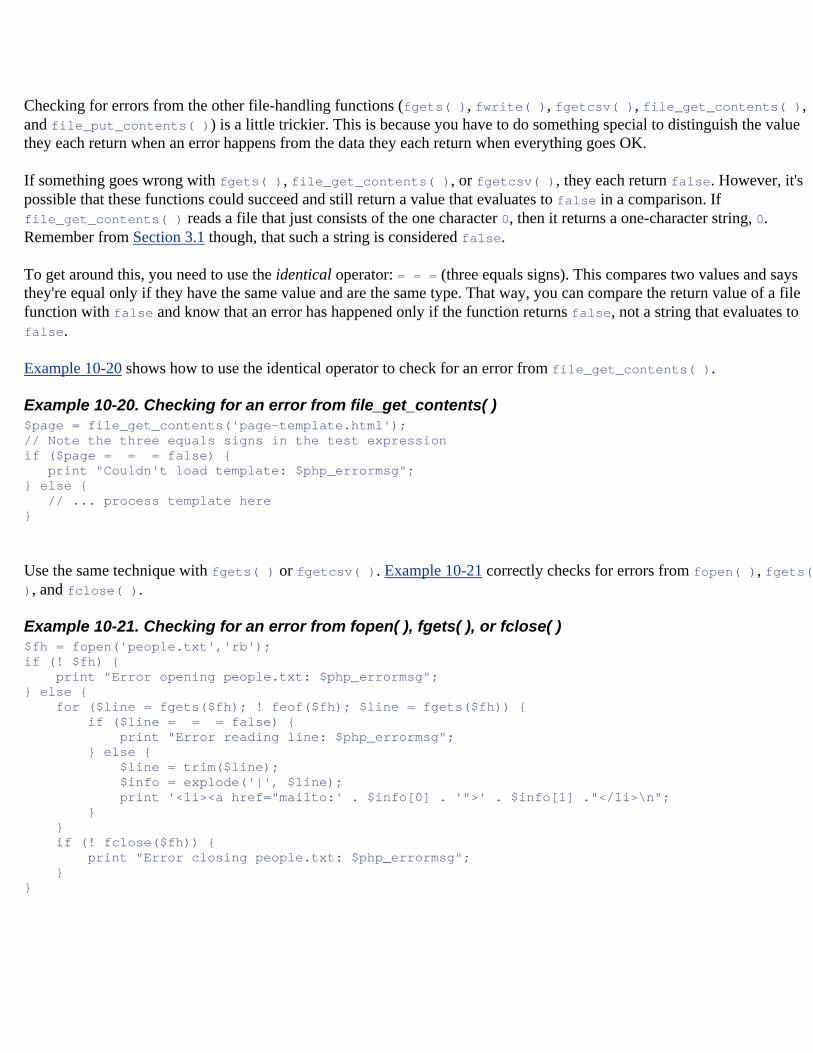
Checking for errors from the other file-handling functions (fgets( ), fwrite( ), fgetcsv( ), file_get_contents( ), and file_put_contents( )) is a little trickier. This is because you have to do something special to distinguish the value they each return when an error happens from the data they each return when everything goes OK.
If something goes wrong with fgets( ), file_get_contents( ), or fgetcsv( ), they each return false. However, it's possible that these functions could succeed and still return a value that evaluates to false in a comparison. If file_get_contents( ) reads a file that just consists of the one character 0, then it returns a one-character string, 0. Remember from Section 3.1 though, that such a string is considered false.
To get around this, you need to use the identical operator: = = = (three equals signs). This compares two values and says they're equal only if they have the same value and are the same type. That way, you can compare the return value of a file function with false and know that an error has happened only if the function returns false, not a string that evaluates to false.
Example 10-20 shows how to use the identical operator to check for an error from file_get_contents( ).
Example 10-20. Checking for an error from file_get_contents( ) $page = file_get_contents('page-template.html'); // Note the three equals signs in the test expression if ($page = = = false) { print "Couldn't load template: $php_errormsg"; } else { // ... process template here }
Use the same technique with fgets( ) or fgetcsv( ). Example 10-21 correctly checks for errors from fopen( ), fgets( ), and fclose( ).
Example 10-21. Checking for an error from fopen( ), fgets( ), or fclose( ) $fh = fopen('people.txt','rb'); if (! $fh) { print "Error opening people.txt: $php_errormsg"; } else { for ($line = fgets($fh); ! feof($fh); $line = fgets($fh)) { if ($line = = = false) { print "Error reading line: $php_errormsg"; } else { $line = trim($line); $info = explode('|', $line); print '<li><a href="mailto:' . $info[0] . '">' . $info[1] ."</li>\n"; } } if (! fclose($fh)) { print "Error closing people.txt: $php_errormsg"; } }
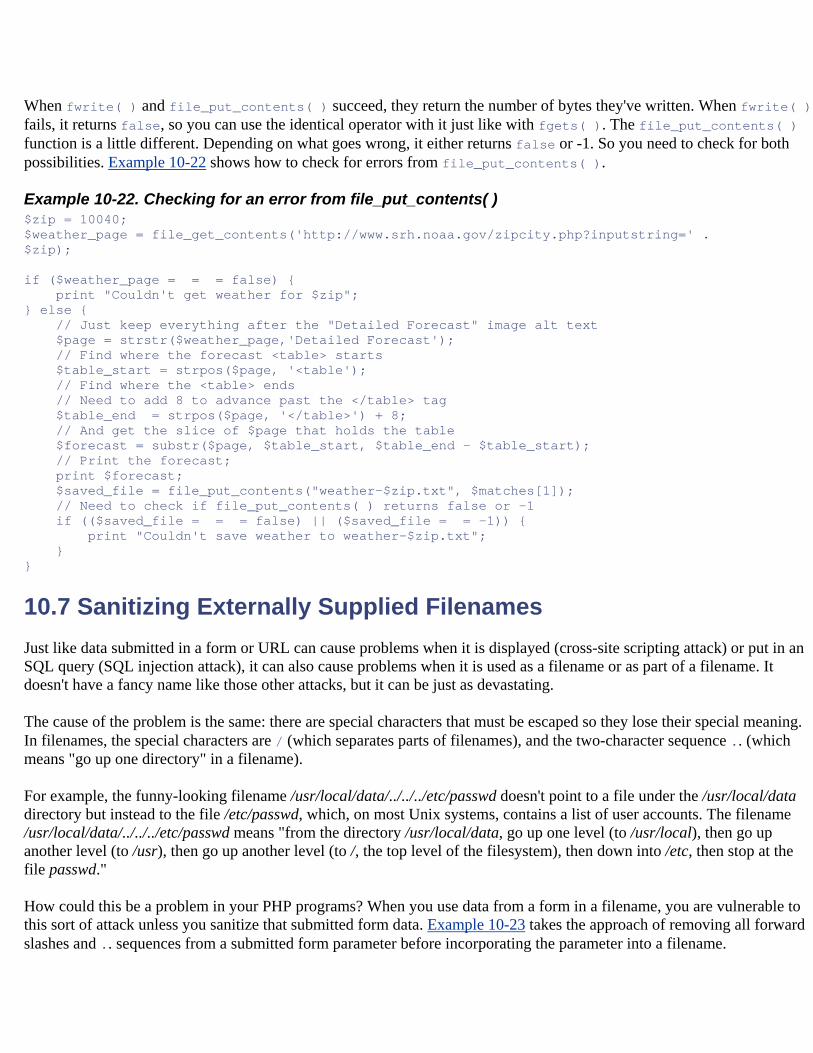
When fwrite( ) and file_put_contents( ) succeed, they return the number of bytes they've written. When fwrite( )fails, it returns false, so you can use the identical operator with it just like with fgets( ). The file_put_contents( ) function is a little different. Depending on what goes wrong, it either returns false or -1. So you need to check for both possibilities. Example 10-22 shows how to check for errors from file_put_contents( ).
Example 10-22. Checking for an error from file_put_contents( ) $zip = 10040; $weather_page = file_get_contents('http://www.srh.noaa.gov/zipcity.php?inputstring=' . $zip); if ($weather_page = = = false) { print "Couldn't get weather for $zip"; } else { // Just keep everything after the "Detailed Forecast" image alt text $page = strstr($weather_page,'Detailed Forecast'); // Find where the forecast <table> starts $table_start = strpos($page, '<table'); // Find where the <table> ends // Need to add 8 to advance past the </table> tag $table_end = strpos($page, '</table>') + 8; // And get the slice of $page that holds the table $forecast = substr($page, $table_start, $table_end - $table_start); // Print the forecast; print $forecast; $saved_file = file_put_contents("weather-$zip.txt", $matches[1]); // Need to check if file_put_contents( ) returns false or -1 if (($saved_file = = = false) || ($saved_file = = -1)) { print "Couldn't save weather to weather-$zip.txt"; } }
10.7 Sanitizing Externally Supplied Filenames Just like data submitted in a form or URL can cause problems when it is displayed (cross-site scripting attack) or put in an SQL query (SQL injection attack), it can also cause problems when it is used as a filename or as part of a filename. It doesn't have a fancy name like those other attacks, but it can be just as devastating.
The cause of the problem is the same: there are special characters that must be escaped so they lose their special meaning. In filenames, the special characters are / (which separates parts of filenames), and the two-character sequence .. (which means "go up one directory" in a filename).
For example, the funny-looking filename /usr/local/data/../../../etc/passwd doesn't point to a file under the /usr/local/data directory but instead to the file /etc/passwd, which, on most Unix systems, contains a list of user accounts. The filename /usr/local/data/../../../etc/passwd means "from the directory /usr/local/data, go up one level (to /usr/local), then go up another level (to /usr), then go up another level (to /, the top level of the filesystem), then down into /etc, then stop at the file passwd."
How could this be a problem in your PHP programs? When you use data from a form in a filename, you are vulnerable to this sort of attack unless you sanitize that submitted form data. Example 10-23 takes the approach of removing all forward slashes and .. sequences from a submitted form parameter before incorporating the parameter into a filename.
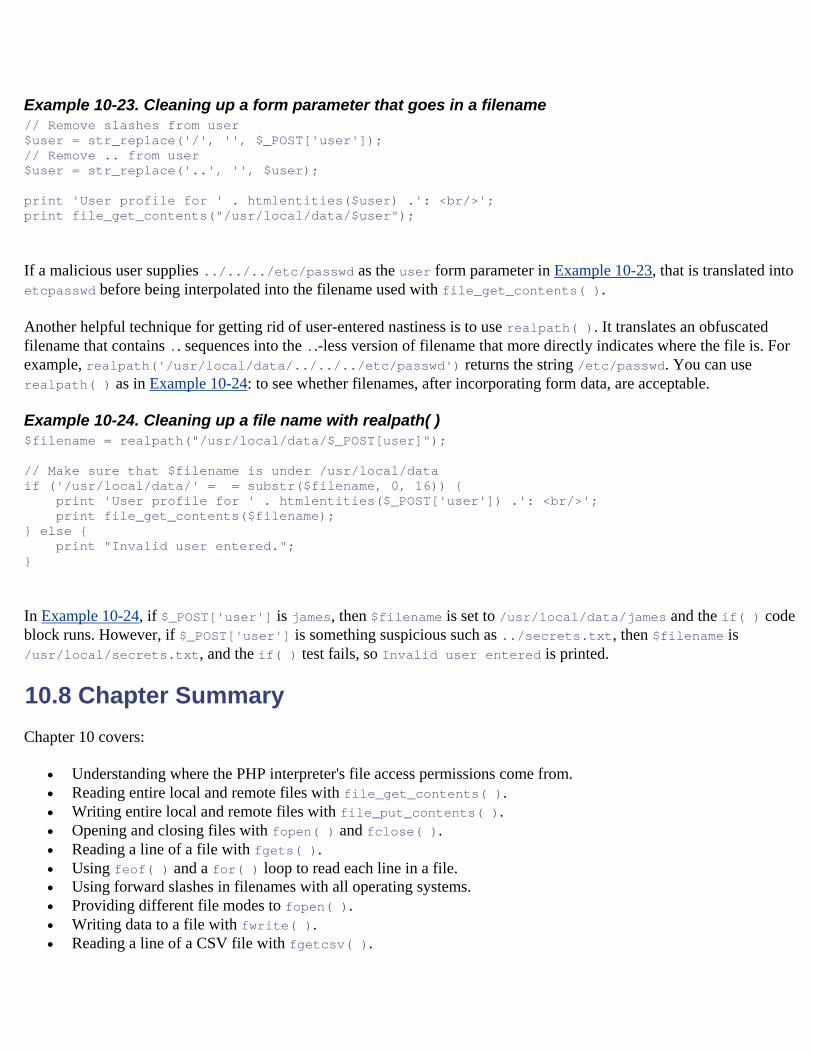
Example 10-23. Cleaning up a form parameter that goes in a filename // Remove slashes from user $user = str_replace('/', '', $_POST['user']); // Remove .. from user $user = str_replace('..', '', $user); print 'User profile for ' . htmlentities($user) .': <br/>'; print file_get_contents("/usr/local/data/$user");
If a malicious user supplies ../../../etc/passwd as the user form parameter in Example 10-23, that is translated into etcpasswd before being interpolated into the filename used with file_get_contents( ).
Another helpful technique for getting rid of user-entered nastiness is to use realpath( ). It translates an obfuscated filename that contains .. sequences into the ..-less version of filename that more directly indicates where the file is. For example, realpath('/usr/local/data/../../../etc/passwd') returns the string /etc/passwd. You can use realpath( ) as in Example 10-24: to see whether filenames, after incorporating form data, are acceptable.
Example 10-24. Cleaning up a file name with realpath( ) $filename = realpath("/usr/local/data/$_POST[user]"); // Make sure that $filename is under /usr/local/data if ('/usr/local/data/' = = substr($filename, 0, 16)) { print 'User profile for ' . htmlentities($_POST['user']) .': <br/>'; print file_get_contents($filename); } else { print "Invalid user entered."; }
In Example 10-24, if $_POST['user'] is james, then $filename is set to /usr/local/data/james and the if( ) code block runs. However, if $_POST['user'] is something suspicious such as ../secrets.txt, then $filename is /usr/local/secrets.txt, and the if( ) test fails, so Invalid user entered is printed.
10.8 Chapter Summary Chapter 10 covers:
• Understanding where the PHP interpreter's file access permissions come from. • Reading entire local and remote files with file_get_contents( ). • Writing entire local and remote files with file_put_contents( ). • Opening and closing files with fopen( ) and fclose( ). • Reading a line of a file with fgets( ). • Using feof( ) and a for( ) loop to read each line in a file. • Using forward slashes in filenames with all operating systems. • Providing different file modes to fopen( ). • Writing data to a file with fwrite( ). • Reading a line of a CSV file with fgetcsv( ).
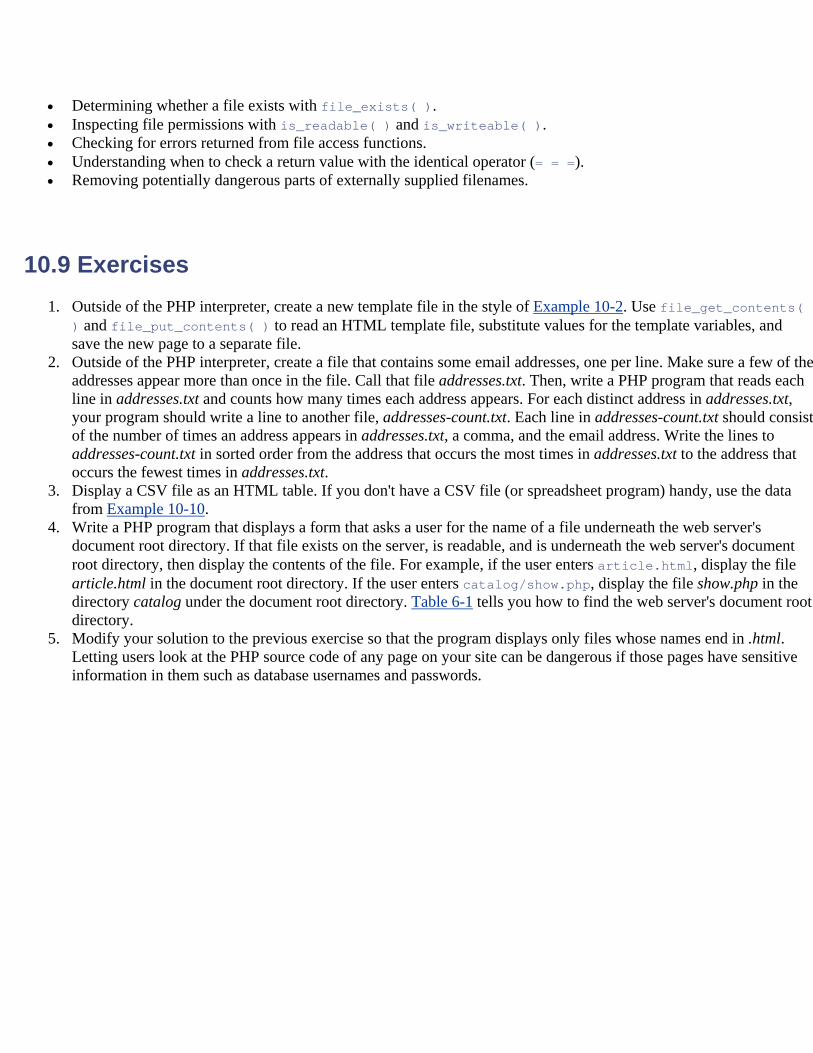
• Determining whether a file exists with file_exists( ). • Inspecting file permissions with is_readable( ) and is_writeable( ). • Checking for errors returned from file access functions. • Understanding when to check a return value with the identical operator (= = =). • Removing potentially dangerous parts of externally supplied filenames.
10.9 Exercises 1. Outside of the PHP interpreter, create a new template file in the style of Example 10-2. Use file_get_contents(
) and file_put_contents( ) to read an HTML template file, substitute values for the template variables, and save the new page to a separate file.
2. Outside of the PHP interpreter, create a file that contains some email addresses, one per line. Make sure a few of the addresses appear more than once in the file. Call that file addresses.txt. Then, write a PHP program that reads each line in addresses.txt and counts how many times each address appears. For each distinct address in addresses.txt, your program should write a line to another file, addresses-count.txt. Each line in addresses-count.txt should consist of the number of times an address appears in addresses.txt, a comma, and the email address. Write the lines to addresses-count.txt in sorted order from the address that occurs the most times in addresses.txt to the address that occurs the fewest times in addresses.txt.
3. Display a CSV file as an HTML table. If you don't have a CSV file (or spreadsheet program) handy, use the data from Example 10-10.
4. Write a PHP program that displays a form that asks a user for the name of a file underneath the web server's document root directory. If that file exists on the server, is readable, and is underneath the web server's document root directory, then display the contents of the file. For example, if the user enters article.html, display the file article.html in the document root directory. If the user enters catalog/show.php, display the file show.php in the directory catalog under the document root directory. Table 6-1 tells you how to find the web server's document root directory.
5. Modify your solution to the previous exercise so that the program displays only files whose names end in .html. Letting users look at the PHP source code of any page on your site can be dangerous if those pages have sensitive information in them such as database usernames and passwords.
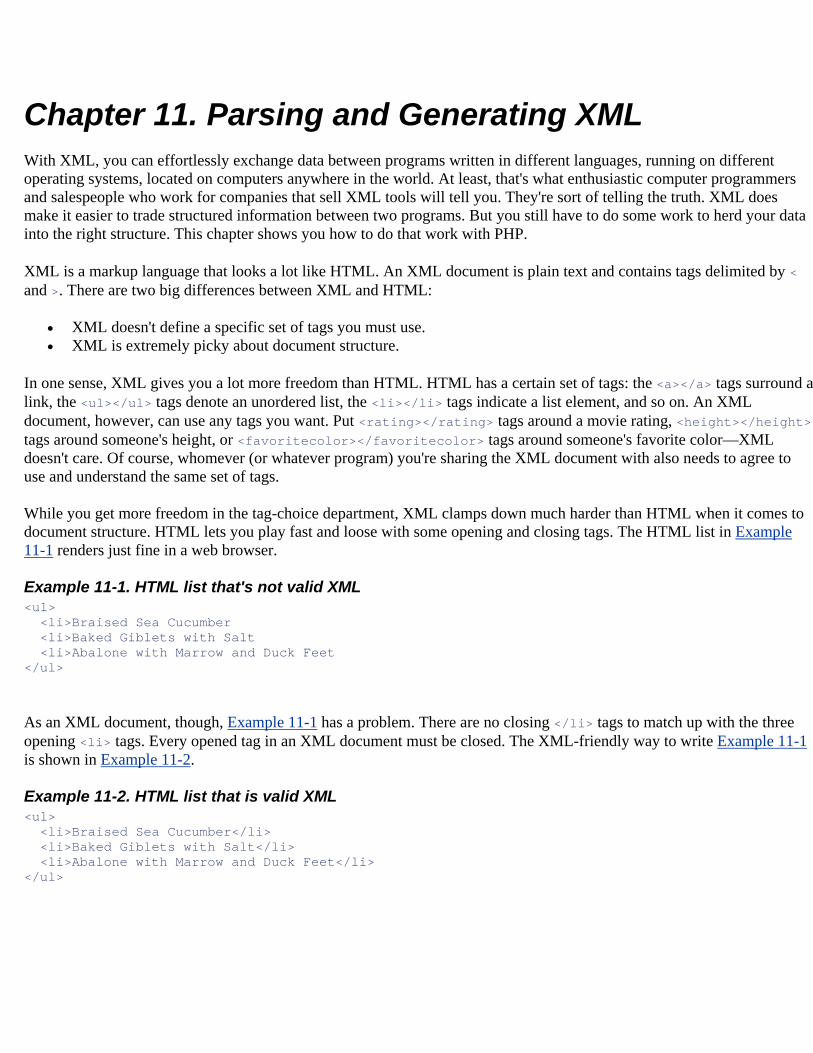
Chapter 11. Parsing and Generating XML With XML, you can effortlessly exchange data between programs written in different languages, running on different operating systems, located on computers anywhere in the world. At least, that's what enthusiastic computer programmers and salespeople who work for companies that sell XML tools will tell you. They're sort of telling the truth. XML does make it easier to trade structured information between two programs. But you still have to do some work to herd your data into the right structure. This chapter shows you how to do that work with PHP.
XML is a markup language that looks a lot like HTML. An XML document is plain text and contains tags delimited by < and >. There are two big differences between XML and HTML:
• XML doesn't define a specific set of tags you must use. • XML is extremely picky about document structure.
In one sense, XML gives you a lot more freedom than HTML. HTML has a certain set of tags: the <a></a> tags surround a link, the <ul></ul> tags denote an unordered list, the <li></li> tags indicate a list element, and so on. An XML document, however, can use any tags you want. Put <rating></rating> tags around a movie rating, <height></height>tags around someone's height, or <favoritecolor></favoritecolor> tags around someone's favorite color—XML doesn't care. Of course, whomever (or whatever program) you're sharing the XML document with also needs to agree to use and understand the same set of tags.
While you get more freedom in the tag-choice department, XML clamps down much harder than HTML when it comes to document structure. HTML lets you play fast and loose with some opening and closing tags. The HTML list in Example 11-1 renders just fine in a web browser.
Example 11-1. HTML list that's not valid XML <ul> <li>Braised Sea Cucumber <li>Baked Giblets with Salt <li>Abalone with Marrow and Duck Feet </ul>
As an XML document, though, Example 11-1 has a problem. There are no closing </li> tags to match up with the three opening <li> tags. Every opened tag in an XML document must be closed. The XML-friendly way to write Example 11-1 is shown in Example 11-2.
Example 11-2. HTML list that is valid XML <ul> <li>Braised Sea Cucumber</li> <li>Baked Giblets with Salt</li> <li>Abalone with Marrow and Duck Feet</li> </ul>
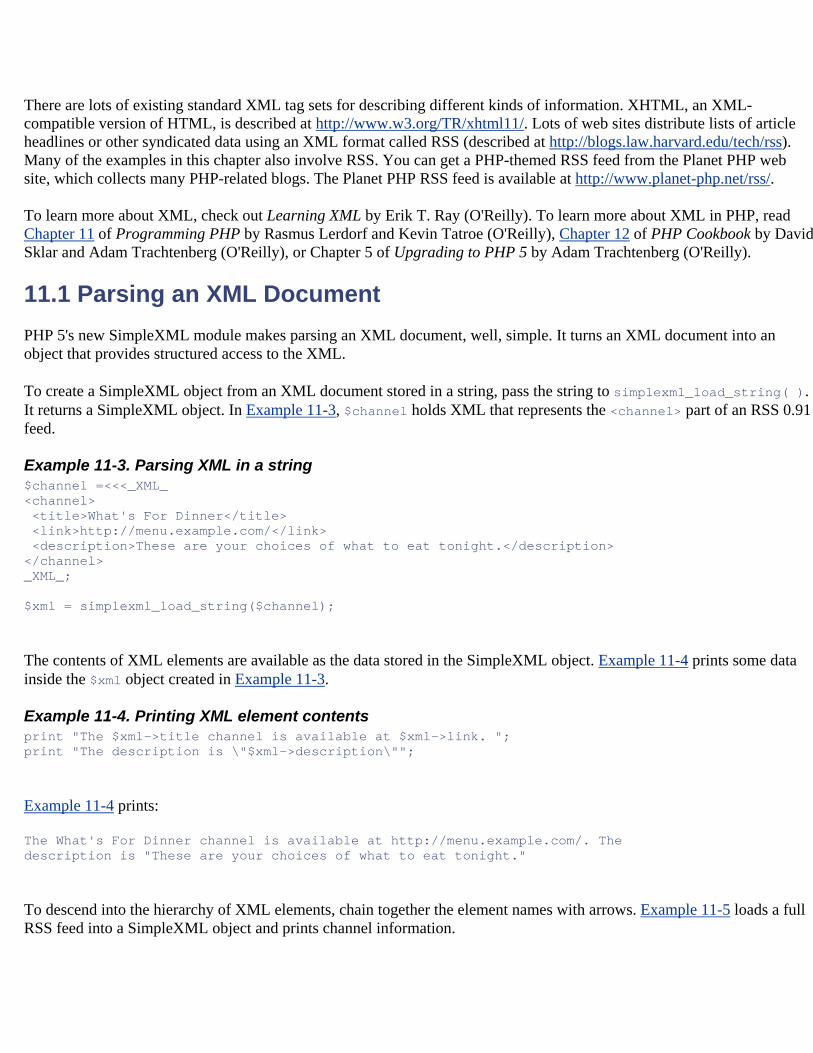
There are lots of existing standard XML tag sets for describing different kinds of information. XHTML, an XML-compatible version of HTML, is described at http://www.w3.org/TR/xhtml11/. Lots of web sites distribute lists of article headlines or other syndicated data using an XML format called RSS (described at http://blogs.law.harvard.edu/tech/rss). Many of the examples in this chapter also involve RSS. You can get a PHP-themed RSS feed from the Planet PHP web site, which collects many PHP-related blogs. The Planet PHP RSS feed is available at http://www.planet-php.net/rss/.
To learn more about XML, check out Learning XML by Erik T. Ray (O'Reilly). To learn more about XML in PHP, read Chapter 11 of Programming PHP by Rasmus Lerdorf and Kevin Tatroe (O'Reilly), Chapter 12 of PHP Cookbook by David Sklar and Adam Trachtenberg (O'Reilly), or Chapter 5 of Upgrading to PHP 5 by Adam Trachtenberg (O'Reilly).
11.1 Parsing an XML Document PHP 5's new SimpleXML module makes parsing an XML document, well, simple. It turns an XML document into an object that provides structured access to the XML.
To create a SimpleXML object from an XML document stored in a string, pass the string to simplexml_load_string( ). It returns a SimpleXML object. In Example 11-3, $channel holds XML that represents the <channel> part of an RSS 0.91 feed.
Example 11-3. Parsing XML in a string $channel =<<<_XML_ <channel> <title>What's For Dinner</title> <link>http://menu.example.com/</link> <description>These are your choices of what to eat tonight.</description> </channel> _XML_; $xml = simplexml_load_string($channel);
The contents of XML elements are available as the data stored in the SimpleXML object. Example 11-4 prints some data inside the $xml object created in Example 11-3.
Example 11-4. Printing XML element contents print "The $xml->title channel is available at $xml->link. "; print "The description is \"$xml->description\"";
Example 11-4 prints:
The What's For Dinner channel is available at http://menu.example.com/. The description is "These are your choices of what to eat tonight."
To descend into the hierarchy of XML elements, chain together the element names with arrows. Example 11-5 loads a full RSS feed into a SimpleXML object and prints channel information.

Example 11-5. Printing subelement contents $menu=<<<_XML_ <?xml version="1.0" encoding="utf-8" ?> <rss version="0.91"> <channel> <title>What's For Dinner</title> <link>http://menu.example.com/</link> <description>These are your choices of what to eat tonight.</description> <item> <title>Braised Sea Cucumber</title> <link>http://menu.example.com/dishes.php?dish=cuke</link> <description>Gentle flavors of the sea that nourish and refresh you.</description> </item> <item> <title>Baked Giblets with Salt</title> <link>http://menu.example.com/dishes.php?dish=giblets</link> <description>Rich giblet flavor infused with salt and spice.</description> </item> <item> <title>Abalone with Marrow and Duck Feet</title> <link>http://menu.example.com/dishes.php?dish=abalone</link> <description>There's no mistaking the special pleasure of abalone.</description> </item> </channel> </rss> _XML_; $xml = simplexml_load_string($menu); print "The {$xml->channel->title} channel is available at {$xml->channel->link}. "; print "The description is \"{$xml->channel->description}\"";
Example 11-5 prints the same text as Example 11-4. The curly braces are necessary around the element names so that the PHP interpreter can properly interpolate the values in the string.
Attributes of XML elements are treated like array indices. Example 11-6 uses the SimpleXML object created in Example 11-5 to access the version attribute of the <rss> tag.
Example 11-6. Print XML element attributes print 'This RSS feed is version ' . $xml['version'];
Example 11-6 prints:
This RSS feed is version 0.91
Because there are multiple <item> tags in the RSS feed, you need to use array index notation to access a particular item. The first is item[0]. Example 11-7 prints the title of each item.
Example 11-7. Accessing identically named elements
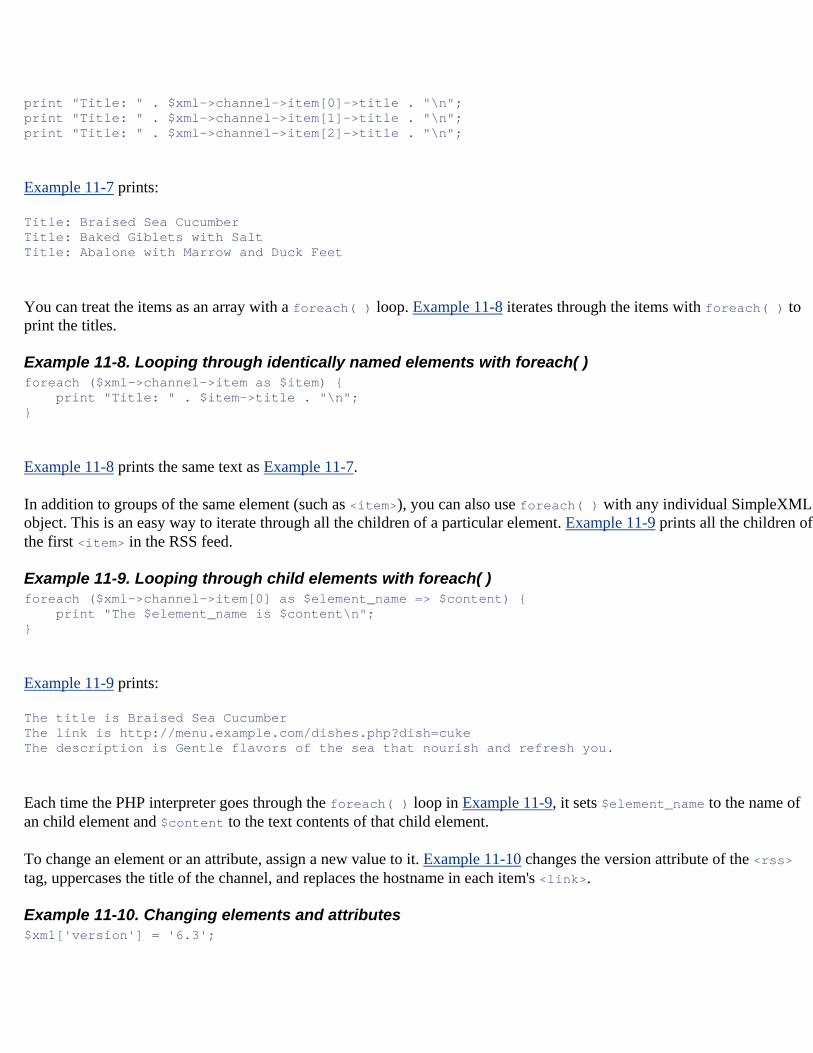
print "Title: " . $xml->channel->item[0]->title . "\n"; print "Title: " . $xml->channel->item[1]->title . "\n"; print "Title: " . $xml->channel->item[2]->title . "\n";
Example 11-7 prints:
Title: Braised Sea Cucumber Title: Baked Giblets with Salt Title: Abalone with Marrow and Duck Feet
You can treat the items as an array with a foreach( ) loop. Example 11-8 iterates through the items with foreach( ) to print the titles.
Example 11-8. Looping through identically named elements with foreach( ) foreach ($xml->channel->item as $item) { print "Title: " . $item->title . "\n"; }
Example 11-8 prints the same text as Example 11-7.
In addition to groups of the same element (such as <item>), you can also use foreach( ) with any individual SimpleXML object. This is an easy way to iterate through all the children of a particular element. Example 11-9 prints all the children of the first <item> in the RSS feed.
Example 11-9. Looping through child elements with foreach( ) foreach ($xml->channel->item[0] as $element_name => $content) { print "The $element_name is $content\n"; }
Example 11-9 prints:
The title is Braised Sea Cucumber The link is http://menu.example.com/dishes.php?dish=cuke The description is Gentle flavors of the sea that nourish and refresh you.
Each time the PHP interpreter goes through the foreach( ) loop in Example 11-9, it sets $element_name to the name of an child element and $content to the text contents of that child element.
To change an element or an attribute, assign a new value to it. Example 11-10 changes the version attribute of the <rss> tag, uppercases the title of the channel, and replaces the hostname in each item's <link>.
Example 11-10. Changing elements and attributes $xml['version'] = '6.3';
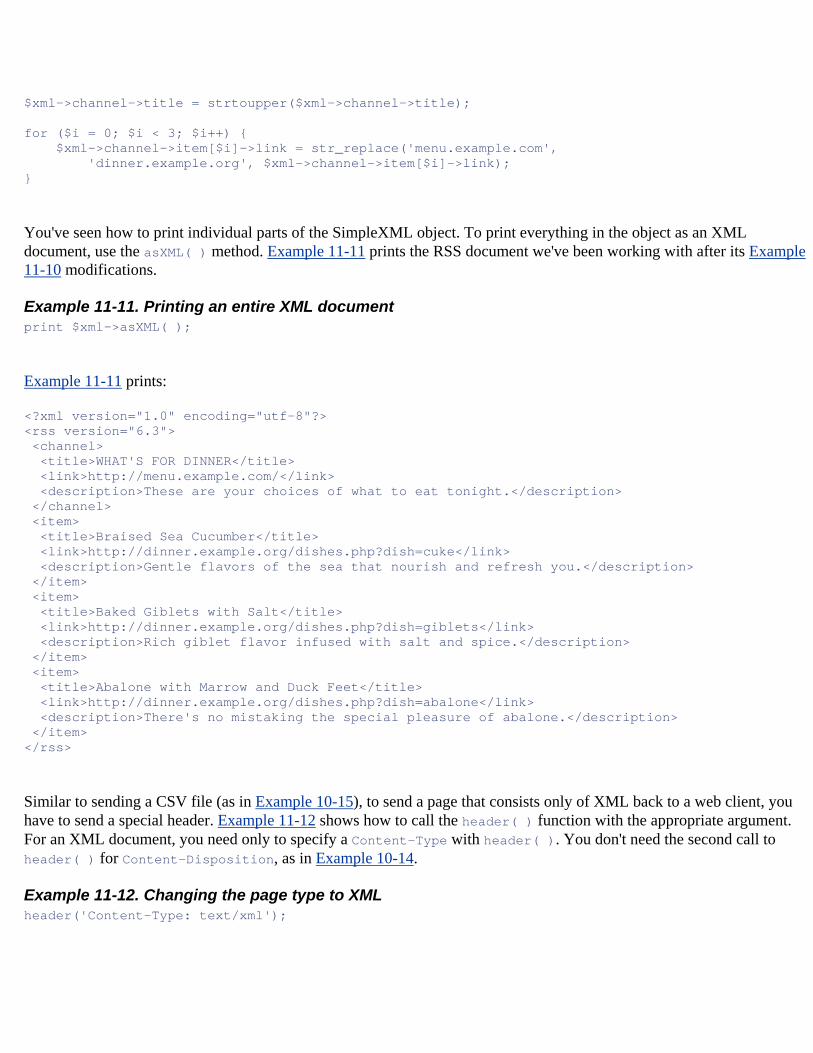
$xml->channel->title = strtoupper($xml->channel->title); for ($i = 0; $i < 3; $i++) { $xml->channel->item[$i]->link = str_replace('menu.example.com', 'dinner.example.org', $xml->channel->item[$i]->link); }
You've seen how to print individual parts of the SimpleXML object. To print everything in the object as an XML document, use the asXML( ) method. Example 11-11 prints the RSS document we've been working with after its Example 11-10 modifications.
Example 11-11. Printing an entire XML document print $xml->asXML( );
Example 11-11 prints:
<?xml version="1.0" encoding="utf-8"?> <rss version="6.3"> <channel> <title>WHAT'S FOR DINNER</title> <link>http://menu.example.com/</link> <description>These are your choices of what to eat tonight.</description> </channel> <item> <title>Braised Sea Cucumber</title> <link>http://dinner.example.org/dishes.php?dish=cuke</link> <description>Gentle flavors of the sea that nourish and refresh you.</description> </item> <item> <title>Baked Giblets with Salt</title> <link>http://dinner.example.org/dishes.php?dish=giblets</link> <description>Rich giblet flavor infused with salt and spice.</description> </item> <item> <title>Abalone with Marrow and Duck Feet</title> <link>http://dinner.example.org/dishes.php?dish=abalone</link> <description>There's no mistaking the special pleasure of abalone.</description> </item> </rss>
Similar to sending a CSV file (as in Example 10-15), to send a page that consists only of XML back to a web client, you have to send a special header. Example 11-12 shows how to call the header( ) function with the appropriate argument. For an XML document, you need only to specify a Content-Type with header( ). You don't need the second call to header( ) for Content-Disposition, as in Example 10-14.
Example 11-12. Changing the page type to XML header('Content-Type: text/xml');
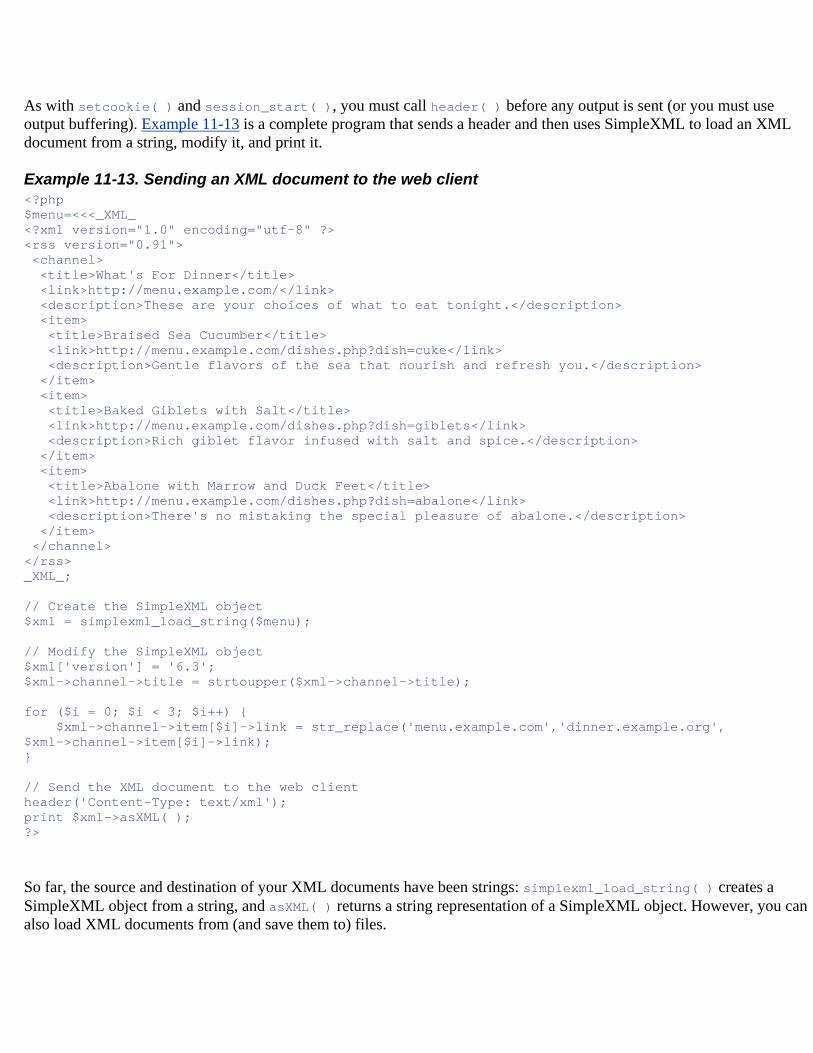
As with setcookie( ) and session_start( ), you must call header( ) before any output is sent (or you must use output buffering). Example 11-13 is a complete program that sends a header and then uses SimpleXML to load an XML document from a string, modify it, and print it.
Example 11-13. Sending an XML document to the web client <?php $menu=<<<_XML_ <?xml version="1.0" encoding="utf-8" ?> <rss version="0.91"> <channel> <title>What's For Dinner</title> <link>http://menu.example.com/</link> <description>These are your choices of what to eat tonight.</description> <item> <title>Braised Sea Cucumber</title> <link>http://menu.example.com/dishes.php?dish=cuke</link> <description>Gentle flavors of the sea that nourish and refresh you.</description> </item> <item> <title>Baked Giblets with Salt</title> <link>http://menu.example.com/dishes.php?dish=giblets</link> <description>Rich giblet flavor infused with salt and spice.</description> </item> <item> <title>Abalone with Marrow and Duck Feet</title> <link>http://menu.example.com/dishes.php?dish=abalone</link> <description>There's no mistaking the special pleasure of abalone.</description> </item> </channel> </rss> _XML_; // Create the SimpleXML object $xml = simplexml_load_string($menu); // Modify the SimpleXML object $xml['version'] = '6.3'; $xml->channel->title = strtoupper($xml->channel->title); for ($i = 0; $i < 3; $i++) { $xml->channel->item[$i]->link = str_replace('menu.example.com','dinner.example.org', $xml->channel->item[$i]->link); } // Send the XML document to the web client header('Content-Type: text/xml'); print $xml->asXML( ); ?>
So far, the source and destination of your XML documents have been strings: simplexml_load_string( ) creates a SimpleXML object from a string, and asXML( ) returns a string representation of a SimpleXML object. However, you can also load XML documents from (and save them to) files.
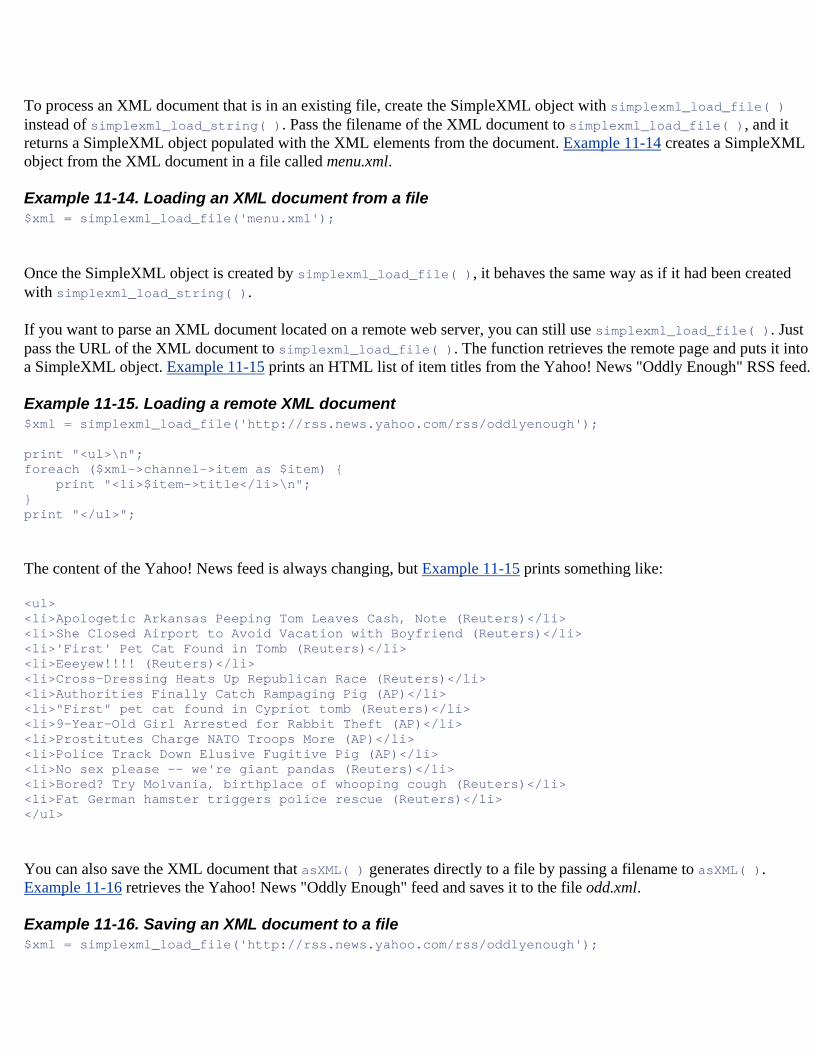
To process an XML document that is in an existing file, create the SimpleXML object with simplexml_load_file( ) instead of simplexml_load_string( ). Pass the filename of the XML document to simplexml_load_file( ), and it returns a SimpleXML object populated with the XML elements from the document. Example 11-14 creates a SimpleXML object from the XML document in a file called menu.xml.
Example 11-14. Loading an XML document from a file $xml = simplexml_load_file('menu.xml');
Once the SimpleXML object is created by simplexml_load_file( ), it behaves the same way as if it had been created with simplexml_load_string( ).
If you want to parse an XML document located on a remote web server, you can still use simplexml_load_file( ). Just pass the URL of the XML document to simplexml_load_file( ). The function retrieves the remote page and puts it into a SimpleXML object. Example 11-15 prints an HTML list of item titles from the Yahoo! News "Oddly Enough" RSS feed.
Example 11-15. Loading a remote XML document $xml = simplexml_load_file('http://rss.news.yahoo.com/rss/oddlyenough'); print "<ul>\n"; foreach ($xml->channel->item as $item) { print "<li>$item->title</li>\n"; } print "</ul>";
The content of the Yahoo! News feed is always changing, but Example 11-15 prints something like:
<ul> <li>Apologetic Arkansas Peeping Tom Leaves Cash, Note (Reuters)</li> <li>She Closed Airport to Avoid Vacation with Boyfriend (Reuters)</li> <li>'First' Pet Cat Found in Tomb (Reuters)</li> <li>Eeeyew!!!! (Reuters)</li> <li>Cross-Dressing Heats Up Republican Race (Reuters)</li> <li>Authorities Finally Catch Rampaging Pig (AP)</li> <li>"First" pet cat found in Cypriot tomb (Reuters)</li> <li>9-Year-Old Girl Arrested for Rabbit Theft (AP)</li> <li>Prostitutes Charge NATO Troops More (AP)</li> <li>Police Track Down Elusive Fugitive Pig (AP)</li> <li>No sex please -- we're giant pandas (Reuters)</li> <li>Bored? Try Molvania, birthplace of whooping cough (Reuters)</li> <li>Fat German hamster triggers police rescue (Reuters)</li> </ul>
You can also save the XML document that asXML( ) generates directly to a file by passing a filename to asXML( ). Example 11-16 retrieves the Yahoo! News "Oddly Enough" feed and saves it to the file odd.xml.
Example 11-16. Saving an XML document to a file $xml = simplexml_load_file('http://rss.news.yahoo.com/rss/oddlyenough');
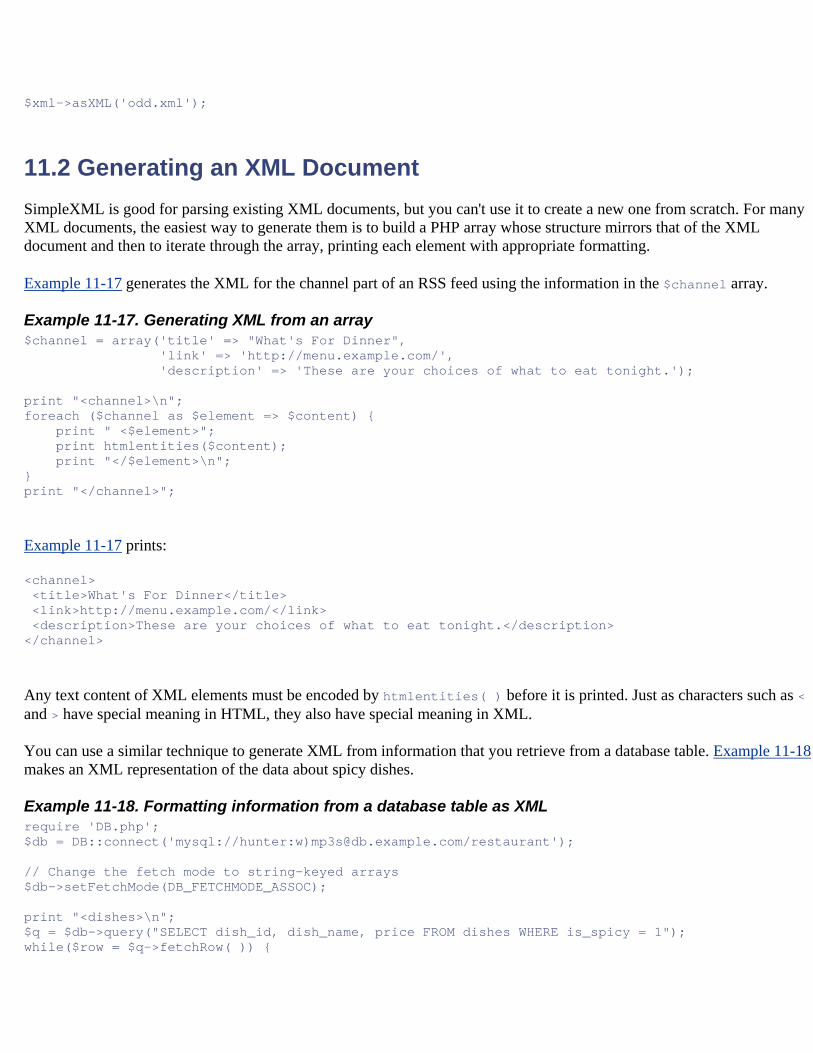
$xml->asXML('odd.xml');
11.2 Generating an XML Document SimpleXML is good for parsing existing XML documents, but you can't use it to create a new one from scratch. For many XML documents, the easiest way to generate them is to build a PHP array whose structure mirrors that of the XML document and then to iterate through the array, printing each element with appropriate formatting.
Example 11-17 generates the XML for the channel part of an RSS feed using the information in the $channel array.
Example 11-17. Generating XML from an array $channel = array('title' => "What's For Dinner", 'link' => 'http://menu.example.com/', 'description' => 'These are your choices of what to eat tonight.'); print "<channel>\n"; foreach ($channel as $element => $content) { print " <$element>"; print htmlentities($content); print "</$element>\n"; } print "</channel>";
Example 11-17 prints:
<channel> <title>What's For Dinner</title> <link>http://menu.example.com/</link> <description>These are your choices of what to eat tonight.</description> </channel>
Any text content of XML elements must be encoded by htmlentities( ) before it is printed. Just as characters such as < and > have special meaning in HTML, they also have special meaning in XML.
You can use a similar technique to generate XML from information that you retrieve from a database table. Example 11-18makes an XML representation of the data about spicy dishes.
Example 11-18. Formatting information from a database table as XML require 'DB.php'; $db = DB::connect('mysql://hunter:w)[email protected]/restaurant'); // Change the fetch mode to string-keyed arrays $db->setFetchMode(DB_FETCHMODE_ASSOC); print "<dishes>\n"; $q = $db->query("SELECT dish_id, dish_name, price FROM dishes WHERE is_spicy = 1"); while($row = $q->fetchRow( )) {
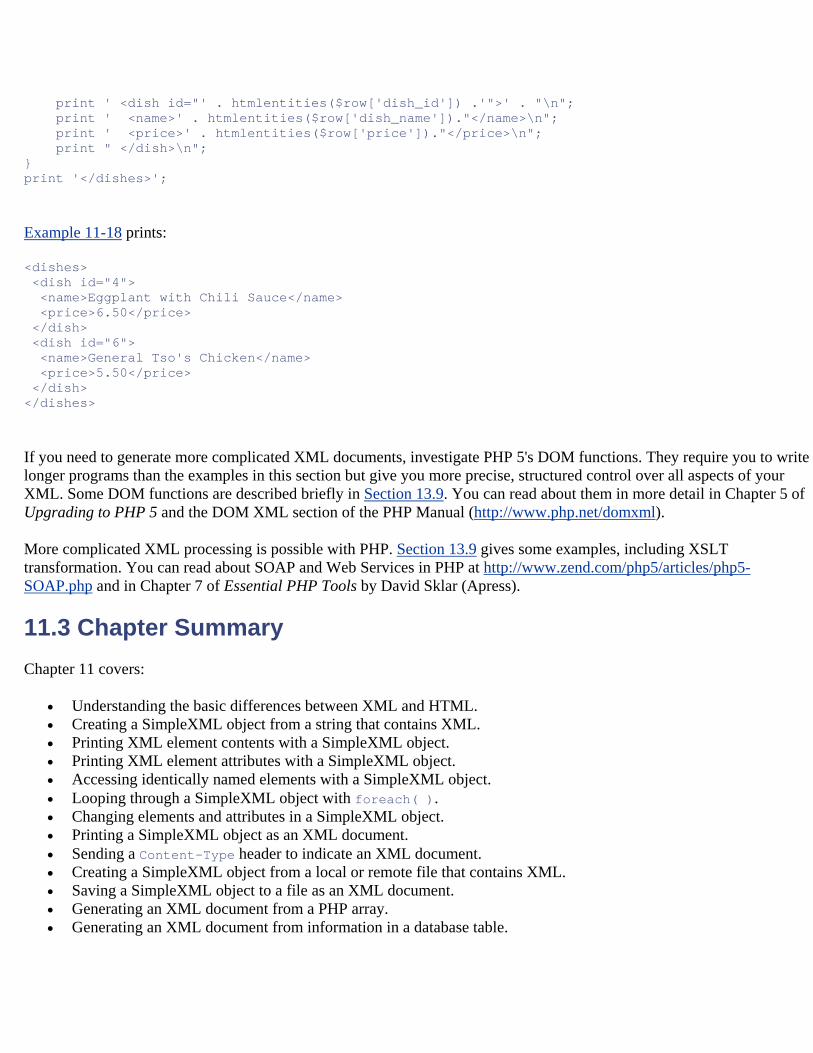
print ' <dish id="' . htmlentities($row['dish_id']) .'">' . "\n"; print ' <name>' . htmlentities($row['dish_name'])."</name>\n"; print ' <price>' . htmlentities($row['price'])."</price>\n"; print " </dish>\n"; } print '</dishes>';
Example 11-18 prints:
<dishes> <dish id="4"> <name>Eggplant with Chili Sauce</name> <price>6.50</price> </dish> <dish id="6"> <name>General Tso's Chicken</name> <price>5.50</price> </dish> </dishes>
If you need to generate more complicated XML documents, investigate PHP 5's DOM functions. They require you to write longer programs than the examples in this section but give you more precise, structured control over all aspects of your XML. Some DOM functions are described briefly in Section 13.9. You can read about them in more detail in Chapter 5 of Upgrading to PHP 5 and the DOM XML section of the PHP Manual (http://www.php.net/domxml).
More complicated XML processing is possible with PHP. Section 13.9 gives some examples, including XSLT transformation. You can read about SOAP and Web Services in PHP at http://www.zend.com/php5/articles/php5-SOAP.php and in Chapter 7 of Essential PHP Tools by David Sklar (Apress).
11.3 Chapter Summary Chapter 11 covers:
• Understanding the basic differences between XML and HTML. • Creating a SimpleXML object from a string that contains XML. • Printing XML element contents with a SimpleXML object. • Printing XML element attributes with a SimpleXML object. • Accessing identically named elements with a SimpleXML object. • Looping through a SimpleXML object with foreach( ). • Changing elements and attributes in a SimpleXML object. • Printing a SimpleXML object as an XML document. • Sending a Content-Type header to indicate an XML document. • Creating a SimpleXML object from a local or remote file that contains XML. • Saving a SimpleXML object to a file as an XML document. • Generating an XML document from a PHP array. • Generating an XML document from information in a database table.
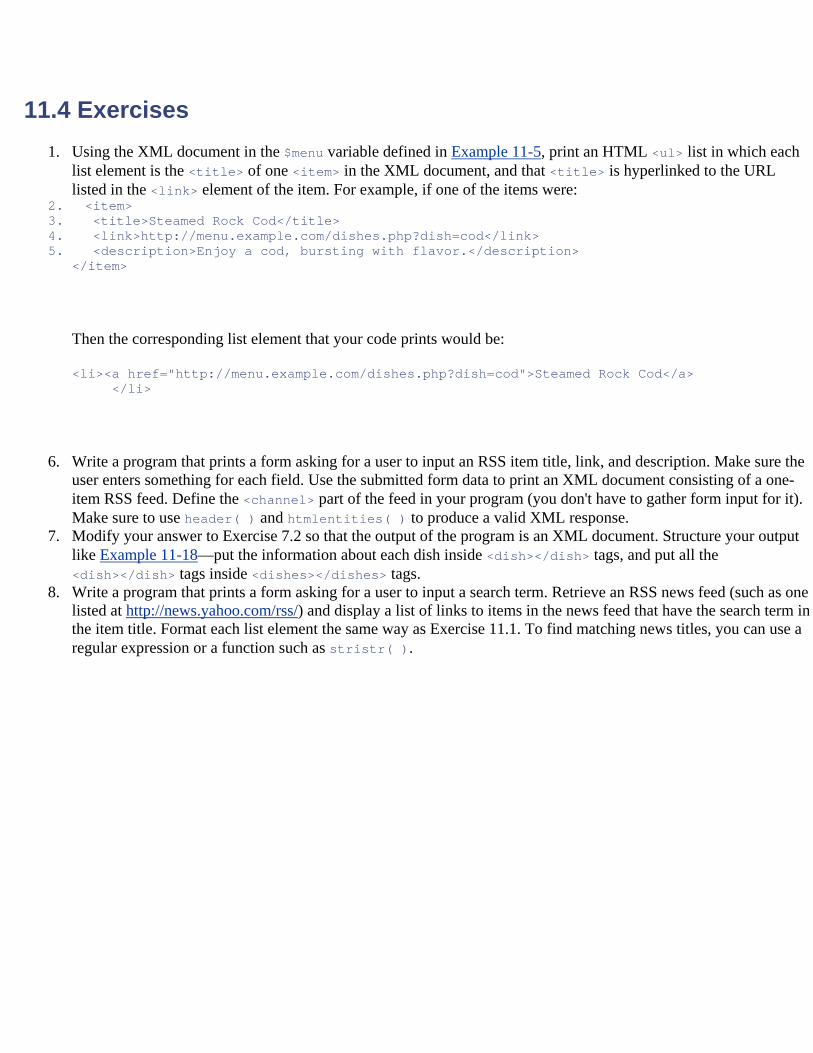
11.4 Exercises 1. Using the XML document in the $menu variable defined in Example 11-5, print an HTML <ul> list in which each
list element is the <title> of one <item> in the XML document, and that <title> is hyperlinked to the URL listed in the <link> element of the item. For example, if one of the items were:
2. <item> 3. <title>Steamed Rock Cod</title> 4. <link>http://menu.example.com/dishes.php?dish=cod</link> 5. <description>Enjoy a cod, bursting with flavor.</description>
</item>
Then the corresponding list element that your code prints would be:
<li><a href="http://menu.example.com/dishes.php?dish=cod">Steamed Rock Cod</a> </li>
6. Write a program that prints a form asking for a user to input an RSS item title, link, and description. Make sure the user enters something for each field. Use the submitted form data to print an XML document consisting of a one-item RSS feed. Define the <channel> part of the feed in your program (you don't have to gather form input for it). Make sure to use header( ) and htmlentities( ) to produce a valid XML response.
7. Modify your answer to Exercise 7.2 so that the output of the program is an XML document. Structure your output like Example 11-18—put the information about each dish inside <dish></dish> tags, and put all the <dish></dish> tags inside <dishes></dishes> tags.
8. Write a program that prints a form asking for a user to input a search term. Retrieve an RSS news feed (such as one listed at http://news.yahoo.com/rss/) and display a list of links to items in the news feed that have the search term in the item title. Format each list element the same way as Exercise 11.1. To find matching news titles, you can use a regular expression or a function such as stristr( ).
Chapter 12. Debugging Programs rarely work correctly the first time. This chapter shows you some techniques for finding and fixing the problems in your programs. When you're just learning PHP, your programs are probably simpler than the programs that PHP wizards write. The errors you get, however, generally aren't much simpler, and you have to use the same tools and techniques to find and fix those errors.
12.1 Controlling Where Errors Appear Many things can go wrong in your program that cause the PHP interpreter to generate an error message. You have a choice about where those error messages go. The messages can be sent along with other program output to the web browser. They can also be included in the web server error log.
A useful way to configure an error message display is to have the errors displayed on screen when you're developing a PHP program, and then sent to the error log once you're done development and people are actually using the program. While you're working on a program, it's helpful to see immediately that there was a parse error on a particular line, for example. But once the program is (supposedly) working so that your coworkers or customers can use it, such an error message would be confusing to them.
To make error messages display in the browser, set the display_errors configuration directive to On. To send errors to the web server error log, set log_errors to On. You can set them both to On if you want error messages in both places.
An error message that the PHP interpreter generates falls into one of five different categories:
Parse error
A problem with the syntax of your program, such as leaving a semicolon off of the end of a statement. The interpreter stops running your program when it encounters a parse error.
Fatal error
A severe problem with the content of your program, such as calling a function that hasn't been defined. The interpreter stops running your program when it encounters a fatal error.
Warning
An advisory from the interpreter that something is fishy in your program, but the interpreter can keep going. Using the wrong number of arguments when you call a function causes a warning.
Notice
A tip from the PHP interpreter playing the role of Miss Manners. For example, printing a variable without first initializing it to some value generates a notice.
Strict notices
An admonishment from the PHP interpreter about your coding style. Most of these have to do with esoteric features that changed between PHP 4 and PHP 5, so you're not likely to run into them too much.
You don't have to be notified about all the different error categories. The error_reporting configuration directive controls which kinds of errors the PHP interpreter reports. The default value for error_reporting is E_ALL & ~E_NOTICE & ~E_STRICT, which tells the interpreter to report all errors except notices and strict notices. Appendix A explains what the & and ~ mean in configuration directive values.
PHP defines some constants you can use to set the value of error_reporting such that only errors of certain types get reported: E_ALL (for all errors except strict notices), E_PARSE (parse errors), E_ERROR (fatal errors), E_WARNING (warnings), E_NOTICE (notices), and E_STRICT (strict notices).
Because strict notices are rare (and new to PHP 5), they are not included in E_ALL. To tell the PHP interpreter that you want to hear about everything that could possibly be an error, set error_reporting to E_ALL | E_STRICT.
12.2 Fixing Parse Errors The PHP interpreter is really picky but not very chatty. If you leave out a necessary semicolon, or start a string with a single quote but end it with a double quote, the interpreter doesn't run your program. It throws up its (virtual) hands, complains about a "parse error," and leaves you stuck in the debugging wilderness.
This can be one of the most frustrating things about programming when you're getting started. Everything has to be phrased and punctuated just so in order for the PHP interpreter to accept it. One thing that helps this process along is writing your programs in an editor that is PHP-aware. This is a program that, when you tell it you are editing a PHP program, turns on some special features that make programming easier.
One of these special features is syntax highlighting. It changes the color of different parts of your program based on what those parts are. For example, strings are pink, keywords such as if and while are blue, comments are grey, and variables are black. Syntax highlighting makes it easier to detect things such as a string that's missing its closing quote: the pink text continues past the line that the string is on, all the way to the end of the file (or the next quote that appears later in the program).
Another feature is quote and bracket matching, which helps to make sure that your quotes and brackets are balanced. When you type a closing delimiter such as }, the editor highlights the opening { that it matches. Different editors do this in different ways, but typical methods are to flash the cursor at the location of the opening {, or to bold the { } pair for a short time. This behavior is helpful for pairs of punctuation that go together: single and double quotes that delimit strings, parentheses, square brackets, and curly braces.
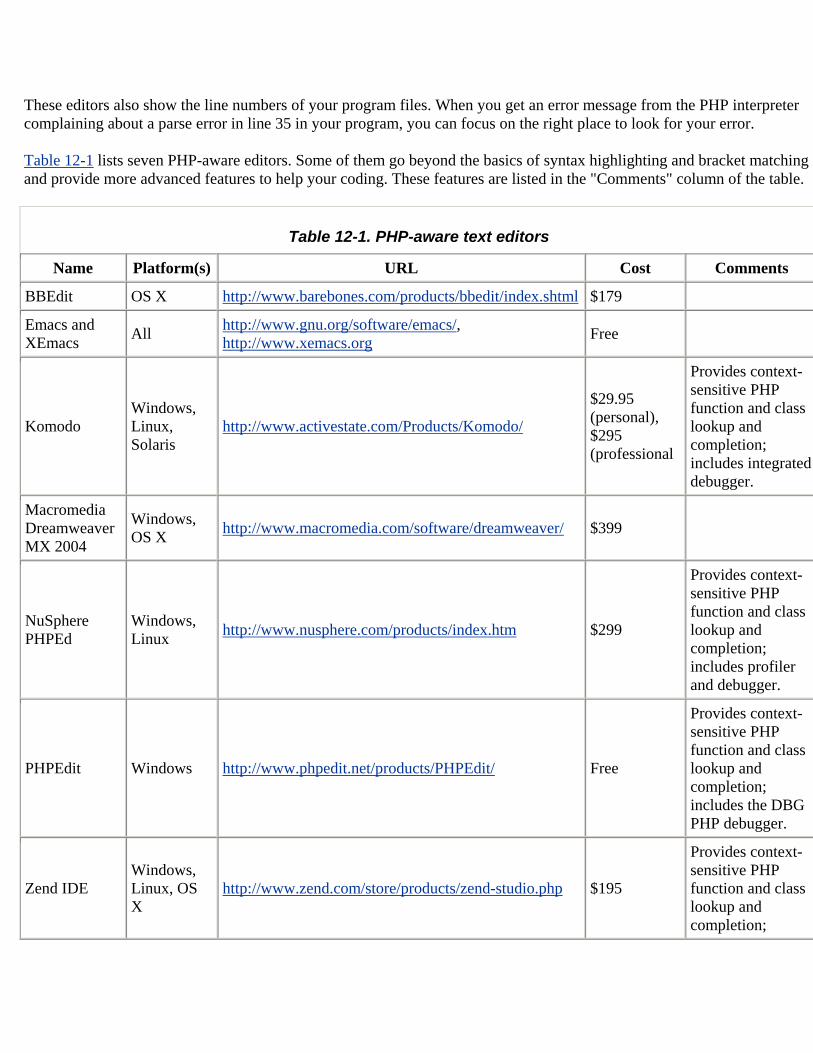
These editors also show the line numbers of your program files. When you get an error message from the PHP interpreter complaining about a parse error in line 35 in your program, you can focus on the right place to look for your error.
Table 12-1 lists seven PHP-aware editors. Some of them go beyond the basics of syntax highlighting and bracket matching and provide more advanced features to help your coding. These features are listed in the "Comments" column of the table.
Table 12-1. PHP-aware text editors
Name Platform(s) URL Cost Comments
BBEdit OS X http://www.barebones.com/products/bbedit/index.shtml $179
Emacs and XEmacs All http://www.gnu.org/software/emacs/,
http://www.xemacs.org Free
Komodo Windows, Linux, Solaris
http://www.activestate.com/Products/Komodo/
$29.95 (personal), $295 (professional
Provides context-sensitive PHP function and class lookup and completion; includes integrated debugger.
Macromedia Dreamweaver MX 2004
Windows, OS X http://www.macromedia.com/software/dreamweaver/ $399
NuSphere PHPEd
Windows, Linux http://www.nusphere.com/products/index.htm $299
Provides context-sensitive PHP function and class lookup and completion; includes profiler and debugger.
PHPEdit Windows http://www.phpedit.net/products/PHPEdit/ Free
Provides context-sensitive PHP function and class lookup and completion; includes the DBG PHP debugger.
Zend IDE Windows, Linux, OS X
http://www.zend.com/store/products/zend-studio.php $195
Provides context-sensitive PHP function and class lookup and completion;
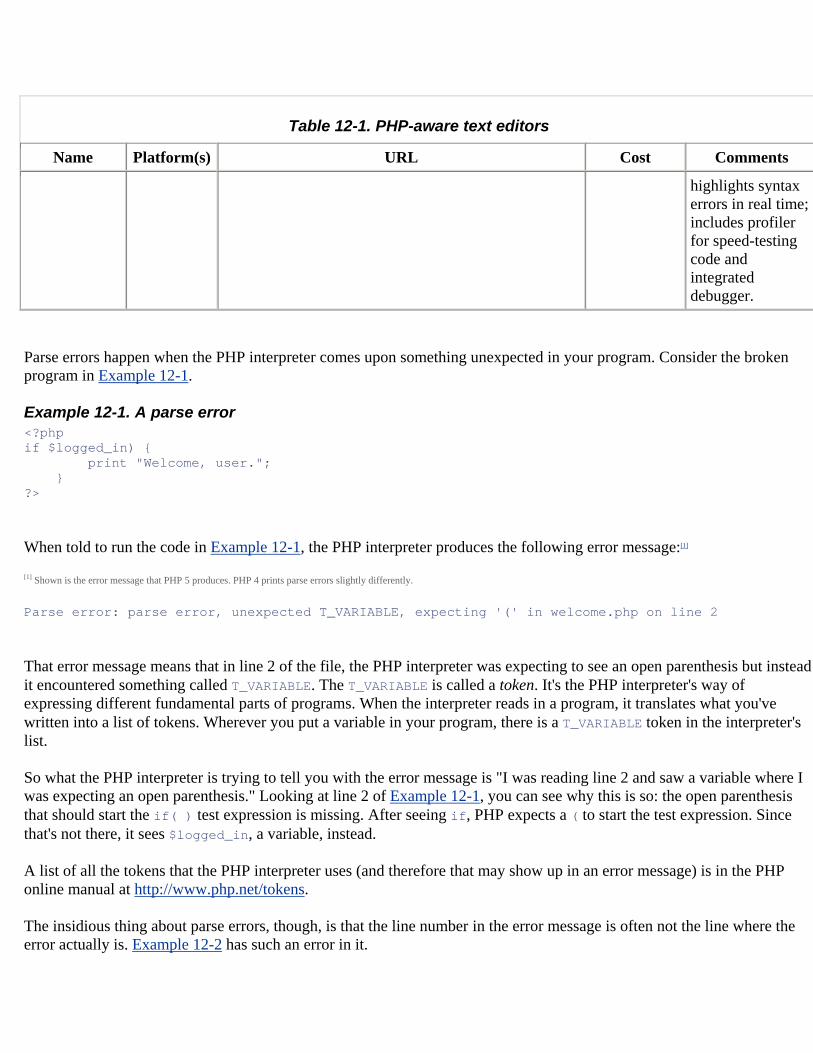
Table 12-1. PHP-aware text editors
Name Platform(s) URL Cost Comments
highlights syntax errors in real time; includes profiler for speed-testing code and integrated debugger.
Parse errors happen when the PHP interpreter comes upon something unexpected in your program. Consider the broken program in Example 12-1.
Example 12-1. A parse error <?php if $logged_in) { print "Welcome, user."; } ?>
When told to run the code in Example 12-1, the PHP interpreter produces the following error message:[1]
[1] Shown is the error message that PHP 5 produces. PHP 4 prints parse errors slightly differently.
Parse error: parse error, unexpected T_VARIABLE, expecting '(' in welcome.php on line 2
That error message means that in line 2 of the file, the PHP interpreter was expecting to see an open parenthesis but instead it encountered something called T_VARIABLE. The T_VARIABLE is called a token. It's the PHP interpreter's way of expressing different fundamental parts of programs. When the interpreter reads in a program, it translates what you've written into a list of tokens. Wherever you put a variable in your program, there is a T_VARIABLE token in the interpreter's list.
So what the PHP interpreter is trying to tell you with the error message is "I was reading line 2 and saw a variable where I was expecting an open parenthesis." Looking at line 2 of Example 12-1, you can see why this is so: the open parenthesis that should start the if( ) test expression is missing. After seeing if, PHP expects a ( to start the test expression. Since that's not there, it sees $logged_in, a variable, instead.
A list of all the tokens that the PHP interpreter uses (and therefore that may show up in an error message) is in the PHP online manual at http://www.php.net/tokens.
The insidious thing about parse errors, though, is that the line number in the error message is often not the line where the error actually is. Example 12-2 has such an error in it.
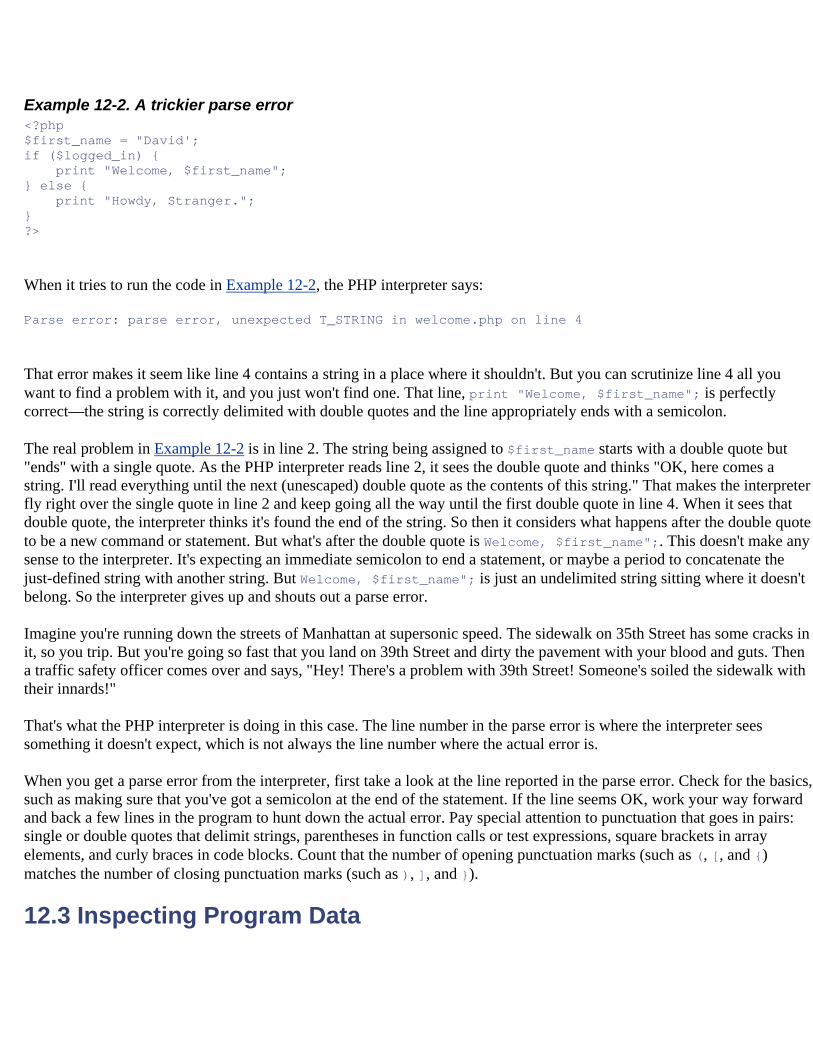
Example 12-2. A trickier parse error <?php $first_name = "David'; if ($logged_in) { print "Welcome, $first_name"; } else { print "Howdy, Stranger."; } ?>
When it tries to run the code in Example 12-2, the PHP interpreter says:
Parse error: parse error, unexpected T_STRING in welcome.php on line 4
That error makes it seem like line 4 contains a string in a place where it shouldn't. But you can scrutinize line 4 all you want to find a problem with it, and you just won't find one. That line, print "Welcome, $first_name"; is perfectly correct—the string is correctly delimited with double quotes and the line appropriately ends with a semicolon.
The real problem in Example 12-2 is in line 2. The string being assigned to $first_name starts with a double quote but "ends" with a single quote. As the PHP interpreter reads line 2, it sees the double quote and thinks "OK, here comes a string. I'll read everything until the next (unescaped) double quote as the contents of this string." That makes the interpreter fly right over the single quote in line 2 and keep going all the way until the first double quote in line 4. When it sees that double quote, the interpreter thinks it's found the end of the string. So then it considers what happens after the double quote to be a new command or statement. But what's after the double quote is Welcome, $first_name";. This doesn't make any sense to the interpreter. It's expecting an immediate semicolon to end a statement, or maybe a period to concatenate the just-defined string with another string. But Welcome, $first_name"; is just an undelimited string sitting where it doesn't belong. So the interpreter gives up and shouts out a parse error.
Imagine you're running down the streets of Manhattan at supersonic speed. The sidewalk on 35th Street has some cracks in it, so you trip. But you're going so fast that you land on 39th Street and dirty the pavement with your blood and guts. Then a traffic safety officer comes over and says, "Hey! There's a problem with 39th Street! Someone's soiled the sidewalk with their innards!"
That's what the PHP interpreter is doing in this case. The line number in the parse error is where the interpreter sees something it doesn't expect, which is not always the line number where the actual error is.
When you get a parse error from the interpreter, first take a look at the line reported in the parse error. Check for the basics, such as making sure that you've got a semicolon at the end of the statement. If the line seems OK, work your way forward and back a few lines in the program to hunt down the actual error. Pay special attention to punctuation that goes in pairs: single or double quotes that delimit strings, parentheses in function calls or test expressions, square brackets in array elements, and curly braces in code blocks. Count that the number of opening punctuation marks (such as (, [, and {) matches the number of closing punctuation marks (such as ), ], and }).
12.3 Inspecting Program Data
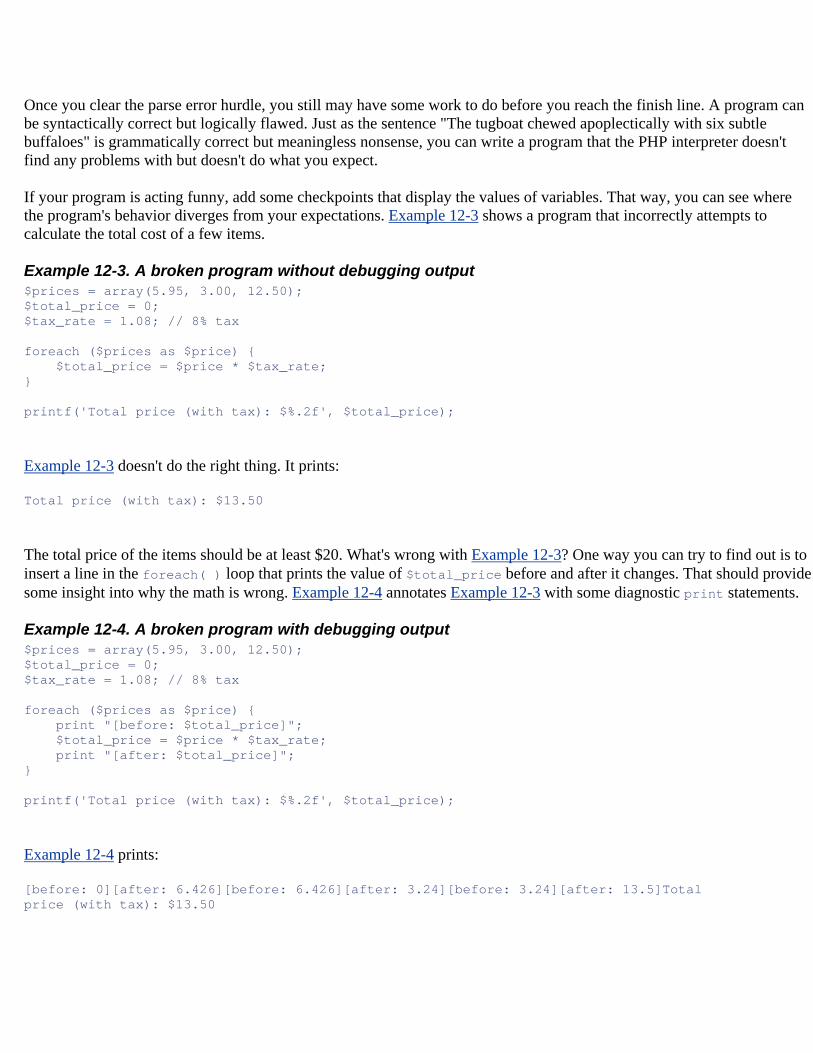
Once you clear the parse error hurdle, you still may have some work to do before you reach the finish line. A program can be syntactically correct but logically flawed. Just as the sentence "The tugboat chewed apoplectically with six subtle buffaloes" is grammatically correct but meaningless nonsense, you can write a program that the PHP interpreter doesn't find any problems with but doesn't do what you expect.
If your program is acting funny, add some checkpoints that display the values of variables. That way, you can see where the program's behavior diverges from your expectations. Example 12-3 shows a program that incorrectly attempts to calculate the total cost of a few items.
Example 12-3. A broken program without debugging output $prices = array(5.95, 3.00, 12.50); $total_price = 0; $tax_rate = 1.08; // 8% tax foreach ($prices as $price) { $total_price = $price * $tax_rate; } printf('Total price (with tax): $%.2f', $total_price);
Example 12-3 doesn't do the right thing. It prints:
Total price (with tax): $13.50
The total price of the items should be at least $20. What's wrong with Example 12-3? One way you can try to find out is to insert a line in the foreach( ) loop that prints the value of $total_price before and after it changes. That should provide some insight into why the math is wrong. Example 12-4 annotates Example 12-3 with some diagnostic print statements.
Example 12-4. A broken program with debugging output $prices = array(5.95, 3.00, 12.50); $total_price = 0; $tax_rate = 1.08; // 8% tax foreach ($prices as $price) { print "[before: $total_price]"; $total_price = $price * $tax_rate; print "[after: $total_price]"; } printf('Total price (with tax): $%.2f', $total_price);
Example 12-4 prints:
[before: 0][after: 6.426][before: 6.426][after: 3.24][before: 3.24][after: 13.5]Total price (with tax): $13.50
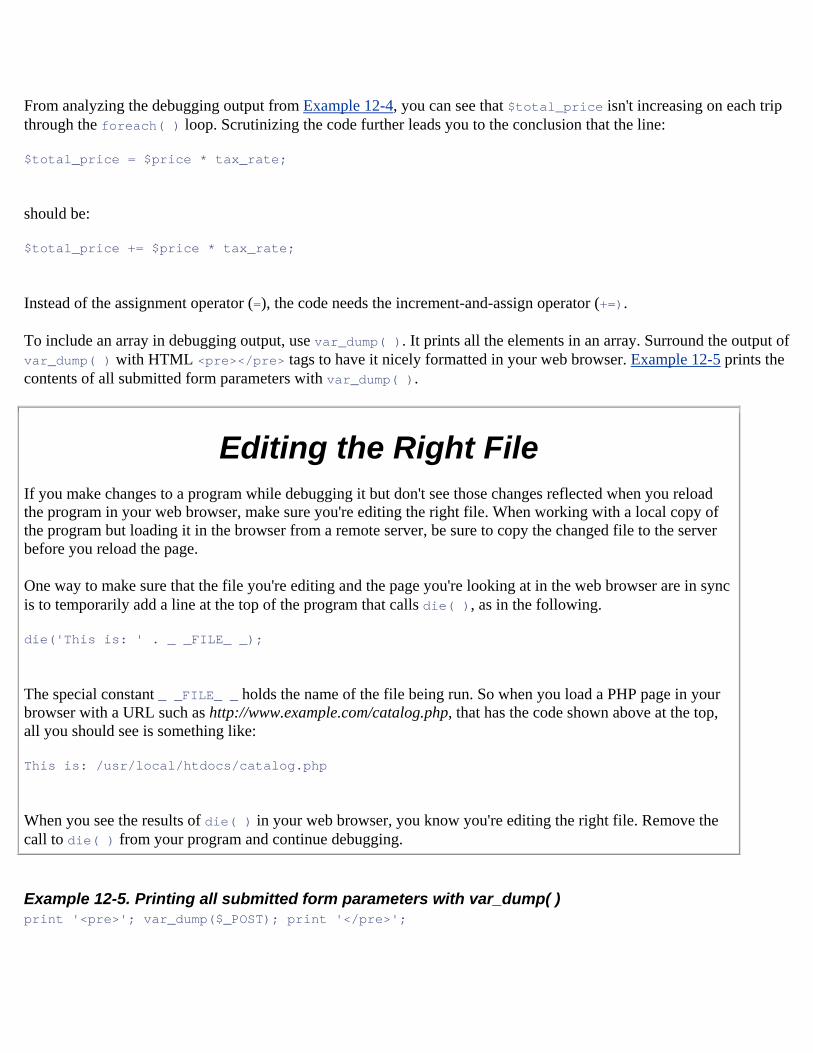
From analyzing the debugging output from Example 12-4, you can see that $total_price isn't increasing on each trip through the foreach( ) loop. Scrutinizing the code further leads you to the conclusion that the line:
$total_price = $price * tax_rate;
should be:
$total_price += $price * tax_rate;
Instead of the assignment operator (=), the code needs the increment-and-assign operator (+=).
To include an array in debugging output, use var_dump( ). It prints all the elements in an array. Surround the output of var_dump( ) with HTML <pre></pre> tags to have it nicely formatted in your web browser. Example 12-5 prints the contents of all submitted form parameters with var_dump( ).
Editing the Right File If you make changes to a program while debugging it but don't see those changes reflected when you reload the program in your web browser, make sure you're editing the right file. When working with a local copy of the program but loading it in the browser from a remote server, be sure to copy the changed file to the server before you reload the page.
One way to make sure that the file you're editing and the page you're looking at in the web browser are in sync is to temporarily add a line at the top of the program that calls die( ), as in the following.
die('This is: ' . _ _FILE_ _);
The special constant _ _FILE_ _ holds the name of the file being run. So when you load a PHP page in your browser with a URL such as http://www.example.com/catalog.php, that has the code shown above at the top, all you should see is something like:
This is: /usr/local/htdocs/catalog.php
When you see the results of die( ) in your web browser, you know you're editing the right file. Remove the call to die( ) from your program and continue debugging.
Example 12-5. Printing all submitted form parameters with var_dump( ) print '<pre>'; var_dump($_POST); print '</pre>';
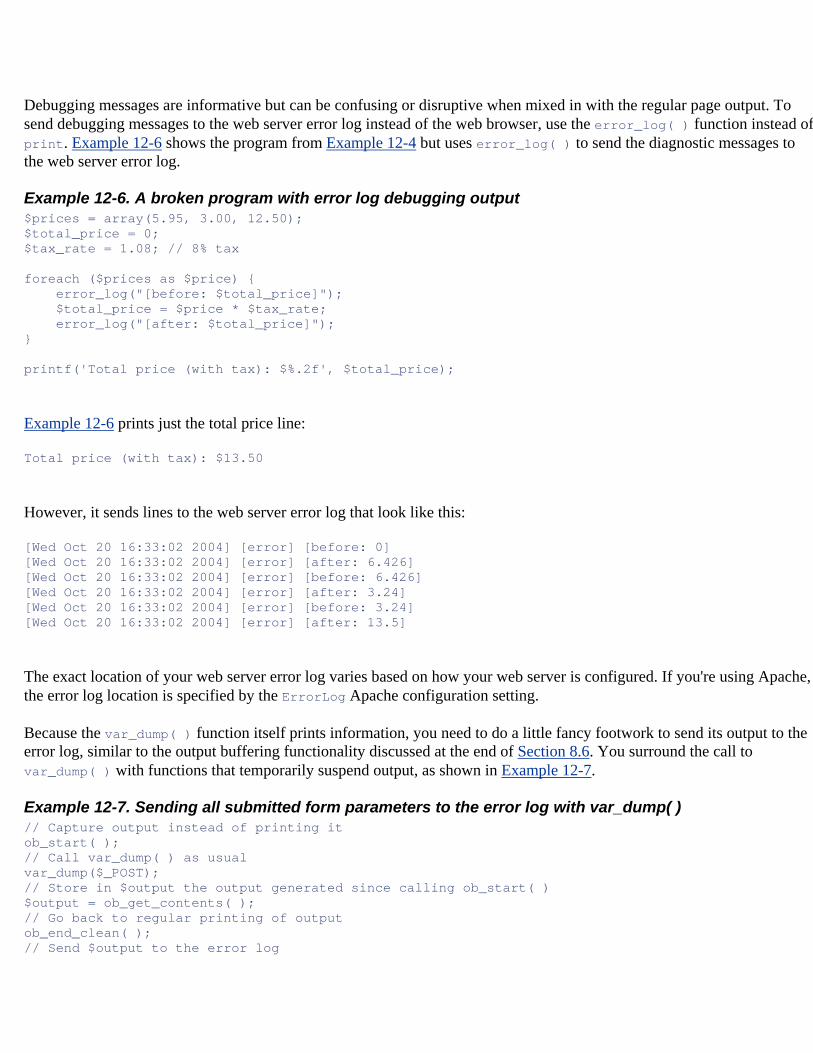
Debugging messages are informative but can be confusing or disruptive when mixed in with the regular page output. To send debugging messages to the web server error log instead of the web browser, use the error_log( ) function instead of print. Example 12-6 shows the program from Example 12-4 but uses error_log( ) to send the diagnostic messages to the web server error log.
Example 12-6. A broken program with error log debugging output $prices = array(5.95, 3.00, 12.50); $total_price = 0; $tax_rate = 1.08; // 8% tax foreach ($prices as $price) { error_log("[before: $total_price]"); $total_price = $price * $tax_rate; error_log("[after: $total_price]"); } printf('Total price (with tax): $%.2f', $total_price);
Example 12-6 prints just the total price line:
Total price (with tax): $13.50
However, it sends lines to the web server error log that look like this:
[Wed Oct 20 16:33:02 2004] [error] [before: 0] [Wed Oct 20 16:33:02 2004] [error] [after: 6.426] [Wed Oct 20 16:33:02 2004] [error] [before: 6.426] [Wed Oct 20 16:33:02 2004] [error] [after: 3.24] [Wed Oct 20 16:33:02 2004] [error] [before: 3.24] [Wed Oct 20 16:33:02 2004] [error] [after: 13.5]
The exact location of your web server error log varies based on how your web server is configured. If you're using Apache, the error log location is specified by the ErrorLog Apache configuration setting.
Because the var_dump( ) function itself prints information, you need to do a little fancy footwork to send its output to the error log, similar to the output buffering functionality discussed at the end of Section 8.6. You surround the call to var_dump( ) with functions that temporarily suspend output, as shown in Example 12-7.
Example 12-7. Sending all submitted form parameters to the error log with var_dump( ) // Capture output instead of printing it ob_start( ); // Call var_dump( ) as usual var_dump($_POST); // Store in $output the output generated since calling ob_start( ) $output = ob_get_contents( ); // Go back to regular printing of output ob_end_clean( ); // Send $output to the error log
error_log($output);
The ob_start( ), ob_get_contents( ), and ob_end_clean( ) functions in Example 12-7 manipulate how the PHP interpreter generates output. The ob_start( ) function tells the interpreter "Don't print anything from now on. Just accumulate anything you would print in an internal buffer." When var_dump( ) is called, the interpreter is under the spell of ob_start( ), so the output goes into that internal buffer. The ob_get_contents( ) function returns the contents of the internal buffer. Since var_dump( ) is the only thing that generated output since ob_start( ) was called, this puts the output of var_dump( ) into $output. The ob_end_clean( ) function undoes the work of ob_start( ): it tells the PHP interpreter to go back to its regular behavior with regard to printing. Last, error_log( ) sends $output (which holds what var_dump( ) "printed") to the web server error log.
12.4 Fixing Database Errors When your program involves talking to a database, you have to deal with an additional universe of errors. Just as the PHP interpreter expects your programs to adhere to a particular grammar, the database program expects your SQL statements to adhere to the grammar of SQL.
The setErrorHandling( ) function introduced in Section 7.4 has an additional mode of operation that gives you increased control over how database errors are handled in your PHP programs. Instead of having a terse error message printed or your program exit when a database error happens, you can have a custom function called. That function can do whatever you want, such as print a more detailed error message or write to the web server error log.
To enable this mode, call setErrorHandling( ) with the PEAR_ERROR_CALLBACK constant and the name of your error-handling function. Example 12-8 says that when there is a database error, the database_error( ) function should be called.
Example 12-8. Setting up a custom database error handling function $db->setErrorHandling(PEAR_ERROR_CALLBACK,'database_error');
You also have to write the custom error-handling function whose name is passed to setErrorHandling( ). This function must accept one argument. When DB invokes the function, it passes an object to the function that contains the error information. You can use the getDebugInfo( ) method of that object to get more detailed error information. Example 12-9 is a sample custom error-handling function.
Example 12-9. A custom database error handling function function database_error($error_object) { print "We're sorry, but there is a temporary problem with the database."; $detailed_error = $error_object->getDebugInfo( ); error_log($detailed_error); }
The database_error( ) function defined in Example 12-9 prints a generic message when a database error happens. It sends more detailed information about the error to the web server error log. Because this detailed information includes the
full text of the database queries that caused errors, you shouldn't show it to your web site visitors. The messages that database_error( ) sends to the error log look like this:
SELECT dish_name, price, has_spiciness FROM dishes WHERE price >= '5.00' AND price <= '25.00' AND is_spicy = 0 [nativecode=1054 ** Unknown column 'has_spiciness' in 'field list']
Since the dishes table doesn't have a column called has_spiciness, a query that tries to use such a column fails.
12.5 Chapter Summary Chapter 12 covers:
• Configuring error display for a web browser, a web server error log, or both. • Configuring the PHP interpreter's error-reporting level. • Getting the benefits of a PHP-aware text editor. • Deciphering parse error messages. • Finding and fixing parse errors. • Printing debugging information with print, var_dump( ) and error_log( ). • Sending var_dump( ) output to the error log with output buffering functions. • Writing a custom database error-handling function.
12.6 Exercises 1. This program has a syntax error in it: 2. <?php 3. $name = 'Umberto'; 4. function say_hello( ) { 5. print 'Hello, '; 6. print global $name; 7. } 8. say_hello( );
?>
Without running the program through the PHP interpreter, try to figure out what the parse error looks like that gets printed when the interpreter tries to run the program. What change must you make to the program to get it to run properly and print Hello, Umberto?
9. Modify the validate_form( ) function in your answer to Exercise 6.3 so that it prints in the web server error log the names and values of all of the submitted form parameters.
10. Modify your answer to Exercise 7.4 to use a custom database error-handling function that prints out different messages in the web browser and in the web server error log. The error-handling function should make the program exit after it prints the error messages.
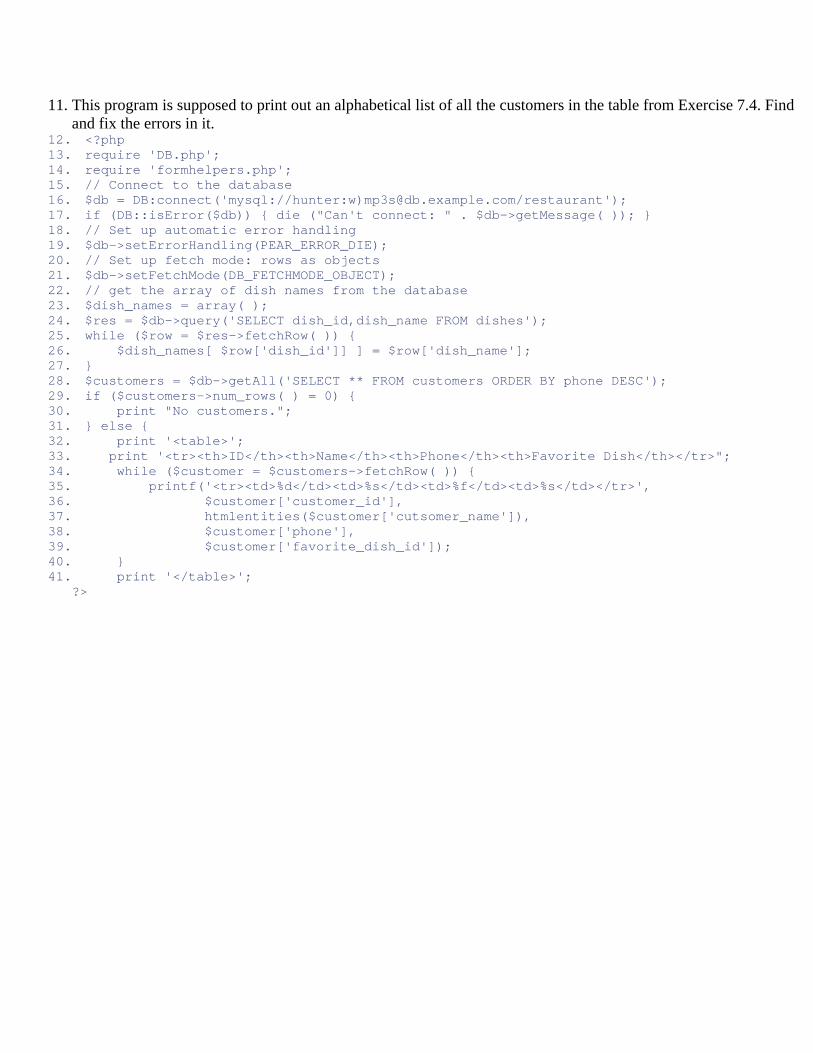
11. This program is supposed to print out an alphabetical list of all the customers in the table from Exercise 7.4. Find and fix the errors in it.
12. <?php 13. require 'DB.php'; 14. require 'formhelpers.php'; 15. // Connect to the database 16. $db = DB:connect('mysql://hunter:w)[email protected]/restaurant'); 17. if (DB::isError($db)) { die ("Can't connect: " . $db->getMessage( )); } 18. // Set up automatic error handling 19. $db->setErrorHandling(PEAR_ERROR_DIE); 20. // Set up fetch mode: rows as objects 21. $db->setFetchMode(DB_FETCHMODE_OBJECT); 22. // get the array of dish names from the database 23. $dish_names = array( ); 24. $res = $db->query('SELECT dish_id,dish_name FROM dishes'); 25. while ($row = $res->fetchRow( )) { 26. $dish_names[ $row['dish_id']] ] = $row['dish_name']; 27. } 28. $customers = $db->getAll('SELECT ** FROM customers ORDER BY phone DESC'); 29. if ($customers->num_rows( ) = 0) { 30. print "No customers."; 31. } else { 32. print '<table>'; 33. print '<tr><th>ID</th><th>Name</th><th>Phone</th><th>Favorite Dish</th></tr>"; 34. while ($customer = $customers->fetchRow( )) { 35. printf('<tr><td>%d</td><td>%s</td><td>%f</td><td>%s</td></tr>', 36. $customer['customer_id'], 37. htmlentities($customer['cutsomer_name']), 38. $customer['phone'], 39. $customer['favorite_dish_id']); 40. } 41. print '</table>';
?>
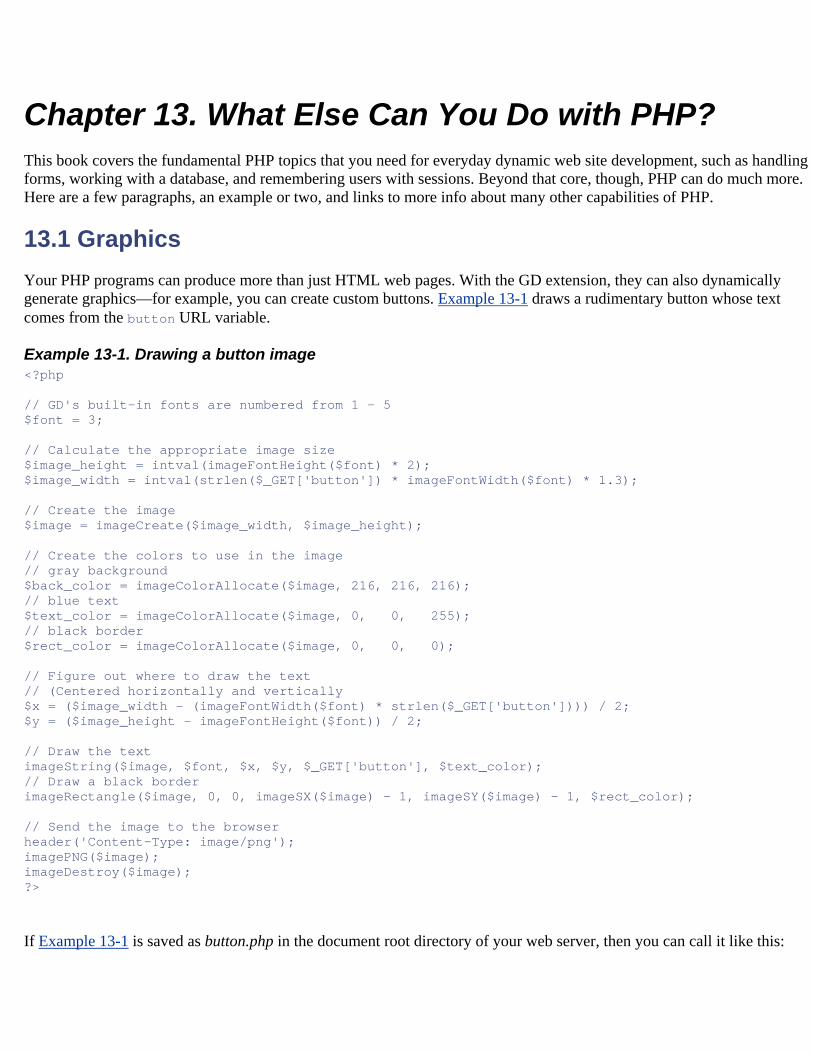
Chapter 13. What Else Can You Do with PHP? This book covers the fundamental PHP topics that you need for everyday dynamic web site development, such as handling forms, working with a database, and remembering users with sessions. Beyond that core, though, PHP can do much more. Here are a few paragraphs, an example or two, and links to more info about many other capabilities of PHP.
13.1 Graphics Your PHP programs can produce more than just HTML web pages. With the GD extension, they can also dynamically generate graphics—for example, you can create custom buttons. Example 13-1 draws a rudimentary button whose text comes from the button URL variable.
Example 13-1. Drawing a button image <?php // GD's built-in fonts are numbered from 1 - 5 $font = 3; // Calculate the appropriate image size $image_height = intval(imageFontHeight($font) * 2); $image_width = intval(strlen($_GET['button']) * imageFontWidth($font) * 1.3); // Create the image $image = imageCreate($image_width, $image_height); // Create the colors to use in the image // gray background $back_color = imageColorAllocate($image, 216, 216, 216); // blue text $text_color = imageColorAllocate($image, 0, 0, 255); // black border $rect_color = imageColorAllocate($image, 0, 0, 0); // Figure out where to draw the text // (Centered horizontally and vertically $x = ($image_width - (imageFontWidth($font) * strlen($_GET['button']))) / 2; $y = ($image_height - imageFontHeight($font)) / 2; // Draw the text imageString($image, $font, $x, $y, $_GET['button'], $text_color); // Draw a black border imageRectangle($image, 0, 0, imageSX($image) - 1, imageSY($image) - 1, $rect_color); // Send the image to the browser header('Content-Type: image/png'); imagePNG($image); imageDestroy($image); ?>
If Example 13-1 is saved as button.php in the document root directory of your web server, then you can call it like this:
<img src="/button.php?button=Click+Here">
It then outputs a button that looks like Figure 13-1.
Figure 13-1. Dynamic button
Read more about these functions in Chapter 9 of Programming PHP by Rasmus Lerdorf and Kevin Tatroe (O'Reilly), in Chapter 15 of PHP Cookbook by David Sklar and Adam Trachtenberg (O'Reilly), and in the Image section of the PHP Manual (http://www.php.net/image). Jeff Knight's presentation to NYPHP about PHP's image functions is also a good source of information. It's available at http://www.nyphp.org/content/presentations/GDintro.
13.2 PDF Another kind of non-HTML document that your PHP programs can produce is a PDF file, as shown in Example 13-2. This is handy for making an invoice that incorporates information from your database or providing printable versions of pages that meet exacting layout standards.
Example 13-2. Generating a PDF document // These values are in points (1/72nd of an inch) $fontsize = 72; // 1 inch high letters $page_height = 612; // 8.5 inch high page $page_width = 792; // 11 inch wide page // Use a default message if none is supplied if (strlen(trim($_GET['message']))) { $message = trim($_GET['message']); } else { $message = 'Generate a PDF!'; } // Create a new PDF document in memory $pdf = pdf_new( ); pdf_open_file($pdf, ''); // Add a 11"x8.5" page to the document pdf_begin_page($pdf, $page_width, $page_height); // Select the Helvetica font at 72 points $font = pdf_findfont($pdf, "Helvetica", "winansi", 0); pdf_setfont($pdf, $font, $fontsize); // Display the message centered on the page pdf_show_boxed($pdf, $message, 0, ($page_height-$fontsize)/2, $page_width, $fontsize, 'center'); // End the page and the document pdf_end_page($pdf); pdf_close($pdf);

// Get the contents of the document and delete it from memory $pdf_doc = pdf_get_buffer($pdf); pdf_delete($pdf); // Send appropriate headers and the document contents header('Content-Type: application/pdf'); header('Content-Length: ' . strlen($pdf_doc)); print $pdf_doc;
Example 13-2 uses the functions in the PDF extension. This extension depends on the PDFLib library that is available at http://www.pdflibrary.com. The CLibPDF extension also generates PDF files, but depends on the ClibPDF library that is available at http://www.fastio.com. Both PDFLib and CLibPDF require that you buy a license to use them for commercial purposes.
See Chapter 10 of O'Reilly's Programming PHP for detailed information about creating PDF documents, and read http://www.php.net/manual/faq.using.php#faq.using.freepdf for some free PDF creation options.
13.3 Shockwave/Flash You can also create full-featured SWF-format Flash movies with the Ming extension. Example 13-3 produces a movie with a blue circle in it that you can drag around.
Example 13-3. Generating a Flash movie // Use SWF Version 6 to enable Actionscript ming_UseSwfVersion(6); // Create a new movie and set some parameters $movie = new SWFMovie( ); $movie->setRate(20.000000); $movie->setDimension(550, 400); $movie->setBackground(0xcc,0xcc,0xcc); // Create the circle $circle = new SWFShape( ); $circle->setRightFill(33,66,99); $circle->drawCircle(40); $sprite= new SWFSprite( ); $sprite->add($circle); $sprite->nextFrame( ); // Add the circle to the movie $displayitem = $movie->add($sprite); $displayitem->setName('circle'); $displayitem->moveTo(100,100); // Add the Actionscript that implements the dragging $movie->add(new SWFAction(" circle.onPress=function( ){ this.startDrag('');}; circle.onRelease= circle.onReleaseOutside=function( ){ stopDrag( );}; "));
// Display the movie header("Content-type: application/x-shockwave-flash"); $movie->output(1);
Save Example 13-3 as ming.php and then reference it from another page as in Example 13-4.
Example 13-4. Including the Flash movie in a web page <OBJECT classid="clsid:D27CDB6E-AE6D-11cf-96B8-444553540000" codebase="http://download.macromedia.com/pub/shockwave/cabs/flash/swflash. cab#version=6,0,0,0" WIDTH="300" HEIGHT="300"> <PARAM NAME=movie VALUE="ming.php"> <PARAM NAME=bgcolor VALUE="#ffffff"> <EMBED src="ming.php" bgcolor="#ffffff" WIDTH="300" HEIGHT="300" TYPE="application/x-shockwave-flash" PLUGINSPAGE="http://www.macromedia.com/go/ getflashplayer"></EMBED> </OBJECT>
Read about the Ming functions in the PHP Manual at http://www.php.net/ming. The Ming extension depends on the external Ming library, which you can download from http://ming.sourceforge.net. The site at http://ming.sourceforge.net also contains lots of documentation and examples of how to use Ming from PHP. (Example 13-3 is adapted from one of the examples on that site.)
13.4 Browser-Specific Code The get_browser( ) function gives you information about the characteristics and capabilities of a user's browser. It makes it easy to dynamically determine what kind of page to output based on what a browser can do, what kind of browser it is, or on what operating system it's running. Example 13-5 prints a message that depends on the operating system of the user's browser.
Example 13-5. Using get_browser( ) $browser = get_browser( ); if ($browser->platform = = 'WinXP') { print 'You are using Windows XP.'; } elseif ($browser->platform = = 'MacOSX') { print 'You are using Mac OS X.'; } else { print 'You are using a different operating system.'; }
The get_browser( ) function uses the $_SERVER['HTTP_USER_AGENT'] variable described in Table 6-1. Remember, that variable can be faked, but it is still useful in producing customized pages for the majority of your users. For get_browser( ) to work, you need to download a separate browser capabilities file and set the browscap configuration directive. The
PHP Manual page about get_browser( ) (http://www.php.net/get_browser) provides up-to-date information on where to get a browser capabilities file.
13.5 Sending and Receiving Mail The mail( ) function (which you saw briefly in Example 6-30) sends an email message. To use mail( ), pass it a destination address, a message subject, and a message body. Example 13-6 sends a message with mail( ).
Example 13-6. Sending a message with mail( ) $mail_body=<<<_TXT_ Your order is: * 2 Fried Bean Curd * 1 Eggplant with Chili Sauce * 3 Pineapple with Yu Fungus _TXT_; mail('[email protected]','Your Order',$mail_body);
To handle more complicated messages, such as an HTML message or a message with an attachment, use the PEAR Mail and Mail_Mime modules. Example 13-7 shows how to use Mail_Mime to send a multipart message that has a text part and an HTML part.
Example 13-7. Sending a message with text and HTML bodies require 'Mail.php'; require 'Mail/mime.php'; $headers = array('From' => '[email protected]', 'Subject' => 'Your Order'); $text_body = <<<_TXT_ Your order is: * 2 Fried Bean Curd * 1 Eggplant with Chili Sauce * 3 Pineapple with Yu Fungus _TXT_; $html_body = <<<_HTML_ <p>Your order is:</p> <ul> <li><b>2</b> Fried Bean Curd</li> <li><b>1</b> Eggplant with Chili Sauce</li> <li><b>3</b> Pineapple with Yu Fungus</li> </ul> _HTML_; $mime = new Mail_mime( ); $mime->setTXTBody($text_body); $mime->setHTMLBody($html_body); $msg_body = $mime->get( ); $msg_headers = $mime->headers($headers);
$mailer = Mail::factory('mail'); $mailer->send('[email protected]', $msg_headers, $msg_body);
When [email protected] reads the message sent in Example 13-7, his mail-reading program displays the HTML body or the text body, depending on its capabilities and how it is configured.
Read more about PEAR Mail and Mail_Mime in PHP Cookbook (O'Reilly), Recipes 17.1 and 17.2; in Chapter 9 of Essential PHP Tools by David Sklar (APress); and at http://pear.php.net/manual/en/package.mail.mail-mime.php.
13.6 Uploading Files in Forms The <input type="file"> form element lets a user upload the entire contents of a file to your server. When a form that includes a file element is submitted, the PHP interpreter provides access to the uploaded file through the $_FILES auto-global array. Example 13-8 shows a form-processing program whose validate_form( ) and process_form( ) functions use $_FILES.
Example 13-8. A file upload form if ($_POST['_stage']) { // If validate_form( ) returns errors, pass them to show_form( ) if ($form_errors = validate_form( )) { show_form($form_errors); } else { // The submitted data is valid, so process it process_form( ); } } else { // The form wasn't submitted, so display show_form( ); } function show_form($errors = '') { if ($errors) { print 'You need to correct the following errors: <ul><li>'; print implode('</li><li>',$errors); print '</li></ul>'; } print<<<_HTML_ <form enctype="multipart/form-data" method="POST" action="$_SERVER[PHP_SELF]"> File to Upload: <input name="my_file" type="file"/> <input type="hidden" name="MAX_FILE_SIZE" value="131072"/> <input type="hidden" name="_stage" value="1"> <input type="submit" value="Upload"/> </form> _HTML_; }
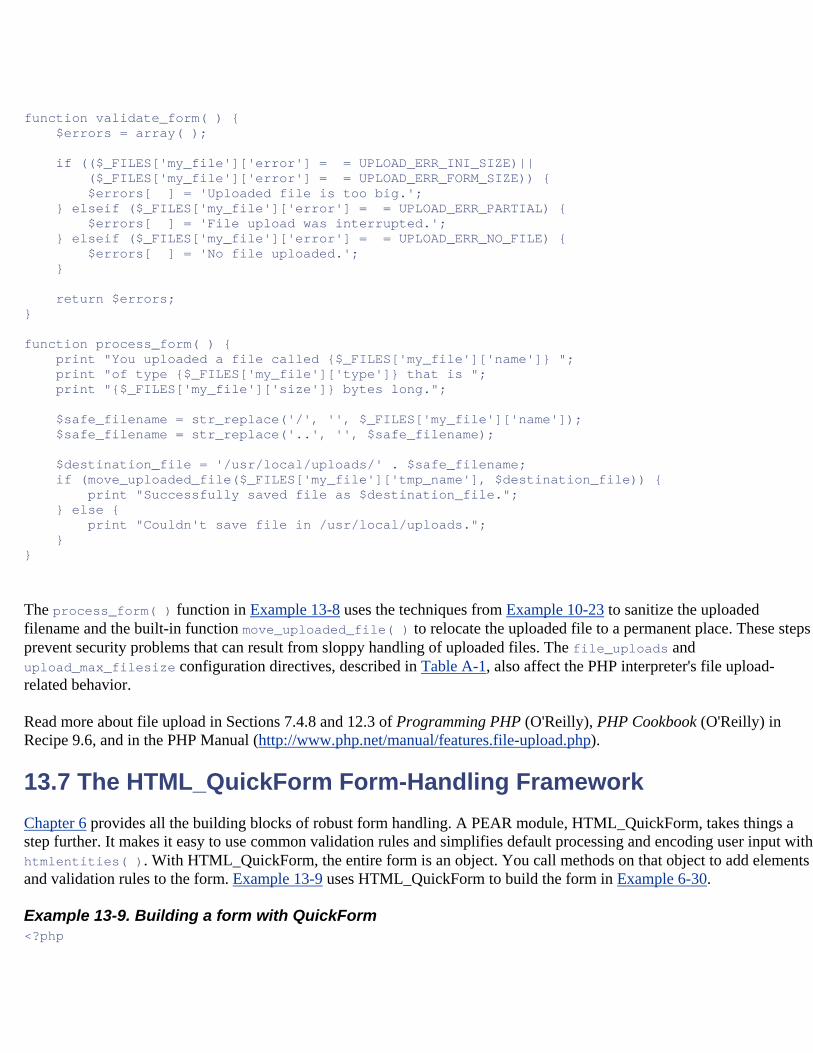
function validate_form( ) { $errors = array( ); if (($_FILES['my_file']['error'] = = UPLOAD_ERR_INI_SIZE)|| ($_FILES['my_file']['error'] = = UPLOAD_ERR_FORM_SIZE)) { $errors[ ] = 'Uploaded file is too big.'; } elseif ($_FILES['my_file']['error'] = = UPLOAD_ERR_PARTIAL) { $errors[ ] = 'File upload was interrupted.'; } elseif ($_FILES['my_file']['error'] = = UPLOAD_ERR_NO_FILE) { $errors[ ] = 'No file uploaded.'; } return $errors; } function process_form( ) { print "You uploaded a file called {$_FILES['my_file']['name']} "; print "of type {$_FILES['my_file']['type']} that is "; print "{$_FILES['my_file']['size']} bytes long."; $safe_filename = str_replace('/', '', $_FILES['my_file']['name']); $safe_filename = str_replace('..', '', $safe_filename); $destination_file = '/usr/local/uploads/' . $safe_filename; if (move_uploaded_file($_FILES['my_file']['tmp_name'], $destination_file)) { print "Successfully saved file as $destination_file."; } else { print "Couldn't save file in /usr/local/uploads."; } }
The process_form( ) function in Example 13-8 uses the techniques from Example 10-23 to sanitize the uploaded filename and the built-in function move_uploaded_file( ) to relocate the uploaded file to a permanent place. These steps prevent security problems that can result from sloppy handling of uploaded files. The file_uploads and upload_max_filesize configuration directives, described in Table A-1, also affect the PHP interpreter's file upload-related behavior.
Read more about file upload in Sections 7.4.8 and 12.3 of Programming PHP (O'Reilly), PHP Cookbook (O'Reilly) in Recipe 9.6, and in the PHP Manual (http://www.php.net/manual/features.file-upload.php).
13.7 The HTML_QuickForm Form-Handling Framework Chapter 6 provides all the building blocks of robust form handling. A PEAR module, HTML_QuickForm, takes things a step further. It makes it easy to use common validation rules and simplifies default processing and encoding user input with htmlentities( ). With HTML_QuickForm, the entire form is an object. You call methods on that object to add elements and validation rules to the form. Example 13-9 uses HTML_QuickForm to build the form in Example 6-30.
Example 13-9. Building a form with QuickForm <?php
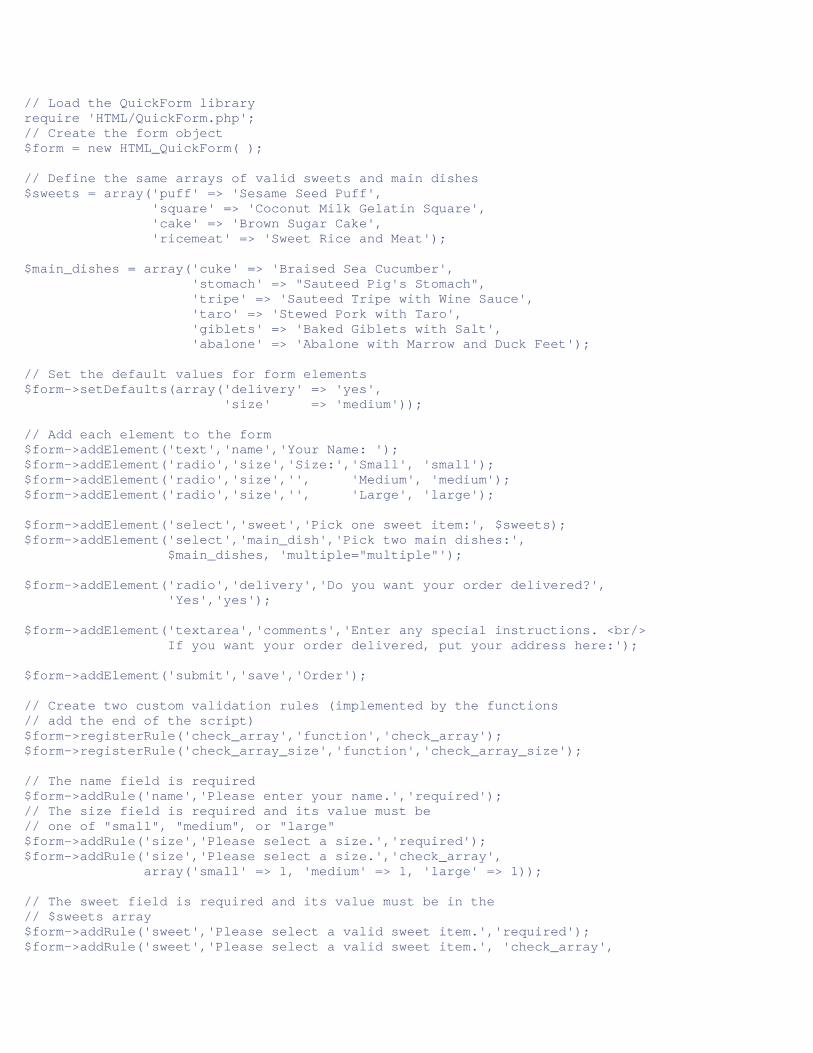
// Load the QuickForm library require 'HTML/QuickForm.php'; // Create the form object $form = new HTML_QuickForm( ); // Define the same arrays of valid sweets and main dishes $sweets = array('puff' => 'Sesame Seed Puff', 'square' => 'Coconut Milk Gelatin Square', 'cake' => 'Brown Sugar Cake', 'ricemeat' => 'Sweet Rice and Meat'); $main_dishes = array('cuke' => 'Braised Sea Cucumber', 'stomach' => "Sauteed Pig's Stomach", 'tripe' => 'Sauteed Tripe with Wine Sauce', 'taro' => 'Stewed Pork with Taro', 'giblets' => 'Baked Giblets with Salt', 'abalone' => 'Abalone with Marrow and Duck Feet'); // Set the default values for form elements $form->setDefaults(array('delivery' => 'yes', 'size' => 'medium')); // Add each element to the form $form->addElement('text','name','Your Name: '); $form->addElement('radio','size','Size:','Small', 'small'); $form->addElement('radio','size','', 'Medium', 'medium'); $form->addElement('radio','size','', 'Large', 'large'); $form->addElement('select','sweet','Pick one sweet item:', $sweets); $form->addElement('select','main_dish','Pick two main dishes:', $main_dishes, 'multiple="multiple"'); $form->addElement('radio','delivery','Do you want your order delivered?', 'Yes','yes'); $form->addElement('textarea','comments','Enter any special instructions. <br/> If you want your order delivered, put your address here:'); $form->addElement('submit','save','Order'); // Create two custom validation rules (implemented by the functions // add the end of the script) $form->registerRule('check_array','function','check_array'); $form->registerRule('check_array_size','function','check_array_size'); // The name field is required $form->addRule('name','Please enter your name.','required'); // The size field is required and its value must be // one of "small", "medium", or "large" $form->addRule('size','Please select a size.','required'); $form->addRule('size','Please select a size.','check_array', array('small' => 1, 'medium' => 1, 'large' => 1)); // The sweet field is required and its value must be in the // $sweets array $form->addRule('sweet','Please select a valid sweet item.','required'); $form->addRule('sweet','Please select a valid sweet item.', 'check_array',
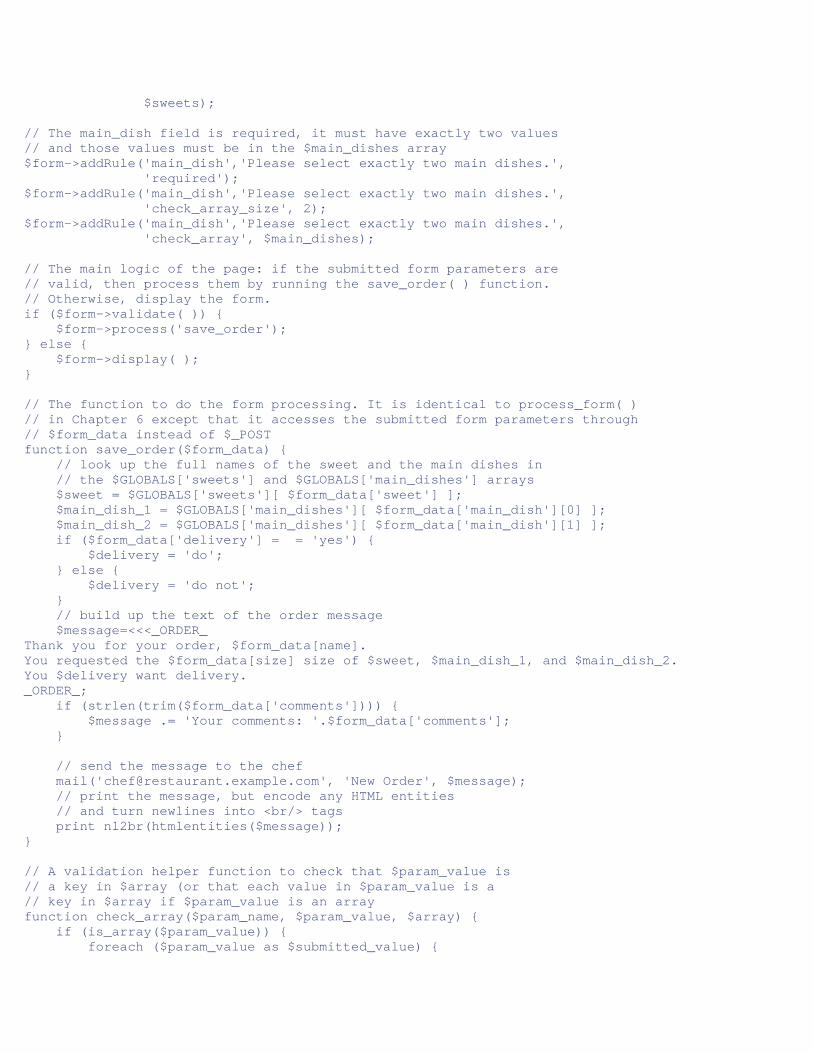
$sweets); // The main_dish field is required, it must have exactly two values // and those values must be in the $main_dishes array $form->addRule('main_dish','Please select exactly two main dishes.', 'required'); $form->addRule('main_dish','Please select exactly two main dishes.', 'check_array_size', 2); $form->addRule('main_dish','Please select exactly two main dishes.', 'check_array', $main_dishes); // The main logic of the page: if the submitted form parameters are // valid, then process them by running the save_order( ) function. // Otherwise, display the form. if ($form->validate( )) { $form->process('save_order'); } else { $form->display( ); } // The function to do the form processing. It is identical to process_form( ) // in Chapter 6 except that it accesses the submitted form parameters through // $form_data instead of $_POST function save_order($form_data) { // look up the full names of the sweet and the main dishes in // the $GLOBALS['sweets'] and $GLOBALS['main_dishes'] arrays $sweet = $GLOBALS['sweets'][ $form_data['sweet'] ]; $main_dish_1 = $GLOBALS['main_dishes'][ $form_data['main_dish'][0] ]; $main_dish_2 = $GLOBALS['main_dishes'][ $form_data['main_dish'][1] ]; if ($form_data['delivery'] = = 'yes') { $delivery = 'do'; } else { $delivery = 'do not'; } // build up the text of the order message $message=<<<_ORDER_ Thank you for your order, $form_data[name]. You requested the $form_data[size] size of $sweet, $main_dish_1, and $main_dish_2. You $delivery want delivery. _ORDER_; if (strlen(trim($form_data['comments']))) { $message .= 'Your comments: '.$form_data['comments']; } // send the message to the chef mail('[email protected]', 'New Order', $message); // print the message, but encode any HTML entities // and turn newlines into <br/> tags print nl2br(htmlentities($message)); } // A validation helper function to check that $param_value is // a key in $array (or that each value in $param_value is a // key in $array if $param_value is an array function check_array($param_name, $param_value, $array) { if (is_array($param_value)) { foreach ($param_value as $submitted_value) {
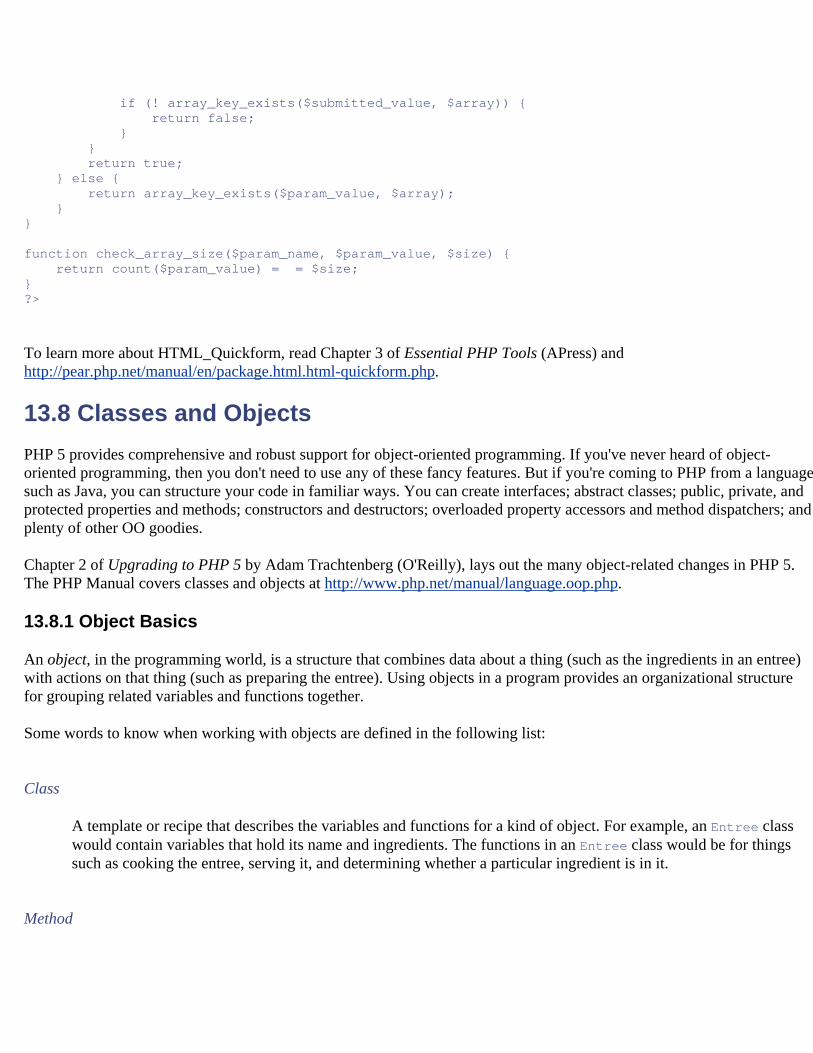
if (! array_key_exists($submitted_value, $array)) { return false; } } return true; } else { return array_key_exists($param_value, $array); } } function check_array_size($param_name, $param_value, $size) { return count($param_value) = = $size; } ?>
To learn more about HTML_Quickform, read Chapter 3 of Essential PHP Tools (APress) and http://pear.php.net/manual/en/package.html.html-quickform.php.
13.8 Classes and Objects PHP 5 provides comprehensive and robust support for object-oriented programming. If you've never heard of object-oriented programming, then you don't need to use any of these fancy features. But if you're coming to PHP from a language such as Java, you can structure your code in familiar ways. You can create interfaces; abstract classes; public, private, and protected properties and methods; constructors and destructors; overloaded property accessors and method dispatchers; and plenty of other OO goodies.
Chapter 2 of Upgrading to PHP 5 by Adam Trachtenberg (O'Reilly), lays out the many object-related changes in PHP 5. The PHP Manual covers classes and objects at http://www.php.net/manual/language.oop.php.
13.8.1 Object Basics
An object, in the programming world, is a structure that combines data about a thing (such as the ingredients in an entree) with actions on that thing (such as preparing the entree). Using objects in a program provides an organizational structure for grouping related variables and functions together.
Some words to know when working with objects are defined in the following list:
Class
A template or recipe that describes the variables and functions for a kind of object. For example, an Entree class would contain variables that hold its name and ingredients. The functions in an Entree class would be for things such as cooking the entree, serving it, and determining whether a particular ingredient is in it.
Method
A function defined in a class is called a method.
Property
A variable defined in a class is called a property.
Instance
An individual usage of a class. If you are serving three entrees for dinner in your program, you would create three instances of the Entree class. While each of these instances is based on the same class, they differ internally with different properties. The methods in each instance contain the same instructions, but probably produce different results because they each rely on the particular property values in each instance. Creating a new instance of a class is called "instantiating an object."
Constructor
A special method that is automatically run when an object is instantiated. Usually, constructors set up object properties and do other housekeeping that makes the object ready for use.
Static method
A special kind of method that can be called without instantiating a class. Static methods don't depend on the property values of a particular instance. PEAR DB uses a static method to create a database connection.
13.8.2 Creating a New Object
PEAR DB uses a static method to create a new object instance for you to use:
$db = DB::connect($dsn);
This calls the connect( ) method defined in the DB class. The connect( ) method is a static method: nothing in connect( ) depends on a specific instance of the DB class. The classname::method( ) syntax is how you call a static method. When you see two colons in a function name like that in a PHP program, think "static method call."
The other way to create a new object is with the new operator:
$dinner = new Entree( );
This makes the variable $dinner an instance of the class Entree. To pass arguments to a class's constructor, put them in the parentheses:
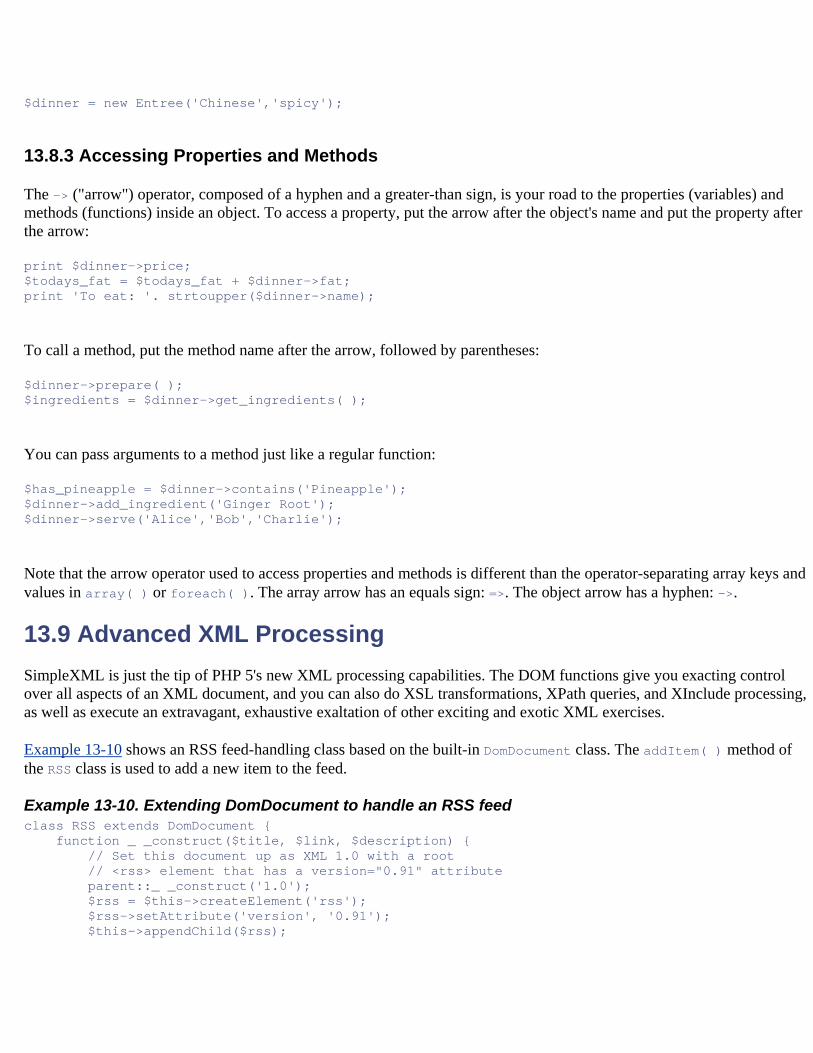
$dinner = new Entree('Chinese','spicy');
13.8.3 Accessing Properties and Methods
The -> ("arrow") operator, composed of a hyphen and a greater-than sign, is your road to the properties (variables) and methods (functions) inside an object. To access a property, put the arrow after the object's name and put the property after the arrow:
print $dinner->price; $todays_fat = $todays_fat + $dinner->fat; print 'To eat: '. strtoupper($dinner->name);
To call a method, put the method name after the arrow, followed by parentheses:
$dinner->prepare( ); $ingredients = $dinner->get_ingredients( );
You can pass arguments to a method just like a regular function:
$has_pineapple = $dinner->contains('Pineapple'); $dinner->add_ingredient('Ginger Root'); $dinner->serve('Alice','Bob','Charlie');
Note that the arrow operator used to access properties and methods is different than the operator-separating array keys and values in array( ) or foreach( ). The array arrow has an equals sign: =>. The object arrow has a hyphen: ->.
13.9 Advanced XML Processing SimpleXML is just the tip of PHP 5's new XML processing capabilities. The DOM functions give you exacting control over all aspects of an XML document, and you can also do XSL transformations, XPath queries, and XInclude processing, as well as execute an extravagant, exhaustive exaltation of other exciting and exotic XML exercises.
Example 13-10 shows an RSS feed-handling class based on the built-in DomDocument class. The addItem( ) method of the RSS class is used to add a new item to the feed.
Example 13-10. Extending DomDocument to handle an RSS feed class RSS extends DomDocument { function _ _construct($title, $link, $description) { // Set this document up as XML 1.0 with a root // <rss> element that has a version="0.91" attribute parent::_ _construct('1.0'); $rss = $this->createElement('rss'); $rss->setAttribute('version', '0.91'); $this->appendChild($rss);
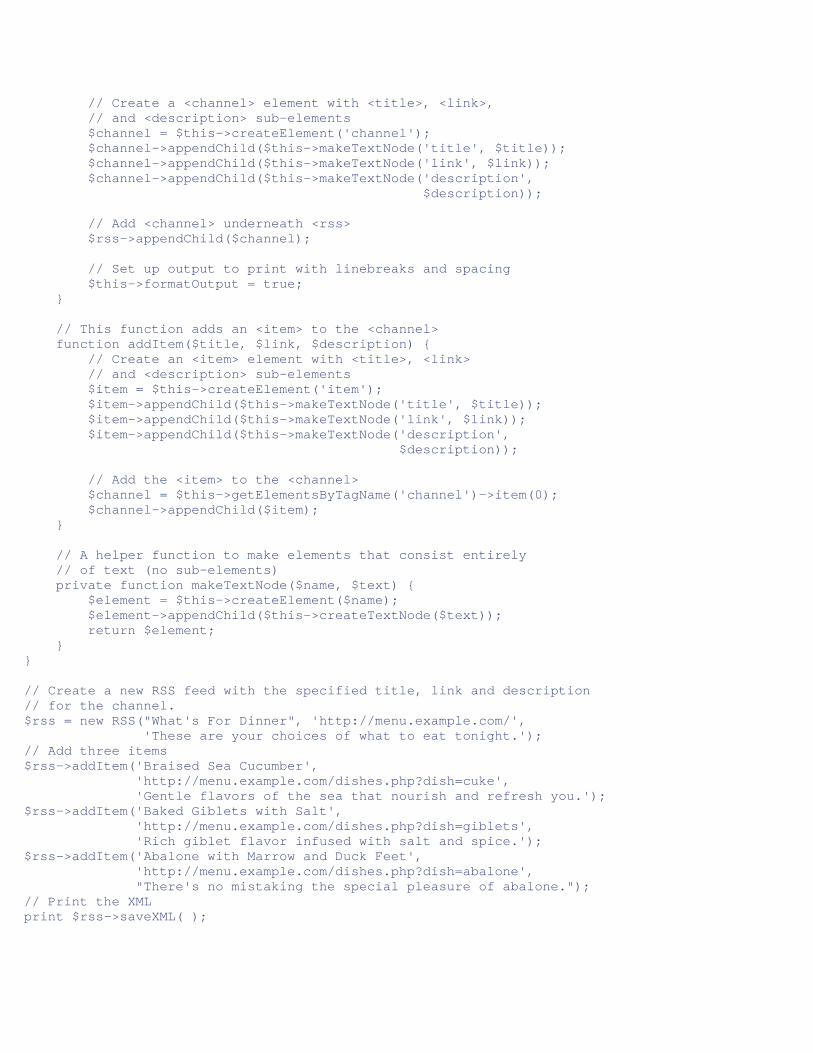
// Create a <channel> element with <title>, <link>, // and <description> sub-elements $channel = $this->createElement('channel'); $channel->appendChild($this->makeTextNode('title', $title)); $channel->appendChild($this->makeTextNode('link', $link)); $channel->appendChild($this->makeTextNode('description', $description)); // Add <channel> underneath <rss> $rss->appendChild($channel); // Set up output to print with linebreaks and spacing $this->formatOutput = true; } // This function adds an <item> to the <channel> function addItem($title, $link, $description) { // Create an <item> element with <title>, <link> // and <description> sub-elements $item = $this->createElement('item'); $item->appendChild($this->makeTextNode('title', $title)); $item->appendChild($this->makeTextNode('link', $link)); $item->appendChild($this->makeTextNode('description', $description)); // Add the <item> to the <channel> $channel = $this->getElementsByTagName('channel')->item(0); $channel->appendChild($item); } // A helper function to make elements that consist entirely // of text (no sub-elements) private function makeTextNode($name, $text) { $element = $this->createElement($name); $element->appendChild($this->createTextNode($text)); return $element; } } // Create a new RSS feed with the specified title, link and description // for the channel. $rss = new RSS("What's For Dinner", 'http://menu.example.com/', 'These are your choices of what to eat tonight.'); // Add three items $rss->addItem('Braised Sea Cucumber', 'http://menu.example.com/dishes.php?dish=cuke', 'Gentle flavors of the sea that nourish and refresh you.'); $rss->addItem('Baked Giblets with Salt', 'http://menu.example.com/dishes.php?dish=giblets', 'Rich giblet flavor infused with salt and spice.'); $rss->addItem('Abalone with Marrow and Duck Feet', 'http://menu.example.com/dishes.php?dish=abalone', "There's no mistaking the special pleasure of abalone."); // Print the XML print $rss->saveXML( );
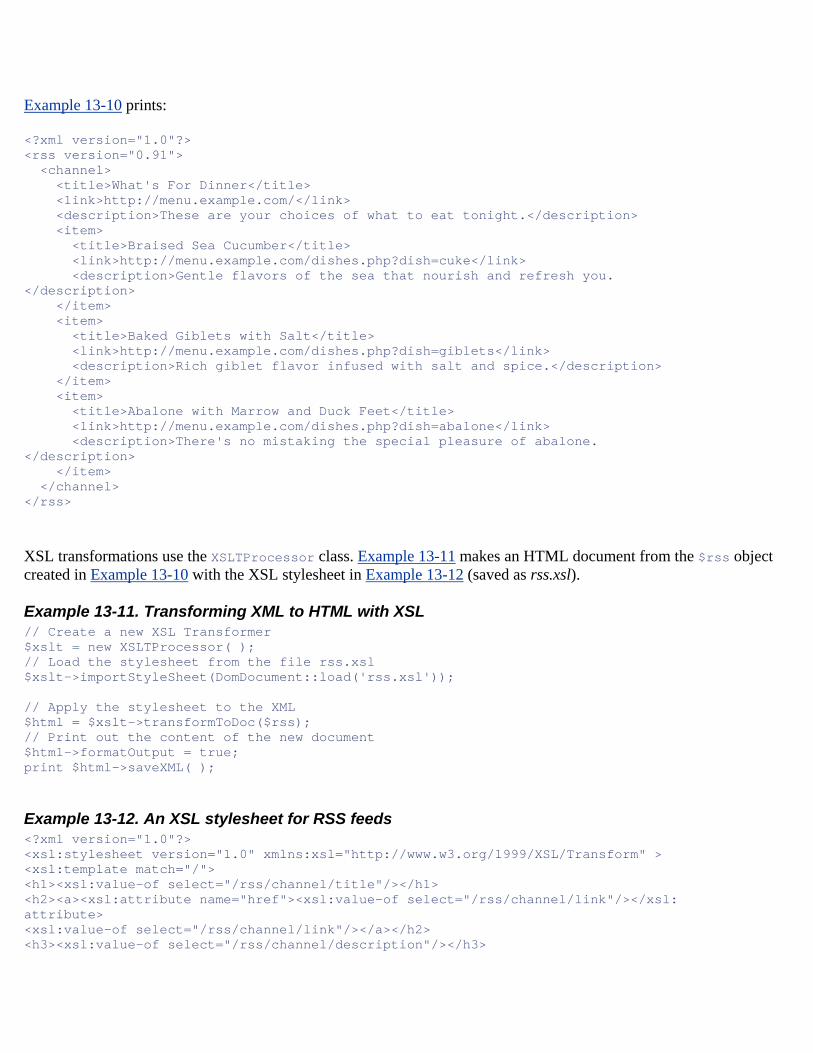
Example 13-10 prints:
<?xml version="1.0"?> <rss version="0.91"> <channel> <title>What's For Dinner</title> <link>http://menu.example.com/</link> <description>These are your choices of what to eat tonight.</description> <item> <title>Braised Sea Cucumber</title> <link>http://menu.example.com/dishes.php?dish=cuke</link> <description>Gentle flavors of the sea that nourish and refresh you. </description> </item> <item> <title>Baked Giblets with Salt</title> <link>http://menu.example.com/dishes.php?dish=giblets</link> <description>Rich giblet flavor infused with salt and spice.</description> </item> <item> <title>Abalone with Marrow and Duck Feet</title> <link>http://menu.example.com/dishes.php?dish=abalone</link> <description>There's no mistaking the special pleasure of abalone. </description> </item> </channel> </rss>
XSL transformations use the XSLTProcessor class. Example 13-11 makes an HTML document from the $rss object created in Example 13-10 with the XSL stylesheet in Example 13-12 (saved as rss.xsl).
Example 13-11. Transforming XML to HTML with XSL // Create a new XSL Transformer $xslt = new XSLTProcessor( ); // Load the stylesheet from the file rss.xsl $xslt->importStyleSheet(DomDocument::load('rss.xsl')); // Apply the stylesheet to the XML $html = $xslt->transformToDoc($rss); // Print out the content of the new document $html->formatOutput = true; print $html->saveXML( );
Example 13-12. An XSL stylesheet for RSS feeds <?xml version="1.0"?> <xsl:stylesheet version="1.0" xmlns:xsl="http://www.w3.org/1999/XSL/Transform" > <xsl:template match="/"> <h1><xsl:value-of select="/rss/channel/title"/></h1> <h2><a><xsl:attribute name="href"><xsl:value-of select="/rss/channel/link"/></xsl: attribute> <xsl:value-of select="/rss/channel/link"/></a></h2> <h3><xsl:value-of select="/rss/channel/description"/></h3>
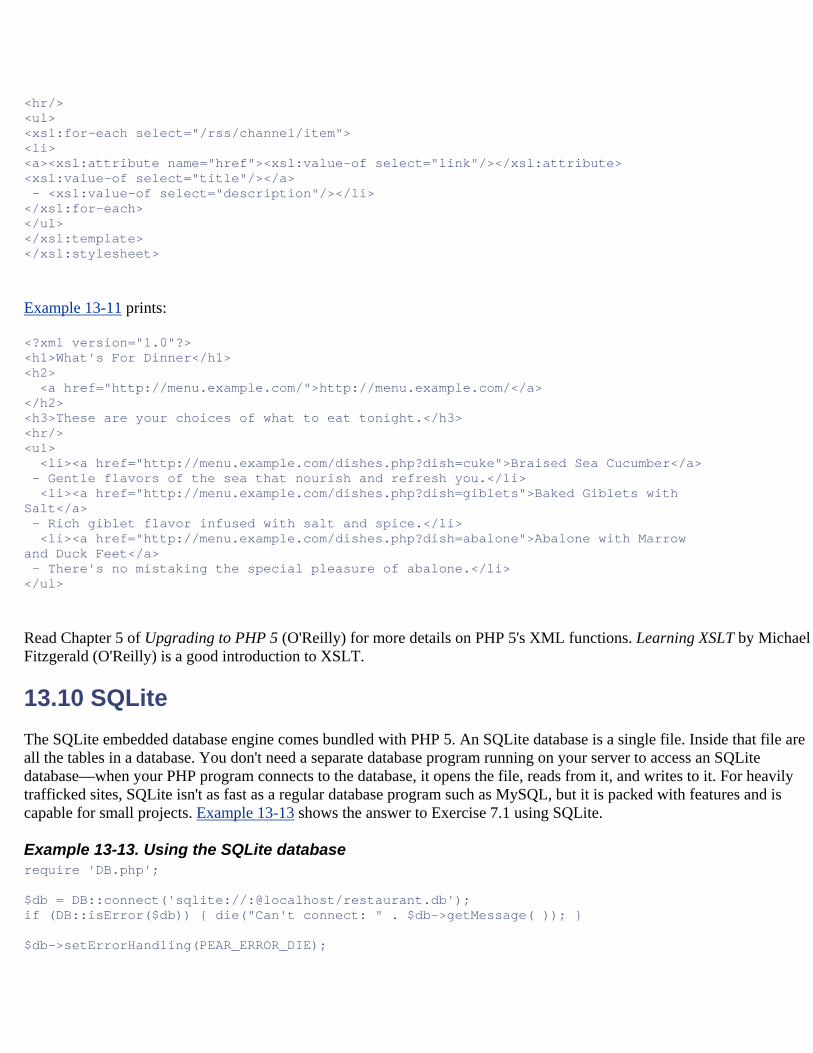
<hr/> <ul> <xsl:for-each select="/rss/channel/item"> <li> <a><xsl:attribute name="href"><xsl:value-of select="link"/></xsl:attribute> <xsl:value-of select="title"/></a> - <xsl:value-of select="description"/></li> </xsl:for-each> </ul> </xsl:template> </xsl:stylesheet>
Example 13-11 prints:
<?xml version="1.0"?> <h1>What's For Dinner</h1> <h2> <a href="http://menu.example.com/">http://menu.example.com/</a> </h2> <h3>These are your choices of what to eat tonight.</h3> <hr/> <ul> <li><a href="http://menu.example.com/dishes.php?dish=cuke">Braised Sea Cucumber</a> - Gentle flavors of the sea that nourish and refresh you.</li> <li><a href="http://menu.example.com/dishes.php?dish=giblets">Baked Giblets with Salt</a> - Rich giblet flavor infused with salt and spice.</li> <li><a href="http://menu.example.com/dishes.php?dish=abalone">Abalone with Marrow and Duck Feet</a> - There's no mistaking the special pleasure of abalone.</li> </ul>
Read Chapter 5 of Upgrading to PHP 5 (O'Reilly) for more details on PHP 5's XML functions. Learning XSLT by Michael Fitzgerald (O'Reilly) is a good introduction to XSLT.
13.10 SQLite The SQLite embedded database engine comes bundled with PHP 5. An SQLite database is a single file. Inside that file are all the tables in a database. You don't need a separate database program running on your server to access an SQLite database—when your PHP program connects to the database, it opens the file, reads from it, and writes to it. For heavily trafficked sites, SQLite isn't as fast as a regular database program such as MySQL, but it is packed with features and is capable for small projects. Example 13-13 shows the answer to Exercise 7.1 using SQLite.
Example 13-13. Using the SQLite database require 'DB.php'; $db = DB::connect('sqlite://:@localhost/restaurant.db'); if (DB::isError($db)) { die("Can't connect: " . $db->getMessage( )); } $db->setErrorHandling(PEAR_ERROR_DIE);
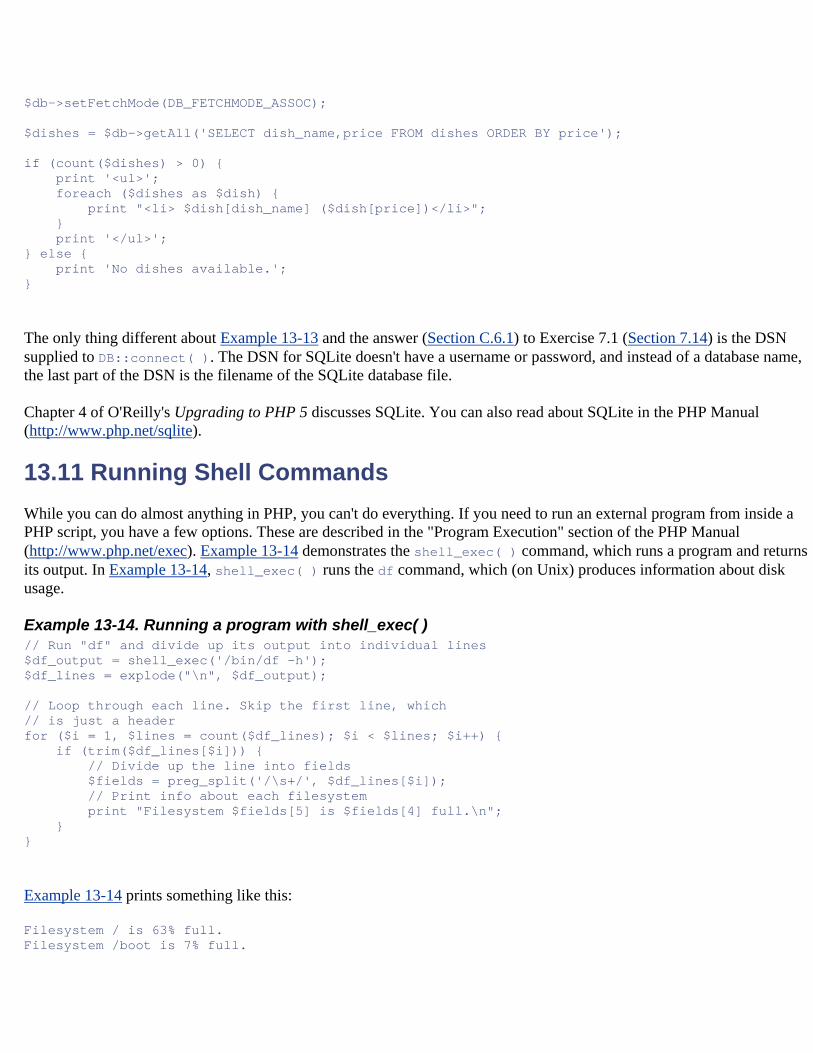
$db->setFetchMode(DB_FETCHMODE_ASSOC); $dishes = $db->getAll('SELECT dish_name,price FROM dishes ORDER BY price'); if (count($dishes) > 0) { print '<ul>'; foreach ($dishes as $dish) { print "<li> $dish[dish_name] ($dish[price])</li>"; } print '</ul>'; } else { print 'No dishes available.'; }
The only thing different about Example 13-13 and the answer (Section C.6.1) to Exercise 7.1 (Section 7.14) is the DSN supplied to DB::connect( ). The DSN for SQLite doesn't have a username or password, and instead of a database name, the last part of the DSN is the filename of the SQLite database file.
Chapter 4 of O'Reilly's Upgrading to PHP 5 discusses SQLite. You can also read about SQLite in the PHP Manual (http://www.php.net/sqlite).
13.11 Running Shell Commands While you can do almost anything in PHP, you can't do everything. If you need to run an external program from inside a PHP script, you have a few options. These are described in the "Program Execution" section of the PHP Manual (http://www.php.net/exec). Example 13-14 demonstrates the shell_exec( ) command, which runs a program and returns its output. In Example 13-14, shell_exec( ) runs the df command, which (on Unix) produces information about disk usage.
Example 13-14. Running a program with shell_exec( ) // Run "df" and divide up its output into individual lines $df_output = shell_exec('/bin/df -h'); $df_lines = explode("\n", $df_output); // Loop through each line. Skip the first line, which // is just a header for ($i = 1, $lines = count($df_lines); $i < $lines; $i++) { if (trim($df_lines[$i])) { // Divide up the line into fields $fields = preg_split('/\s+/', $df_lines[$i]); // Print info about each filesystem print "Filesystem $fields[5] is $fields[4] full.\n"; } }
Example 13-14 prints something like this:
Filesystem / is 63% full. Filesystem /boot is 7% full.
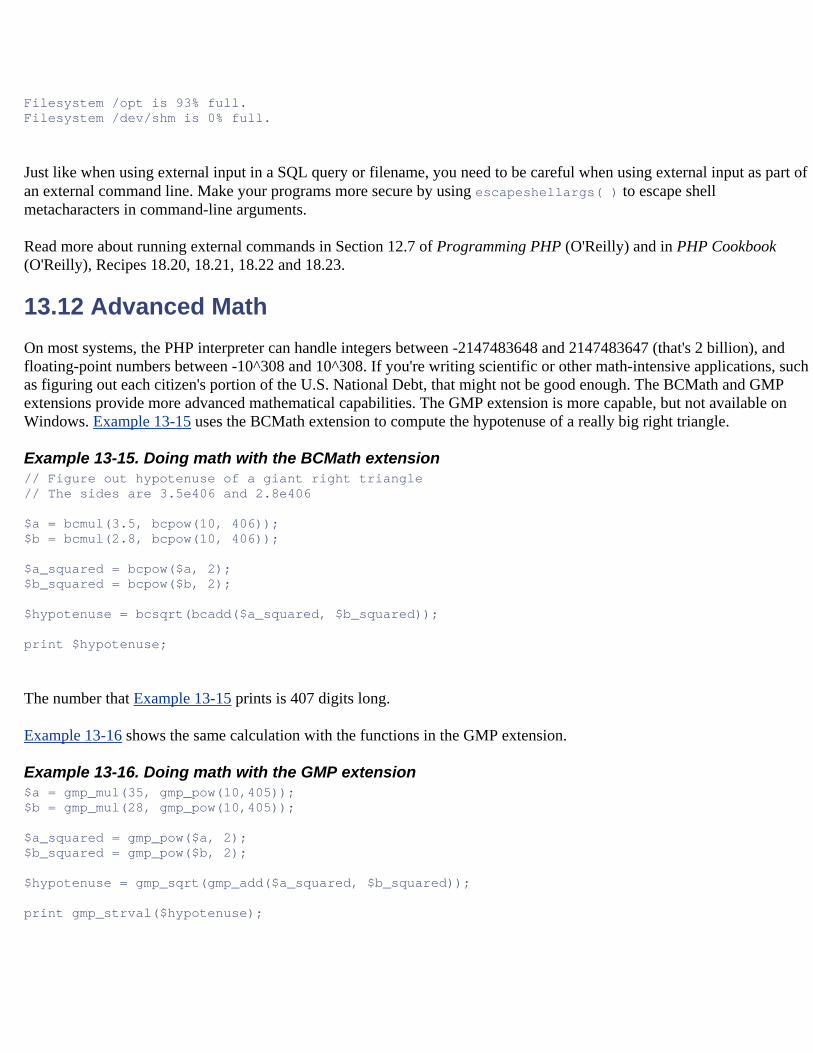
Filesystem /opt is 93% full. Filesystem /dev/shm is 0% full.
Just like when using external input in a SQL query or filename, you need to be careful when using external input as part of an external command line. Make your programs more secure by using escapeshellargs( ) to escape shell metacharacters in command-line arguments.
Read more about running external commands in Section 12.7 of Programming PHP (O'Reilly) and in PHP Cookbook (O'Reilly), Recipes 18.20, 18.21, 18.22 and 18.23.
13.12 Advanced Math On most systems, the PHP interpreter can handle integers between -2147483648 and 2147483647 (that's 2 billion), and floating-point numbers between -10^308 and 10^308. If you're writing scientific or other math-intensive applications, such as figuring out each citizen's portion of the U.S. National Debt, that might not be good enough. The BCMath and GMP extensions provide more advanced mathematical capabilities. The GMP extension is more capable, but not available on Windows. Example 13-15 uses the BCMath extension to compute the hypotenuse of a really big right triangle.
Example 13-15. Doing math with the BCMath extension // Figure out hypotenuse of a giant right triangle // The sides are 3.5e406 and 2.8e406 $a = bcmul(3.5, bcpow(10, 406)); $b = bcmul(2.8, bcpow(10, 406)); $a_squared = bcpow($a, 2); $b_squared = bcpow($b, 2); $hypotenuse = bcsqrt(bcadd($a_squared, $b_squared)); print $hypotenuse;
The number that Example 13-15 prints is 407 digits long.
Example 13-16 shows the same calculation with the functions in the GMP extension.
Example 13-16. Doing math with the GMP extension $a = gmp_mul(35, gmp_pow(10,405)); $b = gmp_mul(28, gmp_pow(10,405)); $a_squared = gmp_pow($a, 2); $b_squared = gmp_pow($b, 2); $hypotenuse = gmp_sqrt(gmp_add($a_squared, $b_squared)); print gmp_strval($hypotenuse);
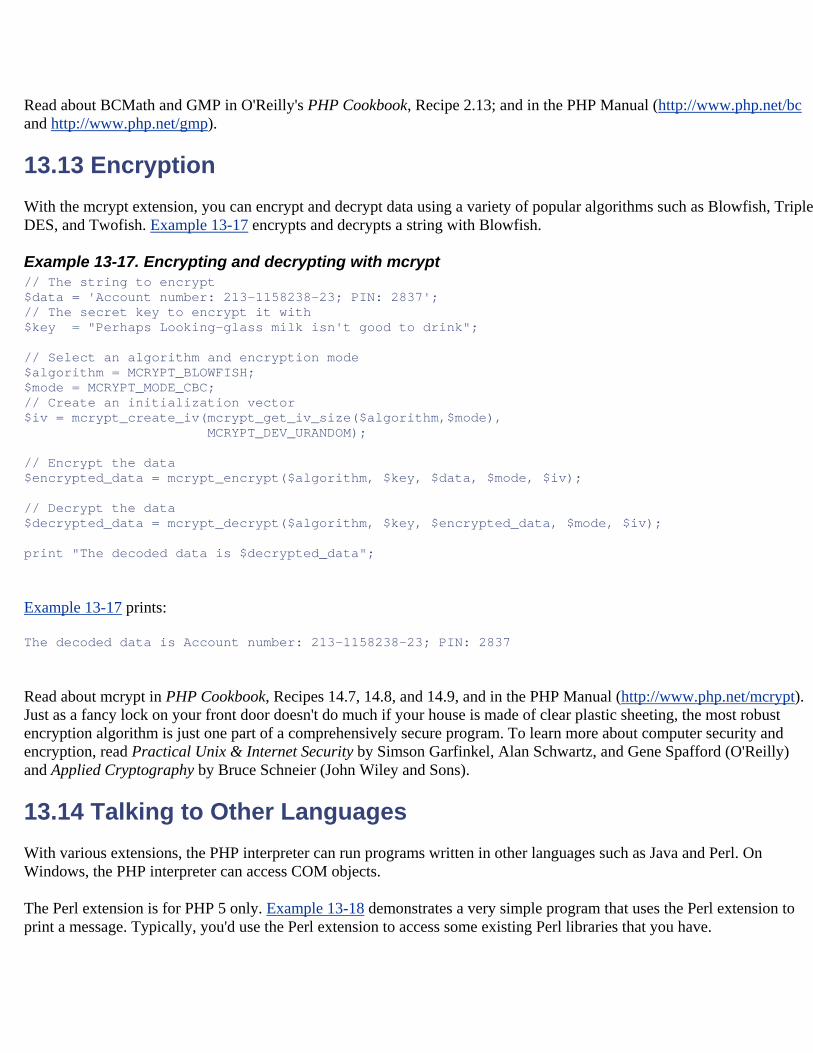
Read about BCMath and GMP in O'Reilly's PHP Cookbook, Recipe 2.13; and in the PHP Manual (http://www.php.net/bc and http://www.php.net/gmp).
13.13 Encryption With the mcrypt extension, you can encrypt and decrypt data using a variety of popular algorithms such as Blowfish, Triple DES, and Twofish. Example 13-17 encrypts and decrypts a string with Blowfish.
Example 13-17. Encrypting and decrypting with mcrypt // The string to encrypt $data = 'Account number: 213-1158238-23; PIN: 2837'; // The secret key to encrypt it with $key = "Perhaps Looking-glass milk isn't good to drink"; // Select an algorithm and encryption mode $algorithm = MCRYPT_BLOWFISH; $mode = MCRYPT_MODE_CBC; // Create an initialization vector $iv = mcrypt_create_iv(mcrypt_get_iv_size($algorithm,$mode), MCRYPT_DEV_URANDOM); // Encrypt the data $encrypted_data = mcrypt_encrypt($algorithm, $key, $data, $mode, $iv); // Decrypt the data $decrypted_data = mcrypt_decrypt($algorithm, $key, $encrypted_data, $mode, $iv); print "The decoded data is $decrypted_data";
Example 13-17 prints:
The decoded data is Account number: 213-1158238-23; PIN: 2837
Read about mcrypt in PHP Cookbook, Recipes 14.7, 14.8, and 14.9, and in the PHP Manual (http://www.php.net/mcrypt). Just as a fancy lock on your front door doesn't do much if your house is made of clear plastic sheeting, the most robust encryption algorithm is just one part of a comprehensively secure program. To learn more about computer security and encryption, read Practical Unix & Internet Security by Simson Garfinkel, Alan Schwartz, and Gene Spafford (O'Reilly) and Applied Cryptography by Bruce Schneier (John Wiley and Sons).
13.14 Talking to Other Languages With various extensions, the PHP interpreter can run programs written in other languages such as Java and Perl. On Windows, the PHP interpreter can access COM objects.
The Perl extension is for PHP 5 only. Example 13-18 demonstrates a very simple program that uses the Perl extension to print a message. Typically, you'd use the Perl extension to access some existing Perl libraries that you have.
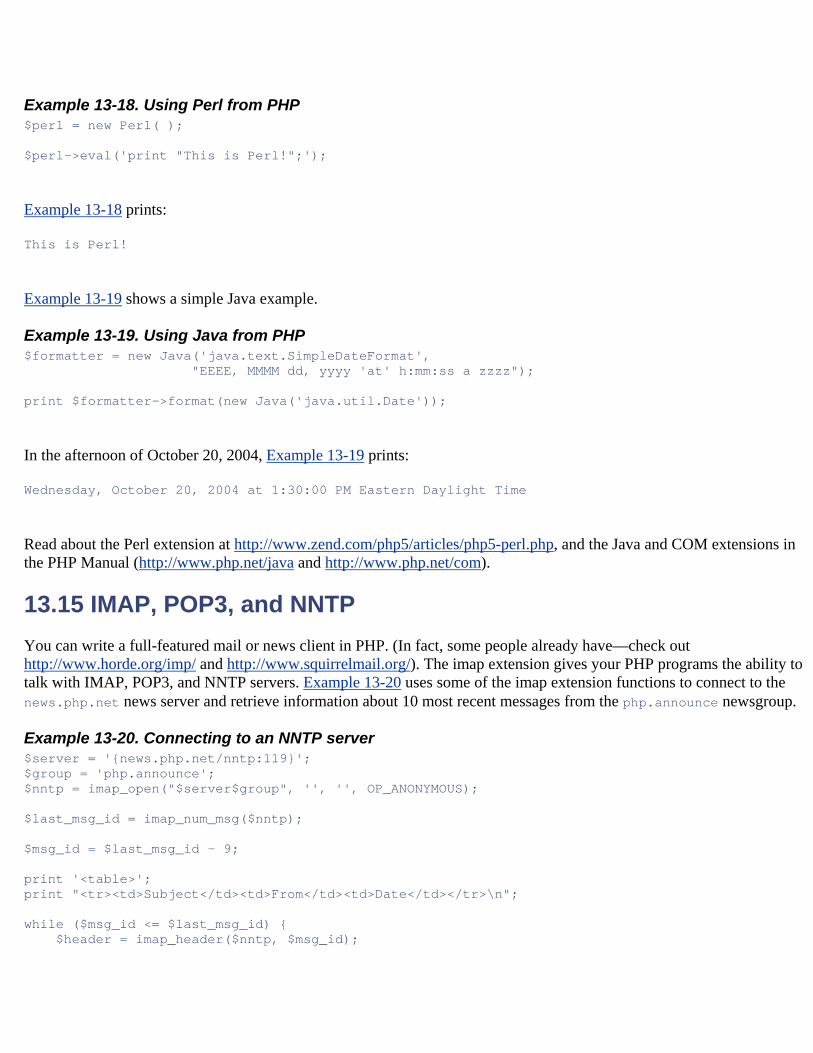
Example 13-18. Using Perl from PHP $perl = new Perl( ); $perl->eval('print "This is Perl!";');
Example 13-18 prints:
This is Perl!
Example 13-19 shows a simple Java example.
Example 13-19. Using Java from PHP $formatter = new Java('java.text.SimpleDateFormat', "EEEE, MMMM dd, yyyy 'at' h:mm:ss a zzzz"); print $formatter->format(new Java('java.util.Date'));
In the afternoon of October 20, 2004, Example 13-19 prints:
Wednesday, October 20, 2004 at 1:30:00 PM Eastern Daylight Time
Read about the Perl extension at http://www.zend.com/php5/articles/php5-perl.php, and the Java and COM extensions in the PHP Manual (http://www.php.net/java and http://www.php.net/com).
13.15 IMAP, POP3, and NNTP You can write a full-featured mail or news client in PHP. (In fact, some people already have—check out http://www.horde.org/imp/ and http://www.squirrelmail.org/). The imap extension gives your PHP programs the ability to talk with IMAP, POP3, and NNTP servers. Example 13-20 uses some of the imap extension functions to connect to the news.php.net news server and retrieve information about 10 most recent messages from the php.announce newsgroup.
Example 13-20. Connecting to an NNTP server $server = '{news.php.net/nntp:119}'; $group = 'php.announce'; $nntp = imap_open("$server$group", '', '', OP_ANONYMOUS); $last_msg_id = imap_num_msg($nntp); $msg_id = $last_msg_id - 9; print '<table>'; print "<tr><td>Subject</td><td>From</td><td>Date</td></tr>\n"; while ($msg_id <= $last_msg_id) { $header = imap_header($nntp, $msg_id);
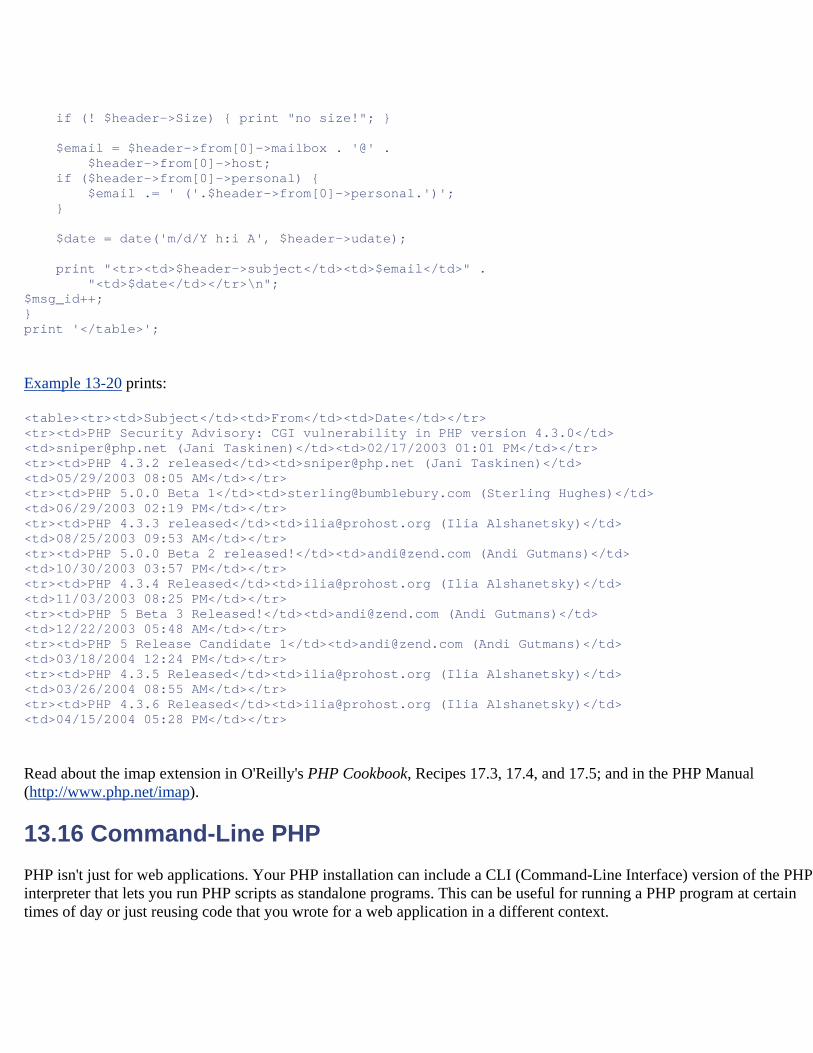
if (! $header->Size) { print "no size!"; } $email = $header->from[0]->mailbox . '@' . $header->from[0]->host; if ($header->from[0]->personal) { $email .= ' ('.$header->from[0]->personal.')'; } $date = date('m/d/Y h:i A', $header->udate); print "<tr><td>$header->subject</td><td>$email</td>" . "<td>$date</td></tr>\n"; $msg_id++; } print '</table>';
Example 13-20 prints:
<table><tr><td>Subject</td><td>From</td><td>Date</td></tr> <tr><td>PHP Security Advisory: CGI vulnerability in PHP version 4.3.0</td> <td>[email protected] (Jani Taskinen)</td><td>02/17/2003 01:01 PM</td></tr> <tr><td>PHP 4.3.2 released</td><td>[email protected] (Jani Taskinen)</td> <td>05/29/2003 08:05 AM</td></tr> <tr><td>PHP 5.0.0 Beta 1</td><td>[email protected] (Sterling Hughes)</td> <td>06/29/2003 02:19 PM</td></tr> <tr><td>PHP 4.3.3 released</td><td>[email protected] (Ilia Alshanetsky)</td> <td>08/25/2003 09:53 AM</td></tr> <tr><td>PHP 5.0.0 Beta 2 released!</td><td>[email protected] (Andi Gutmans)</td> <td>10/30/2003 03:57 PM</td></tr> <tr><td>PHP 4.3.4 Released</td><td>[email protected] (Ilia Alshanetsky)</td> <td>11/03/2003 08:25 PM</td></tr> <tr><td>PHP 5 Beta 3 Released!</td><td>[email protected] (Andi Gutmans)</td> <td>12/22/2003 05:48 AM</td></tr> <tr><td>PHP 5 Release Candidate 1</td><td>[email protected] (Andi Gutmans)</td> <td>03/18/2004 12:24 PM</td></tr> <tr><td>PHP 4.3.5 Released</td><td>[email protected] (Ilia Alshanetsky)</td> <td>03/26/2004 08:55 AM</td></tr> <tr><td>PHP 4.3.6 Released</td><td>[email protected] (Ilia Alshanetsky)</td> <td>04/15/2004 05:28 PM</td></tr>
Read about the imap extension in O'Reilly's PHP Cookbook, Recipes 17.3, 17.4, and 17.5; and in the PHP Manual (http://www.php.net/imap).
13.16 Command-Line PHP PHP isn't just for web applications. Your PHP installation can include a CLI (Command-Line Interface) version of the PHP interpreter that lets you run PHP scripts as standalone programs. This can be useful for running a PHP program at certain times of day or just reusing code that you wrote for a web application in a different context.
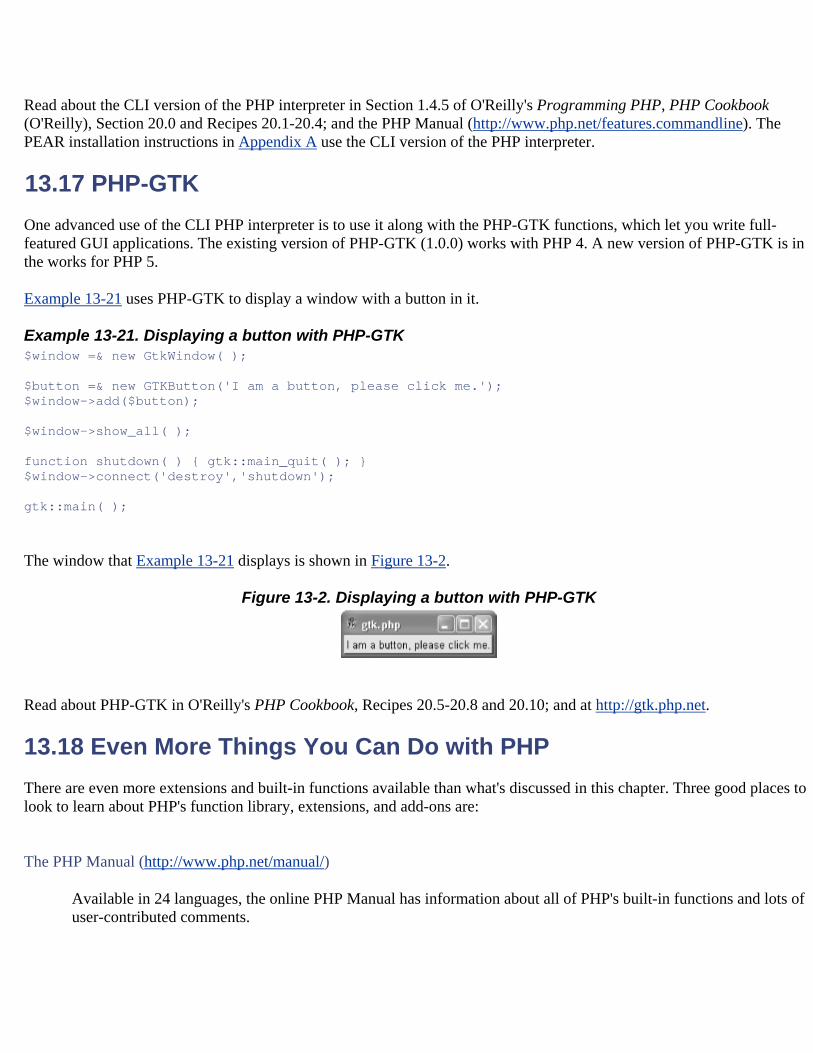
Read about the CLI version of the PHP interpreter in Section 1.4.5 of O'Reilly's Programming PHP, PHP Cookbook (O'Reilly), Section 20.0 and Recipes 20.1-20.4; and the PHP Manual (http://www.php.net/features.commandline). The PEAR installation instructions in Appendix A use the CLI version of the PHP interpreter.
13.17 PHP-GTK One advanced use of the CLI PHP interpreter is to use it along with the PHP-GTK functions, which let you write full-featured GUI applications. The existing version of PHP-GTK (1.0.0) works with PHP 4. A new version of PHP-GTK is in the works for PHP 5.
Example 13-21 uses PHP-GTK to display a window with a button in it.
Example 13-21. Displaying a button with PHP-GTK $window =& new GtkWindow( ); $button =& new GTKButton('I am a button, please click me.'); $window->add($button); $window->show_all( ); function shutdown( ) { gtk::main_quit( ); } $window->connect('destroy','shutdown'); gtk::main( );
The window that Example 13-21 displays is shown in Figure 13-2.
Figure 13-2. Displaying a button with PHP-GTK
Read about PHP-GTK in O'Reilly's PHP Cookbook, Recipes 20.5-20.8 and 20.10; and at http://gtk.php.net.
13.18 Even More Things You Can Do with PHP There are even more extensions and built-in functions available than what's discussed in this chapter. Three good places to look to learn about PHP's function library, extensions, and add-ons are:
The PHP Manual (http://www.php.net/manual/)
Available in 24 languages, the online PHP Manual has information about all of PHP's built-in functions and lots of user-contributed comments.
The PEAR Package List (http://pear.php.net/packages.php)
PEAR is a collection of hundreds of add-on packages to PHP. The DB package covered in Chapter 7 is probably the most popular one. This chapter highlights some others. When you need to solve a new problem with PHP, check out PEAR before you start to write your code. Someone may have already solved it for you.
The PECL Package List (http://pecl.php.net/packages.php)
PECL is another location for finding extensions to PHP. While the packages in PEAR are themselves written in PHP, PECL packages are written in C and provide access to external libraries or other resources.
Appendix A. Installing and Configuring the PHP Interpreter If you want to write some PHP programs, you need a PHP interpreter to turn them from punctuation-studded text files into actual interactive web pages. The easiest way to get up and running with PHP is to sign up for a cheap or free web-hosting provider that offers PHP—but you can run the PHP interpreter on your own computer, too.
A.1 Using PHP with a Web-Hosting Provider If you already have an account with a web-hosting provider, you probably have access to a PHP-enabled server. These days, it is the odd web-hosting provider that doesn't have PHP support. Usually, hosting providers configure their servers so that files whose names end in .php are treated as PHP programs. To see whether your hosted web site supports PHP, first save the file in Example A-1 on your server as phptest.php.
Example A-1. PHP test program <?php print "PHP enabled"; ?>
Load the file in your browser by visiting the right URL for your site (e.g., http://www.example.com/phptest.php). If you see just the message PHP enabled, then your hosted web site supports PHP. If you see the entire contents of the page (<?php print "PHP enabled"; ?>), then your hosting provider probably doesn't support PHP. Check with them, however, to make sure that they haven't turned on PHP for a different file extension or made some other nonstandard configuration choice.
If you can't use PHP with your web hosting provider (or you don't have one), the links at http://www.php.net/links.php#hosts are a good place to start when looking for a web-hosting provider that supports PHP.
A.2 Installing the PHP Interpreter Installing the PHP interpreter on your own computer is a good idea if you don't have an account with a hosting provider, or you just want to experiment with PHP without exposing your programs to the entire Internet. If you're not using a hosting provider and want to install the PHP interpreter on your own computer, follow the instructions in this section. After you've installed the interpreter, you'll be able to run your own PHP programs.
Installing the PHP interpreter is a matter of downloading some files and putting them in the right places on your computer. You must also configure your web server so that it knows about PHP. This section contains instructions on how to do this for computers running Windows, Linux, Unix, and OS X. If you get stuck, check out the installation FAQ at http://www.php.net/manual/faq.installation.
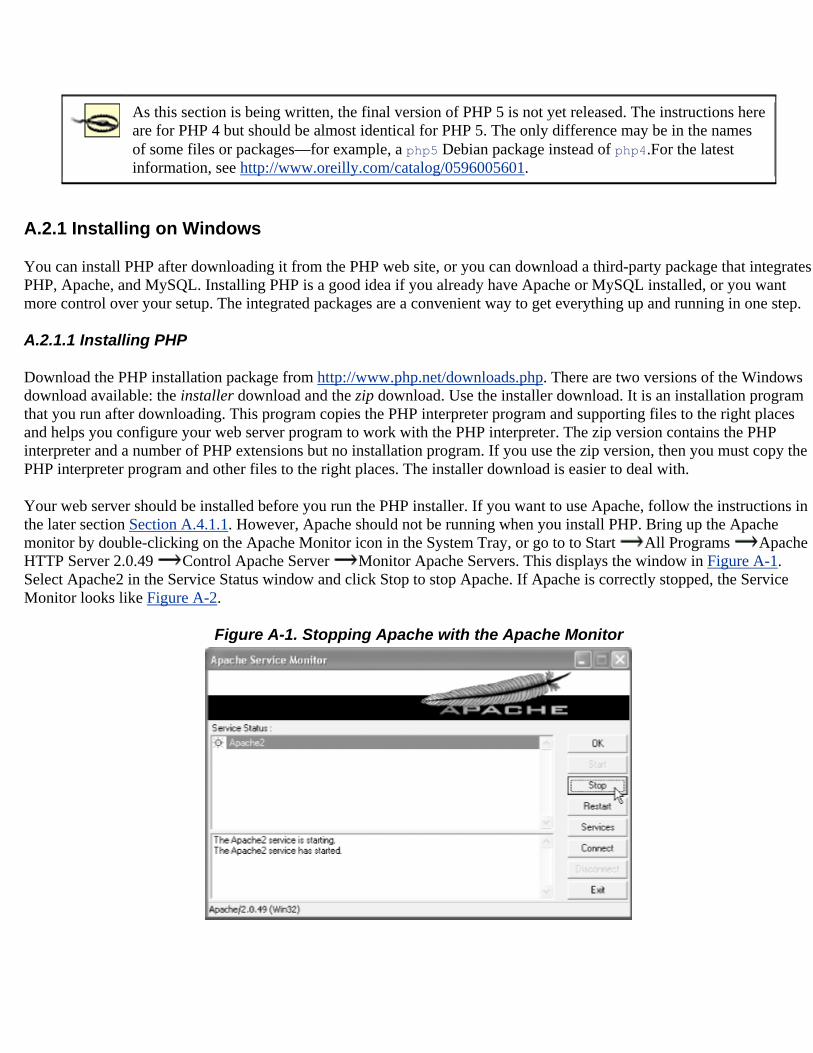
As this section is being written, the final version of PHP 5 is not yet released. The instructions here are for PHP 4 but should be almost identical for PHP 5. The only difference may be in the names of some files or packages—for example, a php5 Debian package instead of php4.For the latest information, see http://www.oreilly.com/catalog/0596005601.
A.2.1 Installing on Windows
You can install PHP after downloading it from the PHP web site, or you can download a third-party package that integrates PHP, Apache, and MySQL. Installing PHP is a good idea if you already have Apache or MySQL installed, or you want more control over your setup. The integrated packages are a convenient way to get everything up and running in one step.
A.2.1.1 Installing PHP
Download the PHP installation package from http://www.php.net/downloads.php. There are two versions of the Windows download available: the installer download and the zip download. Use the installer download. It is an installation program that you run after downloading. This program copies the PHP interpreter program and supporting files to the right places and helps you configure your web server program to work with the PHP interpreter. The zip version contains the PHP interpreter and a number of PHP extensions but no installation program. If you use the zip version, then you must copy the PHP interpreter program and other files to the right places. The installer download is easier to deal with.
Your web server should be installed before you run the PHP installer. If you want to use Apache, follow the instructions in the later section Section A.4.1.1. However, Apache should not be running when you install PHP. Bring up the Apache monitor by double-clicking on the Apache Monitor icon in the System Tray, or go to to Start All Programs Apache HTTP Server 2.0.49 Control Apache Server Monitor Apache Servers. This displays the window in Figure A-1. Select Apache2 in the Service Status window and click Stop to stop Apache. If Apache is correctly stopped, the Service Monitor looks like Figure A-2.
Figure A-1. Stopping Apache with the Apache Monitor
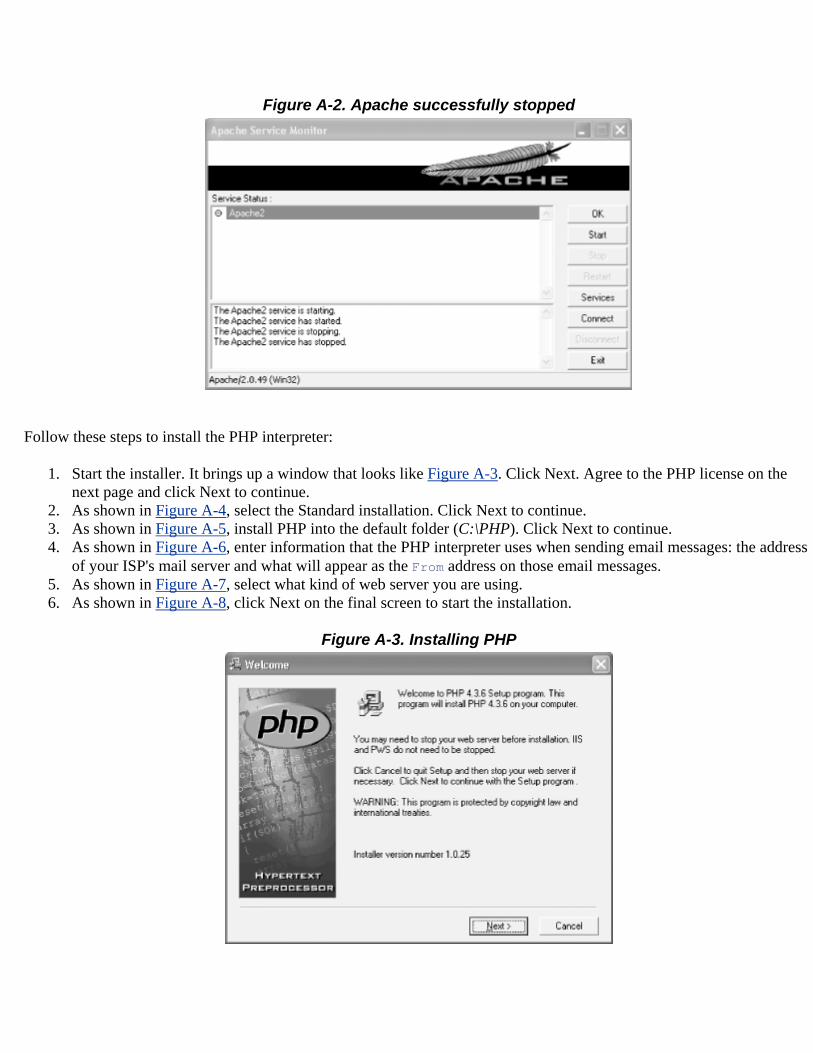
Figure A-2. Apache successfully stopped
Follow these steps to install the PHP interpreter:
1. Start the installer. It brings up a window that looks like Figure A-3. Click Next. Agree to the PHP license on the next page and click Next to continue.
2. As shown in Figure A-4, select the Standard installation. Click Next to continue. 3. As shown in Figure A-5, install PHP into the default folder (C:\PHP). Click Next to continue. 4. As shown in Figure A-6, enter information that the PHP interpreter uses when sending email messages: the address
of your ISP's mail server and what will appear as the From address on those email messages. 5. As shown in Figure A-7, select what kind of web server you are using. 6. As shown in Figure A-8, click Next on the final screen to start the installation.
Figure A-3. Installing PHP
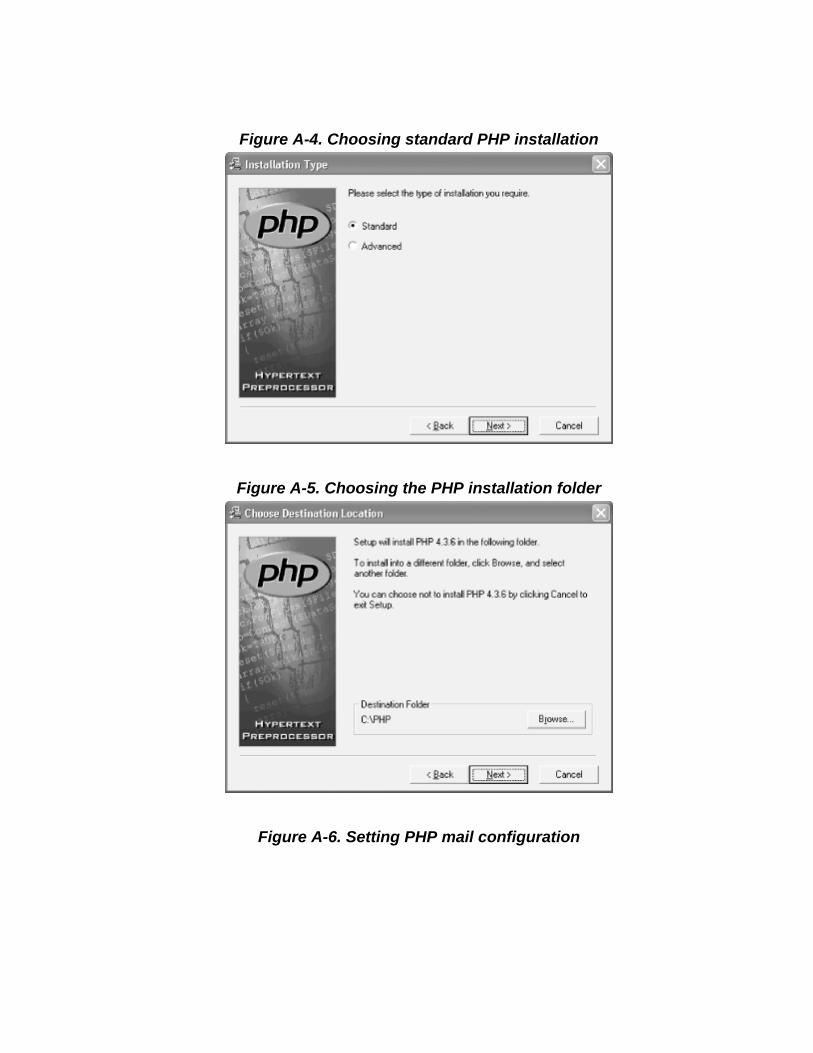
Figure A-4. Choosing standard PHP installation
Figure A-5. Choosing the PHP installation folder
Figure A-6. Setting PHP mail configuration
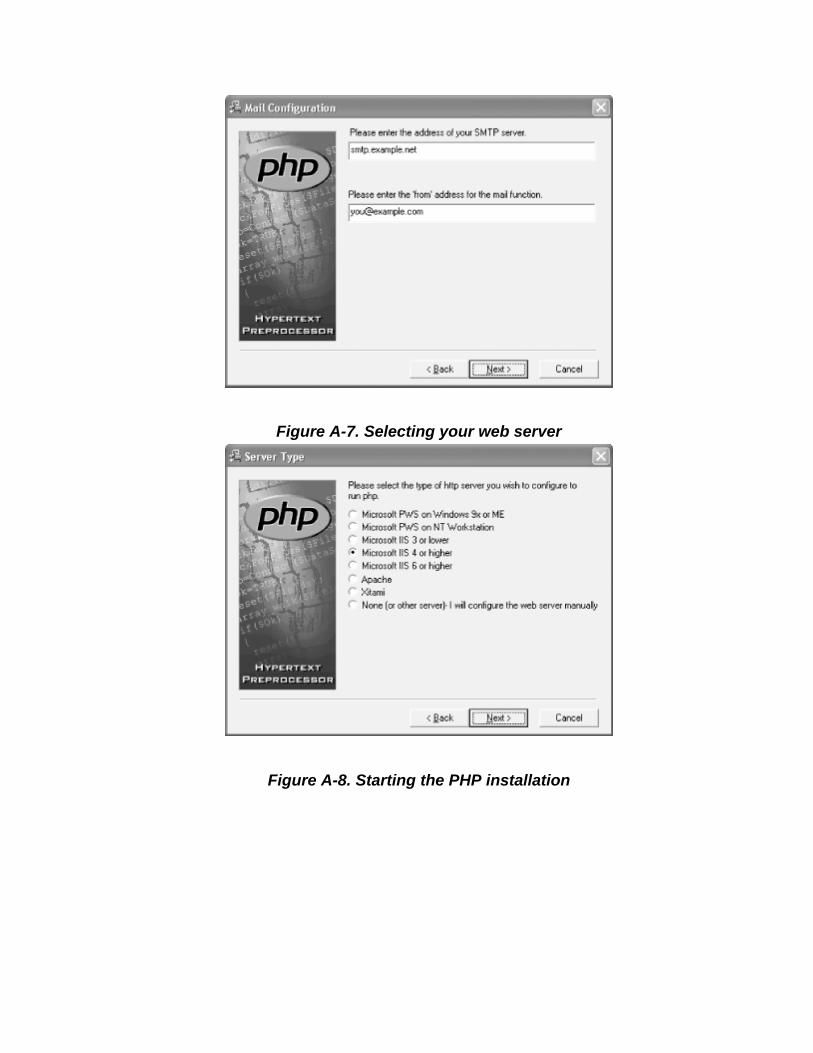
Figure A-7. Selecting your web server
Figure A-8. Starting the PHP installation
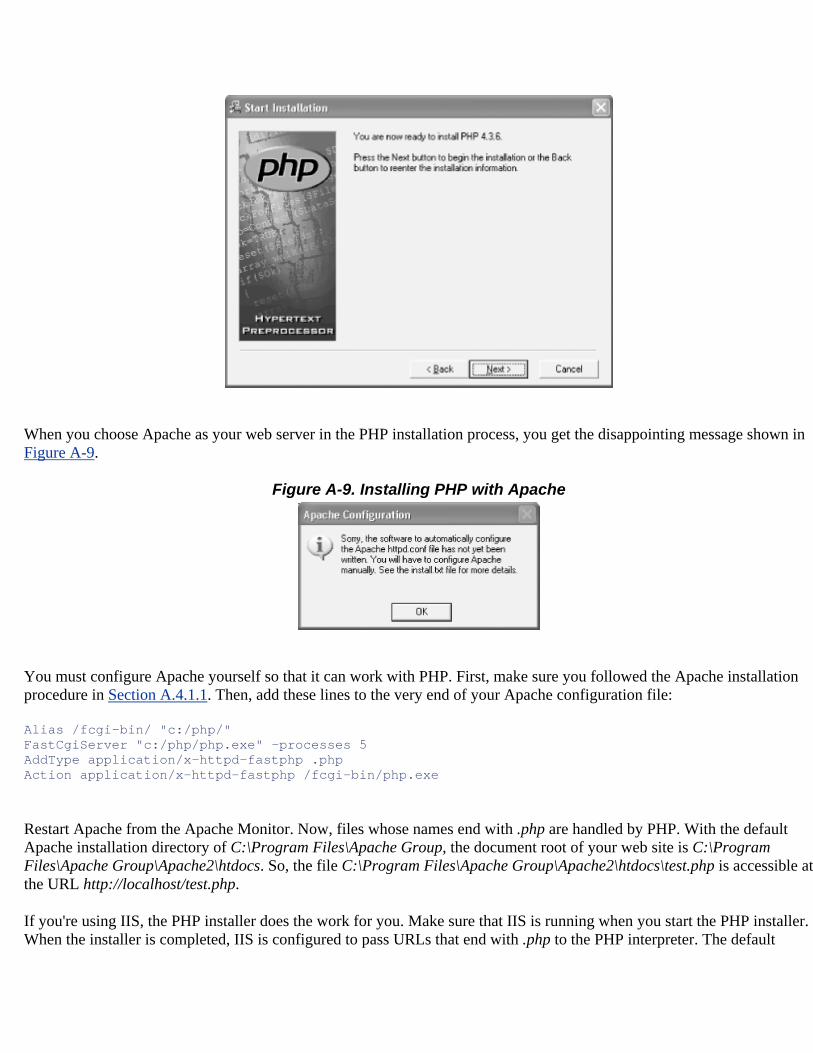
When you choose Apache as your web server in the PHP installation process, you get the disappointing message shown in Figure A-9.
Figure A-9. Installing PHP with Apache
You must configure Apache yourself so that it can work with PHP. First, make sure you followed the Apache installation procedure in Section A.4.1.1. Then, add these lines to the very end of your Apache configuration file:
Alias /fcgi-bin/ "c:/php/" FastCgiServer "c:/php/php.exe" -processes 5 AddType application/x-httpd-fastphp .php Action application/x-httpd-fastphp /fcgi-bin/php.exe
Restart Apache from the Apache Monitor. Now, files whose names end with .php are handled by PHP. With the default Apache installation directory of C:\Program Files\Apache Group, the document root of your web site is C:\Program Files\Apache Group\Apache2\htdocs. So, the file C:\Program Files\Apache Group\Apache2\htdocs\test.php is accessible at the URL http://localhost/test.php.
If you're using IIS, the PHP installer does the work for you. Make sure that IIS is running when you start the PHP installer. When the installer is completed, IIS is configured to pass URLs that end with .php to the PHP interpreter. The default
document root for IIS is C:\Inetpub\wwwroot. So, the file C:\Inetpub\wwwroot\test.php is accessible at the URL http://localhost/test.php.
A.2.1.2 EasyPHP
The EasyPHP package makes it a snap to set up your Windows machine with everything you need for web development. You just need to download a single file to install the PHP interpreter, the MySQL database program, the Apache web server, and the PHPMyAdmin database administration program.
To use EasyPHP, download it from http://www.easyphp.org/telechargements.php3 and then follow the installation instructions at http://www.canowhoopass.com/guides/easyphp/.
A.2.2 Installing on Linux and Unix
Most Linux distributions come with PHP already installed or with binary PHP packages that you can install. For example, if you're using Fedora Linux (http://fedora.redhat.com/), install the php RPM and the RPMs whose names begin with php-. If you're using Debian Linux (http://www.debian.org/), install the packages whose names begin with php4- and libphp-.
If those packages are out of date, you can build PHP yourself. From http://www.php.net/downloads.php, download the Complete Source Code .tar.gz package. From a shell prompt, uncompress and unpack the archive:
gunzip php-5.0.0.tar.gz tar xvf php-5.0.0.tar
This creates a directory, php-5.0.0, that contains the PHP interpreter source code. Read the file INSTALL at the top level of the source code directory for detailed installation instructions. There is also an overview of PHP installation on Linux and Unix at http://www.php.net/manual/install.unix. Instructions for installing PHP with Apache 1.3 are at http://www.php.net/manual/install.apache. Instructions for installing PHP with Apache 2.0 are at http://www.php.net/manual/install.apache2.
A.2.3 Installing on OS X
OS X 10.3.3 comes with PHP 4.3.2 installed. However, the PEAR libraries that come with the default OS X PHP installation are misconfigured. To install a complete, updated version of PHP on OS X, go to http://www.entropy.ch/software/macosx/php/ and download the latest installation package. This will be something like Entropy-PHP-4.3.6-3.dmg (the 4.3.6-3 part will change as PHP's version numbers change).
The package should automatically mount as a disk image and then pop up in a Finder window. If not, double-click on the downloaded file to mount it. The contents of the disk image are shown in Figure A-10. Then, double-click on the .pkg file (e.g. php-4.3.6.pkg) to begin the installation procedure.
Figure A-10. The PHP installation package mounted as a disk image
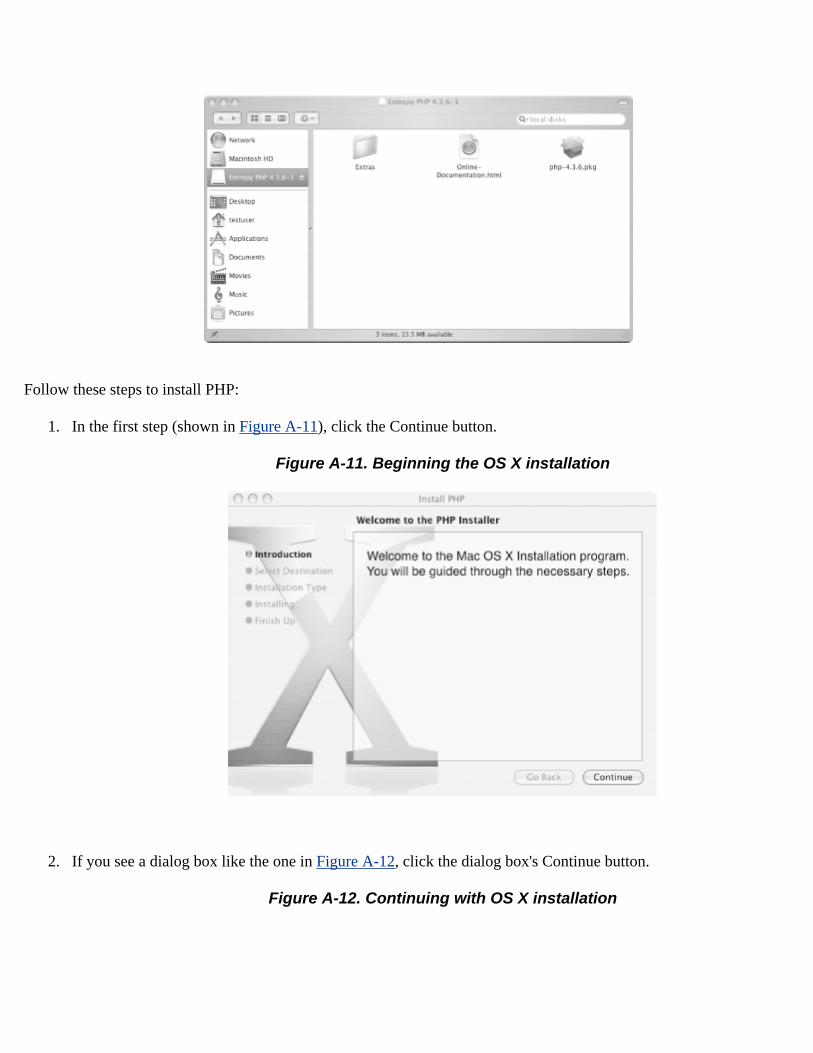
Follow these steps to install PHP:
1. In the first step (shown in Figure A-11), click the Continue button.
Figure A-11. Beginning the OS X installation
2. If you see a dialog box like the one in Figure A-12, click the dialog box's Continue button.
Figure A-12. Continuing with OS X installation
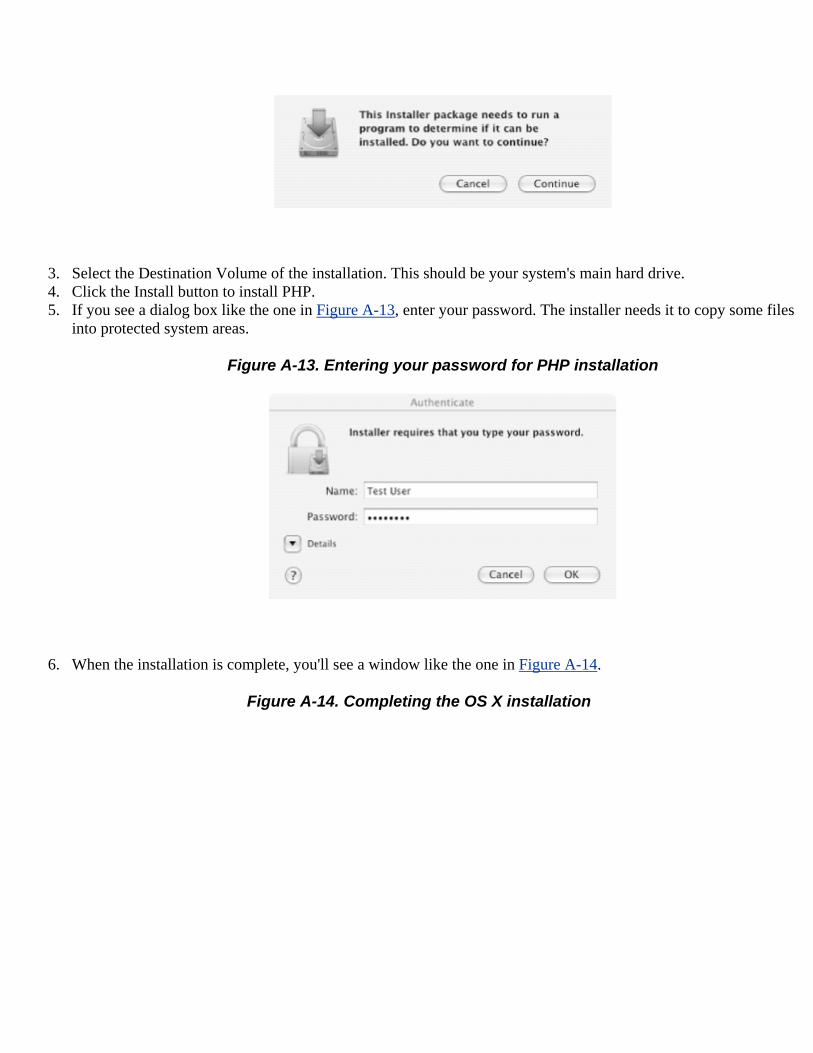
3. Select the Destination Volume of the installation. This should be your system's main hard drive. 4. Click the Install button to install PHP. 5. If you see a dialog box like the one in Figure A-13, enter your password. The installer needs it to copy some files
into protected system areas.
Figure A-13. Entering your password for PHP installation
6. When the installation is complete, you'll see a window like the one in Figure A-14.
Figure A-14. Completing the OS X installation
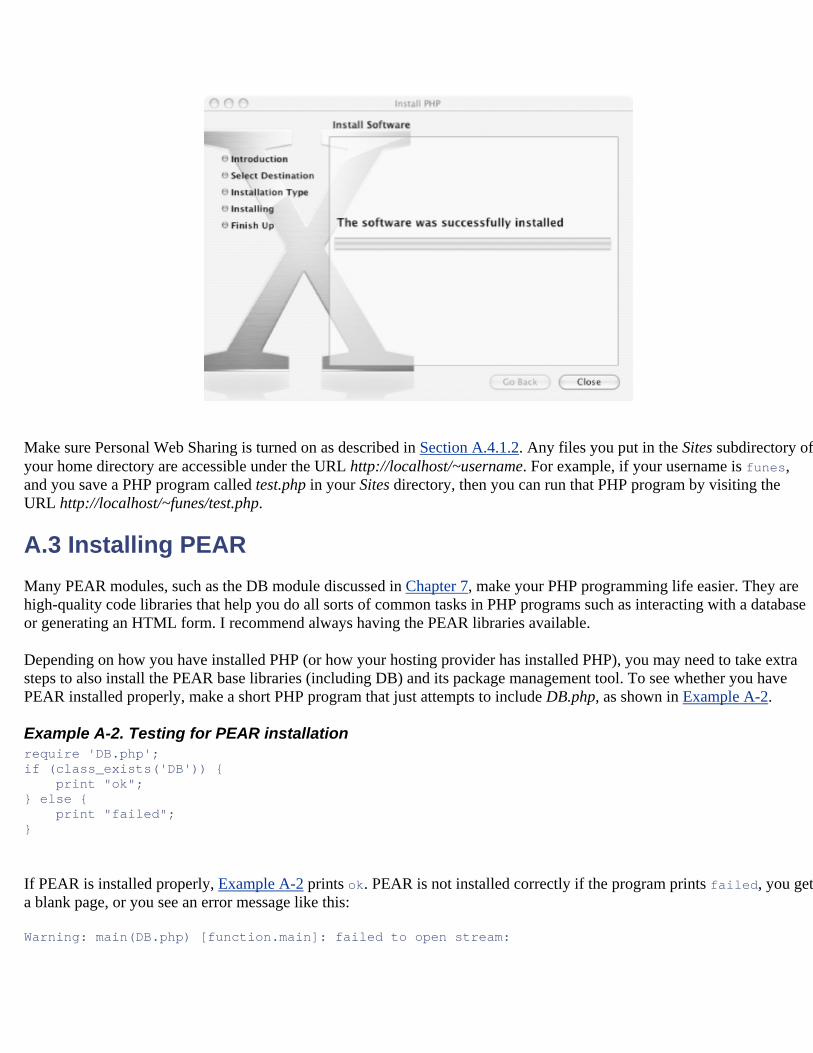
Make sure Personal Web Sharing is turned on as described in Section A.4.1.2. Any files you put in the Sites subdirectory of your home directory are accessible under the URL http://localhost/~username. For example, if your username is funes, and you save a PHP program called test.php in your Sites directory, then you can run that PHP program by visiting the URL http://localhost/~funes/test.php.
A.3 Installing PEAR Many PEAR modules, such as the DB module discussed in Chapter 7, make your PHP programming life easier. They are high-quality code libraries that help you do all sorts of common tasks in PHP programs such as interacting with a database or generating an HTML form. I recommend always having the PEAR libraries available.
Depending on how you have installed PHP (or how your hosting provider has installed PHP), you may need to take extra steps to also install the PEAR base libraries (including DB) and its package management tool. To see whether you have PEAR installed properly, make a short PHP program that just attempts to include DB.php, as shown in Example A-2.
Example A-2. Testing for PEAR installation require 'DB.php'; if (class_exists('DB')) { print "ok"; } else { print "failed"; }
If PEAR is installed properly, Example A-2 prints ok. PEAR is not installed correctly if the program prints failed, you get a blank page, or you see an error message like this:
Warning: main(DB.php) [function.main]: failed to open stream:
No such file or directory in /usr/local/apache/htdocs/pearcheck.php on line 2 Fatal error: main( ) [function.require]: Failed opening required 'DB.php' (include_path='.:/usr/local/php/lib') in /usr/local/apache/htdocs/pearcheck.php on line 2
The specific steps to take to start the PEAR installation process vary based on your operating system. On Windows, visit http://go-pear.org/ in a web browser and save the contents of that page as C:\PHP\go-pear.org (assuming you've installed PHP in C:\PHP). Then pass that file to the php.exe program. From the command prompt, type:
C: CD \PHP PHP go-pear.org
On Linux, as root at a shell prompt, type:
lynx -source go-pear.org | php
On OS X, at a Terminal shell prompt, type:
curl go-pear.org | sudo php
After you've started the PEAR installation process in the appropriate way, the next steps are the same on all platforms. The installation program asks a number of questions about how it should install PEAR. Use the default answers for all the questions, including when it asks you whether it should alter your php.ini file. The installation process must change the include_path setting in php.ini so that require and include work correctly with PEAR libraries.
Once PEAR has been installed successfully, run the PEAR package manager from a command or shell prompt to install and upgrade individual PEAR packages. The package manager is a program called pear. On Windows, you may need to be in the C:\PHP directory to run pear. On Linux, it should work from any directory, but you should be root when you run it. On OS X, you should run sudo pear so that the program has the appropriate permissions.
The OS X PHP package from www.entropy.ch installs its own complete copy of the base PEAR libraries and the PEAR package management tools. Because OS X 10.3.3 comes with a broken PEAR installation, however, you have to distinguish between them. If you just type sudo pear from the Terminal shell prompt, you run the pre-installed tool. To run the version installed with the www.entropy.ch package, you must type sudo /usr/local/php/bin/pear. To save yourself some typing, you can overwrite the preinstalled pear tool with the following:
sudo cp /usr/local/php/bin/pear /usr/bin/pear
Then, you can just type sudo pear at the Terminal shell prompt to access the right version of the package management tool.
The pear program understands a number of commands that control its behavior. You can see a list of them by running it with no additional arguments. The three most useful commands are list, which shows you what packages you have installed, install, which installs a new package, and uninstall, which removes an installed package.
For example, to list installed packages, type pear list. This prints a list of installed packages and their versions:
INSTALLED PACKAGES: = = = = = = = = = = = = = PACKAGE VERSION STATE Archive_Tar 1.1 stable Console_Getopt 1.2 stable DB 1.6.2 stable Mail 1.1.3 stable Net_SMTP 1.2.6 stable Net_Socket 1.0.1 stable PEAR 1.3.1 stable PHPUnit 1.0.1 stable XML_Parser 1.1.0 stable XML_RPC 1.1.0 stable
To install a package, type pear install. It's a good idea to use the -a flag with install so that any packages required by the package you're trying to install are also installed. For example, to install the HTML_QuickForm package discussed in Section 13.7, type:
pear install -a HTML_QuickForm
The HTML_QuickForm package requires the HTML_Common package, so both are downloaded and installed. The pear program prints:
downloading HTML_QuickForm-3.2.2.tgz ... Starting to download HTML_QuickForm-3.2.2.tgz (88,941 bytes) .....................done: 88,941 bytes downloading HTML_Common-1.2.1.tgz ... Starting to download HTML_Common-1.2.1.tgz (3,637 bytes) ...done: 3,637 bytes install ok: HTML_Common 1.2.1 install ok: HTML_QuickForm 3.2.2
To remove a package, use pear uninstall. For example, to remove HTML_QuickForm and HTML_Common, you must run pear uninstall twice. First, uninstall HTML_QuickForm:
pear uninstall HTML_QuickForm
This prints:
uninstall ok: HTML_QuickForm
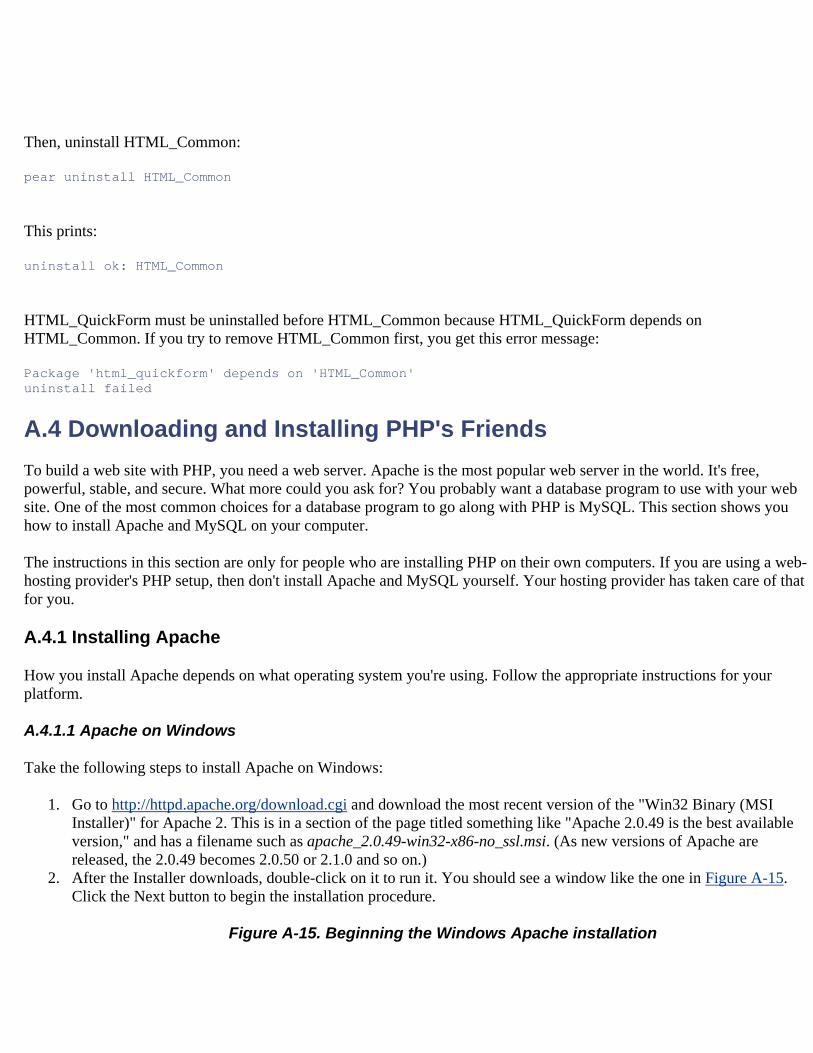
Then, uninstall HTML_Common:
pear uninstall HTML_Common
This prints:
uninstall ok: HTML_Common
HTML_QuickForm must be uninstalled before HTML_Common because HTML_QuickForm depends on HTML_Common. If you try to remove HTML_Common first, you get this error message:
Package 'html_quickform' depends on 'HTML_Common' uninstall failed
A.4 Downloading and Installing PHP's Friends To build a web site with PHP, you need a web server. Apache is the most popular web server in the world. It's free, powerful, stable, and secure. What more could you ask for? You probably want a database program to use with your web site. One of the most common choices for a database program to go along with PHP is MySQL. This section shows you how to install Apache and MySQL on your computer.
The instructions in this section are only for people who are installing PHP on their own computers. If you are using a web-hosting provider's PHP setup, then don't install Apache and MySQL yourself. Your hosting provider has taken care of that for you.
A.4.1 Installing Apache
How you install Apache depends on what operating system you're using. Follow the appropriate instructions for your platform.
A.4.1.1 Apache on Windows
Take the following steps to install Apache on Windows:
1. Go to http://httpd.apache.org/download.cgi and download the most recent version of the "Win32 Binary (MSI Installer)" for Apache 2. This is in a section of the page titled something like "Apache 2.0.49 is the best available version," and has a filename such as apache_2.0.49-win32-x86-no_ssl.msi. (As new versions of Apache are released, the 2.0.49 becomes 2.0.50 or 2.1.0 and so on.)
2. After the Installer downloads, double-click on it to run it. You should see a window like the one in Figure A-15. Click the Next button to begin the installation procedure.
Figure A-15. Beginning the Windows Apache installation
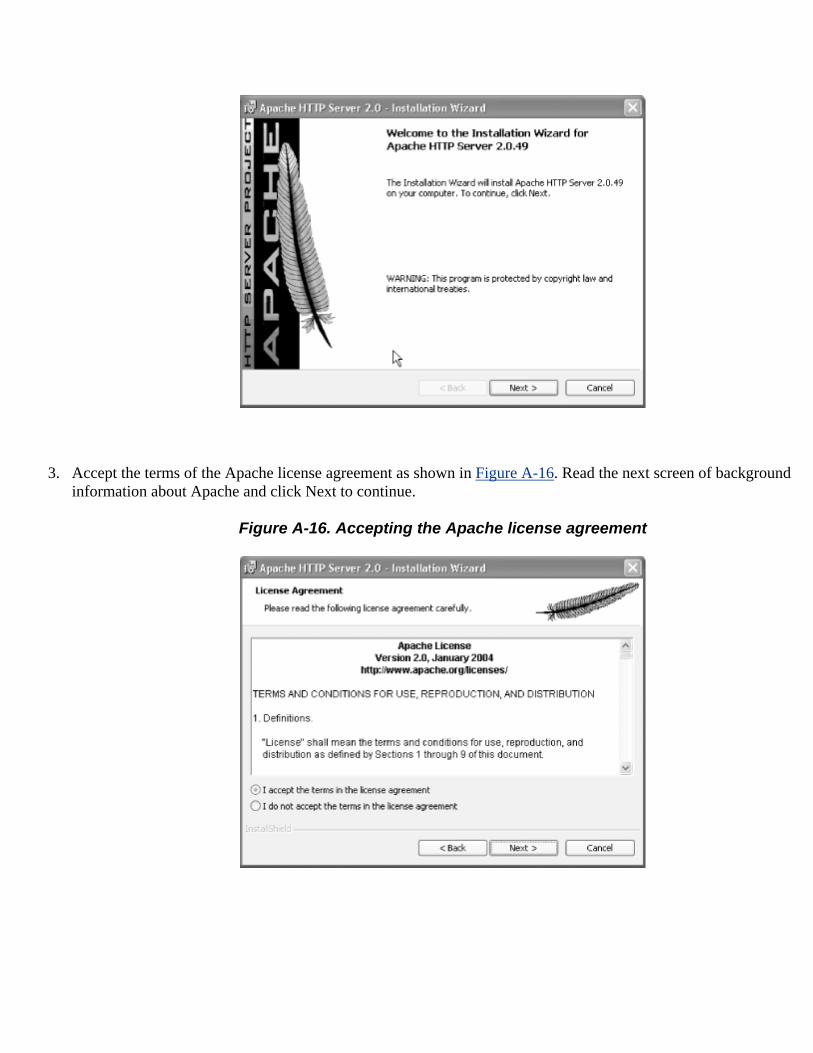
3. Accept the terms of the Apache license agreement as shown in Figure A-16. Read the next screen of background information about Apache and click Next to continue.
Figure A-16. Accepting the Apache license agreement
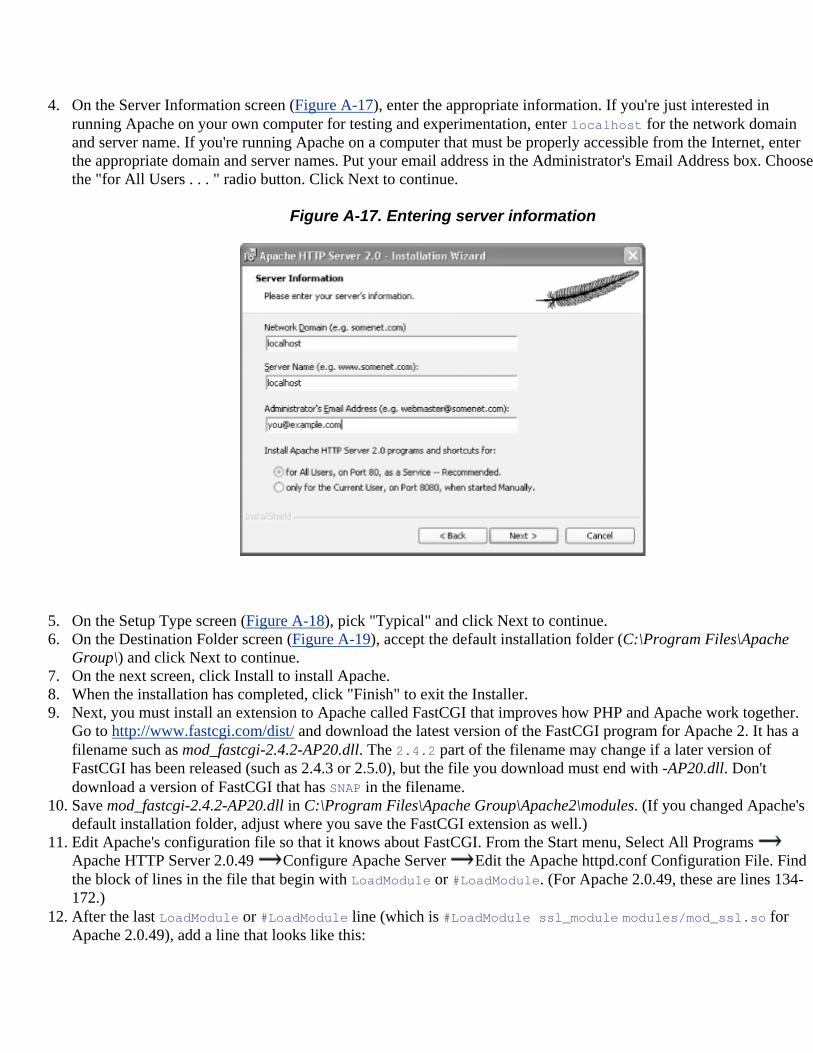
4. On the Server Information screen (Figure A-17), enter the appropriate information. If you're just interested in running Apache on your own computer for testing and experimentation, enter localhost for the network domain and server name. If you're running Apache on a computer that must be properly accessible from the Internet, enter the appropriate domain and server names. Put your email address in the Administrator's Email Address box. Choose the "for All Users . . . " radio button. Click Next to continue.
Figure A-17. Entering server information
5. On the Setup Type screen (Figure A-18), pick "Typical" and click Next to continue. 6. On the Destination Folder screen (Figure A-19), accept the default installation folder (C:\Program Files\Apache
Group\) and click Next to continue. 7. On the next screen, click Install to install Apache. 8. When the installation has completed, click "Finish" to exit the Installer. 9. Next, you must install an extension to Apache called FastCGI that improves how PHP and Apache work together.
Go to http://www.fastcgi.com/dist/ and download the latest version of the FastCGI program for Apache 2. It has a filename such as mod_fastcgi-2.4.2-AP20.dll. The 2.4.2 part of the filename may change if a later version of FastCGI has been released (such as 2.4.3 or 2.5.0), but the file you download must end with -AP20.dll. Don't download a version of FastCGI that has SNAP in the filename.
10. Save mod_fastcgi-2.4.2-AP20.dll in C:\Program Files\Apache Group\Apache2\modules. (If you changed Apache's default installation folder, adjust where you save the FastCGI extension as well.)
11. Edit Apache's configuration file so that it knows about FastCGI. From the Start menu, Select All Programs Apache HTTP Server 2.0.49 Configure Apache Server Edit the Apache httpd.conf Configuration File. Find the block of lines in the file that begin with LoadModule or #LoadModule. (For Apache 2.0.49, these are lines 134-172.)
12. After the last LoadModule or #LoadModule line (which is #LoadModule ssl_module modules/mod_ssl.so for Apache 2.0.49), add a line that looks like this:
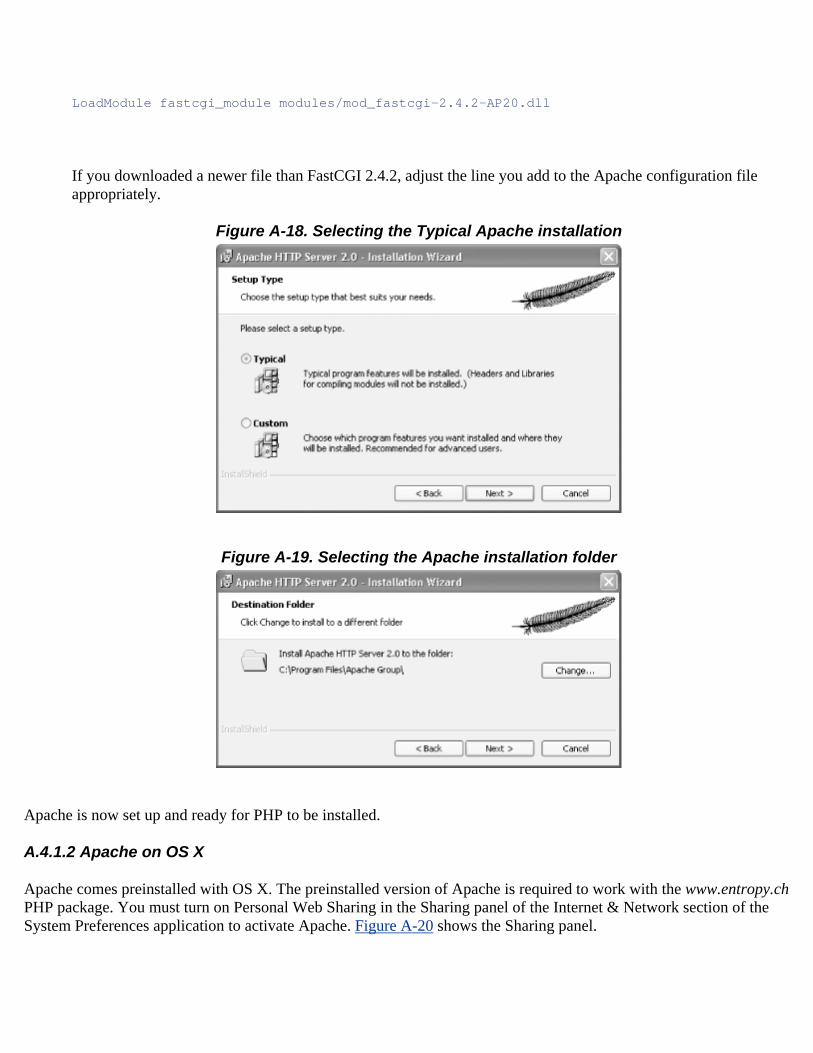
LoadModule fastcgi_module modules/mod_fastcgi-2.4.2-AP20.dll
If you downloaded a newer file than FastCGI 2.4.2, adjust the line you add to the Apache configuration file appropriately.
Figure A-18. Selecting the Typical Apache installation
Figure A-19. Selecting the Apache installation folder
Apache is now set up and ready for PHP to be installed.
A.4.1.2 Apache on OS X
Apache comes preinstalled with OS X. The preinstalled version of Apache is required to work with the www.entropy.ch PHP package. You must turn on Personal Web Sharing in the Sharing panel of the Internet & Network section of the System Preferences application to activate Apache. Figure A-20 shows the Sharing panel.
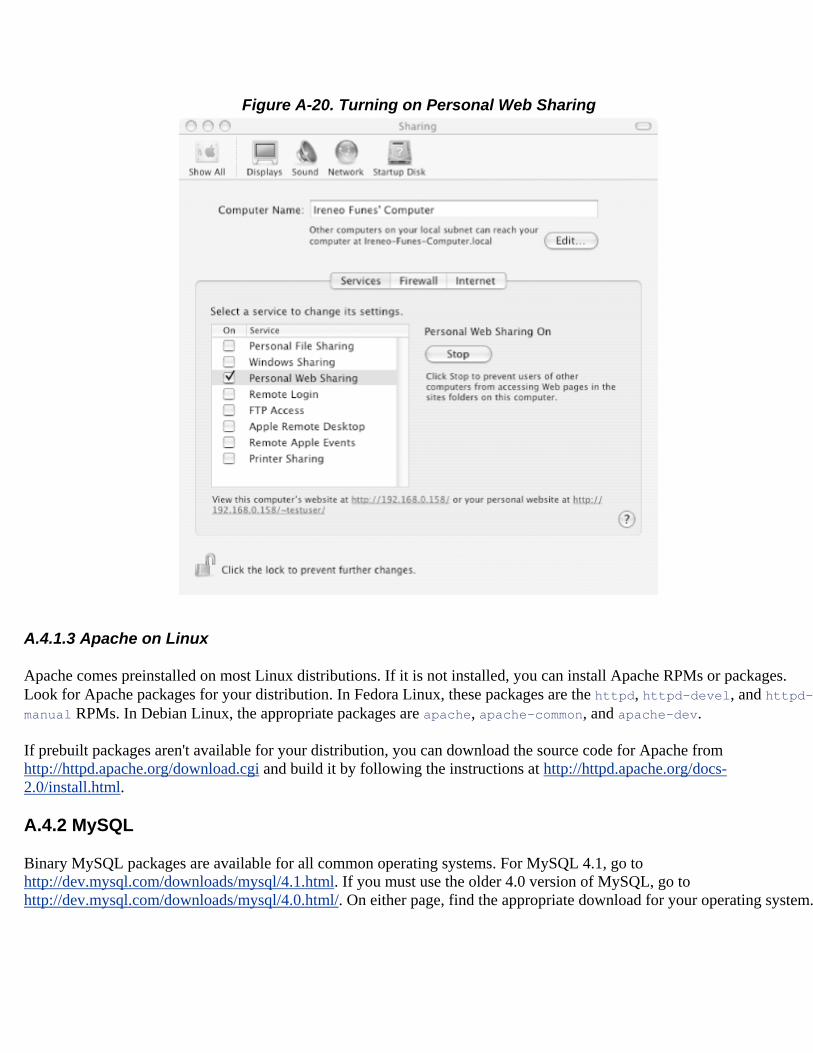
Figure A-20. Turning on Personal Web Sharing
A.4.1.3 Apache on Linux
Apache comes preinstalled on most Linux distributions. If it is not installed, you can install Apache RPMs or packages. Look for Apache packages for your distribution. In Fedora Linux, these packages are the httpd, httpd-devel, and httpd-manual RPMs. In Debian Linux, the appropriate packages are apache, apache-common, and apache-dev.
If prebuilt packages aren't available for your distribution, you can download the source code for Apache from http://httpd.apache.org/download.cgi and build it by following the instructions at http://httpd.apache.org/docs-2.0/install.html.
A.4.2 MySQL
Binary MySQL packages are available for all common operating systems. For MySQL 4.1, go to http://dev.mysql.com/downloads/mysql/4.1.html. If you must use the older 4.0 version of MySQL, go to http://dev.mysql.com/downloads/mysql/4.0.html/. On either page, find the appropriate download for your operating system.
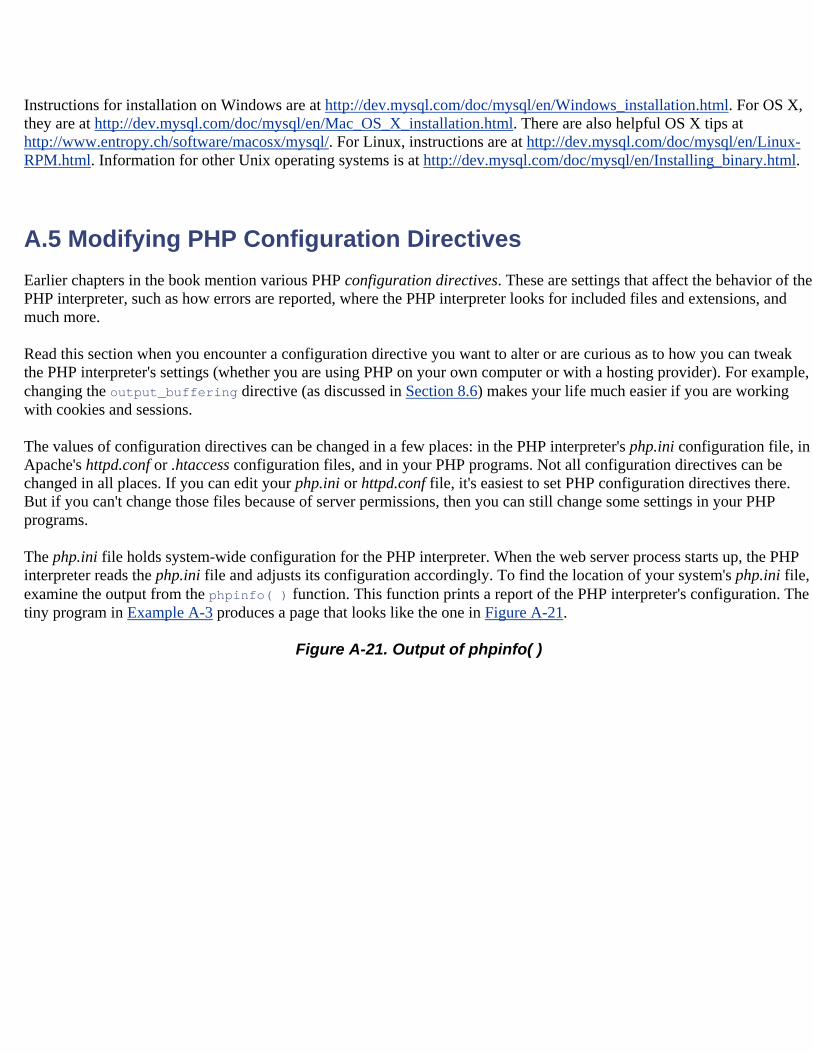
Instructions for installation on Windows are at http://dev.mysql.com/doc/mysql/en/Windows_installation.html. For OS X, they are at http://dev.mysql.com/doc/mysql/en/Mac_OS_X_installation.html. There are also helpful OS X tips at http://www.entropy.ch/software/macosx/mysql/. For Linux, instructions are at http://dev.mysql.com/doc/mysql/en/Linux-RPM.html. Information for other Unix operating systems is at http://dev.mysql.com/doc/mysql/en/Installing_binary.html.
A.5 Modifying PHP Configuration Directives Earlier chapters in the book mention various PHP configuration directives. These are settings that affect the behavior of the PHP interpreter, such as how errors are reported, where the PHP interpreter looks for included files and extensions, and much more.
Read this section when you encounter a configuration directive you want to alter or are curious as to how you can tweak the PHP interpreter's settings (whether you are using PHP on your own computer or with a hosting provider). For example, changing the output_buffering directive (as discussed in Section 8.6) makes your life much easier if you are working with cookies and sessions.
The values of configuration directives can be changed in a few places: in the PHP interpreter's php.ini configuration file, in Apache's httpd.conf or .htaccess configuration files, and in your PHP programs. Not all configuration directives can be changed in all places. If you can edit your php.ini or httpd.conf file, it's easiest to set PHP configuration directives there. But if you can't change those files because of server permissions, then you can still change some settings in your PHP programs.
The php.ini file holds system-wide configuration for the PHP interpreter. When the web server process starts up, the PHP interpreter reads the php.ini file and adjusts its configuration accordingly. To find the location of your system's php.ini file, examine the output from the phpinfo( ) function. This function prints a report of the PHP interpreter's configuration. The tiny program in Example A-3 produces a page that looks like the one in Figure A-21.
Figure A-21. Output of phpinfo( )
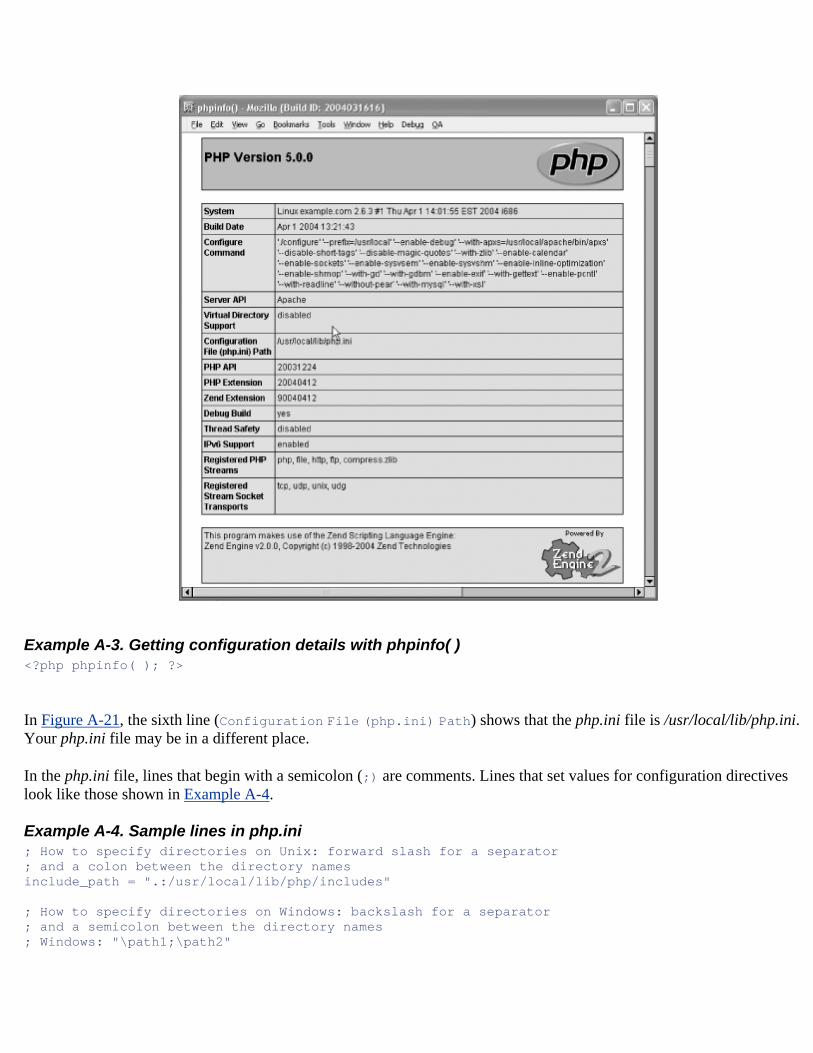
Example A-3. Getting configuration details with phpinfo( ) <?php phpinfo( ); ?>
In Figure A-21, the sixth line (Configuration File (php.ini) Path) shows that the php.ini file is /usr/local/lib/php.ini. Your php.ini file may be in a different place.
In the php.ini file, lines that begin with a semicolon (;) are comments. Lines that set values for configuration directives look like those shown in Example A-4.
Example A-4. Sample lines in php.ini ; How to specify directories on Unix: forward slash for a separator ; and a colon between the directory names include_path = ".:/usr/local/lib/php/includes" ; How to specify directories on Windows: backslash for a separator ; and a semicolon between the directory names ; Windows: "\path1;\path2"
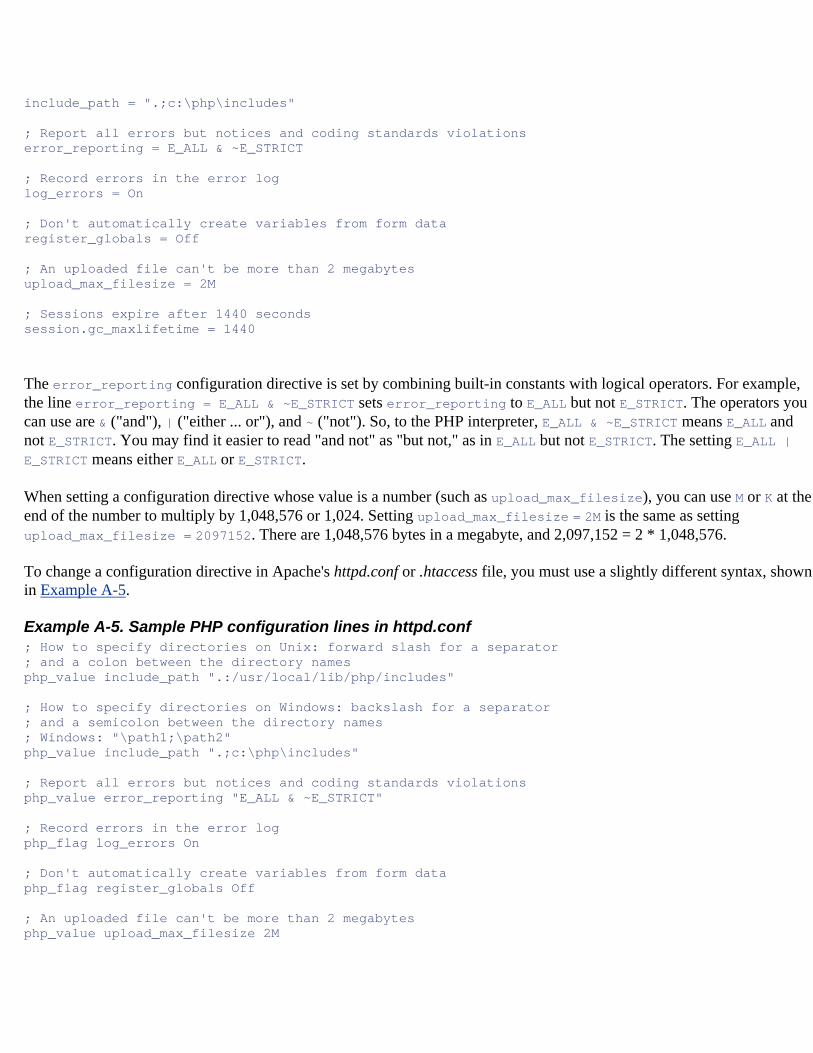
include_path = ".;c:\php\includes" ; Report all errors but notices and coding standards violations error_reporting = E_ALL & ~E_STRICT ; Record errors in the error log log_errors = On ; Don't automatically create variables from form data register_globals = Off ; An uploaded file can't be more than 2 megabytes upload_max_filesize = 2M ; Sessions expire after 1440 seconds session.gc_maxlifetime = 1440
The error_reporting configuration directive is set by combining built-in constants with logical operators. For example, the line error_reporting = E_ALL & ~E_STRICT sets error_reporting to E_ALL but not E_STRICT. The operators you can use are & ("and"), | ("either ... or"), and ~ ("not"). So, to the PHP interpreter, E_ALL & ~E_STRICT means E_ALL and not E_STRICT. You may find it easier to read "and not" as "but not," as in E_ALL but not E_STRICT. The setting E_ALL | E_STRICT means either E_ALL or E_STRICT.
When setting a configuration directive whose value is a number (such as upload_max_filesize), you can use M or K at the end of the number to multiply by 1,048,576 or 1,024. Setting upload_max_filesize = 2M is the same as setting upload_max_filesize = 2097152. There are 1,048,576 bytes in a megabyte, and 2,097,152 = 2 * 1,048,576.
To change a configuration directive in Apache's httpd.conf or .htaccess file, you must use a slightly different syntax, shown in Example A-5.
Example A-5. Sample PHP configuration lines in httpd.conf ; How to specify directories on Unix: forward slash for a separator ; and a colon between the directory names php_value include_path ".:/usr/local/lib/php/includes" ; How to specify directories on Windows: backslash for a separator ; and a semicolon between the directory names ; Windows: "\path1;\path2" php_value include_path ".;c:\php\includes" ; Report all errors but notices and coding standards violations php_value error_reporting "E_ALL & ~E_STRICT" ; Record errors in the error log php_flag log_errors On ; Don't automatically create variables from form data php_flag register_globals Off ; An uploaded file can't be more than 2 megabytes php_value upload_max_filesize 2M
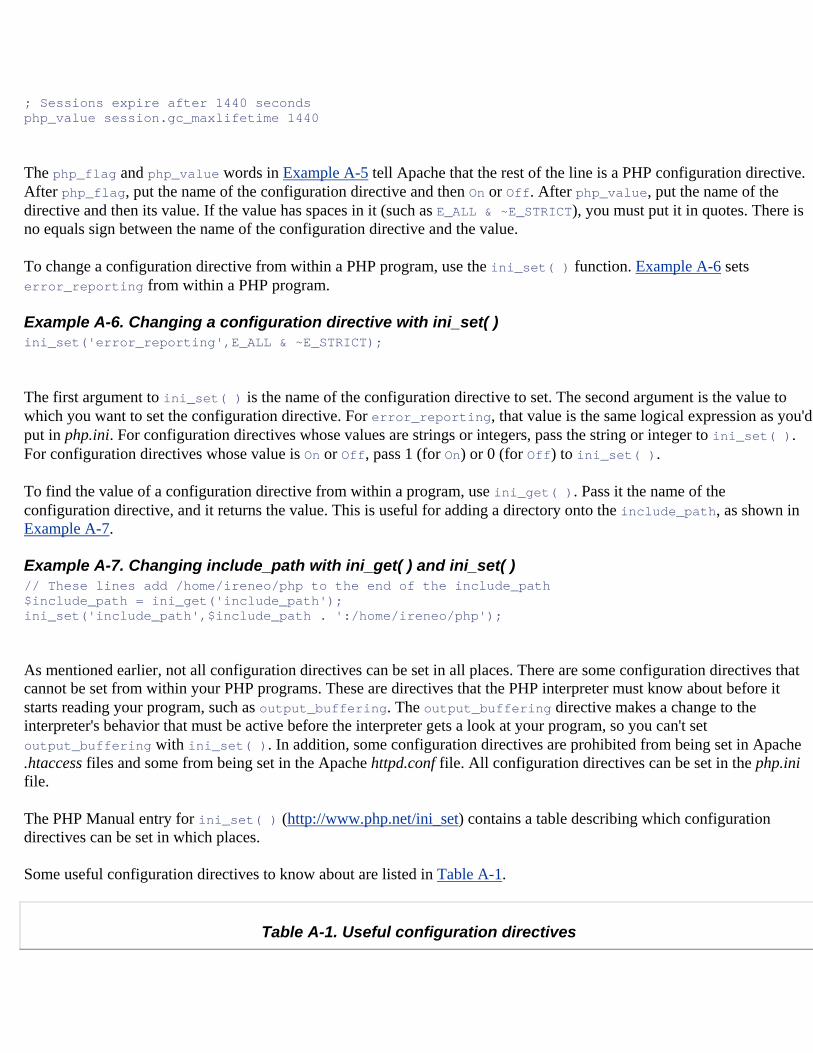
; Sessions expire after 1440 seconds php_value session.gc_maxlifetime 1440
The php_flag and php_value words in Example A-5 tell Apache that the rest of the line is a PHP configuration directive. After php_flag, put the name of the configuration directive and then On or Off. After php_value, put the name of the directive and then its value. If the value has spaces in it (such as E_ALL & ~E_STRICT), you must put it in quotes. There is no equals sign between the name of the configuration directive and the value.
To change a configuration directive from within a PHP program, use the ini_set( ) function. Example A-6 sets error_reporting from within a PHP program.
Example A-6. Changing a configuration directive with ini_set( ) ini_set('error_reporting',E_ALL & ~E_STRICT);
The first argument to ini_set( ) is the name of the configuration directive to set. The second argument is the value to which you want to set the configuration directive. For error_reporting, that value is the same logical expression as you'd put in php.ini. For configuration directives whose values are strings or integers, pass the string or integer to ini_set( ). For configuration directives whose value is On or Off, pass 1 (for On) or 0 (for Off) to ini_set( ).
To find the value of a configuration directive from within a program, use ini_get( ). Pass it the name of the configuration directive, and it returns the value. This is useful for adding a directory onto the include_path, as shown in Example A-7.
Example A-7. Changing include_path with ini_get( ) and ini_set( ) // These lines add /home/ireneo/php to the end of the include_path $include_path = ini_get('include_path'); ini_set('include_path',$include_path . ':/home/ireneo/php');
As mentioned earlier, not all configuration directives can be set in all places. There are some configuration directives that cannot be set from within your PHP programs. These are directives that the PHP interpreter must know about before it starts reading your program, such as output_buffering. The output_buffering directive makes a change to the interpreter's behavior that must be active before the interpreter gets a look at your program, so you can't set output_buffering with ini_set( ). In addition, some configuration directives are prohibited from being set in Apache .htaccess files and some from being set in the Apache httpd.conf file. All configuration directives can be set in the php.ini file.
The PHP Manual entry for ini_set( ) (http://www.php.net/ini_set) contains a table describing which configuration directives can be set in which places.
Some useful configuration directives to know about are listed in Table A-1.
Table A-1. Useful configuration directives
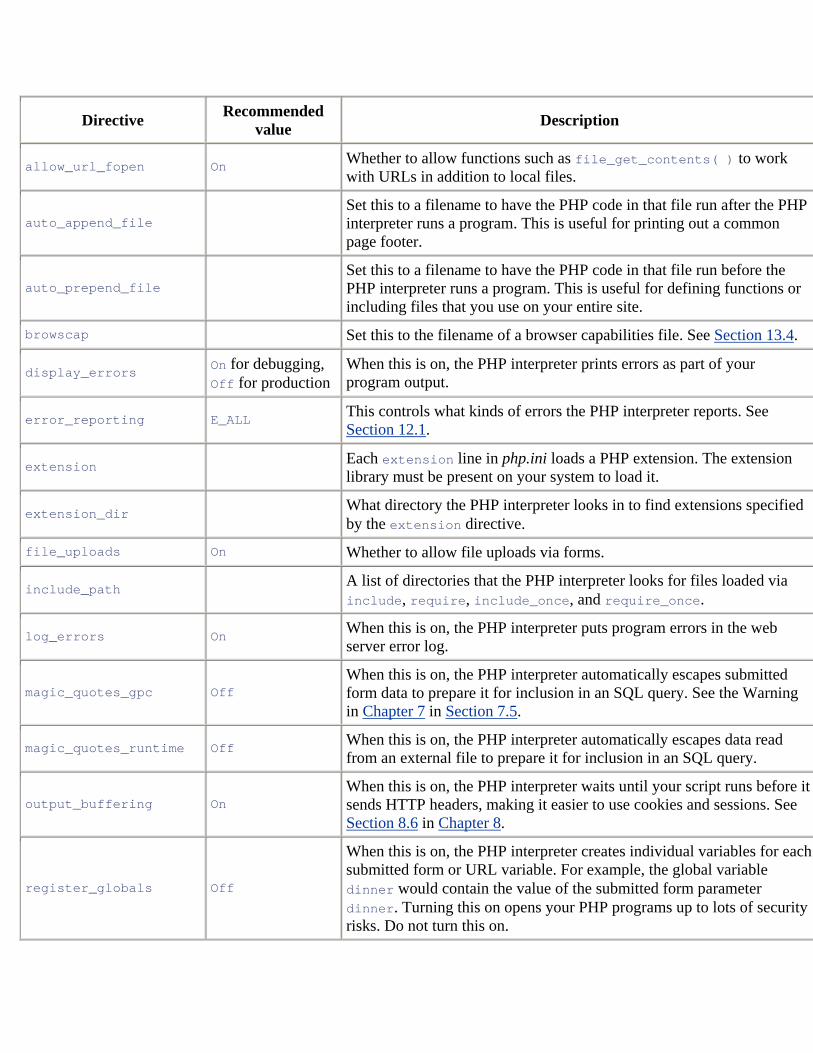
Directive Recommended value Description
allow_url_fopen On Whether to allow functions such as file_get_contents( ) to work with URLs in addition to local files.
auto_append_file Set this to a filename to have the PHP code in that file run after the PHP interpreter runs a program. This is useful for printing out a common page footer.
auto_prepend_file Set this to a filename to have the PHP code in that file run before the PHP interpreter runs a program. This is useful for defining functions or including files that you use on your entire site.
browscap Set this to the filename of a browser capabilities file. See Section 13.4.
display_errors On for debugging, Off for production
When this is on, the PHP interpreter prints errors as part of your program output.
error_reporting E_ALL This controls what kinds of errors the PHP interpreter reports. See Section 12.1.
extension Each extension line in php.ini loads a PHP extension. The extension library must be present on your system to load it.
extension_dir What directory the PHP interpreter looks in to find extensions specified by the extension directive.
file_uploads On Whether to allow file uploads via forms.
include_path A list of directories that the PHP interpreter looks for files loaded via include, require, include_once, and require_once.
log_errors On When this is on, the PHP interpreter puts program errors in the web server error log.
magic_quotes_gpc Off When this is on, the PHP interpreter automatically escapes submitted form data to prepare it for inclusion in an SQL query. See the Warning in Chapter 7 in Section 7.5.
magic_quotes_runtime Off When this is on, the PHP interpreter automatically escapes data read from an external file to prepare it for inclusion in an SQL query.
output_buffering On When this is on, the PHP interpreter waits until your script runs before it sends HTTP headers, making it easier to use cookies and sessions. See Section 8.6 in Chapter 8.
register_globals Off
When this is on, the PHP interpreter creates individual variables for each submitted form or URL variable. For example, the global variable dinner would contain the value of the submitted form parameter dinner. Turning this on opens your PHP programs up to lots of security risks. Do not turn this on.
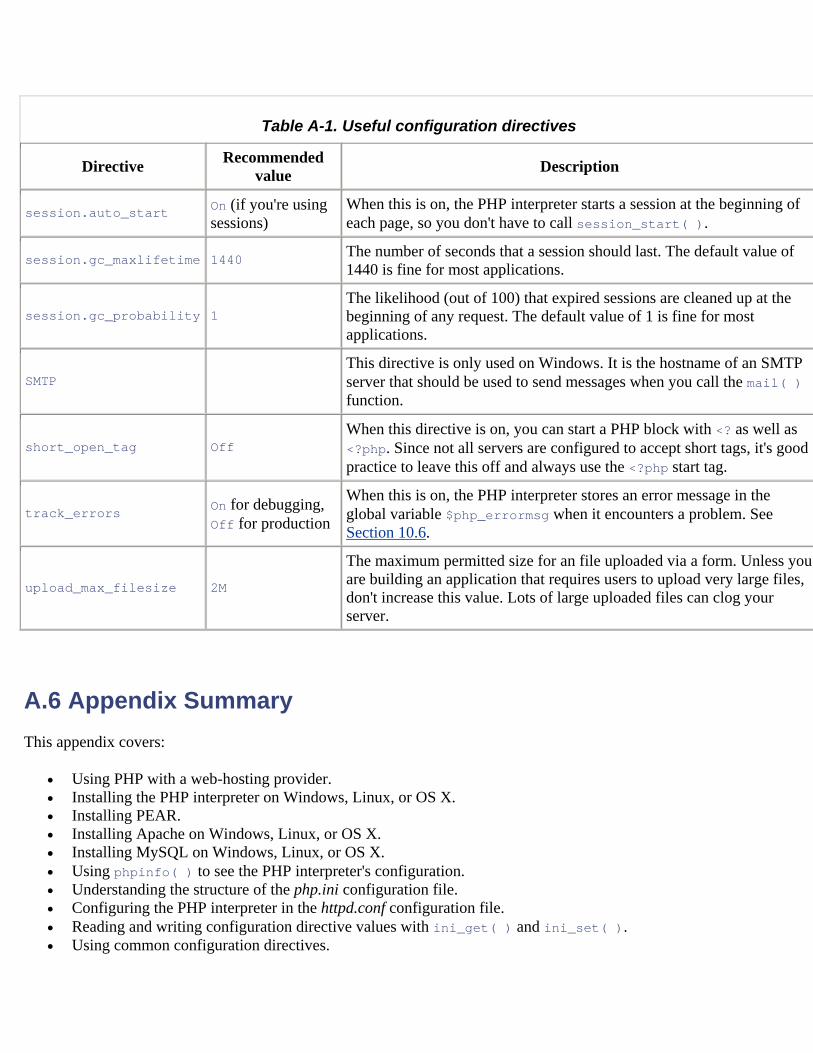
Table A-1. Useful configuration directives
Directive Recommended value Description
session.auto_start On (if you're using sessions)
When this is on, the PHP interpreter starts a session at the beginning of each page, so you don't have to call session_start( ).
session.gc_maxlifetime 1440 The number of seconds that a session should last. The default value of 1440 is fine for most applications.
session.gc_probability 1 The likelihood (out of 100) that expired sessions are cleaned up at the beginning of any request. The default value of 1 is fine for most applications.
SMTP This directive is only used on Windows. It is the hostname of an SMTP server that should be used to send messages when you call the mail( ) function.
short_open_tag Off When this directive is on, you can start a PHP block with <? as well as <?php. Since not all servers are configured to accept short tags, it's good practice to leave this off and always use the <?php start tag.
track_errors On for debugging, Off for production
When this is on, the PHP interpreter stores an error message in the global variable $php_errormsg when it encounters a problem. See Section 10.6.
upload_max_filesize 2M The maximum permitted size for an file uploaded via a form. Unless you are building an application that requires users to upload very large files, don't increase this value. Lots of large uploaded files can clog your server.
A.6 Appendix Summary This appendix covers:
• Using PHP with a web-hosting provider. • Installing the PHP interpreter on Windows, Linux, or OS X. • Installing PEAR. • Installing Apache on Windows, Linux, or OS X. • Installing MySQL on Windows, Linux, or OS X. • Using phpinfo( ) to see the PHP interpreter's configuration. • Understanding the structure of the php.ini configuration file. • Configuring the PHP interpreter in the httpd.conf configuration file. • Reading and writing configuration directive values with ini_get( ) and ini_set( ). • Using common configuration directives.
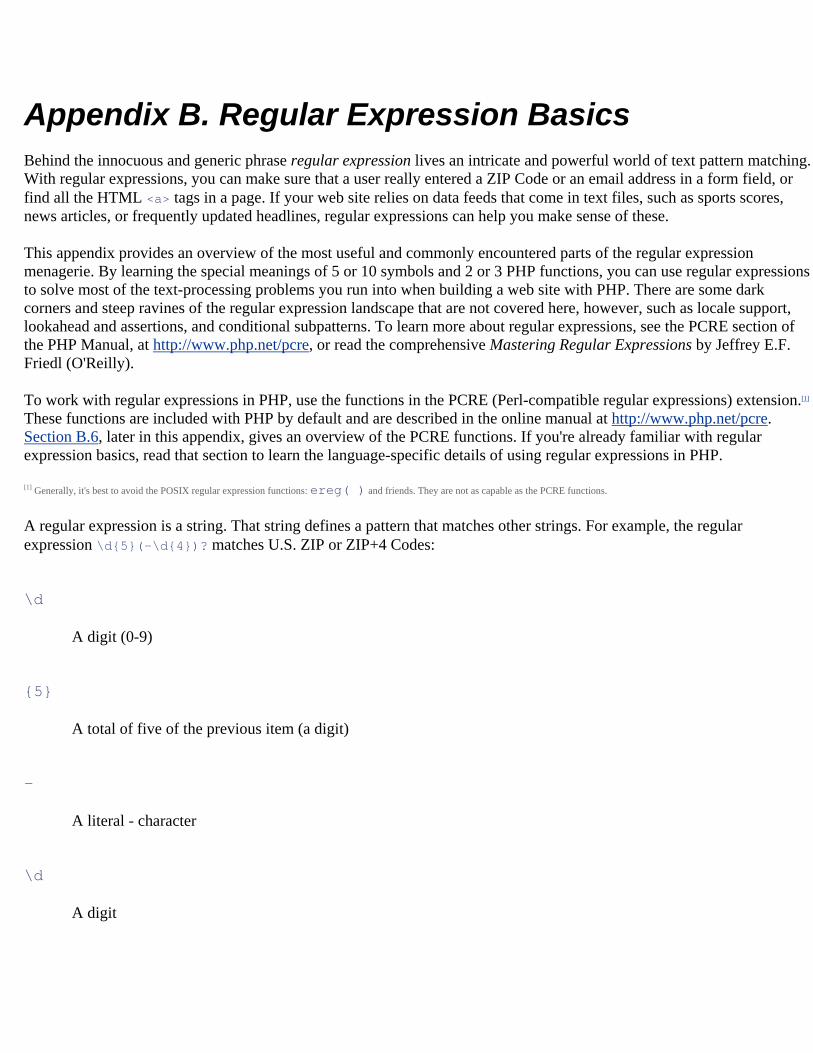
Appendix B. Regular Expression Basics Behind the innocuous and generic phrase regular expression lives an intricate and powerful world of text pattern matching. With regular expressions, you can make sure that a user really entered a ZIP Code or an email address in a form field, or find all the HTML <a> tags in a page. If your web site relies on data feeds that come in text files, such as sports scores, news articles, or frequently updated headlines, regular expressions can help you make sense of these.
This appendix provides an overview of the most useful and commonly encountered parts of the regular expression menagerie. By learning the special meanings of 5 or 10 symbols and 2 or 3 PHP functions, you can use regular expressions to solve most of the text-processing problems you run into when building a web site with PHP. There are some dark corners and steep ravines of the regular expression landscape that are not covered here, however, such as locale support, lookahead and assertions, and conditional subpatterns. To learn more about regular expressions, see the PCRE section of the PHP Manual, at http://www.php.net/pcre, or read the comprehensive Mastering Regular Expressions by Jeffrey E.F. Friedl (O'Reilly).
To work with regular expressions in PHP, use the functions in the PCRE (Perl-compatible regular expressions) extension.[1] These functions are included with PHP by default and are described in the online manual at http://www.php.net/pcre. Section B.6, later in this appendix, gives an overview of the PCRE functions. If you're already familiar with regular expression basics, read that section to learn the language-specific details of using regular expressions in PHP.
[1] Generally, it's best to avoid the POSIX regular expression functions: ereg( ) and friends. They are not as capable as the PCRE functions.
A regular expression is a string. That string defines a pattern that matches other strings. For example, the regular expression \d{5}(-\d{4})? matches U.S. ZIP or ZIP+4 Codes:
\d
A digit (0-9)
{5}
A total of five of the previous item (a digit)
-
A literal - character
\d
A digit
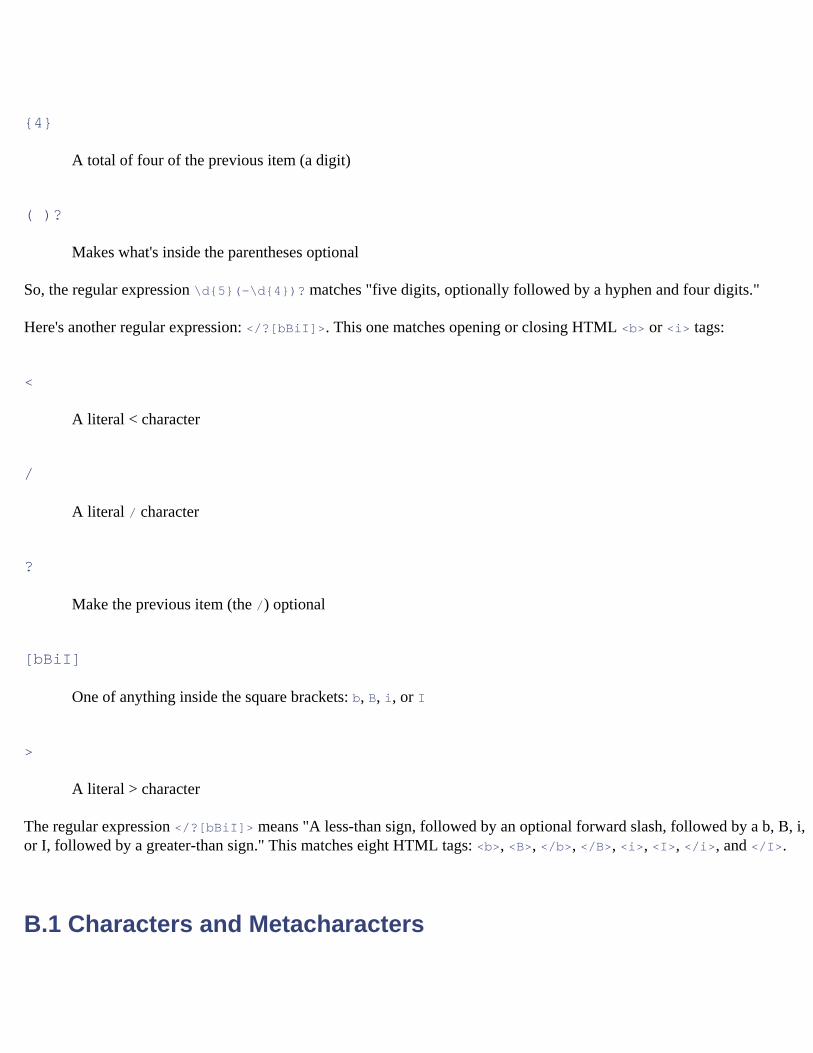
{4}
A total of four of the previous item (a digit)
( )?
Makes what's inside the parentheses optional
So, the regular expression \d{5}(-\d{4})? matches "five digits, optionally followed by a hyphen and four digits."
Here's another regular expression: </?[bBiI]>. This one matches opening or closing HTML <b> or <i> tags:
<
A literal < character
/
A literal / character
?
Make the previous item (the /) optional
[bBiI]
One of anything inside the square brackets: b, B, i, or I
>
A literal > character
The regular expression </?[bBiI]> means "A less-than sign, followed by an optional forward slash, followed by a b, B, i, or I, followed by a greater-than sign." This matches eight HTML tags: <b>, <B>, </b>, </B>, <i>, <I>, </i>, and </I>.
B.1 Characters and Metacharacters
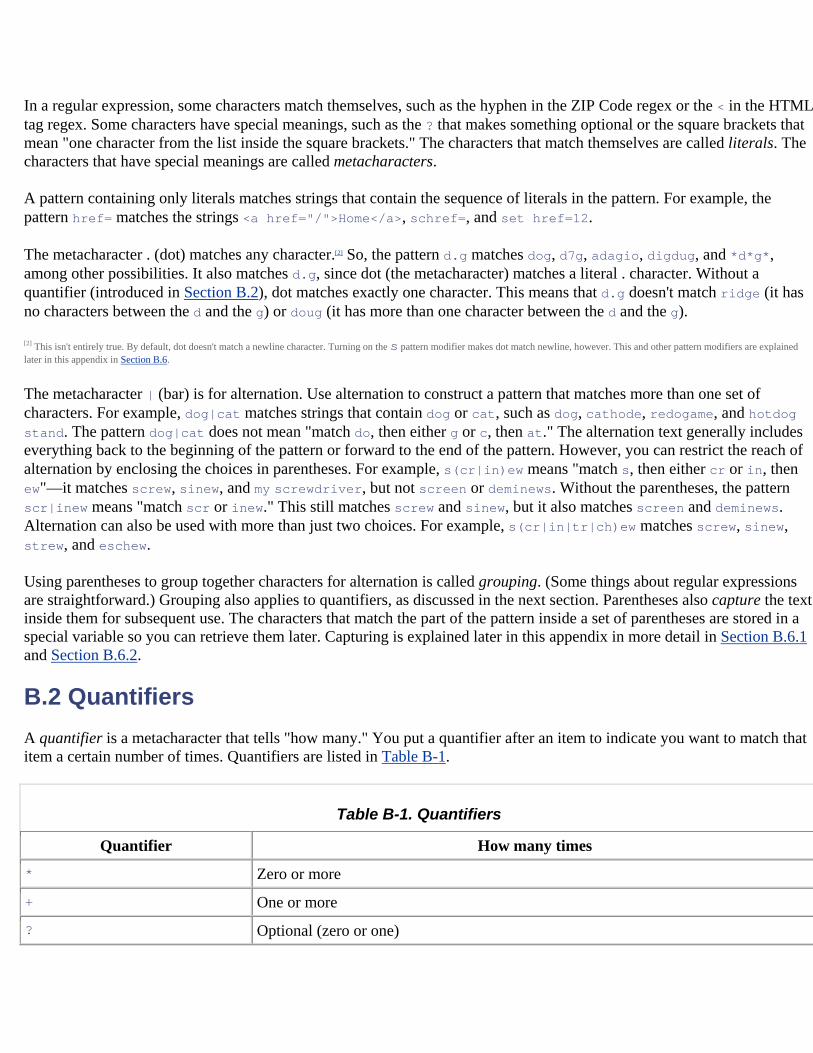
In a regular expression, some characters match themselves, such as the hyphen in the ZIP Code regex or the < in the HTML tag regex. Some characters have special meanings, such as the ? that makes something optional or the square brackets that mean "one character from the list inside the square brackets." The characters that match themselves are called literals. The characters that have special meanings are called metacharacters.
A pattern containing only literals matches strings that contain the sequence of literals in the pattern. For example, the pattern href= matches the strings <a href="/">Home</a>, schref=, and set href=12.
The metacharacter . (dot) matches any character.[2] So, the pattern d.g matches dog, d7g, adagio, digdug, and *d*g*, among other possibilities. It also matches d.g, since dot (the metacharacter) matches a literal . character. Without a quantifier (introduced in Section B.2), dot matches exactly one character. This means that d.g doesn't match ridge (it has no characters between the d and the g) or doug (it has more than one character between the d and the g).
[2] This isn't entirely true. By default, dot doesn't match a newline character. Turning on the s pattern modifier makes dot match newline, however. This and other pattern modifiers are explained later in this appendix in Section B.6.
The metacharacter | (bar) is for alternation. Use alternation to construct a pattern that matches more than one set of characters. For example, dog|cat matches strings that contain dog or cat, such as dog, cathode, redogame, and hotdog stand. The pattern dog|cat does not mean "match do, then either g or c, then at." The alternation text generally includes everything back to the beginning of the pattern or forward to the end of the pattern. However, you can restrict the reach of alternation by enclosing the choices in parentheses. For example, s(cr|in)ew means "match s, then either cr or in, then ew"—it matches screw, sinew, and my screwdriver, but not screen or deminews. Without the parentheses, the pattern scr|inew means "match scr or inew." This still matches screw and sinew, but it also matches screen and deminews. Alternation can also be used with more than just two choices. For example, s(cr|in|tr|ch)ew matches screw, sinew, strew, and eschew.
Using parentheses to group together characters for alternation is called grouping. (Some things about regular expressions are straightforward.) Grouping also applies to quantifiers, as discussed in the next section. Parentheses also capture the text inside them for subsequent use. The characters that match the part of the pattern inside a set of parentheses are stored in a special variable so you can retrieve them later. Capturing is explained later in this appendix in more detail in Section B.6.1 and Section B.6.2.
B.2 Quantifiers A quantifier is a metacharacter that tells "how many." You put a quantifier after an item to indicate you want to match that item a certain number of times. Quantifiers are listed in Table B-1.
Table B-1. Quantifiers
Quantifier How many times
* Zero or more
+ One or more
? Optional (zero or one)
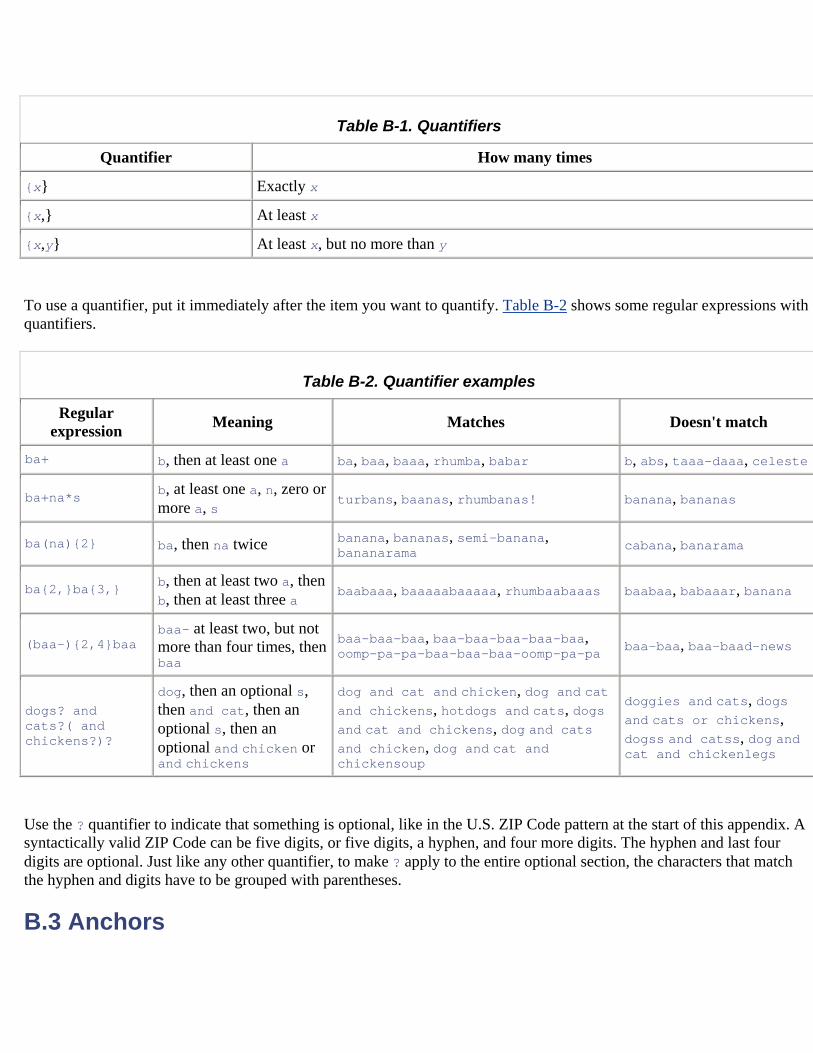
Table B-1. Quantifiers
Quantifier How many times
{x} Exactly x
{x,} At least x
{x,y} At least x, but no more than y
To use a quantifier, put it immediately after the item you want to quantify. Table B-2 shows some regular expressions with quantifiers.
Table B-2. Quantifier examples
Regular expression Meaning Matches Doesn't match
ba+ b, then at least one a ba, baa, baaa, rhumba, babar b, abs, taaa-daaa, celeste
ba+na*s b, at least one a, n, zero or more a, s turbans, baanas, rhumbanas! banana, bananas
ba(na){2} ba, then na twice banana, bananas, semi-banana, bananarama cabana, banarama
ba{2,}ba{3,} b, then at least two a, then b, then at least three a baabaaa, baaaaabaaaaa, rhumbaabaaas baabaa, babaaar, banana
(baa-){2,4}baa baa- at least two, but not more than four times, then baa
baa-baa-baa, baa-baa-baa-baa-baa, oomp-pa-pa-baa-baa-baa-oomp-pa-pa baa-baa, baa-baad-news
dogs? and cats?( and chickens?)?
dog, then an optional s, then and cat, then an optional s, then an optional and chicken or and chickens
dog and cat and chicken, dog and cat and chickens, hotdogs and cats, dogs and cat and chickens, dog and cats and chicken, dog and cat and chickensoup
doggies and cats, dogs and cats or chickens, dogss and catss, dog and cat and chickenlegs
Use the ? quantifier to indicate that something is optional, like in the U.S. ZIP Code pattern at the start of this appendix. A syntactically valid ZIP Code can be five digits, or five digits, a hyphen, and four more digits. The hyphen and last four digits are optional. Just like any other quantifier, to make ? apply to the entire optional section, the characters that match the hyphen and digits have to be grouped with parentheses.
B.3 Anchors
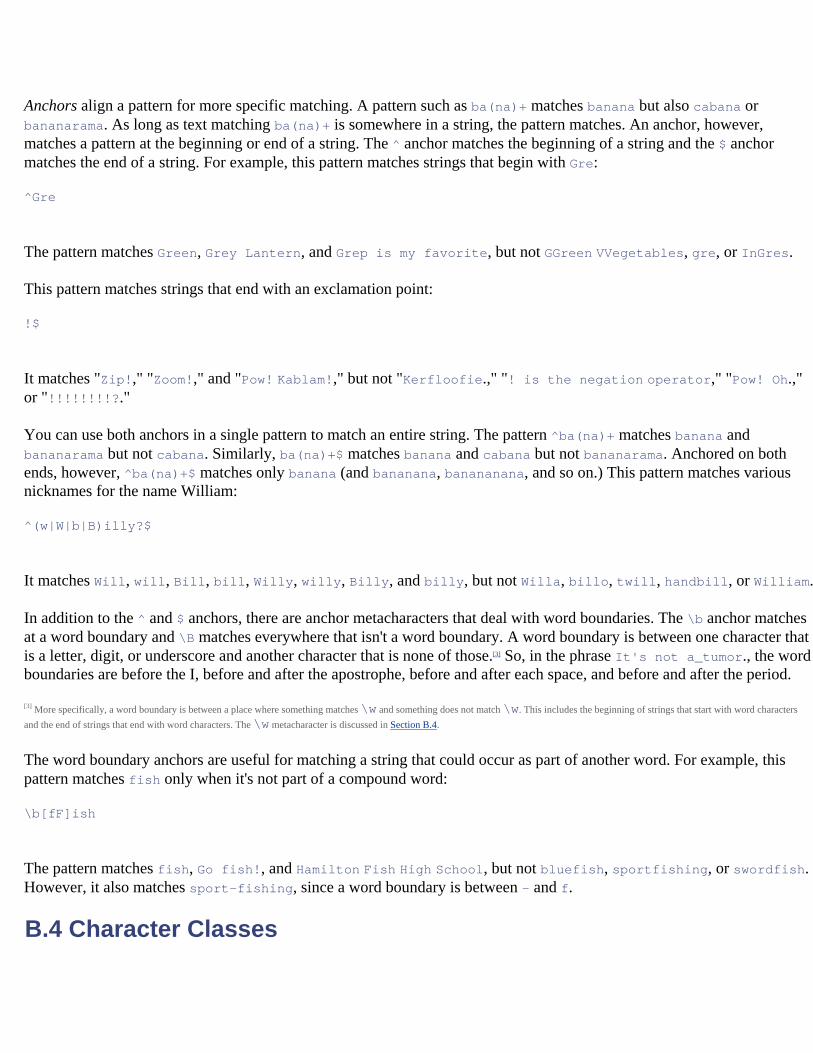
Anchors align a pattern for more specific matching. A pattern such as ba(na)+ matches banana but also cabana or bananarama. As long as text matching ba(na)+ is somewhere in a string, the pattern matches. An anchor, however, matches a pattern at the beginning or end of a string. The ^ anchor matches the beginning of a string and the $ anchor matches the end of a string. For example, this pattern matches strings that begin with Gre:
^Gre
The pattern matches Green, Grey Lantern, and Grep is my favorite, but not GGreen VVegetables, gre, or InGres.
This pattern matches strings that end with an exclamation point:
!$
It matches "Zip!," "Zoom!," and "Pow! Kablam!," but not "Kerfloofie.," "! is the negation operator," "Pow! Oh.," or "!!!!!!!!?."
You can use both anchors in a single pattern to match an entire string. The pattern ^ba(na)+ matches banana and bananarama but not cabana. Similarly, ba(na)+$ matches banana and cabana but not bananarama. Anchored on both ends, however, ^ba(na)+$ matches only banana (and bananana, banananana, and so on.) This pattern matches various nicknames for the name William:
^(w|W|b|B)illy?$
It matches Will, will, Bill, bill, Willy, willy, Billy, and billy, but not Willa, billo, twill, handbill, or William.
In addition to the ^ and $ anchors, there are anchor metacharacters that deal with word boundaries. The \b anchor matches at a word boundary and \B matches everywhere that isn't a word boundary. A word boundary is between one character that is a letter, digit, or underscore and another character that is none of those.[3] So, in the phrase It's not a_tumor., the word boundaries are before the I, before and after the apostrophe, before and after each space, and before and after the period.
[3] More specifically, a word boundary is between a place where something matches \w and something does not match \w. This includes the beginning of strings that start with word characters and the end of strings that end with word characters. The \w metacharacter is discussed in Section B.4.
The word boundary anchors are useful for matching a string that could occur as part of another word. For example, this pattern matches fish only when it's not part of a compound word:
\b[fF]ish
The pattern matches fish, Go fish!, and Hamilton Fish High School, but not bluefish, sportfishing, or swordfish. However, it also matches sport-fishing, since a word boundary is between - and f.
B.4 Character Classes
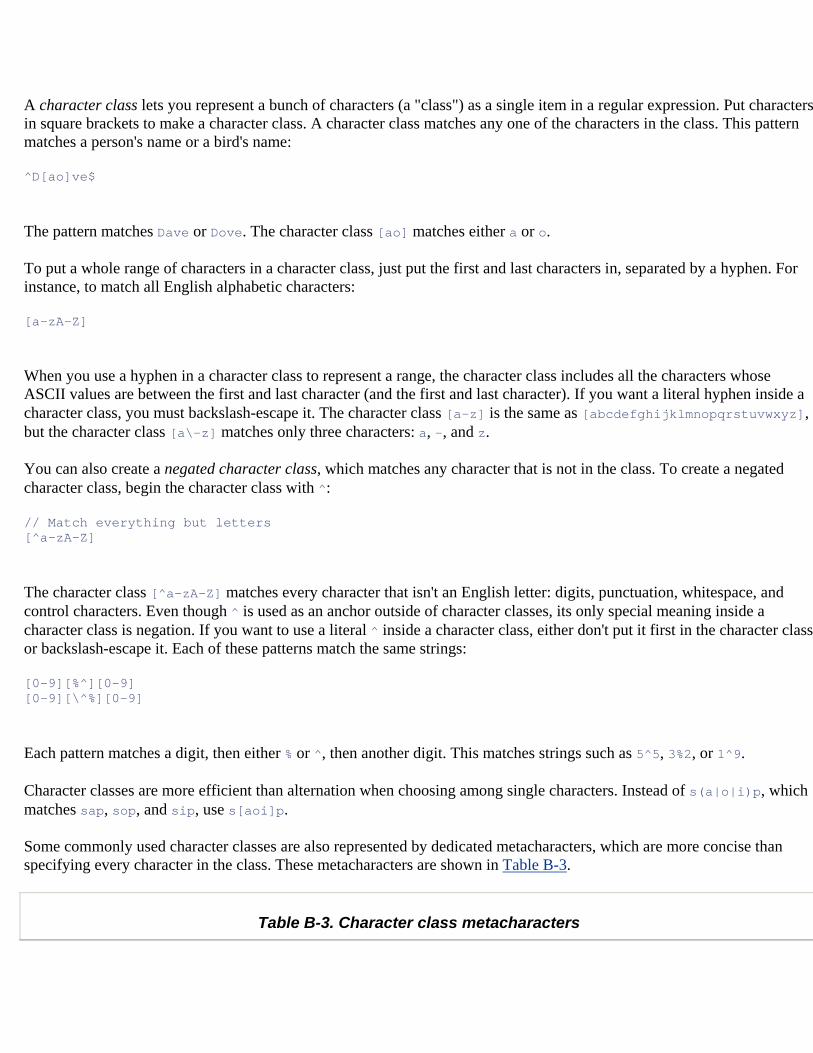
A character class lets you represent a bunch of characters (a "class") as a single item in a regular expression. Put characters in square brackets to make a character class. A character class matches any one of the characters in the class. This pattern matches a person's name or a bird's name:
^D[ao]ve$
The pattern matches Dave or Dove. The character class [ao] matches either a or o.
To put a whole range of characters in a character class, just put the first and last characters in, separated by a hyphen. For instance, to match all English alphabetic characters:
[a-zA-Z]
When you use a hyphen in a character class to represent a range, the character class includes all the characters whose ASCII values are between the first and last character (and the first and last character). If you want a literal hyphen inside a character class, you must backslash-escape it. The character class [a-z] is the same as [abcdefghijklmnopqrstuvwxyz], but the character class [a\-z] matches only three characters: a, -, and z.
You can also create a negated character class, which matches any character that is not in the class. To create a negated character class, begin the character class with ^:
// Match everything but letters [^a-zA-Z]
The character class [^a-zA-Z] matches every character that isn't an English letter: digits, punctuation, whitespace, and control characters. Even though ^ is used as an anchor outside of character classes, its only special meaning inside a character class is negation. If you want to use a literal ^ inside a character class, either don't put it first in the character class or backslash-escape it. Each of these patterns match the same strings:
[0-9][%^][0-9] [0-9][\^%][0-9]
Each pattern matches a digit, then either % or ^, then another digit. This matches strings such as 5^5, 3%2, or 1^9.
Character classes are more efficient than alternation when choosing among single characters. Instead of s(a|o|i)p, which matches sap, sop, and sip, use s[aoi]p.
Some commonly used character classes are also represented by dedicated metacharacters, which are more concise than specifying every character in the class. These metacharacters are shown in Table B-3.
Table B-3. Character class metacharacters
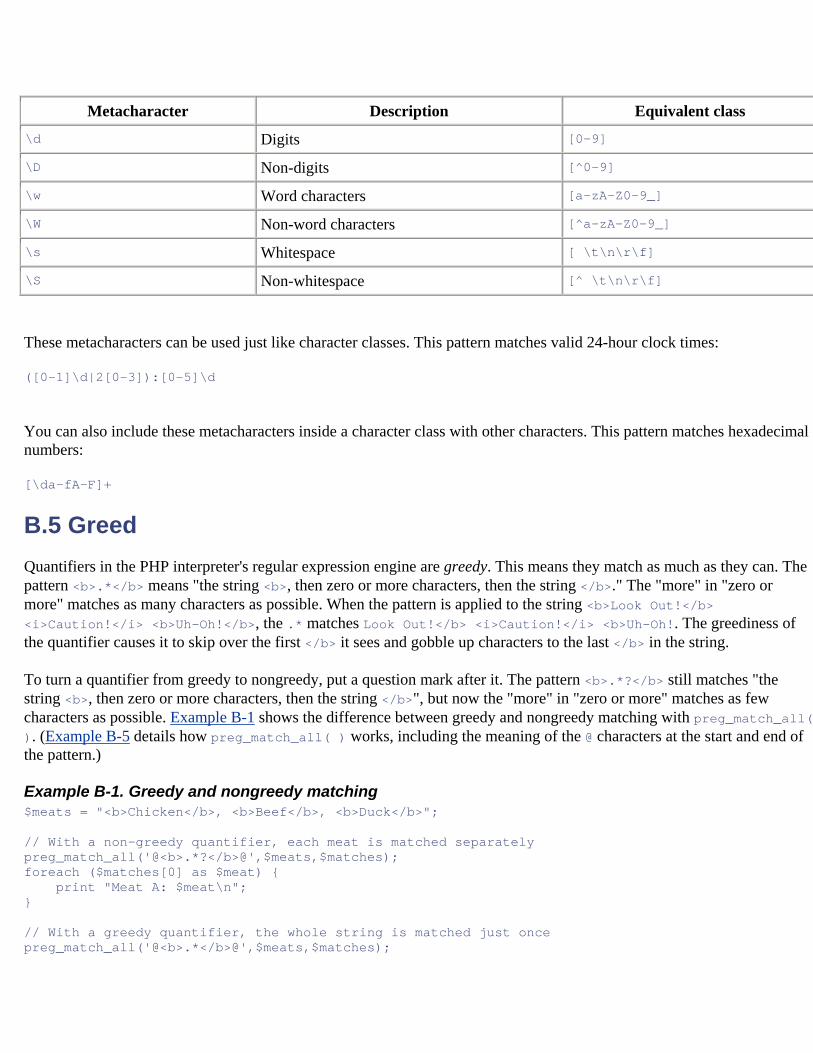
Metacharacter Description Equivalent class
\d Digits [0-9]
\D Non-digits [^0-9]
\w Word characters [a-zA-Z0-9_]
\W Non-word characters [^a-zA-Z0-9_]
\s Whitespace [ \t\n\r\f]
\S Non-whitespace [^ \t\n\r\f]
These metacharacters can be used just like character classes. This pattern matches valid 24-hour clock times:
([0-1]\d|2[0-3]):[0-5]\d
You can also include these metacharacters inside a character class with other characters. This pattern matches hexadecimal numbers:
[\da-fA-F]+
B.5 Greed Quantifiers in the PHP interpreter's regular expression engine are greedy. This means they match as much as they can. The pattern <b>.*</b> means "the string <b>, then zero or more characters, then the string </b>." The "more" in "zero or more" matches as many characters as possible. When the pattern is applied to the string <b>Look Out!</b> <i>Caution!</i> <b>Uh-Oh!</b>, the .* matches Look Out!</b> <i>Caution!</i> <b>Uh-Oh!. The greediness of the quantifier causes it to skip over the first </b> it sees and gobble up characters to the last </b> in the string.
To turn a quantifier from greedy to nongreedy, put a question mark after it. The pattern <b>.*?</b> still matches "the string <b>, then zero or more characters, then the string </b>", but now the "more" in "zero or more" matches as few characters as possible. Example B-1 shows the difference between greedy and nongreedy matching with preg_match_all( ). (Example B-5 details how preg_match_all( ) works, including the meaning of the @ characters at the start and end of the pattern.)
Example B-1. Greedy and nongreedy matching $meats = "<b>Chicken</b>, <b>Beef</b>, <b>Duck</b>"; // With a non-greedy quantifier, each meat is matched separately preg_match_all('@<b>.*?</b>@',$meats,$matches); foreach ($matches[0] as $meat) { print "Meat A: $meat\n"; } // With a greedy quantifier, the whole string is matched just once preg_match_all('@<b>.*</b>@',$meats,$matches);
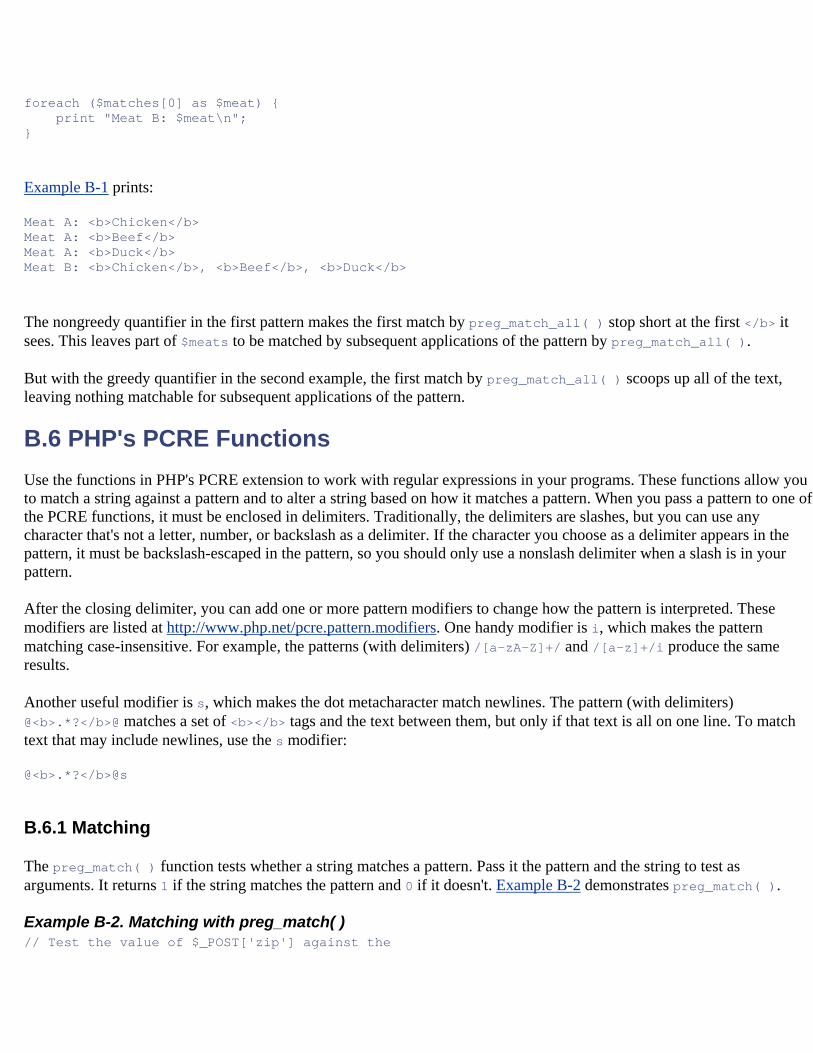
foreach ($matches[0] as $meat) { print "Meat B: $meat\n"; }
Example B-1 prints:
Meat A: <b>Chicken</b> Meat A: <b>Beef</b> Meat A: <b>Duck</b> Meat B: <b>Chicken</b>, <b>Beef</b>, <b>Duck</b>
The nongreedy quantifier in the first pattern makes the first match by preg_match_all( ) stop short at the first </b> it sees. This leaves part of $meats to be matched by subsequent applications of the pattern by preg_match_all( ).
But with the greedy quantifier in the second example, the first match by preg_match_all( ) scoops up all of the text, leaving nothing matchable for subsequent applications of the pattern.
B.6 PHP's PCRE Functions Use the functions in PHP's PCRE extension to work with regular expressions in your programs. These functions allow you to match a string against a pattern and to alter a string based on how it matches a pattern. When you pass a pattern to one of the PCRE functions, it must be enclosed in delimiters. Traditionally, the delimiters are slashes, but you can use any character that's not a letter, number, or backslash as a delimiter. If the character you choose as a delimiter appears in the pattern, it must be backslash-escaped in the pattern, so you should only use a nonslash delimiter when a slash is in your pattern.
After the closing delimiter, you can add one or more pattern modifiers to change how the pattern is interpreted. These modifiers are listed at http://www.php.net/pcre.pattern.modifiers. One handy modifier is i, which makes the pattern matching case-insensitive. For example, the patterns (with delimiters) /[a-zA-Z]+/ and /[a-z]+/i produce the same results.
Another useful modifier is s, which makes the dot metacharacter match newlines. The pattern (with delimiters) @<b>.*?</b>@ matches a set of <b></b> tags and the text between them, but only if that text is all on one line. To match text that may include newlines, use the s modifier:
@<b>.*?</b>@s
B.6.1 Matching
The preg_match( ) function tests whether a string matches a pattern. Pass it the pattern and the string to test as arguments. It returns 1 if the string matches the pattern and 0 if it doesn't. Example B-2 demonstrates preg_match( ).
Example B-2. Matching with preg_match( ) // Test the value of $_POST['zip'] against the
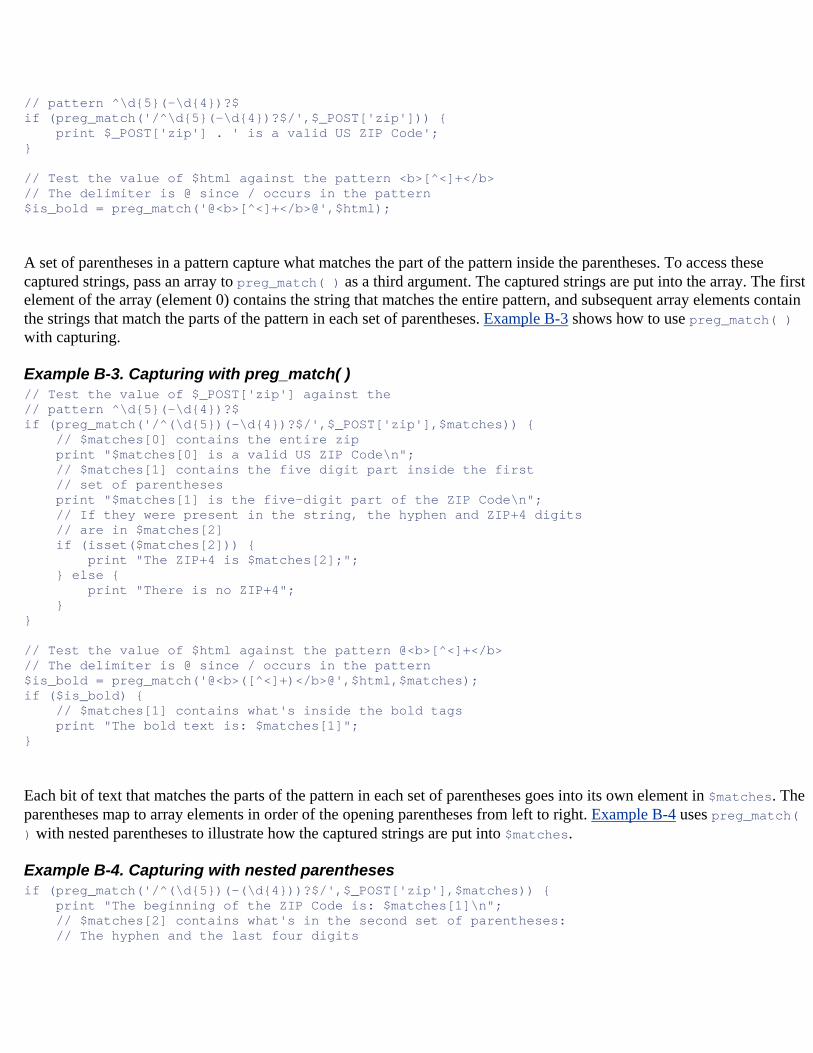
// pattern ^\d{5}(-\d{4})?$ if (preg_match('/^\d{5}(-\d{4})?$/',$_POST['zip'])) { print $_POST['zip'] . ' is a valid US ZIP Code'; } // Test the value of $html against the pattern <b>[^<]+</b> // The delimiter is @ since / occurs in the pattern $is_bold = preg_match('@<b>[^<]+</b>@',$html);
A set of parentheses in a pattern capture what matches the part of the pattern inside the parentheses. To access these captured strings, pass an array to preg_match( ) as a third argument. The captured strings are put into the array. The first element of the array (element 0) contains the string that matches the entire pattern, and subsequent array elements contain the strings that match the parts of the pattern in each set of parentheses. Example B-3 shows how to use preg_match( ) with capturing.
Example B-3. Capturing with preg_match( ) // Test the value of $_POST['zip'] against the // pattern ^\d{5}(-\d{4})?$ if (preg_match('/^(\d{5})(-\d{4})?$/',$_POST['zip'],$matches)) { // $matches[0] contains the entire zip print "$matches[0] is a valid US ZIP Code\n"; // $matches[1] contains the five digit part inside the first // set of parentheses print "$matches[1] is the five-digit part of the ZIP Code\n"; // If they were present in the string, the hyphen and ZIP+4 digits // are in $matches[2] if (isset($matches[2])) { print "The ZIP+4 is $matches[2];"; } else { print "There is no ZIP+4"; } } // Test the value of $html against the pattern @<b>[^<]+</b> // The delimiter is @ since / occurs in the pattern $is_bold = preg_match('@<b>([^<]+)</b>@',$html,$matches); if ($is_bold) { // $matches[1] contains what's inside the bold tags print "The bold text is: $matches[1]"; }
Each bit of text that matches the parts of the pattern in each set of parentheses goes into its own element in $matches. The parentheses map to array elements in order of the opening parentheses from left to right. Example B-4 uses preg_match( ) with nested parentheses to illustrate how the captured strings are put into $matches.
Example B-4. Capturing with nested parentheses if (preg_match('/^(\d{5})(-(\d{4}))?$/',$_POST['zip'],$matches)) { print "The beginning of the ZIP Code is: $matches[1]\n"; // $matches[2] contains what's in the second set of parentheses: // The hyphen and the last four digits
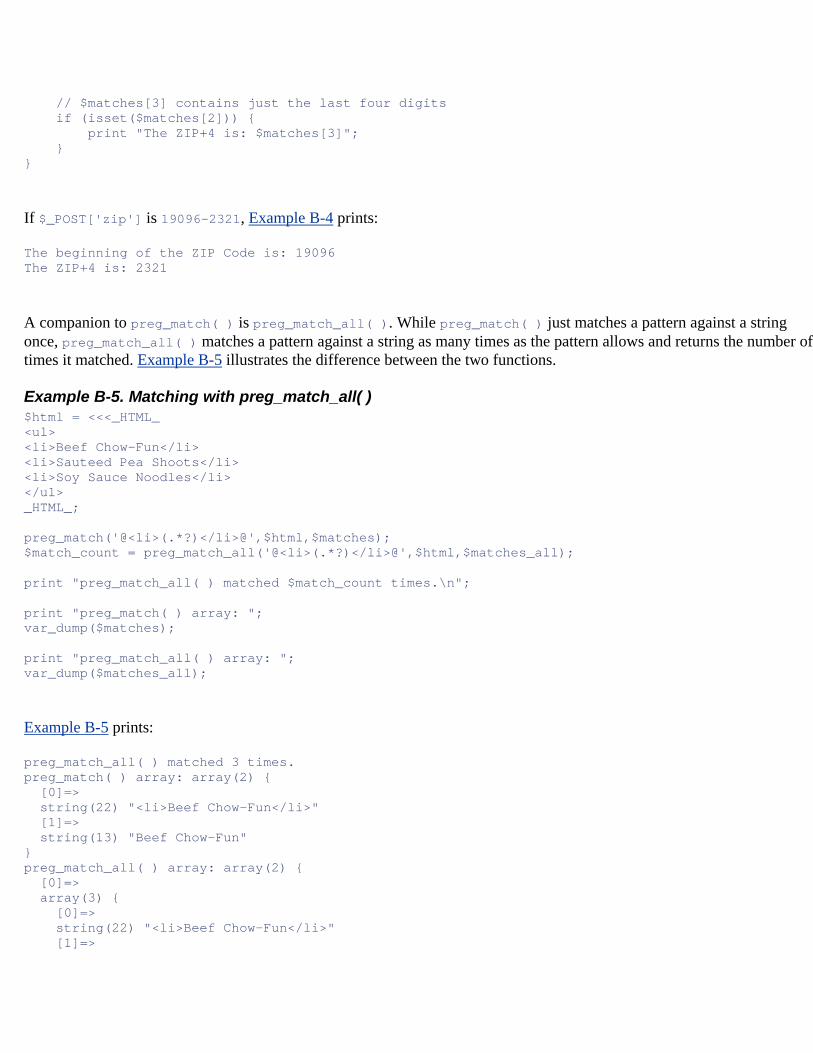
// $matches[3] contains just the last four digits if (isset($matches[2])) { print "The ZIP+4 is: $matches[3]"; } }
If $_POST['zip'] is 19096-2321, Example B-4 prints:
The beginning of the ZIP Code is: 19096 The ZIP+4 is: 2321
A companion to preg_match( ) is preg_match_all( ). While preg_match( ) just matches a pattern against a string once, preg_match_all( ) matches a pattern against a string as many times as the pattern allows and returns the number of times it matched. Example B-5 illustrates the difference between the two functions.
Example B-5. Matching with preg_match_all( ) $html = <<<_HTML_ <ul> <li>Beef Chow-Fun</li> <li>Sauteed Pea Shoots</li> <li>Soy Sauce Noodles</li> </ul> _HTML_; preg_match('@<li>(.*?)</li>@',$html,$matches); $match_count = preg_match_all('@<li>(.*?)</li>@',$html,$matches_all); print "preg_match_all( ) matched $match_count times.\n"; print "preg_match( ) array: "; var_dump($matches); print "preg_match_all( ) array: "; var_dump($matches_all);
Example B-5 prints:
preg_match_all( ) matched 3 times. preg_match( ) array: array(2) { [0]=> string(22) "<li>Beef Chow-Fun</li>" [1]=> string(13) "Beef Chow-Fun" } preg_match_all( ) array: array(2) { [0]=> array(3) { [0]=> string(22) "<li>Beef Chow-Fun</li>" [1]=>
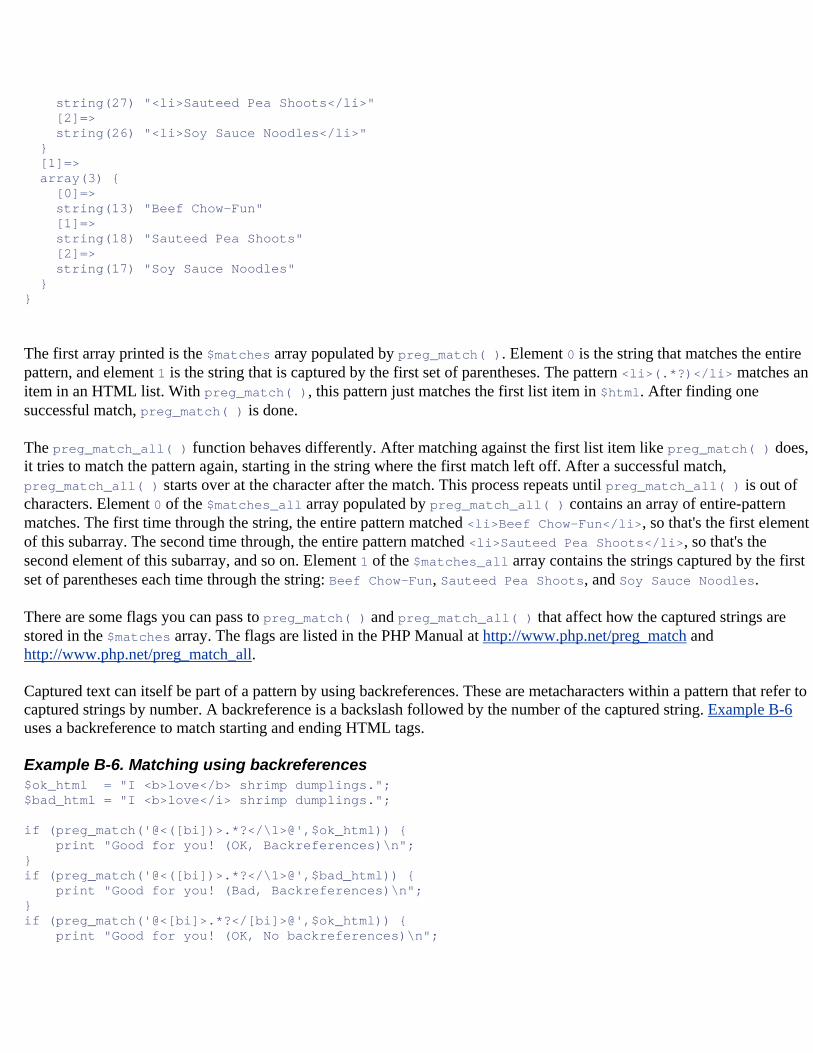
string(27) "<li>Sauteed Pea Shoots</li>" [2]=> string(26) "<li>Soy Sauce Noodles</li>" } [1]=> array(3) { [0]=> string(13) "Beef Chow-Fun" [1]=> string(18) "Sauteed Pea Shoots" [2]=> string(17) "Soy Sauce Noodles" } }
The first array printed is the $matches array populated by preg_match( ). Element 0 is the string that matches the entire pattern, and element 1 is the string that is captured by the first set of parentheses. The pattern <li>(.*?)</li> matches an item in an HTML list. With preg_match( ), this pattern just matches the first list item in $html. After finding one successful match, preg_match( ) is done.
The preg_match_all( ) function behaves differently. After matching against the first list item like preg_match( ) does, it tries to match the pattern again, starting in the string where the first match left off. After a successful match, preg_match_all( ) starts over at the character after the match. This process repeats until preg_match_all( ) is out of characters. Element 0 of the $matches_all array populated by preg_match_all( ) contains an array of entire-pattern matches. The first time through the string, the entire pattern matched <li>Beef Chow-Fun</li>, so that's the first element of this subarray. The second time through, the entire pattern matched <li>Sauteed Pea Shoots</li>, so that's the second element of this subarray, and so on. Element 1 of the $matches_all array contains the strings captured by the first set of parentheses each time through the string: Beef Chow-Fun, Sauteed Pea Shoots, and Soy Sauce Noodles.
There are some flags you can pass to preg_match( ) and preg_match_all( ) that affect how the captured strings are stored in the $matches array. The flags are listed in the PHP Manual at http://www.php.net/preg_match and http://www.php.net/preg_match_all.
Captured text can itself be part of a pattern by using backreferences. These are metacharacters within a pattern that refer to captured strings by number. A backreference is a backslash followed by the number of the captured string. Example B-6 uses a backreference to match starting and ending HTML tags.
Example B-6. Matching using backreferences $ok_html = "I <b>love</b> shrimp dumplings."; $bad_html = "I <b>love</i> shrimp dumplings."; if (preg_match('@<([bi])>.*?</\1>@',$ok_html)) { print "Good for you! (OK, Backreferences)\n"; } if (preg_match('@<([bi])>.*?</\1>@',$bad_html)) { print "Good for you! (Bad, Backreferences)\n"; } if (preg_match('@<[bi]>.*?</[bi]>@',$ok_html)) { print "Good for you! (OK, No backreferences)\n";
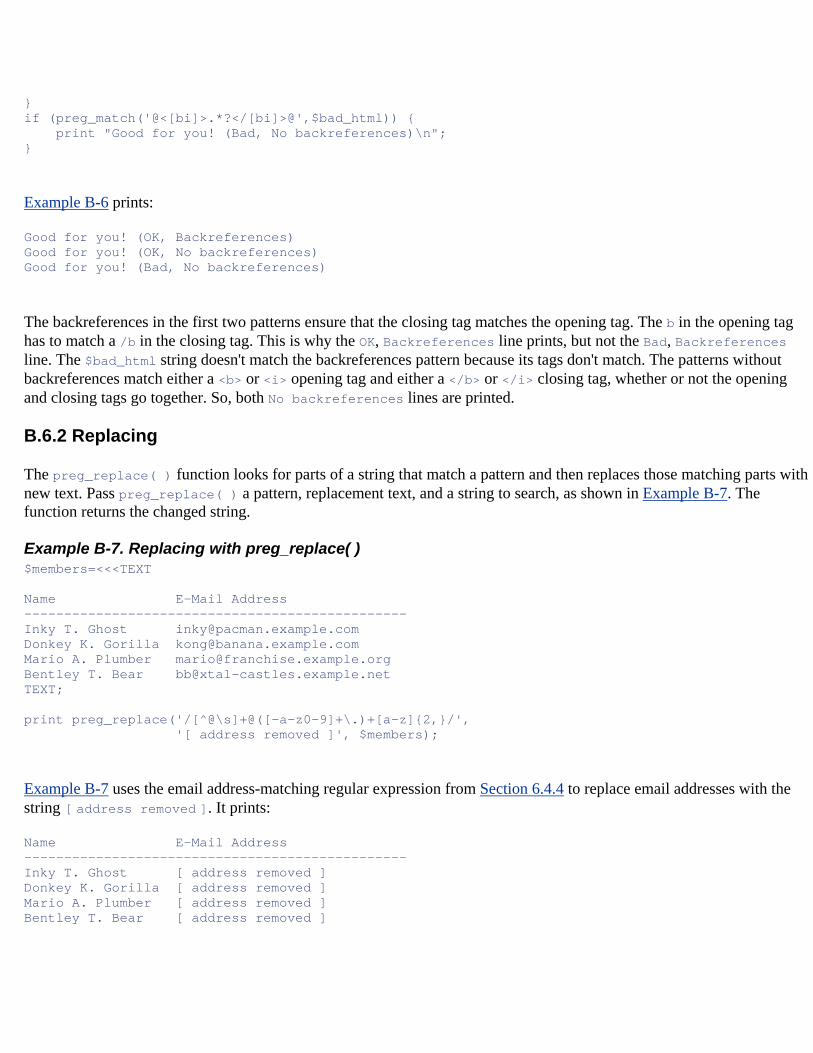
} if (preg_match('@<[bi]>.*?</[bi]>@',$bad_html)) { print "Good for you! (Bad, No backreferences)\n"; }
Example B-6 prints:
Good for you! (OK, Backreferences) Good for you! (OK, No backreferences) Good for you! (Bad, No backreferences)
The backreferences in the first two patterns ensure that the closing tag matches the opening tag. The b in the opening tag has to match a /b in the closing tag. This is why the OK, Backreferences line prints, but not the Bad, Backreferences line. The $bad_html string doesn't match the backreferences pattern because its tags don't match. The patterns without backreferences match either a <b> or <i> opening tag and either a </b> or </i> closing tag, whether or not the opening and closing tags go together. So, both No backreferences lines are printed.
B.6.2 Replacing
The preg_replace( ) function looks for parts of a string that match a pattern and then replaces those matching parts with new text. Pass preg_replace( ) a pattern, replacement text, and a string to search, as shown in Example B-7. The function returns the changed string.
Example B-7. Replacing with preg_replace( ) $members=<<<TEXT Name E-Mail Address ------------------------------------------------ Inky T. Ghost [email protected] Donkey K. Gorilla [email protected] Mario A. Plumber [email protected] Bentley T. Bear [email protected] TEXT; print preg_replace('/[^@\s]+@([-a-z0-9]+\.)+[a-z]{2,}/', '[ address removed ]', $members);
Example B-7 uses the email address-matching regular expression from Section 6.4.4 to replace email addresses with the string [ address removed ]. It prints:
Name E-Mail Address ------------------------------------------------ Inky T. Ghost [ address removed ] Donkey K. Gorilla [ address removed ] Mario A. Plumber [ address removed ] Bentley T. Bear [ address removed ]
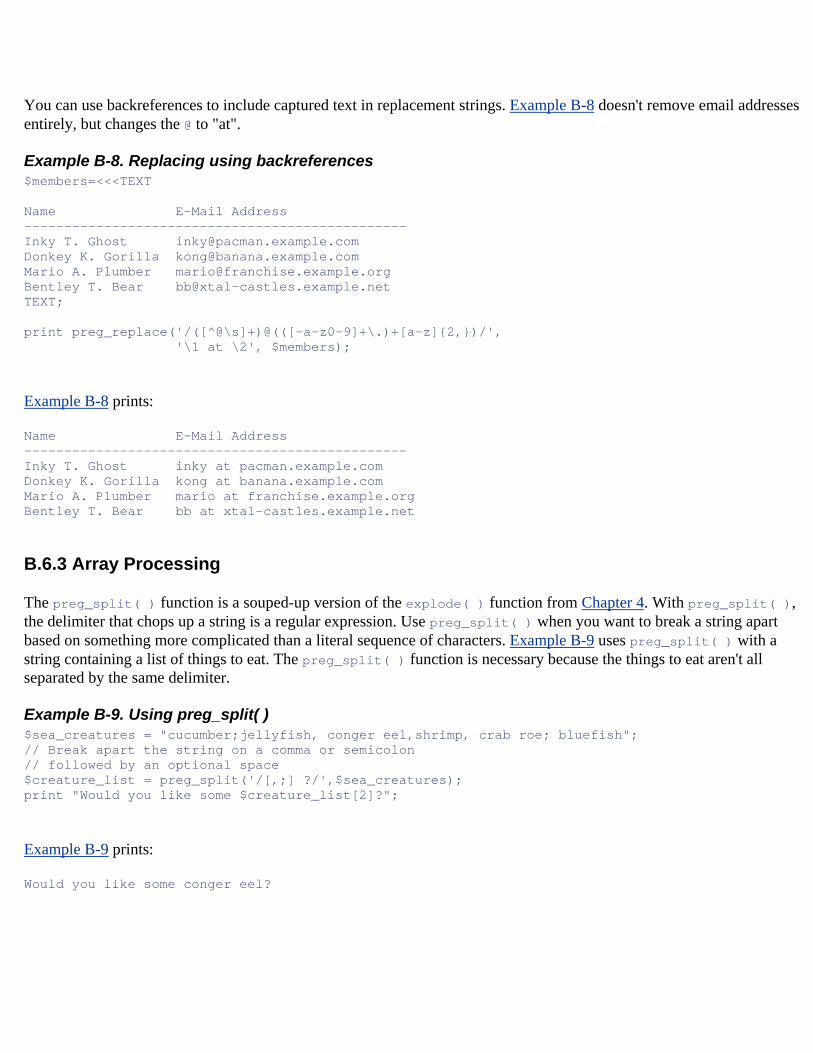
You can use backreferences to include captured text in replacement strings. Example B-8 doesn't remove email addresses entirely, but changes the @ to "at".
Example B-8. Replacing using backreferences $members=<<<TEXT Name E-Mail Address ------------------------------------------------ Inky T. Ghost [email protected] Donkey K. Gorilla [email protected] Mario A. Plumber [email protected] Bentley T. Bear [email protected] TEXT; print preg_replace('/([^@\s]+)@(([-a-z0-9]+\.)+[a-z]{2,})/', '\1 at \2', $members);
Example B-8 prints:
Name E-Mail Address ------------------------------------------------ Inky T. Ghost inky at pacman.example.com Donkey K. Gorilla kong at banana.example.com Mario A. Plumber mario at franchise.example.org Bentley T. Bear bb at xtal-castles.example.net
B.6.3 Array Processing
The preg_split( ) function is a souped-up version of the explode( ) function from Chapter 4. With preg_split( ), the delimiter that chops up a string is a regular expression. Use preg_split( ) when you want to break a string apart based on something more complicated than a literal sequence of characters. Example B-9 uses preg_split( ) with a string containing a list of things to eat. The preg_split( ) function is necessary because the things to eat aren't all separated by the same delimiter.
Example B-9. Using preg_split( ) $sea_creatures = "cucumber;jellyfish, conger eel,shrimp, crab roe; bluefish"; // Break apart the string on a comma or semicolon // followed by an optional space $creature_list = preg_split('/[,;] ?/',$sea_creatures); print "Would you like some $creature_list[2]?";
Example B-9 prints:
Would you like some conger eel?
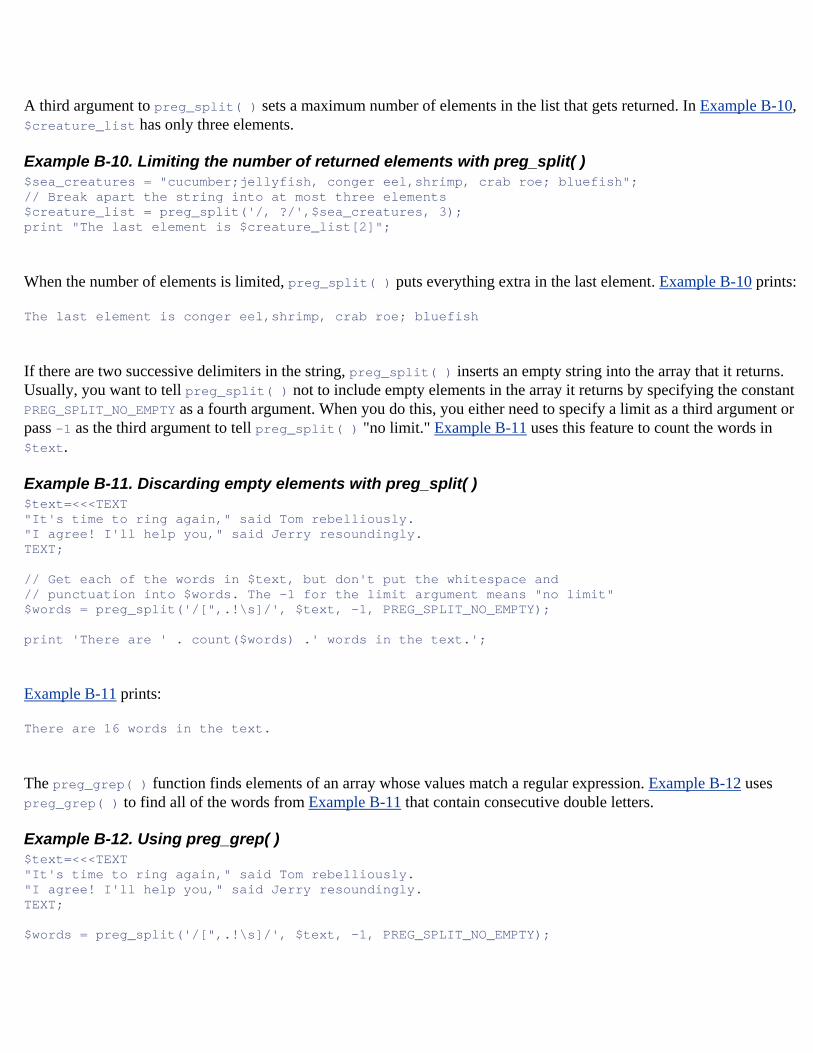
A third argument to preg_split( ) sets a maximum number of elements in the list that gets returned. In Example B-10, $creature_list has only three elements.
Example B-10. Limiting the number of returned elements with preg_split( ) $sea_creatures = "cucumber;jellyfish, conger eel,shrimp, crab roe; bluefish"; // Break apart the string into at most three elements $creature_list = preg_split('/, ?/',$sea_creatures, 3); print "The last element is $creature_list[2]";
When the number of elements is limited, preg_split( ) puts everything extra in the last element. Example B-10 prints:
The last element is conger eel,shrimp, crab roe; bluefish
If there are two successive delimiters in the string, preg_split( ) inserts an empty string into the array that it returns. Usually, you want to tell preg_split( ) not to include empty elements in the array it returns by specifying the constant PREG_SPLIT_NO_EMPTY as a fourth argument. When you do this, you either need to specify a limit as a third argument or pass -1 as the third argument to tell preg_split( ) "no limit." Example B-11 uses this feature to count the words in $text.
Example B-11. Discarding empty elements with preg_split( ) $text=<<<TEXT "It's time to ring again," said Tom rebelliously. "I agree! I'll help you," said Jerry resoundingly. TEXT; // Get each of the words in $text, but don't put the whitespace and // punctuation into $words. The -1 for the limit argument means "no limit" $words = preg_split('/[",.!\s]/', $text, -1, PREG_SPLIT_NO_EMPTY); print 'There are ' . count($words) .' words in the text.';
Example B-11 prints:
There are 16 words in the text.
The preg_grep( ) function finds elements of an array whose values match a regular expression. Example B-12 uses preg_grep( ) to find all of the words from Example B-11 that contain consecutive double letters.
Example B-12. Using preg_grep( ) $text=<<<TEXT "It's time to ring again," said Tom rebelliously. "I agree! I'll help you," said Jerry resoundingly. TEXT; $words = preg_split('/[",.!\s]/', $text, -1, PREG_SPLIT_NO_EMPTY);
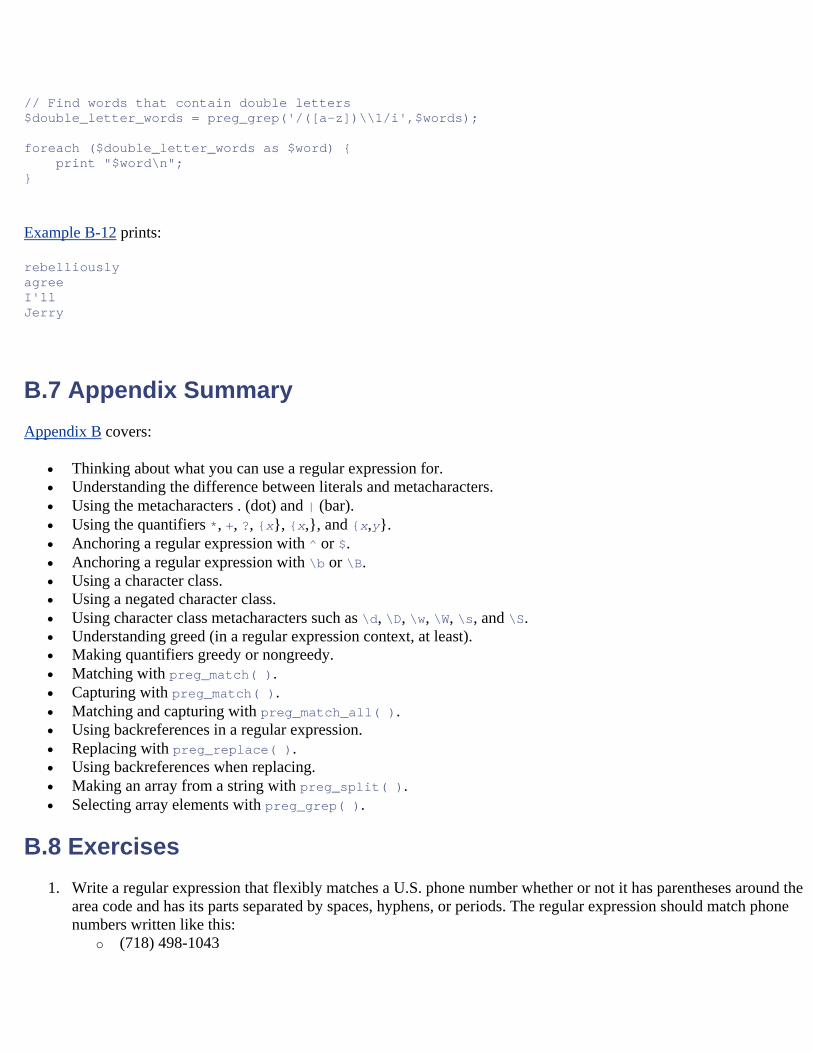
// Find words that contain double letters $double_letter_words = preg_grep('/([a-z])\\1/i',$words); foreach ($double_letter_words as $word) { print "$word\n"; }
Example B-12 prints:
rebelliously agree I'll Jerry
B.7 Appendix Summary Appendix B covers:
• Thinking about what you can use a regular expression for. • Understanding the difference between literals and metacharacters. • Using the metacharacters . (dot) and | (bar). • Using the quantifiers *, +, ?, {x}, {x,}, and {x,y}. • Anchoring a regular expression with ^ or $. • Anchoring a regular expression with \b or \B. • Using a character class. • Using a negated character class. • Using character class metacharacters such as \d, \D, \w, \W, \s, and \S. • Understanding greed (in a regular expression context, at least). • Making quantifiers greedy or nongreedy. • Matching with preg_match( ). • Capturing with preg_match( ). • Matching and capturing with preg_match_all( ). • Using backreferences in a regular expression. • Replacing with preg_replace( ). • Using backreferences when replacing. • Making an array from a string with preg_split( ). • Selecting array elements with preg_grep( ).
B.8 Exercises 1. Write a regular expression that flexibly matches a U.S. phone number whether or not it has parentheses around the
area code and has its parts separated by spaces, hyphens, or periods. The regular expression should match phone numbers written like this:
o (718) 498-1043
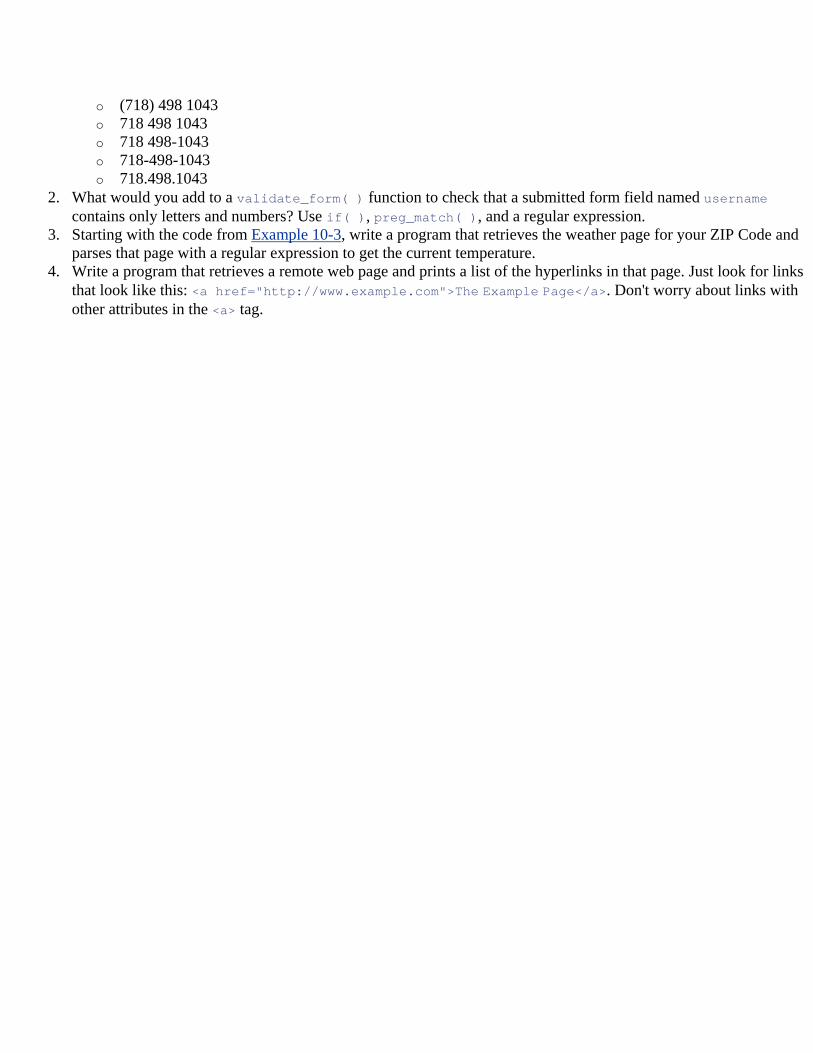
o (718) 498 1043 o 718 498 1043 o 718 498-1043 o 718-498-1043 o 718.498.1043
2. What would you add to a validate_form( ) function to check that a submitted form field named username contains only letters and numbers? Use if( ), preg_match( ), and a regular expression.
3. Starting with the code from Example 10-3, write a program that retrieves the weather page for your ZIP Code and parses that page with a regular expression to get the current temperature.
4. Write a program that retrieves a remote web page and prints a list of the hyperlinks in that page. Just look for links that look like this: <a href="http://www.example.com">The Example Page</a>. Don't worry about links with other attributes in the <a> tag.
Appendix C. Answers To Exercises Section C.1. Chapter 2
Section C.2. Chapter 3
Section C.3. Chapter 4
Section C.4. Chapter 5
Section C.5. Chapter 6
Section C.6. Chapter 7
Section C.7. Chapter 8
Section C.8. Chapter 9
Section C.9. Chapter 10
Section C.10. Chapter 11
Section C.11. Chapter 12
Section C.12. Appendix B
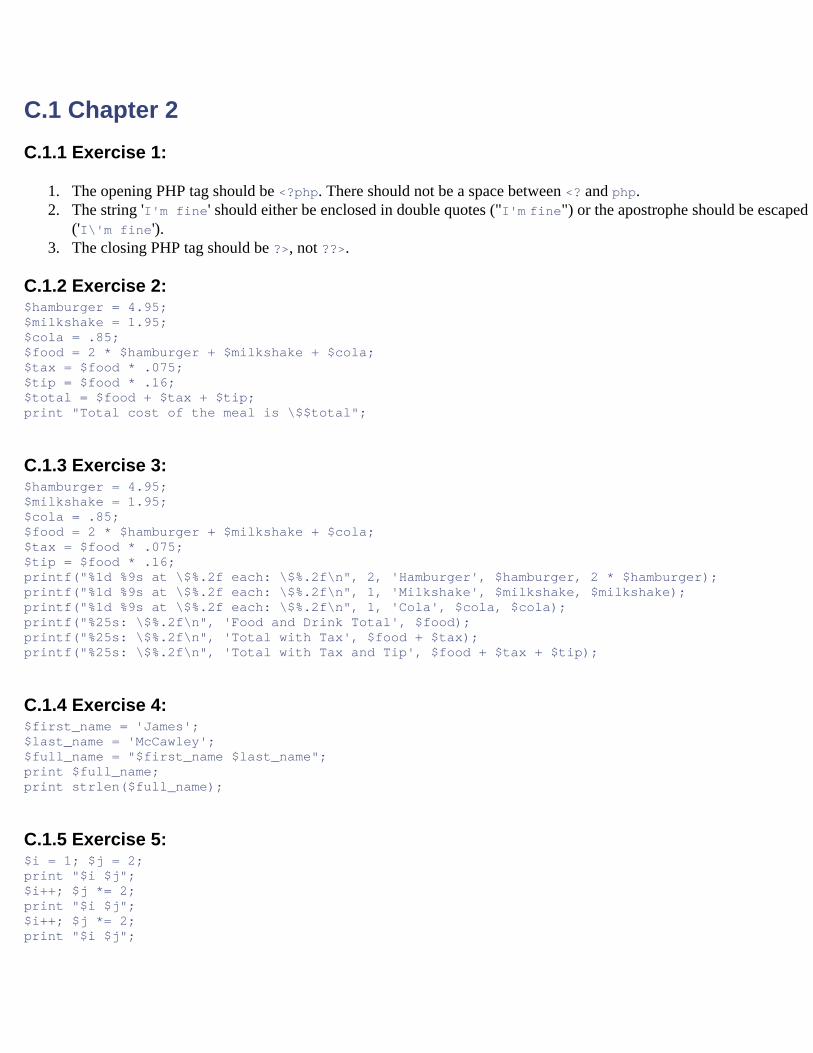
C.1 Chapter 2 C.1.1 Exercise 1:
1. The opening PHP tag should be <?php. There should not be a space between <? and php. 2. The string 'I'm fine' should either be enclosed in double quotes ("I'm fine") or the apostrophe should be escaped
('I\'m fine'). 3. The closing PHP tag should be ?>, not ??>.
C.1.2 Exercise 2: $hamburger = 4.95; $milkshake = 1.95; $cola = .85; $food = 2 * $hamburger + $milkshake + $cola; $tax = $food * .075; $tip = $food * .16; $total = $food + $tax + $tip; print "Total cost of the meal is \$$total";
C.1.3 Exercise 3: $hamburger = 4.95; $milkshake = 1.95; $cola = .85; $food = 2 * $hamburger + $milkshake + $cola; $tax = $food * .075; $tip = $food * .16; printf("%1d %9s at \$%.2f each: \$%.2f\n", 2, 'Hamburger', $hamburger, 2 * $hamburger); printf("%1d %9s at \$%.2f each: \$%.2f\n", 1, 'Milkshake', $milkshake, $milkshake); printf("%1d %9s at \$%.2f each: \$%.2f\n", 1, 'Cola', $cola, $cola); printf("%25s: \$%.2f\n", 'Food and Drink Total', $food); printf("%25s: \$%.2f\n", 'Total with Tax', $food + $tax); printf("%25s: \$%.2f\n", 'Total with Tax and Tip', $food + $tax + $tip);
C.1.4 Exercise 4: $first_name = 'James'; $last_name = 'McCawley'; $full_name = "$first_name $last_name"; print $full_name; print strlen($full_name);
C.1.5 Exercise 5: $i = 1; $j = 2; print "$i $j"; $i++; $j *= 2; print "$i $j"; $i++; $j *= 2; print "$i $j";

$i++; $j *= 2; print "$i $j"; $i++; $j *= 2; print "$i $j";
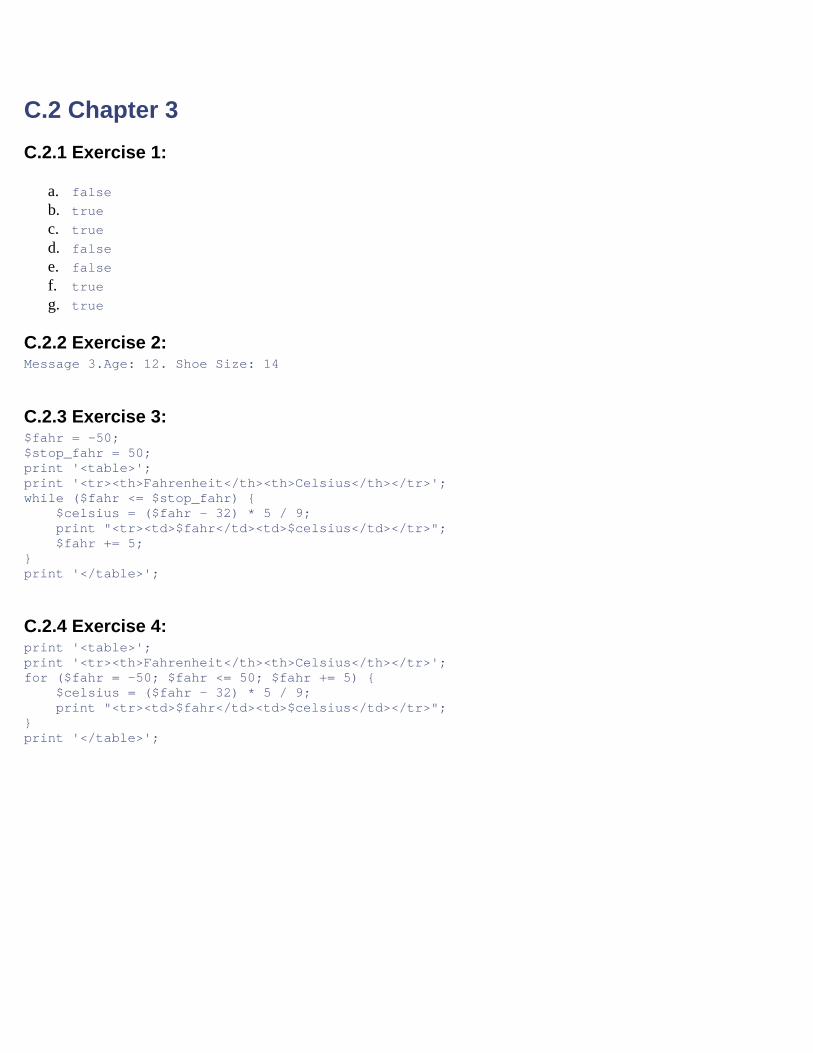
C.2 Chapter 3 C.2.1 Exercise 1:
a. false b. true c. true d. false e. false f. true g. true
C.2.2 Exercise 2: Message 3.Age: 12. Shoe Size: 14
C.2.3 Exercise 3: $fahr = -50; $stop_fahr = 50; print '<table>'; print '<tr><th>Fahrenheit</th><th>Celsius</th></tr>'; while ($fahr <= $stop_fahr) { $celsius = ($fahr - 32) * 5 / 9; print "<tr><td>$fahr</td><td>$celsius</td></tr>"; $fahr += 5; } print '</table>';
C.2.4 Exercise 4: print '<table>'; print '<tr><th>Fahrenheit</th><th>Celsius</th></tr>'; for ($fahr = -50; $fahr <= 50; $fahr += 5) { $celsius = ($fahr - 32) * 5 / 9; print "<tr><td>$fahr</td><td>$celsius</td></tr>"; } print '</table>';
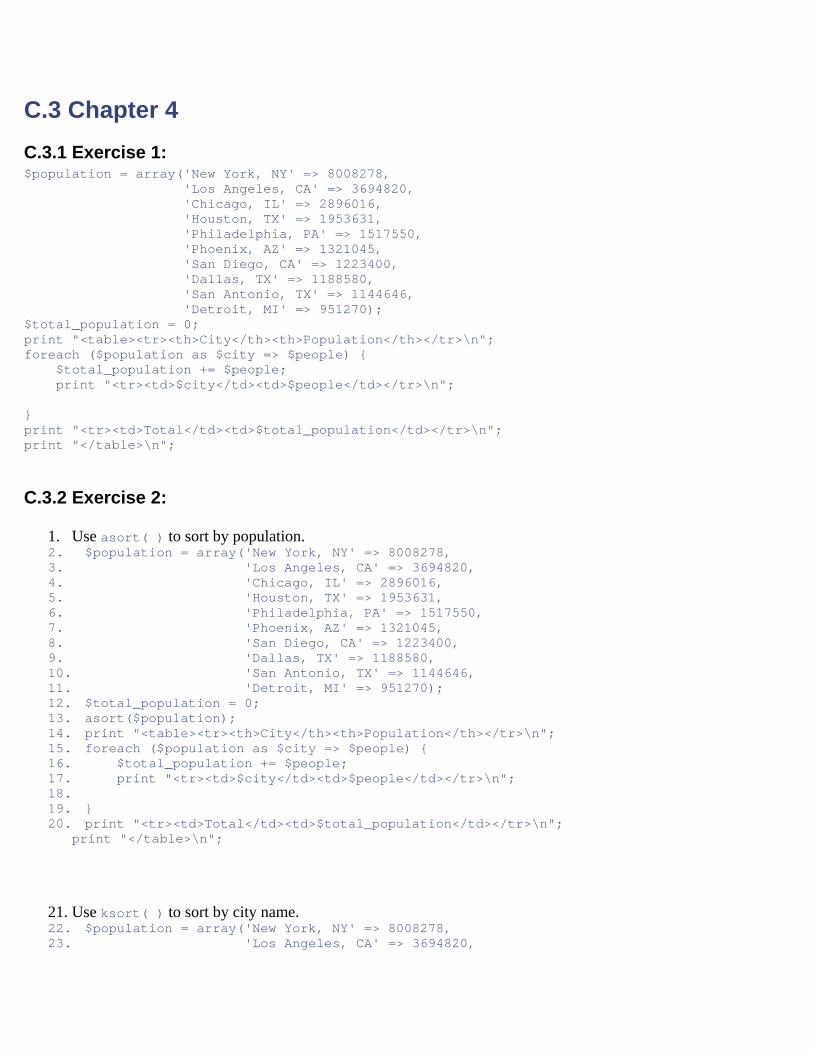
C.3 Chapter 4 C.3.1 Exercise 1: $population = array('New York, NY' => 8008278, 'Los Angeles, CA' => 3694820, 'Chicago, IL' => 2896016, 'Houston, TX' => 1953631, 'Philadelphia, PA' => 1517550, 'Phoenix, AZ' => 1321045, 'San Diego, CA' => 1223400, 'Dallas, TX' => 1188580, 'San Antonio, TX' => 1144646, 'Detroit, MI' => 951270); $total_population = 0; print "<table><tr><th>City</th><th>Population</th></tr>\n"; foreach ($population as $city => $people) { $total_population += $people; print "<tr><td>$city</td><td>$people</td></tr>\n"; } print "<tr><td>Total</td><td>$total_population</td></tr>\n"; print "</table>\n";
C.3.2 Exercise 2:
1. Use asort( ) to sort by population. 2. $population = array('New York, NY' => 8008278, 3. 'Los Angeles, CA' => 3694820, 4. 'Chicago, IL' => 2896016, 5. 'Houston, TX' => 1953631, 6. 'Philadelphia, PA' => 1517550, 7. 'Phoenix, AZ' => 1321045, 8. 'San Diego, CA' => 1223400, 9. 'Dallas, TX' => 1188580, 10. 'San Antonio, TX' => 1144646, 11. 'Detroit, MI' => 951270); 12. $total_population = 0; 13. asort($population); 14. print "<table><tr><th>City</th><th>Population</th></tr>\n"; 15. foreach ($population as $city => $people) { 16. $total_population += $people; 17. print "<tr><td>$city</td><td>$people</td></tr>\n"; 18. 19. } 20. print "<tr><td>Total</td><td>$total_population</td></tr>\n";
print "</table>\n";
21. Use ksort( ) to sort by city name. 22. $population = array('New York, NY' => 8008278, 23. 'Los Angeles, CA' => 3694820,
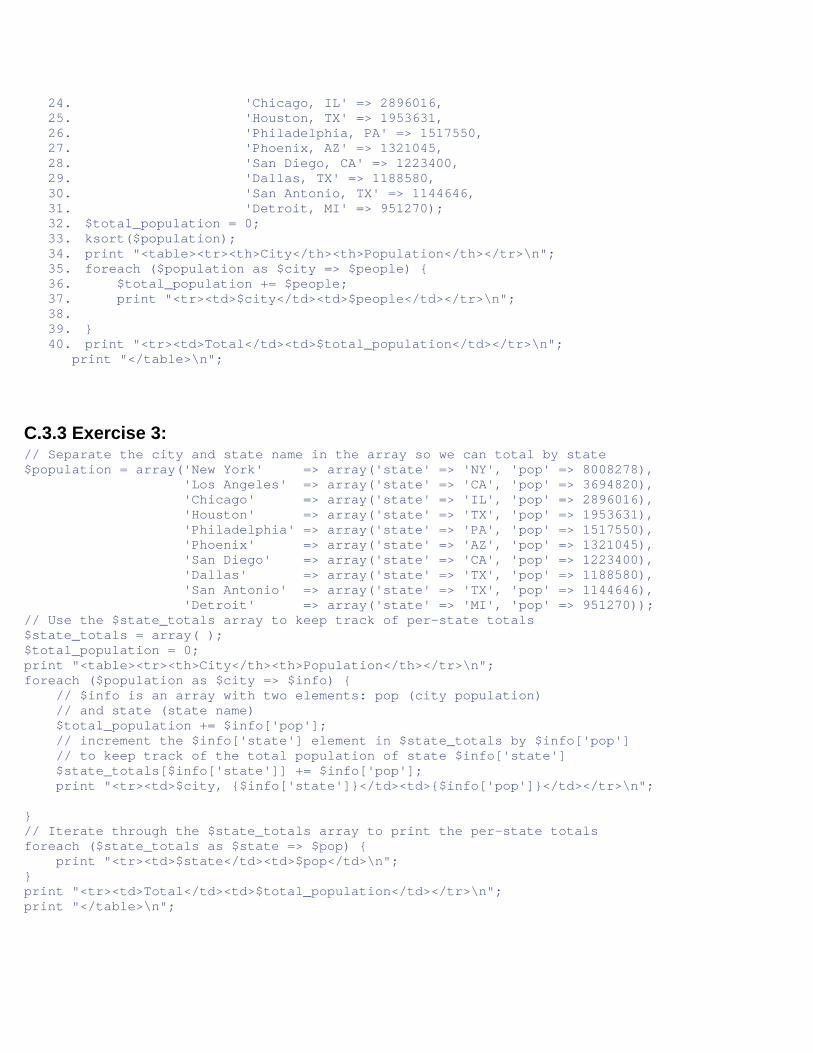
24. 'Chicago, IL' => 2896016, 25. 'Houston, TX' => 1953631, 26. 'Philadelphia, PA' => 1517550, 27. 'Phoenix, AZ' => 1321045, 28. 'San Diego, CA' => 1223400, 29. 'Dallas, TX' => 1188580, 30. 'San Antonio, TX' => 1144646, 31. 'Detroit, MI' => 951270); 32. $total_population = 0; 33. ksort($population); 34. print "<table><tr><th>City</th><th>Population</th></tr>\n"; 35. foreach ($population as $city => $people) { 36. $total_population += $people; 37. print "<tr><td>$city</td><td>$people</td></tr>\n"; 38. 39. } 40. print "<tr><td>Total</td><td>$total_population</td></tr>\n";
print "</table>\n";
C.3.3 Exercise 3: // Separate the city and state name in the array so we can total by state $population = array('New York' => array('state' => 'NY', 'pop' => 8008278), 'Los Angeles' => array('state' => 'CA', 'pop' => 3694820), 'Chicago' => array('state' => 'IL', 'pop' => 2896016), 'Houston' => array('state' => 'TX', 'pop' => 1953631), 'Philadelphia' => array('state' => 'PA', 'pop' => 1517550), 'Phoenix' => array('state' => 'AZ', 'pop' => 1321045), 'San Diego' => array('state' => 'CA', 'pop' => 1223400), 'Dallas' => array('state' => 'TX', 'pop' => 1188580), 'San Antonio' => array('state' => 'TX', 'pop' => 1144646), 'Detroit' => array('state' => 'MI', 'pop' => 951270)); // Use the $state_totals array to keep track of per-state totals $state_totals = array( ); $total_population = 0; print "<table><tr><th>City</th><th>Population</th></tr>\n"; foreach ($population as $city => $info) { // $info is an array with two elements: pop (city population) // and state (state name) $total_population += $info['pop']; // increment the $info['state'] element in $state_totals by $info['pop'] // to keep track of the total population of state $info['state'] $state_totals[$info['state']] += $info['pop']; print "<tr><td>$city, {$info['state']}</td><td>{$info['pop']}</td></tr>\n"; } // Iterate through the $state_totals array to print the per-state totals foreach ($state_totals as $state => $pop) { print "<tr><td>$state</td><td>$pop</td>\n"; } print "<tr><td>Total</td><td>$total_population</td></tr>\n"; print "</table>\n";
C.3.4 Exercise 4:
a. An associative array whose keys are students' names and whose values are associative arrays of grade and ID number.
b. $students = array('James D. McCawley' => array('grade' => 'A+', c. 'id' => 271231), d. 'Buwei Yang Chao' => array('grade' => 'A',
'id' => 818211));
e. An associative array whose key is the item name and whose value is the number in stock. f. $stock = array('Woks' => 5, 'Steamers' => 3, 'Heavy Cleavers' => 2,
'Light Cleavers' => 6);
g. An associative array whose key is the day and whose value is an associative array describing the meal. This associative array has a key/value pair for cost and a key/value pair for each part of the meal (entree, side dish, drink).
h. $lunches = array('Monday' => array('cost' => 1.50, i. 'entree' => 'Beef Shiu-Mai', j. 'side' => 'Salty Fried Cake', k. 'drink' => 'Black Tea'), l. 'Tuesday' => array('cost' => 1.50, m. 'entree' => 'Clear-steamed Fish', n. 'side' => 'Turnip Cake', o. 'drink' => 'Black Tea'), p. 'Wednesday' => array('cost' => 2.00, q. 'entree' => 'Braised Sea Cucumber', r. 'side' => 'Turnip Cake', s. 'drink' => 'Green Tea'), t. 'Thursday' => array('cost' => 1.35, u. 'entree' => 'Stir-fried Two Winters', v. 'side' => 'Egg Puff', w. 'drink' => 'Black Tea'), x. 'Friday' => array('cost' => 2.15, y. 'entree' => 'Stewed Pork with Taro', z. 'side' => 'Duck Feet',
'drink' => 'Jasmine Tea'));
aa. A numeric array whose values are the names of family members.
$family = array('Bart','Lisa','Homer','Marge','Maggie');
bb. An associative array whose keys are the names of family members and whose values are associative arrays of age and relationship.
cc. $family = array('Bart' => array('relation' => 'brother', dd. 'age' => 10), ee. 'Lisa' => array('relation' => 'sister', ff. 'age' => 7), gg. 'Homer' => array('relation' => 'father', hh. 'age' => 36), ii. 'Marge' => array('relation' => 'mother', jj. 'age' => 34), kk. 'Maggie' => array('relation' => 'self',
'age' => 1));
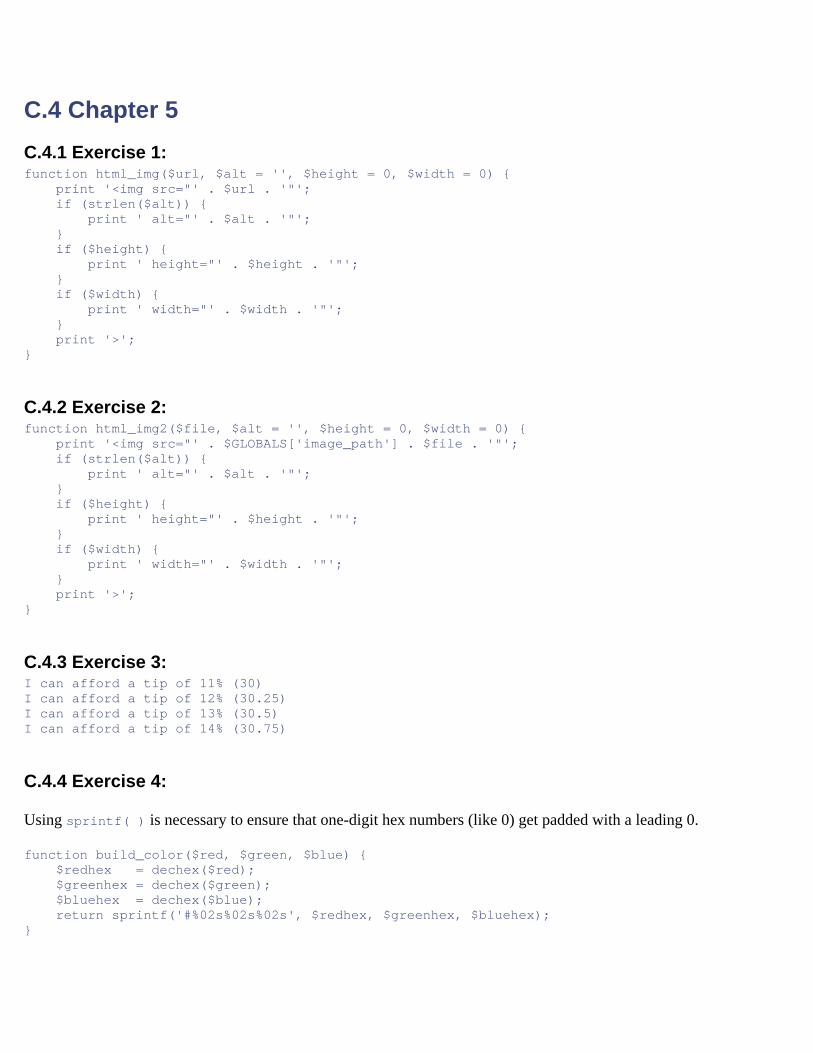
C.4 Chapter 5 C.4.1 Exercise 1: function html_img($url, $alt = '', $height = 0, $width = 0) { print '<img src="' . $url . '"'; if (strlen($alt)) { print ' alt="' . $alt . '"'; } if ($height) { print ' height="' . $height . '"'; } if ($width) { print ' width="' . $width . '"'; } print '>'; }
C.4.2 Exercise 2: function html_img2($file, $alt = '', $height = 0, $width = 0) { print '<img src="' . $GLOBALS['image_path'] . $file . '"'; if (strlen($alt)) { print ' alt="' . $alt . '"'; } if ($height) { print ' height="' . $height . '"'; } if ($width) { print ' width="' . $width . '"'; } print '>'; }
C.4.3 Exercise 3: I can afford a tip of 11% (30) I can afford a tip of 12% (30.25) I can afford a tip of 13% (30.5) I can afford a tip of 14% (30.75)
C.4.4 Exercise 4:
Using sprintf( ) is necessary to ensure that one-digit hex numbers (like 0) get padded with a leading 0.
function build_color($red, $green, $blue) { $redhex = dechex($red); $greenhex = dechex($green); $bluehex = dechex($blue); return sprintf('#%02s%02s%02s', $redhex, $greenhex, $bluehex); }
You can also rely on sprintf( )'s built-in hex-to-decimal conversion with the %x format character:
function build_color($red, $green, $blue) { return sprintf('#%02x%02x%02x', $red, $green, $blue); }
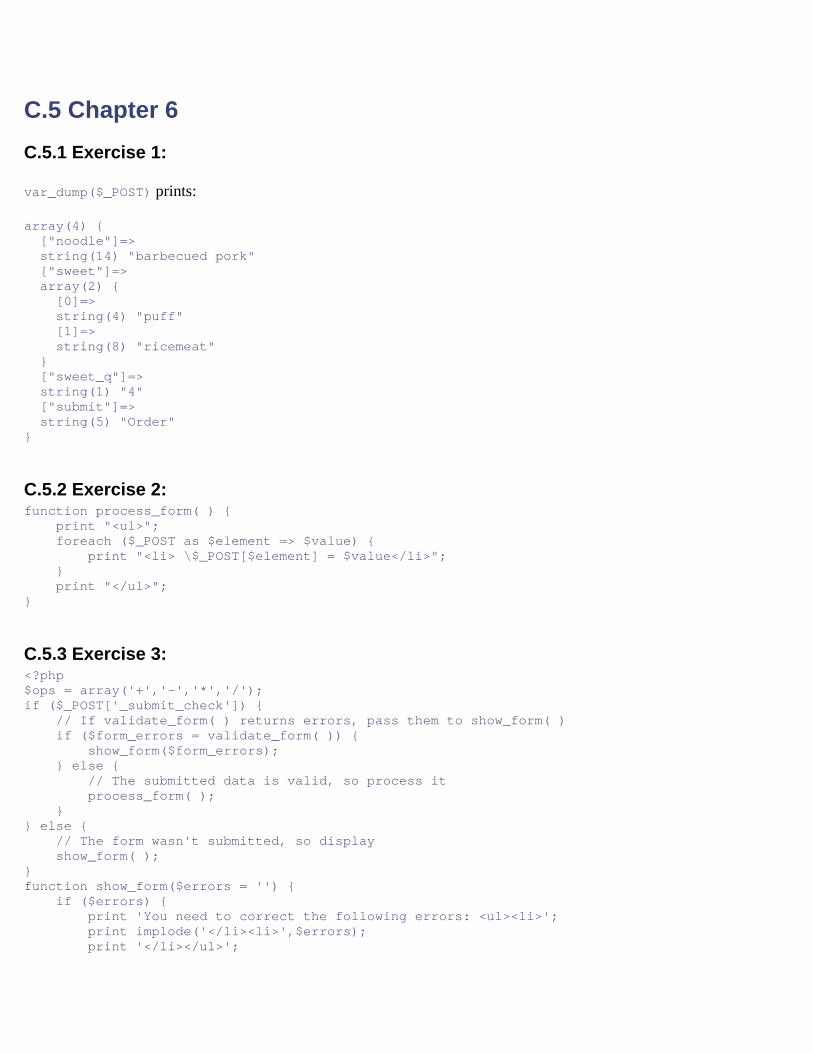
C.5 Chapter 6 C.5.1 Exercise 1:
var_dump($_POST) prints:
array(4) { ["noodle"]=> string(14) "barbecued pork" ["sweet"]=> array(2) { [0]=> string(4) "puff" [1]=> string(8) "ricemeat" } ["sweet_q"]=> string(1) "4" ["submit"]=> string(5) "Order" }
C.5.2 Exercise 2: function process_form( ) { print "<ul>"; foreach ($_POST as $element => $value) { print "<li> \$_POST[$element] = $value</li>"; } print "</ul>"; }
C.5.3 Exercise 3: <?php $ops = array('+','-','*','/'); if ($_POST['_submit_check']) { // If validate_form( ) returns errors, pass them to show_form( ) if ($form_errors = validate_form( )) { show_form($form_errors); } else { // The submitted data is valid, so process it process_form( ); } } else { // The form wasn't submitted, so display show_form( ); } function show_form($errors = '') { if ($errors) { print 'You need to correct the following errors: <ul><li>'; print implode('</li><li>',$errors); print '</li></ul>';
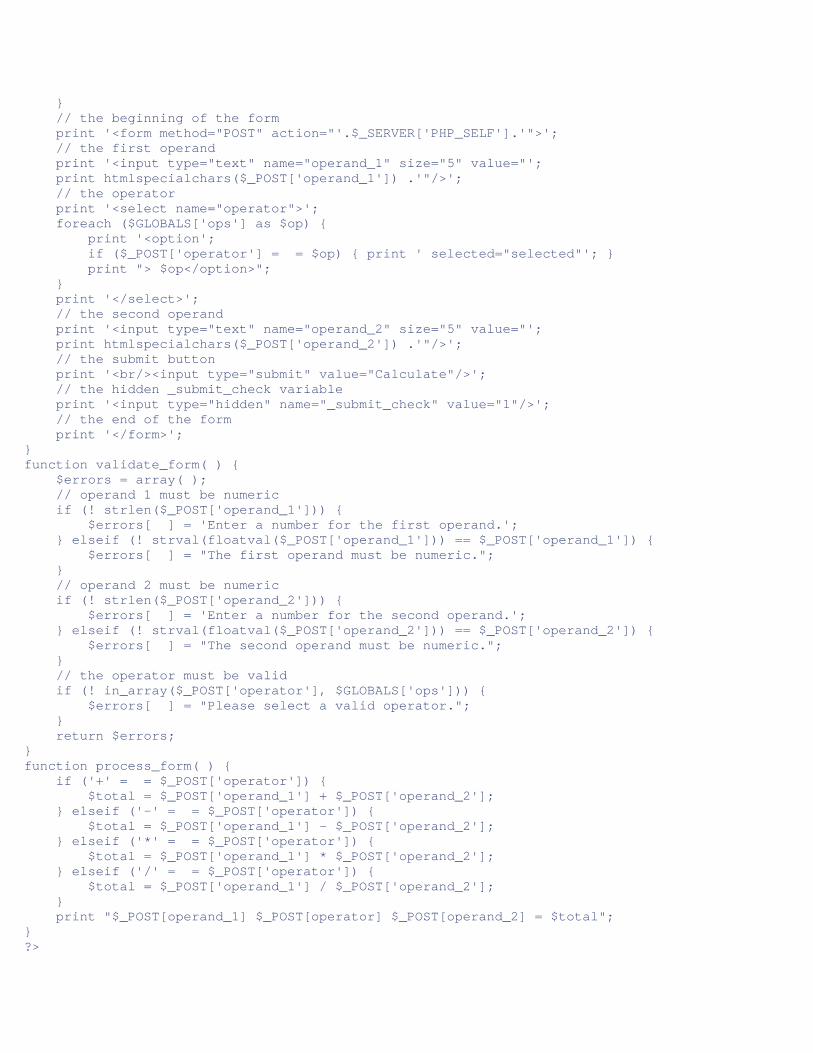
} // the beginning of the form print '<form method="POST" action="'.$_SERVER['PHP_SELF'].'">'; // the first operand print '<input type="text" name="operand_1" size="5" value="'; print htmlspecialchars($_POST['operand_1']) .'"/>'; // the operator print '<select name="operator">'; foreach ($GLOBALS['ops'] as $op) { print '<option'; if ($_POST['operator'] = = $op) { print ' selected="selected"'; } print "> $op</option>"; } print '</select>'; // the second operand print '<input type="text" name="operand_2" size="5" value="'; print htmlspecialchars($_POST['operand_2']) .'"/>'; // the submit button print '<br/><input type="submit" value="Calculate"/>'; // the hidden _submit_check variable print '<input type="hidden" name="_submit_check" value="1"/>'; // the end of the form print '</form>'; } function validate_form( ) { $errors = array( ); // operand 1 must be numeric if (! strlen($_POST['operand_1'])) { $errors[ ] = 'Enter a number for the first operand.'; } elseif (! strval(floatval($_POST['operand_1'])) == $_POST['operand_1']) { $errors[ ] = "The first operand must be numeric."; } // operand 2 must be numeric if (! strlen($_POST['operand_2'])) { $errors[ ] = 'Enter a number for the second operand.'; } elseif (! strval(floatval($_POST['operand_2'])) == $_POST['operand_2']) { $errors[ ] = "The second operand must be numeric."; } // the operator must be valid if (! in_array($_POST['operator'], $GLOBALS['ops'])) { $errors[ ] = "Please select a valid operator."; } return $errors; } function process_form( ) { if ('+' = = $_POST['operator']) { $total = $_POST['operand_1'] + $_POST['operand_2']; } elseif ('-' = = $_POST['operator']) { $total = $_POST['operand_1'] - $_POST['operand_2']; } elseif ('*' = = $_POST['operator']) { $total = $_POST['operand_1'] * $_POST['operand_2']; } elseif ('/' = = $_POST['operator']) { $total = $_POST['operand_1'] / $_POST['operand_2']; } print "$_POST[operand_1] $_POST[operator] $_POST[operand_2] = $total"; } ?>
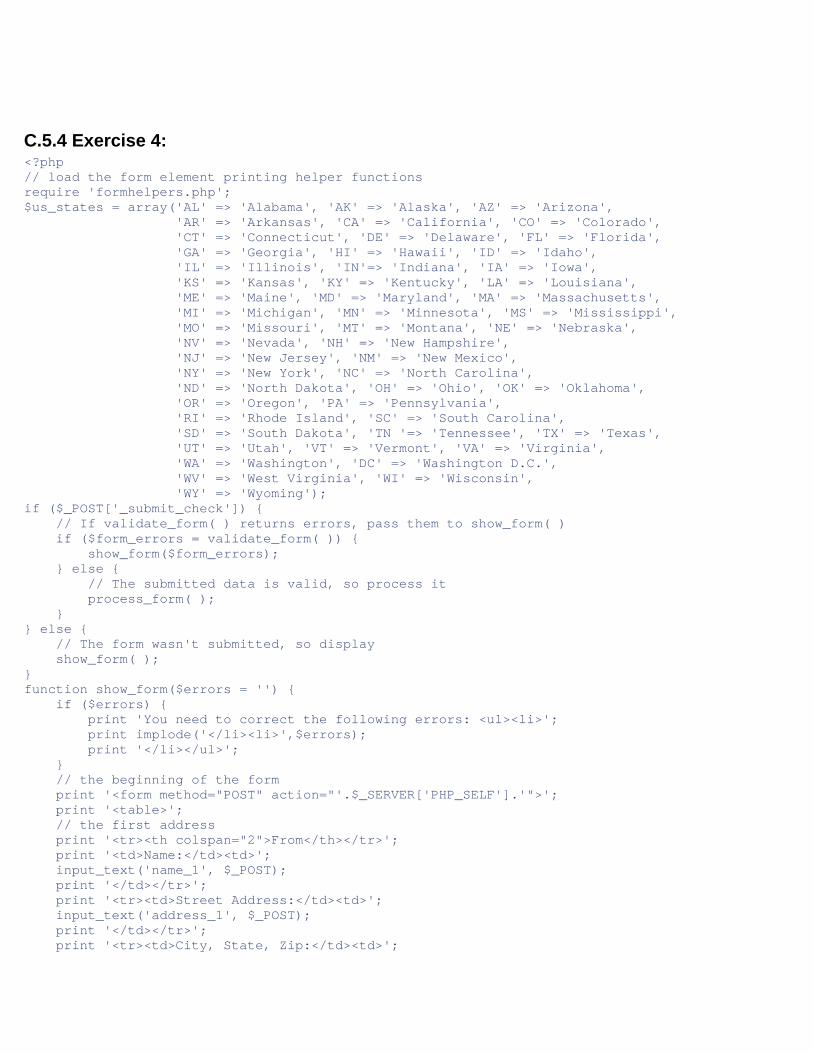
C.5.4 Exercise 4: <?php // load the form element printing helper functions require 'formhelpers.php'; $us_states = array('AL' => 'Alabama', 'AK' => 'Alaska', 'AZ' => 'Arizona', 'AR' => 'Arkansas', 'CA' => 'California', 'CO' => 'Colorado', 'CT' => 'Connecticut', 'DE' => 'Delaware', 'FL' => 'Florida', 'GA' => 'Georgia', 'HI' => 'Hawaii', 'ID' => 'Idaho', 'IL' => 'Illinois', 'IN'=> 'Indiana', 'IA' => 'Iowa', 'KS' => 'Kansas', 'KY' => 'Kentucky', 'LA' => 'Louisiana', 'ME' => 'Maine', 'MD' => 'Maryland', 'MA' => 'Massachusetts', 'MI' => 'Michigan', 'MN' => 'Minnesota', 'MS' => 'Mississippi', 'MO' => 'Missouri', 'MT' => 'Montana', 'NE' => 'Nebraska', 'NV' => 'Nevada', 'NH' => 'New Hampshire', 'NJ' => 'New Jersey', 'NM' => 'New Mexico', 'NY' => 'New York', 'NC' => 'North Carolina', 'ND' => 'North Dakota', 'OH' => 'Ohio', 'OK' => 'Oklahoma', 'OR' => 'Oregon', 'PA' => 'Pennsylvania', 'RI' => 'Rhode Island', 'SC' => 'South Carolina', 'SD' => 'South Dakota', 'TN '=> 'Tennessee', 'TX' => 'Texas', 'UT' => 'Utah', 'VT' => 'Vermont', 'VA' => 'Virginia', 'WA' => 'Washington', 'DC' => 'Washington D.C.', 'WV' => 'West Virginia', 'WI' => 'Wisconsin', 'WY' => 'Wyoming'); if ($_POST['_submit_check']) { // If validate_form( ) returns errors, pass them to show_form( ) if ($form_errors = validate_form( )) { show_form($form_errors); } else { // The submitted data is valid, so process it process_form( ); } } else { // The form wasn't submitted, so display show_form( ); } function show_form($errors = '') { if ($errors) { print 'You need to correct the following errors: <ul><li>'; print implode('</li><li>',$errors); print '</li></ul>'; } // the beginning of the form print '<form method="POST" action="'.$_SERVER['PHP_SELF'].'">'; print '<table>'; // the first address print '<tr><th colspan="2">From</th></tr>'; print '<td>Name:</td><td>'; input_text('name_1', $_POST); print '</td></tr>'; print '<tr><td>Street Address:</td><td>'; input_text('address_1', $_POST); print '</td></tr>'; print '<tr><td>City, State, Zip:</td><td>';
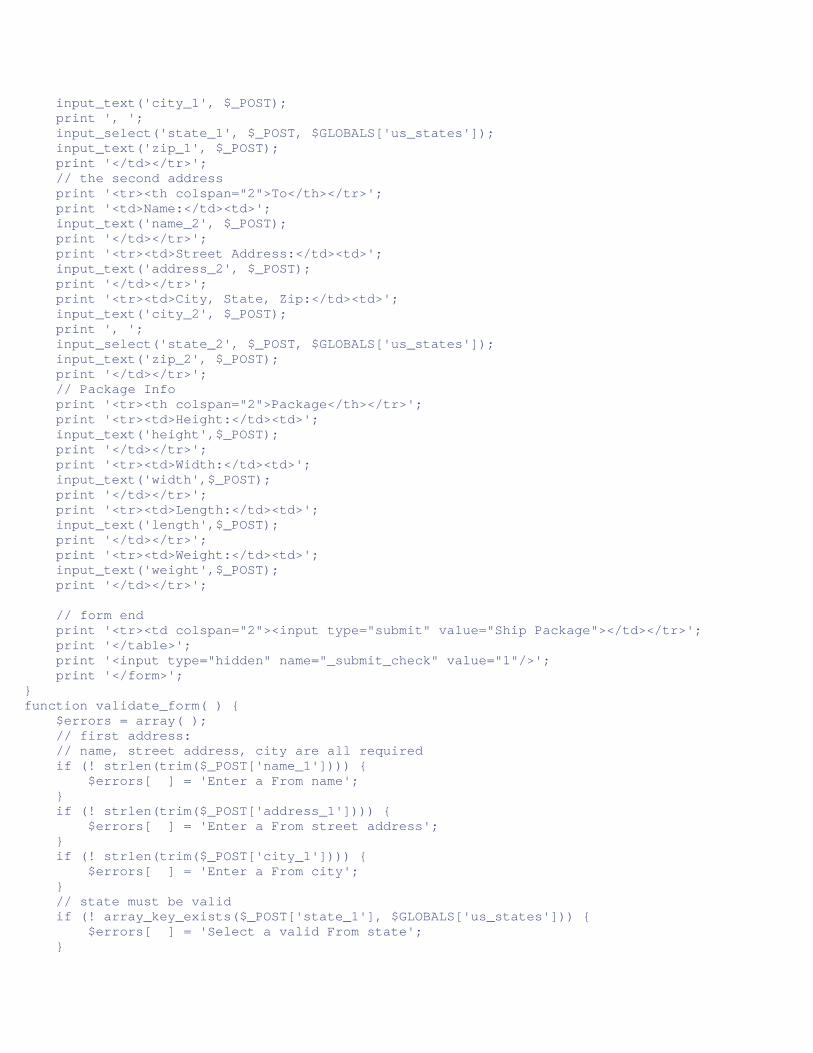
input_text('city_1', $_POST); print ', '; input_select('state_1', $_POST, $GLOBALS['us_states']); input_text('zip_1', $_POST); print '</td></tr>'; // the second address print '<tr><th colspan="2">To</th></tr>'; print '<td>Name:</td><td>'; input_text('name_2', $_POST); print '</td></tr>'; print '<tr><td>Street Address:</td><td>'; input_text('address_2', $_POST); print '</td></tr>'; print '<tr><td>City, State, Zip:</td><td>'; input_text('city_2', $_POST); print ', '; input_select('state_2', $_POST, $GLOBALS['us_states']); input_text('zip_2', $_POST); print '</td></tr>'; // Package Info print '<tr><th colspan="2">Package</th></tr>'; print '<tr><td>Height:</td><td>'; input_text('height',$_POST); print '</td></tr>'; print '<tr><td>Width:</td><td>'; input_text('width',$_POST); print '</td></tr>'; print '<tr><td>Length:</td><td>'; input_text('length',$_POST); print '</td></tr>'; print '<tr><td>Weight:</td><td>'; input_text('weight',$_POST); print '</td></tr>'; // form end print '<tr><td colspan="2"><input type="submit" value="Ship Package"></td></tr>'; print '</table>'; print '<input type="hidden" name="_submit_check" value="1"/>'; print '</form>'; } function validate_form( ) { $errors = array( ); // first address: // name, street address, city are all required if (! strlen(trim($_POST['name_1']))) { $errors[ ] = 'Enter a From name'; } if (! strlen(trim($_POST['address_1']))) { $errors[ ] = 'Enter a From street address'; } if (! strlen(trim($_POST['city_1']))) { $errors[ ] = 'Enter a From city'; } // state must be valid if (! array_key_exists($_POST['state_1'], $GLOBALS['us_states'])) { $errors[ ] = 'Select a valid From state'; }
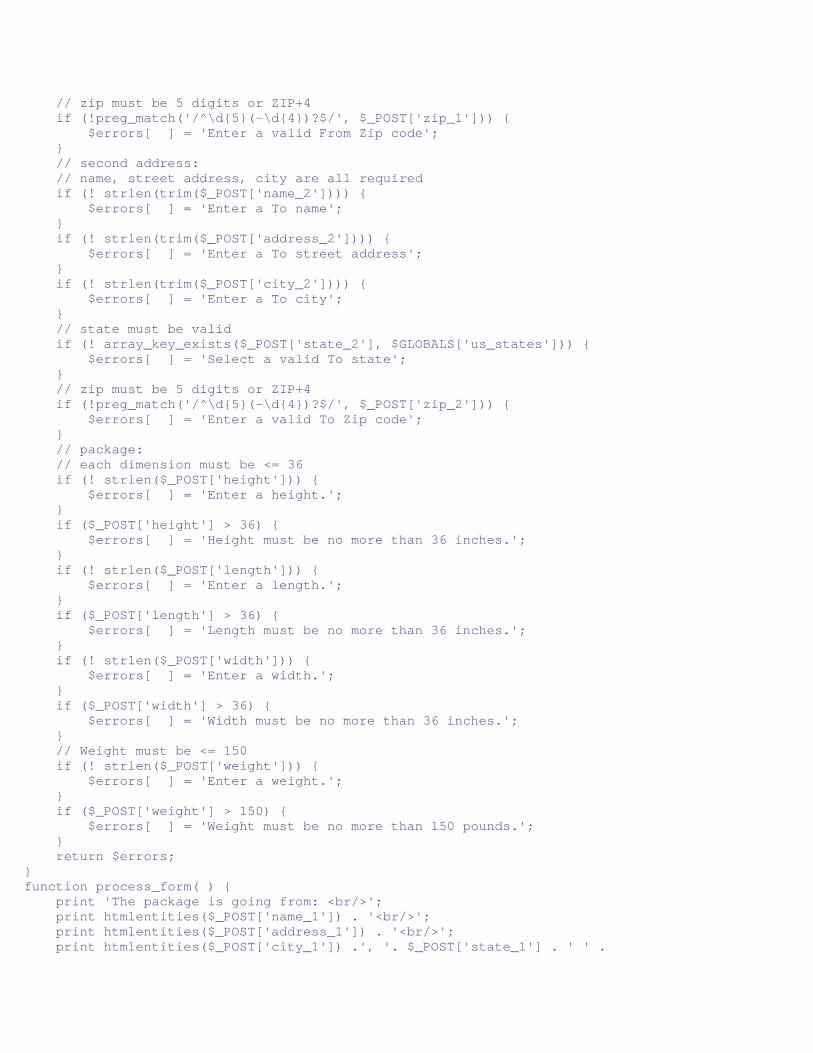
// zip must be 5 digits or ZIP+4 if (!preg_match('/^\d{5}(-\d{4})?$/', $_POST['zip_1'])) { $errors[ ] = 'Enter a valid From Zip code'; } // second address: // name, street address, city are all required if (! strlen(trim($_POST['name_2']))) { $errors[ ] = 'Enter a To name'; } if (! strlen(trim($_POST['address_2']))) { $errors[ ] = 'Enter a To street address'; } if (! strlen(trim($_POST['city_2']))) { $errors[ ] = 'Enter a To city'; } // state must be valid if (! array_key_exists($_POST['state_2'], $GLOBALS['us_states'])) { $errors[ ] = 'Select a valid To state'; } // zip must be 5 digits or ZIP+4 if (!preg_match('/^\d{5}(-\d{4})?$/', $_POST['zip_2'])) { $errors[ ] = 'Enter a valid To Zip code'; } // package: // each dimension must be <= 36 if (! strlen($_POST['height'])) { $errors[ ] = 'Enter a height.'; } if ($_POST['height'] > 36) { $errors[ ] = 'Height must be no more than 36 inches.'; } if (! strlen($_POST['length'])) { $errors[ ] = 'Enter a length.'; } if ($_POST['length'] > 36) { $errors[ ] = 'Length must be no more than 36 inches.'; } if (! strlen($_POST['width'])) { $errors[ ] = 'Enter a width.'; } if ($_POST['width'] > 36) { $errors[ ] = 'Width must be no more than 36 inches.'; } // Weight must be <= 150 if (! strlen($_POST['weight'])) { $errors[ ] = 'Enter a weight.'; } if ($_POST['weight'] > 150) { $errors[ ] = 'Weight must be no more than 150 pounds.'; } return $errors; } function process_form( ) { print 'The package is going from: <br/>'; print htmlentities($_POST['name_1']) . '<br/>'; print htmlentities($_POST['address_1']) . '<br/>'; print htmlentities($_POST['city_1']) .', '. $_POST['state_1'] . ' ' .
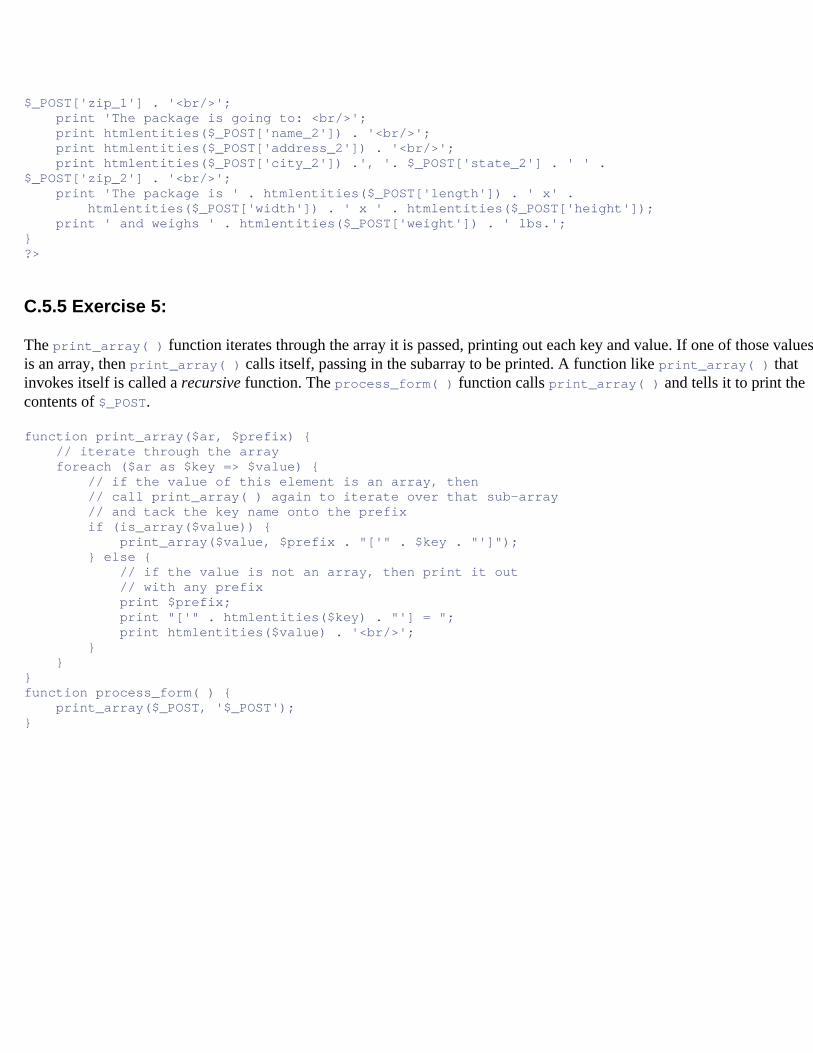
$_POST['zip_1'] . '<br/>'; print 'The package is going to: <br/>'; print htmlentities($_POST['name_2']) . '<br/>'; print htmlentities($_POST['address_2']) . '<br/>'; print htmlentities($_POST['city_2']) .', '. $_POST['state_2'] . ' ' . $_POST['zip_2'] . '<br/>'; print 'The package is ' . htmlentities($_POST['length']) . ' x' . htmlentities($_POST['width']) . ' x ' . htmlentities($_POST['height']); print ' and weighs ' . htmlentities($_POST['weight']) . ' lbs.'; } ?>
C.5.5 Exercise 5:
The print_array( ) function iterates through the array it is passed, printing out each key and value. If one of those values is an array, then print_array( ) calls itself, passing in the subarray to be printed. A function like print_array( ) that invokes itself is called a recursive function. The process_form( ) function calls print_array( ) and tells it to print the contents of $_POST.
function print_array($ar, $prefix) { // iterate through the array foreach ($ar as $key => $value) { // if the value of this element is an array, then // call print_array( ) again to iterate over that sub-array // and tack the key name onto the prefix if (is_array($value)) { print_array($value, $prefix . "['" . $key . "']"); } else { // if the value is not an array, then print it out // with any prefix print $prefix; print "['" . htmlentities($key) . "'] = "; print htmlentities($value) . '<br/>'; } } } function process_form( ) { print_array($_POST, '$_POST'); }
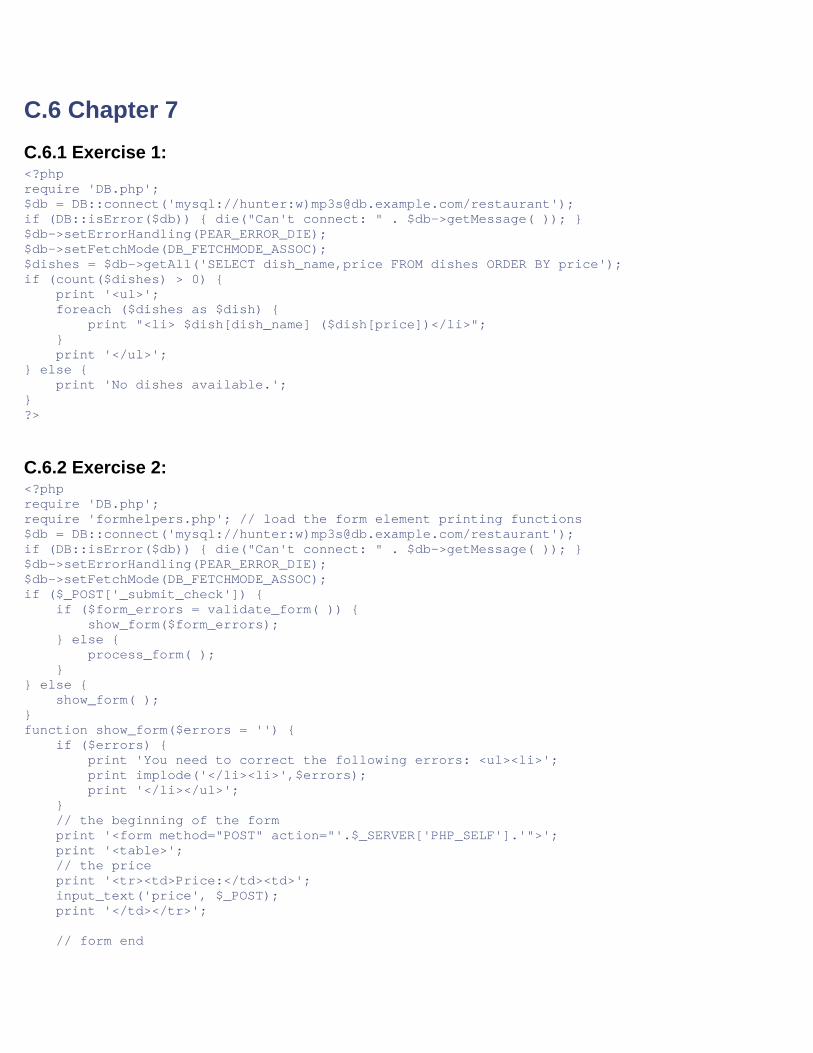
C.6 Chapter 7 C.6.1 Exercise 1: <?php require 'DB.php'; $db = DB::connect('mysql://hunter:w)[email protected]/restaurant'); if (DB::isError($db)) { die("Can't connect: " . $db->getMessage( )); } $db->setErrorHandling(PEAR_ERROR_DIE); $db->setFetchMode(DB_FETCHMODE_ASSOC); $dishes = $db->getAll('SELECT dish_name,price FROM dishes ORDER BY price'); if (count($dishes) > 0) { print '<ul>'; foreach ($dishes as $dish) { print "<li> $dish[dish_name] ($dish[price])</li>"; } print '</ul>'; } else { print 'No dishes available.'; } ?>
C.6.2 Exercise 2: <?php require 'DB.php'; require 'formhelpers.php'; // load the form element printing functions $db = DB::connect('mysql://hunter:w)[email protected]/restaurant'); if (DB::isError($db)) { die("Can't connect: " . $db->getMessage( )); } $db->setErrorHandling(PEAR_ERROR_DIE); $db->setFetchMode(DB_FETCHMODE_ASSOC); if ($_POST['_submit_check']) { if ($form_errors = validate_form( )) { show_form($form_errors); } else { process_form( ); } } else { show_form( ); } function show_form($errors = '') { if ($errors) { print 'You need to correct the following errors: <ul><li>'; print implode('</li><li>',$errors); print '</li></ul>'; } // the beginning of the form print '<form method="POST" action="'.$_SERVER['PHP_SELF'].'">'; print '<table>'; // the price print '<tr><td>Price:</td><td>'; input_text('price', $_POST); print '</td></tr>'; // form end
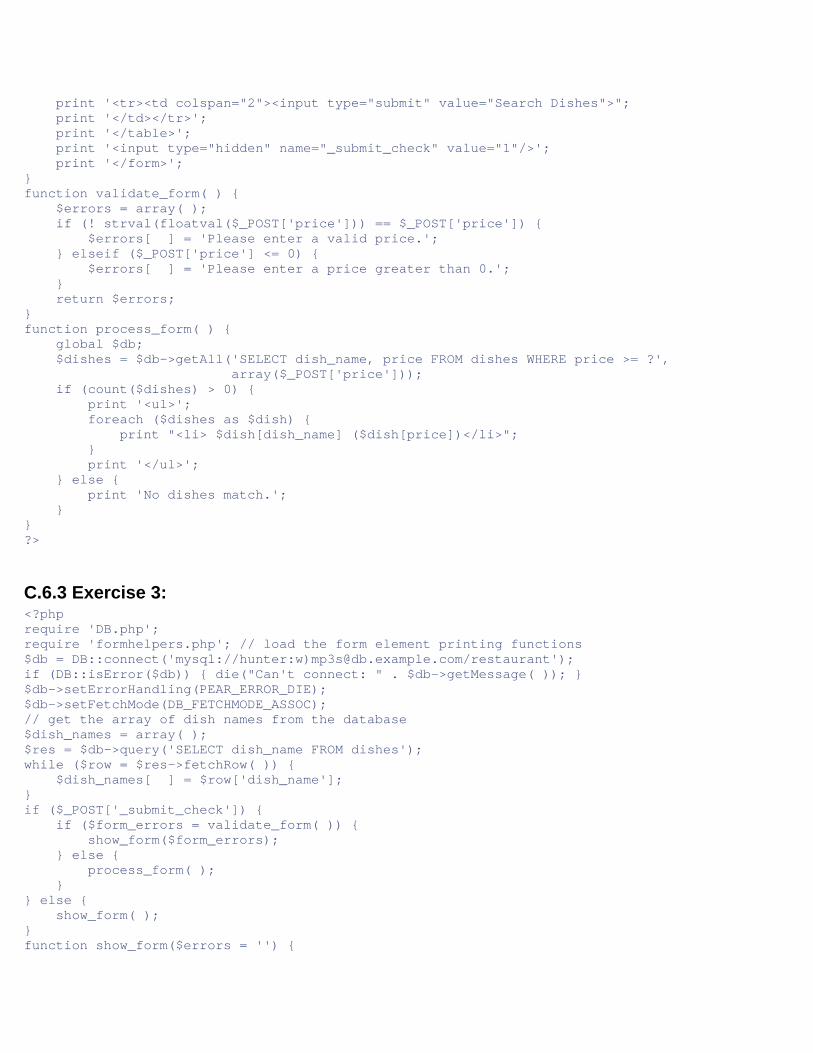
print '<tr><td colspan="2"><input type="submit" value="Search Dishes">"; print '</td></tr>'; print '</table>'; print '<input type="hidden" name="_submit_check" value="1"/>'; print '</form>'; } function validate_form( ) { $errors = array( ); if (! strval(floatval($_POST['price'])) == $_POST['price']) { $errors[ ] = 'Please enter a valid price.'; } elseif ($_POST['price'] <= 0) { $errors[ ] = 'Please enter a price greater than 0.'; } return $errors; } function process_form( ) { global $db; $dishes = $db->getAll('SELECT dish_name, price FROM dishes WHERE price >= ?', array($_POST['price'])); if (count($dishes) > 0) { print '<ul>'; foreach ($dishes as $dish) { print "<li> $dish[dish_name] ($dish[price])</li>"; } print '</ul>'; } else { print 'No dishes match.'; } } ?>
C.6.3 Exercise 3: <?php require 'DB.php'; require 'formhelpers.php'; // load the form element printing functions $db = DB::connect('mysql://hunter:w)[email protected]/restaurant'); if (DB::isError($db)) { die("Can't connect: " . $db->getMessage( )); } $db->setErrorHandling(PEAR_ERROR_DIE); $db->setFetchMode(DB_FETCHMODE_ASSOC); // get the array of dish names from the database $dish_names = array( ); $res = $db->query('SELECT dish_name FROM dishes'); while ($row = $res->fetchRow( )) { $dish_names[ ] = $row['dish_name']; } if ($_POST['_submit_check']) { if ($form_errors = validate_form( )) { show_form($form_errors); } else { process_form( ); } } else { show_form( ); } function show_form($errors = '') {
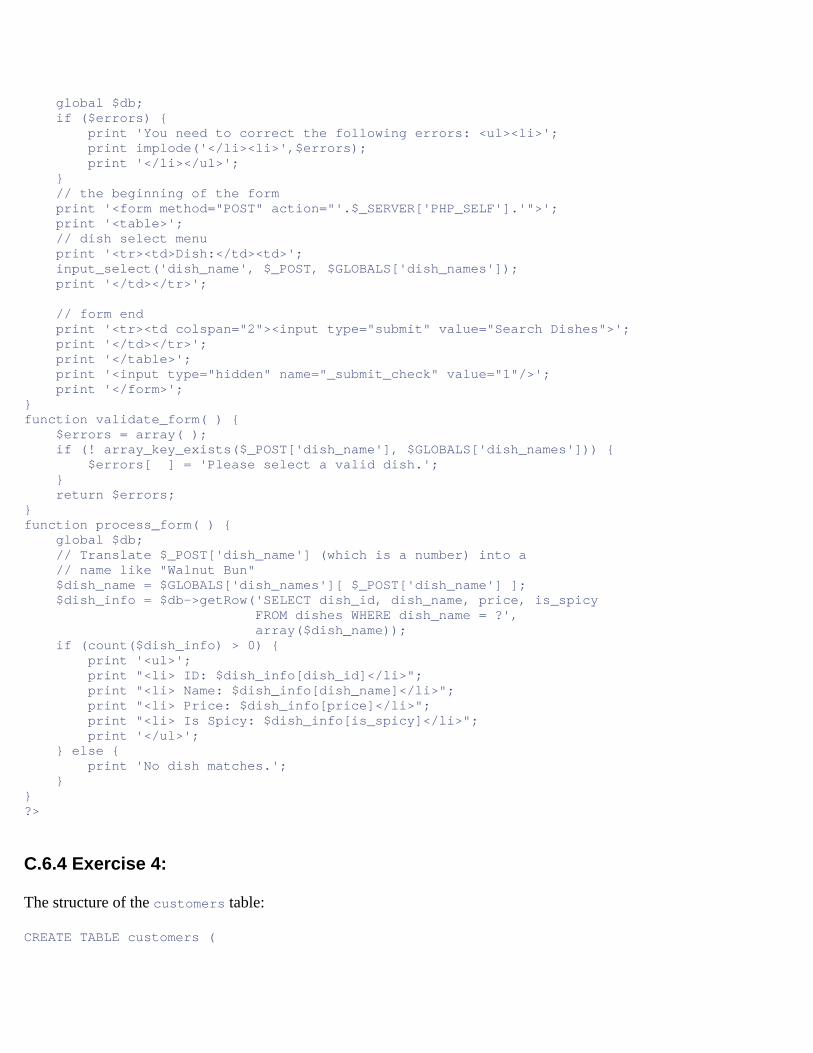
global $db; if ($errors) { print 'You need to correct the following errors: <ul><li>'; print implode('</li><li>',$errors); print '</li></ul>'; } // the beginning of the form print '<form method="POST" action="'.$_SERVER['PHP_SELF'].'">'; print '<table>'; // dish select menu print '<tr><td>Dish:</td><td>'; input_select('dish_name', $_POST, $GLOBALS['dish_names']); print '</td></tr>'; // form end print '<tr><td colspan="2"><input type="submit" value="Search Dishes">'; print '</td></tr>'; print '</table>'; print '<input type="hidden" name="_submit_check" value="1"/>'; print '</form>'; } function validate_form( ) { $errors = array( ); if (! array_key_exists($_POST['dish_name'], $GLOBALS['dish_names'])) { $errors[ ] = 'Please select a valid dish.'; } return $errors; } function process_form( ) { global $db; // Translate $_POST['dish_name'] (which is a number) into a // name like "Walnut Bun" $dish_name = $GLOBALS['dish_names'][ $_POST['dish_name'] ]; $dish_info = $db->getRow('SELECT dish_id, dish_name, price, is_spicy FROM dishes WHERE dish_name = ?', array($dish_name)); if (count($dish_info) > 0) { print '<ul>'; print "<li> ID: $dish_info[dish_id]</li>"; print "<li> Name: $dish_info[dish_name]</li>"; print "<li> Price: $dish_info[price]</li>"; print "<li> Is Spicy: $dish_info[is_spicy]</li>"; print '</ul>'; } else { print 'No dish matches.'; } } ?>
C.6.4 Exercise 4:
The structure of the customers table:
CREATE TABLE customers (
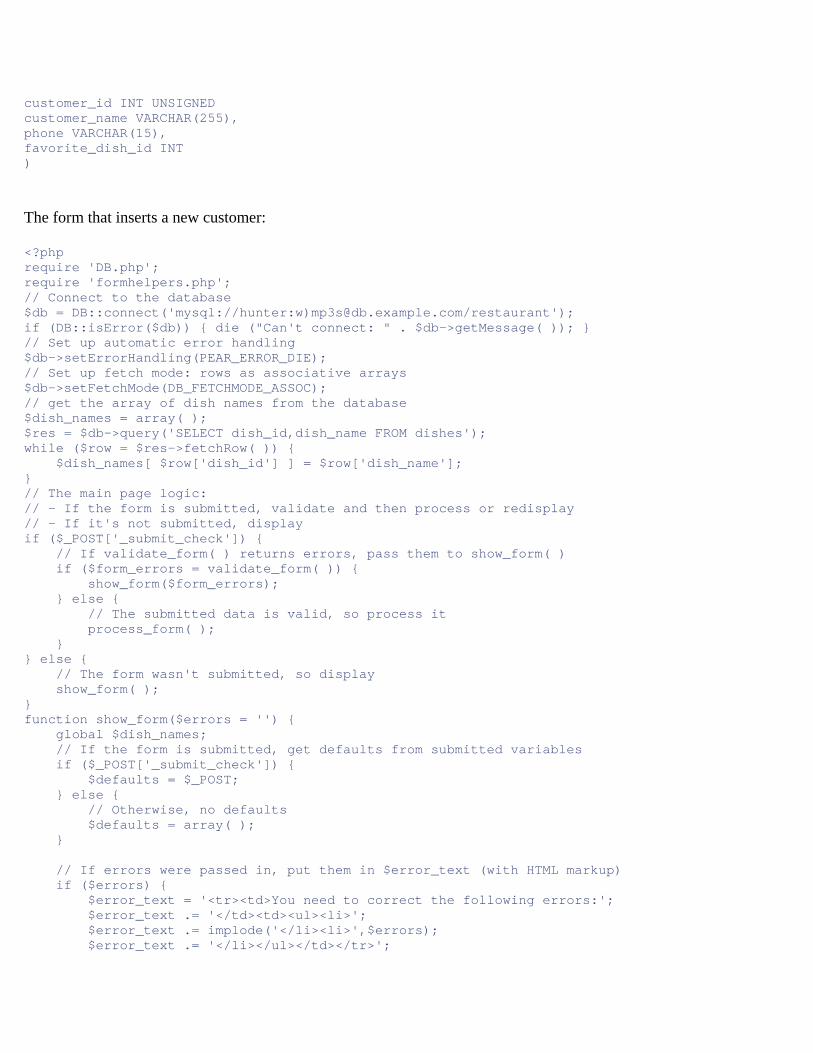
customer_id INT UNSIGNED customer_name VARCHAR(255), phone VARCHAR(15), favorite_dish_id INT )
The form that inserts a new customer:
<?php require 'DB.php'; require 'formhelpers.php'; // Connect to the database $db = DB::connect('mysql://hunter:w)[email protected]/restaurant'); if (DB::isError($db)) { die ("Can't connect: " . $db->getMessage( )); } // Set up automatic error handling $db->setErrorHandling(PEAR_ERROR_DIE); // Set up fetch mode: rows as associative arrays $db->setFetchMode(DB_FETCHMODE_ASSOC); // get the array of dish names from the database $dish_names = array( ); $res = $db->query('SELECT dish_id,dish_name FROM dishes'); while ($row = $res->fetchRow( )) { $dish_names[ $row['dish_id'] ] = $row['dish_name']; } // The main page logic: // - If the form is submitted, validate and then process or redisplay // - If it's not submitted, display if ($_POST['_submit_check']) { // If validate_form( ) returns errors, pass them to show_form( ) if ($form_errors = validate_form( )) { show_form($form_errors); } else { // The submitted data is valid, so process it process_form( ); } } else { // The form wasn't submitted, so display show_form( ); } function show_form($errors = '') { global $dish_names; // If the form is submitted, get defaults from submitted variables if ($_POST['_submit_check']) { $defaults = $_POST; } else { // Otherwise, no defaults $defaults = array( ); } // If errors were passed in, put them in $error_text (with HTML markup) if ($errors) { $error_text = '<tr><td>You need to correct the following errors:'; $error_text .= '</td><td><ul><li>'; $error_text .= implode('</li><li>',$errors); $error_text .= '</li></ul></td></tr>';
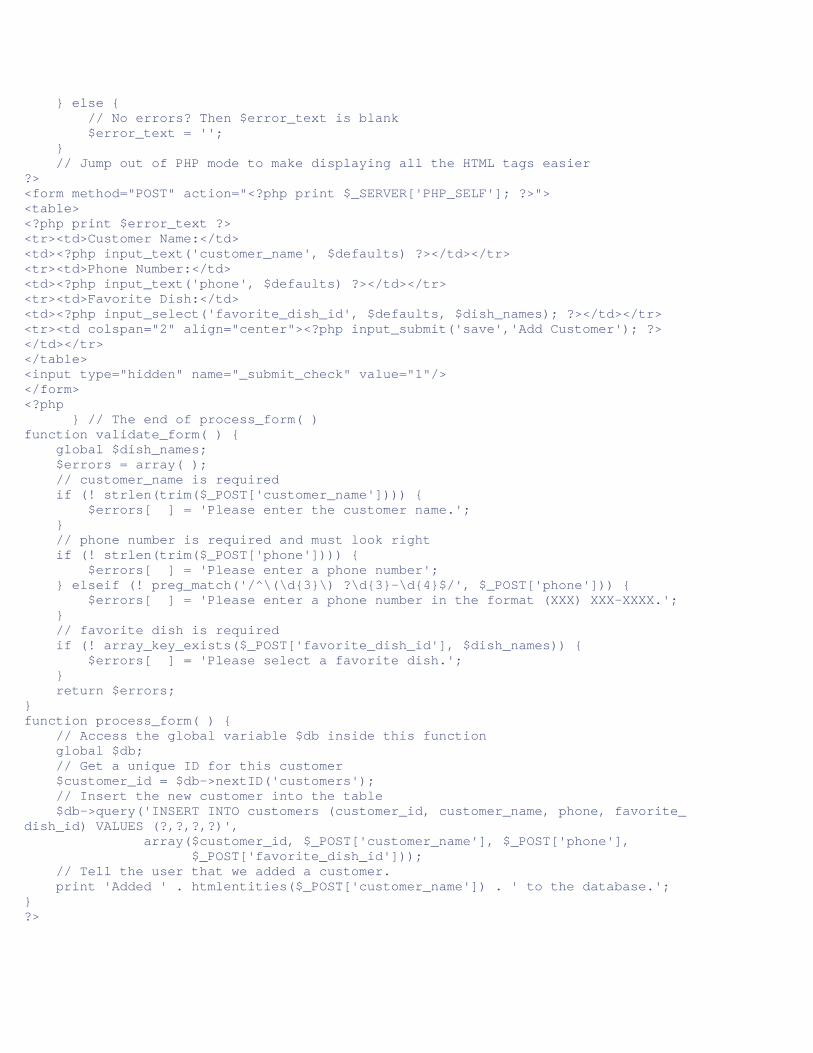
} else { // No errors? Then $error_text is blank $error_text = ''; } // Jump out of PHP mode to make displaying all the HTML tags easier ?> <form method="POST" action="<?php print $_SERVER['PHP_SELF']; ?>"> <table> <?php print $error_text ?> <tr><td>Customer Name:</td> <td><?php input_text('customer_name', $defaults) ?></td></tr> <tr><td>Phone Number:</td> <td><?php input_text('phone', $defaults) ?></td></tr> <tr><td>Favorite Dish:</td> <td><?php input_select('favorite_dish_id', $defaults, $dish_names); ?></td></tr> <tr><td colspan="2" align="center"><?php input_submit('save','Add Customer'); ?> </td></tr> </table> <input type="hidden" name="_submit_check" value="1"/> </form> <?php } // The end of process_form( ) function validate_form( ) { global $dish_names; $errors = array( ); // customer_name is required if (! strlen(trim($_POST['customer_name']))) { $errors[ ] = 'Please enter the customer name.'; } // phone number is required and must look right if (! strlen(trim($_POST['phone']))) { $errors[ ] = 'Please enter a phone number'; } elseif (! preg_match('/^\(\d{3}\) ?\d{3}-\d{4}$/', $_POST['phone'])) { $errors[ ] = 'Please enter a phone number in the format (XXX) XXX-XXXX.'; } // favorite dish is required if (! array_key_exists($_POST['favorite_dish_id'], $dish_names)) { $errors[ ] = 'Please select a favorite dish.'; } return $errors; } function process_form( ) { // Access the global variable $db inside this function global $db; // Get a unique ID for this customer $customer_id = $db->nextID('customers'); // Insert the new customer into the table $db->query('INSERT INTO customers (customer_id, customer_name, phone, favorite_ dish_id) VALUES (?,?,?,?)', array($customer_id, $_POST['customer_name'], $_POST['phone'], $_POST['favorite_dish_id'])); // Tell the user that we added a customer. print 'Added ' . htmlentities($_POST['customer_name']) . ' to the database.'; } ?>
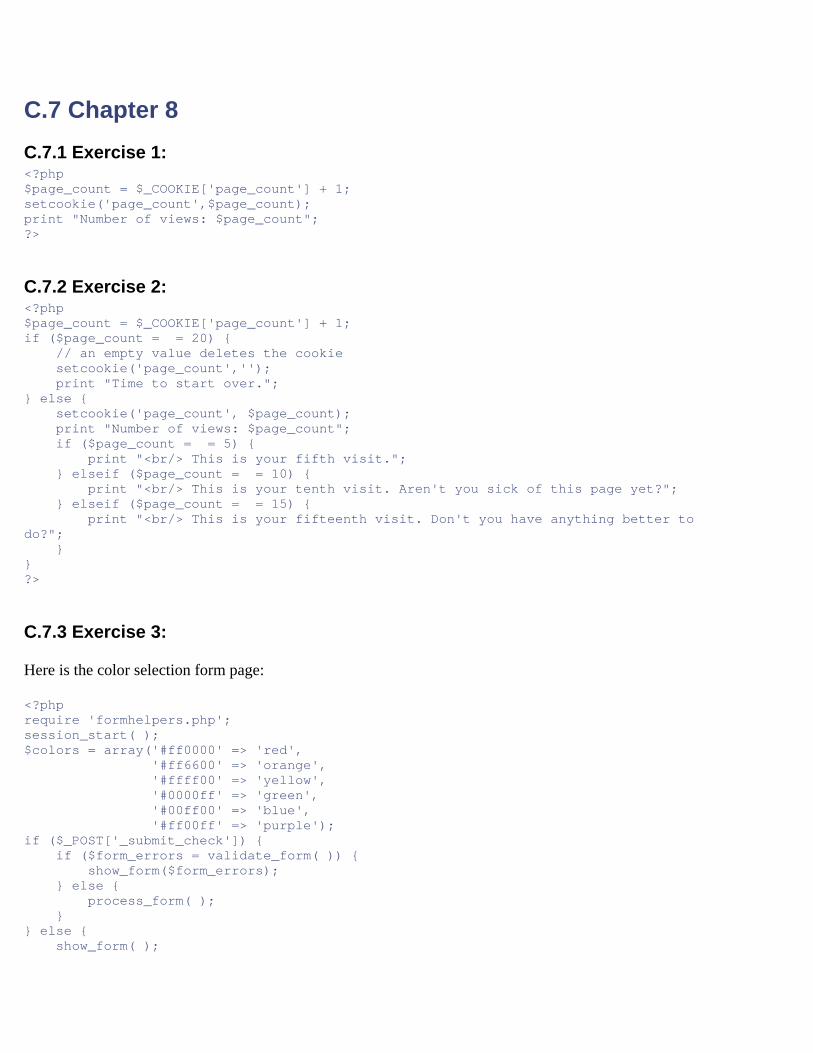
C.7 Chapter 8 C.7.1 Exercise 1: <?php $page_count = $_COOKIE['page_count'] + 1; setcookie('page_count',$page_count); print "Number of views: $page_count"; ?>
C.7.2 Exercise 2: <?php $page_count = $_COOKIE['page_count'] + 1; if ($page_count = = 20) { // an empty value deletes the cookie setcookie('page_count',''); print "Time to start over."; } else { setcookie('page_count', $page_count); print "Number of views: $page_count"; if ($page_count = = 5) { print "<br/> This is your fifth visit."; } elseif ($page_count = = 10) { print "<br/> This is your tenth visit. Aren't you sick of this page yet?"; } elseif ($page_count = = 15) { print "<br/> This is your fifteenth visit. Don't you have anything better to do?"; } } ?>
C.7.3 Exercise 3:
Here is the color selection form page:
<?php require 'formhelpers.php'; session_start( ); $colors = array('#ff0000' => 'red', '#ff6600' => 'orange', '#ffff00' => 'yellow', '#0000ff' => 'green', '#00ff00' => 'blue', '#ff00ff' => 'purple'); if ($_POST['_submit_check']) { if ($form_errors = validate_form( )) { show_form($form_errors); } else { process_form( ); } } else { show_form( );
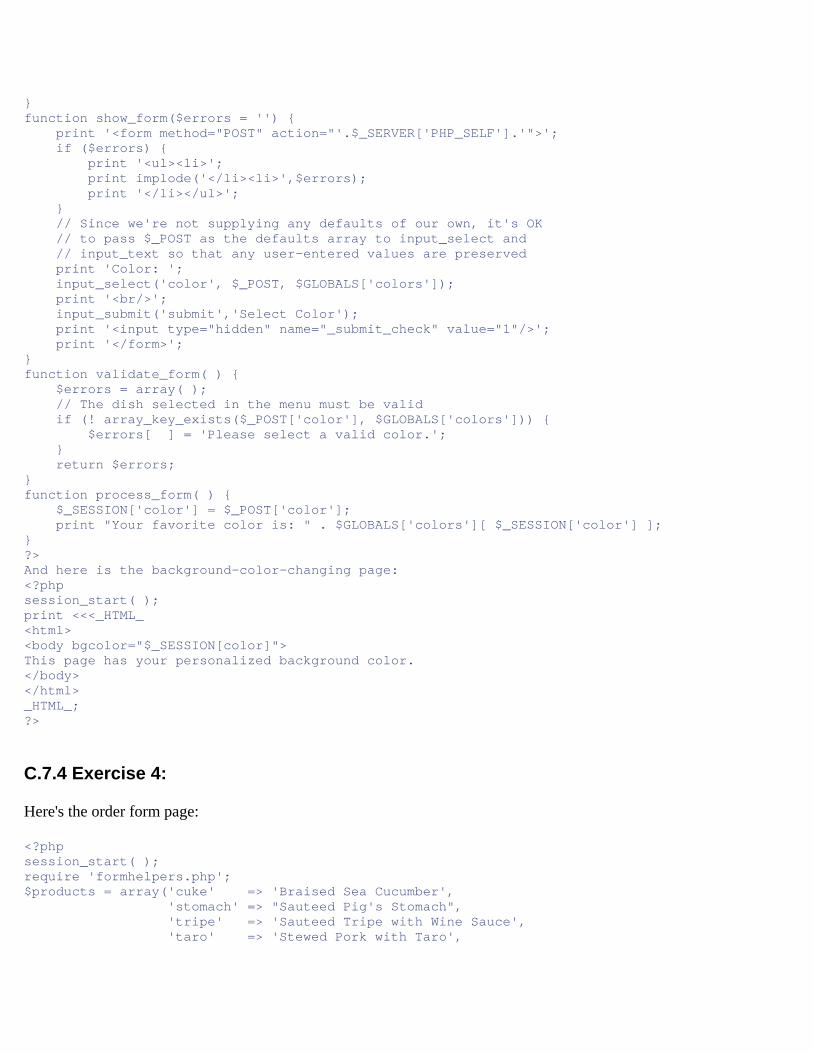
} function show_form($errors = '') { print '<form method="POST" action="'.$_SERVER['PHP_SELF'].'">'; if ($errors) { print '<ul><li>'; print implode('</li><li>',$errors); print '</li></ul>'; } // Since we're not supplying any defaults of our own, it's OK // to pass $_POST as the defaults array to input_select and // input_text so that any user-entered values are preserved print 'Color: '; input_select('color', $_POST, $GLOBALS['colors']); print '<br/>'; input_submit('submit','Select Color'); print '<input type="hidden" name="_submit_check" value="1"/>'; print '</form>'; } function validate_form( ) { $errors = array( ); // The dish selected in the menu must be valid if (! array_key_exists($_POST['color'], $GLOBALS['colors'])) { $errors[ ] = 'Please select a valid color.'; } return $errors; } function process_form( ) { $_SESSION['color'] = $_POST['color']; print "Your favorite color is: " . $GLOBALS['colors'][ $_SESSION['color'] ]; } ?> And here is the background-color-changing page: <?php session_start( ); print <<<_HTML_ <html> <body bgcolor="$_SESSION[color]"> This page has your personalized background color. </body> </html> _HTML_; ?>
C.7.4 Exercise 4:
Here's the order form page:
<?php session_start( ); require 'formhelpers.php'; $products = array('cuke' => 'Braised Sea Cucumber', 'stomach' => "Sauteed Pig's Stomach", 'tripe' => 'Sauteed Tripe with Wine Sauce', 'taro' => 'Stewed Pork with Taro',
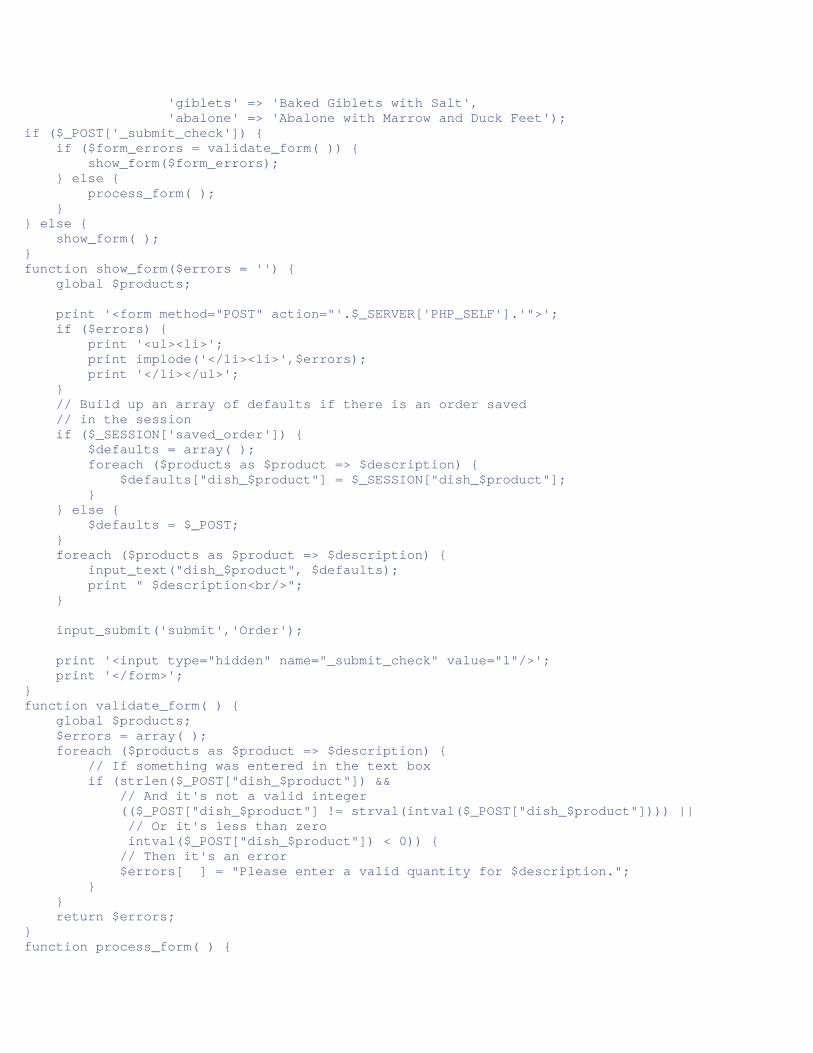
'giblets' => 'Baked Giblets with Salt', 'abalone' => 'Abalone with Marrow and Duck Feet'); if ($_POST['_submit_check']) { if ($form_errors = validate_form( )) { show_form($form_errors); } else { process_form( ); } } else { show_form( ); } function show_form($errors = '') { global $products; print '<form method="POST" action="'.$_SERVER['PHP_SELF'].'">'; if ($errors) { print '<ul><li>'; print implode('</li><li>',$errors); print '</li></ul>'; } // Build up an array of defaults if there is an order saved // in the session if ($_SESSION['saved_order']) { $defaults = array( ); foreach ($products as $product => $description) { $defaults["dish_$product"] = $_SESSION["dish_$product"]; } } else { $defaults = $_POST; } foreach ($products as $product => $description) { input_text("dish_$product", $defaults); print " $description<br/>"; } input_submit('submit','Order'); print '<input type="hidden" name="_submit_check" value="1"/>'; print '</form>'; } function validate_form( ) { global $products; $errors = array( ); foreach ($products as $product => $description) { // If something was entered in the text box if (strlen($_POST["dish_$product"]) && // And it's not a valid integer (($_POST["dish_$product"] != strval(intval($_POST["dish_$product"]))) || // Or it's less than zero intval($_POST["dish_$product"]) < 0)) { // Then it's an error $errors[ ] = "Please enter a valid quantity for $description."; } } return $errors; } function process_form( ) {

global $products; $_SESSION['saved_order'] = 1; foreach ($products as $product => $description) { if (strlen($_POST["dish_$product"])) { $_SESSION["dish_$product"] = $_POST["dish_$product"]; } } print 'Thank you for your order.'; } ?>
Here's the check-out page:
<?php session_start( ); require 'formhelpers.php'; $products = array('cuke' => 'Braised Sea Cucumber', 'stomach' => "Sauteed Pig's Stomach", 'tripe' => 'Sauteed Tripe with Wine Sauce', 'taro' => 'Stewed Pork with Taro', 'giblets' => 'Baked Giblets with Salt', 'abalone' => 'Abalone with Marrow and Duck Feet'); // Since the form just consists of one button, there's no need // to validate the submitted form data if ($_POST['_submit_check']) { process_form( ); } else { show_form( ); } function show_form($errors = '') { global $products; if ($_SESSION['saved_order']) { print 'Your order: <ul>'; foreach ($products as $product => $description) { if (array_key_exists("dish_$product", $_SESSION)) { print '<li> '.$_SESSION["dish_$product"]." $description </li>"; } } print '</ul>'; } else { print 'There is no saved order.'; } print '<br/>'; // This assumes that the order form page is saved as "orderform.php" print '<a href="orderform.php">Return to Order Page</a>'; print '<br/>'; print '<form method="POST" action="'.$_SERVER['PHP_SELF'].'">'; input_submit('submit','Check Out'); print '<input type="hidden" name="_submit_check" value="1"/>'; print '</form>'; } function process_form( ) { global $products; unset($_SESSION['saved_order']);
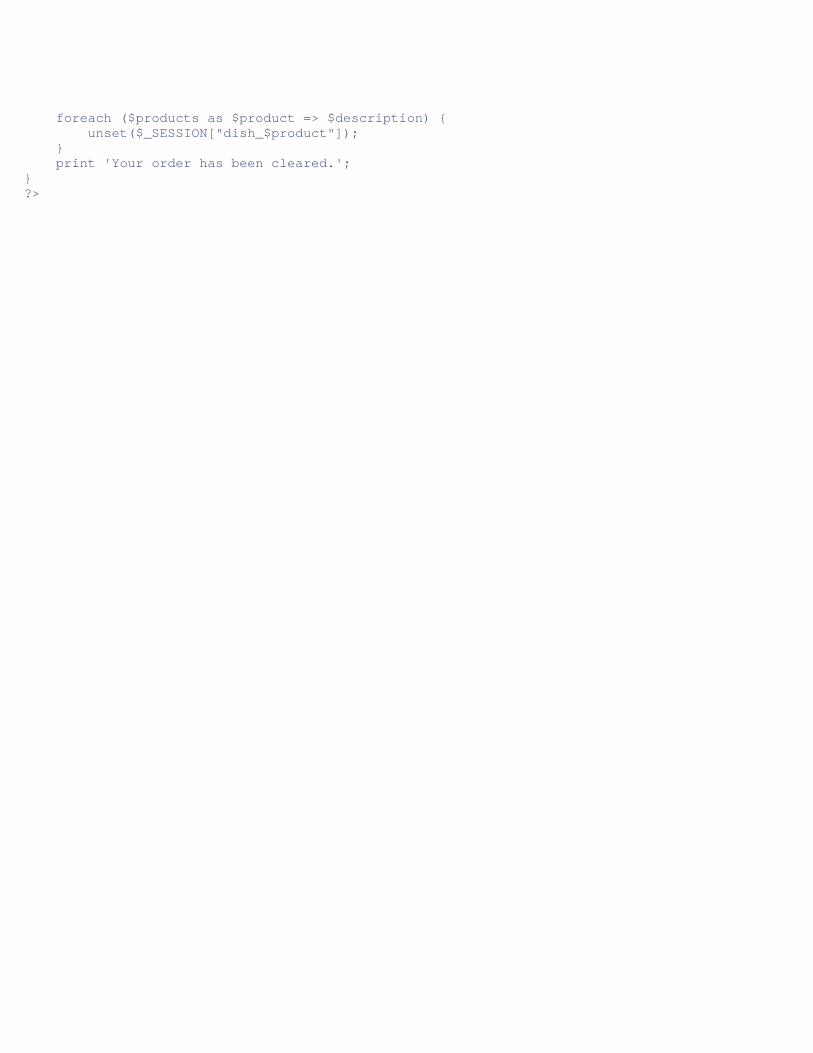
foreach ($products as $product => $description) { unset($_SESSION["dish_$product"]); } print 'Your order has been cleared.'; } ?>
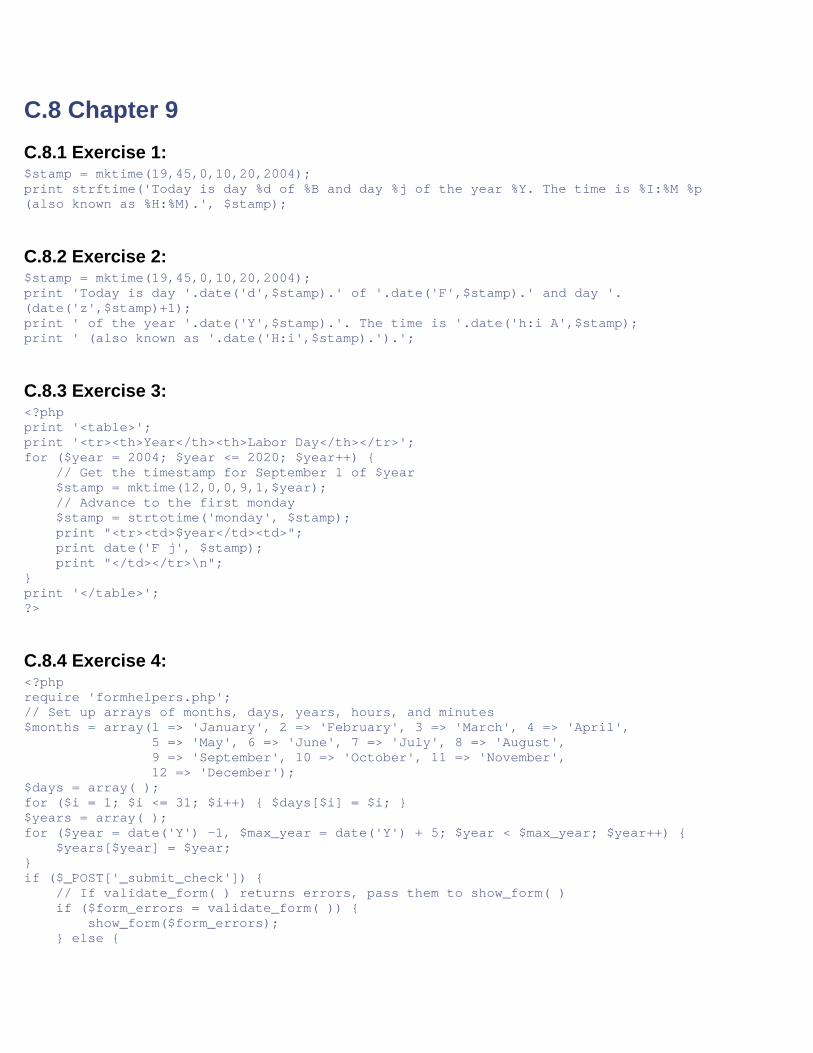
C.8 Chapter 9 C.8.1 Exercise 1: $stamp = mktime(19,45,0,10,20,2004); print strftime('Today is day %d of %B and day %j of the year %Y. The time is %I:%M %p (also known as %H:%M).', $stamp);
C.8.2 Exercise 2: $stamp = mktime(19,45,0,10,20,2004); print 'Today is day '.date('d',$stamp).' of '.date('F',$stamp).' and day '. (date('z',$stamp)+1); print ' of the year '.date('Y',$stamp).'. The time is '.date('h:i A',$stamp); print ' (also known as '.date('H:i',$stamp).').';
C.8.3 Exercise 3: <?php print '<table>'; print '<tr><th>Year</th><th>Labor Day</th></tr>'; for ($year = 2004; $year <= 2020; $year++) { // Get the timestamp for September 1 of $year $stamp = mktime(12,0,0,9,1,$year); // Advance to the first monday $stamp = strtotime('monday', $stamp); print "<tr><td>$year</td><td>"; print date('F j', $stamp); print "</td></tr>\n"; } print '</table>'; ?>
C.8.4 Exercise 4: <?php require 'formhelpers.php'; // Set up arrays of months, days, years, hours, and minutes $months = array(1 => 'January', 2 => 'February', 3 => 'March', 4 => 'April', 5 => 'May', 6 => 'June', 7 => 'July', 8 => 'August', 9 => 'September', 10 => 'October', 11 => 'November', 12 => 'December'); $days = array( ); for ($i = 1; $i <= 31; $i++) { $days[$i] = $i; } $years = array( ); for ($year = date('Y') -1, $max_year = date('Y') + 5; $year < $max_year; $year++) { $years[$year] = $year; } if ($_POST['_submit_check']) { // If validate_form( ) returns errors, pass them to show_form( ) if ($form_errors = validate_form( )) { show_form($form_errors); } else {
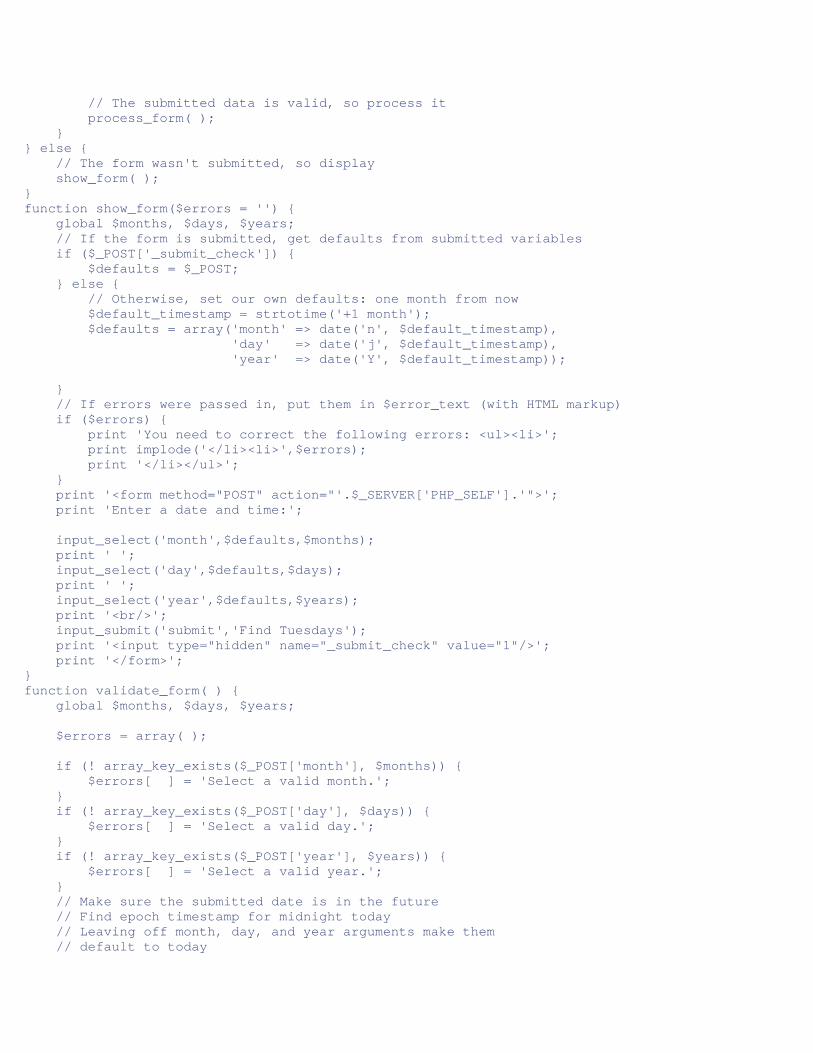
// The submitted data is valid, so process it process_form( ); } } else { // The form wasn't submitted, so display show_form( ); } function show_form($errors = '') { global $months, $days, $years; // If the form is submitted, get defaults from submitted variables if ($_POST['_submit_check']) { $defaults = $_POST; } else { // Otherwise, set our own defaults: one month from now $default_timestamp = strtotime('+1 month'); $defaults = array('month' => date('n', $default_timestamp), 'day' => date('j', $default_timestamp), 'year' => date('Y', $default_timestamp)); } // If errors were passed in, put them in $error_text (with HTML markup) if ($errors) { print 'You need to correct the following errors: <ul><li>'; print implode('</li><li>',$errors); print '</li></ul>'; } print '<form method="POST" action="'.$_SERVER['PHP_SELF'].'">'; print 'Enter a date and time:'; input_select('month',$defaults,$months); print ' '; input_select('day',$defaults,$days); print ' '; input_select('year',$defaults,$years); print '<br/>'; input_submit('submit','Find Tuesdays'); print '<input type="hidden" name="_submit_check" value="1"/>'; print '</form>'; } function validate_form( ) { global $months, $days, $years; $errors = array( ); if (! array_key_exists($_POST['month'], $months)) { $errors[ ] = 'Select a valid month.'; } if (! array_key_exists($_POST['day'], $days)) { $errors[ ] = 'Select a valid day.'; } if (! array_key_exists($_POST['year'], $years)) { $errors[ ] = 'Select a valid year.'; } // Make sure the submitted date is in the future // Find epoch timestamp for midnight today // Leaving off month, day, and year arguments make them // default to today
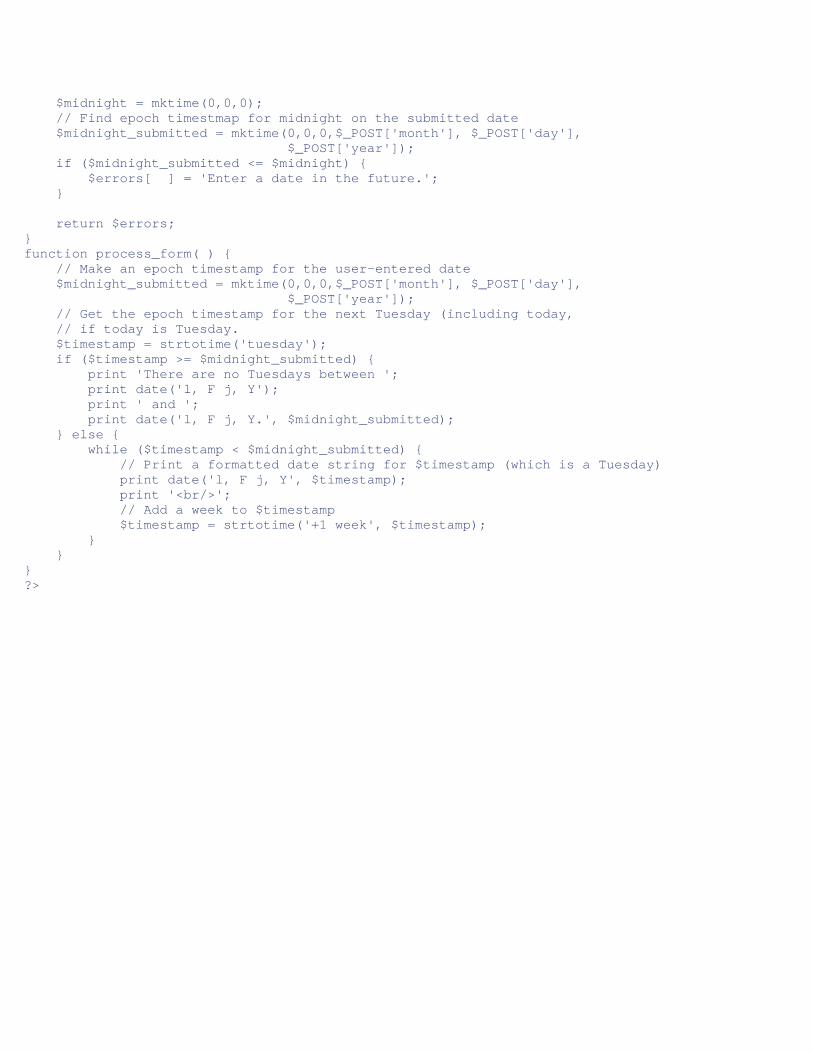
$midnight = mktime(0,0,0); // Find epoch timestmap for midnight on the submitted date $midnight_submitted = mktime(0,0,0,$_POST['month'], $_POST['day'], $_POST['year']); if ($midnight_submitted <= $midnight) { $errors[ ] = 'Enter a date in the future.'; } return $errors; } function process_form( ) { // Make an epoch timestamp for the user-entered date $midnight_submitted = mktime(0,0,0,$_POST['month'], $_POST['day'], $_POST['year']); // Get the epoch timestamp for the next Tuesday (including today, // if today is Tuesday. $timestamp = strtotime('tuesday'); if ($timestamp >= $midnight_submitted) { print 'There are no Tuesdays between '; print date('l, F j, Y'); print ' and '; print date('l, F j, Y.', $midnight_submitted); } else { while ($timestamp < $midnight_submitted) { // Print a formatted date string for $timestamp (which is a Tuesday) print date('l, F j, Y', $timestamp); print '<br/>'; // Add a week to $timestamp $timestamp = strtotime('+1 week', $timestamp); } } } ?>
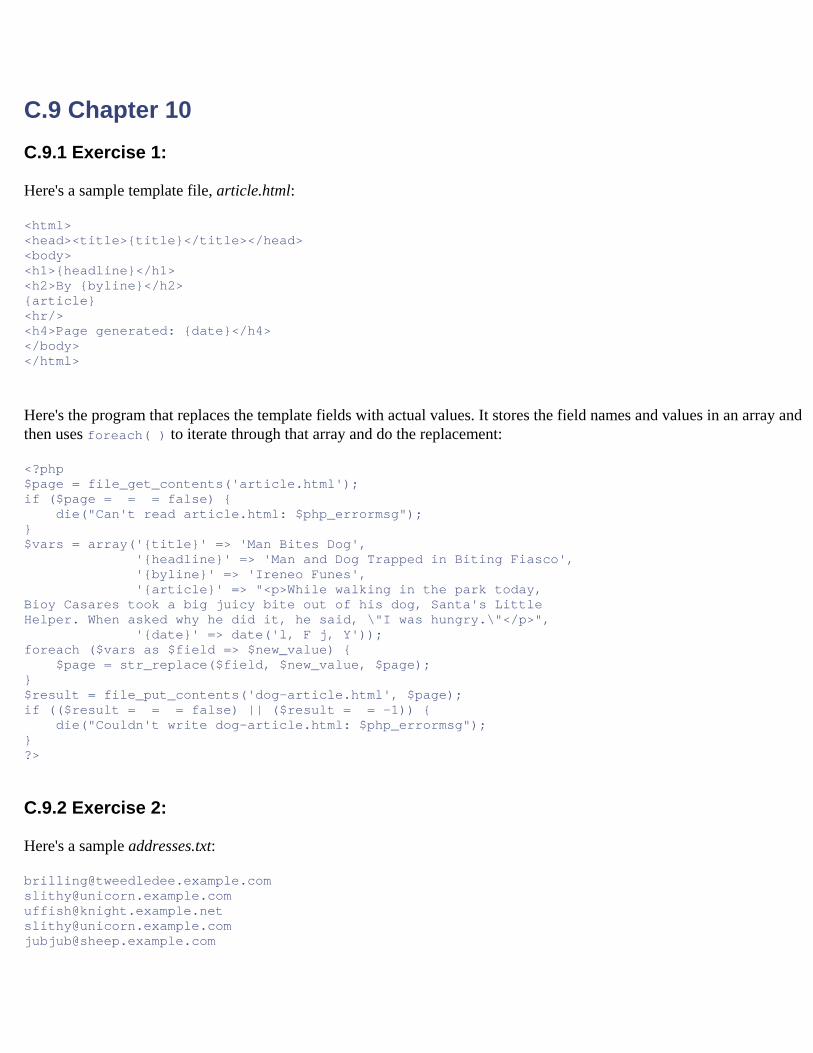
C.9 Chapter 10 C.9.1 Exercise 1:
Here's a sample template file, article.html:
<html> <head><title>{title}</title></head> <body> <h1>{headline}</h1> <h2>By {byline}</h2> {article} <hr/> <h4>Page generated: {date}</h4> </body> </html>
Here's the program that replaces the template fields with actual values. It stores the field names and values in an array and then uses foreach( ) to iterate through that array and do the replacement:
<?php $page = file_get_contents('article.html'); if ($page = = = false) { die("Can't read article.html: $php_errormsg"); } $vars = array('{title}' => 'Man Bites Dog', '{headline}' => 'Man and Dog Trapped in Biting Fiasco', '{byline}' => 'Ireneo Funes', '{article}' => "<p>While walking in the park today, Bioy Casares took a big juicy bite out of his dog, Santa's Little Helper. When asked why he did it, he said, \"I was hungry.\"</p>", '{date}' => date('l, F j, Y')); foreach ($vars as $field => $new_value) { $page = str_replace($field, $new_value, $page); } $result = file_put_contents('dog-article.html', $page); if (($result = = = false) || ($result = = -1)) { die("Couldn't write dog-article.html: $php_errormsg"); } ?>
C.9.2 Exercise 2:
Here's a sample addresses.txt:
[email protected] [email protected] [email protected] [email protected] [email protected]
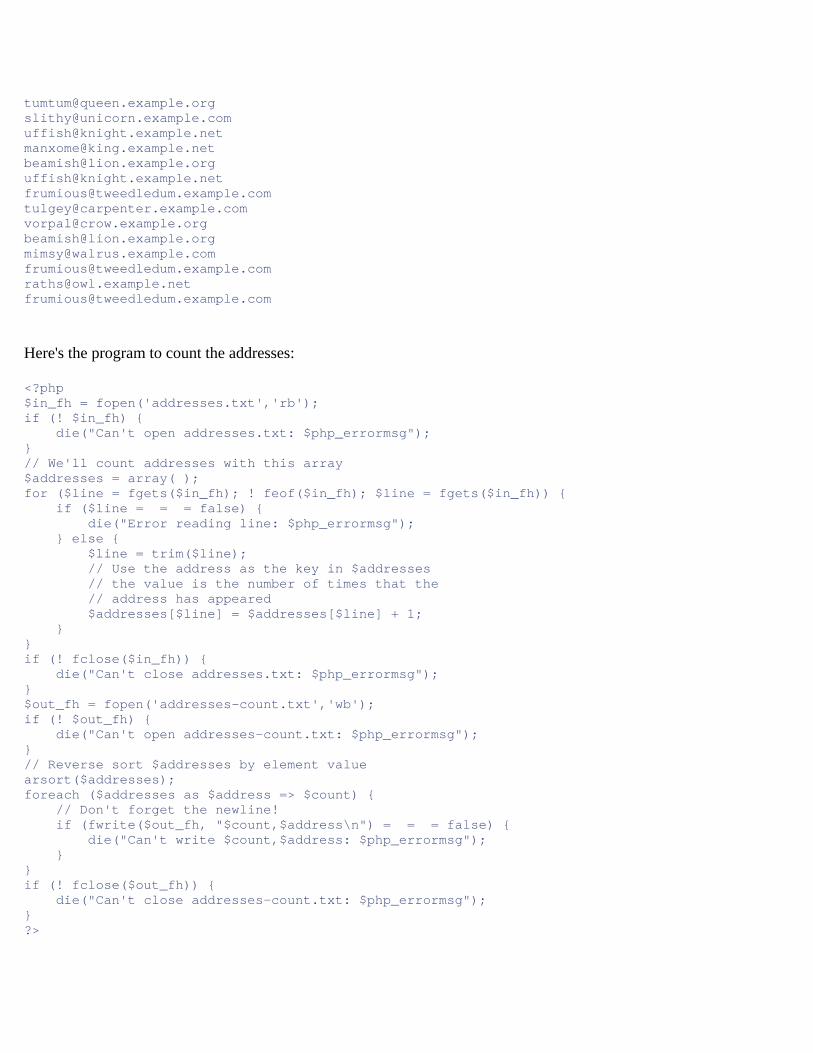
[email protected] [email protected] [email protected] [email protected] [email protected] [email protected] [email protected] [email protected] [email protected] [email protected] [email protected] [email protected] [email protected] [email protected]
Here's the program to count the addresses:
<?php $in_fh = fopen('addresses.txt','rb'); if (! $in_fh) { die("Can't open addresses.txt: $php_errormsg"); } // We'll count addresses with this array $addresses = array( ); for ($line = fgets($in_fh); ! feof($in_fh); $line = fgets($in_fh)) { if ($line = = = false) { die("Error reading line: $php_errormsg"); } else { $line = trim($line); // Use the address as the key in $addresses // the value is the number of times that the // address has appeared $addresses[$line] = $addresses[$line] + 1; } } if (! fclose($in_fh)) { die("Can't close addresses.txt: $php_errormsg"); } $out_fh = fopen('addresses-count.txt','wb'); if (! $out_fh) { die("Can't open addresses-count.txt: $php_errormsg"); } // Reverse sort $addresses by element value arsort($addresses); foreach ($addresses as $address => $count) { // Don't forget the newline! if (fwrite($out_fh, "$count,$address\n") = = = false) { die("Can't write $count,$address: $php_errormsg"); } } if (! fclose($out_fh)) { die("Can't close addresses-count.txt: $php_errormsg"); } ?>
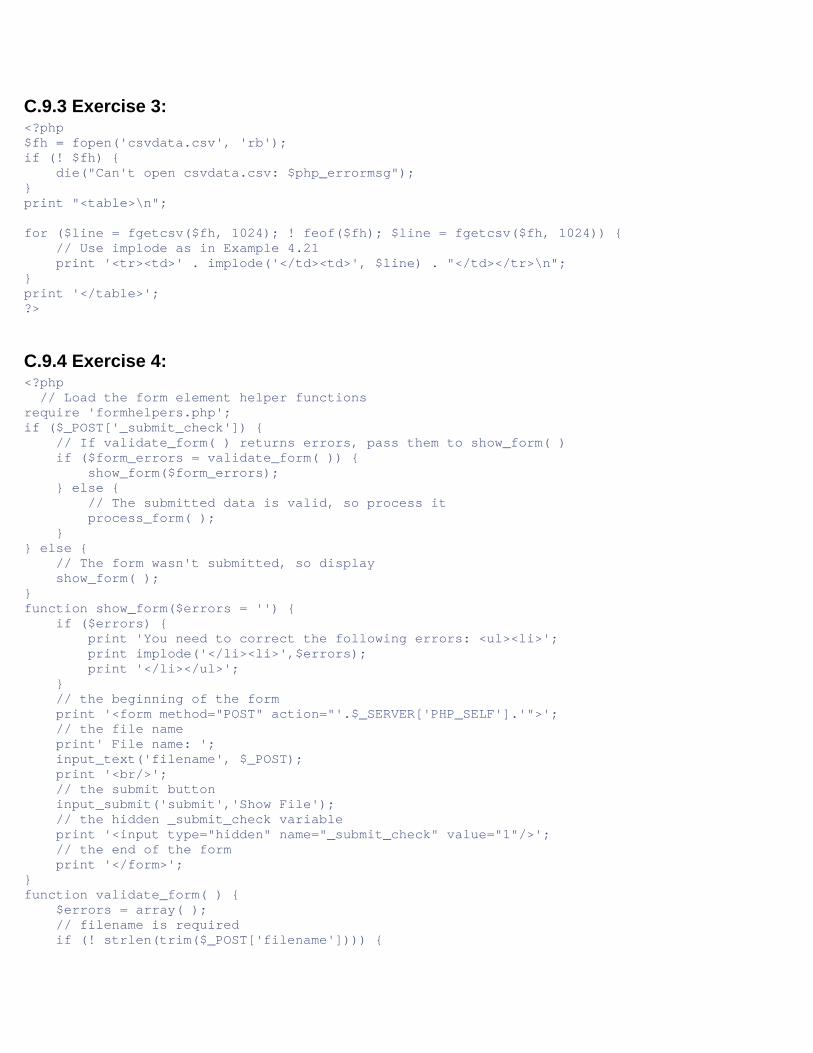
C.9.3 Exercise 3: <?php $fh = fopen('csvdata.csv', 'rb'); if (! $fh) { die("Can't open csvdata.csv: $php_errormsg"); } print "<table>\n"; for ($line = fgetcsv($fh, 1024); ! feof($fh); $line = fgetcsv($fh, 1024)) { // Use implode as in Example 4.21 print '<tr><td>' . implode('</td><td>', $line) . "</td></tr>\n"; } print '</table>'; ?>
C.9.4 Exercise 4: <?php // Load the form element helper functions require 'formhelpers.php'; if ($_POST['_submit_check']) { // If validate_form( ) returns errors, pass them to show_form( ) if ($form_errors = validate_form( )) { show_form($form_errors); } else { // The submitted data is valid, so process it process_form( ); } } else { // The form wasn't submitted, so display show_form( ); } function show_form($errors = '') { if ($errors) { print 'You need to correct the following errors: <ul><li>'; print implode('</li><li>',$errors); print '</li></ul>'; } // the beginning of the form print '<form method="POST" action="'.$_SERVER['PHP_SELF'].'">'; // the file name print' File name: '; input_text('filename', $_POST); print '<br/>'; // the submit button input_submit('submit','Show File'); // the hidden _submit_check variable print '<input type="hidden" name="_submit_check" value="1"/>'; // the end of the form print '</form>'; } function validate_form( ) { $errors = array( ); // filename is required if (! strlen(trim($_POST['filename']))) {
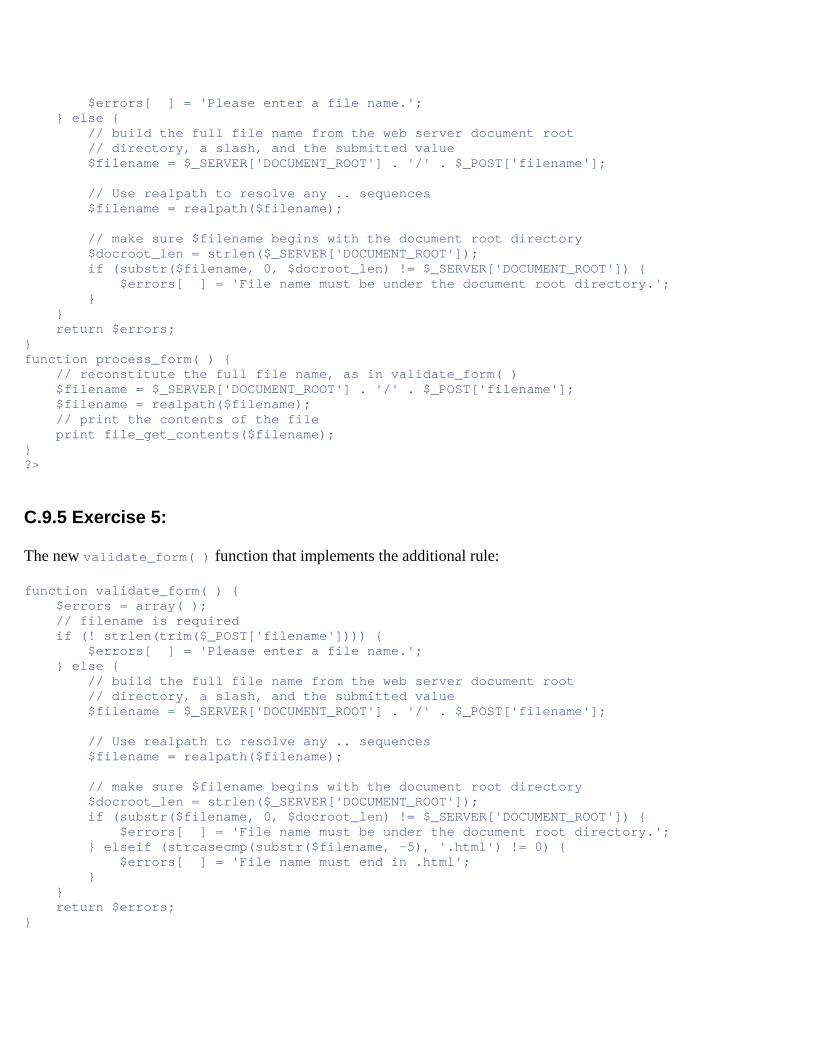
$errors[ ] = 'Please enter a file name.'; } else { // build the full file name from the web server document root // directory, a slash, and the submitted value $filename = $_SERVER['DOCUMENT_ROOT'] . '/' . $_POST['filename']; // Use realpath to resolve any .. sequences $filename = realpath($filename); // make sure $filename begins with the document root directory $docroot_len = strlen($_SERVER['DOCUMENT_ROOT']); if (substr($filename, 0, $docroot_len) != $_SERVER['DOCUMENT_ROOT']) { $errors[ ] = 'File name must be under the document root directory.'; } } return $errors; } function process_form( ) { // reconstitute the full file name, as in validate_form( ) $filename = $_SERVER['DOCUMENT_ROOT'] . '/' . $_POST['filename']; $filename = realpath($filename); // print the contents of the file print file_get_contents($filename); } ?>
C.9.5 Exercise 5:
The new validate_form( ) function that implements the additional rule:
function validate_form( ) { $errors = array( ); // filename is required if (! strlen(trim($_POST['filename']))) { $errors[ ] = 'Please enter a file name.'; } else { // build the full file name from the web server document root // directory, a slash, and the submitted value $filename = $_SERVER['DOCUMENT_ROOT'] . '/' . $_POST['filename']; // Use realpath to resolve any .. sequences $filename = realpath($filename); // make sure $filename begins with the document root directory $docroot_len = strlen($_SERVER['DOCUMENT_ROOT']); if (substr($filename, 0, $docroot_len) != $_SERVER['DOCUMENT_ROOT']) { $errors[ ] = 'File name must be under the document root directory.'; } elseif (strcasecmp(substr($filename, -5), '.html') != 0) { $errors[ ] = 'File name must end in .html'; } } return $errors; }
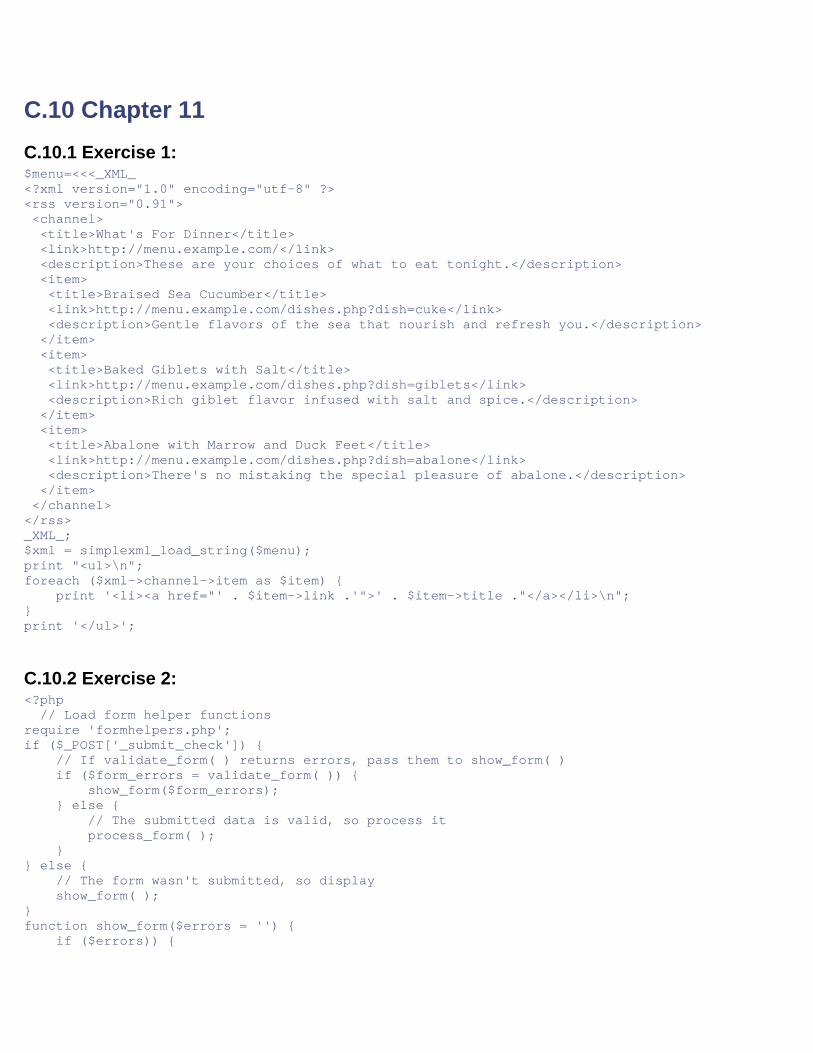
C.10 Chapter 11 C.10.1 Exercise 1: $menu=<<<_XML_ <?xml version="1.0" encoding="utf-8" ?> <rss version="0.91"> <channel> <title>What's For Dinner</title> <link>http://menu.example.com/</link> <description>These are your choices of what to eat tonight.</description> <item> <title>Braised Sea Cucumber</title> <link>http://menu.example.com/dishes.php?dish=cuke</link> <description>Gentle flavors of the sea that nourish and refresh you.</description> </item> <item> <title>Baked Giblets with Salt</title> <link>http://menu.example.com/dishes.php?dish=giblets</link> <description>Rich giblet flavor infused with salt and spice.</description> </item> <item> <title>Abalone with Marrow and Duck Feet</title> <link>http://menu.example.com/dishes.php?dish=abalone</link> <description>There's no mistaking the special pleasure of abalone.</description> </item> </channel> </rss> _XML_; $xml = simplexml_load_string($menu); print "<ul>\n"; foreach ($xml->channel->item as $item) { print '<li><a href="' . $item->link .'">' . $item->title ."</a></li>\n"; } print '</ul>';
C.10.2 Exercise 2: <?php // Load form helper functions require 'formhelpers.php'; if ($_POST['_submit_check']) { // If validate_form( ) returns errors, pass them to show_form( ) if ($form_errors = validate_form( )) { show_form($form_errors); } else { // The submitted data is valid, so process it process_form( ); } } else { // The form wasn't submitted, so display show_form( ); } function show_form($errors = '') { if ($errors)) {
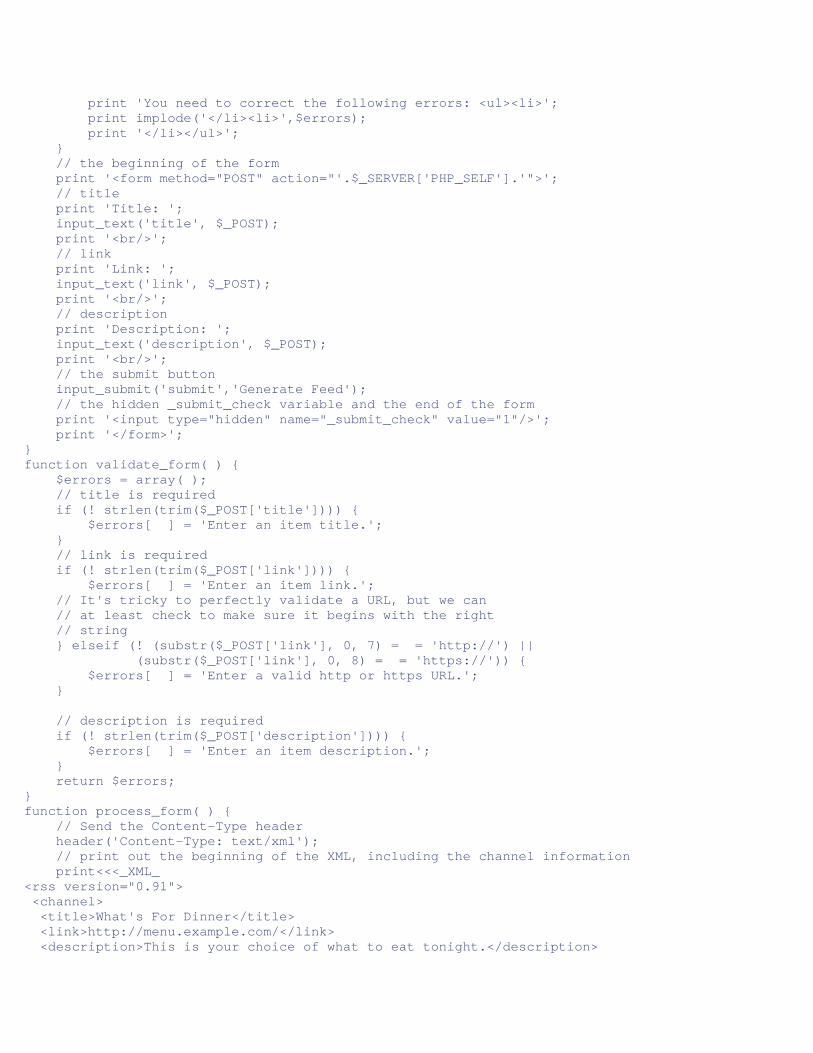
print 'You need to correct the following errors: <ul><li>'; print implode('</li><li>',$errors); print '</li></ul>'; } // the beginning of the form print '<form method="POST" action="'.$_SERVER['PHP_SELF'].'">'; // title print 'Title: '; input_text('title', $_POST); print '<br/>'; // link print 'Link: '; input_text('link', $_POST); print '<br/>'; // description print 'Description: '; input_text('description', $_POST); print '<br/>'; // the submit button input_submit('submit','Generate Feed'); // the hidden _submit_check variable and the end of the form print '<input type="hidden" name="_submit_check" value="1"/>'; print '</form>'; } function validate_form( ) { $errors = array( ); // title is required if (! strlen(trim($_POST['title']))) { $errors[ ] = 'Enter an item title.'; } // link is required if (! strlen(trim($_POST['link']))) { $errors[ ] = 'Enter an item link.'; // It's tricky to perfectly validate a URL, but we can // at least check to make sure it begins with the right // string } elseif (! (substr($_POST['link'], 0, 7) = = 'http://') || (substr($_POST['link'], 0, 8) = = 'https://')) { $errors[ ] = 'Enter a valid http or https URL.'; } // description is required if (! strlen(trim($_POST['description']))) { $errors[ ] = 'Enter an item description.'; } return $errors; } function process_form( ) { // Send the Content-Type header header('Content-Type: text/xml'); // print out the beginning of the XML, including the channel information print<<<_XML_ <rss version="0.91"> <channel> <title>What's For Dinner</title> <link>http://menu.example.com/</link> <description>This is your choice of what to eat tonight.</description>
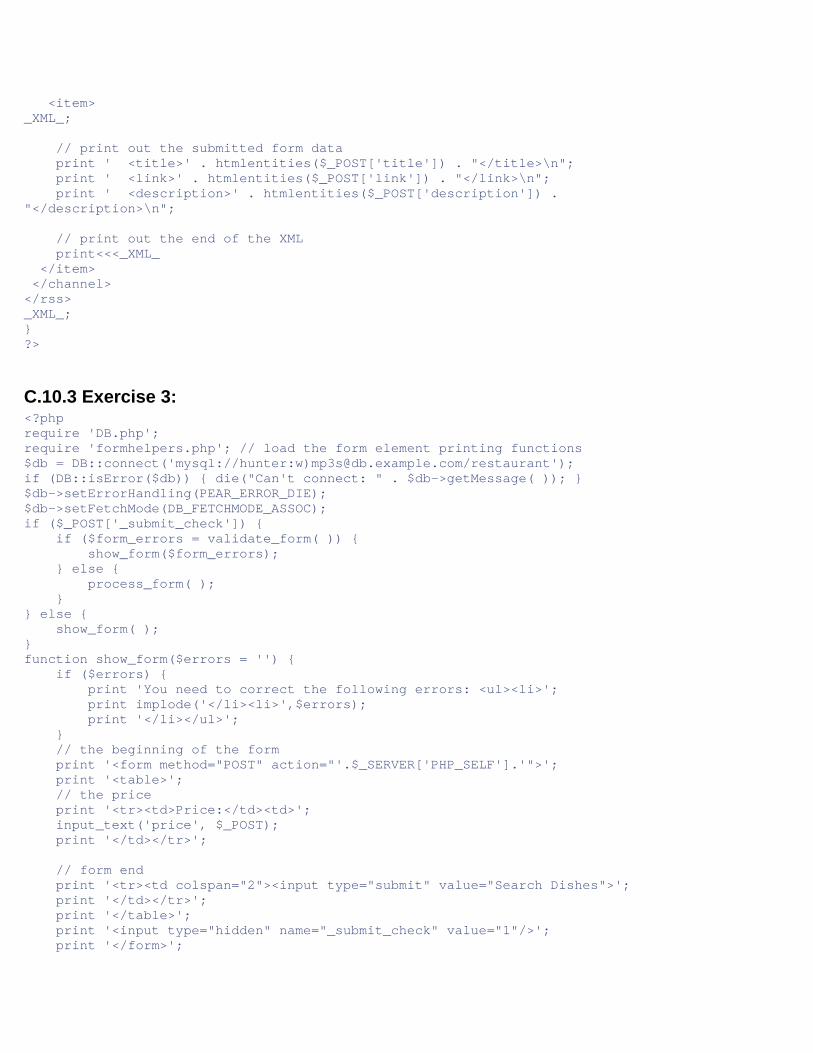
<item> _XML_; // print out the submitted form data print ' <title>' . htmlentities($_POST['title']) . "</title>\n"; print ' <link>' . htmlentities($_POST['link']) . "</link>\n"; print ' <description>' . htmlentities($_POST['description']) . "</description>\n"; // print out the end of the XML print<<<_XML_ </item> </channel> </rss> _XML_; } ?>
C.10.3 Exercise 3: <?php require 'DB.php'; require 'formhelpers.php'; // load the form element printing functions $db = DB::connect('mysql://hunter:w)[email protected]/restaurant'); if (DB::isError($db)) { die("Can't connect: " . $db->getMessage( )); } $db->setErrorHandling(PEAR_ERROR_DIE); $db->setFetchMode(DB_FETCHMODE_ASSOC); if ($_POST['_submit_check']) { if ($form_errors = validate_form( )) { show_form($form_errors); } else { process_form( ); } } else { show_form( ); } function show_form($errors = '') { if ($errors) { print 'You need to correct the following errors: <ul><li>'; print implode('</li><li>',$errors); print '</li></ul>'; } // the beginning of the form print '<form method="POST" action="'.$_SERVER['PHP_SELF'].'">'; print '<table>'; // the price print '<tr><td>Price:</td><td>'; input_text('price', $_POST); print '</td></tr>'; // form end print '<tr><td colspan="2"><input type="submit" value="Search Dishes">'; print '</td></tr>'; print '</table>'; print '<input type="hidden" name="_submit_check" value="1"/>'; print '</form>';
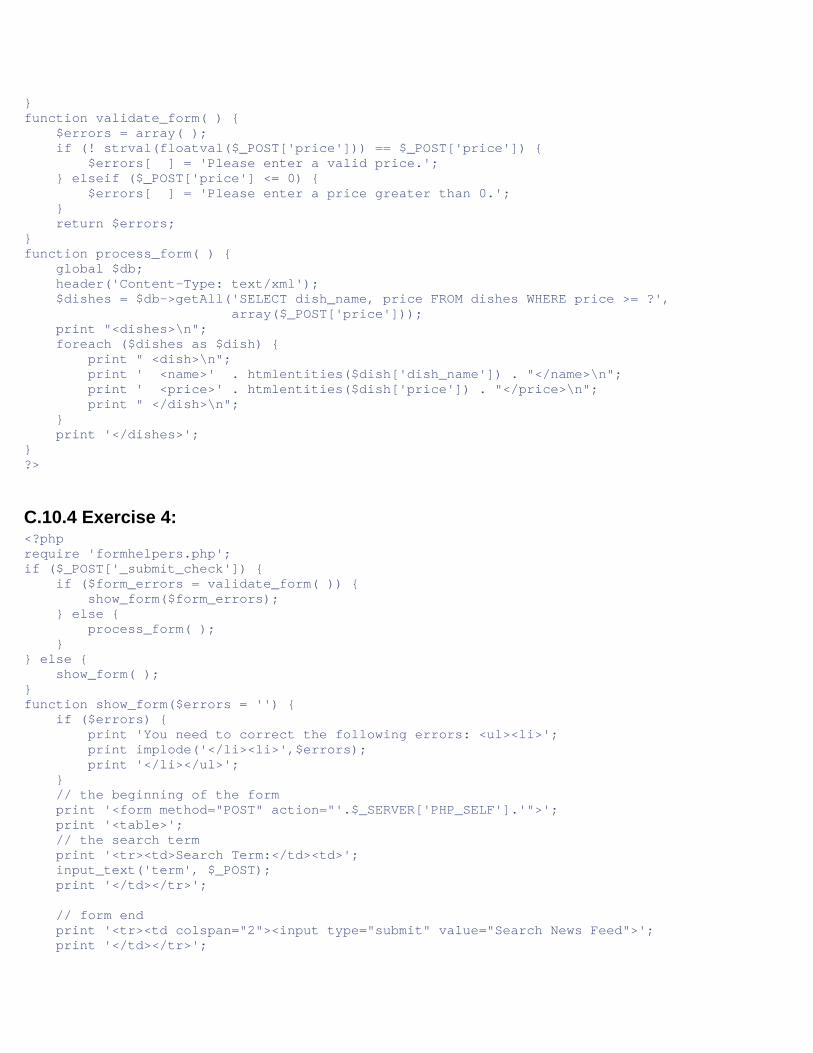
} function validate_form( ) { $errors = array( ); if (! strval(floatval($_POST['price'])) == $_POST['price']) { $errors[ ] = 'Please enter a valid price.'; } elseif ($_POST['price'] <= 0) { $errors[ ] = 'Please enter a price greater than 0.'; } return $errors; } function process_form( ) { global $db; header('Content-Type: text/xml'); $dishes = $db->getAll('SELECT dish_name, price FROM dishes WHERE price >= ?', array($_POST['price'])); print "<dishes>\n"; foreach ($dishes as $dish) { print " <dish>\n"; print ' <name>' . htmlentities($dish['dish_name']) . "</name>\n"; print ' <price>' . htmlentities($dish['price']) . "</price>\n"; print " </dish>\n"; } print '</dishes>'; } ?>
C.10.4 Exercise 4: <?php require 'formhelpers.php'; if ($_POST['_submit_check']) { if ($form_errors = validate_form( )) { show_form($form_errors); } else { process_form( ); } } else { show_form( ); } function show_form($errors = '') { if ($errors) { print 'You need to correct the following errors: <ul><li>'; print implode('</li><li>',$errors); print '</li></ul>'; } // the beginning of the form print '<form method="POST" action="'.$_SERVER['PHP_SELF'].'">'; print '<table>'; // the search term print '<tr><td>Search Term:</td><td>'; input_text('term', $_POST); print '</td></tr>'; // form end print '<tr><td colspan="2"><input type="submit" value="Search News Feed">'; print '</td></tr>';
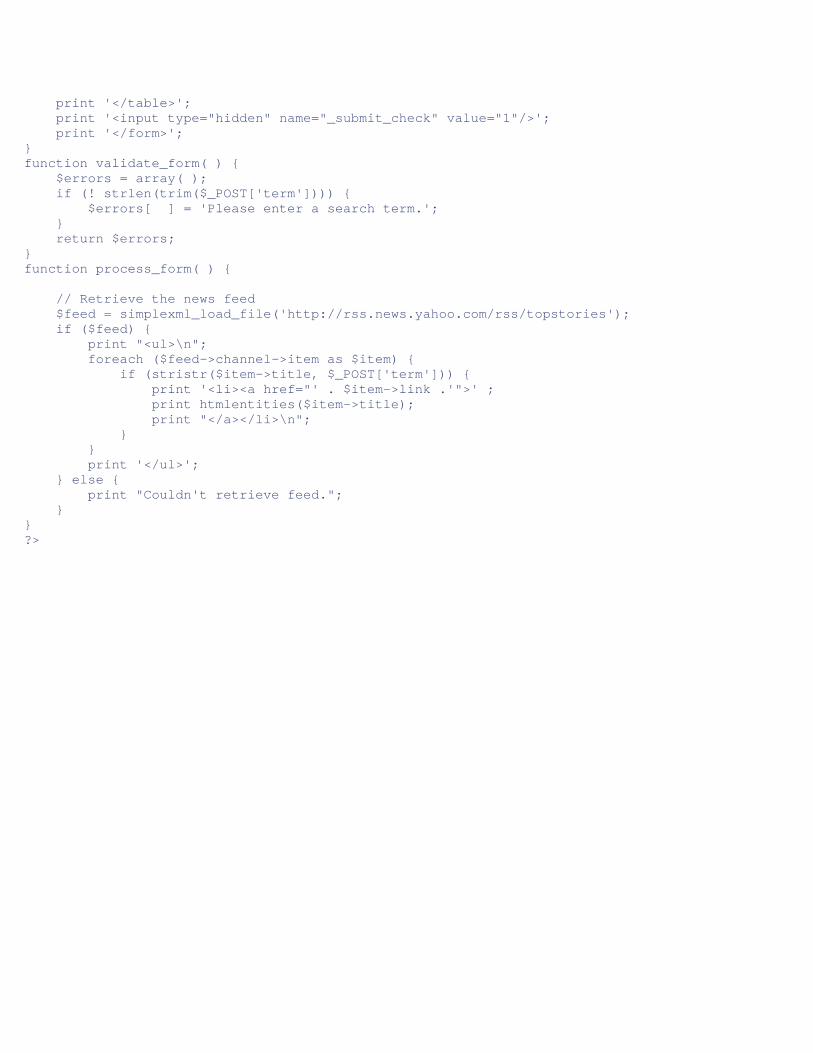
print '</table>'; print '<input type="hidden" name="_submit_check" value="1"/>'; print '</form>'; } function validate_form( ) { $errors = array( ); if (! strlen(trim($_POST['term']))) { $errors[ ] = 'Please enter a search term.'; } return $errors; } function process_form( ) { // Retrieve the news feed $feed = simplexml_load_file('http://rss.news.yahoo.com/rss/topstories'); if ($feed) { print "<ul>\n"; foreach ($feed->channel->item as $item) { if (stristr($item->title, $_POST['term'])) { print '<li><a href="' . $item->link .'">' ; print htmlentities($item->title); print "</a></li>\n"; } } print '</ul>'; } else { print "Couldn't retrieve feed."; } } ?>
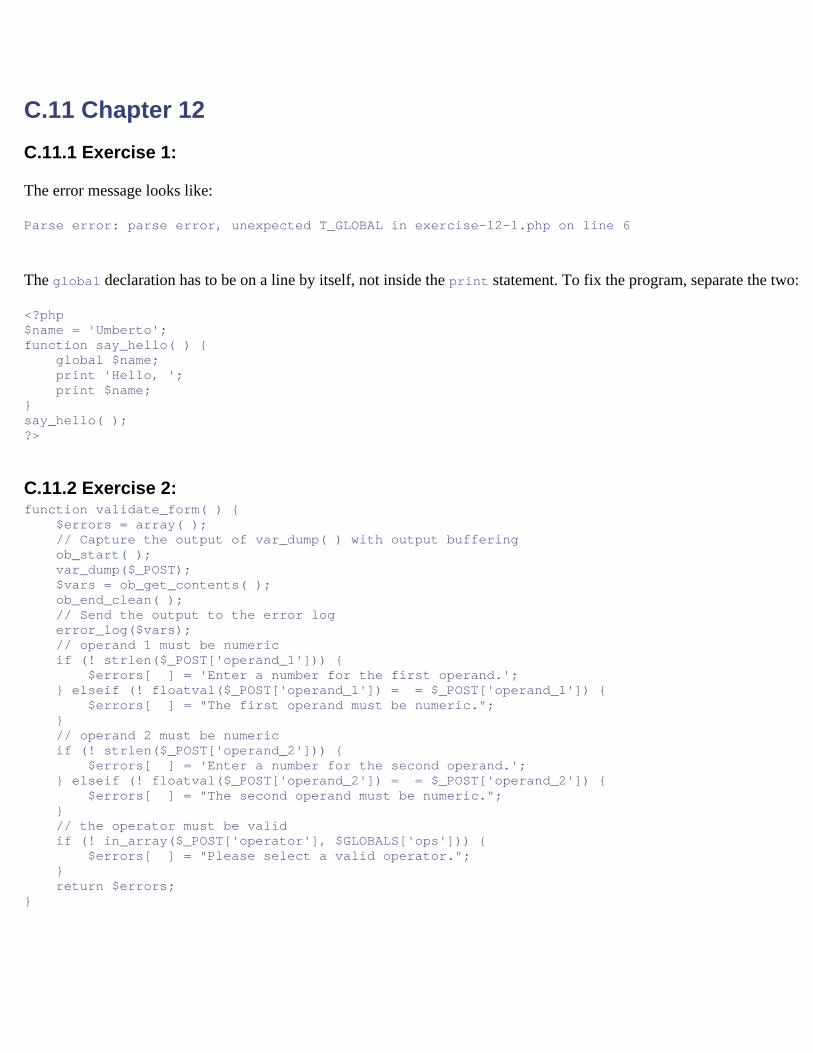
C.11 Chapter 12 C.11.1 Exercise 1:
The error message looks like:
Parse error: parse error, unexpected T_GLOBAL in exercise-12-1.php on line 6
The global declaration has to be on a line by itself, not inside the print statement. To fix the program, separate the two:
<?php $name = 'Umberto'; function say_hello( ) { global $name; print 'Hello, '; print $name; } say_hello( ); ?>
C.11.2 Exercise 2: function validate_form( ) { $errors = array( ); // Capture the output of var_dump( ) with output buffering ob_start( ); var_dump($_POST); $vars = ob_get_contents( ); ob_end_clean( ); // Send the output to the error log error_log($vars); // operand 1 must be numeric if (! strlen($_POST['operand_1'])) { $errors[ ] = 'Enter a number for the first operand.'; } elseif (! floatval($_POST['operand_1']) = = $_POST['operand_1']) { $errors[ ] = "The first operand must be numeric."; } // operand 2 must be numeric if (! strlen($_POST['operand_2'])) { $errors[ ] = 'Enter a number for the second operand.'; } elseif (! floatval($_POST['operand_2']) = = $_POST['operand_2']) { $errors[ ] = "The second operand must be numeric."; } // the operator must be valid if (! in_array($_POST['operator'], $GLOBALS['ops'])) { $errors[ ] = "Please select a valid operator."; } return $errors; }
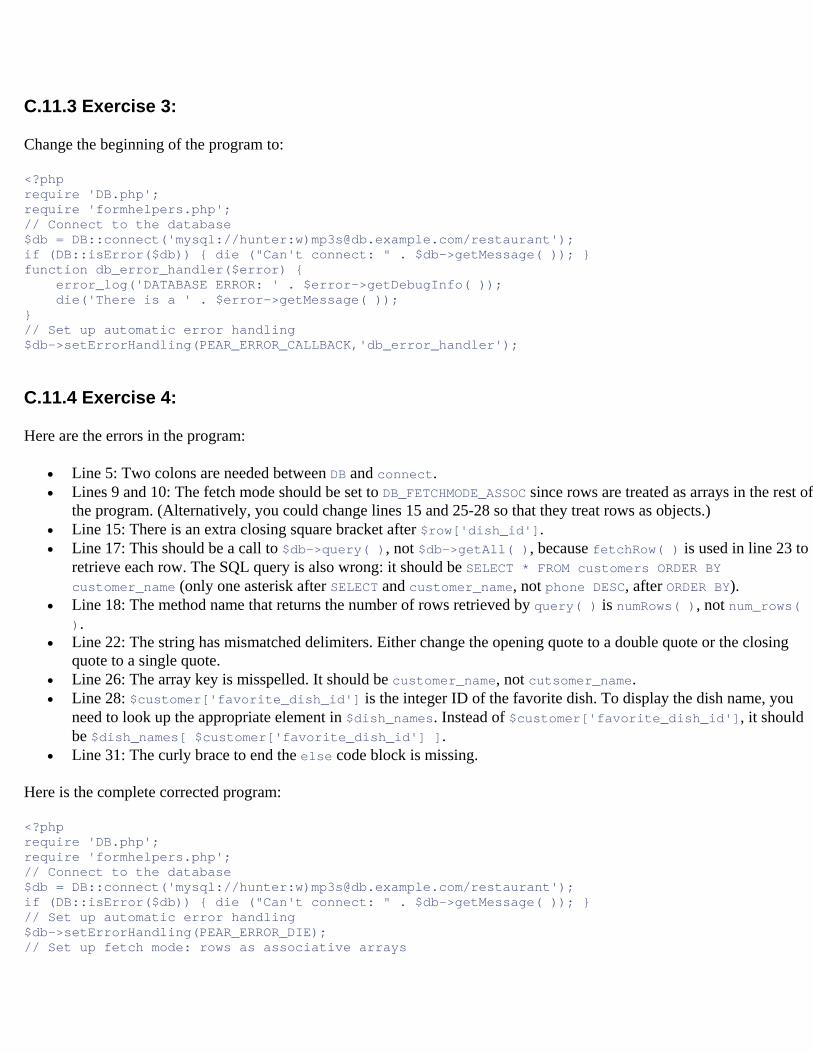
C.11.3 Exercise 3:
Change the beginning of the program to:
<?php require 'DB.php'; require 'formhelpers.php'; // Connect to the database $db = DB::connect('mysql://hunter:w)[email protected]/restaurant'); if (DB::isError($db)) { die ("Can't connect: " . $db->getMessage( )); } function db_error_handler($error) { error_log('DATABASE ERROR: ' . $error->getDebugInfo( )); die('There is a ' . $error->getMessage( )); } // Set up automatic error handling $db->setErrorHandling(PEAR_ERROR_CALLBACK,'db_error_handler');
C.11.4 Exercise 4:
Here are the errors in the program:
• Line 5: Two colons are needed between DB and connect. • Lines 9 and 10: The fetch mode should be set to DB_FETCHMODE_ASSOC since rows are treated as arrays in the rest of
the program. (Alternatively, you could change lines 15 and 25-28 so that they treat rows as objects.) • Line 15: There is an extra closing square bracket after $row['dish_id']. • Line 17: This should be a call to $db->query( ), not $db->getAll( ), because fetchRow( ) is used in line 23 to
retrieve each row. The SQL query is also wrong: it should be SELECT * FROM customers ORDER BY customer_name (only one asterisk after SELECT and customer_name, not phone DESC, after ORDER BY).
• Line 18: The method name that returns the number of rows retrieved by query( ) is numRows( ), not num_rows( ).
• Line 22: The string has mismatched delimiters. Either change the opening quote to a double quote or the closing quote to a single quote.
• Line 26: The array key is misspelled. It should be customer_name, not cutsomer_name. • Line 28: $customer['favorite_dish_id'] is the integer ID of the favorite dish. To display the dish name, you
need to look up the appropriate element in $dish_names. Instead of $customer['favorite_dish_id'], it should be $dish_names[ $customer['favorite_dish_id'] ].
• Line 31: The curly brace to end the else code block is missing.
Here is the complete corrected program:
<?php require 'DB.php'; require 'formhelpers.php'; // Connect to the database $db = DB::connect('mysql://hunter:w)[email protected]/restaurant'); if (DB::isError($db)) { die ("Can't connect: " . $db->getMessage( )); } // Set up automatic error handling $db->setErrorHandling(PEAR_ERROR_DIE); // Set up fetch mode: rows as associative arrays
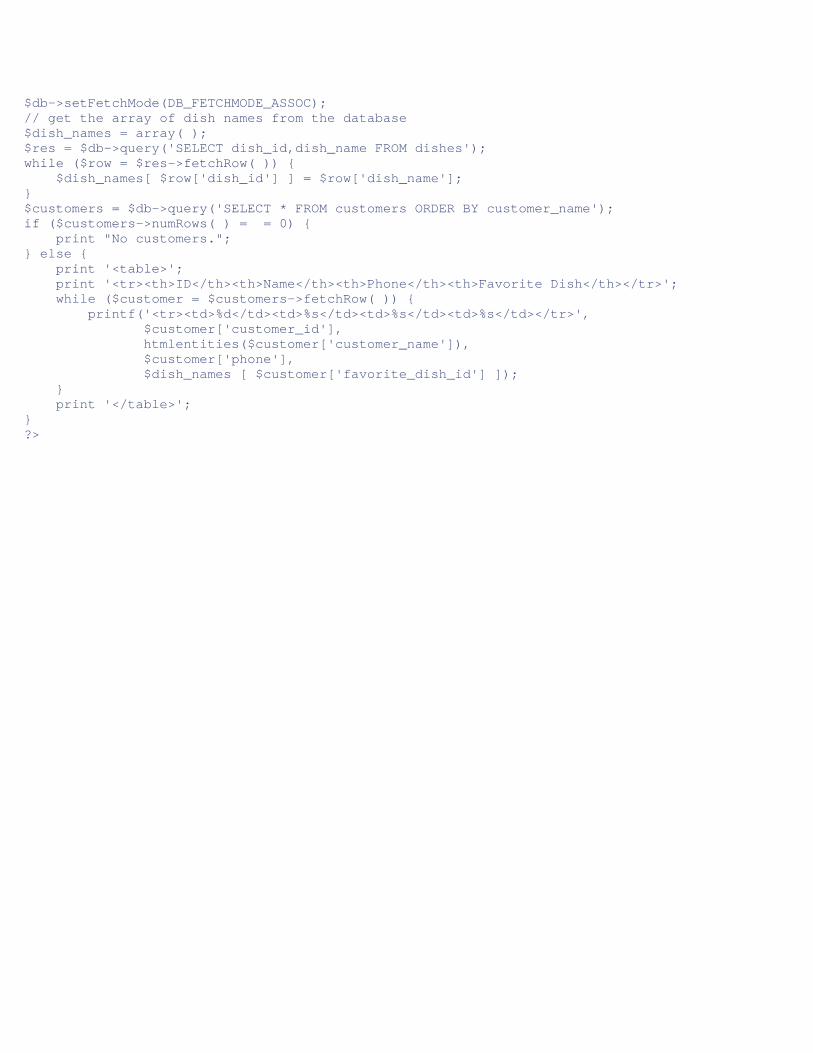
$db->setFetchMode(DB_FETCHMODE_ASSOC); // get the array of dish names from the database $dish_names = array( ); $res = $db->query('SELECT dish_id,dish_name FROM dishes'); while ($row = $res->fetchRow( )) { $dish_names[ $row['dish_id'] ] = $row['dish_name']; } $customers = $db->query('SELECT * FROM customers ORDER BY customer_name'); if ($customers->numRows( ) = = 0) { print "No customers."; } else { print '<table>'; print '<tr><th>ID</th><th>Name</th><th>Phone</th><th>Favorite Dish</th></tr>'; while ($customer = $customers->fetchRow( )) { printf('<tr><td>%d</td><td>%s</td><td>%s</td><td>%s</td></tr>', $customer['customer_id'], htmlentities($customer['customer_name']), $customer['phone'], $dish_names [ $customer['favorite_dish_id'] ]); } print '</table>'; } ?>
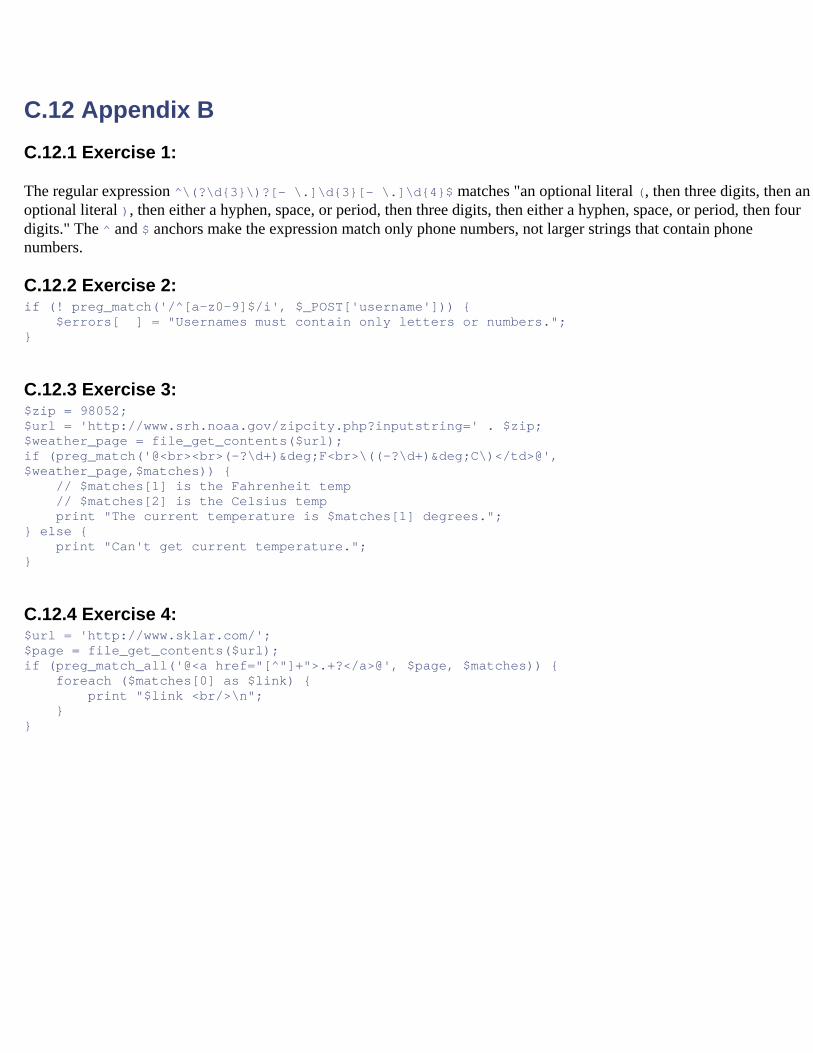
C.12 Appendix B C.12.1 Exercise 1:
The regular expression ^\(?\d{3}\)?[- \.]\d{3}[- \.]\d{4}$ matches "an optional literal (, then three digits, then an optional literal ), then either a hyphen, space, or period, then three digits, then either a hyphen, space, or period, then four digits." The ^ and $ anchors make the expression match only phone numbers, not larger strings that contain phone numbers.
C.12.2 Exercise 2: if (! preg_match('/^[a-z0-9]$/i', $_POST['username'])) { $errors[ ] = "Usernames must contain only letters or numbers."; }
C.12.3 Exercise 3: $zip = 98052; $url = 'http://www.srh.noaa.gov/zipcity.php?inputstring=' . $zip; $weather_page = file_get_contents($url); if (preg_match('@<br><br>(-?\d+)°F<br>\((-?\d+)°C\)</td>@', $weather_page,$matches)) { // $matches[1] is the Fahrenheit temp // $matches[2] is the Celsius temp print "The current temperature is $matches[1] degrees."; } else { print "Can't get current temperature."; }
C.12.4 Exercise 4: $url = 'http://www.sklar.com/'; $page = file_get_contents($url); if (preg_match_all('@<a href="[^"]+">.+?</a>@', $page, $matches)) { foreach ($matches[0] as $link) { print "$link <br/>\n"; } }
Colophon
Our look is the result of reader comments, our own experimentation, and feedback from distribution channels. Distinctive covers complement our distinctive approach to technical topics, breathing personality and life into potentially dry subjects.
The animal on the cover of Learning PHP 5 is an eagle. Eagles fall into the category of bird known as "raptors," a category that also includes falcons and hawks. There are two types of raptor: grasping killers, with beaks shaped for tearing and cutting and short toes with curved claws designed for killing; and grasping holders, with beaks shaped for tearing and biting, and longer toes designed for holding. Eagles are grasping killers. Sea eagles have special adaptations to their toes that enable them to grasp smooth prey such as fish. Their excellent vision enables all eagles to spot prey from the air or a high perch. The eagle then swoops down, grabs its prey, and takes off in flight again, in one graceful movement. Eagles often eat their victims while still flying, breaking them apart and discarding the nonedible parts to lighten their load. Eagles, like most raptors, often dine on sick or wounded animals.
There are more than 50 species of eagle spread throughout the world, with the exception of New Zealand and Antarctica. All species of eagles build nests, or aeries, high above the ground, in trees or on rocky ledges. A pair of eagles will use the same nest year after year, lining it with green leaves and grass, fur, turf, or soft materials. The eagle will add to its nest each year. The largest eagle nest ever found was 20 feet deep and 10 feet across.
Hunting, increased use of pesticides, and the diminishment of their natural environment, with the attendant reduction in food sources, have endangered many species of eagle.
Mary Brady was the production editor and the copyeditor for Learning PHP 5. Leanne Soylemez was the proofreader. Mary Anne Weeks Mayo and Claire Cloutier provided quality control. Judy Hoer wrote the index.
Hanna Dyer designed the cover of this book, based on a series design by Edie Freedman. The cover image is a 19th-century engraving from the Dover Pictorial Archive. Emma Colby produced the cover layout with QuarkXPress 4.1 using Adobe's ITC Garamond font.
David Futato designed the interior layout. This book was converted by Joe Wizda to FrameMaker 5.5.6 with a format conversion tool created by Erik Ray, Jason McIntosh, Neil Walls, and Mike Sierra that uses Perl and XML technologies. The text font is Linotype Birka; the heading font is Adobe Myriad Condensed; and the code font is LucasFont's TheSans Mono Condensed. The illustrations that appear in the book were produced by Robert Romano and Jessamyn Read using Macromedia FreeHand 9 and Adobe Photoshop 6. The tip and warning icons were drawn by Christopher Bing. This colophon was written by Mary Brady.
The online edition of this book was created by the Safari production group (John Chodacki, Becki Maisch, and Ellie Cutler) using a set of Frame-to-XML conversion and cleanup tools written and maintained by Erik Ray, Benn Salter, John Chodacki, Ellie Cutler, and Jeff Liggett.

Related Documents