Lab Exercise #4: Lab Exercise #4: Intro to lab safety Intro to lab safety Microscopes Microscopes

Lab Exercise #4: Intro to lab safety Microscopes.
Dec 13, 2015
Welcome message from author
This document is posted to help you gain knowledge. Please leave a comment to let me know what you think about it! Share it to your friends and learn new things together.
Transcript
Lab Exercise #4:Lab Exercise #4:
Intro to lab safetyIntro to lab safety
MicroscopesMicroscopes

Safety infoSafety info
Read the two sheets (green and Read the two sheets (green and pink)pink)
Sign the yellow sheetSign the yellow sheet Under 18? Please see me.Under 18? Please see me.
Lab safetyLab safety
First aid kit at the front First aid kit at the front Fire extinguisher at the backFire extinguisher at the back Eye wash at sinkEye wash at sink Showers in the backShowers in the back
Lab SafetyLab Safety
No eating or drinking in labNo eating or drinking in lab Clean up rule:Clean up rule:
– It is your responsibility to clean up It is your responsibility to clean up after yourself and put everything after yourself and put everything back like you found itback like you found it
Lab clean upLab clean up
Put models back, like you found Put models back, like you found themthem
Put microscopes backPut microscopes back Put slides back Put slides back in the proper in the proper
boxbox
Lab clean upLab clean up
Dispose of other items as follows:Dispose of other items as follows:– Paper towels go in the trashPaper towels go in the trash– Broken glass and slide cover slips go Broken glass and slide cover slips go
in “broken glass”in “broken glass”– Biological waste goes in red bucketBiological waste goes in red bucket– Empty slides get rinsed, dried, and Empty slides get rinsed, dried, and
returned to boxreturned to box– Dissection tools: put in washDissection tools: put in wash– Wipe down your bench area when Wipe down your bench area when
donedone

Lab 4: Lab 4: Intro to Intro to microscopesmicroscopes
Microscopic anatomy:Microscopic anatomy:– CellsCells– TissuesTissues

Who cares?Who cares?
Medically, microscopes are used Medically, microscopes are used for for pathologypathology, the study of , the study of disease.disease.– If a disease is suspected, a tissue If a disease is suspected, a tissue
sample is taken (biopsy, blood) or a sample is taken (biopsy, blood) or a cell sample (pap test)cell sample (pap test)
– Pathologist or technician looks for Pathologist or technician looks for abnormal cells, etc.abnormal cells, etc.

Who cares?Who cares?
Scientifically, microscopes are Scientifically, microscopes are used to study cells and tissues for used to study cells and tissues for all kinds of reasons (e.g. brain all kinds of reasons (e.g. brain damage research)damage research)
What about us?What about us?
Educationally, microscopes are Educationally, microscopes are the only way to truly learn about the only way to truly learn about the microscopic organizations of the microscopic organizations of cells and tissues.cells and tissues.
Knowing how to use a microscope Knowing how to use a microscope is a great skill to have, no matter is a great skill to have, no matter what medical or biology subfield what medical or biology subfield you are involved in.you are involved in.

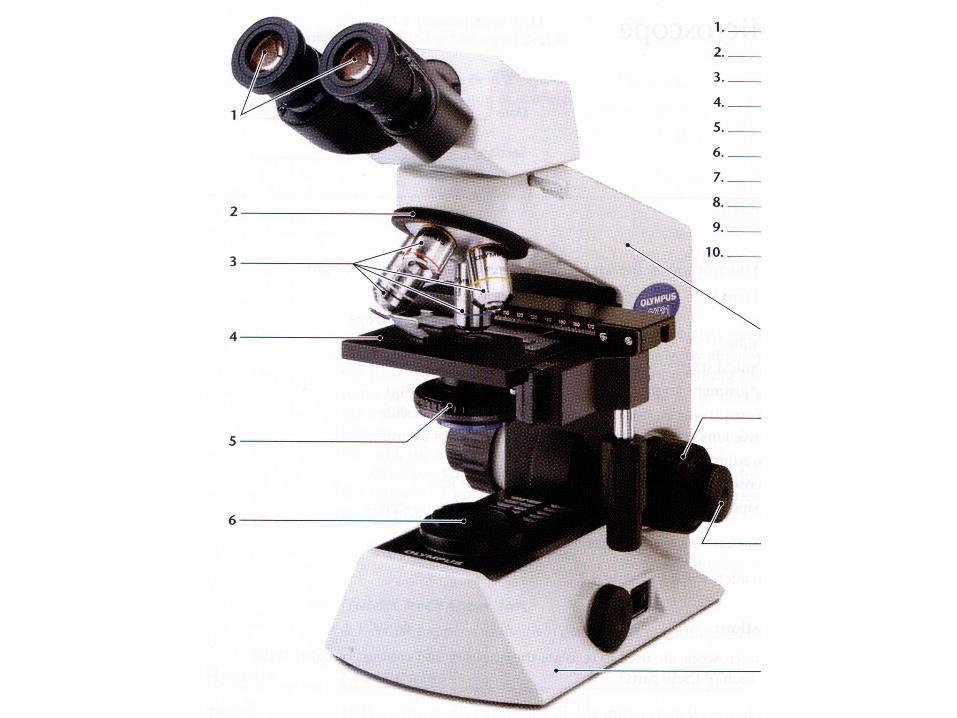
Compound microscopeCompound microscope
Uses multiple lenses to achieve Uses multiple lenses to achieve larger magnificationlarger magnification
Compound microscopeCompound microscope
Key parts: Key parts: – Eyepieces Eyepieces
(ocular (ocular objectives)objectives)
– ArmArm– BaseBase– ObjectivesObjectives– Stage (and Stage (and
stage clips)stage clips)
– Stage controlsStage controls– Coarse and Coarse and
Fine focusFine focus– CondenserCondenser– Iris diaphragmIris diaphragm– LightLight

How to carry a How to carry a microscopemicroscope Two hands, one on arm, one on Two hands, one on arm, one on
basebase Put your microscope back in the Put your microscope back in the
numbered cubby it came fromnumbered cubby it came from
PropertiesProperties
Compound: occulars = 10x, Compound: occulars = 10x, objectives = 4x, 10x, 40x. objectives = 4x, 10x, 40x. Multiply to get total magnificationMultiply to get total magnification
ParafocalParafocal Inverted opticsInverted optics Field of viewField of view
How to useHow to use
Start on lowest power (condenser up)Start on lowest power (condenser up) Load slid into clipLoad slid into clip Look thorough oculars, adjust (one image)Look thorough oculars, adjust (one image) Focus (coarse)Focus (coarse) Find region of interest, go to higher powerFind region of interest, go to higher power Focus (fine)Focus (fine)
**Adjust light level and iris diaphragm as **Adjust light level and iris diaphragm as needed (less light at low power)needed (less light at low power)
CarefulCareful
When using higher power When using higher power objectives, it is easy to break objectives, it is easy to break slides.slides.

Making a wet mount Making a wet mount slideslide Put drop on slidePut drop on slide Put on over slip at an anglePut on over slip at an angle

ActivitiesActivities Get scope and set upGet scope and set up Make pond water wet mount slide Make pond water wet mount slide
and observe (to practice focusing)and observe (to practice focusing) Letter “e” slides (prepared). Letter “e” slides (prepared). Thread slides (Careful, they’re Thread slides (Careful, they’re
thick). Determine order of threads.thick). Determine order of threads. Grid slide: count and calculate – Grid slide: count and calculate –
measure at lowest power, use this measure at lowest power, use this figure to calculate answers at figure to calculate answers at higher power (table 4.1).higher power (table 4.1).
Clean up Clean up
Clean upClean up
Wash/dry fresh mount slides, put Wash/dry fresh mount slides, put backback
Cover slips in lab glass containerCover slips in lab glass container Put prep’d slides back into right boxPut prep’d slides back into right box Clean off lens with lens paper and Clean off lens with lens paper and
lens cleaner ONLYlens cleaner ONLY Clean off stage and return scopeClean off stage and return scope Clean up your areaClean up your area
Turn inTurn in
Lab 4 report due next lab period Lab 4 report due next lab period (rip out or copy). (rip out or copy).
Turn in Turn in parts C and Dparts C and D and and Table Table 4.14.1 your your answers for the order answers for the order of the threads in activity 3of the threads in activity 3
For table 4.1For table 4.1
Ignore “working distance” columnIgnore “working distance” column Find the field diameter for the Find the field diameter for the
lowest magnification by lowest magnification by countingcounting the number of grid squares that the number of grid squares that you can see across the field of you can see across the field of view (1 sq = 1mm)view (1 sq = 1mm)
CALCULATECALCULATE the field diameter for the field diameter for the other magnifications by using the other magnifications by using the formula on p. 42the formula on p. 42
Field diameterField diameter
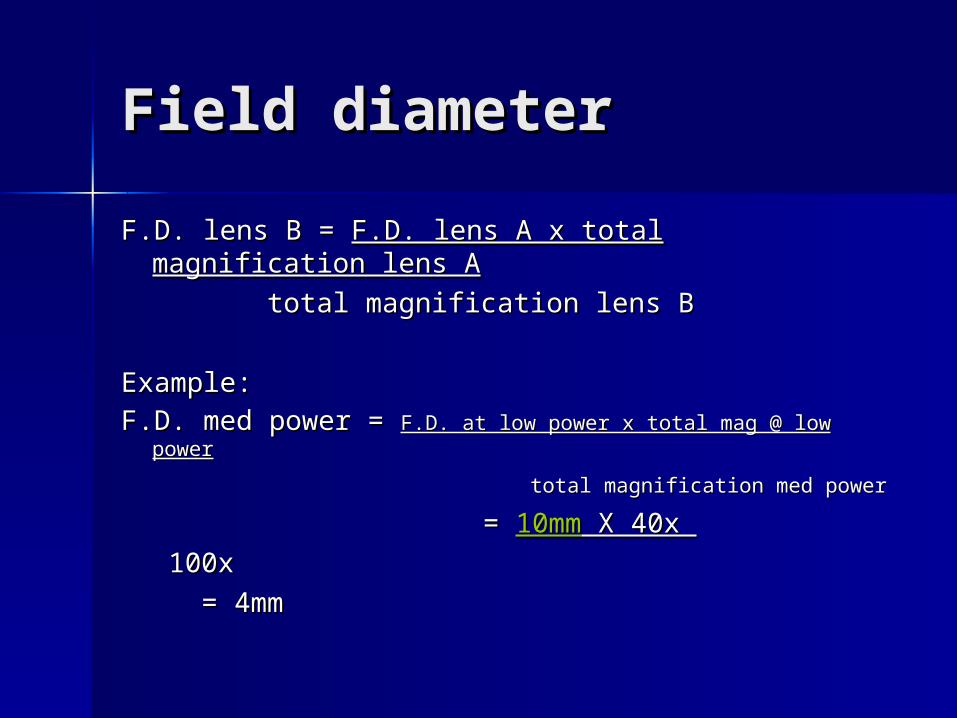
F.D. lens B = F.D. lens B = F.D. lens A x total magnification lens F.D. lens A x total magnification lens AA
total magnification lens Btotal magnification lens B
Example:Example:F.D. med power = F.D. med power = F.D. at low power x total mag @ low powerF.D. at low power x total mag @ low power
total magnification med powertotal magnification med power
= = 10mm10mm X 40x X 40x
100x100x
= 4mm= 4mm
Related Documents