How to Measure Waist, Hips, and More: Free Guide to Finding Your Knitting Measurements

Knitting Measuring Guide
Dec 07, 2015
knitting
Welcome message from author
This document is posted to help you gain knowledge. Please leave a comment to let me know what you think about it! Share it to your friends and learn new things together.
Transcript

How to Measure Waist, Hips, and More:
Free Guide to Finding
Your Knitting Measurements

©F+W Media, Inc. | All rights reserved | F+W Media grants permission for any or all pages in this issue to be copied for personal use | www.knittingdaily.com 2
Contents
A Measurement Worksheet ...........................................................PAGE 3
“Comfort” Garment Measurements .....................................PAGE 4
Measuring a Curve ..................................................................................PAGE 5
Understanding Ease ...............................................................................PAGE 6
Sweater and Body Measurements,
Standard and Otherwise ...................................................................PAGE 6
What is a Schematic and How Do I Read It? ................PAGE 7
More Resources for How to Measure
Waist, Bust, and More .........................................................................PAGE 8
Knitting Patterns
Henley Perfected ...............................................................................PAGE 9
Refined Aran Jacket ..................................................................... PAGE 16
Manicougan Pullover ................................................................... PAGE 21
Farrington Pullover ........................................................................ PAGE 23
How to Measure Waist, Hips, and More: Free Guide to Finding Your Knitting Measurements
TO KNIT SWEATERS THAT FIT,
MEASURING YOURSELF ACCURATELY is one of the most important things to understand.
Many of us assume we know our measurements, but in reality, we all need to measure ourselves carefully every year, or if anything about our bodies has changed (weight loss or gain, illness, pregnancy, change in height, and so on).
Most patterns are based on bust size, which is a good place to start, but there are lots more measurements that are very useful to have on hand.
It’s easier to have a buddy take your measurements; my suggestion is to have a measuring party with your knitting group. I did
this and it was lots of fun! Turn on some music, have a glass of wine, and enjoy yourself!
This eBook will help you understand how your measurements translate into knitted garments that fit. You’ll find resources for taking measurements, information on different types of measurements, and even patterns to knit once you know your measurements!
Cheers,
Kathleen Cubley Editor, KnittingDaily.com
HOW TO MEASURE WAIST, HIPS, AND MORE:
FREE GUIDE TO FINDING YOUR KNITTING MEASUREMENTS
A Knitting Daily eBook edited by
Kathleen Cubley
E D I T O R I A L S T A F F
EDITOR, KNITTING DAILY Kathleen Cubley
C R E A T I V E S E R V I C E S
PRODUCTION DESIGNER Janice TapiaPHOTOGRAPHY As noted
ILLUSTRATION Gayle Ford
Projects and information are for inspiration and personal use only. Interweave Knits and Knitting Daily do not recommend, approve, or endorse any of the advertisers, products, services, or views advertised in this publication. Nor does Knits or Knitting Daily evaluate the advertisers’ claims in any way. You should, therefore, use your own judgment in evalu ating the advertisers, products, services, and views advertised in Knits or Knitting Daily.
©F+W Media, Inc. | All rights reserved | F+W Media grants permission for any or all pages in this issue to be copied for personal use | www.knittingdaily.com 3
25
W I T H Y O U I N M I N D : C U S T O M - F I T T I N G T E C H N I Q U E S
Actual Body Measurement ChartFor: ________________________________ Date: _________________________________
1A
2
3 Hip3 Bottom
4A
4B
5
6A6B
6C
6D
6E
7
8
9
1B
10
11A
11B
12A12B
12C
1A. Bust/Chest: ______________________________
1B. Back: ___________________________________
2. Waist: __________________________________
3. Hip/Bottom: _____________________________
4. Sleeve Length
A. Short sleeve: ___________________________
B. Long sleeve: ___________________________
5. Back Neck Width: ________________________
6. Finished Length
A. Cropped: ______________________________
B. High Hip: _____________________________
C. Low Hip: _____________________________
D. Fingertip: _____________________________
E. Coat: _________________________________
7. Upper Arm: ______________________________
8. Wrist: __________________________________
9. Shoulders: _______________________________
10. Armhole: _______________________________
11. V Depth
A. Pullover: ______________________________
B. Cardigan: _____________________________
12. Rounded Neck Depth
A. Crew: ________________________________
B. Jewel: ________________________________
C. Scoop: ________________________________
A Measurement WorksheetDesigners Laura Bryant and Barry Klein put together a measurement worksheet, which is a good thing to fill out and keep in your knitting bag or a handy notebook. It’s important to take your measurements in the correct places, and this worksheet shows you exactly where to measure.

©F+W Media, Inc. | All rights reserved | F+W Media grants permission for any or all pages in this issue to be copied for personal use | www.knittingdaily.com 4
“Comfort” Garment Measurements Your body measurements alone will be of little use since a garment made to those measurements would be tight and uncomfortable if you could, in fact, get into it.
Therefore, you’ll want to also take measurements from various garments that you feel comfortable wearing to determine the amount of ease that’s comfortable for you.
For the best results, measure a knitted garment that’s made of a similar weight to the fabric you plan to knit and that fits the way you like.
Be aware that a garment made with bulky or hairy yarn will have both an inside and an outside measurement. The outside of the garment will be puffier, thus wider. If you use the outside measurement of a bulky garment for a garment that you plan to knit out of fine yarn, your garment may end up a little looser than you expected. In this case, it would be better to use the inside measurement.
—excerpted from Knitwear Design Workshop by Shirley Paden

©F+W Media, Inc. | All rights reserved | F+W Media grants permission for any or all pages in this issue to be copied for personal use | www.knittingdaily.com 5
Measuring a CurveFor accurate length and width measurements on an armhole or neck opening, always measure straight along a vertical line of rows and a horizontal row of stitches near the part of your garment that is curved.
Do not measure around a curved area that has been shaped unless specifically instructed to do so.
—excerpted from Knitwear Design Workshop by Shirley Paden

©F+W Media, Inc. | All rights reserved | F+W Media grants permission for any or all pages in this issue to be copied for personal use | www.knittingdaily.com 6
Understanding EaseIn order to move comfortably in a garment, there has to be some ease, or extra width. Most designers allow about 2" (5 cm) of ease for a garment that will be worn over undergarments. This means that the garment measures about 2" (5 cm) more in circumference than the actual body measurements, or 1" (2.5 cm) wider across the front and back. Usually, and additional 1" (2.5 cm) to 2" (5 cm) are added to the standard ease amount for outerwear that is worn over clothing, for a total of 3" to 4" (7.5 to 10 cm) of ease.
Keep in mind that these are standards, and they may not correspond to the way you like your clothing to fit. The amount of ease is a personal choice. Compare your body measurements to a garment that fits well to get an idea of the amount of ease that’s comfortable for you. Try on and measure several garments to determine your ease preferences. You may like the way one garment fits in the bust, the way another fits in the sleeve and armhole, and the way a third fits at the neck. In each case, lay the garment out flat on a hard surface (a table or measuring board), measure the parts that you like, and then compare those measurements to your recorded body measurements to determine the desired amount of ease.
—excerpted from Knitwear Design Workshop by Shirley Paden
Standard Sweater and Body MeasurementsBeyond bust circumference, there are many measurable expanses in a sweater, and there are accepted standards for most of them—for example, the length of a woman’s set-in sleeve to the underarm is generally between 16" and 18" (40.5 and 45.5 cm). Having these standards at your fingertips can eliminate frustrating trial-and-error; why reinvent the wheel? While it is true that few women’s bodies are “standard,” these standards provide a starting point on which to base your own custom measurements.
And we do have a standards list available in our sizes—the Craft Yarn Council of America (CYCA) has devised a table of standard measurements that range from a woman’s 28" (71 cm) bust to a 62" (157.5 cm) bust.
—excerpted from Knitwear Design Workshop by Shirley Paden

©F+W Media, Inc. | All rights reserved | F+W Media grants permission for any or all pages in this issue to be copied for personal use | www.knittingdaily.com 7
What Is a Schematic and How Do I Read It?
Understanding how to read a pattern schematic is really helpful. You’ll be able to compare your measurements to the pattern schematics and pick the perfect size to knit. Here’s some wisdom from Interweave Knits editor Lisa Shroyer, excerpted from her book Knitting Plus:
A schematic is a blueprint of a sweater design. The schematic reflects the garment as it would look if laid flat; either in one piece or in separate pieces, depending on the construction. It shows all the finite measurements based on the gauge(s), stitch counts, and the step-by-step instructions. Note that if the individual sweater pieces (front or fronts, back, and sleeves) will be seamed during the finishing process, some fabric—and therefore width—will be lost in the seams. In these cases, the measurements in the schematic may differ slightly from the finished garment measurements. In general, pattern writers try to keep schematics as minimal as possible for space reasons, so a schematic will likely include only one sleeve and only one front of a cardigan.
A schematic will show measurements for all sizes in the pattern, but the drawing itself is usually rendered based on the proportions of the smallest size. If the larger sizes replicate the design identically, then the provided schematic should be sufficient for an understanding of the design and construction. It can be a useful practice (and a fun one) to draw your own schematic based on the proportions of your chosen size. You’ll get a visual of the elements and how they interact, and you’ll be best able to tweak the pattern for your particular body shape. Using graph paper and a scale of 1 square = 1" (2.5 cm) of knitting, copy the provided schematic but draw the elements to the scale of the measurements for your size.
—from Knitting Plus by Lisa Shroyer
What Size Do I Knit?
Most knitting patterns list sizes by bust measurement. If you know your bust circumference and how much ease you want at the bust, choosing a size is fairly straightforward. But if your belly protrudes further than your bust, should you pick a size based on belly circumference? If you don’t want the sweater to stretch over the bulge of your abdomen and emphasize its protrusion, then, yes, you should pick a size based on your belly. If you have one major problem area and don’t want to customize your knitting, pick a size based on that particular part. Keep in mind that most patterns don’t list sizes by elements other than bust circumference, so you’ll need to review the schematics, gauge, and stitch counts in the pattern to figure out the size of the sweater at your problem area.
To determine your problem area(s), or if you have any, compare your measurements to the CYCA standards. Are your other measurements in proportion to your bust? Or, do you have outliers that skew far from the CYCA standards for your bust size? If so, garments that follow your bust size won’t fit these other areas because the pattern writer based the measurements on proportions that don’t match yours. In general, not all pattern writers base sizing on CYCA standards, and some designs don’t lend themselves to that type of exactitude in all areas. Always review all of the measurements on the schematic before choosing a size.
—from Knitting Plus by Lisa Shroyer

©F+W Media, Inc. | All rights reserved | F+W Media grants permission for any or all pages in this issue to be copied for personal use | www.knittingdaily.com 8
More ResourcesNow you know where to measure waist, hips, bust, and more, explore these additional helpful resources + some of our favorite patterns to practice your skills:
Laura and Barry demonstrate taking measurements
Measuring Yourself: Bust, Waist, Hips
How to Use the Knitting Daily Waist Shaping Calculator
The Ultimate Knitting Measurements Resource: Knitting Daily Waist Shaping Calculator
2 3 4
Sweater Patterns to KnitUse your new-found knowledge to take your measurements and knit the following sweaters!
Henley Perfected by Connie Chang Chinchio ....................9
Refined Aran Jacket by Pam Allen ...................................16
Manicouagan Pullover by Alex Capshaw-Taylor .............21
Farrington Pullover by Lisa Shroyer .................................23
1
2
3
4
1
http://www.knittingdaily.com/blogs/knitting-daily/new-online-knitting-tool-waist-shaping-calculator/
©F+W Media, Inc. | All rights reserved | F+W Media grants permission for any or all pages in this issue to be copied for personal use | www.knittingdaily.com 9
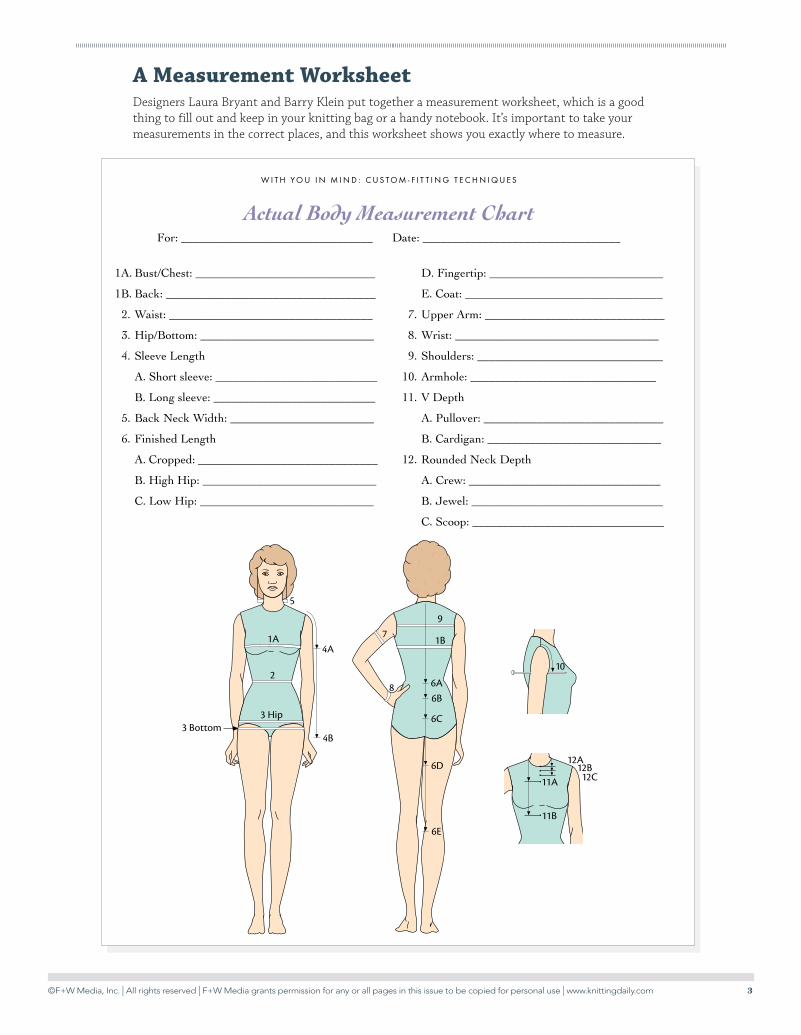
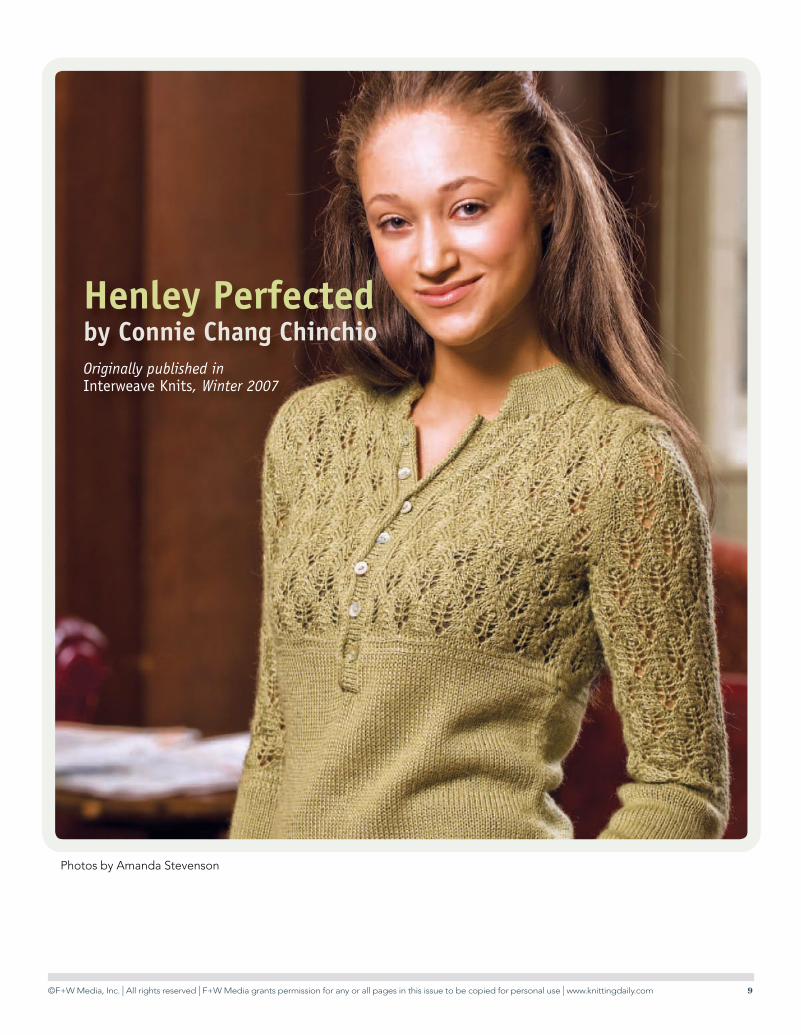
Henley Perfectedby Connie Chang ChinchioOriginally published in Interweave Knits, Winter 2007
Photos by Amanda Stevenson
©F+W Media, Inc. | All rights reserved | F+W Media grants permission for any or all pages in this issue to be copied for personal use | www.knittingdaily.com 10
BACK
Hem: With smaller needle, CO 97 (105, 115, 127, 139, 153) sts. Beg with a RS row, work in St st (knit on RS; purl on WS) for 5 rows. Turning ridge: (WS) *K1 through back loop (tbl); rep from * across. Change to larger needle. Work in St st until piece measures 3 (3, 31⁄2, 31⁄2, 4, 4)" from turning ridge, ending with a WS row. Shape waist: Dec 1 st each end of needle on next row, then every 8 (8, 8, 8, 10, 10)th row 3 (3, 3, 3, 2, 2) more times—89 (97, 107, 119, 133, 147) sts rem. Work even in St st for 2", ending with a WS row—piece measures about 8 (8, 81⁄2, 81⁄2, 81⁄2, 81⁄2)" from turning ridge. Shape bust: Inc 1 st each end of needle on next row, then every 10 (10, 8, 8, 12, 12)th row 2 (2, 2, 2, 1, 1) more time(s)—95 (103, 113, 125, 137, 151) sts; piece measures about 103⁄4 (103⁄4, 103⁄4, 103⁄4, 101⁄4, 101⁄4)" from turning ridge. Work 6 rows of divi-sion patt (see Stitch Guide). Adjust st
count: (WS) K1, purl to last st and at the same time, dec 4 (4, 4, 6, 6, 8) sts evenly
spaced, k1—91 (99, 109, 119, 131, 143) sts rem. Keeping fi rst and last st in garter st (knit every row) and the second and second-to-last st in St st, work center 87 (95, 105, 115, 127, 139) sts according to Back and Sleeve Lace chart, beg and ending as indicated for your size. Work in patt until piece measures 141⁄2 (15, 15, 151⁄2, 151⁄2, 16)" from turning ridge, ending with a WS row. Shape armholes: Keep-ing in lace patt with edge sts (see Notes), BO 4 (5, 6, 6, 8, 9) sts at beg of next 2 rows—83 (89, 97, 107, 115, 125) sts rem. Dec 1 st each end of needle every RS row 4 (5, 6, 7, 8, 10) times—75 (79, 85, 93, 99, 105) sts rem. Work even in patt until armholes measure 7 (7, 71⁄2, 71⁄2, 8, 81⁄2)", ending with a WS row. Place fi rst 20 (21, 24, 27, 30, 31) sts on one holder for the right shoulder, the next 35 (37, 37, 39, 39, 43) sts on a second holder for the back neck, and the last 20 (21, 24, 27, 30, 31) sts on a third holder for the left shoulder.
FRONT
HENLEY PERFECTED
CONNIE CHANG CHINCHIO is an out-of-work physicist who enjoys playing with yarn and designing in New Jersey and New York. More designs and yarn talk can be found on her blog at www.physicsknits.blogspot.com.
Finished Size 321⁄2 (35, 39, 421⁄2, 461⁄2, 51)" bust circumference. Sweater shown measures 35".Yarn Blue Sky Alpacas Alpaca Silk (50% alpaca, 50% silk; 146 yd [134 m]/50 g): #131 kiwi (pale green), 8 (8, 9, 10, 11, 12) skeins.Needles Body and sleeves—size 4 (3.5 mm). Bands and hems—size 3 (3.25 mm). Adjust needle size if necessary to obtain the correct gauge.Notions Stitch holders; markers (m); seven 1⁄2" buttons; tapestry needle.Gauge 24 sts and 32 rows = 4" in St st on larger needle; 221⁄2 sts and 34 rows = 4" in lace patt on larger needle.
C O N N I E C H A N G C H I N C H I O
STITCH GUIDE
Division Pattern:Row 1: (WS) K1, *sl 1 pwise with yarn in front (wyf), yo; rep from * to last st, k1.Row 2: (RS) K1, *k2tog tbl (slipped st and yo); rep from * to last st, k1.Row 3: K1, purl to last st, k1.Row 4: Knit.Row 5: Rep Row 1.Row 6: Rep Row 2.
3-Stitch I-cord Bind-Off: CO 3 sts. *K2, ssk, sl 3 sts from right needle to left needle; rep from * until 3 sts rem, sl 1, k2tog, psso. Fasten off last st.
NOTES
◆ Knit the fi rst and last stitch of every row for garter selvedge stitches. ◆ Work all increases and decreases inside the selvedge stitches. ◆ When decreasing for neck and armhole shaping in lace, make sure that every lace decrease
(k2tog or ssk) is accompanied by a lace increase (yo) and every lace double decrease (sl 1 k2tog psso) is accompanied by two lace increases (yo) to maintain correct stitch counts. If there are not enough stitches to work increase(s) with accompanying decrease, work these stitches in stockinette stitch. For ease in seaming in the lace portion, the two edge stitches should not include any yarnovers or decreases (ssk, k2tog, sl1 k2tog psso).
©F+W Media, Inc. | All rights reserved | F+W Media grants permission for any or all pages in this issue to be copied for personal use | www.knittingdaily.com 11
Work as for back until piece measures 9 (9, 9, 9, 83⁄4, 83⁄4)" from turn-ing ridge, ending with a RS row—91 (99, 109, 121, 135, 149) sts. Placket opening: (WS)
P44 (48, 53, 59, 66, 73), BO 3 sts, purl to end of row. Place 44 (48, 53, 59, 66, 73) sts for right front on a holder and cont on left-front sts only. Left front: Finish bust shaping as for back, then work 6 rows of division patt—46 (50, 55, 61, 67, 74) sts. Adjust st count: (WS) K1, purl to last st and at the same time dec 2 (2, 2, 3, 3, 4) sts evenly spaced, k1—44 (48, 53, 58, 64, 70) sts rem. Keeping fi rst and last st in gar-ter st and second and second-to-last st in St st, work center 40 (44, 49, 54, 60, 66) sts according to Left Front Lace chart for your size, beg and ending as indicated for your size. Work in patt until piece mea-
sures 141⁄2 (15, 15, 151⁄2, 151⁄2, 16)" from turning ridge, ending with a WS row. Shape armhole: (RS) Keeping in lace patt with edge sts (see Notes), BO 4 (5, 6, 6, 8, 9) sts at beg of next row—40 (43, 47, 52, 56, 61) sts rem. Dec 1 st at armhole edge (beg of RS rows) every RS row 4 (5, 6, 7, 8, 10) times—36 (38, 41, 45, 48, 51) sts rem. Work even until armhole measures
5 (5, 51⁄2, 51⁄4, 53⁄4, 6)", ending with a RS row. Shape
neck: (WS) Work 10 (11, 11, 12, 12, 13) sts in patt and place these sts on a holder, work to end. Dec 1 st at neck edge every row 3 times, then every other row 3 (3, 3, 3, 3, 4) times—20 (21, 24, 27, 30, 31) sts rem. Work even until armhole measures 7 (7, 71⁄2, 71⁄2, 8, 81⁄2)", ending with a WS row. Place sts on holder. Right front: With RS facing, join yarn to neck edge. Finish bust shaping as for back, then work 6 rows of division patt—46 (50, 55, 61, 67, 74) sts. Adjust st count: (WS) K1, purl to last st and at the same time, dec 2 (2, 2, 3, 3, 4) sts evenly spaced, k1—44 (48, 53, 58, 64, 70) sts rem. Keeping fi rst and last st in garter st and second and second-to-last st in St st, work center 40 (44, 49, 54, 60, 66) sts according to Right Front Lace chart for your size, beg and ending as indicated for your size. Work in patt until piece measures 141⁄2 (15, 15, 151⁄2, 151⁄2, 16)" from turning ridge, ending with a RS row. Shape armhole: (WS) Keeping in lace patt with edge sts (see Notes), BO 4 (5, 6, 6, 8, 9) sts at beg of next row—40 (43, 47, 52, 56, 61) sts rem. Dec 1 st at armhole edge (end of RS rows) every RS row 4 (5, 6, 7, 8, 10) times—36 (38, 41, 45, 48, 51) sts rem. Work even until armhole measures 5 (5, 51⁄2, 51⁄4, 53⁄4, 6)", ending with a WS row. Shape neck: (RS) Work 10 (11, 11, 12, 12, 13) sts in patt and place these sts on a holder, work to end. Dec 1 st at neck edge every row 3 times, then every other row 3 (3, 3, 3, 3, 4) times—20 (21, 24, 27, 30, 31) sts rem. Work even until armhole measures 7 (7, 71⁄2, 71⁄2, 8, 81⁄2)", ending with a WS row. Place sts on holder.
SLEEVES
Hem: With smaller needle, CO 62 (63, 69, 77, 81, 87) sts. Work 5 rows in St st. Turn-
ing ridge: (WS) *K1tbl; rep from * across. Change to larger needle. Work even in St st until piece measures 83⁄4 (83⁄4, 83⁄4, 81⁄2, 81⁄4, 81⁄4)" from turning ridge, ending with
a RS row. Work 6 rows of division patt. Adjust st count: (WS) K1, purl to last st and at the same time, dec 3 (2, 4, 4, 4, 4) sts evenly spaced across row, k1—59 (61, 65, 73, 77, 83) sts rem. Keeping fi rst and last st in garter st and second and second-to-last st in St st, work center 55 (57, 61, 69, 73, 79) sts according to Back and Sleeve Lace chart, beg and end as indicated for your size. Work even in patt until piece measures 11" from turn-ing ridge, ending with a WS row. Shape
sleeve: Inc 1 st each end of needle on next row, then every 12 (12, 10, 12, 14, 14)th row 4 (4, 5, 4, 4, 4) more times, working new sts into lace patt when pos-sible—69 (71, 77, 83, 87, 93) sts. Work even in patt until piece measures 17 (17, 17, 17, 18, 18)" from turning ridge, ending with a WS row. Shape cap: Keeping in lace patt with edge sts (see Notes), BO 4 (5, 6, 6, 8, 9) sts at beg of next 2 rows—61 (61, 65, 71, 71, 75) sts rem. Dec 1 st each end of needle every row 5 (5, 5, 7, 7, 7) times, then every other row 4 (4, 4, 5, 5, 5) times, then every 4th row 3 (3, 3, 2, 3, 3) times, then every other row 4 (4, 5, 4, 4, 7) times, then every row 1 (1, 2, 4, 3, 2) time(s)—27 sts rem. BO 3 sts at beg of next 4 rows—15 sts rem. BO all sts.
FINISHING
Join shoulders using the three-needle BO (see box). Sew in sleeves, easing any full-ness at the top. Use mattress st (see box) to sew side and sleeve seams, beg at the turning ridge of the body and ending at the turning ridge of the sleeves. Whip-stitch (see box) hems to the WS. Button-
band: With smaller needle and RS facing, pick up and knit 67 (69, 73, 75, 79, 85) sts along right-front placket opening, beg at lower edge. Work in St st for 6 rows, ending with a RS row. With WS facing, work 3-st I-cord BO (see Stitch Guide).
Hen
ley
BACK
Hem: With smaller needle, CO 97 (105, 115, 127, 139, 153) sts. Beg with a RS row, work in St st (knit on RS; purl on WS) for 5 rows. Turning ridge: (WS) *K1 through back loop (tbl); rep from * across. Change to larger needle. Work in St st until piece measures 3 (3, 31⁄2, 31⁄2, 4, 4)" from turning ridge, ending with a WS row. Shape waist: Dec 1 st each end of needle on next row, then every 8 (8, 8, 8, 10, 10)th row 3 (3, 3, 3, 2, 2) more times—89 (97, 107, 119, 133, 147) sts rem. Work even in St st for 2", ending with a WS row—piece measures about 8 (8, 81⁄2, 81⁄2, 81⁄2, 81⁄2)" from turning ridge. Shape bust: Inc 1 st each end of needle on next row, then every 10 (10, 8, 8, 12, 12)th row 2 (2, 2, 2, 1, 1) more time(s)—95 (103, 113, 125, 137, 151) sts; piece measures about 103⁄4 (103⁄4, 103⁄4, 103⁄4, 101⁄4, 101⁄4)" from turning ridge. Work 6 rows of divi-sion patt (see Stitch Guide). Adjust st
count: (WS) K1, purl to last st and at the same time, dec 4 (4, 4, 6, 6, 8) sts evenly
spaced, k1—91 (99, 109, 119, 131, 143) sts rem. Keeping fi rst and last st in garter st (knit every row) and the second and second-to-last st in St st, work center 87 (95, 105, 115, 127, 139) sts according to Back and Sleeve Lace chart, beg and ending as indicated for your size. Work in patt until piece measures 141⁄2 (15, 15, 151⁄2, 151⁄2, 16)" from turning ridge, ending with a WS row. Shape armholes: Keep-ing in lace patt with edge sts (see Notes), BO 4 (5, 6, 6, 8, 9) sts at beg of next 2 rows—83 (89, 97, 107, 115, 125) sts rem. Dec 1 st each end of needle every RS row 4 (5, 6, 7, 8, 10) times—75 (79, 85, 93, 99, 105) sts rem. Work even in patt until armholes measure 7 (7, 71⁄2, 71⁄2, 8, 81⁄2)", ending with a WS row. Place fi rst 20 (21, 24, 27, 30, 31) sts on one holder for the right shoulder, the next 35 (37, 37, 39, 39, 43) sts on a second holder for the back neck, and the last 20 (21, 24, 27, 30, 31) sts on a third holder for the left shoulder.
FRONT
HENLEY PERFECTED
CONNIE CHANG CHINCHIO is an out-of-work physicist who enjoys playing with yarn and designing in New Jersey and New York. More designs and yarn talk can be found on her blog at www.physicsknits.blogspot.com.
Finished Size 321⁄2 (35, 39, 421⁄2, 461⁄2, 51)" bust circumference. Sweater shown measures 35".Yarn Blue Sky Alpacas Alpaca Silk (50% alpaca, 50% silk; 146 yd [134 m]/50 g): #131 kiwi (pale green), 8 (8, 9, 10, 11, 12) skeins.Needles Body and sleeves—size 4 (3.5 mm). Bands and hems—size 3 (3.25 mm). Adjust needle size if necessary to obtain the correct gauge.Notions Stitch holders; markers (m); seven 1⁄2" buttons; tapestry needle.Gauge 24 sts and 32 rows = 4" in St st on larger needle; 221⁄2 sts and 34 rows = 4" in lace patt on larger needle.
C O N N I E C H A N G C H I N C H I O
STITCH GUIDE
Division Pattern:Row 1: (WS) K1, *sl 1 pwise with yarn in front (wyf), yo; rep from * to last st, k1.Row 2: (RS) K1, *k2tog tbl (slipped st and yo); rep from * to last st, k1.Row 3: K1, purl to last st, k1.Row 4: Knit.Row 5: Rep Row 1.Row 6: Rep Row 2.
3-Stitch I-cord Bind-Off: CO 3 sts. *K2, ssk, sl 3 sts from right needle to left needle; rep from * until 3 sts rem, sl 1, k2tog, psso. Fasten off last st.
NOTES
◆ Knit the fi rst and last stitch of every row for garter selvedge stitches. ◆ Work all increases and decreases inside the selvedge stitches. ◆ When decreasing for neck and armhole shaping in lace, make sure that every lace decrease
(k2tog or ssk) is accompanied by a lace increase (yo) and every lace double decrease (sl 1 k2tog psso) is accompanied by two lace increases (yo) to maintain correct stitch counts. If there are not enough stitches to work increase(s) with accompanying decrease, work these stitches in stockinette stitch. For ease in seaming in the lace portion, the two edge stitches should not include any yarnovers or decreases (ssk, k2tog, sl1 k2tog psso).

©F+W Media, Inc. | All rights reserved | F+W Media grants permission for any or all pages in this issue to be copied for personal use | www.knittingdaily.com 12
Buttonhole band: With smaller needle and RS facing, pick up and knit 67 (69, 73, 75, 79, 85) sts along left-front placket open-ing, beg at upper edge. Work in St st for 3 rows. Buttonhole row: (RS) K4 (5, 4, 5, 4, 4), work 2-st one row buttonhole (see box), *k7 (7, 8, 8, 9, 10), work 2-st one row buttonhole; rep from * 5 more times, k7 (8, 7, 8, 7, 7)—7 buttonholes. Cont in St st for 2 more rows, ending with a
RS row. With WS facing, work 3-st I-cord BO. Sew lower edge of each band to BO sts at base of placket. Sew buttons to but-tonband opposite buttonholes. Neckband: With smaller needle and RS facing, beg at right-front neck edge, k10 (11, 11, 12, 12, 13) held sts, pick up and knit 17 (17, 17, 19, 19, 21) sts along side of right neck, k35 (37, 37, 39, 39, 43) back-neck sts from holder, pick up and knit 17 (17,
17, 19, 19, 21) sts along side of left neck, and k10 (11, 11, 12, 12, 13) held left-front sts—89 (93, 93, 101, 101, 111) sts total. Row 2: Purl.Row 3: K27 (28, 28, 31, 31, 34), place marker (pm), k35 (37, 37, 39, 39, 43), pm, k27 (28, 28, 31, 31, 34).Row 4: Purl.Row 5: Knit to first m,
ssk, knit to 2 sts before second m, k2tog, knit to end—87 (91, 91, 99, 99, 109) sts rem.Row 6: Purl. Row 7: K1, ssk, knit to fi rst m, ssk, knit to 2 sts before second m, k2tog, knit to last 3 sts, k2tog, k1—4 sts dec’d.Row 8: Purl. Row 9: Rep Row 7. Row 10: Purl. Row 11: K1, ssk, knit to last 3 sts, k2tog, k1—77 (81, 81, 89, 89, 99) sts rem.Row 12: (turning ridge) *K1tbl; rep from * across.Row 13: K1, M1 (see box), knit to last st, M1, k1—79 (83, 83, 91, 91, 101) sts.Row 14: Purl.Row 15: K1, M1, knit to m, k1, M1, knit to 1 st before m, M1, knit to last st, M1, k1—4 sts inc’d.Row 16: Purl.Row 17: Rep Row 15—87 (91, 91, 99, 99, 109) sts.Work 5 rows in St st. BO all sts loosely.
Folding collar a t t u r n i n g ridge, whip-s t i tch neck facing to WS. W e a v e i n loose ends.
Place stitches to be joined onto two separate needles. Hold them with right sides of knitting facing together. Insert a third needle into fi rst stitch on each of the other two needles and knit them together as one stitch. *Knit next stitch on each needle the same way. Pass fi rst stitch over second stitch. Repeat from * until one stitch remains on third needle. Cut yarn and pull tail through last stitch.
Three-Needle Bind-Off
With left needle tip, lift strand between needles from front to back (Figure 1). Knit lifted loop through the back (Figure 2).
Figure 1 Figure 2
Raised (M1) Increases
Left Slant (M1L)
With left needle tip, lift strand between nee-dles from back to front (Figure 1). Knit lifted loop through the front (Figure 2).
Figure 1 Figure 2
Right Slant (M1R)With RS of knitting facing, use threaded needle to pick up one bar between first two stitches on one piece (Figure 1), then corresponding bar plus the bar above it on other piece (Figure 2). *Pick up next
two bars on fi rst piece, then next two bars on other (Figure 3). Repeat from * to end of seam, fi nishing by picking up last bar (or pair of bars) at the top of fi rst piece.
Figure 2
Figure 3
Mattress Stitch Seam
Figure 1
WhipstitchWith right side of work facing and working one stitch in from the edge, bring threaded needle out from back to front along edge of knitted piece.
Illu
stra
tion
s by
Gay
le F
ord
Work to where you want the buttonhole to begin, bring yarn to front, slip one purlwise, bring yarn to back (Figure 1). *Slip one purl-wise, pass fi rst slipped stitch over second; repeat from * one (two, three, four) more time(s). Place last stitch back on left needle (Fig-ure 2), turn. Cast-on three (four, fi ve, six) stitches as follows: *Insert right needle between the fi rst and second stitches on left needle, draw up a loop, and place it on the left needle (Figure 3); repeat from * two (three, four, fi ve) more times, turn. Bring yarn to back, slip fi rst stitch of left needle onto right needle and pass last cast-on stitch over it (Figure 4), work to end of row.
Figure 4
Figure 1
Figure 2
Figure 3
2 (3, 4, 5) Stitch One-Row Buttonhole

©F+W Media, Inc. | All rights reserved | F+W Media grants permission for any or all pages in this issue to be copied for personal use | www.knittingdaily.com 13
beg35"
461/2"
end35"461/2"
beg421/2"
end421/2"
19
17
15
13
11
9
7
5
3
1
Right-Front Lace, sizes 35 (421⁄2, 461⁄2)"
k on RS; p on WS
p on RS; k on WS
yo
k2tog
ssk
sl 1, k2tog, psso
pattern repeat
beg39"51"
end51"
beg321/2"
end321/2"39"
19
17
15
13
11
9
7
5
3
1
Right-Front Lace, sizes 321⁄2 (39, 51)"

©F+W Media, Inc. | All rights reserved | F+W Media grants permission for any or all pages in this issue to be copied for personal use | www.knittingdaily.com 14
beg321/2"
beg39"51"
end51"
end321/2"39"
19
17
15
13
11
9
7
5
3
1
Left-Front Lace, sizes 321⁄2 (39, 51)"
beg35"
461/2"
end35"461/2"
beg421/2"
end421/2"
19
17
15
13
11
9
7
5
3
1
Left-Front Lace, sizes 35 (421⁄2, 461⁄2)"
k on RS; p on WS
p on RS; k on WS
yo
k2tog
ssk
sl 1, k2tog, psso
pattern repeat

©F+W Media, Inc. | All rights reserved | F+W Media grants permission for any or all pages in this issue to be copied for personal use | www.knittingdaily.com 15
end back421/2"
51"
end back39"
end sleeve35"
461/2"
end back321/2"35"461/2"end sleeve321/2"51"
beg back421/2"51"
beg back39"beg sleeve35"461/2"
beg back321/2"
35"461/2"
beg sleeve321/2"
51"
beg sleeve39"421/2"
end sleeve39"
421/2"
19
17
15
13
11
9
7
5
3
1
Back and Sleeve Lace
k on RS; p on WS
p on RS; k on WS
yo
k2tog
ssk
sl 1, k2tog, psso
pattern repeat
Front & Back
31⁄2 (33⁄4, 41⁄4, 43⁄4, 51⁄4, 51⁄2)"9 (9.5, 11, 12, 13.5, 14) cm
61⁄4 (61⁄2, 61⁄2, 7, 7, 73⁄4)"16 (16.5, 16.5, 18, 18, 19.5) cm
161⁄4 (171⁄2, 191⁄4, 211⁄4, 231⁄4, 251⁄2)"41.5 (44.5, 49, 54, 59, 65) cm
141 ⁄
2 (
15, 1
5, 1
51 ⁄
2, 1
51 ⁄
2, 1
6)"
37
(3
8, 3
8, 3
9.5
, 39
.5, 4
0.5
) cm
7 (
7, 7
1 ⁄2, 7
1 ⁄2, 8
, 81 ⁄
2)"
18 (
18, 1
9, 1
9, 2
0.5
, 21.
5)
cm
143⁄4
(16
1 ⁄4, 1
73⁄4
, 19
3⁄4
, 22
1 ⁄4, 2
41 ⁄
2)"
37
.5 (
41.
5, 4
5, 5
0, 5
6.5
, 62
) cm 16
1 ⁄4 (
171 ⁄
2, 1
91 ⁄
2, 2
11 ⁄4, 2
31 ⁄
4, 2
51 ⁄
2)"
41.
5 (
44
.5, 4
9.5
, 54
, 59
, 65
) cm
23⁄4"7 cm
101⁄4 (101⁄2, 111⁄2, 123⁄4, 131⁄2, 141⁄2)"26 (26.5, 29, 32, 34.5, 37) cm
121 ⁄
4 (
121 ⁄
2, 1
33⁄4
, 14
3⁄4
, 15
1 ⁄2, 1
61 ⁄
2)"
31
(31.
5, 3
5, 3
7.5
, 39
.5, 4
2)
cm
17 (
17, 1
7, 1
7, 1
8, 1
8)"
4
3 (
43
, 43
, 43
, 45
.5, 4
5.5
) cm
43⁄4
(4
3⁄4
, 5, 5
1 ⁄2, 5
1 ⁄2, 6
)"12
(12
, 12
.5, 1
4, 1
4, 1
5)
cm
Sleeve

©F+W Media, Inc. | All rights reserved | F+W Media grants permission for any or all pages in this issue to be copied for personal use | www.knittingdaily.com 16
Refi ned Aran JacketPam AllenOriginally published in Interweave Knits, Winter 2007
Photos by Amanda Stevenson
©F+W Media, Inc. | All rights reserved | F+W Media grants permission for any or all pages in this issue to be copied for personal use | www.knittingdaily.com 17
POCKET LINING (MAKE 2)With larger needles, CO 24 sts. Beg with a RS row, work 25 rows in St st (knit on RS; purl on WS). Place sts on holder.
BACK
With smaller needles, CO 105 (117, 129, 141, 153) sts. Next row: (RS) *K1, p1; rep from * to last st, k1. Next row: *P1, k1; rep from * to last st, p1. Rep last 2 rows once more. Change to larger needles. Next row: (RS) K26 (30, 34, 40, 42), place marker (pm), p1, k3, p1, M1 (see box), k1, p1, k3, p1, pm, k15 (17, 19, 19, 23), M1, k16 (18, 20, 20, 24), pm, p1, k3, p1, M1, k1, p1, k3, p1, pm, k26 (30, 34, 40, 42)—108 (120, 132, 144, 156) sts; 12 sts between each set of m. Next row: Work sts as they appear, purling new sts. Next
row: (RS) Knit to first m, work Row 1 of Right Cross chart over next 12 sts, sl m, knit to next m, work Row 1 of Left Cross chart over next 12 sts, sl m, knit to end. Cont in patt as established, work-ing Rows 1–4 of charts between m, until piece measures 2 (3, 4, 5, 6)" from CO, ending with a WS row. Shape waist: Dec
row: (RS) K2, k2tog, work in patt to last 4 sts, ssk (see box), k2—2 sts dec’d. Work 9 rows even in patt. Rep last 10 rows once more—104 (116, 128, 140, 152) sts rem. Center decs: (RS) K2, k2tog, work to sec-ond m, sl m, k2tog, knit to 2 sts before next m, ssk, work to last 4 sts, ssk, k2—4 sts dec’d. Work 9 rows even in patt. Rep last 10 rows once more—96 (108, 120, 132, 144) sts rem. Inc row: (RS) K2, M1, work to second m, sl m, M1, work to next m, M1, sl m, work to last 2 sts, M1, k2—4 sts inc’d. Work 9 rows even in patt. Rep last 10 rows once more—104 (116, 128,
140, 152) sts. Inc row: (RS) K2, M1, work in patt to last 2 sts, M1, k2—2 sts inc’d. Work 9 rows even in patt. Rep last inc row once more—108 (120, 132, 144, 156) sts. Work even in patt until piece measures 13 (131⁄2, 14, 15, 16)" from CO, ending with a WS row. Shape armholes: BO 5 sts at beg of next 2 rows, then BO 2 sts at beg of foll 4 rows—90 (102, 114, 126, 138) sts rem. Dec 1 st each end of needle every other row 1 (4, 4, 7, 9) time(s), then every 4th row 2 times—84 (90, 102, 108, 116) sts rem. Work even in patt until armholes measure 61⁄2 (71⁄2, 81⁄4, 81⁄2, 9)", ending with a WS row. Shape shoulders: BO 8 (8, 10, 11, 11) sts at beg of next 4 (2, 6, 6, 6) rows, then BO 9 (9, 0, 0, 0) sts at beg of foll 2 (4, 0, 0, 0) rows—34 (38, 42, 42, 50) sts rem. BO all sts.
LEFT FRONT
Note: Pocket and collar beg before waist shaping is completed, and collar shap-ing ends after armhole shaping beg; read through all instructions carefully before proceeding. With smaller needles, CO 57 (63, 69, 75, 81) sts. Next row: (RS) K2, *p1, k1; rep from * to last 3 sts, p1, k2. Next row: Sl 1 pwise, *p1, k1; rep from * to last 2 sts, p2. Rep last 2 rows once more. Change to larger needles. Next row: (RS) K19 (23, 27, 33, 35), pm for pocket, k7, pm, p1, k3, p1, M1, k1, p1, k3, p1, pm, k7, pm for pocket, k8 (10, 12, 12, 16), p1, k1, p1, k2—58 (64, 70, 76, 82) sts. Next row: Sl 1 pwise, [p1, k1] twice, work sts as they appear to end, purling new st. Next row: (RS) Work to second m, sl m, work Row 1 of Right Cross chart over 12 sts, sl m, work in patt to end. Cont as established, working 5 edge sts in rib and Rows 1–4 of
REFINED ARAN JACKET
PAM ALLEN, creative director at Classic Elite Yarns, likes little fi tted jackets, especially if they’re knitted.
Finished Size 34 (38, 42, 46, 50)" bust circumference. Jacket shown measures 34".Yarn Classic Elite Classic One Fifty (100% merino; 150 yd [137 m]/50 g): #7255 scarlet, 9 (10, 12, 13, 15) balls.Needles Sizes 5 (3.75 mm) and 6 (4 mm). Adjust needle size if necessary to obtain the correct gauge.Notions Cable needle (cn); markers (m); stitch holders; tapestry needle; four 3⁄4" buttons.Gauge 24 sts and 32 rows = 4" in St st on larger needles.
P A M A L L E N
STITCH GUIDE
3-Row Buttonhole:Row 1: (RS) [Yo] 2 times, k2tog.Row 2: Knit into yo, dropping extra wrap.Row 3: Purl into yo in row below.

©F+W Media, Inc. | All rights reserved | F+W Media grants permission for any or all pages in this issue to be copied for personal use | www.knittingdaily.com 18
chart between m, until piece measures 2 (3, 4, 5, 6)" from CO, ending with a WS row. Shape
waist: Dec row: (RS) K2, k2tog, work in patt to end—1 st dec’d. Work 9
rows even in patt. Rep last 10 rows once more—56 (62, 68, 74, 80) sts rem. Center
decs: (RS) K2, k2tog, work to 2 sts before m, ssk, sl m, work 12 sts in charted patt, sl m, k2tog, work in patt to end—3 sts dec’d. Work 9 rows even in patt. Rep last 10 rows once more—50 (56, 62, 68, 74) sts rem. Inc row: (RS) K2, M1, work in patt to m, M1, sl m, work 12 sts in charted patt, sl m, M1, work in patt to end—3 sts inc’d. Work 9 rows even in patt. Rep last 10 rows once more—56 (62, 68, 74, 80) sts. Inc row: (RS) K2, M1, work in patt to end—1 st inc’d. Work 9 rows even in patt. Rep last inc row once more—58 (64, 70, 76, 82) sts. Cont in patt until piece measures 13 (131⁄2, 14, 15, 16)" from CO, ending with a RS row. Pocket and collar: At the same time, on 29th row after CO, insert pocket lining as foll: (RS) Work in patt to first m, remove m, transfer next 26 sts to holder, remove next pocket m. With RS facing, transfer 24 sts of pocket lining to left needle and work as foll: K6, M1, pm, k12, pm, M1, k6—26 pocket sts (chart row omitted); cont to end as estab-lished. Cont in patt until piece measures 9" from CO, ending with a WS row. Col-
lar: Work as established to last 7 sts, [p1, k1] 3 times, k1—7 sts for collar. Cont as established, working 2 more sts in k1, p1 rib at beg of collar every 10th row 6 (7, 8, 8, 10) more times. Shape armhole: At the
same time, when piece measures 13 (131⁄2, 14, 15, 16)" from CO, BO 5 sts at beg of next RS row, then 2 sts at beg of foll 2 RS rows—49 (55, 61, 67, 73) sts rem. Dec 1 st at beg of next 1 (4, 4, 7, 9) RS row(s), then dec 1 st at beg of every 4th row 2 times—46 (49, 55, 58, 62) sts rem. Cont in patt until armhole measures 61⁄2 (71⁄2, 81⁄4, 81⁄2, 9)", ending with a WS row. Shape
shoulder: BO 8 (8, 10, 11, 11) sts at beg of next 2 (1, 3, 3, 3) RS row(s), then 9 sts at beg of foll 1 (2, 0, 0, 0) RS row(s)—21 (23, 25, 25, 29) collar sts rem. Inc 1 st at end of next row for seam st—22 (24,
26, 26, 30) sts. Work even in patt until piece measures 4 (41⁄2, 5, 5, 51⁄2)" from last shoulder BO. Place sts on holder.
RIGHT FRONT
Note: Buttonholes end after waist shaping beg, pocket and collar beg before waist shaping is completed, and collar shap-ing ends after armhole shaping beg; read through all instructions carefully before proceeding. With smaller needles, CO 57 (63, 69, 75, 81) sts. Row 1: K1, *k1, p1; rep from * to last 2 sts, k2. Row 2: P2, *k1, p1; rep from * to last 3 sts, k1, p2.Row 3: Sl 1 kwise, *k1, p1; rep from * to last 2 sts, k2.Rep Row 2. Change to larger needles. Next row: (RS) Sl 1 kwise, [k1, p1] 2 times, k8 (10, 12, 12, 16), pm for pocket, k7, pm, p1, k3, p1, M1, k1, p1, k3, p1, pm, k7, pm for pocket, knit to end—58 (64, 70, 76, 82) sts. Next row: Work sts as they appear, purling new st. Beg chart
and work buttonhole: (RS) Sl 1 kwise, k1, p1, k1, work Row 1 of 3-row buttonhole (see Stitch Guide), knit to second m, sl m, work Row 1 of Left Cross chart over
12 sts, sl m, knit to end. Working rem 2 rows of buttonhole, cont in patt, working chart between m and 5 sts at center-front edge in rib as established. Rep Row 1 of buttonhole every 20th row 3 more times, working rem 2 rows of buttonhole on foll 2 rows. Shape waist: At the same time, when piece measures 2 (3, 4, 5, 6)" from CO, shape waist as foll: Dec row: (RS) Work in patt to last 4 sts, ssk, k2—1 st dec’d. Work 9 rows even in patt. Rep last 10 rows once more—56 (62, 68, 74, 80) sts rem. Center decs: (RS) Work in patt to 2 sts before m, ssk, sl m, work 12 sts in charted patt, sl m, k2tog, work to last 4 sts, ssk, k2—3 sts dec’d. Work 9 rows even in patt. Rep last 10 rows once more—50 (56, 62, 68, 74) sts rem. Inc row: (RS) Work in patt to m, M1, sl m, work 12 sts in charted patt, sl m, M1, work in patt to last 2 sts, M1, k2—3 sts inc’d. Work 9 rows even in patt. Rep last 10 rows once more—56 (62, 68, 74, 80) sts. Inc row: (RS) Work in patt to last 2 sts, M1, k2—1 st inc’d. Work 9 rows even in patt. Rep last inc row—58 (64, 70, 76, 82) sts. Cont in patt until piece measures 13 (131⁄2, 14, 15, 16)" from CO, ending with a RS row. Pocket
and collar: At the same time, on 29th row
Refi n
ed A
ran

©F+W Media, Inc. | All rights reserved | F+W Media grants permission for any or all pages in this issue to be copied for personal use | www.knittingdaily.com 19
after CO, insert pocket l ining as fol l : (RS) Work in patt to fi rst m, remove m, transfer next 26 sts to holder, remove next pocket m. With RS facing, transfer 24 sts of
pocket lining to left needle and work as foll: K6, M1, pm, k12, pm, M1, k6—26 pocket sts (chart row omitted); work to end of row in patt. Cont in patt until piece measures 9" from CO, ending with a WS row. Collar: (RS) Sl 1 kwise, [k1, p1] 3 times, work in patt to end of row—7 sts for collar. Cont as established, working 2 more sts in k1, p1 rib at end of collar every 10th row 6 (7, 8, 8, 10) more times. Shape armhole: At the same time, when piece measures 13 (131⁄2, 14, 15, 16)" from CO, BO 5 sts at beg of next WS row, then BO 2 sts at beg of foll 2 WS rows— 49 (55, 61, 67, 73) sts rem. Dec 1 st at end of next 1 (4, 4, 7, 9) RS row(s), then dec 1 st at end of every 4th row 2 times—46 (49, 55, 58, 62) sts rem. Work even until arm-hole measures 61⁄2 (71⁄2, 81⁄4, 81⁄2, 9)", ending with a RS row. Shape shoulder: BO 8 (8, 10, 11, 11) sts at beg of next 2 (1, 3, 3, 3) WS row(s), then BO 9 sts at beg of foll 1 (2, 0, 0, 0) WS row(s)—21 (23, 25, 25, 29) collar sts rem. Inc 1 st at end of next row for seam st—22 (24, 26, 26, 30) sts. Work even in patt until piece measures 4 (41⁄2, 5, 5, 51⁄2)" from last shoulder BO. Place sts on holder.
SLEEVES
With smaller needles, CO 48 (54, 60, 66, 66) sts. Work in k1, p1 rib for 4 rows. Change to larger needles. Next row: (RS) K19 (22, 25, 28, 28), pm, p1, k3, p1, M1, k1, p1, k3, p1, pm, k16 (19, 22, 25, 25), M1, k2—50 (56, 62, 68, 68) sts. Next row: Work sts as they appear, purling new sts. Next row: (RS) Knit to fi rst m, work Row 1 of Sleeve chart, sl m, knit to end. Cont as established, working chart between m, until piece measures 5" from CO, ending with a WS row. Inc row: (RS) K2, M1, work in patt to last 2 sts, M1, k2—2 sts inc’d. Cont in patt and rep Inc row every 10 (8, 8, 8, 6)th row 5 (7, 7, 8, 15) more times, then every 8 (6, 6, 6, 4)th row 5 (6, 7, 6, 2) times—72 (84, 92, 98, 104)
sts. Work even until piece measures 18 (181⁄2, 19, 193⁄4, 203⁄4)" from CO, ending with a WS row. Shape sleeve cap: BO 5 sts at beg of next 2 rows, then BO 2 sts at beg of foll 4 (6, 8, 8, 8) rows—54 (62, 66, 72, 78) sts rem. Dec 1 st each end of needle every other row 7 (8, 9, 8, 8) times, then every 4th row once, then every other row 4 (5, 6, 6, 7) times, then every row 8 (10, 10, 14, 16) times, ending with a WS row—14 sts rem; 12 chart sts plus 1 seam st on each side. Saddle: Next row: (RS) K1, work in patt to last st, k1. Next row: P1, work in patt to last st, p1. Rep last 2 rows until saddle measures 33⁄4 (33⁄4, 41⁄2, 5, 5)". BO all sts.
FINISHING Transfer 26 pocket sts to smaller needle. Work 4 rows in k1, p1 rib for pocket bor-der, inc 1 st each end of needle on first row for seam st—28 sts. Sew sides of pock-et border to fronts. Sew pocket linings to WS of fronts. Gently block pieces to mea-surements. Sew back and front shoulders to saddles. Adjust collar pieces so that they lie along the neck edge without stretching or buckling. Rip or work more rows as needed. Join ends of collar pieces using the three-needle BO (see box). Sew collar to jacket with RS of collar facing inside of jacket. Sew remainder of sleeve caps into armholes. Sew side and sleeve seams. Sew buttons onto left front oppo-site buttonholes. Steam seams.
Refi n
ed A
ran
Illu
stra
tion
s by
Gay
le F
ord
With left needle tip, lift strand between needles from front to back (Figure 1). Knit lifted loop through the back (Figure 2).
Figure 1 Figure 2
Left Slant (M1L)
With left needle tip, lift strand between needles from back to front (Figure 1). Knit lifted loop through the front (Figure 2).
Figure 1 Figure 2
Right Slant (M1R)
Raised (M1) IncreasesSlip two stitches knitwise one at a time (Figure 1). Insert point of left needle into front of two slipped stitch es and knit them together through back loops with right nee-dle (Figure 2).
Figure 2Figure 1
Ssk Decrease
Place stitches to be joined onto two separate needles. Hold them with right sides of knitting facing together. Insert a third needle into fi rst stitch on each of the other two needles and knit them together as one stitch. *Knit next stitch on each needle the same way. Pass fi rst stitch over second stitch. Repeat from * until one stitch remains on third needle. Cut yarn and pull tail through last stitch.
Three-Needle Bind-Off

©F+W Media, Inc. | All rights reserved | F+W Media grants permission for any or all pages in this issue to be copied for personal use | www.knittingdaily.com 20
Right Front
Back
17 (19, 21, 23, 25)"43 (48.5, 53.5, 58.5, 63.5) cm
91 ⁄4 (1
01 ⁄4, 1
11 ⁄4, 1
21 ⁄4, 1
31 ⁄4)"
23.5
(26,
28.
5, 3
1, 33
.5) c
m
13 (1
31 ⁄2, 1
4, 15
, 16)
"33
(34.
5, 3
5.5,
38,
40.
5) c
m 15 (1
7, 19
, 21,
23)"
38 (4
3, 4
8.5,
53.
5, 5
8.5)
cm
61 ⁄2 (7
1 ⁄2, 8
1 ⁄4, 8
1 ⁄2, 9
)"16
.5 (1
9, 2
1, 21
.5, 2
3) c
m
3⁄4"2 cm
4 (4
1 ⁄2, 5
, 5, 5
1 ⁄2)"
10 (1
1.5, 1
2.5,
12.5
, 14)
cm
33 ⁄4 (3
3 ⁄4, 4
1 ⁄2, 5
, 5)"
9.5
(9.5
, 11.5
, 12.
5, 12
.5) c
m
53 ⁄4 (6
1 ⁄4, 7
, 7, 8
1 ⁄4)"
14.5
(16,
18, 1
8, 2
1) c
m
Sleeve
73⁄4 (83⁄4, 93⁄4, 103⁄4, 103⁄4)"19.5 (22, 25, 27.5, 27.5) cm
18 (1
81 ⁄2, 1
9, 19
3 ⁄4, 2
03 ⁄4)"
45.5
(47,
48.
5, 5
0, 5
2.5)
cm
111 ⁄2 (1
31 ⁄2, 1
43 ⁄4, 1
53 ⁄4, 1
63 ⁄4)"
29 (3
4.5,
37.
5, 4
0, 4
2.5)
cm
5 (6
, 63 ⁄4
, 7, 7
1 ⁄2)"
12.5
(15,
17, 1
8, 19
) cm
33⁄4 (33⁄4, 41⁄2, 5, 5)"9.5 (9.5, 11.5, 12.5, 12.5) cm
11⁄2"3.8 cm
k on RS; p on WS
p on RS; k on WS
pattern repeat
sl 2 sts onto cn, hold in back, k1, k2 from cn
sl 1 st onto cn, hold in front, k2, k1 from cn
3
1
Left Cross
3
1
Right Cross
3
1
Sleeve
©F+W Media, Inc. | All rights reserved | F+W Media grants permission for any or all pages in this issue to be copied for personal use | www.knittingdaily.com 21
MANICOUAGAN PULLOVERAlex Capshaw-Taylor
Finished Size 34 (37½, 41, 44½, 48½)" bust circumference. Pullover shown measures 34", modeled with 4" of positive ease.Yarn Classic Elite Yarns Woodland (65% wool, 35% nettles; 131 yd [120 m]/1¾ oz [50 g]): #3175 charcoal, 8 (9, 10, 11, 12) balls.Needles Sizes 4 (3.5 mm) and 6 (4 mm). Adjust needle size if necessary to obtain the correct gauge.Notions Removable markers (m); stitch holder; tapestry needle; eight ⅝" buttons.Gauge 22 sts and 25 rows = 4" in Drop St Ca-ble patt on larger needles after dropping sts; 31 sts and 27 rows = 4" in Drop St Cable patt on larger needles before dropping sts.
? See the Glossary on page 130 for terms you don’t know. For our
master glossary, visit KnittingDaily.com/glossary.
NOTES
• This pullover is worked in pieces from the bottom up. The sleeves are worked flat and sewn in.
• In the Drop Stitch Cable pattern, the first stitch of each pattern repeat (the single Stockinette stitch) is a stitch which is later dropped. When binding off or de-creasing this stitch, drop it from the left needle and count it as one of the stitches being bound off or decreased. Ravel each dropped stitch to the lifeline above the ribbing at the lower edge. (For an example, see the video on youtube.com/worldknits.)
• If the first stitch after a bind-off is one that should later be dropped (e.g. if you are to bind off 3 stitches, and the
4th stitch on the left needle is one that will later be dropped), before binding off the final stitch, drop the stitch after the bind-off, then M1 to create a new stitch, then finish the bind off. Later, when binding off or decreasing that stitch, do not drop it; just bind it off or decrease it as usual.
• The lifelines that are placed in the gar-ment are permanent (they prevent the dropped stitches from raveling into the ribbing). Use the same yarn that is used for the garment when placing a lifeline.
Stitch Guide1/1 RT: K2tog but don’t drop sts from left needle, knit first st again, drop both sts from left needle.
Drop Stitch Cable Pattern: (multiple of 5 sts)Row 1 (RS) *K1, p1, k2, p1; rep from * to end.Row 2 *K1, p2, k1, p1; rep from * to end.Row 3 *K1, p1, 1/1 RT (see Stitch Guide), p1; rep from * to end.Row 4 *K1, p2, k1, p1; rep from * to end.Rep Rows 1–4 for patt.
BACKWith smaller needles, CO 108 (120, 134, 146, 160) sts. Work in k1, p1 rib for 1", ending with a WS row. Change to larger needles. Next row (RS) Knit, dec 15 (17, 21, 23, 27) sts evenly spaced—93 (103, 113, 123, 133) sts rem. Place lifeline (see Notes). Set-up row (WS) K1, *k1, p2, k1, p1; rep from * to last 2 sts, k2. Next row (RS) K2, work Drop St Cable patt (see Stitch Guide) over 90 (100, 110, 120, 130) sts, k1. Cont in patt until piece measures 15" from CO, ending with a WS row. Shape armholes: (See Notes) BO 5 (5, 6, 6, 6) sts at beg of next 2 rows, then BO 4 (4,
5, 5, 5) sts at beg of foll 2 (2, 2, 4, 4) rows—75 (85, 91, 91, 101) sts rem. BO 3 (3, 4, 4, 4) sts at beg of next 4 (4, 2, 2, 2) rows, then BO 2 (2, 3, 2, 3) sts at beg of foll 2 rows—59 (69, 77, 79, 87) sts rem. BO 1 (1, 2, 1, 2) st(s) at beg of next 2 rows—57 (67, 73, 77, 83) sts rem. Work even until armhole measures 7½ (7½, 8, 8½, 9)", ending with a WS row. Shape neck and shoulders: BO 3 (4, 4, 5, 6) sts at beg of next 2 rows—51 (59, 65, 67, 71) sts rem. Next row (RS) BO 3 (4, 4, 5, 5) sts, work 13 (15, 18, 18, 19) sts, join new yarn and BO 19 (21, 21, 21, 23) sts, work to end—13 (15, 18, 18, 19) sts rem for right shoulder and 16 (19, 22, 23, 24) sts rem for left shoulder. Place right shoulder sts on holder. Left shoulder: Next row (WS) BO 3 (4, 4, 5, 5) sts, work to end—13 (15, 18, 18, 19) sts rem. Next row (RS) BO 4 (5, 5, 5, 6) sts, work to end—9 (10, 13, 13, 13) sts rem. Next row BO 3 (3, 4, 4, 4) sts, work to end—6 (7, 9, 9, 9) sts rem. Next row BO 4 (4, 5, 5, 5) sts, work to end—2 (3, 4, 4, 4) sts rem. BO all sts. Right shoulder: With WS facing, rejoin yarn to 13 (15, 18, 18, 19) right shoulder sts. Next row (WS) BO 4 (5, 5, 5, 6) sts, work to end—9 (10, 13, 13, 13) sts rem. Next row (RS) BO 3 (3, 4, 4, 4) sts, work to end—6 (7, 9, 9, 9) sts rem. Next row BO 4 (4, 5, 5, 5) sts, work to end—2 (3, 4, 4, 4) sts rem. BO all sts.
FRONTWith smaller needles, CO 108 (120, 134, 146, 160) sts. Work in k1, p1 rib for 1", ending with a WS row. Change to larger needles. Next row (RS) Knit, dec 15 (17, 21, 23, 27) sts evenly spaced—93 (103, 113, 123, 133) sts rem. Place lifeline. Set-up row (WS) K1, *k1, p2, k1, p1; rep from * to last 2 sts, k2. Next row (RS) K2, work Drop St Cable patt over 90 (100, 110, 120, 130) sts, k1. Cont in patt until piece measures 5"
17 (183⁄4, 201⁄2, 221⁄4, 241⁄4)"43 (47.5, 52, 56.5, 61.5) cm
5"12.5 cm
15"38 cm
71⁄2
(71⁄
2, 8
, 81⁄
2, 9
)"19
(19,
20
.5, 2
1.5,
23)
cm
11⁄4"3.2 cm
2 (21⁄2, 3, 31⁄4, 31⁄2)"5 (6.5, 7.5, 8.5, 9) cm
61⁄4 (7, 71⁄2, 71⁄2, 81⁄4)"16 (18, 19, 19, 21) cm
33⁄4
(33⁄
4, 4
1⁄4,
41⁄
4, 4
1⁄4)
"9.
5 (9
.5, 1
1, 1
1, 1
1) c
m
front & back
sleeve
8 (8, 9, 9, 9)"20.5 (20.5, 23, 23, 23) cm
12 (1
2, 1
31⁄4
, 141
⁄4, 1
5)"
30.5
(30
.5, 3
3.5,
36,
38)
cm
171⁄2"44.5 cm
41⁄4"11 cm
3 (3, 3, 3, 31⁄2)"7.5 (7.5, 7.5, 7.5, 9) cm
030_048_KNwin13.indd 42 10/10/13 11:36 AM
? See knittingdaily.com/Glossary for terms you don’t know.
Pho
tos
by
Joe
Han
cock

©F+W Media, Inc. | All rights reserved | F+W Media grants permission for any or all pages in this issue to be copied for personal use | www.knittingdaily.com 22
from CO, ending with a WS row. Divide for placket: Next row (RS) Work 44 (49, 54, 59, 64) sts in patt, BO 5 sts, work to end—44 (49, 54, 59, 64) sts rem each side. Place left front sts on holder. Right front: Next row (WS) Work in patt to last st, k1f&b—45 (50, 55, 60, 65) sts. Next row (RS) P1, work in patt as established to end. Cont in patt until piece measures 15" from CO, ending with a RS row. Shape armhole: At beg of WS rows, BO 5 (5, 6, 6, 6) sts once, then BO 4 (4, 5, 5, 5) sts 1 (1, 1, 2, 2) time(s)—36 (41, 44, 44, 49) sts rem. Work 1 RS row. At beg of WS rows, BO 3 (3, 4, 4, 4) sts 2 (2, 1, 1, 1) times(s), then BO 2 (2, 3, 2, 3) sts once—28 (33, 37, 38, 42) sts rem. Work 1 RS row. Next row (WS) BO 1 (1, 2, 1, 2) st(s), work to end—27 (32, 35, 37, 40) sts rem. Work even until armhole measures 5 (5, 5, 5½, 6)", ending with a WS row. Shape neck: Next row (RS) BO 9 (11, 11, 11, 13) sts, work to end—18 (21, 24, 26, 27) sts rem. Work 1 WS row. Dec 1 st at neck edge every RS row 7 (7, 8, 8, 8) times—11 (14, 16, 18, 19) sts rem. Work even until armhole measures 7½ (7½, 8, 8½, 9)", ending with a RS row. Shape shoulder: At beg of WS rows, BO 3 (4, 4, 5, 6) sts 3 (2, 4, 2, 1) time(s), then BO 2 (3, 0, 4, 5) sts 1 (2, 0, 2, 1) time(s), then BO 0 (0, 0, 0, 4) sts 0 (0, 0, 0, 2) times—no sts rem. Left front: With WS facing, rejoin yarn to 44 (49, 54, 59, 64) left front sts. Next row (WS) K1f&b, work in patt to end—45 (50, 55, 60, 65) sts. Next row (RS) Work in patt as established to last st, p1. Cont in patt until piece measures 15" from CO, ending with a WS row. Shape armhole: At beg of RS rows, BO 5 (5, 6, 6, 6) sts once, then BO 4 (4, 5, 5, 5) sts 1 (1, 1, 2, 2) time(s)—36 (41, 44, 44, 49) sts rem. Work 1 WS row. At beg of RS rows, BO 3 (3, 4, 4, 4) sts 2 (2, 1, 1, 1) times(s), then BO 2 (2, 3, 2, 3) sts once—28 (33, 37, 38, 42) sts rem. Work 1 WS row. Next row (RS) BO 1 (1, 2, 1, 2) st(s), work to end—27 (32, 35, 37, 40) sts rem. Work even until armhole measures 5 (5, 5, 5½, 6)", ending with a RS row. Shape neck: Next row (WS) BO 9 (11, 11, 11, 13) sts, work to end—18 (21, 24, 26, 27) sts rem. Dec 1 st at neck edge every RS row 7 (7, 8, 8, 8) times—11 (14, 16, 18, 19) sts rem. Work even until armhole measures 7½ (7½, 8, 8½, 9)", ending with a WS row. Shape shoulder: At beg of RS rows, BO 3 (4, 4, 5, 6) sts 3 (2, 4, 2, 1) time(s), then BO 2 (3, 0, 4, 5) sts 1 (2, 0, 2, 1) time(s), then BO 0 (0, 0, 0, 4) sts 0 (0, 0, 0, 2) times—no sts rem.
SLEEVESWith smaller needles, CO 52 (52, 60, 60, 60) sts. Work in k1, p1 rib for 1", ending with a WS row. Change to larger needles.
Next row (RS) Knit, dec 8 (8, 11, 11, 11) sts evenly spaced—44 (44, 49, 49, 49) sts rem. Place lifeline. Set-up row (WS) K2, *k1, p2, k1, p1; rep from * to last 2 sts, k2. Inc row (RS) P2, M1, work Drop St Cable to last 2 sts, M1, p2—2 sts inc’d. Rep Inc row every 10 (10, 8, 8, 6)th row 4 (4, 10, 1, 13) more time(s), then every 8 (8, 6, 6, 4)th row 6 (6, 1, 13, 3) time(s), working new sts into Drop St Cable patt—66 (66, 73, 79, 83) sts. Work even until piece measures 17½" from CO, ending with a WS row. Shape cap: BO 5 (5, 6, 6, 6) sts at beg of next 2 rows—56 (56, 61, 67, 71) sts rem. BO 2 sts at beg of next 10 (10, 14, 20, 18) rows—36 (36, 33, 27, 35) sts rem. BO 1 (1, 1, 0, 3) st(s) at beg of next 10 (10, 6, 0, 2) rows—26 (26, 27, 27, 29) sts rem. BO 3 sts at beg of next 2 rows, then BO 2 sts at beg of foll 2 rows—16 (16, 17, 17, 19) sts rem. BO all sts.
FINISHINGWeave in ends. Block pieces to measure-ments. Sew shoulder seams. Sew sleeve seams. Sew sleeves into armholes. Neck-band: With smaller needles and RS facing, beg at right front neck edge, pick up and knit 77 (83, 91, 91, 97) sts around neck, ending at left front neck edge. Work in k1,
p1 rib for 1", ending with a RS row. BO all sts in rib. Button band: With smaller needles and RS facing, beg at top of neckband, pick up and knit 101 (101, 101, 105, 107) sts along left front placket edge. Work in k1, p1 rib for 1", ending with a RS row. BO all sts in rib. Buttonhole band: Mark placement for 8 buttons, placing top button ½" from top of band, bottom button ½" from bottom of band, and others evenly spaced between. With smaller needles and RS facing, pick up and knit 101 (101, 101, 105, 107) sts along right front edge, ending at top of neckband. Work in k1, p1 rib for 3 rows. Next row (RS) Work in rib, working (yo, k2tog) buttonhole at each m. Cont in rib until band measures 1" from pick-up row, ending with a RS row. BO all sts in rib. Sew buttons to button band opposite buttonholes. Sew bottom edge of button band and buttonhole band to BO edge at base of placket.
When Alex Capshaw-Taylor isn’t in her studio designing or in a yarn store teaching, you can find her globe trekking in search of inspiration. She makes sure to knit daily, and she still loves learning new knitting tricks and techniques. Connect with her online at www.worldknits.com.
030_048_KNwin13.indd 44 10/10/13 11:37 AM
©F+W Media, Inc. | All rights reserved | F+W Media grants permission for any or all pages in this issue to be copied for personal use | www.knittingdaily.com 23
joe
hanc
ock
Farrington Pullover Lisa ShroyerOriginally published in Knitting Plus (Interweave, 2011)
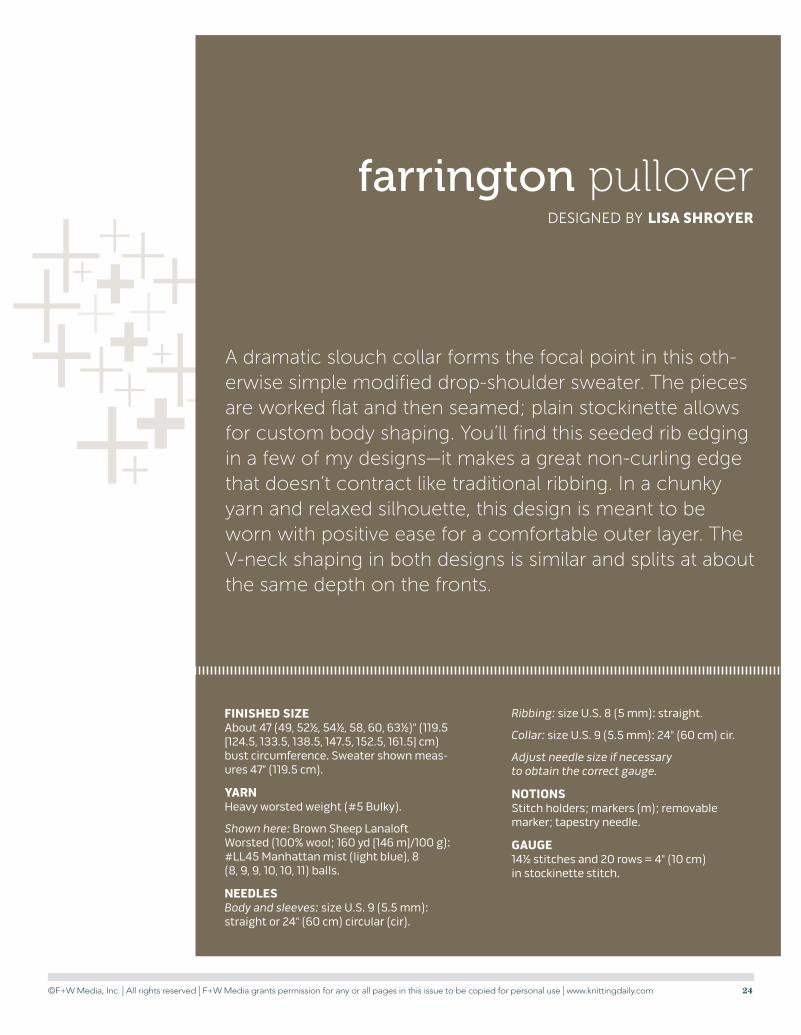
©F+W Media, Inc. | All rights reserved | F+W Media grants permission for any or all pages in this issue to be copied for personal use | www.knittingdaily.com 24
FINISHED SIZE About 47 (49, 52½, 54½, 58, 60, 63½)" (119.5 [124.5, 133.5, 138.5, 147.5, 152.5, 161.5] cm) bust circumference. Sweater shown meas-ures 47" (119.5 cm).
YARN Heavy worsted weight (#5 Bulky).
Shown here: Brown Sheep Lanaloft Worsted (100% wool; 160 yd [146 m]/100 g): #LL45 Manhattan mist (light blue), 8 (8, 9, 9, 10, 10, 11) balls.
NEEDLES Body and sleeves: size U.S. 9 (5.5 mm): straight or 24" (60 cm) circular (cir).
Ribbing: size U.S. 8 (5 mm): straight.
Collar: size U.S. 9 (5.5 mm): 24" (60 cm) cir.
Adjust needle size if necessary to obtain the correct gauge.
NOTIONS Stitch holders; markers (m); removable marker; tapestry needle.
GAUGE 14½ stitches and 20 rows = 4" (10 cm) in stockinette stitch.
farrington pullover DESIGNED BY LISA SHROYER
A dramatic slouch collar forms the focal point in this oth-erwise simple modified drop-shoulder sweater. The pieces are worked flat and then seamed; plain stockinette allows for custom body shaping. You’ll find this seeded rib edging in a few of my designs—it makes a great non-curling edge that doesn’t contract like traditional ribbing. In a chunky yarn and relaxed silhouette, this design is meant to be worn with positive ease for a comfortable outer layer. The V-neck shaping in both designs is similar and splits at about the same depth on the fronts.

©F+W Media, Inc. | All rights reserved | F+W Media grants permission for any or all pages in this issue to be copied for personal use | www.knittingdaily.com 25
+ A 24" (60 cm) or shorter size U.S. 9 (5.5 mm) circular needle is recommended for working the collar, but if you use a circular needle for the body, the same needle can also be used for the collar.
+ The body length to the armhole gets pro-gressively shorter with each size because the armhole depth gets progressively deeper with each size; the total length from cast-on edge to shoulder line for this project has been capped at 28" (71 cm), and the lengths for the individual sizes are 26¾ (27½, 28, 28, 28, 28, 28)" (68 [70, 71, 71, 71, 71, 71] cm).
+ Because the cross-back width gets progres-sively wider for the larger sizes, the sleeves get progressively shorter to prevent the cuff-to-cuff measurement from becoming too wide.
+ This design features no body shaping; the hip and bust measurements are equal. A relaxed fit at the bust paired with a strained fit around the hips is neither attractive nor comfortable. Is your hip circumference larger than your bust? If so, consider work-ing A-line shaping in the lower body. Work-ing within the multiple of the rib pattern at the hem (multiple of 2 stitches + 3), cast on for your needed hip circumference. Then, starting several inches up from the cast on, gradually decrease to the stitch count for your bust size. This is a better solution than choosing a size based on the hip circumfer-ence, which would cause the garment to be far too large for you.
+ Before altering stitch counts for the sleeves, carefully review the materials on drop-shoulder construction earlier in this chap-ter. The sleeve width and armhole depth are fundamentally linked; changing one means changing the other (or you’ll face a seaming nightmare when trying to fit the sleeve into the armhole).
notes

©F+W Media, Inc. | All rights reserved | F+W Media grants permission for any or all pages in this issue to be copied for personal use | www.knittingdaily.com 26
backWith smaller needles, CO 85 (89, 95, 99, 105, 109, 115) sts.
ROW 1 (RS) Knit.ROW 2 (WS) P2, *k1, p1; rep from *
to last 3 sts, k1, p2.
Rep these 2 rows 4 more times—piece measures about 1½" (3.8 cm) from CO. Change to larger needles and work in St st (knit RS rows; purl WS rows) until piece measures 17 (17, 16½, 16, 15½, 15½, 15)" (43 [43, 42, 40.5, 39.5, 39.5, 38] cm) from CO (see Notes), ending with a WS row.
Shape ArmholesBO 6 (6, 7, 7, 7, 8, 8) sts at beg of next 2 rows—73 (77, 81, 85, 91, 93, 99) sts rem. Work even in St st until armholes measure 9¾ (10½, 11½, 12, 12½, 12½, 13)" (25 [26.5, 29, 30.5, 31.5, 31.5, 33] cm). Place sts on holder.
frontWork as for back until 2 rows before armhole shaping, ending with a WS row—85 (89, 95, 99, 105, 109, 115) sts; piece measures about 16½ (16½, 16, 15½, 15, 15, 14½)" (42 [42, 40.5, 39.5, 38, 38, 37] cm) from CO.
Shape NeckNEXT ROW (RS) K42 (44, 47, 49,
52, 54, 57), BO center st, knit to end—42 (44, 47, 49, 52, 54, 57) sts rem each side.
Work neck and armhole shaping separately for each side as foll (sts for left front may rem on needle while working sts of right front).

©F+W Media, Inc. | All rights reserved | F+W Media grants permission for any or all pages in this issue to be copied for personal use | www.knittingdaily.com 27
farrington pullover
23½ (24½, 26¼, 27¼, 29, 30, 31¾)"59.5 (62, 66.5, 69, 73.5, 76, 80.5) cm
9¾ (1
0½
, 11½
, 12,
12½
, 12½
, 13)
"25
(26.
5, 2
9, 3
0.5
, 31.
5, 3
1.5,
33)
cm
21½
(21½
, 21½
, 21,
21,
21,
20
½)"
54.5
(54.
5, 5
4.5,
53.
5, 5
3.5,
53.
5, 5
2) c
m
6½ (6½, 6½, 7¼, 7¾, 8, 8½)"16.5 (16.5, 16.5, 18.5, 19.5, 20.5, 21.5) cm
17 (1
7, 1
6½, 1
6, 1
5½, 1
5½, 1
5)"
43 (4
3, 4
2, 4
0.5
, 39.
5, 3
9.5,
38
) cm
6¾ (8, 9, 9, 9½, 9½, 10¼)"17 (20.5, 23, 23, 24, 24, 26) cm
10¼
(11,
12,
12½
, 13,
13,
14½
)"26
(28
, 30
.5, 3
1.5,
33,
33,
37)
cm
11¾ (11¾, 12½, 12½, 12½, 13, 13)"30 (30, 31.5, 31.5, 31.5, 33, 33) cm
18½ (20, 22¼, 23½, 24, 24½, 25)"47 (51, 56.5, 59.5, 61, 62, 63.5) cm
Back+
Front
Sleeve
RIGHT FRONT
NEXT ROW (WS) Purl to BO gap at center, turn.
DEC ROW (RS) Sl 1 pwise with yarn in back (wyb), k1, ssk, knit to end—1 st dec’d at neck edge.
NEXT ROW (WS) BO 6 (6, 7, 7, 7, 8, 8) sts for armhole, purl to end—35 (37, 39, 41, 44, 45, 48) sts rem.
Slipping the first st of every RS row, rep dec row on the next 1 (3, 5, 5, 6, 6, 7) RS row(s), then every other RS row (i.e., every 4th row) 10 times—24 (24, 24, 26, 28, 29, 31) sts rem. Work even in St st until armhole measures 9¾ (10½, 11½, 12, 12½, 12½, 13)" (25 [26.5, 29, 30.5, 31.5, 31.5, 33] cm). Place sts on holder.
LEFT FRONT
With WS facing, rejoin yarn to left front neck edge.
NEXT ROW (WS) Purl. NEXT ROW (RS) BO 6 (6, 7, 7, 7, 8,
8) sts, knit to last 4 sts, k2tog, k2—35 (37, 39, 41, 44, 45, 48) sts rem.
NEXT ROW (WS) Sl 1 pwise with yarn in front (wyf), purl to end.
DEC ROW (RS) Knit to last 4 sts, k2tog, k2—1 st dec’d at neck edge.
Slipping the first st of WS rows, rep dec row on the next 0 (2, 4, 4, 5, 5, 6) RS rows, then every other RS row 10 times—24 (24, 24, 26, 28, 29, 31) sts rem. Work even in
St st until armhole measures 9¾ (10½, 11½, 12, 12½, 12½, 13)" (25 [26.5, 29, 30.5, 31.5, 31.5, 33] cm). Place sts on holder.
sleevesWith smaller needles, CO 43 (43, 45, 45, 45, 47, 47) sts.
ROW 1 (RS) Knit.ROW 2 (WS) P2, *k1, p1; rep from *
to last 3 sts, k1, p2.
Rep these 2 rows 4 more times—piece measures about 1½" (3.8 cm) from CO. Change to larger needles and work 2 rows in St st, ending with a WS row.

©F+W Media, Inc. | All rights reserved | F+W Media grants permission for any or all pages in this issue to be copied for personal use | www.knittingdaily.com 28
INC ROW (RS) K2, M1, knit to last 2 sts, M1, k2—2 sts inc’d.
[Work 7 (7, 5, 5, 3, 3, 1) row(s) even, then rep inc row] 5 (1, 4, 3, 20, 20, 4) time(s)—55 (47, 55, 53, 87, 89, 57) sts. Rep inc row every 6 (6, 4, 4, 0, 0, 4)th row 6 (13, 13, 16, 0, 0, 17) times—67 (73, 81, 85, 87, 89, 91) sts. Work even in St st until piece measures 21½ (21½, 21½, 21, 21, 21, 20½)" (54.5 [54.5, 54.5, 53.5, 53.5, 53.5, 52] cm) from CO (see Notes), ending with a WS row. BO all sts.
finishingBlock pieces to measurements. With RS touching and WS facing out, use the three-needle method to BO 24 (24, 24, 26, 28, 29, 31) held back and right shoulder sts tog. Rep for left shoulder—25 (29, 33, 33, 35, 35, 37) center back sts rem on holder.
CollarWith 24" (60 cm) cir needle (see Notes) and RS facing, join yarn to beg of held center back sts. K25 (29, 33, 33, 35, 35, 37) back neck sts, pick up and knit 30 (32, 36, 36, 38, 38, 40) sts evenly spaced along left front neck to base of V-neck, pick up and knit 1 st from center front BO, then 30 (32, 36, 36, 38, 38, 40) sts evenly spaced along right front neck—86 (94, 106, 106, 112, 112, 118) sts total. Pm, and join for working in rnds; rnd beg at right shoulder.
INC RND [K1f&b, k1] 12 (14, 16, 16, 17, 17, 18) times, k1f&b, pm for left shoulder, [k1, k1f&b] 15 (16,
18, 18, 19, 19, 20) times, k1 (center front st) and place a removable marker in this st, [k1f&b, k1] 15 (16, 18, 18, 19, 19, 20) times—129 (141, 159, 159, 168, 168, 177) sts; 38 (44, 50, 50, 53, 53, 56) back neck sts; 45 (48, 54, 54, 57, 57, 60) sts each side of 1 marked center front st.
NOTE The collar is worked in rev St st (purl on RS, knit on WS). Turn the work so the WS of the collar is facing so you can work the collar rnds by knitting each rnd instead of purling. Move the removable marker up as you work so you can always identify the center front st. Cont as foll with WS (knit side) of collar facing:
RND 1 (dec rnd) K44 (47, 53, 53, 56, 56, 59) along right front neck to 1 st before marked st at center front, sl 2 tog kwise, k1, p2sso, knit to end—2 sts dec’d at center front.
RND 2 Knit.RND 3 Knit to 1 st before marked st
at center front, sl 2 tog kwise, k1, p2sso, knit to end—2 sts dec’d.
RND 4 Knit. Rep the last 2 rnds 8 (9, 9, 9, 10, 10, 10) more times—109 (119, 137, 137, 144, 144, 153) sts rem; collar measures about 4¼ (4½, 4½, 4½, 5, 5, 5)" (11 [11.5, 11.5, 11.5, 12.5, 12.5, 12.5] cm) from pick-up rnd, measured straight up along a single column of sts (not along the mitered dec line at center front). Work short-rows as foll:
SHORT-ROW 1 (knit side) Knit to 1 st before marked st at center front, sl 2 tog kwise, k1, p2sso, knit to 6
sts beyond m at left shoulder (not beg-of-rnd m at right shoulder), wrap next st, turn.
SHORT-ROW 2 (purl side) Purl to 6 sts past beg-of-rnd m, wrap next st, turn.
SHORT-ROWS 3, 5, AND 7 Knit to 1 st before marked st at center front, sl 2 tog kwise, k1, p2sso, knit to 6 sts before previously wrapped st, wrap next st, turn.
SHORT-ROWS 4, 6, AND 8 Purl to 6 sts before previously wrapped st, wrap next st, turn.
NEXT ROW Knit to beg-of-rnd m at right shoulder; there is no need to work the wraps tog with the wrapped sts because the purl bumps will hide them—101 (111, 129, 129, 136, 136, 145) sts rem.
Beg working in rnds again and knit 1 rnd across all sts.
DEC RND K1 (1, 1, 1, 0, 0, 1), *k2tog; rep from *—51 (56, 65, 65, 68, 68, 73) sts rem.
Knit 1 rnd—collar measures about 6¾ (7, 7, 7, 7½, 7½, 7½)" (17 [18, 18, 18, 19, 19, 19] cm) from pick-up rnd in front and 4¾ (5, 5, 5, 5½, 5½, 5½)" (12 [12.5, 12.5, 12.5, 14, 14, 14] cm) in back, measured along a single column of sts. BO all sts kwise.
With yarn threaded on a tapestry needle, sew sleeve tops into armholes, matching midpoint of each sleeve with shoulder seam and easing to fit. Sew sleeve and side seams. Weave in loose ends. Block again if desired.
Discover knitwear designs that will capture your imagination. You don’t have to be a designer or a knitting pro to make beautiful knitted garments and accessories, and you don’t have to hunt all over for inspiring designs.From cover to cover, Interweave Knits magazine gives you great projects, from the beginner to the advanced. Every issue is packed full of captivating smart designs, step-by-step instructions, easy-to-understand illustrations, plus well-written, lively articles sure to inspire.
interweaveknits.com
I N T E R W E A V E
KNITS
Related Documents