Kath Crawford Kath Crawford Jan Barfoot Jan Barfoot PCR of PCR of Chloroplast DNA Chloroplast DNA

Kath Crawford Jan Barfoot
Jan 01, 2016
PCR of Chloroplast DNA. Kath Crawford Jan Barfoot. Today’s activities. Amplification of chloroplast DNA Photosynthesis – an overview Bacterial transformation with the pGLO plasmid. Schedule for today. Plant PCR: Extraction of DNA from plant material. - PowerPoint PPT Presentation
Welcome message from author
This document is posted to help you gain knowledge. Please leave a comment to let me know what you think about it! Share it to your friends and learn new things together.
Transcript

Kath CrawfordKath Crawford
Jan BarfootJan Barfoot
PCR of PCR of
Chloroplast DNAChloroplast DNA

Amplification of chloroplast DNA
Photosynthesis – an overview
Bacterial transformation with the pGLO plasmid
Today’s activities

Plant PCR: Extraction of DNA from plant material
Plant PCR: Gel electrophoresis of amplified products
Explanation and discussion
Stain and record results
Plant PCR: Purification of DNA from plant material
Amplification of cpDNA
Schedule for today
Photosynthesis – an overview (lecture theatre)
Bacterial transformation using pGLO (lab)

The use of amplified chloroplast DNA (cpDNA) to investigate evolutionary relationships of
common plants
Plant PCR

(i) Extraction of DNA from plant material (p8)
FTA card – chemically treated paper matrix for the safe collection, transport, storage, purification and analysis of DNA.
DNA is extracted on to the paper matrix, purified and then amplified.
Plant PCR
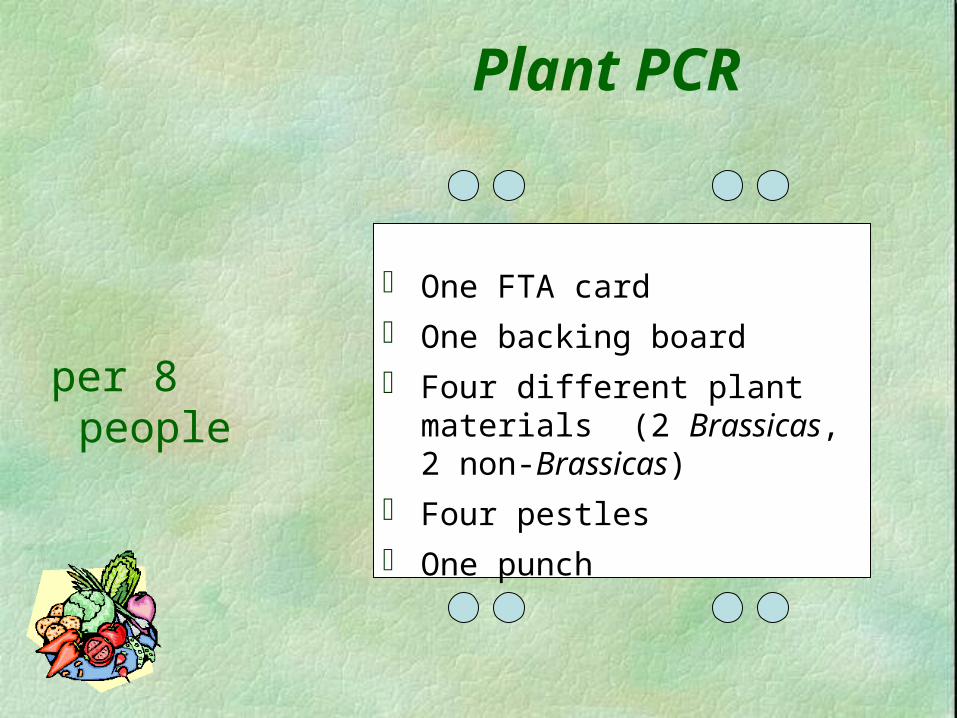
per 8 people
One FTA card
One backing board
Four different plant materials (2 Brassicas, 2 non-Brassicas)
Four pestles
One punch
Plant PCR

Place backing board between the back cover of the card and the absorbent layer.
Plant PCR

Place a piece of fresh plant material on to one box on the FTA card.
Ensure it does not extend outwith the box.
Close cover.
Plant PCR

Using a pestle, squash the leaf on to the card until moisture has soaked through to the back of the absorbent layer. Discard squashed plant material.
Plant PCR
Try to keep the sample within the box.

Plant PCR
Repeat extraction for second plant material in a different box.
Try to ensure no ‘escape’ to another
box!

Plant PCR
Make sure that moisture from the leaf has soaked through to the back of the paper.

Plant PCR
Repeat extraction for third and fourth plant materials in the remaining boxes.
Try to ensure no ‘escape’ of extracted materials to
other boxes!

Plant PCR
Have you labelled your samples?

Plant PCR
Leave cards open to dry.
Transfer to lecture theatre.

One completed card (four samples), one punch per 8 people
Plant PCR
Use the punch in turn (cleaning between samples) so that each person removes one disc – the DNA to be amplified is on the disc.
One Brassica and one non-Brassica per pair.
One of each sample or one of three samples + negative control (blank paper, one per card) per four people.
(ii) Purification of the extracted DNA (p9)

Plant PCR
1. Place cutting/backing board (clean!) behind absorbent layer.
Place tip of the punch over the area to be sampled, press firmly and rotate to remove a paper disc. Important – choose an area where the extract has soaked through to the back.
Clean punch between samples by removing a disc of paper from an
extract-free area.
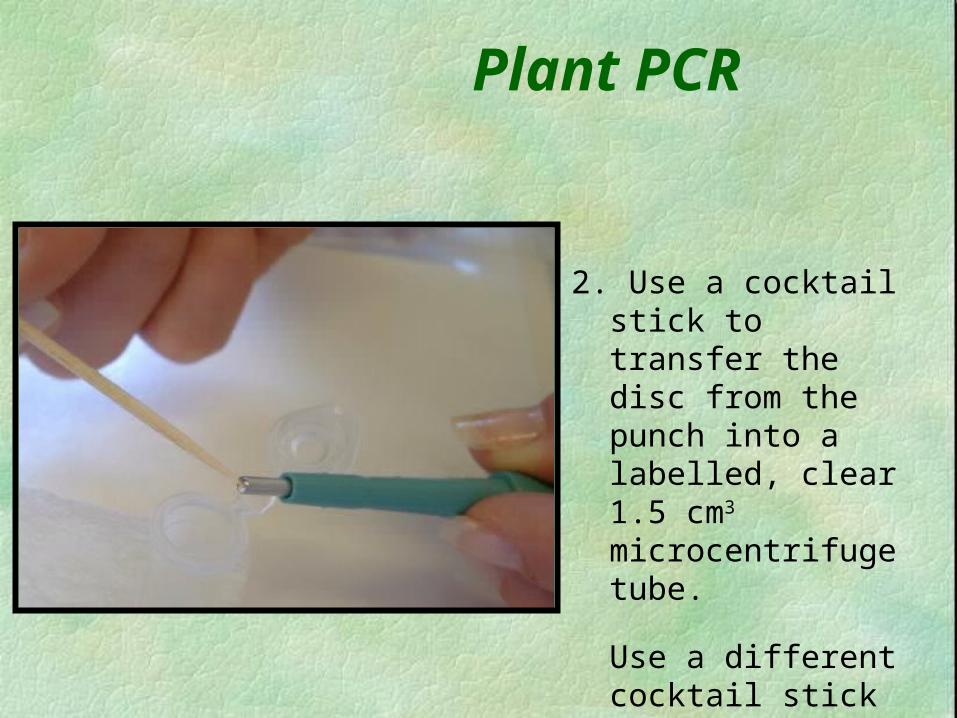
Plant PCR
2. Use a cocktail stick to transfer the disc from the punch into a labelled, clear 1.5 cm3 microcentrifuge tube.
Use a different cocktail stick for each sample!

per 2 people One P-20 (2 – 20 l)
One P-200 (20 – 200 l)
Plant PCR
Micropipettes

Twist dial to desired volume Pick up pipette tip Press plunger to first, soft stop Insert pipette tip into solution to be
transferred Slowly release plunger to retrieve liquid Move pipette tip to above desired well Press plunger past first stop to second,
hard stop to transfer liquid
Plant PCR

Plant PCR
3. Use a P-200 micropipette to add 150 l Purification reagent to the disc. Different tips for different discs!
4. Close tube and flick tube to wash the disc. Ensure the disc remains in the liquid.
5. Remove and discard purification reagent.
6. Repeat steps 3,4 and 5

Plant PCR
7. Use a fresh tip to add 150 l TE-1 buffer to the disc. Different tips for different discs!
8. Close tube and flick tube to wash the disc. Ensure the disc remains in the liquid.
9. Remove and discard buffer.
10. Repeat steps 7, 8 and 9
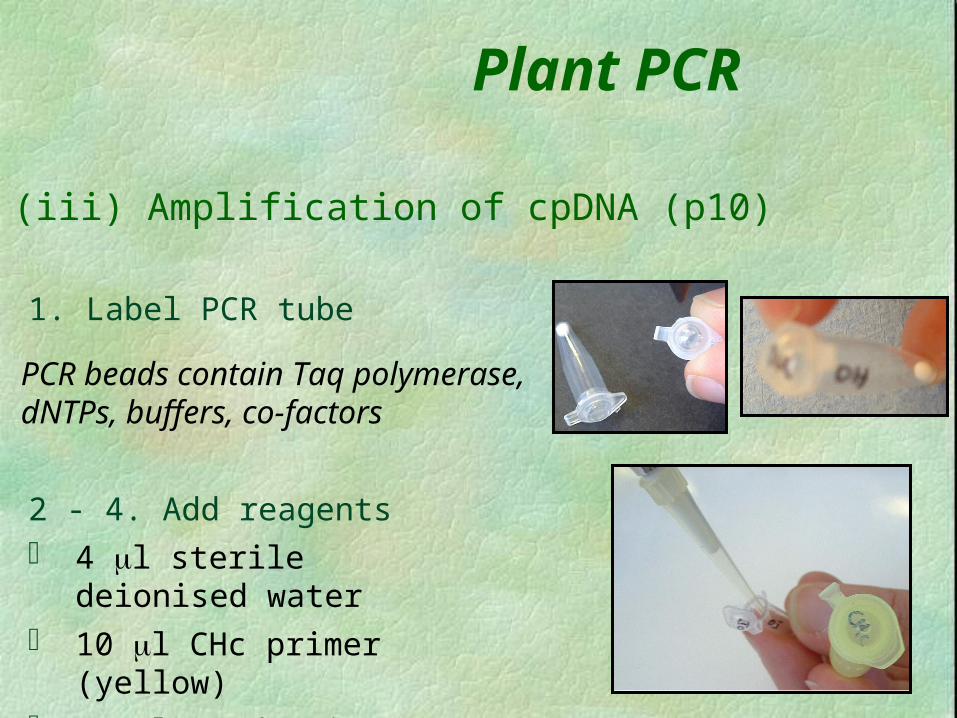
(iii) Amplification of cpDNA (p10)
1. Label PCR tube
2 - 4. Add reagents 4 l sterile deionised water 10 l CHc primer (yellow) 10 l CHd primer (blue)
PCR beads contain Taq polymerase, dNTPs, buffers, co-factors
Plant PCR
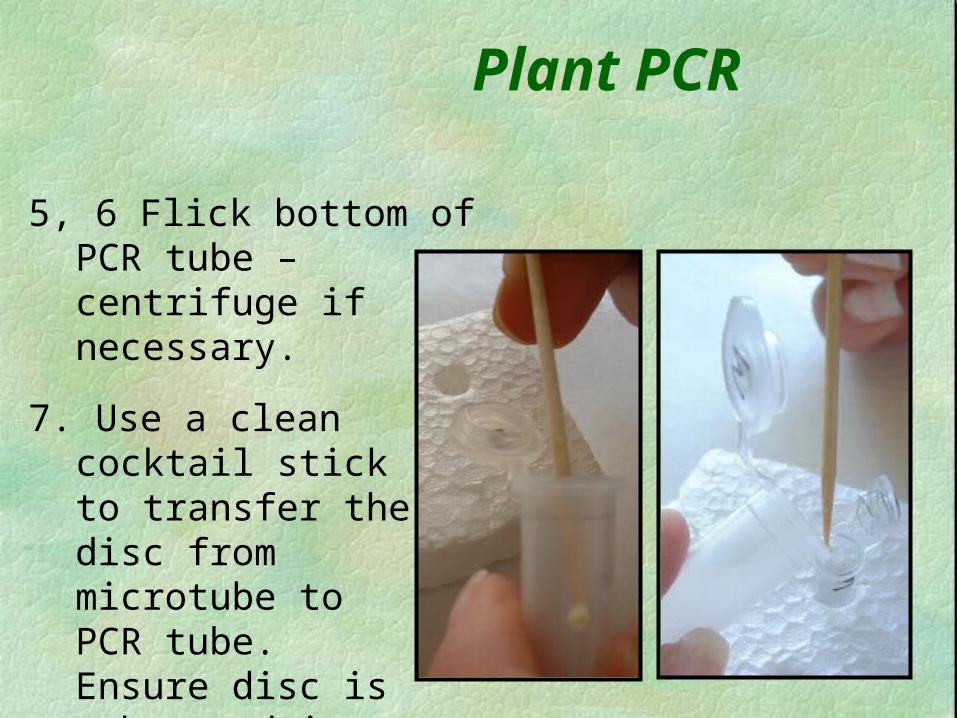
5, 6 Flick bottom of PCR tube – centrifuge if necessary.
Plant PCR
7. Use a clean cocktail stick to transfer the disc from microtube to PCR tube. Ensure disc is submerged in the PCR reagents.
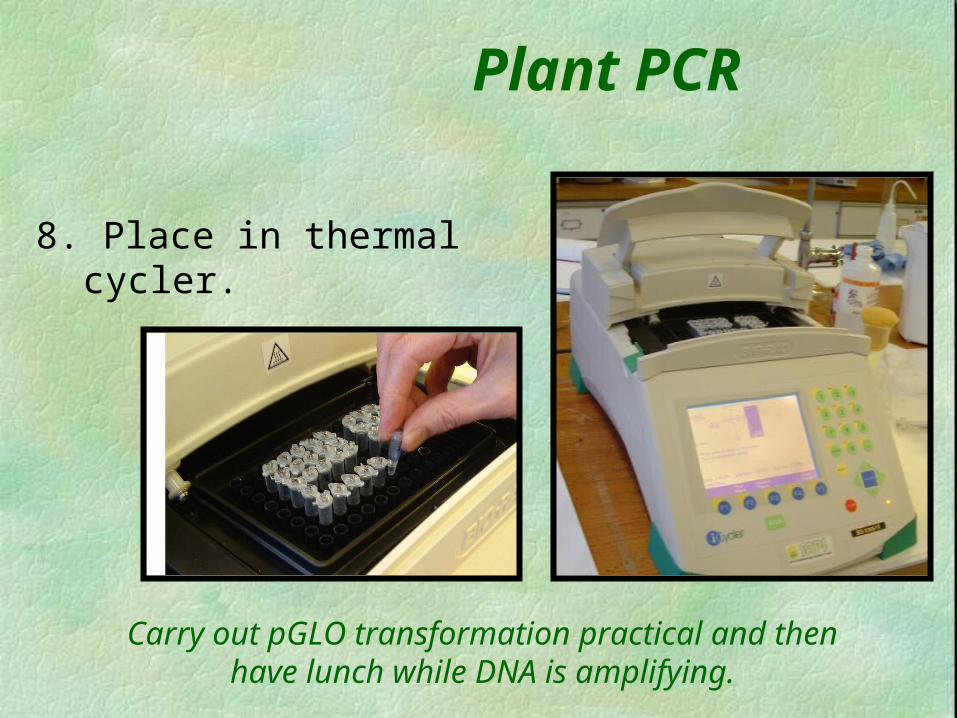
8. Place in thermal cycler.
Plant PCR
Carry out pGLO transformation practical and then have lunch while DNA is amplifying.
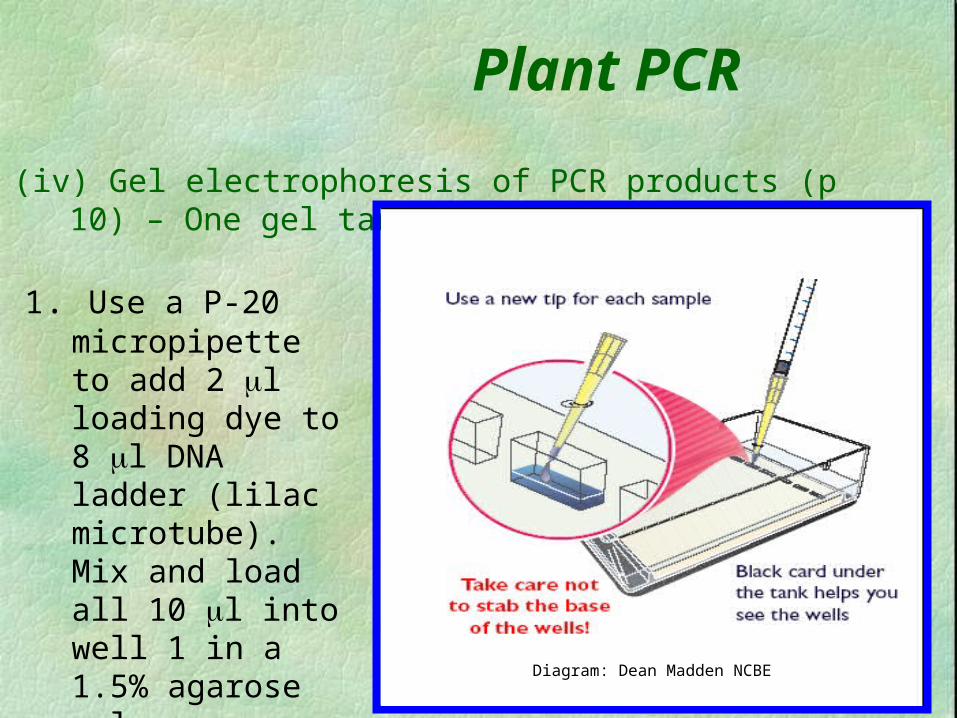
(iv) Gel electrophoresis of PCR products (p 10) – One gel tank per pair
Plant PCR
1. Use a P-20 micropipette to add 2 l loading dye to 8 l DNA ladder (lilac microtube). Mix and load all 10 l into well 1 in a 1.5% agarose gel.
Diagram: Dean Madden NCBE
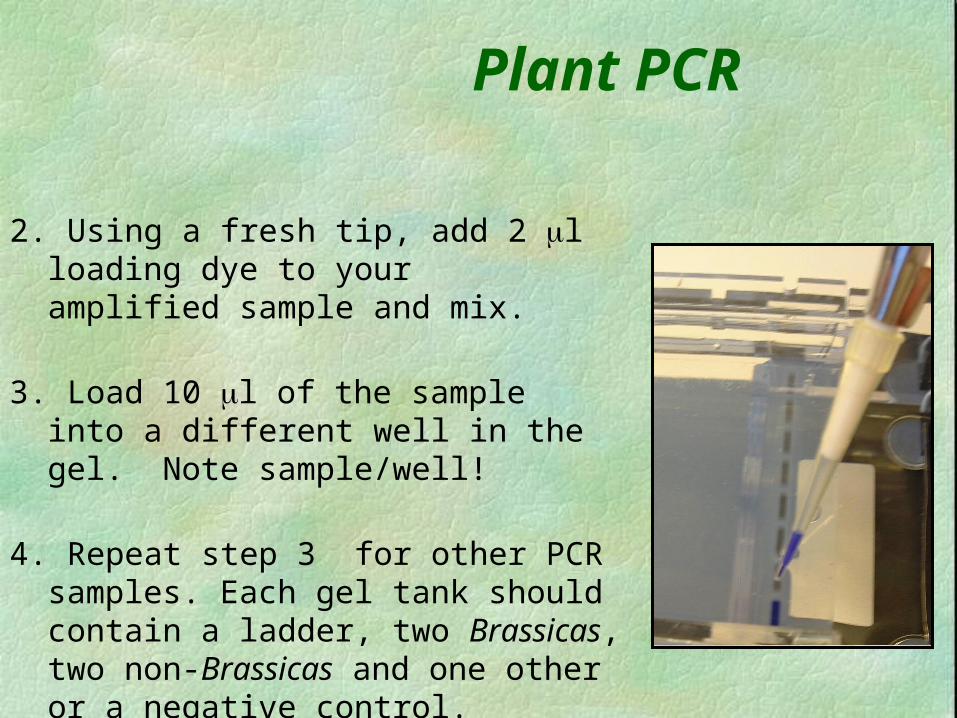
4. Repeat step 3 for other PCR samples. Each gel tank should contain a ladder, two Brassicas, two non-Brassicas and one other or a negative control.
Plant PCR
3. Load 10 l of the sample into a different well in the gel. Note sample/well!
2. Using a fresh tip, add 2 l loading dye to your amplified sample and mix.

Plant PCR
Diagram: Dean Madden NCBE
Plant PCR

Mechanical breakdown of cell walls/membranes by homogenisation with sand
Chemical disruption of cellular membranes by addition of detergent (SDS)
EDTA chelates Mg++ ions, helps break up protein complexes
NaCl helps disrupt cells and precipitate DNA Tris buffer maintains appropriate pH Ethanol to precipitate DNA
Plant PCR -extraction
Traditional method

Flinders Technology Australia, Fast Track Analysis
Commercially obtained from Whatmans –contain SDS, TrisEDTA buffer and other proprietary reagents
Application in research, diagnostics, environmental science, forensics and DNA databases
Included in SAPS/NCBE PCR kit
Plant PCR -extraction
FTA Cards – technology for processing nucleic acids invented by Professor Leigh Burgoyne of Flinders University
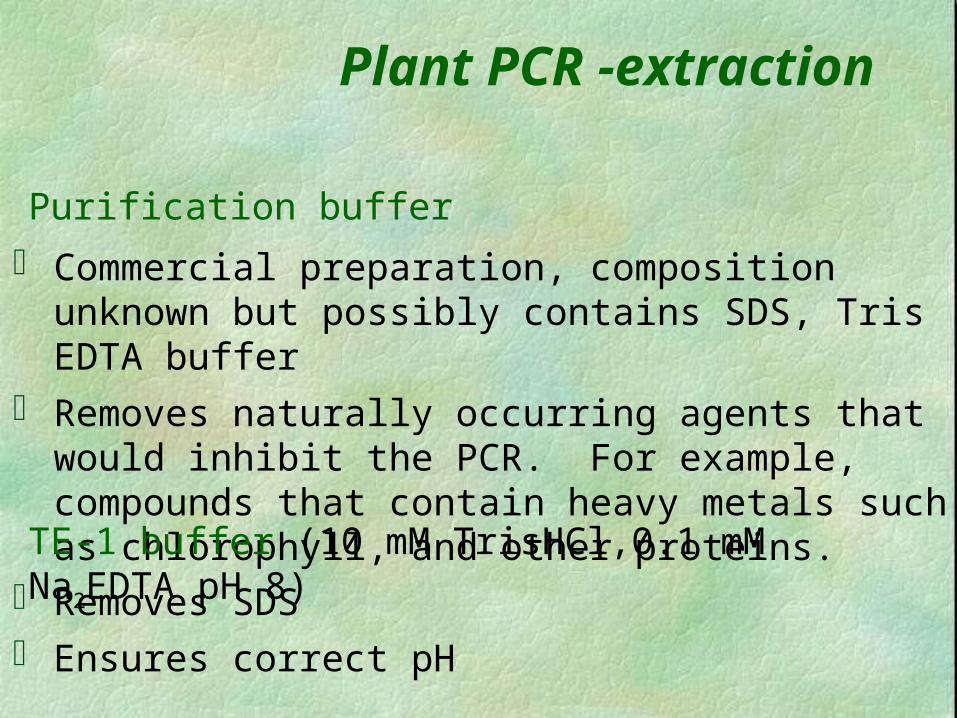
Commercial preparation, composition unknown but possibly contains SDS, Tris EDTA buffer
Removes naturally occurring agents that would inhibit the PCR. For example, compounds that contain heavy metals such as chlorophyll, and other proteins.
Purification buffer
Plant PCR -extraction
Removes SDS Ensures correct pH
TE-1 buffer (10 mM TrisHCl,0.1 mM Na2EDTA pH 8)

Polymerase Chain Reaction (PCR) Allows selective amplification of any
fragment of DNA providing the nucleotide sequences flanking the fragment are known
Finds a needle in the haystack and then produces a haystack of needles by
selective amplification
Kerry Mullis: Nobel Prize 1993
Plant PCR
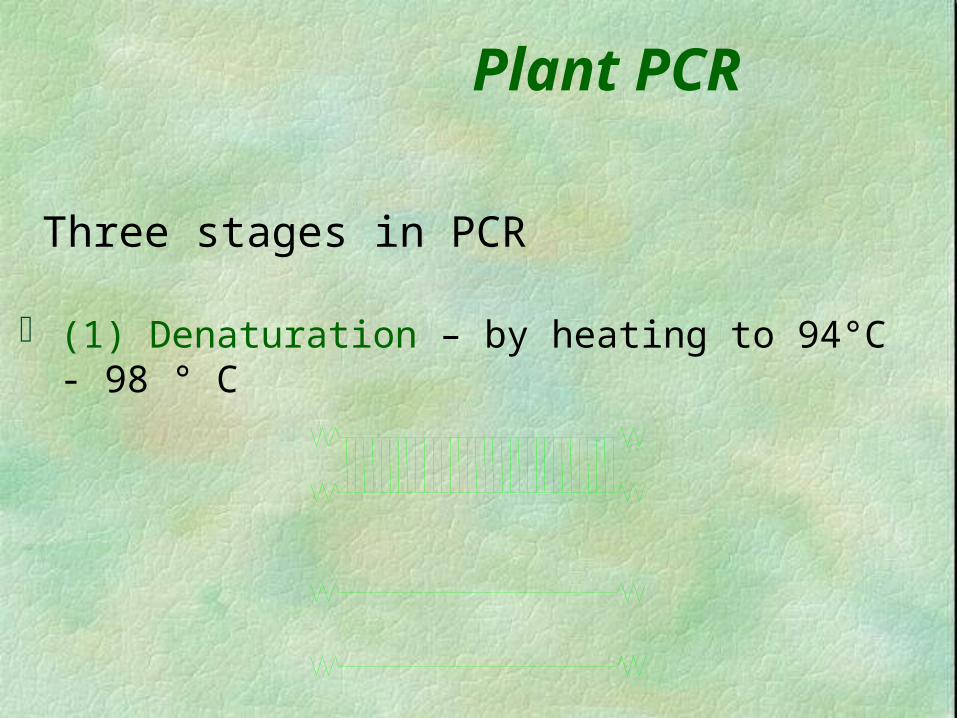
Three stages in PCR
(1) Denaturation – by heating to 94°C - 98 ° C
Plant PCR

Three stages in PCRThree stages in PCR
(2) Annealing – of synthetic oligonucleotide primers to end of area to be copied at 64 ° C
primers Taq polymerase
Plant PCR

These three steps are repeated many times, the quantity of DNA doubling with each cycle
Three stages in PCR (3) Extension – of the strand by DNA polymerase
from Thermus aquaticus at 72°C
Plant PCR

PCR Beads: each bead is designed for a single 25 l reaction, in which volume the final component concentrations are:
Plant PCR -amplification
CHc primer (forward) CHd primer (reverse)
Taq polymerase ~2.5 units dNTPs (dATP, dCTP, dGTP, dTTP) 0.2 mM
each TrisHCl (pH 9.0) 10 mM KCl 50 mM
MgCl2 1.5 mMPCR Primers
Primers are diluted to a working concentration of 10 pmol/ l

5| 3|
5|3|
3| 5|
3|5|
Cycle Cycle Cycle

Chloroplast DNA Self-replicating DNA, 120 – 220 kb pairs
Highly conserved gene order
Contains genes that encode for tRNA (highly conserved across species)
nucleotide sequences identical in the chloroplast DNA of almost all higher plants
‘consensus’ or ‘universal’ oligonucleotide primers
Plant PCR

Chloroplast DNA higher frequency of mutations in non-coding
stretches of cpDNA which lie between genes
relatively high rates of evolutionary change
amplification of non-coding regions of DNA between genes may be used to show differences in the cpDNA of different populations
Plant PCR

Amplification of chloroplast DNA
5’3’
5’ 3’
oligonucleotide primer
highly conserved region of cpDNA
variable (non-coding) region of cpDNA
CHc: 5’CGAAATCGGTAGACGCTACG3’
CHd: 5’GGGGATAGAGGGACTTGAAC3’ Primers
Plant PCR

PCR cycle 94°C for two minutes to ensure maximum
separation of the strands
Thirty cycles of:
94°C for 30 seconds
55°C for 30 seconds
72°C for 45 seconds (at final stage 2 minutes)
PCR product can now be refrigerated or frozen
Plant PCR

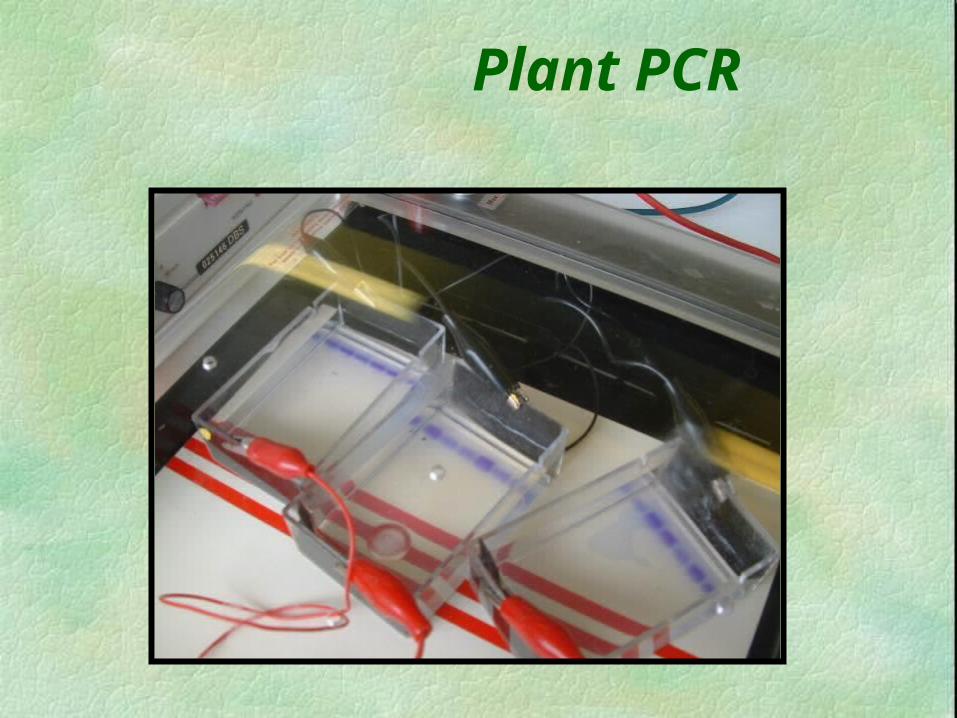
Gel electrophoresis negatively charged DNA moves towards the
anode
gel is porous
small molecules travel through gel more easily than larger molecules
in a given time, smaller DNA fragments travel further than larger DNA molecules through a gel
Plant PCR

Plant PCR
The distance moved on the gel by the amplified cpDNA varies according to its length.
Bands which move the same distance but which are from different plants indicate that the lengths of DNA amplified is the same. This may indicate that these plants are genetically similar.
To gain a more complete phylogenetic picture, many primer pairs would require to be used to provide comparisons over a greater
range of the organisms’ DNA
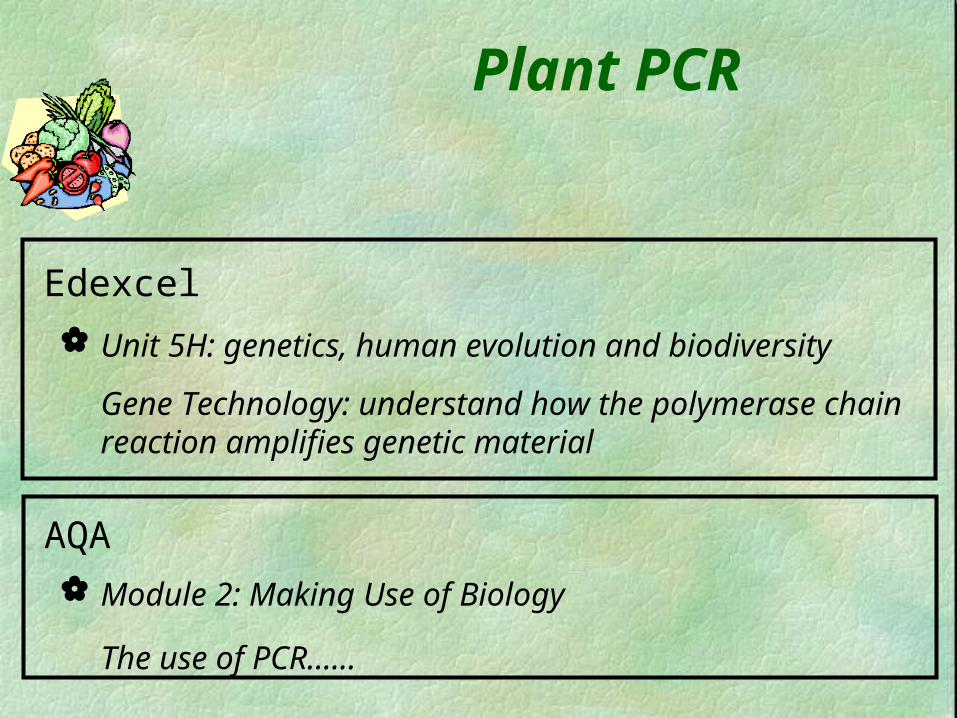
Module 2: Making Use of Biology
The use of PCR……
AQA
Edexcel
Unit 5H: genetics, human evolution and biodiversity
Gene Technology: understand how the polymerase chain reaction amplifies genetic material
Plant PCR

Unit 1, Cell function and inheritance b) protein synthesis: Role of DNA, RNA and cellular organelles
Higher Human Biology
Higher Biology
Unit 1 Cell Biology d) Synthesis and release of proteins – the role of DNA, RNA and cellular organelles
Unit 2 Genetics and Adaptation: Selection and speciation
Plant PCR

Cell and Molecular Biology: d) Applications of DNA Technology
Advanced Higher Biology
Higher Biotechnology
Unit 1, Microbiology: b) 3. Copying and translating genes c) Genetic engineering
Unit 3, Biotechnology: b) 2.Clinical and forensic medicine applications
Plant PCR

Plant PCR - staining

Plant PCR - staining
Using the plastic ‘card’, gently scoop the gel from the tank into the tray.

Plant PCR - staining
Pour ‘Fast Blast’ stain over and leave for three minutes exactly, then pour off stain and wash in warm water.

Kenny Hamilton, Biology teacher at Breadalbane Academy, who worked with us on an RSE Teaching Fellowship
Dr Craig Simpson - Scottish Crop Research Institute Dr Jan Barfoot - Scottish Institute for Biotechnology
Education University of Edinburgh
Royal Society of Edinburgh Scottish Executive
Plant PCR
Related Documents