Kaseya Fundamentals Workshop Developed by Kaseya University Powered by IT Scholars Kaseya Version 6.5 Last updated March, 2014 Customization

Kaseya Fundamentals Workshop
Jan 03, 2016
Kaseya Fundamentals Workshop. Customization. Developed by Kaseya University. Powered by IT Scholars. Kaseya Version 6.5 Last updated March, 2014. What is Covered?. Overview Color Scheme Site Customization Local Settings Live Connect. Kaseya Fundamentals Workshop. Overview. - PowerPoint PPT Presentation
Welcome message from author
This document is posted to help you gain knowledge. Please leave a comment to let me know what you think about it! Share it to your friends and learn new things together.
Transcript

Kaseya Fundamentals Workshop
Developed by
Kaseya UniversityPowered by
IT ScholarsKaseya Version 6.5
Last updated March, 2014
Customization

What is Covered?• Overview• Color Scheme• Site Customization• Local Settings• Live Connect

Kaseya Fundamentals Workshop
Overview

Motivation• It is time to change the color, logo and
Agent Icons from the Kaseya default to something more relevant to FIU.

Customize Function Overview
a) Color Scheme: This function determines the set of colors displayed by the VSA environment. Color Scheme selection applies to all users within the same partition (on SaaS) or all users within the same on-premise KServer.
b) Site Customization: This function customizes the Logon Page (on-premise only), Site Header, Agent Icons, Deploy Header, and Org Custom Field Title.
c) Local Settings: This function customizes local settings such as Date and Number Format which will be applied system-wide. These settings currently affect the Time Tracking and Service Billing modules.
d) Live Connect: This function customizes Home tabs that display in the Live Connect and Portal Access windows. You can create multiple, customized Home tabs and save them by name.a
bcd

Kaseya Fundamentals Workshop
Color Scheme

The Color Scheme Function• This function determines the set of colors
displayed by the VSA environment. • Color Scheme selection applies to all users
within the same partition or on the same on-premise KServer.

COLOR SCHEMELAB 1
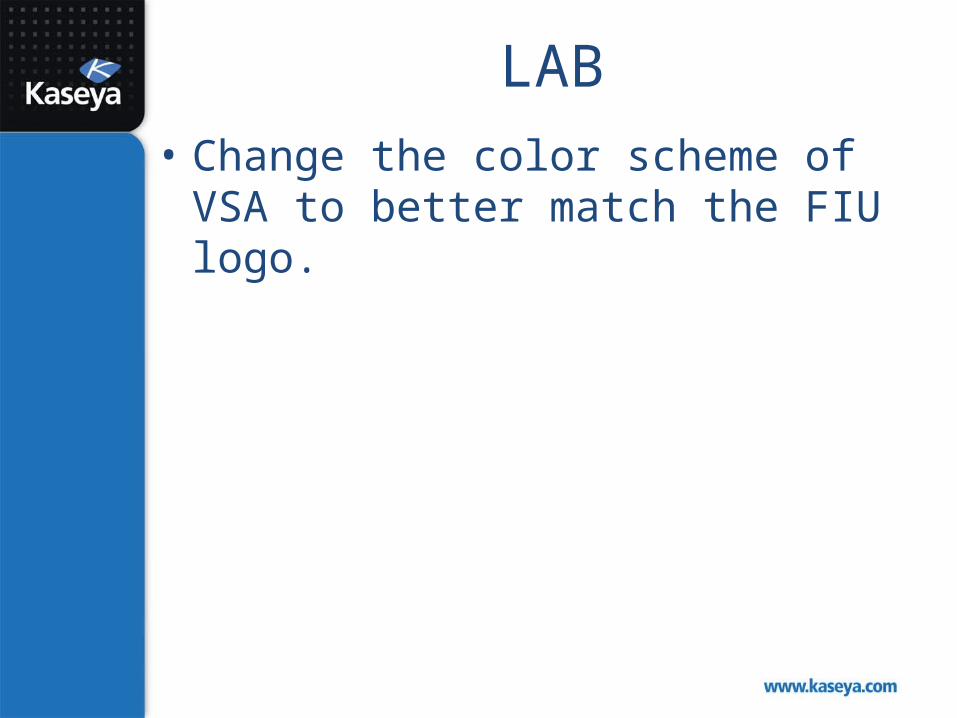
LAB• Change the color scheme of VSA to better
match the FIU logo.

Steps to Change Color Scheme
2
1
3
4

It Is Your T
urn!
Progress Check• Do you know how to change the color
scheme of your VSA to better fit the colors used in your company logo?

Kaseya Fundamentals Workshop
Site Customization
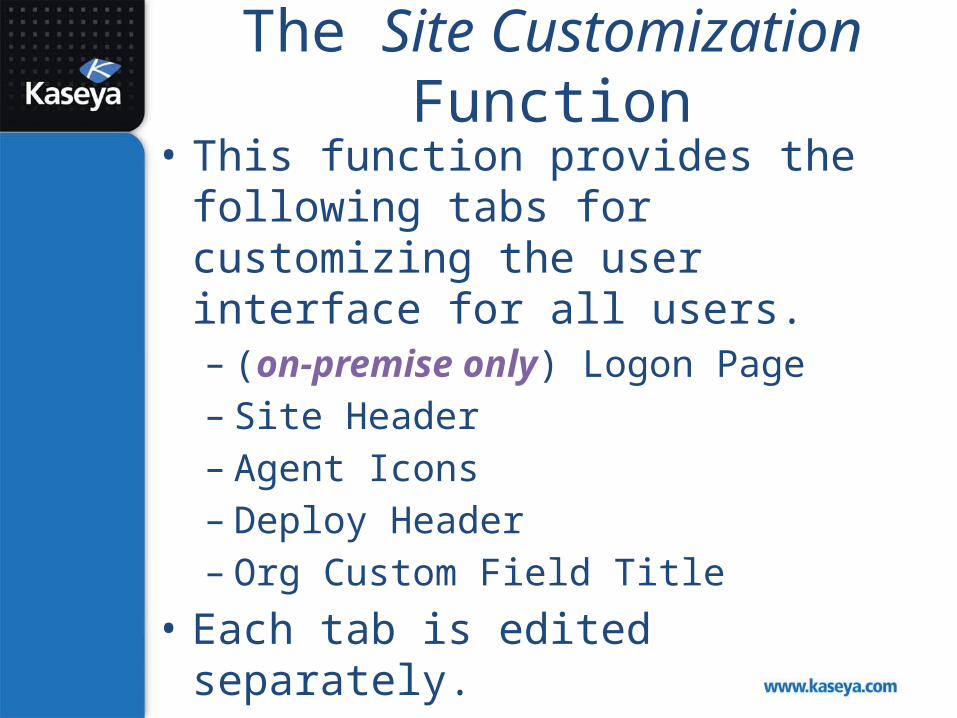
The Site Customization Function• This function provides the following tabs
for customizing the user interface for all users.– (on-premise only) Logon Page – Site Header– Agent Icons– Deploy Header– Org Custom Field Title
• Each tab is edited separately.

The Site Header Tab• The following settings can be customized:
– Logo: You can select a custom logo to replace the default logo. Click the Default button to reset.
– Title: You can enter a custom title that displays next to the logo. Click the Default button to reset.
– Header Height: The header height in pixels. Defaults to 50, which works best in most browsers.
– Favorites Icon: You can change the "favicon" image displays next to the text of the bookmark in your browser. Customize this image using a 16x16 pixel .ico file.

BRAND THE SITE HEADERLAB 2

LAB• Customize VSA by branding the Site Header
for FIU.
Note: The FIU logos and icons can be found at: http://users.cis.fiu.edu/~sadjadi/Teaching/IT%20Automation/K263/CustomAgentIcon.zip

Steps to Brand Site Header
2
14
5
3

Steps to Brand Site Header
5
2
14
6
3

Steps to Brand Site Header
6
2
14
5
3

Steps to Brand Site Header
2
14
5
7
8
9
3

Steps to Brand Site Header
5
7
2
14
8
9
10
3

Steps to Brand Site Header
10
2
14
5
7
8
9
11
3

Steps to Brand Site Header
2
14
3

The Agent Icon Tab• This tab allows you to customize the agent
icons. • There are four icons showing the following
states:– Agent online: The agent is checking in
successfully.– Agent offline: The agent is not checking in.– Agent blinking: A message is waiting to be
read by the machine user.– Remote control is disabled: Remote control of
the managed machine has been disabled by the machine user.

Formatting Custom Agent Icons• For Windows custom agent icons:
– The format must be .ico. – The maximum size of 32x32 pixels is recommended.– The color depth cannot exceed 8 bit or 256 colors.
• For Macintosh custom agent icons:– The format must be .tif.– The maximum size of 48x48 pixels is recommended.– The color depth should be RGB 32 bit color.
• For Linux custom agent icons:– The format must be .png.– A size of 24x24 pixels is recommended.– The color depth cannot exceed 8 bit or 256 colors.

Icon Names• For Windows Agents:
– online.ico, offline.ico, blink.ico, and noremote.ico.
• For Mac Agents: – macOnline.tif, macOffline.tif, macNoremote.tif,
and macBlink.tif.• For Linux Agents:
– linuxOnline.png, linuxOffline.png, linuxNoremote.png, and linuxBlink.png.
BRAND THE AGENT ICONSLAB 3

LAB• Brand Agent Icons for FIU.• Ensure the deployed agents will also use
the new icons.
Note: The FIU logos and icons can be found at: http://users.cis.fiu.edu/~sadjadi/Teaching/IT%20Automation/K263/CustomAgentIcon.zip

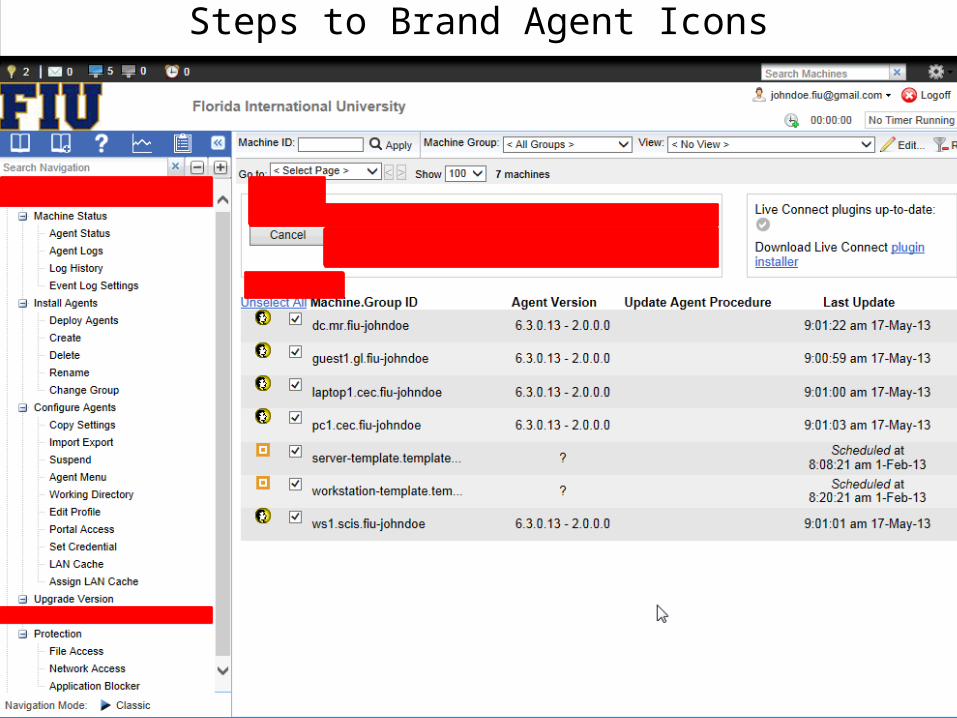
Steps to Brand Agent Icons
2
1
4
3
5

Steps to Brand Agent Icons
2
1
3

Steps to Brand Agent Icons
2
1
4
3
5
6
7
8

Steps to Brand Agent Icons
2
1
4
3
9
10
11
12

Steps to Brand Agent Icons
2
1
4
3
13
14
15
16
17

Steps to Brand Agent Icons
2
1
3
4

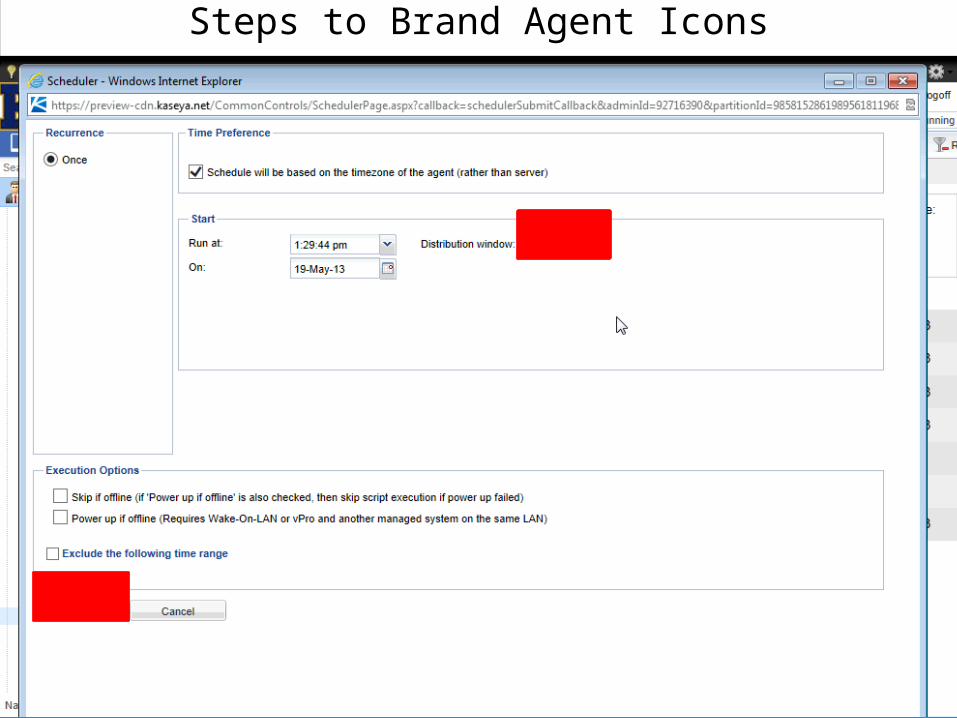
Deploy Agent Icons• New agents will be deployed with the
custom agent icons.• To upload the custom agent icons for the
already deployed agents, all you need to do is to force an agent update on all of the managed machines.
• To make sure the custom icons will appear as soon as possible, you can run the Logoff User agent procedure.

Steps to Brand Agent Icons
19
18
20
2122
23
Steps to Brand Agent Icons
19
18
20
21
22
23
Steps to Brand Agent Icons
24
25

Steps to Brand Agent Icons
19
18

Steps to Brand Agent Icons
19
18

Steps to Brand Agent Icons - Verify
26
• If the agent icon does not show properly, even after running the Logoff User agent procedure, just restart the machines.

BRAND THE DEPLOY HEADERLAB 4

LAB• Customize the Deploy Header for FIU.
Note: The FIU logos and icons can be found at: http://users.cis.fiu.edu/~sadjadi/Teaching/IT%20Automation/K263/CustomAgentIcon.zip

Steps to Brand Deploy Header
2
1
43
5 Press Delete 6

Steps to Brand Deploy Header
2
1
43
7
8

Steps to Brand Deploy Header
2
1
3
9
8

Steps to Brand Deploy Header
2
1
43
10

2
1
43

The Org Custom Field Title Tab• This tab customizes the titles of custom
fields used to classify organizations. • You can assign values to custom fields using
System > Manage > Org/Groups/Depts/Staff > Custom Fields.

The Org Custom Field Title Tab
2
1
3

It Is Your T
urn!
Progress Check• Do you know how to customize and brand
the VSA by changing the following parts of VSA?– Site Header– Agent Icons– Deploy Header– Org Custom Field Title

Kaseya Fundamentals Workshop
Local Settings

The Local Settings Function• This function defines the system Date/Time
and currency formatting.• These settings currently affect the Time
Tracking and Service Billing modules.

Date Format• Format
– Selects the date format used by dates in the VSA:• mm/dd/yyyy• dd/mm/yyyy• yy/mm/dd
• Delimiter used – Selects the date format delimiter used by dates in the
VSA:• / (slash)• - (dash)• . (dot)
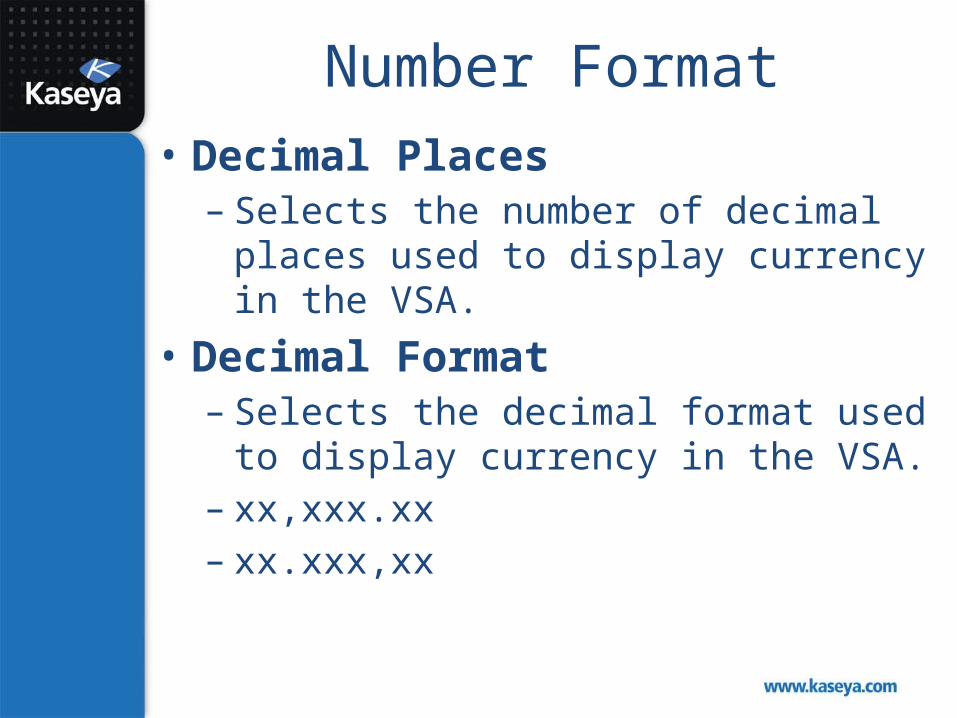
Number Format• Decimal Places
– Selects the number of decimal places used to display currency in the VSA.
• Decimal Format – Selects the decimal format used to display
currency in the VSA.– xx,xxx.xx– xx.xxx,xx

The Local Settings Function
2
1

Kaseya Fundamentals Workshop
Live Connect
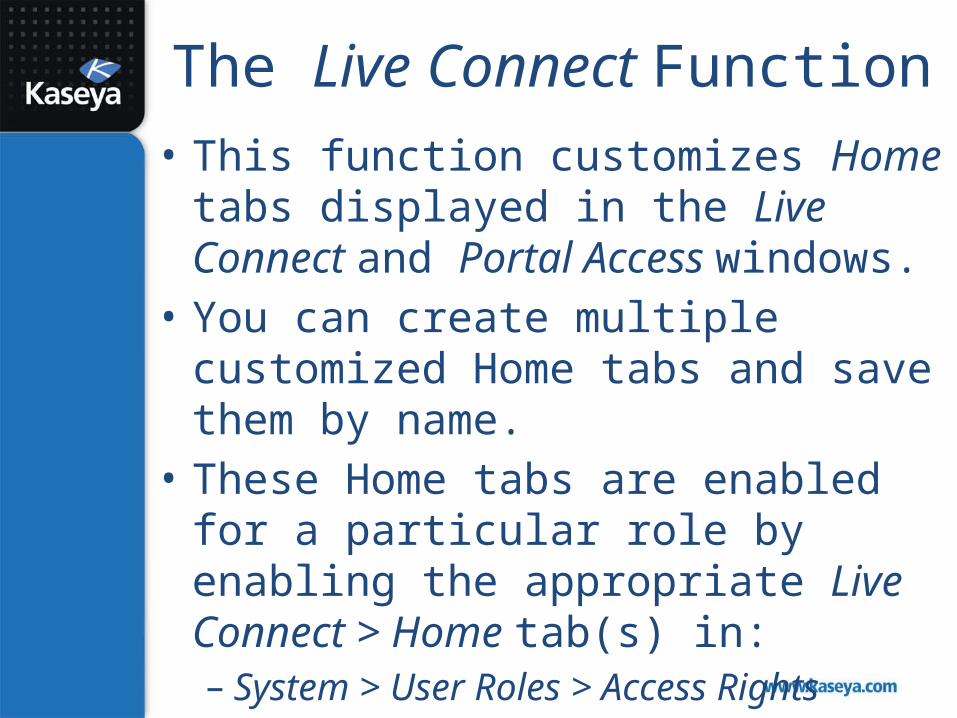
The Live Connect Function• This function customizes Home tabs
displayed in the Live Connect and Portal Access windows.
• You can create multiple customized Home tabs and save them by name.
• These Home tabs are enabled for a particular role by enabling the appropriate Live Connect > Home tab(s) in:– System > User Roles > Access Rights– System > Machine Roles > Access Rights

The Live Connect Function (cont.)• You can customize three sections on the
default Home page.– Portal Header: Customize the text and image
displayed at the top of the Home tab.– Agent Procedures: Provide a customized list of
agent procedures the user can run immediately from this tab.
– Custom Links: Provide a customized list of URLs the user can click using this tab. For example, you may provide a URL to a webpage providing technical information used to troubleshoot problems on managed machines.

CUSTOMIZE LIVE CONNECTLAB 5

LAB• Customize live connect and brand it for FIU
by customizing the default Home tab for technicians’ Live Connect use:– Brand the Portal Header area.– Include all procedures for Common
Maintenance Tasks in the Agent Procedures area.
– Include links to FIU’s web site, phonebook, and campus map in the Custom Links area.
• Run Check Disk on ws1.

Steps to Customize Live Connect > Home Tab > Portal Header
2
1
4
3
5
67

Steps to Customize Live Connect > Home Tab > Portal Header
8
9

Steps to Customize Live Connect>Home Tab>Agent Procedures
2
1
11
10
12

Steps to Customize Live Connect>Home Tab>Agent Procedures
2
1
12
13

Steps to Customize Live Connect>Home Tab>Agent Procedures
2
1
11
10
14

Steps to Customize Live Connect>Home Tab>Agent Procedures
2
1
10
1415161718
19

Steps to Customize Live Connect>Home Tab>Agent Procedures
2
1
10
19

Steps to Customize Live Connect>Home Tab>Agent Procedures
20
21
22

Steps to Customize Live Connect > Home Tab > Custom Links
2
1
24
23
2526
27

Steps to Customize Live Connect > Home Tab > Custom Links
2
1
272829
30
23

Steps to Customize Live Connect > Home Tab > Custom Links
2
1 30
23

Steps to Customize Live Connect > Home Tab > Custom Links
32
33
31

Steps to Customize Live Connect > Home Tab > Custom Links

CUSTOMIZE PORTAL ACCESSLAB 6

LAB• Customize live connect and brand it for FIU
by Creating a new Home tab for machine users’ Portal Access:– Brand the Portal Header area.– Include all procedures for Application Deploy in
the Agent Procedures area.– Include links to FIU’s web site in the Custom
Links area.• Install Spybot on ws1.

Steps to Create New Home Tab
2
1
3
4
5

Steps to Customize Portal Access > Home Tab > Portal Header
2
1
7
6
8
910

Steps to Customize Portal Access>Home Tab>Agent Procedure
2
1
12
11
13

Steps to Customize Portal Access>Home Tab>Agent Procedure
2
1
13
14

Steps to Customize Portal Access>Home Tab>Agent Procedure
2
1
12
11
15

Steps to Customize Portal Access>Home Tab>Agent Procedure
2
1
11
1516
17

Steps to Customize Portal Access>Home Tab>Agent Procedure
2
1
11
17

Steps to Customize Portal Access > Home Tab > Custom Links
2
1
19
18
2021
22

Steps to Customize Portal Access > Home Tab > Custom Links
2
1 23
18
Steps to Customize Portal Access
25
24
27
26
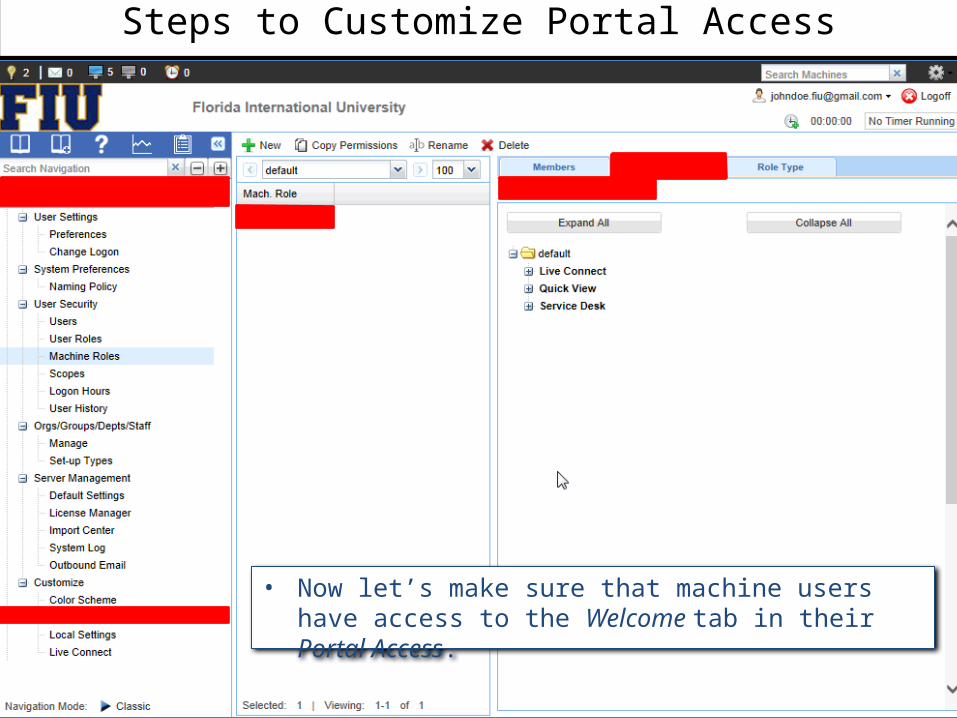
• Now let’s make sure that machine users have access to the Welcome tab in their Portal Access.
28

Steps to Customize Portal Access
2
1
29
30
31
32

Steps to Customize Portal Access
25
24
27
2628

Steps to Customize Portal Access
33
36
35
34
37

Steps to Customize Portal Access
33
39
38

It Is Your T
urn!
Progress Check• Do you know how to customize and brand the
VSA to your liking?
• Do you know how to change the contents of the default Home tab of Live Connect to better fit your needs?
• Do you know how to create a Welcome tab for machine users to use when accessing their Portal Access?

Kaseya Fundamentals Workshop
Summary
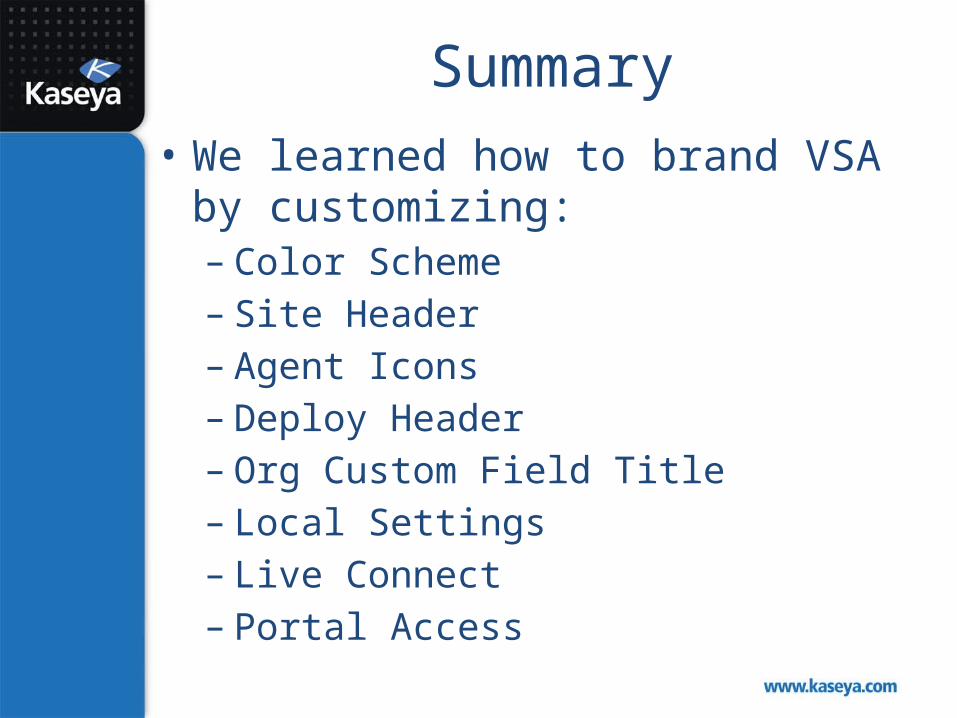
Summary• We learned how to brand VSA by
customizing:– Color Scheme– Site Header– Agent Icons– Deploy Header– Org Custom Field Title– Local Settings– Live Connect – Portal Access

THE END!
Related Documents


