MOHAMAD QHIRIL FIKRI BIN AHMAD MAKLUMAT DIRI Nama : .................................................. …………………………………………………………………… No.Kad Pengenalan : ............................................... ……………………………………………………………………… Alamat Tetap : ............................................... ……………………………………………………………………… E-mail No Hp : ............................................... ……………………………………………………………………… No. Tel Rumah : ............................................... ……………………………………………………………………… Tarikh Lahir Umur : ............................................... ……………………………………………………………………… Jantina : ............................................... ……………………………………………………………………… Lesen Kenderaan : ............................................... ……………………………………………………………………… Taraf Perkahwinan : ............................................... ……………………………………………………………………… Warganegara : ............................................... ……………………………………………………………………… Bangsa : ................................................ ……………………………………………………………………… Agama : ................................................ ……………………………………………………………………… LATAR BELAKANG PENDIDIKAN TAHUN 2002-2008 SEKOLAH KEBANGSAAN KUALA DIPANG TAHUN 2009-2013 SEKOLAH MENENGAH KEBANGSAAN KAMPAR TARAF PENDIDIKAN TAHUN -2013 - SIJIL PELAJARAN MALAYSIA (SPM) TAHUN 2011 - PENILAIAN MENENGAH RENDAH (PMR) – TAHUN 2008 -UJIAN PENILAIAN SEKOLAH RENDAH (UPSR) – MINAT DAN HOBI BERMAIN FUTSAL 960928-08-5397 KAMPUNG CHANGKAT JERING KUALA DIPANG 31850 KAMPAR PERAK [email protected] 05-4773725 28-9-1996/19 TAHUN LELAKI BUJANG MALAYSIA MELAYU ISLAM TIADA

Welcome message from author
This document is posted to help you gain knowledge. Please leave a comment to let me know what you think about it! Share it to your friends and learn new things together.
Transcript

MOHAMAD QHIRIL FIKRI BIN AHMAD
MAKLUMAT DIRI
Nama :……………………………………………………………………..................................................
No.Kad Pengenalan :………………………………………………………………………...............................................
Alamat Tetap :………………………………………………………………………...............................................
E-mail No Hp :………………………………………………………………………...............................................
No. Tel Rumah :………………………………………………………………………...............................................
Tarikh Lahir Umur :………………………………………………………………………...............................................
Jantina :………………………………………………………………………...............................................
Lesen Kenderaan :………………………………………………………………………...............................................
Taraf Perkahwinan :………………………………………………………………………...............................................
Warganegara :………………………………………………………………………...............................................
Bangsa :………………………………………………………………………................................................
Agama :………………………………………………………………………................................................
LATAR BELAKANG PENDIDIKAN
TAHUN 2002-2008 SEKOLAH KEBANGSAAN KUALA DIPANG TAHUN 2009-2013 SEKOLAH MENENGAH KEBANGSAAN KAMPAR
TARAF PENDIDIKAN
TAHUN -2013 - SIJIL PELAJARAN MALAYSIA (SPM) TAHUN – 2011 - PENILAIAN MENENGAH RENDAH (PMR) TAHUN – 2008 -UJIAN PENILAIAN SEKOLAH RENDAH (UPSR)
MINAT DAN HOBI
BERMAIN FUTSAL MELAYARI INTERNET
960928-08-5397
KAMPUNG CHANGKAT JERING KUALA DIPANG 31850 KAMPAR PERAK
05-4773725
28-9-1996/19 TAHUN
LELAKI
BUJANG
MALAYSIA
MELAYU
ISLAM
TIADA
KEMAHIRAN INTERPERSONAL
Berkerja Secara Konsisten Bermatlamat Memenuhi Prinsip Visi Dan Misi Syarikat Mudah Berinteraksi Boleh Bekerjasama Dalam Organisasi
AKTIVITI KO- KURIKULUM TAHUN – SIJIL PENYERTAANI PENGHARGAANI SIJIL KEMAHIRAN
KEBOLEHAN
Pemahaman Dan Pertuturan
Bahasa Melayu – Menulis Dan Membaca Bahasa Inggeris - Sederhana
Perisian Yang Biasa Digunakan
MS.Word,MS Exsel,MS Power Point,MS.Access. Internet
Kebolehan Menaip
1 Minit = 25 Patah Perkataan 15 minit = 1 Perenggan 45 minit = 1 Muka surat
PENGALAMAN KERJA
1) Nama jawatan yang disandang semasa kerja
2) Kemahiran :- Membina Akaun Niaga Menaip @Mengedit Surat – Menyurat Mengemaskini Data Print Dan Scane
Tarikh Mula : -12/4/2014
Tarikh Berhenti : -21/12/2014
Pengalaman Kerja : -8 BULAN
Sebab Berhenti : -Sambung Berlajar kat IKM
Rujukan
(NAMA MAJIKAN ) -Matlim Bin Mattop
ALAMAT RUMAH -Kampong Changkat Jering Kuala Dipang
DAN NO. TELEFON -05477 3725
QUESTION/DISCUSSION
QUESTION(1)HOW TO INSERT PICTURE
Adding images to your Word document can really spice it up and make your information stand out. There are multiple ways to insert an image, depending on the situation you find yourself in. Follow this guide to
add images to your document using any version of Word
PART1 of 3: Using the Insert Feature
1.
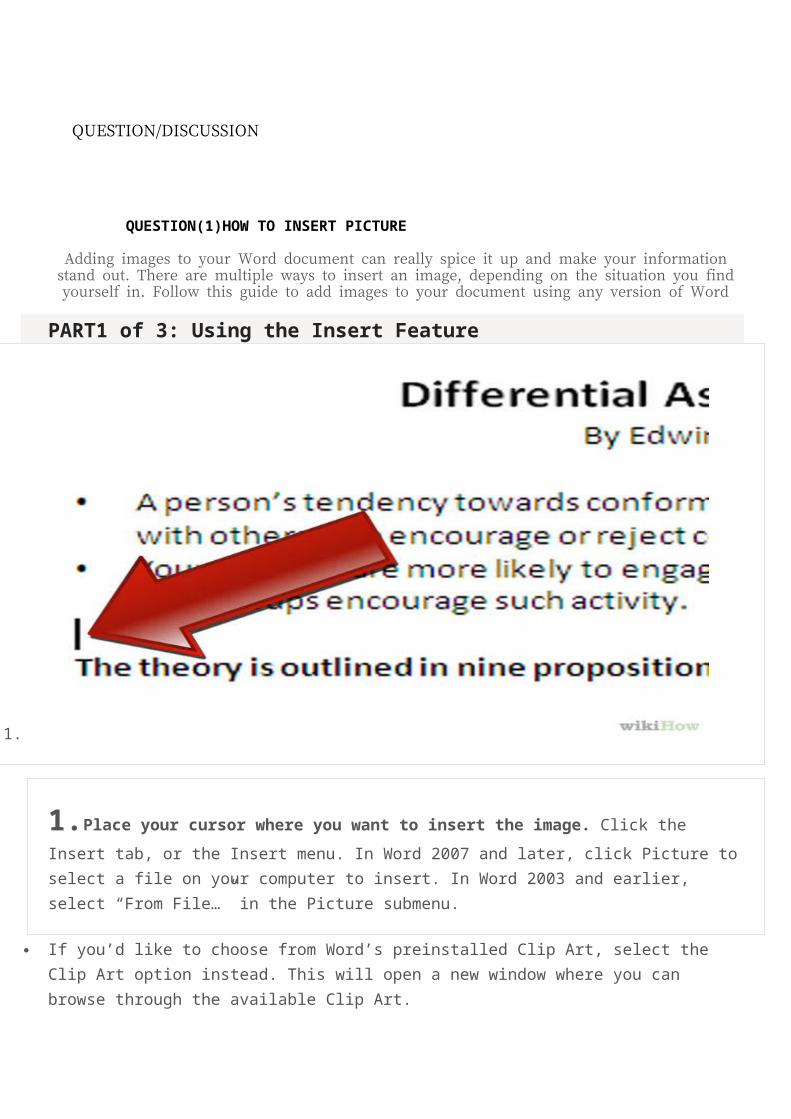
1.Place your cursor where you want to insert the image. Click the Insert tab, or the Insert
menu. In Word 2007 and later, click Picture to select a file on your computer to insert. In Word 2003 and earlier, select “From File…” in the Picture submenu.
If you’d like to choose from Word’s preinstalled Clip Art, select the Clip Art option instead. This will open a new window where you can browse through the available Clip Art.
1.
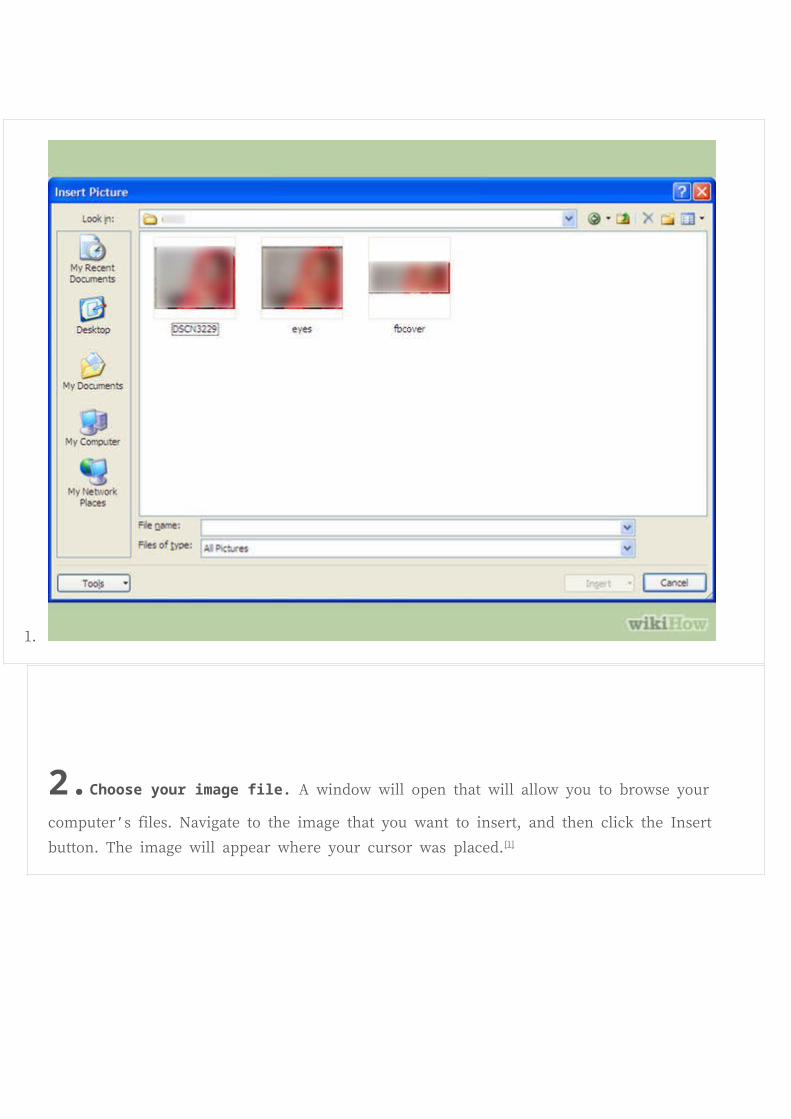
2.Choose your image file. A window will open that will allow you to browse your computer’s files.
Navigate to the image that you want to insert, and then click the Insert button. The image will appear where
your cursor was placed.[1]

1.
3.Manipulate the image. Once the image has been inserted, you can drag it around the
document and resize it by using the boxes surrounding the image.
You can click and drag the green circle to rotate the image. You can add effects, borders, and more using the Picture Tools tab.
1.
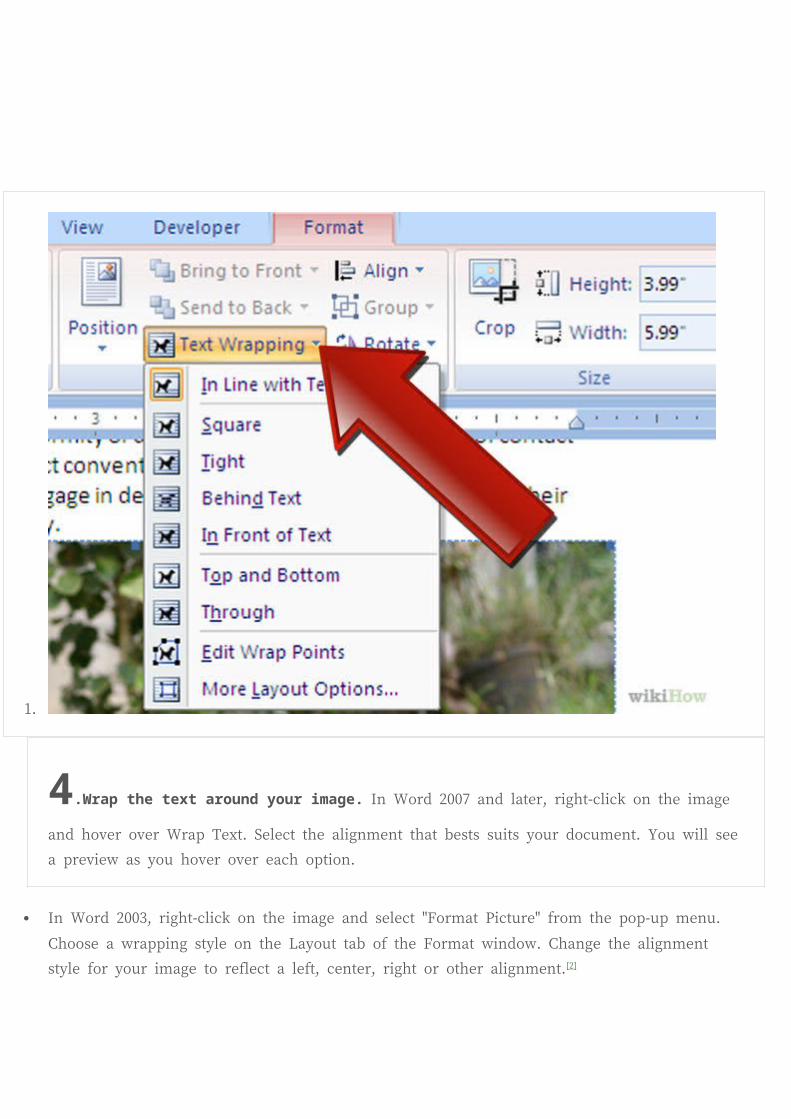
4.Wrap the text around your image. In Word 2007 and later, right-click on the image and hover over
Wrap Text. Select the alignment that bests suits your document. You will see a preview as you hover over
each option.
In Word 2003, right-click on the image and select "Format Picture" from the pop-up menu. Choose a
wrapping style on the Layout tab of the Format window. Change the alignment style for your image to
reflect a left, center, right or other alignment.[2]
1.
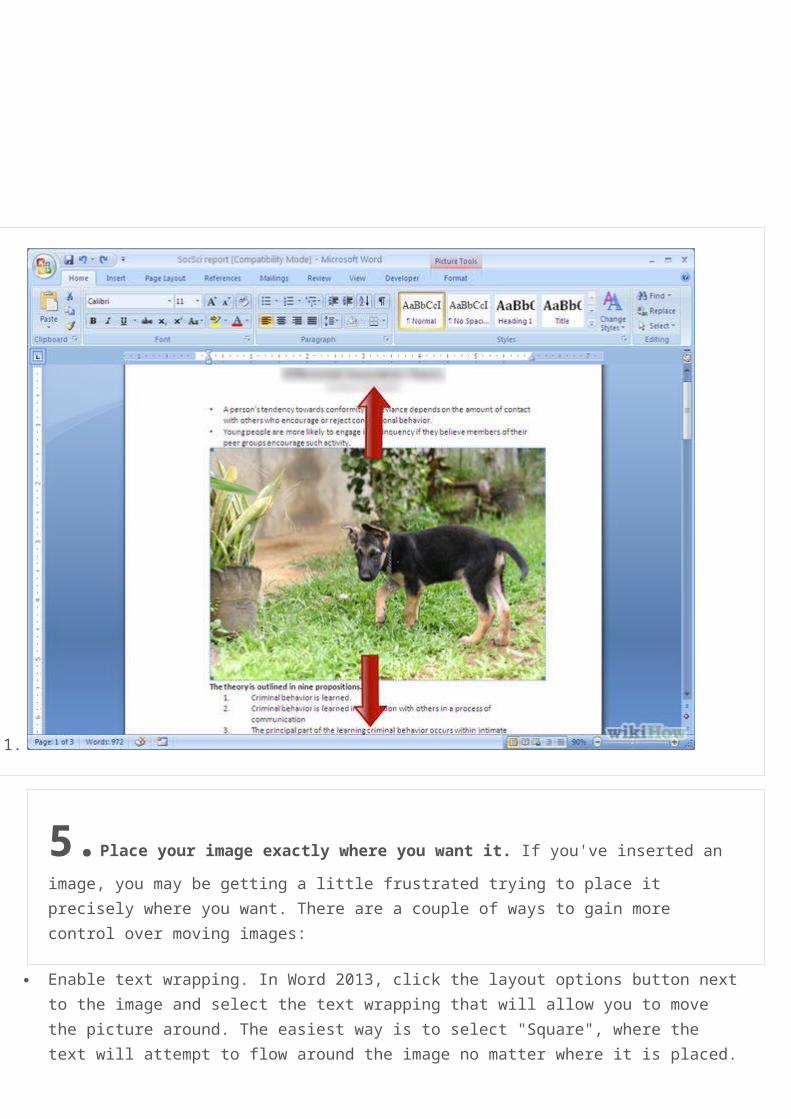
5.Place your image exactly where you want it. If you've inserted an image, you may be
getting a little frustrated trying to place it precisely where you want. There are a couple of ways to gain more control over moving images:
Enable text wrapping. In Word 2013, click the layout options button next to the image and select the text wrapping that will allow you to move the picture around. The easiest way is to select "Square", where the text will attempt to flow around the image no matter where it is placed.
Select the image and then hold the Ctrl key. While holding the key, use the arrow keys to move the picture around the document.

2 OF 3 PART Clicking and Dragging
1.
1.Find the image on your computer. Open a file browser and find the image that you want to
add. Click and drag the file into your Word document. You can set where you want it by looking at the preview cursor. Release the mouse button to place the image.

2.
2.Manipulate the image. Once the image has been inserted, you can use drag it around the
document and resize it by using the boxes surrounding the image.
You can click and drag the green circle to rotate the image. You can add effects, borders, and more using the Picture Tools tab.

3 OF 3 PART Copying and Pasting
1.
1Copy the image that you want to insert. You can do this with images on your computer or
images from websites. To copy an image from a website, right-click and select Copy Image. To copy an image on your computer, select it and select Copy from the Edit menu, right-click on it and select Copy, or press Ctrl + C.

2.
2.Place your cursor where you want to insert the image. Select Paste from the Edit menu,
press Ctrl + V, or right-click and select Paste. Your image will appear where the cursor is.

QUESTION (2)HOW TO USE BULLET AND NUMBERING
You can quickly add bullets or numbers to existing lines of text, or Word can automatically create lists as you type.By default, if you start a paragraph with an asterisk or a number 1., Word recognizes that you are trying to start a bulleted or
numbered list. If you don't want your text turned into a list, you can click the AutoCorrect Optionsbutton that appears.
Lists: One level or many levelsMake a list with just one level, or make a multilevel list to show lists within a list.
When you create a bulleted or numbered list, you can do any of the following:
Use the convenient Bullet and Numbering libraries Use the default bullet and numbering formats for lists, customize the lists, or select other formats from the Bullet and Numbering libraries.
Format bullets or numbers Format bullets or numbers differently from the text in a list. For example, click a number and change the number color for the entire list, without making changes to the text in the list.
Use pictures or symbols Create a picture bulleted list to add visual interest to a document or a Web page.
Top of Page
Create a one-level bulleted or numbered listWord can automatically create bulleted and numbered lists as you type, or you can quickly add bullets or numbers to existing lines of text.

Type a bulleted or numbered list
1. Type * (asterisk) to start a bulleted list or 1. to start a numbered list, and then press SPACEBAR or the TAB key.2. Type any text that you want.3. Press ENTER to add the next list item.
Word automatically inserts the next bullet or number.
4. To finish the list, press ENTER twice, or press BACKSPACE to delete the last bullet or number in the list.
If bullets and numbering do not begin automatically
1. Click the File tab and then click Options.2. Click Proofing.3. Click AutoCorrect Options, and then click the AutoFormat As You Type tab.4. Under Apply as you type, select the Automatic bulleted lists check box and the Automatic numbered listscheck box.
Add bullets or numbering to a list
1. Select the items that you want to add bullets or numbering to.2. On the Home tab, in the Paragraph group, click Bullets or Numbering.
Bullets
Numbering
NOTE
You can find different bullet styles and numbering formats by clicking the arrow next to Bullets or Numberingon the Home tab, in the Paragraph group.
Spread out the items in a list
You can increase the space between the lines in all of your lists by clearing a check box.
1. On the Home tab, in the Styles group, click the More arrow next to the Styles gallery, and then right-click the List Paragraph style.

2. Click Modify.3. In the Modify Style dialog box, click Format, and then click Paragraph.4. Clear the Don't add space between paragraphs of the same style check box.
Top of Page
Move an entire list to the left or the right1. Click a bullet or number in the list to highlight the list.2. Drag the list to a new location.
The entire list moves as you drag. The numbering levels do not change.
Turn a one-level list into a multilevel listYou can turn an existing list into a multilevel list by changing the hierarchical level of items in the list.
1. Click any item that you want to move to a different level.2. On the Home tab, in the Paragraph group, click the arrow next to Bullets or Numbering, click Change List Level, and
then click the level that you want.

Top of Page
Choose a multilevel list style from the galleryYou can apply a gallery style to any multilevel list.
1. Click an item in the list.2. On the Home tab, in the Paragraph group, click the arrow next to Multilevel List.

3. Click the multilevel list style that you want.

QUESTION (3)HOW OT INSERT SYMBOL
How to Insert Symbols in an MS Word DocumentSometimes the standard characters, numbers, and punctuation marks are just not enough. If you are preparing an MS Word document and need to insert a special symbol such as a copyright symbol, trademark, the ever-popular Euro symbol, and much more, here are a few ways to do this.
1. 2
Make sure autocorrect is turned on.
Click on File → Options → Proofing → AutoCorrect Options , then under the AutoCorrect tab, check the Replace text as you type box.
Note that you can set additional AutoCorrections for symbols you often use, perhaps df for °F.
2. 3
Type (r) or (R) to create the registered symbol, ®.
3. 4
Type (c)or (C) to create the copyright symbol, ©.
4. 5

Type (tm) or (TM) to create the trademark symbol, ™.
5. 6
Type (e) or (E) to create the euro symbol, €.
Method 2 of 5: Using the Symbol Menu
1.
1

Place your cursor. Make sure the insert cursor is blinking in the location you're about to place your symbol. Click on the Insert tab on the taskbar.
2.
2Locate the Symbol group. Click on the Symbol button, and a list of recently used symbols will appear. Selecting a symbol from that menu will place that symbol where your insertion cursor is located.
Method 3 of 5: Using the Symbol Window

1.
1.If you’re using an older version of Word, or you do not see the symbol you are looking for, click
on Mor e Symbols to open the Symbol window.


2The Symbol window will open in the first of two menu tabs. The second tab is
the Special Characters tab.
3.
3Choose the desired symbol from the Special Characters chart.

4.
4.Click the Inse r t button. It’s located on the lower portion of the Symbolwindow, and
the copyright symbol will be inserted in your document at the insertion cursor location.
Method 4 of 5: Using Built-in Codes
1. 1
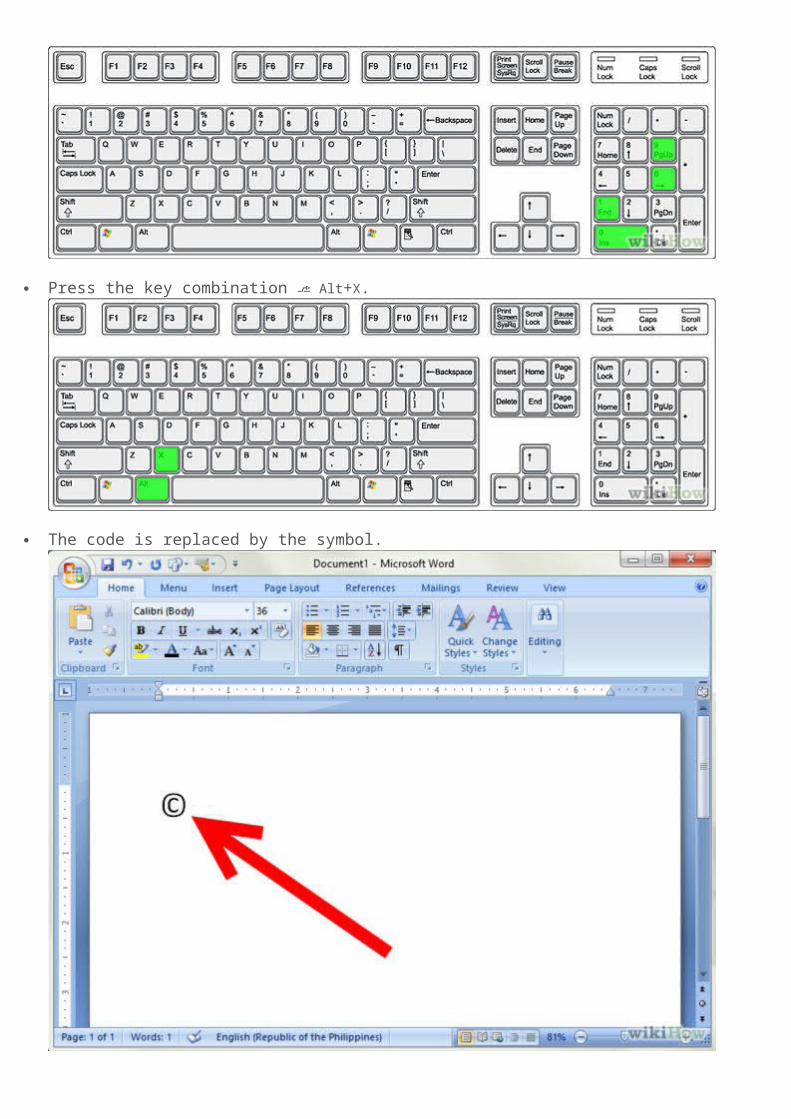
Insert the symbols manually. You can also insert symbols manually by entering the symbol code, then pressing ⎇ Alt+X..To insert the copyright symbol, first enter the copyright symbol’s code,0169.

Press the key combination ⎇ Alt+X.
The code is replaced by the symbol.
Method 5 of 5: Using Shortcut Keys
1.
1.Some frequently used symbols have alternative shortcuts. The copyrightshortcut, for example,
is ⎇ Alt+^ Ctrl+C.
Use the Spe c ia l Char ac t e r s tab to find frequently used symbols, likecopyright, registered, trademark, ellipsis, single opening quote, etc., along with their shortcuts.
Conclusion
I have learn how to insert picture and using symbol.
Related Documents