09 ManageEngine IT360 Beta Getting Started Guide

Welcome message from author
This document is posted to help you gain knowledge. Please leave a comment to let me know what you think about it! Share it to your friends and learn new things together.
Transcript
09
ManageEngine IT360Beta Getting Started Guide
ManageEngine IT360BETA Getting Started Guide
2
AdventNet Inc www.manageengine.com ManageEngine IT360
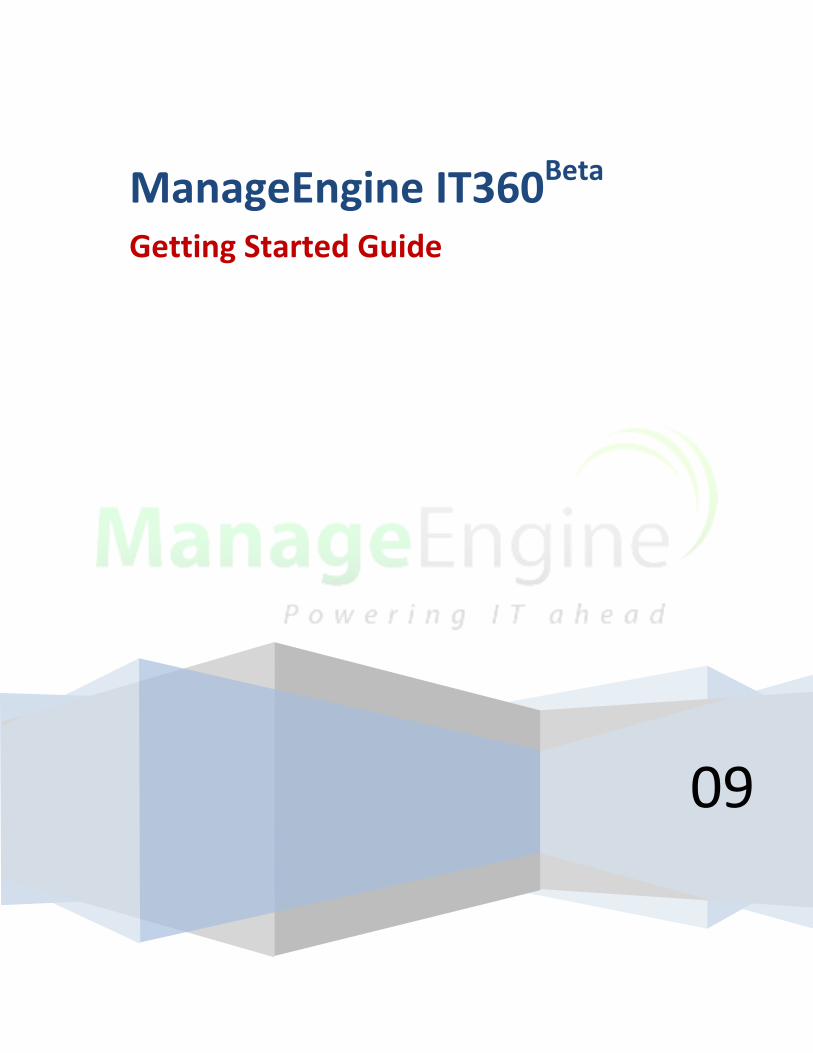
Table of Contents
1. Introduction 2. Pre-requisites for ManageEngine IT360
Configure your Mail Server Configure your Proxy Server Configure Users and Roles
3. Starting and Shutting down ManageEngine IT360
4. Discovering Business IT Resources (Applications, Servers and
Network Devices)
5. Creating Business Services
6. Creating Sub Groups
7. Associating IT Resources to Business Services and Sub Groups
Configure Action and Alerts for Thresholds
8. Generating Alerts and Reports
9. Logging Tickets with ServiceDesk
10. Reference for ManageEngine IT360
ManageEngine IT360BETA Getting Started Guide
3
AdventNet Inc www.manageengine.com ManageEngine IT360
1. Introduction Now that you have successfully installed ManageEngine IT360, now let us proceed on how to configure
ManageEngine IT360 and learn how you can fully leverage its components to monitor your business
critical IT resources.
2. Pre-Requisites for ManageEngine IT360
Before we go ahead and start monitoring your business applications and servers, lets us make sure that
you have covered pre-requisites for ManageEngine IT360 . These pre-requisites enable you to monitor
your business applications and network infrastructure.
Configure your Mail Server
Configure your Proxy Server
Configure Users and Roles
Configure Action for Thresholds
Configure Global Alerts
Configure Servicedesk
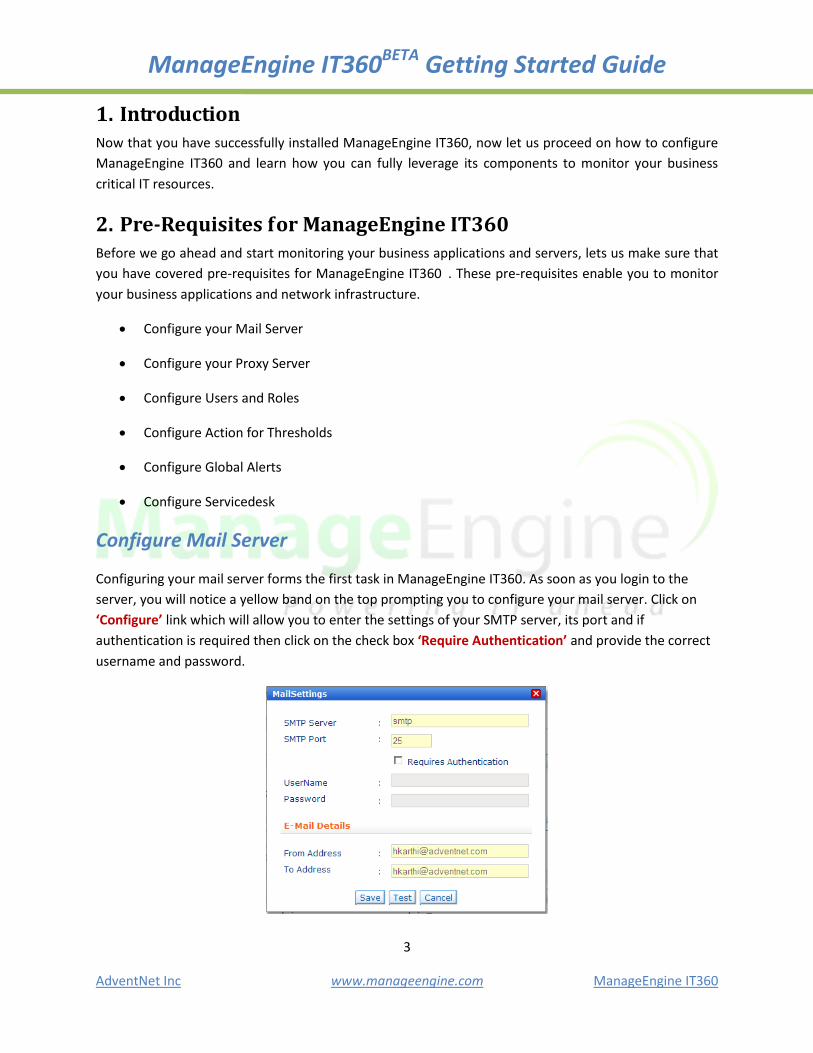
Configure Mail Server
Configuring your mail server forms the first task in ManageEngine IT360. As soon as you login to the
server, you will notice a yellow band on the top prompting you to configure your mail server. Click on
‘Configure’ link which will allow you to enter the settings of your SMTP server, its port and if
authentication is required then click on the check box ‘Require Authentication’ and provide the correct
username and password.
ManageEngine IT360BETA Getting Started Guide
4
AdventNet Inc www.manageengine.com ManageEngine IT360
Next, provide the ‘E-mail Details’. The email provided here would be used for alerting and reporting
about various business services configured in ManageEngine IT360 .
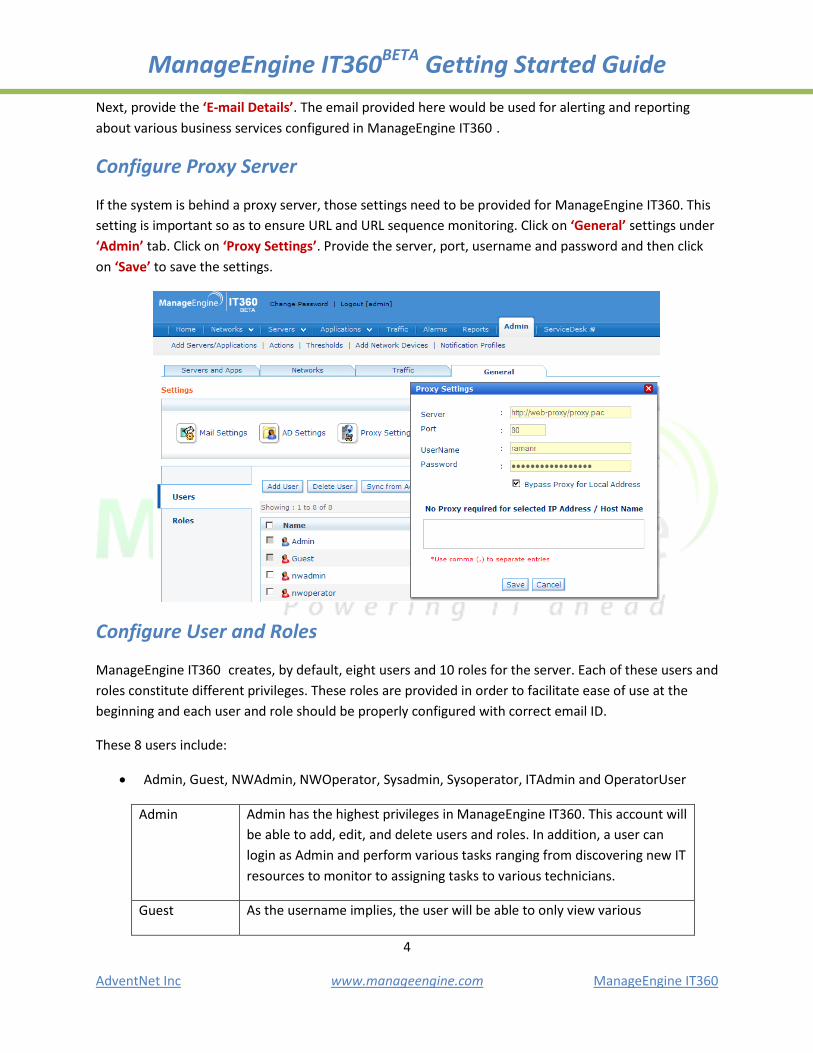
Configure Proxy Server
If the system is behind a proxy server, those settings need to be provided for ManageEngine IT360. This
setting is important so as to ensure URL and URL sequence monitoring. Click on ‘General’ settings under
‘Admin’ tab. Click on ‘Proxy Settings’. Provide the server, port, username and password and then click
on ‘Save’ to save the settings.
Configure User and Roles
ManageEngine IT360 creates, by default, eight users and 10 roles for the server. Each of these users and
roles constitute different privileges. These roles are provided in order to facilitate ease of use at the
beginning and each user and role should be properly configured with correct email ID.
These 8 users include:
Admin, Guest, NWAdmin, NWOperator, Sysadmin, Sysoperator, ITAdmin and OperatorUser
Admin Admin has the highest privileges in ManageEngine IT360. This account will
be able to add, edit, and delete users and roles. In addition, a user can
login as Admin and perform various tasks ranging from discovering new IT
resources to monitor to assigning tasks to various technicians.
Guest As the username implies, the user will be able to only view various
ManageEngine IT360BETA Getting Started Guide
5
AdventNet Inc www.manageengine.com ManageEngine IT360
business services and will not be able to execute any action.
NWAdmin NWAdmin or Network Admin allows access only to add, edit and delete
network devices for monitoring. This user login is provided to
troubleshoot any performance related issues to network and its devices.
The user will also have admin privileges for bandwidth monitoring as well.
NWOperator NWOperator or Network Operator allows user to restricted access to
various network devices added. The user will not have admin privileges
vis-à-vis NWAdmin.
Sysadmin Sysadmin or System Admin is similar to Admin user. However, critical
difference is that with Sysadmin you will be able to add, edit and delete
various servers and application servers with your IT infrastructure.
He/She will also have access to NWAdmin operations; however he/she
will have no access to bandwidth monitoring.
Sysoperator Sysoperator or System Operator will have restricted view of various IT
resources monitored through ManageEngine IT360. He/she will have no
admin privileges to server or network operations.
ITAdmin ITAdmin or IT Administrator is similar to Admin. He/she will have entire
access to various IT resources. The user will also have the ability to add,
edit and delete these resources and assign issues to appropriate support
staff.
OperatorUser Being OperatorUser, the user can only those business services,
applications, servers, networks or traffic for which he/she has been
assigned to. In addition, the user does not have admin privileges and
hence can only be used for viewing various business services or IT
resources assigned to them.
And the 10 roles include:
User Administrator, Network Administrator, Network Operator, System Administrator, System
Operator, IT Administrator, Read Only Access, Operator Only, Servicedesk Technician,
Servicedesk Requestor
Read Only Access Once a particular user has this setting, then the user will be able to only
view the IT resources configured inside ManageEngine IT360. He/she will
not be able to edit any values pertaining to the IT resource.
ManageEngine IT360BETA Getting Started Guide
6
AdventNet Inc www.manageengine.com ManageEngine IT360
Operator Only Operator Only, as the name implies, will allow user to only view IT
resources configured
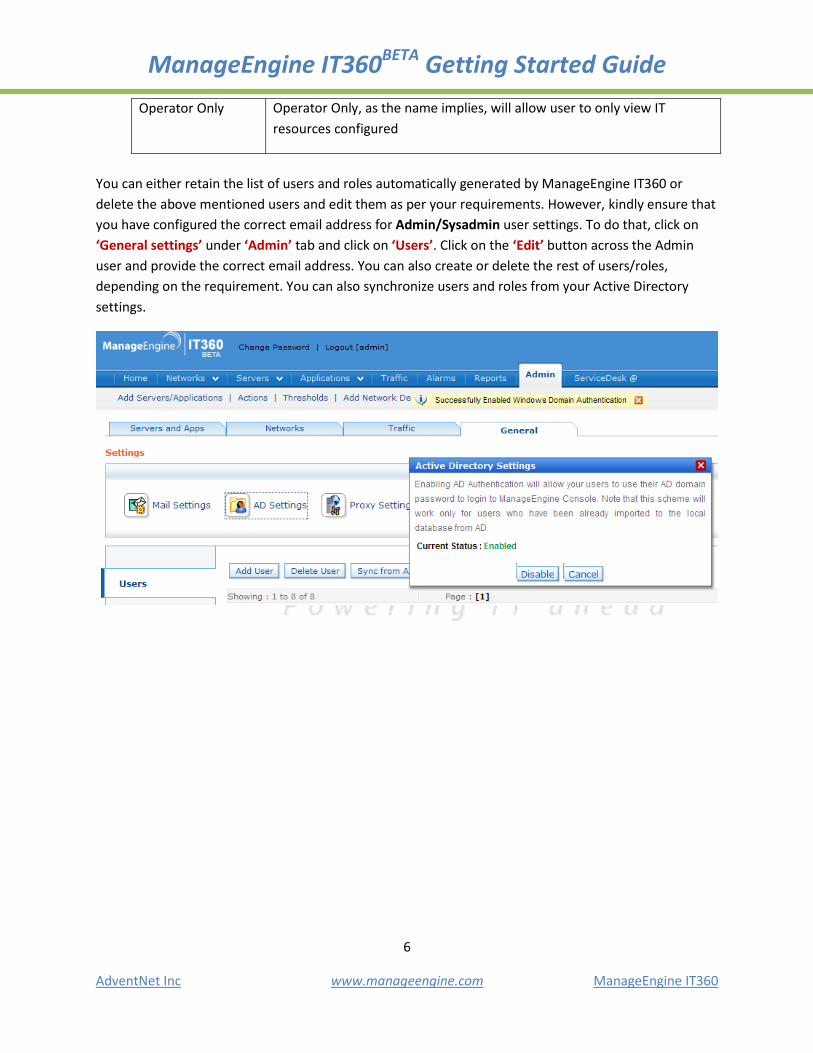
You can either retain the list of users and roles automatically generated by ManageEngine IT360 or
delete the above mentioned users and edit them as per your requirements. However, kindly ensure that
you have configured the correct email address for Admin/Sysadmin user settings. To do that, click on
‘General settings’ under ‘Admin’ tab and click on ‘Users’. Click on the ‘Edit’ button across the Admin
user and provide the correct email address. You can also create or delete the rest of users/roles,
depending on the requirement. You can also synchronize users and roles from your Active Directory
settings.

ManageEngine IT360BETA Getting Started Guide
7
AdventNet Inc www.manageengine.com ManageEngine IT360
3. Starting and Shutting down ManageEngine IT360BETA
During installation, ManageEngine IT360 is installed as Windows service. You can then start
ManageEngine IT360 server by right-clicking on the system tray icon and selecting on the various
options provided.
From these ‘Startup Options’, you can select “Show Tray Icon on Windows StartUp” and or “Start Web
Client On Server StartUp”. Once the first option is selected, MANAGEENGINE IT360 icon loads
automatically into your system tray after Windows reboots. By selecting the second option,
MANAGEENGINE IT360 server will open web client as soon as it starts. In case, you did not select the
second option, then you can manually open the web client by typing the following address in your
browser:
http://localhost:8080/ or http://<system-name>:8080/
Once the server starts, you will notice that the system tray icon starts blinking and the web console
opens up in your default browser.
4. Discovering Business IT Resources (Applications, Servers and
Network Devices)
Once the preliminary settings and pre-requisites are provided, you can now go ahead and start adding
your business critical IT resources into ManageEngine IT360. First you need to discover your network
devices and servers running your IT infrastructure. Once this is done, you can then move on discovering
or adding individual applications, application servers, databases, web servers and services. And then
finally you can then configure your routers and switches to ensure monitoring of your bandwidth
utilization.
Login to ManageEngine IT360 using appropriate administrator privileges, so as to add and edit IT
resources which are critical to your business.
Go to ‘Admin’ tab and click on ‘Networks’ tab.
ManageEngine IT360BETA Getting Started Guide
8
AdventNet Inc www.manageengine.com ManageEngine IT360
Click on ‘Credentials’ setting. Since ManageEngine IT360 accesses these remote devices using
the protocols SNMP, CLI, or WMI, these credentials like the password/SNMP community, port
etc, may differ from device to device. Pre-configuring these set of credentials allows you to
apply them to multiple set of devices simultaneously, saving a lot of manual effort.
You will find that ManageEngine has a pre-configured credential setting called ‘Public’ which
you can use.
Now you can either discover network devices by specifying a range or the entire network. This
also saves you a lot of manual effort. ManageEngine IT360 uses ICMP/NMAP to discover devices
on network and configure the same under Networks module.
Click on ‘Discover Devices’ setting.
Select either ‘Use IP range’ or ‘Use CIDR’. If you select Use IP Range, then enter the ‘Start IP’
and ‘End IP’ settings. Provide correct ‘Netmask’ IP. Select the credential you would like to apply
for this range. Click on Advanced SNMP settings to increase SNMP timeout or retries.
Click ‘Discover’. ManageEngine IT360 starts automatically discovering various devices which
falls within provided range and groups them according to their categories.
If you had selected Use CIDR, then enter the network IP to discover the entire network.
Select the correct credential and provide correct SNMP setting. Click ‘Discover’ and
ManageEngine IT360 starts detecting and sort’s device based on the category automatically.
In case if you have added more devices to your network after discovery is done, then you would
have to discover these devices separately. Click on ‘Networks’ tab and click on ‘Add Device’
setting.
Provide the ‘Device Name’ or ‘IP setting’ of the particular device and click on ‘Add Device’.
ManageEngine IT360 will automatically detect the device and sort it based on its category.
Once your network devices have been configured and added, you now need to discover the various
servers and applications running your business critical services. However, before you proceed to
discover the various servers and application servers running in your infrastructure, kindly ensure that
you have met the pre-requisites for these settings also. In order to monitor those resources, follow the
steps given below.
Click on ‘Availability Setting’. Set the desired configuration for ManageEngine IT360, and click
on ‘Save’ to update the settings.
ManageEngine IT360BETA Getting Started Guide
9
AdventNet Inc www.manageengine.com ManageEngine IT360
Similar to discovering a host of network devices present in your IT infrastructure quickly, you can
also perform a similar function to identify and add various IT resources quickly without having to
add them individually.
Click on ‘Discover’ setting. Provide the correct IP address of your network and the ‘Sub Net
Mask’ setting and click on ‘Start Discovery’. You can also decide whether or not to add various
services that may run in your network by clicking on ‘Services’.
ManageEngine IT360 will start automatically discovering various applications, application
servers, web servers, services, databases and servers running in your IT infrastructure. It will
also automatically categorize them based on the type.
You can also configure your bandwidth utilization accordingly by following the steps given here.
Now, ManageEngine IT360 has begun to start monitoring various IT resources you have added and will
display them under each category. You can now create business services and group your IT resources
which play a vital role for those mission-critical business services.
5. Creating Business Services Business services are a logical group of one or more Monitors (Network devices, Servers and
Applications) that provides a holistic view of your business environment. The health of an online Web
application depends on various factors, such as the health of the application server hosting the Web
application, the availability of the Web server for accessing the Web applications, the database server
for storing or getting the required information, etc.
A Business Service helps to group resources like servers, databases and application servers that work
together, to meet the needs of a business process. It can be also used to group monitors by location or
geography. These can be monitored as a single group. This can also be assigned to selective users
thereby restricting the user’s scope to view/monitor a set of devices and increasing the security of the
network.
Create a Business Service
In order to create a business service, you need to ensure that all the network devices, servers and
applications have been successfully configured and are add to ManageEngine for monitoring. Once that
is done, you need to follow the steps below to create a business service.
Go to the ‘Home’ page. Click on the ‘Add Business Service’ link on the right side of the screen.
Provide a proper name for the business service, description and select the users for whom you
would like to provide access for.
If this business service is overseas, then provide location details by clicking on ‘Add Location’.
ManageEngine IT360BETA Getting Started Guide
10
AdventNet Inc www.manageengine.com ManageEngine IT360
Click ‘Create Business Service’ to create the same.
6. Creating Sub Groups You can also create ‘Sub-Groups’ within a business service. These Sub-Groups allow you to group a
list of IT resources. Sub-Groups help better organization of your resources. With Sub-Groups, you
can capture advanced dependencies in your infrastructure. You can group clustered databases or
servers and create complex groups. For e.g., A huge banking application Business Service may
contain 100 monitors (application servers, systems, databases, URLs, etc.). All the database monitors
can be grouped under a Sub-Group for effective monitoring. To create such a Sub-Group,
Click on ‘Add Sub-Group’ and provide a name and description for the same.
Click on ‘Create Sub-Group’.
7. Associating Resources to Business Services and Sub Groups Once the Business Services and its Sub-Groups are created, you can now proceed to add the various IT
resources you have discovered and add them to these business services. However, in order to gain a
better understanding on the performance of your critical business services, make sure that you add
relevant resources pertaining to particular business service in order to identify any performance related
issue and help you troubleshoot issues quickly. In order to add these resources to your business
services,
Click on ‘Add/Remove Resources’ link to add various resources available in your IT
infrastructure.
You can also disassociate a particular resource or a group of resources within a business service.
When these services no longer play a crucial role in a particular business service, you may want
to remove those resources for that business service. By clicking on ‘Add/Remove Resources’
you will be able to remove such resources.
You can also associate particular resources to these Sub-Groups created within a Business
Service.
Once business services and IT resources have been, monitoring of these resources begins automatically.
However, the threshold of each of these resources differ and hence, it is prudent to set appropriate
thresholds for each of these resource types. In addition, in case there is a performance issue with one
web server, an action has to be generated to inform you (the user) of such a performance issue and
allow you to take proper action to quickly troubleshoot the issue. The following section explains you
how to configure action for thresholds and global alerts.
For every performance metric of applications and servers, ManageEngine IT360 allows you to set various
thresholds which allow you to monitor their performance constantly. Whenever, these thresholds are

ManageEngine IT360BETA Getting Started Guide
11
AdventNet Inc www.manageengine.com ManageEngine IT360
breached, an action is executed in the form of sending email, SMS or triggering an execution of a script
or an application. Some of these thresholds are pre-configured for certain performance metrics.
However, you can either edit/create new thresholds for the various resources you are monitoring
through ManageEngine IT360. However, for network devices the ability to set thresholds and actions is
enabled within each snapshot of the device. Click on the particular network device and click on
Performance Monitors under Monitors tab. Click on Edit function across each performance metric. You
can also add other monitors for the particular network device by clicking on ‘Add Monitors’.
Configure Thresholds for Servers and Apps
To configure a threshold,
Click on ‘Admin’ tab setting.
Click on ‘Thresholds’ link.
Click on ‘Add New’ link. Select if you would like threshold with numeric values or string values.
Provide a Threshold name. Click on ‘Show Advanced Option’ setting to set threshold values for
various levels of severities.
Click on ‘Threshold Profile’.
Once this is set, you can configure this particular threshold profile for any of the resource’s performance
metric.
Configure Actions and Alerts for Thresholds
Once the threshold is set, appropriate action has to be set for each threshold. This action, as mentioned
before, could be anything from sending an email alert, SMS or executing an in-house script. Most
commonly used function is that of sending email. Once this action is configured, you (the user) will be
ManageEngine IT360BETA Getting Started Guide
12
AdventNet Inc www.manageengine.com ManageEngine IT360
alerted automatically about the kind performance issue that has risen, which business service has been
affected and how long as soon as the threshold is breached.
To configure action for a threshold for servers and applications, click here.
To configure action for network devices, click here.
8. Generating Alerts and Reports In any enterprise framework, an important aspect of all management tasks is that you can analyze the
trend over time and evaluate the performance. This analysis is also useful in making calculated
predictions and taking corrective actions as and when necessary. These calculated predictions allow you
to plan for any future impact on performance for various resources. To view these reports follow the
given steps below:
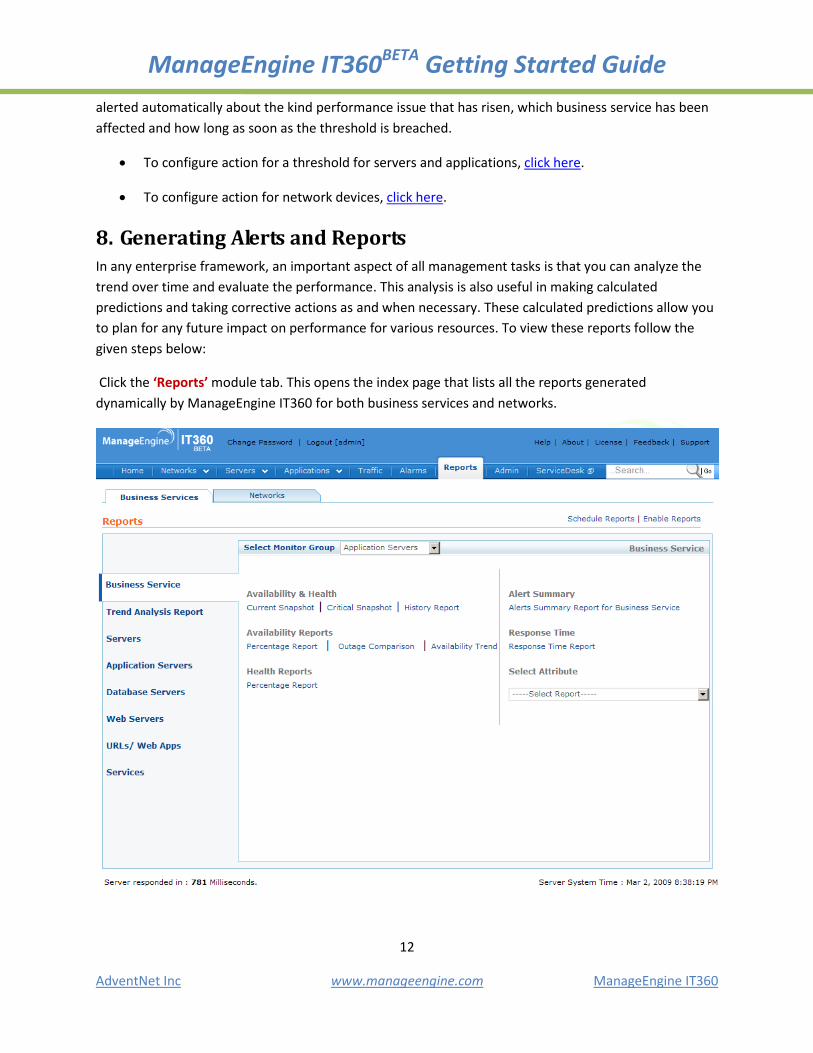
Click the ‘Reports’ module tab. This opens the index page that lists all the reports generated
dynamically by ManageEngine IT360 for both business services and networks.
ManageEngine IT360BETA Getting Started Guide
13
AdventNet Inc www.manageengine.com ManageEngine IT360
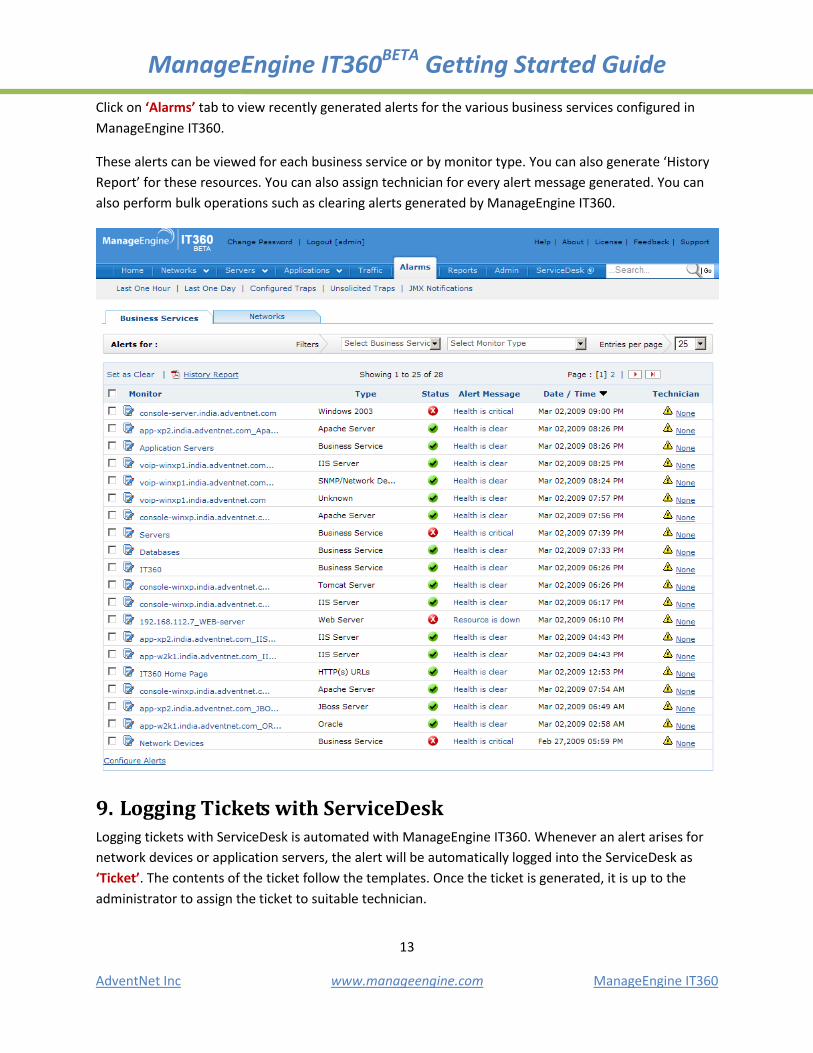
Click on ‘Alarms’ tab to view recently generated alerts for the various business services configured in
ManageEngine IT360.
These alerts can be viewed for each business service or by monitor type. You can also generate ‘History
Report’ for these resources. You can also assign technician for every alert message generated. You can
also perform bulk operations such as clearing alerts generated by ManageEngine IT360.
9. Logging Tickets with ServiceDesk Logging tickets with ServiceDesk is automated with ManageEngine IT360. Whenever an alert arises for
network devices or application servers, the alert will be automatically logged into the ServiceDesk as
‘Ticket’. The contents of the ticket follow the templates. Once the ticket is generated, it is up to the
administrator to assign the ticket to suitable technician.
ManageEngine IT360BETA Getting Started Guide
14
AdventNet Inc www.manageengine.com ManageEngine IT360
To generate ticket for applications and servers, click here.
To generate ticket for network devices, click here.
10. Reference for ManageEngine IT360BETA
You can also refer to the online help document available in .zip format. You can download it, unzip to a
location and use it to configure and utilize ManageEngine IT360 . Some helpful references for using
ManageEngine IT360 are given below:
ManageEngine IT360 Features
Online Help Document (zip format)
Request Technical Support
Request Demo for ManageEngine IT360
ManageEngine IT360 Blog
Follow us on Twitter
Related Documents


![Skaffold - storage.googleapis.com · [getting-started getting-started] Hello world! [getting-started getting-started] Hello world! [getting-started getting-started] Hello world! 5.](https://static.cupdf.com/doc/110x72/5ec939f2a76a033f091c5ac7/skaffold-getting-started-getting-started-hello-world-getting-started-getting-started.jpg)