Introduction to Physical Assessment Practicum I & II Health Science Technology 2011 - 2012

Welcome message from author
This document is posted to help you gain knowledge. Please leave a comment to let me know what you think about it! Share it to your friends and learn new things together.
Transcript
Introduction to Physical Assessment
Practicum I & II
Health Science Technology 2011 - 2012
Introduction
• Assessment begins with subjective findings, including the health history and review of systems
• Once this is obtained you move to the physical assessment to obtain objective data about a patient
• Physical assessment has 4 parts: 1. General Survey2. Vital Sign Measurements3. Assessment of Height and Weight4. Physical Examination

Basic Assessment Equipment
• Thermometer• Stethoscope• Sphygmomanometer• Visual Acuity Charts• Penlight or Flashlight• Measuring Tape and
Pocket Ruler• Marking Pencil• Scale
• Tongue Depressor• Safety Pins• Cotton Balls• Test tubes filled with
Hot and Cold water• Water – Soluble
lubricant
Advanced Assessment Equipment
• Ophthalmoscope• Nasoscope• Otoscope• Tuning Fork• Reflex Hammer• Skin Calipers• Vaginal Speculum• Goniometer• Transilluminator
Physical Assessment Techniques
• Inspection
• Palpation
• Percussion
• Auscultation
1. Inspection
• Critical observation or inspection is the first step in assessing a patient
• Reveals more than other techniques
• Approach inspection in a careful, unhurried manner
• Pay close attention to details, and try to draw logical conclusions from the findings
2. Palpation
• The examiner touches the body to feel pulsations and vibrations, to locate body structures, and to assess such characteristics as size, texture, warmth, mobility, and tenderness
• Allows detection of a pulse, muscle rigidity, enlarged lymph nodes, skin or hair dryness, organ tenderness or breast lumps, and measurement of the chest rising and falling with each respiration
Guidelines for Palpation
• Warm your hands before beginning• Explain what you will do and why, and
describe what the client can expect, especially in sensitive areas
• Encourage the client to relax by taking several deep breaths, concentrating on inhaling and exhaling
• Stop palpating immediately if the patient complains of pain

3. Percussion
• Use of quick, sharp tapping of the fingers or hands against body surfaces to produce sounds, elicit tenderness, or assess reflexes
• Percussing for sound – the most common percussion goal – helps locate organ borders, identify organ shape and position, and determine if an organ is solid or filled with fluid or gas
Percussion
• When percussing for sound, the examiner uses quick light blows to create vibrations that penetrate about 1 ½ inch to 2 inches under the skin surface
• The returning sounds reflect the contents of the percussed body cavity

Normal Percussion Sounds:
• Resonance
• Tympany
• Dullness
Resonance
• The long, low, hollow sound heard over an intercostal space lying above healthy lung tissue

Tympany
• The loud, high – pitched, drumlike sound heard over a gastric air bubble or gas filled bowel

Dullness
• Soft, high – pitched, thudding sound normally heard over more solid organs, such as the liver and heart
Abnormal Percussion Sounds
• Hyperresonance – long, loud, low – pitched sound – classic sign of lung hyperinflation such as in emphysema
• Flatness – Similar to dullness but shorter in duration and softer in intensity – may also be heard over pleural fluid accumulation or pleural thickening
Guidelines for Percussion
To enhance you percussion technique and improve results, follow these guidelines:
• Keep your fingernails short, and warm your hands before starting
• Have the client void before you begin
• Make sure the examination room or area is quiet and distraction free

Guidelines for Percussion
• Remove any jewelry or other items that could clatter and interfere with the ability to hear returning sounds
• Before performing percussion, briefly explain to the client what you will do and why
• In an obese client, expect percussion sounds to be muffled by a thick subcutaneous fat layer

4. Auscultation
• The examiner listens to body sounds – particularly those procedure by the heart, lungs, vessels, stomach, and intestines
• Most auscultated sounds result from air or fluid movement
• Usually performed after other assessment techniques
• EXCEPT in the abdomen, auscultation is performed BEFORE percussion and palpation
Approach to Physical Assessment
1. Begin by introducing yourself
2. Make sure your grooming, dress and behavior reflect a professional attitude
3. Before starting the assessment, briefly explain what you will do and why; include any position changes that you will ask the client to make
Approach to Physical Assessment
4. Have all necessary equipment on hand and in working order
5. To help ensure accurate findings and promote client comfort, ask the client to void before you begin the assessment
6. Respect the client’s privacy and modesty; ask family members and other visitors to leave, close the door, and use pull drapes as appropriate
Approach to Physical Assessment
• Make the client as comfortable as possible by offering a pillow and making sure that the room and assessment equipment are warm
• Always warn the client before performing a procedure that may cause discomfort
• If possible avoid touching painful tender or painful areas until the end of the assessment

Approach to Physical Assessment
• Use the same communication skills you applied in the interview; politely ask the client to follow your instructions; answer any questions and express thanks for cooperation
• Be sensitive, unhurried, and reassuring
• Wash your hands BEFORE and AFTER the assessment in the client’s presence
Approach to Physical Assessment
• Dress comfortably and minimize position changes during the assessment
• Always use the same systematic approach to assessment, varying it only to accommodate the patient’s particular needs
• Avoid negative reactions, such as grimaces or exclamations, to abnormal or unexpected findings and unpleasant odors or sights

The General Survey
• Begins with the first moments of the patient encounter
• How do you perceive the patient’s apparent state of health, demeanor, and facial affect or expression, grooming, posture and gait?
• Height and Weight

Vital signs
• These include blood pressure, heart rate, respiratory rate, and temperature
Pain Assessment
• Commonly under – diagnosed
• Major focus of caring for patients in all health professions
• Fifth Vital Sign
Common Concerning Symptoms
• Changes in Weight
• Fatigue and Weakness
• Fever, Chills, Night Sweats
• Pain
Changes in Weight
• Result from changes in body tissue or body fluids
• Good Opening questions include:
1. “How often do you check your weight?”
2. How is your current weight compared to 1 year ago?
3. What would you like to weigh?
4. Why do you think your weight has changed?
Significance
• Rapid changes in weight, over a few days, suggests changes in body fluids, NOT tissues.
Weight Gain
• Usually occurs when caloric intake exceeds caloric expenditure over time and typically appears as increased body fat
• May also reflect abnormal accumulation of body fluids
• Fluid retention that is mild, may not be visible
Why are vital signs so important?
• Indicate normal or abnormal function
• Normal = homeostasis (balance)
• Accuracy can mean the difference between life and death

What are vital signs?• TPR and BP where:• T = body temperature (measure of body
heat)• P = pulse rate (the rate at which the
heart is pumping blood through the body)
• R = respiratory rate (the rate at which the lungs are breathing air in and out)
• BP = blood pressure (the highest and lowest amount of pressure placed on the blood vessels of the body)
What is body heat (temperature)?
• Heat is produced by muscle activity, food oxidation, and glands.
• Heat is “lost” through respiration, perspiration, and excretion.
Factors that increase body temperature:
• Exercise
• Digestion of food
• Increase environmental temperature
• Illness
• Infection
• Excitement
• Anxiety

Factors that decrease body temperature:
• Sleep
• Fasting
• Exposure to cold
• Depression
• Decreased muscle activity
• Certain illnesses
• Mouth breathing

Most common sites to measure temperature:
• Mouth (Oral)
• Axilla (Underarm)
• Rectum
• Tympanic

Types of thermometers:
• Glass
• Electronic digital
• Aural or tympanometer
• Chemically treated strips

Normal temperature readings:
• Oral/Tympanic = 98.6° F (37° C)
• Axillary = 97.6° F (36.4° C)
• Rectal = 99.6° F (38° C)

Pulse
• The number of times the heart pumps or beats in a minute
• Indicates that blood is circulating through the body
• Most common sites to measure pulse – radial, antecubital (brachial), apical (stethoscope on the chest wall)
When counting the pulse, you feel the pressure of
blood against the artery as the heart contracts. Pulse
rate varies for different ages (faster in infants)newborn = 120 – 160teenagers = 60 - 110
adults = 60-100
Characteristics of a pulse:
• Rate – fast, slow
• Rhythm – regular, steady, irregular
• Arrhythmia – even or uneven intervals between pulse
• Force of the beat / volume – bounding, thready or weak; normal, strong

Pulse
• Pulse rates below 60 or above 100 should always be reported
• Pulse below 60 = Bradycardia
• Pulse above 100 = Tachycardia
• Athletes may have a pulse rate under 60 due to excellent fitness
Factors that influence pulse rate:
• Exercise (increases pulse rate)• Hemorrhage (weakens, increases)• Emotional excitement (increases)• Elevated temperature (increases)• Medication (increases or decreases)• Age (increases)• Aerobic fitness (decreases)• Depression (decreases)• Illness (increases or decreases)• Shock (increases)
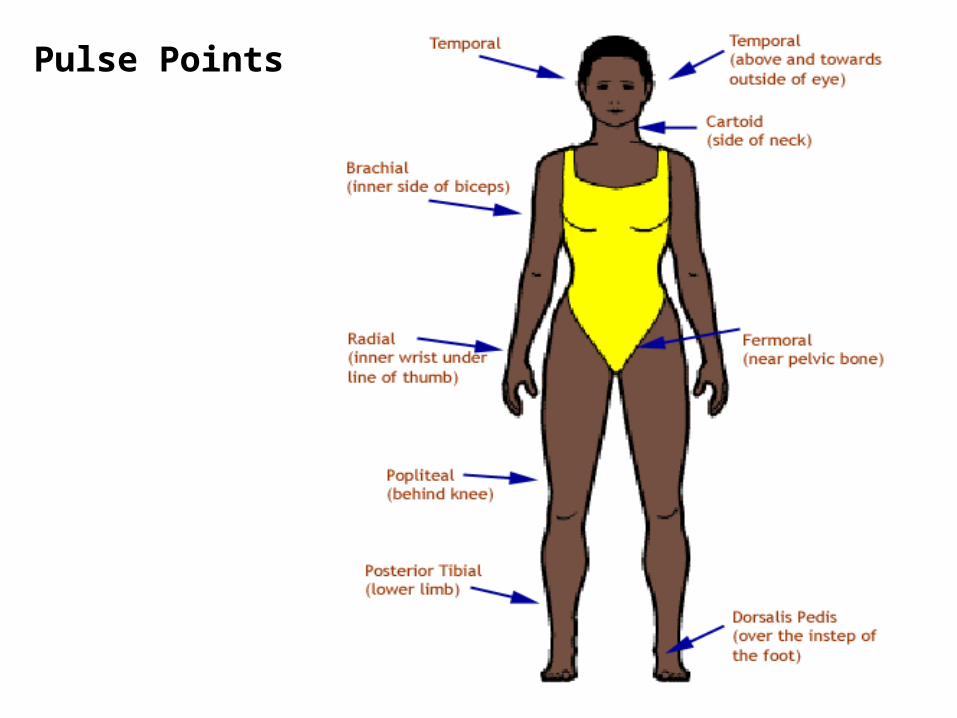
Pulse Points

• The radial pulse is the most common site for counting the pulse rate.
• Adult pulse rate may range from 60-80.
• The pulse oximeter is an electronic device that determines pulse and oxygen concentration in the hemoglobin of the arterial blood.
• pO2 < 90% not enough oxygen in the tissues to function normally
Respiration
• The process of taking in oxygen and expelling carbon dioxide
• Helps regulate temperature and eliminate all waste products
• 1 expiration / exhalation (breathing out) + 1 inspiration / inhalation (breathing in)
Respiration rate is assessed by observing the client’s
chest movement upward and outward for a complete
minute.
Auscultation (listening with a stethoscope) is another
method to assess respiratory rate.

Abnormal respirations (lung sounds) include:
• Dyspnea – difficulty breathing (diminished lung sound)
• Apnea – stopped breathing (no lung sound)
• Cheynes-Stokes – periods of labored breathing followed by apnea
• Rales – bubbling or rattling sounds caused by mucus

Factors that affect respiration:• Anxiety• Respiratory rate• Relaxation• Depression• Head injury• Age (newborn 40/minute; adult
12-20/minute)• Exercise• Pain• Fever• Heart disease; congestive heart failure• medication

Hyperventilation
• – increase in the respiratory rate may be caused by:
• -physical / mental stress such as infection, exercise, or anxiety
• - increase in body temperature
• -lack of carbon dioxide or low blood pressure

Hypoventilation
• – decrease in respiratory rate may be caused by:
• -pain medications and alcohol
• - decrease body temperature
• - severe lack of oxygen and no blood pressure


Blood Pressure:
• the force of the blood pushing against the walls of the blood vessels.– Systolic – greatest force exerted on the
arteries when the heart is contracting causing a beat to be heard. This is the higher number.
– Diastolic – least force exerted on the arteries when the heart relaxes.

Blood Pressure depends on:
• Volume of blood in the circulatory system
• Force of the heartbeat
• Condition of the arteries

Factors that Increase Blood Pressure:
• Loss of elasticity in the arteries
• Exercise
• Eating
• Stimulants (medication, coffee)
• Anxiety
Factors that Decrease Blood Pressure
• Hemorrhage
• Inactivity
• Fasting
• Suppressants (medications that lower B/P)
• Depression
• Expected B/P readings – Systolic between 100 – 140 mmHg– Diastolic between 60 – 90 mmHg–Written as a fraction with systolic
over diastolic• Hypertension – blood pressure
above normal (high blood pressure) 140/90 or higher
• Hypotension – blood pressure below normal (low blood pressure) below 90/60

Equipment used:
• Sphygmomanometer – instrument used to measure blood pressure (also called a blood pressure cuff)– Three types:• Aneroid – calibrated dial• Electronic – digital display (does not require a stethoscope)• Mercury – calibrated cylinder with mercury
• Stethoscope
Measuring Blood Pressure
1. Roll up client’s sleeve above elbow, being careful that it’s not too tight. Support client’s arm on a firm surface.
2. Wrap wide part of cuff around client’s arm directly over brachial artery. Lower edge of cuff should be 1 or 2 inches above the bend of elbow.
3. Clean earpieces of stethoscope.
4. Locate brachial artery.
5. Tighten thumbscrew on valve.
6. Hold stethoscope in place.
7. Inflate cuff to 180-200mmHg.
8. Open valve so that air is released. The needle should fall approximately every 2 seconds.
9. Note systolic at first beat. (When you hear the first heart sound)
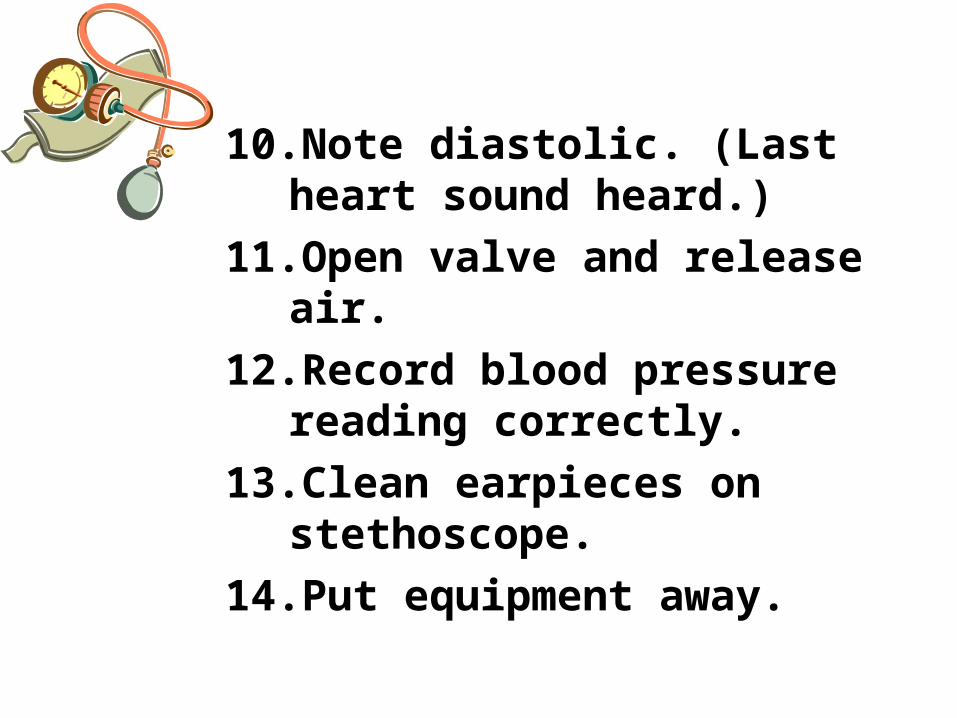
10.Note diastolic. (Last heart sound heard.)
11.Open valve and release air.
12.Record blood pressure reading correctly.
13.Clean earpieces on stethoscope.
14.Put equipment away.
Vocabulary• Afebrile – temperature is within
normal range
• Febrile – temperature is elevated
• Hypothermia – temperature is below normal
• Axillary – referring to the armpit
• Aural – pertaining to the ear
• Oral – referring to by mouth
• Rectal – referring to the end of the large intestine just above the anus

Vocabulary continued…
• Calibration – standard measure (each line on a thermometer or a ruler is a calibration)
• Celsius – measure of heat; abbreviated C
• Fahrenheit – measure of heat; abbreviated F

Vocabulary continued…
• Arrhythmia – irregular heart beats
• Apex – the top of the heart
• Bounding – extremely strong heart beat
• Bradycardia – slower than normal heart beat
• Hemorrhage – bleeding
• Tachycardia – faster than normal heart beat
Related Documents