INTRODUCTION TO ADOBE INDESIGN

Welcome message from author
This document is posted to help you gain knowledge. Please leave a comment to let me know what you think about it! Share it to your friends and learn new things together.
Transcript
INTRODUCTION TO ADOBE INDESIGN
2
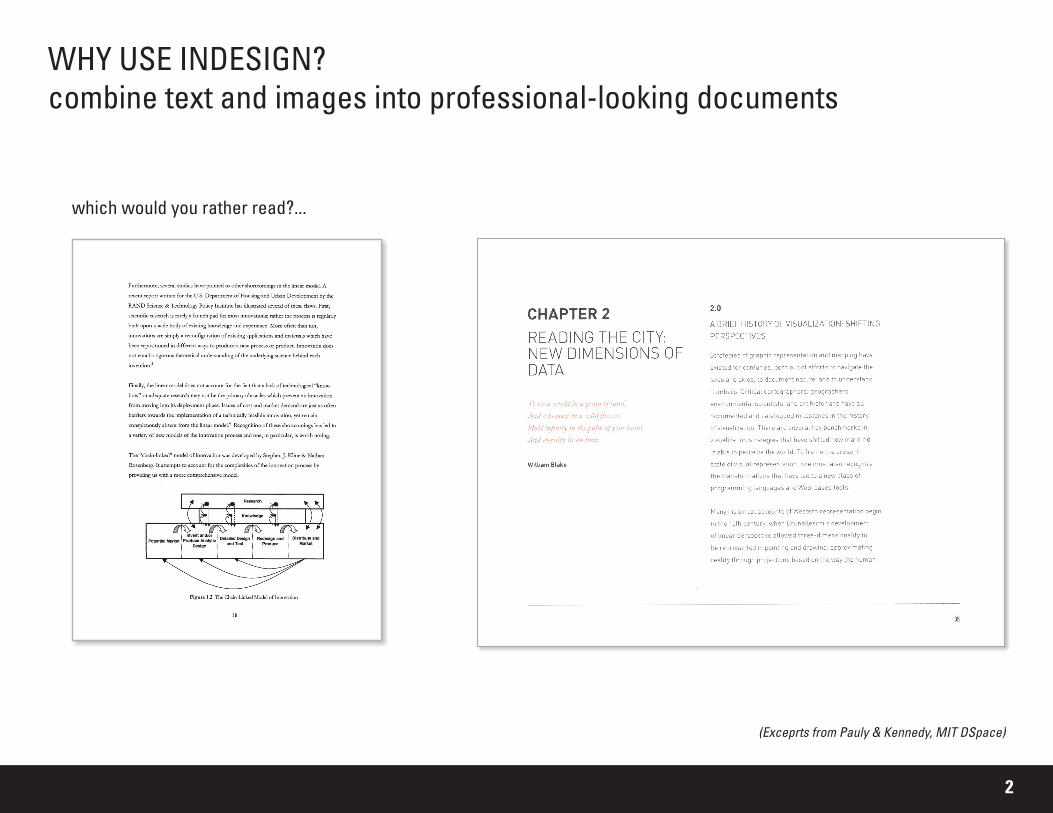
WHY USE INDESIGN?combine text and images into professional-looking documents
which would you rather read?...
(Exceprts from Pauly & Kennedy, MIT DSpace)
3
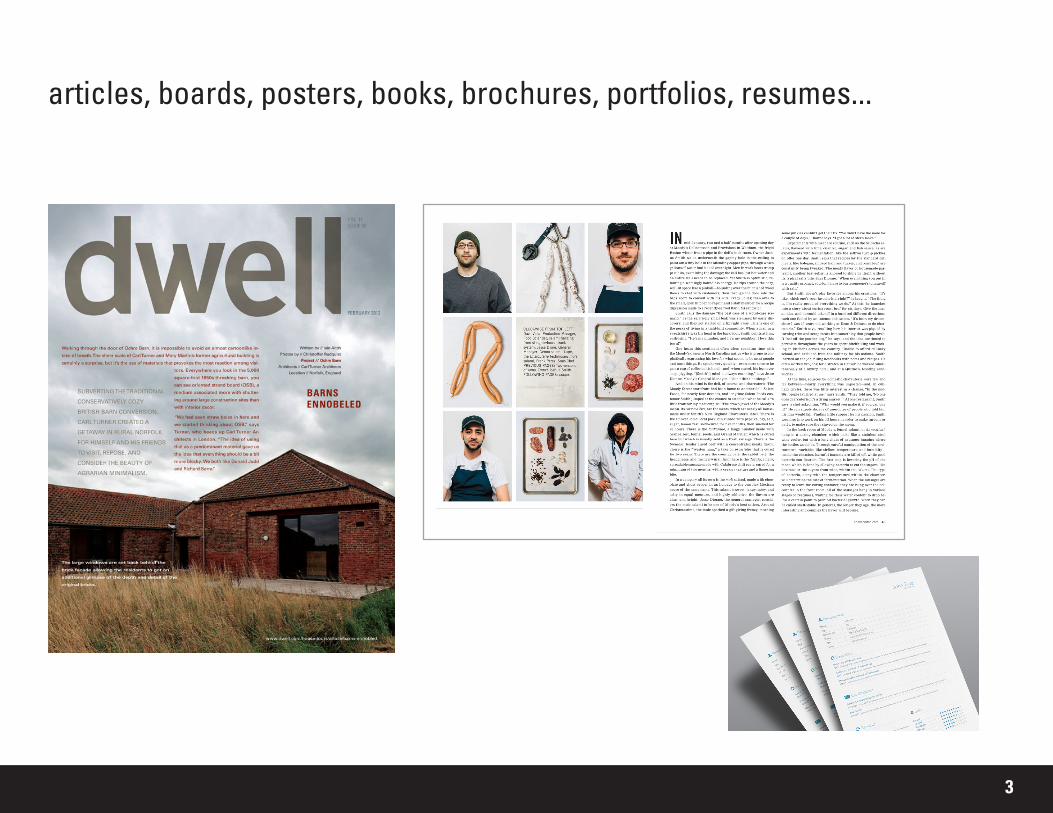
articles, boards, posters, books, brochures, portfolios, resumes...
4
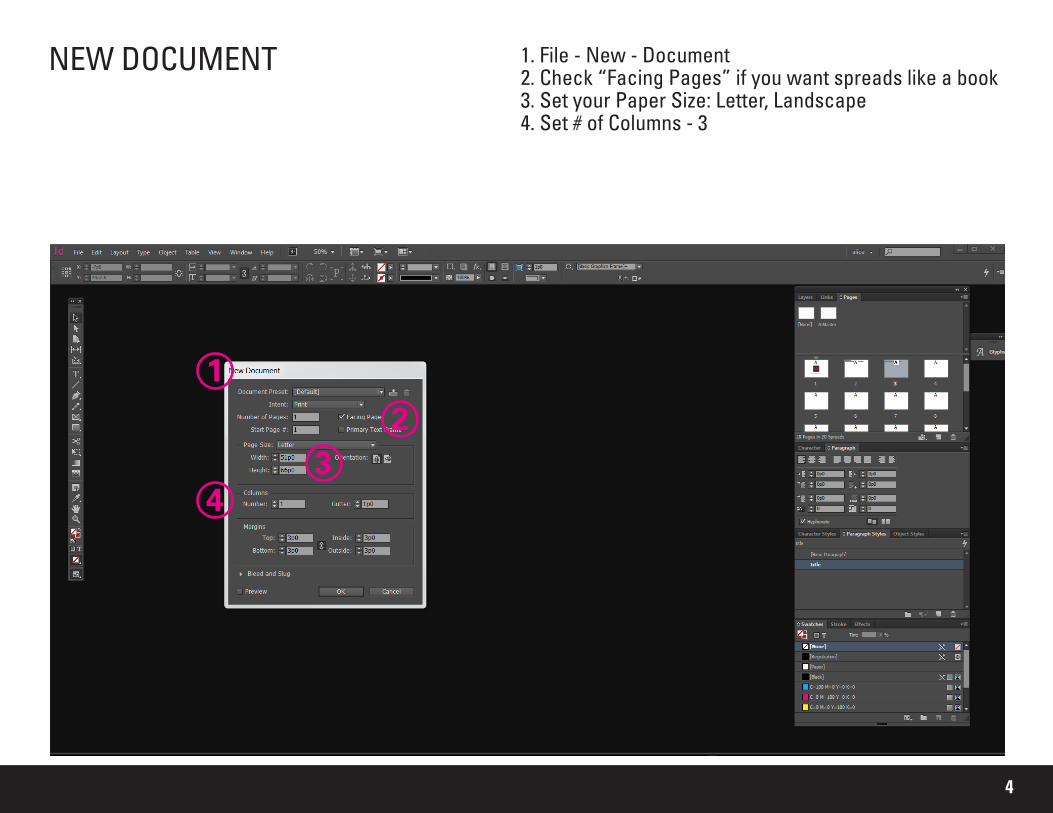
NEW DOCUMENT 1. File - New - Document2. Check “Facing Pages” if you want spreads like a book3. Set your Paper Size: Letter, Landscape4. Set # of Columns - 3
1
23
4

5
INTERFACE 1. Tool Bar2. Object Stroke/Fill3. Basic properties of selected object4. Other menus (“windows”)5. Pages Panel
1
2
3
4
5
6
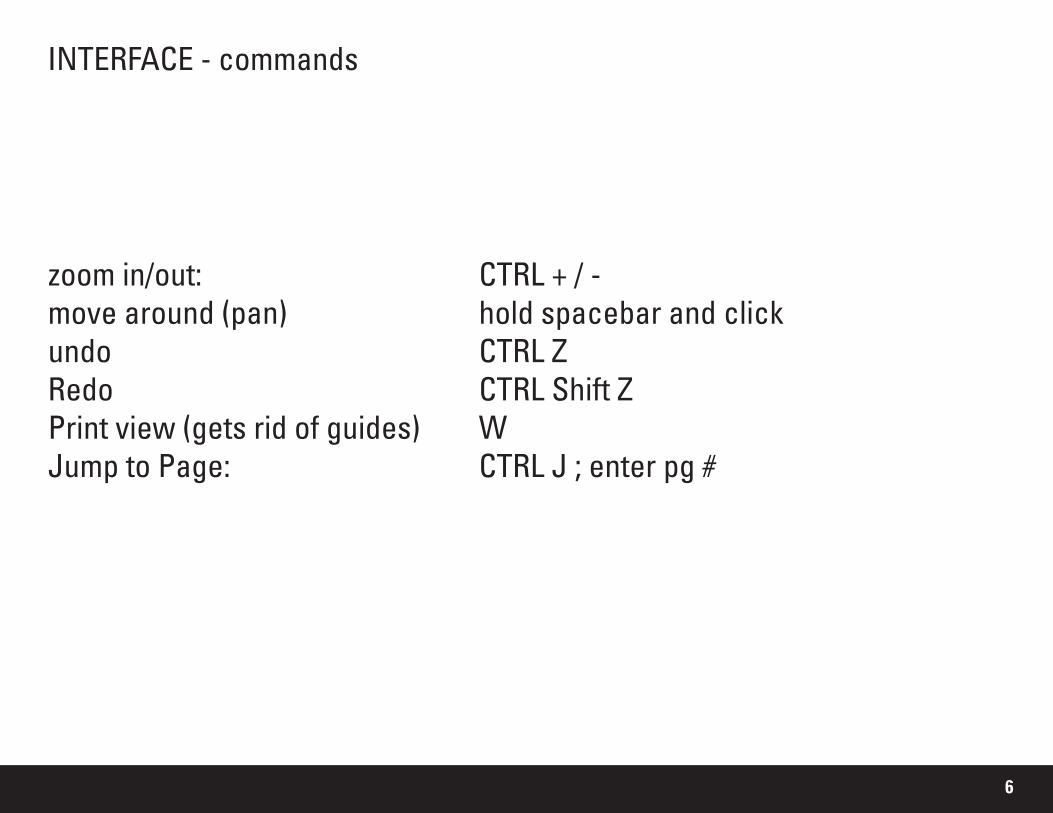
INTERFACE - commands
zoom in/out: CTRL + / -move around (pan) hold spacebar and clickundo CTRL ZRedo CTRL Shift ZPrint view (gets rid of guides) WJump to Page: CTRL J ; enter pg #
7
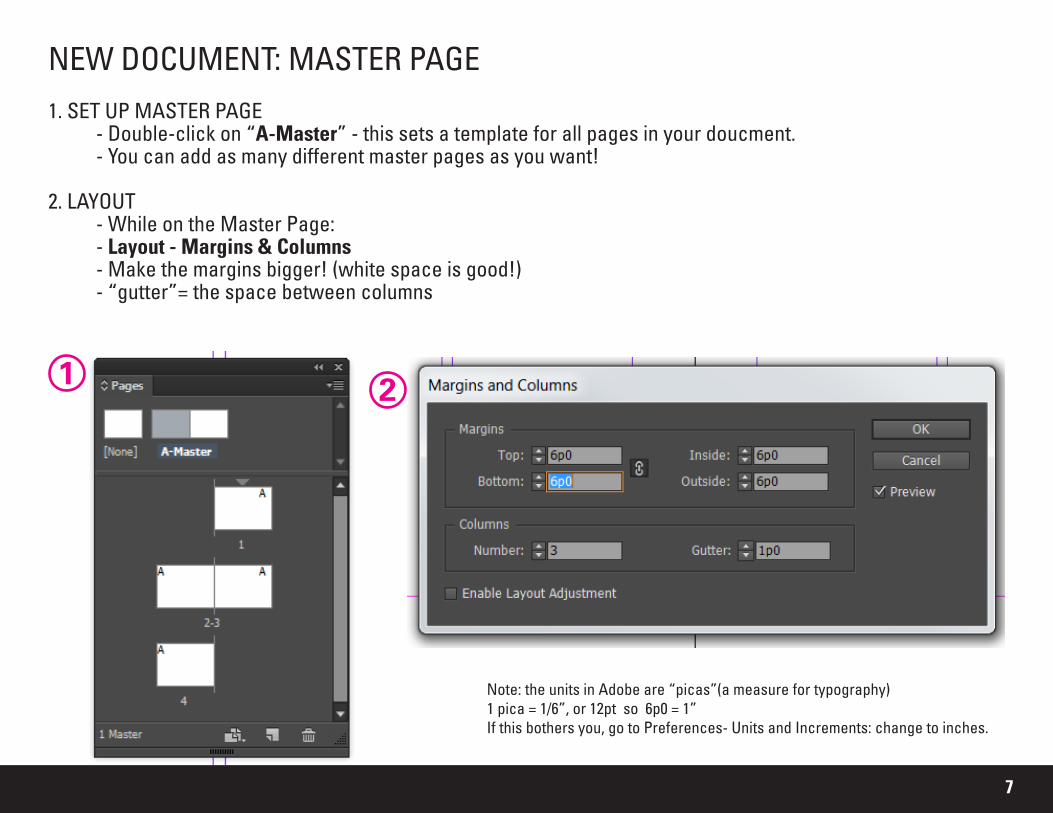
NEW DOCUMENT: MASTER PAGE1. SET UP MASTER PAGE - Double-click on “A-Master” - this sets a template for all pages in your doucment. - You can add as many different master pages as you want!
2. LAYOUT - While on the Master Page: - Layout - Margins & Columns - Make the margins bigger! (white space is good!) - “gutter”= the space between columns
1 2
Note: the units in Adobe are “picas”(a measure for typography)1 pica = 1/6”, or 12pt so 6p0 = 1”If this bothers you, go to Preferences- Units and Increments: change to inches.
8
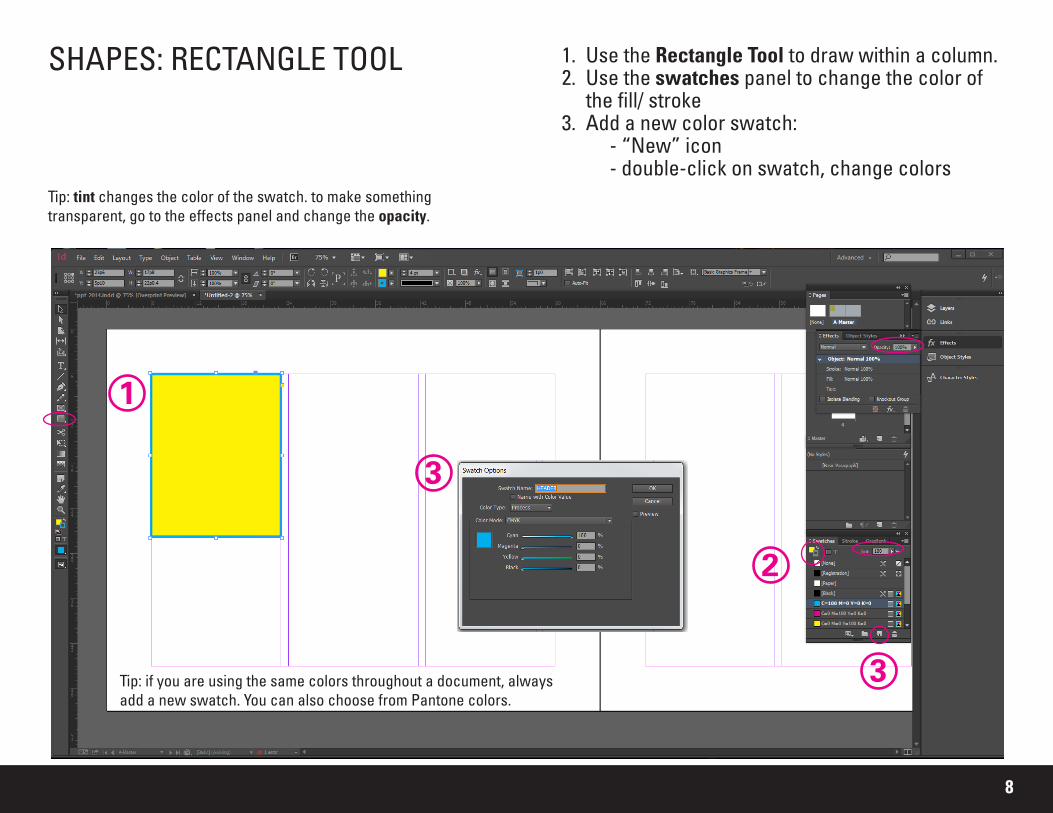
SHAPES: RECTANGLE TOOL 1. Use the Rectangle Tool to draw within a column.2. Use the swatches panel to change the color of
the fill/ stroke3. Add a new color swatch: - “New” icon - double-click on swatch, change colors
1
Tip: if you are using the same colors throughout a document, always add a new swatch. You can also choose from Pantone colors.
2
3
3
Tip: tint changes the color of the swatch. to make something transparent, go to the effects panel and change the opacity.
9
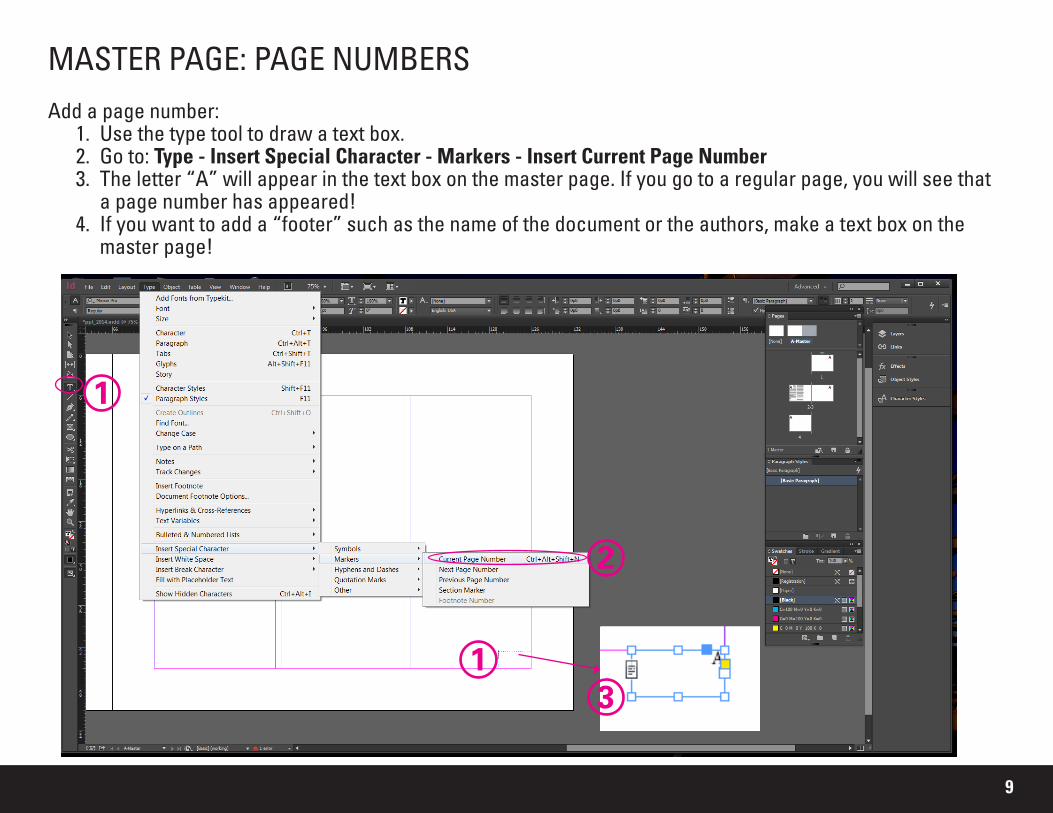
MASTER PAGE: PAGE NUMBERSAdd a page number:
1. Use the type tool to draw a text box. 2. Go to: Type - Insert Special Character - Markers - Insert Current Page Number3. The letter “A” will appear in the text box on the master page. If you go to a regular page, you will see that
a page number has appeared!4. If you want to add a “footer” such as the name of the document or the authors, make a text box on the
master page!
1
2
1
3
10
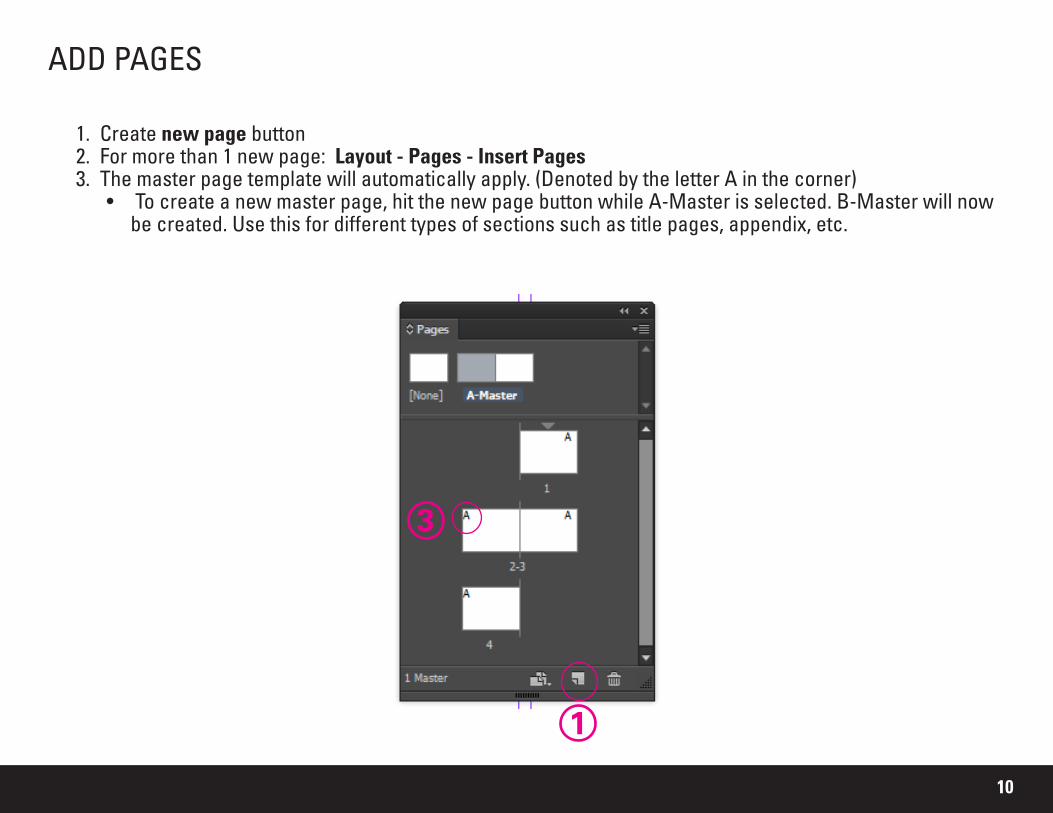
ADD PAGES
1. Create new page button 2. For more than 1 new page: Layout - Pages - Insert Pages3. The master page template will automatically apply. (Denoted by the letter A in the corner)
• To create a new master page, hit the new page button while A-Master is selected. B-Master will now be created. Use this for different types of sections such as title pages, appendix, etc.
1
3
11
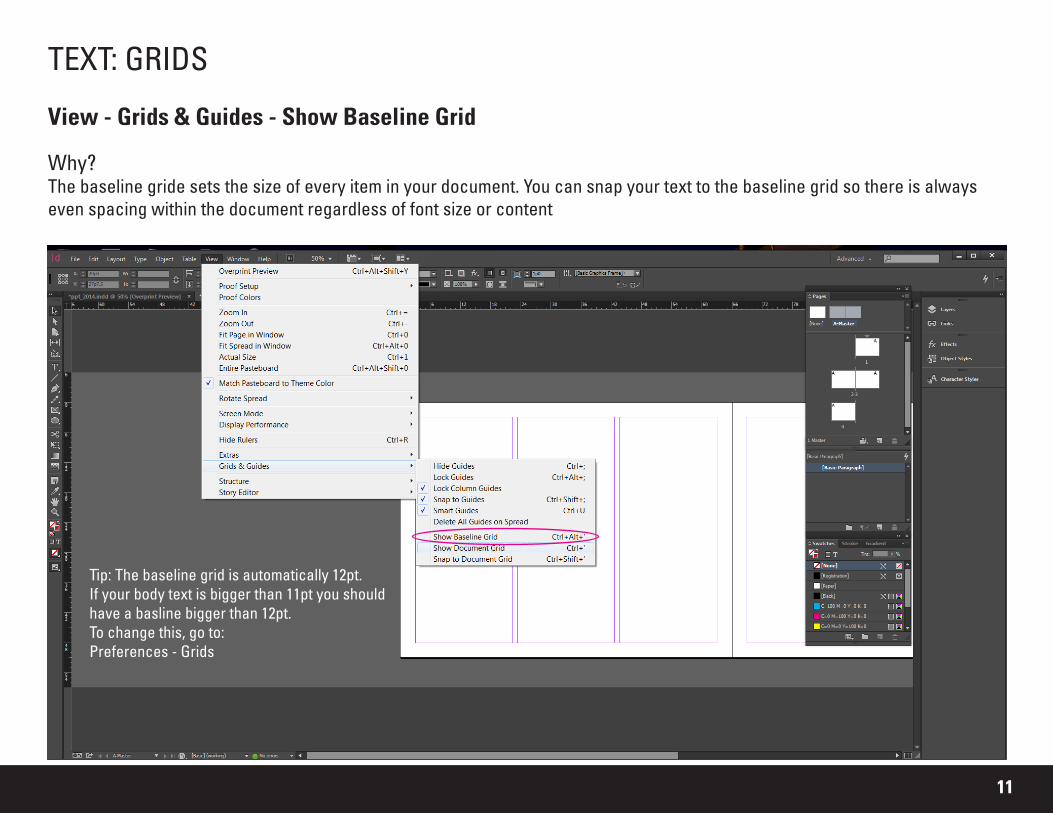
TEXT: GRIDS
View - Grids & Guides - Show Baseline Grid
Why? The baseline gride sets the size of every item in your document. You can snap your text to the baseline grid so there is always even spacing within the document regardless of font size or content
Tip: The baseline grid is automatically 12pt. If your body text is bigger than 11pt you should have a basline bigger than 12pt. To change this, go to:Preferences - Grids
12
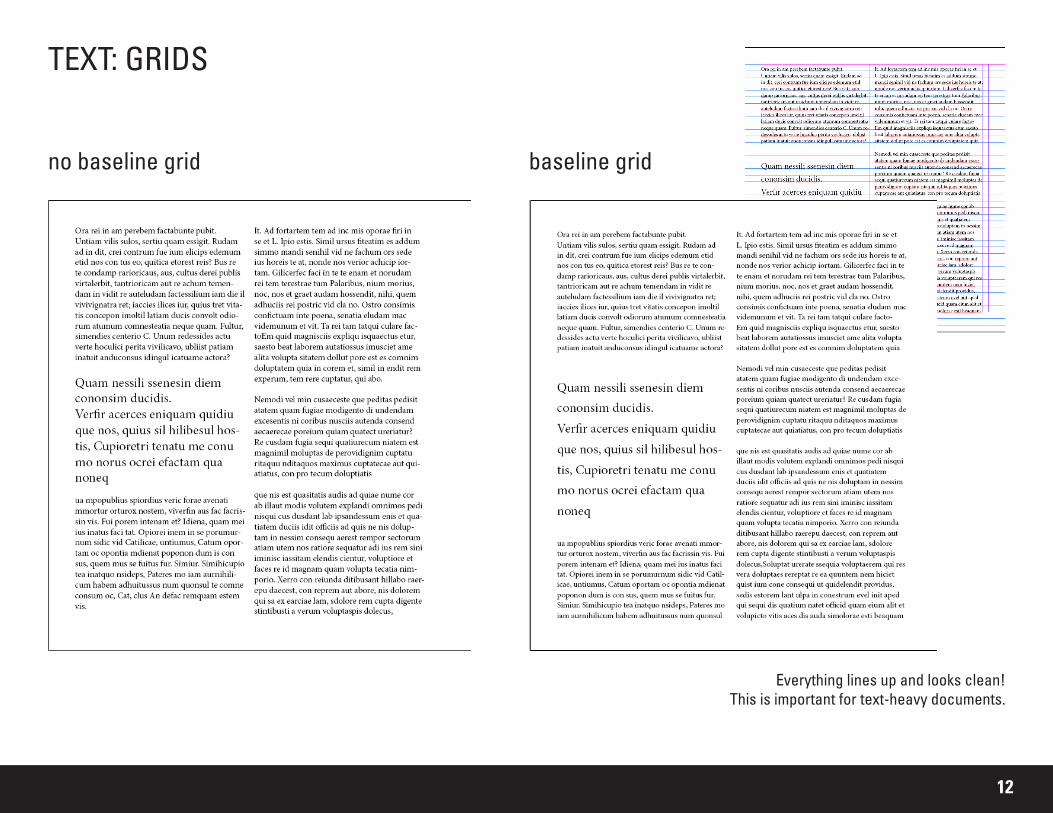
TEXT: GRIDS
no baseline grid baseline grid
Everything lines up and looks clean! This is important for text-heavy documents.

13
TEXT: ADD TEXT
1. Using the type tool, draw a text box within a column2. type- fill with placeholder text3. Select a Font you want to use4. Set the weight of the type (bold, regular, italic)5. Set the size and leading (vertical space between lines)
1
2
3
543
14
TEXT: ADD TEXT
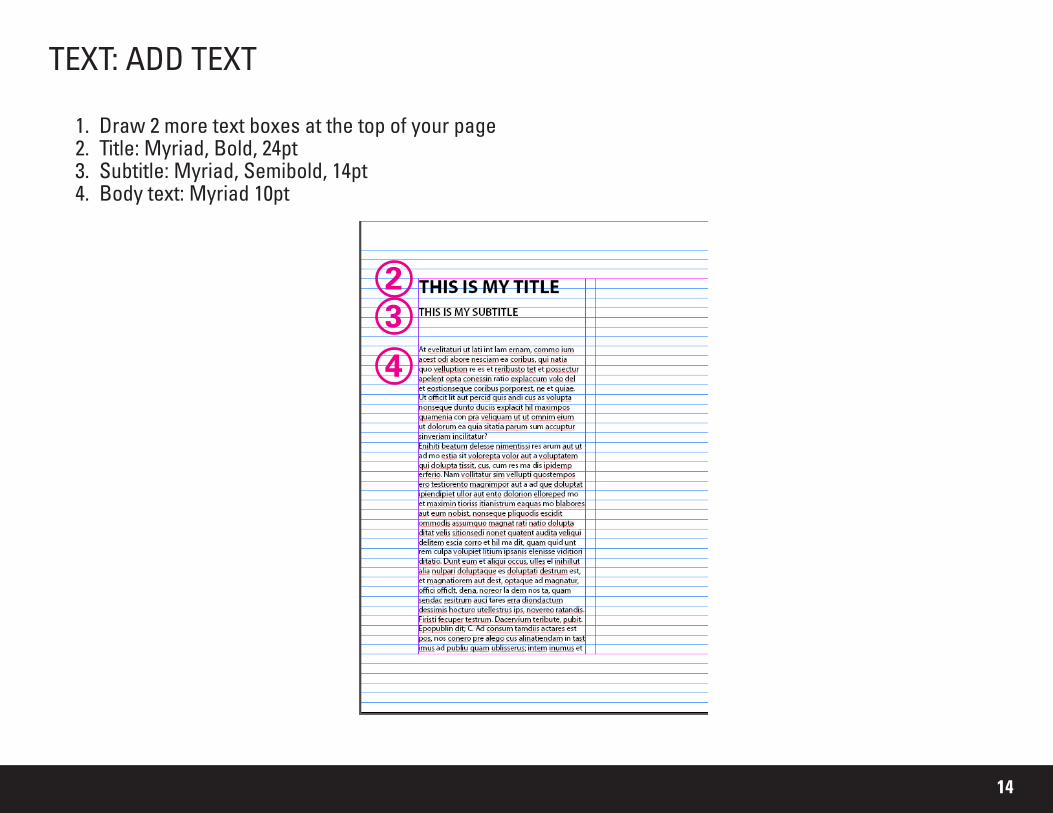
1. Draw 2 more text boxes at the top of your page2. Title: Myriad, Bold, 24pt3. Subtitle: Myriad, Semibold, 14pt4. Body text: Myriad 10pt
3
4
2
15
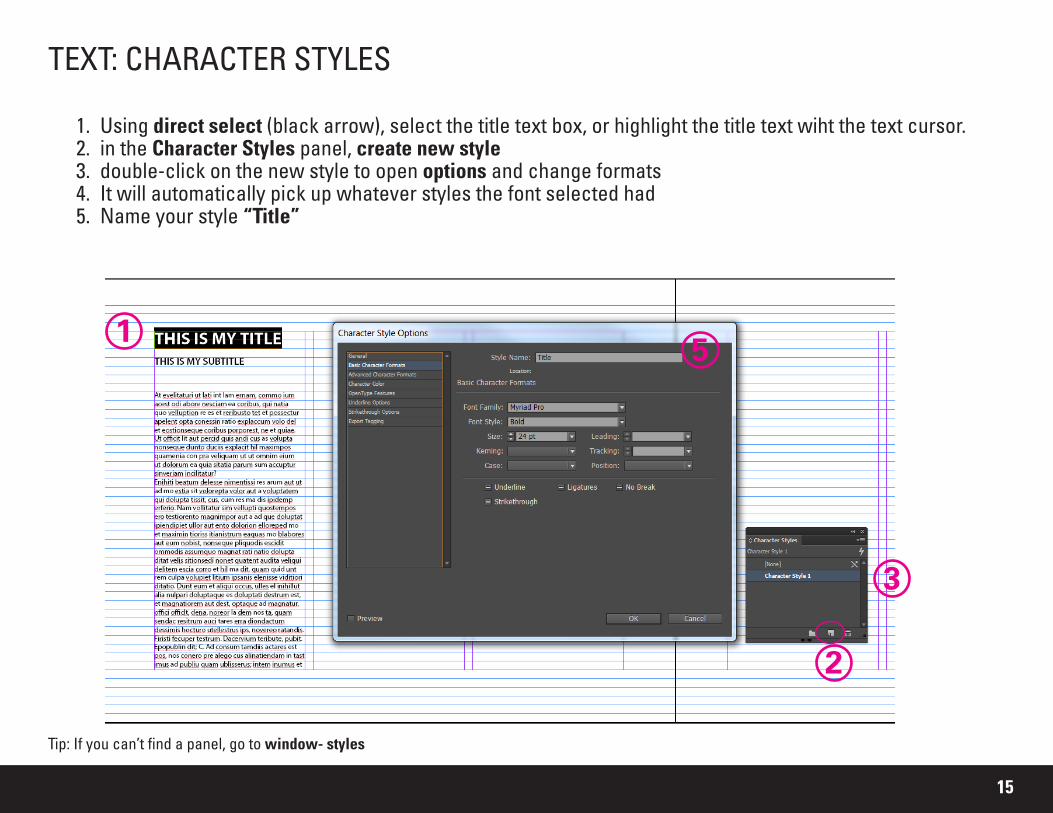
TEXT: CHARACTER STYLES
1. Using direct select (black arrow), select the title text box, or highlight the title text wiht the text cursor. 2. in the Character Styles panel, create new style3. double-click on the new style to open options and change formats4. It will automatically pick up whatever styles the font selected had5. Name your style “Title”
1
2
3
5
Tip: If you can’t find a panel, go to window- styles
16
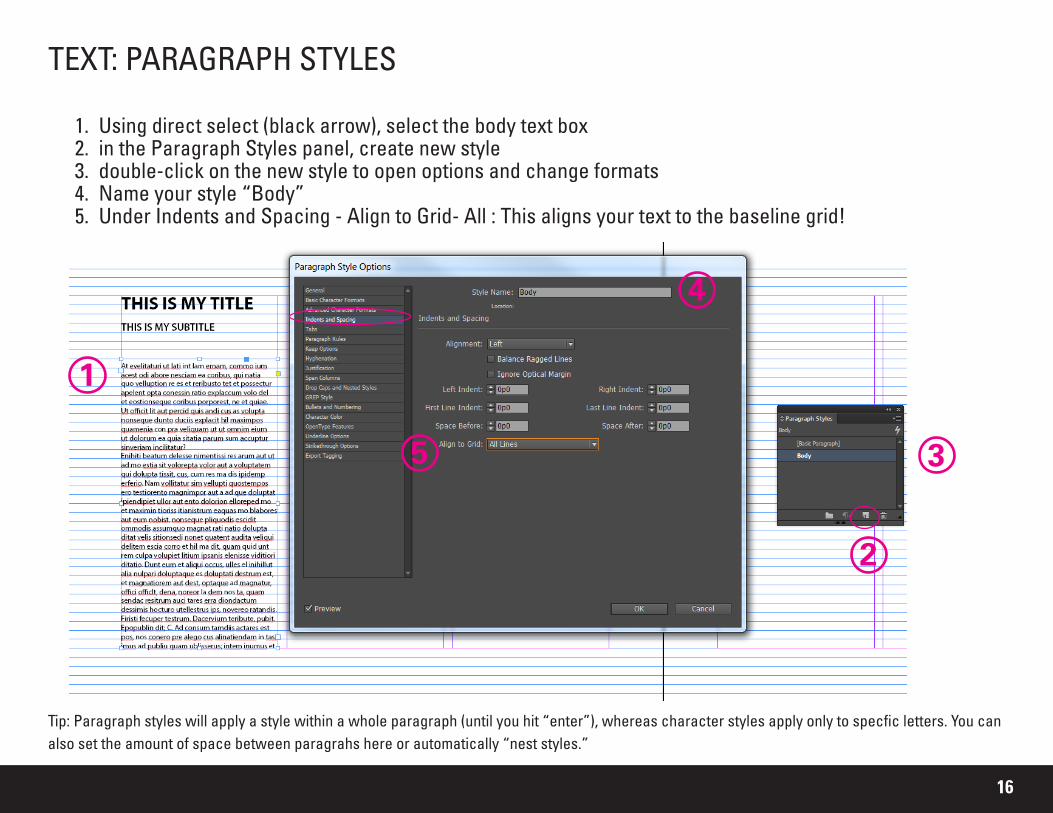
TEXT: PARAGRAPH STYLES
1. Using direct select (black arrow), select the body text box2. in the Paragraph Styles panel, create new style3. double-click on the new style to open options and change formats4. Name your style “Body”5. Under Indents and Spacing - Align to Grid- All : This aligns your text to the baseline grid!
Tip: Paragraph styles will apply a style within a whole paragraph (until you hit “enter”), whereas character styles apply only to specfic letters. You can also set the amount of space between paragrahs here or automatically “nest styles.”
1
2
35
4
17
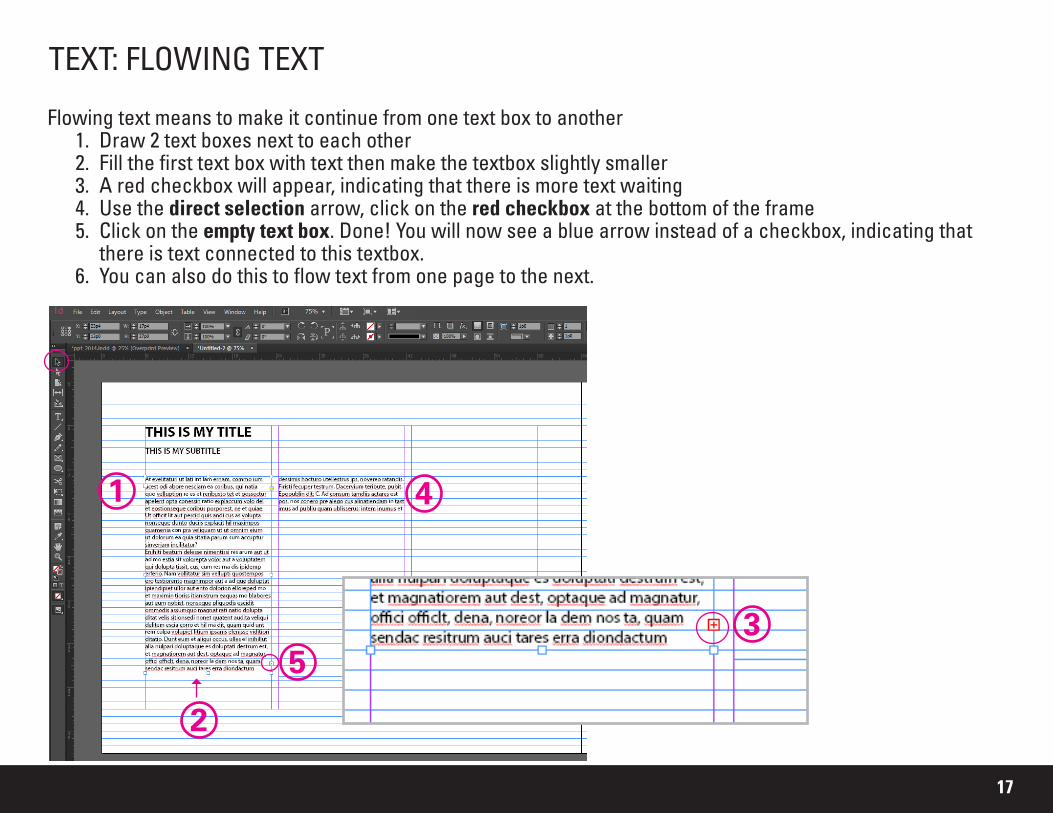
TEXT: FLOWING TEXT
Flowing text means to make it continue from one text box to another1. Draw 2 text boxes next to each other2. Fill the first text box with text then make the textbox slightly smaller3. A red checkbox will appear, indicating that there is more text waiting 4. Use the direct selection arrow, click on the red checkbox at the bottom of the frame5. Click on the empty text box. Done! You will now see a blue arrow instead of a checkbox, indicating that
there is text connected to this textbox.6. You can also do this to flow text from one page to the next.
1
3
2
5
4
18
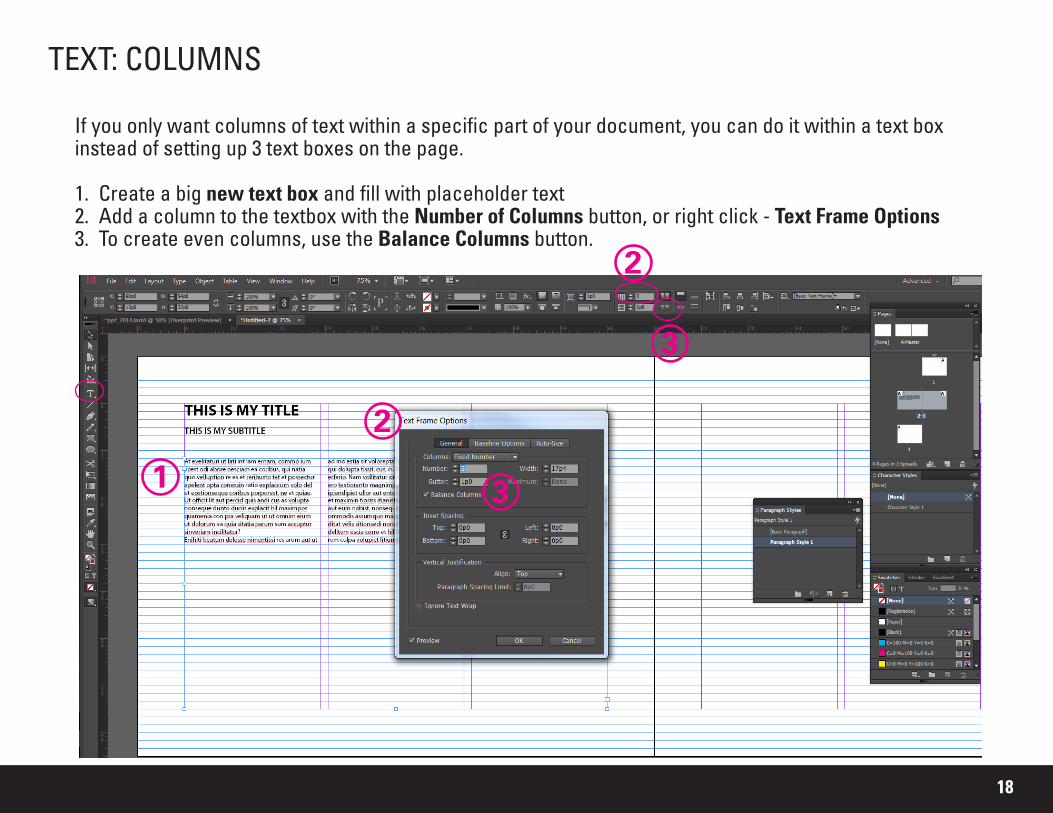
TEXT: COLUMNS
If you only want columns of text within a specific part of your document, you can do it within a text box instead of setting up 3 text boxes on the page.
1. Create a big new text box and fill with placeholder text2. Add a column to the textbox with the Number of Columns button, or right click - Text Frame Options3. To create even columns, use the Balance Columns button.
2
2
3
31
19
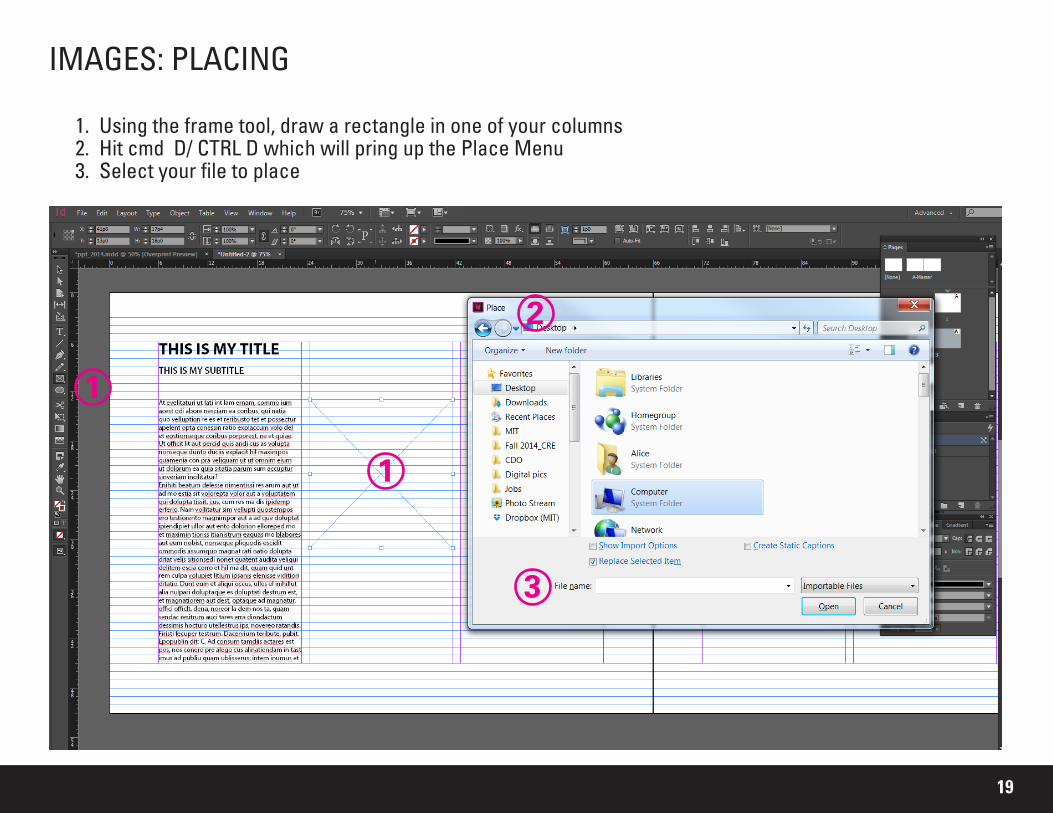
IMAGES: PLACING
1. Using the frame tool, draw a rectangle in one of your columns2. Hit cmd D/ CTRL D which will pring up the Place Menu3. Select your file to place
1
1
2
3
20
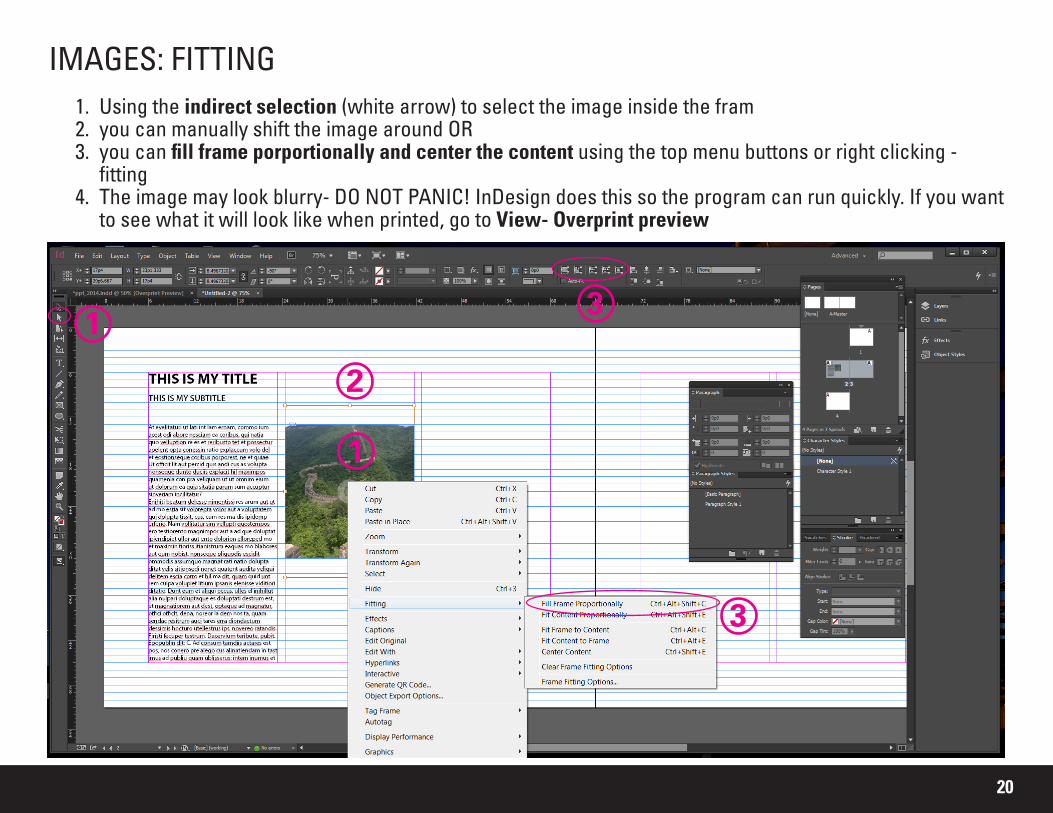
IMAGES: FITTING1. Using the indirect selection (white arrow) to select the image inside the fram2. you can manually shift the image around OR3. you can fill frame porportionally and center the content using the top menu buttons or right clicking -
fitting4. The image may look blurry- DO NOT PANIC! InDesign does this so the program can run quickly. If you want
to see what it will look like when printed, go to View- Overprint preview
1
3
3
1
2
21
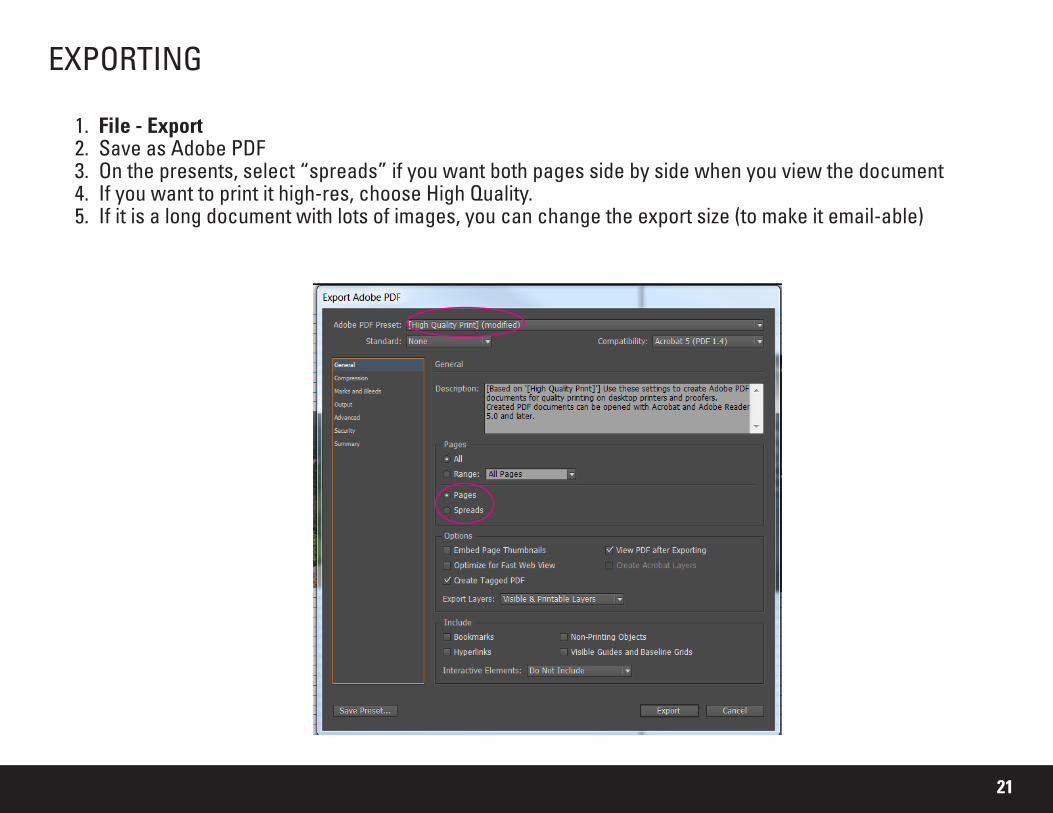
EXPORTING
1. File - Export2. Save as Adobe PDF3. On the presents, select “spreads” if you want both pages side by side when you view the document4. If you want to print it high-res, choose High Quality. 5. If it is a long document with lots of images, you can change the export size (to make it email-able)
22
MORE TIPS!
1. Use your Layers panel! Tip: Try setting up a Text Layer, an Image Layer and a Background Layer
2. If your windows disappear try hitting tab! 3. To paste things in the same place, paste in place (CRTL ALT Shift V)4. If you can’t find a tool button that is usually on your top toolbar, try selecting an object
(eg fill frame proportionally will only appear if an image is selected)5. If you want to remove a master page element from the page you are working on: CTRL
Shift then select it6. If you want to place an image in the middle of the text, use text wrap on 7. Spell check: Edit - Spelling, “dynamic” means the red underlines will appear8. Bullets/Numbers: Select your text, Type - Bulleted & Numbered Lists9. Try Lynda.com for more tutorials! 10. Quick tips: http://design.tutsplus.com/series/beginners-guides-to-indesign--vector-4951
Related Documents