APPLICATION NOTE Building pylon Applications with Eclipse under Linux Applicable to Linux operating systems only Document Number: AW001025 Version: 02 Language: 000 (English) Release Date: 16 September 2016 INTERNAL USE ONLY (Set it to white if you do not need it)

INTERNAL USE ONLY (Set it to white if you do not … · Tel. +1 610 280 0171 Fax +1 610 280 7608 . [email protected]
Sep 15, 2018
Welcome message from author
This document is posted to help you gain knowledge. Please leave a comment to let me know what you think about it! Share it to your friends and learn new things together.
Transcript

APPLICATION NOTE
Building pylon Applications with Eclipse under Linux Applicable to Linux operating systems only
Document Number: AW001025 Version: 02 Language: 000 (English) Release Date: 16 September 2016
INTERNAL USE ONLY (Set it to white if you do not need it)

Contacting Basler Support Worldwide
Europe, Middle East, Africa
Basler AG An der Strusbek 60–62 22926 Ahrensburg Germany
Tel. +49 4102 463 515 Fax +49 4102 463 599
The Americas
Basler, Inc. 855 Springdale Drive, Suite 203 Exton, PA 19341 USA
Tel. +1 610 280 0171 Fax +1 610 280 7608
Asia-Pacific
Basler Asia Pte. Ltd. 35 Marsiling Industrial Estate Road 3 #05–06 Singapore 739257
Tel. +65 6367 1355 Fax +65 6367 1255
www.baslerweb.com
All material in this publication is subject to change without notice and is copyright Basler AG.

AW00102502000 Basler Application Note
Building pylon Applications with Eclipse under Linux 1
Table of Contents
1 Introduction ........................................................................................................................... 2
2 Steps to Be Carried out ........................................................................................................ 2
2.1 Installing the pylon Camera Software Suite for Linux ................................................ 2 2.2 Installing the Eclipse IDE ........................................................................................... 2 2.3 Configuring the System ............................................................................................. 3 2.4 Setting up a Project ................................................................................................... 4
Revision History ......................................................................................................................... 14

AW00102502000 Basler Application Note
Building pylon Applications with Eclipse under Linux 2
1 Introduction
This document explains how to build pylon 5 applications using the Eclipse IDE under various Linux distributions.
The procedures described in this document use Ubuntu 15.10 x64, pylon 5.0.5.x x86 64bit, and Eclipse IDE for C/C++ Developers (4.6) Neon.
2 Steps to Be Carried out
In order to build pylon 5 applications using the Eclipse IDE, carry out the following steps:
1. Install the current pylon Camera Software Suite for Linux. 2. Install the Eclipse IDE. 3. Configure the system. 4. Set up a project.
In the following sections, these steps are described in detail.
2.1 Installing the pylon Camera Software Suite for Linux
1. Download the current pylon Camera Software Suite for Linux from the Basler website: www.baslerweb.com
2. Install the pylon Camera Software Suite for Linux. 3. Make sure that the pylon tools (pylon Viewer and IP Configurator) are running. 4. Make sure that the pylon SDK samples can be compiled as described in the README and
INSTALL files included in the pylon SDK package.
2.2 Installing the Eclipse IDE
1. Install the latest Java Runtime Environment, if not installed yet, e.g.: #sudo apt-get install openjdk-8-jdk
2. Download the latest Eclipse version from: www.eclipse.org 3. Extract the downloaded Eclipse tar.gz file, e.g.:
#tar –zxvf eclipse*.tar.gz 4. Run the eclipse-inst executable in the extracted eclipse-installer folder in order to install the
Eclipse IDE.
In order to run the Eclipse installer, the latest Java Runtime Environment must be available. For this application note, the Java 8 JRE (openjdk-8-jre) package with its related packages has been used.

AW00102502000 Basler Application Note
Building pylon Applications with Eclipse under Linux 3
5. Select Eclipse IDE for C/C++ Developers.
2.3 Configuring the System
To build pylon 5 based applications, you can export an environment variable, e.g. PYLON_ROOT, that is to be used within the Eclipse settings. Proceed as follows: 1. Open the user .profile file via a terminal and a text editing program (such as gedit, nano, or vi),
e.g.: #sudo gedit .profile
2. Add the following lines to the end of the file: # pylon settings if [ -d "/opt/pylon5" ] ; then
export PYLON_ROOT=/opt/pylon5 fi
In this example, it is assumed that pylon 5 has been installed under the /opt folder. 3. Save the changes. 4. Log out and reboot the computer for the changes to take effect.
During installation, the Eclipse installer checks whether new plugin versions are available. Therefore, an (active) internet connection is required.
The online check for new plugins can slow down the installation process.
AW00102502000 Basler Application Note
Building pylon Applications with Eclipse under Linux 4
2.4 Setting up a Project
Running Eclipse
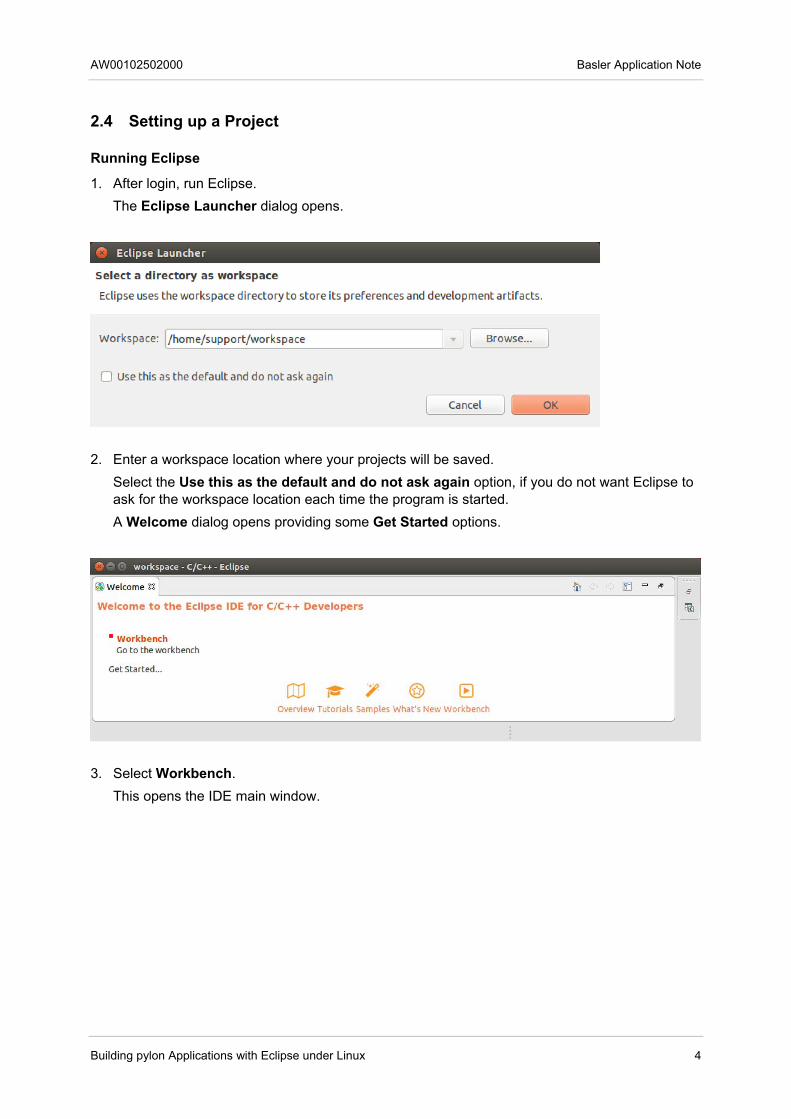
1. After login, run Eclipse. The Eclipse Launcher dialog opens.
2. Enter a workspace location where your projects will be saved. Select the Use this as the default and do not ask again option, if you do not want Eclipse to ask for the workspace location each time the program is started. A Welcome dialog opens providing some Get Started options.
3. Select Workbench. This opens the IDE main window.

AW00102502000 Basler Application Note
Building pylon Applications with Eclipse under Linux 5
Creating a new project
1. Click on the icon (or “Ctrl+N”). A wizard for creating a new project opens.
2. Select the C++ Project entry and click Next.

AW00102502000 Basler Application Note
Building pylon Applications with Eclipse under Linux 6
3. Enter a project name, e.g. CameraApplication. 4. Select a project type and toolchain. 5. Click Next.
AW00102502000 Basler Application Note
Building pylon Applications with Eclipse under Linux 7
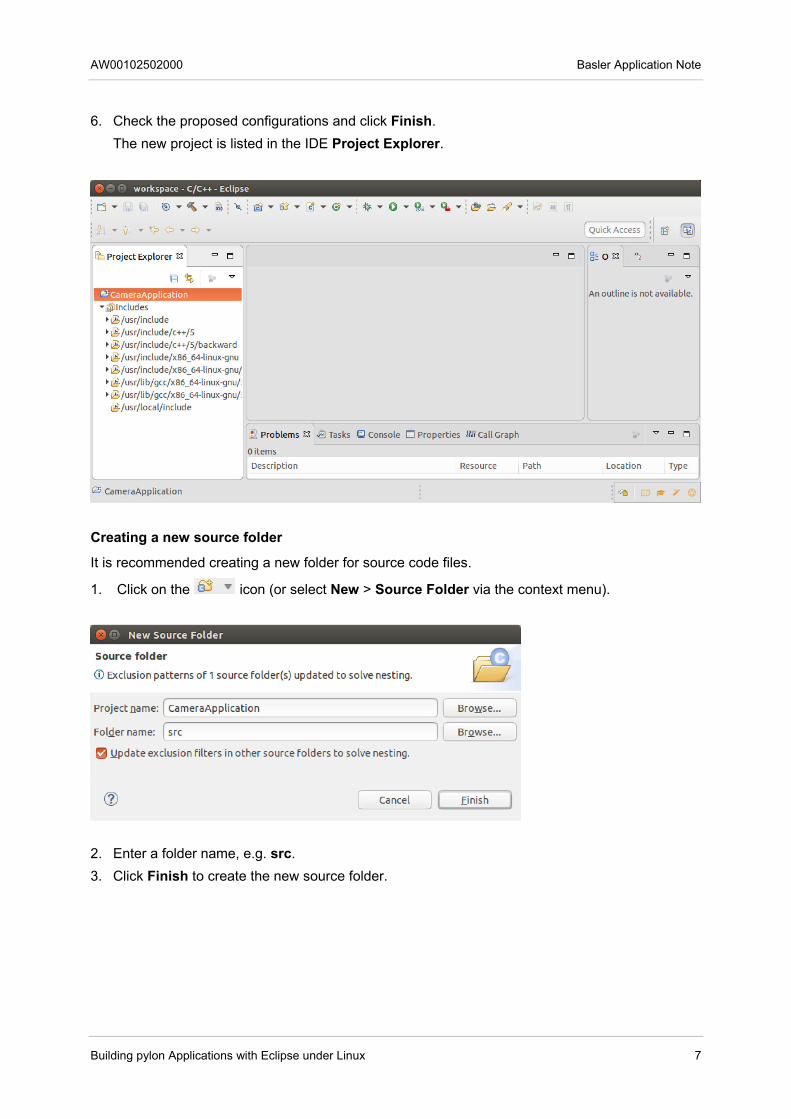
6. Check the proposed configurations and click Finish. The new project is listed in the IDE Project Explorer.
Creating a new source folder
It is recommended creating a new folder for source code files.
1. Click on the icon (or select New > Source Folder via the context menu).
2. Enter a folder name, e.g. src. 3. Click Finish to create the new source folder.

AW00102502000 Basler Application Note
Building pylon Applications with Eclipse under Linux 8
Creating a new source file
1. Select the new source folder in the Project Explorer and click on the icon (or select New > Source File via the context menu).
2. Enter a source file name, e.g. Grab.cpp. 3. Click Finish to create the new source file.
The created source file can now be filled with source code, e.g. with the content of the standard pylon SDK C++ Grab.cpp sample file.

AW00102502000 Basler Application Note
Building pylon Applications with Eclipse under Linux 9
Adding an include path
1. Right-click on the project and select Properties via the context menu. The Properties dialog opens.
2. Select C/C++ Build > Settings > GCC C++ Compiler > Includes and add an include path corresponding to the path where pylon has been installed.
Your include path would, e.g., look like this:
${PYLON_ROOT}/include if the preset PYLON_ROOT environment variable is used.
3. Click OK.
Declaring the linker libraries and the search path
1. In the Properties dialog, select C/C++ Build > Settings > GCC C++ Linker > Libraries and add the libraries (-l) as follows:
pylonbase pylonutility GenApi_gcc_v3_0_Basler_pylon_v5_0 GCBase_gcc_v3_0_Basler_pylon_v5_0

AW00102502000 Basler Application Note
Building pylon Applications with Eclipse under Linux 10
2. Add the search path (-L) as follows: ${PYLON_ROOT}/lib64
if the preset PYLON_ROOT environment variable is used. If you are working with a 32-bit Linux system, use lib instead of lib64.

AW00102502000 Basler Application Note
Building pylon Applications with Eclipse under Linux 11
Checking the run time type information for pylon defined types
Make sure that the run time type information for pylon defined types is processed properly:
1. In the Properties dialog, select C/C++ Build > Settings > GCC C++ Linker > Miscellaneous and add the following options (switches) to the Linker flags line:
-Wl,-E This is essential for a proper exception handling and for dynamic casting of objects.
At runtime, the dynamic linker must know where it can find the pylon libraries. In pylon versions prior to 5.0 this was handled by extending the environment variable LD_LIBRARY_PATH. This works, but it is rather cumbersome and error prone. From pylon 5 upwards, the rpath feature of the GNU linker is used to specify the runtime location of pylon. You can find more details about rpath and runpath at: https://en.wikipedia.org/wiki/Rpath
2. In the Other options (-Xlinker [option]) area, include the following values: --enable-new-dtags -rpath ${PYLON_ROOT}/lib64
if the preset PYLON_ROOT environment variable is used within the path. If you are working with a 32-bit Linux system, use lib instead of lib64. These settings declare the usage of DT_RUNPATH instead of DT_RPATH, allowing that LD_LIBRARY_PATH optionally works as a fallback. In addition, the required path information is added.

AW00102502000 Basler Application Note
Building pylon Applications with Eclipse under Linux 12
3. Save the settings and close the Properties dialog. 4. Right-click on the project in the Project Explorer and select Build Project via the context
menu. If all settings have been made correctly, no errors will be reported, two additional folders will be generated in the project (Binaries and Debug) and the console window will output the compiler string as well as the build time as a sign of completion.
The built project results in an executable file that can be run.

AW00102502000 Basler Application Note
Building pylon Applications with Eclipse under Linux 13
AW00102502000 Basler Application Note
Building pylon Applications with Eclipse under Linux 14
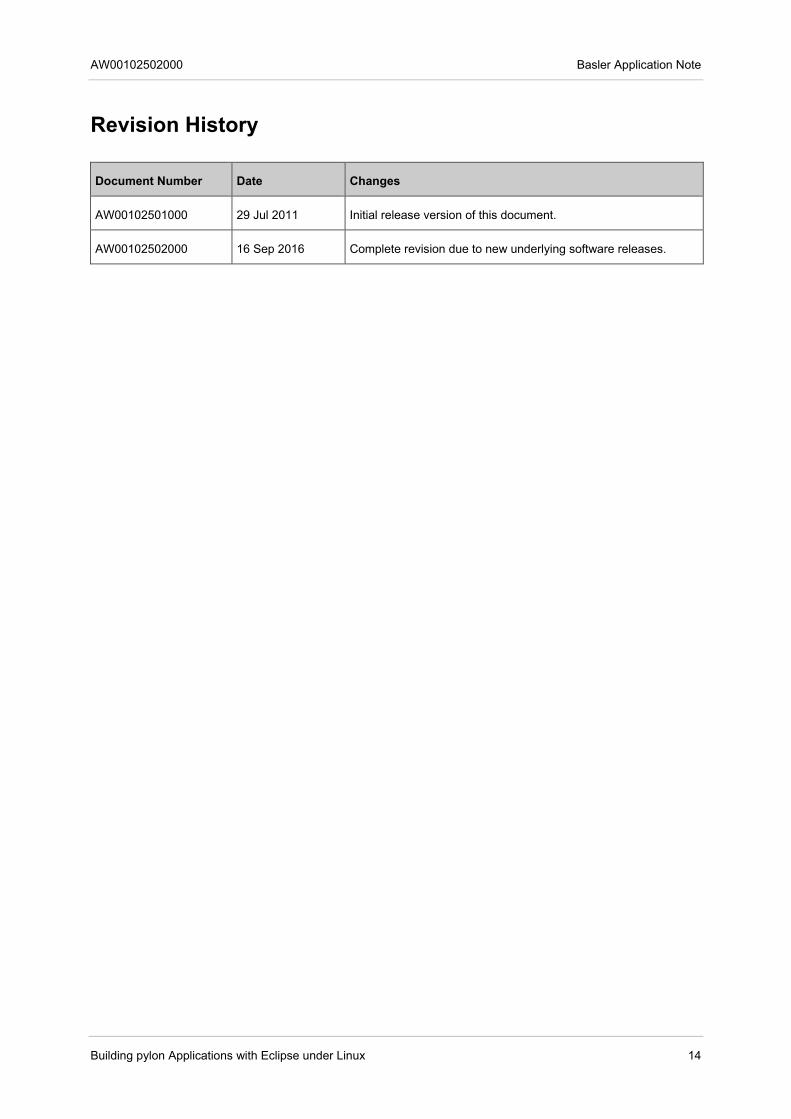
Revision History
Document Number Date Changes
AW00102501000 29 Jul 2011 Initial release version of this document.
AW00102502000 16 Sep 2016 Complete revision due to new underlying software releases.
Related Documents