Intel Do-It-Yourself Challenge Pololu USB Controller Nicolas Vailliet www.Intel-Software-Academic-Program.com [email protected] Intel Software 2014-02-01

Intel Do-It-Yourself Challenge Pololu USB Controller Nicolas Vailliet [email protected] Intel Software.
Dec 16, 2015
Welcome message from author
This document is posted to help you gain knowledge. Please leave a comment to let me know what you think about it! Share it to your friends and learn new things together.
Transcript

Intel Do-It-Yourself ChallengePololu USB Controller
Nicolas Vaillietwww.Intel-Software-Academic-Program.com
[email protected] Software
2014-02-01
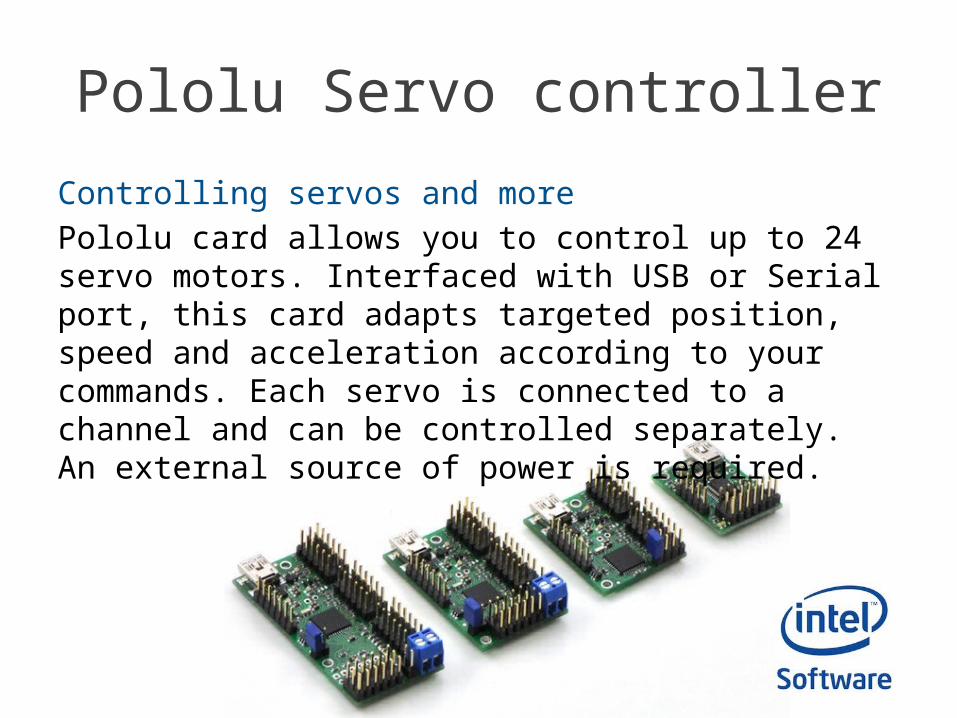
Pololu Servo controller
Controlling servos and morePololu card allows you to control up to 24 servo motors. Interfaced with USB or Serial port, this card adapts targeted position, speed and acceleration according to your commands. Each servo is connected to a channel and can be controlled separately. An external source of power is required.

We’ll use …OSUbuntu 12.04 LTS (other Oses are supported)
An Intel Galileo board and network connectivityWe assume you know how to communicate with the embedded OS and performing GPIO commands.
A Pololu Micro Maestro 6-channel USB servo controller We also need a Mini-A Mini-B USB cable.
A full Clanton Linux imageThis will provide development tools and libusb-1.0 to use USB port. The cross-compile toolchain for Intel Quark on your computerThis is a good practice. Even if our sample codes do not link to many libraries, Intel Galileo is not a compilation platform. Compile your C/C++ program with the cross-compile toolchain on your computer instead of using g++ on your board. See our other courses to do so.

Installation

Installation- Boot your board and wait for the USB LED to be
on.- Connect the USB cable on host USB port.- Connect the Pololu controller at the other
extremity.
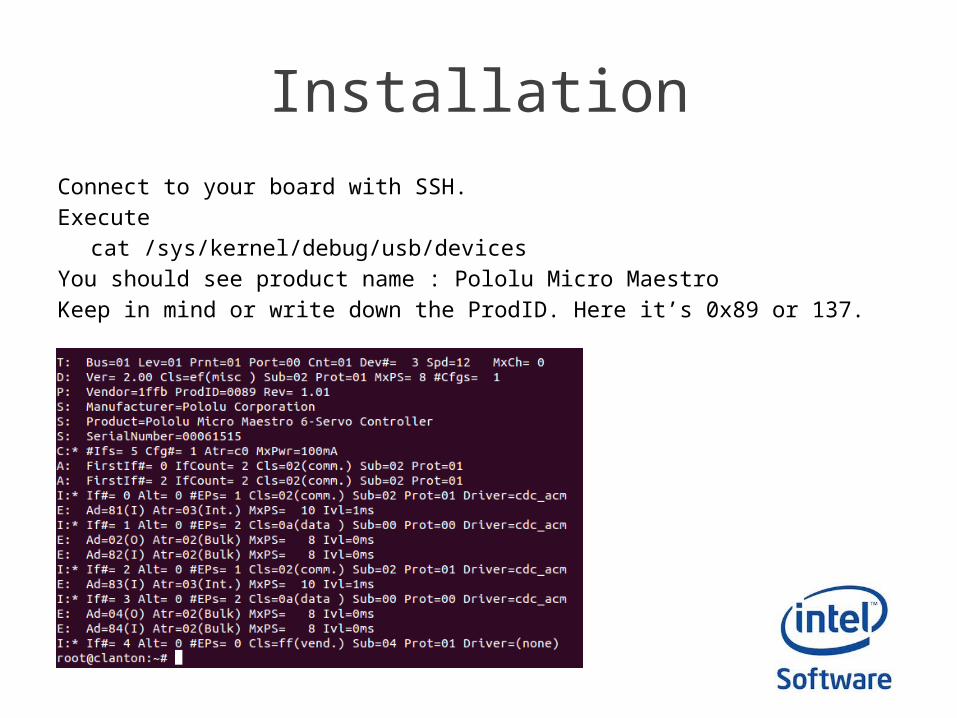
InstallationConnect to your board with SSH.Execute
cat /sys/kernel/debug/usb/devicesYou should see product name : Pololu Micro MaestroKeep in mind or write down the ProdID. Here it’s 0x89 or 137.
-
USB communication with libusb
libusb
A powerful librarylibusb is a very convenient library to enable USB support in your program. It is available in C++ and many common used languages. http://www.libusb.org/
Let’s take a look at a sample code!The following code is generic and show you how to use the library. Don’t hesitate to take a look at the library’s online documentation.

Libusb code sample#include <libusb-1.0/libusb.h> // we include library’s headersusing namespace std;
int main(int argc, char *argv[]){
libusb_device **devs; // will contain USB deviceslibusb_context *ctx = NULL; // will contain the USB contextlibusb_device_descriptor descr; // will a device’s descriptor
// a pointer to the USB device you want to connect tolibusb_device *mydevice;
int r; // to get error code to debugssize_t cnt; // number of USB devices detected
r = libusb_init(&ctx); // initialize USB communicationlibusb_set_debug(ctx, 3); // set debug level to infocnt = libusb_get_device_list(ctx, &devs); // get device list
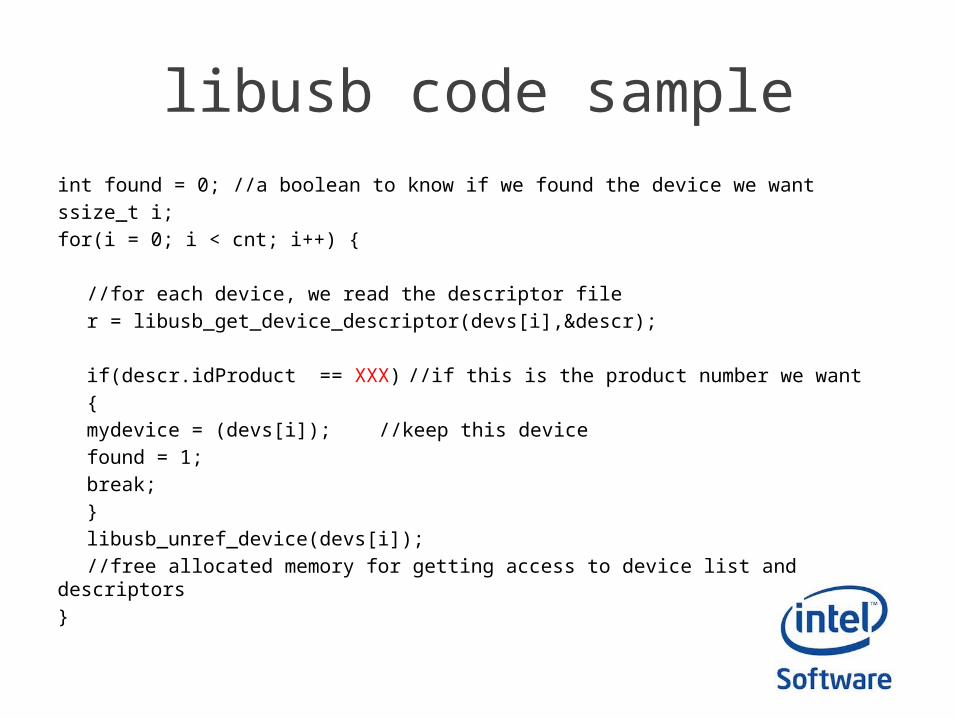
libusb code sampleint found = 0; //a boolean to know if we found the device we wantssize_t i;for(i = 0; i < cnt; i++) {
//for each device, we read the descriptor filer = libusb_get_device_descriptor(devs[i],&descr);
if(descr.idProduct == XXX) //if this is the product number we want{mydevice = (devs[i]); //keep this devicefound = 1;break;}libusb_unref_device(devs[i]);//free allocated memory for getting access to device list and descriptors
}

libusb code sampleif(found){
//table of handler (to handle USB endpoints, USB channelslibusb_device_handle **handle;
//Opening our devicer = libusb_open(mydevice,handle);
//Just in case, we want to be sure that Linux kernel is not trying to handle this USB devicer = libusb_detach_kernel_driver(*handle,0);if(r < 0 && r != LIBUSB_ERROR_NOT_FOUND) {
cout<<"Error: detach kernel driver failed"<<endl;return 1;
}
//We tell the system we are going to manage this USB interfacer = libusb_claim_interface(*handle,0);
//Add your stuff here//For example, performing a control transferr = libusb_control_transfer( … );

libusb code sample//When you’re done, release the interfacer = libusb_release_interface(*handle,0);//and close the USB channellibusb_close(*handle);
}
//to free allocated memory, free device list and USB contextlibusb_free_device_list(devs, 1);libusb_exit(ctx);
//End the programreturn 0;}
Pololu USB controller

Pololu USB controllerNext slides gather three different programs.
These programs ask the Pololu controller to perform a single action. It opens the USB channel, performs a control transfer thru it, and closes it.
The three programs concern:- Setting up the target position of a servo motor- Setting up the speed of a servo motor- Setting up the acceleration of a servo motor
Here is the code and we explain how to run it right after.

Pololu USB controllerSet_target.cpp#include <iostream>#include <string>#include <libusb-1.0/libusb.h>#include <unistd.h>#include <stdlib.h>
using namespace std;
int main(int argc, char *argv[]){
if(argc < 3)cout << "Usage: binary servo_number target_value" << endl;
int servo = atoi(argv[1]); //First parameter to give is the servo channel numberint value = atoi(argv[2]); //Second one is the value
libusb_device **devs; libusb_context *ctx = NULL; libusb_device_descriptor descr;libusb_device *pololu;
int r;int found = 0;ssize_t cnt;
r = libusb_init(&ctx);
libusb_set_debug(ctx, 3);cnt = libusb_get_device_list(ctx, &devs);
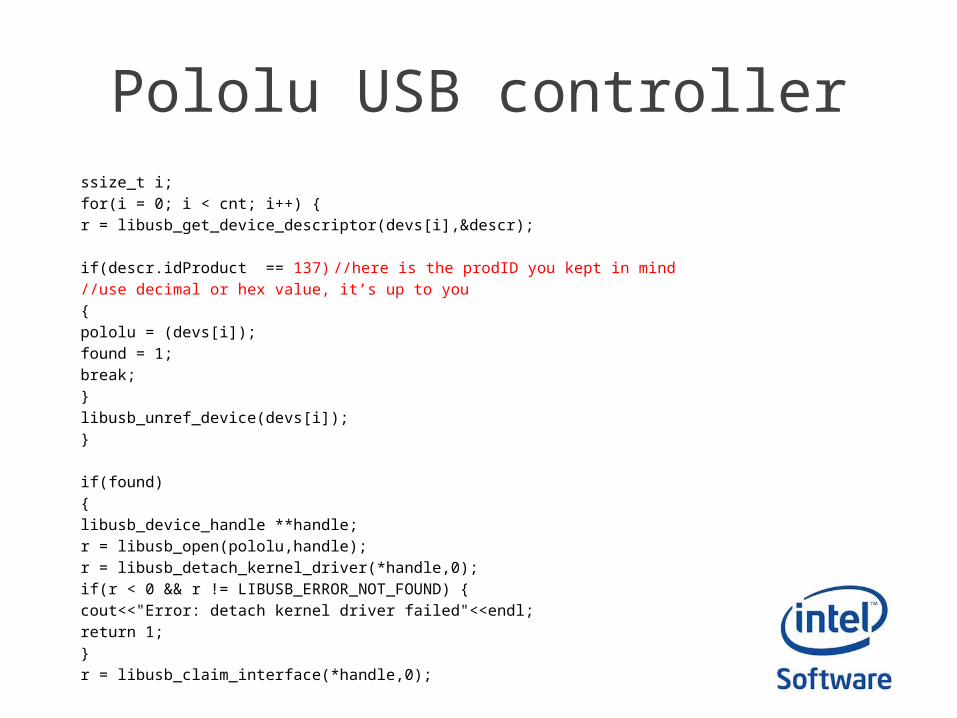
Pololu USB controllerssize_t i;for(i = 0; i < cnt; i++) {
r = libusb_get_device_descriptor(devs[i],&descr);
if(descr.idProduct == 137) //here is the prodID you kept in mind//use decimal or hex value, it’s up to you
{pololu = (devs[i]);found = 1;break;
}libusb_unref_device(devs[i]);
}
if(found){
libusb_device_handle **handle;r = libusb_open(pololu,handle);r = libusb_detach_kernel_driver(*handle,0);if(r < 0 && r != LIBUSB_ERROR_NOT_FOUND) {
cout<<"Error: detach kernel driver failed"<<endl;return 1;
}r = libusb_claim_interface(*handle,0);

Pololu USB controller//set position
r = libusb_control_transfer( *handle,0x40, //request type0x85, //requestvalue, //valueservo, //servo numberNULL,0,5000 );
//0x85 is the request corresponding to a set target position actionr = libusb_release_interface(*handle,0);libusb_close(*handle); }
libusb_free_device_list(devs, 1);libusb_exit(ctx);return 0;
}

Pololu USB controllerSet_accel and Set_speedFor the two other programs, copy your set_target.cpp file and to set_accel.cpp and set_speed.cpp. Replace the control transfer function call by these ones.
Set_accelr = libusb_control_transfer( *handle, 0x40,
0x84,value, servo | 0x80,NULL,0,5000);
Set_speedr = libusb_control_transfer( *handle, 0x40,
0x84,value, servo,NULL,0,5000);
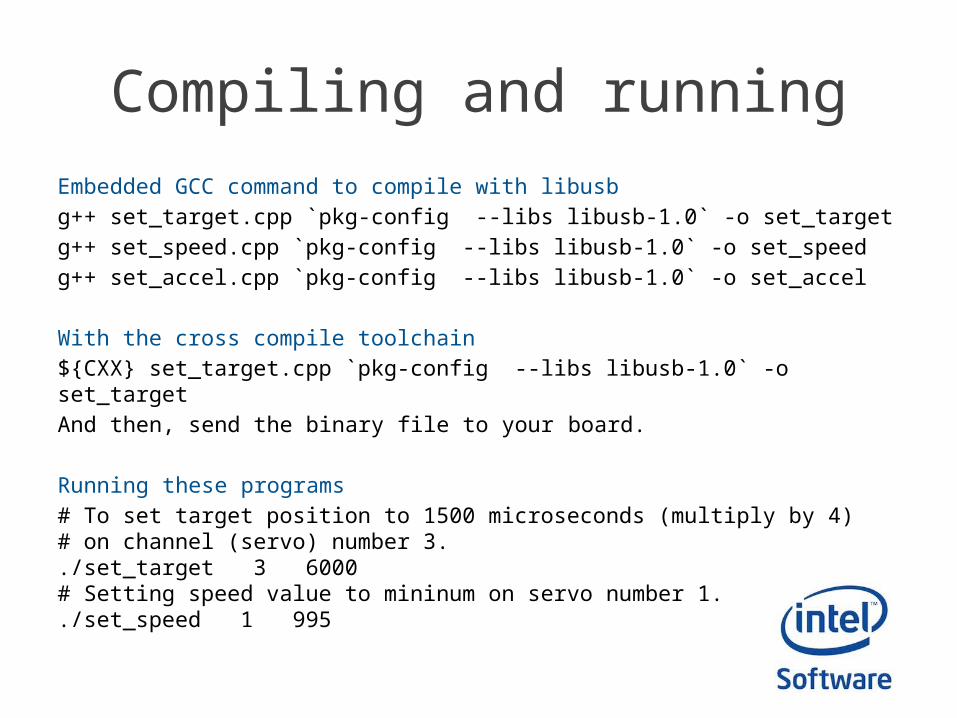
Compiling and runningEmbedded GCC command to compile with libusbg++ set_target.cpp `pkg-config --libs libusb-1.0` -o set_targetg++ set_speed.cpp `pkg-config --libs libusb-1.0` -o set_speedg++ set_accel.cpp `pkg-config --libs libusb-1.0` -o set_accel
With the cross compile toolchain${CXX} set_target.cpp `pkg-config --libs libusb-1.0` -o set_targetAnd then, send the binary file to your board.
Running these programs# To set target position to 1500 microseconds (multiply by 4)# on channel (servo) number 3../set_target 3 6000# Setting speed value to mininum on servo number 1../set_speed 1 995

License Creative Commons – By 3.0
You are free:• to Share — to copy, distribute and transmit the work • to Remix — to adapt the work • to make commercial use of the work Under the following conditions:• Attribution — You must attribute the work in the manner specified by the author or licensor (but
not in any way that suggests that they endorse you or your use of the work).With the understanding that: • Waiver — Any of the above conditions can be waived if you get permission from the copyright
holder. • Public Domain — Where the work or any of its elements is in the public domain under applicable
law, that status is in no way affected by the license. • Other Rights — In no way are any of the following rights affected by the license:
– Your fair dealing or fair use rights, or other applicable copyright exceptions and limitations; – The author's moral rights; – Rights other persons may have either in the work itself or in how the work is used, such as publicity or
privacy rights. • Notice — For any reuse or distribution, you must make clear to others the license terms of this
work. The best way to do this is with a link to this web page.
http://creativecommons.org/licenses/by/3.0/
Related Documents