IntegradWeb ® PACS Quick Start User Guide This guide includes all the information you need to begin using IntegradWeb PACS. It is organized according to a logical workflow—stepping you through the initial login, opening and managing a study and exiting a study. It also includes tips on shortcuts and provides answers to frequently asked questions. For full information on all IntegradWeb PACS features, click the Help (question mark) button in the upper right corner of the main screen to access the online Help system. Launch and Login 1. Open DI PACS by double clicking on the DI icon. 2. Always answer “Yes” to security questions. 3. Type your username, then password. 4. Click Login (or use Enter key). Launch from a CD Studies and reports saved to CDs can be read on any computer, even those without access to IntegradWeb. All the necessary utilities to read the study are included on the CD; simply insert the CD into the CD drive of the computer. A viewer for IntegradWeb opens automatically, and you can access images and reports using the features described in this document. Accessing Studies from a CD Always answer “Yes” to security questions.Studies and reports saved to CDs can be read on any computer, even those without access to IntegradWeb. All the necessary utilities to read the study are included on the CD; simply insert the CD into the CD drive of the computer. A viewer for IntegradWeb opens automatically, and you can access images and reports using the features described in this document. Study List Basics A Study List is a group of similar studies, such as CTs, MRs, or all studies performed today. Each Study List is displayed under a tab for quick access, and its studies are itemized with descriptive information. (Names are encrypted for privacy.) Click on a tab to display a particular Study List. Use the paging buttons on the toolbar above the tabs to navigate forward or backward through the Study List. Use the icons next to each study for a quick grasp of that study’s status: Denotes that the study is selected. Click here to view the study. (Note: That if this icon is yellow, the particular study is already open. This feature is available to radiologists only, as recognized by their login, and is designed to help radiologists make updates to only one copy of a study. Indicates the note/report status: The gray notepad indicates that no note or report is attached to the study. If the notepad icon is yellow, then a note has been attached to the study. If the notepad icon is green, then a full report—either preliminary ("wet read") or final—has been attached to the study. Indicates the read status. A study may have a large checkmark (the study has been read and dictated by a radiologist), a small checkmark (the study has been reviewed but not dictated, or it’s been read by a resident), both or neither.

Welcome message from author
This document is posted to help you gain knowledge. Please leave a comment to let me know what you think about it! Share it to your friends and learn new things together.
Transcript

IntegradWeb®
PACS Quick Start User Guide This guide includes all the information you need to begin using IntegradWeb PACS. It is organized according to a logical workflow—stepping you through the initial login, opening and managing a study and exiting a study. It also includes tips on shortcuts and provides answers to frequently asked questions. For full information on all IntegradWeb PACS features, click the Help (question mark) button in the upper right corner of the main screen to access the online Help system.
Launch and Login 1. Open DI PACS by double clicking on the DI icon.
2. Always answer “Yes” to security questions. 3. Type your username, then password. 4. Click Login (or use Enter key).
Launch from a CD Studies and reports saved to CDs can be read on any computer, even those without access to IntegradWeb. All the necessary utilities to read the study are included on the CD; simply insert the CD into the CD drive of the computer. A viewer for IntegradWeb opens automatically, and you can access images and reports using the features described in this document.
Accessing Studies from a CD Always answer “Yes” to security questions.Studies and reports saved to CDs can be read on any computer, even those without access to IntegradWeb. All the necessary utilities to read the study are included on the CD; simply insert the CD into the CD drive of the computer. A viewer for IntegradWeb opens automatically, and you can access images and reports using the features described in this document.
Study List Basics A Study List is a group of similar studies, such as CTs, MRs, or all studies performed today. Each Study List is displayed under a tab for quick access, and its studies are itemized with descriptive information. (Names are encrypted for privacy.) Click on a tab to display a particular Study List.
Use the paging buttons on the toolbar above the tabs to navigate forward or backward through the Study List. Use the icons next to each study for a quick grasp of that study’s status:
Denotes that the study is selected.
Click here to view the study. (Note: That if this icon is yellow, the particular study is already open. This feature is available to radiologists only, as recognized by their login, and is designed to help radiologists make updates to only one copy of a study.
Indicates the note/report status:
The gray notepad indicates that no note or report is attached to the study.
If the notepad icon is yellow, then a note has been attached to the study.
If the notepad icon is green, then a full report—either preliminary ("wet read") or final—has been attached to the study.
Indicates the read status. A study may have a large checkmark (the study has been read and dictated by a radiologist), a small checkmark (the study has been reviewed but not dictated, or it’s been read by a resident), both or neither.

Note: All examinations should be viewed using Lossless Wavelet Compression
If images are not loaded in lossless compression, the lossy compression is indicated in the lower left corner of the image, as shown in the figure at right. Tip! Point the mouse at an icon to see a tool tip that defines its function. Right-click to open floating menus.
Click Refresh Viewer from the menu to view any new images that were added while the study was loaded.
Opening and Managing a Study
1. Click the view icon next to the study, or highlight the study to open by directing the mouse to that line. Click anywhere on that line to open the study. The study is launched in the Image Viewer.
2. Each series in the study is displayed in a separate window. (Plain-film studies, however, are shown in one window.) Increase the size of a window by clicking and dragging its corner.
3. To page through the images in a series, point the mouse to that series and click. Each successive click displays the next image in the “stack.”
4. To alter the brightness or contrast of an image, click the Windowing button in the toolbar, and then drag the mouse left/right (for contrast) or up/down (for brightness). Set the mouse over any toolbar button to see a tool tip, which displays the button’s function.
Searching for a Study
1. Select the Search button on the toolbar (next to the column headings). 2. The Search dialog is displayed. All fields are clear; click the Last Search button at the bottom of the
dialog to enter criteria from the last search, or enter new search criteria. For Patient Name, MRN, Accession Number, Referring Physician and Study Description, you can enter all or part of the information and use the option buttons to the right to denote how that information should be matched.
3. Click the Search button. Results are displayed under the Search tab. Click the F5 button to refresh the
contents of the Search tab.
Patient Folder
In the Image Viewer, lick the toolbar button for the Patient’s Folder, which displays information for all the studies—current and prior—that have been performed on that patient. The Patient Folder may be set to launch automatically when a study is opened; see the administrator. The top portion shows a list of the patient's studies, with the current study highlighted in blue and the other studies listed chronologically. The middle pane shows all orders for the study, communicated to IntegradWeb PACS by the RIS. The bottom pane allows privileged users to write a note or report to the study.
Comparing Two Studies
1. From the study list, click the checkbox In the Image Viewer, lick the toolbar button for the Patient’s Folder, which displays information for all the studies—current and prior—that have been performed on that patient. The Patient Folder may be set to launch automatically when a study is opened; see the administrator.
The top portion shows a list of the patient's studies, with the current study highlighted in blue and the other
studies listed chronologically. The middle pane shows all orders for the study, communicated to IntegradWeb PACS by the RIS. The bottom pane allows privileged users to write a note or report to the study. next to the studies you want to compare, or select only one study and right-click to display a floating menu and select All Studies for Selected MRN to display studies for that patient.

2. Click the Compare button on the toolbar, or right-click anywhere and select Compare Selected Studies from the floating menu. The studies are loaded; the most recent study displays first.
3. To display them side-by-side, click the Compare button on the Image Viewer toolbar. 4. The Compare dialog displays; select which study displays on the left and which displays on the right. Click
the Display button.
Adding a Note or Report to a Study You can add a preliminary report or note. The preliminary report can become the final report upon dictation of the study.
1. From Image Viewer, click the Notes button on the toolbar. If you are in the Study List, click the
Note/Report icon next to the desired study in the list. 2. The Notes dialog is displayed. The header shows the patient's name and other identifying information, as
well as study data. Click the appropriate button to add information to the study, i.e., note, internal note (radiologists only) or preliminary report. The pane changes color to indicate the kind of note you are adding (gray for note, green for internal note, blue for report).
3. Enter the diagnostic data in the text pane. Click the Done button below the pane when complete. 4. Click the Done button at the bottom of the dialog to exit, or select another button to add a new note/report. The Note/Report icon updates to a new color (yellow for a note, green for a report) in the Study List. View a Study Single click the highlighted line to open a patient’s exam; Image Viewer launches with a toolbar and menu that hold many features.
Page/Scroll
When the exam opens, Page/Scroll mode is enabled on the main toolbar. To page through images, click anywhere in a series window to activate it, then page using any of these actions: Drag the left mouse button, Scroll using the mouse wheel, Left- or middle-click.
Use the up and down arrow keys or the page up and page down keys.
Shortcut Right-click for a floating menu. Right-click and drag to adjust the Window /Level. Hit the space bar to toggle preset Window /Level settings. Hold F2 for Triangulation mode.
Tips! You can set additional keyboard shortcuts to jump to the middle slice of a series or to jump
forward/backward a page; you can also scroll directly from one series to the next. See Shortcut tab and the More Settings tab in Layout Editor.
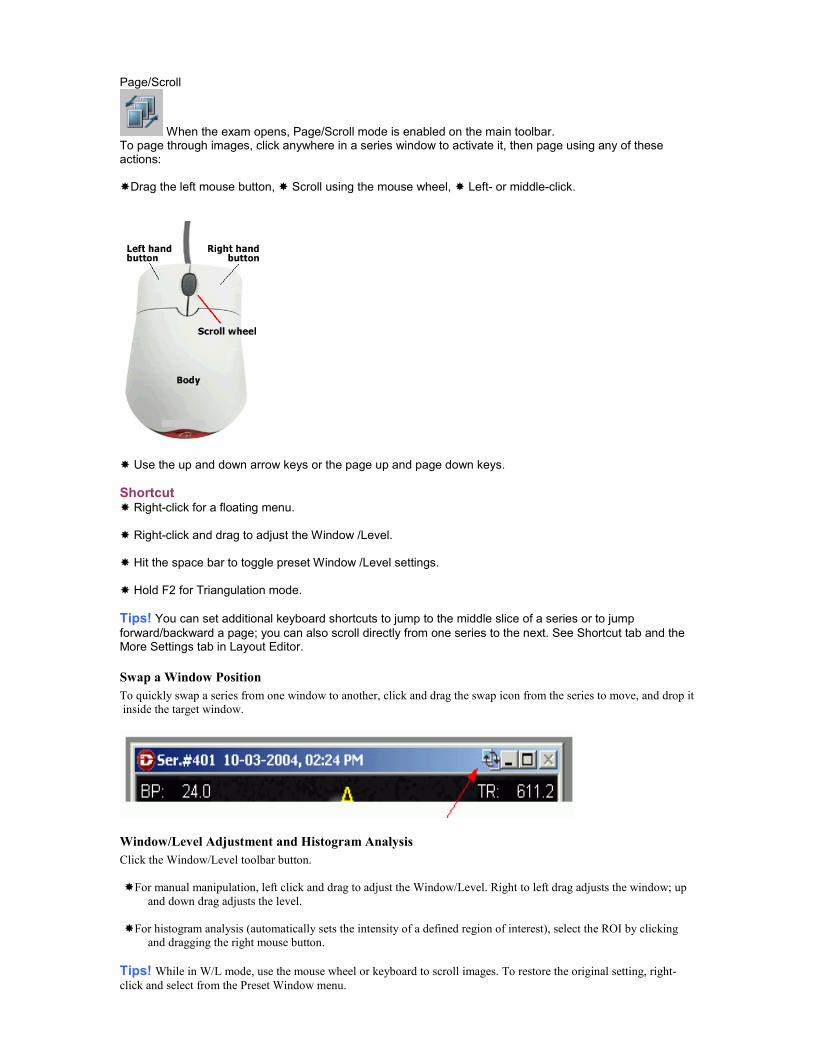
Swap a Window Position
To quickly swap a series from one window to another, click and drag the swap icon from the series to move, and drop it
inside the target window.
Window/Level Adjustment and Histogram Analysis
Click the Window/Level toolbar button.
For manual manipulation, left click and drag to adjust the Window/Level. Right to left drag adjusts the window; up
and down drag adjusts the level.
For histogram analysis (automatically sets the intensity of a defined region of interest), select the ROI by clicking
and dragging the right mouse button.
Tips! While in W/L mode, use the mouse wheel or keyboard to scroll images. To restore the original setting, right-
click and select from the Preset Window menu.

Zoom
Click the Zoom toolbar button. Left click and drag the mouse up to increase in size . Left click and drag the mouse down to decrease in size.
Tips! Look for the zoom factor in the lower left corner of the image. To undo zoom, right click and select
Zoom Factor-to fit, or choose Set Zoom from the Main Menu. Hold the middle mouse button to pan while in Zoom mode. Use the Zoom to ROI (Scissors) button to zoom only one part of the image.
Pan
Click the Pan toolbar button. Left click and drag to re-center or scroll image.
Tip! Hold the middle mouse button to zoom when in pan mode.
Select an Image
Click the Select toolbar button. Left-click an image to select it, i.e., mark it as a key image. To select nonadjacent images, hold CTRL while clicking each image. To select adjacent images, click on the first image, then hold SHIFT while clicking on the last image.
Tips! To deselect an image, hold CTRL and click on the image again. For more options, click on Select
from the Main Menu.
Key Images
There are several ways to save key images: printed to paper or film, or by saving to a file. Method 1: Click Key Images on the main menu and select the desired format, a blank page will appear.
Return to viewing mode by clicking the Page/Scroll icon on the main toolbar, or from the right click pop-up menu. While paging through the study, type the letter i on the keyboard to insert the current image
to the print preview. Method 2: Click Key Images on the main menu and select the desired format, a blank page will appear.
This will activate the “add to key images” icon on the main toolbar. Click an image to send it to print preview. To continue viewing, make the series active by clicking on the title bar, then use the up/down arrow key to page. Click inside the image to add it to the print page.
Method 3: Use the Select tool to mark images within the same series as selected. From the Key Images
drop down menu (on the main menu bar), click “add selected images to print preview.” Method 4: Click Key Images on the main menu and select “activate print preview.” Use the key images
toolbar on the right to select a format (L on the keyboard), or click the New icon (D) and make selections.

Click the Save button (G) in the Key Images toolbar to save the selected images to the desired output.
Tips! The print page can be moved to any location on the monitors by dragging the title bar.
The print page can be resized by dragging the double arrows on any corner. The Done Option can be set to prompt you to save your work at exit by checking “save unsaved key images.” To delete an image from the print page, double click on it with the “add to key images” tool; to replace, click and drag any image over another to swap places.
Shortcut
Type the letter i to insert the current image onto the print page.

Navigator
Click the Navigator toolbar button. A thumbnail image representing each series is displayed. The active series is outlined in blue. Displayed series are outlined in white. Undisplayed series have no outline. Double click an undisplayed series to open the window. Point the mouse over a thumbnail to display the series description. Click and hold a thumbnail to locate its position, which will flash on the monitor. Re-sort the order by clicking and dragging a series to the new position.
Click the Navigator toolbar button in the upper left to open the Layout Preview. Series in the thumbnail view can be dragged and dropped into open series window positions in the Layout Preview. Use this feature to quickly reorganize/move series on the monitors by exchanging positions.
Tips! When an exam is displayed that has additional series not provided for in the layout, Navigator opens automatically. The Navigator can be resized by dragging its borders. If a scroll bar appears, it indicates there is additional information that can be viewed by scrolling or resizing.

Film View
This icon toggles between Film View and Single Series View. When enabled, paging icons will appear on the toolbar, and images will be displayed in a row & column format.
Click Page Format on the Main Menu to select a different matrix display. Use the paging icons on the right end of the
Main Toolbar to page through images.
First Page Page Forward
Fast Back Fast Forward
Page Back Last Page
Tip! Page/Scroll options (as described above) also page while in Film View.
Open the Navigator, click and drag thumbnails to re-sort the order. Click the Film View icon again to return to Single Series View.
Cine Mode
Click the Cine button on the toolbar; a control bar opens at the bottom of the series, as shown below. Use the
arrows to set the frames per second (FPS). Use the arrows to control the direction forward, backward, or bounce
back and forth mode.

Tip! Point the mouse at a control button to see a tool tip that defines its function.
Click the slider to advance to that section of the cine.
Magnifying Glass
Click the magnifying glass, then click on the area of interest. The area changes to full 100% resolution (1.0
magnification). Use this tool for x-rays (CR,DR,etc.), especially chest x-rays.
Tip! Click the toolbar button to toggle between off and on. Click and drag the corner of the ROI to resize it.
Shortcut Hold the shift key to drag the zoom area.
Synchronize
Click the toolbar button to toggle the feature off and on.
Tips! For more linking options, go to “Synchronize” in the main menu bar. Absolute Position is the bed position from the scanner.
Absolute Number is the image number from the scanner.
Use Inter-Studies Sync to page in concert when in comparison mode (e.g., current and prior studies).
Cross Reference
Click the toolbar button to toggle the feature off and on.
Image Overlay
Click the toolbar button to toggle through the different preset slice information templates. Click the down
arrow to open the menu to display all the overlay templates.
Tip! For more slice information, right click an image and choose Image Info.
Create Copy
Click the toolbar button to create a duplicate of the active series.
Tip! This is very useful for CT Abdomen and for creating duplicates for Lung, Liver and Bone windows.

Triangulation
Click the toolbar button to activate this feature. Click an area of interest; all other series (of unlike axes) will
advance to that level and be marked by a green circle.
Tips! A red circle indicates that there are no corresponding slices at that level. Click and drag over an area of interest to display the corresponding images. Click and drag along a sagittal spine to move the axial series.
Shortcut While in paging mode, hold F2 to activate Triangulation.
Exiting a Study
next to the exit button in the Image Viewer toolbar. Click the down arrow and select Exit or hit the X
key on the keyboard. Logout
Click the logout button to end the session.
Tips! This will free the license for another user to login, if your facility has a limited number of licenses.
The system administrator may set the auto logout for a predetermined inactivity timeout.
Shortcuts Key Images.....................................Use ctrl to page Zoom................................Use middle mouse to pan Pan................................Use middle mouse to zoom Windowing...................Middle mouse opens presets For 1.00 zoom...................................................Shift Refresh Study List................................................F5 Jump to first image..........................................Home Jump to last image.............................................End Patient Folder.......................................................F1 Triangulation.........................................................F2 Cine........................................................................C Done.......................................................................D Exit.........................................................................X
Flip..........................................................................F Magnifying Glass....................................................G Mirror.......................................................................9 Insert Key Image.......................................................I Key Image Page.....................................................K Labels......................................................................L Measurements........................................................M Page/Scroll.............................................................P Rotate...........................................................0 (zero) Sharpen..................................................................S Invert.......................................................................V Window/Level mode..............................................W Zoom......................................................................Z
Troubleshooting
Image viewer will not launch!
Answer: Active X may not be loaded on your PC. At some sites, individual users may not
have the privileges to load the needed software. Call your IS group and have IS load Active X onto your PC.

FAQ—Frequently Asked Questions I can’t log in!
Answer: Enter the username and password in lowercase.
My PC has two monitors. Does IntegradWeb PACS support dual monitor configurations?
Answer: Yes. The second monitor must be configured in a specific way so that images don’t straddle the monitor boundary. See the administrator or call support. Support number is at the bottom of this page.
I use a firewall. Can I still use my PC to access imaging studies?
Answer: Yes. IntegradWeb PACS works successfully with the common software firewalls or common hardware firewalls that come with a Cable/DSL router.
If I use my User ID on one computer, can I then use it at another computer?
Answer: Yes, but not simultaneously.
I don’t like to see CT images in “stacks.” Can I see them as if they are on sheets of film?
Answer: Yes. Click this button on the Image Viewer toolbar to activate Film View.
The image seems blurry.
Answer: You are using lossy compression, indicated as such in the image: Lossy 1:192. Right-click on the image, and select Request Full Image Quality.
When I try to login, I get a message that says licenses are unavailable. Why? Answer: The IntegradWeb application has been licensed by your institution for a specific number of users. This message indicates that all available licenses are now in use. If a logged-in user has not used the application after a certain period of time, IntegradWeb automatically reclaims the license. Therefore, you should try to login again after waiting a short time. I entered a note or preliminary report by mistake. How can I delete it? Answer: Select the Hide button. IntegradWeb's audit feature does not allow any user to delete a note or preliminary report. If you successfully enter a note or report and then wish to delete it, you can select the Hide button, which appears when you begin to enter text into the text area. This preserves your institution's audit trail, while allowing you to display or print the appropriate information.

Why should I compress data? Answer: When Study sizes and images are quite large, it can take longer to bring a study to your workstation. If you want to minimize the wait time, you can use data compression. If you don't want to compress images, you can select multiple studies for viewing. If you select multiple studies, it may still take time, but you can view the first study while the others are loading. Aren't compressed images poor in quality? Answer: "Quality" depends on your perspective, the kind of study viewed and your aversion to risk. Even radiologists are not unanimous on whether a compressed image is "good enough" for primary interpretation, or on which kind of studies best lend themselves to data compression. Doesn't the American College of Radiology (ACR) stipulate that only non-compressed images are acceptable for primary interpretation or "good medicine"? Answer: The ACR standards cover two topics: the ACR Standard for Teleradiology and the ACR Standard for Digital Image Data Management. Neither topic states that only an uncompressed image is acceptable. (You will need Adobe Acrobat reader to view these documents. If you do not have that program, click here.) I have clicked the Synchronize button, but images that are parallel do not move in concert. Why? Answer: Synchronizing depends on a "common frame of reference," which is a common physical reference point for all images in the study. This reference point is typically sent by the scanner, and it is the only way IntegradWeb can calculate how each image is related (and, thus, which images are parallel). In some cases, the scanner does not send a common frame of reference, which makes synchronization impossible. The patient moved in between MR series. Can I still synchronize? Answer: Yes. For example, if the study protocol called for 20 axial images using a T1-weighted series and then an equal number in a T2-weighted series, and you had to reposition the patient between series, you would need to accommodate the different anatomical range in each sequence. To do so, turn Synchronize off temporarily, manually advance one of the series so that the same "slice" is displayed in both series, and then select Synchronize by Relative Position. The patient moved, and I have unequal slice thicknesses. Can I still synchronize? Answer: Yes. Turn off Synchronization temporarily. Manually page through one series until the same anatomical slice is displayed in both series. Select Synchronize by Relative Position. How do I view more than one image at a time? Right-click the image and choose Page Format. Select the number of rows and columns you would like displayed.

Unequal slice thicknesses were used for two series. Can I still synchronize? Answer: Yes. If you Synchronize by Absolute Number, slice #1 in the first series will line up with slice #1 in the second series, but as you page through, the same anatomical slice would not be displayed in both series. In that case, select Synchronize by Absolute Position. IntegradWeb automatically delivers the slice from the synchronized series that is nearest in position to the active image. Images are displayed at different sizes on different computers. Why? Answer: IntegradWeb automatically checks the display resolution of your monitor and adjusts the window sizes accordingly. For example, a monitor with a 1074x768 resolution would show larger images than a monitor with a 800x600 resolution. My images are upside-down. Can I fix this? Answer: Yes. Right-click on the image and select Flip from the menu. Flip turns image from top to bottom, and vice versa. Rotate turns images from left to right, and vice versa. How can I make the image larger or smaller? Answer: You can use the standard Windows technique for changing a window size, which is to "grab" a corner of the window when you have a double-headed arrow and drag that corner out (larger) or in (smaller). You can also zoom the image with the Zoom tool or by right-clicking the image and selecting preset magnification factor. I'm not sure whether I changed the brightness or contrast, but the image is unrecognizable. How can I fix it? Answer: Right-click the image, select Pre-Set Window and then Automatic, or hit the spacebar on the keyboard. The image updates to the optimum windowing level. I'm using the magnifying glass to get an enlarged image, but I see no difference. Why? Answer: Magnify means to update a study to its true resolution. You are probably using the True Resolution/Magnify tool on an MRI, CT, US or NM study. These kinds of studies are already loaded at their true resolution on most monitors, whereas most monitors cannot handle plain-film studies at true resolution. Thus, the True Res/Magnify tool is really intended for use with plain-film studies. To see enlarged images for CT, MR, etc., use the Zoom tool. I'm used to seeing x-rays with lots of information displayed around the image. Can I see that information? Answer: Yes. Enable Image Overlay to populate the image with study information. You can also right-click and select Patient Information from the menu to see additional details on the patient. Click Image Information to see additional information on the image.

I keep clicking, but no more images show up. Why? Answer: You may be at the beginning or end of the series. Left-click (or up arrow on your keyboard) brings up the next image and right-click (or down arrow on your keyboard) brings up the previous image. Also, make sure you are clicking in the display area of the image. I keep clicking on the X in the top right corner of the screen, but it won't close. Why? Answer: Make sure you are clicking on the X in the title bar that contains the patient's name and age. If that doesn't close the study, you probably have another window open, probably a dialog box. I am viewing multiple MRI series and made a complete mess putting one stack window on the top of the others. How can I come back to the original screen? Answer: Click Layout from the main menu, and select Reload. All series revert to the original layout.
Ft Collins-AMIC support Phone Number is: 970-266-4464
Related Documents