INSTRUCTIONS

Welcome message from author
This document is posted to help you gain knowledge. Please leave a comment to let me know what you think about it! Share it to your friends and learn new things together.
Transcript

INSTR
UCTIONS

2
TRID
ER
españolenglishfrançaisdeutschitaliano
portuguêspolskiceský
1521273339455157

3
fig
ure
s
1.a
1 2 2.a
4
INST
RU
CTI
ON
S3 4

5
fig
ure
s
5
“CLACK”
6
6.a

6
INST
RU
CTI
ON
S7.b 7.c7.a

7
fig
ure
s
8 8.a 9PRO-FIX

8
INST
RU
CTI
ON
S10.b
10.a 11
9

9
fig
ure
s
12 12.a

10
INST
RU
CTI
ON
S1413
13.a
11
fig
ure
s
16b
dc
“CLICK”
15A

12
INST
RU
CTI
ON
S19
18 19.a
17
STOP
17.aGO
HARD
SOFT

13
fig
ure
s
2120

14
INST
RU
CTI
ON
S

15
esp
año
l
INDICE
INFORMACIÓN Y ADVERTENCIAS DE SEGURIDAD1. MONTAJE Y DESMONTAJE DE LAS RUEDAS2. PLEGADO Y DESPLEGADO3. SISTEMA PRO-FIX4. MONTAJE Y DESMONTAJE DE LA HAMACA5. AJUSTE DEL ÁNGULO DE LA HAMAQUITA6. USO DEL PROTECTOR DE SEGURIDAD7. EMPLEO DE CAPOTA8. AJUSTE DEL MANILLAR9. CINTURÓN DE SEGURIDAD10.- USO PARA MENORES DE 6 MESES 11. AJUSTE DEL REPOSAPIÉS12. USO DEL FRENO DEL ESTACIONAMIENTO13. REGULACIÓN DE LA DUREZA DE LA SUSPENSIÓN14. BLOQUEO DE LA RUEDA DELANTERA15. PROTECTOR DE LLUVIA 16. MANTENIMIENTOINFORMACIÓN SOBRE LA GARANTÍA
161717171818181818191919191919202020
16
TRID
ER
INFORMACIÓN Y ADVERTENCIAS DE SEGURIDAD
InstruccionesIMPORTANTE: LEER DETENIDAMENTE Y MANTENERLAS PARA FUTURAS CONSULTAS.ADVERTENCIAS:-No dejar nunca al niño desatendido.-Asegurarse de que todos los dispositivos de cierre están engranados antes del uso.-Para evitar lesiones, asegúrese de que el niño se mantiene alejadodurante el desplegado y el plegado de este producto.-No permita que el niño juegue con este producto.-Usar siempre el sistema de retención.-Comprobar que los dispositivos de sujeción del capazo, delasiento o de la silla de coche están correctamente engranadosantes del uso.-Este producto no es adecuado para correr o patinar.-Esta silla es adecuada para niños a partir del nacimiento y hasta 15 kg. -Nunca permita que el niño se ponga de pie en el reposapiés o estribo.
RESTRICCIONES DE USO:-Se recomienda el uso en la posición más reclinada desde nacimiento hasta los 6 meses. -Active siempre el freno de la silla antes de colocar o retirar los niños de la silla.-Cualquier carga fijada al manillar y/o a la parte trasera del respaldo y/o a los laterales de la silla afecta a la estabilidad de ésta.-Esta silla ha sido diseñada para un único niño, no utilizarlo conmás niños a la vez.-No deben utilizarse accesorios no aprobados por JANÉ.-Solo deben utilizarse los repuestos suministrados o recomen-dados por JANÉ.-Para los portabebés usados con un chasis, esta silla no reemplaza una cuna o cama. Si el niño necesita dormir, debería colocarseen un capazo, una cuna o una cama adecuados.-La masa máxima permitida de la cestilla portaobjetos nunca puede superar lo indicado en la cestilla (4 kg).-Este producto no es resistente al agua salada.
17
esp
año
l
El chasis de su cochecito incluye el sistema PRO-FIX, prepara-do para incorporar los siguientes portabebés y Sistemas de Retención infantil: MICRO, MATRIX, KOOS, TRANSPORTER y NEST. 8-9El sistema PRO-FIX le facilitará el acople y la extracción de estos accesorios al chasis, de un modo rápido, fácil y seguro, quedando éstos anclados al chasis. Para ello siga detenida-mente las instrucciones de estos accesorios.
ADVERTENCIA: Es imprescindible asegurarse que el niño se mantiene alejado de la silla durante las acciones de plegado y desplegado. La aparición de puntos de corte y compresión y atra-pamientos son inevitables durante estas operaciones.
1.- MONTAJE Y DESMONTAJE DE LAS RUEDAS
2.- PLEGADO Y DESPLEGADO3.- SISTEMA PRO-FIX
ADVERTENCIA: Es imprescindible desmontar la hamaca del co-checito para poder acoplar cualquier accesorio de auto.
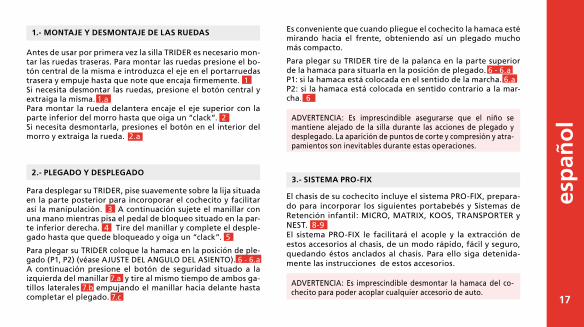
Antes de usar por primera vez la silla TRIDER es necesario mon-tar las ruedas traseras. Para montar las ruedas presione el bo-tón central de la misma e introduzca el eje en el portarruedas trasera y empuje hasta que note que encaja firmemente. 1Si necesita desmontar las ruedas, presione el botón central y extraiga la misma. 1.aPara montar la rueda delantera encaje el eje superior con la parte inferior del morro hasta que oiga un “clack”. 2Si necesita desmontarla, presiones el botón en el interior del morro y extraiga la rueda. 2.a
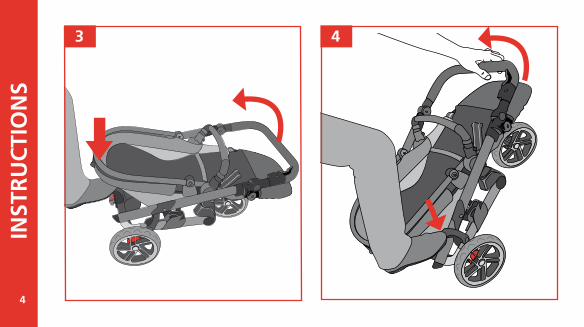
Para desplegar su TRIDER, pise suavemente sobre la lija situada en la parte posterior para incoroporar el cochecito y facilitar así la manipulación. 3 A continuación sujete el manillar con una mano mientras pisa el pedal de bloqueo situado en la par-te inferior derecha. 4 Tire del manillar y complete el desple-gado hasta que quede bloqueado y oiga un “clack”. 5
Para plegar su TRIDER coloque la hamaca en la posición de ple-gado (P1, P2) (véase AJUSTE DEL ANGULO DEL ASIENTO). 6 - 6.a A continuación presione el botón de seguridad situado a la izquierda del manillar 7.a y tire al mismo tiempo de ambos ga-tillos laterales 7.b empujando el manillar hacia delante hasta completar el plegado. 7.c
Es conveniente que cuando pliegue el cochecito la hamaca esté mirando hacia el frente, obteniendo así un plegado mucho más compacto.
Para plegar su TRIDER tire de la palanca en la parte superior de la hamaca para situarla en la posición de plegado. 6 - 6.aP1: si la hamaca está colocada en el sentido de la marcha. 6.aP2: si la hamaca está colocada en sentido contrario a la mar-cha. 6

18
TRID
ER
El manillar puede ajustarse en 7 posiciones distintas. Pulse simúltaneamente los botones situados a ambos lados del ma-nillar. 14
Si lo desea puede liberar un lado solamente presionando los botones laterales y el protector quedará totalmente articulado por el otro extremo. 12 -12.a
El protector de seguridad está diseñado para encajar en los alojamientos dispuestos en la hamaca.
6.- USO DEL PROTECTOR DE SEGURIDAD
Su TRIDER está equipado con el sistema pro-fix. Con este sis-tema, la hamaquita TRIDER puede acoplarse perfectamente al chasis. Además puede colocar la hamaca mirando hacia usted o hacia delante, por tratarse de una hamaca reversible. 8 - 9Para desenganchar la hamaquita, tire simultáneamente de las palancas de desbloqueo situadas a ambos lados de la propia hamaquita.
4.- MONTAJE Y DESMONTAJE DE LA HAMACA
Para asegurar la capota en el marco de la hamaquita, deslíce-la desde arriba hasta los correspondientes alojamientos situa-dos en la parte central. Use la cremallera que lleva la capota para unirla al marco. 13 -13.aSiga el procedimiento a la inversa para liberarla.
7.- EMPLEO DE LA CAPOTA
Puede reclinar la hamaca respecto al suelo, para transportar a su bebé en la posición más cómoda posible en cada mo-mento. Para bajar el respaldo tire de la cinta situada en la parte posterior, con el logo rojo, hacia abajo hasta la posición deseada. 10.a Para subir el respaldo tire de la cinta con el logo negro hacia arriba. 10.b
5.- AJUSTE DEL ÁNGULO DE LA HAMAQUITA
8.- AJUSTE DEL MANILLAR
ATENCIÓN: La única posición de uso es el punto verde. Las posiciones P1 y P2 son solamente para facilitar el ple-gado, no está permitido utilizarlas para el transporte de su bebé, al igual que la posición. 11
ATENCIÓN: El niño debe mantenerse alejado de partes móviles cuando estas están siendo manipuladas por el adulto responsable. La aparición de puntos de corte y compresión y atrapamientos son inevitables durante es-tas operaciones.
ATENCIÓN: Nunca sujete el cochecito o la hamaca por la barra de protección, no es asa de transporte.
19
esp
año
l
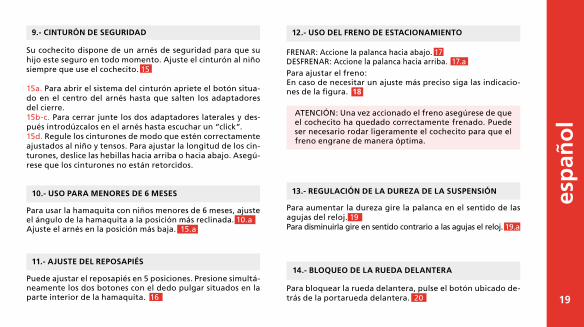
Para ajustar el freno:En caso de necesitar un ajuste más preciso siga las indicacio-nes de la figura. 18
12.- USO DEL FRENO DE ESTACIONAMIENTO
Para bloquear la rueda delantera, pulse el botón ubicado de-trás de la portarueda delantera. 20
14.- BLOQUEO DE LA RUEDA DELANTERA
13.- REGULACIÓN DE LA DUREZA DE LA SUSPENSIÓN
Para aumentar la dureza gire la palanca en el sentido de las agujas del reloj. 19Para disminuirla gire en sentido contrario a las agujas el reloj. 19.a
Para usar la hamaquita con niños menores de 6 meses, ajuste el ángulo de la hamaquita a la posición más reclinada. 10.a Ajuste el arnés en la posición más baja. 15.a
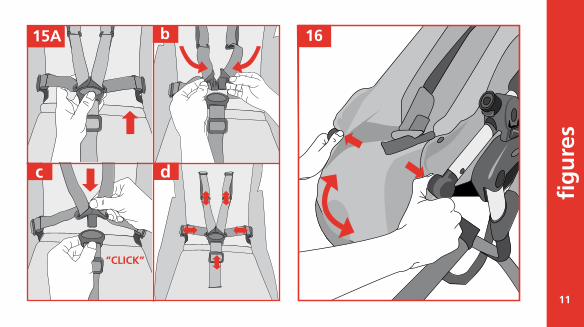
Puede ajustar el reposapiés en 5 posiciones. Presione simultá-neamente los dos botones con el dedo pulgar situados en la parte interior de la hamaquita. 16
10.- USO PARA MENORES DE 6 MESES
11.- AJUSTE DEL REPOSAPIÉS
ATENCIÓN: Una vez accionado el freno asegúrese de que el cochecito ha quedado correctamente frenado. Puede ser necesario rodar ligeramente el cochecito para que el freno engrane de manera óptima.
FRENAR: Accione la palanca hacia abajo. 17DESFRENAR: Accione la palanca hacia arriba. 17.a
9.- CINTURÓN DE SEGURIDAD
Su cochecito dispone de un arnés de seguridad para que su hijo este seguro en todo momento. Ajuste el cinturón al niño siempre que use el cochecito. 15
15a. Para abrir el sistema del cinturón apriete el botón situa-do en el centro del arnés hasta que salten los adaptadores del cierre. 15b-c. Para cerrar junte los dos adaptadores laterales y des-pués introdúzcalos en el arnés hasta escuchar un “click”. 15d. Regule los cinturones de modo que estén correctamente ajustados al niño y tensos. Para ajustar la longitud de los cin-turones, deslice las hebillas hacia arriba o hacia abajo. Asegú-rese que los cinturones no están retorcidos.

20
TRID
ER
INFORMACIÓN SOBRE LA GARANTÍA
Este artículo dispone de garantía según lo estipulado en elR.D. Legislativo 1 / 2015 de 24 de julio. Conserve la factura decompra, es imprescindible que se presente en la tienda dondeadquirió el producto para justificar su validez ante cualquierreclamación.
Quedan excluídos de la presente garantía aquellos defectos o averías producidas por un uso inadecuado del artículo o el incumplimiento de las normas de seguridad y mantenimien-to descritas en las hojas de instrucciones y en las etiquetas de lavado, así como los elementos de desgaste por uso normal y manejo diario.
La etiqueta que contiene el número de chasis de su modelo, no debe ser arrancada bajo ningún concepto, contiene infor-mación importante.
Atención:Para obtener la máxima seguridad y atención sobre su nuevo JANÉ, es muy importante que rellene la tarjeta de registro que encontrará en la página www.janeworld.com. El registro le permitirá informarse, si es necesario, de la evolución y man-tenimiento de su producto. También, siempre que lo desee, le podremos informar de nuevos modelos o noticias que conside-remos pueden ser de su interés.
No exponga el tapizado al sol durante largos períodos.Lave las partes de plástico con agua templada y jabón, secando posteriormente todos los componentes concienzudamente.El tapizado puede desmontarse para ser lavado. Compruebe regularmente los frenos, arneses y fijaciones que pudieran sufrir algún daño por el uso.Engrase regularmente las partes móviles y mecanismos con un spray a base de siliconas. No usar aceite o grasa.Recuerde ajustar su freno periódicamente siguiendo el méto-do explicado en la figura. 18Tanto para su seguridad como para la buena conservación de este producto, es importante que haga una revisión periódica en cualquiera de nuestros talleres oficiales.
16.- MANTENIMIENTO
El protector de lluvia de su TRIDER es muy sencillo de colo-car, sólo tiene que cubrir la hamaca y ajustar los enganches al chasis para sujetarla. Ésta tiene una pequeña ventana que se puede enrollar y fijar con velcros para que el niño pueda investigar lo que le rodea con total libertad. 21
15.- PROTECTOR DE LLUVIA

21
eng
lish
TABLE OF CONTENTS
INFORMATION AND SAFETY WARNINGS1. FITTING AND REMOVING THE WHEELS2. FOLDING AND UNFOLDING3. PRO-FIX SYSTEM4. FITTING AND REMOVING THE HAMMOCK5. ADJUSTING THE ANGLE OF THE HAMMOCK6. USING THE SAFETY ARMREST7. USING THE HOOD8. ADJUSTING THE HANDLEBAR9. SEAT BELT10. USE WITH INFANTS UNDER 6 MONTHS11. ADJUSTING THE FOOTREST12. USING THE PARKING BRAKE13. ADJUSTING THE STRENGTH OF THE SUSPENSION14. LOCKING THE FRONT WHEELS15. RAIN COVER16. MAINTENANCEINFORMATION ABOUT THE GUARANTEE
222323232424242424252525252525262626

22
TRID
ER
INFORMATION AND SAFETY WARNINGS
InstructionsIMPORTANT: READ CAREFULLY AND KEEP THEM FOR FUTURE REFERENCE.
WARNINGS:-Never leave the child unattended.-Make sure that all the locking devices are engaged beforeusing the product.-To avoid injury, make sure that the child is kept at a safe distanceduring the unfolding and folding operations.-Do not let the child play with this product.-Always use the restraint system.-Check that the fastening devices for the hood, the seat orthe car seat are correctly engaged before using the product.-This product is not suitable for running or skating.-This pushchair is suitable for children from birth and up to a weight of 15 kg.-Never let the child stand up on the footrest or the footboard.
USAGE RESTRICTIONS:-The most reclined position is recommended from birth upto 6 months.-Always put the brake on when getting children in or out of thepushchair.-Any load attached to the handlebar and/or back of the backrestand/or the sides of the pushchair will affect its stability.-This pushchair has been designed to carry one child at a time,do not use it to carry more than one child.-Do not use accessories that have not been approved by JANÉ.-Only use replacement parts supplied or recommended by JANÉ.-For baby carriers used with a chassis, this pushchair is not asubstitute for a cot or a bed. If the child needs to sleep, youshould put him in a suitable carrycot, cot or bed.-Do not exceed the maximum weight indicated on the basket(4 kg).-This product is not salt water resistant.

23
eng
lish
Before using the TRIDER pushchair for the first time it is ne-cessary to fit the rear wheels. To fit the wheels press the but-ton on the middle of the wheel and insert the axle into the rear wheel bearer and push until it slots firmly into place. 1If you need to remove the wheels, press the central button and take the wheel off. 1.aTo assemble the front wheel fit the upper axle into the lower part of the frame until it clicks into place. 2If you need to detach it, press the button on the inside of the frame and take the wheel off. 2.a
The chassis of your pushchair is fitted with the PRO-FIX sys-tem, making it ready for the following baby carriers and child Restraint Systems to be attached: MICRO, MATRIX, KOOS, TRANSPORTER and NEST. 8-9 The PRO-FIX system makes it easier to attach and remove the-se accessories to and from the chassis, securing them to the chassis in a quick, simple and safe way. To do this follow the instructions for these accessories carefully.
WARNING: You must make sure that the child is kept away from the pushchair while it is being folded or unfolded. During the-se operations the appearance of sharp points and compression areas are inevitable.
1.- FITTING AND REMOVING THE WHEELS
2.- FOLDING AND UNFOLDING
When folding the pushchair it is useful to place the hammock facing forwards as this makes it fold up more compactly.
To fold your TRIDER pull the lever on the top part of the seat to set it to the folding position. 6 - 6.aP1: if the hammock is positioned facing forwards. 6.aP2: if the hammock is positioned facing backwards. 6
3.- PRO-FIX SYSTEM
WARNING: It is necessary to remove the hammock from the pushchair to attach any of the auto accessories.
To unfold your TRIDER, lightly press the bar on the back to tilt the buggy and make it easier to manoeuvre. 3 Then hold the handlebar with one hand while you press the locking pedal at the bottom on the right. 4 Pull the handlebar and unfold until it clicks and locks into place. 5
To fold your TRIDER place the hammock in the folding posi-tion (P1, P2) (see ADJUSTING THE ANGLE OF THE SEAT). 6 - 6.aNext, press the safety button on the left of the handlebar 7.awhile pulling both side catches 7.b pushing the handlebarforwards until it is fully folded. 7.c

24
TRID
ER
The handlebar can be set to 7 different positions. Simulta-neously press the buttons on both sides of the handlebar. 14
If you want you can release just one side of the armrest by sim-ply pressing the side buttons and the armrest will be fully hin-ged by the other side. 12 -12.a
The safety armrest is designed to slot into casing on the seat.
6.- USING THE SAFETY ARMREST
Your TRIDER is fitted with the pro-fix system. With this sys-tem, the TRIDER hammock can be attached perfectly to the chassis. What’s more, the hammock is reversible so it can be positioned facing you or facing forwards. 8 - 9To take the hammock off, simultaneously pull the unlocking levers situated on both sides of the hammock.
4.- FITTING AND REMOVING THE HAMMOCK
To fasten the hood onto the frame of the hammock, slide it from the top down to the corresponding slots on the central part. Use the zip on the hood to attach it to the frame. 13 -13.a Follow the same steps in reverse order to take the hood off.
7.- USING THE HOOD
You can recline the hammock, to carry the baby in the mostcomfortable position at all times.To lower the backrest take hold of the strap found on the back, with the red logo, and pull it downwards to the requi-red position. 10.aTo raise the backrest pull the strap with the black logo upwards. 10.b
5.- ADJUSTING THE ANGLE OF THE HAMMOCK
8.- ADJUSTING THE HANDLEBAR
WARNING: Only use the pushchair when the green dot is displayed. Positions P1 and P2 simply make folding easier and, together with position 11, must never be used with your baby in the pushchair. 11
WARNING: The child should be kept away from the mobile parts when the responsible adult is handling these. The appearance of cutting, compression and pinch points are inevitable during these operations.
WARNING: Never hold the pram or the hammock by theprotection bar, it is not a carrying handle.

25
eng
lish
To lock the front wheel, press the button found behind the front wheel bearer. 20
14.- FRONT WHEEL LOCK
To use the seat with children under 6 months old, adjust the angle of the seat to the most reclined position. 10.aAdjust the harness to the lowest position. 15.a
The footrest can be adjusted to 5 different positions. Use your thumb to simultaneously press the two buttons on the lower part of the hammock. 16
10.- USE WITH INFANTS UNDER 6 MONTHS
11.- ADJUSTING THE FOOTREST
PUTTING THE BRAKE ON: Push the lever downwards. 17TAKING THE BRAKE OFF: Pull the lever upwards. 17.a
12.- USING THE PARKING BRAKE
13.- ADJUSTING THE STRENGTH OF THE SUSPENSION
To increase the strength turn the lever clockwise. 19To reduce it turn the lever anti-clockwise. 19.a
WARNING: When the brake is on make sure that the push-chair has braked correctly. It may be necessary to push the pushchair slightly for the brake to be fully activated.
To adjust the brake: If you need a more precise adjustment follow the indications in figure. 18
9.- SEAT BELT
Your pushchair has a safety harness to keep your child safe at all times. Fit the belt onto the child whenever he is using the pushchair. 15
15a. To open the belts, press the button in the middle of the harness. 15b-c. To fasten it, bring the two side straps together and then insert them into the harness until they click into place. 15d. Adjust the belts so that they fit the child correctly with the right tension. To adjust the length of the belts, slide the buckles up or down. Make sure that the belts are not twisted.

26
TRID
ER
INFORMATION ABOUT THE GUARANTEE
This product comes with a guarantee in compliance with RoyalLegislative Decree 1 / 2015 of 24 July. Keep your purchase receipt, you will need to show it in the shop where you bought the product to prove the guarantee is valid if you have any complaints.
This guarantee excludes any defects or breakages caused by inappropriate use of the article or inobservance of the safety and maintenance rules listed in the instruction pages and on the care labels, as well as faults caused by wear and tear through normal use and daily handling.
The label displaying the chassis number of the model should never be taken off, it contains important information.
Notice:For maximum safety and care for your new JANÉ item, it is very important that you register your new product on our website www.janeworld.com. This registration means we can inform you, if necessary, of the evolution and maintenance of your product. Additionally, if you would like, we can also inform you about new models or news that we think may be useful for you.
Do not expose the cover to sunlight for long periods.Wash the plastic parts with warm water and soap and carefu-lly dry all the components after.The cover can be removed for washing. Regularly check the brakes, harnesses and fastening ele-ments that may suffer wear and tear through use.Regularly grease the mobile parts and mechanisms with a silicone-based spray. Do not use oil or grease.Remember to adjust the brake from time to time using the method explained in figure. 18For your safety and the good conservation of this product, it is important to bring it to one of our official workshops for regular inspections.
16.- MAINTENANCE
The rain cover of your TRIDER is very easy to fit, simply cover the hammock and fit the hooks onto the chassis to secure it. The rain cover has a small window which can be rolled up and held with Velcro so the child is free to investigate his su-rroundings. 21
15.- RAIN COVER

27
fran
çais
TABLE DES MATIÈRES
INFORMATION ET CONSEILS DE SÉCURITÉ1 . MONTAGE ET DÉMONTAGE DES ROUES2 . PLIAGE ET DÉPLIAGE3 . SYSTÈME PRO-FIX4 . MONTAGE ET DÉMONTAGE DU HAMAC5 . RÉGLAGE DE L’ANGLE D’INCLINAISON DU HAMAC6 . UTILISATION DE L’ARCEAU DE SÉCURITÉ7 . UTILISATION DE LA CAPOTE8 . RÉGLAGE DU GUIDON9 . CEINTURE DE SÉCURITÉ10 . UTILISATION POUR ENFANTS DE MOINS DE 6 MOIS11 . RÉGLAGE DU REPOSE-JAMBES12 . UTILISATION DU FREIN DE STATIONNEMENT13 . RÉGLAGE FERMETÉ DE LA SUSPENSION14 . BLOCAGE DES ROUES AVANT15 . HABILLAGE DE PLUIE16 . ENTRETIENINFORMATIONS SUR LA GARANTIE
282929293030303030313131313131323232

28
TRID
ER
INFORMATION ET CONSEILS DE SÉCURITÉ
InstructionsIMPORTANT : LIRE ATTENTIVEMENT ET CONSERVER POUR S’Y REPORTER ULTÉRIEUREMENT.
MISES EN GARDE :-Ne laissez jamais un enfant sans surveillance.-Assurez-vous que tous les dispositifs de verrouillage sont bienenclenchés avant toute utilisation.-Pour éviter tout risque de blessures, assurez-vous que l’enfant nese trouve pas à proximité de la poussette lors du pliage et dudépliage du produit.-Ne laissez pas votre enfant jouer avec ce produit.-Utilisez toujours le système de retenue pour enfant.-Vérifiez si les dispositifs de fixation de la nacelle, de l’assise ou dusiège auto sont bien enclenchés avant toute utilisation.-Ce produit n’est pas adapté pour faire du jogging ou du roller.-Cette poussette peut être utilisée dès la naissance et jusqu’à 15 kg.-Ne laissez jamais votre enfant se mettre debout sur le repose-pied.
RESTRICTIONS D’UTILISATION :-Il est recommandé d’utiliser la position la plus inclinée de lanaissance à 6 mois.-Veillez à toujours enclencher le frein de la poussette avant d’installer ou sortir votre enfant de la poussette.-Toute charge accrochée au guidon, à l’arrière du dossier et/ousur les côtés provoquera un déséquilibre de la poussette.-Cette poussette a été conçue pour un seul enfant. Elle ne doit pasêtre utilisée avec plus d’un enfant à la fois.-N’utilisez jamais d’accessoires qui n’ont pas été homologués par JANÉ.-Seules les pièces de rechange fournies ou recommandées parJANÉ doivent être utilisées.-En cas d’utilisation d’une coque avec le châssis, la poussette ne devra pas être utilisée pour faire dormir l’enfant. Si besoin, installez votre enfant dans une nacelle, un berceau ou un lit approprié.-La charge maximum du panier ne doit jamais dépasser la valeur indiquée sur le panier (4 kg).-Cet article n’est pas résistant à l’eau de mer.
29
fran
çais
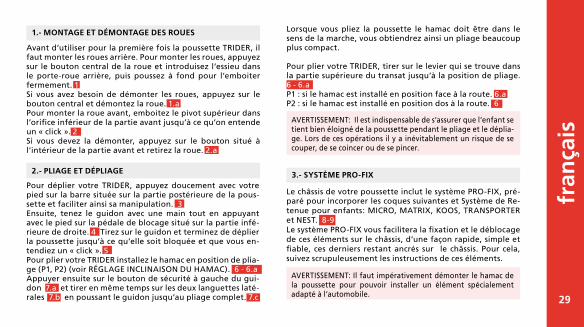
Le châssis de votre poussette inclut le système PRO-FIX, pré-paré pour incorporer les coques suivantes et Système de Re-tenue pour enfants: MICRO, MATRIX, KOOS, TRANSPORTER et NEST. 8-9 Le système PRO-FIX vous facilitera la fixation et le déblocage de ces éléments sur le châssis, d’une façon rapide, simple et fiable, ces derniers restant ancrés sur le châssis. Pour cela, suivez scrupuleusement les instructions de ces éléments.
AVERTISSEMENT: Il est indispensable de s’assurer que l’enfant se tient bien éloigné de la poussette pendant le pliage et le déplia-ge. Lors de ces opérations il y a inévitablement un risque de se couper, de se coincer ou de se pincer.
1.- MONTAGE ET DÉMONTAGE DES ROUES
2.- PLIAGE ET DÉPLIAGE
Lorsque vous pliez la poussette le hamac doit être dans le sens de la marche, vous obtiendrez ainsi un pliage beaucoup plus compact.
Pour plier votre TRIDER, tirer sur le levier qui se trouve dans la partie supérieure du transat jusqu’à la position de pliage. 6 - 6.aP1 : si le hamac est installé en position face à la route. 6.aP2 : si le hamac est installé en position dos à la route. 6
3.- SYSTÈME PRO-FIX
AVERTISSEMENT: Il faut impérativement démonter le hamac de la poussette pour pouvoir installer un élément spécialement adapté à l’automobile.
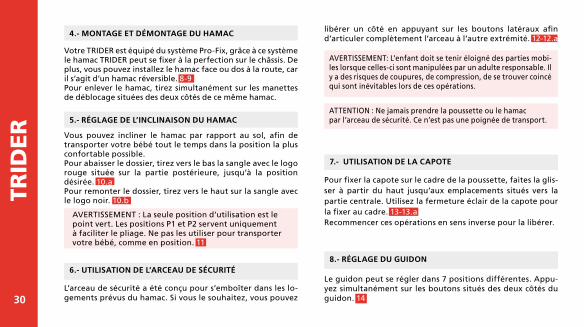
Avant d’utiliser pour la première fois la poussette TRIDER, il faut monter les roues arrière. Pour monter les roues, appuyez sur le bouton central de la roue et introduisez l’essieu dans le porte-roue arrière, puis poussez à fond pour l’emboiter fermement. 1Si vous avez besoin de démonter les roues, appuyez sur le bouton central et démontez la roue. 1.aPour monter la roue avant, emboitez le pivot supérieur dans l’orifice inférieur de la partie avant jusqu’à ce qu’on entende un « click ». 2Si vous devez la démonter, appuyez sur le bouton situé à l’intérieur de la partie avant et retirez la roue. 2.a
Pour déplier votre TRIDER, appuyez doucement avec votre pied sur la barre située sur la partie postérieure de la pous-sette et faciliter ainsi sa manipulation. 3Ensuite, tenez le guidon avec une main tout en appuyant avec le pied sur la pédale de blocage situé sur la partie infé-rieure de droite. 4 Tirez sur le guidon et terminez de déplier la poussette jusqu’à ce qu’elle soit bloquée et que vous en-tendiez un « click ». 5Pour plier votre TRIDER installez le hamac en position de plia-ge (P1, P2) (voir RÉGLAGE INCLINAISON DU HAMAC). 6 - 6.aAppuyer ensuite sur le bouton de sécurité à gauche du gui-don 7.a et tirer en même temps sur les deux languettes laté-rales 7.b en poussant le guidon jusqu’au pliage complet. 7.c
30
TRID
ER
libérer un côté en appuyant sur les boutons latéraux afin d’articuler complètement l’arceau à l’autre extrémité. 12-12.a
L’arceau de sécurité a été conçu pour s’emboîter dans les lo-gements prévus du hamac. Si vous le souhaitez, vous pouvez
6.- UTILISATION DE L’ARCEAU DE SÉCURITÉ
Votre TRIDER est équipé du système Pro-Fix, grâce à ce système le hamac TRIDER peut se fixer à la perfection sur le châssis. De plus, vous pouvez installez le hamac face ou dos à la route, car il s’agit d’un hamac réversible. 8-9 Pour enlever le hamac, tirez simultanément sur les manettes de déblocage situées des deux côtés de ce même hamac.
4.- MONTAGE ET DÉMONTAGE DU HAMAC
Pour fixer la capote sur le cadre de la poussette, faites la glis-ser à partir du haut jusqu’aux emplacements situés vers la partie centrale. Utilisez la fermeture éclair de la capote pour la fixer au cadre. 13-13.aRecommencer ces opérations en sens inverse pour la libérer.
7.- UTILISATION DE LA CAPOTE
Vous pouvez incliner le hamac par rapport au sol, afin de transporter votre bébé tout le temps dans la position la plus confortable possible.Pour abaisser le dossier, tirez vers le bas la sangle avec le logorouge située sur la partie postérieure, jusqu’à la position désirée. 10.aPour remonter le dossier, tirez vers le haut sur la sangle avec le logo noir. 10.b 10
5.- RÉGLAGE DE L’INCLINAISON DU HAMAC
Le guidon peut se régler dans 7 positions différentes. Appu-yez simultanément sur les boutons situés des deux côtés du guidon. 14
8.- RÉGLAGE DU GUIDON
AVERTISSEMENT : La seule position d’utilisation est le point vert. Les positions P1 et P2 servent uniquement à faciliter le pliage. Ne pas les utiliser pour transporter votre bébé, comme en position. 11
AVERTISSEMENT: L’enfant doit se tenir éloigné des parties mobi-les lorsque celles-ci sont manipulées par un adulte responsable. Il y a des risques de coupures, de compression, de se trouver coincé qui sont inévitables lors de ces opérations.
ATTENTION : Ne jamais prendre la poussette ou le hamacpar l’arceau de sécurité. Ce n’est pas une poignée de transport.
31
fran
çais
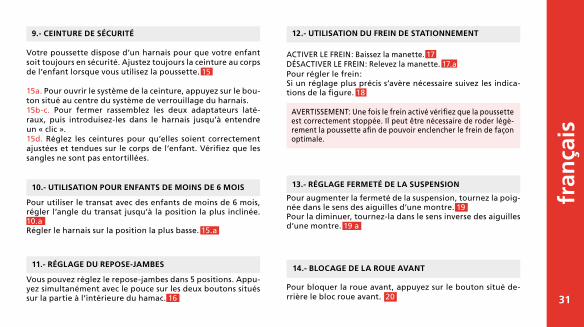
ACTIVER LE FREIN: Baissez la manette. 17DÉSACTIVER LE FREIN: Relevez la manette. 17.aPour régler le frein: Si un réglage plus précis s’avère nécessaire suivez les indica-tions de la figure. 18
12.- UTILISATION DU FREIN DE STATIONNEMENT
Pour bloquer la roue avant, appuyez sur le bouton situé de-rrière le bloc roue avant. 20
14.- BLOCAGE DE LA ROUE AVANT
Pour utiliser le transat avec des enfants de moins de 6 mois,régler l’angle du transat jusqu’à la position la plus inclinée. 10.aRégler le harnais sur la position la plus basse. 15.a 16
Vous pouvez réglez le repose-jambes dans 5 positions. Appu-yez simultanément avec le pouce sur les deux boutons situés sur la partie à l’intérieure du hamac. 16
10.- UTILISATION POUR ENFANTS DE MOINS DE 6 MOIS
11.- RÉGLAGE DU REPOSE-JAMBES
13.- RÉGLAGE FERMETÉ DE LA SUSPENSION
Pour augmenter la fermeté de la suspension, tournez la poig-née dans le sens des aiguilles d’une montre. 19Pour la diminuer, tournez-la dans le sens inverse des aiguilles d’une montre. 19 a
AVERTISSEMENT: Une fois le frein activé vérifiez que la poussette est correctement stoppée. Il peut être nécessaire de roder légè-rement la poussette afin de pouvoir enclencher le frein de façon optimale.
9.- CEINTURE DE SÉCURITÉ
Votre poussette dispose d’un harnais pour que votre enfant soit toujours en sécurité. Ajustez toujours la ceinture au corps de l’enfant lorsque vous utilisez la poussette. 15
15a. Pour ouvrir le système de la ceinture, appuyez sur le bou-ton situé au centre du système de verrouillage du harnais.15b-c. Pour fermer rassemblez les deux adaptateurs laté-raux, puis introduisez-les dans le harnais jusqu’à entendre un « clic ».15d. Réglez les ceintures pour qu’elles soient correctement ajustées et tendues sur le corps de l’enfant. Vérifiez que les sangles ne sont pas entortillées.

32
TRID
ER
INFORMATIONS SUR LA GARANTIE
Cet article dispose de garantie conformément aux indicationsdu D.R. Législatif 1 / 2015 du 24 juillet. Veuillez conserver la facture. Vous devrez la présenter comme preuve d’achat au magasin où vous avez acheté le produit en vue de toute réclamation.
Sont exclues de la présente garantie les défectuosités et les pannes dues à une utilisation inadéquate du produit, ou liés à un manquement aux normes de sécurité ou d’entretien décrites dans les pages d’instructions et sur les étiquettes de lavage, de même que les éléments usés par une utilisation normale et journalière.
L’étiquette qui contient le numéro du châssis de votre modèle, ne doit être arrachée sous aucun prétexte, elle contient des informations très importantes.
Attention:Afin de bénéficier d’une sécurité optimale et d’un meilleur service, il est essentiel que vous enregistriez votre nouveau JANÉ sur notre site www.janeworld.com. L’enregistrement vous permettra de vous informer, si nécessaire, sur l’évolution et l’entretien de votre produit. De même, si vous le souhaitez, nous pourrons vous informer sur les nouveaux modèles et les informations pouvant vous intéresser.
Ne pas exposer le revêtement au soleil pendant de longues périodes.Laver les parties en plastique avec de l’eau tiède et du savon, en séchant ensuite tous les composants consciencieusement.Le revêtement peut se démonter pour être lavé. Vérifiez régulièrement les freins, harnais et fixations pou-vant s’abîmer à l’usage.Graissez régulièrement les parties mobiles et les mécanismes avec un spray à base de silicone.N’oubliez pas de contrôler périodiquement votre frein en sui-vant la méthode indiquée sur le schéma. 18Pour votre sécurité comme pour la bonne conservation de ce produit, il est très important que vous effectuiez un contrôle périodique dans un de nos ateliers.
16.- ENTRETIEN
15.- HABILLAGE DE PLUIE
L’habillage de pluie de votre TRIDER est très facile à installer, il vous suffit de recouvrir le hamac et d’ajuster les crochets sur le châssis pour le fixer. Ce dernier possède une petite fenêtre qui peut s’enrouler et être maintenue par des velcros afin que l’enfant puisse voir en toute liberté tout ce qui l’entoure. 21

33
deu
tsch
INHALTSVERZEICHNIS
INFORMATIONEN UND SICHERHEITSHINWEISE1. BEFESTIGEN UND ENTFERNEN DER RÄDER2. ZUSAMMEN- UND AUSEINANDERKLAPPEN3. PRO-FIX-SYSTEM4. BEFESTIGEN UND ENTFERNEN DER HÄNGEMATTE5. WINKELEINSTELLUNG DER HÄNGEMATTE6. GEBRAUCH DES SCHUTZBÜGELS7. GEBRAUCH DER HAUBE8. LENKERVERSTELLUNG9. SICHERHEITSGURT10. VERWENDUNG FÜR KINDER AB 6 MONATEN11. VERSTELLUNG DER FUSSSTÜTZE12. GEBRAUCH DER FESTSTELLBREMSE13. EINSTELLUNG DER FEDERUNGSHÄRTE14. FESTSTELLEN DER VORDERRÄDER15. REGENSCHUTZ16. PFLEGEINFORMATIONEN ZUR GARANTIE
343535353636363636373737373737383838

34
TRID
ER
INFORMATIONEN UND SICHERHEITSHINWEISE
Bedienungsanleitung:WICHTIG: SORGFÄLTIG LESEN UND FÜR ZUKÜNFTIGE NACHFRAGEN AUFBEWAHREN.
HINWEISE:-Lassen Sie Ihr Kind nie unbeaufsichtigt.-Stellen Sie sicher, dass alle Schließvorrichtungen vor dem Gebrauch eingerastet sind.-Vergewissern Sie sich, dass Ihr Kind beim Aufklappen und Zusammenklappen des Wagens außer Reichweite ist, um Verletzungen zu vermeiden.-Lassen Sie Ihr Kind nicht mit dem Wagen spielen.-Verwenden Sie immer das Rückhaltesystem.-Überprüfen Sie, ob alle Befestigungsvorrichtungen der Babyschale, des Sitzes oder des Kinderautositzes vor dem Gebrauch richtig eingerastet sind.-Dieses Produkt ist nicht zum Joggen oder Skaten geeignet.-Dieser Kinderwagen ist für Kinder ab Geburt und bis 15 kg geeignet.-Erlauben Sie nie, dass sich Ihr Kind auf die Fußstütze oder den Bügel stellt.
NUTZUNGSBESCHRÄNKUNGEN:-Es wird empfohlen, ab Geburt bis zum Alter von 6 Monaten die am weitesten zurückgelehnte Position zu verwenden.-Betätigen Sie immer die Bremse des Kinderwagens, bevor Sie das Kind in den Kinderwagen setzen oder herausnehmen.-Jede am Lenker und/oder auf der Rückseite der Rückenlehne und/oder an den Seiten des Kinderwagens befestigte Last beeinträchtigt seine Stabilität.-Dieser Kinderwagen wurde für ein einziges Kind entworfen. Er darf nicht mit mehreren Kindern gleichzeitig verwendet werden.-Es dürfen keine von JANÉ nicht genehmigten Zubehörteile verwendet werden.-Es dürfen nur von JANÉ gelieferte oder empfohlene Ersatzteile verwendet werden.-Für die mit einem Fahrgestell verwendeten Babytragen ersetzt dieser Kinderwagen weder eine Wiege noch ein Bett. Wenn Ihr Kind schlafen muss, sollte es in eine passende Babyschale, Wiege oder Bett gelegt werden.-Das zugelassene Höchstgewicht des Tragekorbs für Gegenstände darf nie das dort angegebene Gewicht (4 kg) übersteigen.-Dieses Produkt ist nicht salzwasserfest.

35
deu
tsch
Bevor Sie den Sportwagen TRIDER zum ersten Mal benutzen, müssen die Hinterräder befestigt werden. Zur Befestigung der Räder drücken Sie auf den Knopf in der Mitte des Rades und führen die Achse in den Hinterradhalter ein und drücken sie, bis Sie bemerken, dass sie fest eingerastet ist. 1Wenn Sie die Räder entfernen müssen, drücken Sie auf den Knopf in der Mitte und ziehen das Rad heraus. 1.aUm das Vorderrad zu montieren, müssen Sie die obere Achse in den unteren Teil des Bugs einstecken, bis Sie ein Klicken hören. 2Wenn Sie es abnehmen müssen, drücken Sie auf den Knopf im Inneren des Bugs und ziehen das Rad ab. 2.a
ANMERKUNG: Es ist unerlässlich sich zu vergewissern, dass sich das Kind vom Sportwagen während des Zusammen- und Ausei-nanderklappens entfernt hält. Das Auftauchen von Punkten, wo man sich schneiden, verstauchen und einklemmen könnte, ist während dieser Vorgänge unvermeidlich.
1.- BEFESTIGEN UND ENTFERNEN DER RÄDER
2.- ZUSAMMEN- UND AUSEINANDERKLAPPEN
Es wird empfohlen, dass die Hängematte beim Zusammenklap-pen des Sportwagens in Fahrtrichtung blickt, um so ein viel kom-pakteres Zusammenklappen zu erreichen.Zum Zusammenklappen Ihres TRIDER ziehen Sie am Hebel an der Oberseite des Sitzeinhangs, um ihn in die richtige Klappposition zu bringen. 6 - 6.aP1: Wenn die Hängematte in Fahrtrichtung angebracht wird. 6.aP2: Wenn die Hängematte entgegen der Fahrtrichtung angebrachtwird. 6
3.- PRO-FIX-SYSTEM
ANMERKUNG: Es ist unerlässlich, die Hängematte des Sportwagens zu entfern, um ein Zubehörteil des Autos verbinden zu können.
Zum Auseinanderklappen Ihres TRIDER treten Sie sanft auf das sich auf der Rückseite befindende Pedal, um den Sport-wagen hochzuheben und so die Handhabung zu erleichtern. 3 Danach halten Sie den Lenker mit einer Hand fest, während Sie auf das sich an unteren rechten Seite befindende Feststellpedal treten. 4 Ziehen Sie den Lenker hoch und vollenden Sie das Ausei-nanderklappen, bis er einrastet und Sie ein Klicken hören. 5 Um Ihren TRIDER zusammenzuklappen, die Hängematte in dieKlappposition (P1, P2) bringen (siehe EINSTELLUNG DES SITZWINKELS). 6 - 6.a Danach drücken Sie auf den sich links vom Lenker befindenden Sicherheitsknopf 7.a und ziehen gleichzeitig an beiden Sei-tenschnappern 7.b und schieben den Lenker nach vorne, bis das Zusammenklappen vollendet ist. 7.c7.c
Im Rahmen Ihres Wagens ist ein PRO-FIX-System integriert, das zur Aufnahme folgender Babyträger und Kindersitze dient: MICRO, MATRIX, KOOS, TRANSPORTER und NEST. 8-9 Das PRO-FIX System erleichtert Ihnen die schnelle, leichte und sichere Verankerung und Entnahme dieser Zubehörteile in das Fahrgestell. Die Zubehörteile bleiben im Fahrgestell verankert. Folgen Sie dazu bitte aufmerksam den Anweisun-gen dieser Zubehörteile.

36
TRID
ER
platzierten Aussparungen entworfen. Wenn Sie es wüns-chen, können Sie eine Seite nur durch Drücken der seitlichen Knöpfe lösen und der Bügel bleibt vollständig mit dem ande-ren Ende verbunden. 12 - 12.a
Der Schutzbügel wurde zum Einrasten in die im Sitzeinhang
6.- GEBRAUCH DES SCHUTZBÜGELS
4.- BEFESTIGEN UND ENTFERNEN DER HÄNGEMATTE
Um die Haube am Rahmen der Hängematte zu befestigen, schieben Sie sie von oben bis zu den jeweiligen sich im Mit-telteil befindenden Aussparungen herunter. Verwenden Sie den Reißverschluss, den die Haube hat, um sie mit dem Rah-men zu verbinden. 13 -13.a Gehen Sie umgekehrt vor, um sie zu lösen.
7.- GEBRAUCH DER HAUBE
Sie können die Hängematte in Richtung Boden zurückleh-nen, um Ihr Baby jederzeit in der bequemsten Position zu transportieren.Zum Herunterklappen der Rückenlehne ziehen Sie das sich auf der Rückseite befindende Band mit dem roten Logo bis zur gewünschten Position nach unten. 10.aZum Heraufklappen der Rückenlehne ziehen Sie das Band mitdem schwarzen Lgo nach oben. 10.b
5.- WINKELEINSTELLUNG DER HÄNGEMATTE
Der Lenker kann in 7 verschiedene Positionen verstellt wer-den. Drücken Sie gleichzeitig auf beide sich an den Seiten des Lenkers befindenden Knöpfe. 14
8.- LENKERVERSTELLUNG
ACHTUNG: Die einzige Verwendungsposition ist der grüne Punkt. Die Positionen P1 und P2 dienen nur dazu, um das Zusammenklappen zu erleichtern. Es ist nicht er-laubt, sie für den Transport Ihres Babys zu verwenden, ebenso wie die Position. 11
Ihr TRIDER ist mit dem Pro-Fix-System ausgestattet. Mit diesem System kann die Hängematte TRIDER perfekt mit dem Fahrges-tell verbunden werden. Außerdem können Sie die Hängematte mit Blick zu Ihnen oder nach vorne anbringen, da es sich um eine drehbare Hängematte handelt. 8 - 9 Zum Aushängen der Hän-gematte ziehen Sie gleichzeitig an den sich auf beiden Seiten der Hängematte selbst befindenden Entriegelungshebeln.
ANMERKUNG: Das Kind muss von den beweglichen Teilen entfernt gehalten werden, wenn diese von einem verantwortlichen Erwach-senen gehandhabt werden. Das Auftreten von Schnitt-, Druck und Quetschstellen und ist bei diesen Operationen unumgänglich.
ACHTUNG: Halten Sie den Buggy oder den Sitzeinhang nie am Schutzbügel fest, da er kein Tragegriff ist.

37
deu
tsch
BREMSEN: Drücken Sie den Hebel nach unten. 17BREMSE LÖSEN: Drücken Sie den Hebel nach oben. 17.a
Um die Bremse einzustellen:Falls diese einer genaueren Justierung bedarf, die Anleiutun-gen der Abbildung 18 beachten.
12.- GEBRAUCH DER FESTSTELLBREMSE
Zur Arretierung des Vorderrades drücken Sie auf den sich hin-ter dem Vorderradhalter befindenden Knopf. 20
14.- ARRETIERUNG DES VORDERRADES
Um den Sitzeinhang mit Kindern unter 6 Monaten zu verwen-den, stellen Sie den Winkel des Sitzeinhangs in die am weites-ten zurückgelehnte Position ein. 10.aStellen Sie den Gurt in die niedrigste Position ein. 15.a
Sie können die Fußstütze in 5 Positionen verstellen. Drücken Sie gleichzeitig mit dem Daumen auf die beiden sich im In-nenteil der Hängematte befindenden Knöpfe. 16
10.- VERWENDUNG FÜR KINDER AB 6 MONATEN
11.- VERSTELLUNG DER FUSSSTÜTZE
13.- EINSTELLUNG DER FEDERUNGSHÄRTE
Zur Erhöhung der Härte drehen Sie den Hebel im Uhrzeiger-sinn. 19Zur Reduzierung der Härte drehen Sie entgegen dem Uhr-zeigersinn. 19.a
ANMERKUNG: Nachdem die Bremse betätigt wurde, überprüfen, dass der Wagen korrekt gebremst ist. Es könnte erforderlich sein, den Wagen leicht zu drehen, damit die Bremse optimal greift.
9.- SICHERHEITSGURT
Ihr Buggy verfügt über einen Sicherheitsgurt, damit Ihr Kind jederzeit sicher sitzt. Passen Sie den Gurt dem Kind an, wenn Sie den Buggy verwenden. 15
15a. Zum Öffnen des Gurtsystems drücken Sie auf den sich in der Mitte des Gurtverschlusses befindenden Knopf.15b-c. Zum Schließen verbinden Sie die beiden seitlichen Adapter miteinander und führen sie danach in den Sicher-heitsgurt ein, bis Sie ein Klicken hören.15d. Stellen Sie die Gurte so ein, dass sie richtig auf Ihr Kind eingestellt und gespannt sind. Zum Einstellen der Gurtlänge schieben Sie die Schnallen nach oben oder unten. Stellen Sie sicher, dass die Gurte nicht verdreht sind.

38
TRID
ER
INFORMATIONEN ZUR GARANTIE
Dieser Artikel verfügt über eine Garantie gemäß den Bestim-mungen der königlichen Gesetzesverordnung 1 / 2015 vom 24. Juli. Bewahren Sie den Kaufbeleg auf, denn er muss in dem Laden, wo das Produkt gekauft wurde, bei jeder Reklamation vorgelegt werden, um ihre Gültigkeit zu beweisen.
Jene Mängel oder Schäden, die durch unsachgemäßen Ge-brauch des Artikels oder Nichteinhaltung der in der Bedie-nungsanleitung und auf den Pflegeetiketten beschriebenen Sicherheits- und Wartungsvorschriften verursacht wurden, sind von der vorliegenden Garantie ausgeschlossen, ebenso wie die Verschleißteile durch normalen Gebrauch und täglichen Um-gang.
Das Etikett, das die Fahrgestellnummer Ihres Modells enthält, darf unter keinen Umständen abgerissen werden, denn es enthält wichtige Informationen.
Achtung:Um maximale Sicherheit und Betreuung für Ihren neuen JANÉ zu erreichen, ist es sehr wichtig, dass Sie Ihr neues Produkt auf unserer Website www.janeworld.com registrieren es finden, ausfüllen. Die Registrierung wird Ihnen ermöglichen, falls not-wendig, sich über die Entwicklung und Pflege Ihres Produktes zu informieren. Ebenso können wir Sie, wenn Sie es wünschen, über die neuesten Modelle oder Nachrichten, die unserer Ansi-cht nach für Sie von Interesse sind, informieren.
Polstereinlage nicht übermäßig lange einer direkten Sonne-neinstrahlung aussetzen.Plastikteile mit lauwarmem Wasser und Seife reinigen. Ans-chließend alle Bauteile sorgfältig trocknen.Zum Waschen kann die Polstereinlage herausgenommen werden. Überprüfen Sie regelmäßig die Bremsen, die Hosenträger-gurte und die Befestigungen, die aufgrund der Benutzung Schäden erleiden können.Fetten Sie die beweglichen Teile und Vorrichtungen regel-mäßig mit einem Spray auf Silikonbasis ein. Verwenden Sie weder Öl noch Fett!Denken Sie daran Ihre Bremse regelmäßig nach der in Abbil-dung 18 erklärten Methode einzustellen. Sowohl zu Ihrer Sicherheit als auch zur guten Konservierung des Produktes ist es wichtig, eine regelmäßige Überprüfung in einer unserer offiziellen Werkstätten vornehmen zu lassen.
16.- PFLEGE
Der Regenschutz Ihres TRIDER ist sehr leicht anzubringen. Sie müssen nur die Hängematte abdecken und die Verschlüsse dem Fahrgestell anpassen, um ihn zu befestigen. Er besitzt ein kleines Fenster, das aufgerollt und mit Klettbändern be-festigt werden kann, damit das Kind völlig frei seine Umge-bung erkunden kann. 21
15.- REGENSCHUTZ

39
ital
ian
o
INDICE
INFORMAZIONI E AVVERTENZE DI SICUREZZA1. MONTAGGIO E SMONTAGGIO DELLE RUOTE 2. APERTURA E CHIUSURA3. SISTEMA PRO-FIX4. MONTAGGIO E SMONTAGGIO DELLA SEDUTA5. REGOLAZIONE DELL’INCLINAZIONE DELLA SEDUTA 6. USO DEL PROTETTORE DI SICUREZZA 7. USO DELLA CAPOTTINA 8. REGOLAZIONE DEL MANUBRIO9. CINTURA DI SICUREZZA10. USO CON BAMBINI DI ETÀ INFERIORE AI 6 MESI11. REGOLAZIONE DEL POGGIAPIEDI12. USO DEL FRENO DI STAZIONAMENTO13. REGOLAZIONE DELLA DUREZZA DELLE SOSPENSIONI14. BLOCCAGGIO DELLE RUOTE ANTERIORI15. TELO PER LA PIOGGIA16. MANUTENZIONEINFORMAZIONI SULLA GARANZIA
404141414242424242434343434343444444

40
TRID
ER
INFORMAZIONI E AVVERTENZE DI SICUREZZA
IstruzioniIMPORTANTE: LEGGERE ATTENTAMENTE LE PRESENTI ISTRUZIONI E CONSERVARLE PER CONSULTAZIONI FUTURE.
AVVERTENZE:-Non lasciare mai il bambino privo di vigilanza.-Assicurarsi che tutti i dispositivi di chiusura siano inseriti primadell’uso.-Per evitare lesioni, assicurarsi che il bambino sia distante durantel’apertura e la chiusura del prodotto.-Evitare che il bambino giochi con questo prodotto.-Usare sempre il sistema di trattenuta.-Verificare che i dispositivi di trattenuta del portabebè, del passeggino o del seggiolino auto siano correttamente inseriti prima dell’uso.-Questo prodotto non è adatto per correre o pattinare.-Questo passeggino è adatto a bambini dalla nascita fino a 15 kg.-Non permettere mai al bambino di mettersi in piedi sul poggiapiedi.
RESTRIZIONI D’USO:-Si raccomanda l’uso nella posizione più reclinata dalla nascita fino ai 6 mesi.-Attivare sempre il freno del passeggino prima di mettere o ritirareil bambino dal passeggino.-Qualunque carico fissato al manubrio e/o alla parte posterioredello schienale e/o ai lati del passeggino ne compromette la stabilità.-Questo passeggino è stato progettato per un solo bambino; nonutilizzarlo per più di un bambino alla volta.-Non utilizzare accessori non approvati da JANÉ.-Utilizzare solo pezzi di ricambio forniti o raccomandati da JANÉ.-Per i portabebè usati con un telaio: questo passeggino non sostituisce una culla o un lettino. Se il bambino ha bisogno di dormire, utilizzare un portabebè, una culla o un lettino adeguati.-Il peso massimo consentito per il cestino non deve superare quelloindicato sul cestino stesso (4 kg).-Questo prodotto non è resistente all’acqua salata.

41
ital
ian
o
Il telaio del passeggino include il sistema PRO-FIX, prepara-to per incorporare i seguenti porta-neonati e Sistemi di ri-tenzione infantile: MICRO, MATRIX, KOOS, TRANSPORTER e NEST. 8-9 Il sistema PRO-FIX renderà più semplice l’applicazione e la ri-mozione di questi accessori dal telaio, in maniera rapida, faci-le e sicura, poiché restano ancorati al telaio stesso. Per le mo-dalità, seguire attentamente le istruzioni di questi accessori.
ATTENZIONE: È molto importante assicurarsi che il bambino si trovi lontano dal passeggino durante le manovre di apertura e chiusura. La comparsa di punti che possono procurare tagli, com-pressioni o altri danni sono inevitabili durante queste operazioni.
1.- MONTAGGIO E SMONTAGGIO DELLE RUOTE
2.- APERTURA E CHIUSURA
Quando si richiude il passeggino, si consiglia di collocare la seduta rivolta nel senso di marcia per ottenere un formato chiuso molto più compatto.
Per chiudere il TRIDER tirare la leva nella parte superiore dellasdraiata per portarla nella posizione di chiusura. 6 - 6.aP1: se la seduta è collocata nel senso di marcia. 6.aP2: se la seduta è collocata nel senso contrario alla marcia. 6
3.- SISTEMA PRO-FIX
ATTENZIONE: È necessario smontare la seduta dal passeggino per poter applicare qualunque accessorio per auto.
Prima di cominciare ad usare il passeggino TRIDER è necessa-rio montare le ruote posteriori. Per montare le ruote premere il pulsante centrale situato sulla ruota stessa, introdurre l’asse nel portaruote posteriore e spingere fino a che non resta in-castrato in modo fisso. 1 Per smontare le ruote, premere il pulsante centrale ed estrarle. 1.aPer montare la ruota anteriore incastrare l’asse superiore ne-lla parte inferiore della struttura fino a sentire un “click”. 2Per smontarla, premere il pulsante all’interno della struttura ed estrarre la ruota. 2.a
Prima di procedere all’apertura del TRIDER, fare leva delica-tamente sulla barra che si trova nella parte posteriore per so-llevare il passeggino e poterlo maneggiare più facilmente. 3 In seguito, afferrare il manubrio con una mano e contem-poraneamente premere il pedale di bloccaggio situato ne-lla zona inferiore destra. 4 Tirare il manubrio e continuare l’apertura fino al completo blocco del meccanismo, che verrà segnalato da un “clic”. 5 Per richiudere il TRIDER collocare la seduta in posizione di chiusura (P1, P2) (vedi REGOLAZIONE DELL’INCLINAZIONE DELLA SEDUTA) 6 - 6.aIn seguito premere il pulsante di sicurezza alla sinistra del manubrio 7.a e tirare contemporaneamente le leve latera-li 7.b spingendo il manubrio in avanti fino a completare la chiusura. 7.c
42
TRID
ER
ATTENZIONE: l’unica posizione d’uso è il punto verde. Leposizioni P1 e P2 servono solo per facilitare la chiusura enon è permesso usarle per il trasporto del bambino, comela posizione. 11
È possibile reclinare la seduta rispetto al terreno per tras-portare il bambino nella posizione più comoda possibile in ciascun momento.Per abbassare lo schienale tirare verso il basso la cinghia con illogo rosso che si trova nella parte posteriore fino alla posizio-ne desiderata. 10.aPer alzare lo schienale tirare verso l’alto la cinghia con il logonero. 10.b 10
giamenti che si trovano sulla seduta. È possibile liberare unsolo lato premendo i pulsanti laterali, e il protettore rimarràtotalmente articolato sull’altra estremità. 12 - 12.a
Il protettore di sicurezza è realizzato per incastrarsi negli allog-
6.- USO DEL PROTETTORE DI SICUREZZA
4.- MONTAGGIO E SMONTAGGIO DELLA SEDUTA
Per agganciare la capottina al telaio della seduta, farla sco-rrere da sopra fino ai relativi alloggiamenti che si trovano ne-lla parte centrale. Usare la cerniera situata sulla capottina per unirla al telaio della seduta. 13 -13.a Per staccare la capottina, seguire il procedimento inverso.
7.- USO DELLA CAPOTTINA
5.- REGOLAZIONE DELL’INCLINAZIONE DELLA SEDUTA
Il manubrio può essere regolato in 7 diverse posizioni. Preme-re contemporaneamente i pulsanti situati su entrambi i lati del manubrio. 14
8.- REGOLAZIONE DEL MANUBRIO
Il TRIDER è dotato di sistema pro-fix. Grazie a questo siste-ma, la seduta TRIDER rimane perfettamente ancorata al te-laio. Inoltre, è possibile posizionare la seduta rivolta verso l’accompagnatore o nel senso di marcia, trattandosi di una seduta reversibile. 8 - 9 Per sganciare la seduta, tirare simul-taneamente le leve di sbloccaggio situate su entrambi i lati della seduta stessa.
ATTENZIONE: Il bambino deve essere tenuto lontano dalle parti mobili durante le operazioni di manipolazione effettuate da un adulto responsabile. L’apparizione di punti di taglio, compressio-ne e intrappolamento sono inevitabili durante queste operazioni.
ATTENZIONE: Non afferrare mai la carrozzina o la sedutadalla barra di protezione. Non è una maniglia per il trasporto.

43
ital
ian
o
FRENARE: Spingere la leva verso il basso. 17DISINSERIRE IL FRENO: Portare la leva verso l’alto. 17.a
Per regolare il freno:Nel caso in cui sia necessaria una regolazione più precisa, se-guire le indicazioni della figura. 18
12.- USO DEL FRENO DI STAZIONAMENTO
Per bloccare la ruota anteriore, premere il pulsante che si tro-va dietro il portaruota anteriore. 20
14.- BLOCCAGGIO DELLA RUOTA ANTERIORE
13.- REGOLAZIONE DELLA DUREZZA DELLE SOSPENSIONI
Per aumentare la durezza girare il perno in senso orario. 19Per diminuirla girare il perno in senso antiorario. 19.a
Per usare la sdraietta con bambini di età inferiore ai 6 mesi regolare l’angolo nella posizione più reclinata. 10.aRegolare l’imbragatura nella posizione più bassa. 15.a
10.- USO CON BAMBINI DI ETÀ INFERIORE AI 6 MESI
È possibile regolare il poggiapiedi in 5 posizioni. Premere contemporaneamente con il pollice i due pulsanti situati ne-lla parte interna della seduta. 16
11.- REGOLAZIONE DEL POGGIAPIEDI
ATTENZIONE: Una volta azionato il freno assicurarsi che il passe-ggino sia rimasto frenato correttamente. Potrebbe essere neces-sario ruotare leggermente il passeggino affinché il freno ingrani in maniera ottima.
9.- CINTURA DI SICUREZZA
Il passeggino è dotato di un’imbragatura di sicurezza in modo che il bambino sia sicuro in ogni momento. Allacciare le cinture al bambino ogni volta che si usa il passeggino. 15
15a. Per aprire il sistema di cinture di sicurezza premere il pul-sante che si trova al centro dell’imbragatura.15b-c. Per chiudere unire i due adattatori laterali e poi intro-durli nella fibbia fino a sentire un “clic”.15d. Regolare le cinture in modo che siano ben aderenti al bambino e tese. Per regolare la lunghezza delle cinture spo-stare la fibbia verso l’alto o verso il basso. Assicurarsi che le cinture non siano attorcigliate.
44
TRID
ER
INFORMAZIONI SULLA GARANZIA
Questo articolo dispone di garanzia secondo quanto stipu-lato nel R.D. Legislativo 1 / 2015 dl 24 luglio. Conservare lo scontrino d’acquisto. È imprescindibile presentarlo presso il negozio in cui è stato acquistato il prodotto come prova d’ac-quisto in caso di reclamo. Sono esclusi dalla presente garanzia i difetti o le avarie dovu-ti a un uso non adeguato del prodotto o al mancato compi-mento delle norme di sicurezza e manutenzione descritte nei libretti di istruzioni e sulle etichette per il lavaggio. Lo stesso vale per i danni dovuti all’usura in caso di utilizzo prolungato.
L’etichetta che contiene il numero di telaio del modello non deve essere rimossa in nessun caso, dato che contiene infor-mazioni importanti.
Attenzione:Per ottenere la massima sicurezza e assistenza riguardo il suo nuovo JANÉ, è importante registrare il prodotto sul nostro sito www.janeworld.com. La registrazione le consentirà di essere informato, se è necessario, riguardo l’evoluzione e la manutenzione del suo prodotto. Inoltre, sempre se lo deside-ra, la potremo informare sui nuovi modelli o altre novità che riteniamo di suo interesse.
Non esporre il rivestimento ai raggi solari per lunghi inter-valli.Lavare le parti di plastica con acqua insaponata, poi asciuga-re scrupolosamente tutti i componenti.Il rivestimento può essere tolto e lavato. Controllare regolarmente i freni, le cinture e le chiusure che possano subire un deterioramento dovuto all’uso.Lubrificare regolarmente le parti mobili e i meccanismi con uno spray a base di silicone. Non usare olio o grasso.Ricordi di regolare periodicamente il freno seguendo il meto-do spiegato nella figura. 18È importante sottoporre il prodotto a una revisione periodica in uno qualunque dei nostri centri ufficiali, sia per la sua si-curezza che per la buona conservazione del prodotto stesso.
16.- MANUTENZIONE
Il telo per la pioggia del TRIDER è molto semplice da montare: basta posizionarlo in modo da coprire la seduta e allacciare i ganci al telaio per tenerlo fermo. Il telo è dotato di una fi-nestrella che può essere arrotolata e fissata con il velcro in modo che il bambino possa guardare intorno a sé in completa libertà. 21
15.- TELO PER LA PIOGGIA

po
rtu
gu
ês
45
INDICE
INFORMAÇÃO E ADVERTÊNCIAS DE SEGURANÇA1. MONTAGEM E DESMONTAGEM DAS RODAS2. DOBRAGEM E DESDOBRAGEM3. SISTEMA PRO-FIX4. MONTAGEM E DESMONTAGEM DA CADEIRA5. AJUSTE DO ÂNGULO DA CADEIRINHA6. USO DO PROTETOR DE SEGURANÇA7. USO DA CAPOTA8. AJUSTE DO GUIADOR9. CINTO DE SEGURANÇA10. UTILIZAÇÃO PARA MENORES DE 6 MESES11. AJUSTE DO APOIO DE PÉS12. USO DO TRAVÃO DE ESTACIONAMENTO13. REGULAÇÃO DA DUREZA DA SUSPENSÃO14. BLOQUEIO DAS RODAS DIANTEIRAS15. PROTECTOR DE CHUVA16. MANUTENÇÃOINFORMAÇÃO SOBRE GARANTIA
464747474848484848494949494949505050

46
TRID
ER
INFORMAÇÃO E ADVERTÊNCIAS DE SEGURANÇA
InstruçõesIMPORTANTE: LER ATENTAMENTE E GUARDAR PARA FUTURAS CONSULTAS.ADVERTÊNCIAS:-Nunca deixe a criança desatendida.-Assegure-se de que todos os dispositivos de fecho estão engrenados antes de usar.-Para evitar lesões, assegure-se de que a criança se mantém afastada durante a desdobramento e dobragem deste produto.-Não permita que a criança brinque com este produto.-Use sempre o sistema de retenção.-Comprove se os dispositivos de sujeição da alcofa, deo assento ou da cadeira do carro estão corretamente engrenados antes de usar.-Este producto no es adecuado para correr o patinar.-Esta cadeira é adequada para crianças a partir do nascimento e até 15 kg.-Nunca permita que a criança se ponha de pé no apoio para ospés ou estribo.
RESTRIÇÕES DE USO:-Recomenda-se o uso na posição mais reclinada a partir do nascimento e até aos 6 meses.-Ative sempre o travão da cadeira antes de colocar ou retirar ascrianças da cadeira.-Qualquer carga fixada ao guiador e/ou à parte traseira do encosto e/ou aos lados da cadeira afeta a estabilidade desta.-Esta cadeira foi desenhada para uma só criança e não deve serutilizada por mais crianças de cada vez.-Não devem ser utilizados acessórios não aprovados pela JANÉ.-Apenas devem ser utilizados os substitutos fornecidos ou recomendados pela JANÉ.-Para os porta-bebés usados com um chassis, esta cadeira nãosubstitui um berço ou cama. Se a criança necessitar de dormir,deve ser colocada numa alcofa, num berço ou numa cama adequados.-A massa máxima permitida da cesta porta-objetos nunca podesuperar o indicado na cesta (4 kg).-Este produto não é resistente à água salgada.
po
rtu
gu
ês
47
O chassis do seu carrinho inclui o sistema PRO-FIX, prepara-do para incorporar os seguintes porta-bebés e Sistemas de Retenção infantil: MICRO, MATRIX, KOOS, TRANSPORTER e NEST. 8-9 O sistema PRO-FIX facilita o acoplamento e a retirada de es-tes acessórios no chassis, de um modo rápido, fácil e seguro, ficando fixos ao chassis. Para isso siga atentamente as ins-truções dos acessórios.
ADVERTÊNCIA: É imprescindível assegurar-se que a criança se mantém afastada da cadeira durante as acções de dobragem e desdobragem. O aparecimento de pontos de corte e compressão e de encerramentos são inevitáveis durante estas operações.
1.- MONTAGEM E DESMONTAGEM DAS RODAS
2.- DOBRAGEM E DESDOBRAGEM
É conveniente que quando dobre o carrinho a cadeira esteja colocada no sentido da marcha, obtendo assim uma dobra-gem muito mais compacta.
Para dobrar a sua TRIDER, puxe a alavanca na parte superior da rede, para situá-la na posição de dobragem. 6 - 6.aP1: se a cadeira estiver colocada no sentido da marcha. 6.aP2: se a cadeira estiver colocada no sentido contrário à mar-cha. 6
3.- SISTEMA PRO-FIX
ADVERTÊNCIA: É imprescindível desmontar a cadeira do carrinho para poder acoplar qualquer acessório de auto.
Antes de usar pela primeira vez a cadeira TRIDER é necessário montar as rodas traseiras. Para montar as rodas pressione o botão central da mesma e introduza o eixo no porta rodas traseiro, empurrando até sentir que encaixou firmemente. 1Se necessitar de desmontar as rodas, pressione o botão cen-tral e retire a mesma. 1.aPara montar a roda dianteira encaixe o eixo superior na parte inferior do nariz da roda até ouvir um “clique”. 2Se necessitar de a desmontar, pressione o botão no interior do nariz da roda e extraia a mesma. 2.a
Para desdobrar a sua TRIDER, pise suavemente sobre a lixa si-tuada na parte posterior para incorporar o carrinho e facilitar assim a manipulação. 3 De seguida fixe o guiador com uma mão enquanto pisa o pe-dal de bloqueio situado na parte inferior direita. 4Puxe pelo guiador e termine a desdobragem até que fique bloqueado e ouvir um “clique”. 5Para dobrar o seu TRIDER coloque a cadeira na posição da dobragem (P1, P2) (veja AJUSTE DO ÂNGULO DO ASSENTO).6 - 6.aEm seguida pressione o botão de segurança situado à esquer-da do guiado 7.a e puxe ao mesmo tempo os dois gatilhos la-terais 7.b empurrando o guiador para a frente até completara dobragem. 7.c

48
TRID
ER
O protetor de segurança foi desenhado para encaixar nos
6.- USO DO PROTETOR DE SEGURANÇA
4.- MONTAGEM E DESMONTAGEM DA CADEIRA
Para segurar a capota no marco da cadeirinha, faça-a desli-zar de cima até aos alojamentos correspondentes situados na parte central. Use o fecho que existe na capota para a unir ao marco. 13 -13.a Siga o procedimento inverso para a libertar.
7.- USO DA CAPOTA
Pode inclinar a cadeira em relação ao solo, para transportar oseu bebé na posição mais cómoda possível sempre.Para baixar o encosto puxe da cinta situada na parte poste-rior, com o logótipo vermelho, para baixo até à posição pre-tendida. 10.aPara subir o encosto puxe a cinta com o logótipo preto paracima. 10.b
5.- AJUSTE DO ÂNGULO DA CADEIRINHA
O guiador pode ser ajustado em 7 posições diferentes. Prima simultaneamente os botões situados em ambos os lados do guiador. 14
8.- AJUSTE DO GUIADOR
ATENÇÃO: A única posição de uso é o ponto verde. As posições P1 e P2 são apenas para facilitar a dobragem, não é permitido utilizá-las para o transporte do seu bebé, tal como a posição 11
A sua TRIDER está equipada com o sistema Pro-fix. Com este sistema, a cadeirinha TRIDER pode ser acoplada perfeitamen-te ao chassis. Além disso pode colocar a cadeira no sentido da marcha, por se tratar de uma cadeira reversível. 8 - 9 Para desengatar cadeirinha, puxe em simultâneo pelas ala-vancas de desbloqueio situadas em ambos os lados da própria cadeirinha.
ADVERTÊNCIA: A criança deve manter-se afastada das partes móveis quando estas estiverem a ser manipuladas pelo adulto responsável. A aparição de pontos de corte e compressão e enta-lamentos é inevitável durante estas operações.
ATENÇÃO: Nunca segure o carrinho ou a rede pela barra deproteção, pois não é uma asa de transporte.
alojamentos dispostos na espreguiçadeira. Se assim o desejar,pode soltar apenas um lado pressionando os botões laterais eo protetor ficará totalmente articulado pela outra extremi-dade. 12 -12.a

po
rtu
gu
ês
49
TRAVAR: Accione a alavanca para baixo. 17DESTRAVAR: Accione a alavanca para cima. 17.a
12.- USO DO TRAVÃO DE ESTACIONAMENTO
Para bloquear a roda dianteira, premir o botão localizado atrás do eixo da roda dianteira. 20
14.- BLOQUEIO DA RODA DIANTEIRA
13.- REGULAÇÃO DA DUREZA DA SUSPENSÃO
Para aumentar a dureza rode a alavanca no sentido dos pon-teiros do relógio. 19Para a diminuir rode no sentido contrário aos dos ponteiros do relógio. 19.a
Para usar a espreguiçadeira com crianças menores de 6 me-ses, ajuste o ângulo da espreguiçadeira para a posição mais reclinada. 10.aAjuste o arnês na posição mais baixa. 15.a 16
Pode ajustar o apoio de pés em 5 posições. Pressione simul-taneamente com o polegar os dois botões situados na parte interior da cadeirinha. 16
10.- UTILIZAÇÃO PARA MENORES DE 6 MESES
11.- AJUSTE DO APOIO DE PÉS
ADVERTÊNCIA: Uma vez accionado o travão, certifique-se que o carrinho ficou correctamente travado. Pode ser necessário fa-zer rodar ligeiramente o carrinho para que o travão engrene de forma óptima.
Para Ajustar o travão:No caso de precisar um ajuste mais preciso siga as indicações da figura. 18
9.- CINTO DE SEGURANÇA
O seu carrinho dispõe de um arnês de segurança para que o seu filho esteja sempre seguro. Ajuste o cinto de segurança à criança sempre que usar o carrinho. 15
15a. Para abrir o sistema do cinto de segurança prima o botão situado no centro do arnês de fecho.15b-c. Para fechar junte os dois adaptadores laterais e de se-guida introduza-os no arnês até ouvir um “clique”.15d. Regule os cintos de segurança de modo a que fiquem corretamente ajustados à criança e com tensão. Para ajustar o comprimento dos cintos, deslize as fivelas para cima ou para baixo. Assegure-se que os cinturões não estejam retorcidos.

50
TRID
ER
INFORMAÇÃO SOBRE GARANTIA
Este artigo tem garantia conforme estipulado no R.D. Legis-lativo 1/2015 de 24 de julho. Conserve a fatura de compra, é imprescindível que seja apresentada na loja onde adquiriu o produto para justificar a sua validade perante qualquer re-clamação.
Ficam excluídos da presente garantia os defeitos ou avarias produzidas pelo uso inadequado do artigo ou pelo incumpri-mento das normas de segurança e manutenção descritas nas folhas de instruções e nas etiquetas de lavagem, assim como os elementos de desgaste por uso normal e manuseamento diário.
A etiqueta que contém o número de chassis do seu modelo, não deve ser removida sob nenhum pretexto pois contém in-formação importante.
Atenção:Para obter a máxima segurança e atenção sobre o seu novo JANÉ, é muito importante que registe o seu novo produto no nosso site www.janeworld.com. O registo permite informar-se, se necessário, sobre a evolução e manutenção do seu produto. Também, sempre que pretenda, podemos enviarlhe informa-ção sobre os novos modelos ou noticias que consideremos possam ser do seu interesse.
Não deixe o forro exposto ao sol durante períodos prolon-gados.Lave as partes em plástico com água tépida e sabão e seque bem todos os componentes.O forro pode ser retirado para lavagem. Verifique regularmente os travões, arneses e fixações que possam sofrer algum dano pelo uso.Lubrifique regularmente as partes móveis e mecanismos com um spray à base de silicone. Não usar óleo ou gordura.Lembre-se de ajustar o seu travão periodicamente seguindo o método explicado na figura. 18 Tanto para sua segurança como para a boa conservação des-tes produto, é importante que faça uma revisão periódica em qualquer uma das nossas oficinas oficiais.
16.- MANUTENÇÃO
O protector de chuva do seu TRIDER é muito simples de colo-car, bastando cobrir a cadeira e ajustar os engates ao chassis para o fixar. Este tem uma pequena janela que se pode en-rolar e fixar com velcros para que a criança possa ver o que a rodeia com total liberdade. 21
15.- PROTECTOR DE CHUVA

51
po
lski
SPIS TREŚCI
INFORMACJE DOTYCZĄCE BEZPIECZEŃSTWA I OSTRZEŻENIA1. MONTAŻ I DEMONTAŻ KÓŁ 2. SKŁADANIE I ROZKŁADANIE3. SYSTEM PRO-FIX4. MONTAŻ I DEMONTAŻ SIEDZISKA5. REGULACJA KĄTA NACHYLENIA SIEDZISKA6. KORZYSTANIE Z PAŁĄKA7. BUDKA8. REGULACJA RĄCZKI9. PASY BEZPIECZEŃSTWA10. KORZYSTANIE PRZEZ DZIECI W WIEKU PONIŻEJ 6 MIESIĄCA ŻYCIA11. REGULACJA PODNÓŻKA12. HAMULEC POSTOJOWY13. REGULACJA TWARDOŚCI ZAWIESZENIA14. BLOKADA KÓŁ PRZEDNICH15. OSŁONA PRZECIWDESZCZOWA16. KONSERWACJAINFORMACJA GWARANCYJNA
525353535454545454555555555555565656

52
TRID
ER
INFORMACJE DOTYCZĄCE BEZPIECZEŃSTWA I OSTRZEŻENIA
InstrukcjeWAŻNE : ZAPOZNAĆ SIĘ UWAŻNIE Z TREŚCIĄ INSTRUKCJI I ZACHOWAĆ W CELU PÓŹNIEJSZYCH KONSULTACJI.
OSTRZEŻENIA:-Dziecka nigdy nie należy pozostawiać bez nadzoru.-Przed użyciem należy się upewnić, czy wszystkie mechanizmy blokujące zostały prawidłowo zamknięte.-Podczas składania i rozkładania wózka dziecko powinno znajdować się w bezpiecznej odległości.-Niniejszy produkt nie jest zabawką.-Zawsze używać systemu mocującego.-Przed użyciem należy się upewnić, czy wszystkie mechanizmymocujące gondolę, siedzisko lub fotelik samochodowy zostałyprawidłowo zapięte.-Niniejszy produkt nie jest przeznaczony do biegania lub jazdy na rolkach.-Ten wózek jest przeznaczony dla dzieci od momentu narodzin dowagi 15 kg.-Nie dopuszczać, aby dziecko stawało na podnóżku lub stopniu.
OGRANICZENIA UŻYCIA:-Zaleca się używanie w najbardziej odchylonej pozycji w przypadku dzieci od urodzenia do ukończenia 6 miesiąca życia.-Należy włączyć hamulec przed umieszczeniem dziecka w wózku lub jego wyciągnięciem.-Ciężary zawieszone na rączce i/lub z tyłu oparcia i/lub z boku wózka wpływają na jego stabilność.-Ten wózek jest przeznaczony tylko dla jednego dziecka. Nie powinien być stosowany przez więcej niż jedno dziecko jednocześnie.-Nie stosować akcesoriów niezatwierdzonych przez JANÉ.-Należy korzystać wyłącznie z części zamiennych dostarczonychlub zalecanych przez JANÉ.-W przypadku fotelików samochodowych stosowanych wraz ze stelażem ten wózek nie zastępuje łóżeczka lub łóżka. Jeżeli dziecko chce spać, należy ułożyć je w odpowiedniej gondoli, łóżeczku lub łóżku.-Maksymalny dozwolony ciężar kosza na przedmioty nie możeprzekraczać ciężaru wskazanego na koszu (4 kg).-Produkt nie jest odporny na słoną wodę.

53
po
lski
Podwozie wózka zostało wyposażone w system PROFIX przez-naczony do mocowania następujących nosidełek i urządzeń przytrzymujących dla dzieci: MICRO, MATRIX, KOOS, TRANS-PORTER i NEST. 8-9 System PRO-FIX zapewnia ich łatwe i bezpieczne mocowa-nie i zdejmowanie z podwozia wózka. Aby zapoznać się ze sposobem montażu i demontażu akcesoriów, należy uważnie zapoznać się z instrukcjami obsługi każdego z nich.
UWAGA: Podczas składania i rozkładania wózka dziecko powin-no znajdować się w bezpiecznej odległości. W przeciwnym ra-zie istnieje ryzyko obrażeń ciętych, przygnieceń itp.
1.- MONTAŻ I DEMONTAŻ KÓŁ
2.- SKŁADANIE I ROZKŁADANIE
rączki 7.a pociągnąć jednocześnia za obydwa urządzenia spustowe boczne 7.b popychając rączkę do przodu aż do całkowitego złożenia. 7.c 7.cZaleca się, aby składając wózek, siedzisko znajdowało się w pozycji przodem do kierunku jazdy, co pozwoli na bardziej kompaktowe złożenie wózka.Aby złożyć wózek TRIDER pociągnąć za dźwignię w górnej części siedziska, aby umieścić je w położeniu składania. 6 - 6.aP1: kiedy siedzenie jest ustawione przodem do kierunku ja-zdy. 6.aP2: kiedy siedzenie jest ustawione tyłem do kierunku jazdy. 6
3.- SYSTEM PRO-FIX
UWAGA: Aby móc zamontować akcesoria samochodowe, konie-czne jest zdemontowanie siedziska z podwozia wózka.
Przed pierwszym użyciem wózka TRIDER konieczne jest zamontowanie kół tylnych. Aby zamontować koła, należy wcisnąć środkowy przycisk koła i wprowadzić jego oś do gniazda koła tylnego, po czym docisnąć tak, aby koło zostało dobrze zamocowane. 1Aby zdemontować koła, należy wcisnąć środkowy przycisk, po czym wyciągnąć koło z gniazda. 1.aAby zamontować przednie koło, nałożyć górną oś na dolny trzpień obsady dociskając do momentu, kiedy usłyszymy cha-rakterystyczny dźwięk zatrzaśnięcia. 2W razie konieczności zdemontowania koła nacisnąć przycisk znajdujący się za obsadą i wyjąć je. 2.a
Aby rozłożyć wózek TRIDER, należy delikatnie nadepnąć na pedał umieszczony z tyłu wózka, co pomoże go podnieść i ułatwi jego rozłożenie. 3 Następnie jedną ręką przytrzymaj rączkę wózka, a nogą naciśnij pedał blokady umieszczony na dole, po prawej stronie wózka. 4 Pociągnij za rączkę i rozłóż wózek. Powi-nien być słyszalny charakterystyczny “klak” wskazujący na prawidłowe rozłożenie wózka. 5Celem złożenia TRIDERA należy ustawić leżak w pozycji złożenia (P1, P2) (patrz: REGULACJA KĄTA NACHYLENIA SIE-DZISKA). 6 - 6.a Następnie wcisnąć przycisk bezpieczeństwa po lewej stronie

54
TRID
ER
Pałąk bezpieczeństwa jest zaprojektowany tak, aby można go było zamocować w otworach znajdujących się na sie-
6.- KORZYSTANIE Z PAŁĄKA
4.- MONTAŻ I DEMONTAŻ SIEDZISKA
Aby zamocować budkę na ramie siedziska, wsuń ją po od-powiednich prowadnicach na specjalne uchwyty umieszc-zone po obu stronach ramy. Zasuń zamek błyskawiczny, aby połączyć budkę z ramą siedziska. 13 -13.a Aby zdjąć budkę z siedziska, postępuj w odwrotnej kolejności.
7.- BUDKA
Siedzenie może zostać odchylone do tyłu, by zapewnić niemowlęciu najwygodniejszą pozycję w danej chwili.Aby odchylić oparcie, pociągnąć do dołu za pasek z tyłu opar-cia z czerwonym guzikiem do momentu ustawienia oparcia w pożądanej pozycji. 10.aAby wyprostować oparcie, pociągnąć do góry za pasek z czar-nym guzikiem. 10.b
5.- REGULACJA KĄTA NACHYLENIA SIEDZISKA
Rączkę można ustawić w 7 różnych pozycjach. W tym celu należy wcisnąć obydwa przyciski rączki jednocześnie. 14
8.- REGULACJA RĄCZKI
Wózek TRIDER jest wyposażony w system PRO-FIX, który umożliwia odpowiednie zamocowanie siedziska TRIDER na po-dwoziu. Ponadto siedzisko jest odwracalne, co oznacza, że może być montowane przodem lub tyłem do kierunku jazdy. 8 - 9 Aby wyciągnąć siedzisko z podwozia, pociągnij jednocześnie za obydwie dźwigienki odblokowujące, umieszczone po obu stro-nach siedziska.
UWAGA: Należy używać jedynie pozycji oznaczonej zielonympunktem. Pozycje P1 i P2 służą jedynie do składania urządzeniai zabrania się używania ich w celu transportu dziecka, wpodobny sposób jak pozycja. 11
UWAGA: Dziecko powinno przebywać daleko od ruchomych części, kiedy posługuję się nimi odpowiedzialna osoba dorosła. Pojawienie się miejsc przecięcia, ściśnięcia oraz przytrzaśnięć jest nieuniknione podczas w/w czynności.
UWAGA: Nigdy nie należy chwytać wózka lub siedziska zabarierkę – to nie jest uchwyt do przenoszenia.
dzisku. Istnieje możliwość odłączenia pałąka tylko z jednej strony naciskając przyciski boczne. Pałąk będzie zamocowany wyłączenie po drugiej stronie. 12 - 12.a 12 -12a

55
po
lski
HAMOWANIE: Opuść dźwigienkę hamulca w dół. 17ZWOLNIENIE HAMULCA: Podnieś dźwigienkę hamulca do góry. 17.aRegulacja hamulca:W razie konieczności bardziej precyzyjnej regulacji, należy kierować się wskazówkami przedstawionymi na rysunku. 18
12.- HAMULEC POSTOJOWY
Aby zablokować przednie koło, należy nacisnąć przycisk znajdujący się za wspornikiem osi przedniego koła. 20
14.- BLOKADA PRZEDNIEGO KOŁA
Aby dzieci w wieku poniżej 6 miesiąca życia mogły korzystać z siedziska, należy ustawić je w najbardziej odchylonej po-zycji. 10.aUmieścić szelki w najniższej pozycji. 15.a
Podnóżek można ustawić w 5 różnych pozycjach. Aby zmienić położenie podnóżka, kciukami wciśnij obydwa przyciski umieszczone w wewnętrznej części siedziska. 16
10.- KORZYSTANIE PRZEZ DZIECI W WIEKU PONIŻEJ 6 MIESIĄCA ŻYCIA
11.- REGULACJA PODNÓŻKA
13.- REGULACJA TWARDOŚCI ZAWIESZENIA
Aby zwiększyć twardość zawieszenie, dźwigienkę należy przekręcić w kierunku zgodnym z ruchem wskazówek ze-gara. 19 Aby zmniejszyć twardość zawieszenia, dźwigienkę należy przekręcić w kierunku odwrotnym do ruchu wska-zówek zegara. 19.a
UWAGA: Po wciśnięciu hamulca należy upewnić się, czy wózek został prawidłowo zahamowany. Możliwe, że konieczne będzie lekkie potoczenie wózka po to, by hamulec optymalnie zaskoczył.
9.- PASY BEZPIECZEŃSTWA
Wózek został wyposażony w szelki bezpieczeństwa zapew-niające ochronę dziecka przez cały czas. Zawsze należy przy-piąć dziecko paskami podczas używania wózka. 15
15a. Aby rozpiąć paski, nacisnąć przycisk znajdujący się na środku zapięcia szelek. 15b-c. Aby je zapiąć, zebrać razem obydwie boczne końcówki i następnie wsunąć je do zapięcia szelek do momentu, kiedy zabrzmi charakterystyczny dźwięk zatrzaśnięcia. 15d. Wyregulować paski tak, by były właściwie dopasowane do ciała dziecka i dobrze napięte. Aby wyregulować długość pasków, przesunąć sprzączki w górę lub w dół. Upewnić się, by paski nie były poskręcane.

56
TRID
ER
INFORMACJA GWARANCYJNA
Ten produkt objęty jest gwarancją zgodnie z postanowieniami(hiszpańskiego) Legislacyjnego Dekretu Królewskiego / 24 lip-ca 2015 r. Zachować dowód zakupu. W przypadku reklamacji jest konieczne okazanie dowodu zakupu w sklepie, gdzie za-kupiono wózek.
Gwarancja nie obejmuje wad lub uszkodzeń powstałych w wyniku nieodpowiedniego użytkowania artykułu lub niesto-sowania się do zasad bezpieczeństwa i konserwacji, opisanych w niniejszej instrukcji obsługi oraz na etykietach dotyczących prania. Gwarancja nie obejmuje również części podlegających normalnemu zużyciu, związanemu z codzienną eksploatacją.
Pod żadnym pozorem nie należy odrywać tabliczki z numerem podwozia modelu, ponieważ zawiera ona ważne informacje. Uwaga:A by z apewnić b ezpieczeństwa k orzystania z p roduktu i skorzystać z usług obsługi klienta JANÉ, należy zarejestrować nowy produkt na stronie internetowej www.janeworld.com. Po rejestracji będą Państwo mogli śledzić nowości związane z Państwa produktem oraz, w razie konieczności, zapoznać się z instrukcją jego konserwacji. Ponadto, za Państwa zgodą, będziemy mogli informować Państwa o nowych modelach i innych nowościach, które mogłyby Państwa zainteresować.
Tapicerki nie należy wystawiać na zbyt długie działanie pro-mieni słonecznych.Wszystkie plastikowe części należy myć letnią wodą z neu-tralnym mydłem, po czym dokładnie wysuszyć.Aby wyprać tapicerkę, można ją ściągnąć. Regularnie sprawdzać hamulce, zamocowania i paski, które mogą zostać uszkodzone podczas używania.Okresowo kontrolować ciśnienie w kołach.Ruchome części i mechanizmy wózka należy regularnie naoliwiać, spryskując je sprayem na bazie silikonów. Nie należy stosować olejów ani smarów.Należy pamiętać o okresowej regulacji hamulca wg metody podanej na rysunku. 18W celu zapewnienia bezpieczeństwa i utrzymania produktu w odpowiednim stanie, należy go poddawać okresowym przeglądom w dowolnym warsztacie JANÉ.
16.- KONSERWACJA
Zakładanie osłony przeciwdeszczowej na wózek TRI-DER jest bardzo proste. Wystarczy przykryć nią siedzisko i przymocować zaczepy do podwozia wózka. W osłonie przeciwdeszczowej znajduje się małe okienko, które można otworzyć, podwinąć i zamocować przy pomocy rzepów, aby dziecko miało możliwość oglądania otoczenia. 21
15.- OSŁONA PRZECIWDESZCZOWA

57
česk
ý
OBSAH
DŮLEŽITÉ BEZPEČNOSTNÍ INFORMACE1. MONTÁŽ A DEMONTÁŽ KOL 2. SKLÁDÁNÍ A ROZKLÁDÁNÍ3. SYSTÉM PRO-FIX4. MONTÁŽ A DEMONTÁŽ SEDAČKY5. NASTAVENÍ ÚHLU SEDAČKY6. POUŽITÍ BEZPEČNOSTNÍHO CHRÁNIČE 7. POUŽITÍ STŘÍŠKY8. NASTAVENÍ RUKOJETI9. BEZPEČNOSTNÍ PÁS10. POUŽITÍ PRO DĚTI MLADŠÍ 6 MĚSÍCŮ11. NASTAVENÍ OPĚRKY NOŽIČEK12. POUŽITÍ PARKOVACÍ BRZDY13. NASTAVENÍ TVRDOSTI ODPRUŽENÍ14. ARETACE PŘEDNÍCH KOL15. PLÁŠTĚNKA16. ÚDRŽBAINFORMACE O ZÁRUCE
585959596060606060616161616161626262

58
TRID
ER
DŮLEŽITÉ BEZPEČNOSTNÍ INFORMACE
Návod k obsluzeDŮLEŽITÉ : PEČLIVĚ SI PŘEČTĚTE A USCHOVEJTE PRO BUDOUCÍ KONZULTACE.
UPOZORNĚNÍ:-Nenechávejte nikdy dítě bez dozoru.-Ujistěte se, že všechna zavírání jsou před použitím dobře zasazená.-Abychom předešli zraněním, ujistěte se, že dítě je při rozkládání a skládání produktu v bezpečné vzdálenosti.-Nedovolte dítěti, aby si s tímto výrobkem hrálo.-Používejte vždy systém zadržení.-Zkontrolujte, zda zařízení na uchycení korbičky nebo sedačky jsoupřed použitím správně zasazená.-Tento výrobek není vhodný na běhání nebo jízdu na kolečkovýchbruslích.-Tato sedačka je vhodná pro děti od narození do 15 kg.-Nikdy nedovolte, aby se dítě postavilo na opěrku nebo třmen.
OMEZENÍ POUŽITÍ:-Doporučujeme používat v co nejskloněnější poloze od narození do6 měsíců.-Aktivujte vždy brzdu kočárku předtím, než ji umístíte na řídítkanebo vyndáte dítě ze sedačky.-Jakákoliv zátěž umístěná na řídítka a/nebo na zadní část opěrkya/nebo postranní části kočárku ovlivňuje jeho stabilitu.-Tento kočárek je určen pro jedno dítě, nedávejte do něj více dětí.-Není možné používat doplňky neschválené JANÉ.-Používejte pouze náhradní díly dodané nebo doporučené JANÉ.-U nosítek s podvozkem tato korbička nenahrazuje kolébku nebo postýlku. Pokud dítě potřebuje spát, je třeba jej umístit do hlubokého kočárku, kolébky nebo postýlky určené k tomuto účelu.-Maximální nosnost košíku nesmí nikdy překročit hmotnost uvedenou na košíku (4 kg).-Tento výrobek není odolný vůči slané vodě.

59
česk
ý
Součástí vybavení vašeho kočárku je systém PRO-FIX vhodný pro následující autosedačky a dětské upínací systémy: MICRO, MATRIX, KOOS, TRANSPORTER a NEST. 8-9Systém PRO-FIX umožňuje rychlé, snadné a bezpečné připevnění a pevné ukotvení tohoto příslušenství k podvo-zku, taktéž i jeho vytažení z podvozku. Při těchto úkonech je nutno postupovat přesně dle návodu k tomuto příslušenství.
UPOZORNĚNÍ: Zajistěte, aby se během skládání a rozklá-dání kočárku dítě nacházelo v dostatečné vzdálenosti. Během těchto úkonů hrozí pořezání, stlačení a zachycení a tomuto riziku se nedá zamezit.
1.- MONTÁŽ A DEMONTÁŽ KOL
2.-SKLÁDÁNÍ A ROZKLÁDÁNÍ
Při skládání kočárku by měla být sedačka v poloze ve směru jízdy, složený kočárek pak bude podstatně kompaktnější.
Pro složení TRIDER stiskněte páčku na zadní straně sítě a umístěte ji do složené pozice. 6 - 6.a P1: je-li sedačka umístěna ve směru jízdy. 6.aP2: je-li sedačka umístěna proti směru jízdy. 6
3.- SYSTÉM PRO-FIX
UPOZORNĚNÍ: Při připevnění jakéhokoli automobilového příslušenství je nutno vyjmout sedačku z kočárku.
Před prvním použitím kočárku TRIDER je potřeba namonto-vat zadní kola. Do otvorů v zadních držácích kol vložte kola, zatlačte na tlačítko uprostřed kola, čímž se usnadní vložení osy kolečka, poté zatlačte a pevně zacvakněte. 1Při demontáži kol zatlačte na prostřední tlačítko a kolečko vytáhněte. 1.aPřední kolo se nasazuje tím způsobem, že vrchní čep kola za-sunete do otvoru na čelním rámu konstrukce a stlačíte tak, abyste zaslechli příslušné kliknutí. 2Přední kolo sejmete tím způsobem, že stisknete tlačítko na čelním rámu a kolo vyjmete. 2.a
Při rozkládání kočárku TRIDER jemně sešlápněte pojistku v zadní části, tím usnadníte manipulaci s kočárkem. 3 Jednou rukou držte za rukojeť, zároveň sešlápněte blokovací pedál v pravé dolní části. 4 Zatáhněte za rukojeť a zcela rozložte kočárek, až uslyšíte cvaknutí. 5
Při skládání kočárku TRIDER jej musíte dát do polohy (P1, P2) (viz NASTAVENÍ ÚHLU SEDAČKY). 6 - 6.aNíže stiskněte bezpečnostní tlačítko umístěné vlevo od páčky7.a a zároveň zatáhněte za obě postranní nohy 7.b zatlačtepáčku směrem dopředu a dokončete složení. 7.c

60
TRID
ER
přihrádek umístěných n a l ehátku. P okud c hcete, j e m ožné u volnit j ednu s tranu pouhým stisknutím postranních tlačítek. Chránič tak bude zcela členěný z druhé strany. 12-12 .a 12 -12a
Bezpečnostní chránič je vytvořen tak, aby zapadlo do
6.- POUŽITÍ BEZPEČNOSTNÍHO CHRÁNIČE
4.- MONTÁŽ A DEMONTÁŽ SEDAČKY
Stříšku připevníte k sedačce tak, že ji posunete nahoru až k příslušným bodům v prostřední části. Použijte zip určený k připevnění stříšky k sedačce. 13-13.a Při odepnutí stříšky postupujte v opačném pořadí.
7.- POUŽITÍ STŘÍŠKY
Můžete sedačku kdykoliv sklopit, aby si dítě mohlo lehnout ajízda v kočárku pro něj byla co nejpohodlnější.Při sklápění zatáhněte za pásku s červeným logem na zadnístraně zádové opěrky, kterou nastavíte do požadované polohy. 10.aPři zvedání zádové opěrky zatáhněte za pásku s černým logem směrem vzhůru. 10.b
5.- NASTAVENÍ ÚHLU SEDAČKY
Rukojeť lze nastavit do 7 různých poloh. Stiskněte zároveň tlačítka po obou stranách rukojeti. 14
8.- NASTAVENÍ RUKOJETI
Váš výrobek TRIDER je vybaven systémem pro-fix. Pomocí tohoto systému lze sedačku TRIDER skvěle připevnit k podvozku. Sedačku lze dát do polohy ve směru i proti směru jízdy, neboť je oboustranná. 8 - 9 Přejete-li si uvolnit sedačku z podvozku, zatáhněte za obě uvolňovací páčky z obou stran sedačky.
POZOR: Jediná pozice pro použití je zelený bod. Pozice P1 a P2 slouží pouze pro usnadnění skládání. Není dovoleno používat je pro přepravu dítěte, stejně jako pozici. 11
UPOZORNĚNÍ: Pouze způsobilé dospělé osoby smějí ma-nipulovat s pohyblivými částmi, které přitom musí být mimo dosah dítěte. Během těchto úkonů hrozí nebezpečí pořezání, stlačení, zachycení.
UPOZORNĚNÍ: Nikdy nepřidržujte kočárek nebo sezení za ochrannou hrazdičku či přenosné madlo.

61
česk
ý
ZABRZDIT: Stlačte páčku dolů. 17ODBRZDIT: Zatlačte páčku nahoru. 17.a
Pro nastavení brzdy: V případě potřeby přesnějšího nastavení postupujte podle obrázku. 18
12.- POUŽITÍ PARKOVACÍ BRZDY
Přední kolo lze zablokovat pro přímý směr stisknutím tlačítka na předním závěsu kola. 20
14.- ZABLOKOVÁNÍ PŘEDNÍHO KOLA
13.- NASTAVENÍ TVRDOSTI ODPRUŽENÍ
Pro zvýšení tvrdosti otočte páčkou ve směru hodinových ručiček. 19Pro snížení tvrdosti otočte páčkou proti směru hodinových ručiček. 19.a
Chcete-li použít sedák pro děti mladší 6 měsíců, nastavte úhelsedáku do vodorovného sklonu. 10.aNastavte bezpečnostní pás do nejnižší polohy. 15.a
Opěrku nožiček lze nastavit do 5 poloh. Stiskněte zároveň obě tlačítka umístěná na vnitřní straně sedačky. 16
10.- POUŽITÍ PRO DĚTI MLADŠÍ 6 MĚSÍCŮ
11.- NASTAVENÍ OPĚRKY NOŽIČEK
UPOZORNĚNÍ: Po sešlápnutí brzdy se ujistěte, zda je kočárek řádně zabrzděn. Lehce kočárkem popojeďte, čímž jej zcela zabrzdíte.
9.- BEZPEČNOSTNÍ PÁS
Váš kočárek je vybaven bezpečnostními pásy, s jejichž pomocí bude dítě neustále zajištěno. Připoutejte dítě pásem pokaž-dé, když je posadíte do kočárku. 15
15a. Chcete-li bezpečnostní pás rozepnout, stiskněte středo-vé tlačítko na zapínací sponě pásu.15b-c. Bezpečnostní pás zapnete tím způsobem, že spojíte konce pravého a levého pásu a zasunete je do zapínací spony. Dbejte, abyste zaslechli typické zaklapnutí.15d. Seřiďte pásy, aby přilnuly k tělu dítěte a byly náležitě vypnuty. Nastavení délky pásů provádějte posunutím přezek nahoru a dolů. Ujistěte se, zda pásy nejsou překroucené.
62
TRID
ER
INFORMACE O ZÁRUCE
N atento výrobek se vztahuje záruka v souladu s LegislativnímK.V. 1/ 2015 z 24. července. Uschovejte si fakturu, je nutné ji předložit v obchodě, kde jste produkt koupili, abyste proká-zali platnost záruky při jakékoliv reklamaci. Záruka se nevztahuje na vady a poškození způsobené ne-správným použitím nebo nedodržením bezpečnostních před-pisů či pokynů k údržbě uvedených v návodu k použití a na štítkách s pokyny k praní ani na díly opotřebené běžným ka-ždodenní použitím.
Štítek, na kterém je vyznačeno číslo podvozku vašeho mode-lu, se nesmí v žádném případě odstraňovat, protože obsahuje důležité informace.
Pozor:Abyste zajistili maximální bezpečnost a péči o nový kočárek JANÉ, je velmi důležité zaregistrovat nový výrobek na našem webu www.janeworld.com. Evidence vám umožní se v přípa-dě potřeby informovat o vývoji a údržbě vašeho výrobku. A budete-li mít zájem, můžeme vás také informovat o nových modelech a sdělovat novinky, které budeme pokládat za předmět vašeho zájmu.
Potah nevystavujte dlouhodobě účinkům přímého slunečního záření.Umělohmotné díly omývejte vlažnou vodou s mýdlem a po-tom je důkladně osušte.Potah lze sejmout a vyprat. Kontrolujte pravidelně brzdy, pásy a upevňovací díly, zda se následkem používání nepoškodily. Natírejte pravidelně pohyblivé díly a mechanismy silikono-vým sprejem. Nepoužívejte jiné oleje ani maziva.Pamatujte na pravidelné seřizování brzdy dle metody znázorněné na obrázku. 18Z hlediska bezpečnosti a dobrého stavu vašeho výrobku je důležité, abyste prováděli jeho pravidelnou kontrolu v síti našich servisních středisek.
16.- ÚDRŽBA
Pláštěnku k Vašemu kočárku TRIDER lze velmi snadno na-sadit, musíte pouze překrýt sedačku a připevnit úchytky k podvozku. Pláštěnka má malé okénko, které lze srolovat a připevnit suchým zipem tak, aby dítě mohlo volně pozorovat okolí. 21
15.- PLÁŠTĚNKA

63
česk
ý

IM 1419,06
JANÉ, S.A. Pol. Industrial Riera de CaldesC/Mercaders, 34 - 08184 Palau Solità i Plegamans (BARCELONA) SPAINTelf. +34 93 703 18 00 - Fax: +34 93 703 18 04 - email: [email protected] - www.janeworld.com
Related Documents