INSTRUCTION MANUAL AZ5 Mount Copyright © Sky-Watcher Portable Tripod Heavy Duty AZ5 Tripod

Welcome message from author
This document is posted to help you gain knowledge. Please leave a comment to let me know what you think about it! Share it to your friends and learn new things together.
Transcript
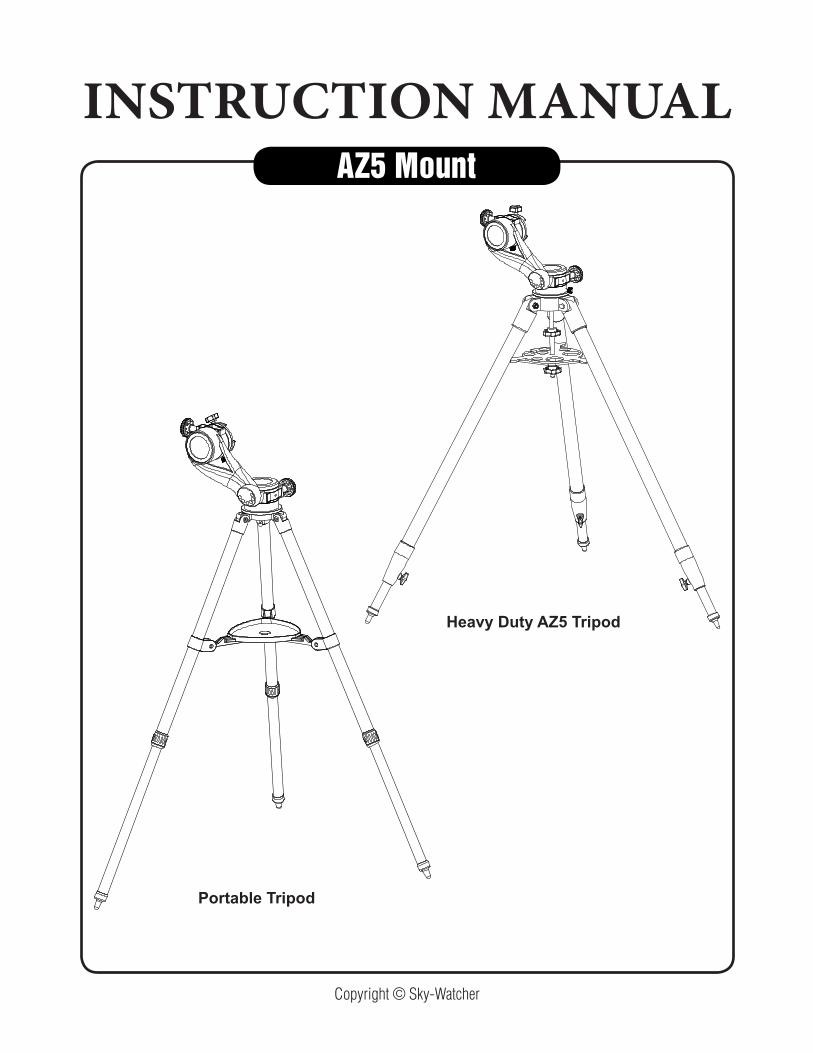
INSTRUCTION MANUALAZ5 Mount
Copyright © Sky-Watcher
Portable Tripod
Heavy Duty AZ5 Tripod
2
PART I : SETTING UP THE AZ5 MOUNT1.1 Setting Up on a Portable Tripod
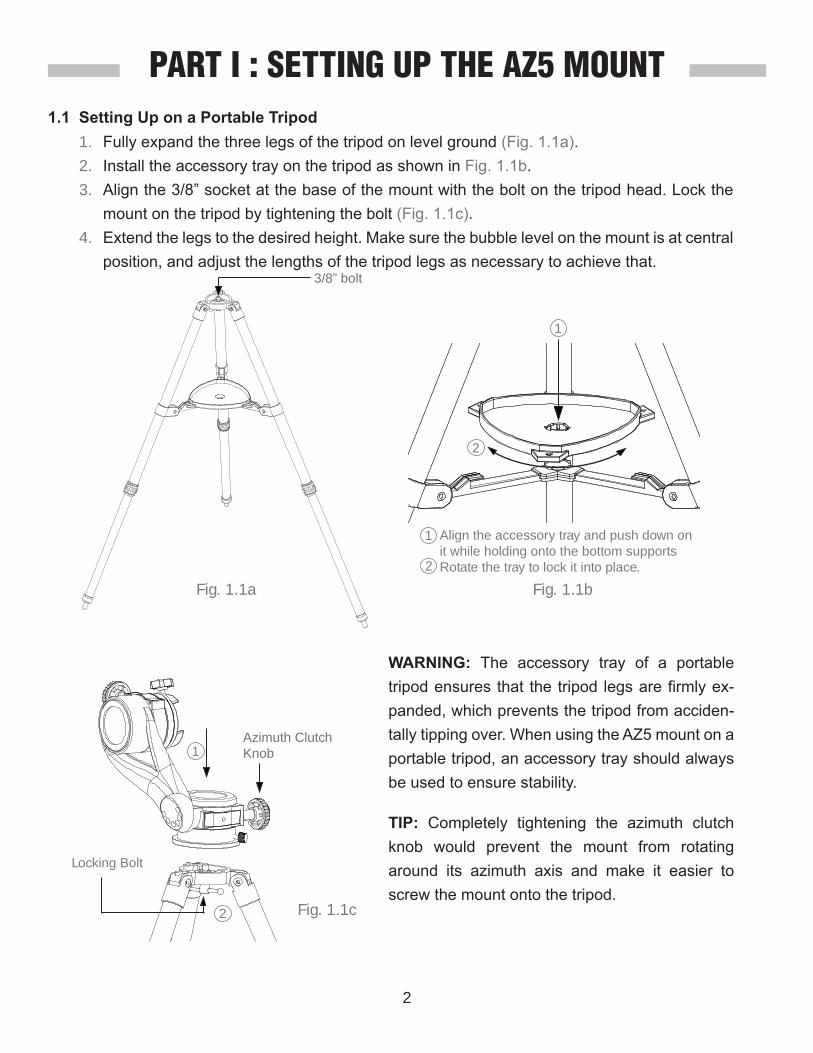
1. Fully expand the three legs of the tripod on level ground (Fig. 1.1a).2. Install the accessory tray on the tripod as shown in Fig. 1.1b.3. Align the 3/8” socket at the base of the mount with the bolt on the tripod head. Lock the
mount on the tripod by tightening the bolt (Fig. 1.1c). 4. Extend the legs to the desired height. Make sure the bubble level on the mount is at central
position, and adjust the lengths of the tripod legs as necessary to achieve that.
TIP: Completely tightening the azimuth clutch knob would prevent the mount from rotating around its azimuth axis and make it easier to screw the mount onto the tripod.
WARNING: The accessory tray of a portable tripod ensures that the tripod legs are firmly ex-panded, which prevents the tripod from acciden-tally tipping over. When using the AZ5 mount on a portable tripod, an accessory tray should always be used to ensure stability.
3/8” bolt
Azimuth Clutch Knob
Locking Bolt
Fig. 1.1a
Fig. 1.1c
1
2
1
2
Align the accessory tray and push down on it while holding onto the bottom supportsRotate the tray to lock it into place.
1
2
Fig. 1.1b
3
PART I: SETTING UP THE AZ5 MOUNT
1.2 Setting Up on a Heavy Duty AZ5 Tripod
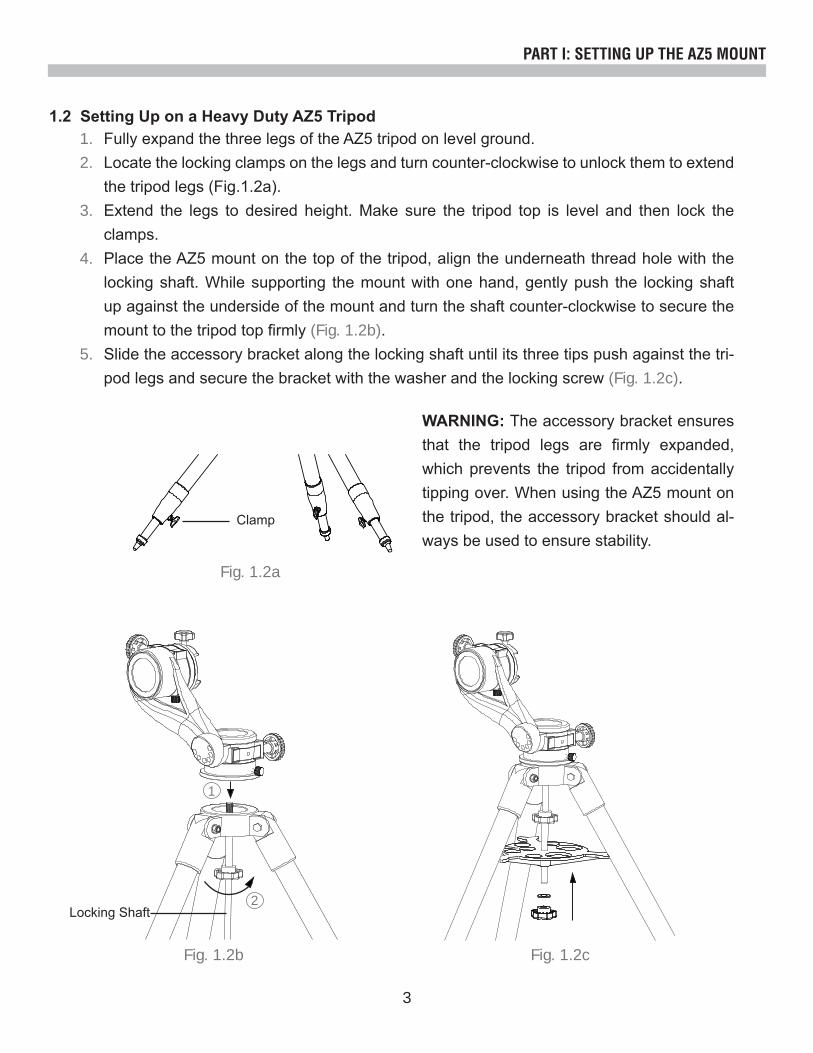
Clamp
Fig. 1.2a
Fig. 1.2b
Locking Shaft
Fig. 1.2c
1. Fully expand the three legs of the AZ5 tripod on level ground.2. Locate the locking clamps on the legs and turn counter-clockwise to unlock them to extend
the tripod legs (Fig.1.2a).3. Extend the legs to desired height. Make sure the tripod top is level and then lock the
clamps.4. Place the AZ5 mount on the top of the tripod, align the underneath thread hole with the
locking shaft. While supporting the mount with one hand, gently push the locking shaft up against the underside of the mount and turn the shaft counter-clockwise to secure the mount to the tripod top firmly (Fig. 1.2b).
5. Slide the accessory bracket along the locking shaft until its three tips push against the tri-pod legs and secure the bracket with the washer and the locking screw (Fig. 1.2c).
WARNING: The accessory bracket ensures that the tripod legs are firmly expanded, which prevents the tripod from accidentally tipping over. When using the AZ5 mount on the tripod, the accessory bracket should al-ways be used to ensure stability.
1
2
4
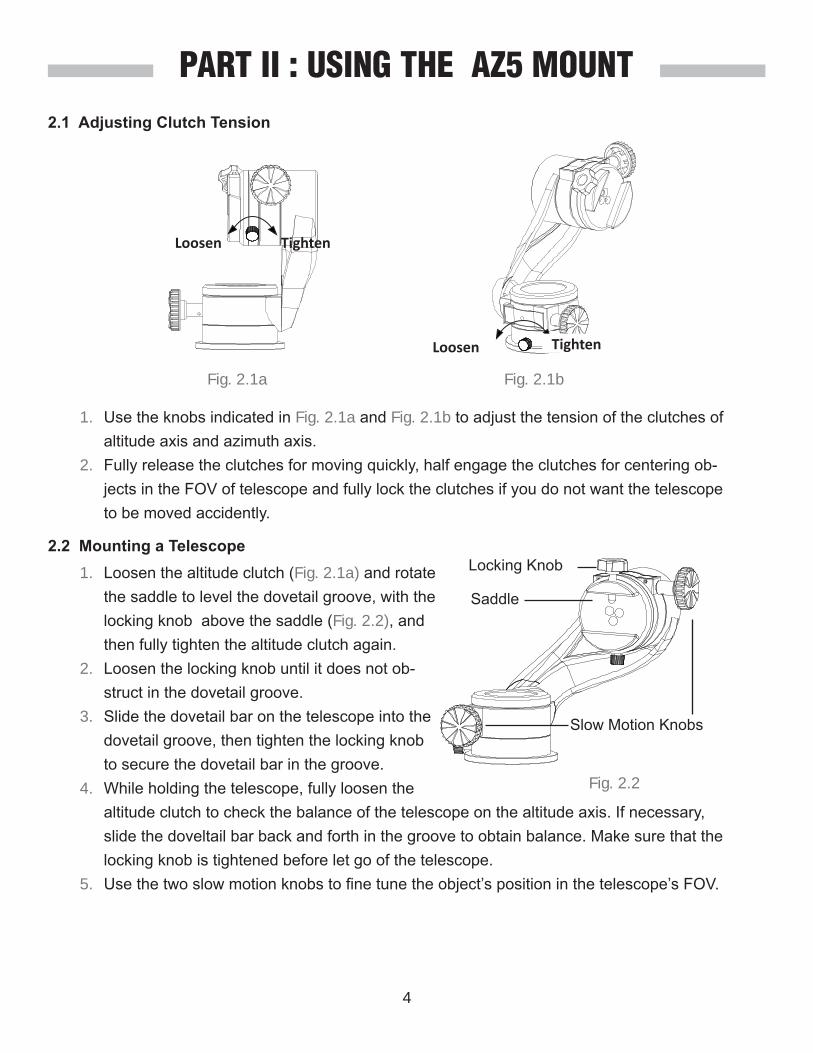
1. Use the knobs indicated in Fig. 2.1a and Fig. 2.1b to adjust the tension of the clutches of altitude axis and azimuth axis.
2. Fully release the clutches for moving quickly, half engage the clutches for centering ob-jects in the FOV of telescope and fully lock the clutches if you do not want the telescope to be moved accidently.
2.1 Adjusting Clutch Tension
PART II : USING THE AZ5 MOUNT
2.2 Mounting a Telescope1. Loosen the altitude clutch (Fig. 2.1a) and rotate
the saddle to level the dovetail groove, with the locking knob above the saddle (Fig. 2.2), and then fully tighten the altitude clutch again.
2. Loosen the locking knob until it does not ob-struct in the dovetail groove.
3. Slide the dovetail bar on the telescope into the dovetail groove, then tighten the locking knob to secure the dovetail bar in the groove.
4. While holding the telescope, fully loosen the altitude clutch to check the balance of the telescope on the altitude axis. If necessary, slide the doveltail bar back and forth in the groove to obtain balance. Make sure that the locking knob is tightened before let go of the telescope.
5. Use the two slow motion knobs to fine tune the object’s position in the telescope’s FOV.
Saddle
Locking Knob
Slow Motion Knobs
Fig. 2.2
Fig. 2.1a Fig. 2.1b
Loosen
Loosen
Tighten
Tighten
5
PART II: USING THE AZ5 MOUNT
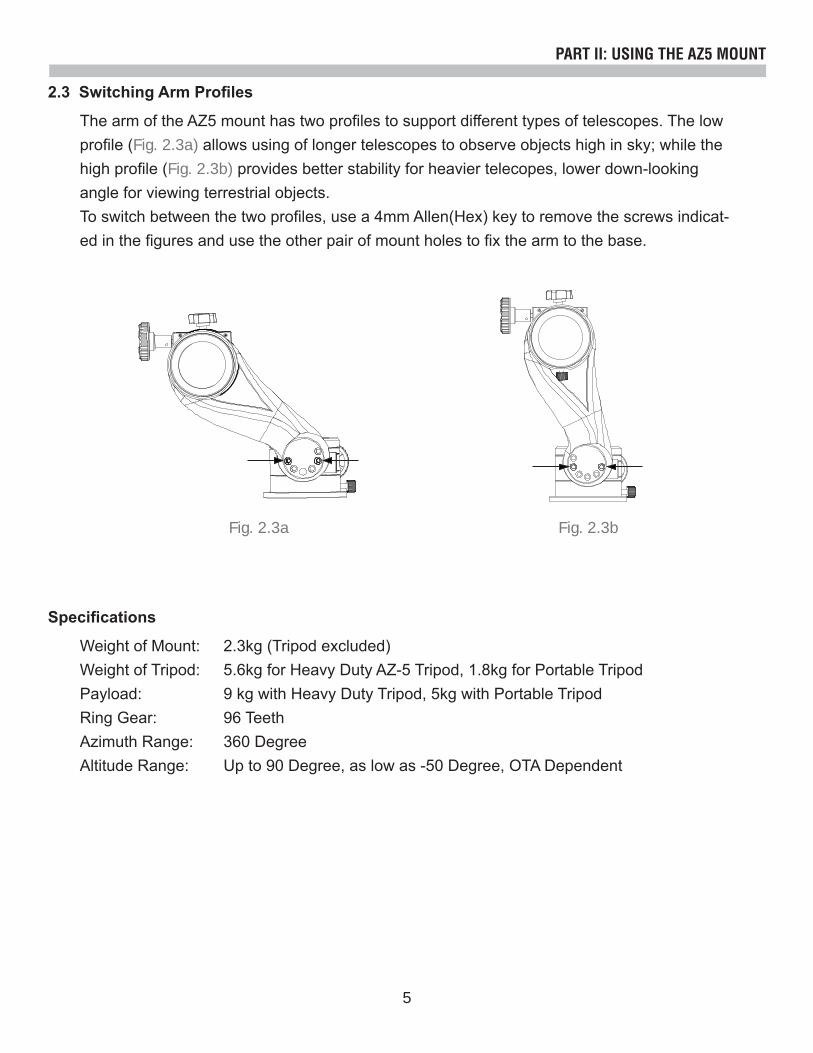
The arm of the AZ5 mount has two profiles to support different types of telescopes. The low profile (Fig. 2.3a) allows using of longer telescopes to observe objects high in sky; while the high profile (Fig. 2.3b) provides better stability for heavier telecopes, lower down-looking angle for viewing terrestrial objects.To switch between the two profiles, use a 4mm Allen(Hex) key to remove the screws indicat-ed in the figures and use the other pair of mount holes to fix the arm to the base.
2.3 Switching Arm Profiles
Fig. 2.3a Fig. 2.3b
Weight of Mount: 2.3kg (Tripod excluded) Weight of Tripod: 5.6kg for Heavy Duty AZ-5 Tripod, 1.8kg for Portable TripodPayload: 9 kg with Heavy Duty Tripod, 5kg with Portable TripodRing Gear: 96 TeethAzimuth Range: 360 DegreeAltitude Range: Up to 90 Degree, as low as -50 Degree, OTA Dependent
Specifications
AZ3-R-F-V1.00-EN © 2016, Sky-Watcher, All Rights Reserved
• NEVER USE YOUR TELESCOPE TO LOOK DIRECTLY AT THE SUN. PERMANENT EYE DAMAGE WILL RESULT. USE A PROPER SOLAR FILTER FIRMLY MOUNTED ON THE FRONT OF THE TELESCOPE FOR VIEWING THE SUN.
• WHEN OBSERVING THE SUN, PLACE A DUST CAP OVER YOUR FINDERSCOPE OR REMOVE THE FINDERSCOPE TO PROTECT YOU FROM ACCIDENTAL EXPOSURE.
• NEVER USE AN EYEPIECE-TYPE SOLAR FILTER AND NEVER USE YOUR TELESCOPE TO PROJECT SUNLIGHT INTO ANOTHER SURFACE, THE INTERNAL HEAT BUILD
WARNING:
Related Documents